|
|||||||
| Tech Talk Technical Discussion About The Nissan 240SX and Nissan Z Cars |
 |
|
|
Thread Tools | Display Modes |
 09-14-2010, 10:00 PM
|
#31 |
|
Zilvia Junkie
 
Join Date: Jun 2006
Location: East Coast
Age: 38
Posts: 585
Trader Rating: (20)
 Feedback Score: 20 reviews
|
Update
During the disassembly of the rear suspension a couple of the eccentric bolts were damaged due to rust. Not needing eccentric bolts for alignment adjustments, as I am using adjustable arms, I needed to find compatible replacements. After some research I stumbled upon Ballerbolts.com, and my prayers were answered. Thank you Ryan
BallerBolts.com offers, not only eccentric bolt lockout kits for the 240sx, but they offer nearly every suspension bolt for the car. Aside from that they offer full SR20 engine fastener kits, titanium dress up kits, titanium suspension bolt kits, and much more. Every fastener far exceeds OEM strength, and cosmetically is not even comparable to old rusted bolts. These are a must for anyone wanting to take their build to the next level. Contact Ryan, and he will get you anything you need. 240SX Bolts, S13-Bolts I purchased the full S14 suspension set, which replaces all of the rear suspension bolts, axle bolts, driveshaft bolts, and eliminates the eccentric bolts. They have 12-point heads, amazing zinc coating, and U-lock nuts. 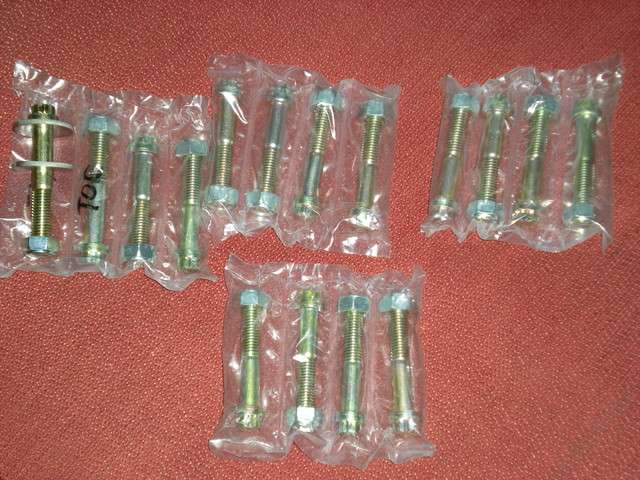 Eccentric lockout  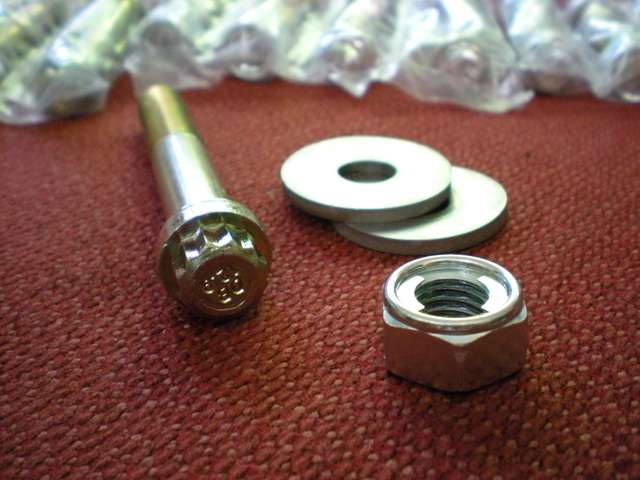 U-lock nut 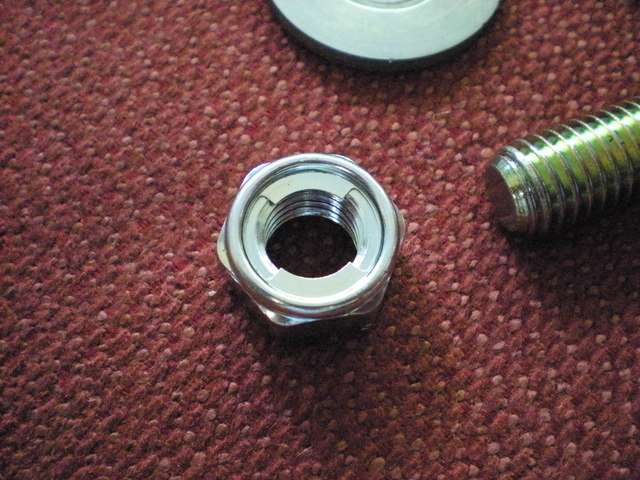 Axle bolts, driveshaft bolts, tension rod bolts   A lot better than this, don't you think? 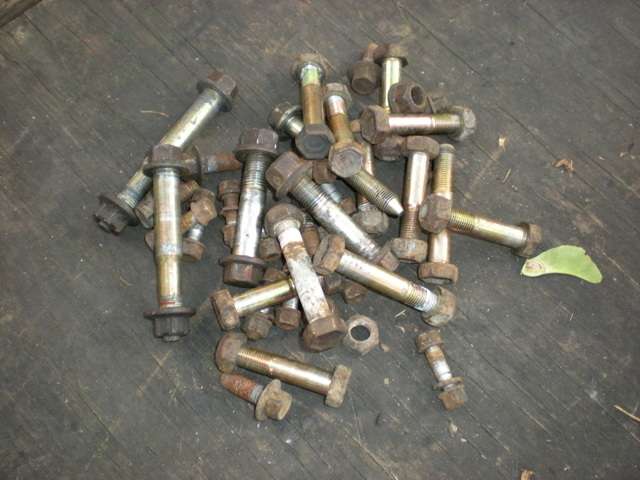 |

|

|
| Sponsored Links |
|
09-14-2010, 10:15 PM
|
#32 |
|
Leaky Injector
Join Date: Sep 2010
Location: North/central NJ kinda yeaaa
Posts: 94
Trader Rating: (0)
Feedback Score: 0 reviews
|
dam fresh frame.i jus picked up my s14 from pa.its not that bad but i got this wierd click in reverse sounds lyk the frame moving
__________________
 no success without excess no success without excess
|
|
|
|
|
09-15-2010, 02:39 PM
|
#36 | |
|
Zilvia Junkie
Join Date: Jun 2006
Location: East Coast
Age: 38
Posts: 585
Trader Rating: (20)
Feedback Score: 20 reviews
|
Quote:
If you contact Donovan at Yamato Garage, he will be able to give you a quote. Contact Ryan at Ballerbolts.com for any bolt you can imagine. For the price, Yamato Garage products are unbeatable, and upon request can be coated a custom color. Ballerbolts are far superior to OEM in every way, and are cheaper. Any bolt that I need replaced I go to Ryan, and he helps me out. Make mention of this thread to either of them and they may just hook you up. Thanks for all the comments, I will keep the updates coming...... |
|
|
|
|
|
09-20-2010, 12:32 PM
|
#37 |
|
Zilvia Addict
 
|
One of my favorite build threads, despite the lack of a car.
My S13 subframe build was almost exactly the same except, Ballerbolts and Yamato didn't exist at the time. 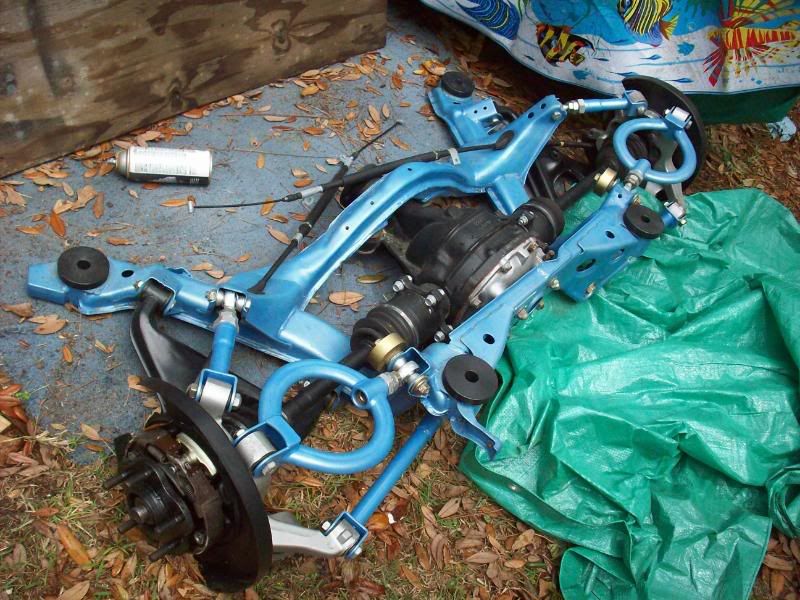 Will definitely be using both their services when I begin my S14 tear down in October. |
|
|
|
|
09-20-2010, 04:08 PM
|
#38 | |
|
Zilvia Junkie
Join Date: Jun 2006
Location: East Coast
Age: 38
Posts: 585
Trader Rating: (20)
Feedback Score: 20 reviews
|
Quote:
As for the lack of car in the thread.....I wanted to make this thread dedicated specifically to the suspension, so the products that were installed were highlighted. Even though the rest of the car is too far along to start a build thread from the beginning, I will still be making a thread starting from the point I am at now......Thanks again for the comments These are some old pictures of the car..... http://zilvia.net/f/tech-talk/229178...25det-s14.html Everything roughly in place..... 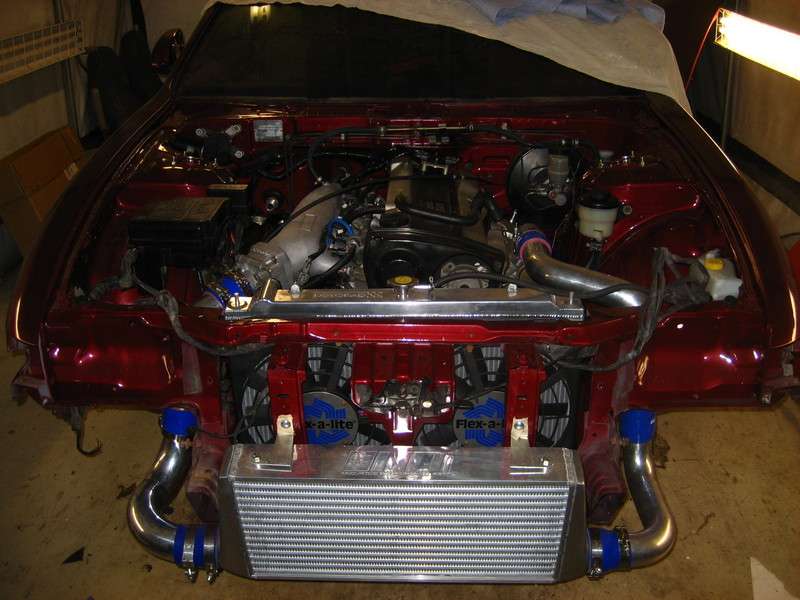 |
|
|
|
|
|
10-04-2010, 06:44 PM
|
#40 | |
|
Zilvia Junkie
Join Date: Jun 2006
Location: East Coast
Age: 38
Posts: 585
Trader Rating: (20)
Feedback Score: 20 reviews
|
Quote:
|
|
|
|
|
|
11-23-2010, 08:30 PM
|
#41 |
|
Zilvia Addict
Join Date: Apr 2009
Location: Las Cruces, NM
Age: 41
Posts: 620
Trader Rating: (16)
Feedback Score: 16 reviews
|
Fucking sick shit, this is what im planning to do with mine, waiting on which links im going to go with so i can paint the subframe the same color. Great attention to detail man, updates??
|
|
|
|
|
11-24-2010, 12:12 PM
|
#43 | |||
|
Nissanaholic!
 
Join Date: Sep 2009
Location: Here and there
Posts: 1,758
Trader Rating: (23)
Feedback Score: 23 reviews
|
Quote:
Quote:
Quote:
|
|||
|
|
|
|
01-04-2011, 11:58 AM
|
#47 |
|
Leaky Injector
|
Nice to see people take pride in their work I'm in the process of doing the same I have all the rear arms by circuit sports wanted to go with stance but couldn't wait to save some more money also stance diff sold bushings Z32 diff with axles (NA) that I will paint as well.hopefully it fits I will also do Z32 brake swap with E brake I got calipers powder coated,I just need rear subframe.
|
|
|
|
|
01-04-2011, 05:04 PM
|
#49 |
|
Zilvia Junkie
Join Date: Jun 2006
Location: East Coast
Age: 38
Posts: 585
Trader Rating: (20)
Feedback Score: 20 reviews
|
As promised, here are some more pictures from the rear suspension build. This portion of the build has actually been done for quite some time, so this post will take us right to the finished product. Thanks to everyone following along, and I will begin posting the front suspension next....
After test fitting all the suspension arms, to verify the fit, everything was disassembled for prevent damaging anything during the installation of the heavier components. 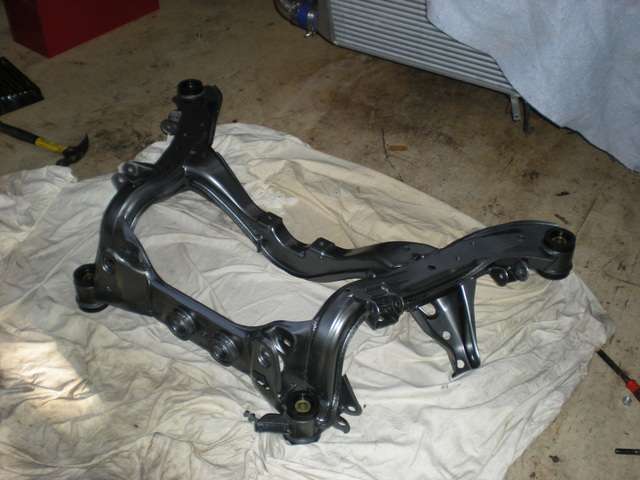 The red Energy Suspension subframe bushings were removed, in favor of the black, for cosmetic reasons only 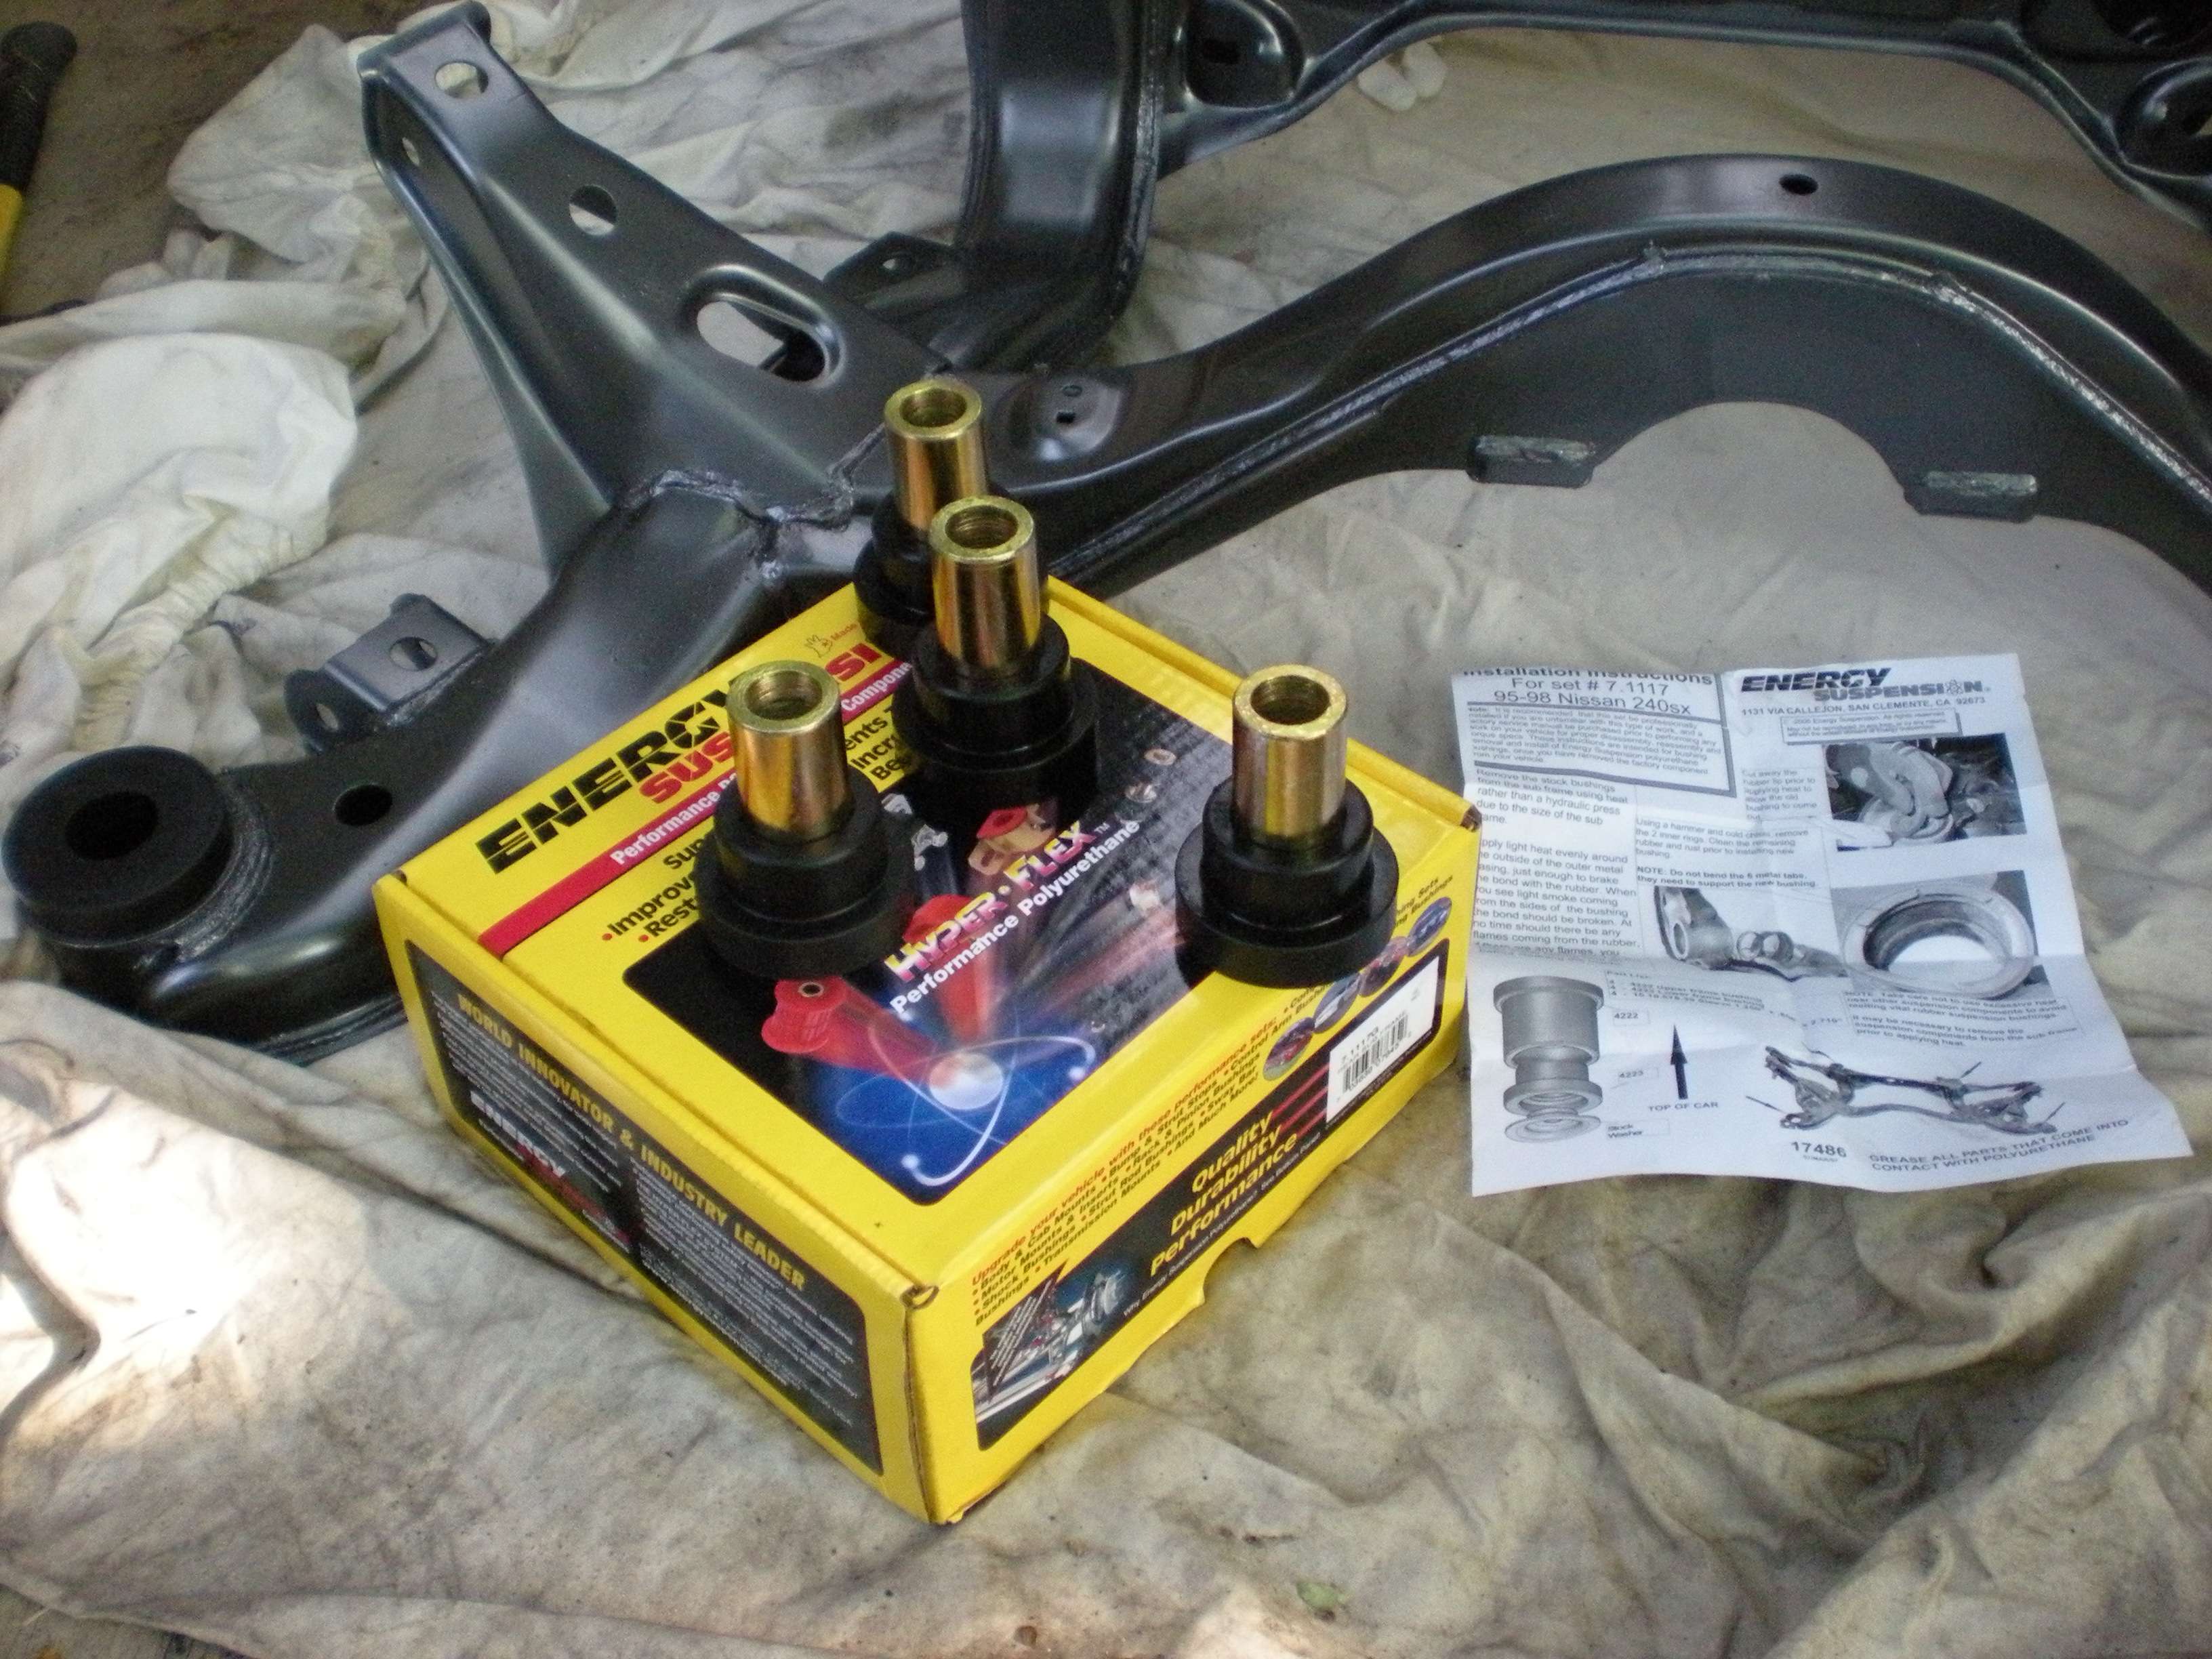 The subframe was theN placed on jack stands, and then the differential was raised into placed. The factory bolts were used, however they were all bead blasted and powder coated. 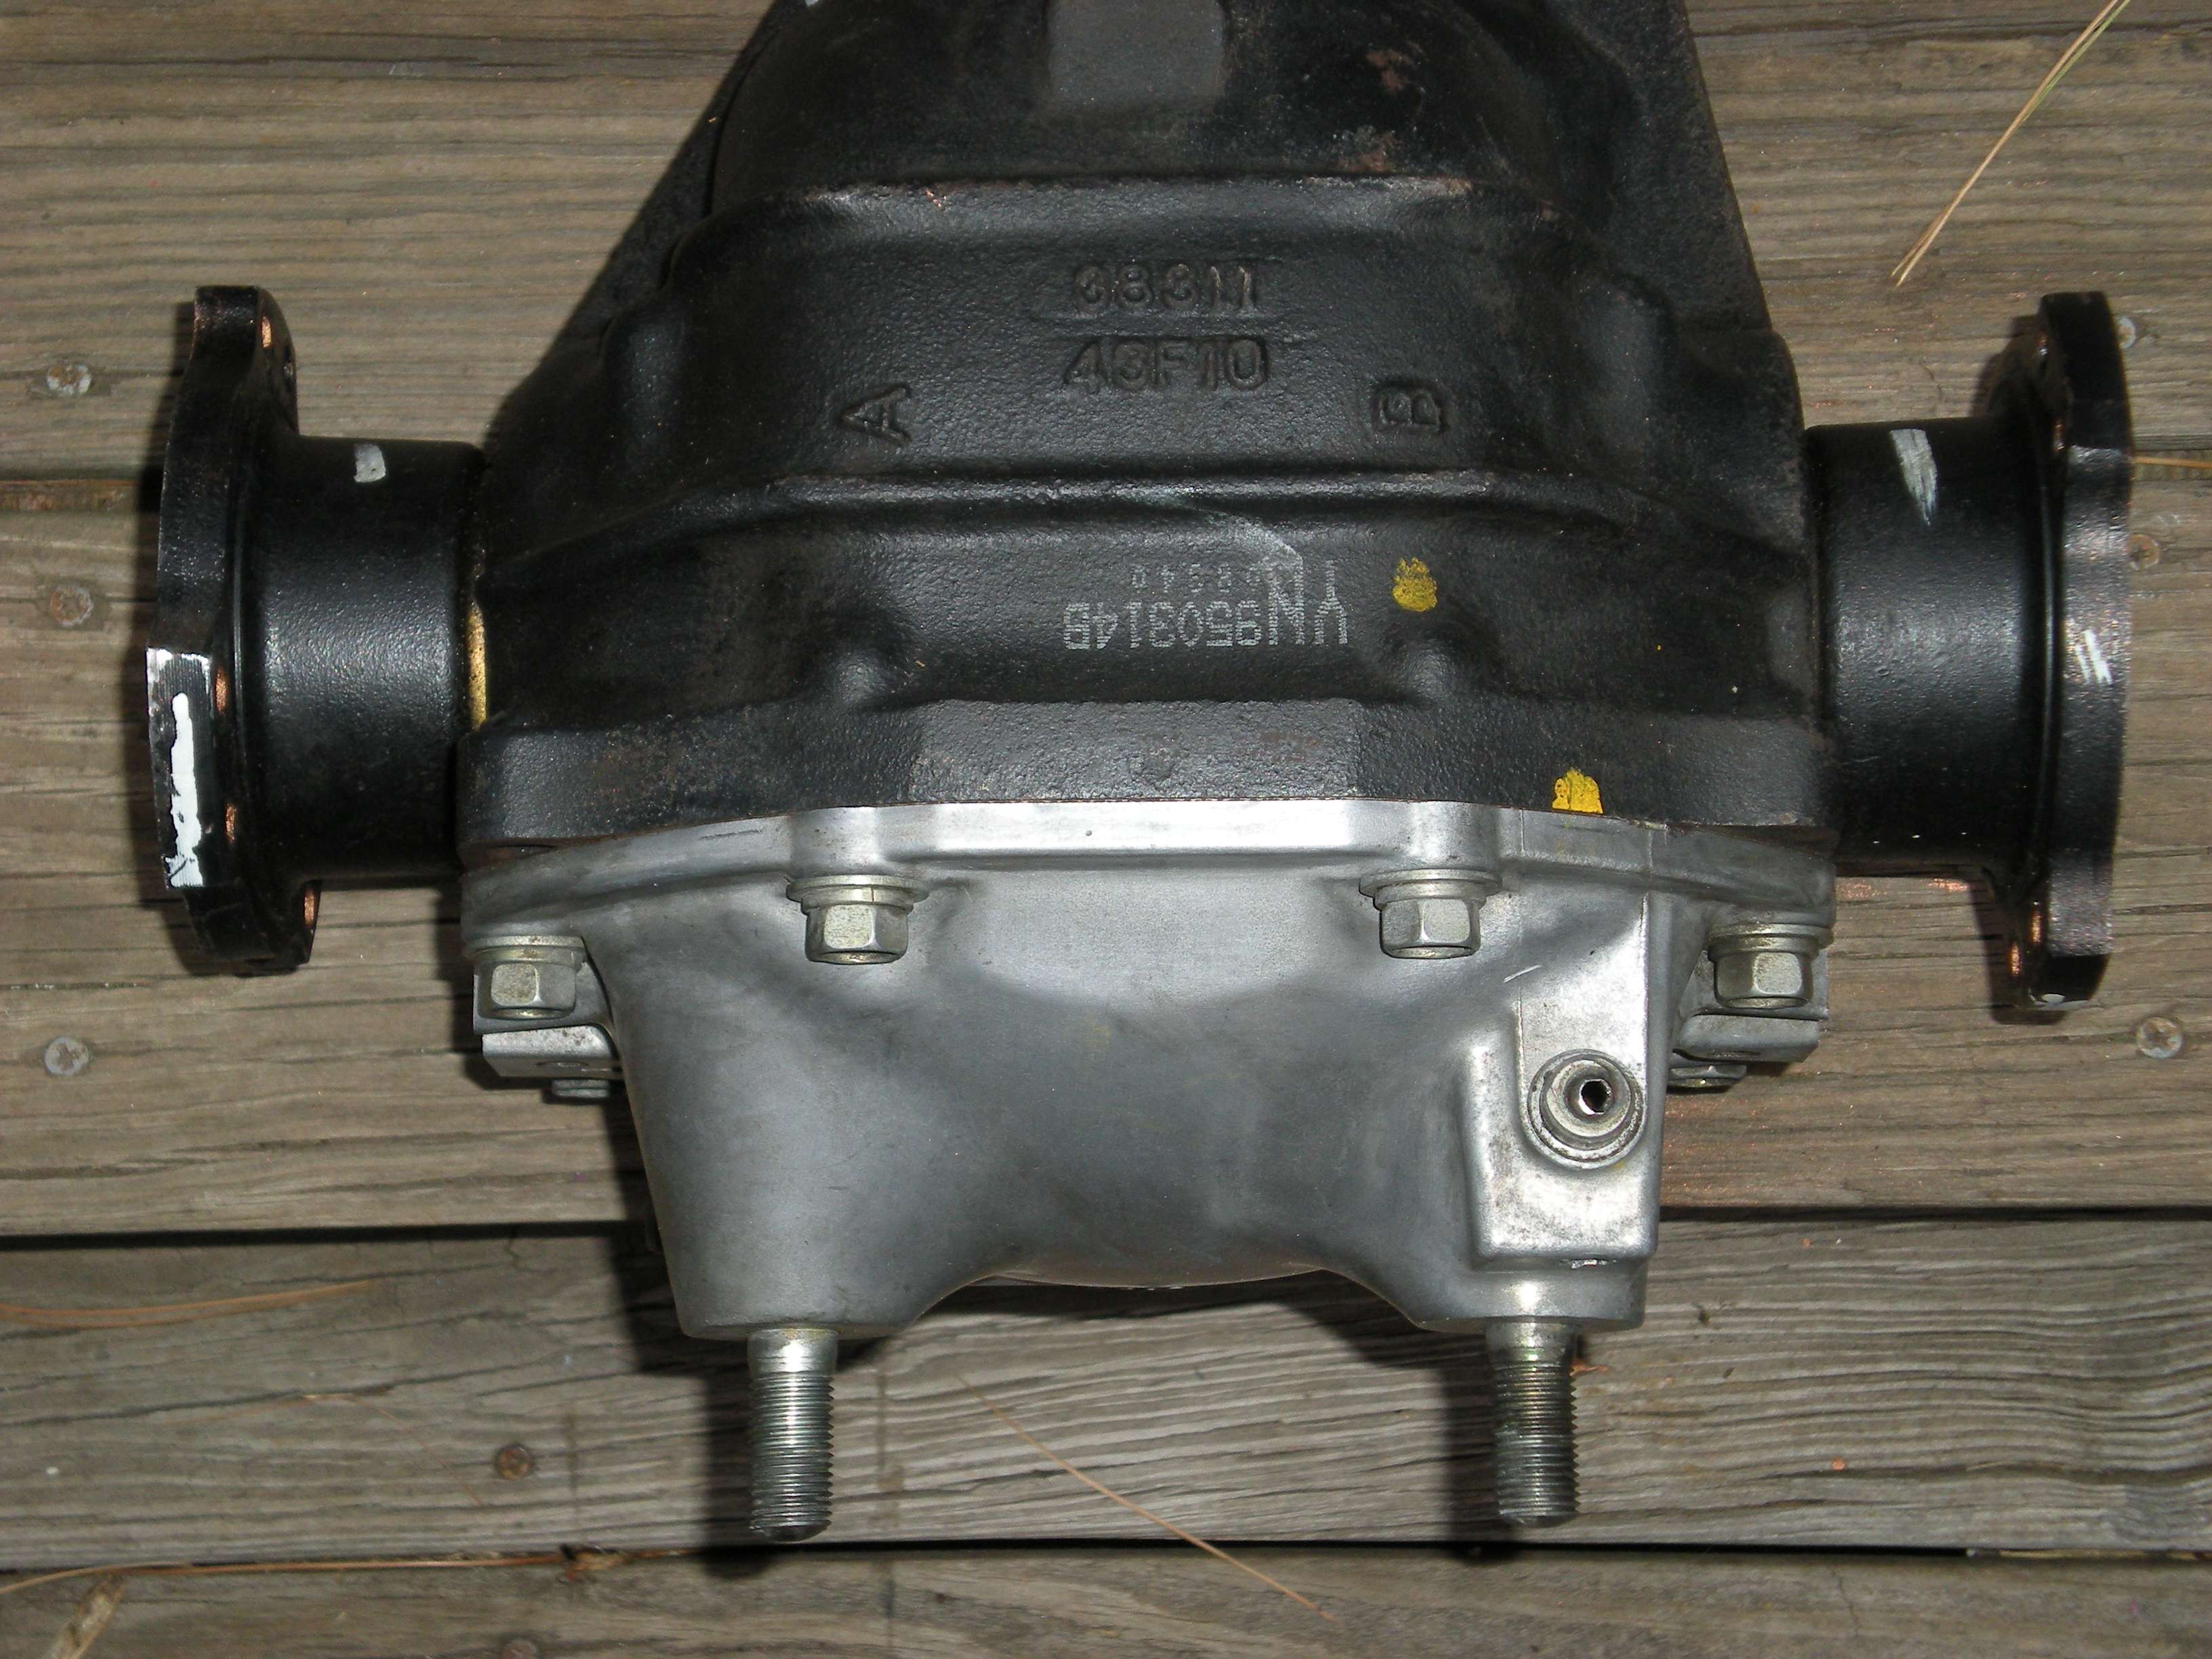 Anti-seize applied 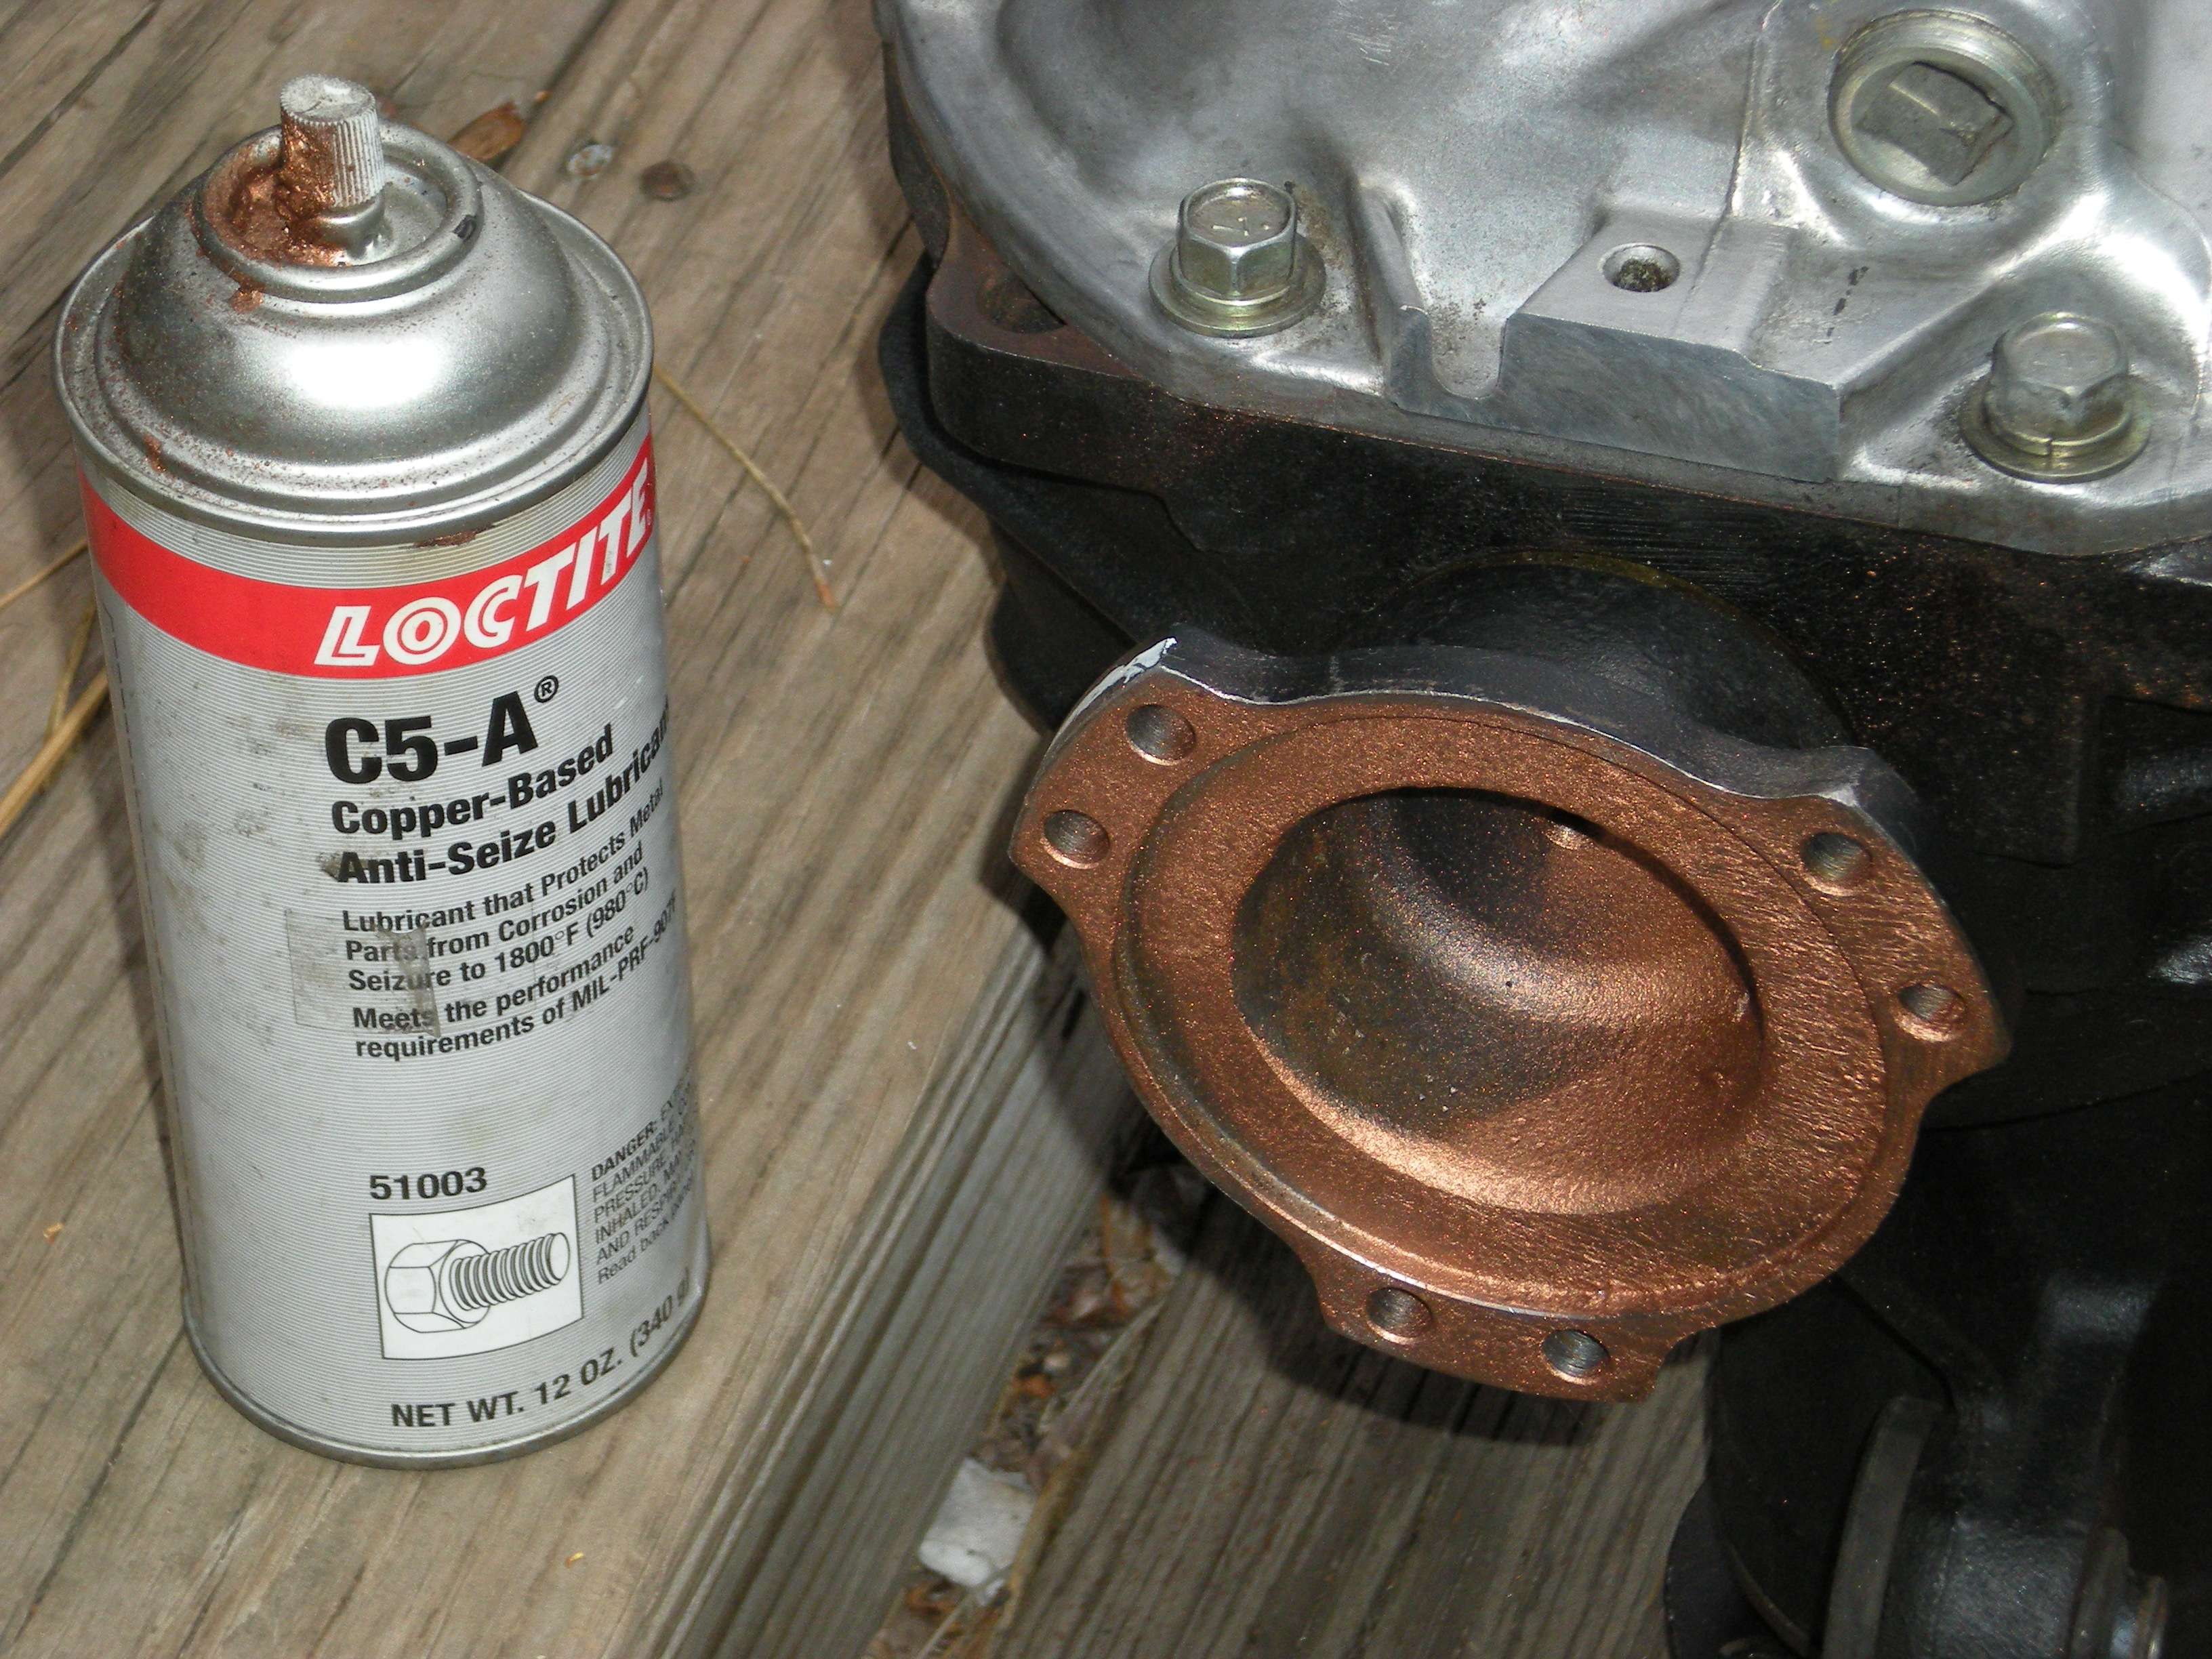 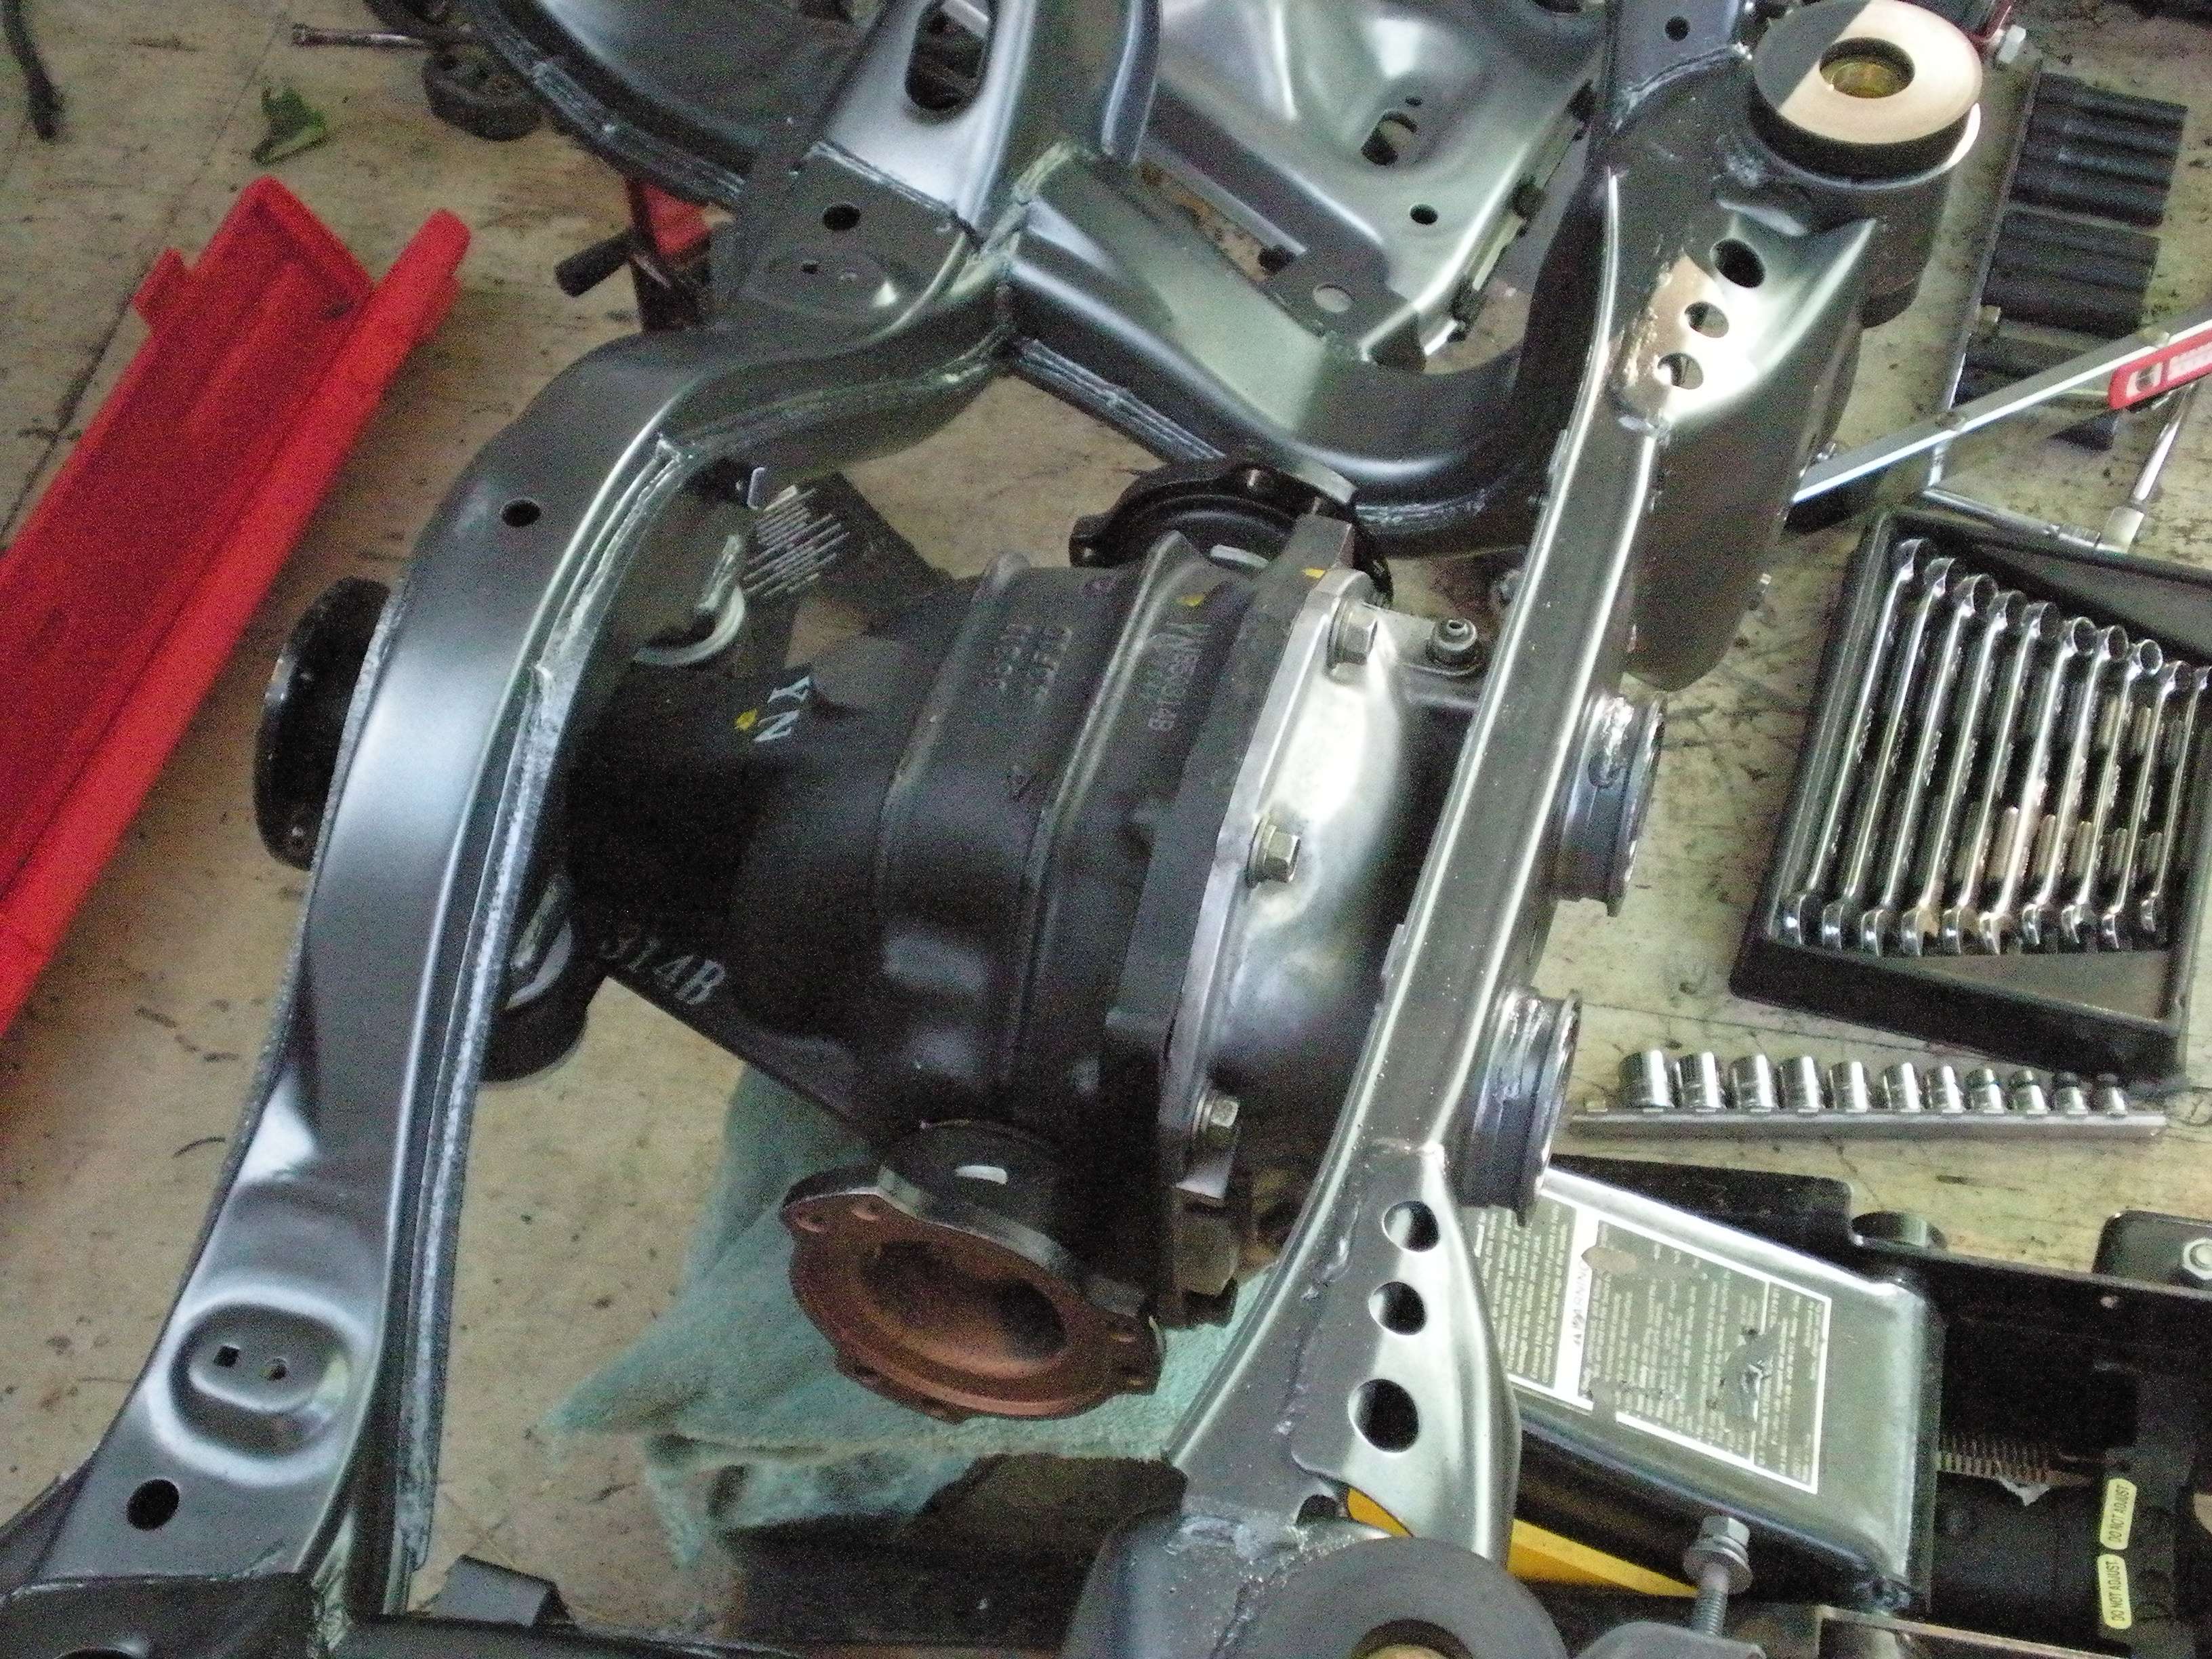 Next up was installing the rear Z32 Emergency brake drum assembly to the spindles.... The backing plates were acid dipped and powder coated gloss black... 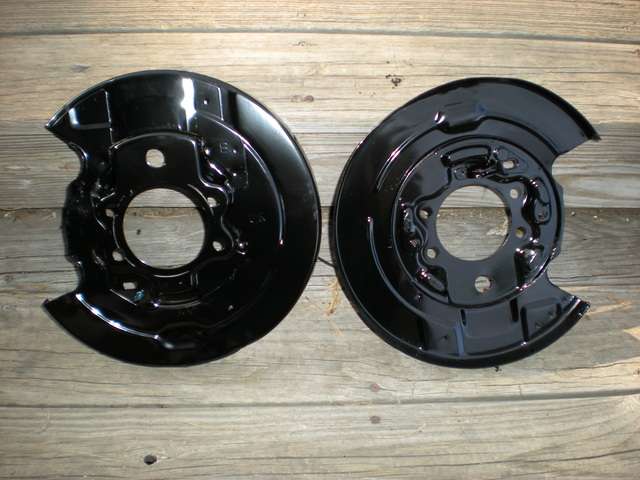 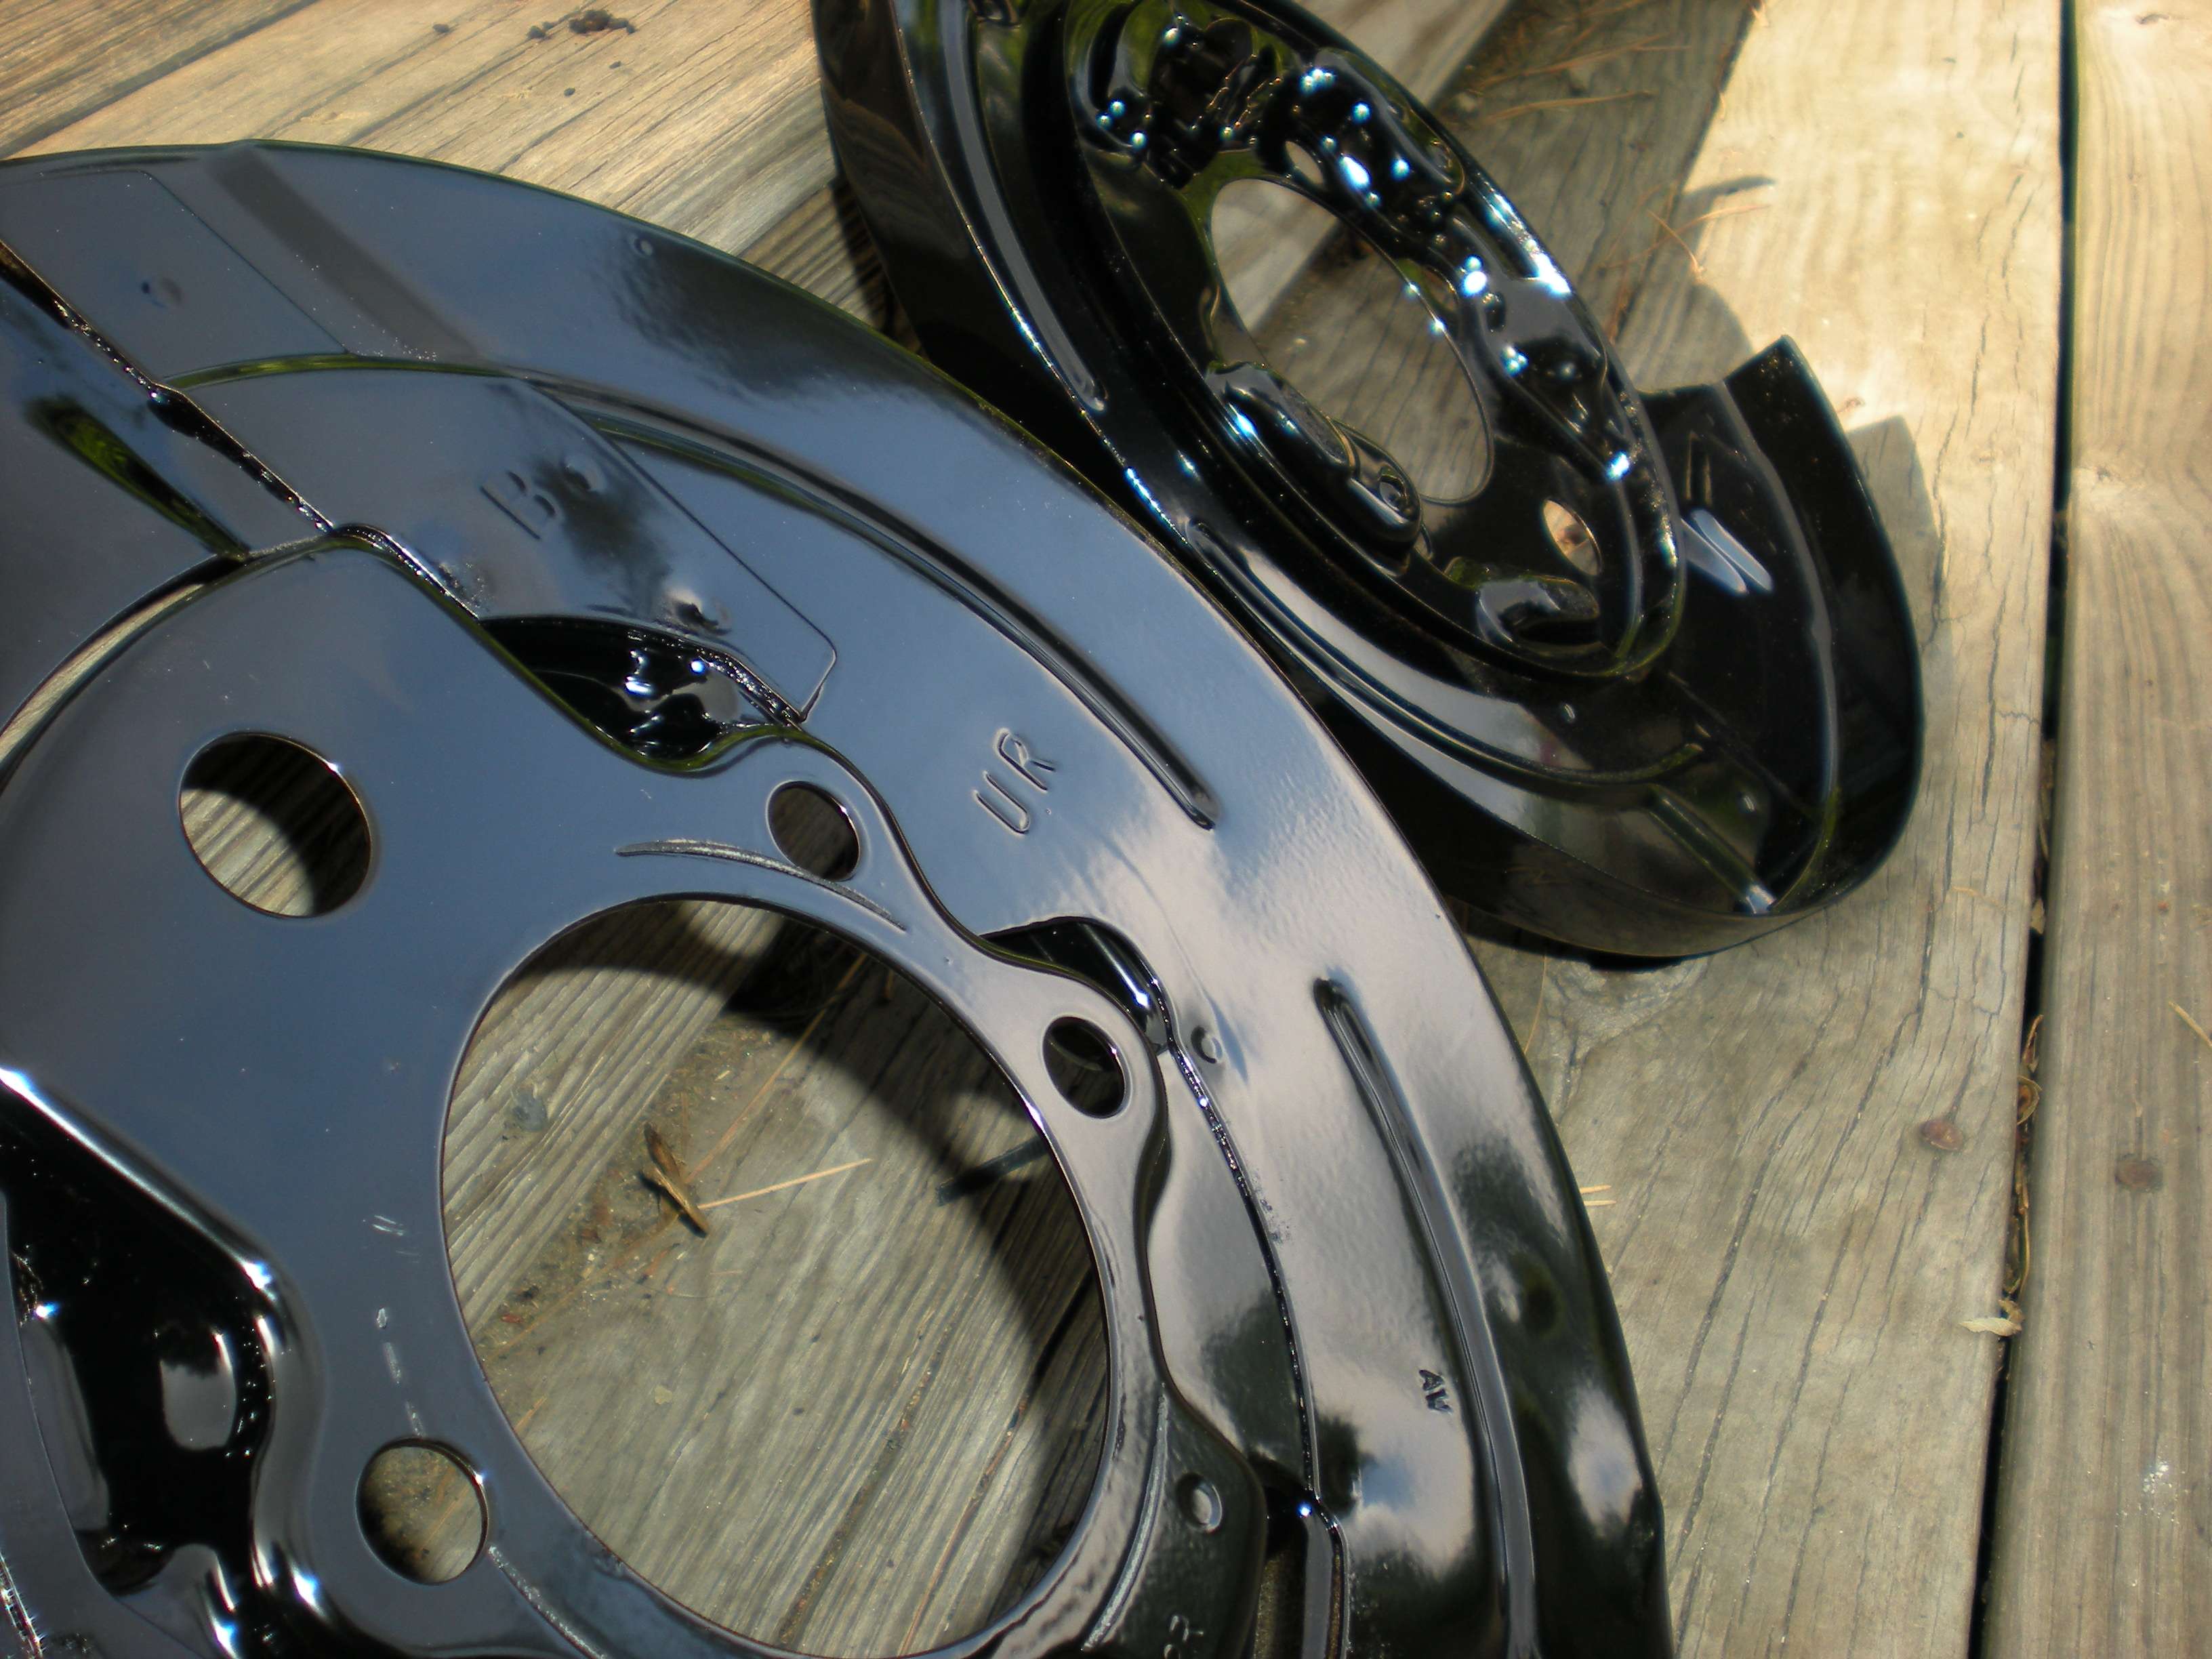 The hubs where properly taped off, bead blasted and sprayed silver. I was hesitant to powder coat them, as I was unsure if the seals could handle the 500 degree temperatures. 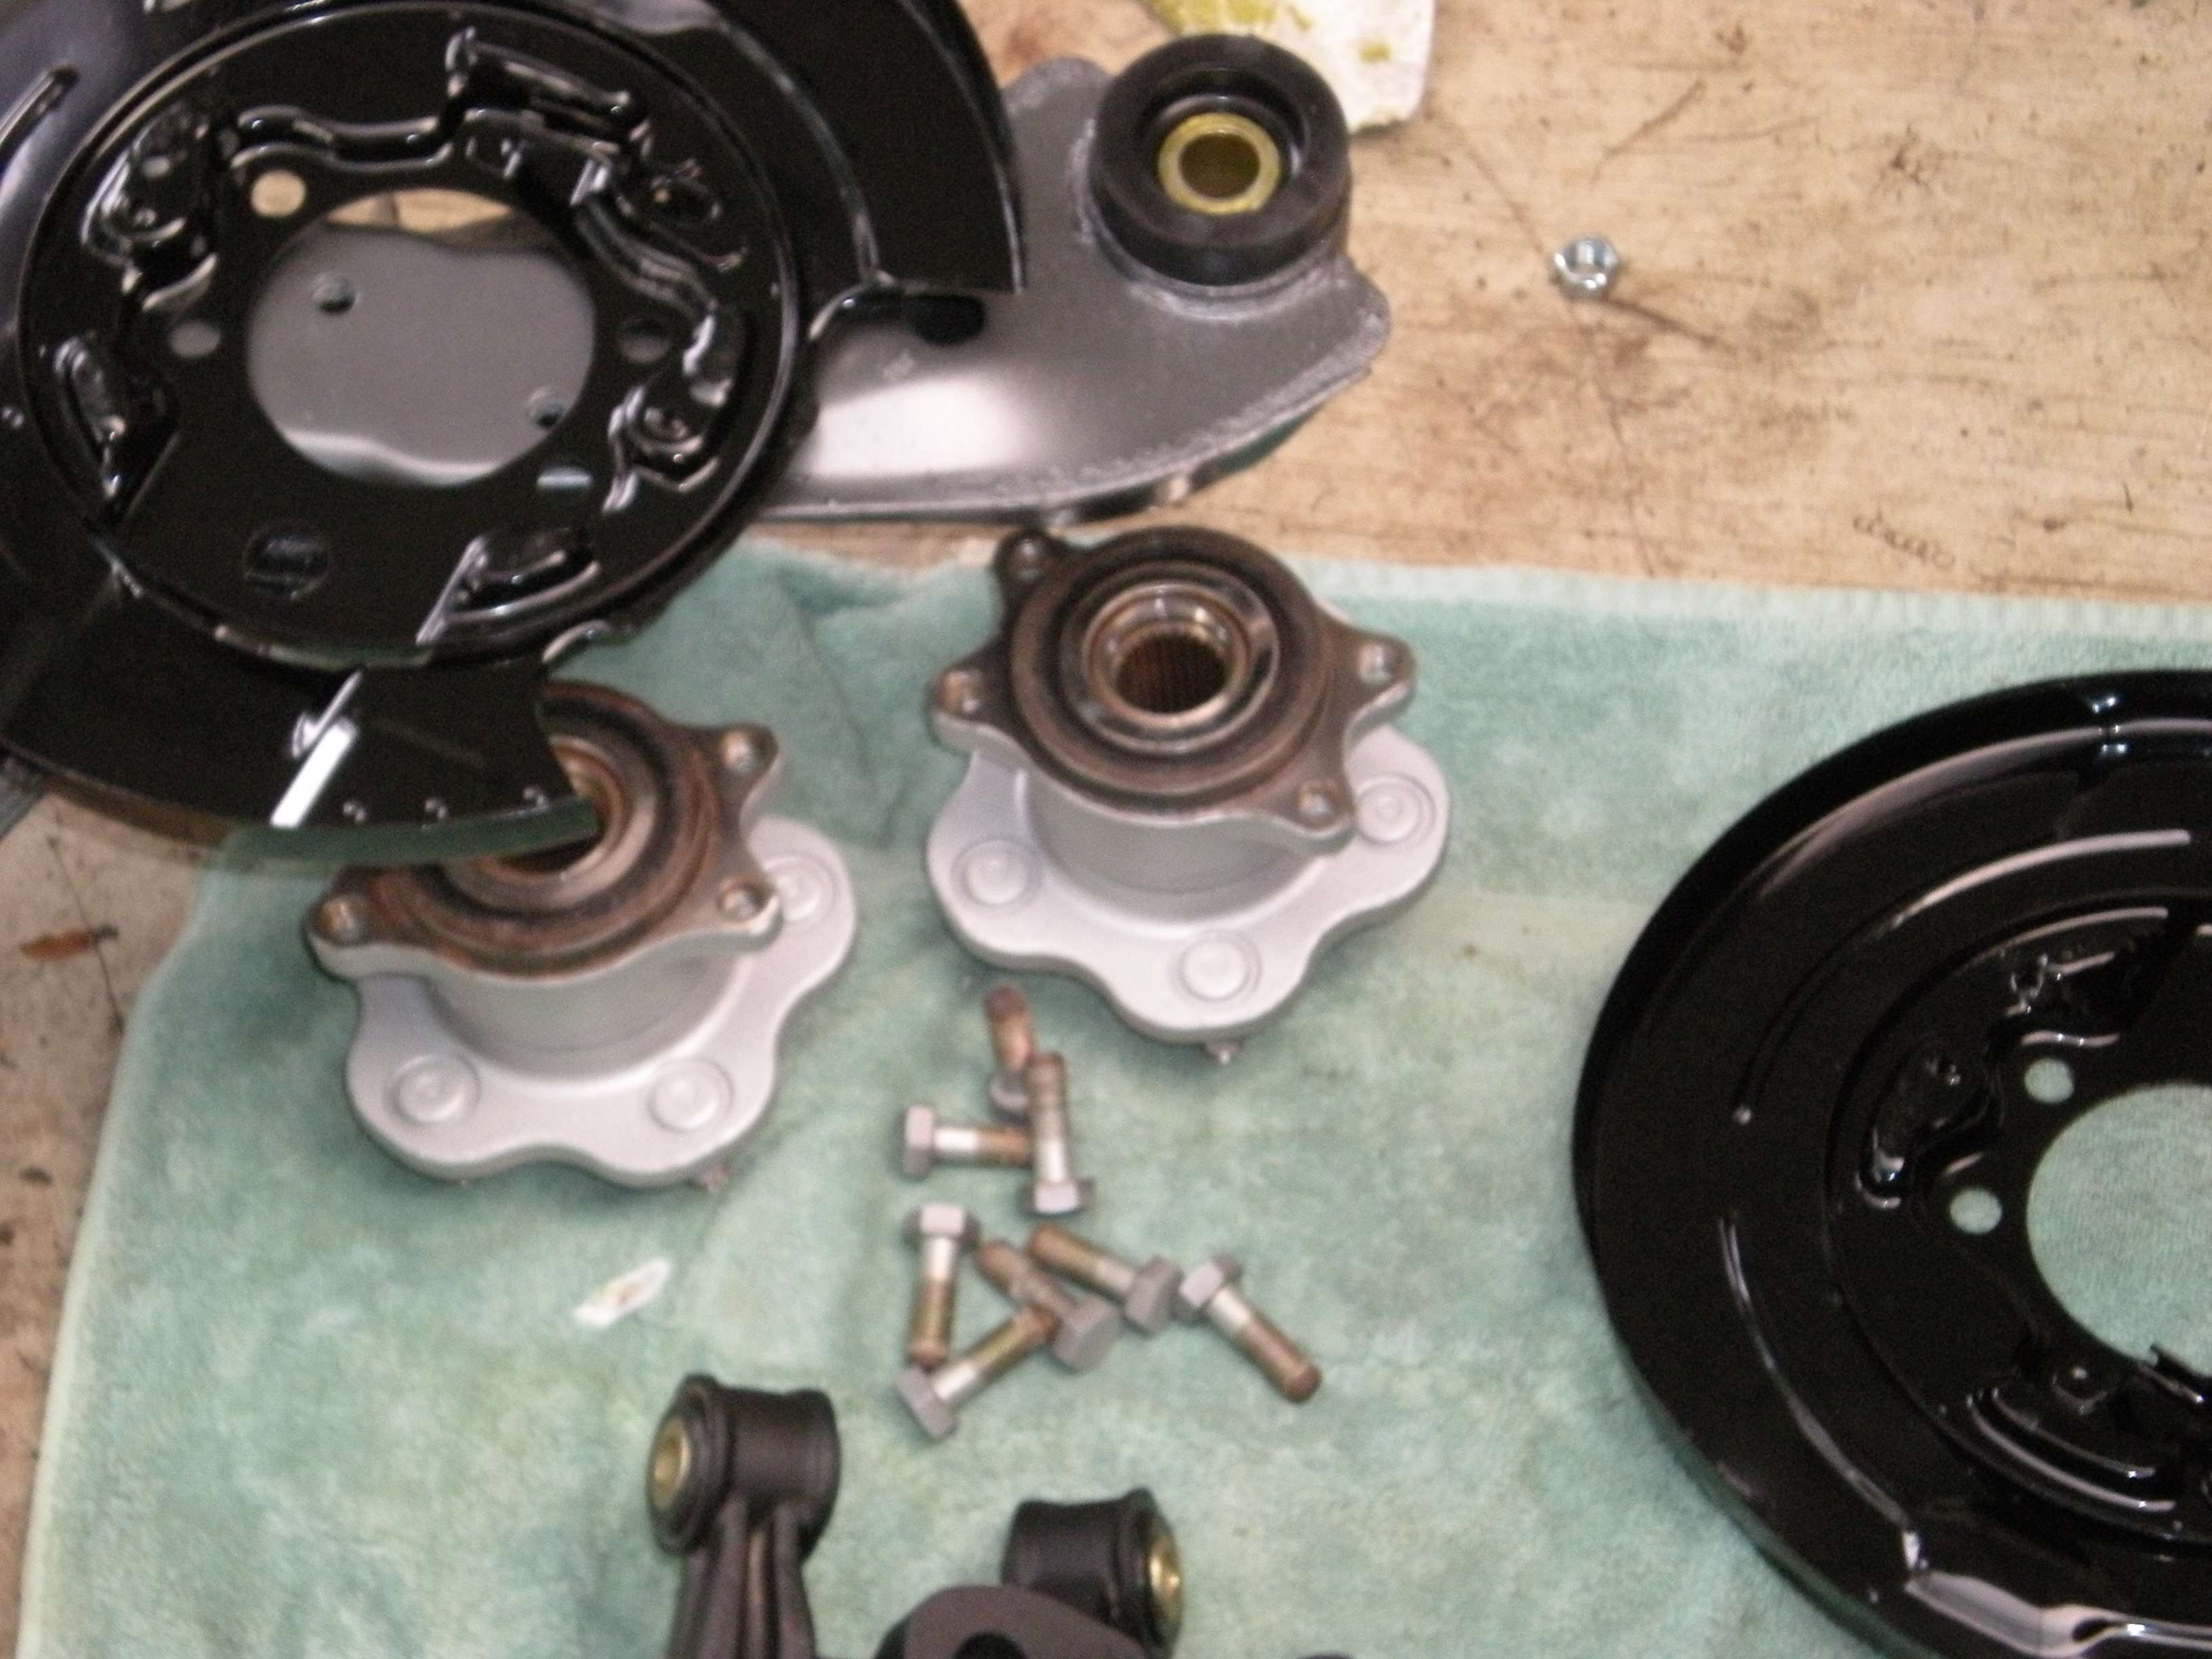 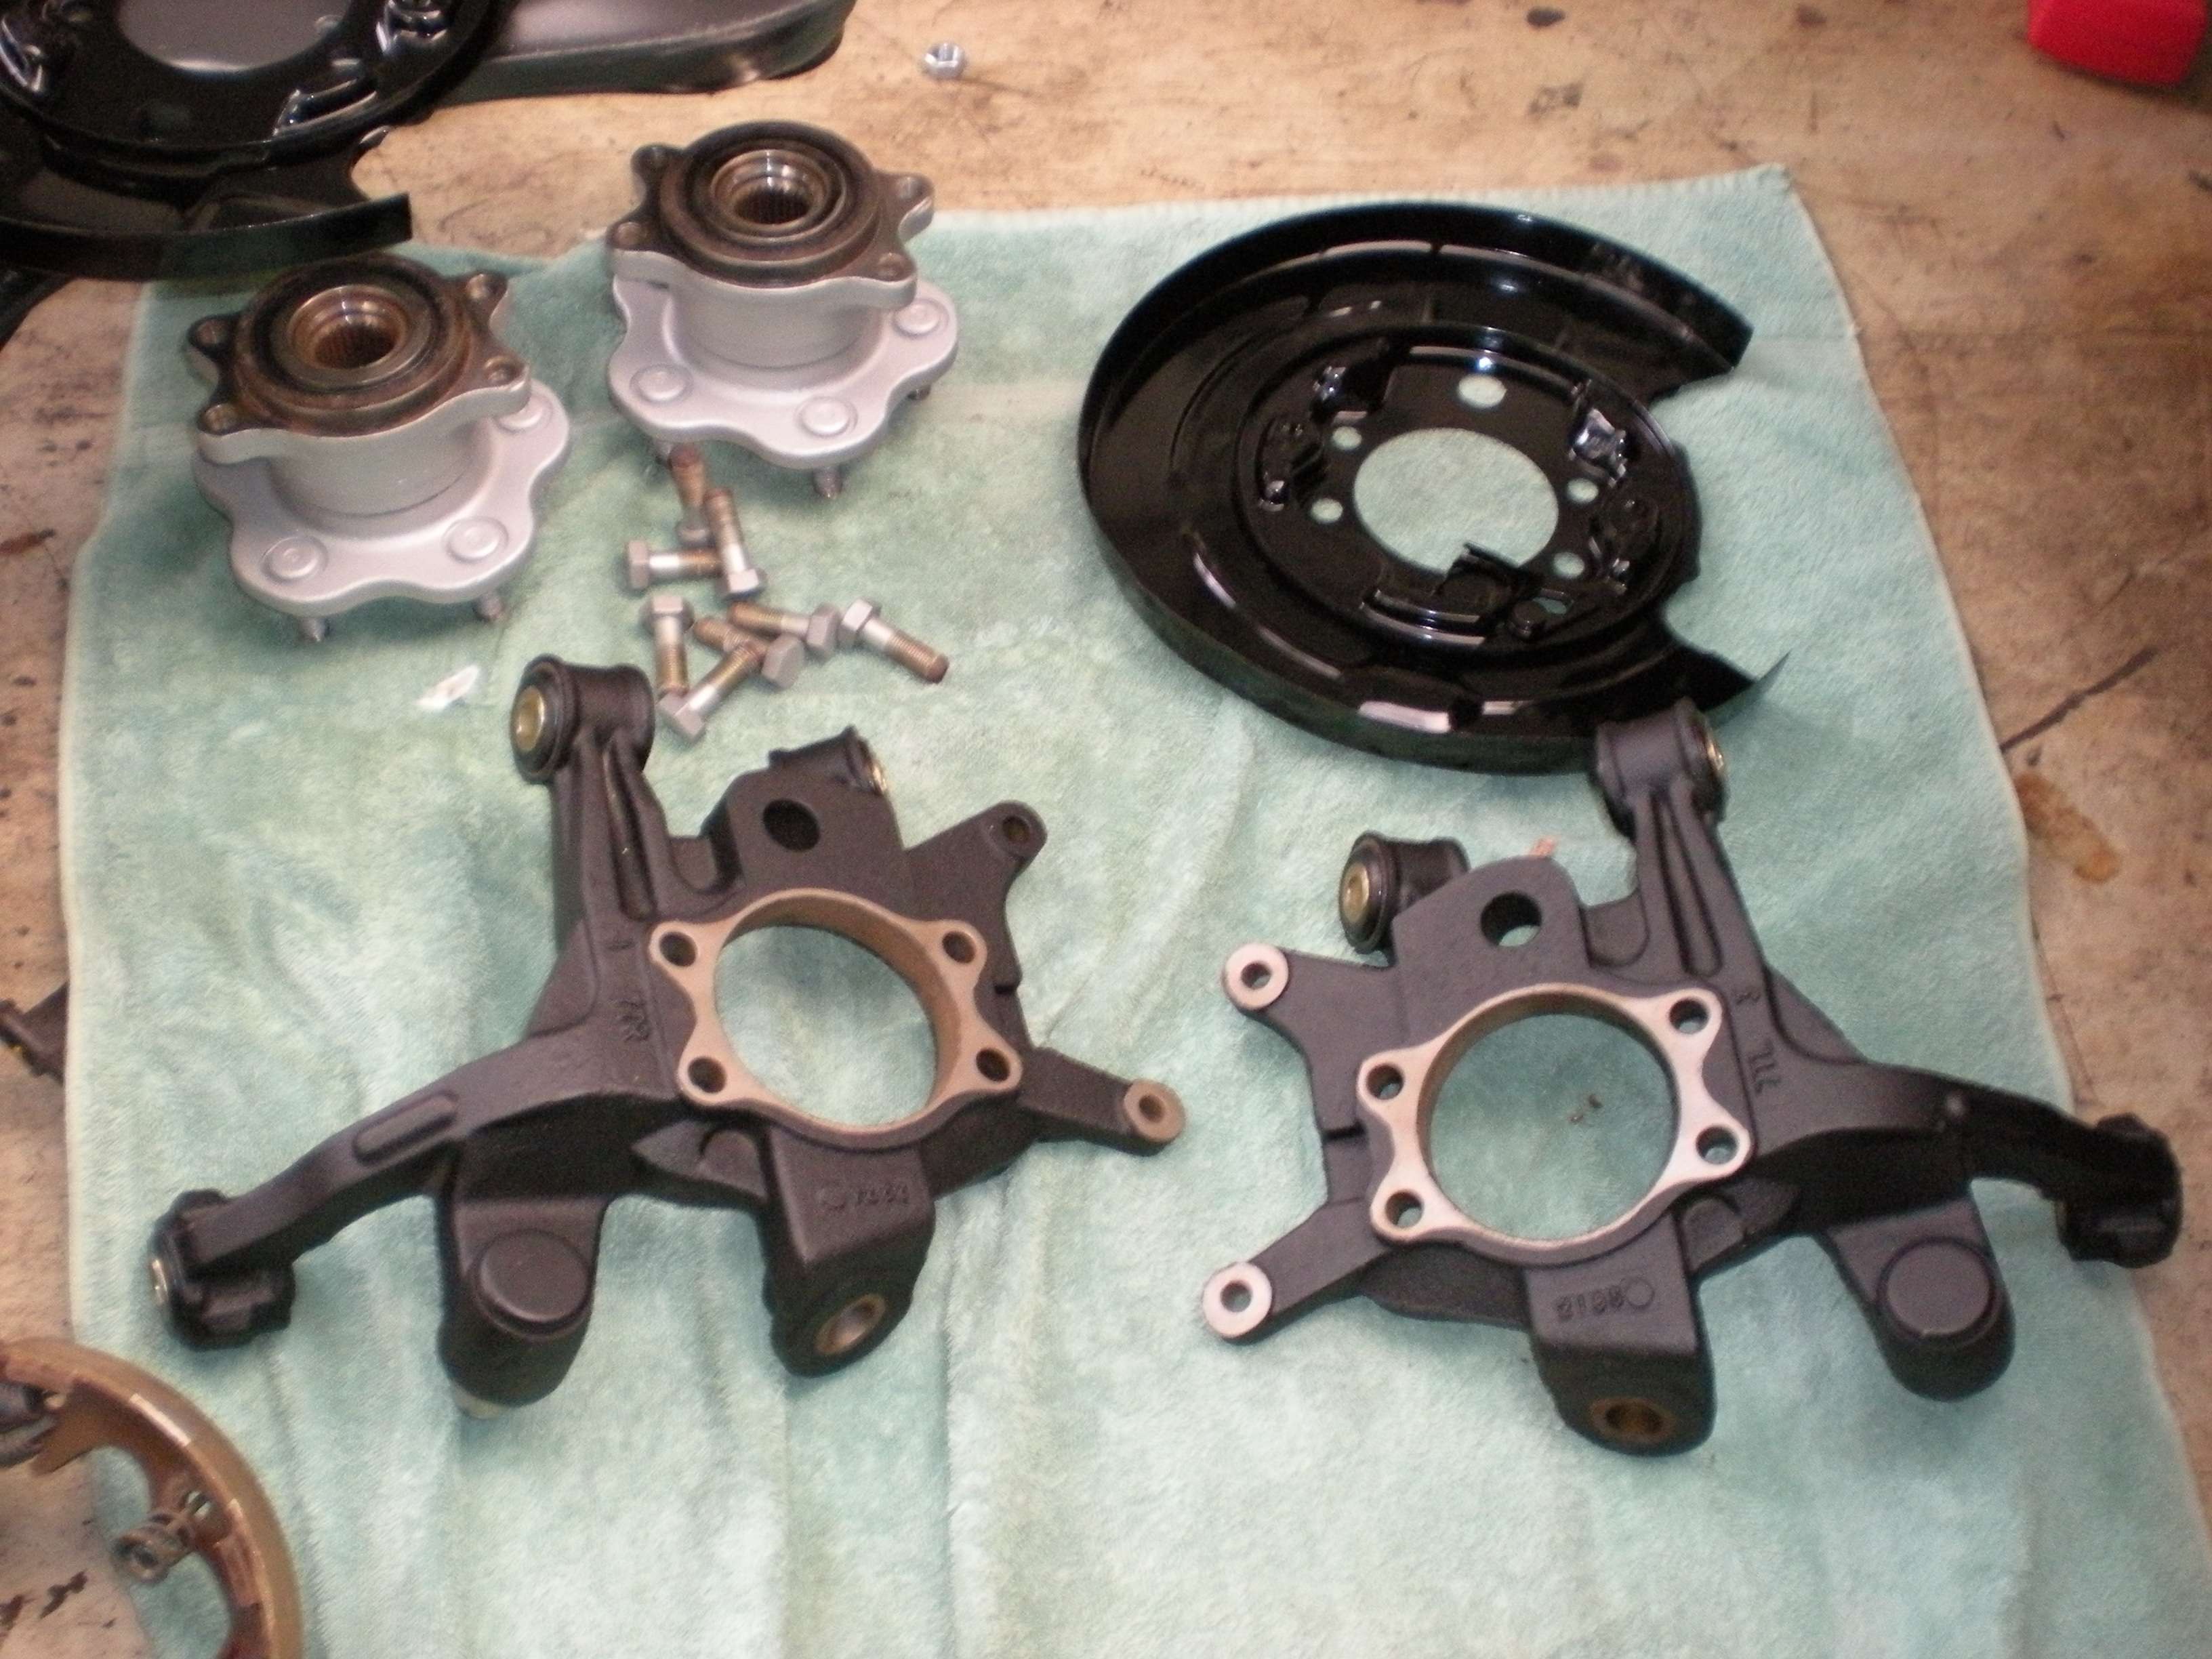 The large hole in the spindle that the post on the drum assembly goes through needed to be opened up a bit, as the post would not fit. I am unsure if that was due to the powder coat or if it is normal with this conversion. I simply used a steeper drill bit and opened the hole until the post fit properly.  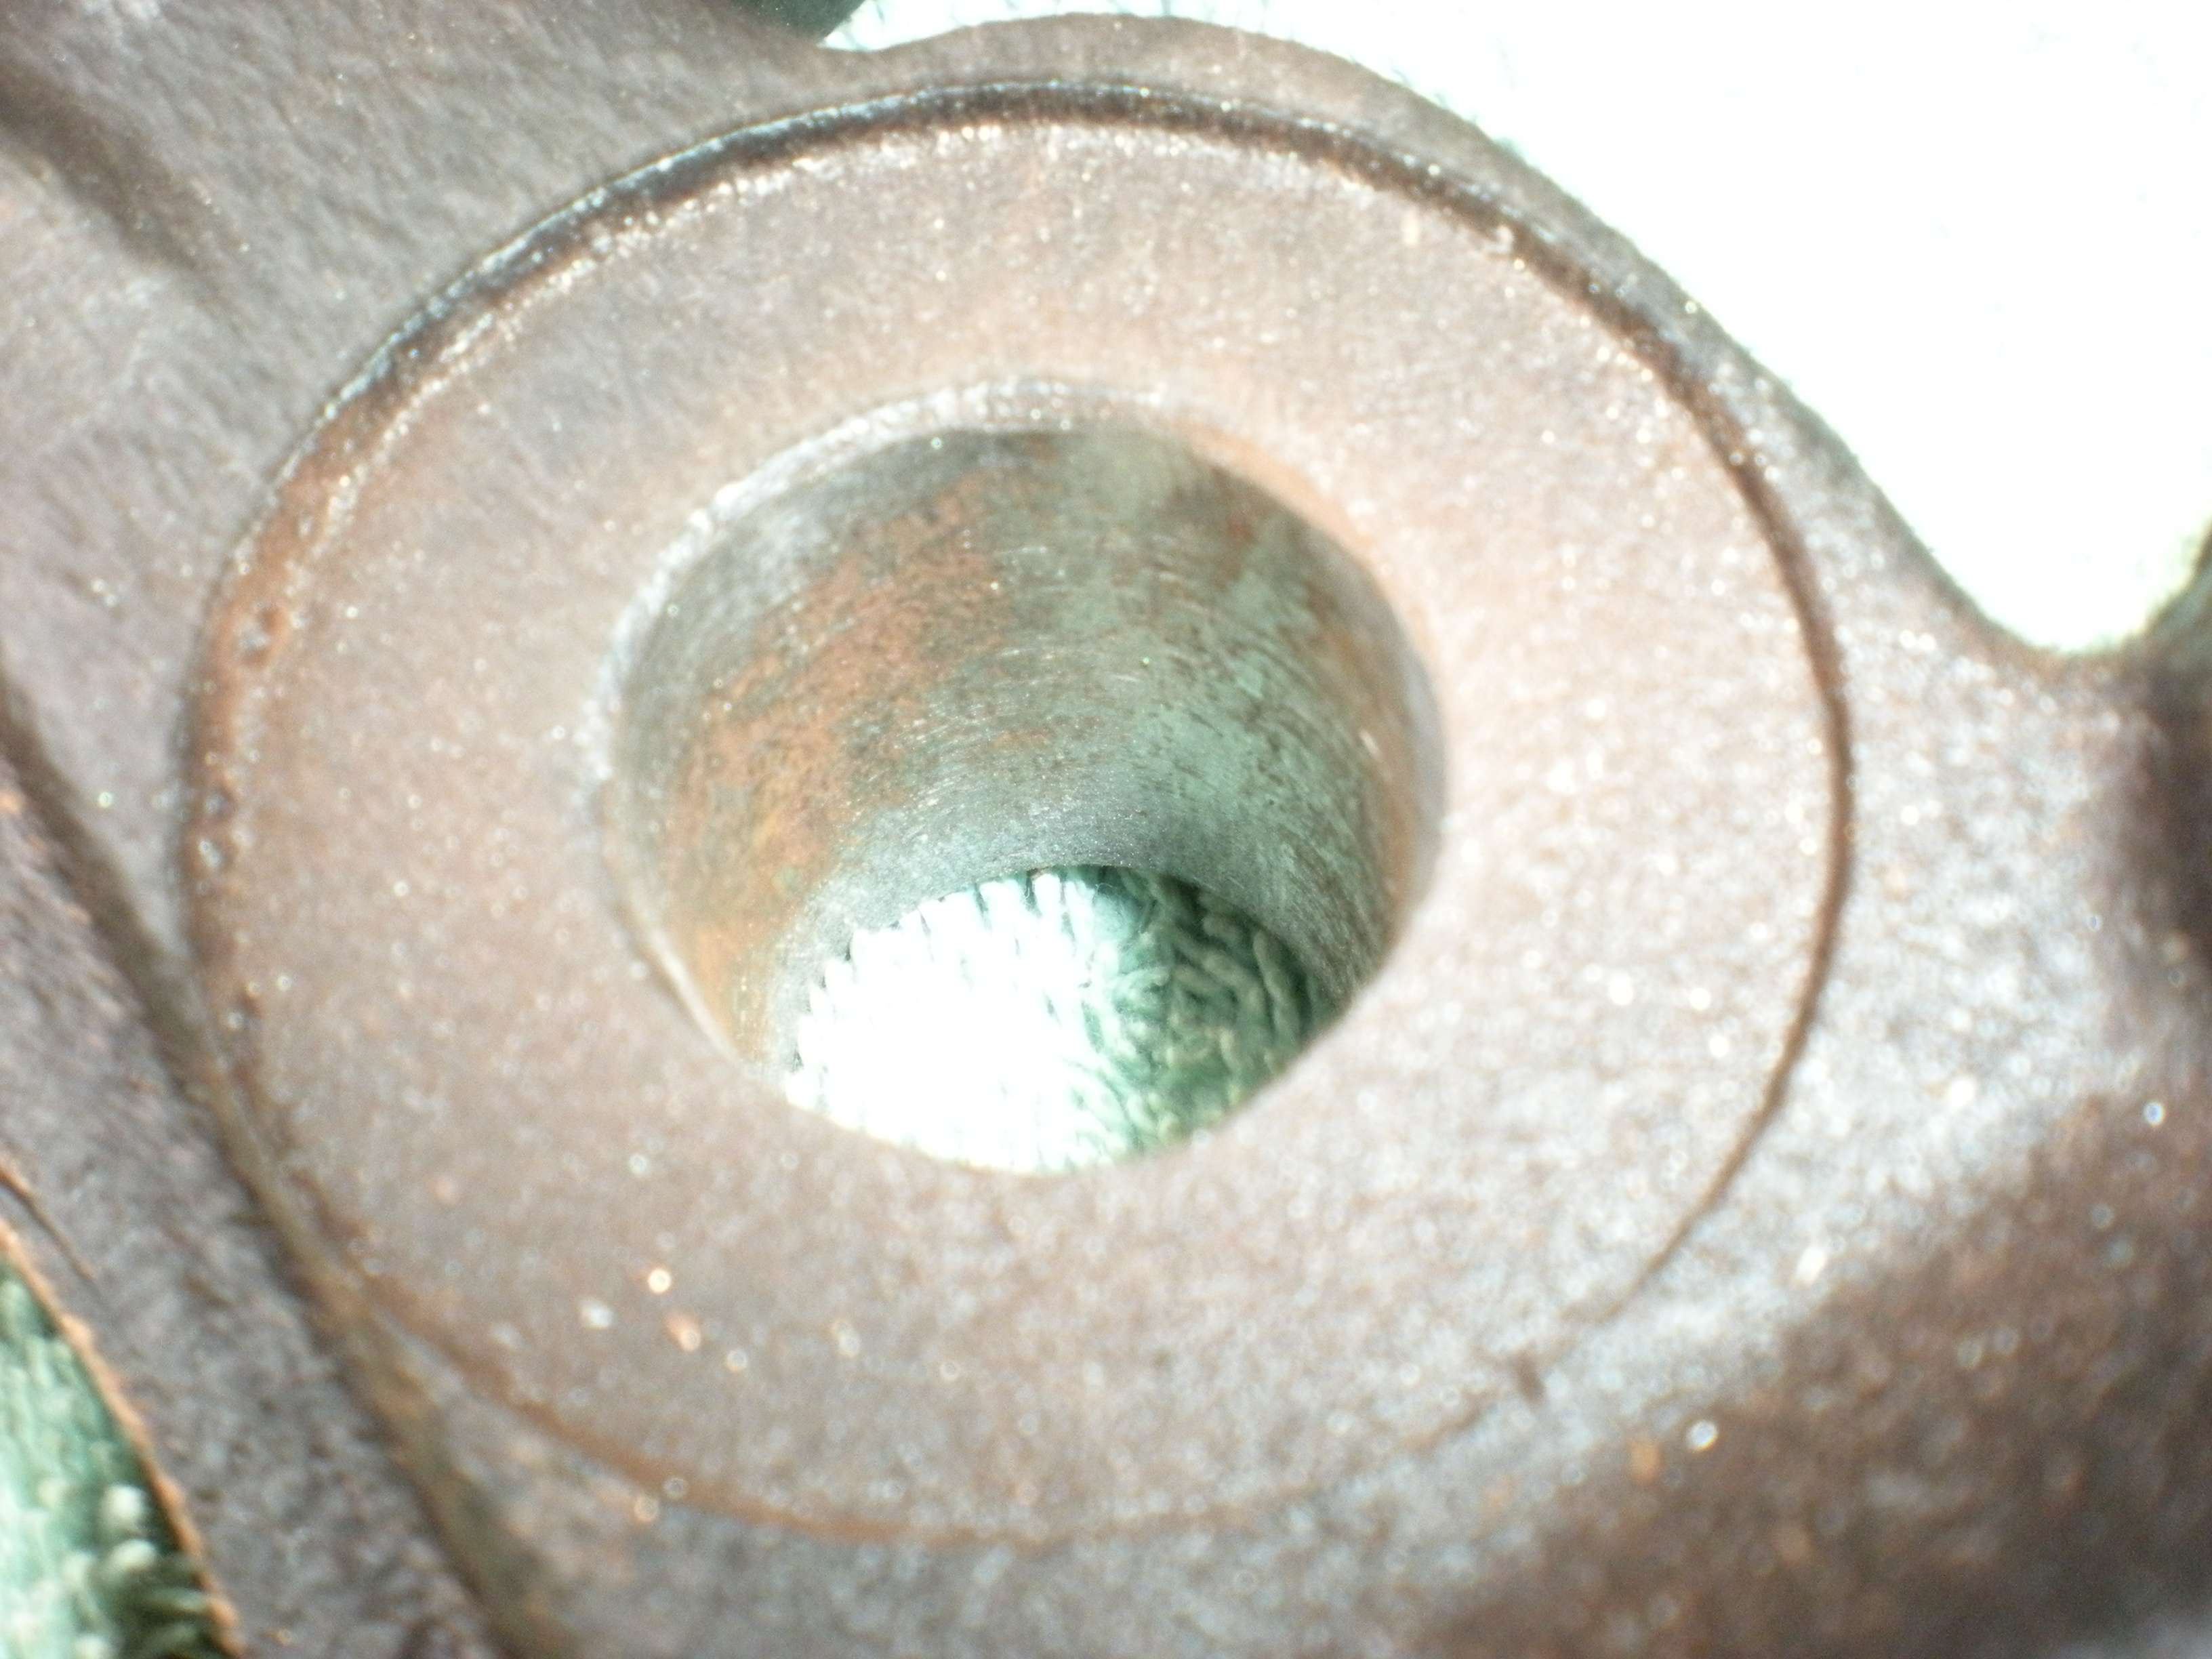 Of course, anti-seize was then applied.... 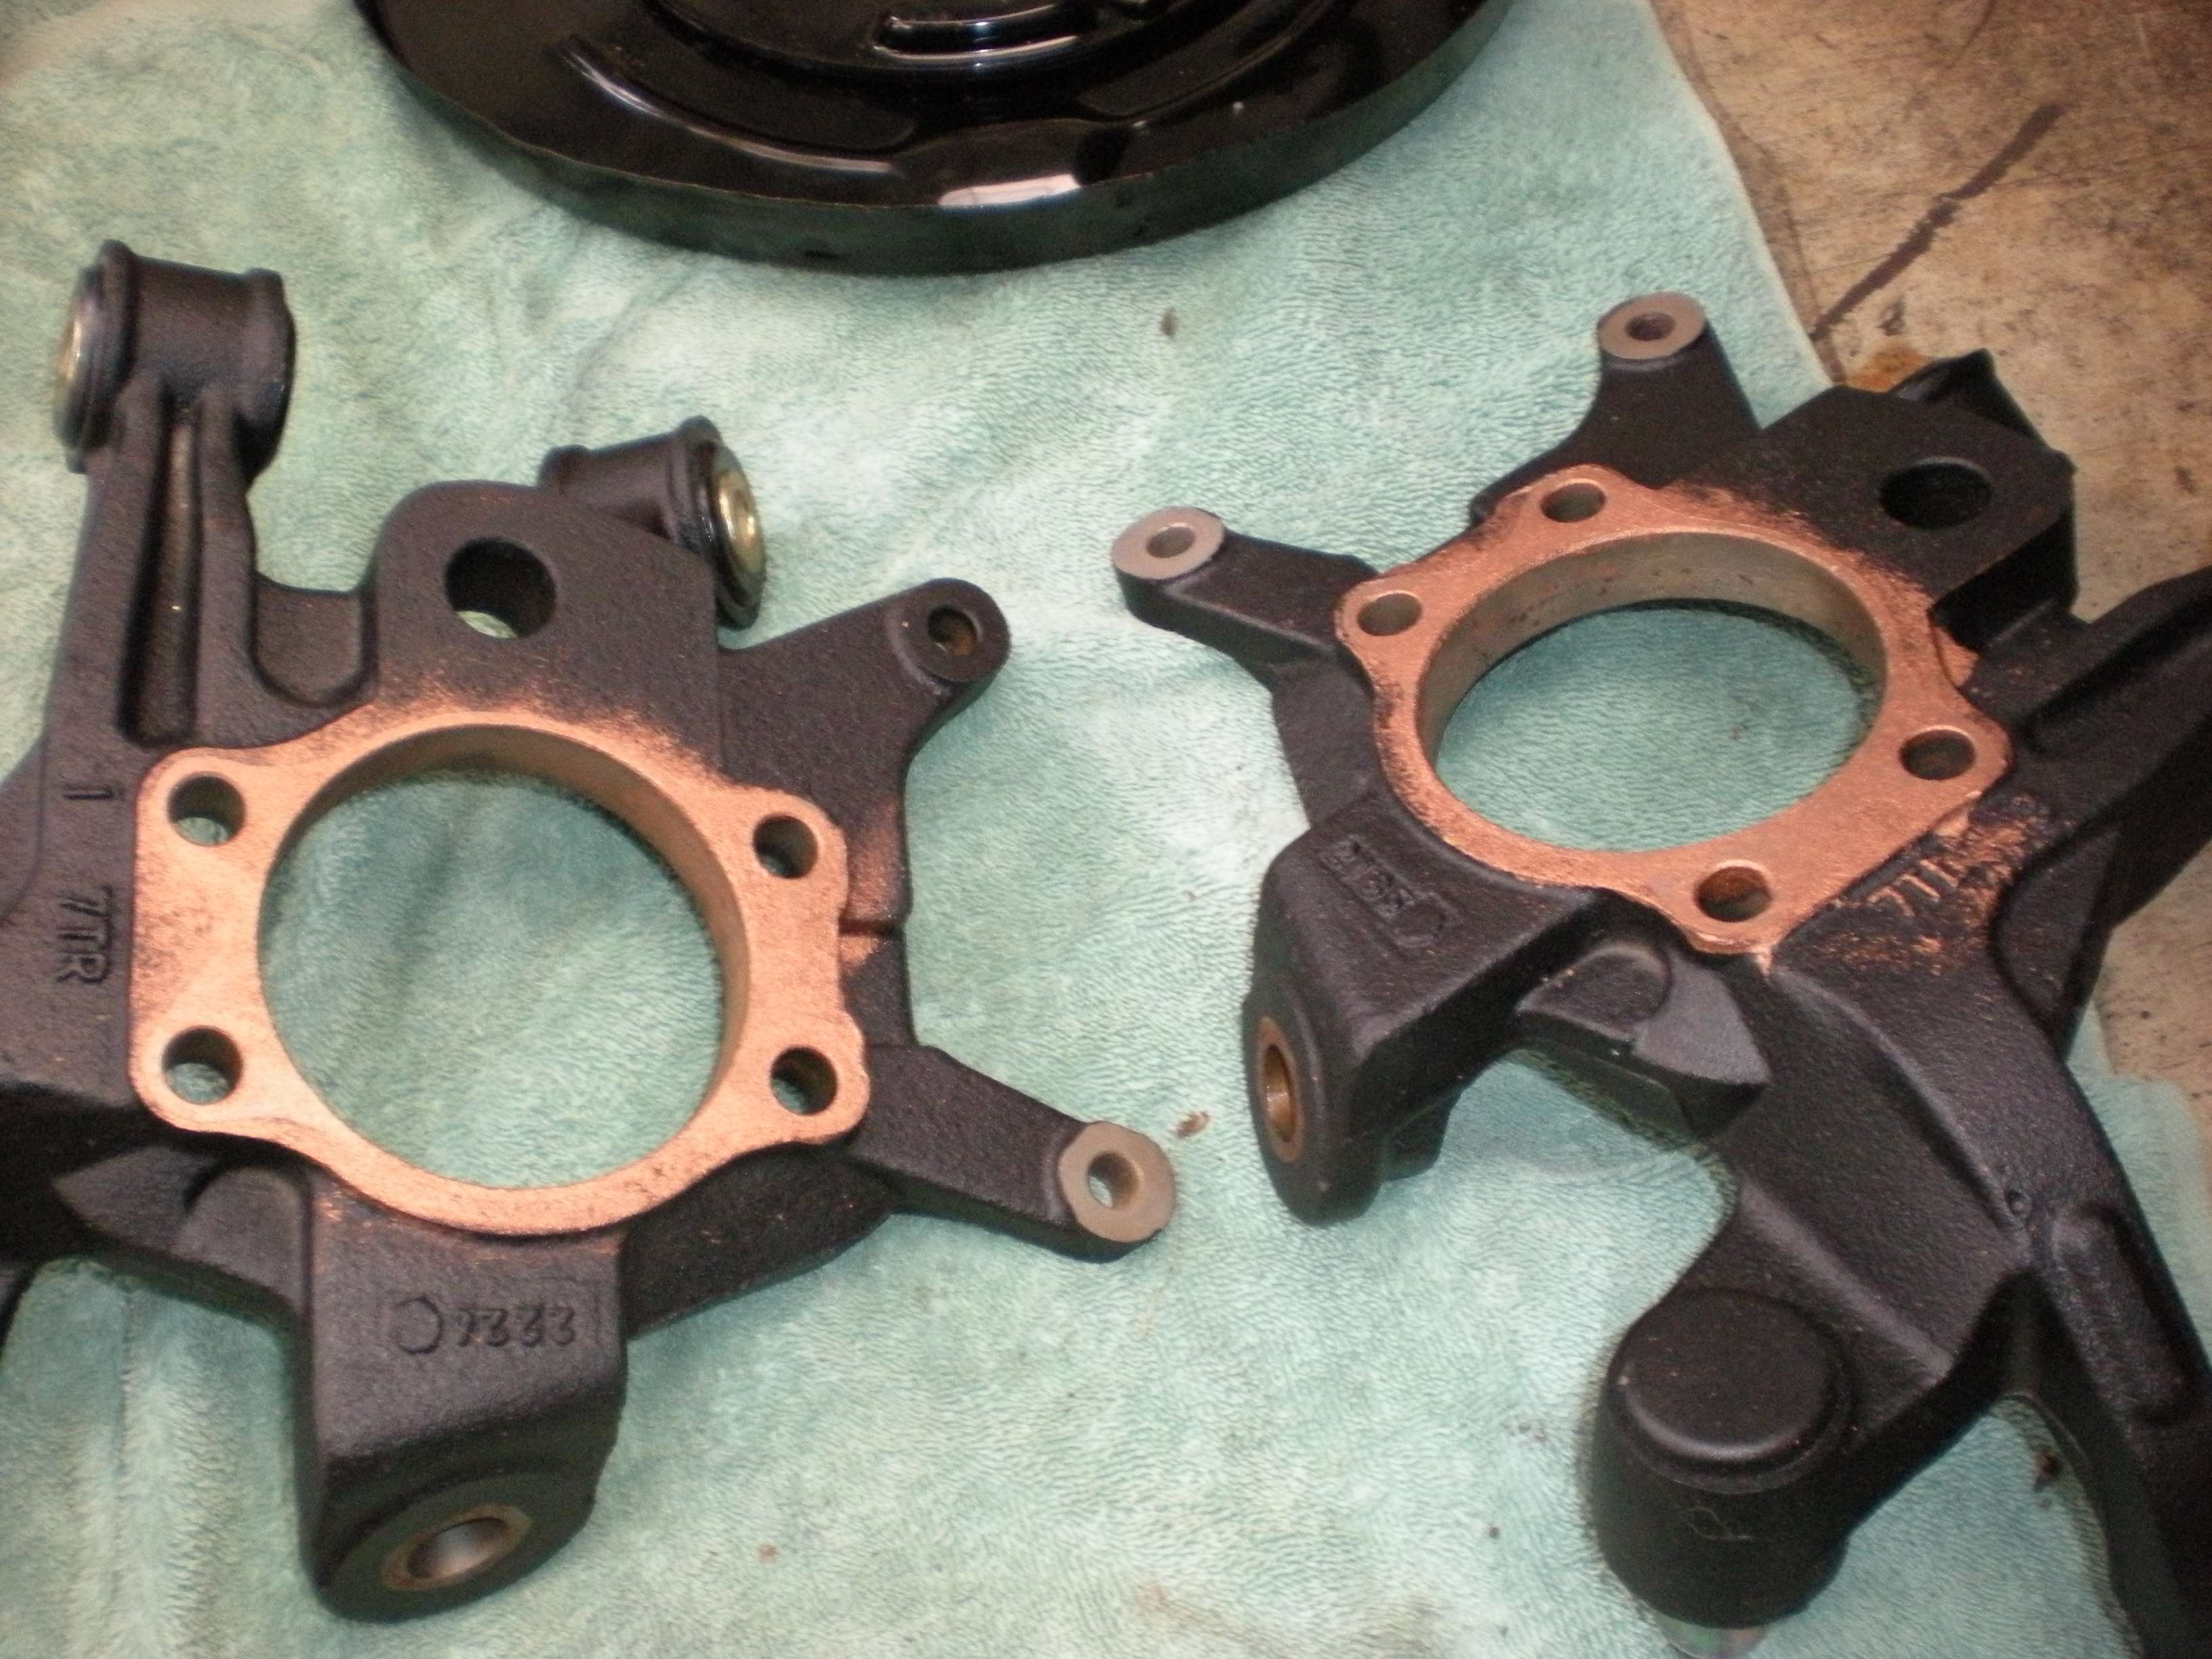  The backing plate was then placed on the spindle, the drum assembly was secured to the plate by the springs, and the spindle was bolted through the back of the spindle. 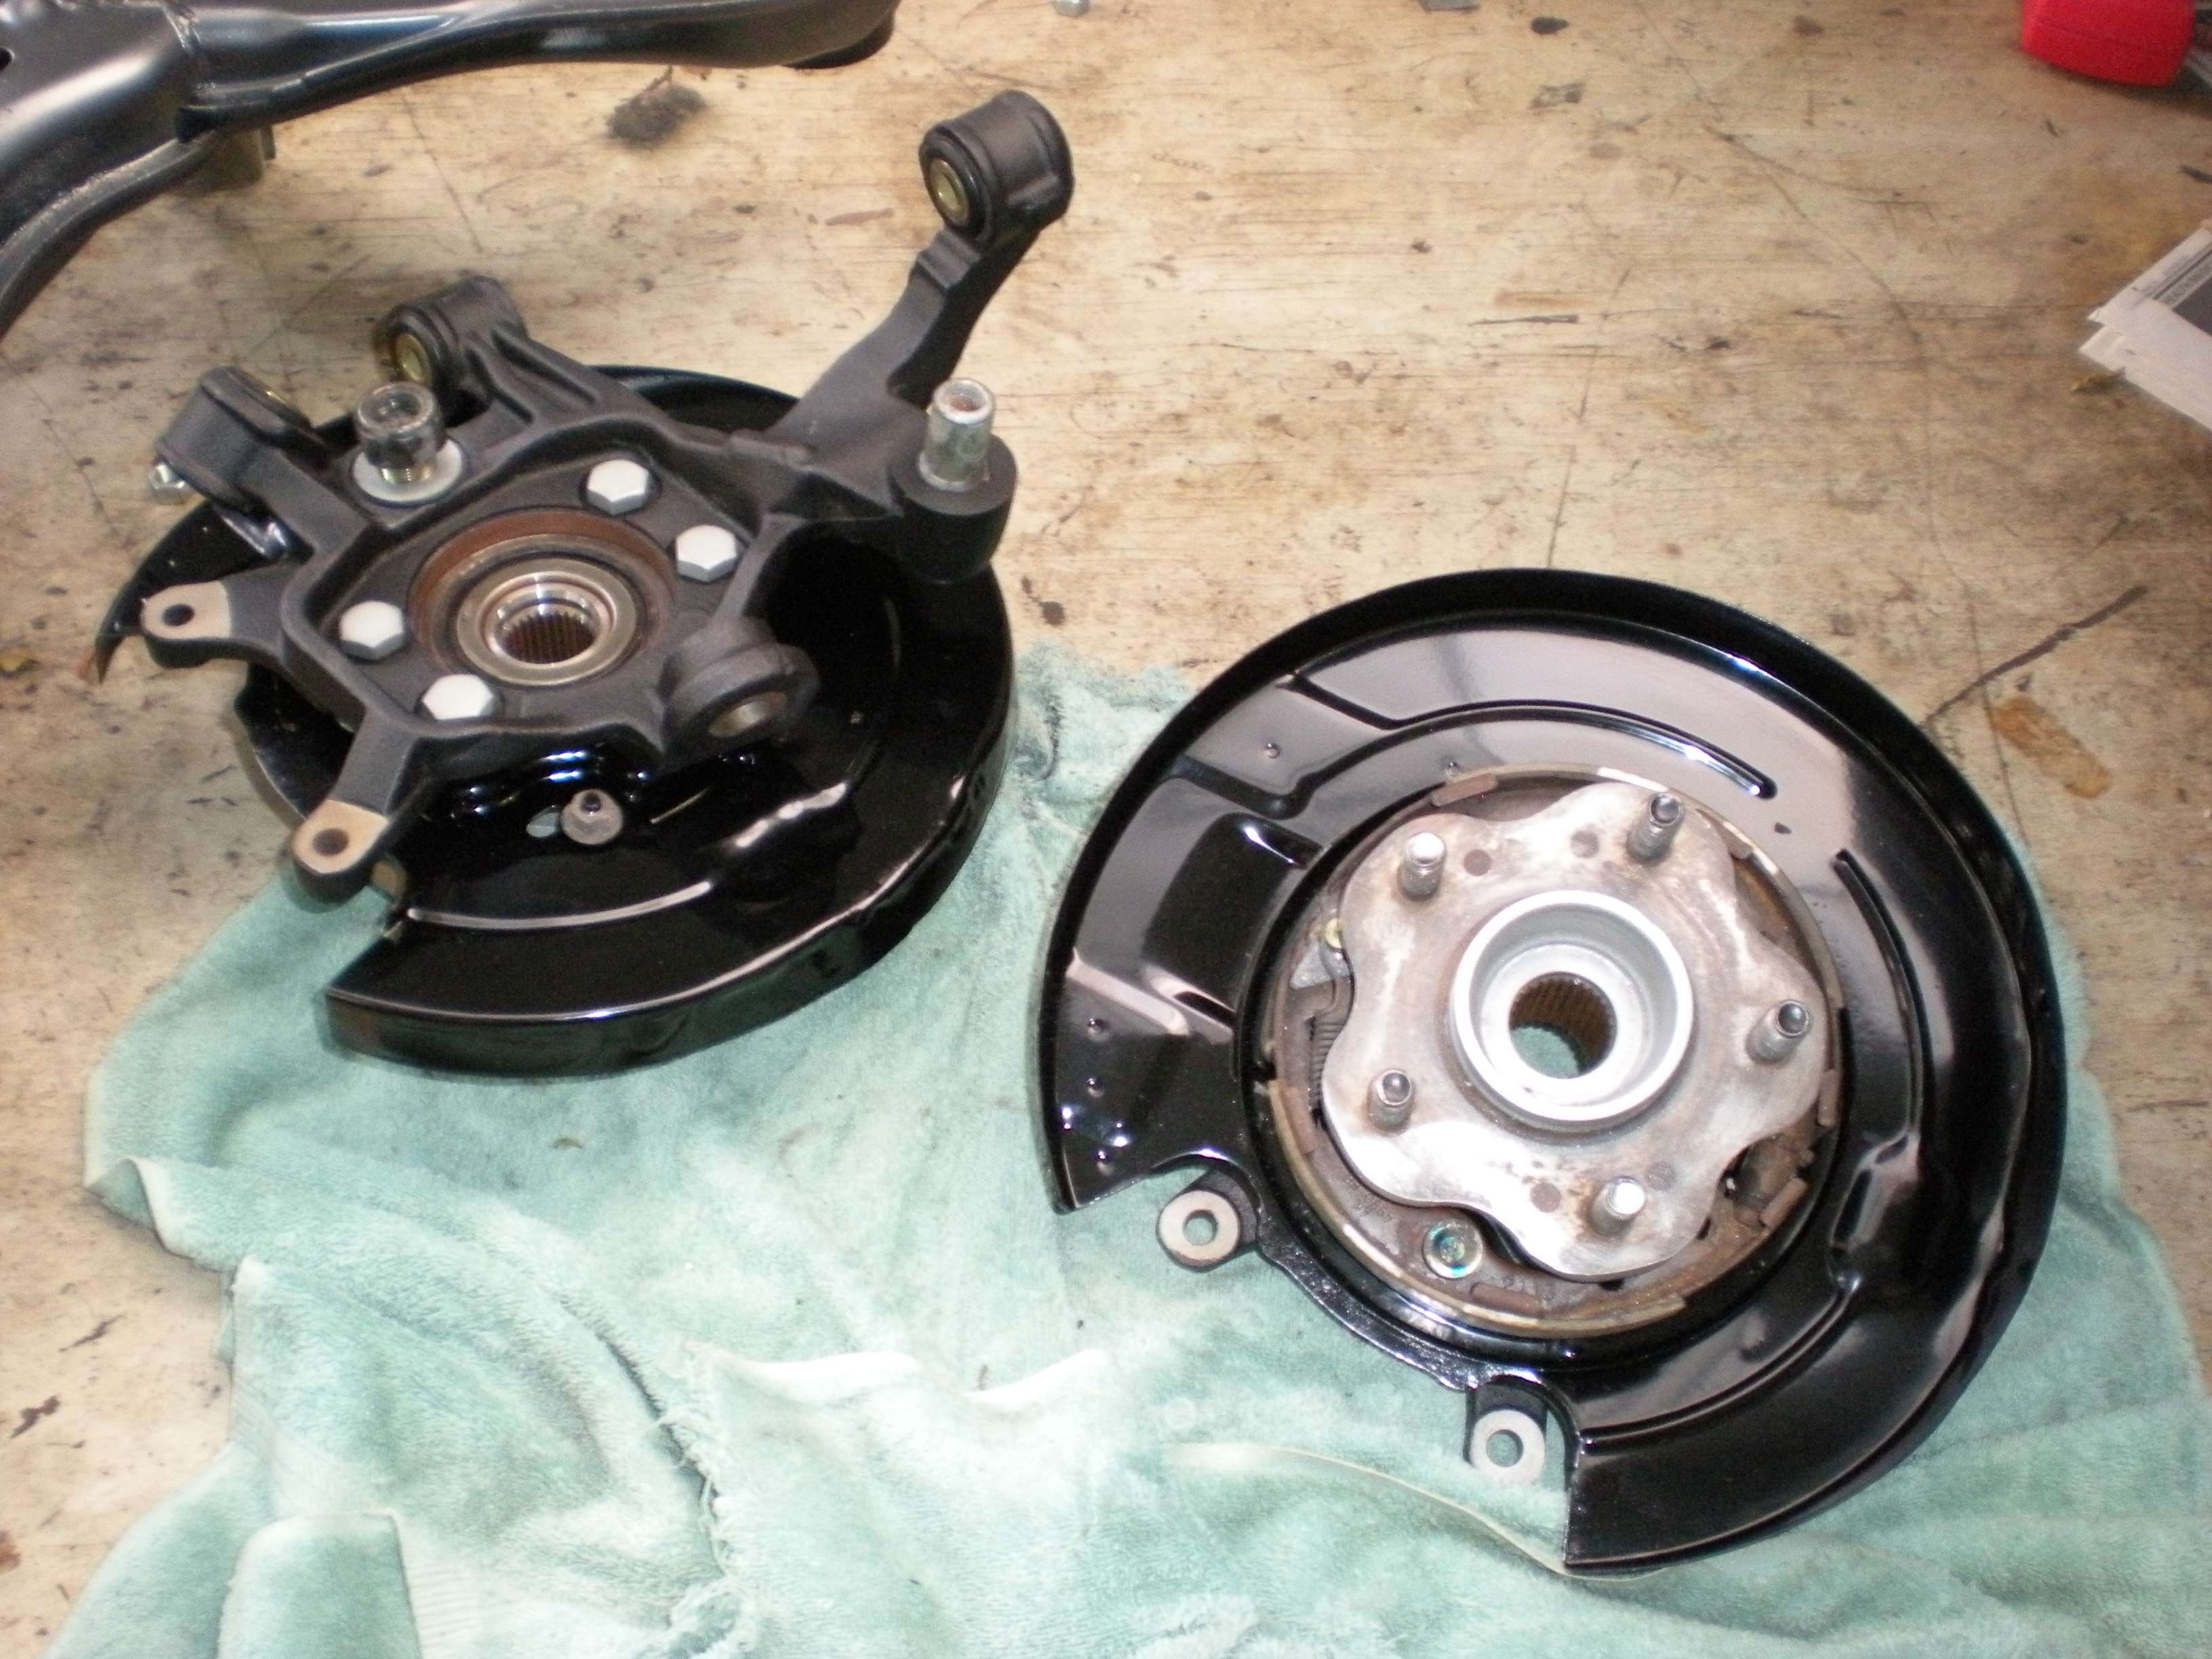 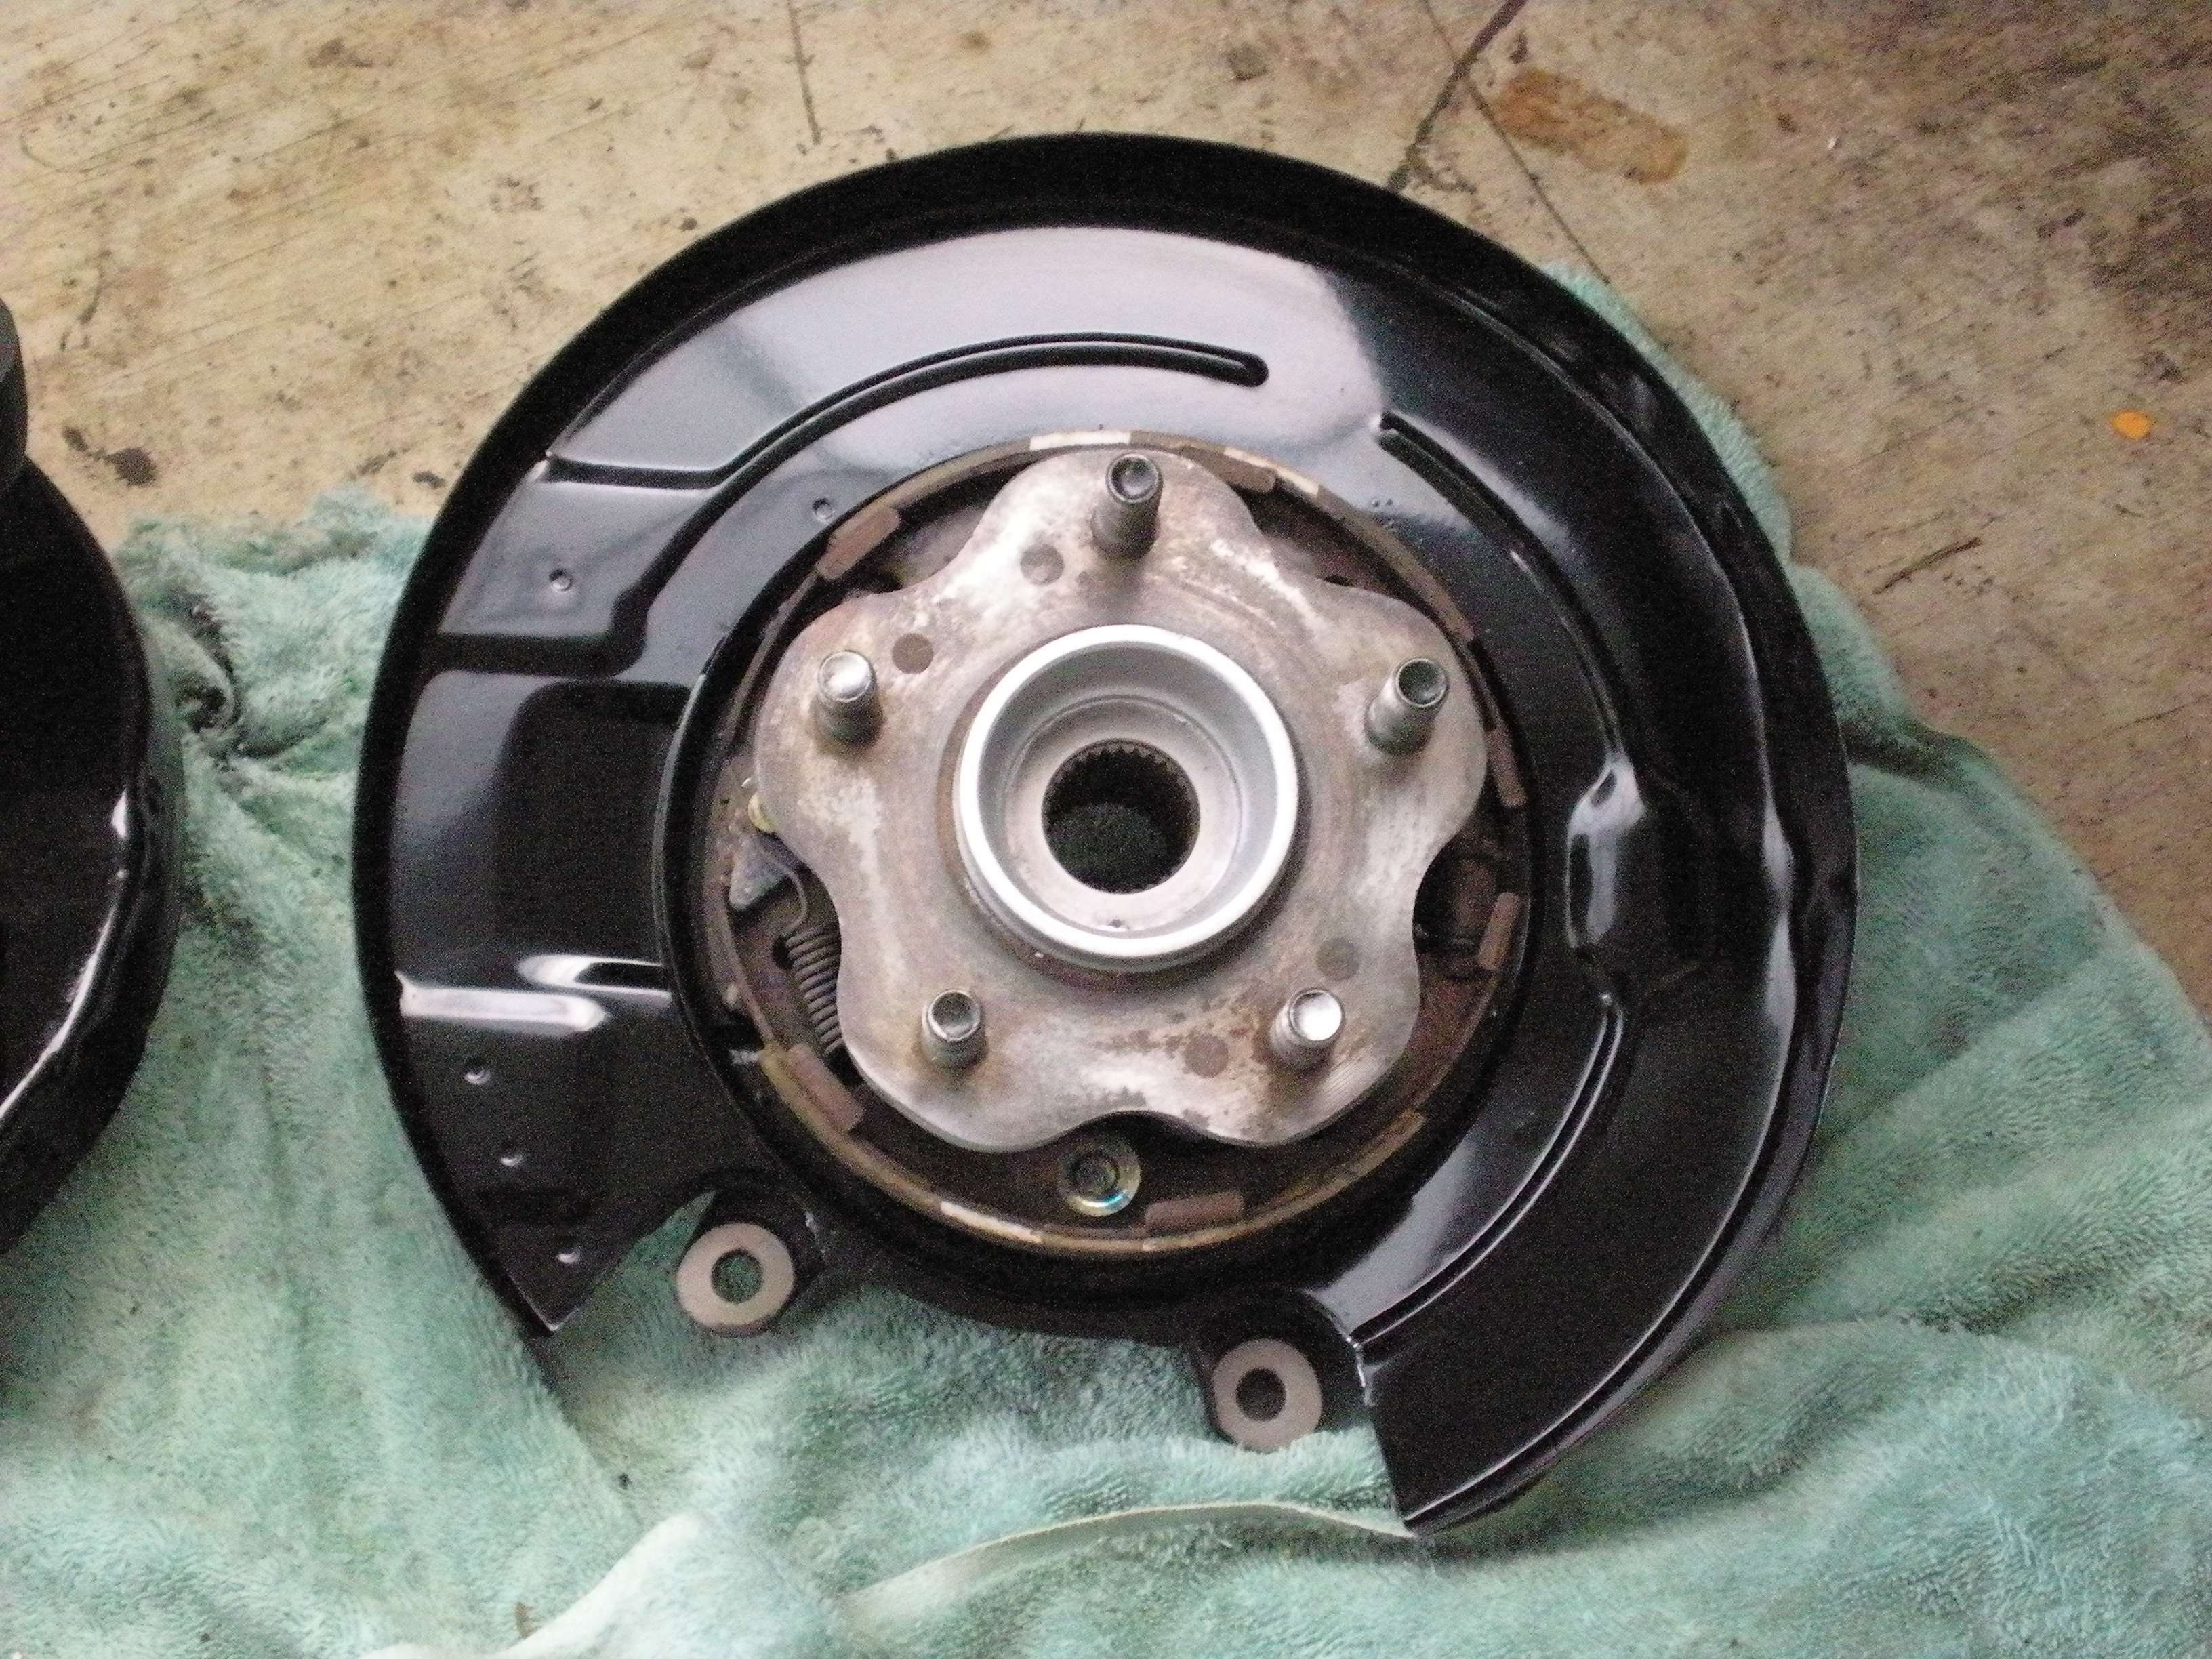 Prior to installing the suspension arms, I applied and aircraft decal edge sealer. We use it at work to prevent decals from lifting off the airplanes at 600 mph. 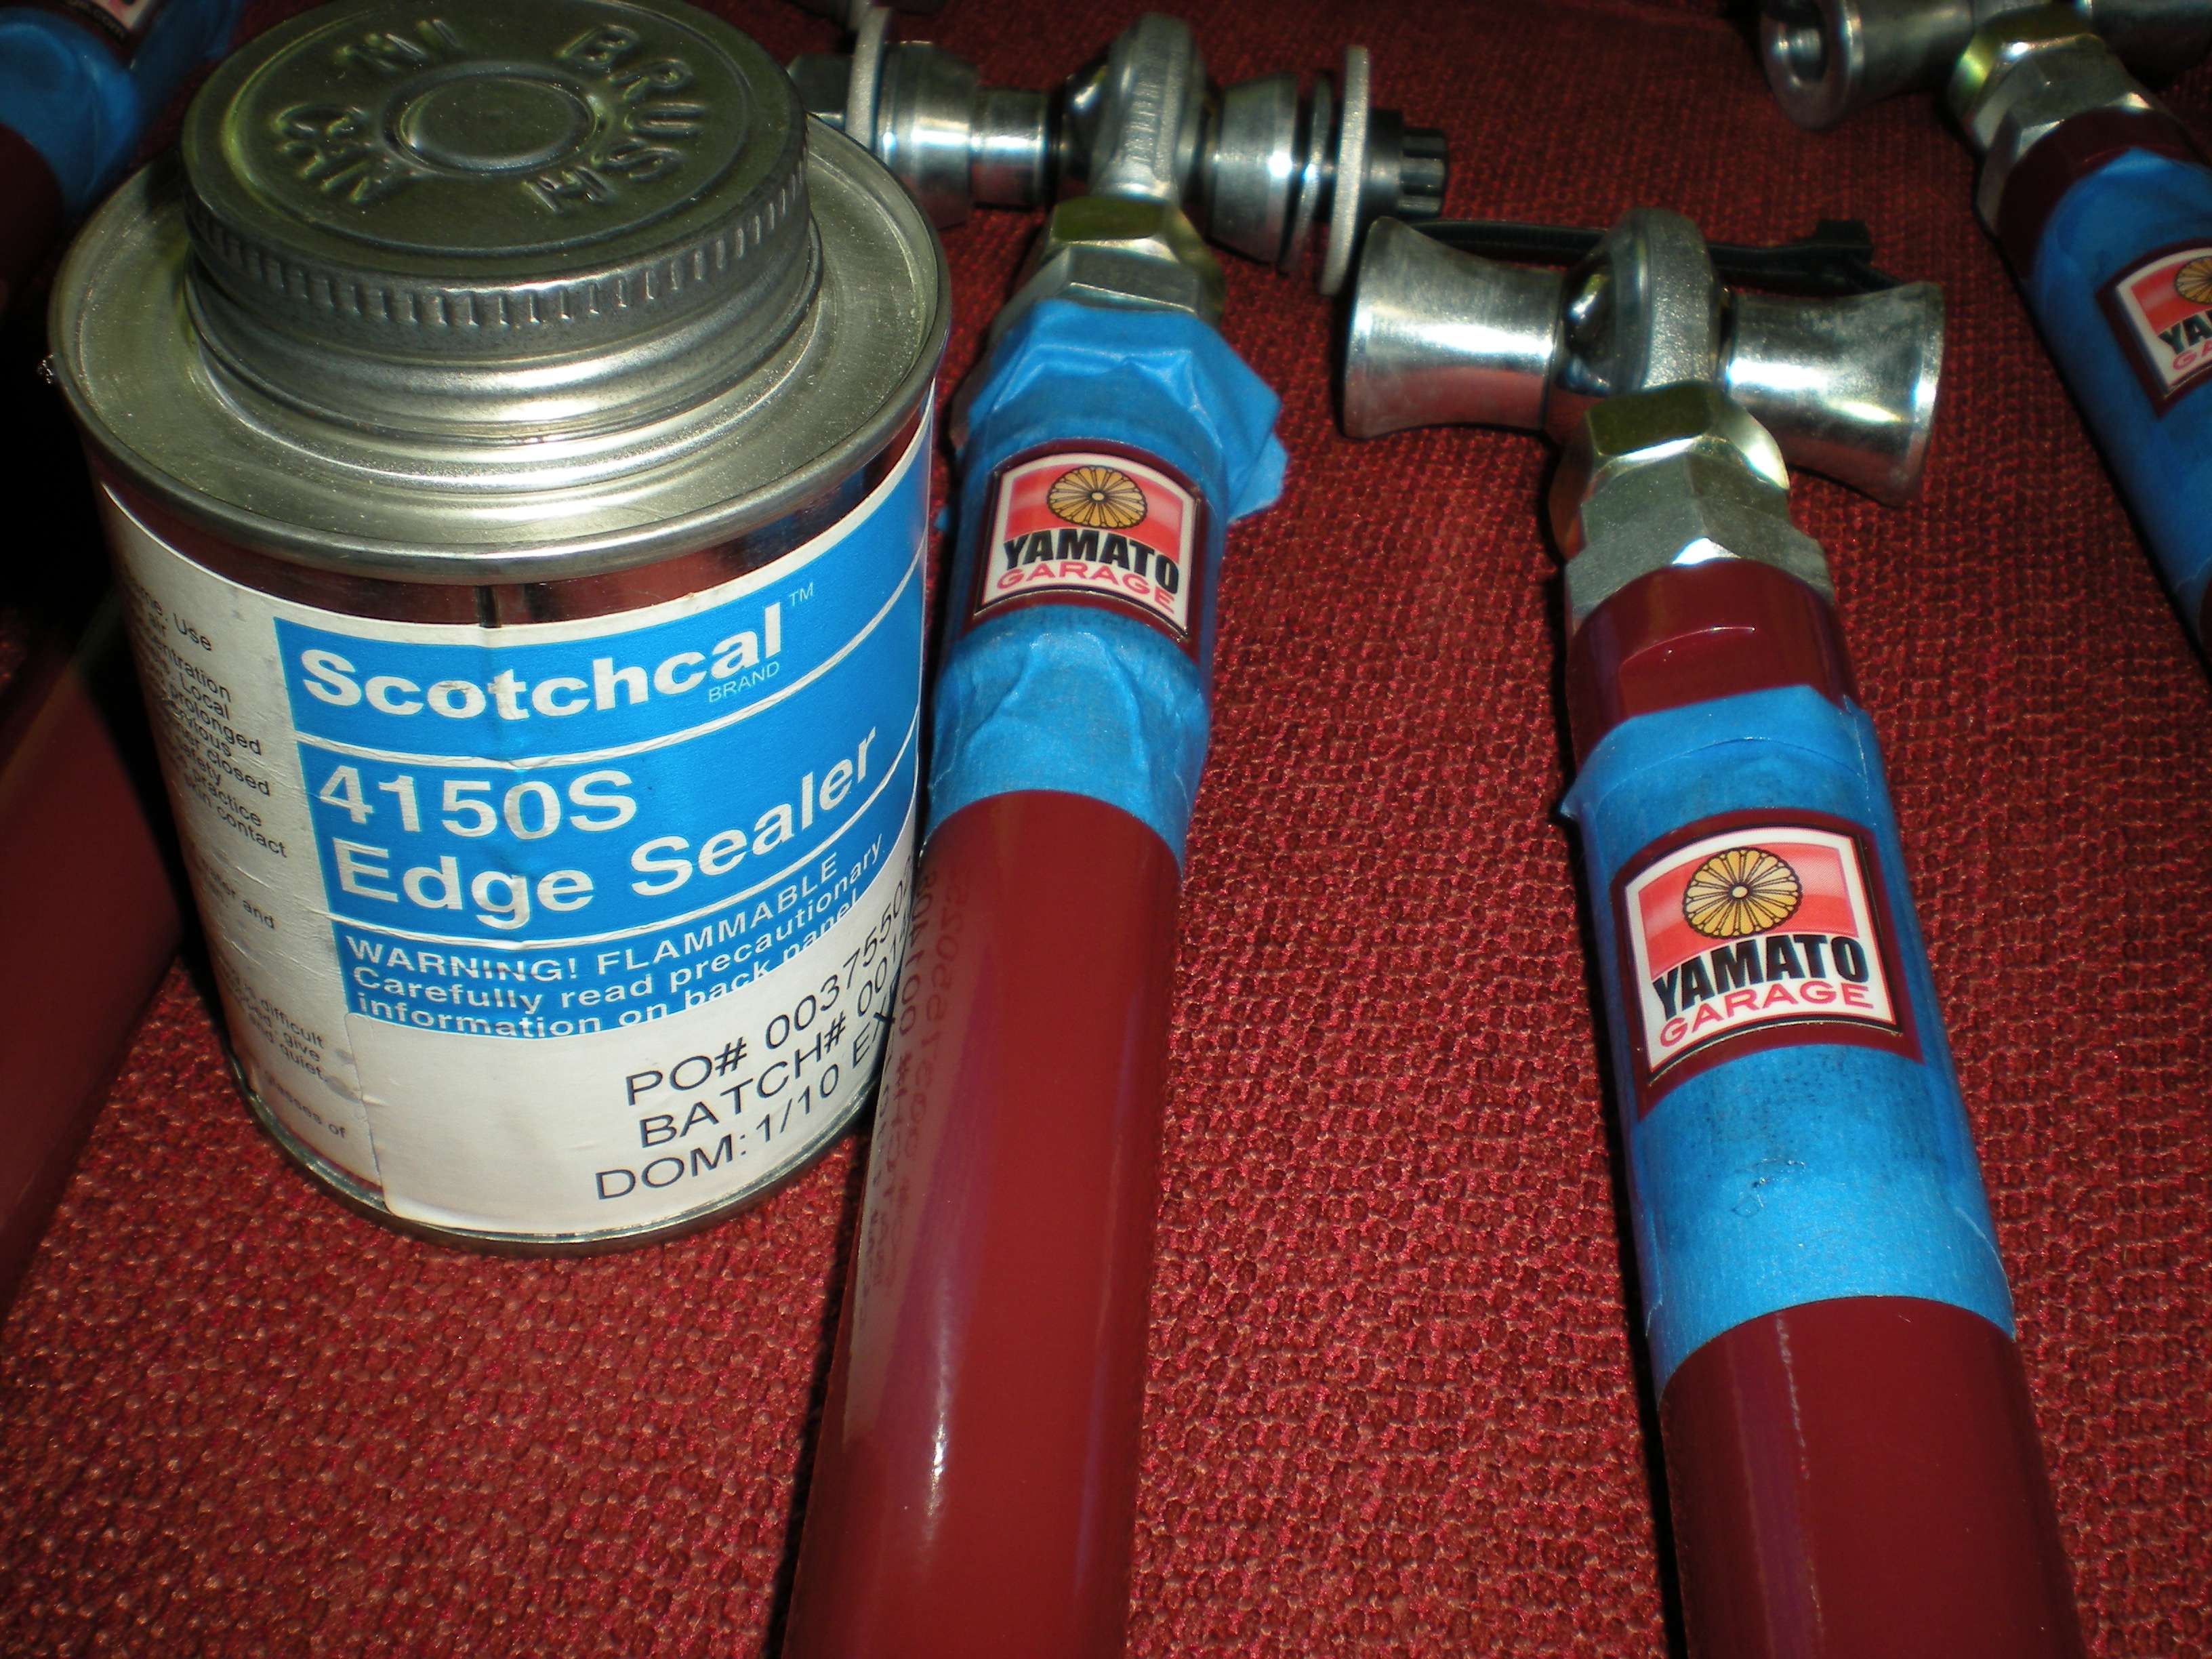  The suspension arms and the spindles were then installed to the subframe... 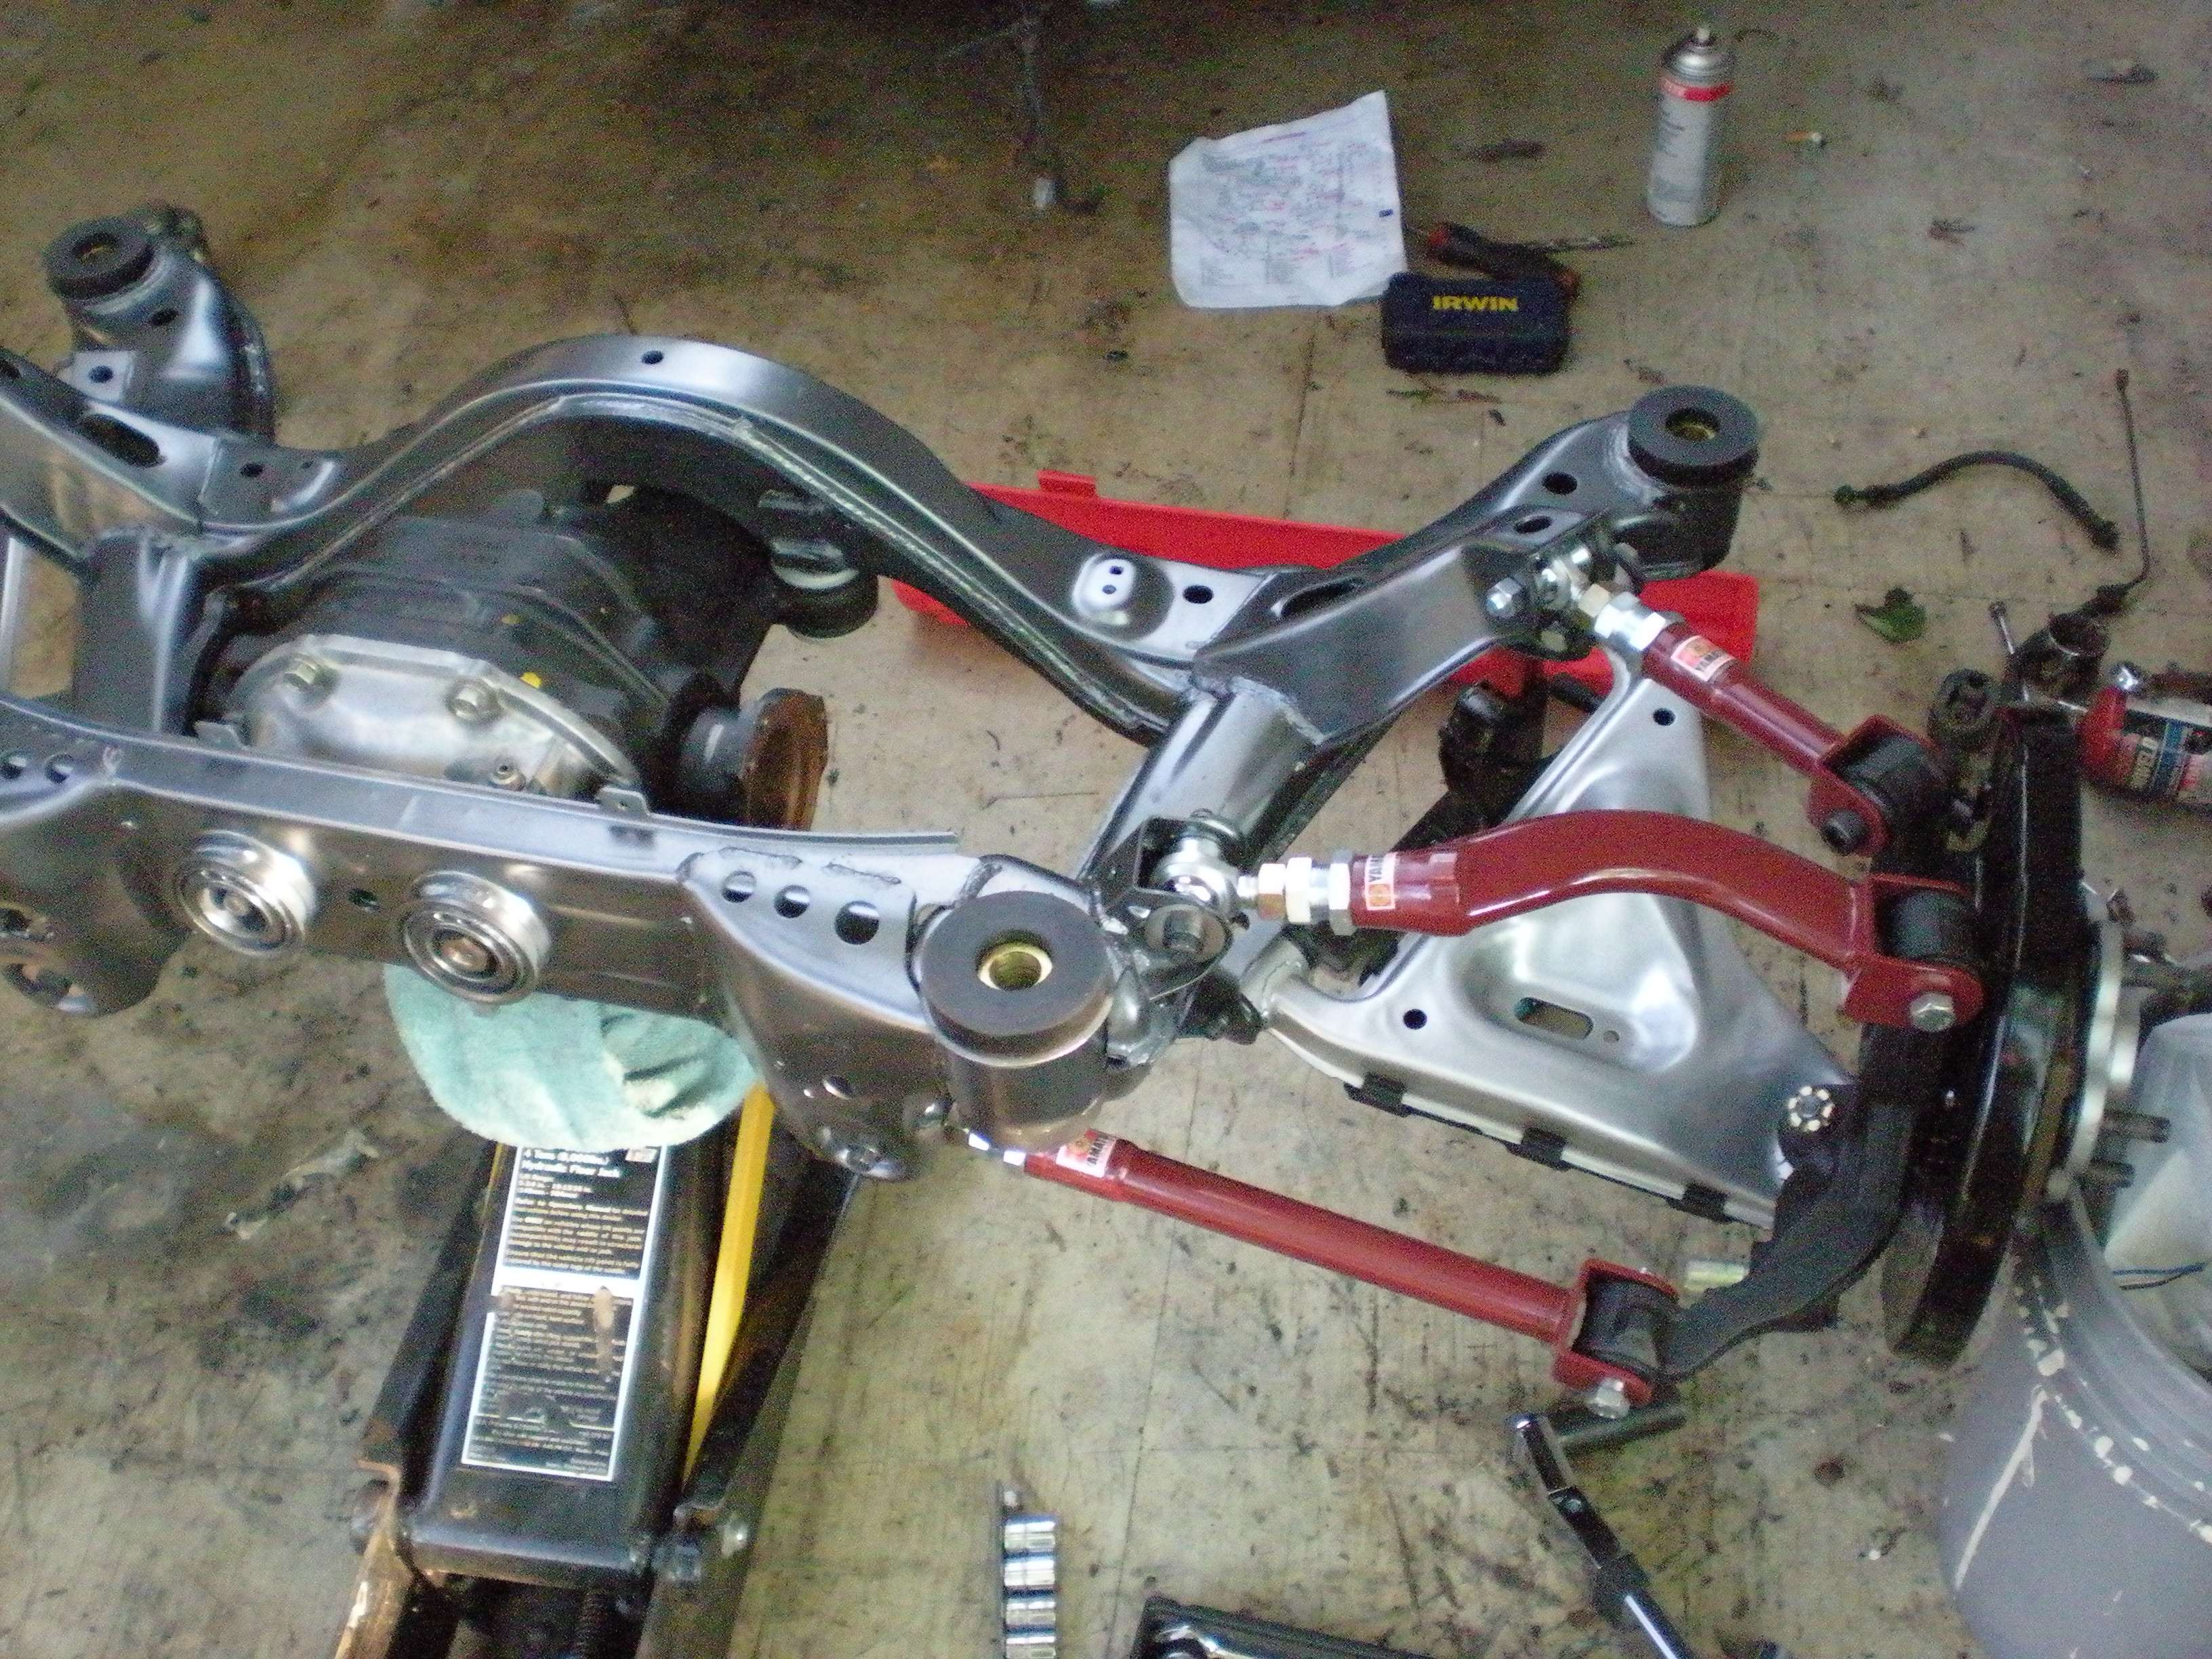 The axles were then slipped into the splines in the hubs, and then bolted to the differential using the BallerBolts.com fasteners. The axle nut is then torqued, the retainer and cotter pin are installed. The axles are different lengths, the driverside being the shorter of the two, from what I remember. 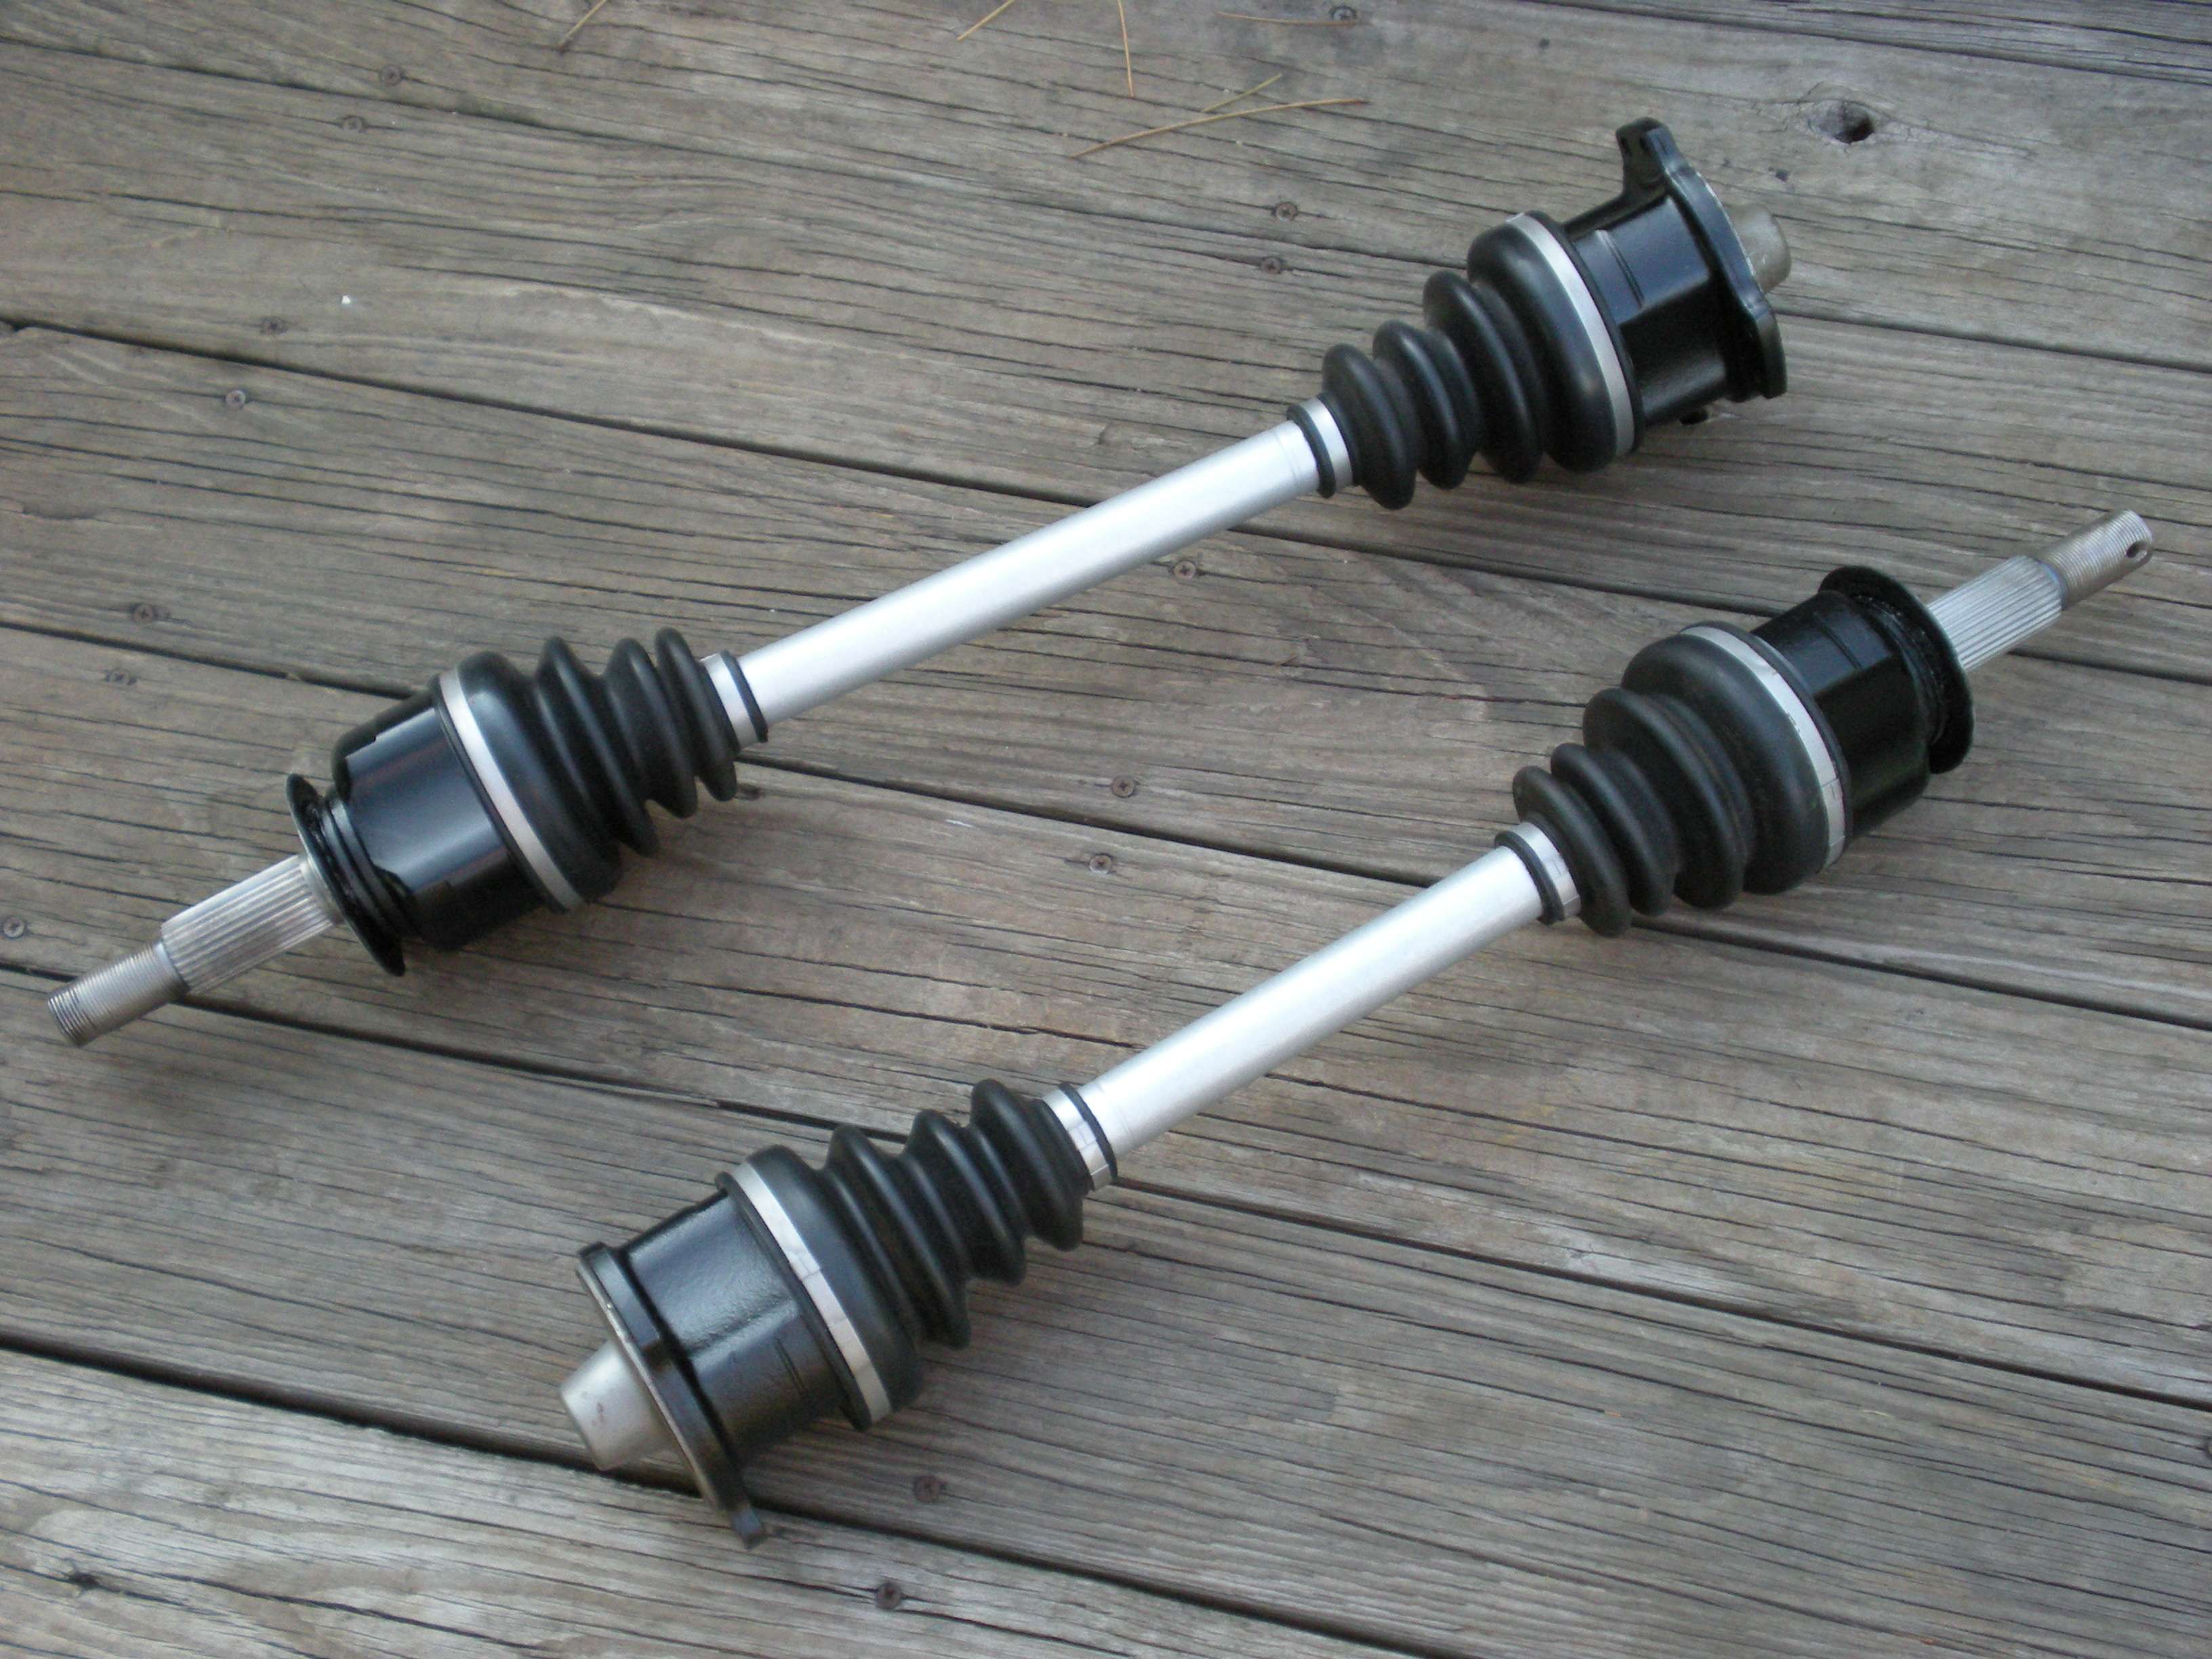 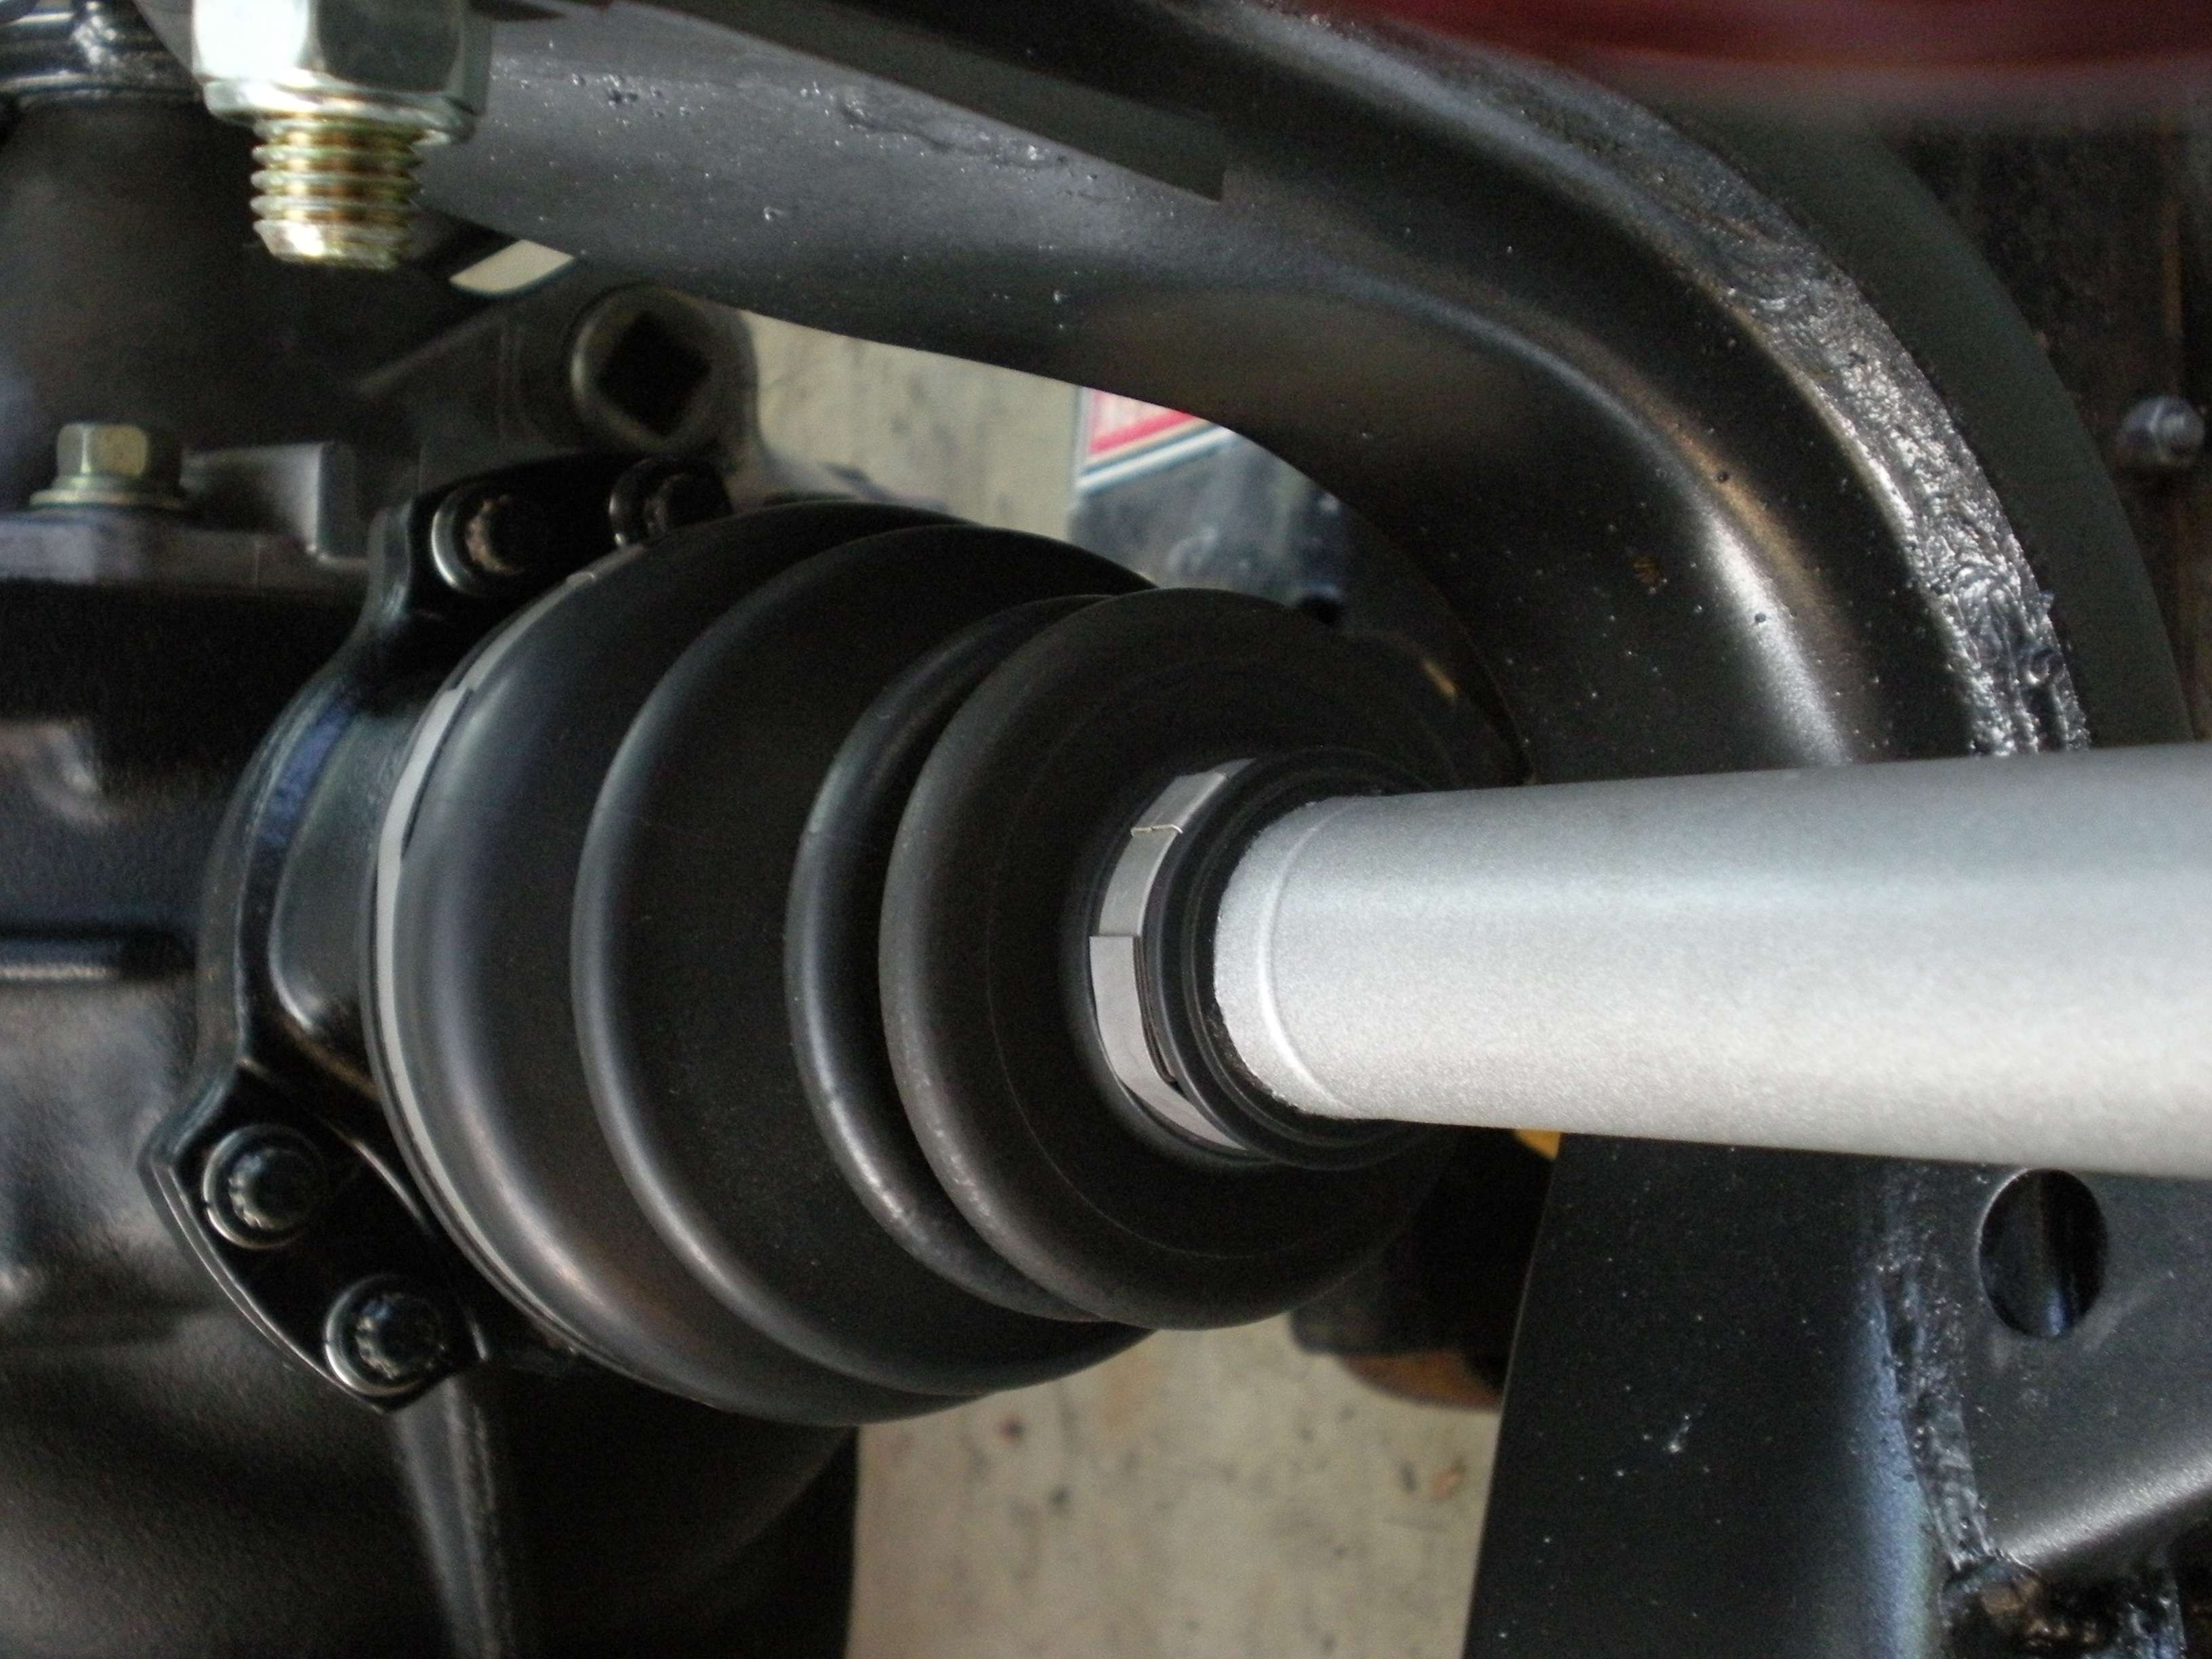 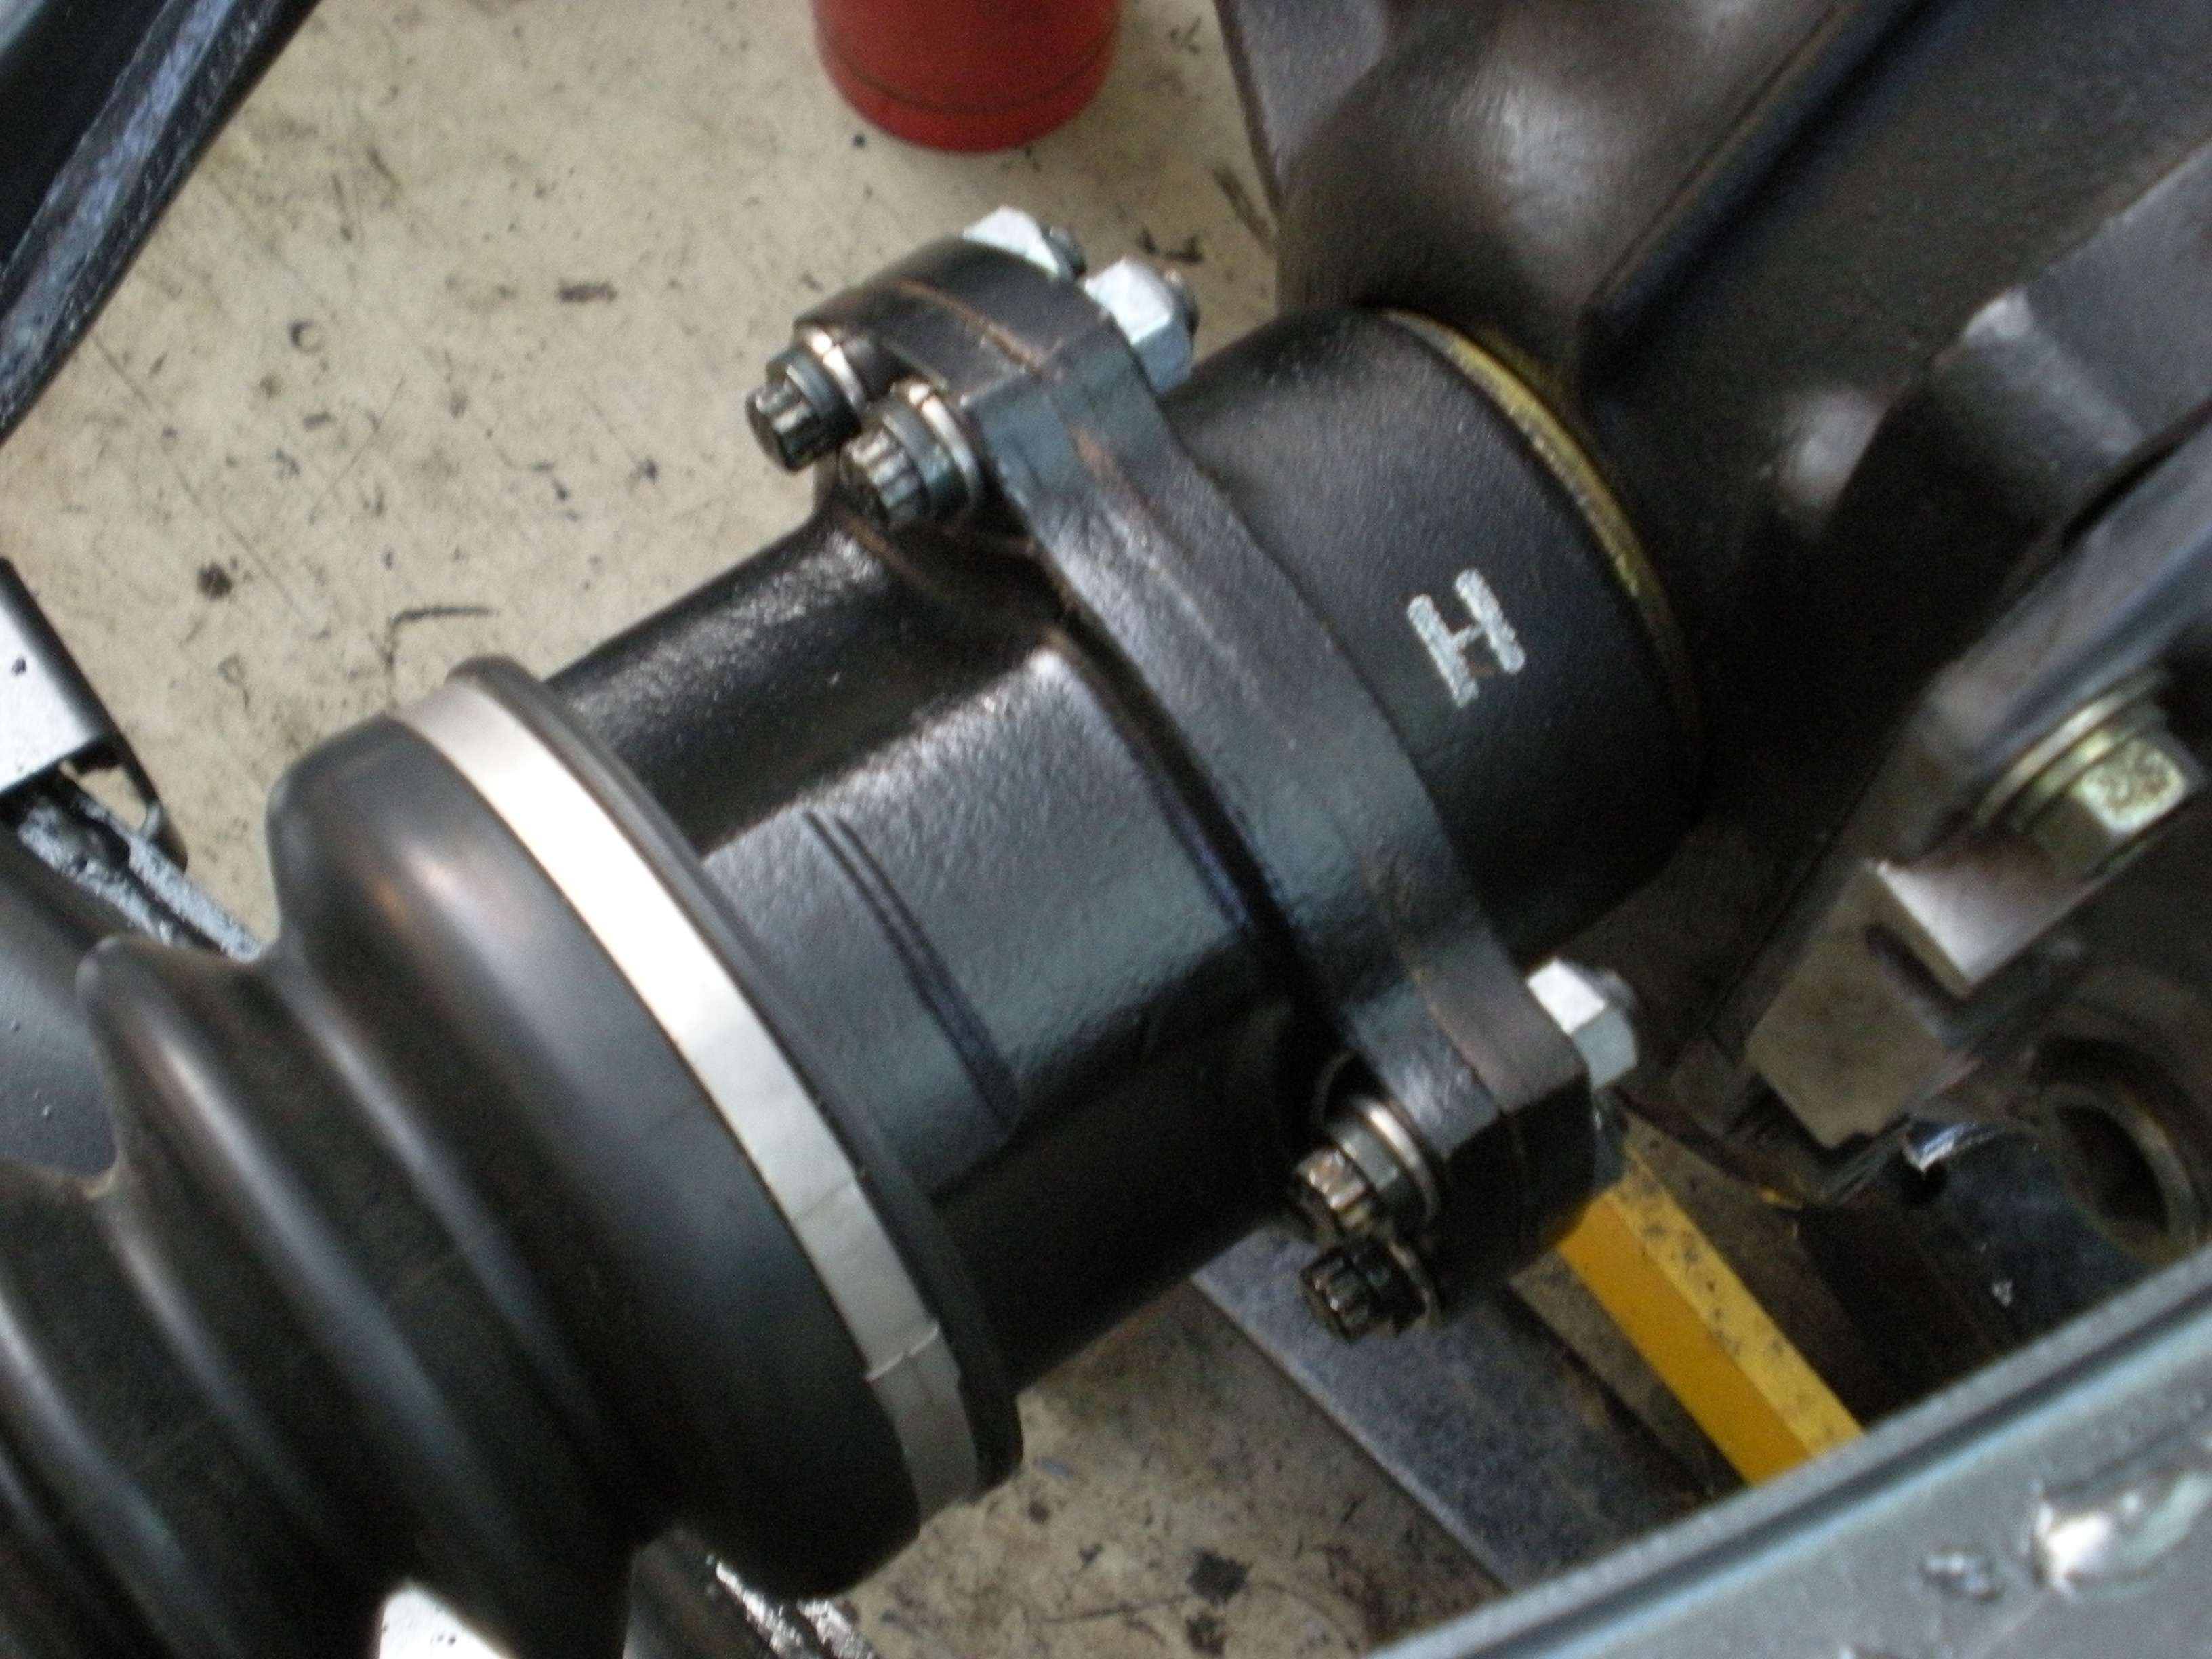 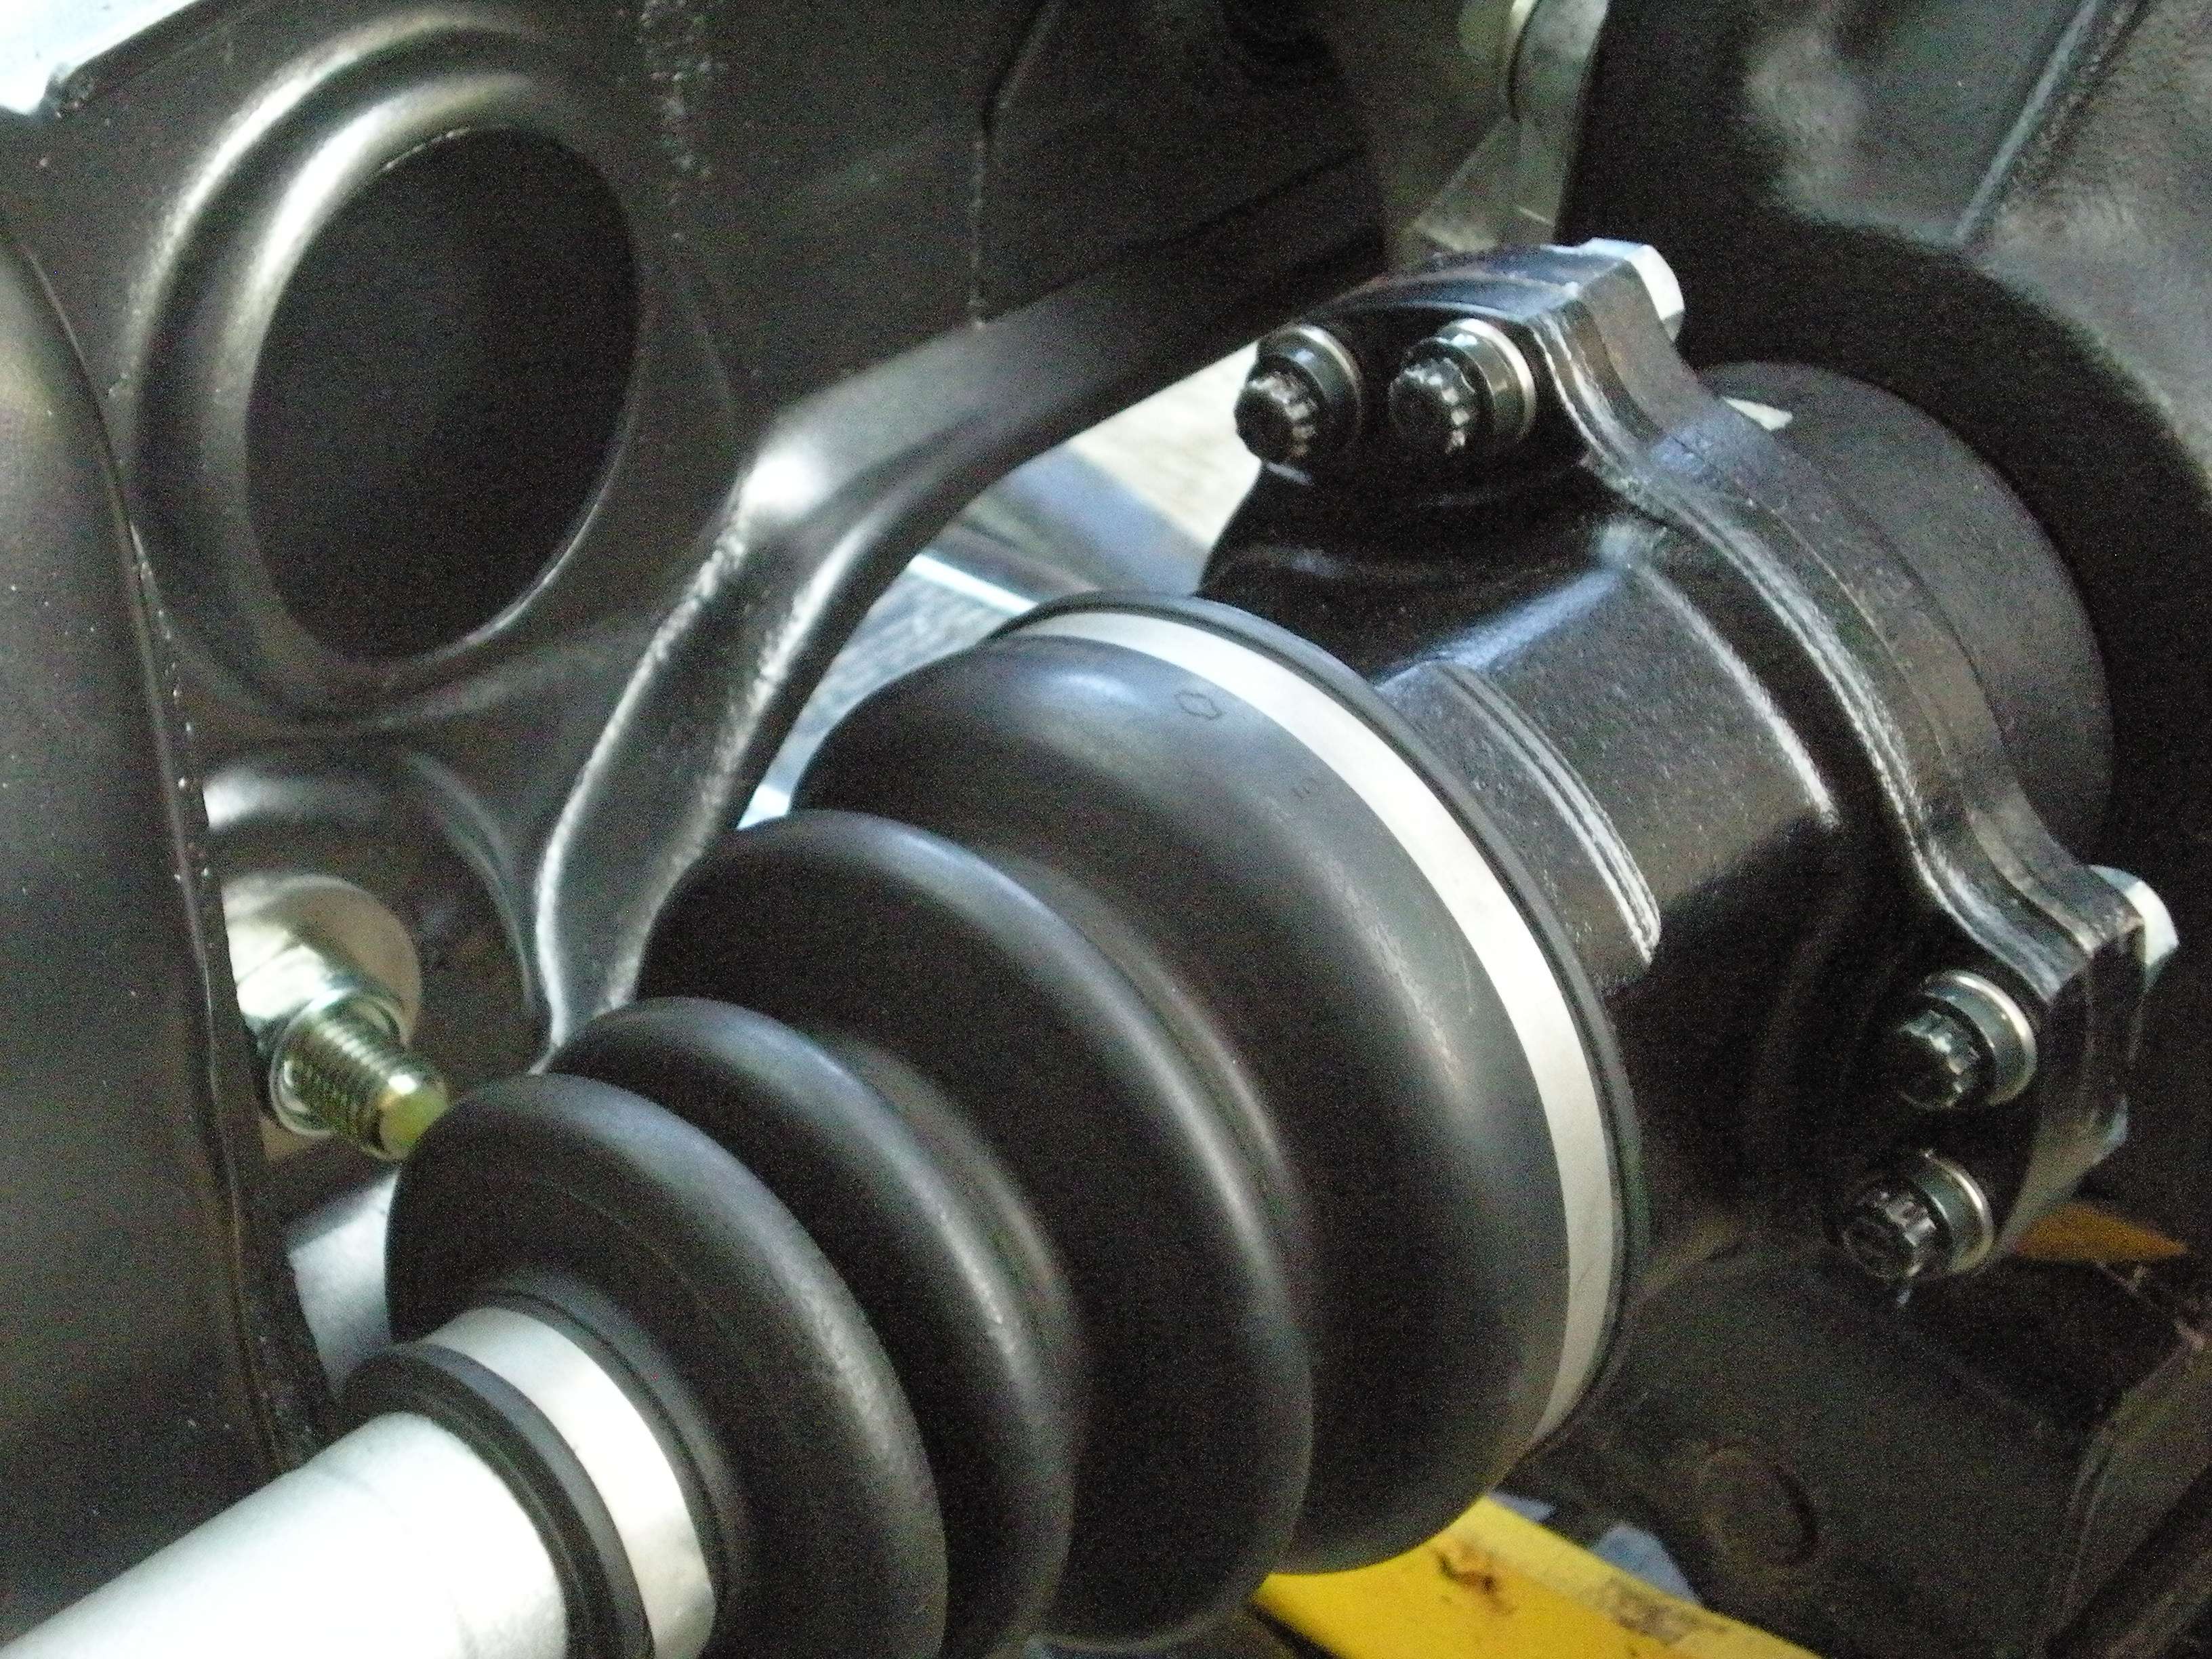 I will cover the braking setup, at a later date, but when all is said and done, you end up with something like this. Thanks to Donovan at Yamato Garage, and Ryan at BallerBolts for offering such great products. Subscribe to see the rest of the build. Thanks 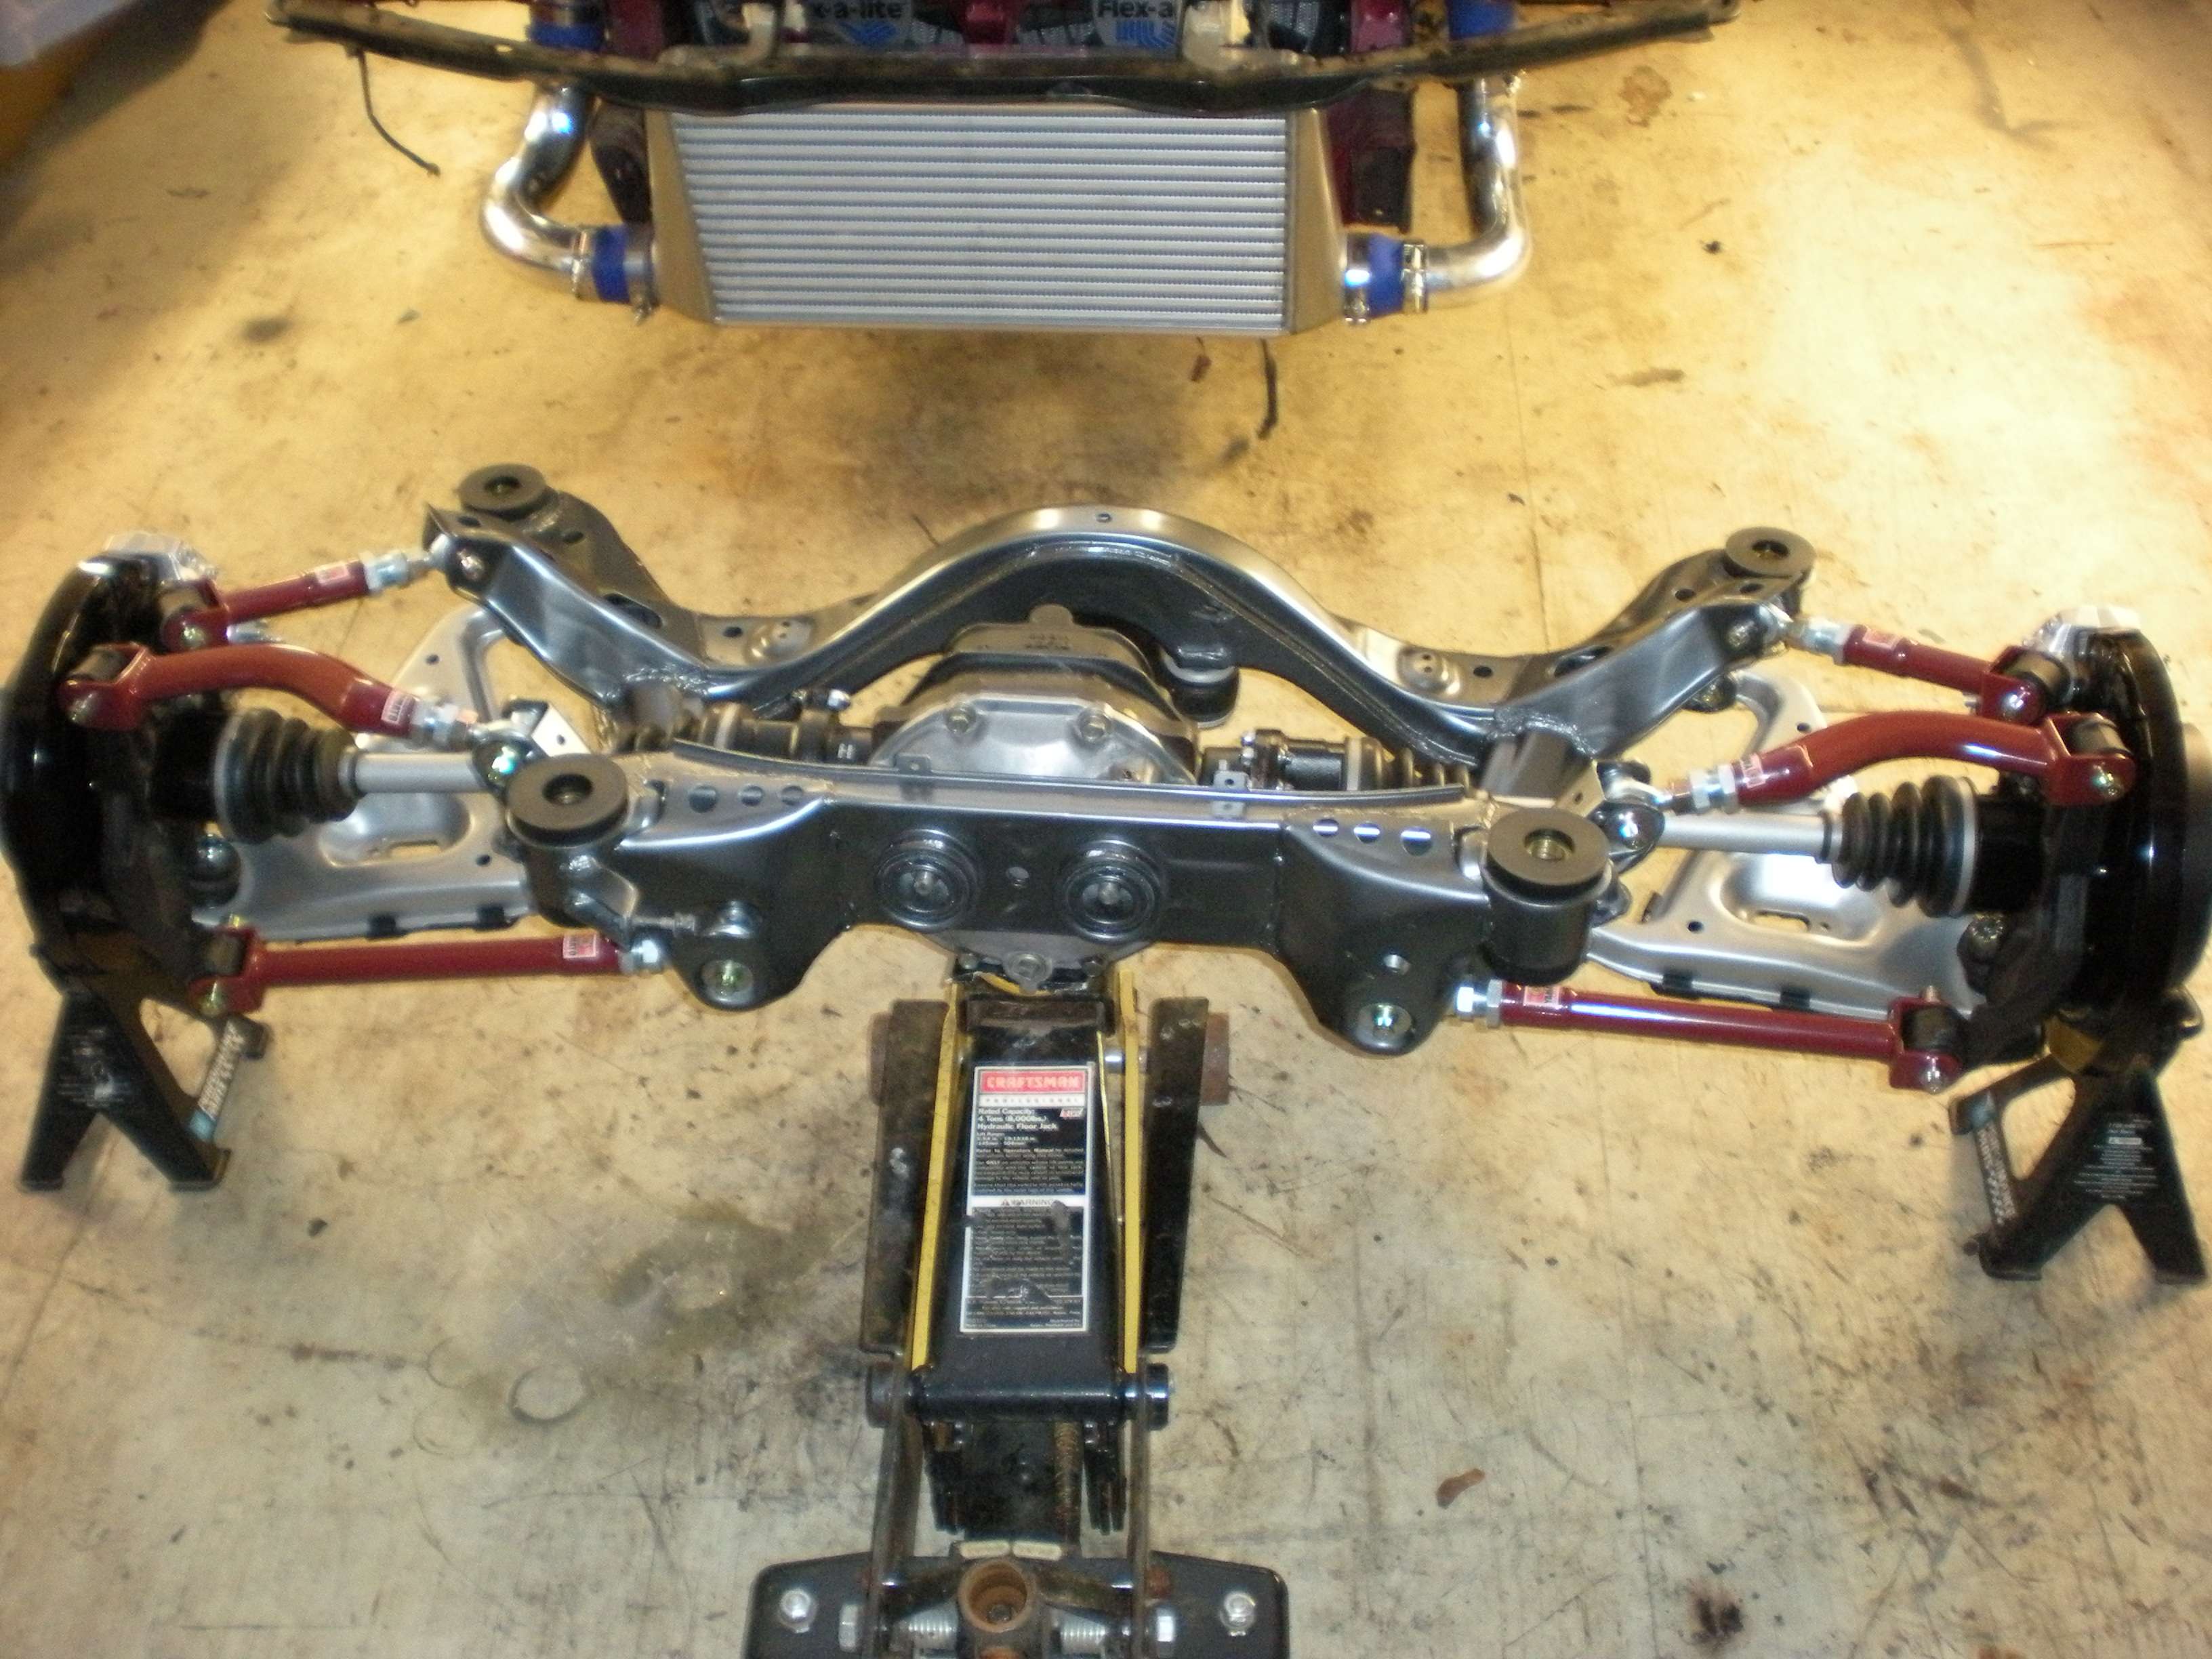 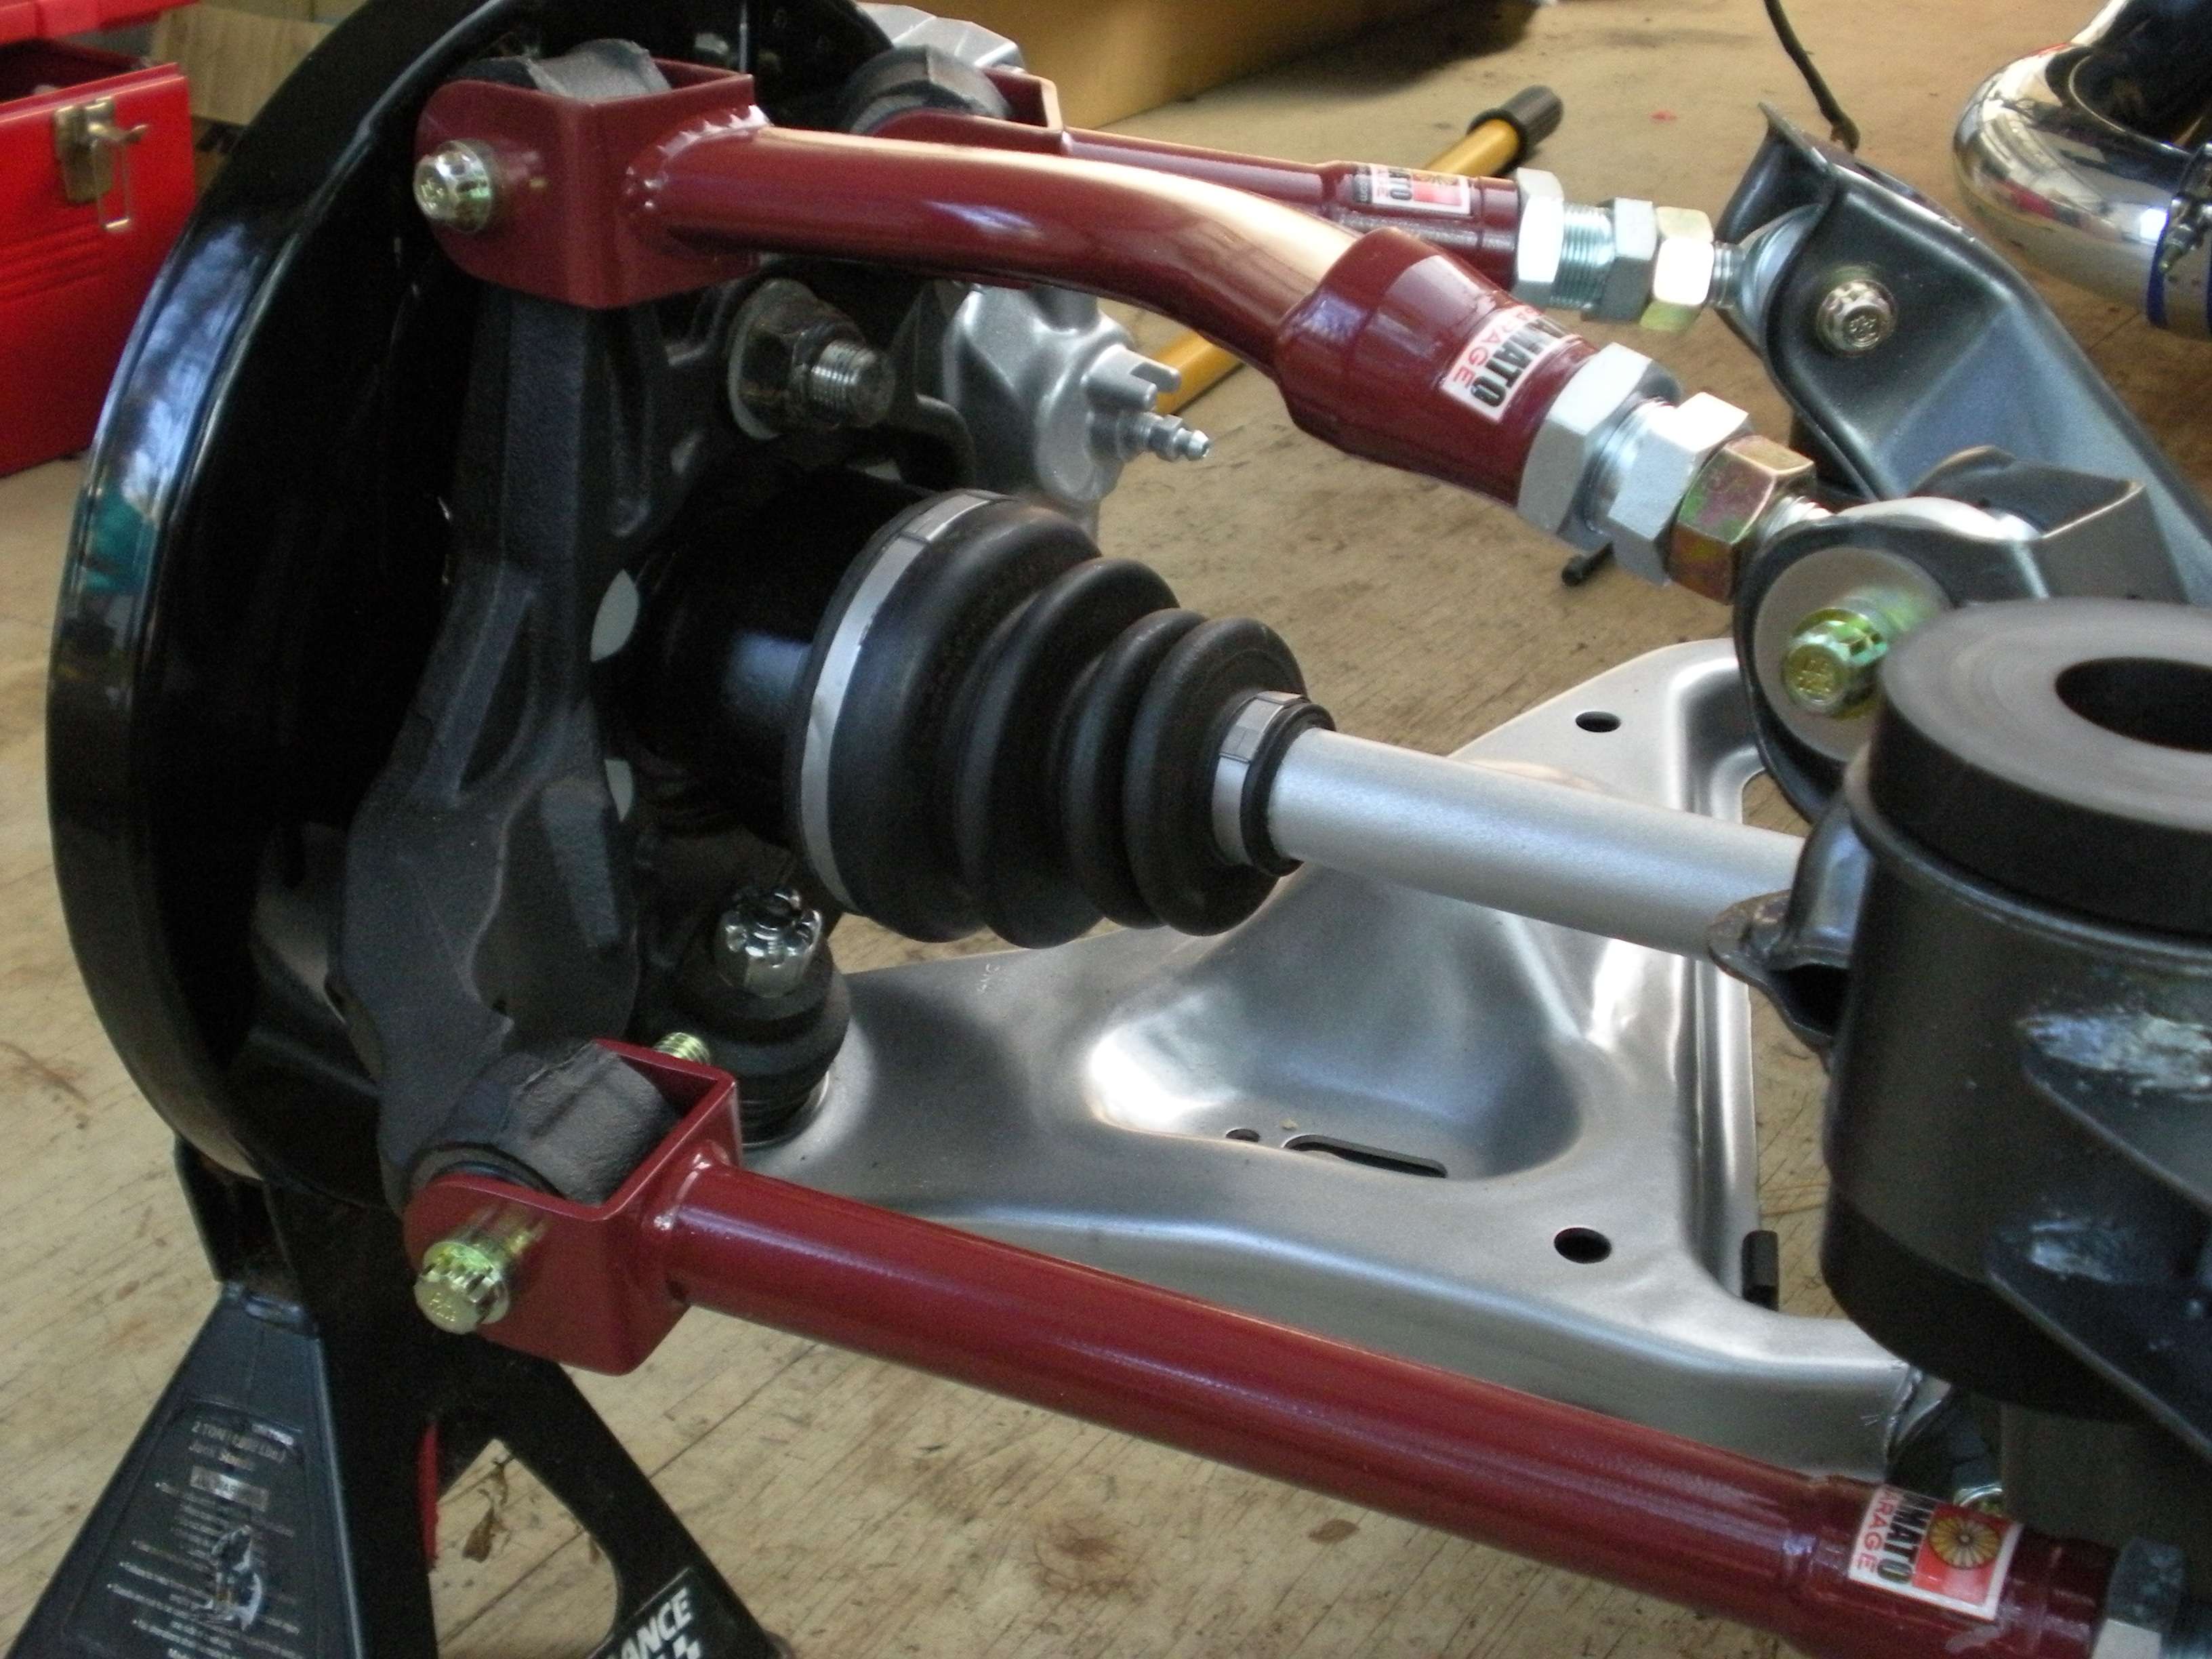 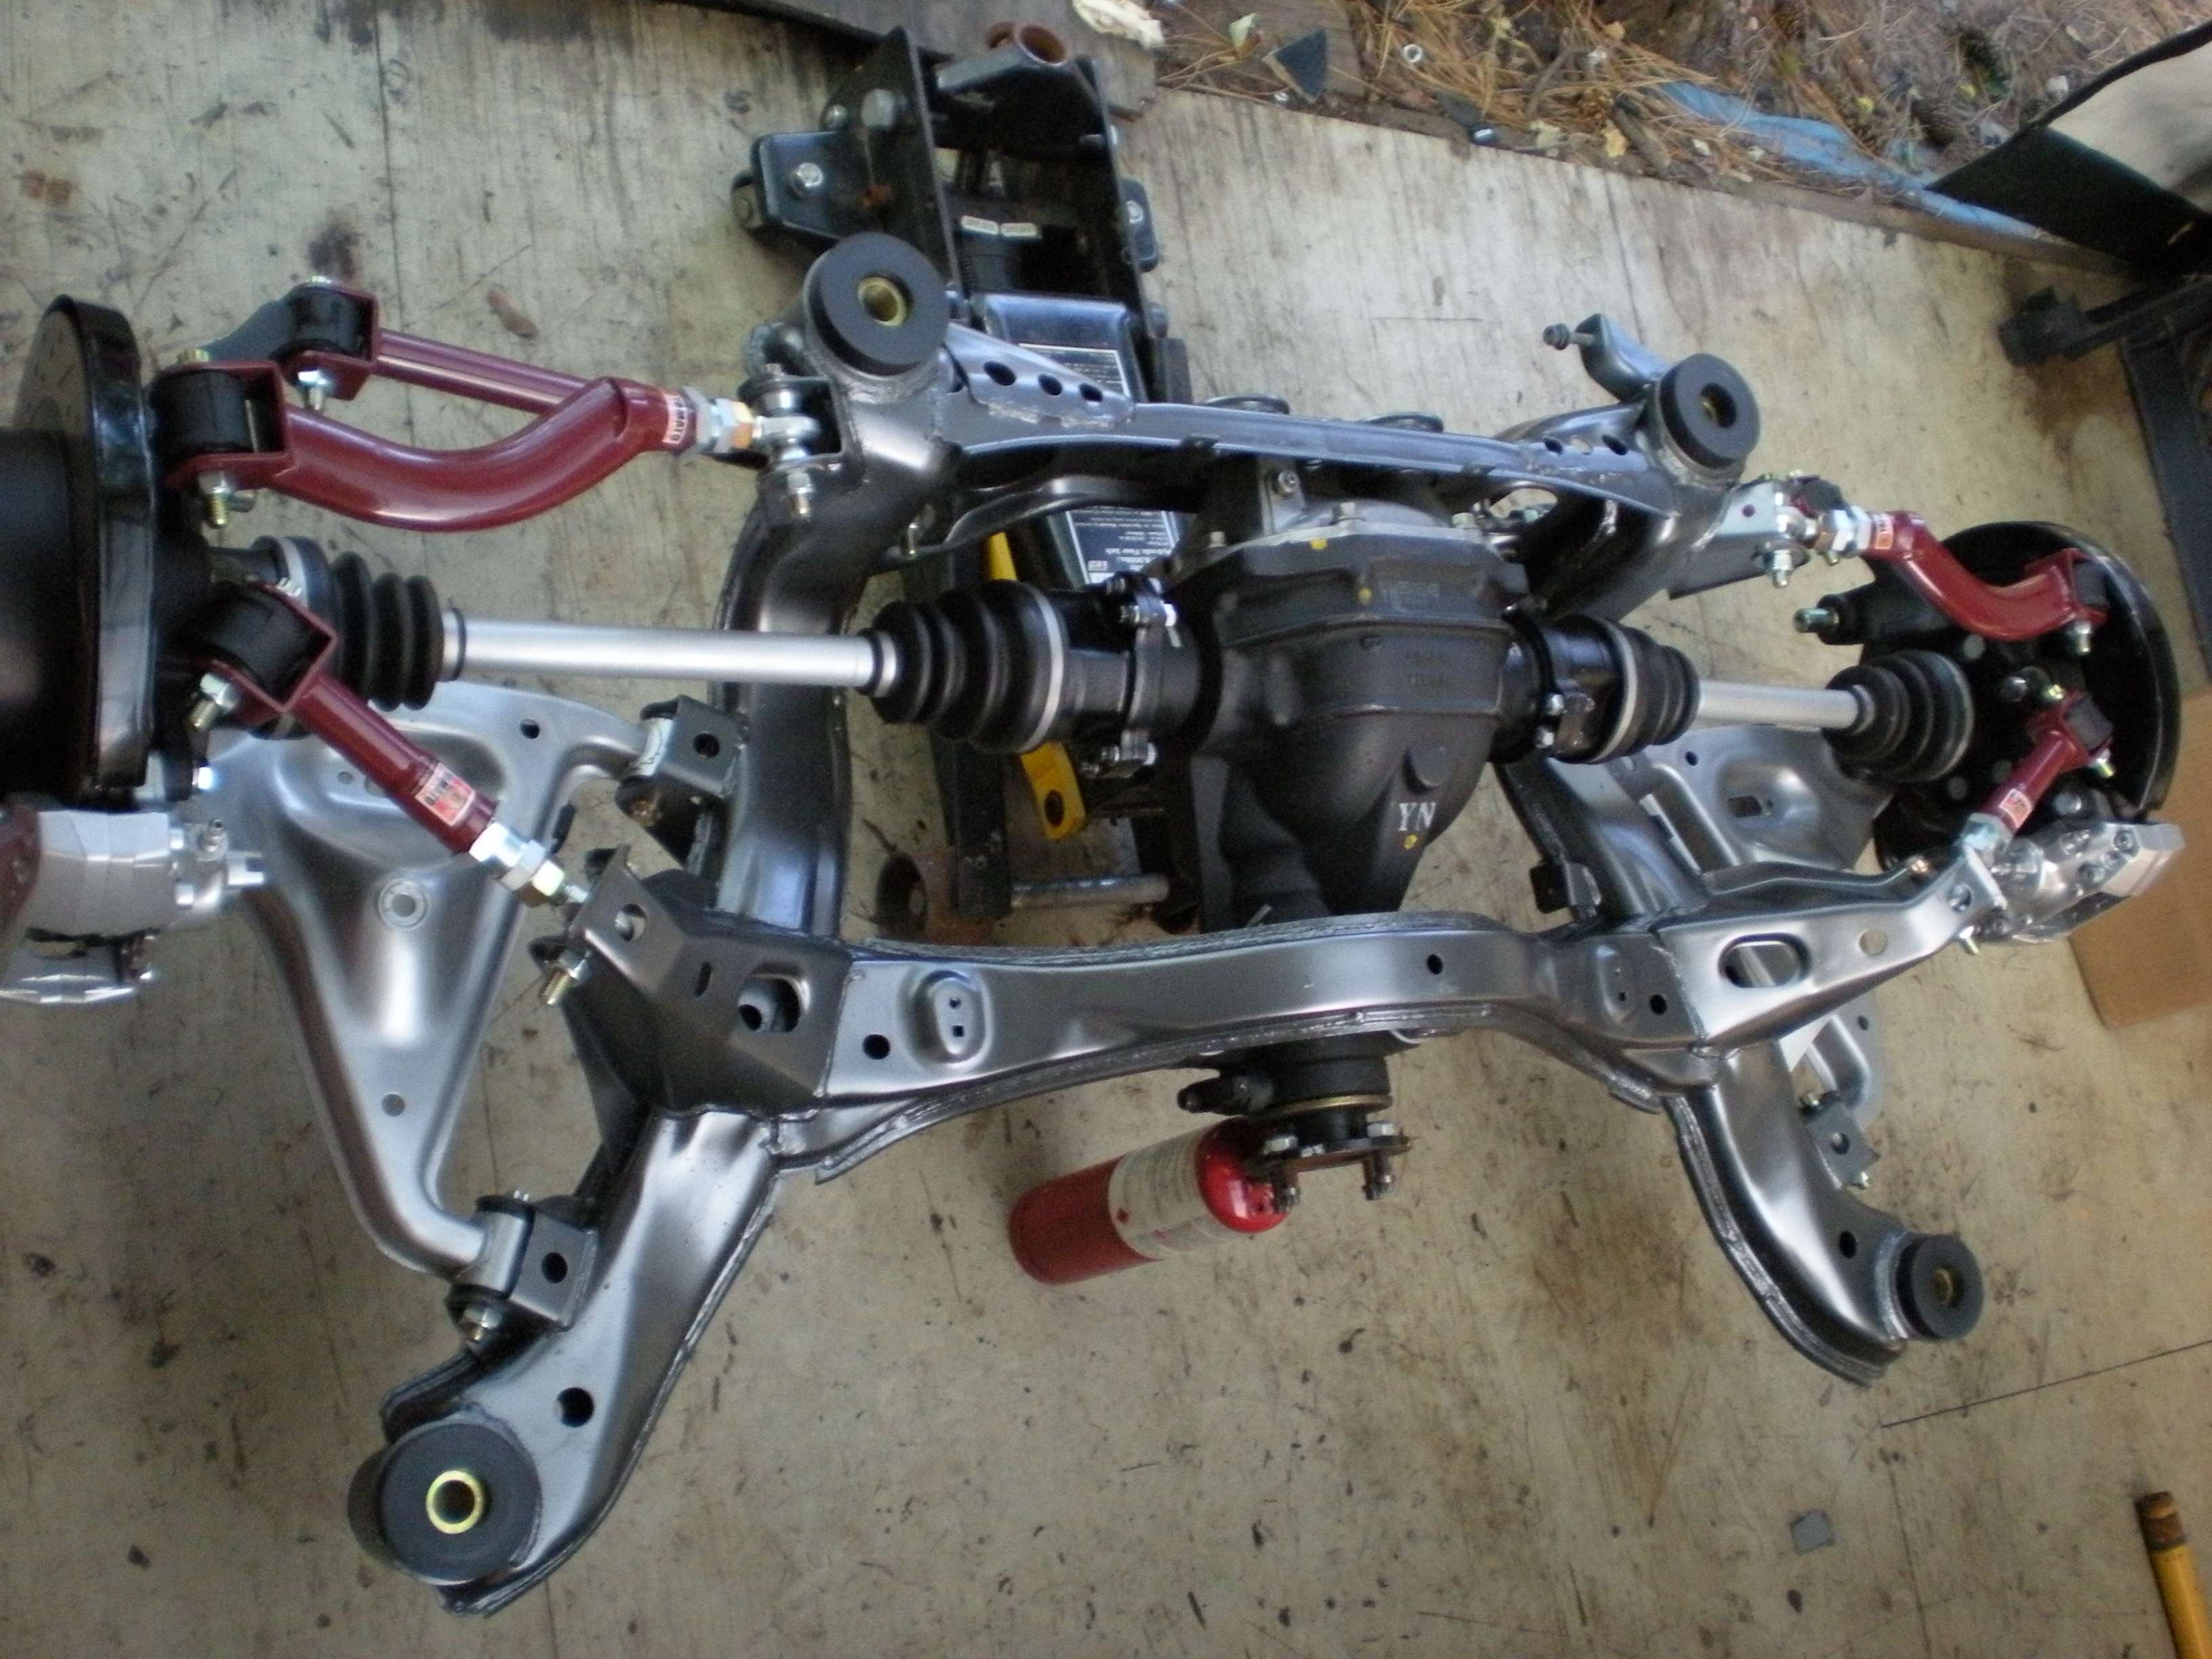  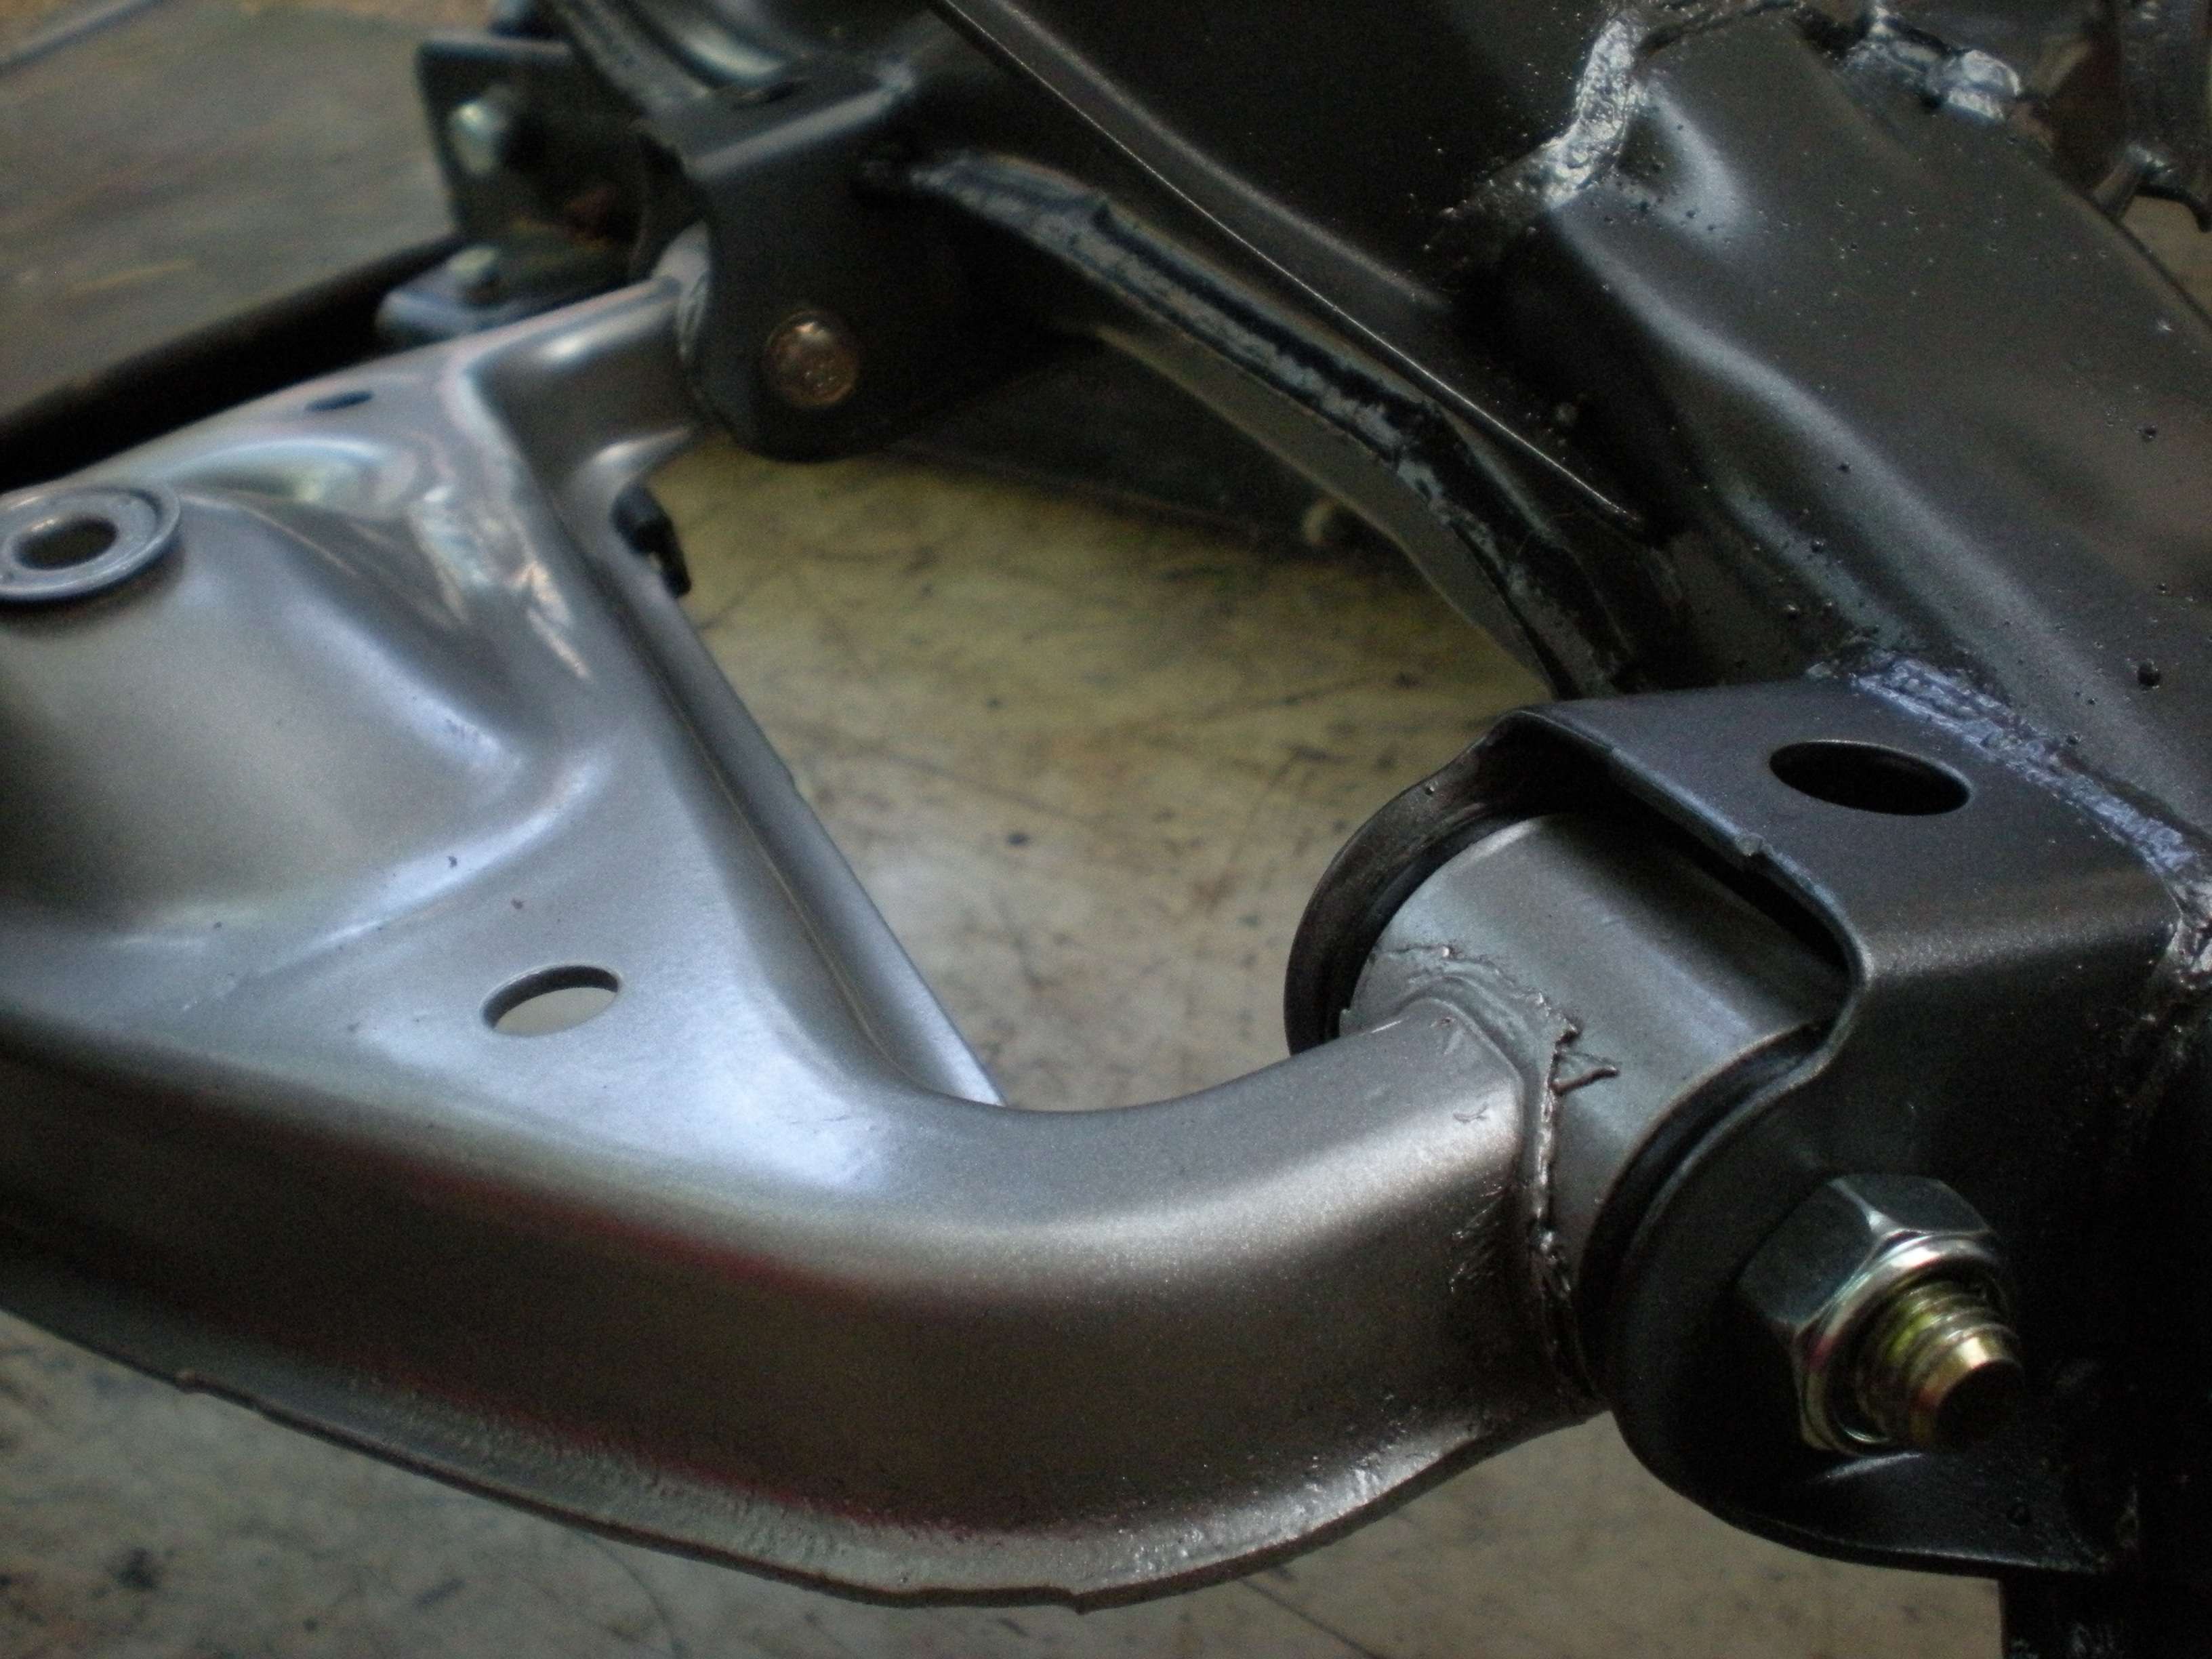 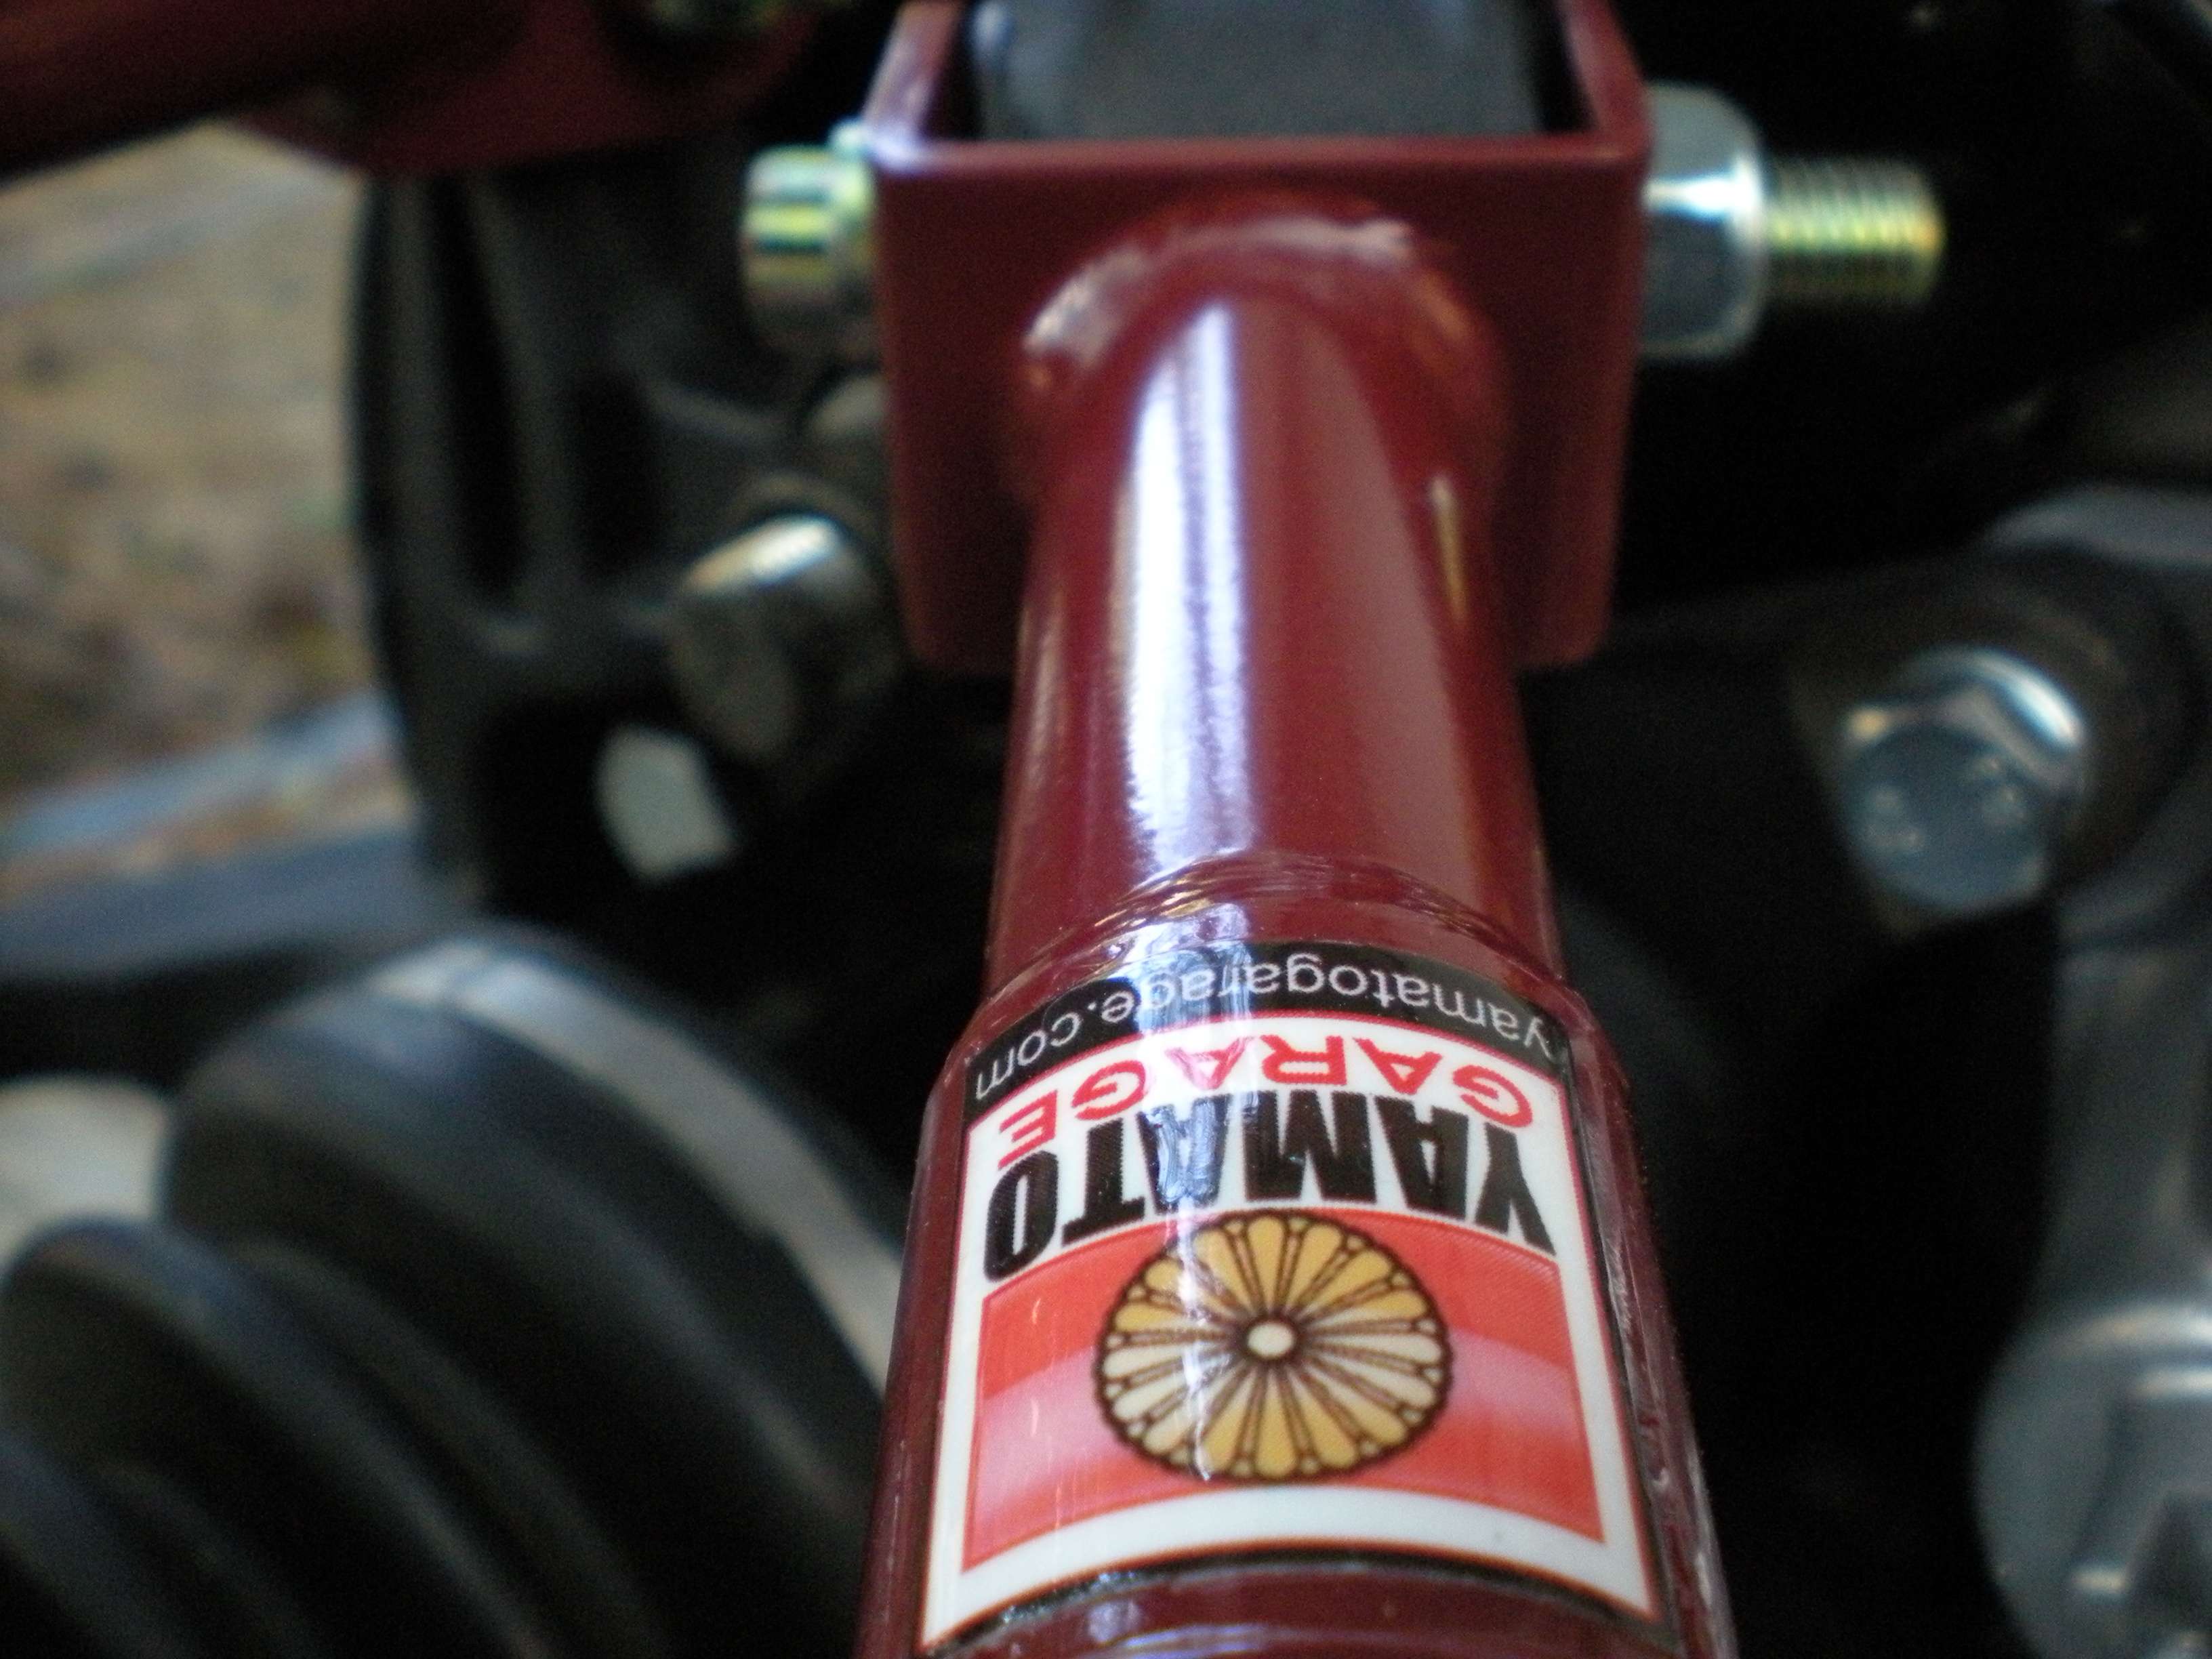  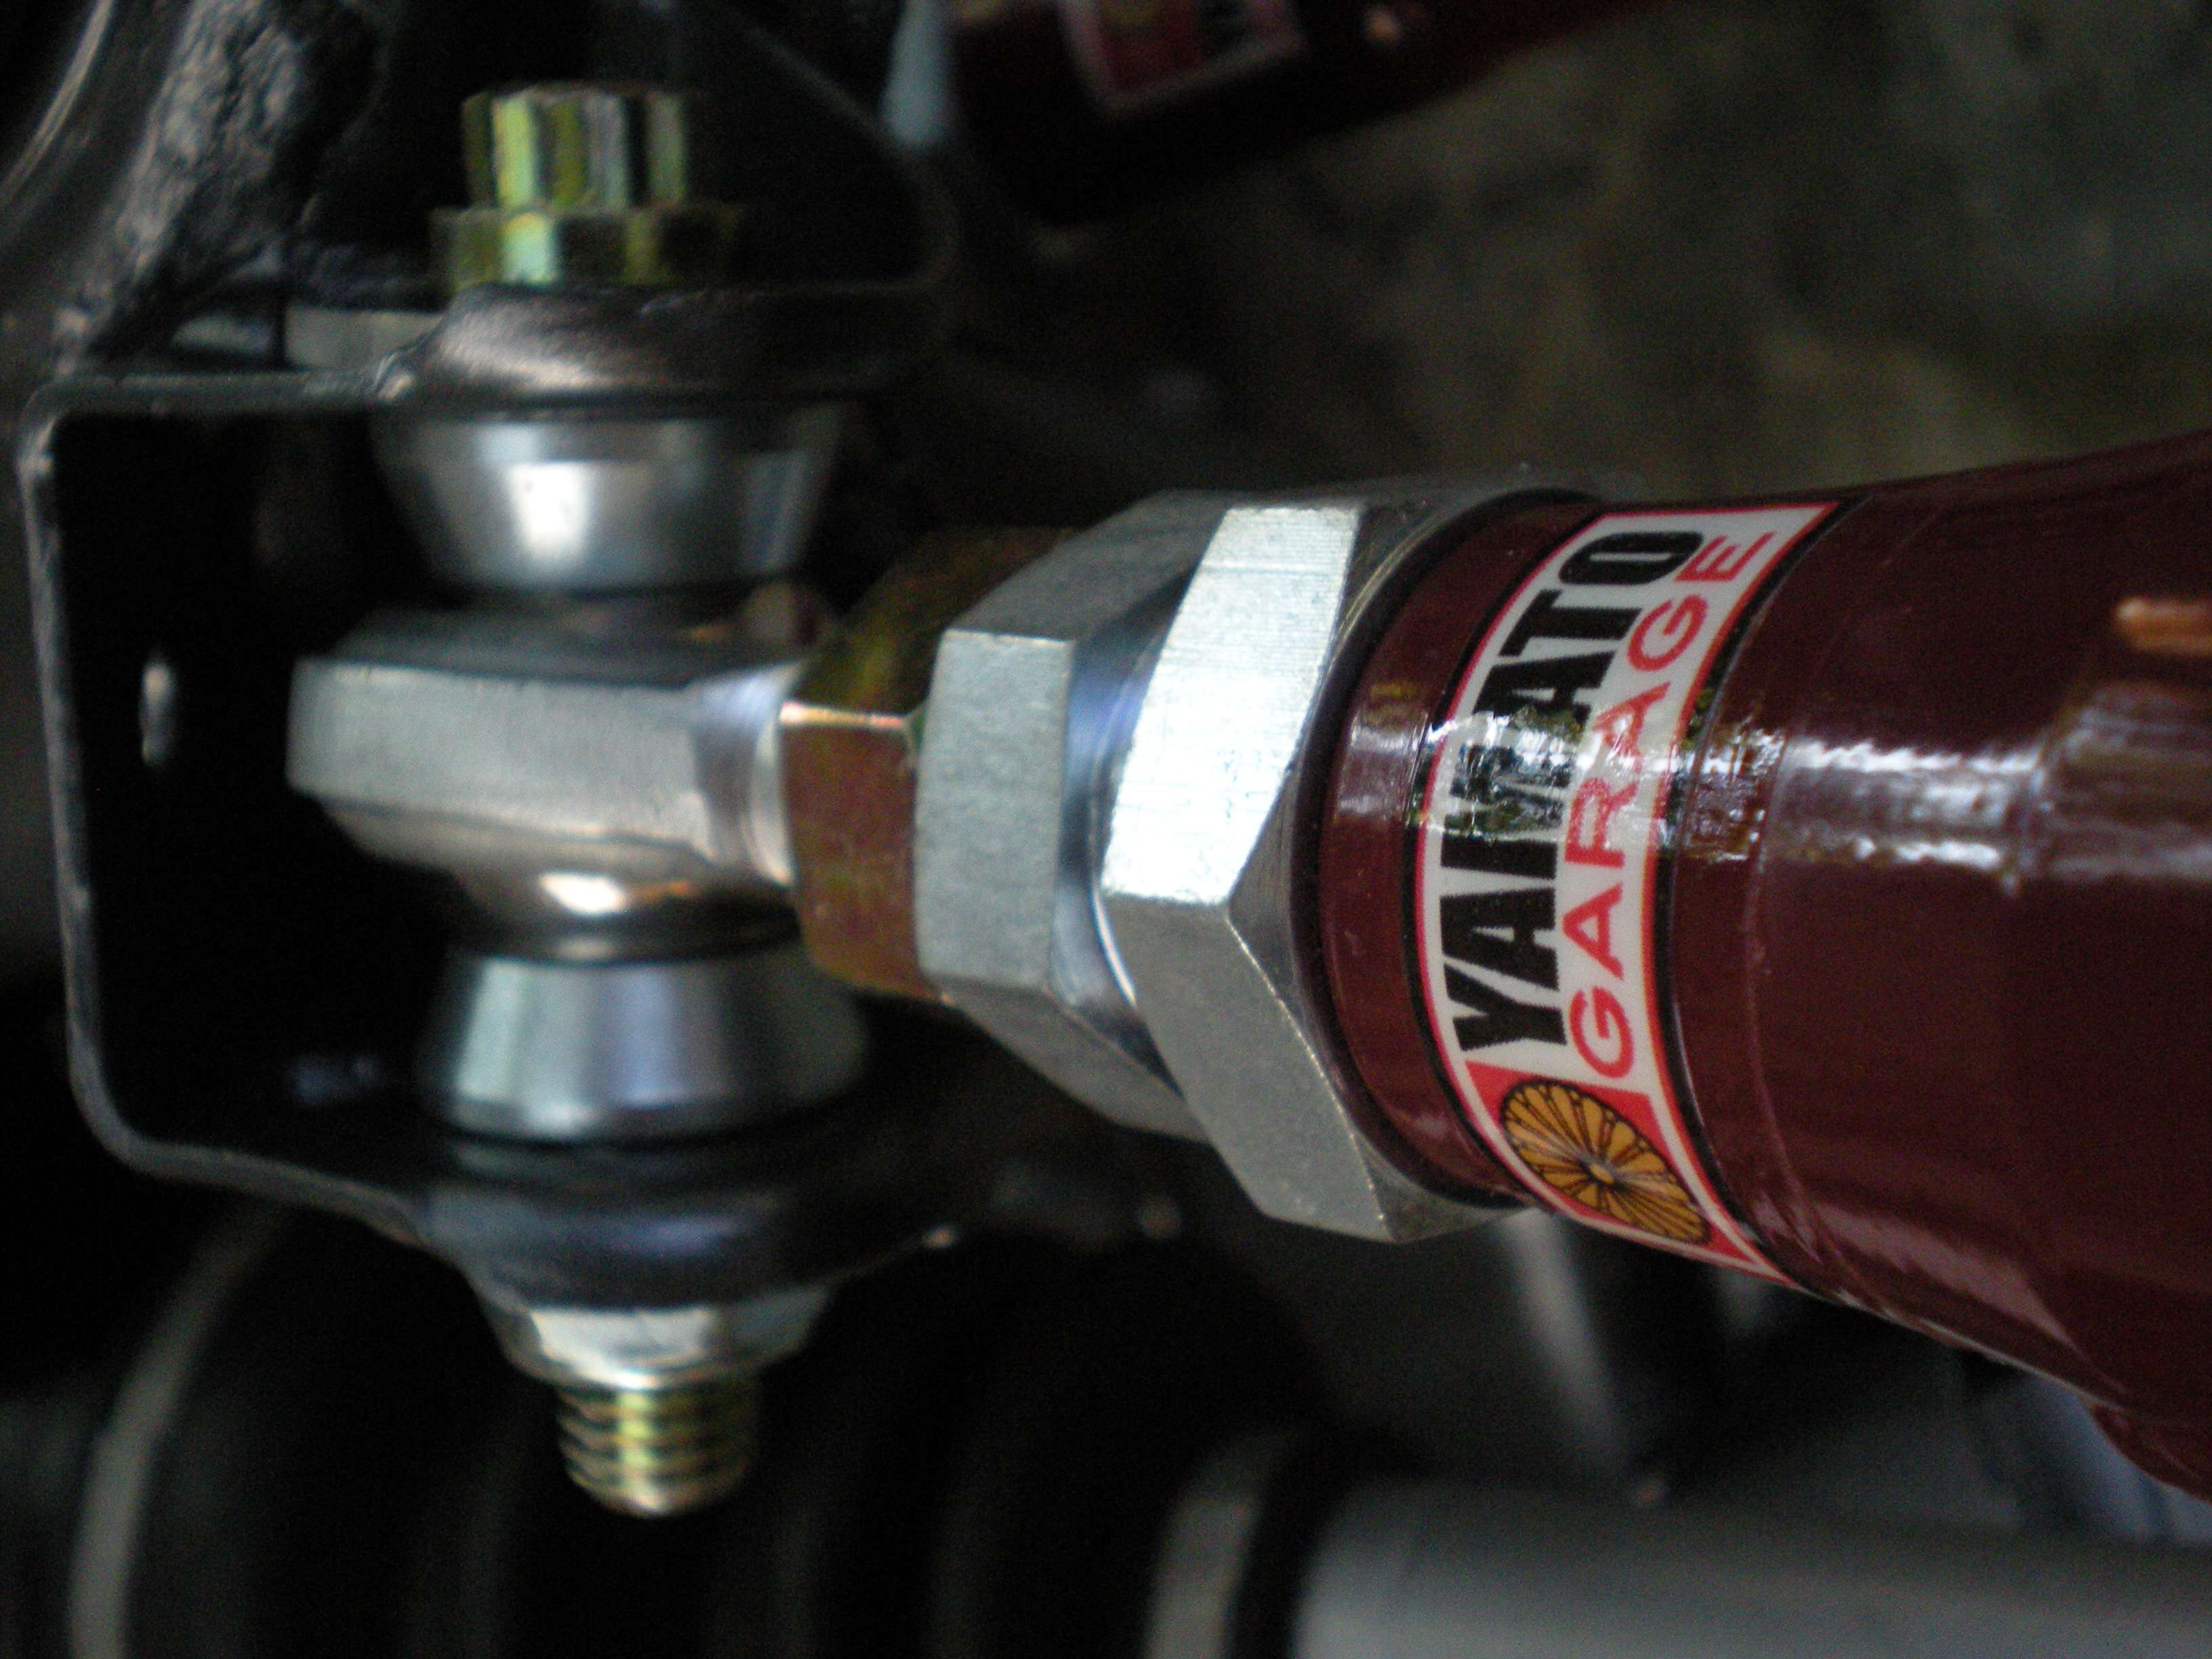 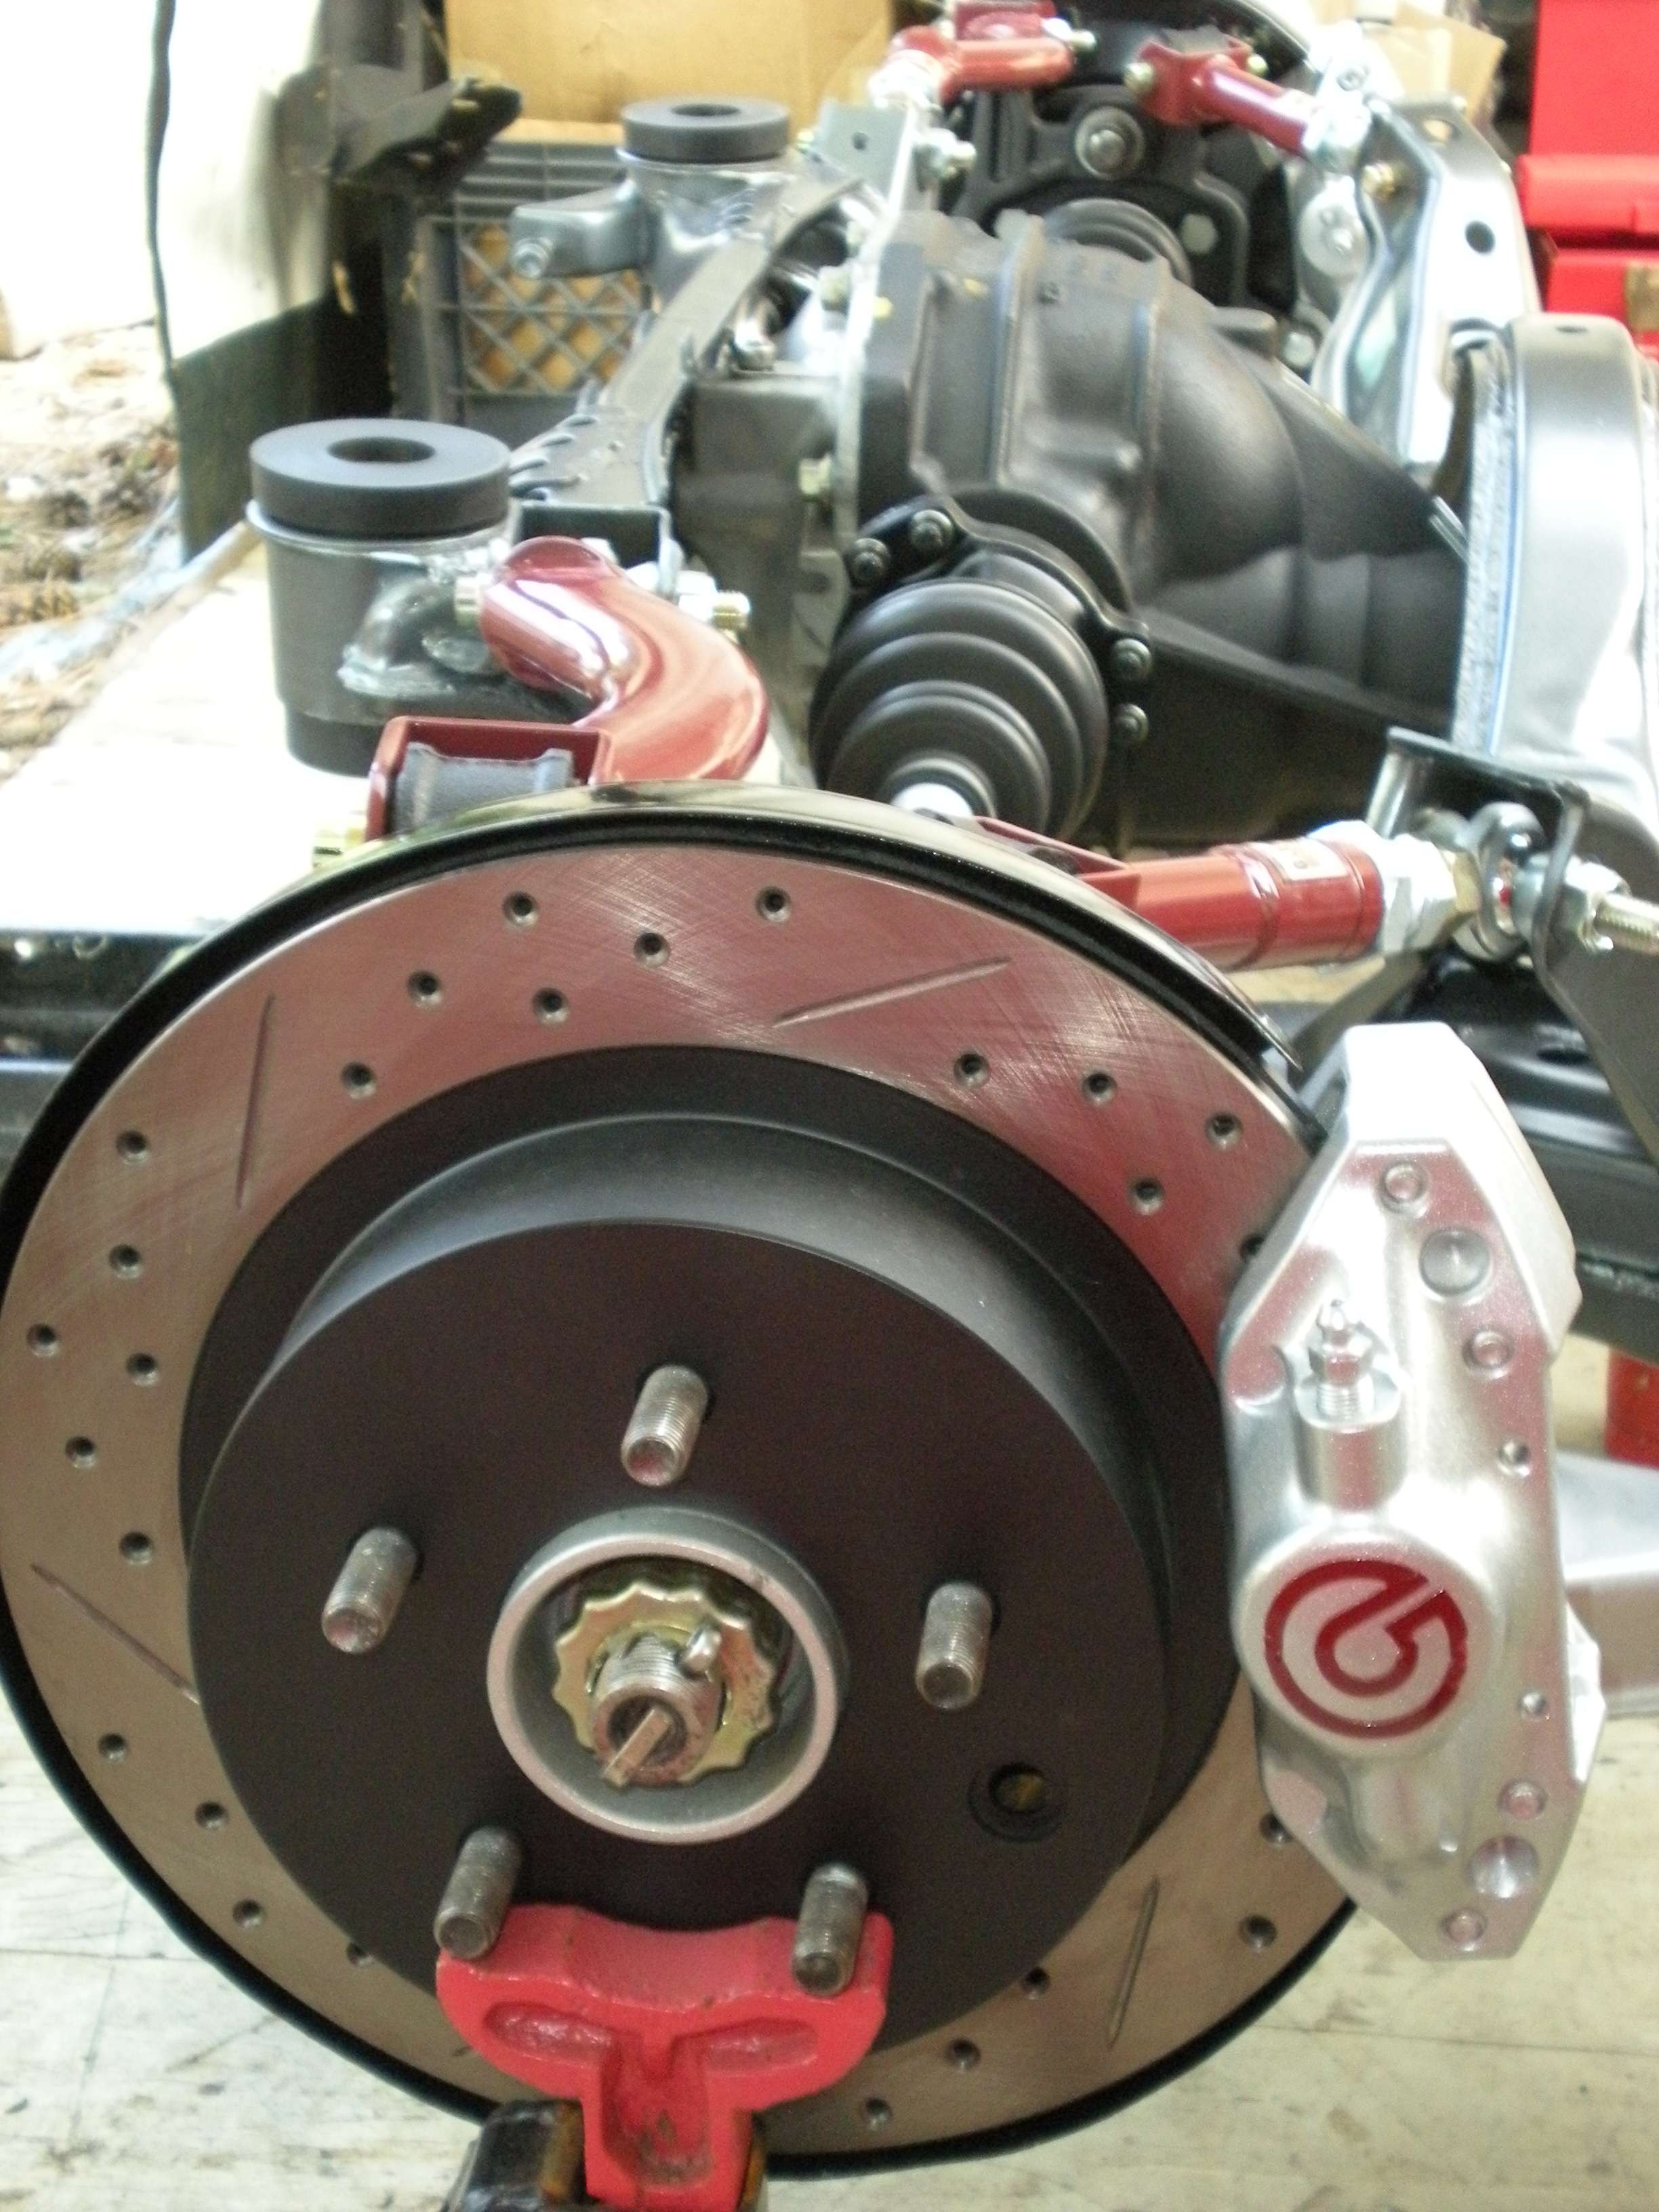 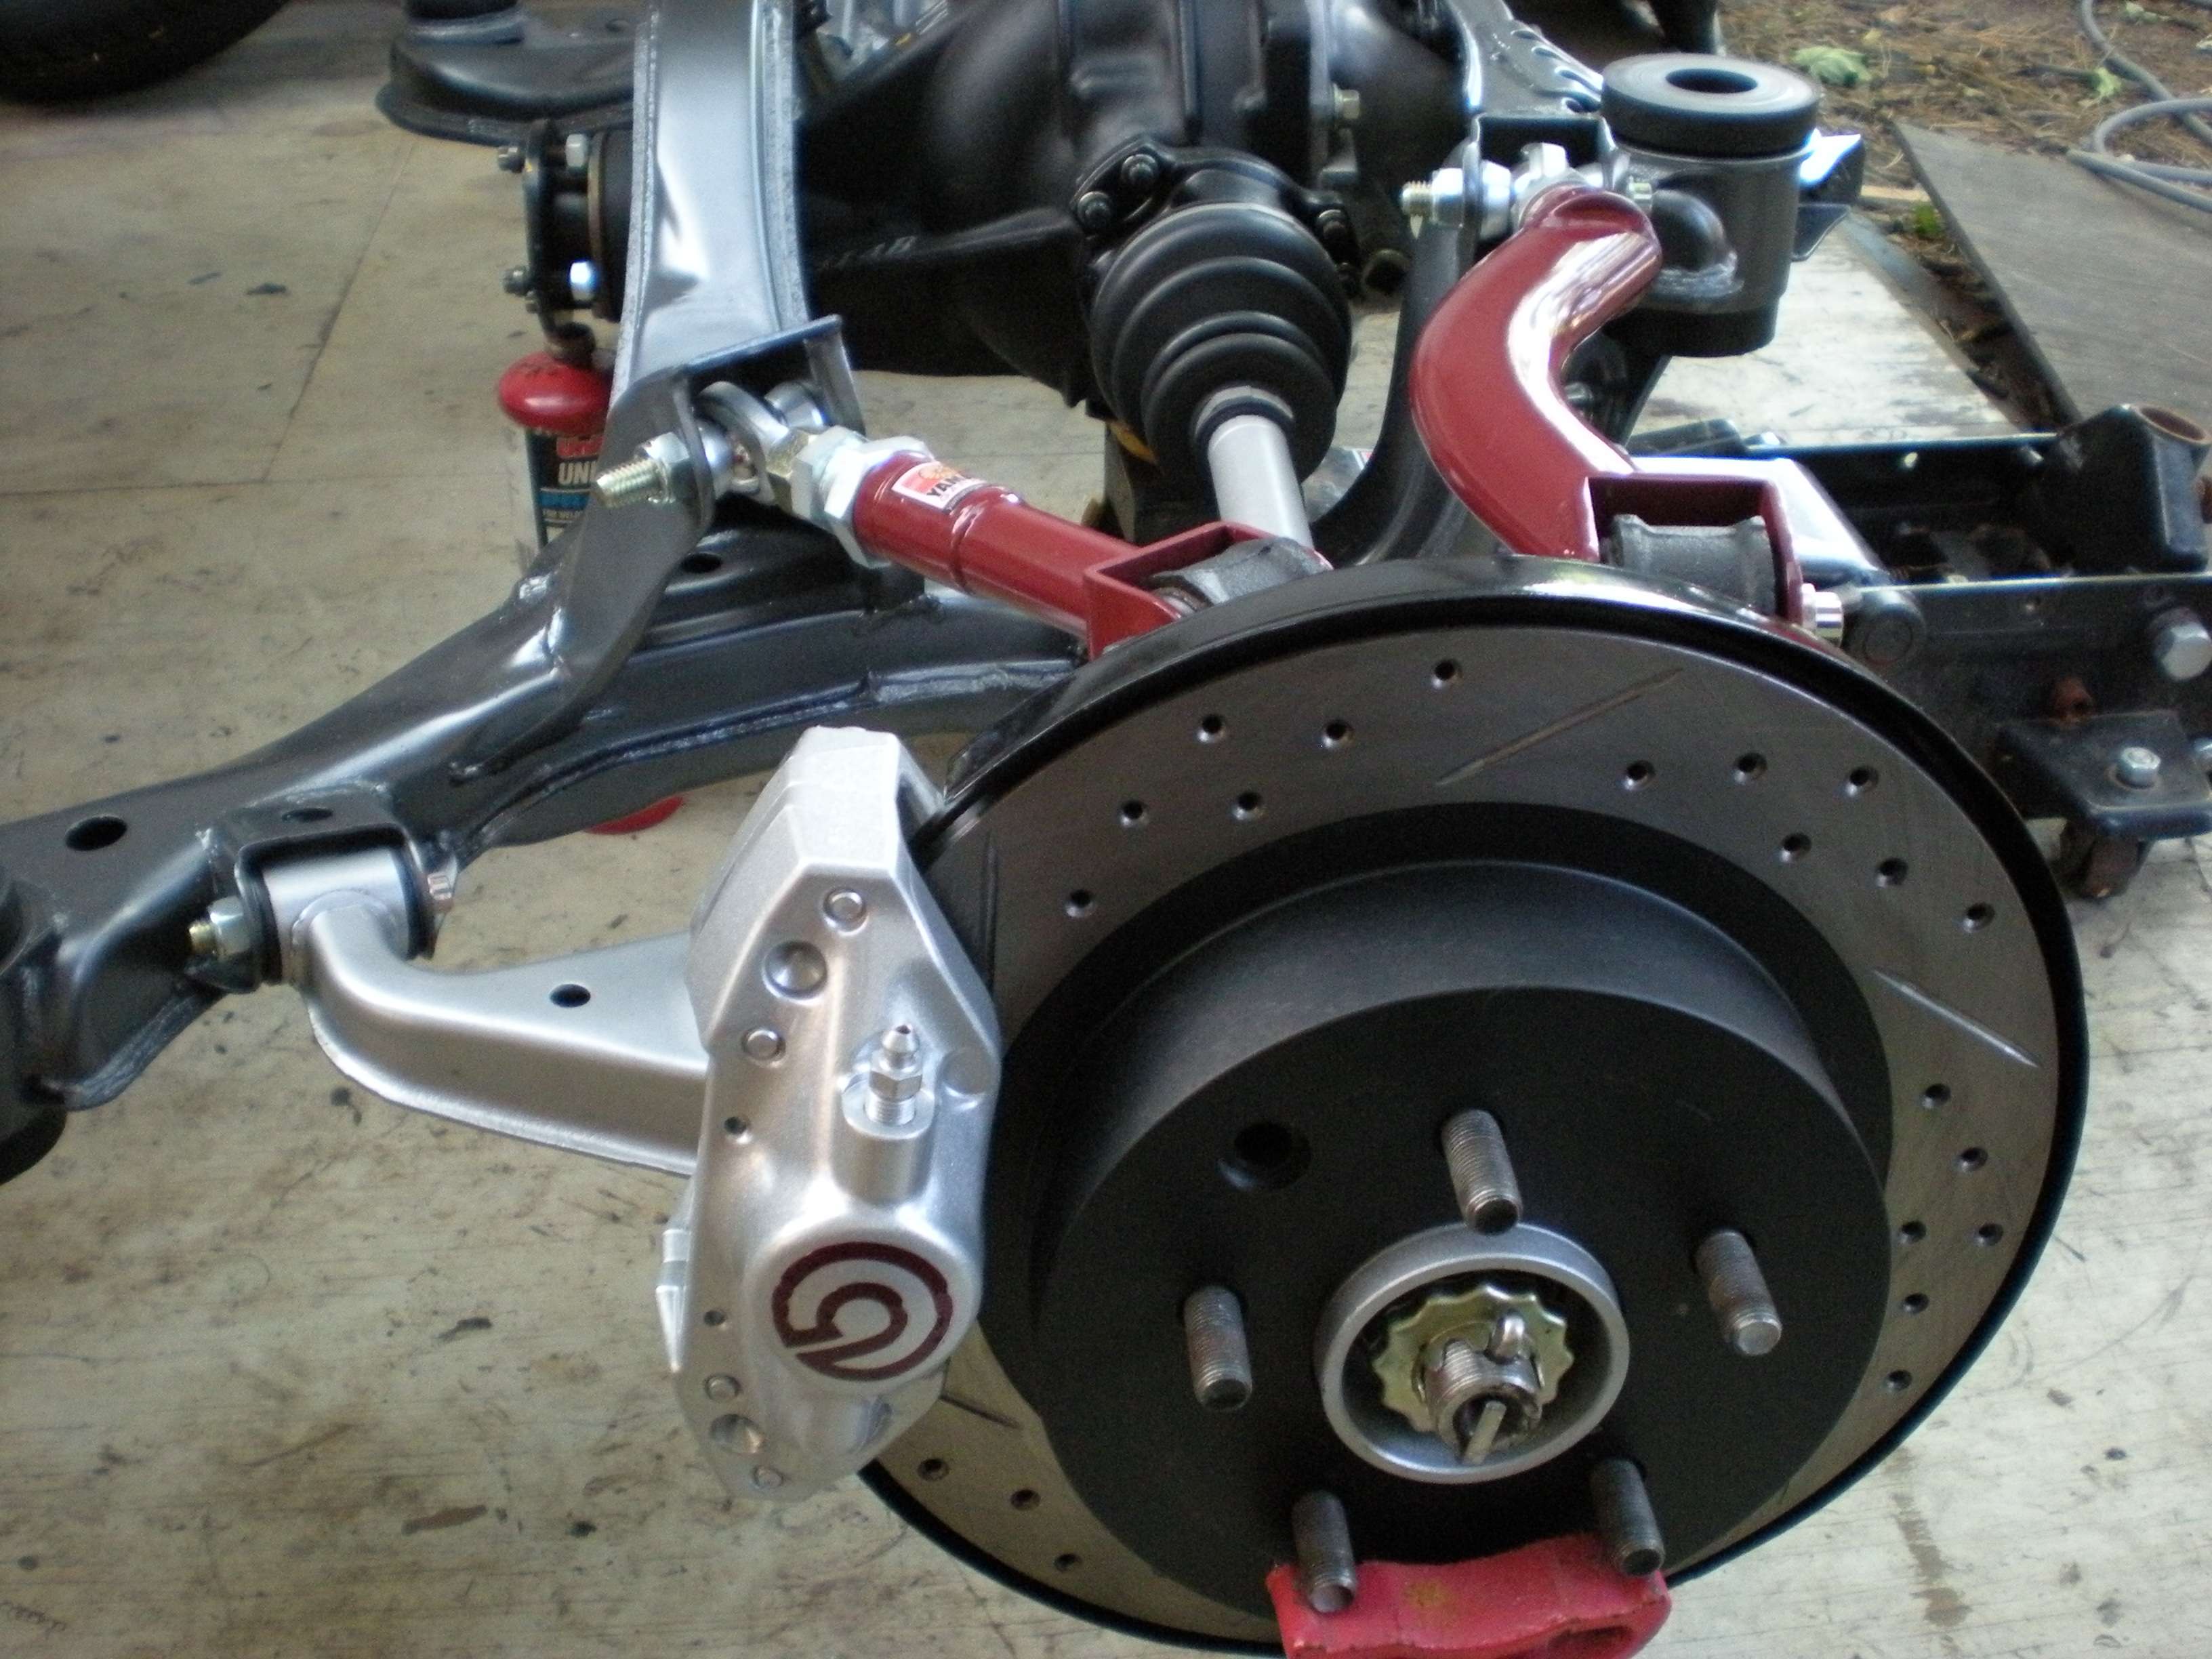 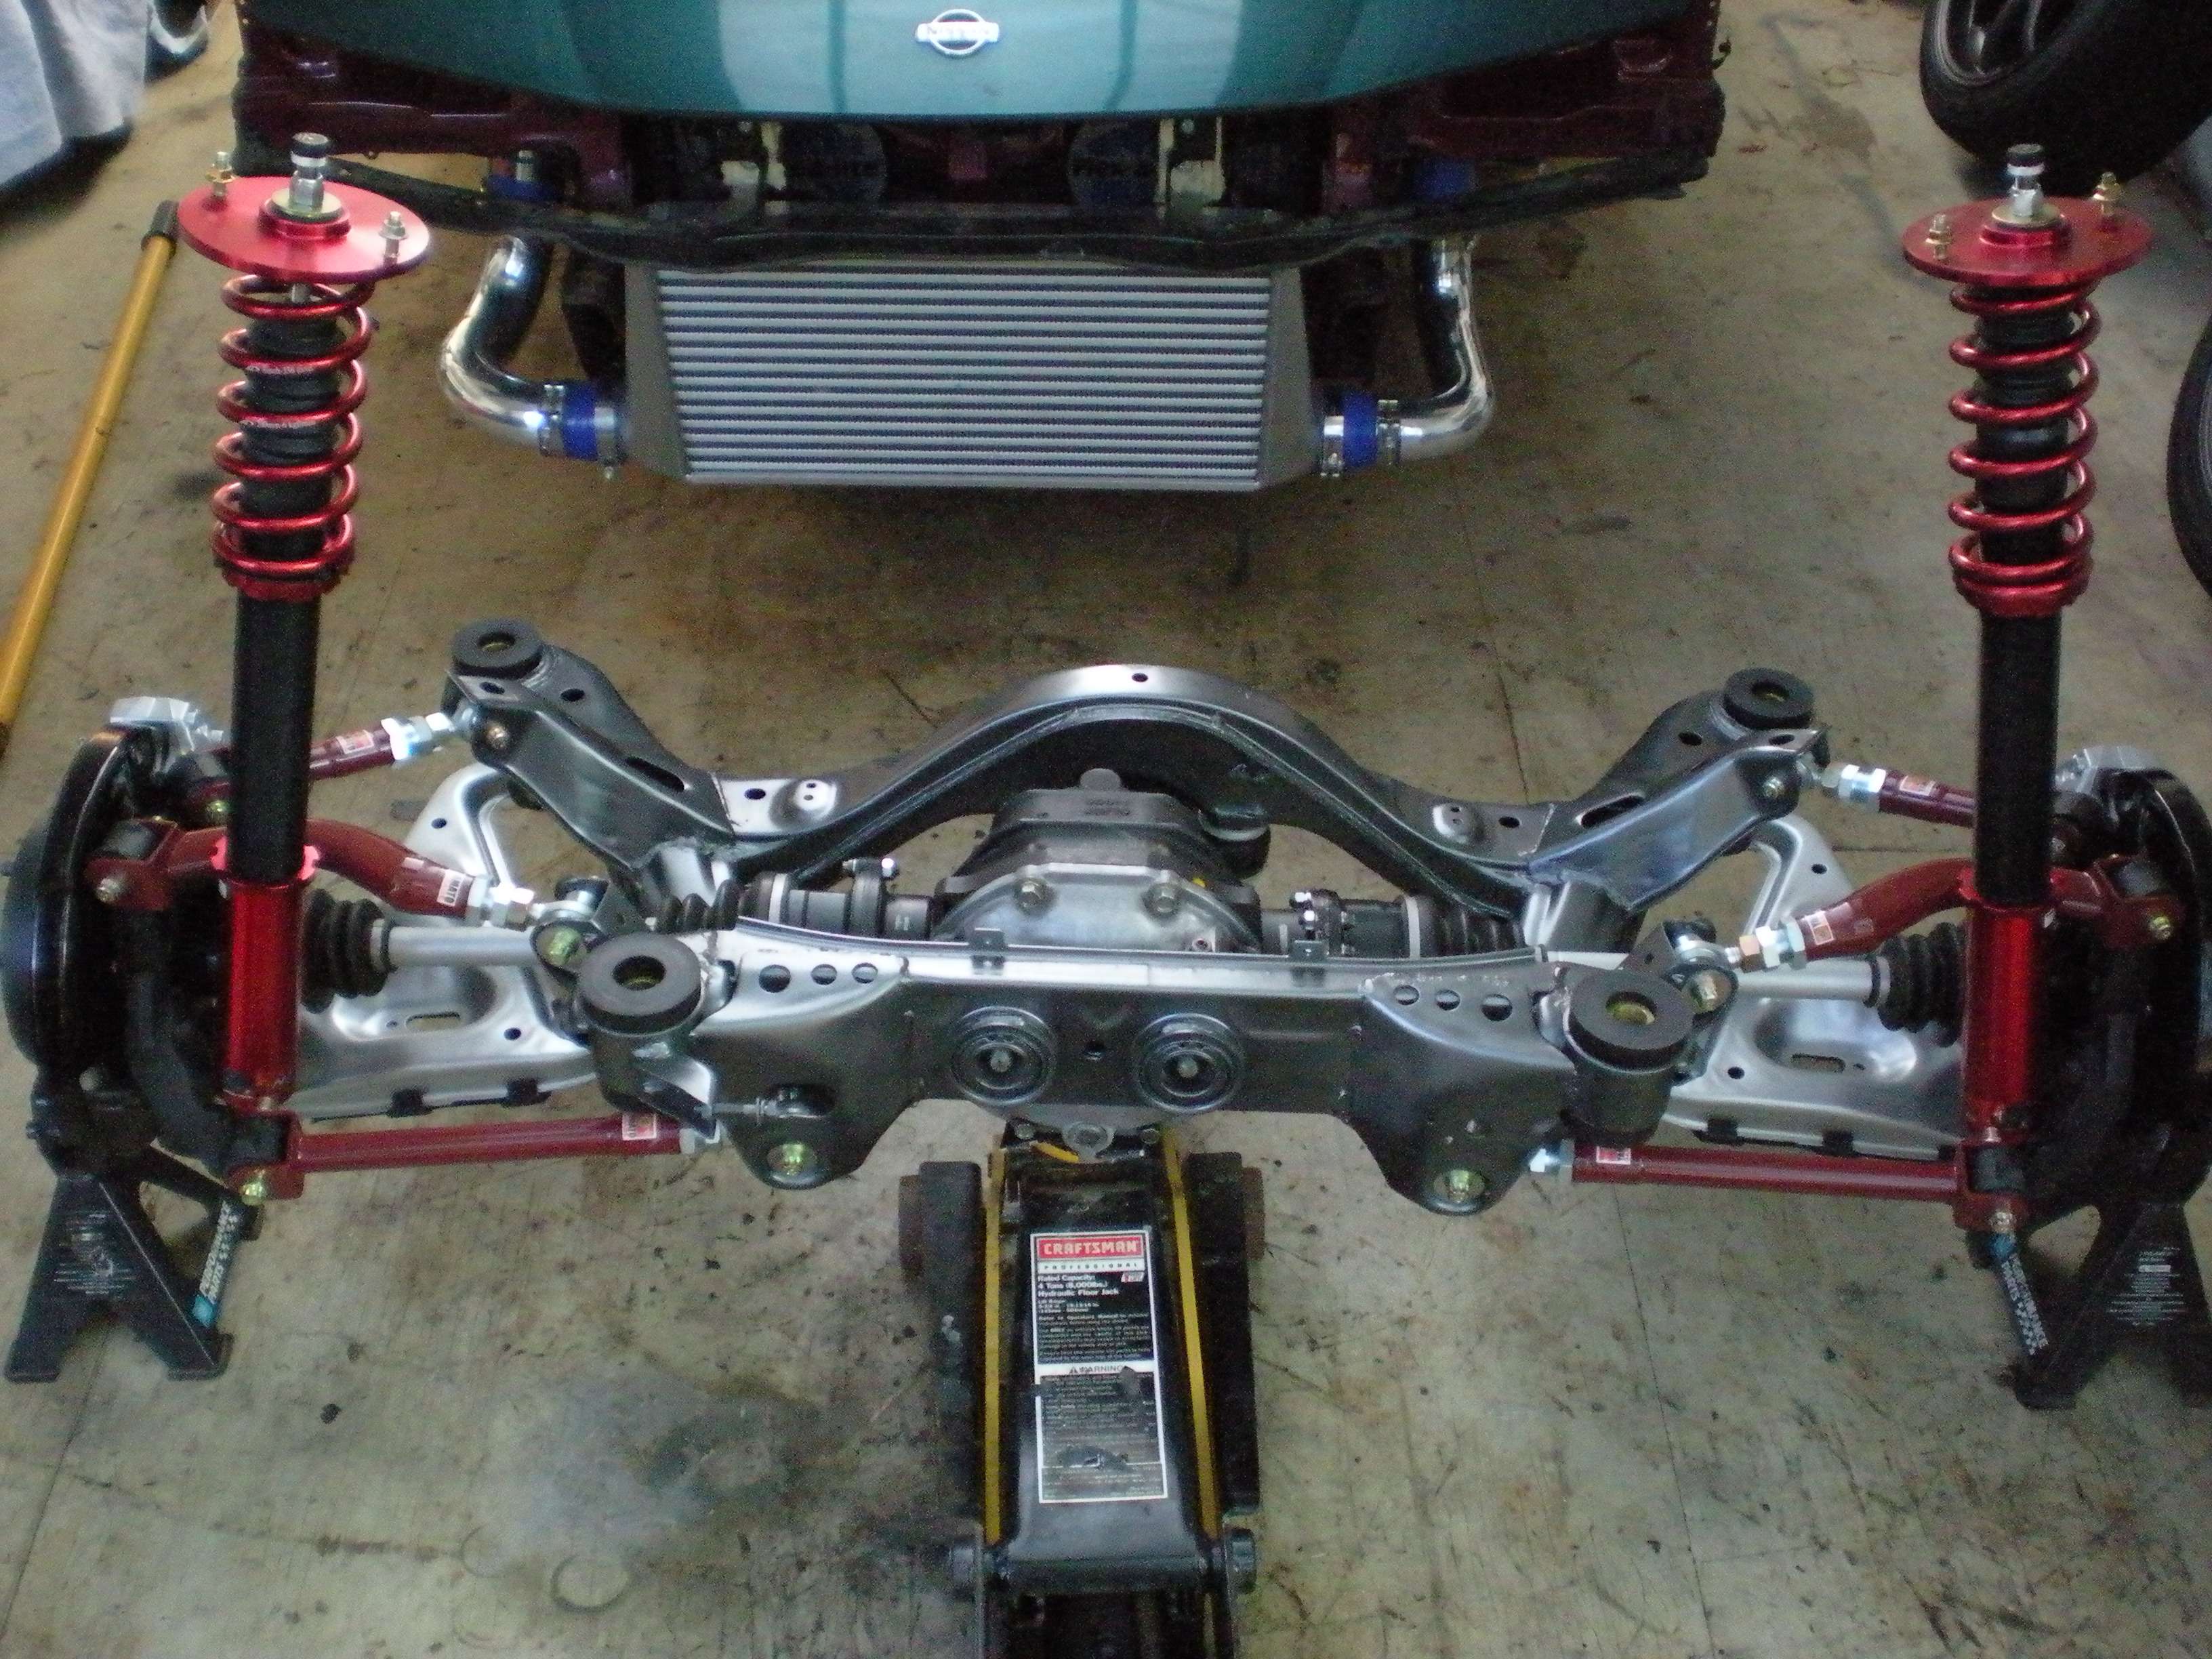 Last edited by doyle4281; 01-06-2011 at 08:57 PM.. |
|
|
|
|
01-05-2011, 07:57 PM
|
#52 | |
|
Zilvia Junkie
Join Date: Jun 2006
Location: East Coast
Age: 38
Posts: 585
Trader Rating: (20)
Feedback Score: 20 reviews
|
Quote:
|
|
|
|
|
|
01-05-2011, 08:10 PM
|
#53 |
|
Zilvia Junkie
Join Date: Jun 2006
Location: East Coast
Age: 38
Posts: 585
Trader Rating: (20)
Feedback Score: 20 reviews
|
These are the wheels that are going on the car. They are Work Emotion XD9's that have been custom coated by Work. The XD9's only came in a matte silver (MGS) finish, however I really wanted more of a gunmetal finish. I contacted Work and they agreed to coat them in their matte gunmetal (MGM) finish for an additional cost. It took 6 months, but they came out great.
18x9 +20 Front/ 18X10 +18 Rear 245 Front/265 Rear 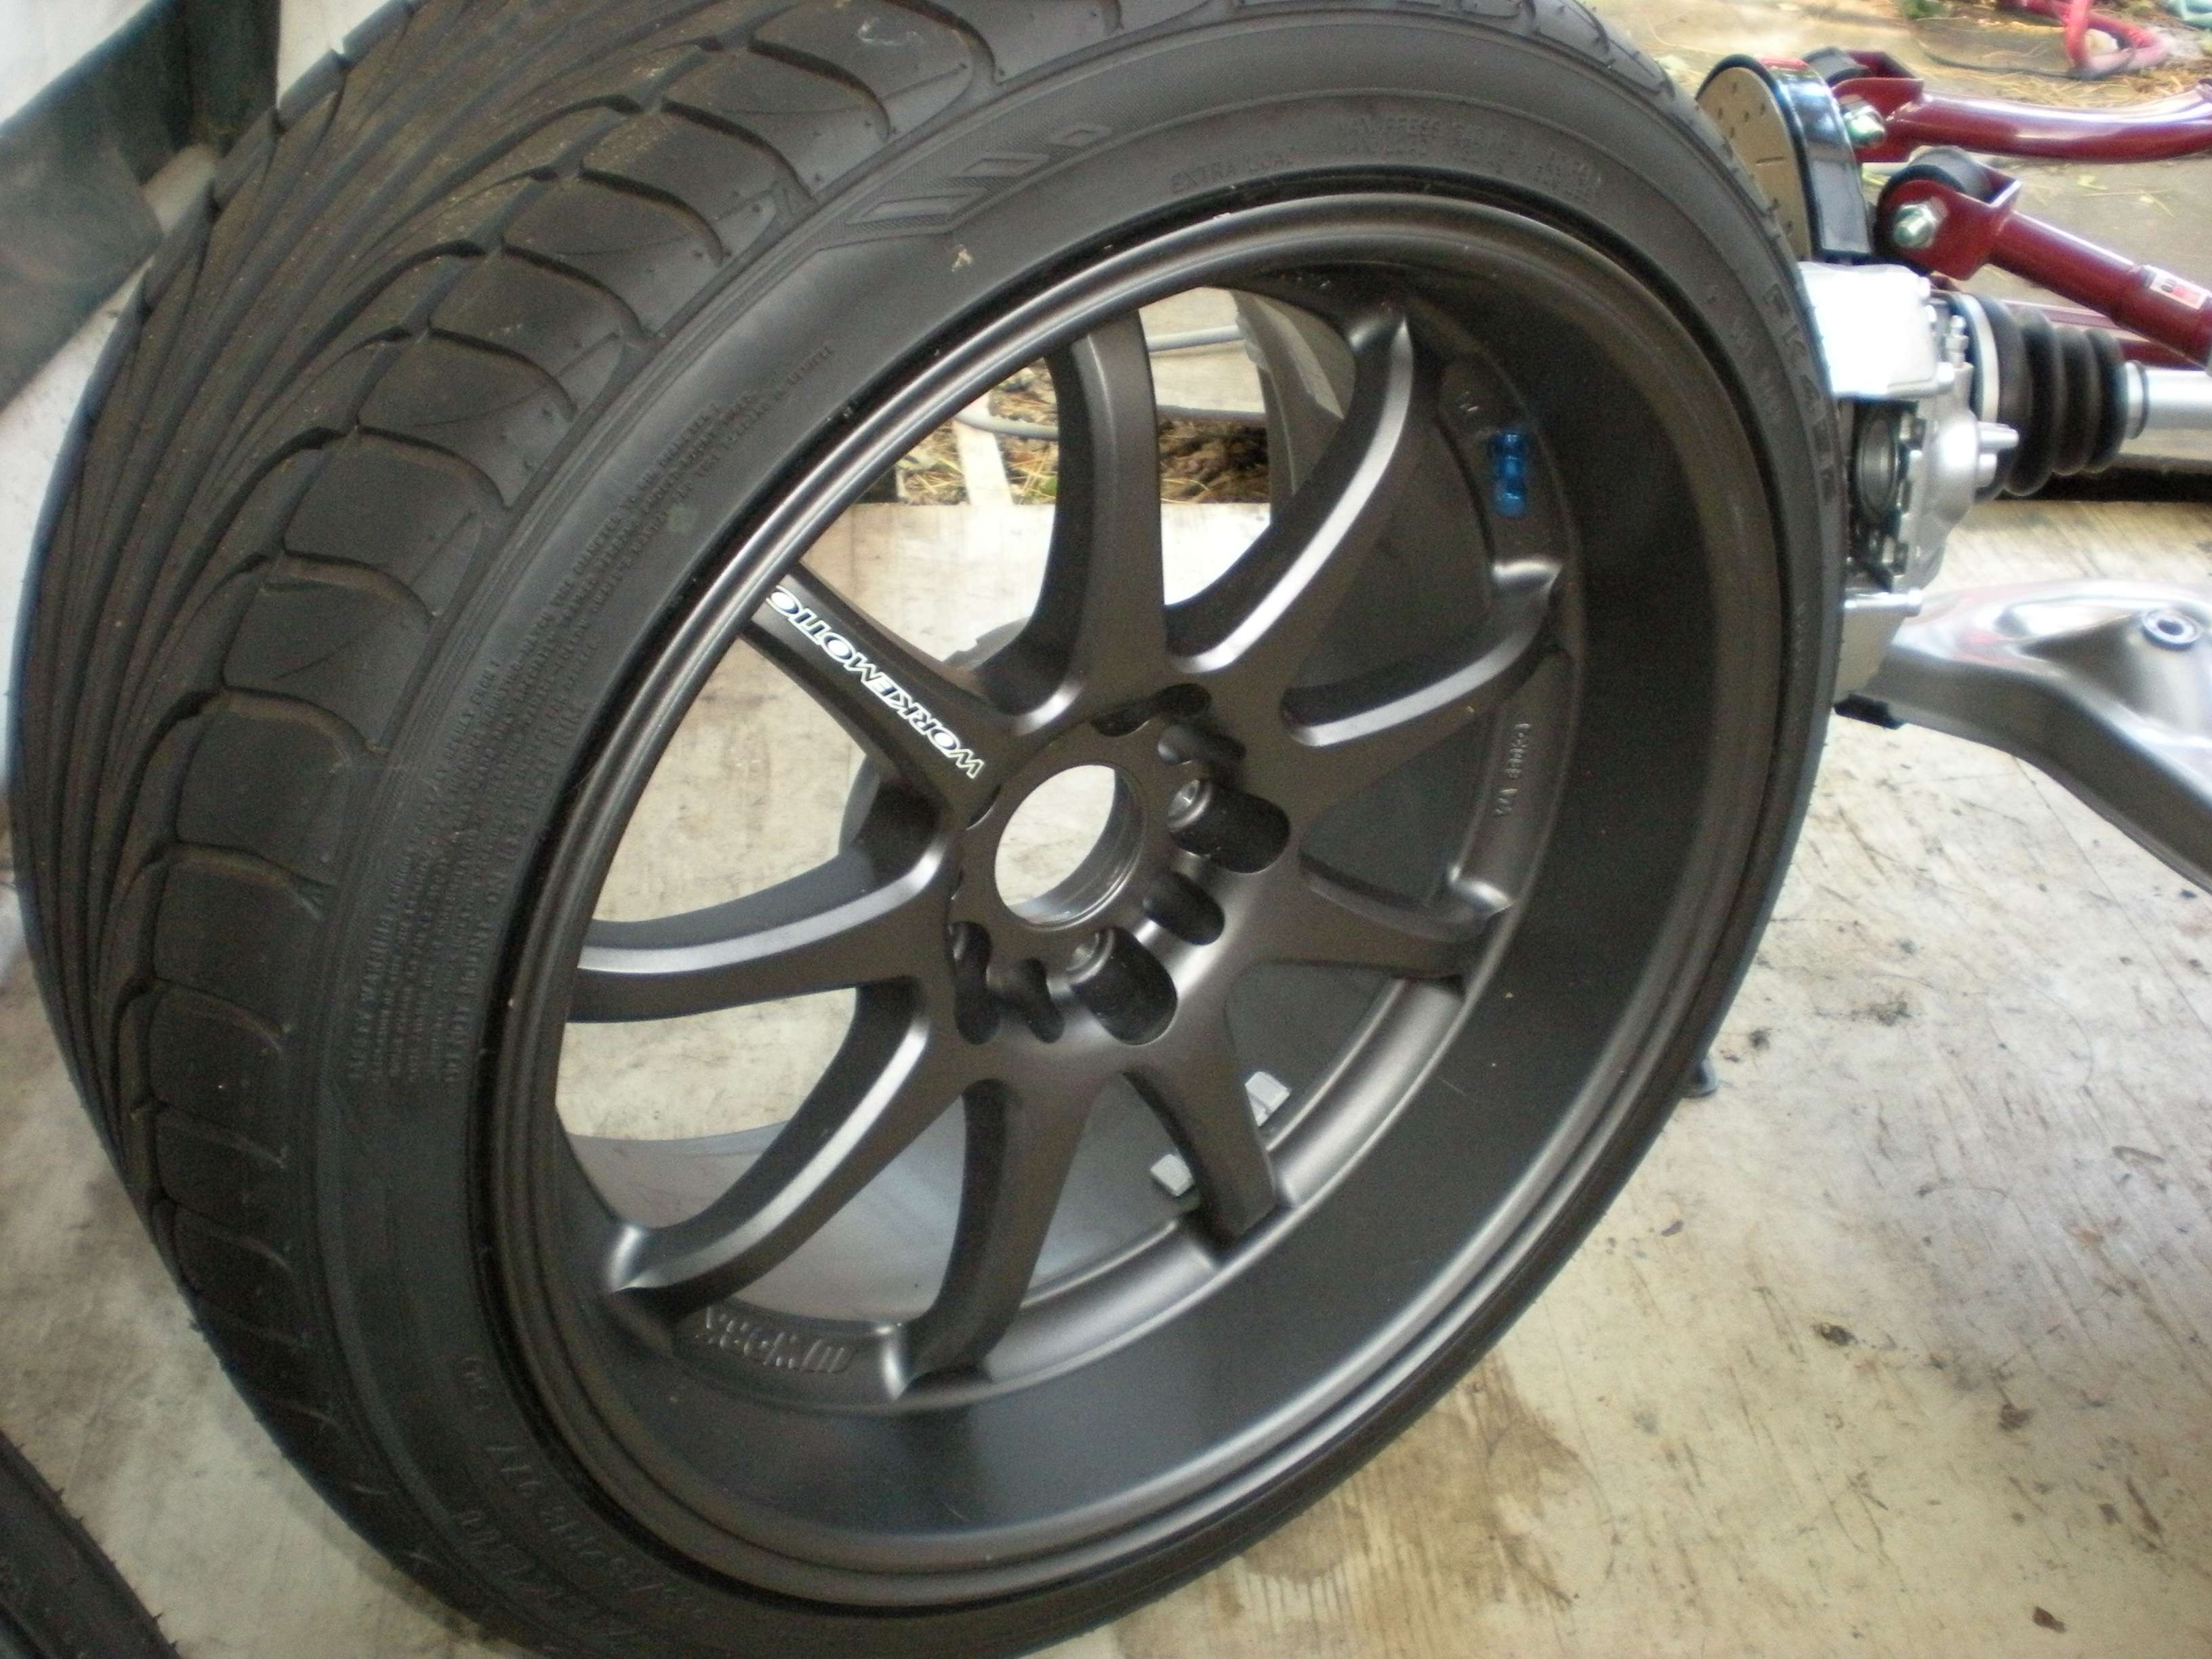 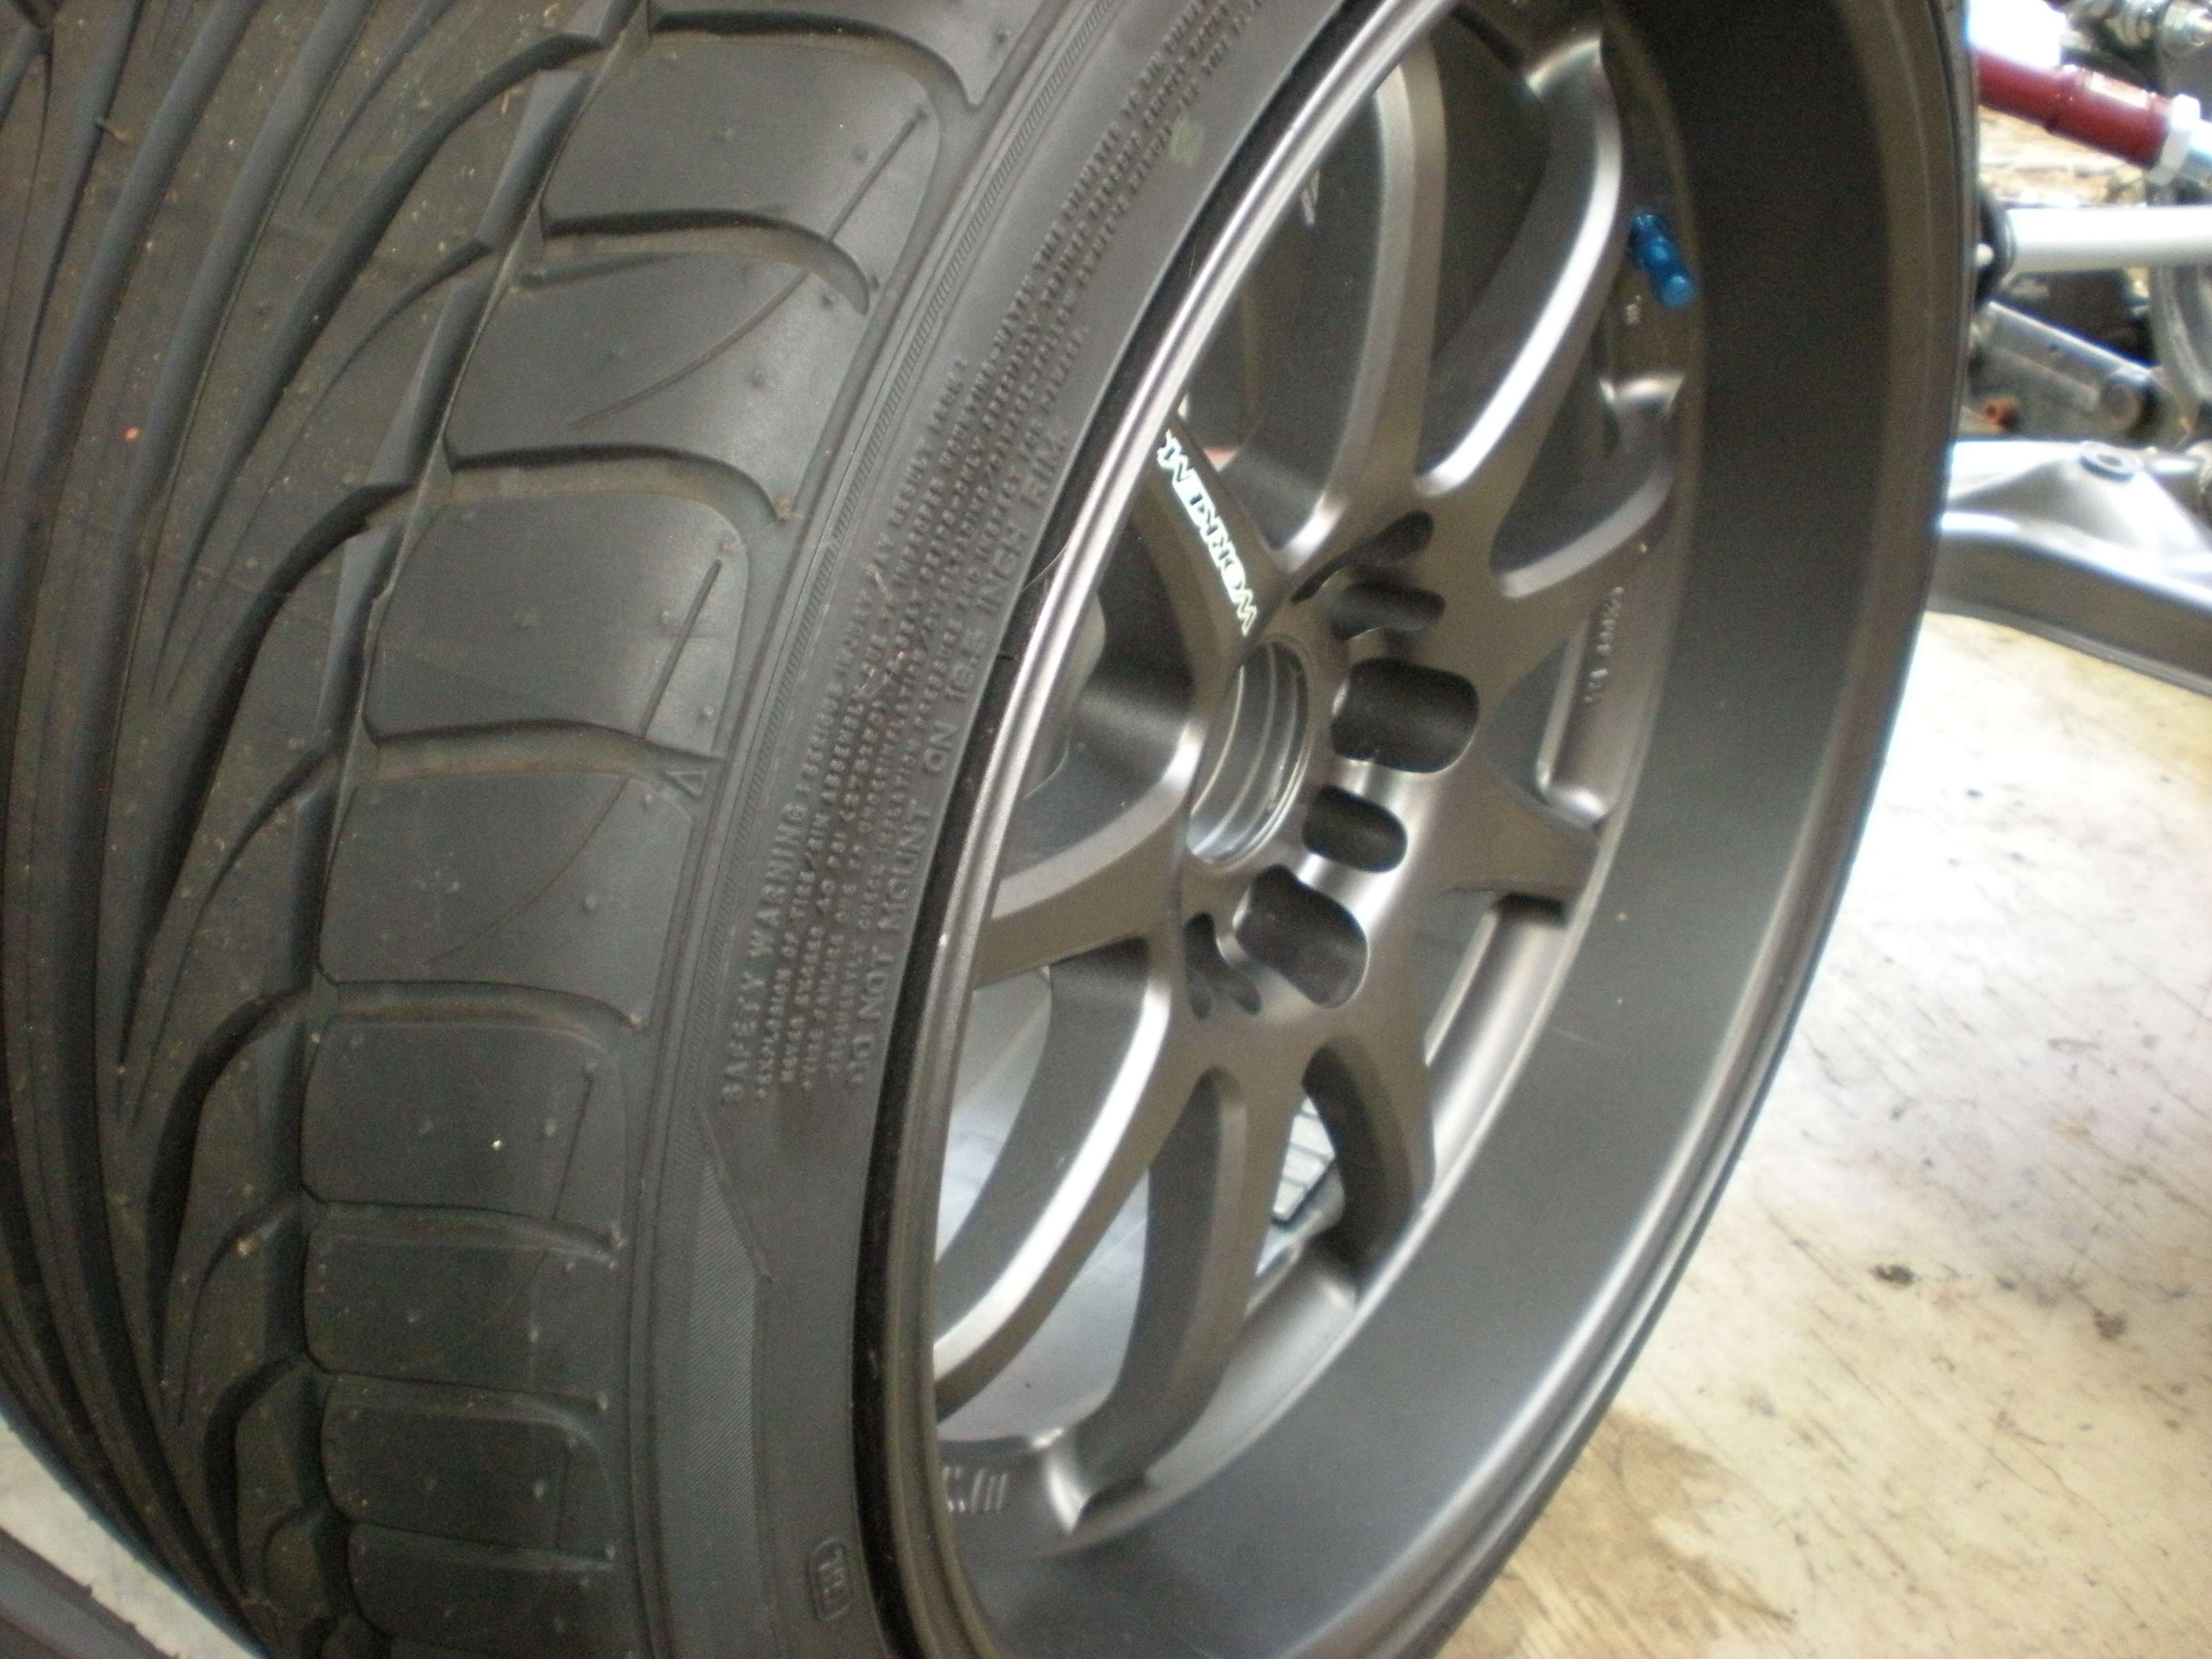 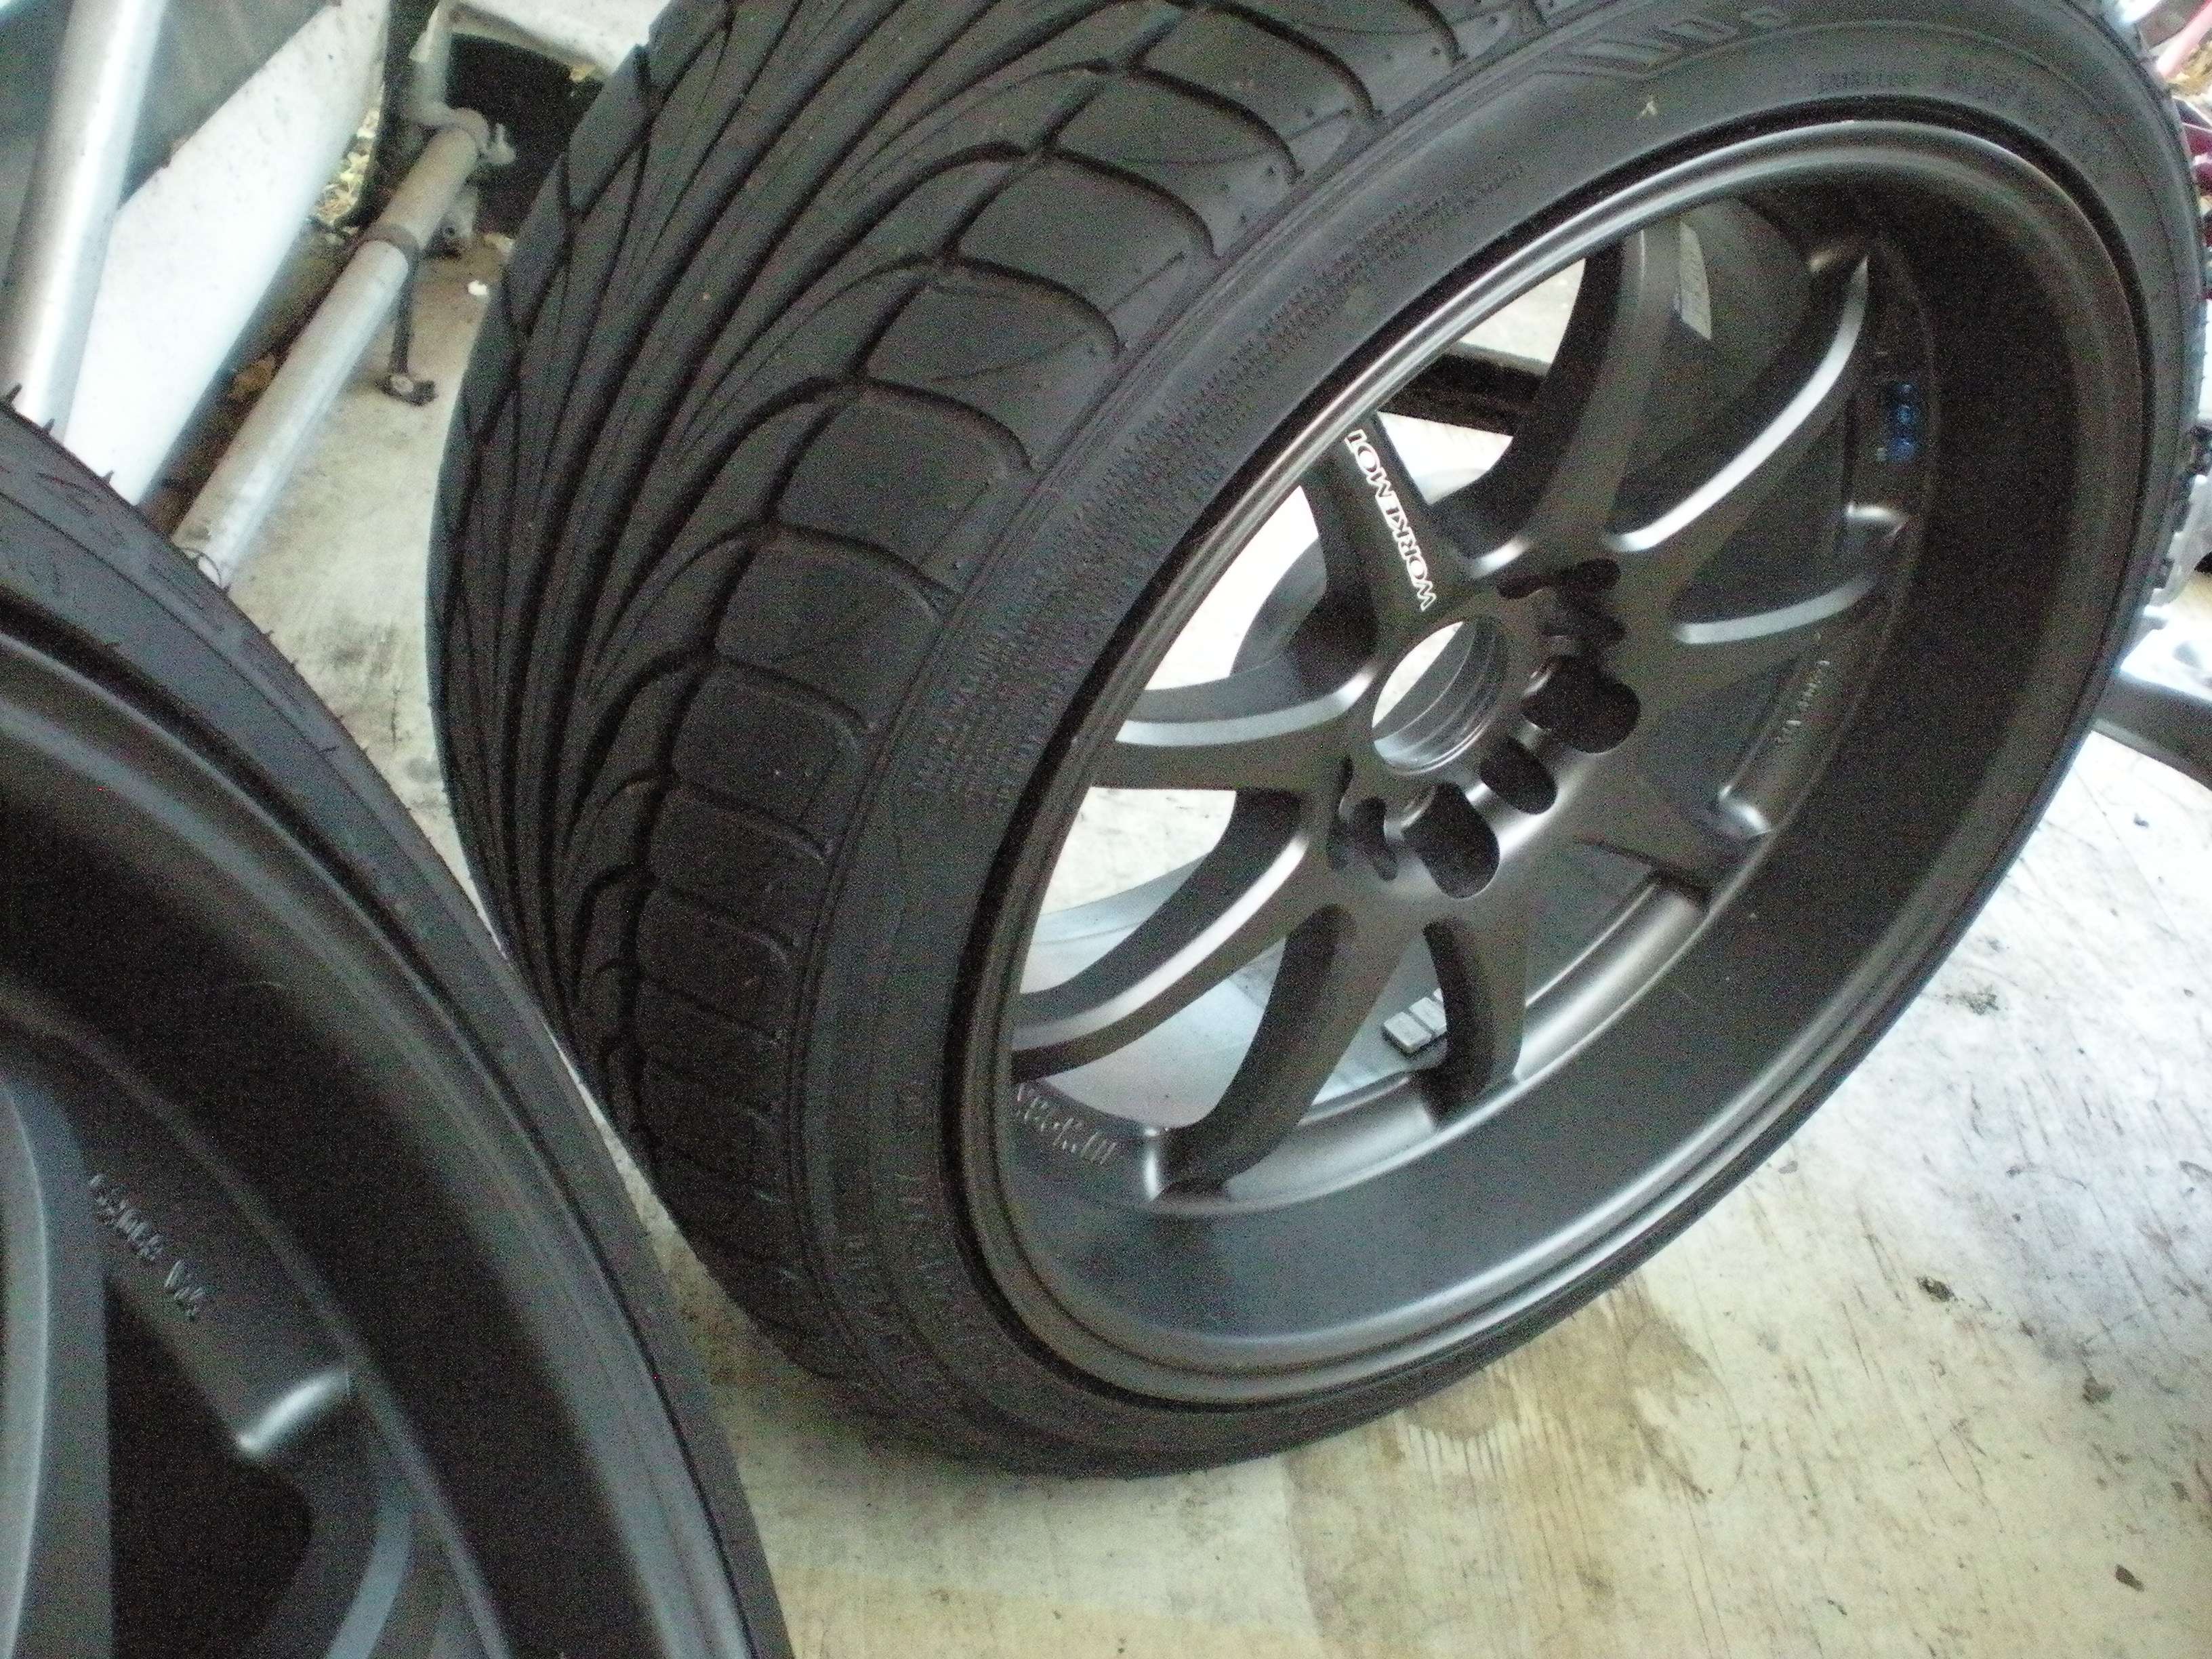 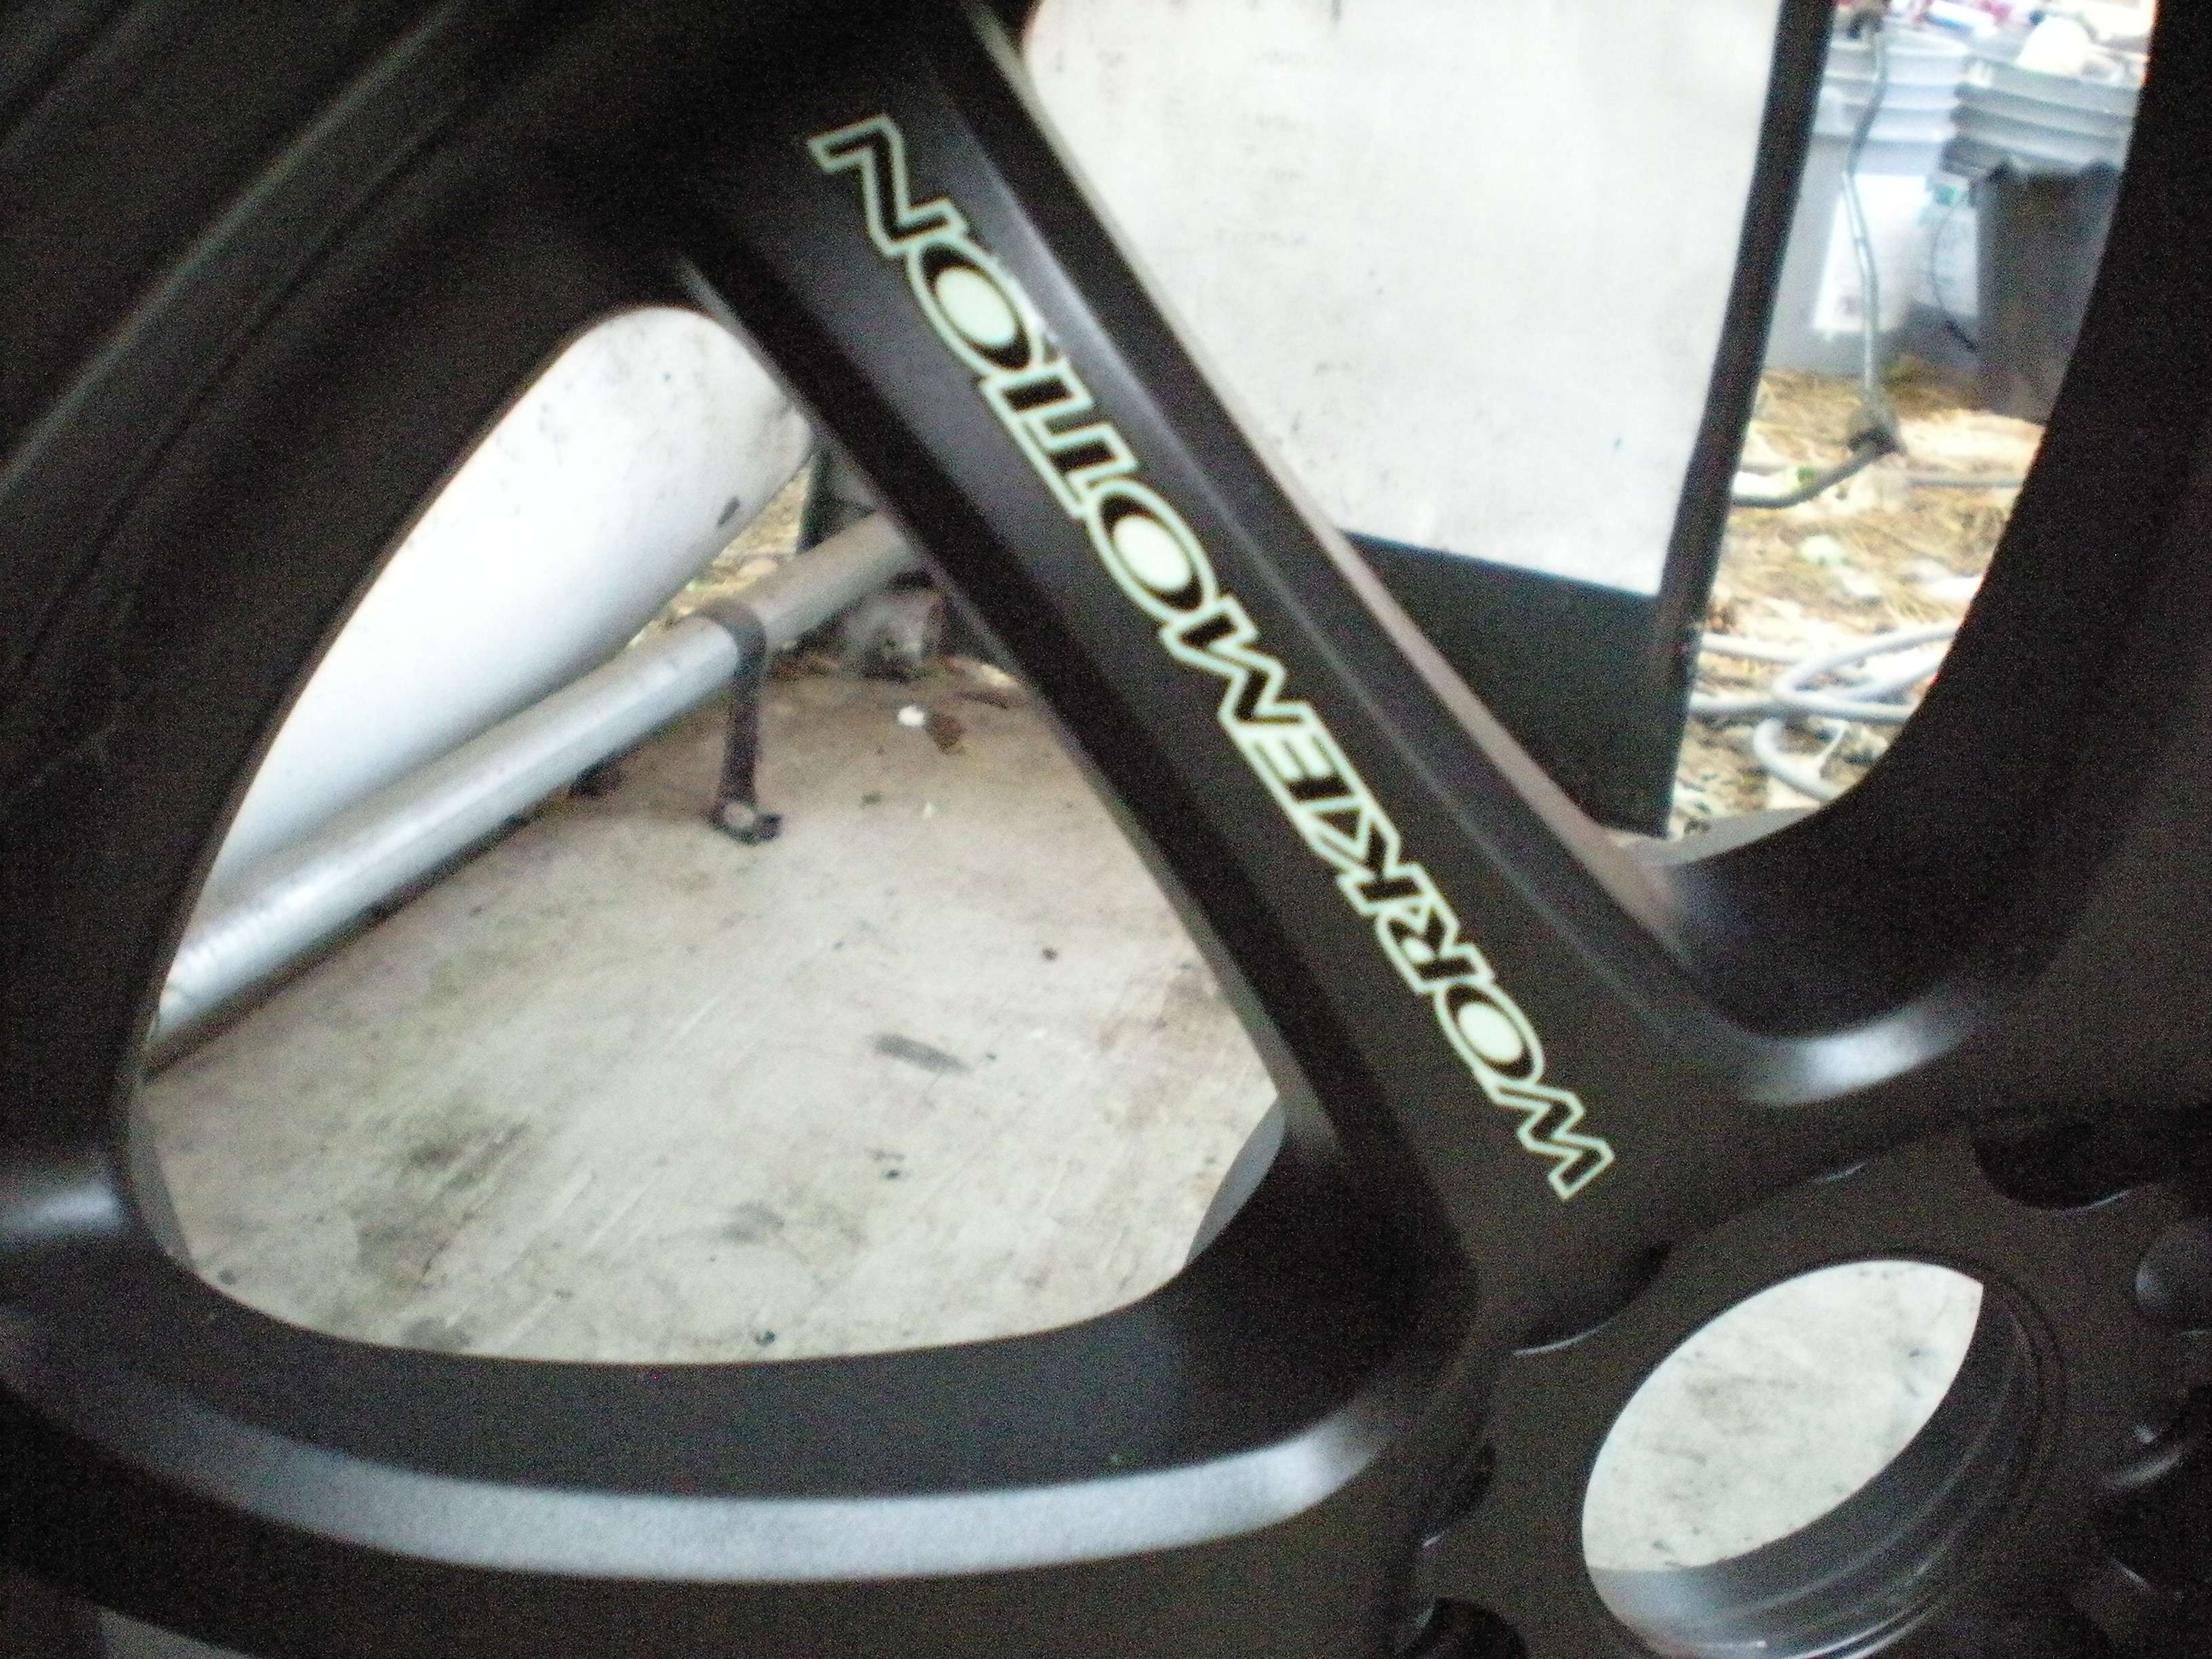 |
|
|
|
|
01-06-2011, 06:23 AM
|
#56 | |
|
Zilvia Junkie
Join Date: Jun 2006
Location: East Coast
Age: 38
Posts: 585
Trader Rating: (20)
Feedback Score: 20 reviews
|
Quote:
Contact Ryan at BallerBolts.com, make mention of this thread, and he will help you with whatever you need |
|
|
|
|
|
01-06-2011, 05:46 PM
|
#59 | |
|
Zilvia Junkie
Join Date: Jun 2006
Location: East Coast
Age: 38
Posts: 585
Trader Rating: (20)
Feedback Score: 20 reviews
|
Quote:
I was considering changing them to longer studs, but I had already purchased the closed face lug nuts. I may install longer studs in the future if needed. |
|
|
|
|
|
01-06-2011, 11:07 PM
|
#60 |
|
Post Whore!
 
|
^I think your RUCAs are backwards.... they typically point down so they don't hit the pinch weld in that area. Yours are pointing up.
Also I said it before but I'll say it again. Those ES bushings that go in the spindles/LCAs SUCK. They create a ton of stiction so the suspension cannot travel as easily even when well greased (the grease only lasts 2 months max anyway). You end up feeling everything in the road like it's train tracks or something. I could not move my suspensioin at all by hand when I had the shock disconnected and ES bushings installed. If you have the money sphericals are a far superior option (the sphericals do wear out quicker but replacements are only like $10 each and they slide right out of the housing for easy replacement). If not i'd try to source some OEM/nismo bushings. |
|
|
|
|
| Bookmarks |
|
|


 Linear Mode

