|
|||||||
| Builds (and builds only) Got a build thread? It goes here, build threads anywhere else on the forum will be locked and never moved. |
 |
|
|
Thread Tools | Display Modes |
|
|
 10-08-2018, 11:59 AM
|
#2 |
|
Zilvia Junkie
 
Join Date: Feb 2008
Location: Carry Water, Chop Wood
Age: 36
Posts: 507
Trader Rating: (0)
  Feedback Score: 0 reviews
|
pretty big update since the car went back together.
 After getting the car on the road and waking up everyone napping from driving it around open header, pulled it back in the driveway, and into the garage to put the exhaust back on later. 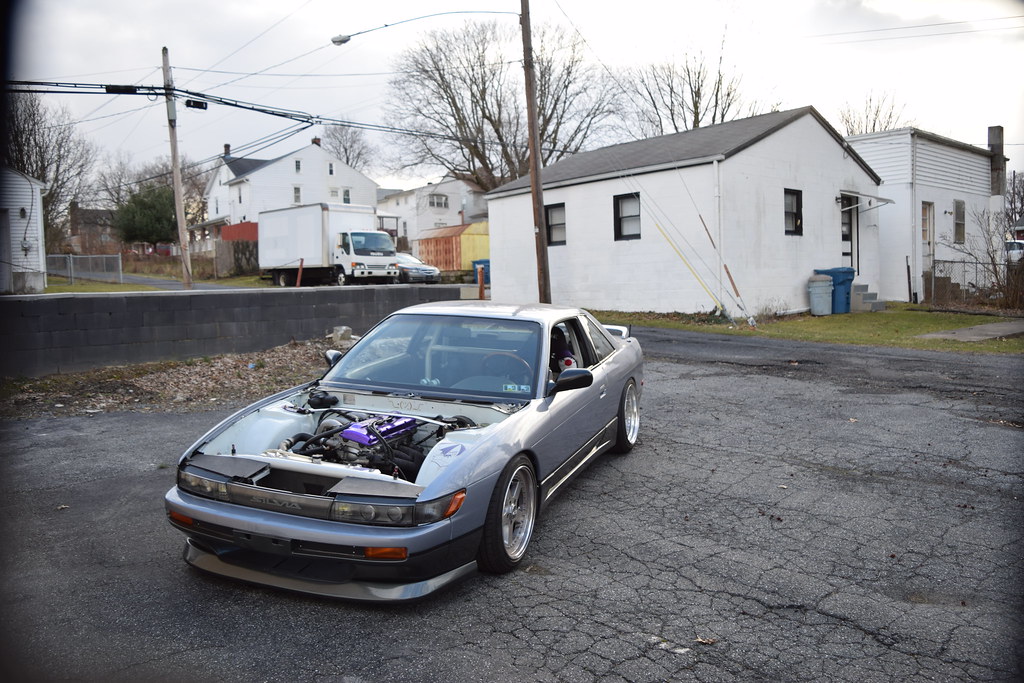 So, the weather broke in the spring the there was green scenery growing, I took it out with a friend and took some pictures. Since he is the Camera guru and didnt have his stuff with him, he used my Nikon D3300. 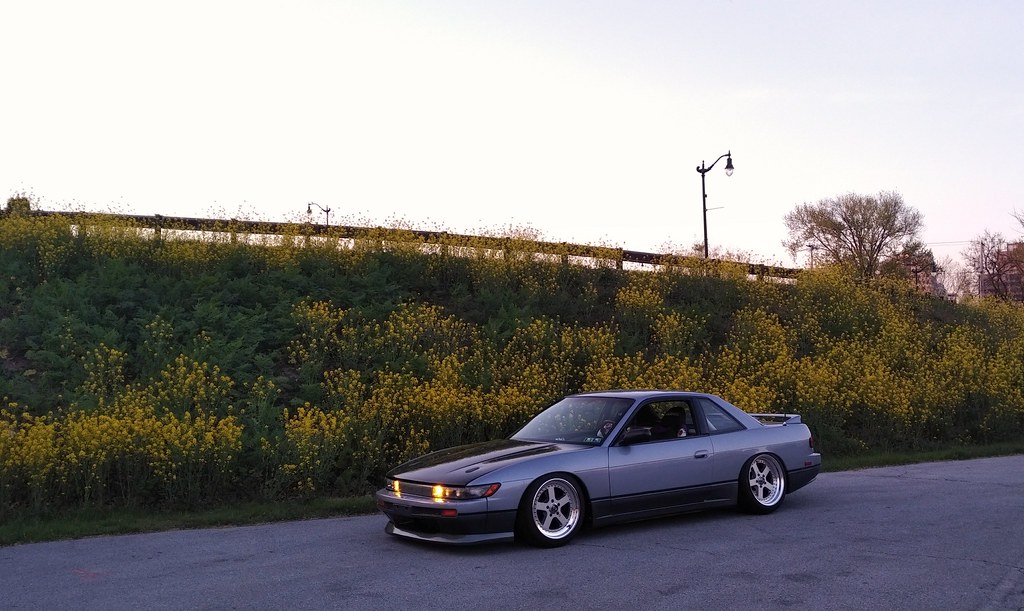 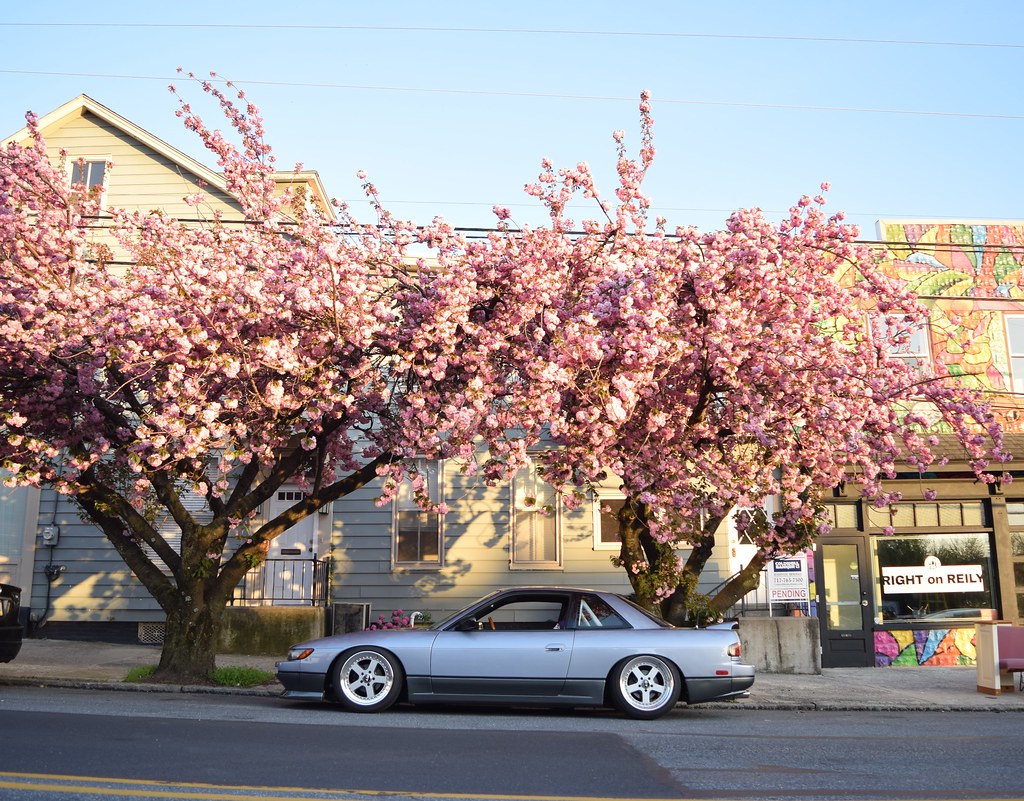  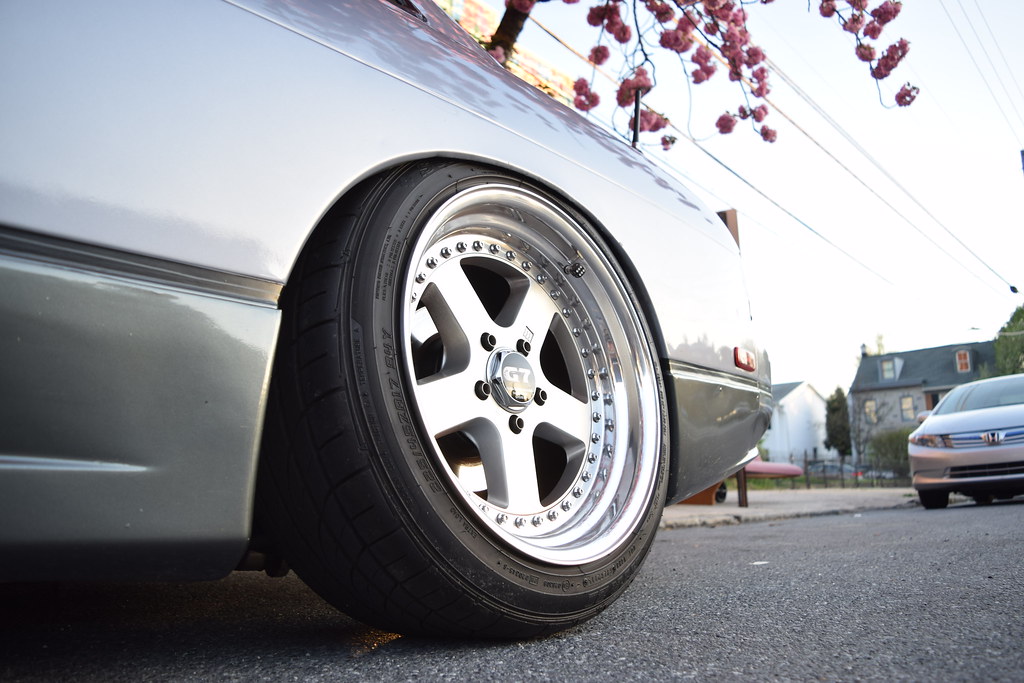 Went to Carlisle Import and Performance this year. took my dad and it was wet friday, by myself and met burnsauto there on saturday, also wet. Sunday was BEAUTIFUL. Not many cars/clubs and it gets less and less each year!!  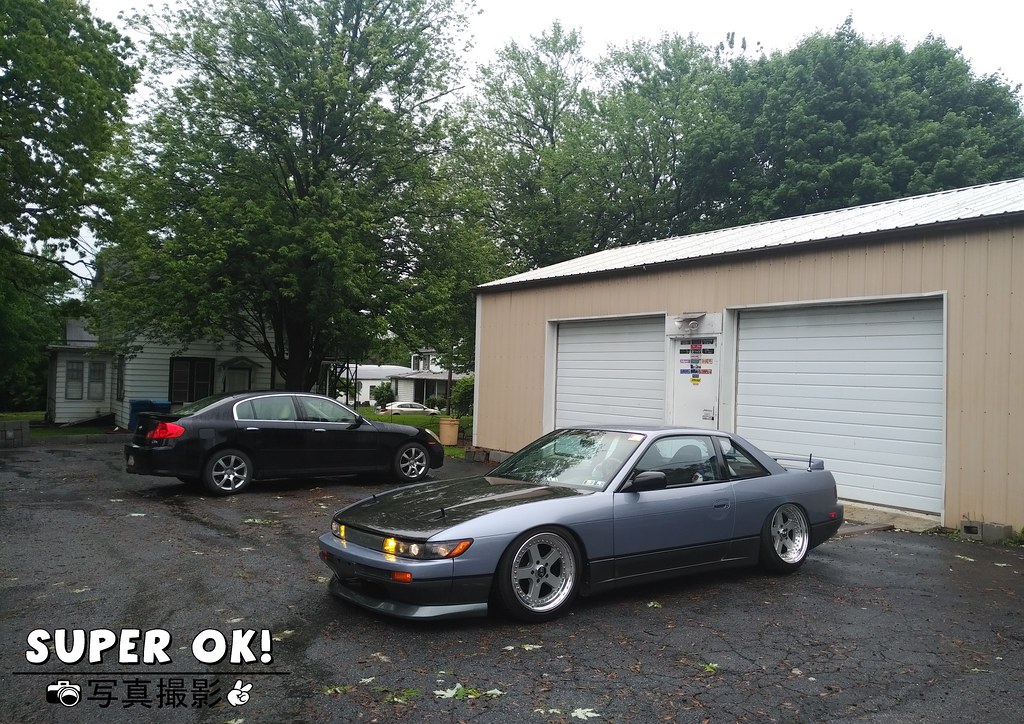  I gave the camera to Ericka while i cleaned the car... of course she took pics, of me....   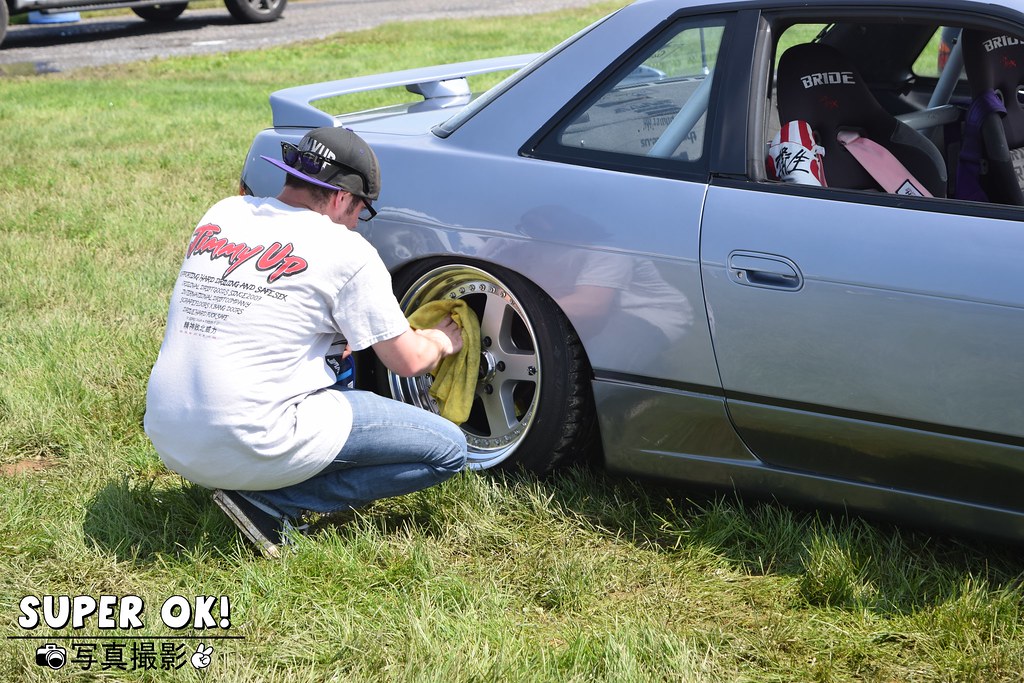 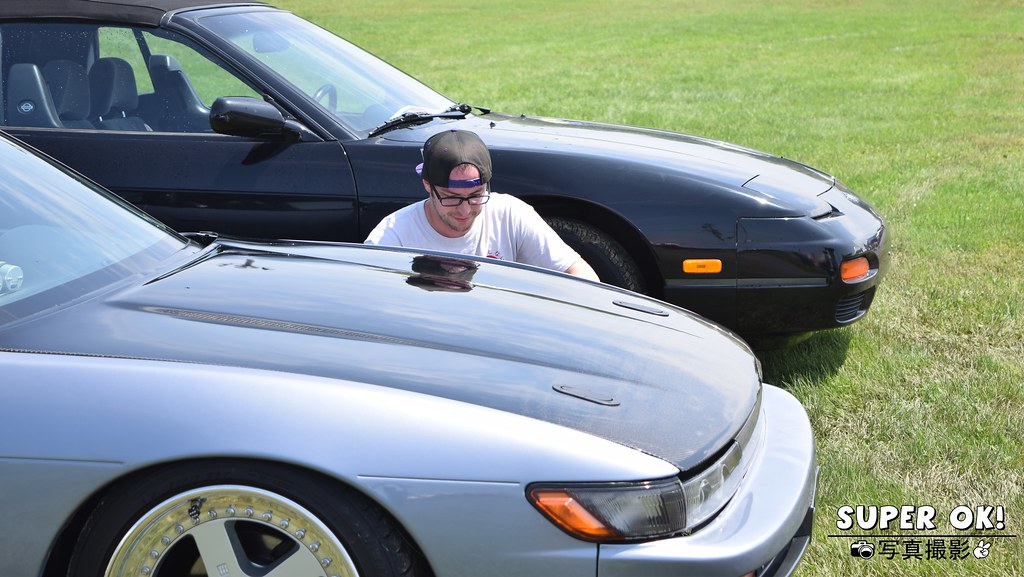  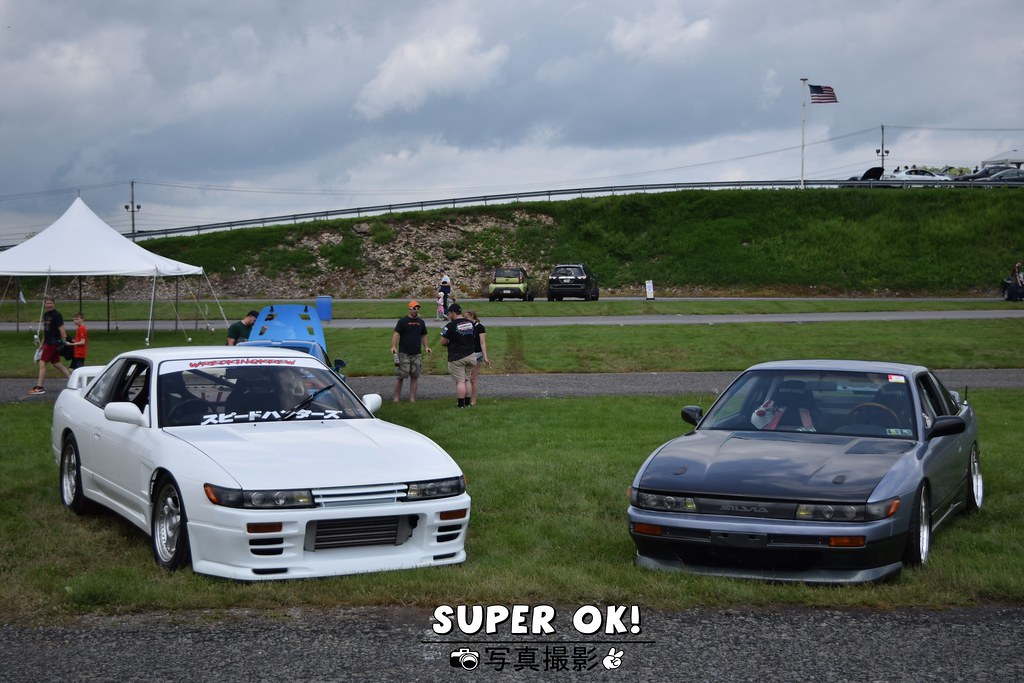 Tables turned, GOTCHA!!! *shutter snap*  After carlisle performance and import in may, I really planned to take apart the car for one last time and re-do the engine bay/RHD plans/ect/ect... But as i was leaving Carlisle/end of the last day, I got an invite card to the Junkfood meet in Harrisburg on riverfront, and since they are really cool peoples, i couldn't refuse. So i postponed the tear-down, Junkfood is filled with lots of cool cars, and awesome food truck food!!   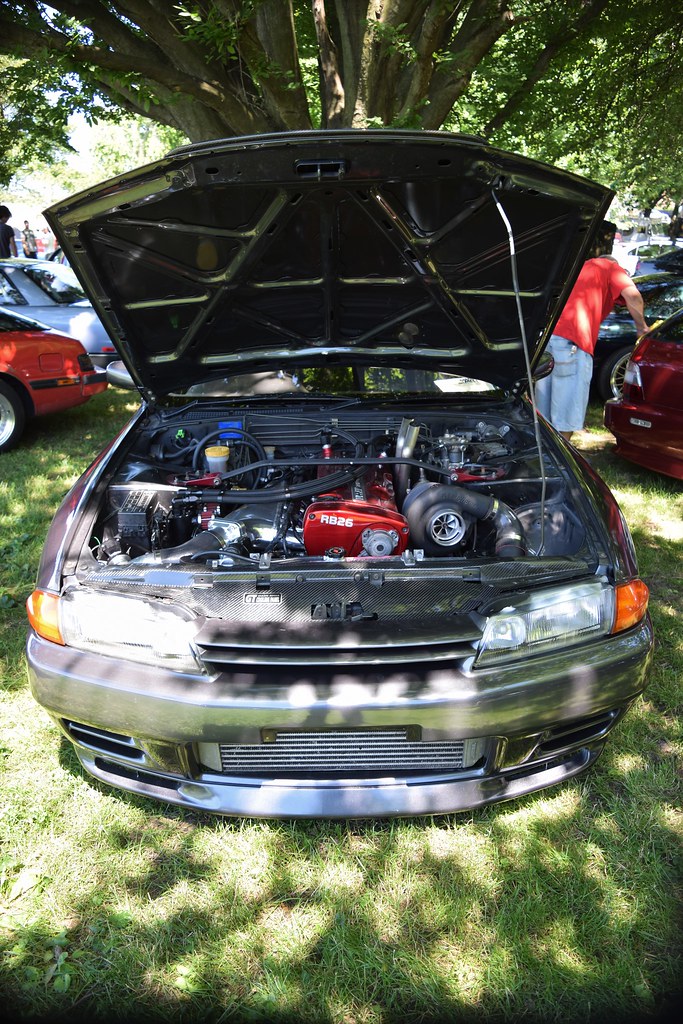  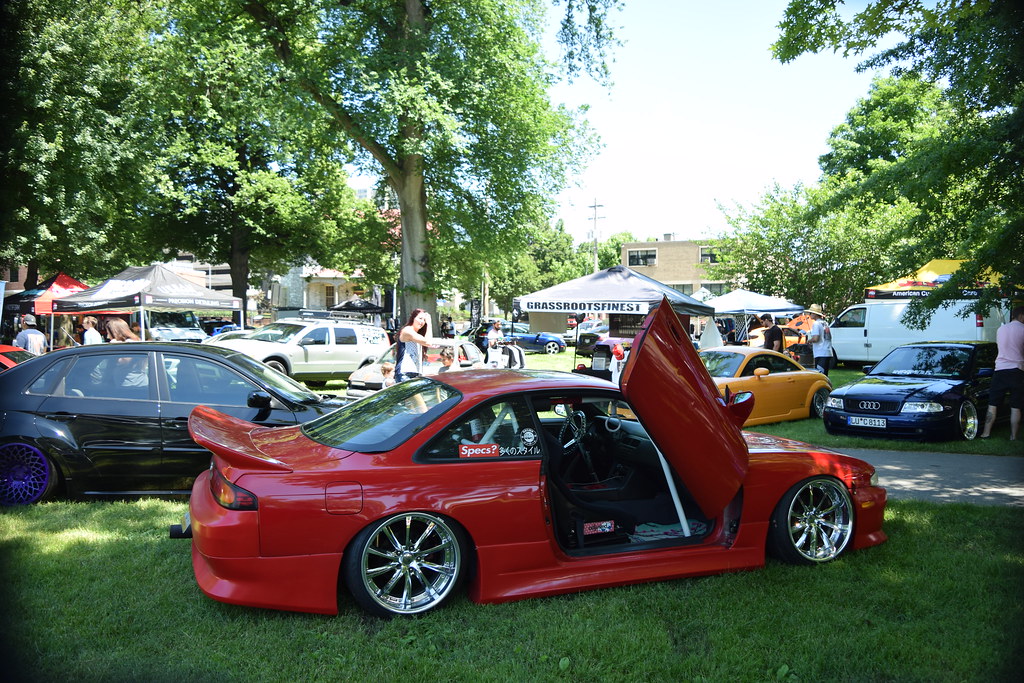 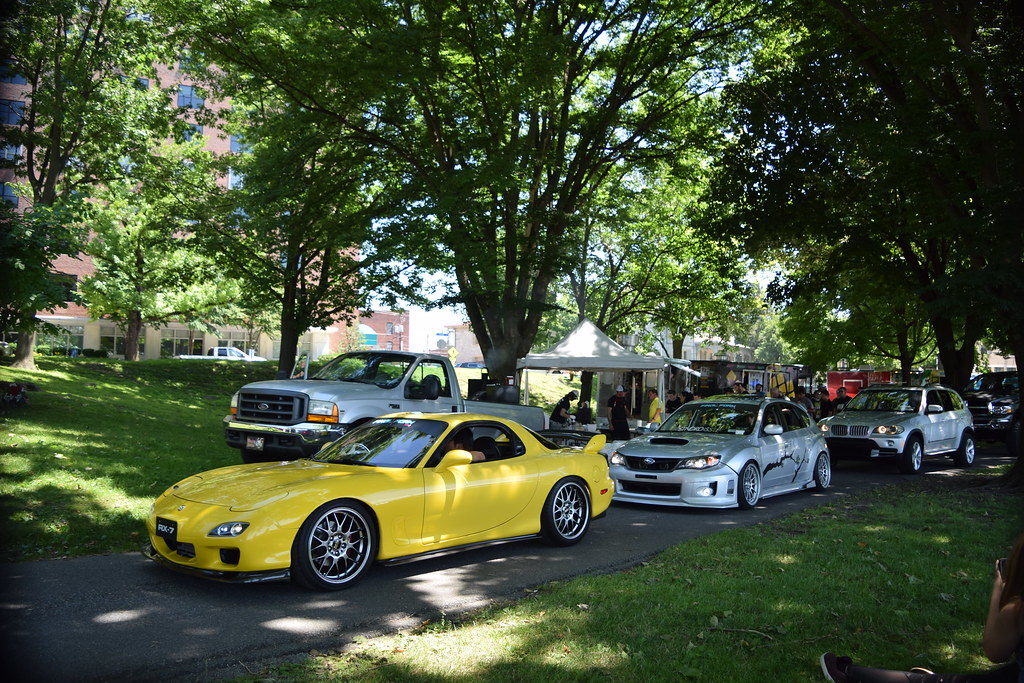  I had an opportunity and i took it.... fan girl me kicked in, and photobombed Boostedchick and her friend! SuperOK! *photo cred: Becker-Junkstyles*  Since the car was still on the road, we went to Cars and Coffee: Japanese Theme. This was in Bethlehem PA, an old steel/industrial town. 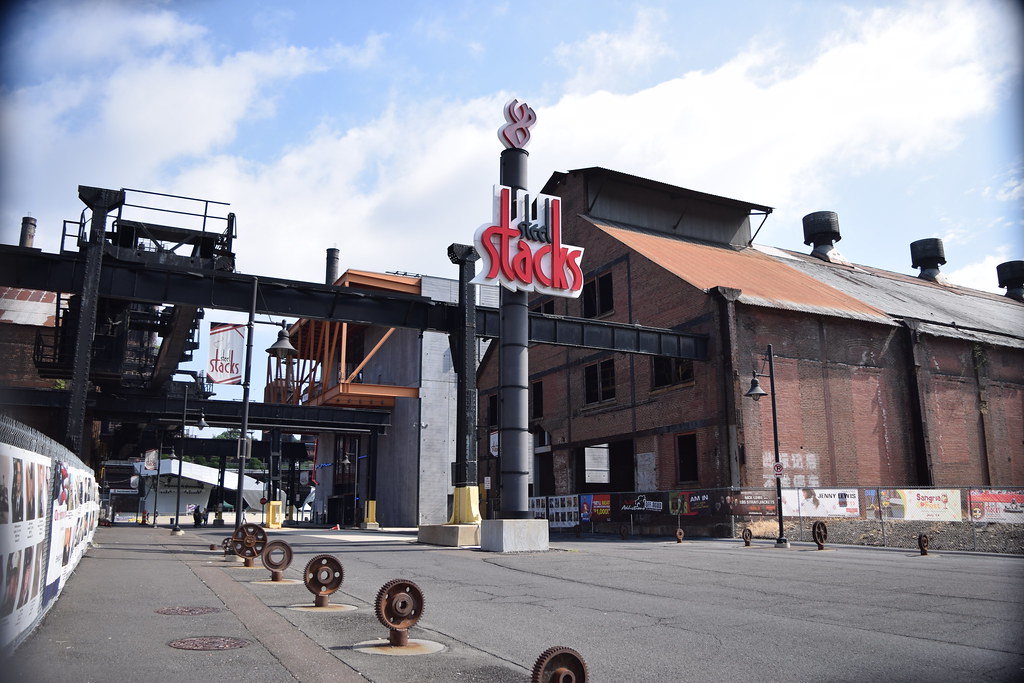 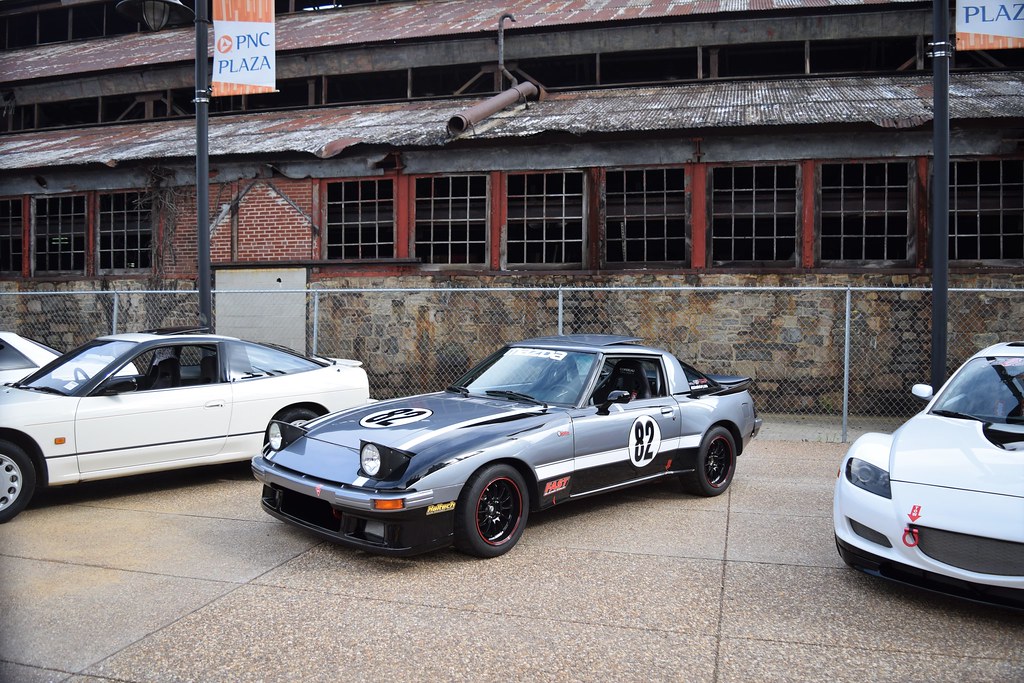  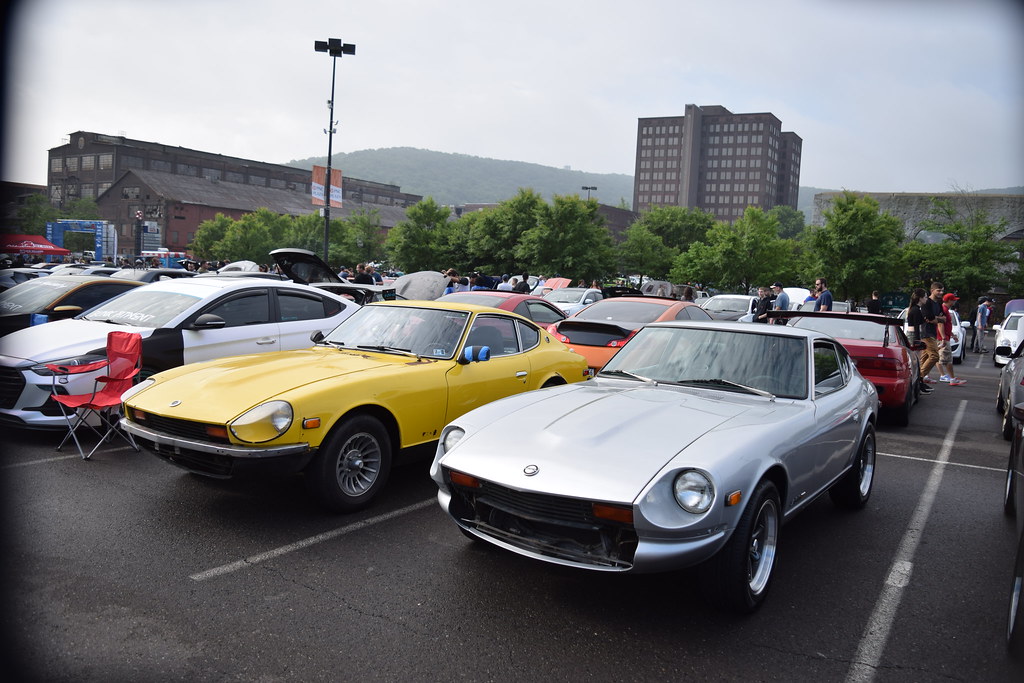  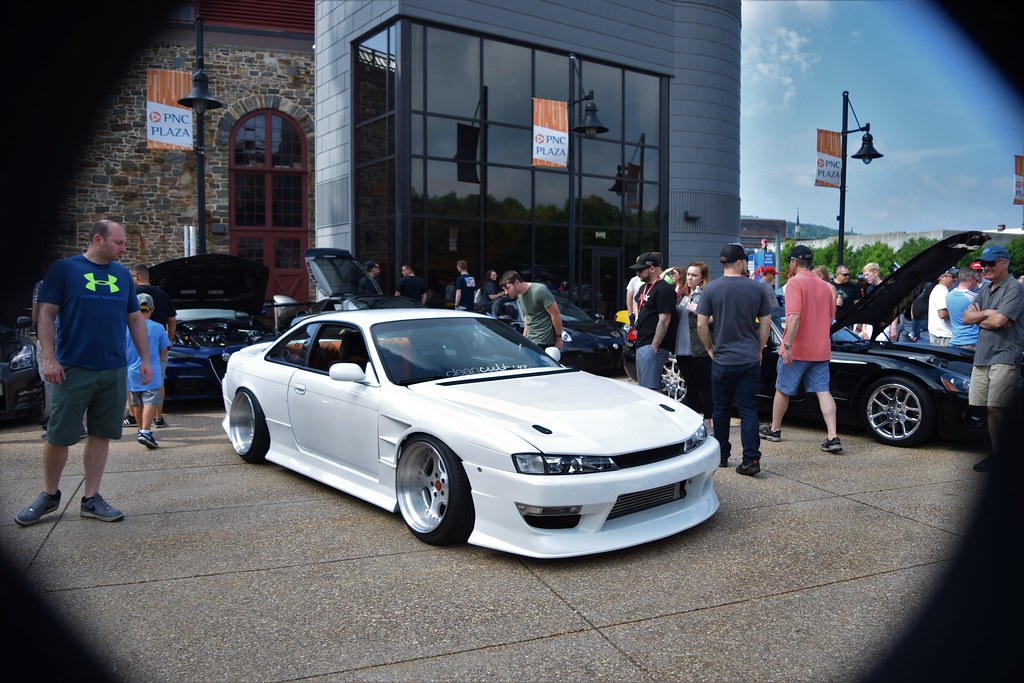 continued into the next post....... |

|

|
|
10-08-2018, 02:31 PM
|
#3 |
|
Zilvia Junkie
Join Date: Feb 2008
Location: Carry Water, Chop Wood
Age: 36
Posts: 507
Trader Rating: (0)
Feedback Score: 0 reviews
|
So, i was driving my car, and knew there's really no more events that i was looking forward to the rest of the year. So i decided to park the car and start the last tear down.
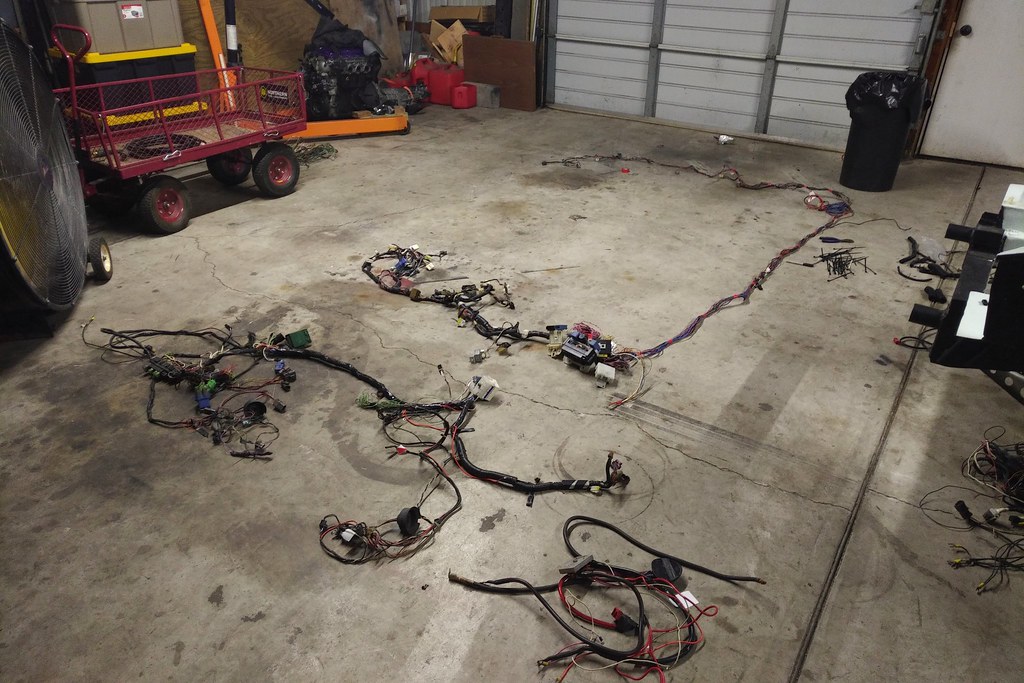
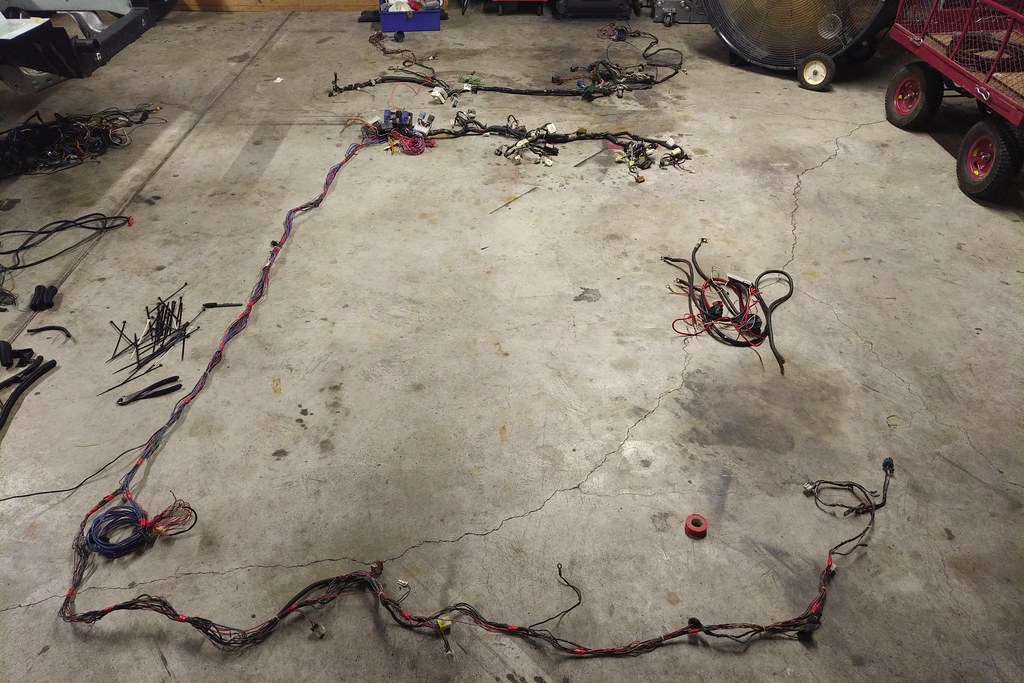
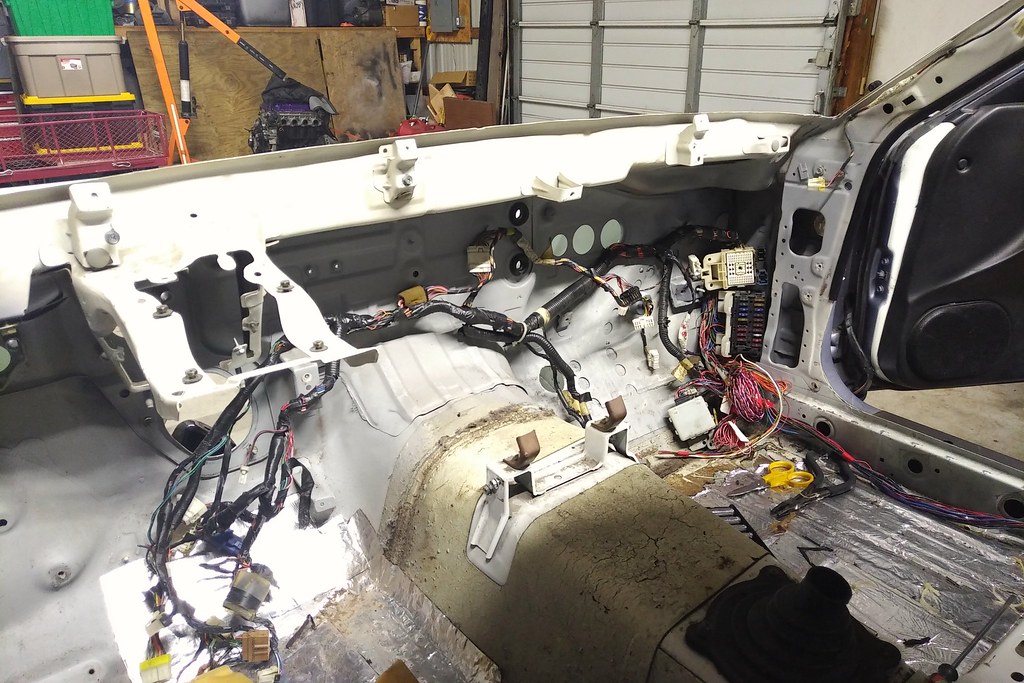
Got out the Super UP! and some rollers. 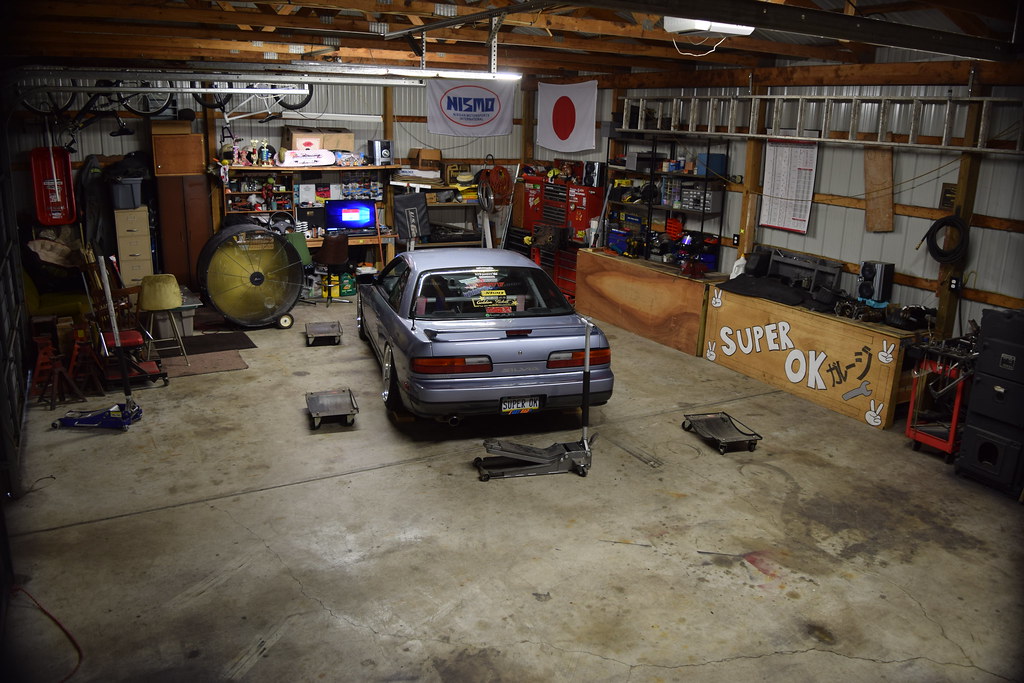 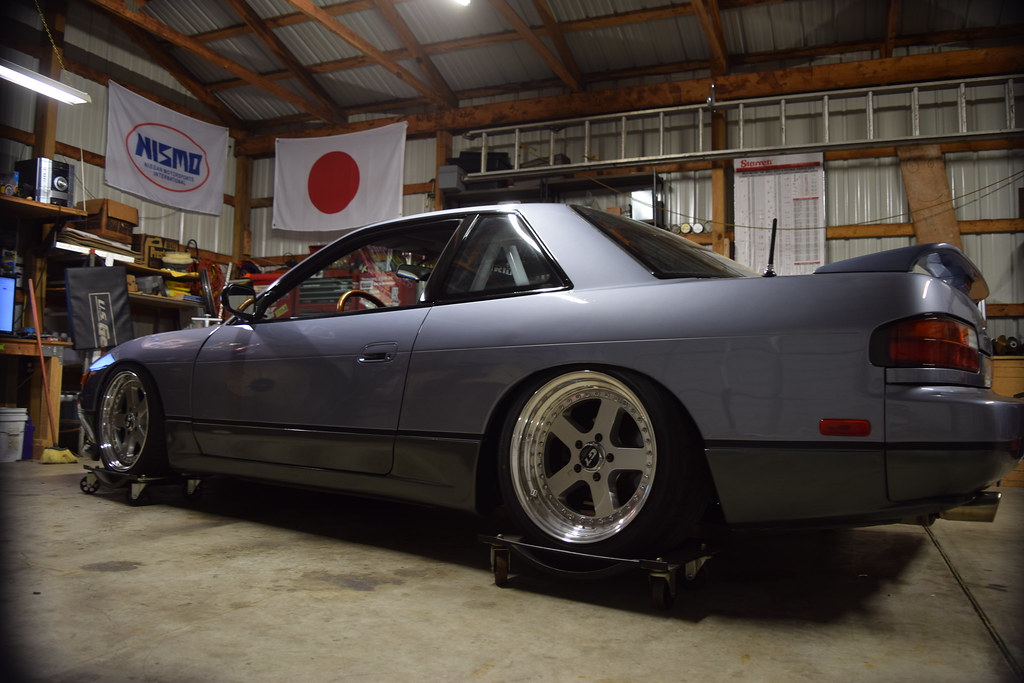 decided to swing the car around. 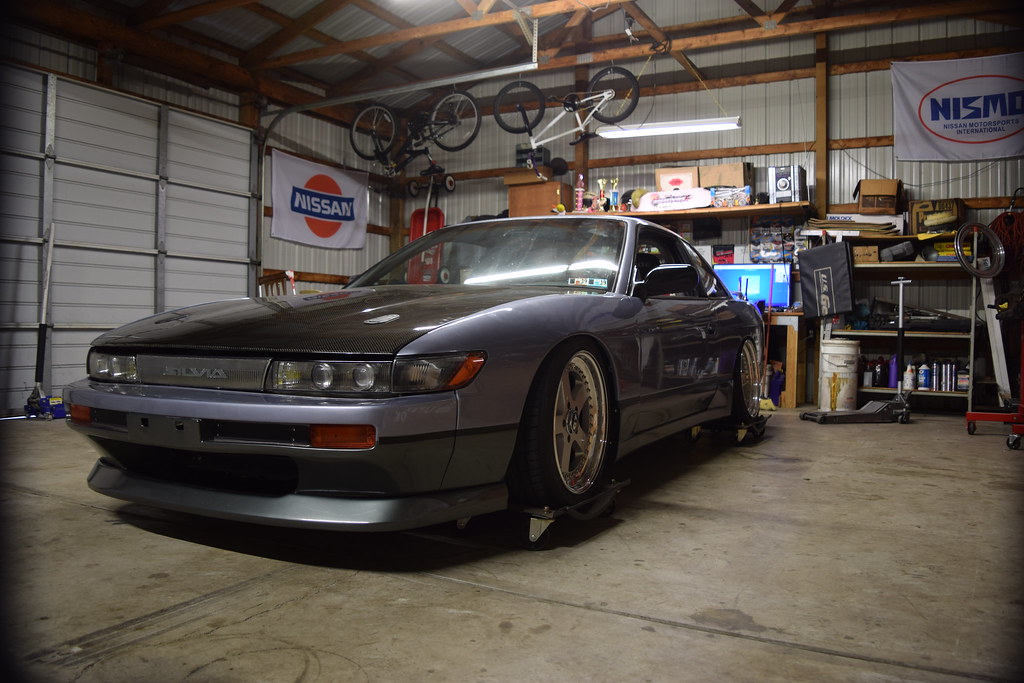 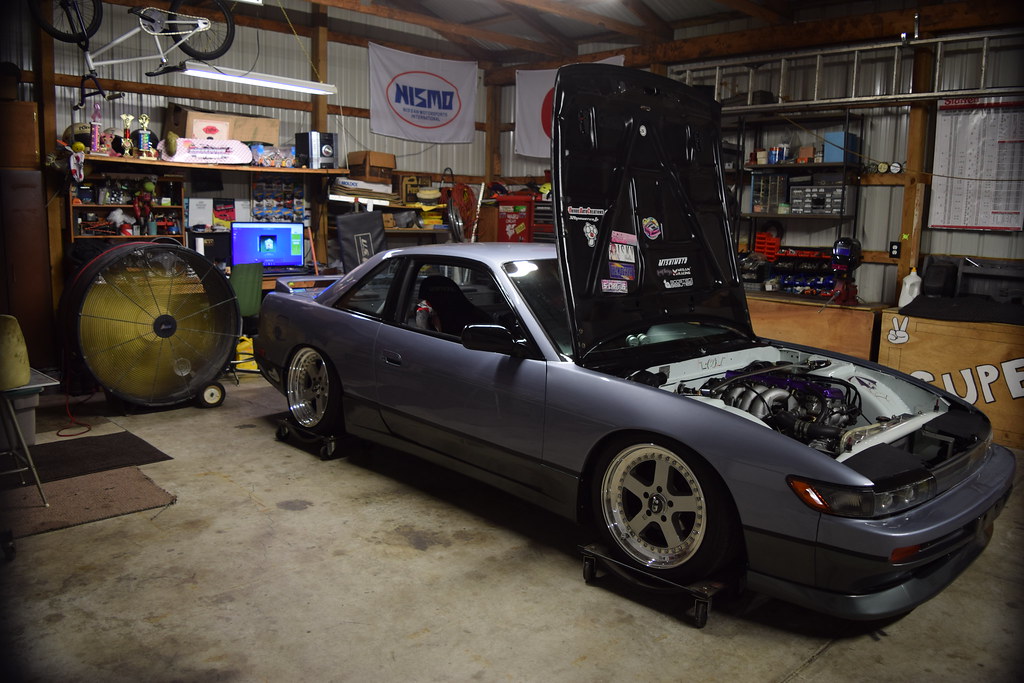 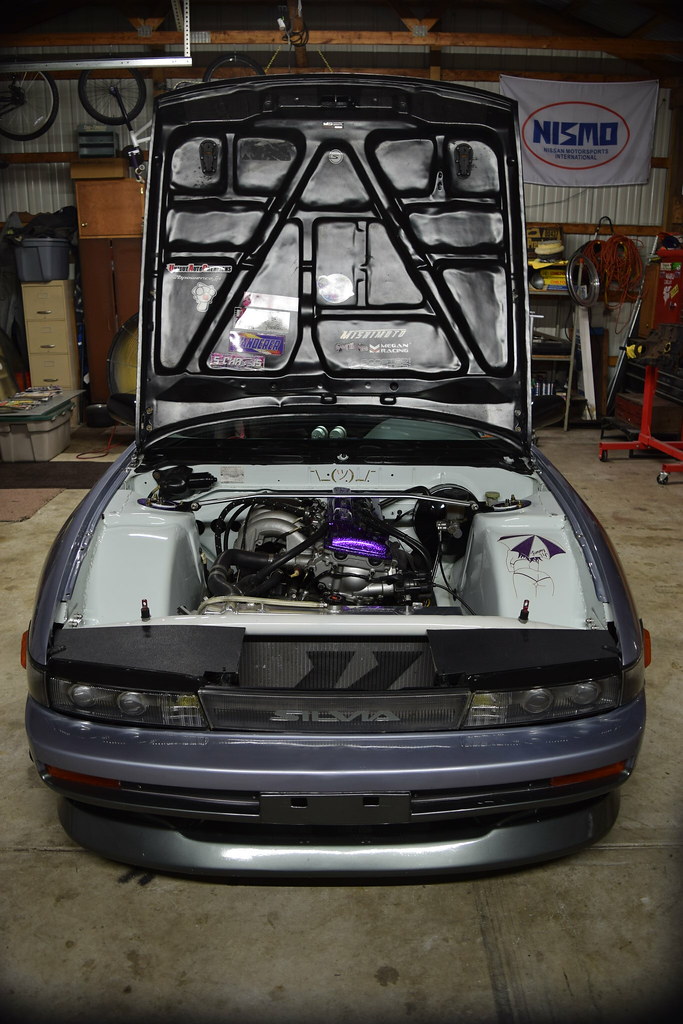 put on jack stands and started by taking wheels off... 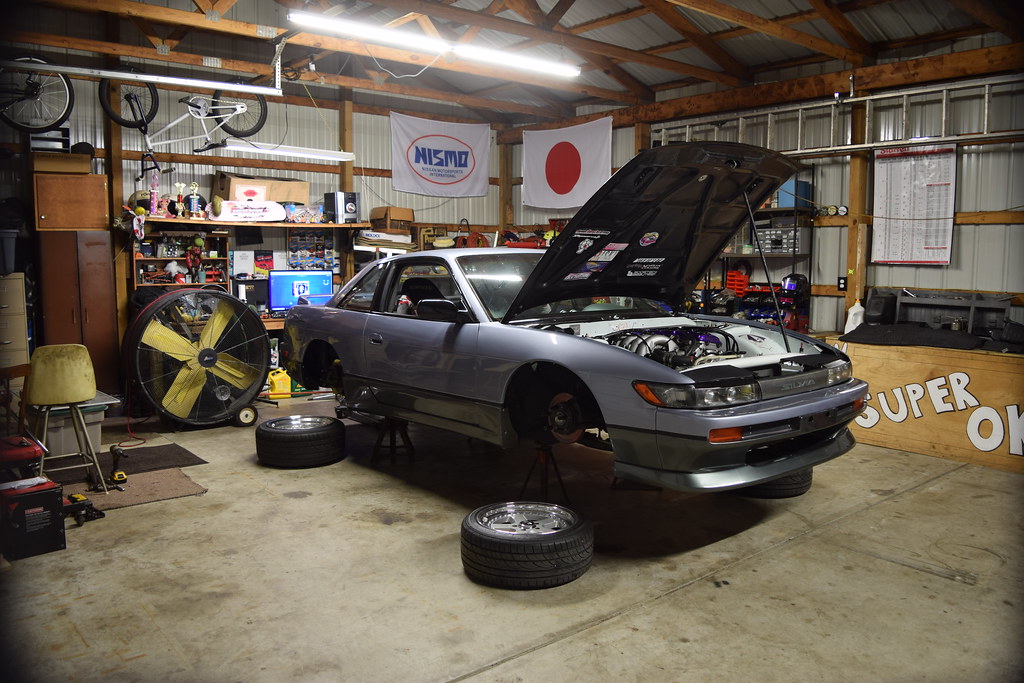 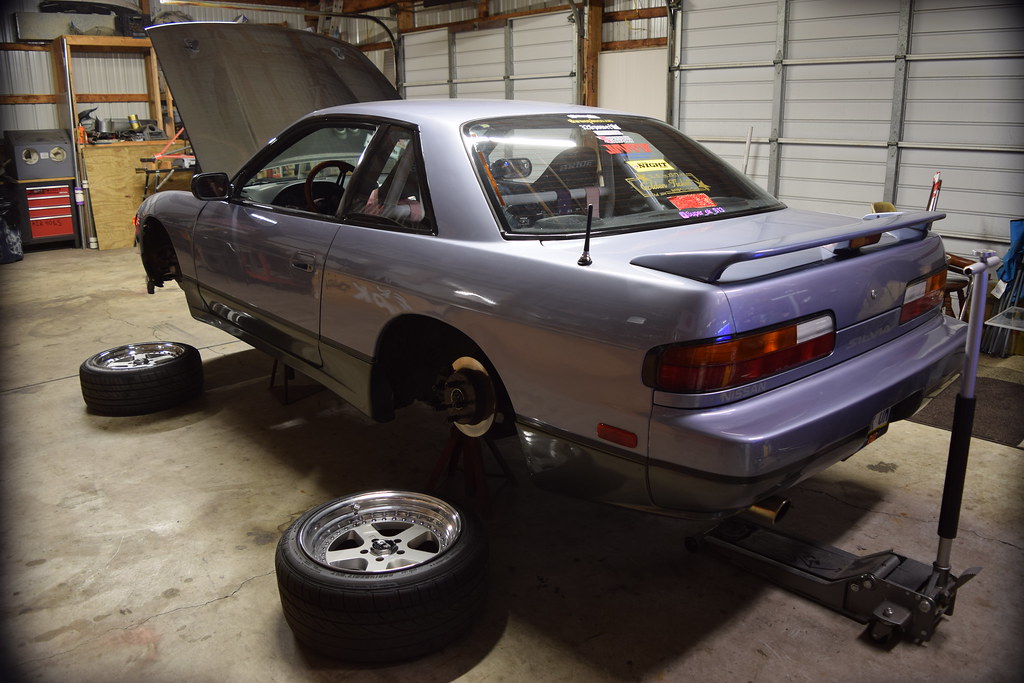 After cars and coffee i was was fixing my moms car and had to go get some parts, going through a small town and i ended up banging my oil pan and subframe/swaybar on a GINORMOUS pot hole. (wasnt paying attention) when i got home i noticed the headlight was kinda droopy. Turns out, the weld broke on the fender where the headlight bolts to it and i decided to zip tie it so i could still use the car a couple more times and run the gas down. Oil pan/cross member. 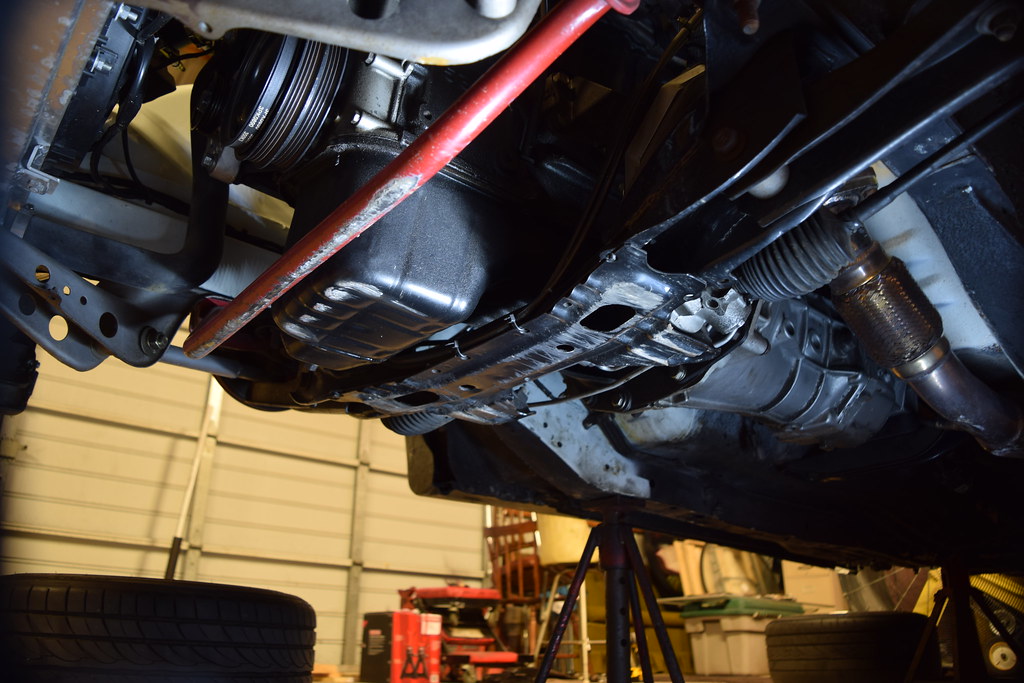 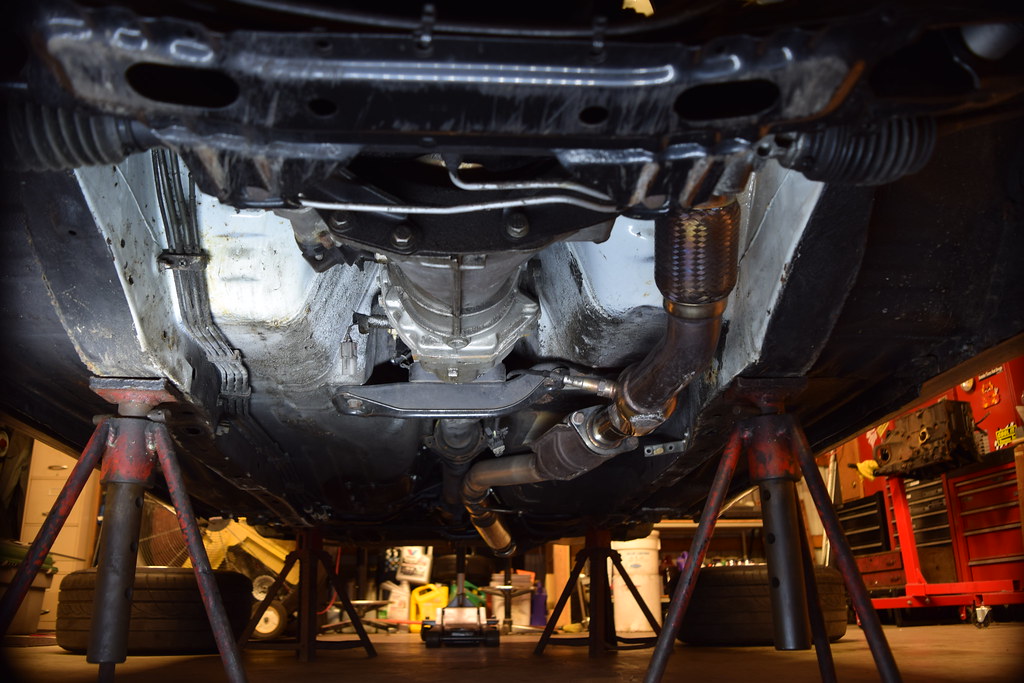 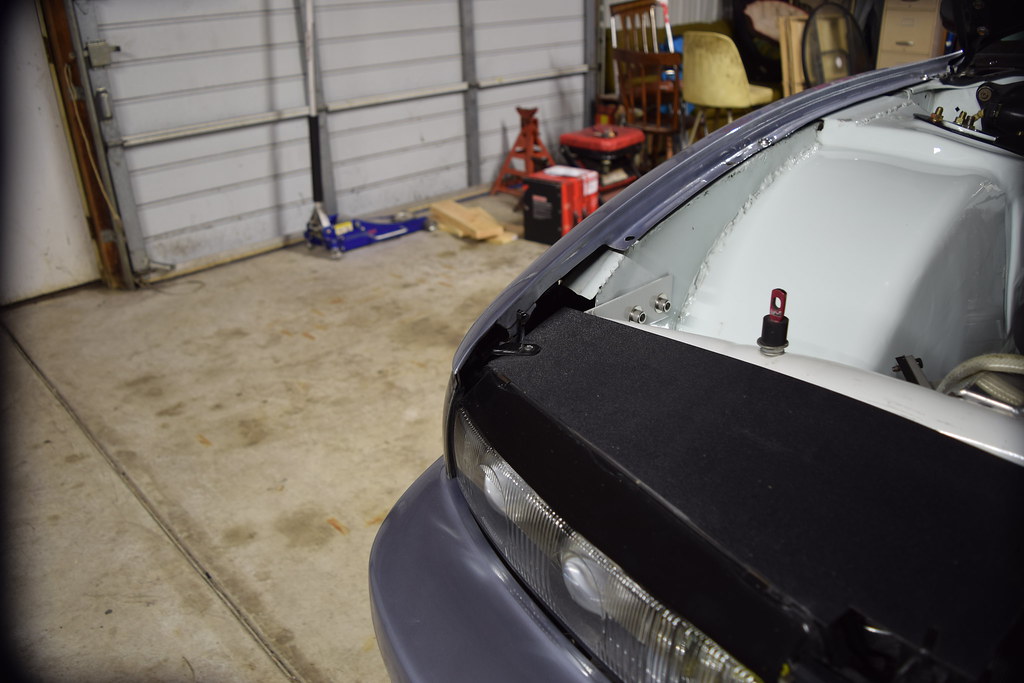 Close up. This was the deciding factor that i wanted to just take the car apart for the last time and fix stuff that bothered me to show it off. 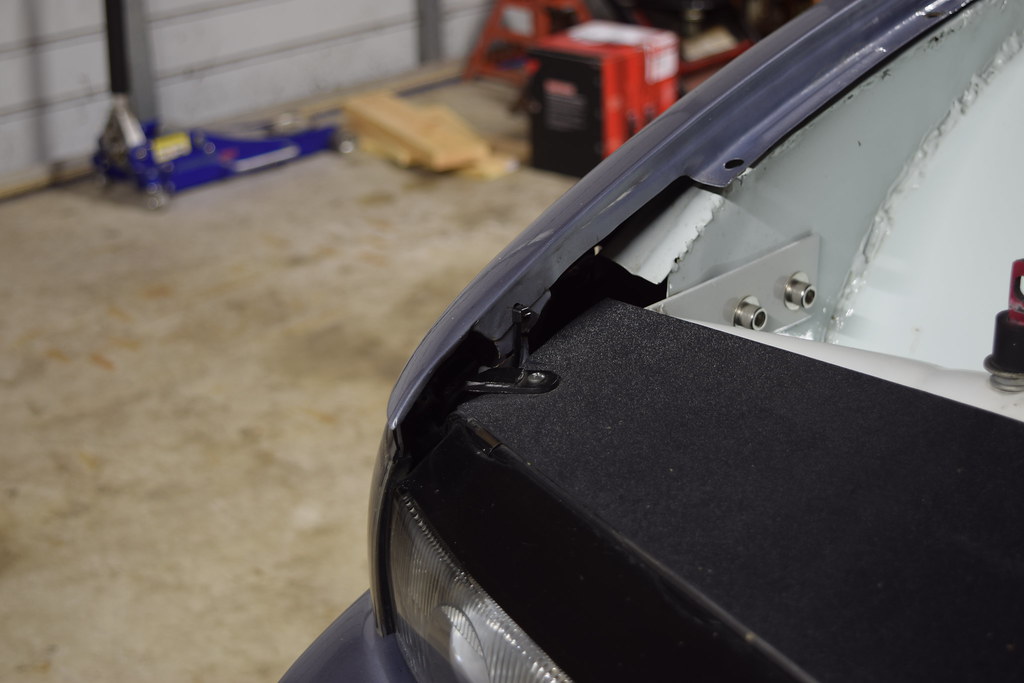 like the seam sealer 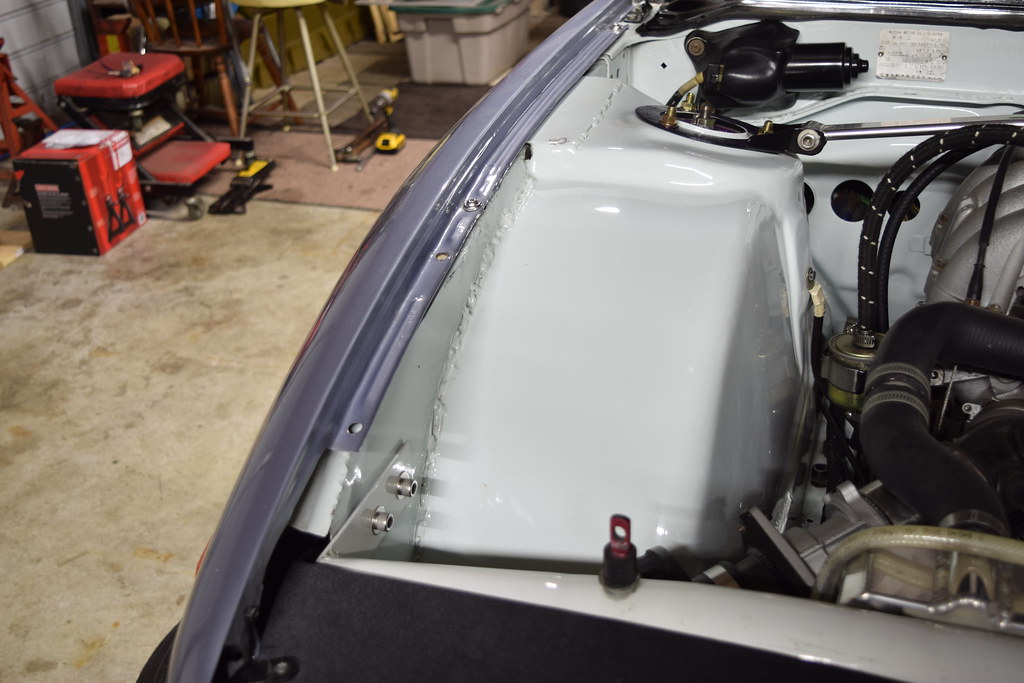 and the brake booster/master leaking. 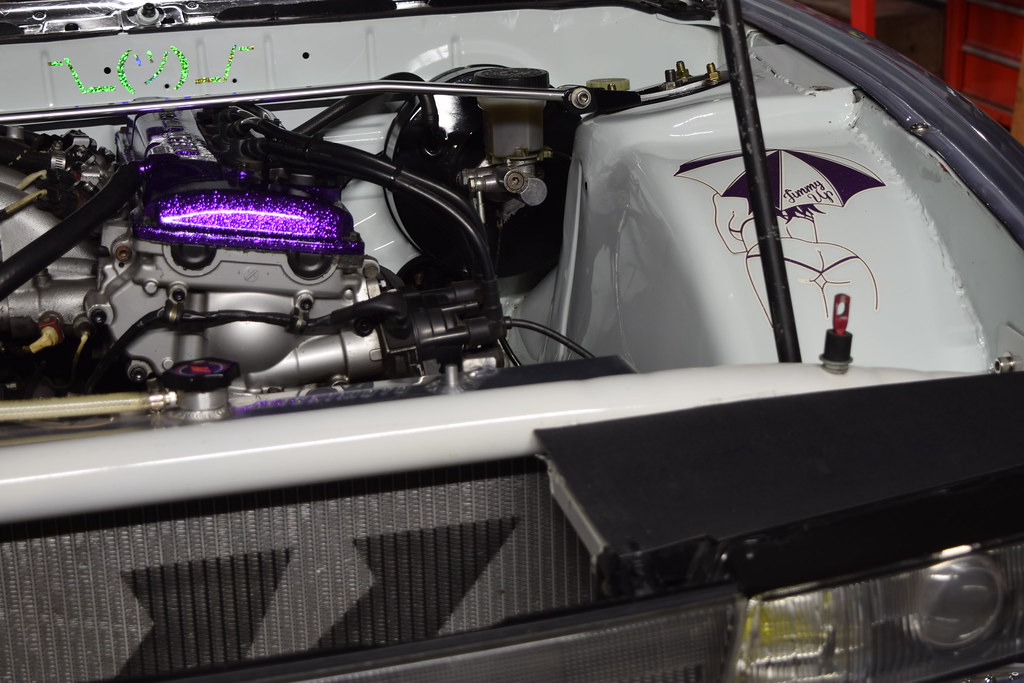 going to be hard to scrape this one off, but i will when i re-spray the engine bay.  Going to scrape the IG handle off. as times change so do I.  Started disassembly of the front end/engine bay. 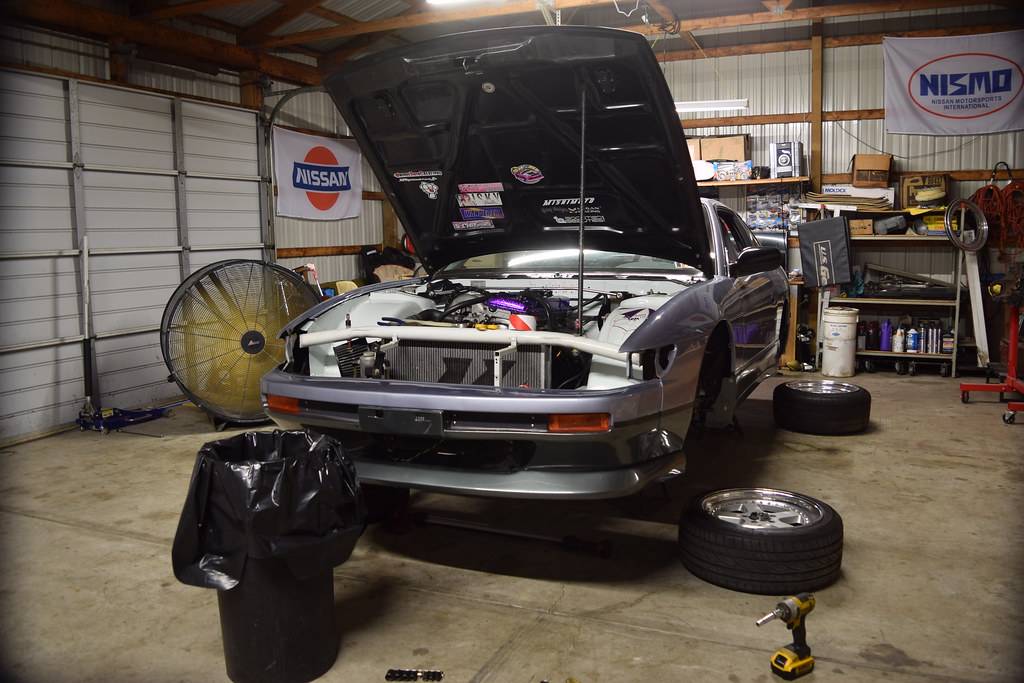  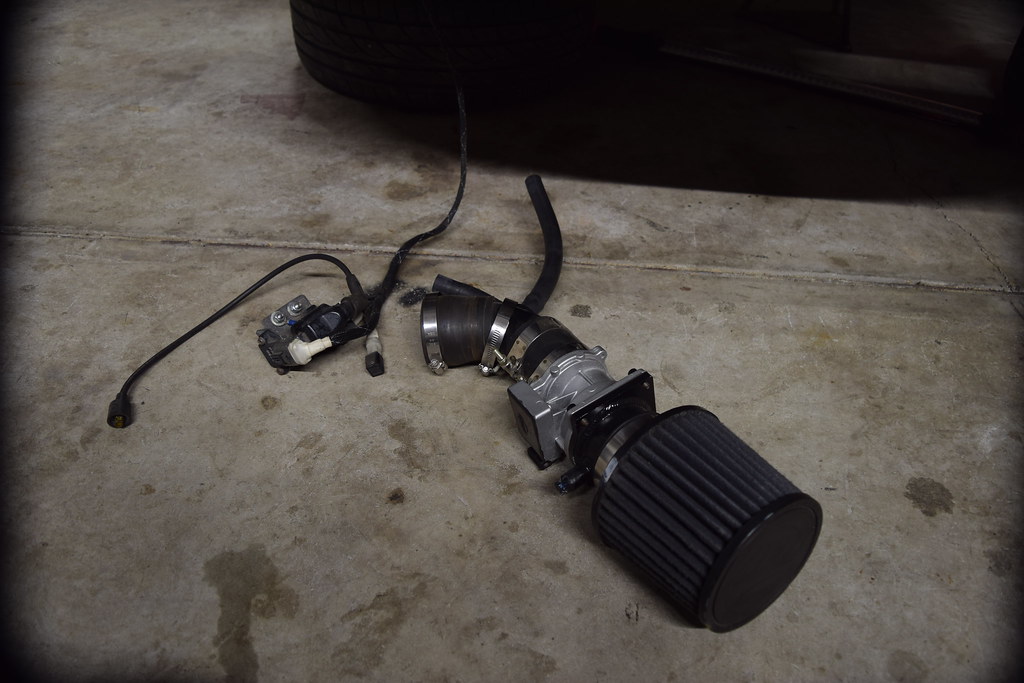 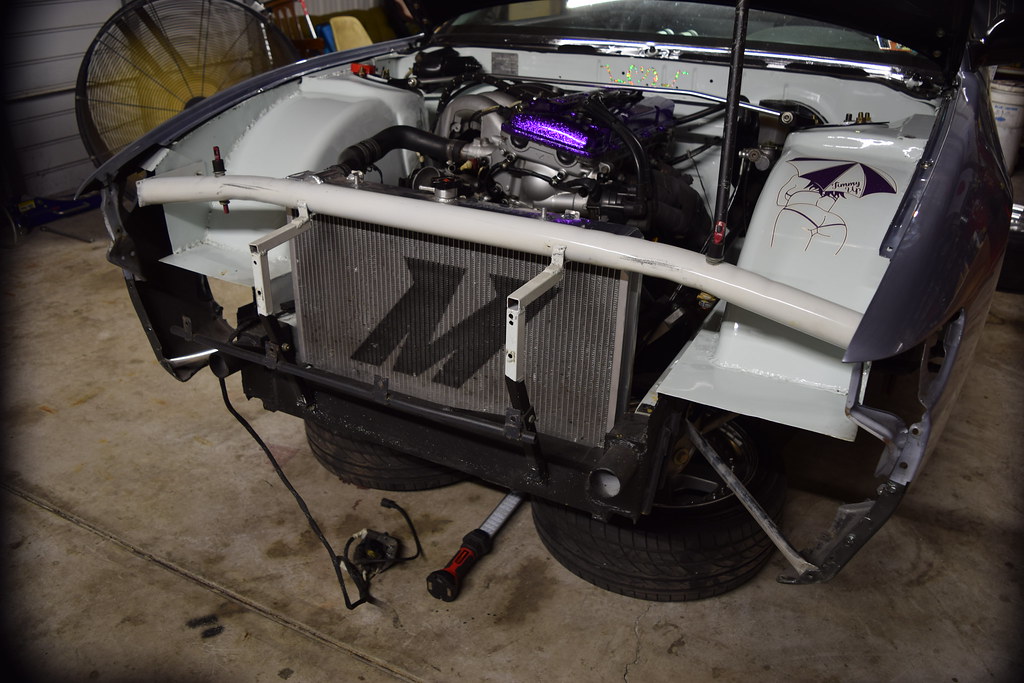 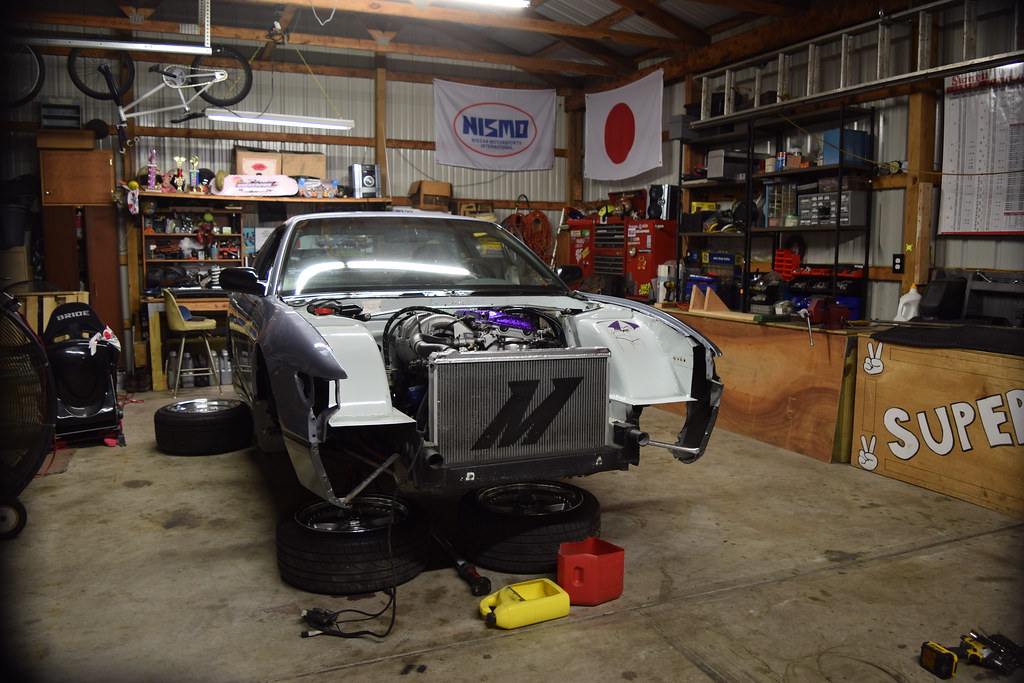 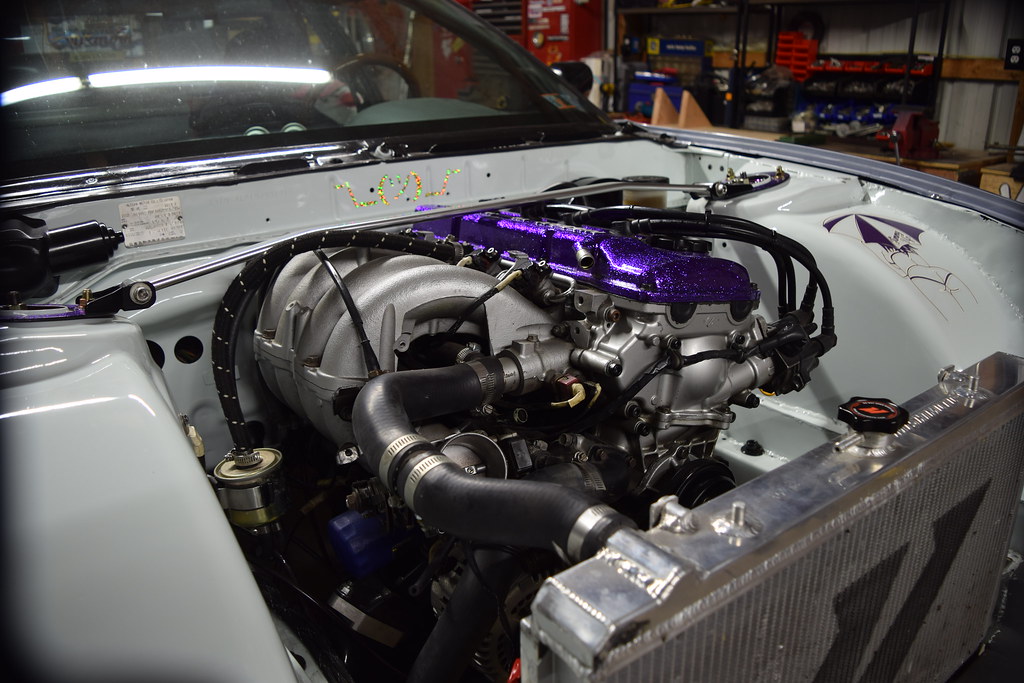 MEH, point of no return?   going to re-wire a thermostatic fan controller on so *snip* and rad/fans off.   Off with the fenders, but first the side-skirts must go. 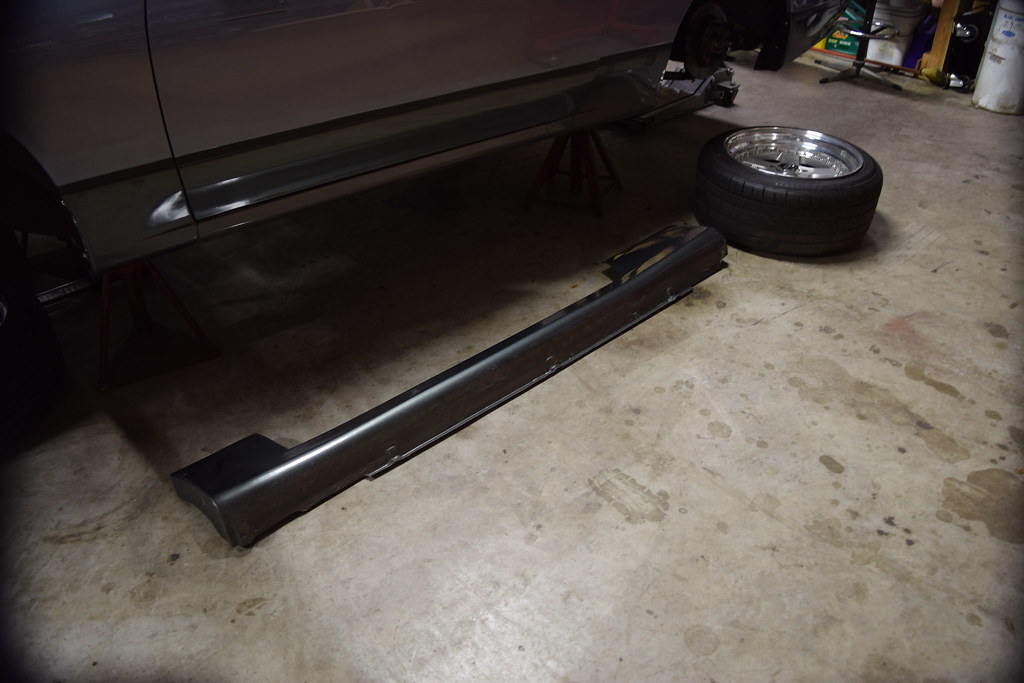 on the floor organized. 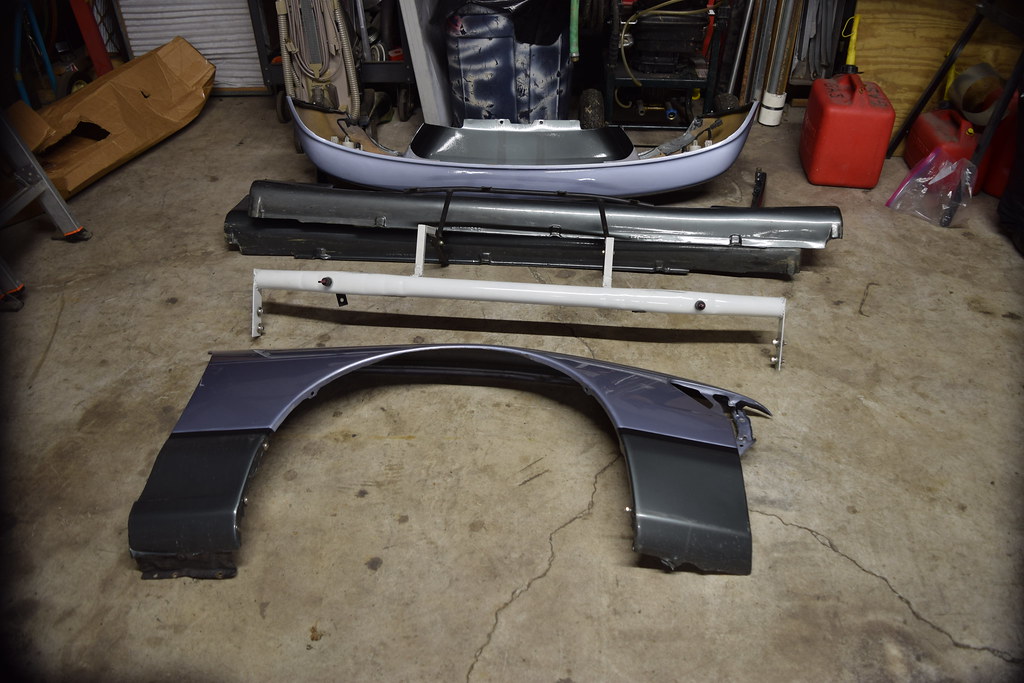 time for the suspension to dissappear. 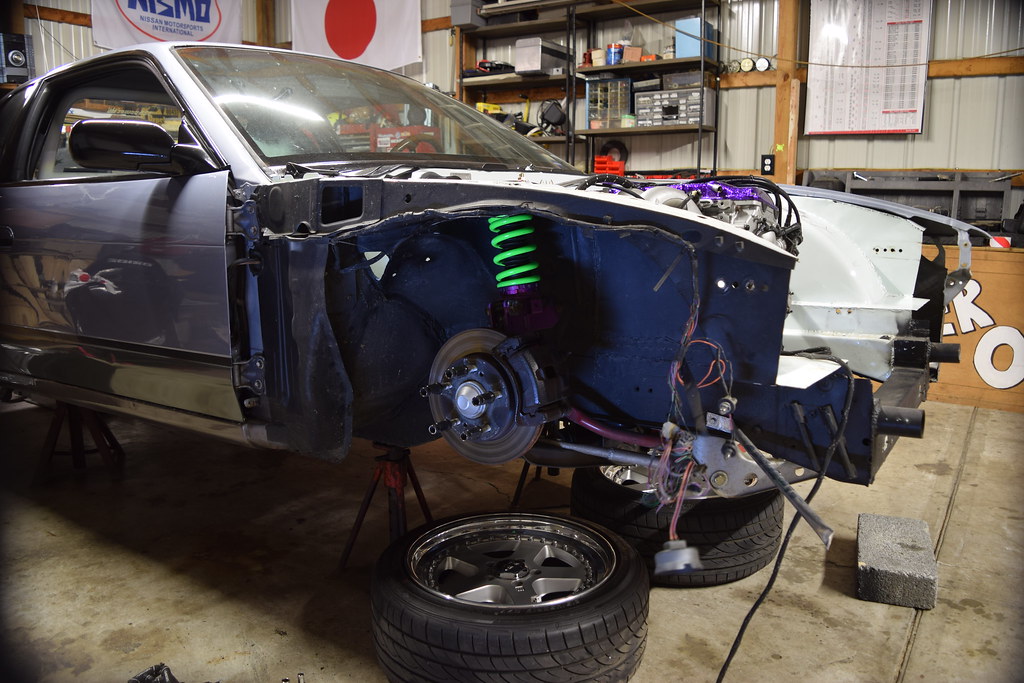 Almost!! 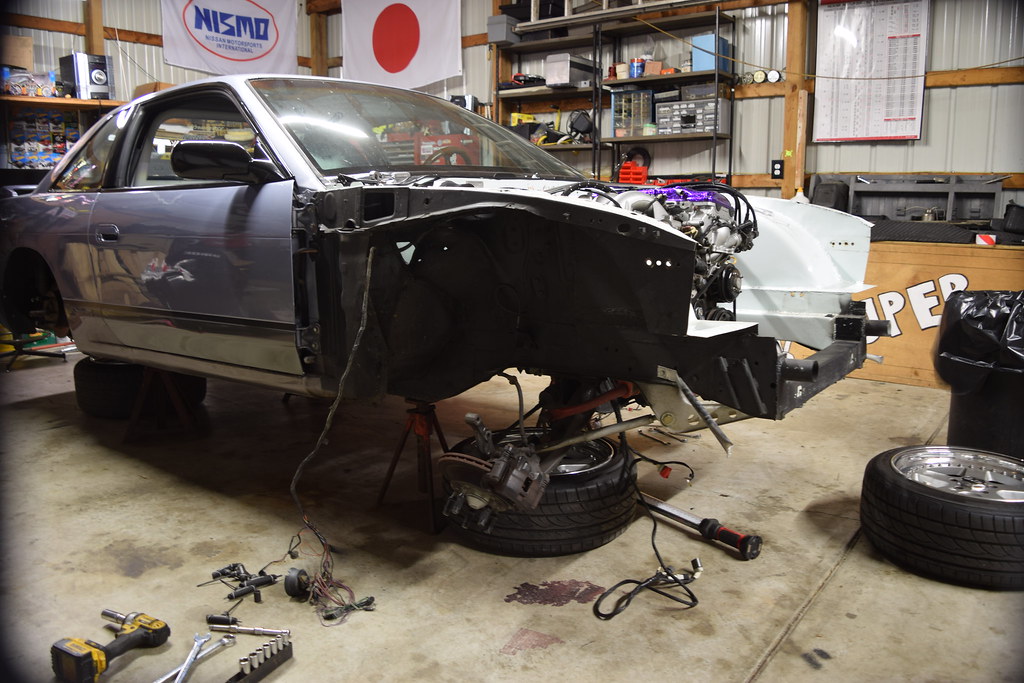 OFF. 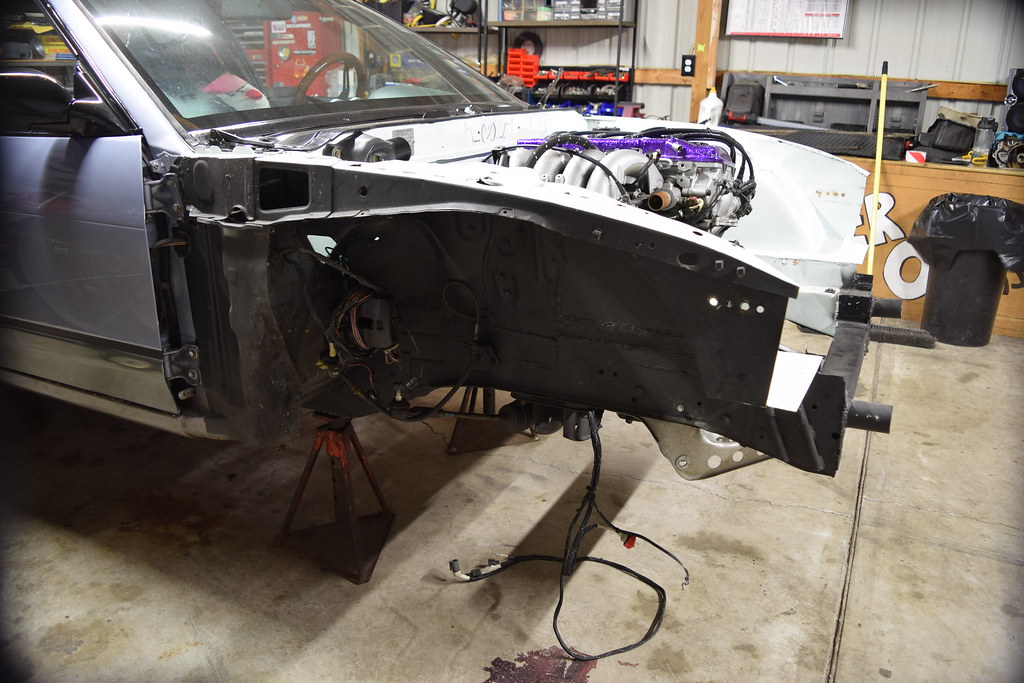 Next was some of the wiring, chassis peeled back 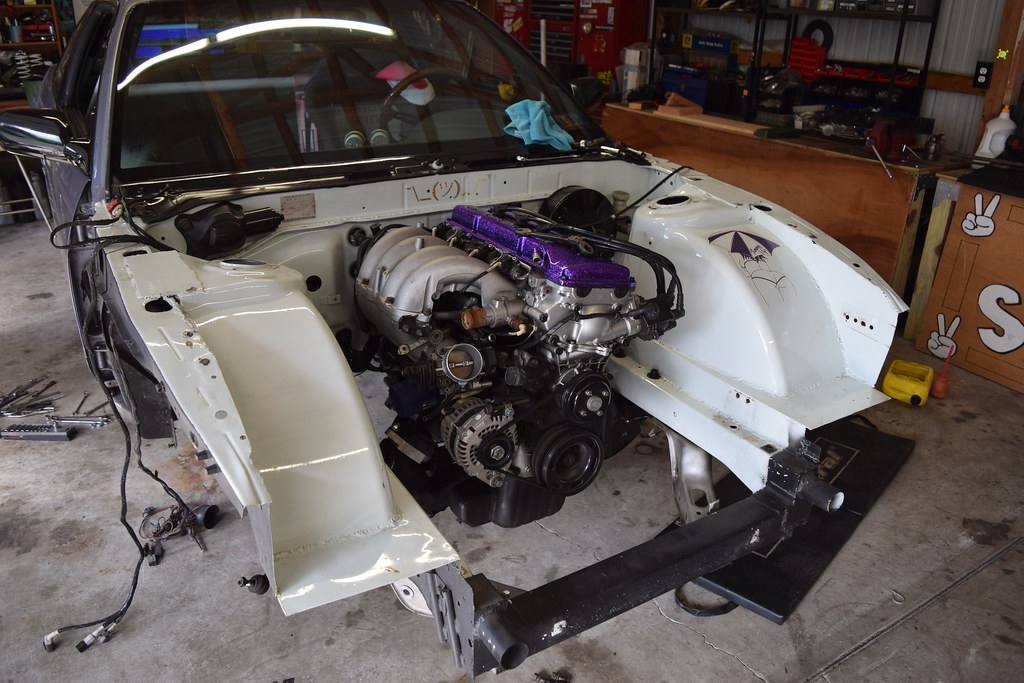 Brake and clutch master/lines  Heater hoses. 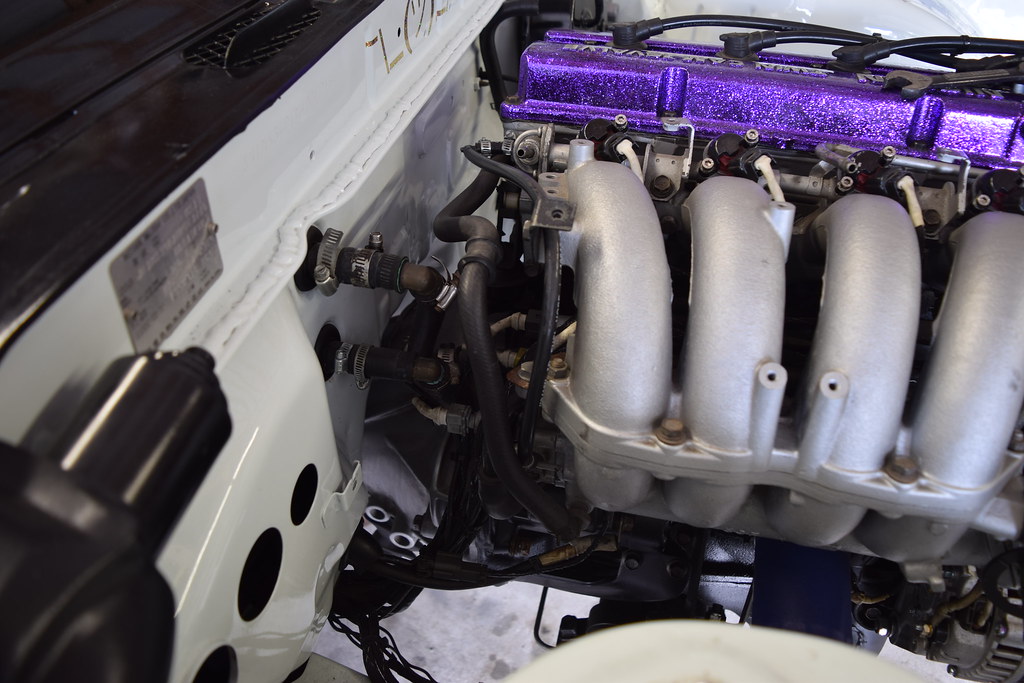 finished stripping the engine of wires. hooking up the engine hoist. 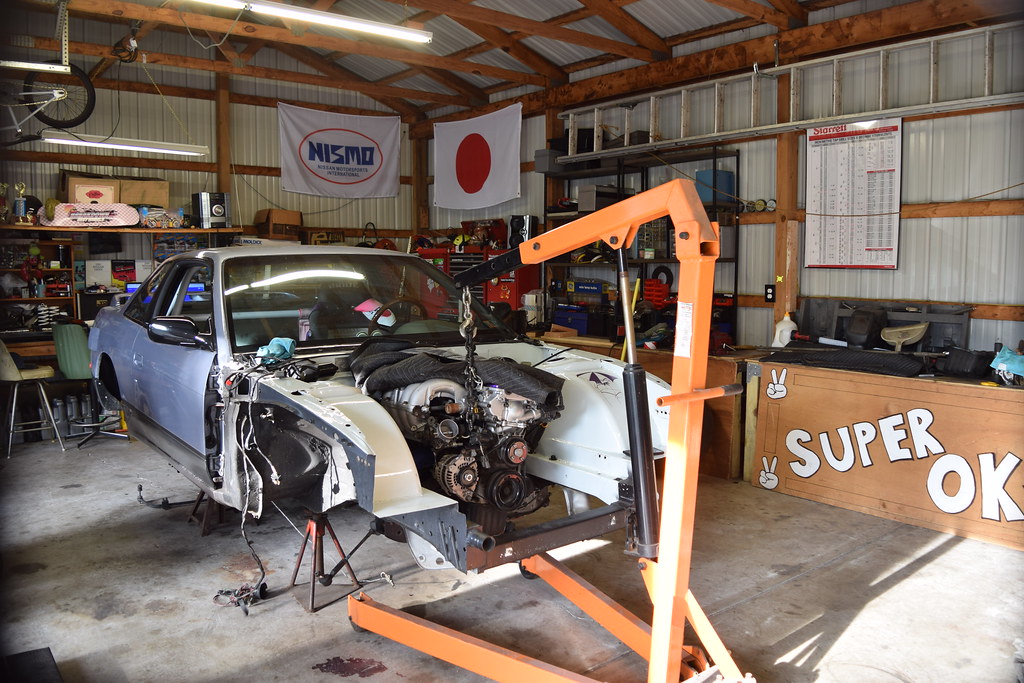 Friend Logan, (the one who took the pictures at the dogwood tree and in front of the yellow flowers) came by to help pull the engine/trans.  Annnndd it's out!! 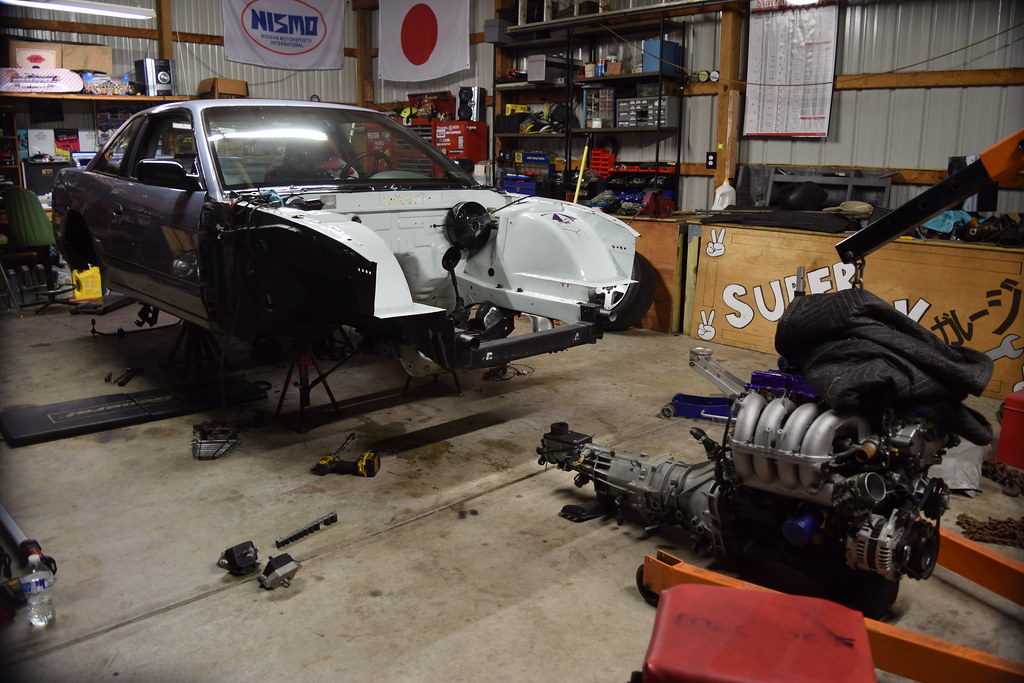 NOW WHAT!? ¯\_(ツ)_/¯ 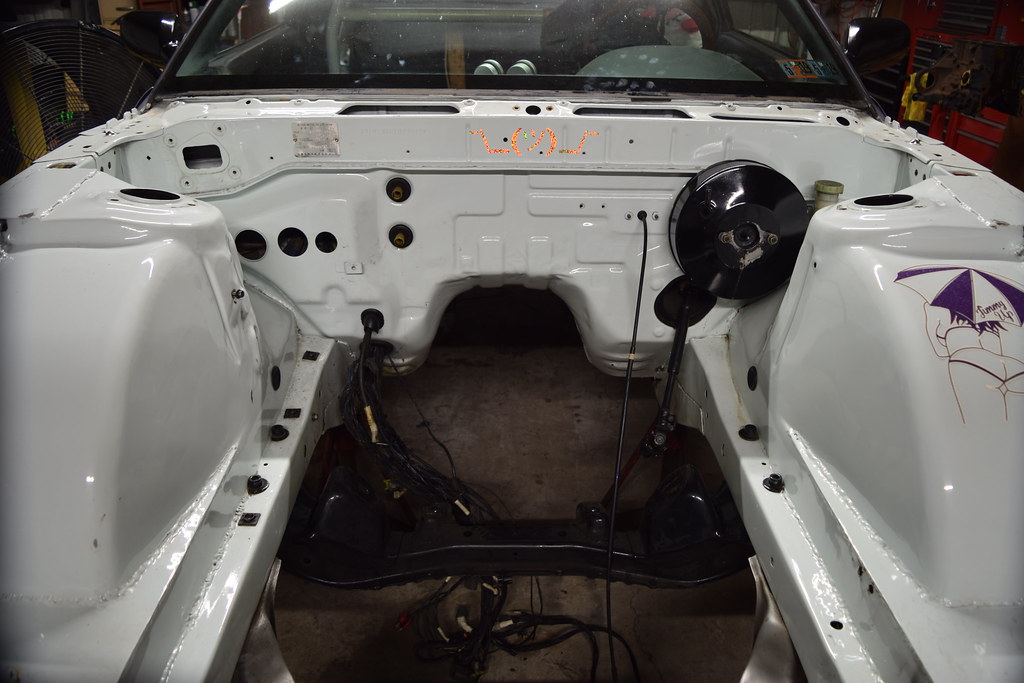 Interior is next..... 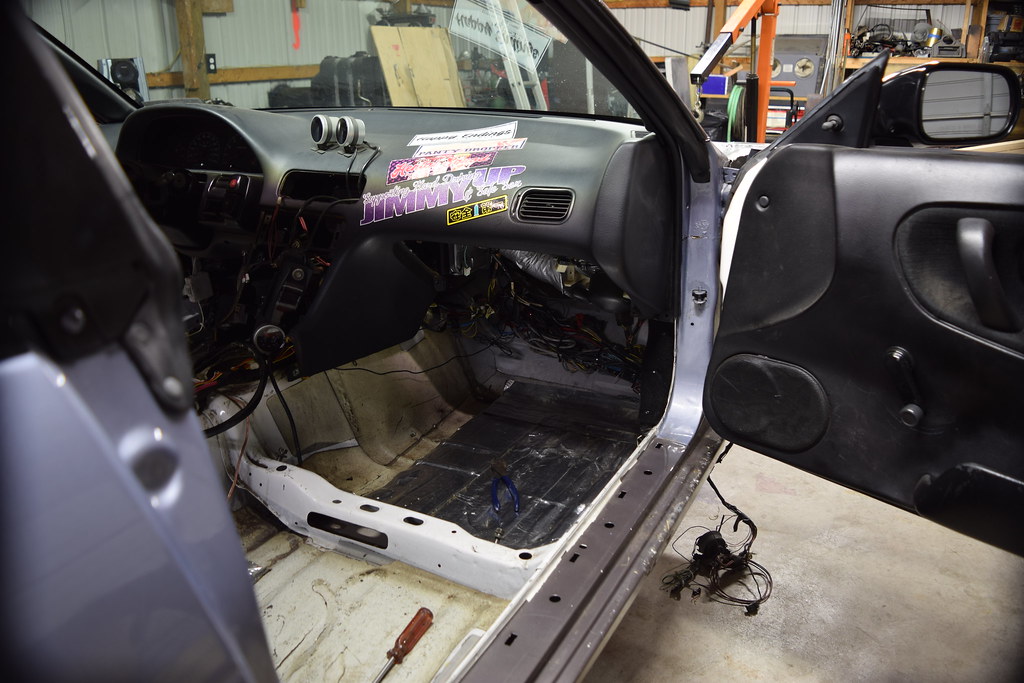  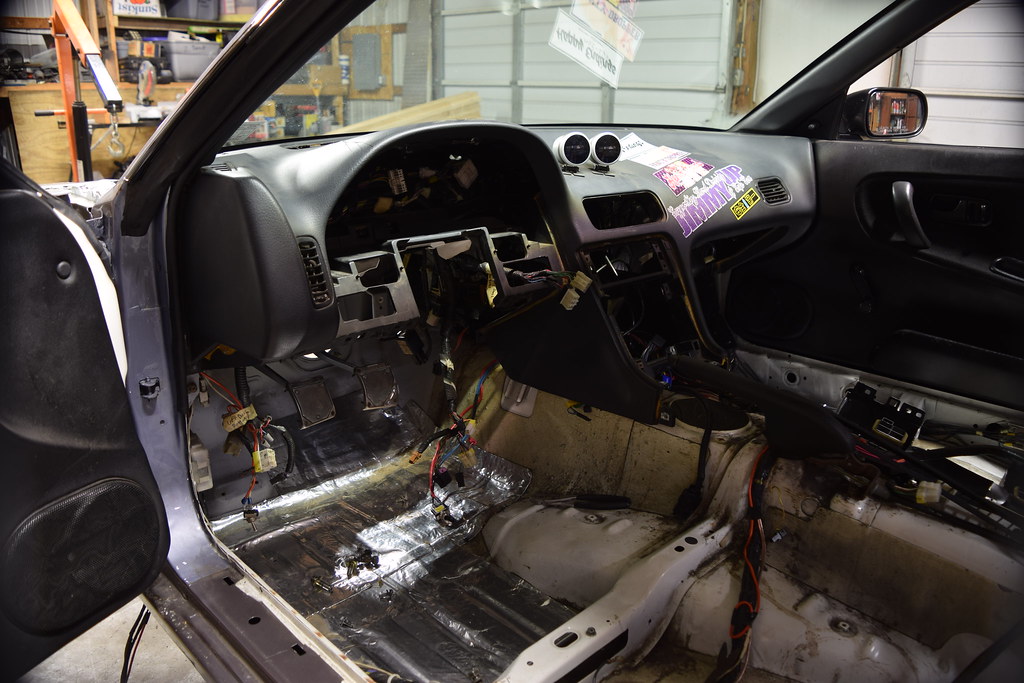 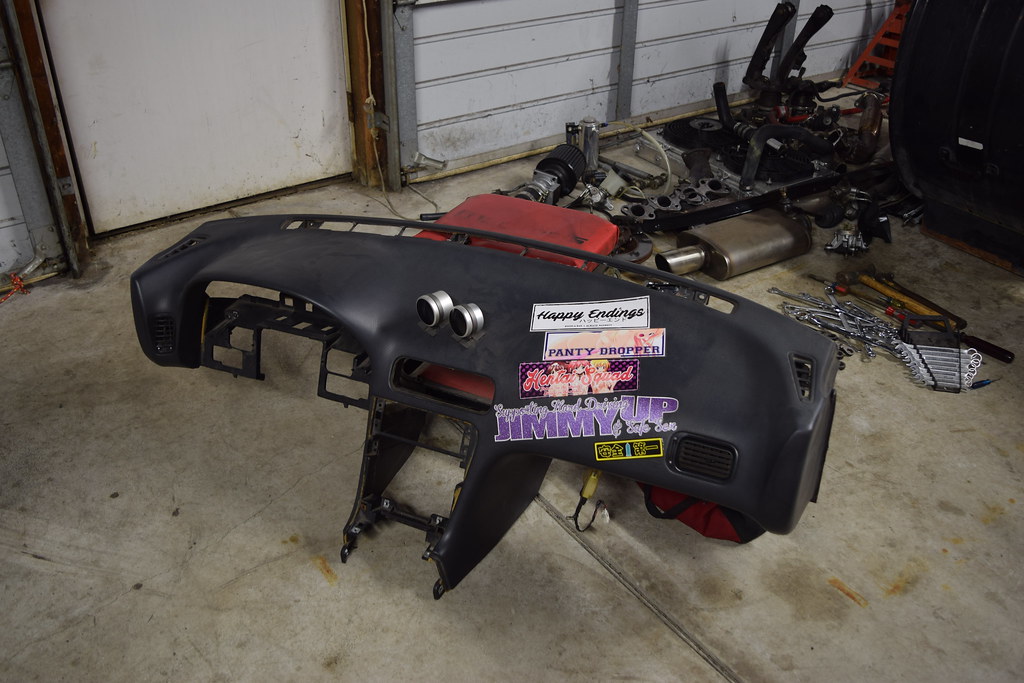 Dash out, next is dash bar and more wiring.  Rats nest. 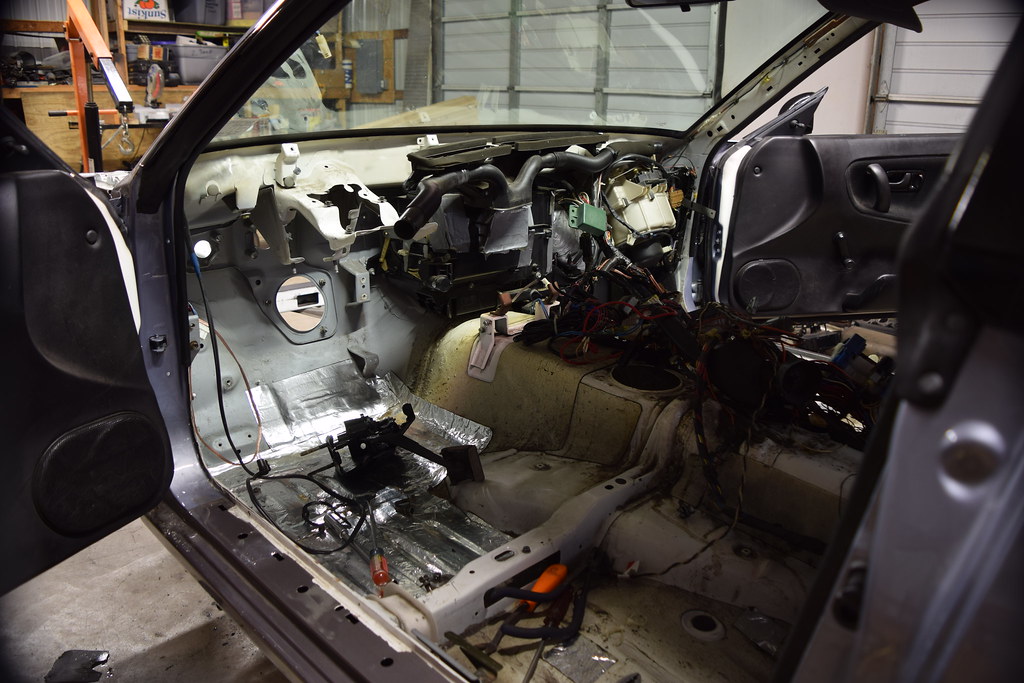 its all on the floor to be un-tangled. 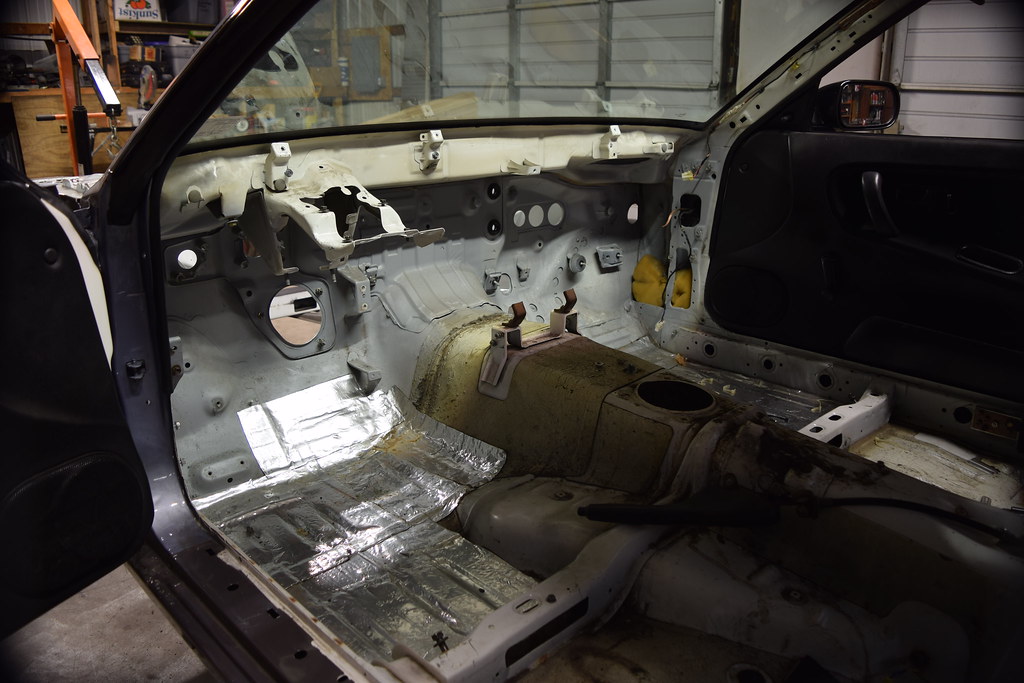 everything is clear. 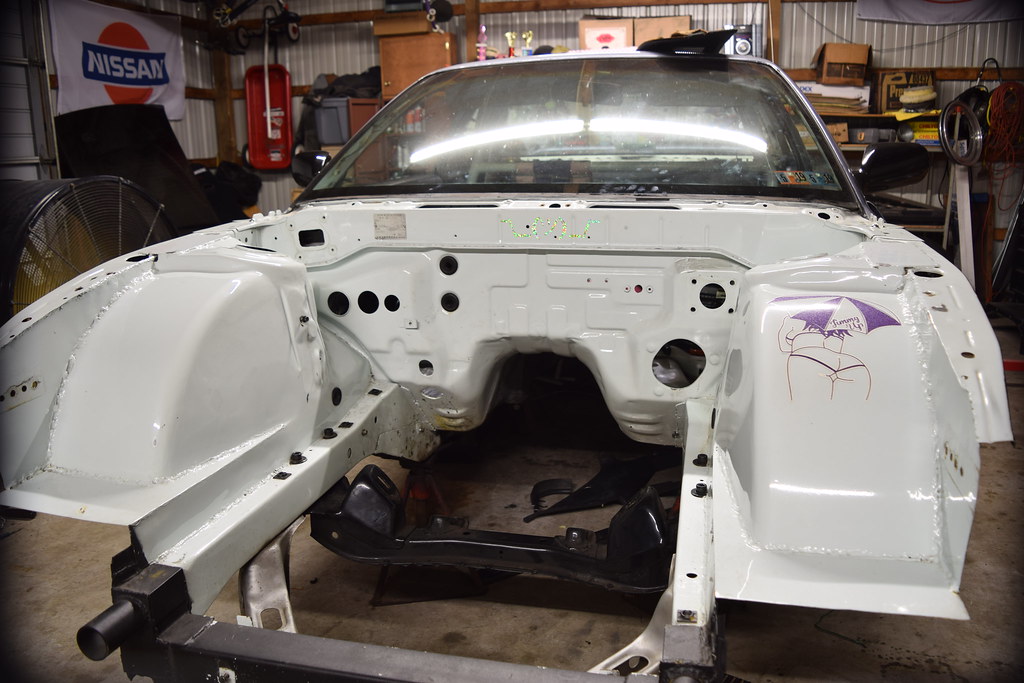 That is the (full) chassis and engine harness all in one pile. 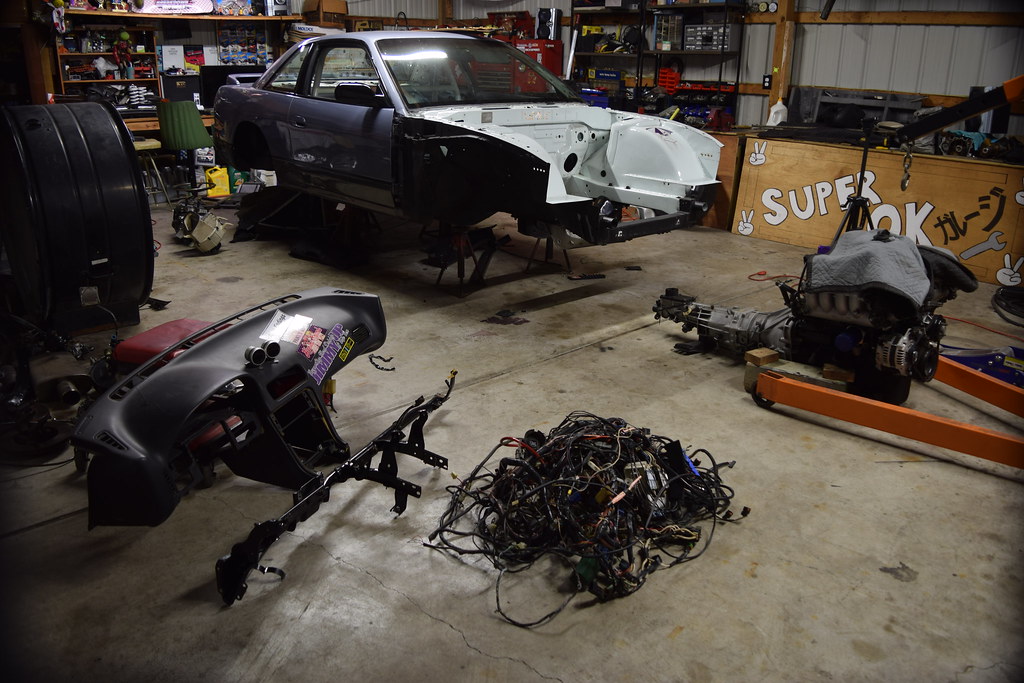 Ended up selling these for cheap  Hung up the areo/fenders to clear the floor a bit. 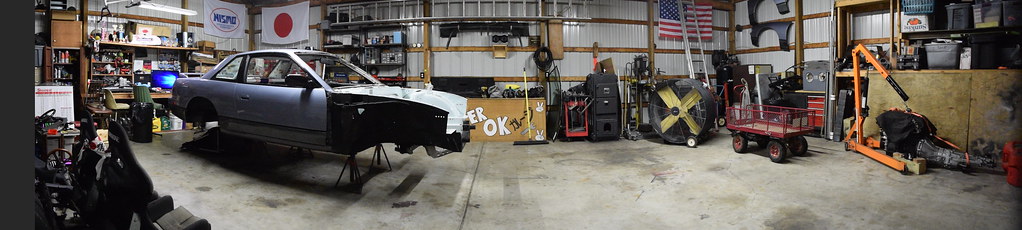 |
|
|
|
|
11-09-2018, 04:41 PM
|
#4 | ||
|
Zilvia Junkie
Join Date: Feb 2008
Location: Carry Water, Chop Wood
Age: 36
Posts: 507
Trader Rating: (0)
Feedback Score: 0 reviews
|
Quote:
I agree, there are many many bad hacks out there for sure! Quote:
 Onto some more progress! Wiped off some dust and marked spot welds. 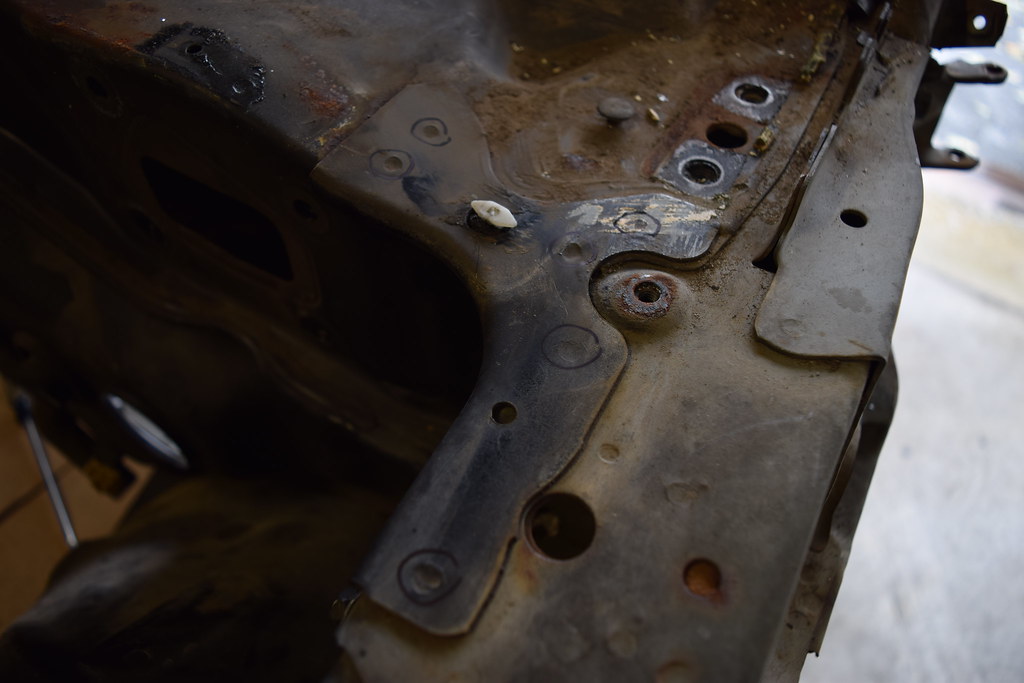 drill them out! 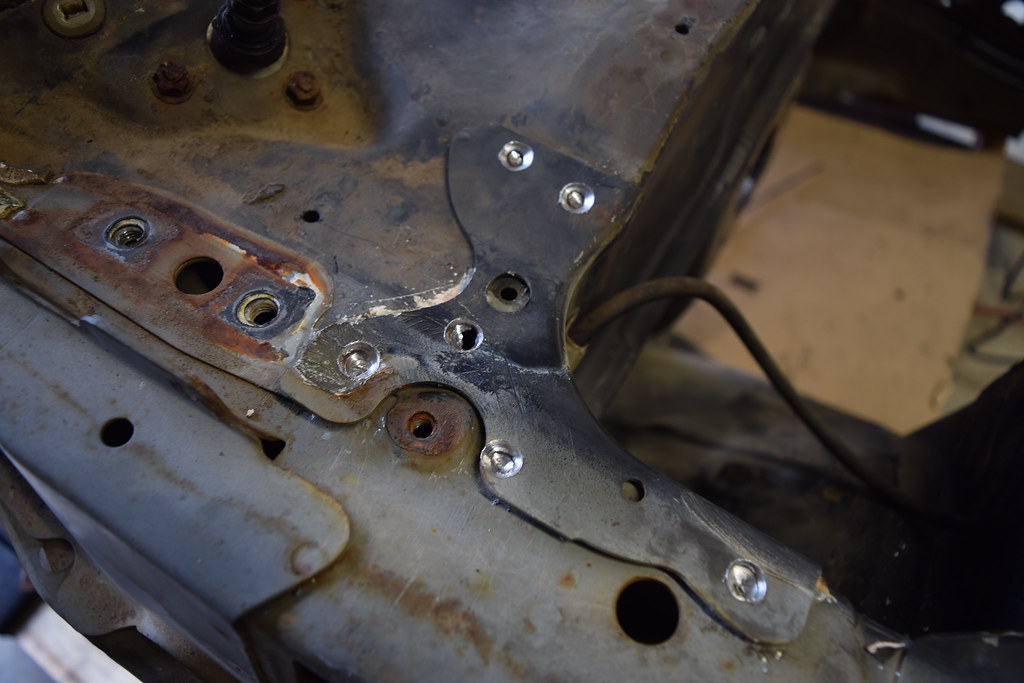 save that for later! 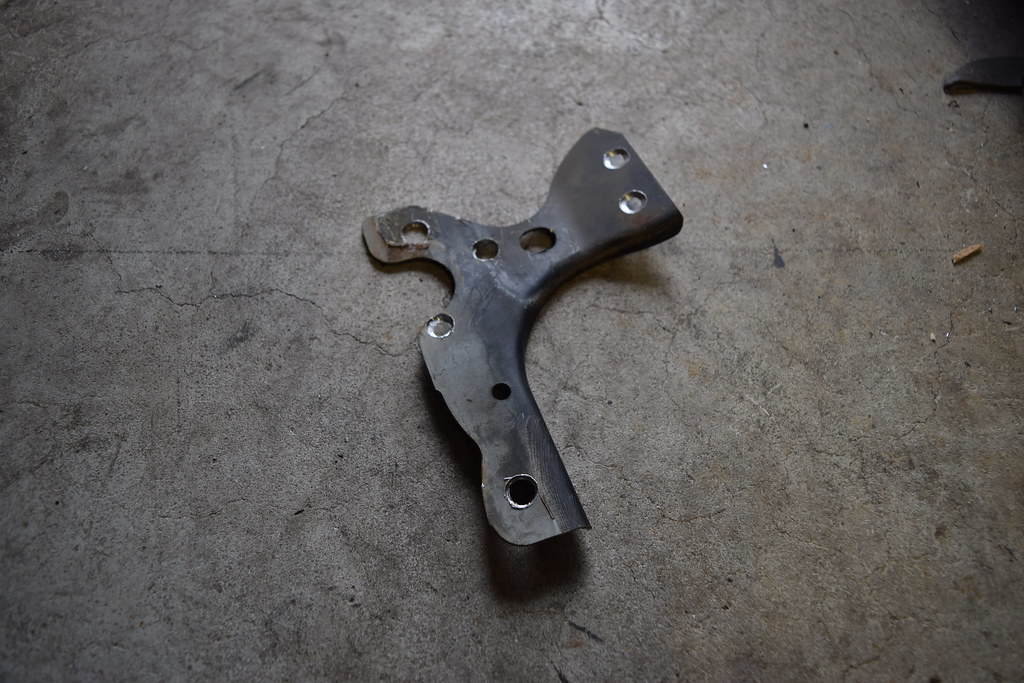 under the windshield sealant. 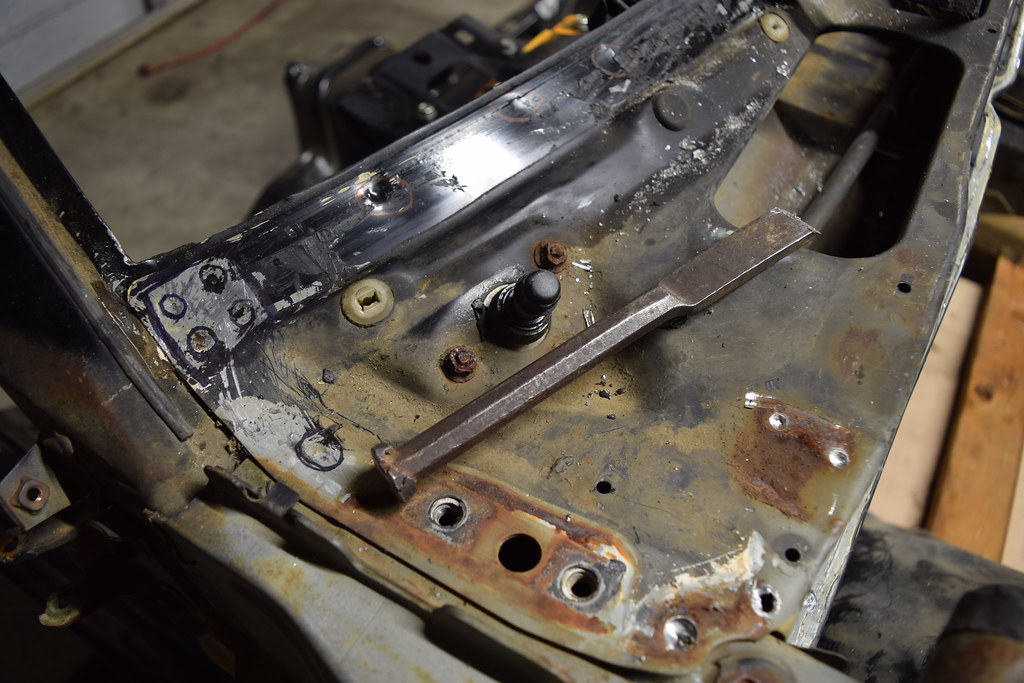 marked the seam, drilled (made a pilot hole/mark) with a smaller bit first. 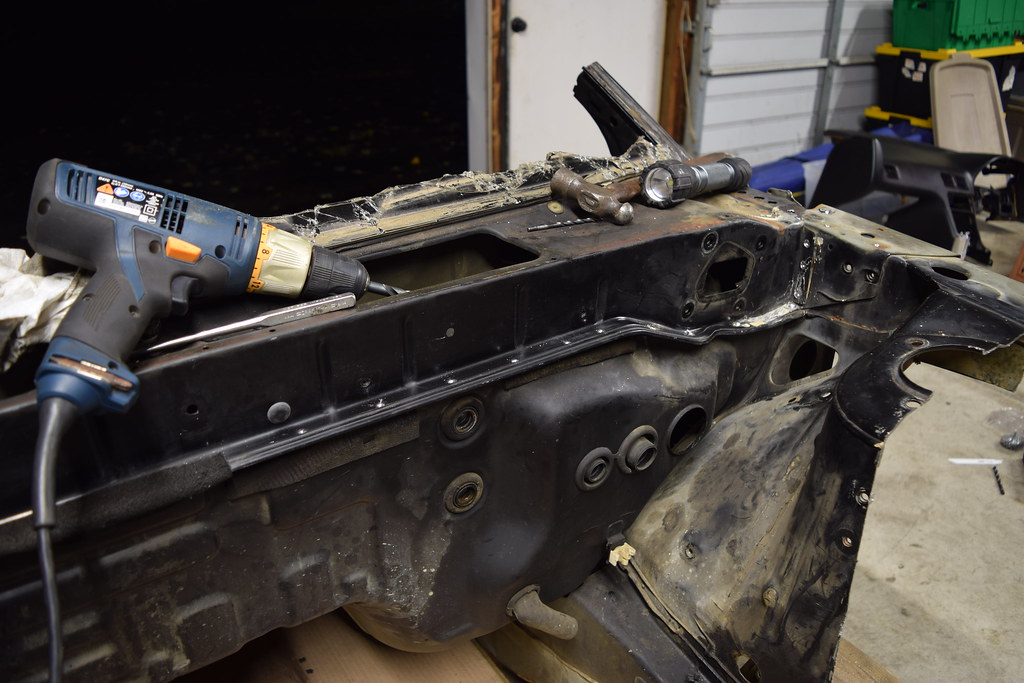 next with the bigger drill bit... 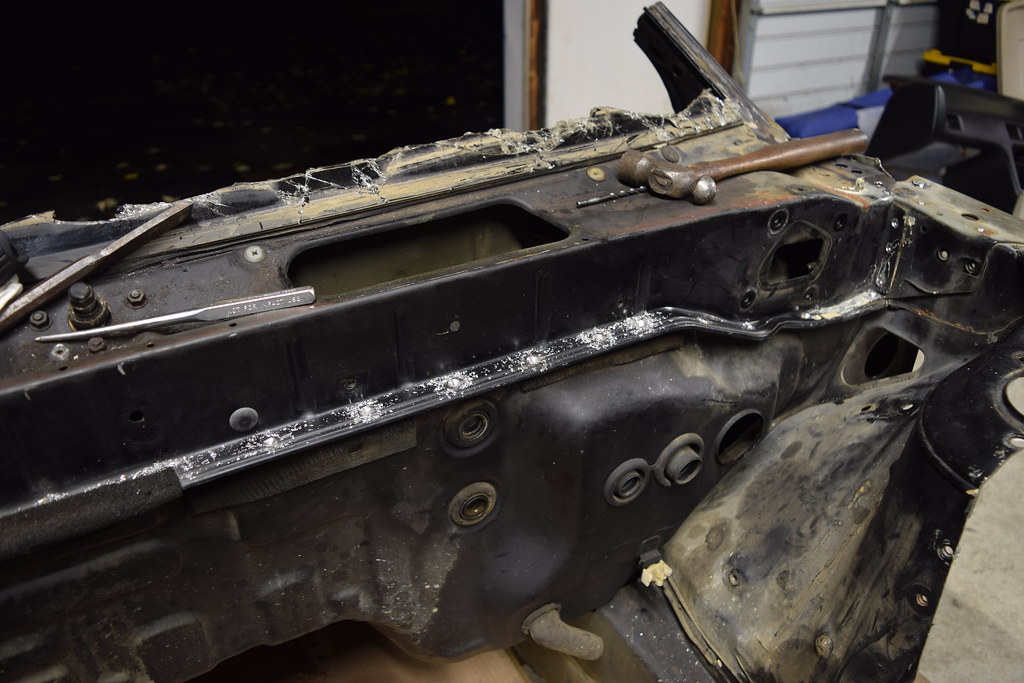 finished scraping the glass off under the windshield, and finished seperating the seam with the chisel. 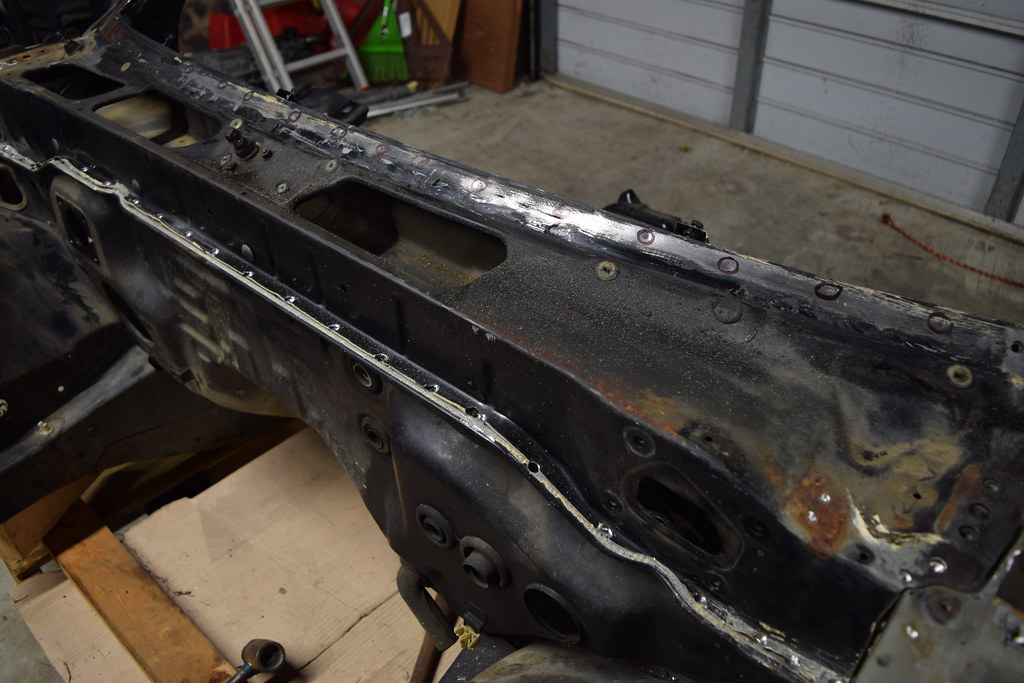 Also, flickr is limiting their free accounts starting jan.2019 with having a 1000 photo limit. so i'll have to find another way to share the pictures after I reach my limit.. Last edited by Super_OK_S13; 12-17-2018 at 05:32 AM.. |
||
|
|
|
|
10-08-2018, 02:50 PM
|
#5 |
|
Zilvia Junkie
Join Date: Feb 2008
Location: Carry Water, Chop Wood
Age: 36
Posts: 507
Trader Rating: (0)
Feedback Score: 0 reviews
|
Went ahead and started organizing the wiring and cutting stuff out. i am going to be using the USDM wiring/cluster/column as i swap to RHD.
   Wiring is the LEAST of my worries and sourcing a firewall is the worst... i can buy a used rack online and have it shipped worst case scenario but the firewall holds all the pieces like the pedals and whatnot, and im not hacking some shit together to make my LHD stuff work that way.. i probably wont use AC/HEAT so theres gonna be some empty space behind the dash, unless i get a FULL FRONT CLIP. SOOOOO.... I've started looking for RHD parts. Firewall/steering rack are a must RIGHT NOW... The rest ill figure out when i get to that point as far as interior. IF you know someone willing to throw a firewall and steering rack on a pallet and ship via fed ex i can pick it up at a local center. |
|
|
|
|
10-09-2018, 06:38 AM
|
#6 |
|
Zilvia Addict
 
Join Date: Nov 2015
Location: Where the bad guys are
Posts: 886
Trader Rating: (6)
 Feedback Score: 6 reviews
|
That is some mighty good work. The best part is (and Im jealous) is the massive garage space you got to work with, it is a dream of mine. Why are you going RHD? Wouldnt it be easier just to buy a whole car and swap parts over?
__________________
Skurr  Skurr Skurr
|
|
|
|
|
10-10-2018, 05:29 AM
|
#8 | ||
|
Zilvia Junkie
Join Date: Feb 2008
Location: Carry Water, Chop Wood
Age: 36
Posts: 507
Trader Rating: (0)
Feedback Score: 0 reviews
|
Quote:
I wish I used the garage more than I do but I seem to be busy with the house/outside landscape more than ever. Quote:
SuperOK!  On a good note! I found and will be getting a clip REALLY soon. I'll definitely keep the thread updated!!! |
||
|
|
|
|
10-14-2018, 07:15 AM
|
#10 |
|
Zilvia Junkie
Join Date: Feb 2008
Location: Carry Water, Chop Wood
Age: 36
Posts: 507
Trader Rating: (0)
Feedback Score: 0 reviews
|
Whilst searching online, i only saw like 2 listings for front clips. 1 on a Californina shop site, and one on ebay.. this was the one i pulled the trigger on and bought it!!
 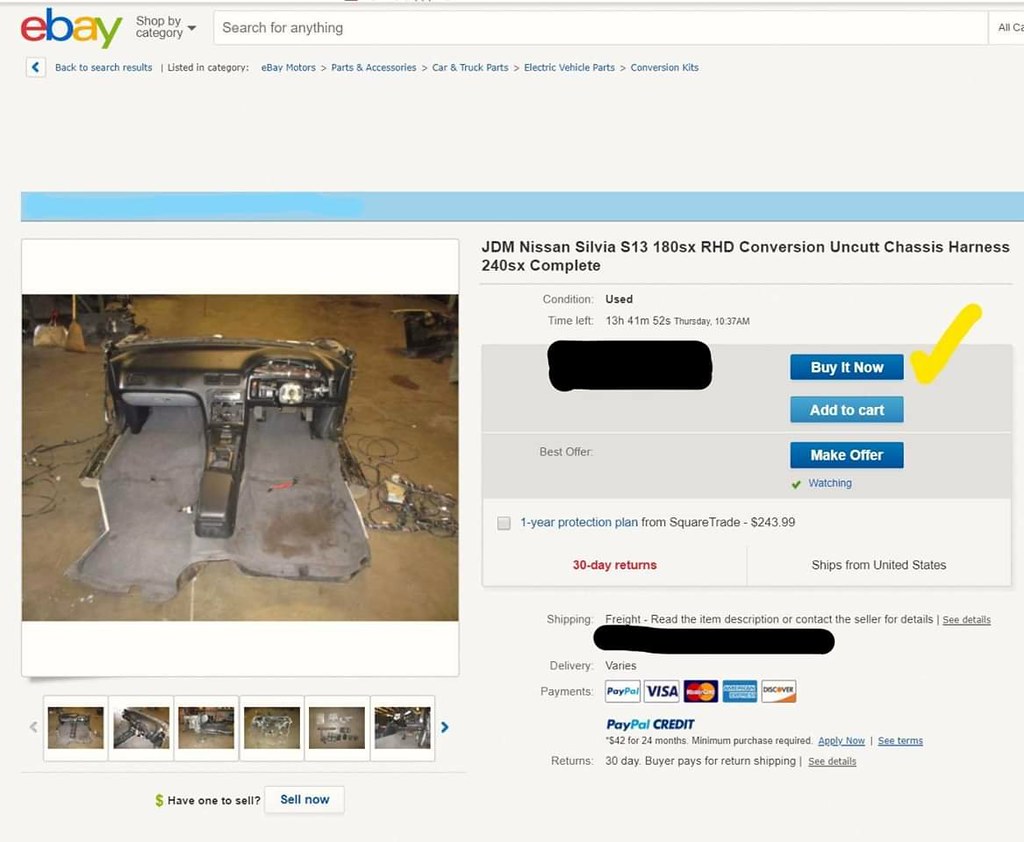 Also, RHD mirrors will be shipped with it. The harness is complete, uncut and for power doors, which i will source local and then get door cards separate for RHD. It also has Digital Climate Control, so I will have A/C back in the car eventually. |
|
|
|
|
10-15-2018, 06:40 AM
|
#11 | |
|
Zilvia Addict

Join Date: Jul 2008
Location: Canada
Age: 37
Posts: 720
Trader Rating: (0)
Feedback Score: 0 reviews
|
Quote:
I bought a silvia halfcut Back when I did my s13 and ended out scrapping most things that we didnt use in the swap. Kicking myself now but back in 08 no one had any use for it 
__________________
-Jordie Lewis '93 Skyline Type M |
|
|
|
|
|
10-16-2018, 04:42 PM
|
#13 |
|
Nissanaholic!
 
Join Date: Jan 2010
Location: location X
Posts: 1,815
Trader Rating: (10)
Feedback Score: 10 reviews
|
how much did you pay?
__________________
http://www.240sxforums.com/forums/rb...ject-s-rb.html |
|
|
|
|
10-16-2018, 06:53 PM
|
#14 | |
|
Zilvia Junkie
Join Date: Feb 2008
Location: Carry Water, Chop Wood
Age: 36
Posts: 507
Trader Rating: (0)
Feedback Score: 0 reviews
|
Quote:
Options on this was, Digital climate control, power window harness, some little pieces (the a-pillar grab handle and fog light button in-tact, power folding mirrors, trunk cable ect ect) basically most of the Hard to find/forgotten stuff that will Nickel and dime me if it didn't come with. Last edited by Super_OK_S13; 10-16-2018 at 08:15 PM.. |
|
|
|
|
|
10-27-2018, 03:17 AM
|
#15 |
|
Zilvia Junkie
Join Date: Feb 2008
Location: Carry Water, Chop Wood
Age: 36
Posts: 507
Trader Rating: (0)
Feedback Score: 0 reviews
|
Shipment was delivered to my uncles Metal Supply house on 10/24,
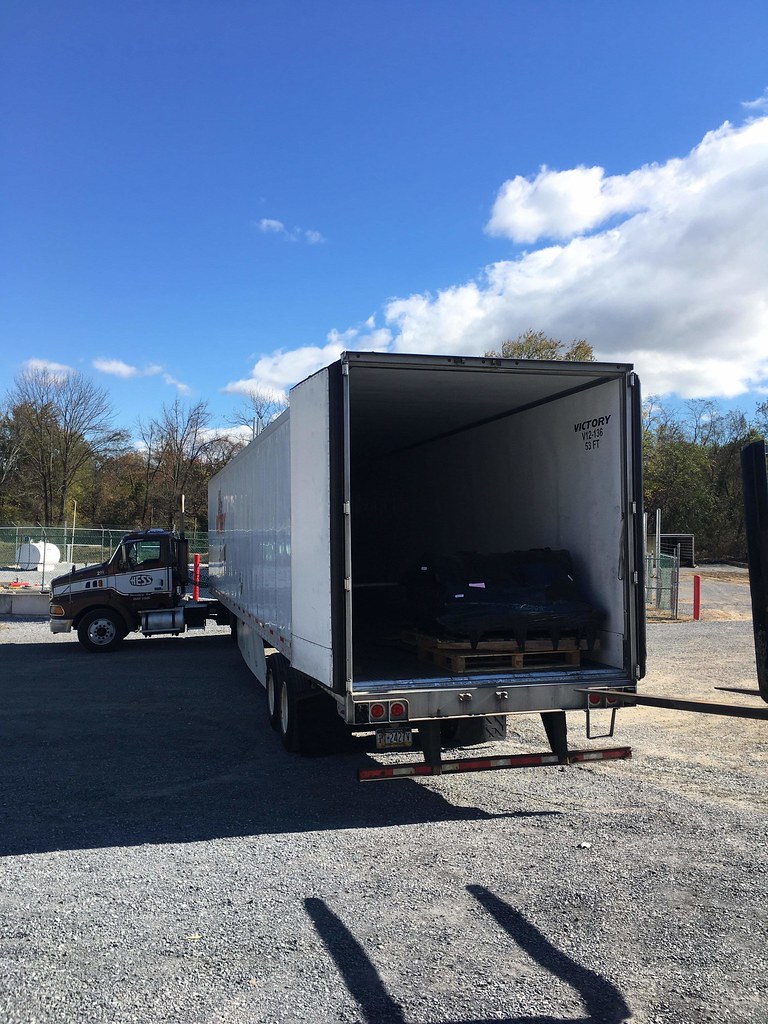 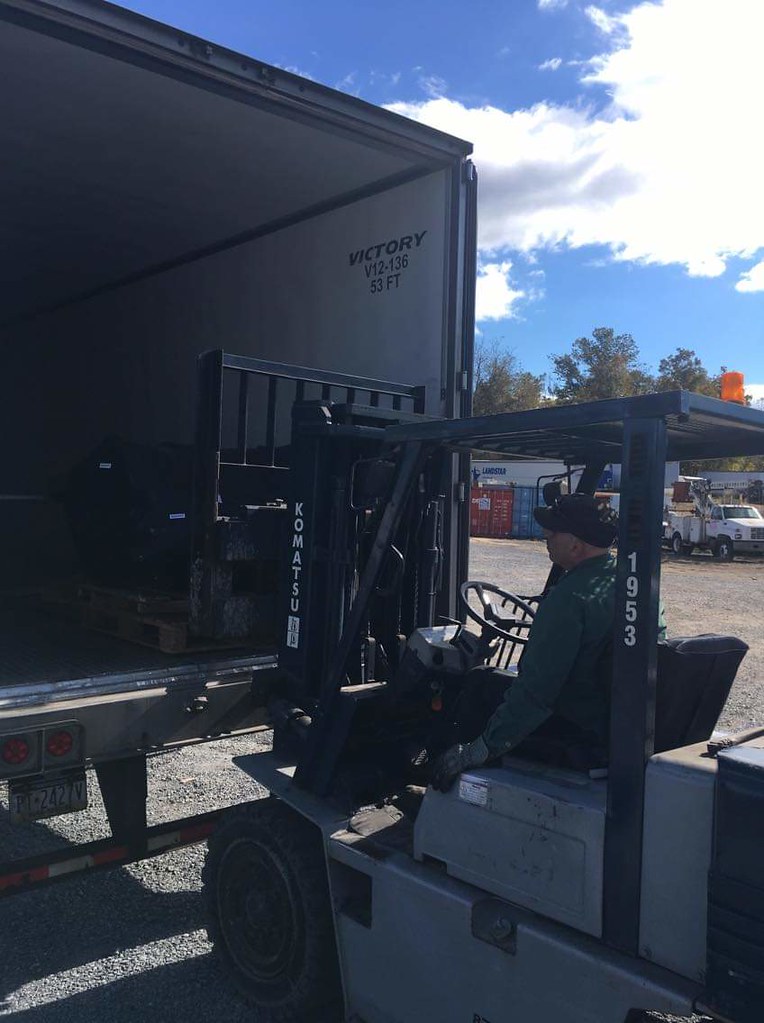 My dad and I were supposed to go get it after i got out of work but he decided to get it himself and leave it at my garage door for when i got home. I don't know how he got it off the trailer, and put it there by him self...  it weighed like 350-400lbs.. I struggled to shift it into the garage my self. it weighed like 350-400lbs.. I struggled to shift it into the garage my self.   Maneuvered it into the garage and started cutting of and tearing off the bubble wrap/shrink wrap carefully.. finally, its time to get started!! 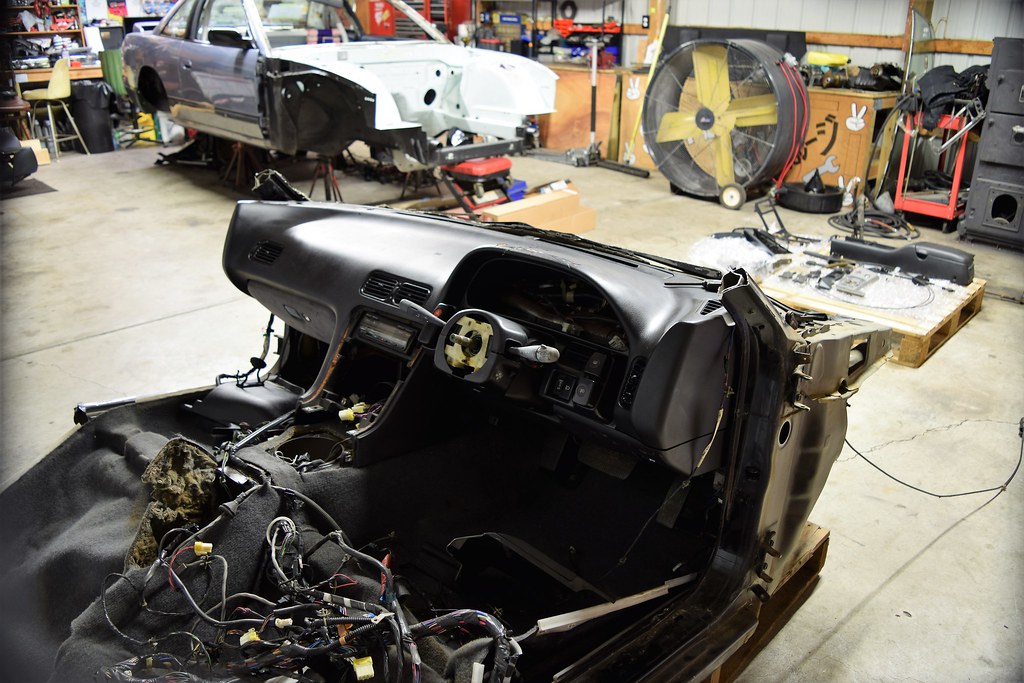 started by pulling off the loose parts and setting them aside. Mirrors, interior trim rack/pinion, ect ect. 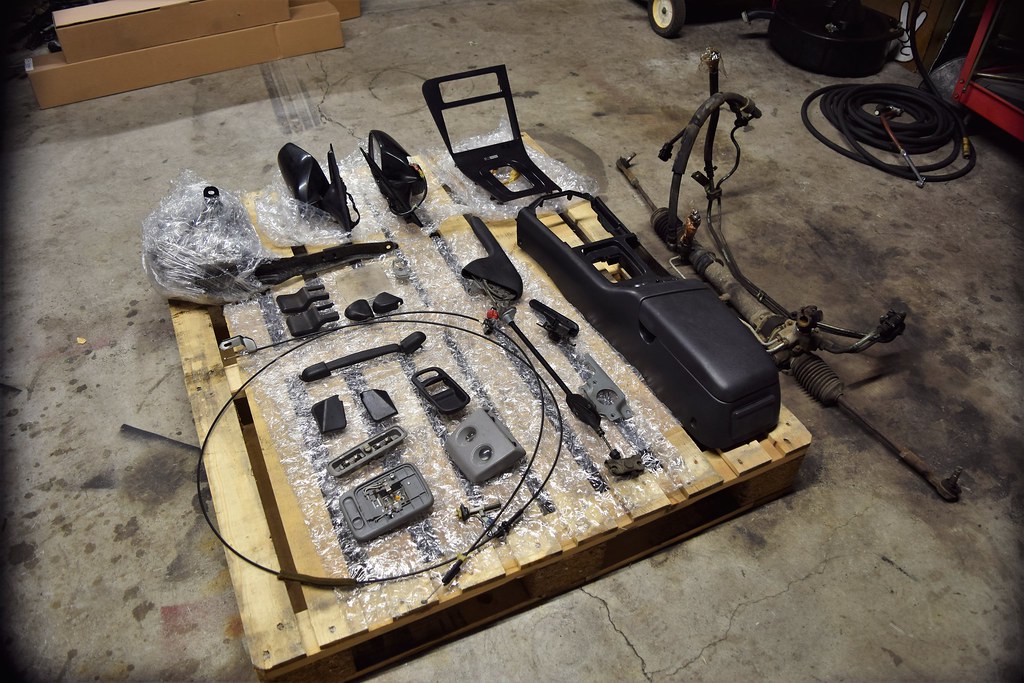 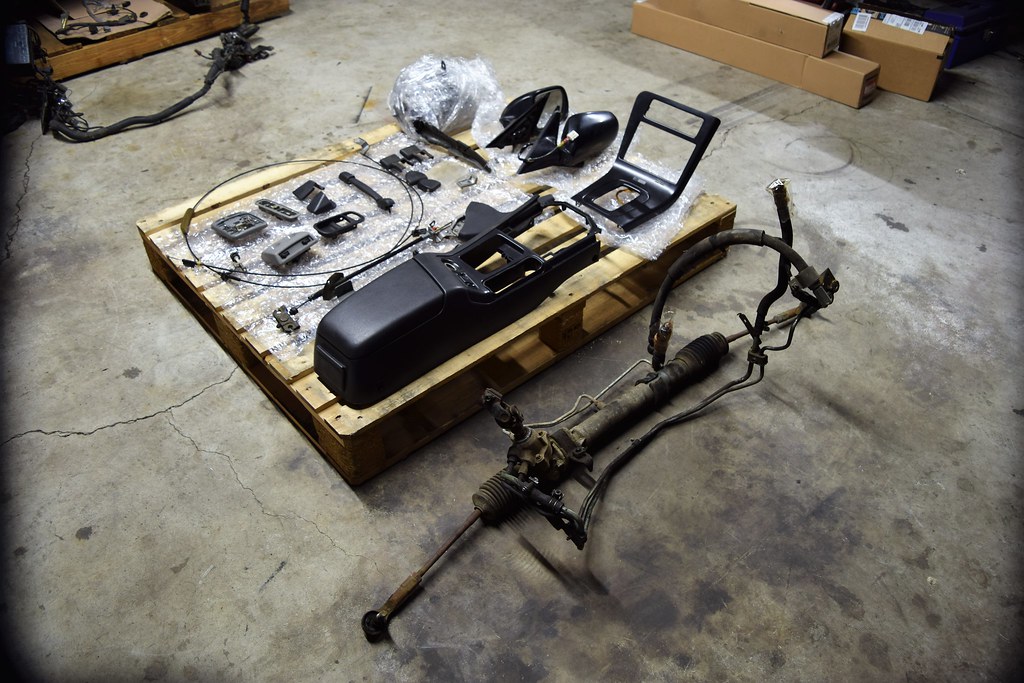 the thing i look forward to the most is this, Can't wait to finally have AC in this car.... 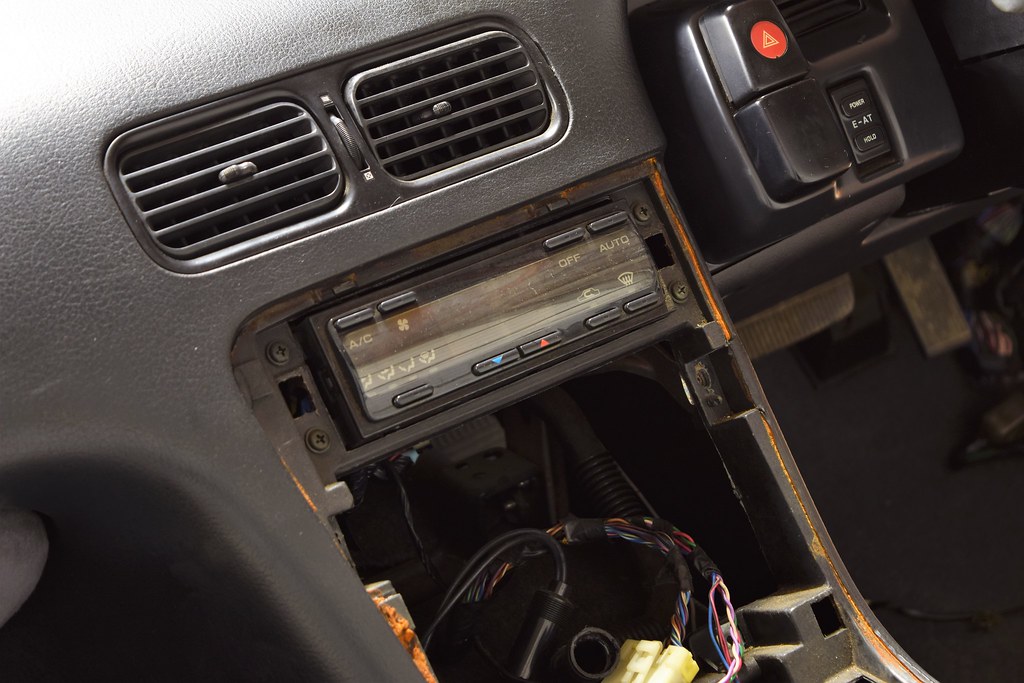 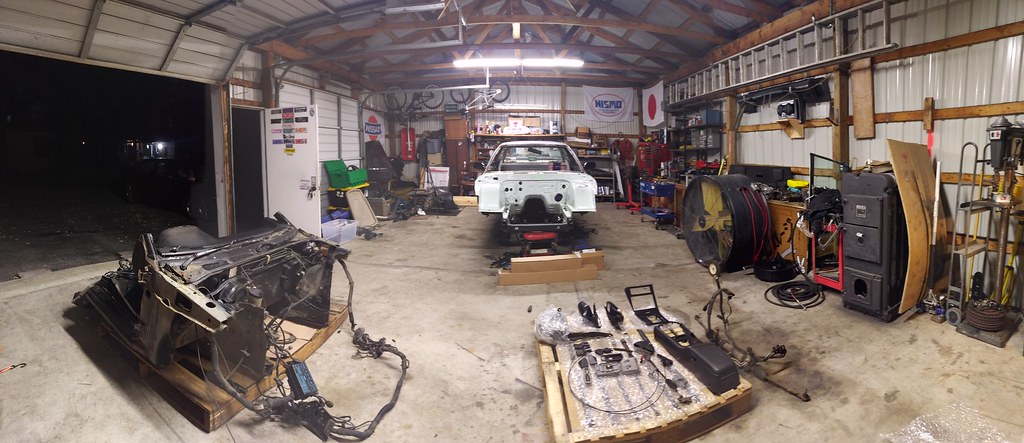  |
|
|
|
|
11-08-2018, 03:33 AM
|
#16 |
|
Zilvia Junkie
Join Date: Feb 2008
Location: Carry Water, Chop Wood
Age: 36
Posts: 507
Trader Rating: (0)
Feedback Score: 0 reviews
|
After un-packing, it was time to dig in!!
Looking up the vin for the clip, I found out i had a Silvia K's Club series 2.5 SR20DET Automatic trans (Digital Full Automatic Airconditioner + Silver Aluminium Wheel + CD Player + Rear Spoiler + Triple Projector Headlamp + Fluorocarbon Resin Coating) Color was KH3 black. 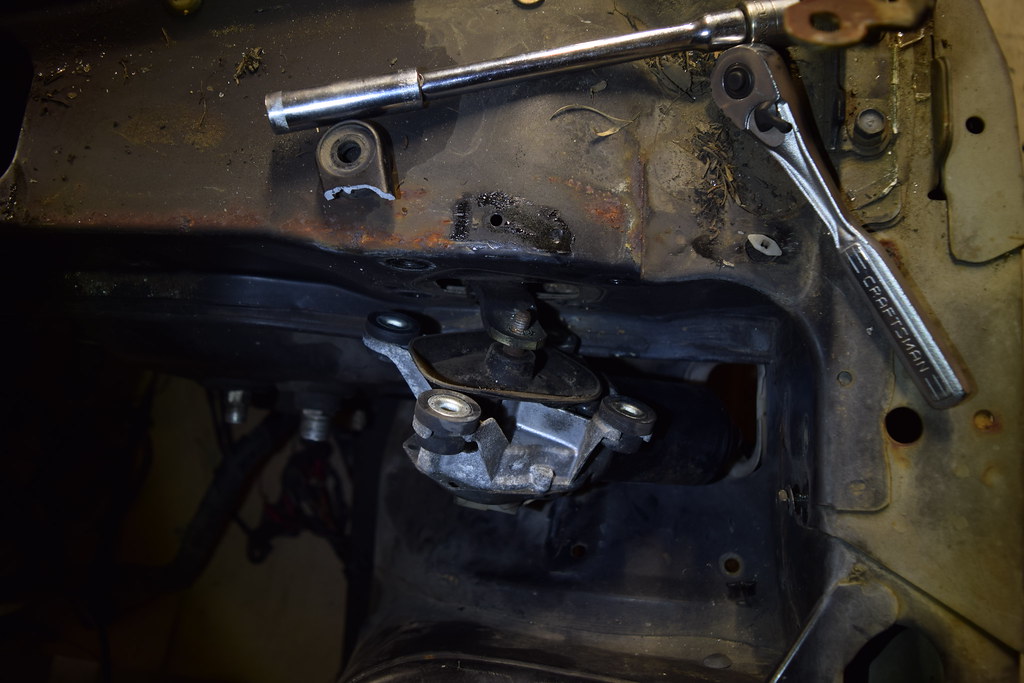 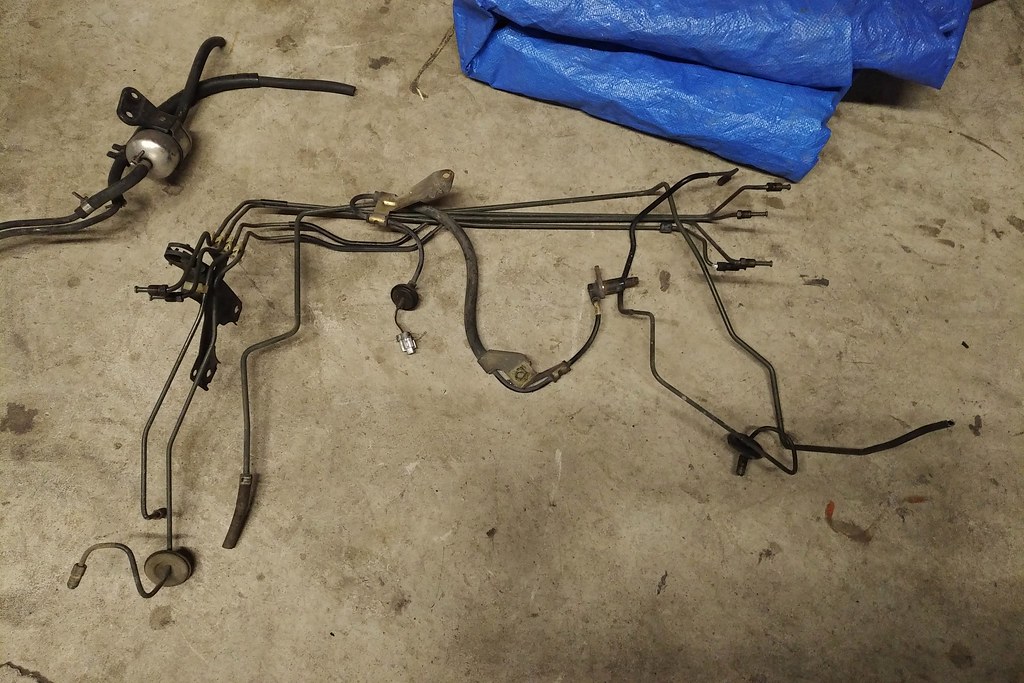 Started taking apart the dash components to get to wiring and pedal assemblies, I found this security system spliced in. 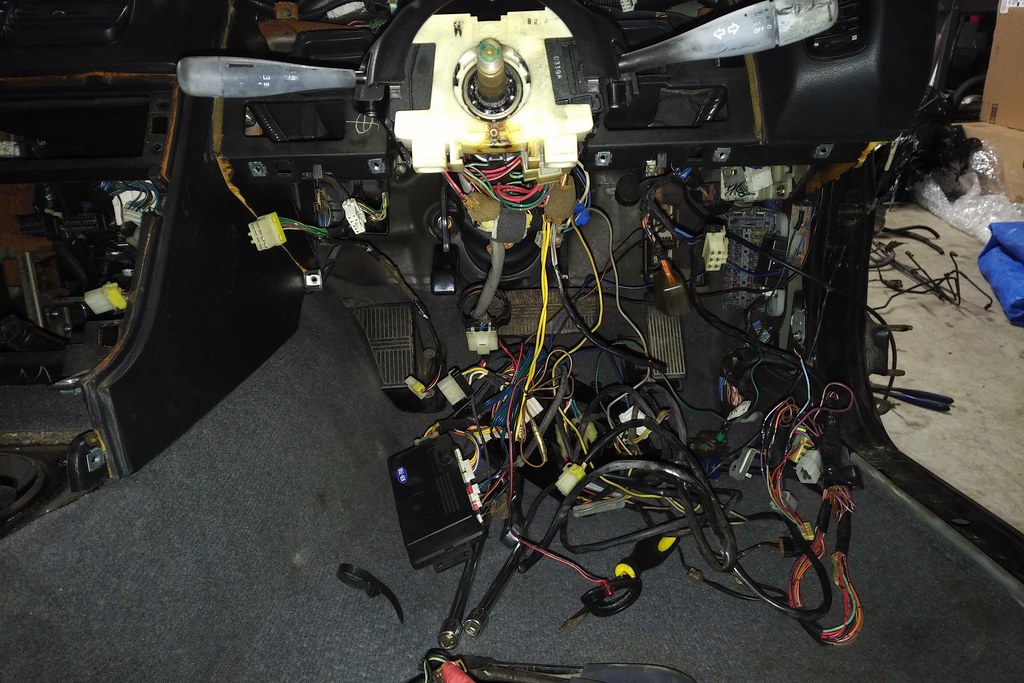 After realizing someone in japan added a pop-up conversion to this silvia clip. i had to un-do this kinda well done add-on.... 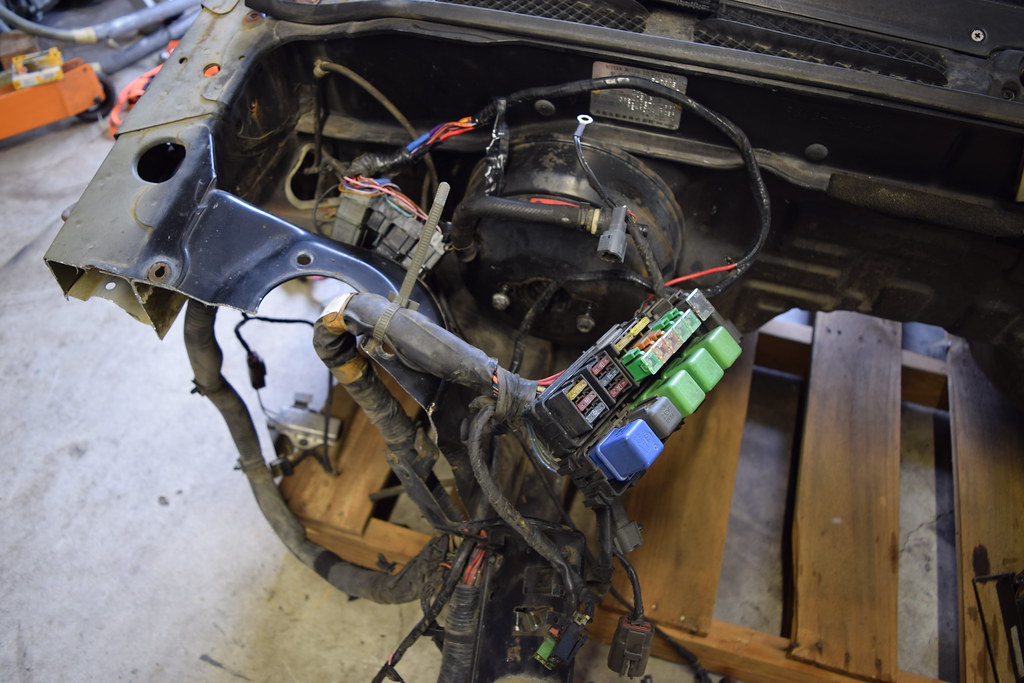 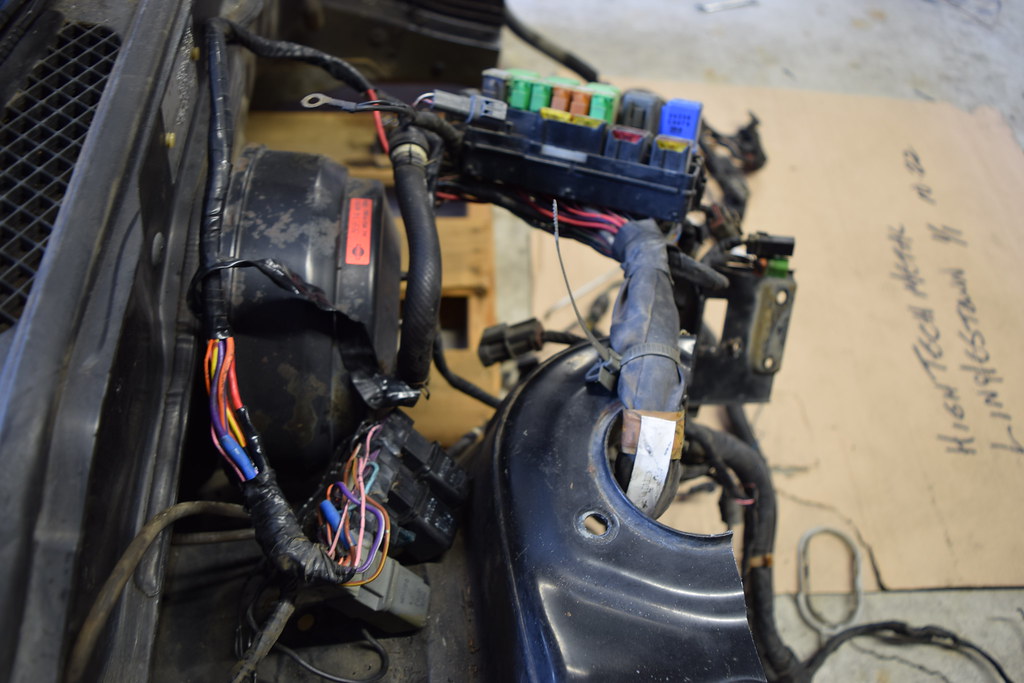 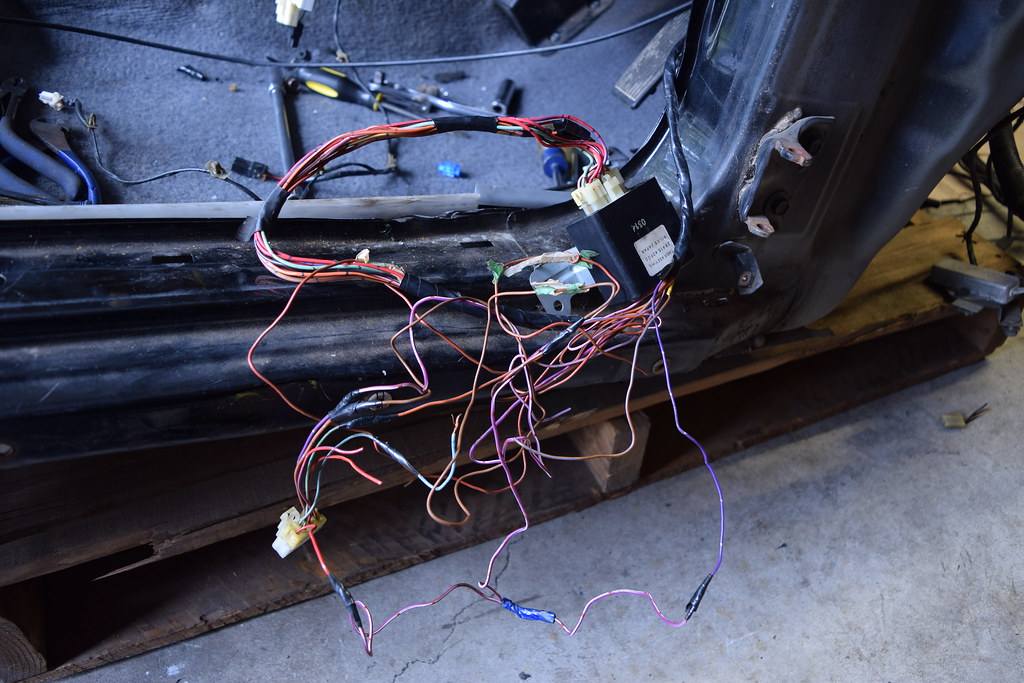 While taking the dash/wiring apart i realized i will need an electrical manual if i'm going to re-tuck everything. Asking around and posting WTB ads turned up no luck or help from anyone. So i reached out to a complete stranger I follow on Instagram from japan, and he helped me search on Buyee for a manual. Found this and it was about 175$ total for a 1991 silvia/sr20de(t) NEW electrical handbook. I WILL be translating this book when i get it so others can look at their silvia wiring in english.  With all of the extra wiring (pop-up section/security device) out of the way i started to dismantle the interior dash components. 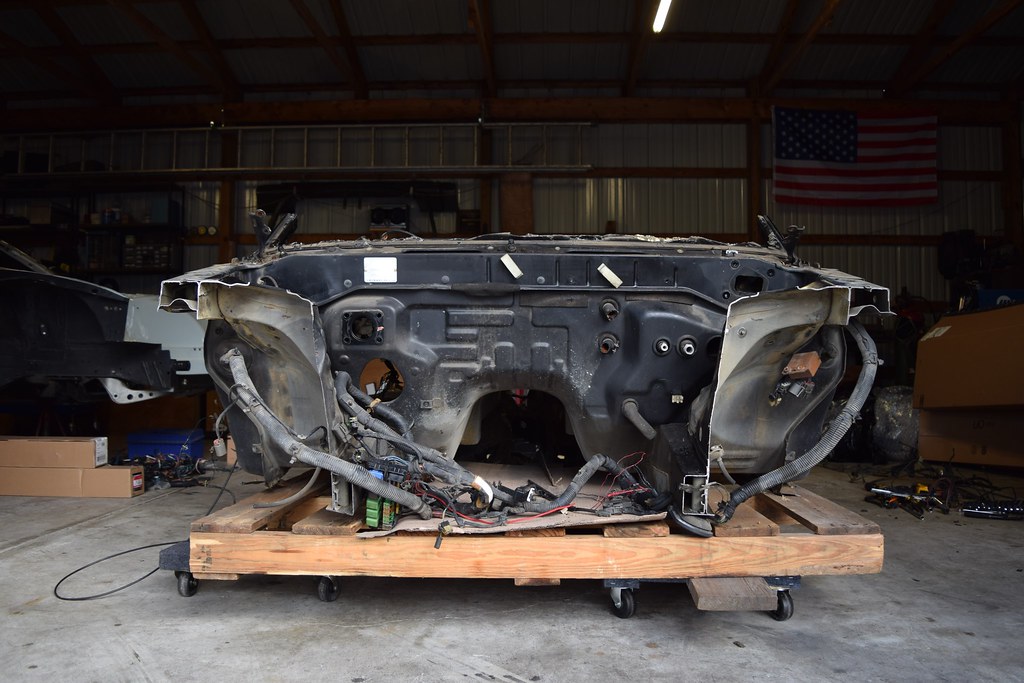 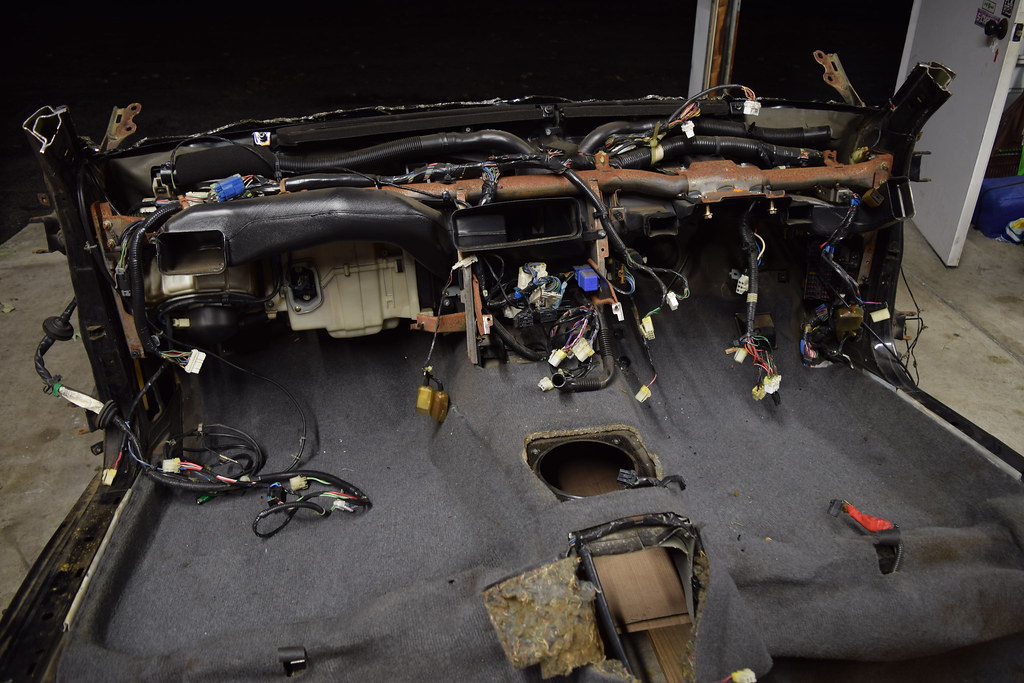 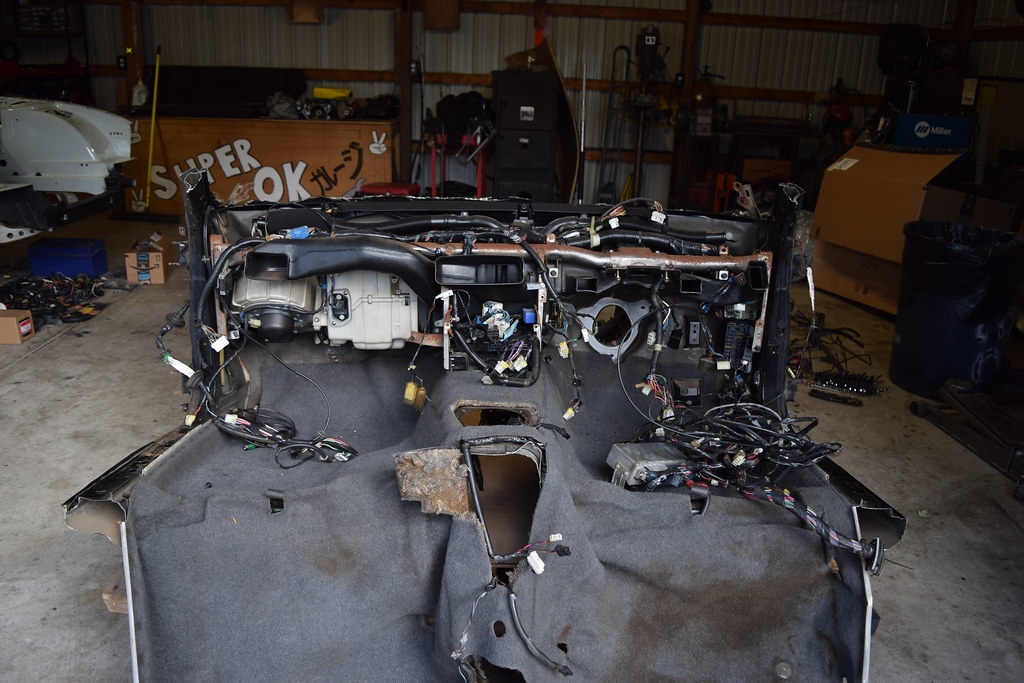 Interior harness Dash --> rear of car. 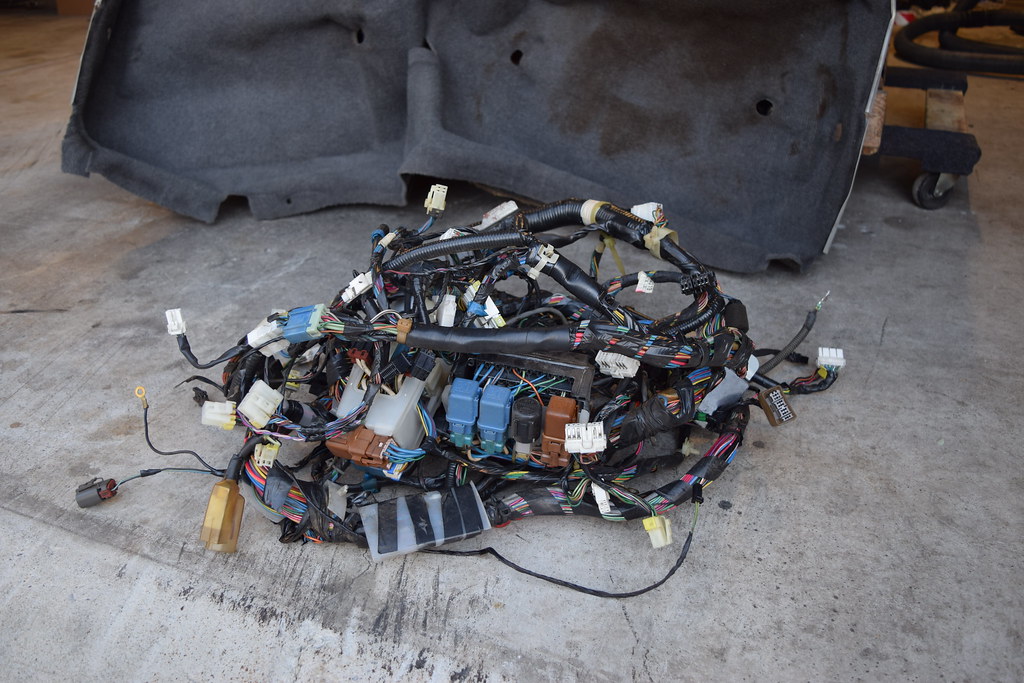 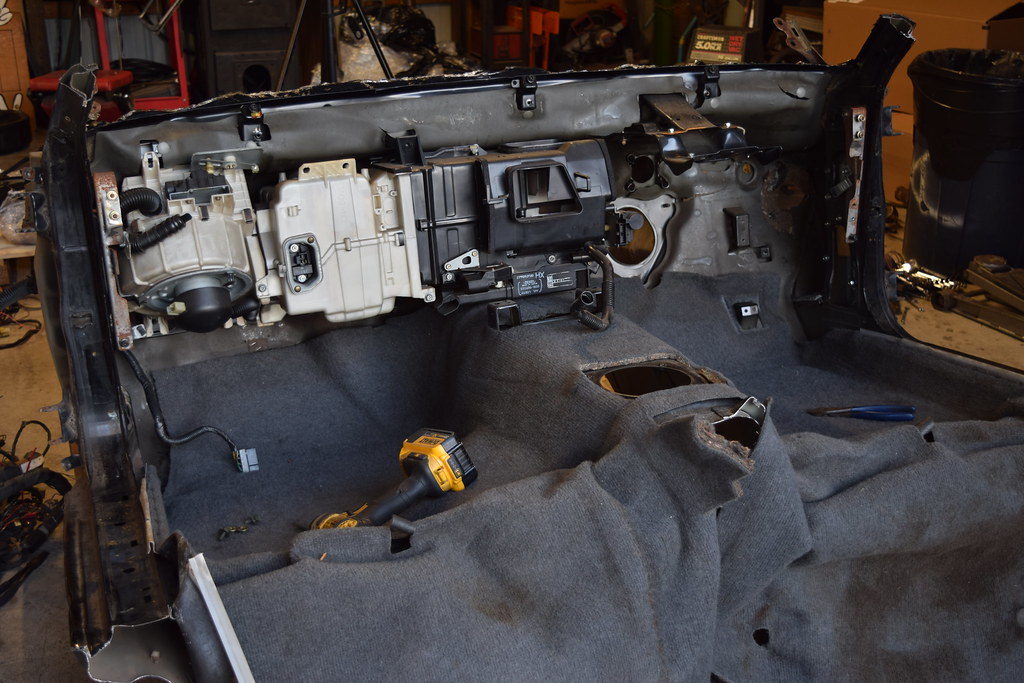 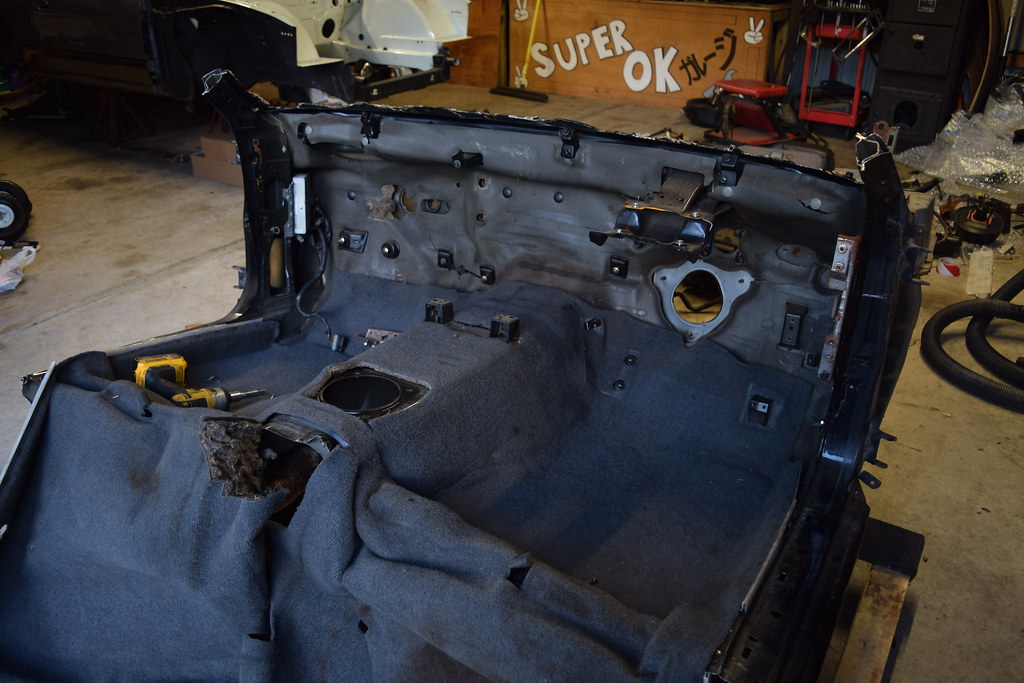 Burnsauto thought that the carpet may be a unique shade of grey not offered in the USA market. It looks OEM since it has the factory padding/sound deadening on the back and the door sill clips too.. i'll post up more probably later tonight when i grab a few more pics from past days progress!! |
|
|
|
|
11-08-2018, 08:08 AM
|
#17 |
|
Post Whore!
 
Join Date: Oct 2013
Location: Western Mass.
Posts: 2,606
Trader Rating: (3)
Feedback Score: 3 reviews
|
Good progress. Hope its done for spring!
Funny thing, I always crack up when people (not you, just in general) say shit like "everybody in japan builds cars better than the US" Its like... no they hack shit up equally bad. Ever see the cars on YAJ? S-chassis scene is a bunch of hacks, world wide. |
|
|
|
|
11-12-2018, 08:15 AM
|
#20 | |
|
Post Whore!

Join Date: Oct 2008
Location: MI
Age: 38
Posts: 3,916
Trader Rating: (131)
Feedback Score: 131 reviews
 |
Quote:
Great progress as always- excited to see more Jimmy! |
|
|
|
|
|
11-13-2018, 03:34 AM
|
#21 | ||
|
Zilvia Junkie
Join Date: Feb 2008
Location: Carry Water, Chop Wood
Age: 36
Posts: 507
Trader Rating: (0)
Feedback Score: 0 reviews
|
Quote:
 Quote:
UPDATES!!! Had Burnsauto come over to hang out and helped drill out some more spot welds on the clip. 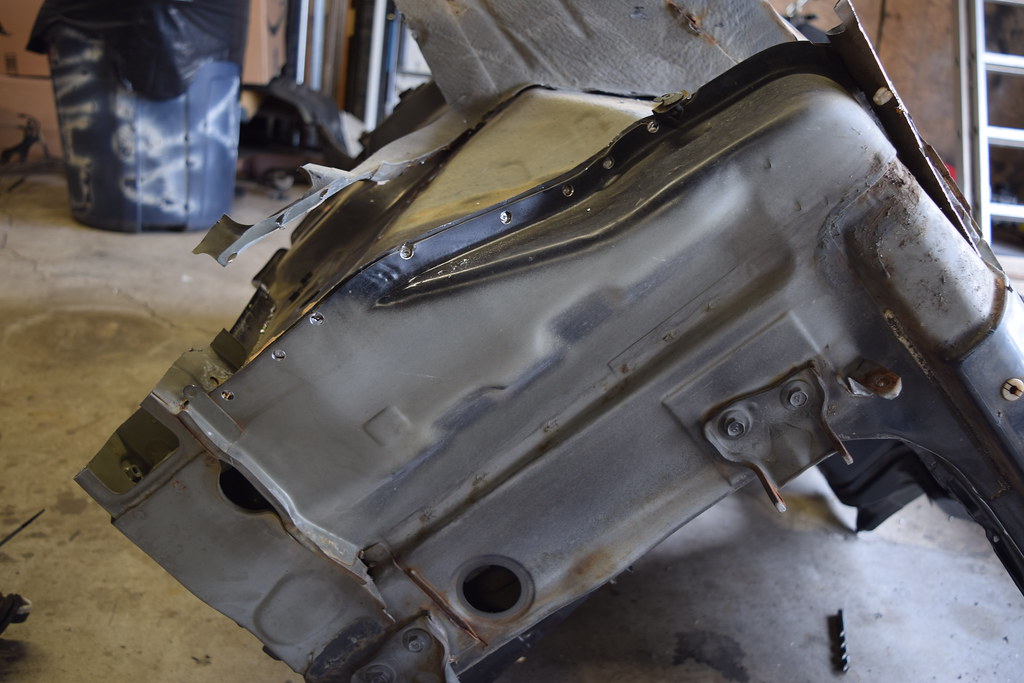 Had to use my air drill to get these since they were in between the frame rail and seam. 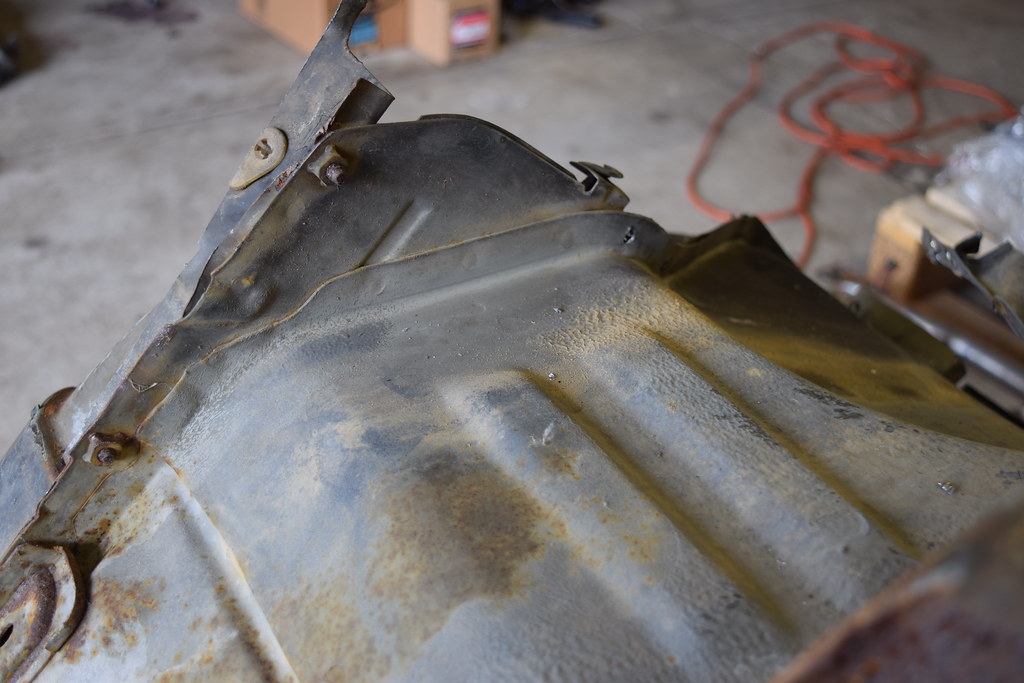 bottom and lower cowl out together. 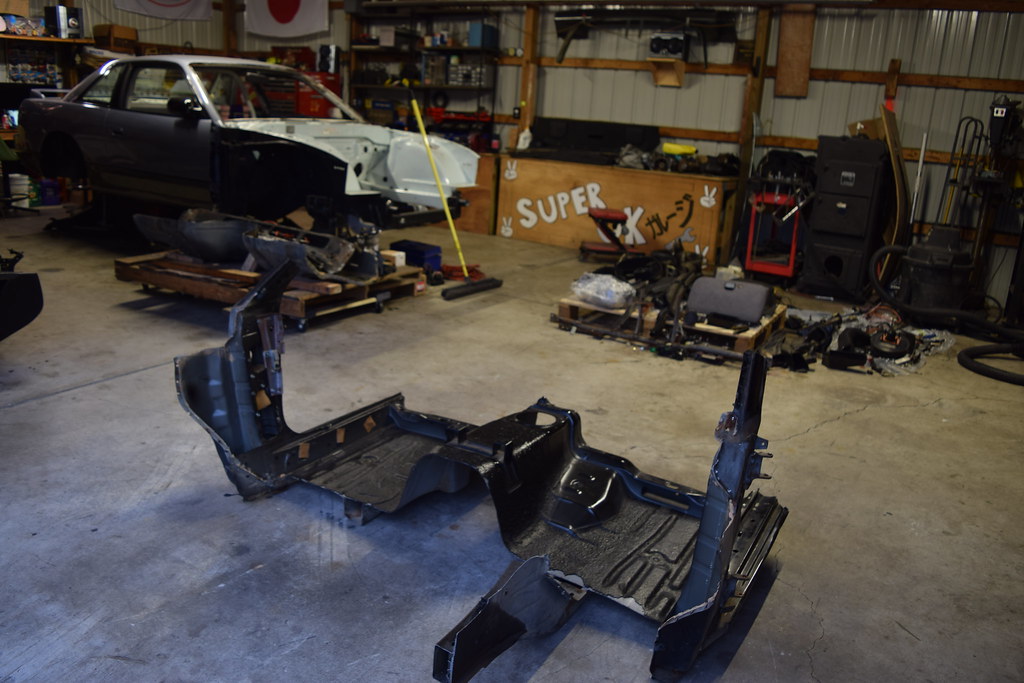 saved the good frame rail for burns auto and his project. 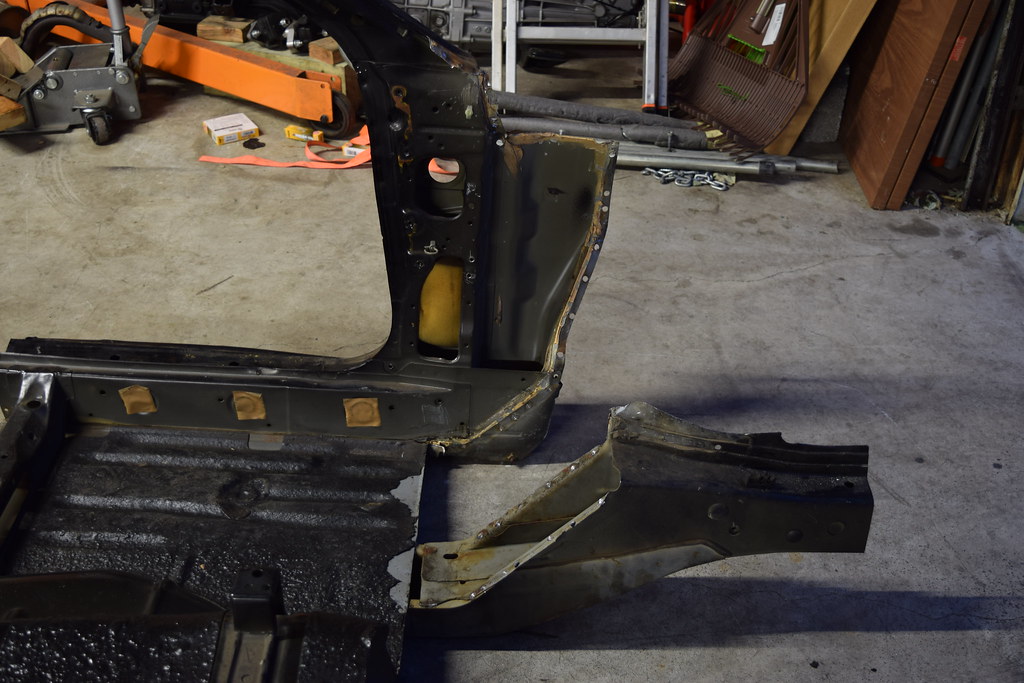 all together. 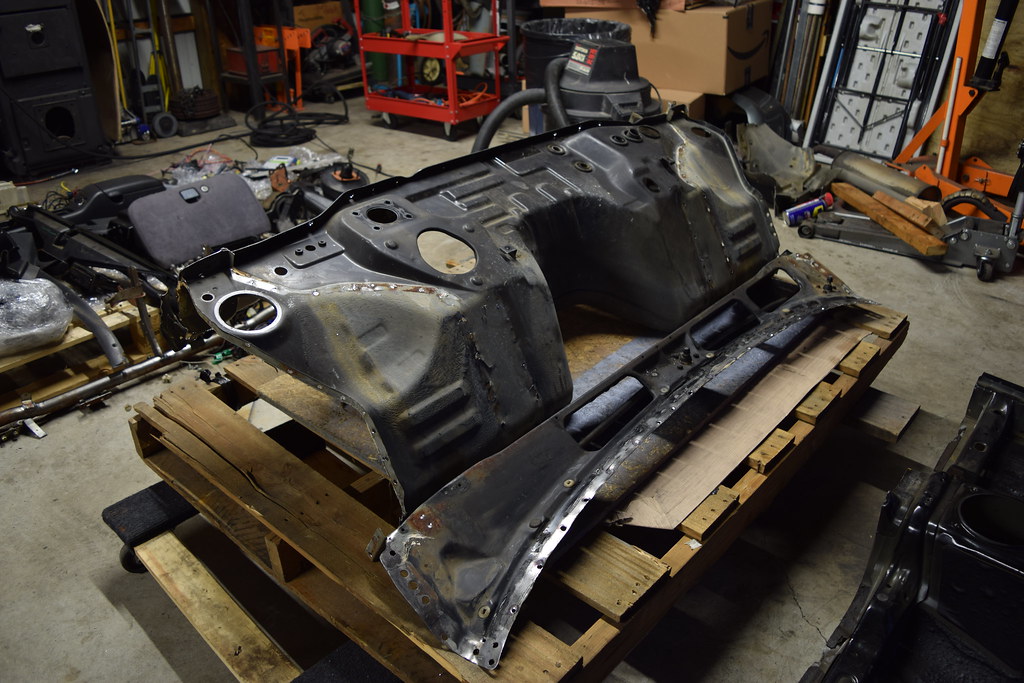 NEXT!!!! 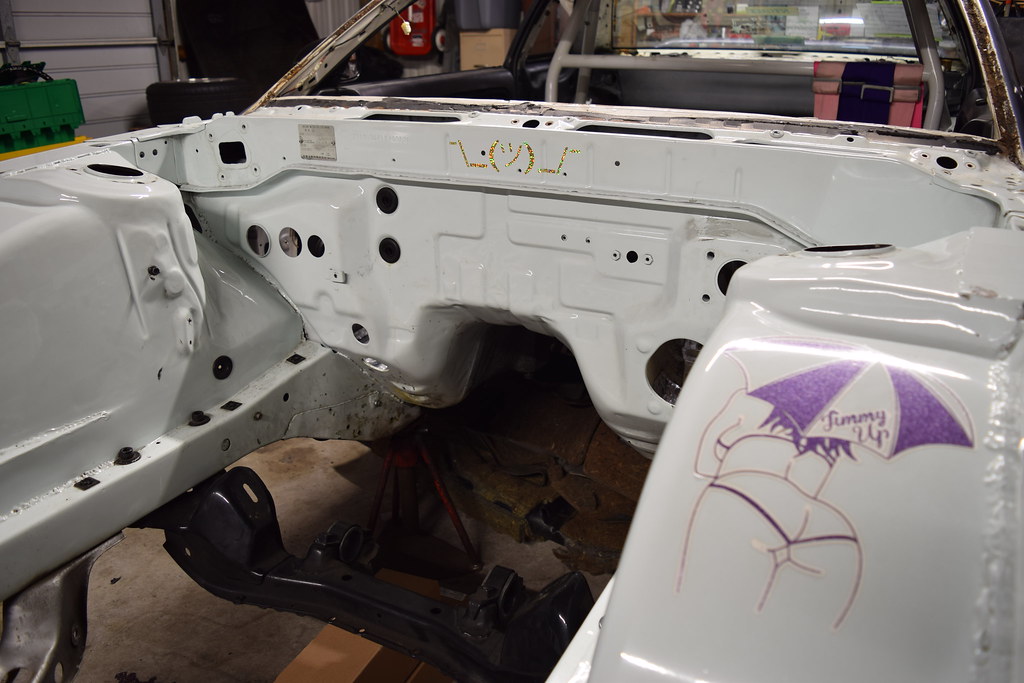 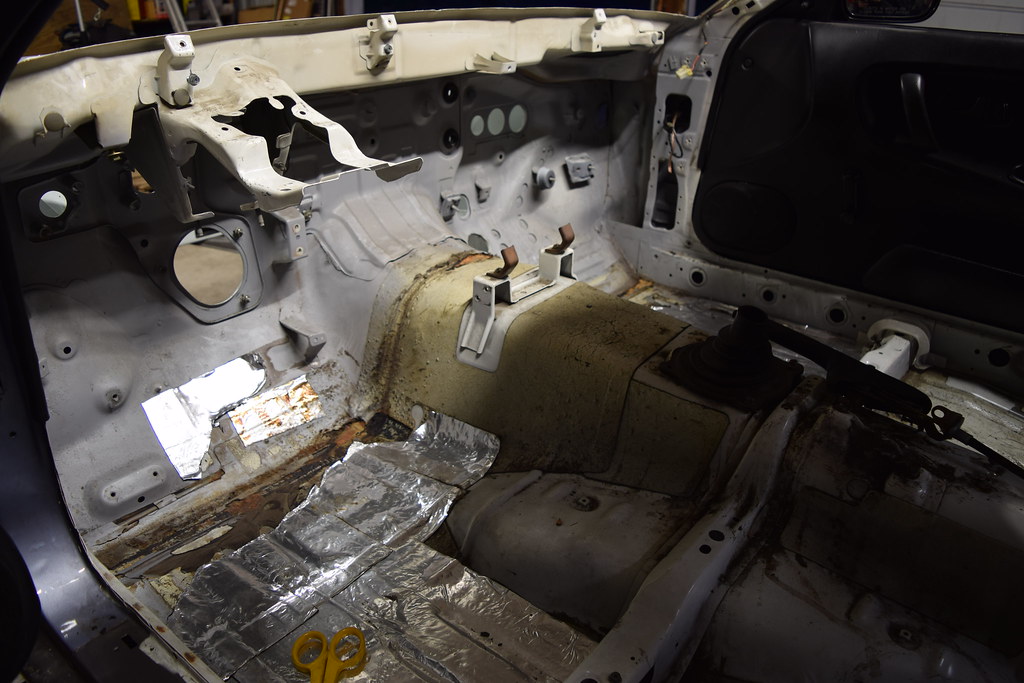 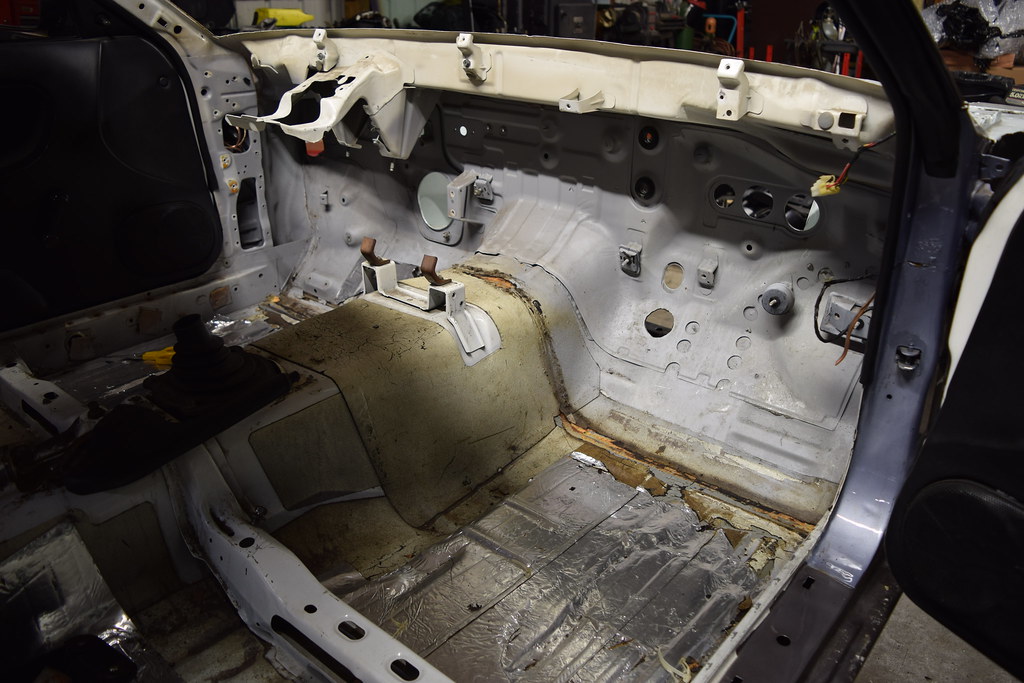 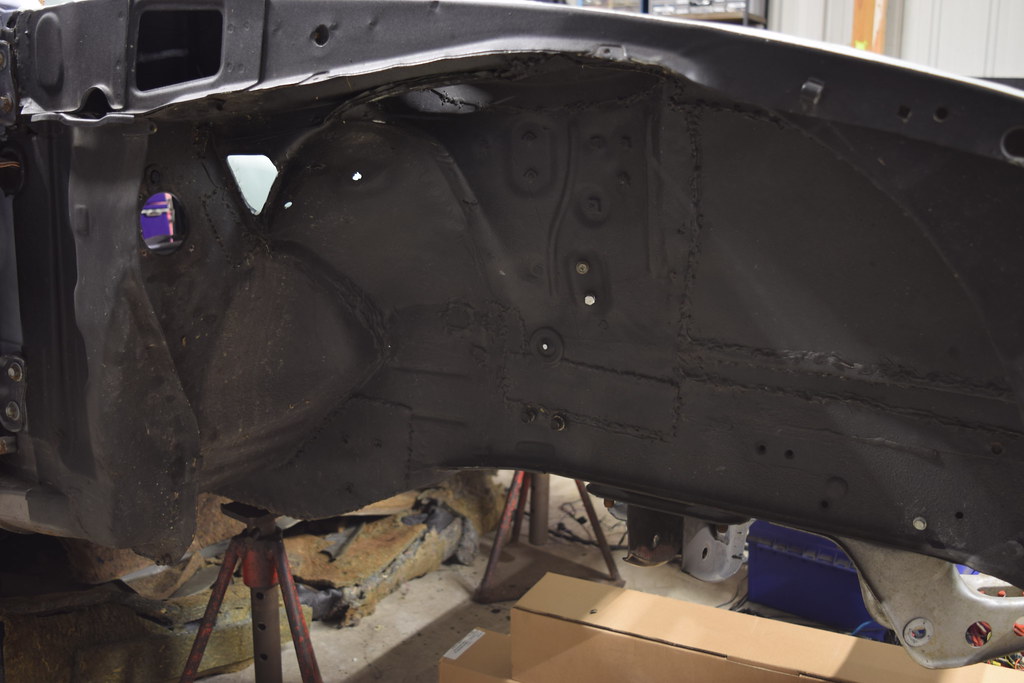 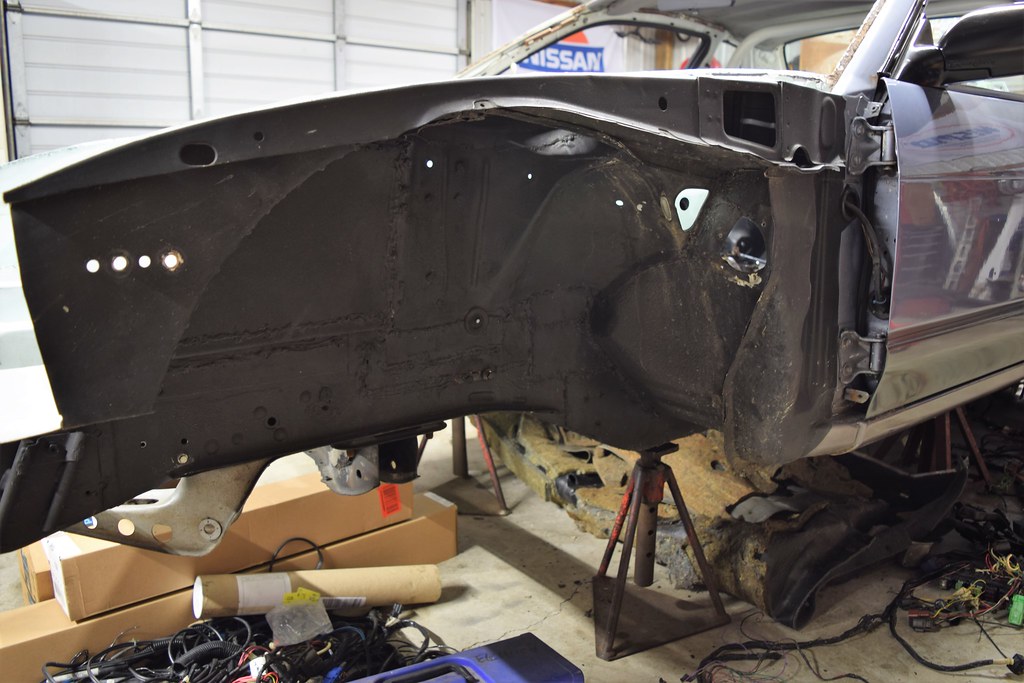 |
||
|
|
|
|
12-17-2018, 10:37 PM
|
#26 |
|
Zilvia Junkie

Join Date: Oct 2006
Location: Carson City, NV
Age: 41
Posts: 312
Trader Rating: (2)
Feedback Score: 2 reviews
|
Man you're doing a great job bro. When I did my RHD conversion years ago there wasn't much info and I just went for it. You'll learn real quick how the usdm and jdm wiring is so similar. I did exactly what you did and I flipped my usdm body harness upside down. Here's a tip...when you're doing the wiring for the turn signals the only thing I did was I matched all the wires to the jdm turn signals steering column controls. The thing is when you wire the turn signals that way color for color your turn signal indicators will contradict eachother lol. If I remember correctly when you turn the turn signal switch to the left your cluster indicator will blink right but the signal lights will blink correctly. Then when you switch to the turn signal to the right it'll make the cluster indicator blink left, but again the signal lights will blink correctly.
Here's the trick! Everyone is going to think you have to extend the turn signal wires from the right side to the left and vice versa. Honestly, that's to much damn work. When I did mine the only thing I did was switch the turn signal wires at the gauge cluster. Sounds way to simple right? Well in all seriousness that's all that needed to be done because everything works from the cluster. If I remember correctly the LH turn signal wire color is Green/black and the RH turn signal wire color is Green/Yellow. What I did was unpin those two wires and then switch them around. So the Green/black goes into the Green/yellow's spot and the Green/yellow goes into the Green/black's spot. You'll find these wires in the Center White plug that goes into the cluster. After I did that everything worked perfectly. You can reference cluster wiring colors with the NX1600 cluster swap wiring diagram. Lots of information there for 240sx cluster wire colors. This thread brought back a ton of memories! If you have any questions at all let me know bro. |
|
|
|
|
12-18-2018, 10:50 AM
|
#28 | ||
|
Zilvia Junkie

Join Date: Mar 2016
Location: I n d i a n a
Age: 28
Posts: 349
Trader Rating: (0)
Feedback Score: 0 reviews
|
Quote:
Quote:
__________________
(づ。◕‿‿◕。)づ T E A M B L O O M |
||
|
|
|
|
12-18-2018, 11:05 AM
|
#29 |
|
Zilvia FREAK!
 
Join Date: Jan 2010
Location: SHOW ME WHAT YOU GOT
Posts: 1,115
Trader Rating: (1)
Feedback Score: 1 reviews
|
looking good! my roommate has a eastwood 250 and its great for what he got it for. we recently braced my IS subframe with it. something about doing stuff like this yourself is so satisfying.
cant wait to see more! |
|
|
|
|
12-19-2018, 03:27 AM
|
#30 | |||||||
|
Zilvia Junkie
Join Date: Feb 2008
Location: Carry Water, Chop Wood
Age: 36
Posts: 507
Trader Rating: (0)
Feedback Score: 0 reviews
|
Quote:
Quote:
Quote:
Quote:
Quote:
Quote:
Quote:
I did stop by a small paint supply shop the other day and pick up some seam sealer/undercoating. i will probably go back and get a tube of 2 part seam sealer as well for where some of the corners meet.. 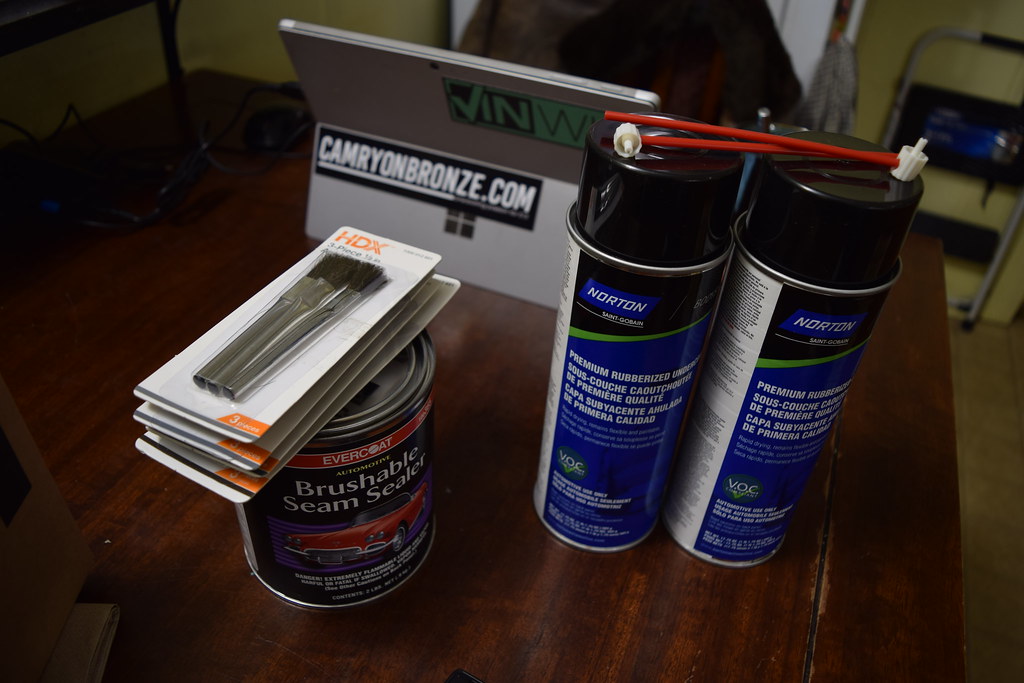 |
|||||||
|
|
|
|
| Bookmarks |
|
|


 Hybrid Mode
