
 |
|
|||||||
| Builds (and builds only) Got a build thread? It goes here, build threads anywhere else on the forum will be locked and never moved. |
 |
|
|
Thread Tools | Display Modes |
|
|
#31 |
|
Zilvia Member
 |
I got more parts in the mail last thursday havn't had a chance to actually install them till this monday/tuesday
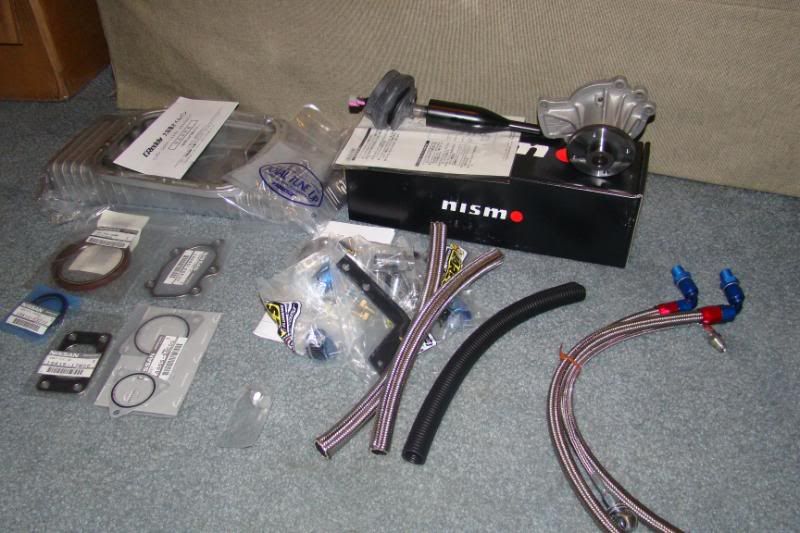 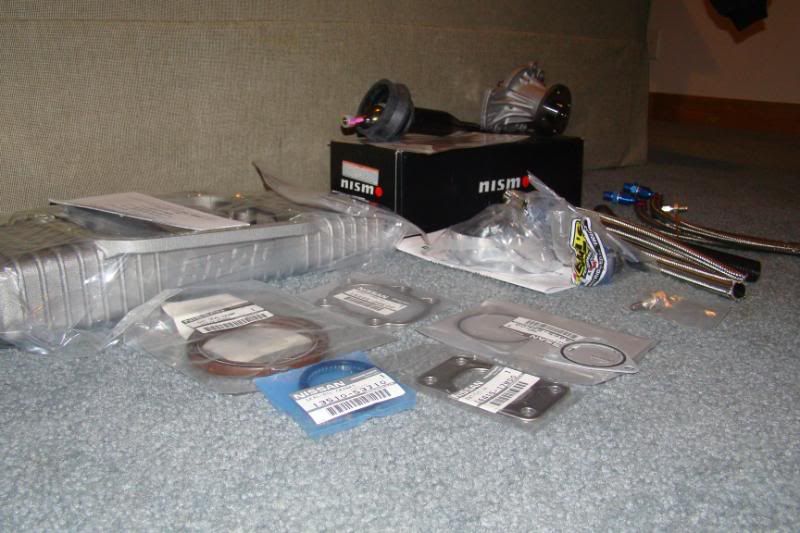 I first tackled my water pump since I noticed my previous one was leaking it's always recommended to replace it anyways for an "SR" swap. Since the new water pump didn't come with studs, I had to reuse my old ones. I grabbed me some vise grips and a shop rag to keep it from moving. 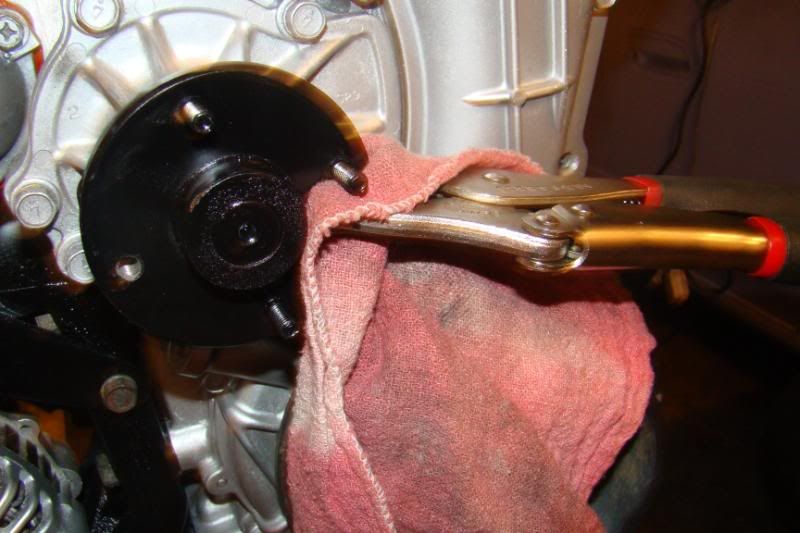 I threaded one bolt on 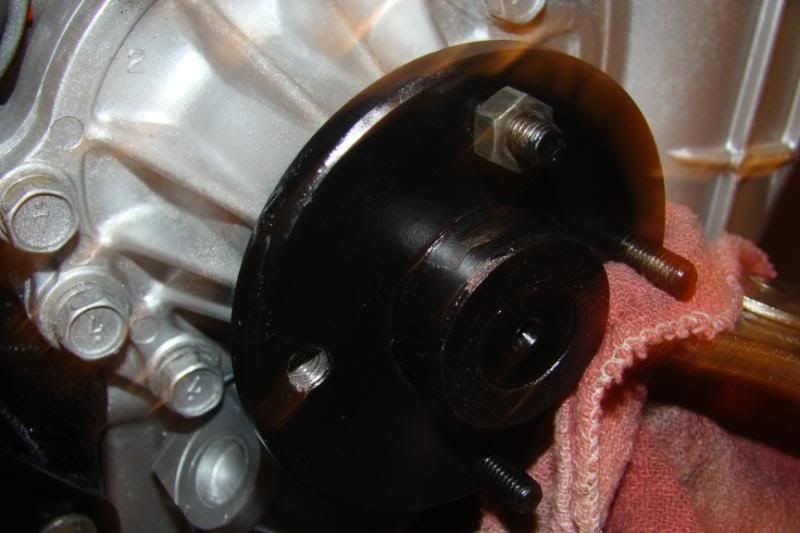 And a second bolt, I called this the two bolt method. 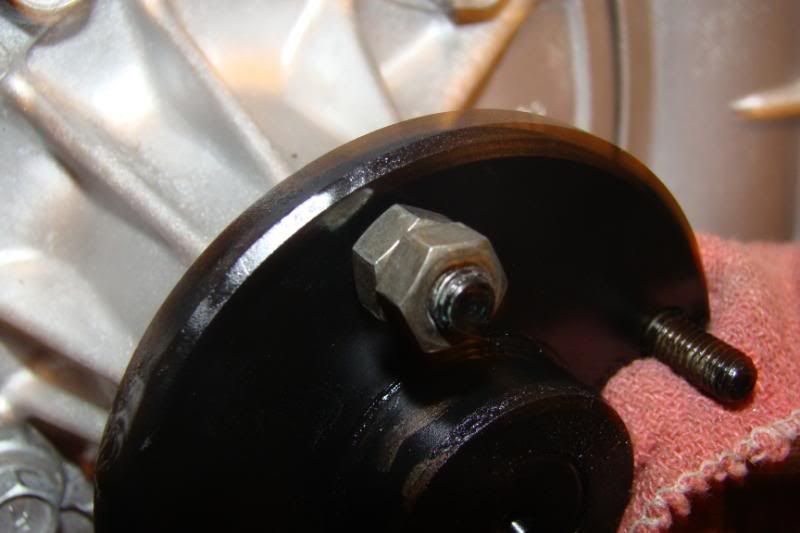 I used a 10mm wrench and a 10mm 3/8 socket to tighten both bolts together 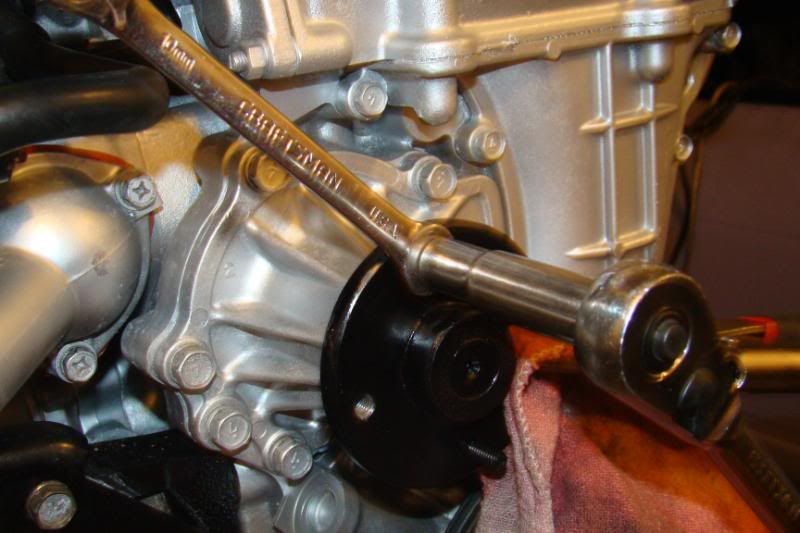 Then I used the 10mm wrench to loosed the stud off. Do this to all for studs before removing the water pump. 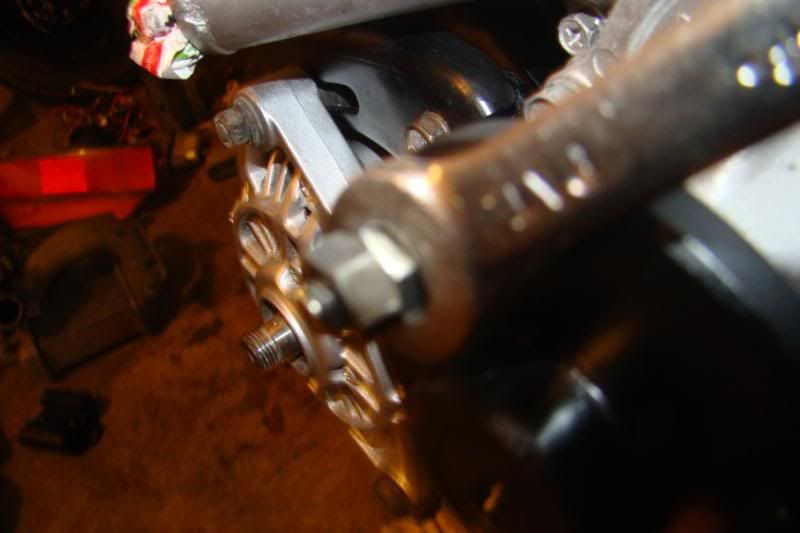 Then start removing all 5x 12mm bolts that are holding the water pump into place 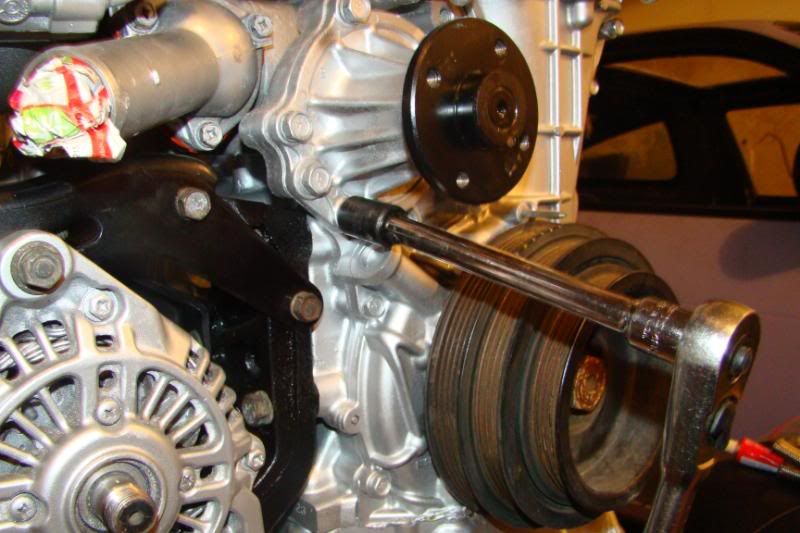 When I removed the water pump it was being stubborn, so I used a rubber malet to beat it off. Two good whacks and it came off. (Oh man does that sound dirty lol) 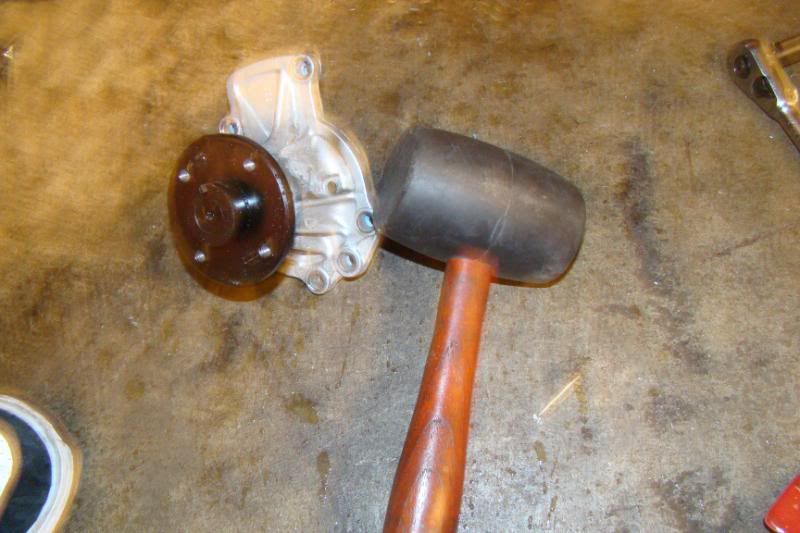 Used high temp rtv silicone as a gasket and torqued it down to 12-15 ft lbs 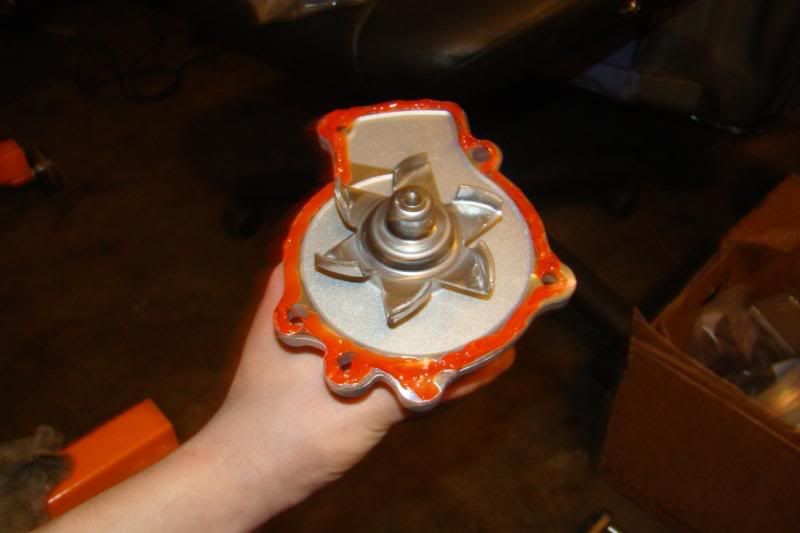 I than proceeded to install my turbo lines, I started with water inlet line and put some thread seal tape 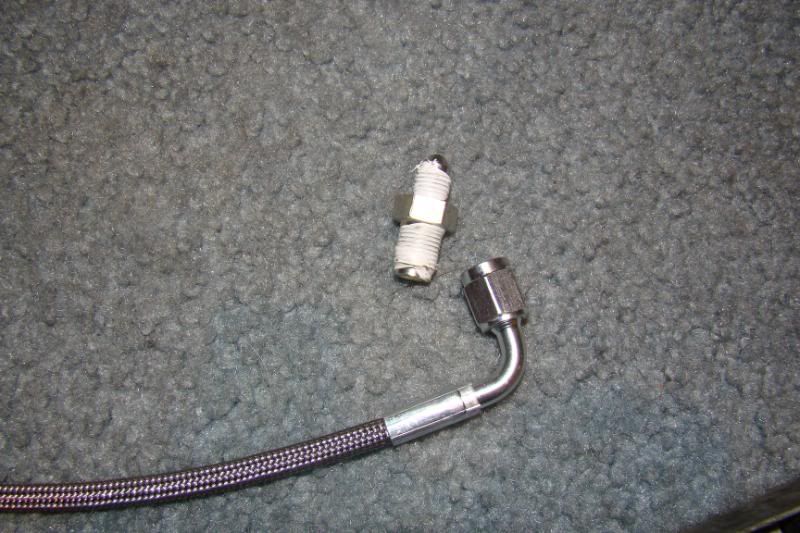 I used a 15mm deepwell socket here so it would fit over the fitting. The fitting gets torqued to 14-23ft lbs. 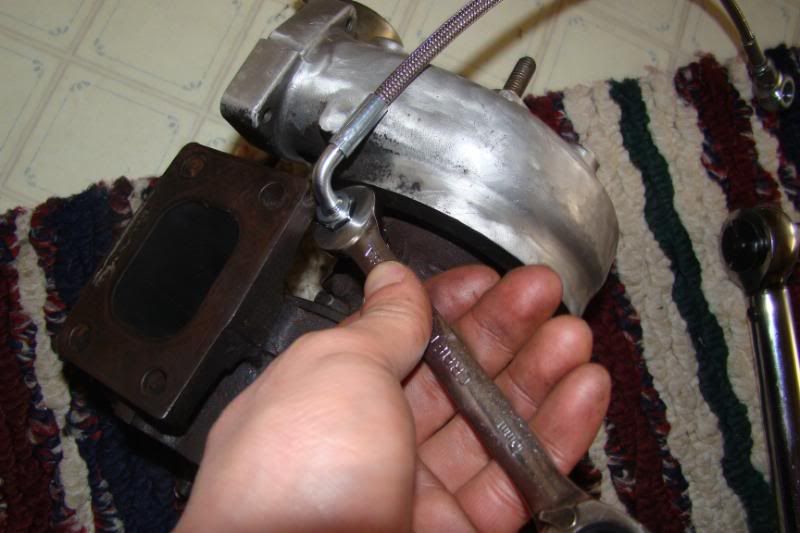 I then used a 13mm wrench to tighten the line onto the fitting 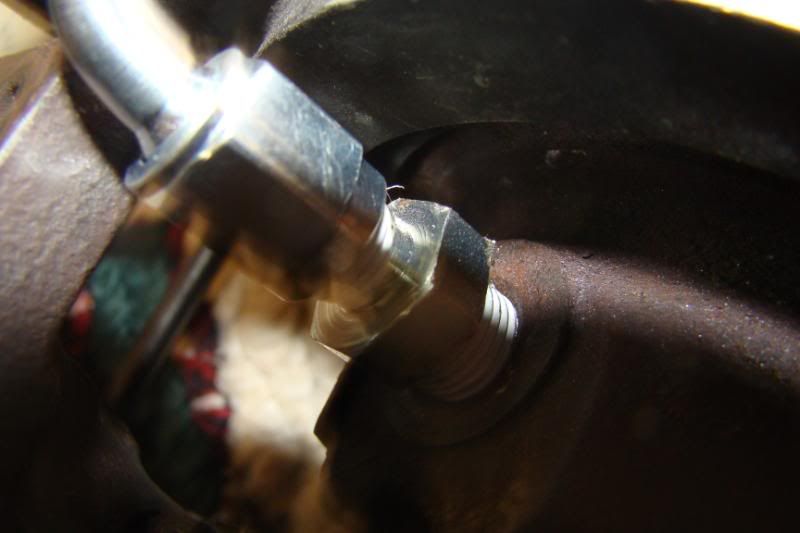 I then proceeded to the water inlet line, put some pipe thread tape on it, thread it by hand, and use a 19mm deepwell socket to tighten it, and it also gets torqued to 14-23ft lbs. 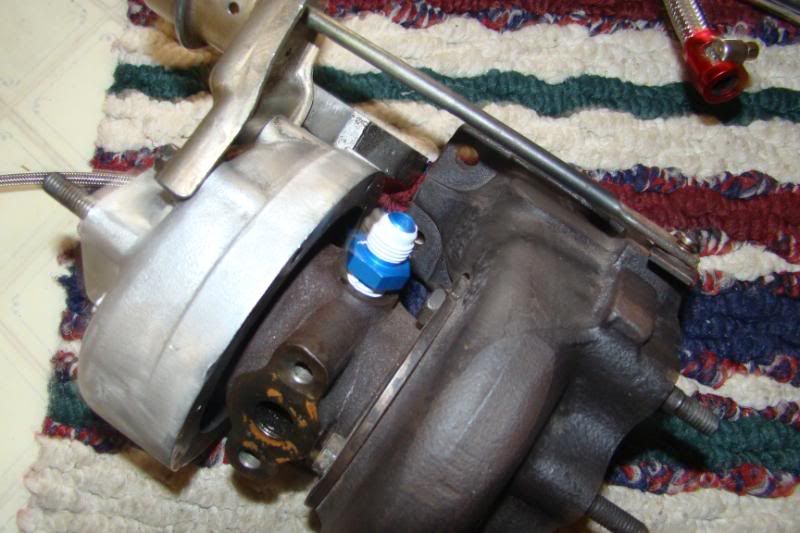 Put the line onto the fitting and tighten it using a 19mm wrench 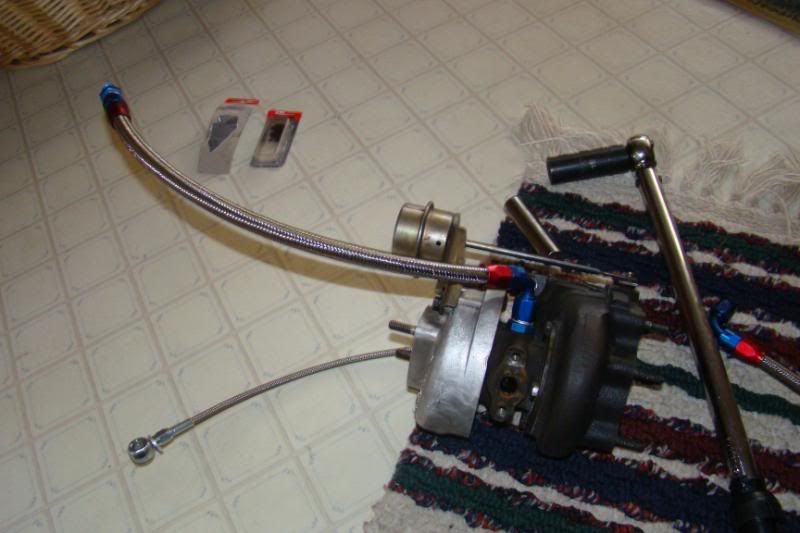 I finally moved onto the oil inlet line, put some thread seal tape and torque it down using a 19mm deepwell socket 14-23 ft lbs. 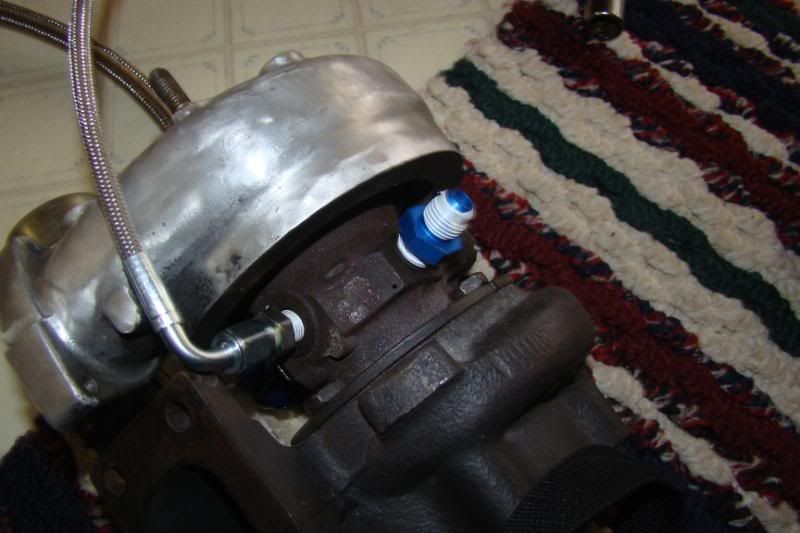 Use a 19mm wrench and tighten the line to the fitting 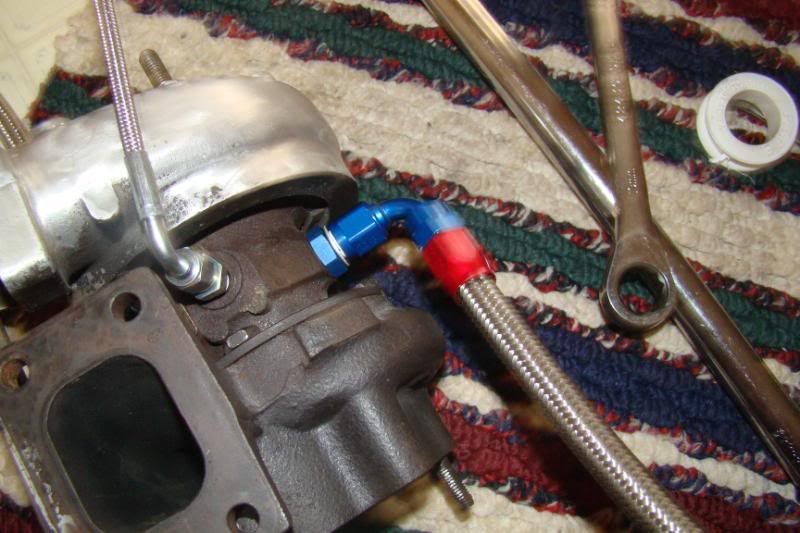 Last edited by xharobikeslifex; 09-19-2013 at 10:03 PM.. |
|
|

|
| Sponsored Links |
|
|
#32 |
|
Zilvia.net Advertiser
 Join Date: Nov 2005
Location: Michigan
Age: 36
Posts: 5,574
Trader Rating: (16)
           Feedback Score: 16 reviews
|
You're not supposed to use teflon tape on AN lines.
They seal with the flare at the end. They will leak if installed like that.
__________________
Build: http://zilvia.net/f/showthread.php?t=643065 Friends don't let friends buy knock-offs. |
|
|

|
|
|
#34 |
|
Zilvia Member
 |
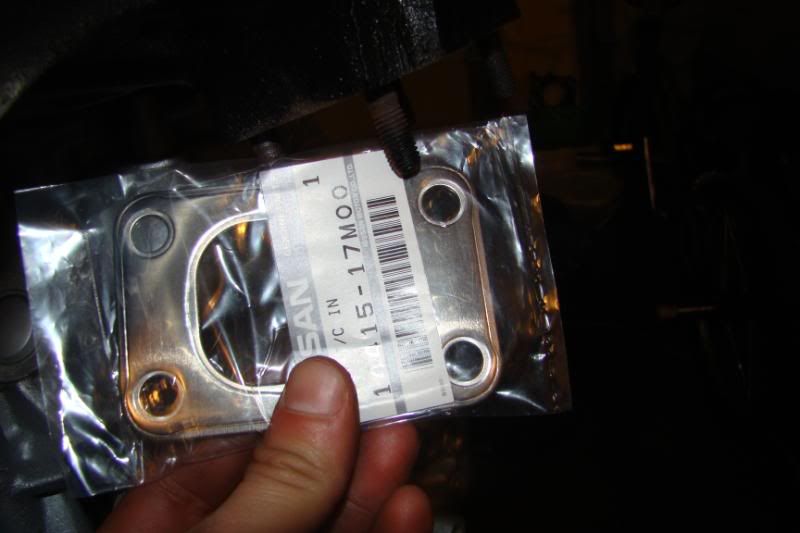
Now your ready to install the turbo to the exhaust manifold, I actually had to take my exhaust manifold back off. Which was fine for me because I wanted to heat wrap my exhaust manifold. To heat wrap first soak the wrap into a bucket of water "so that it will be easier to wrap and so that you can make it tighter" start by wrapping the bottom of the exhaust and I wrapped the 4th runner then 3rd, 2nd, and finally 1st until my exhaust manifold was completely covered with heat wrap during my "wrapping" I used heat wrap zip ties to hold the wrap into place. Once the heat wrap was complete I used this gasket
 And some locking plates 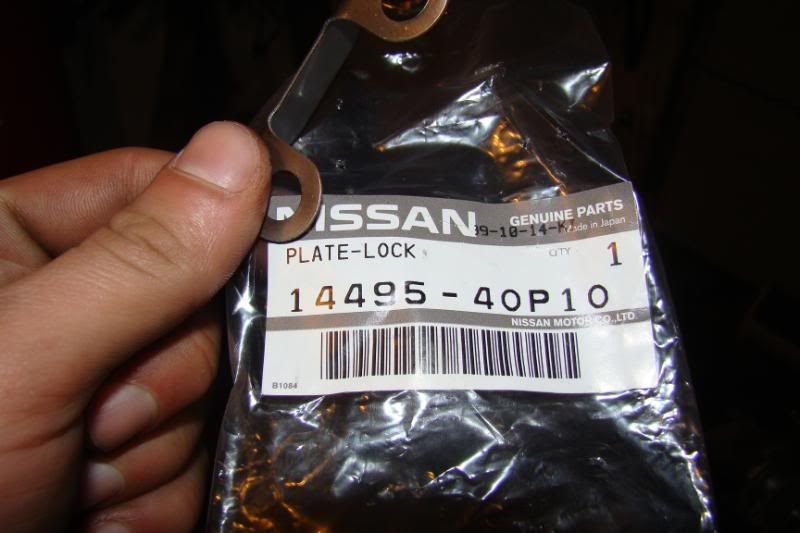 And tighten the F@!K out of the bolts with a 14mm wrench once all 4x bolts are tightened you can then tap in the locking plates on the sides to keep the bolts from unloosing. Bolt back the exhaust manifold like you previously did before and proceed 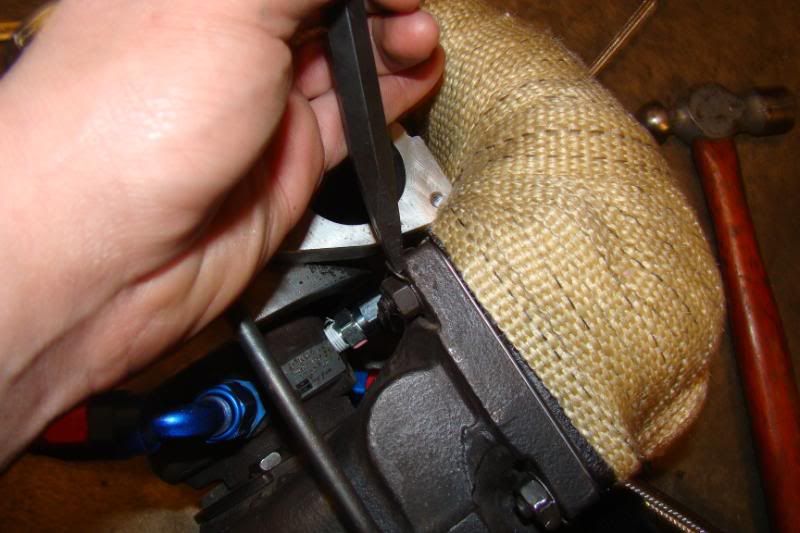 The water line goes to the bottom near the motor mount bracket tighten and torque to 14-23 ft lbs. 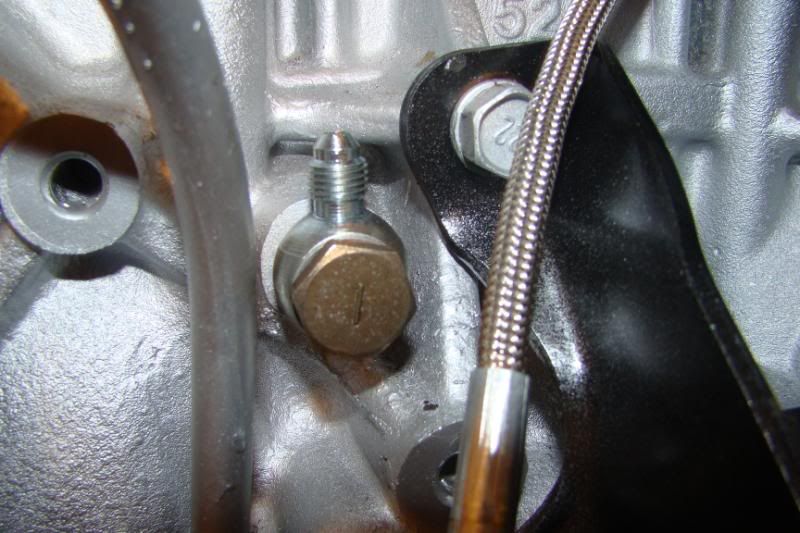 And then oil outlet line goes to the top right under the exhaust manifold tighten and torque to 14-23 ft lbs. 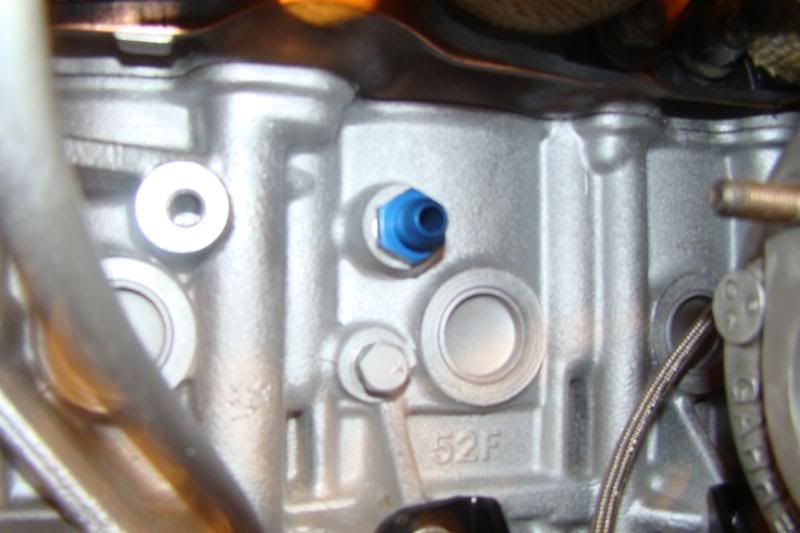 Then finally the last water line goes to the back of the engine remove the factory hose and use a flat head screw driver to tighten. 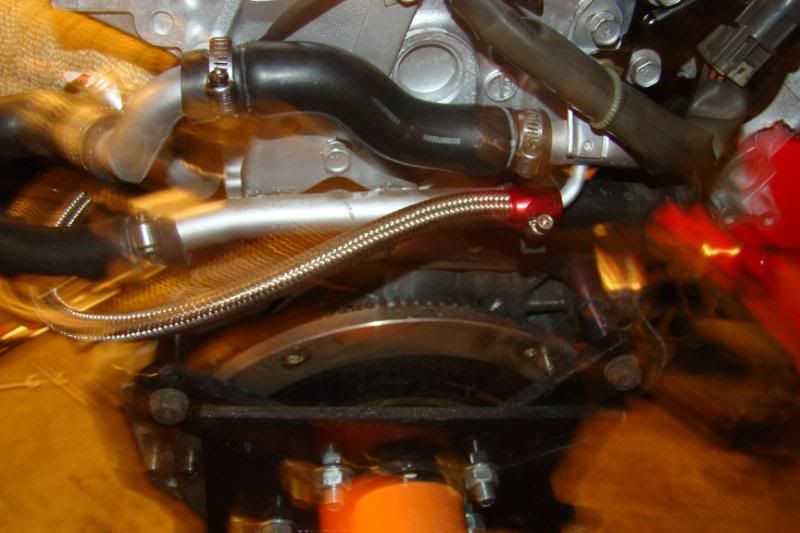 Grab a compressor outlet gasket 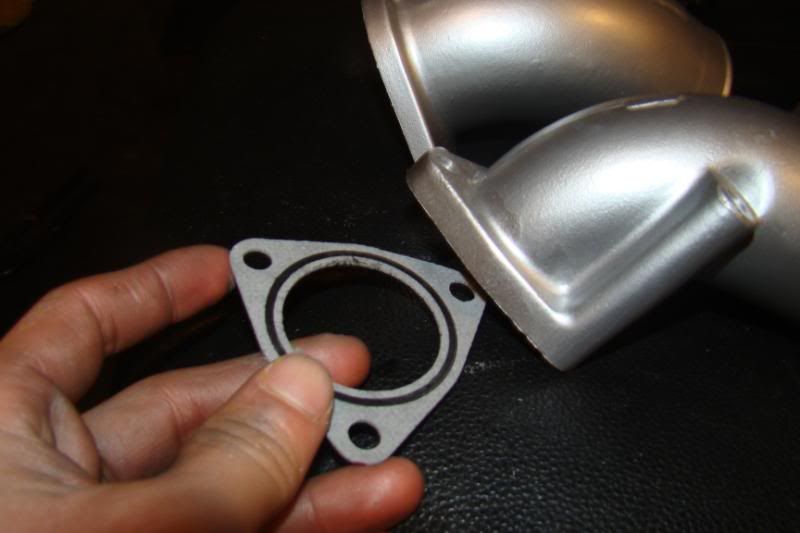 Tighten with a 10mm socket and a 3/8 rachet 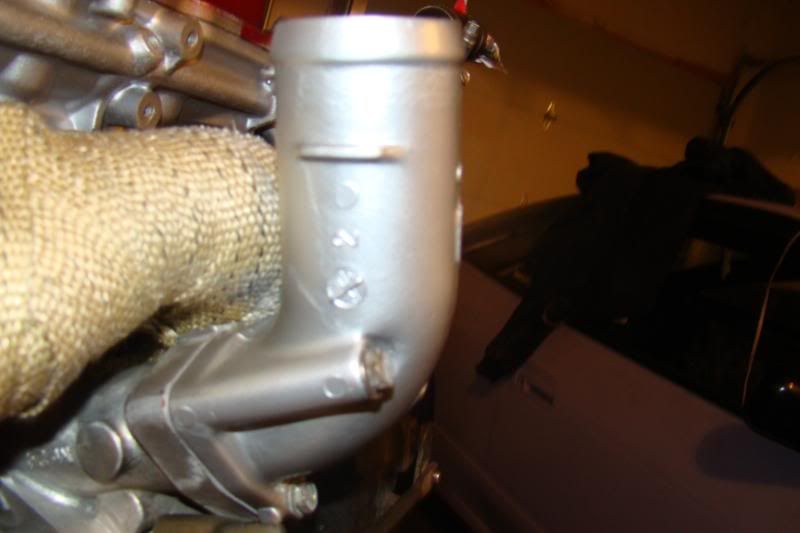 Grab a compressor inlet gasket 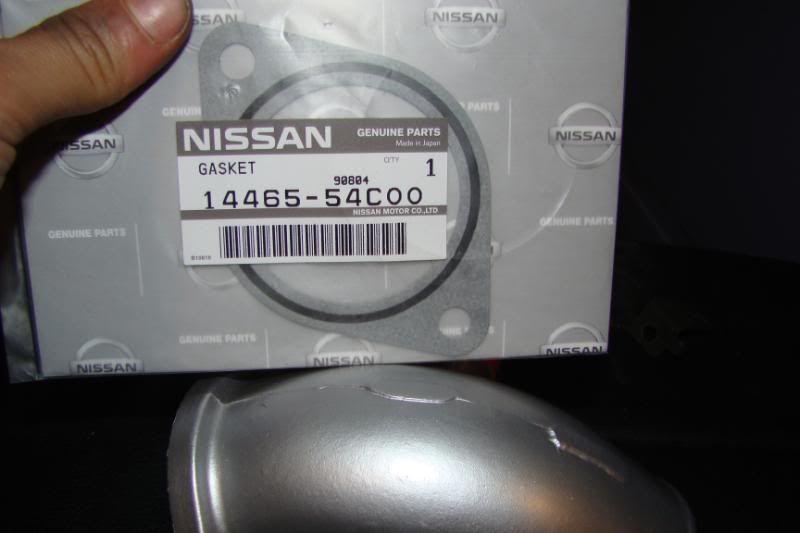 And tighten with a 12mm socket with a 3/8 extension. 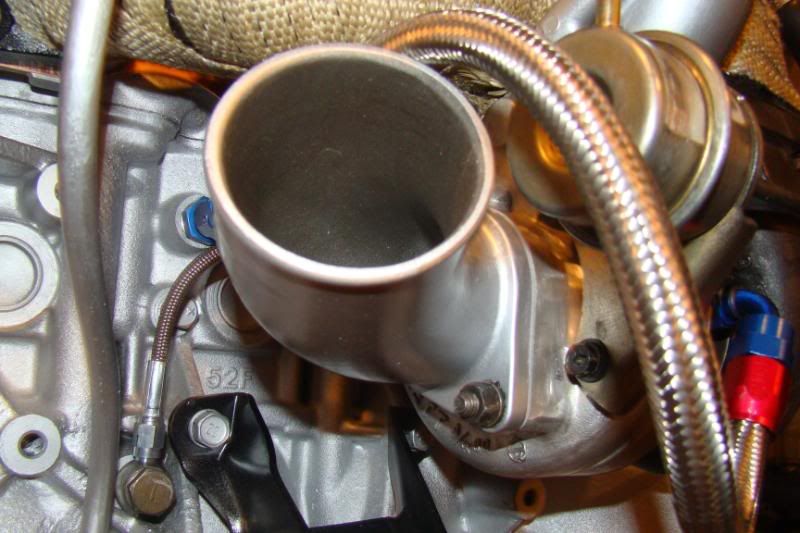 Moved on to the bottom of the engine and removed the 14mm bolt to drain the oil 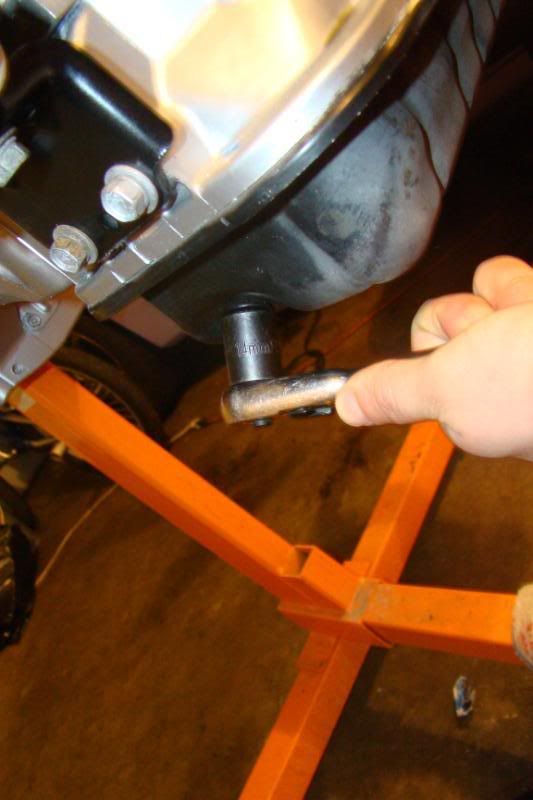 Don't forget to have a oil pan ready  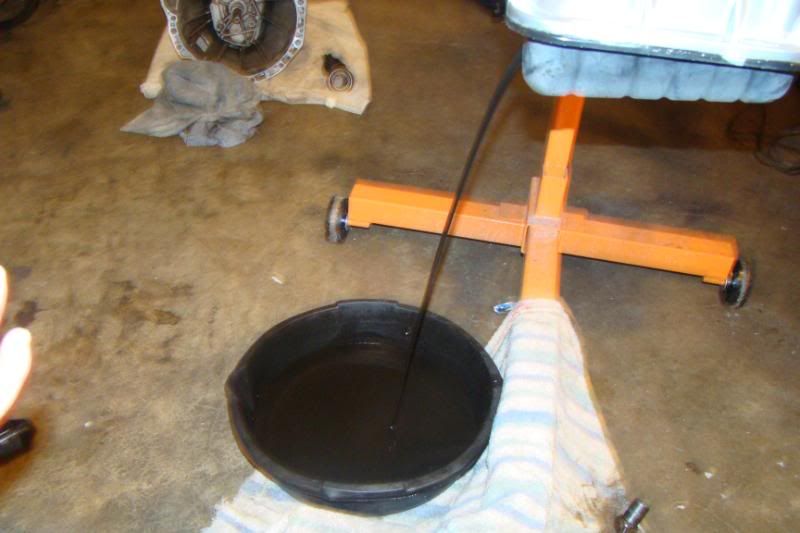 Now the Greddy oil filter relocation kit install. Started with the oil filter side of the kit. and used allen wrenches to tighten all 2x holes 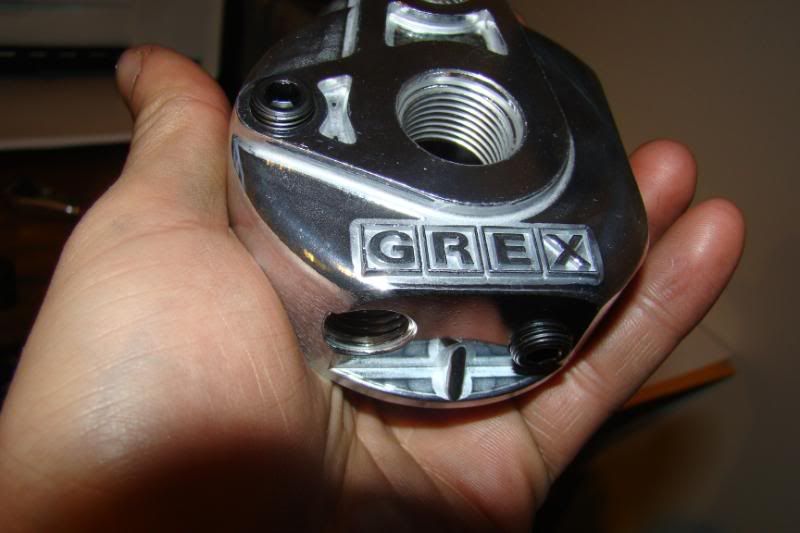 Grabbed this piece and bolted it to the bottom with a 12mm wrench 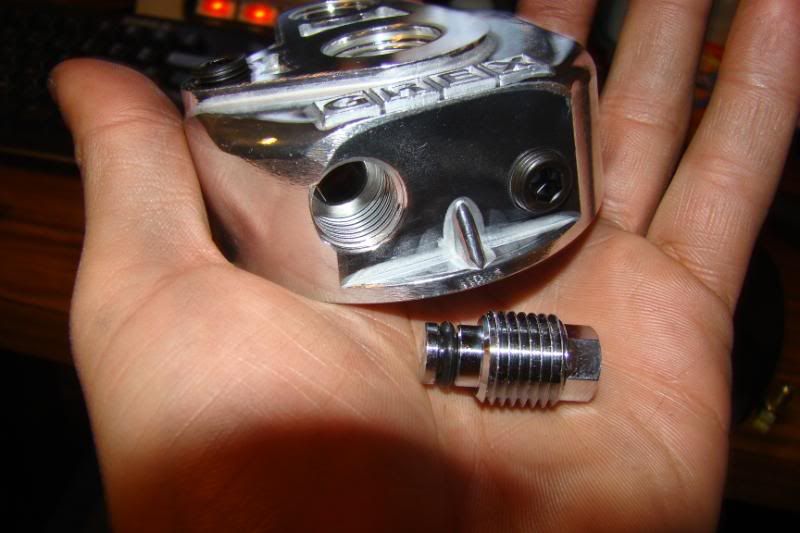 With the kit there will be 4x rubber seals you need to place one on this fitting before tightening. Place this fitting to the top and tighten with a 20mm deep socket I used 1/2 rachet 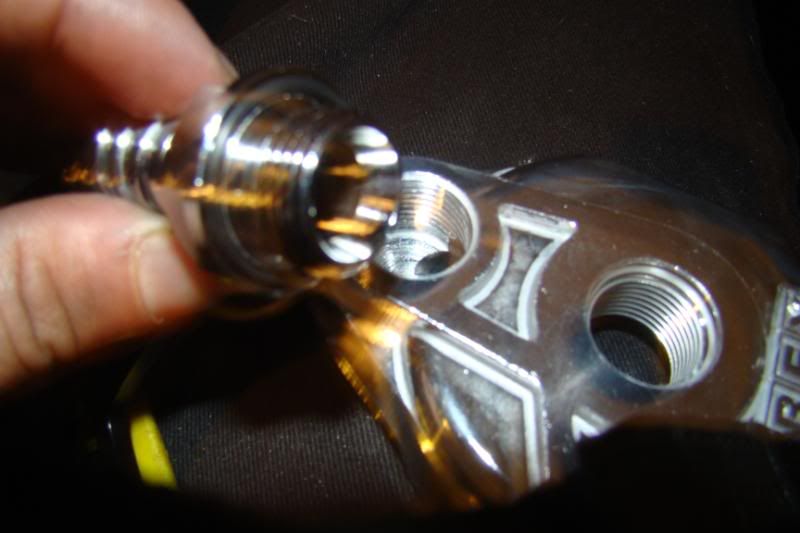 Grab this threaded looking fitting and place a rubber seal underneath and tighten with a 23mm deep socket 1/2 rachet 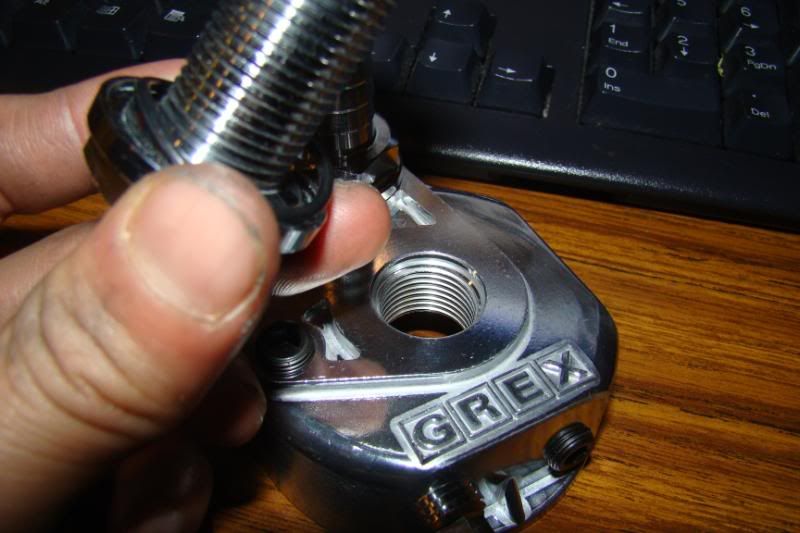 Finally install the bracket and tighten with 11mm socket 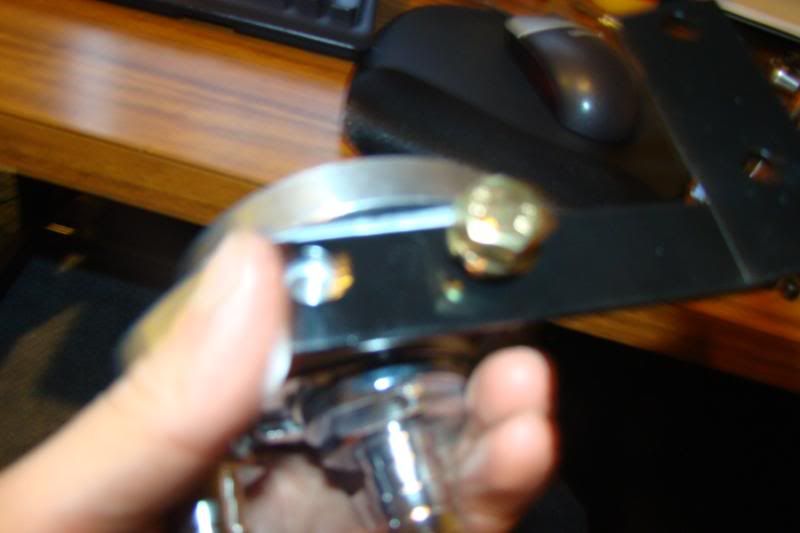 One side complete! 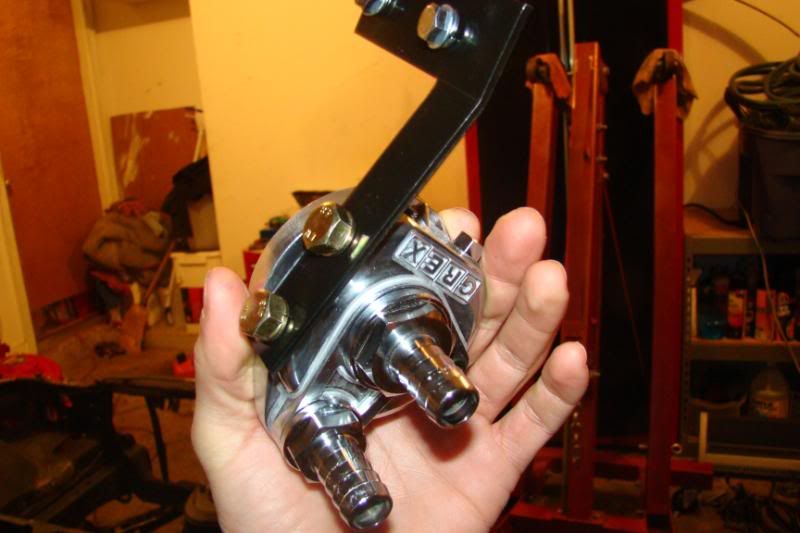 This side is bolted to the stock threaded oil filter location and it's fairly simple tighten all 3x I believe allen screws 1x on top 2x on the side and grab 2x rubber seals and place them under the 2x fittings tighten the bottom fitting with a 20mm deep socket and the top fitting you have to wait till install. 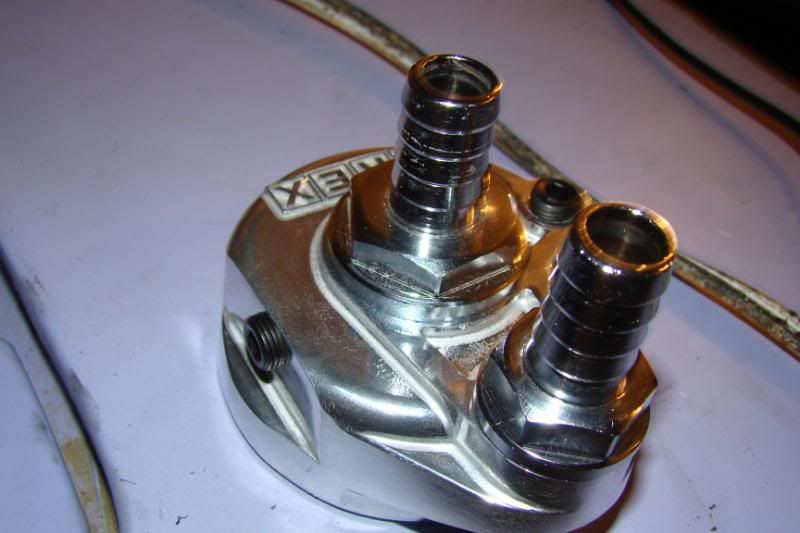 A buddie of mine having difficulty installing the clamps onto the stainless steel hose 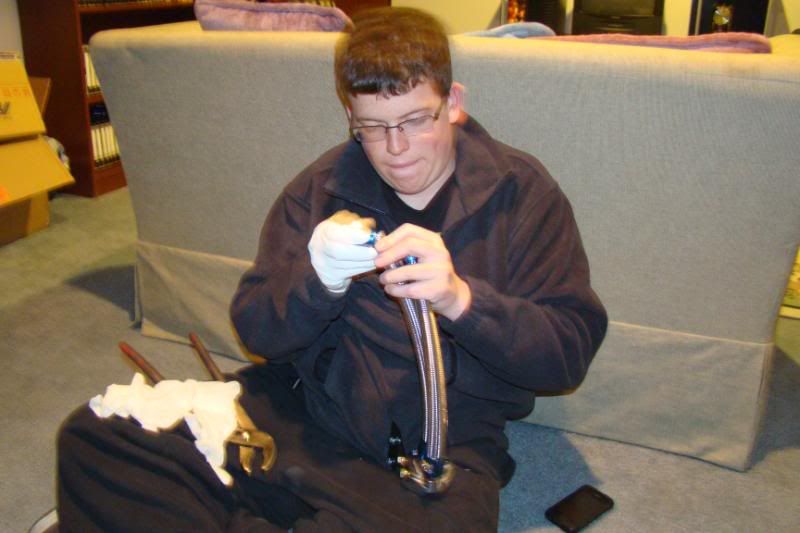 This is what it should look like when completed. They should all just slip on. 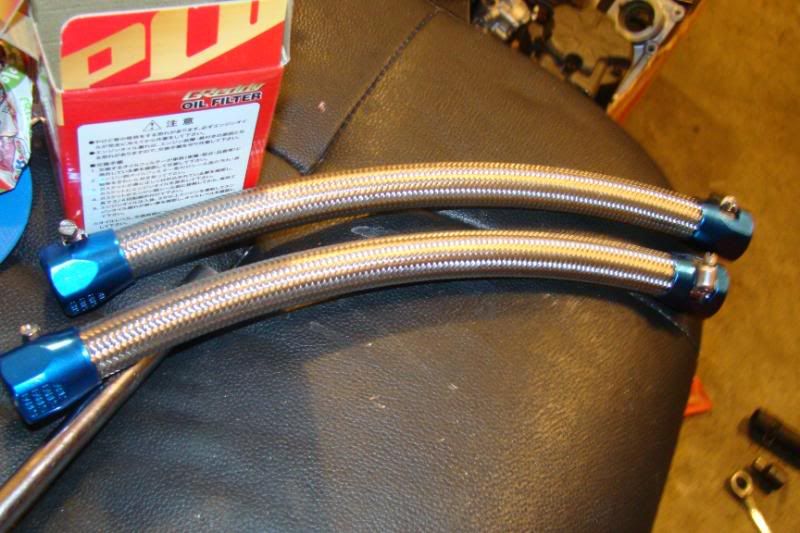 Mount the kit to the stock oil filter location 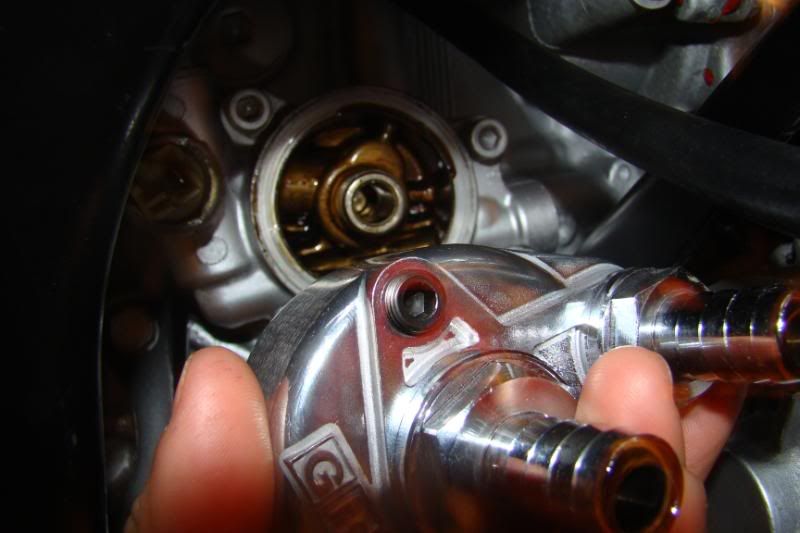 And use a 23mm deep socket to tighten it should end up looking like this 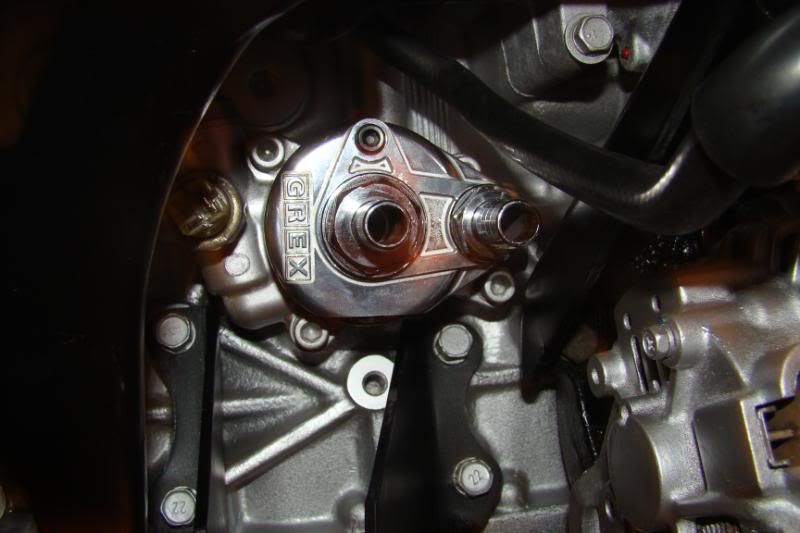 Then install the 2x stainless steel lines and tighten with a flat head screw driver 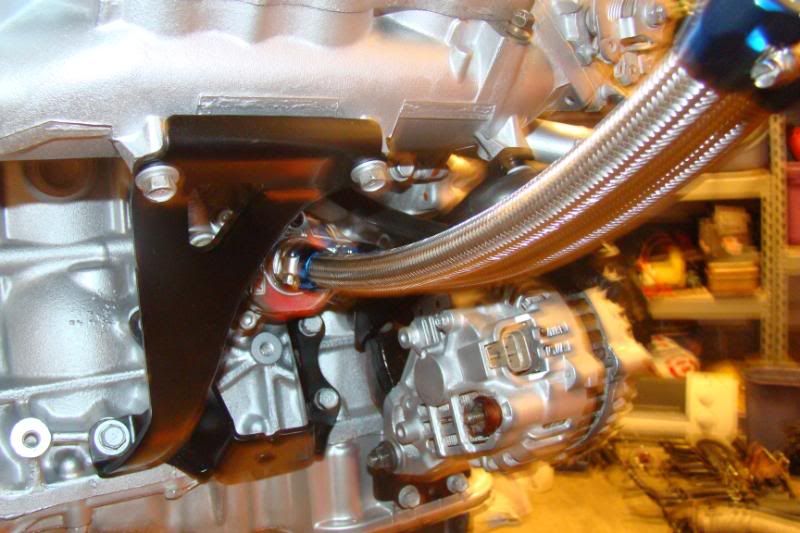 Place the other 2x hoses to the other side of the kit and tighten with a flat head screw driver 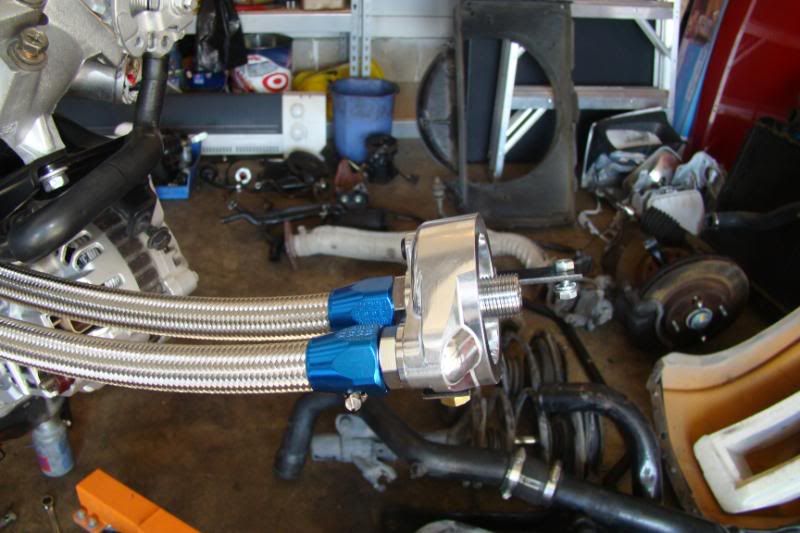 Grab a oil filter and some oil. Place your finger in the oil and apply it around the rubber seal "doing this helps the oil filter seal better" 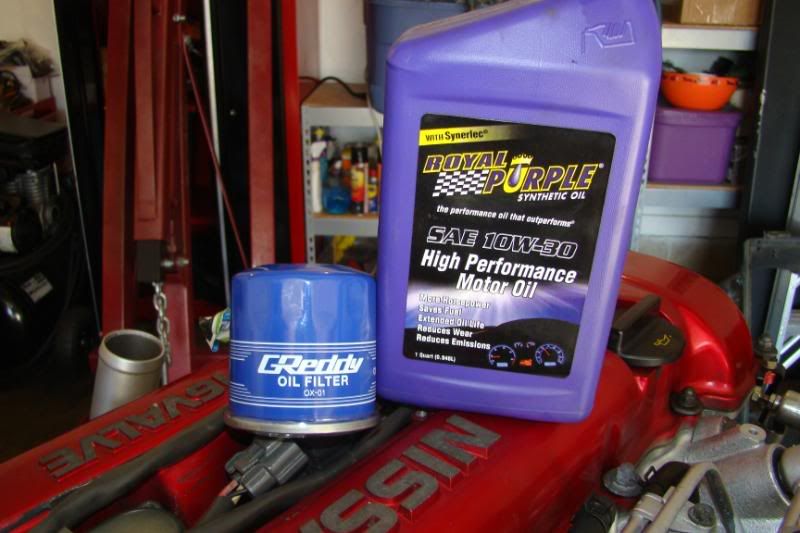 Hand tighten it and grab some zip ties to keep it from dangling 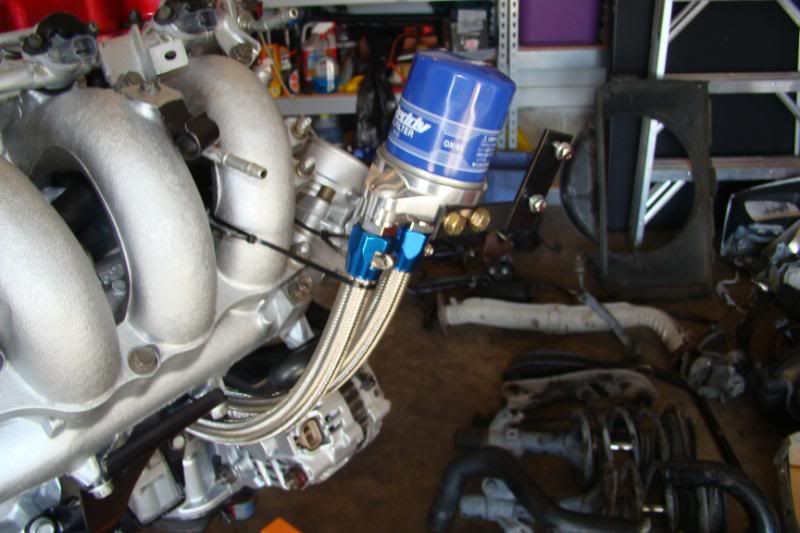 Now it's time to replace that old front oil seal 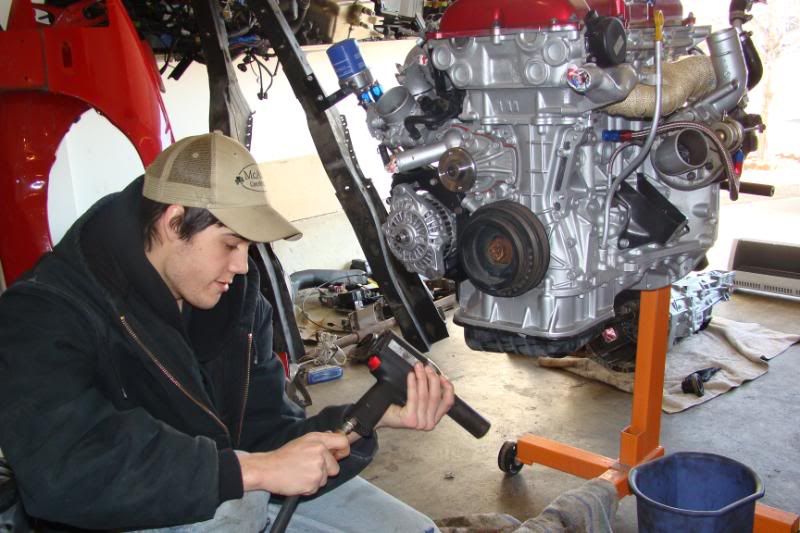 Grab an impact gun with a 27mm socket and go at it! 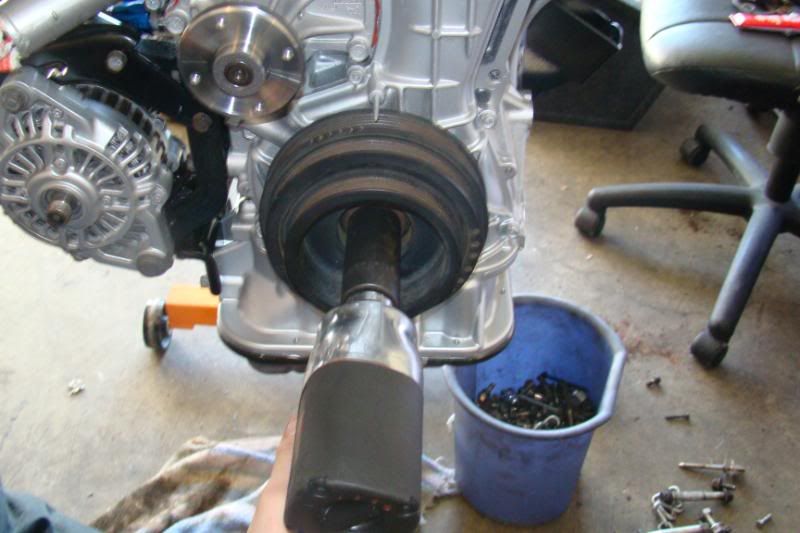 Lol! He looks surprized that it came off with no problem at all 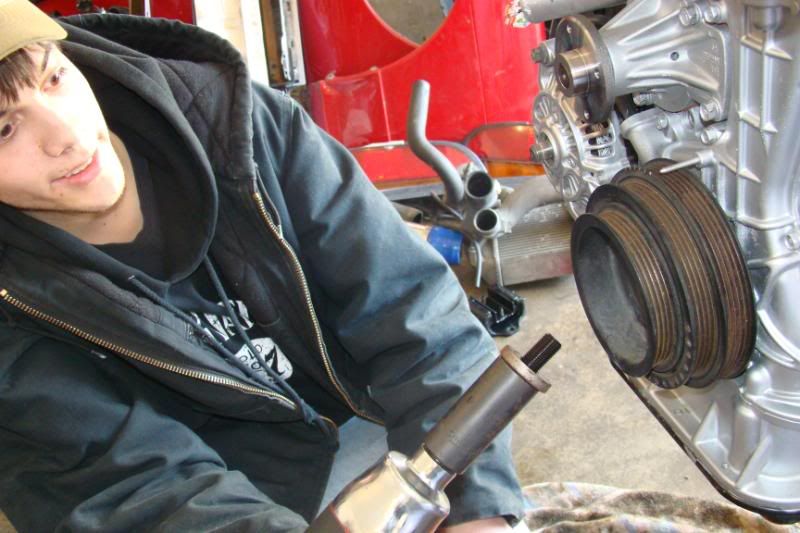 I didn't have a puller so me and my friend thinked outside of the box and used two large flat head screw drivers on opposite sides to pry it off. 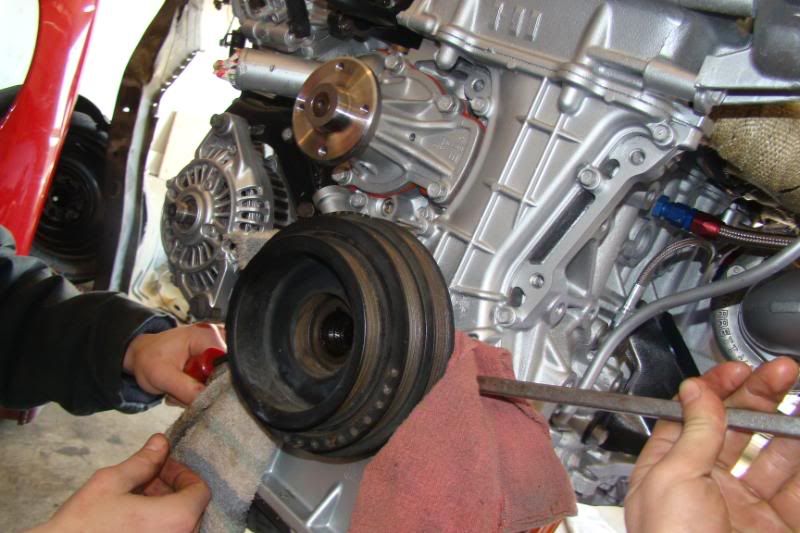 lube up the new oil seal with engine oil duh! 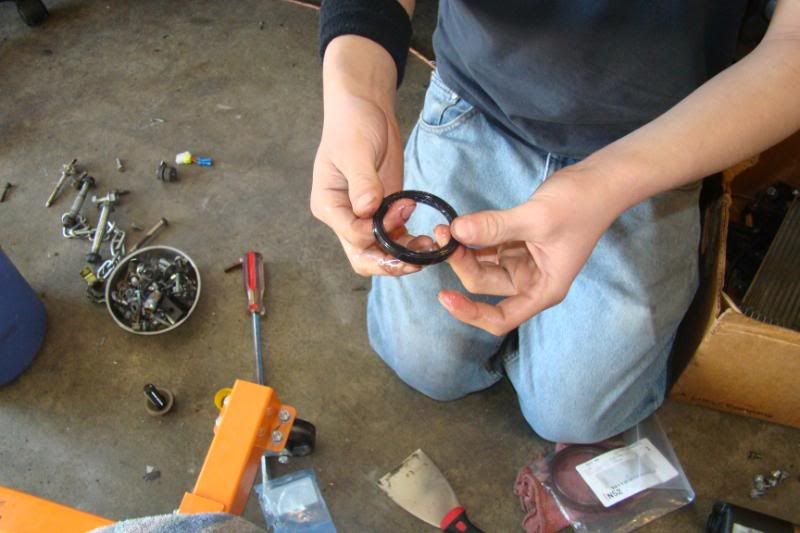 I put the old seal on top of the new one, so that it can seat evenly 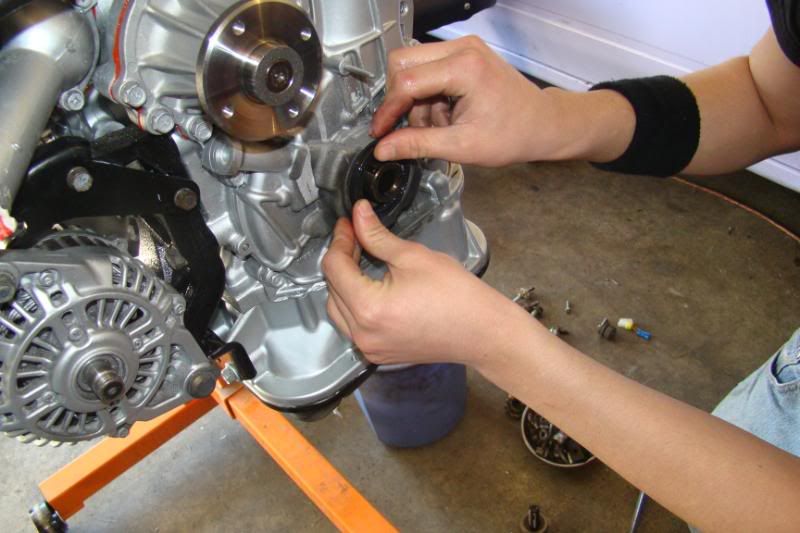 I used a hammer to tap it into place 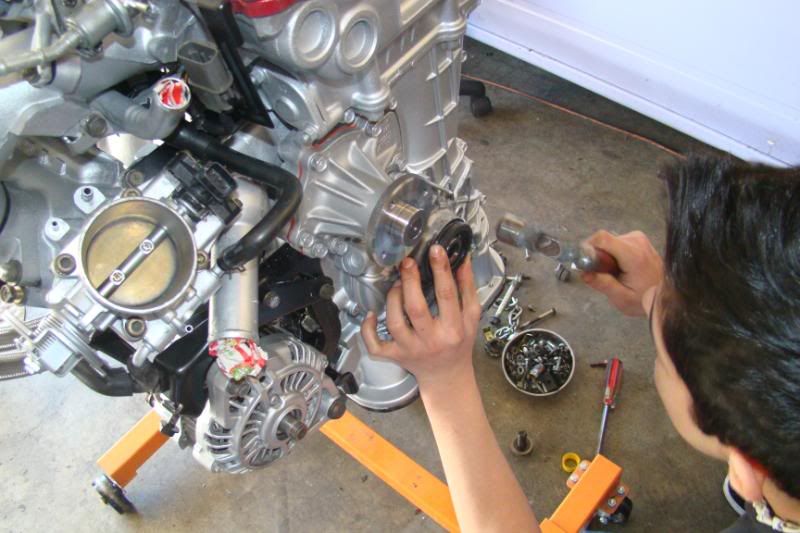 And the finished product can't really see it but trust me it's on correctly 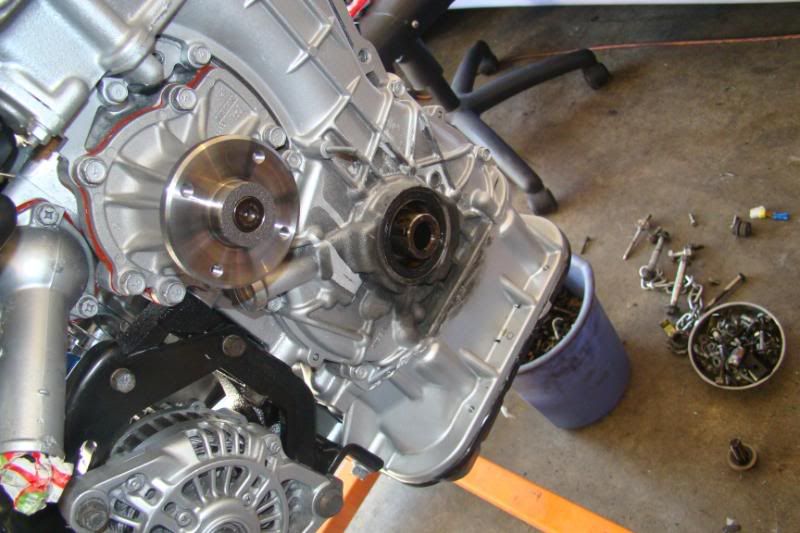 I Got me a Greddy oil pan woot woot!  First I installed this plate with the screws given to you 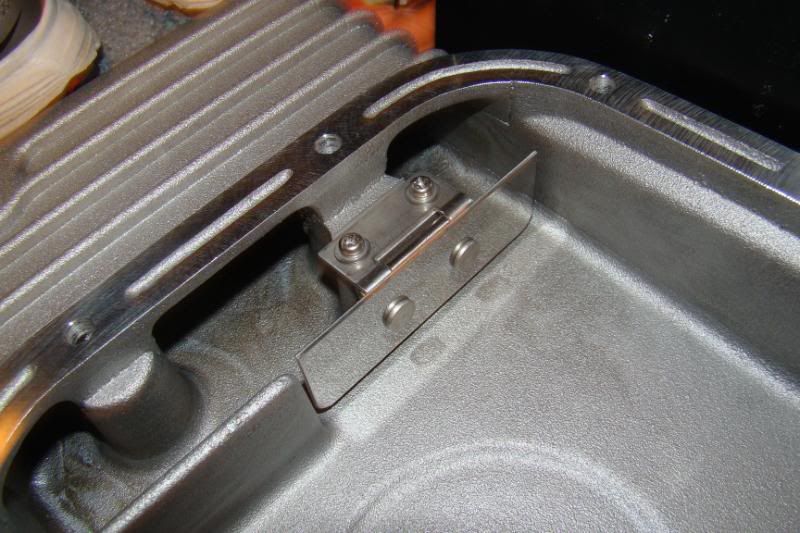 And the smaller plate I screwed in on this side 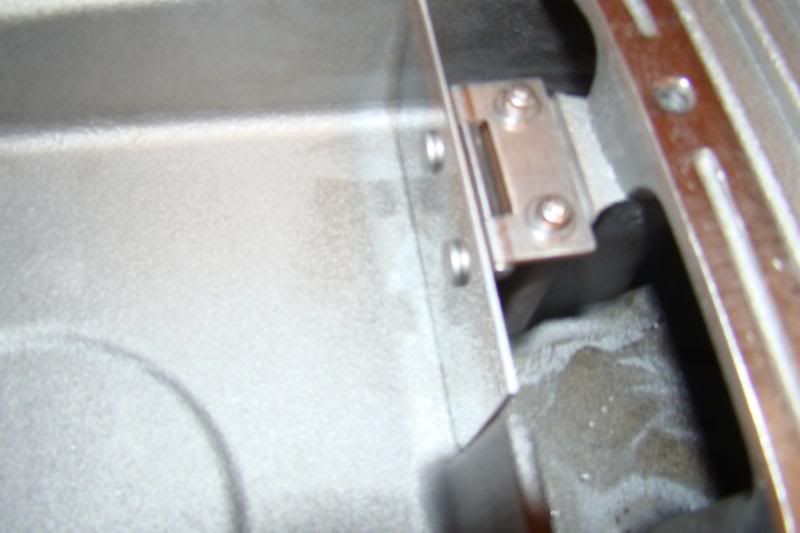 I then bought a circuit sports magnetic drain plug 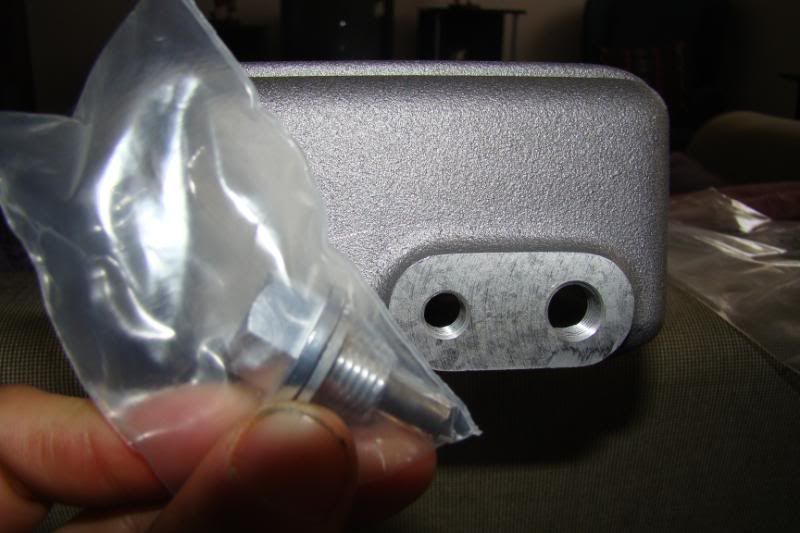 I then tightened it with a 14mm socket and I put thread seal tape on this allen screw and tightened that with an allen wrench. I would install the pan, but i'm waiting for my s14 oil strainer to arrive before I install. 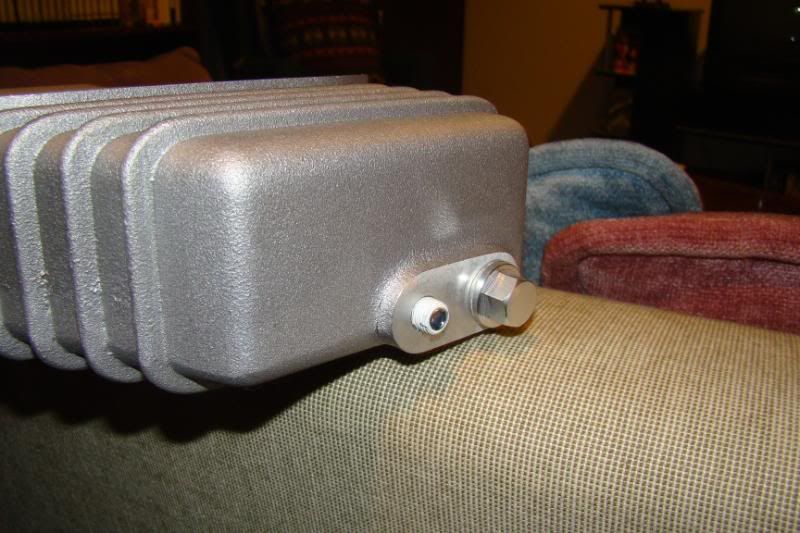 This ends my day. Now i'm waiting for another shipment of parts oooo boy I can't wait you guys just don't even know what I have in mind so stay TUNED! Oh and I almost forgot I have a problem I cant seem to find 2x bolt for the bottom of this t25 turbo could anyone help me out maybe where to go to buy one I have a bucket full of spare bolts and I shit you not. Not one of them threads in... :x 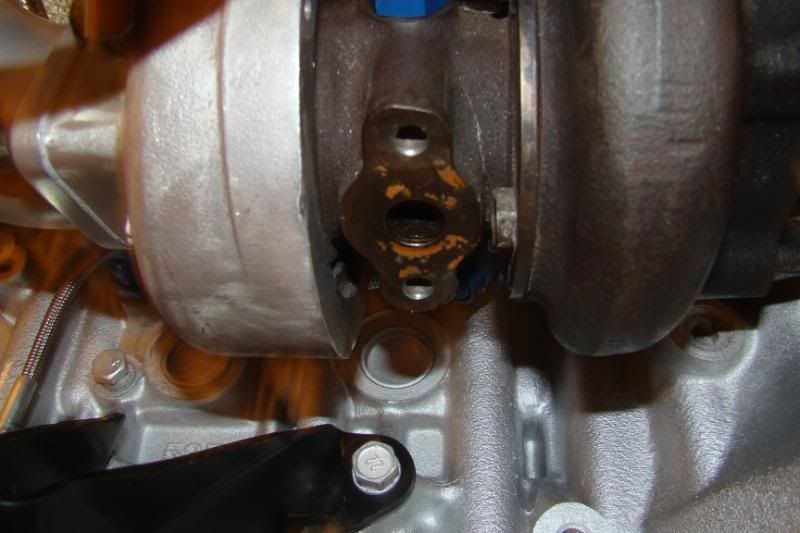 Last edited by xharobikeslifex; 09-19-2013 at 10:04 PM.. |
|
|

|
|
|
#35 |
|
Zilvia Member
 |
|
|
|

|
|
|
#36 |
|
Post Whore!
 Join Date: Dec 2006
Location: Misawa, Japan
Posts: 6,815
Trader Rating: (8)
           Feedback Score: 8 reviews
|
Dont use Royal Purple, That shits garbage.
Ive read and seen quiet a few Engine and Transmission get destroyed when ppl switch to that shit. Happened to me
__________________
 後輪駆動車1番 後輪駆動車1番1989 Built SR GT2871R -363whp 1998 S14 W/RB25- 250ish (For Now) 1986 SR86 - 200ish 1990 R32 GTR - 320hp Don't Buy Engines from JDM-Online http://zilvia.net/f/businesses/207457-jdm-online.html Don't Buy XS-Power or SSAC Shit |
|
|

|
|
|
#38 |
|
Zilvia Member
 |
More stuff arrived! woohoo I swear its like christmas every two weeks lol
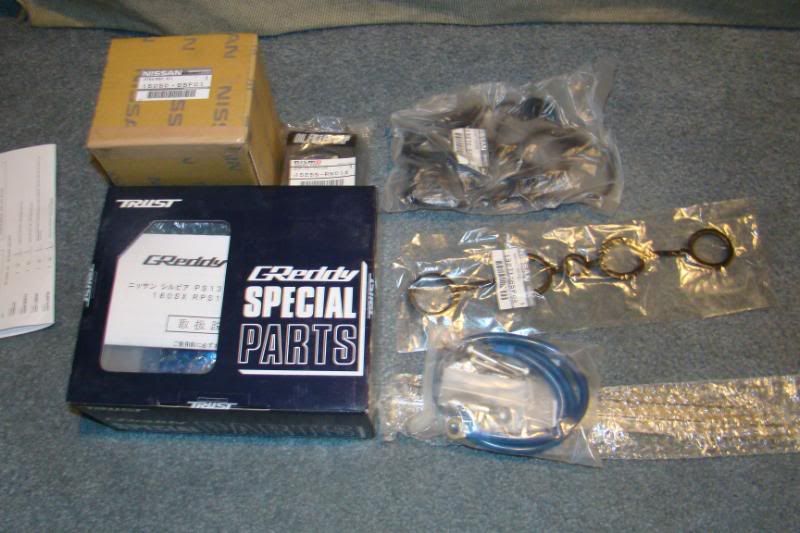 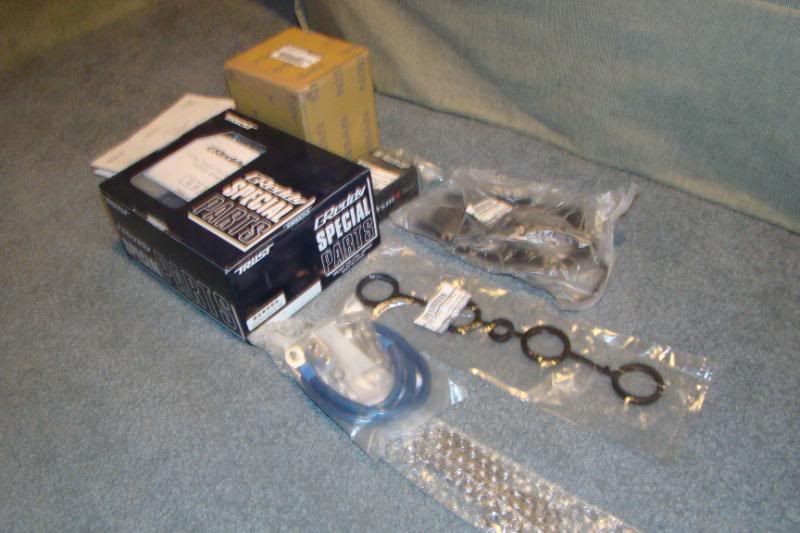 I decided to replace the s13 oil strainer with an s14 oil strainer. 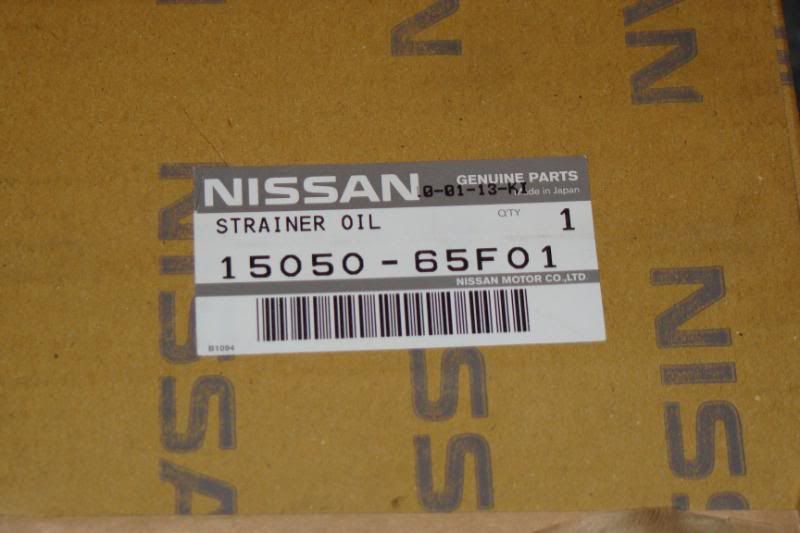 First your going to have to take all 10x oil pan bolts with a 10mm 3/8 rachet. And remove the pan using a combo of a putty knife and hammer. 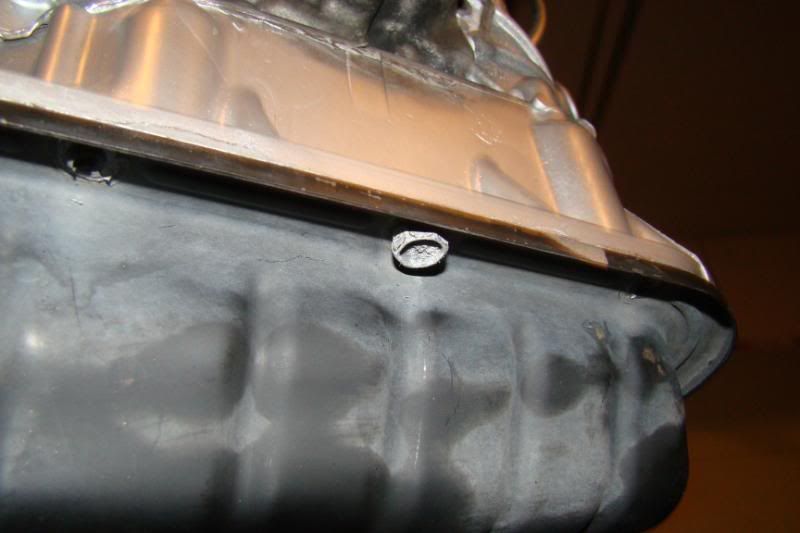 Next remove the 6x plate bolts with a 12mm socket with a 3/8 extension. Take note of location of the baffle plate before removing it 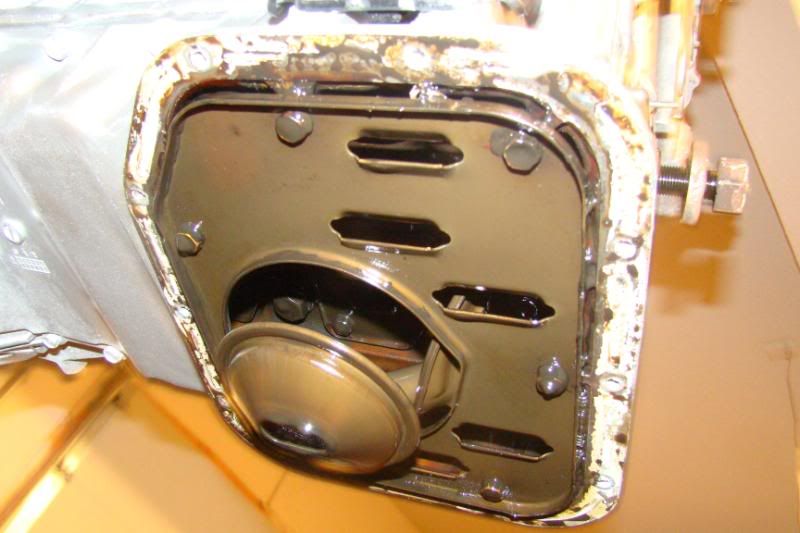 Once I took off the baffle plate I discovered lots of oil sludge gooo! 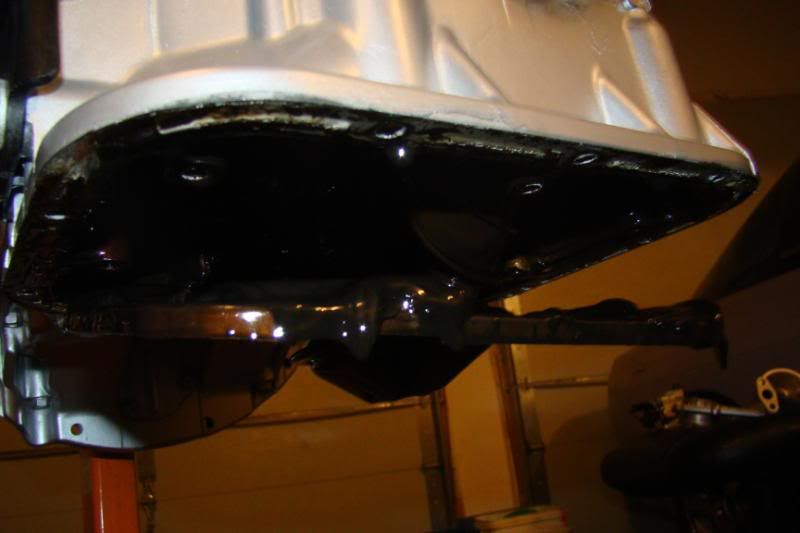 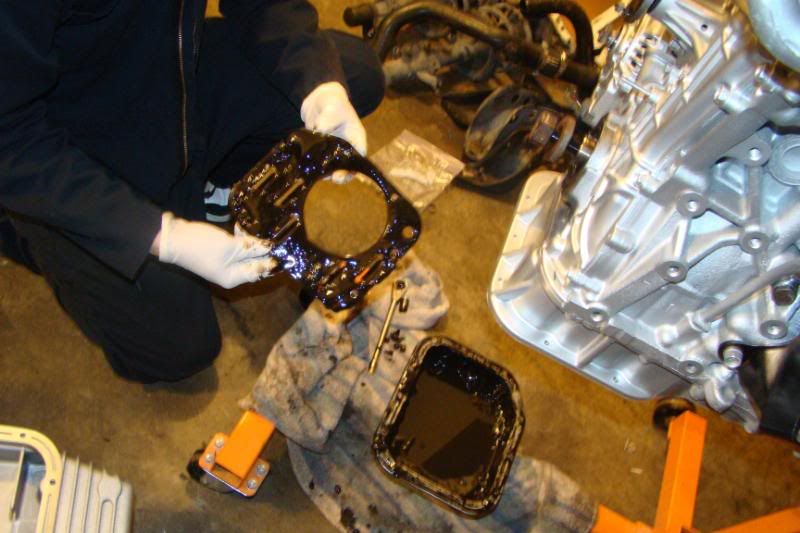 Heres me with some disposal gloves scraping all the old oil/sludge with my hands. I could be on the tv show "Dirty Jobs" for doing this. 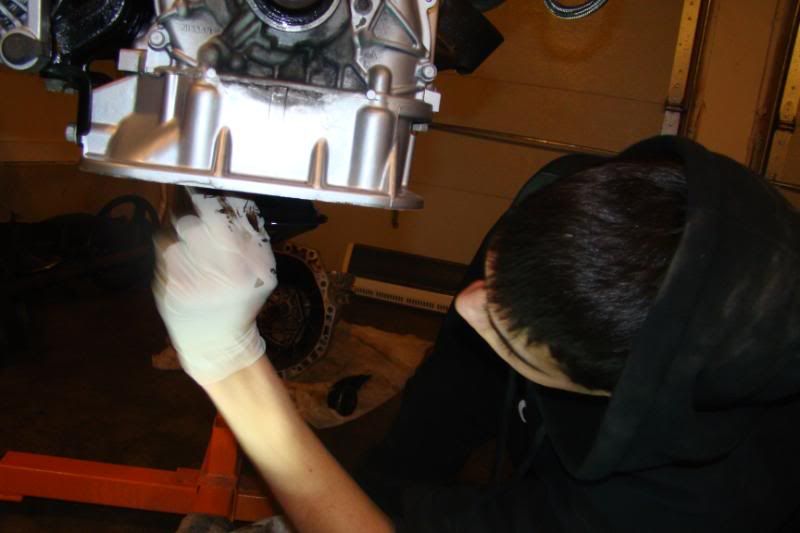 Your going to need a 12mm socket and 3/8 extension for 2 of the bolts thats holding the oil strainer also a 10mm wrench 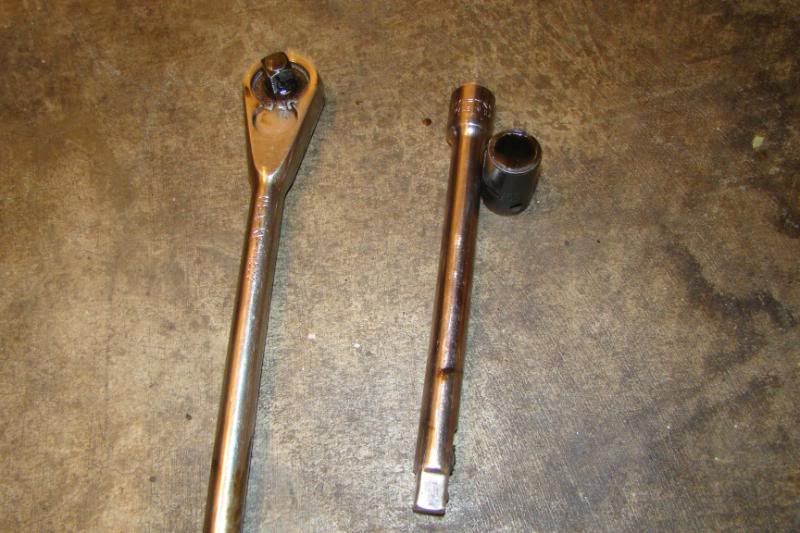 Once you remove the oil strainer notice the difference between the s13 vs s14 oil strainer the s13 has a smaller opening where as the s14 has a much larger one. The 10mm bolt for the s14 oil strainer is bolted to a different location and is a PITA to thread on two people helping you will make it easier to do. 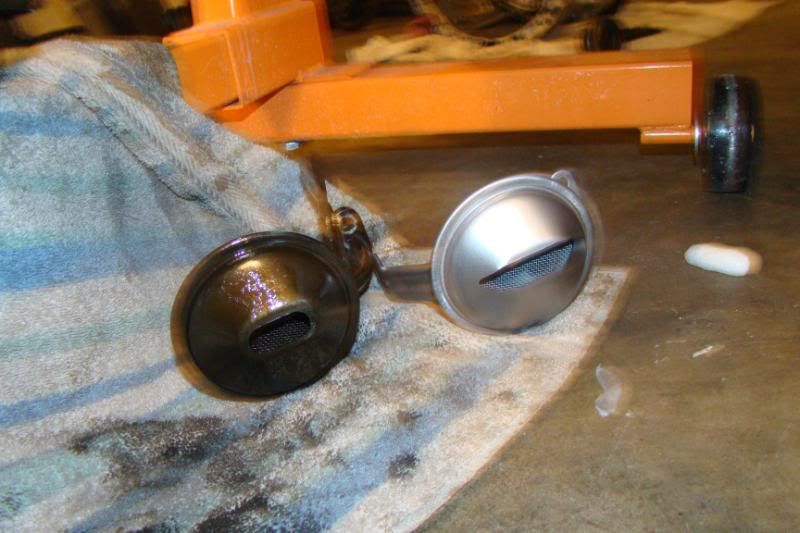 First your going to put a new oil strainer gasket then "Loosely bolt up the 2x 12mm bolts" 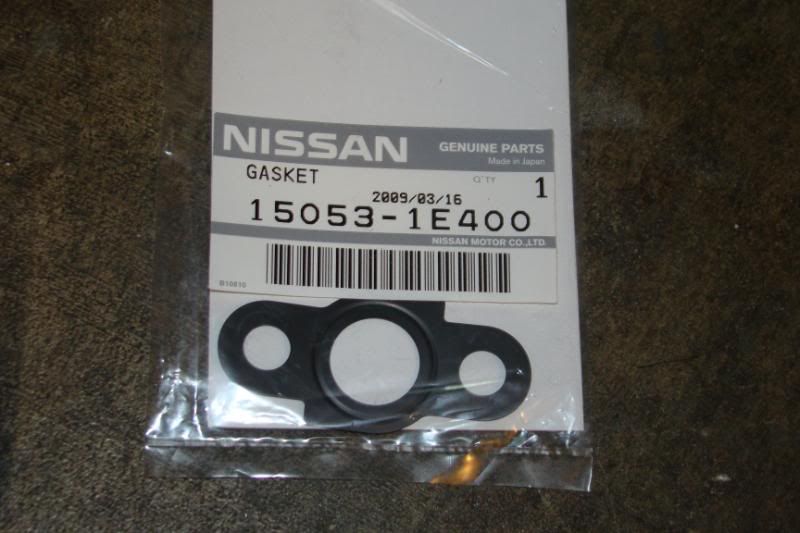 Me and my buddy confirmed that using just your hands, magnet, wrench, needle nose pliers have all failed in trying to get this god forsaken bolt threaded on. 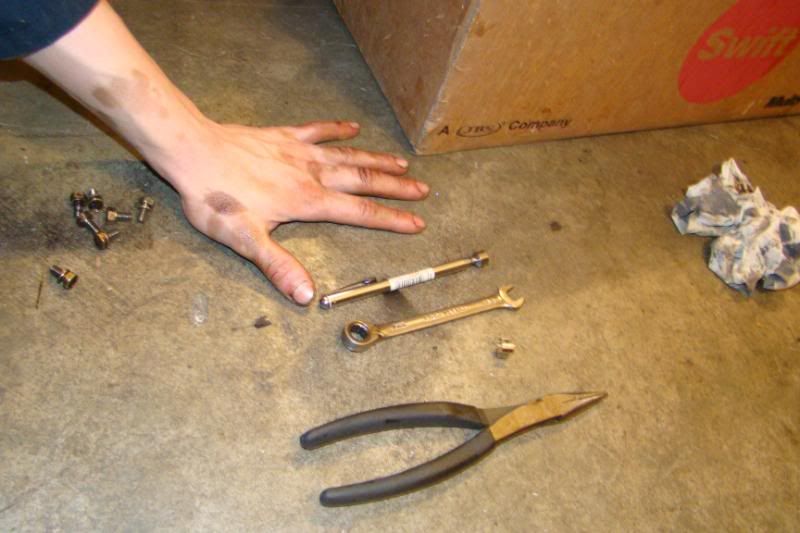 What we did find out to work just fine was positioning the bolt dead center having a small flat head screw driver keep it in place and "slowly" wrenching on it with a 10mm wrench. 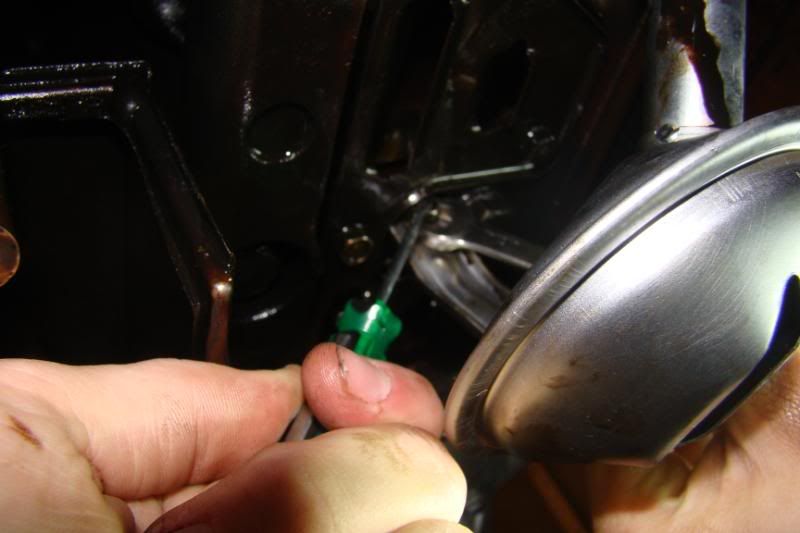 Heres a better pic on how tight of space you have to work with thats why it's better to have the 2x 12mm bolts loosely tightened to allow for more clearance. 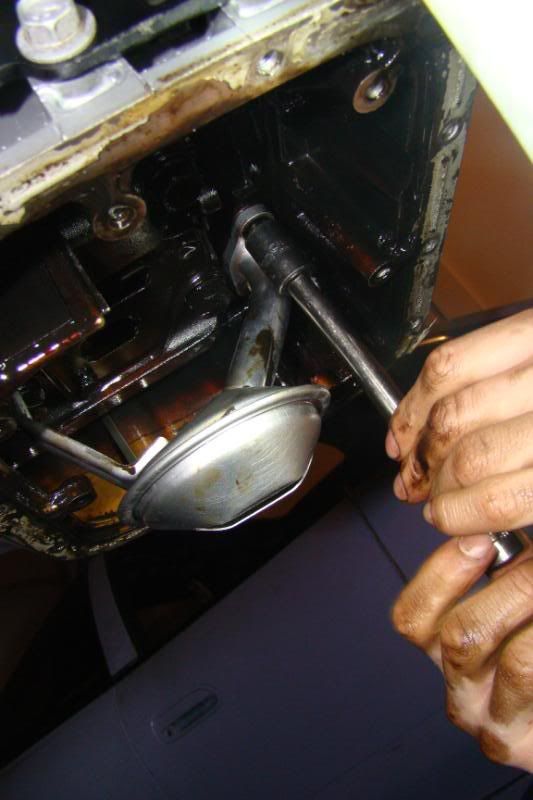 Once you have wrenched the bolt in far enough, you can finally squeeze the rachet wrench on it to make it easier to tighten. 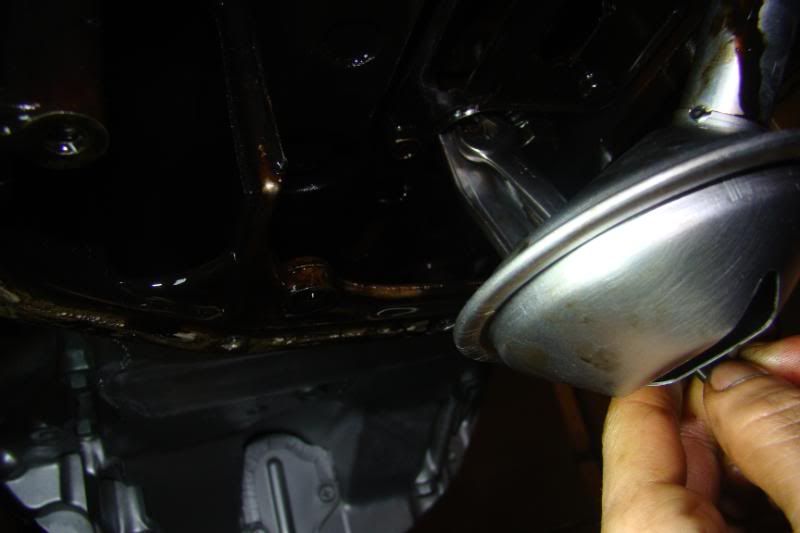 Don't forget to tighten and torque the strainer bolts to 12-14ft lbs. Oh and as for the strainer bracket I just goodin tightened it. Once the strainer installed. Now reinstall the baffle plate and torque them to 4.7 to 5.5ft lbs. Then Scrape and remove all the old gasket from the oil pan. 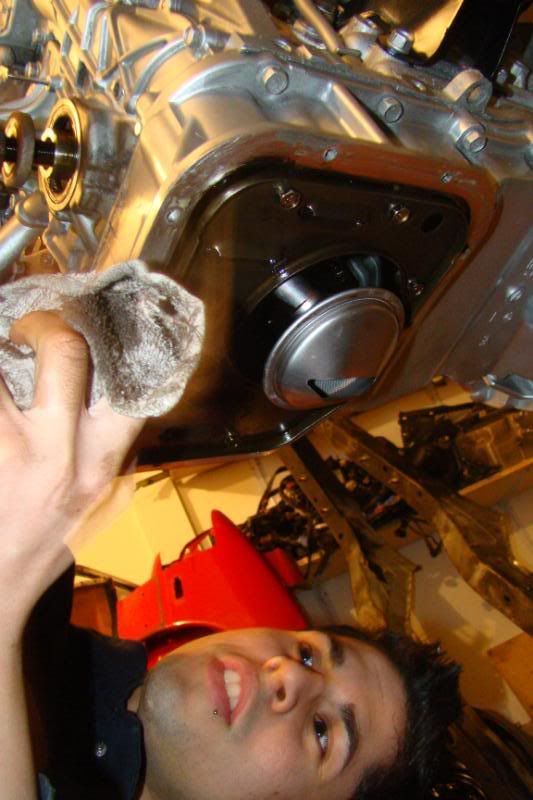 Now apply gasket sealer with one continuous bead all around your new greddy oil pan! 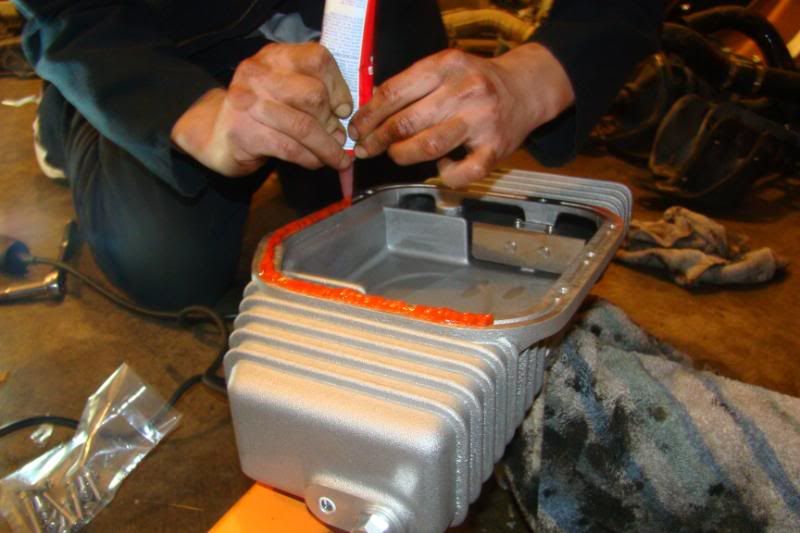 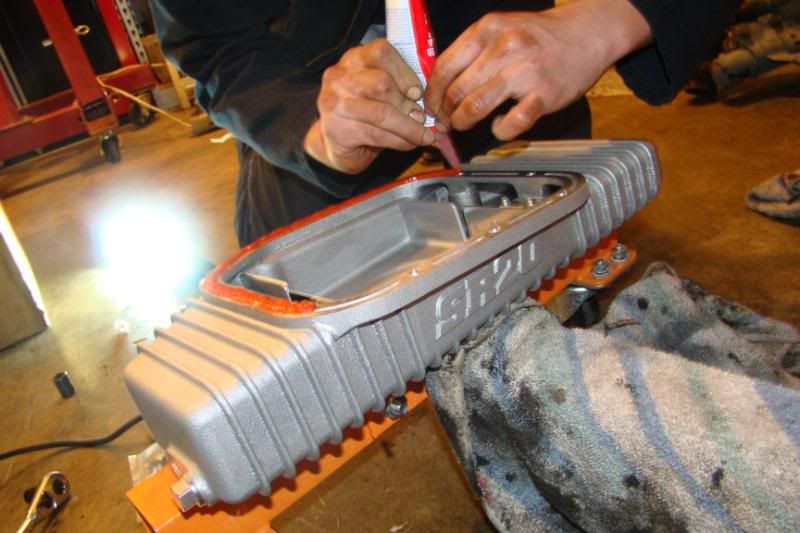 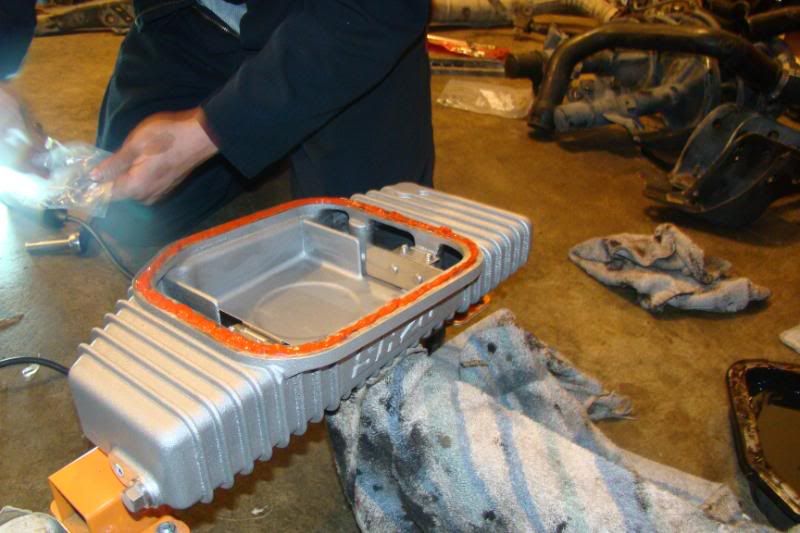 Heres the hardware that came with the greddy oil pan the 4x larger bolts go to the sides of the oil pan where the 6x smaller bolts go to the front and rear. have an allen wrench on standy as well as these bolts. Position the oil pan and screw on all the screws "snug tight" wait about 10-15 minutes then proceed to torque to 4.7-5.5ft lbs. With that low of a number I just hand tightened them. 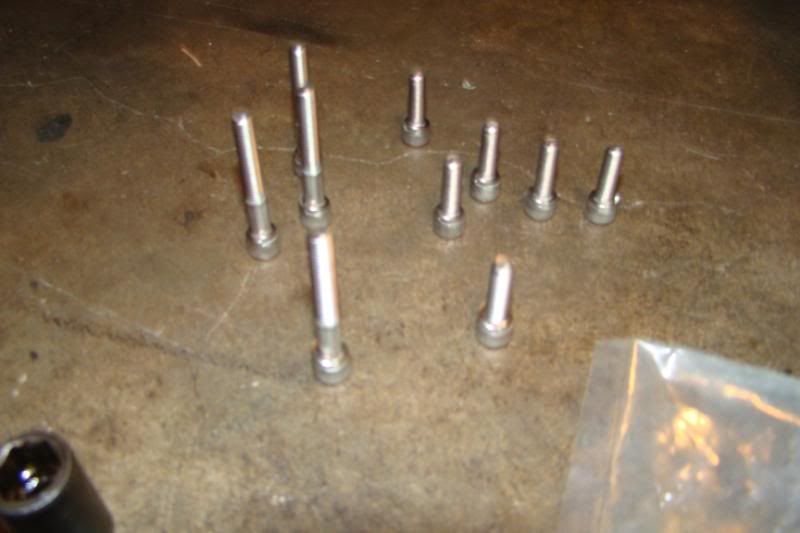 When I removed the Crank Pulley I uncovered more dirt/grime so I cleaned it up 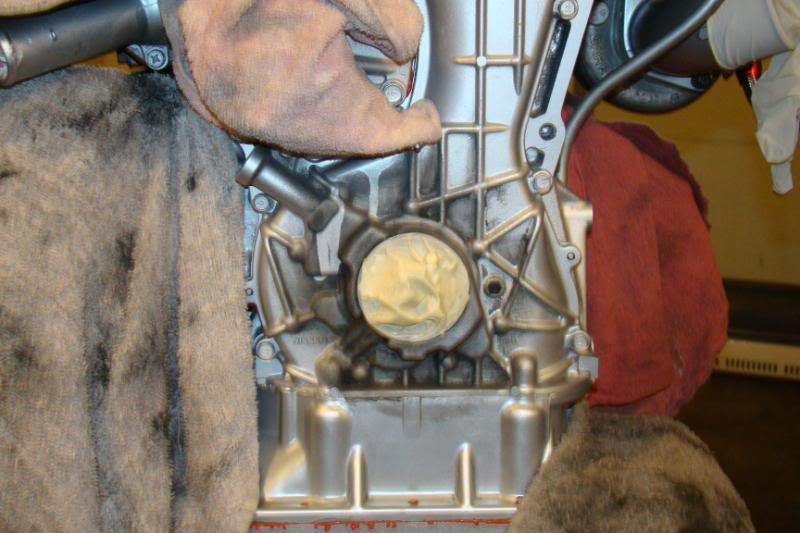 Then sprayed it with 2x coats of high heat engine enamel. 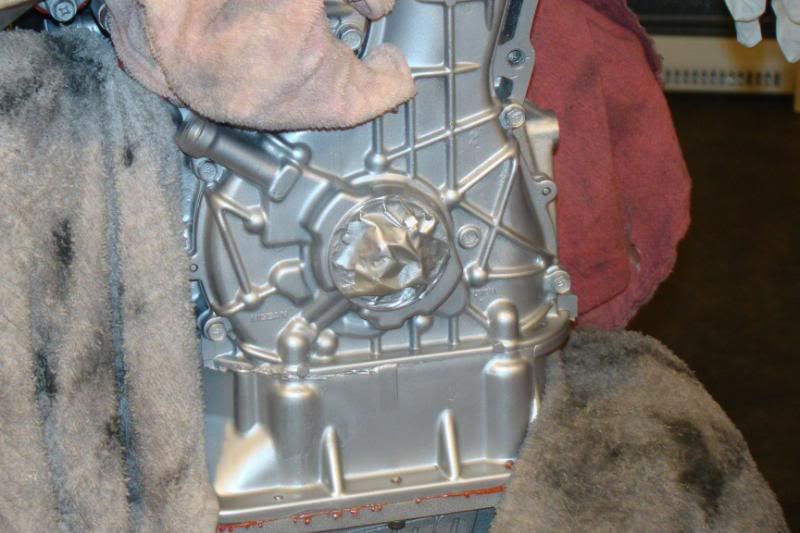 This concludes my day. 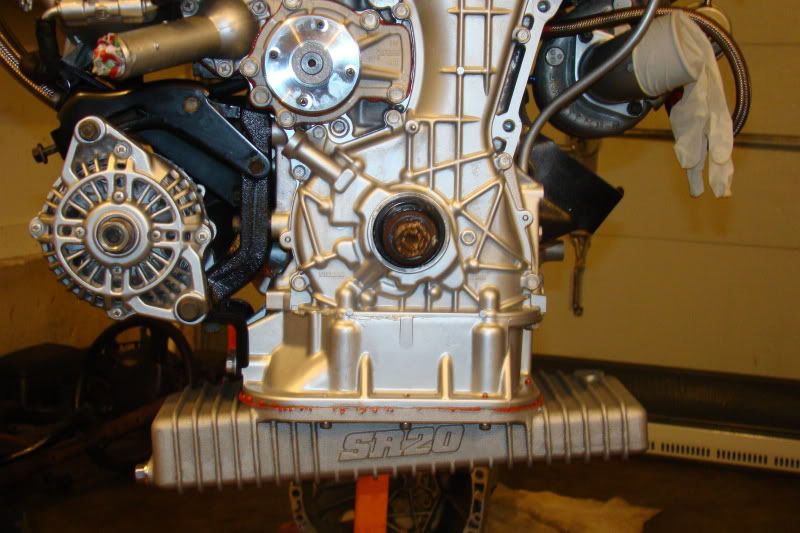 Last edited by xharobikeslifex; 09-19-2013 at 10:05 PM.. |
|
|

|
|
|
#39 |
|
Zilvia Member
 |
I just used it to seal up the oil filter, I don't plan on actually putting it into my engine I plan to use mobile 1
|
|
|

|
|
|
#40 |
|
Zilvia Member
 |
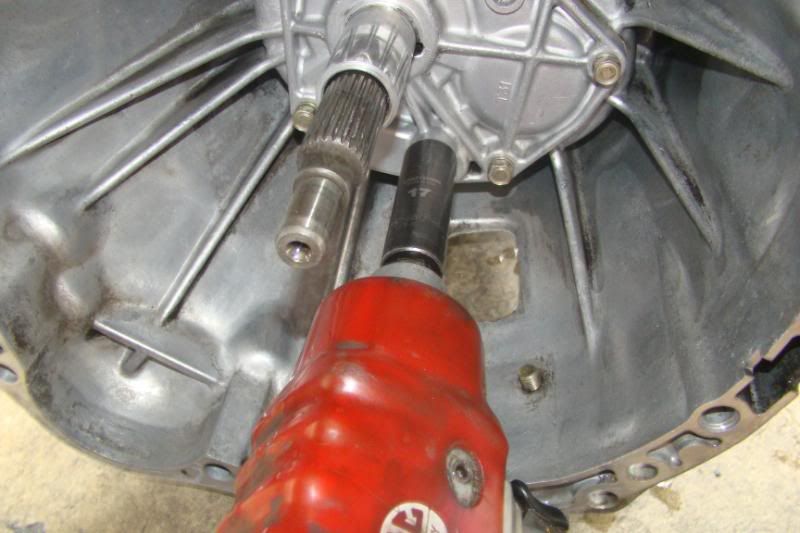 Okay finally got my gaskets in for my transmission I decided to replace the front trans cover gasket. Since i'm going to replace the pivot ball I removed that first with a 17mm deep socket. 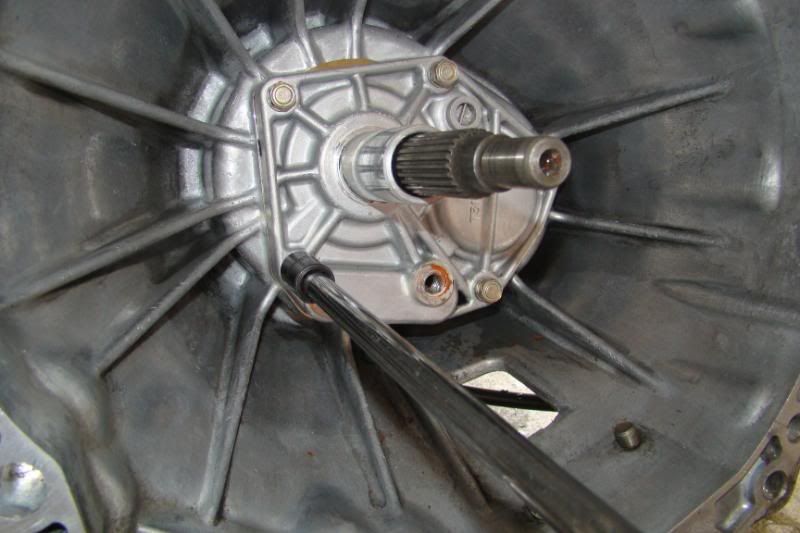 Then got a 12mm socket with a 3/8 extension and loosened all of the front trans cover bolts. 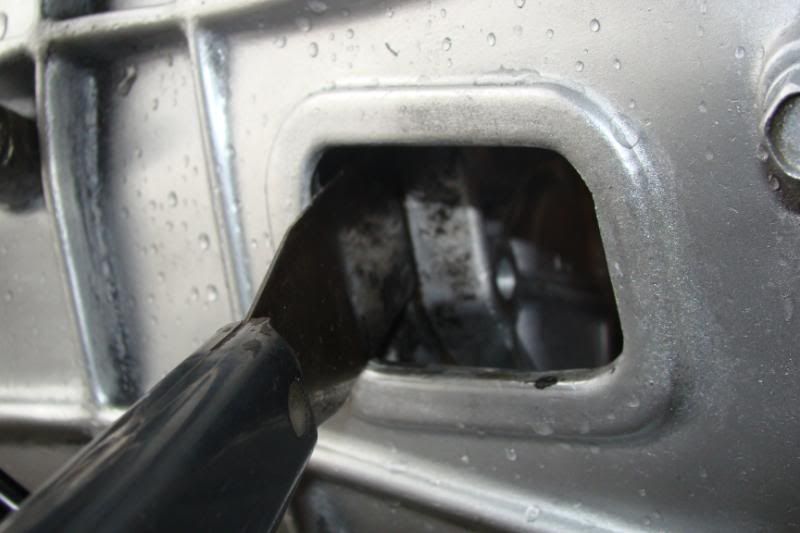 Once all the bolts was removed getting the cover off with my hands was unsuccessful so I used a putty knife and a hammer to seperate it. 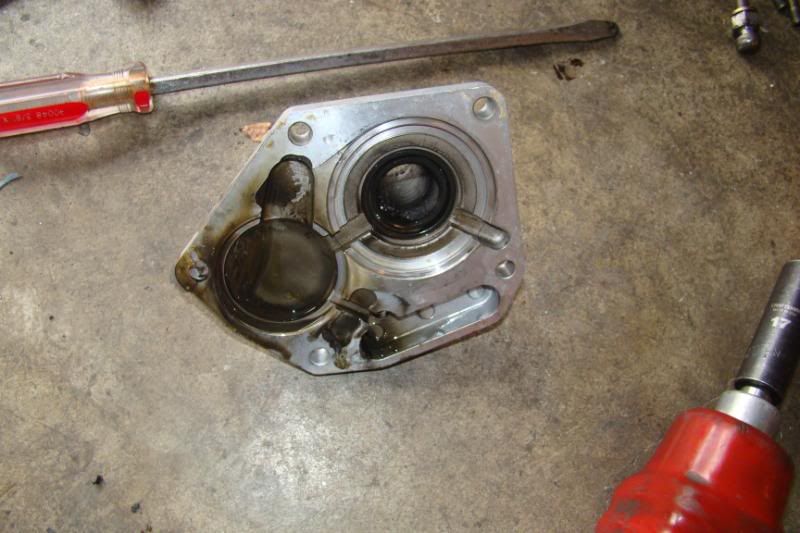 Heres a pic of it finally off. 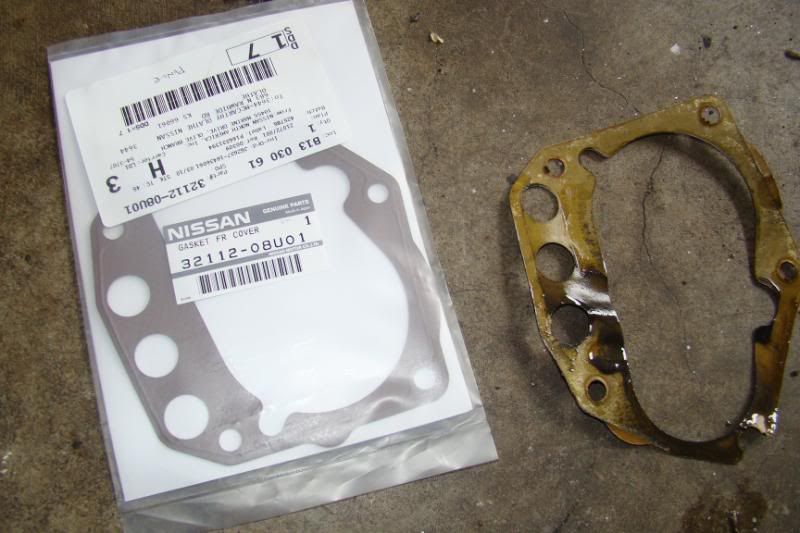 Old gasket vs new gasket. 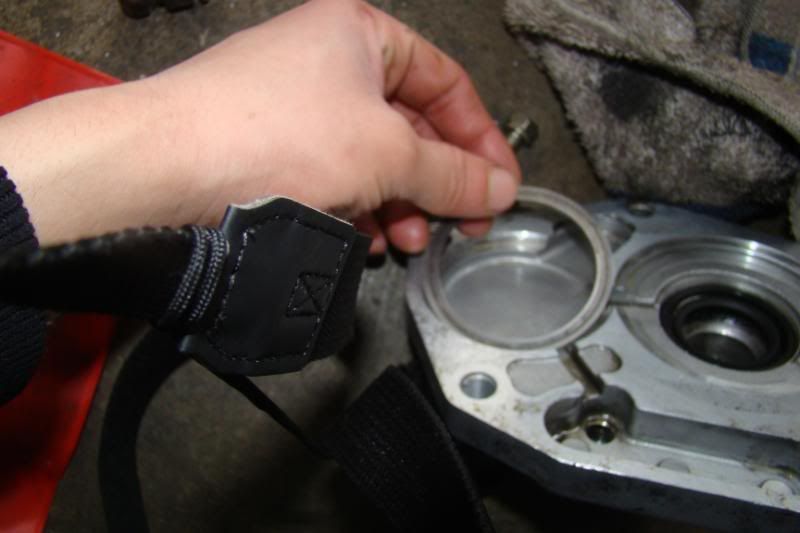 Cleaned out the cover and don't forget to put this metal seal back on before you slap the cover on. Also don't forget to scrape off the old gasket residue. Tighten the cover bolts to 12-15 ft lbs. 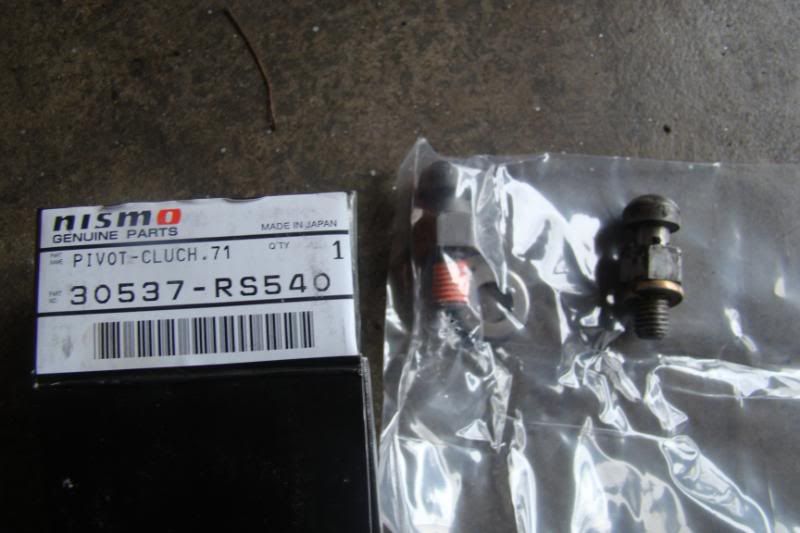 Nismo pivot ball vs OEM. 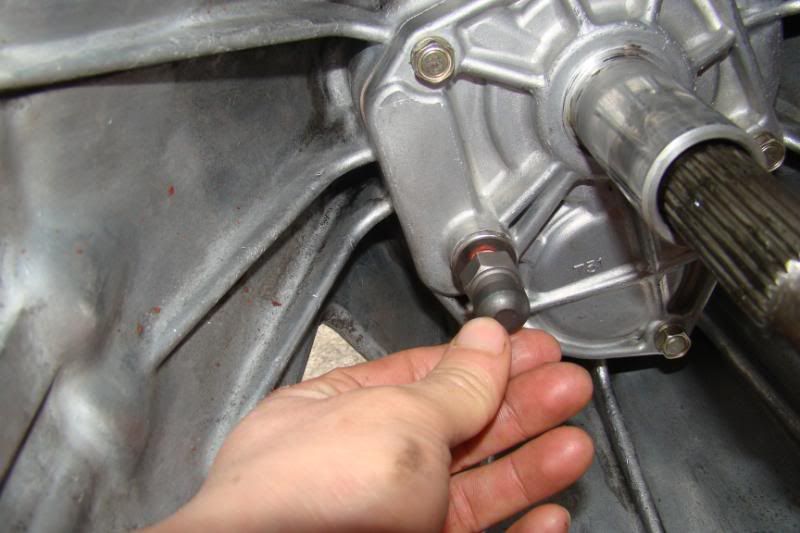 Hand tighten the pivot ball use a 17mm deep socket and then torque down to 14-25 ft lbs.  COMPLETE  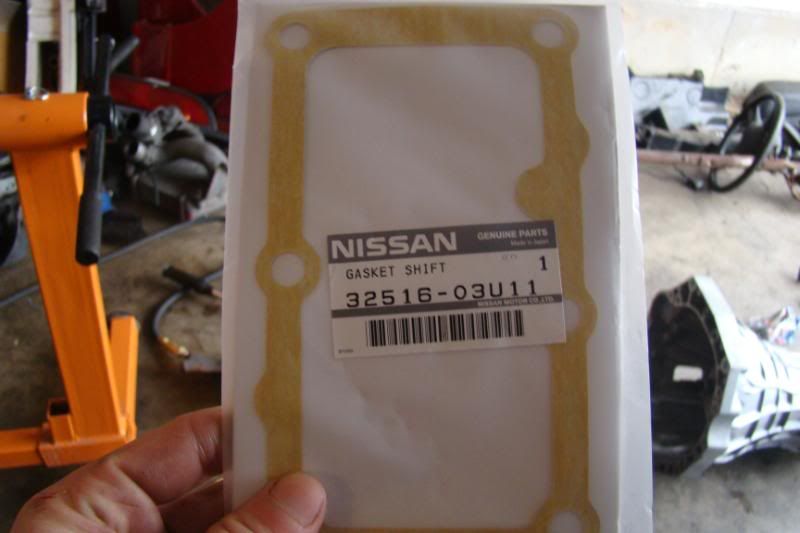 Next is the transmission gear box gasket. 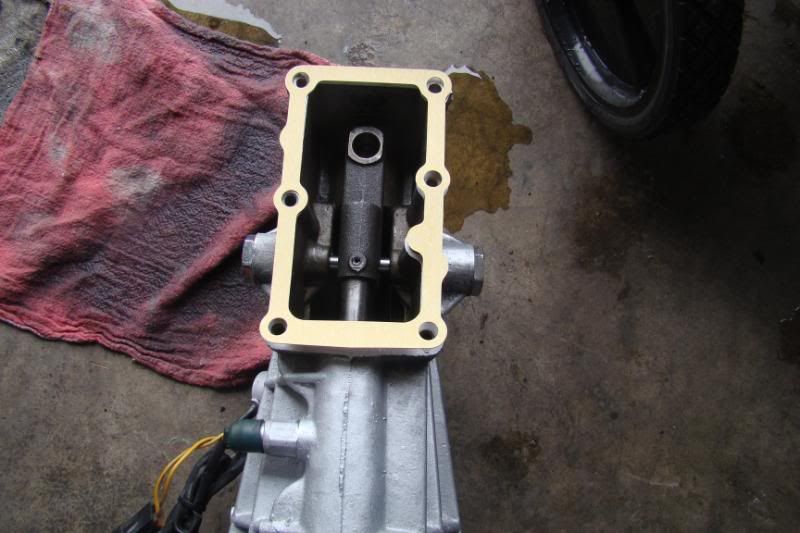 Scrape the old gasket and place it like so... 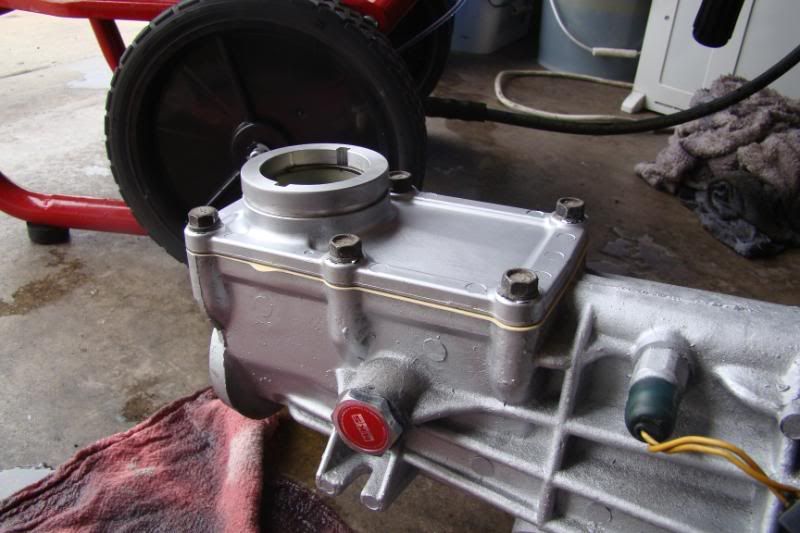 And bolt and torque the 12mm bolts down to 10-13 ft lbs. 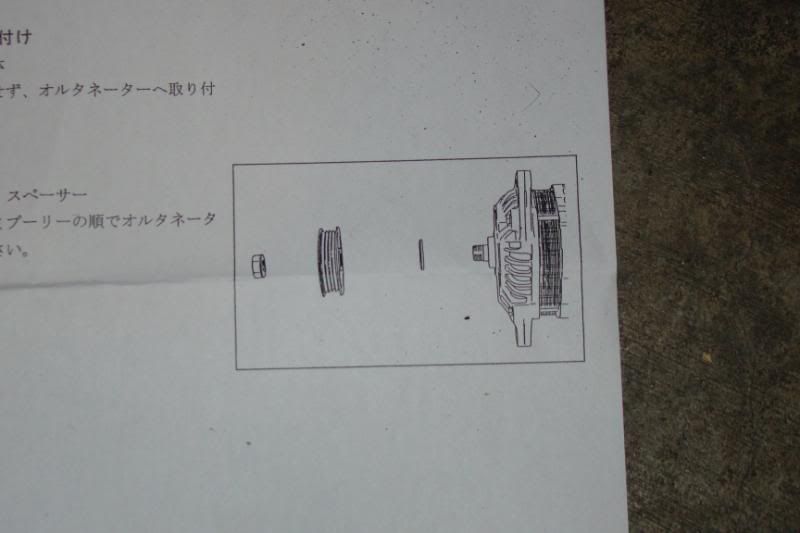 Okay Greddy Pulley Kit Installation, so since I cant read japanese, I decided to do some researching and well the picture pretty much explains it all for the alternator pulley. 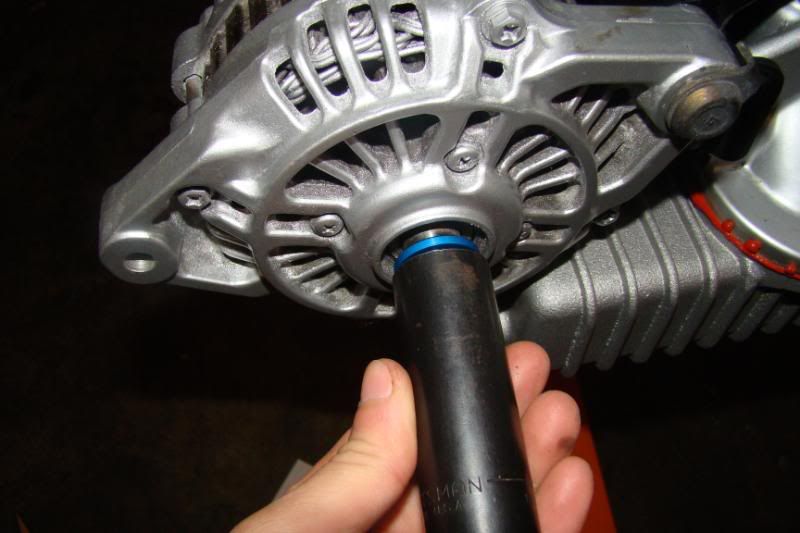 Place spacer that should have came with the kit on FIRST and use a 17mm deep socket and gently tap the spacer all the way in. 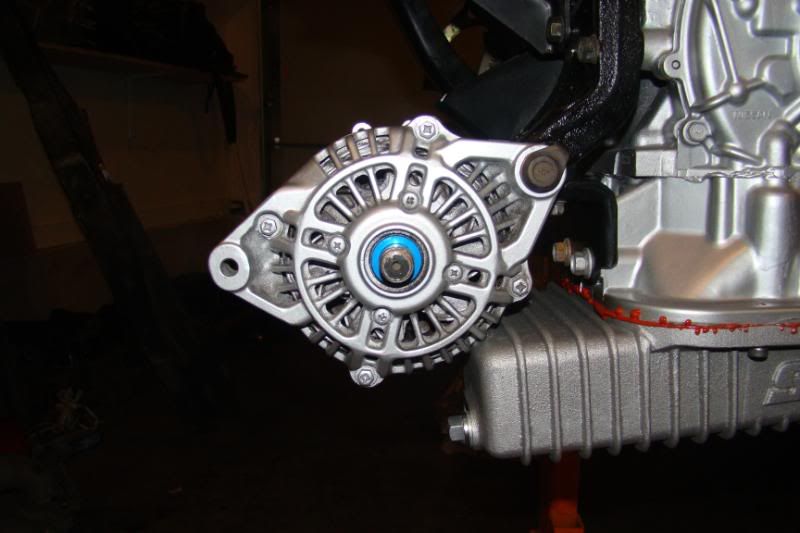 Like so.... 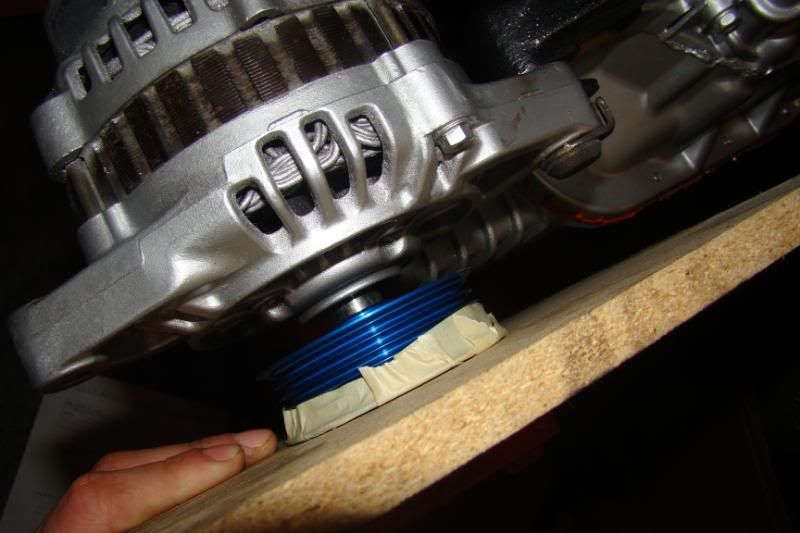 Then Install the pulley I used painters tape on the outer edge of the pulley, so that I wouldnt damage the pulley. I then placed a board, so that I can hammer and seat it in place. 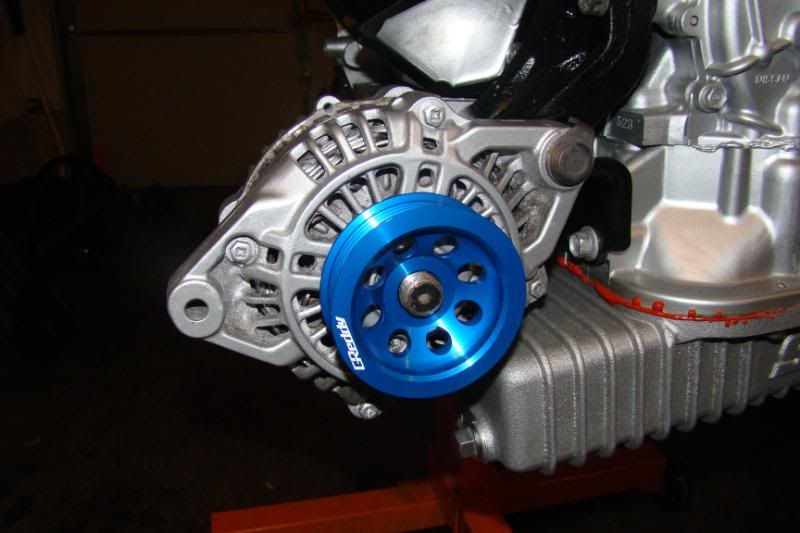 Installed woot woot! I just hand tightened the pulley nut for now until I can figure out what its torqued two? I'm thinking about just torquing it to 35 ft lbs... 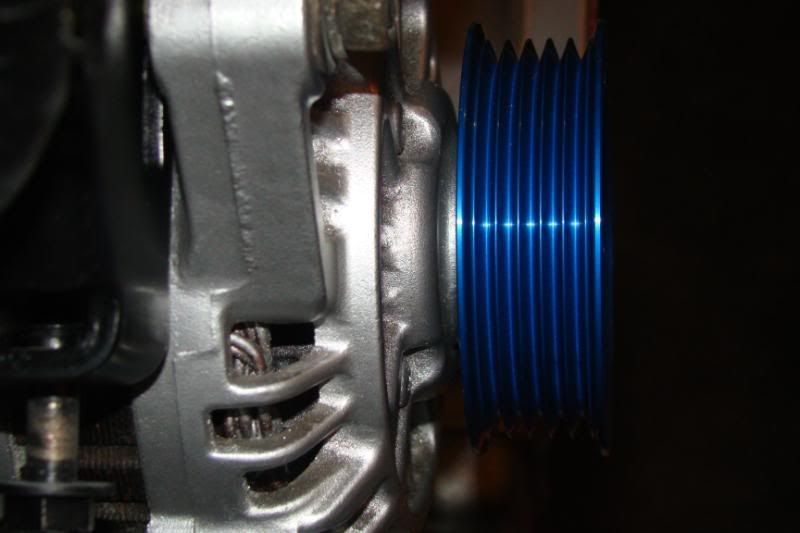 Heres a side view picture.  Water pump pulley and supplied bolts 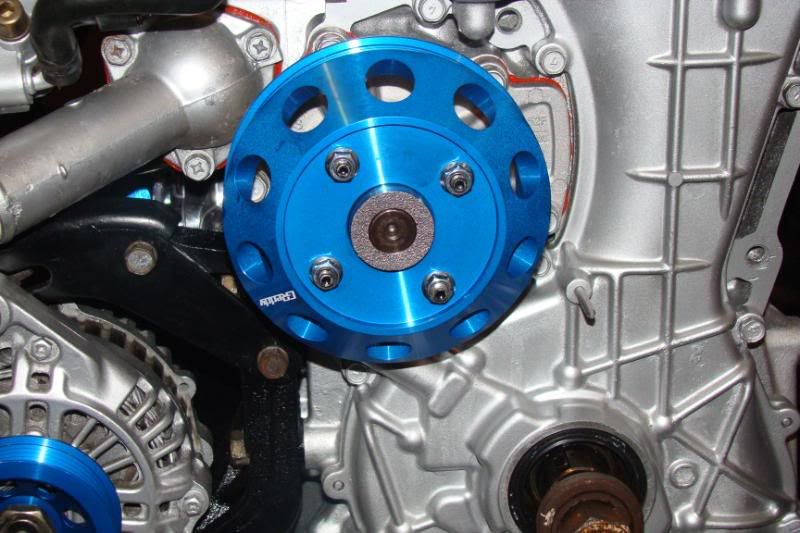 Place on like so and torque the 10mm bolts to 4.6-6 ft lbs I would do the Power steering but I'm waiting for my non hicas p/s bracket/pump to arrive. So to be continued...... Last edited by xharobikeslifex; 09-19-2013 at 10:06 PM.. |
|
|

|
|
|
#41 |
|
Zilvia Member
 |
Onto the build thread!
 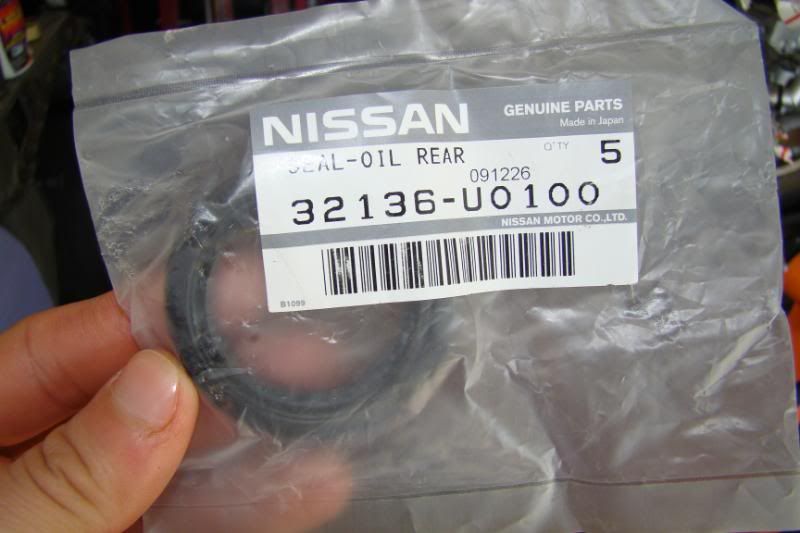 Replaced the rear oil seal on my transmission everytime I do an sr swap this seal always drips tranny fluid about time I did the right thing and replace it haha.  So here is where the rear oil seal is located this often gets hard and doesn't want to seal properly thus me changing it. 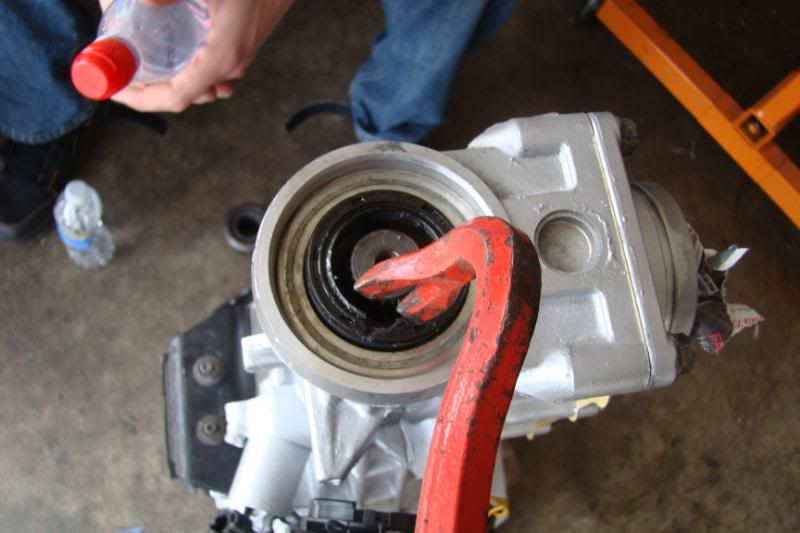 So a seal puller would be nice but I didn't have one so instead I used some leverage! 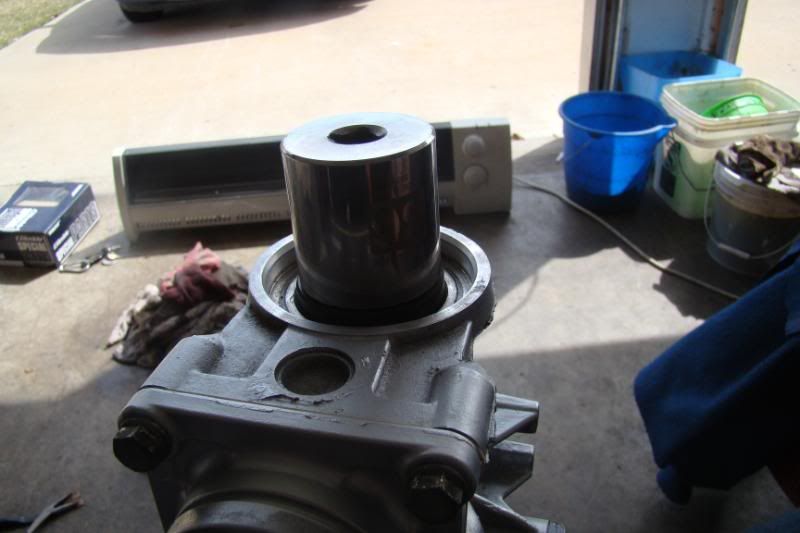 I then put the new seal into place and used a 36mm socket to seat it in place by lightly tapping it with a hammer. 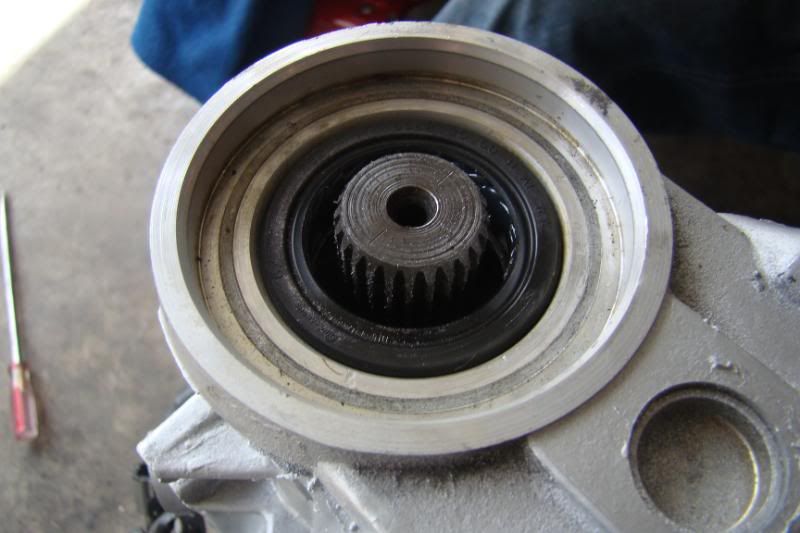 Hella seated brah 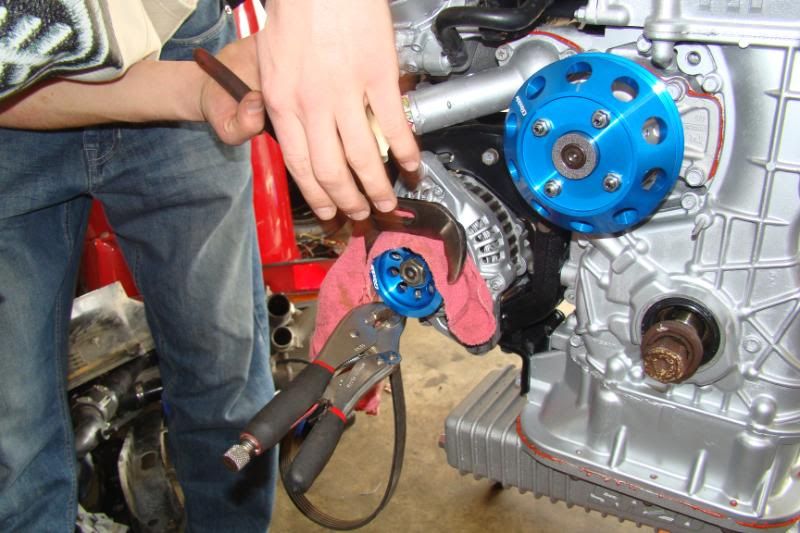 Me and my buddie wesly got creative and figured out a way to hold the alternator pulley without it spining. I'm sure there is an easier way. but we like to think outside of the box haha. we grabbed my old belt and clamped it to the pulley with vise grips. Then we got some huge pliers to clamp over the belt, so the pulley wouldn't get scratched. As he was holding on to dear life I went ahead and torqued it to 45 ft lbs, I never did figure out the actual torque spec for the alternator pulley but since the power steering pulley is 50 ft lbs I figured it was in the same ball park. The Beginning of the legendary S15 CONVERSION! 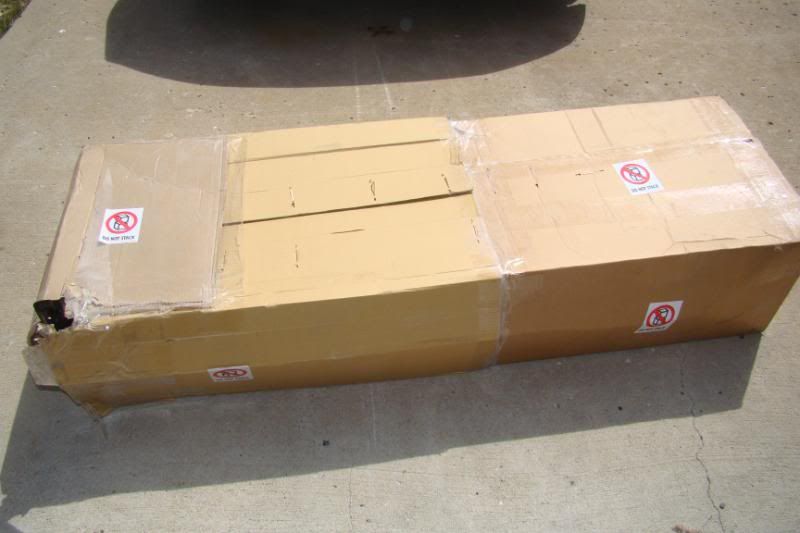 What can possibly be in this box? hmmm 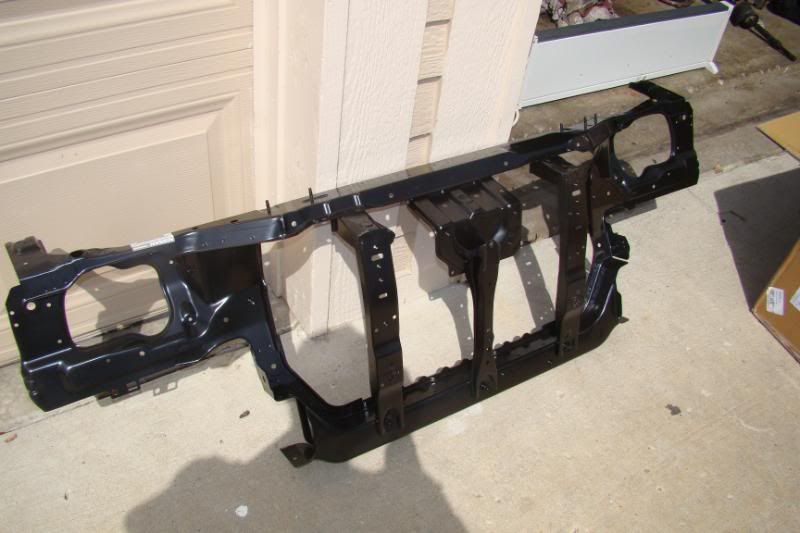 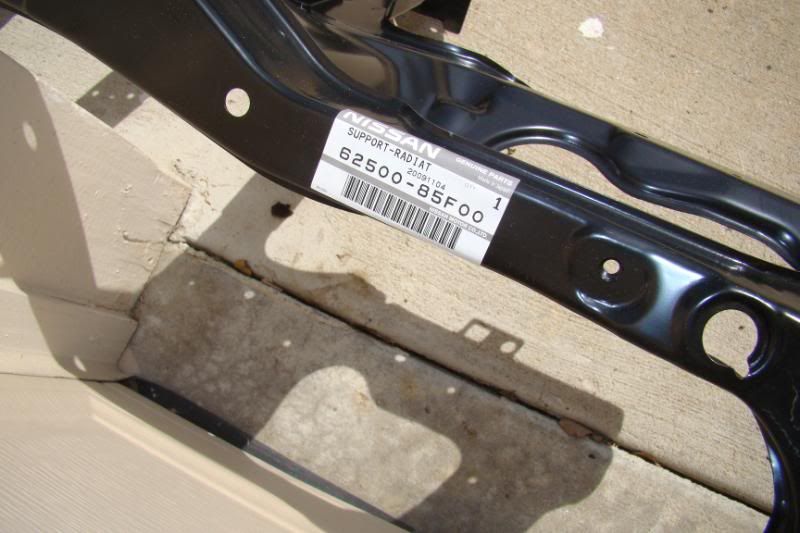 S15 RADIATOR SUPPORT WHAT! ya boi I'm going S15 front on this build. 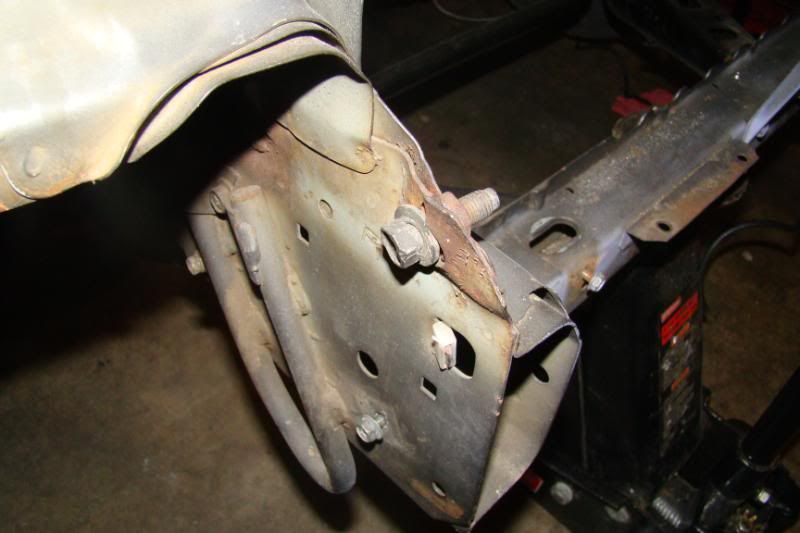 Okay removing the s13 radiator support.. remove on both sides the 14mm bolts 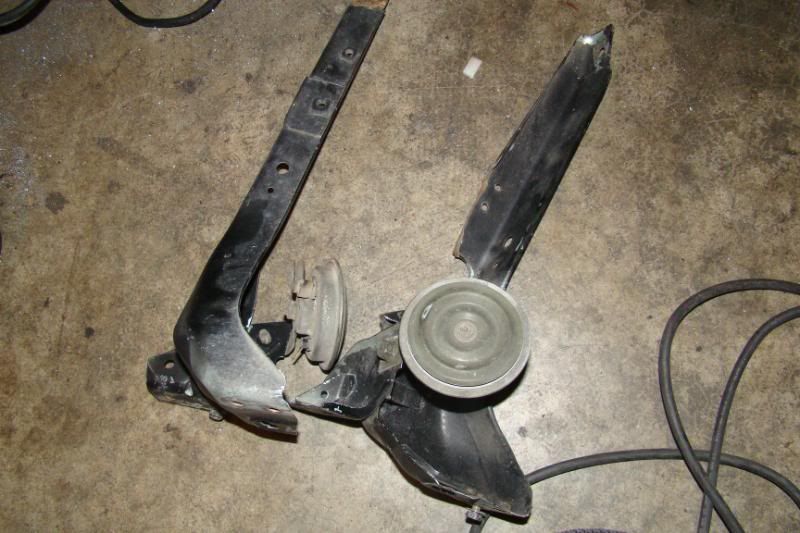 Then remove the horn brackets with a 10mm socket 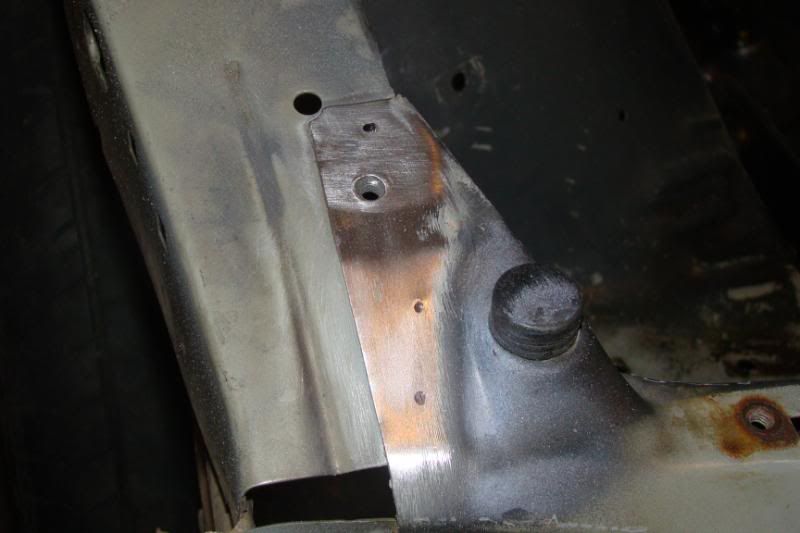 Now using a power drill and a steel braided wheel. Grind off the primer to bare metal to locate the spot welds there will be a total of about 50 spotwelds 25 on the left and 25 on the right fun stuff. And they are all located.... 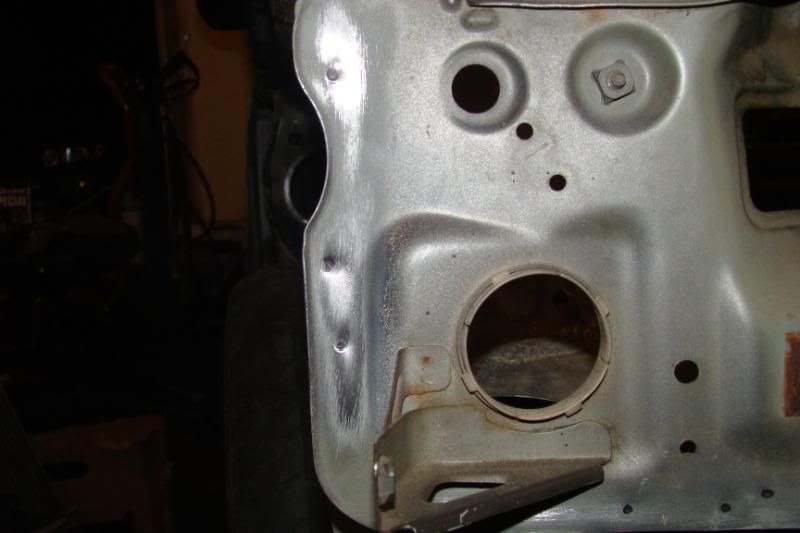 Side of the headlight mount. 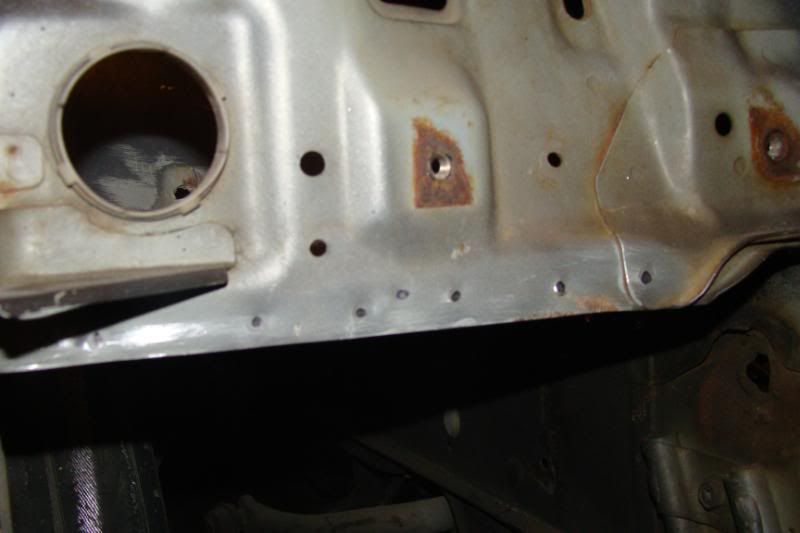 Bottom of the headlight mount. 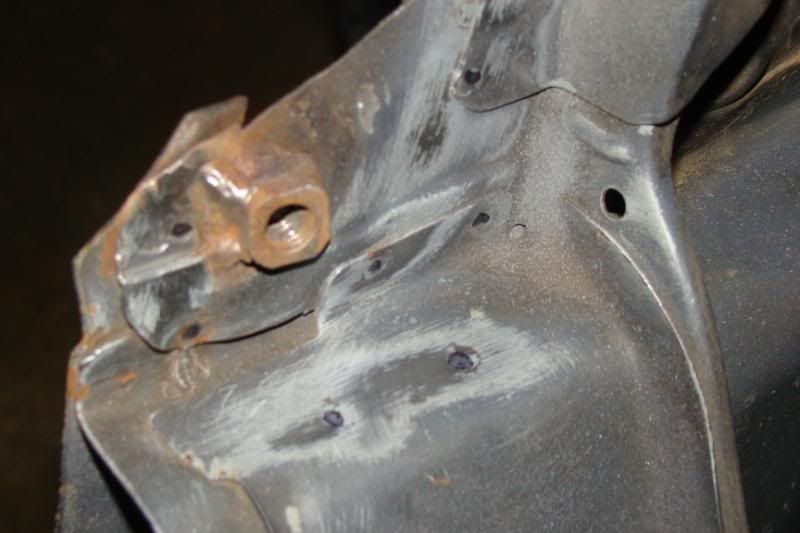 Quite a few located by the rails. 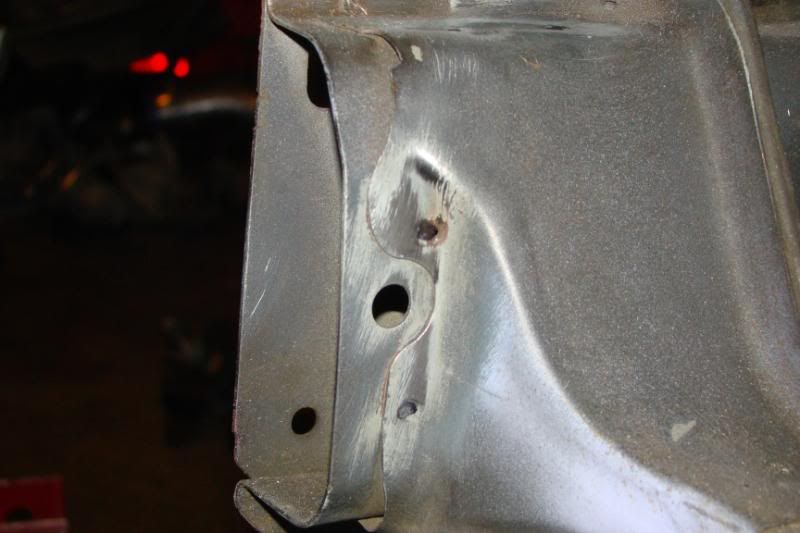 2x located on the side of the rail.  And finally 2x underneath the rails... It helps to look at the s15 radiator support and then look at your s13 radiator support there quite indentical so the spotwelds should be in the same general area. 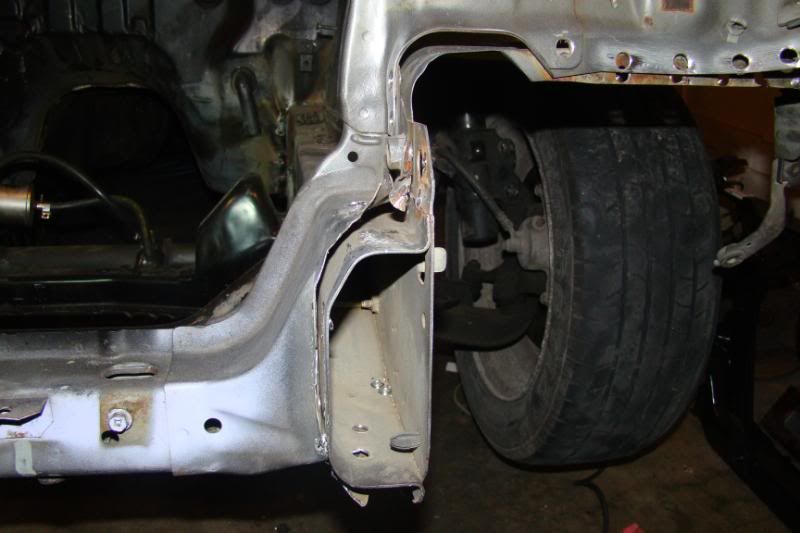 I used a spot weld drill bit to obviously remove the spot welds I had previously located. 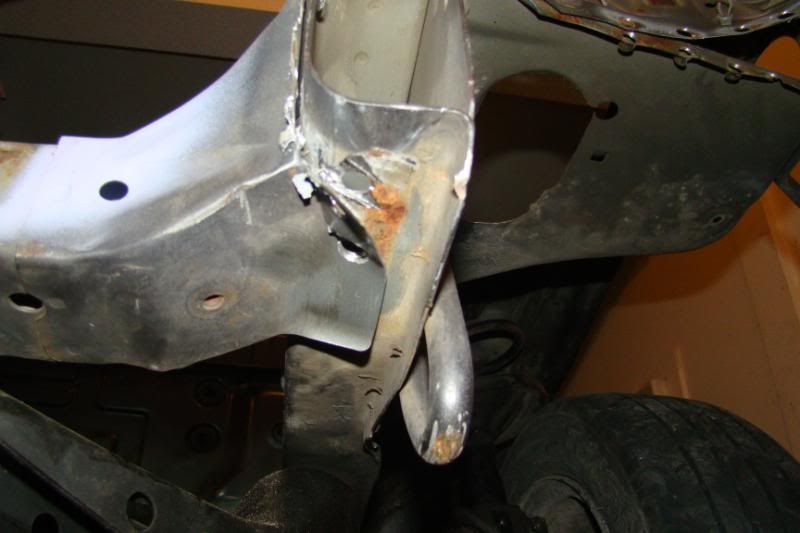 And I used a combination of an air hammer and a wood chisel to remove the radiator support from the chassis. 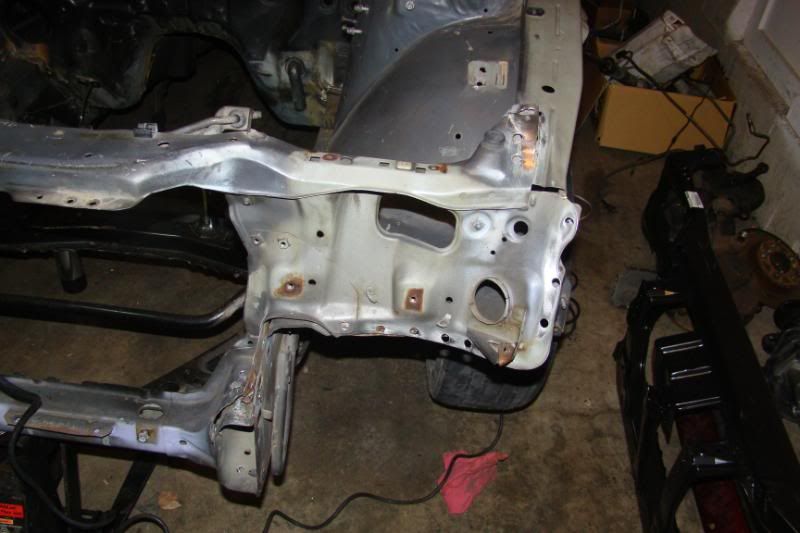 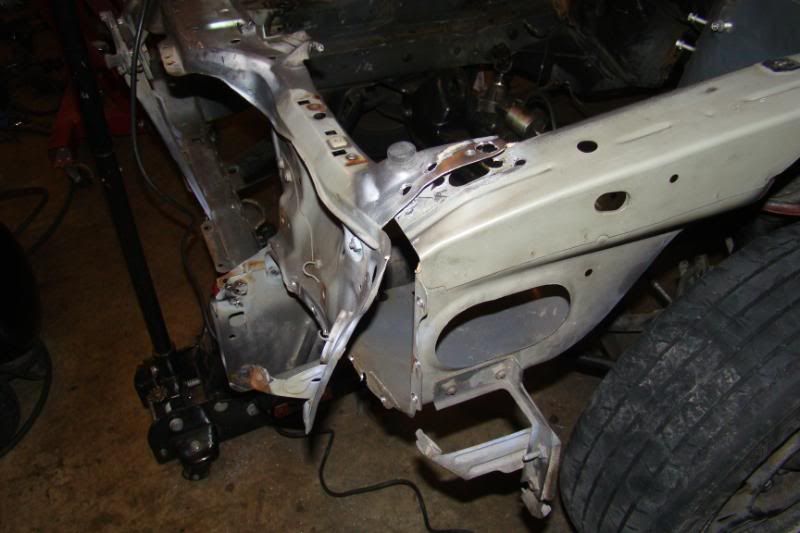 Even if you missed some spot welds the air chisel can zip right through them, but I'd be careful doing it you might zip through other parts of the chassis that you don't want to. 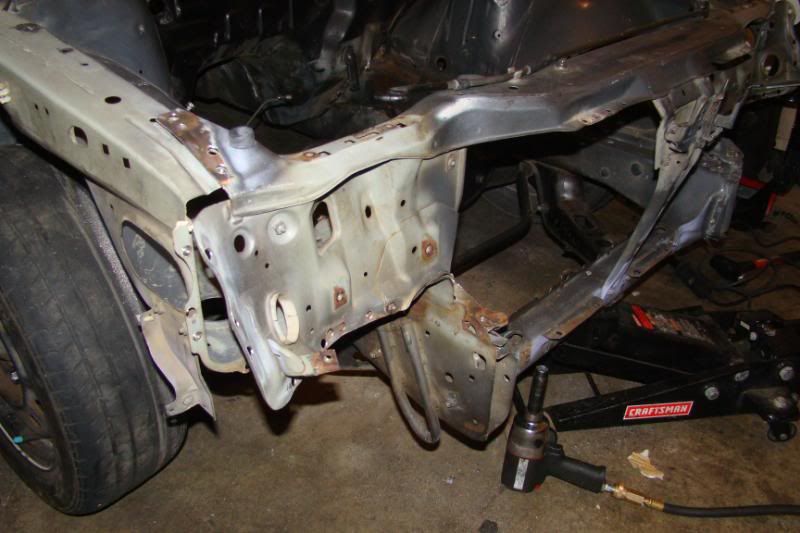 Ahh It's finally almost out 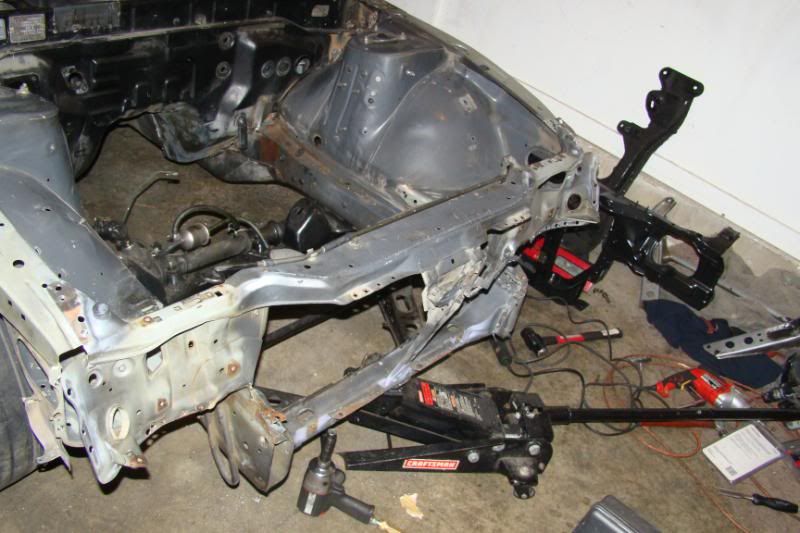 After It's all loose and ready to come out the last thing you need to do is remove the 4x bolts on the tension rods on the bottom of the radiator support 2x bolts on each bracket, I used a 14mm socket and an impact to loosen them lowered the vehicle and then proceeded to loosen it all the way with a regular socket wrench. 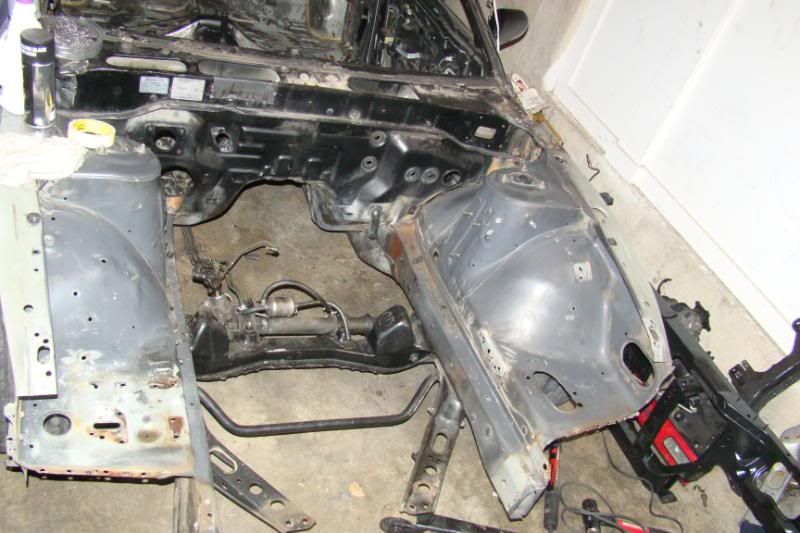 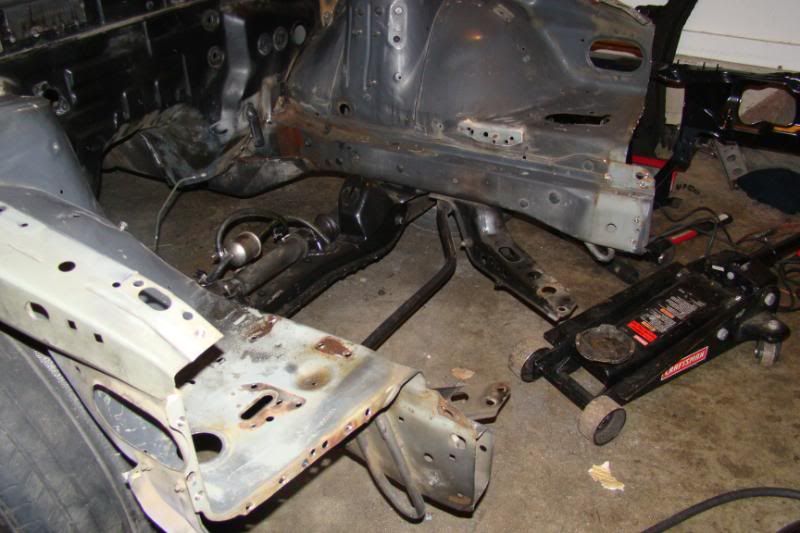 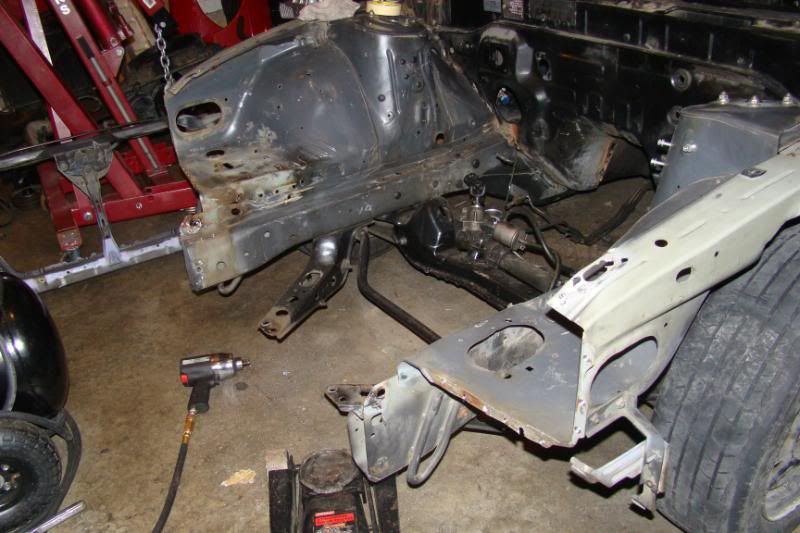 And yourrrrr OUT! This was super super easy to do compared to the firewall.... 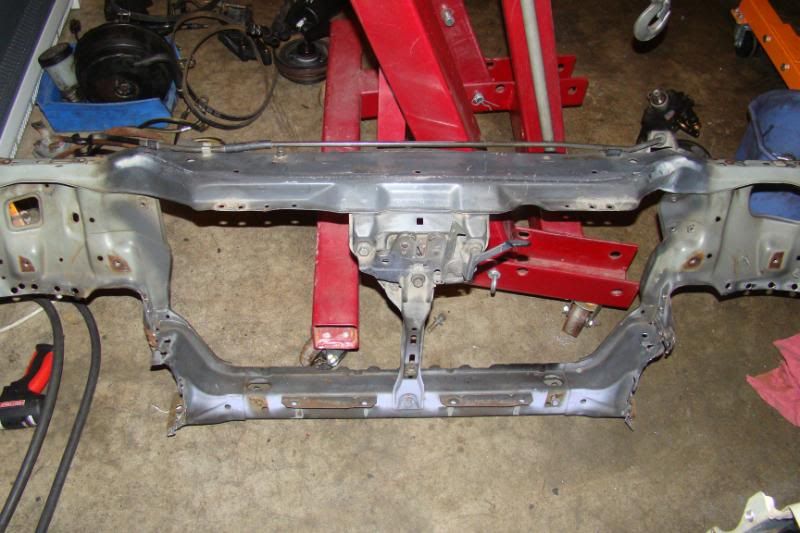 Old s13 radiator support just chilling... Saying wtf mate? 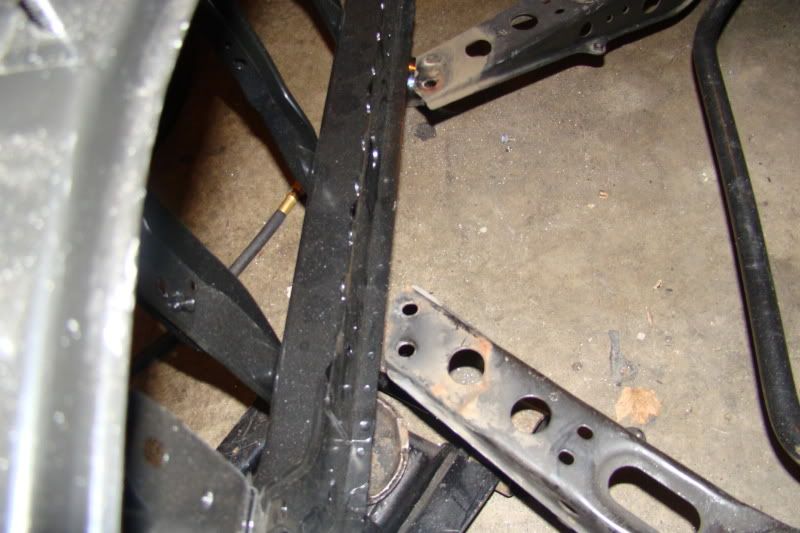 I mocked up the S15 radiator support everything seemed to align great and then I noticed an issue my S13 tension rods wont reach the radiator support... hmmm I may have to get clever on this one or get some S14 ones since those might be slightly longer. 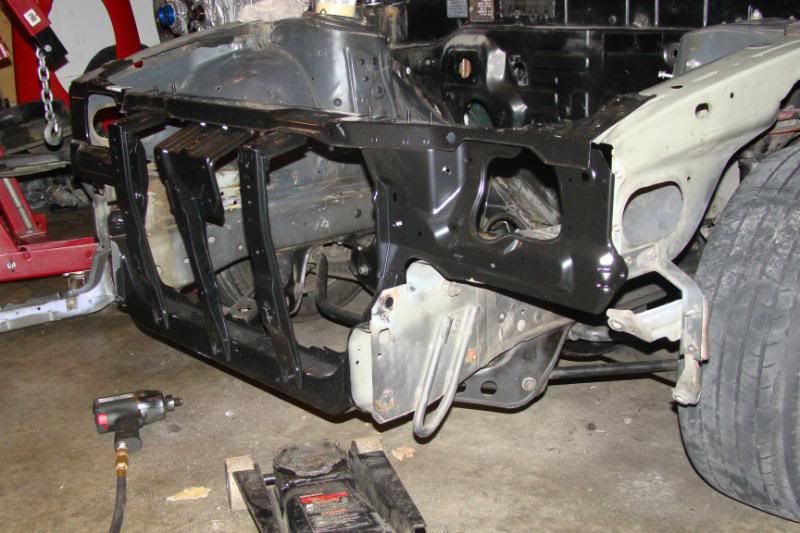 To be continued... Last edited by xharobikeslifex; 09-19-2013 at 10:07 PM.. |
|
|

|
|
|
#42 |
|
Zilvia Member
 |
Ran into some issues...
 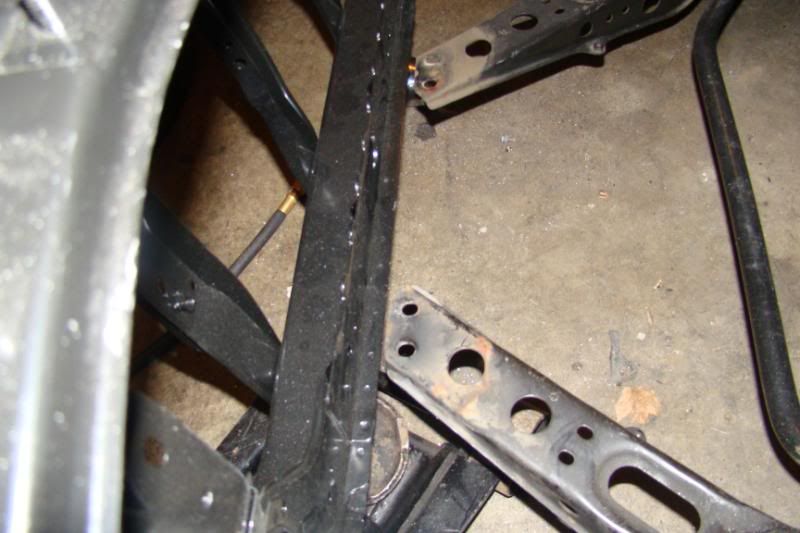 Tension Rod Dillemma with S15 Radiator support 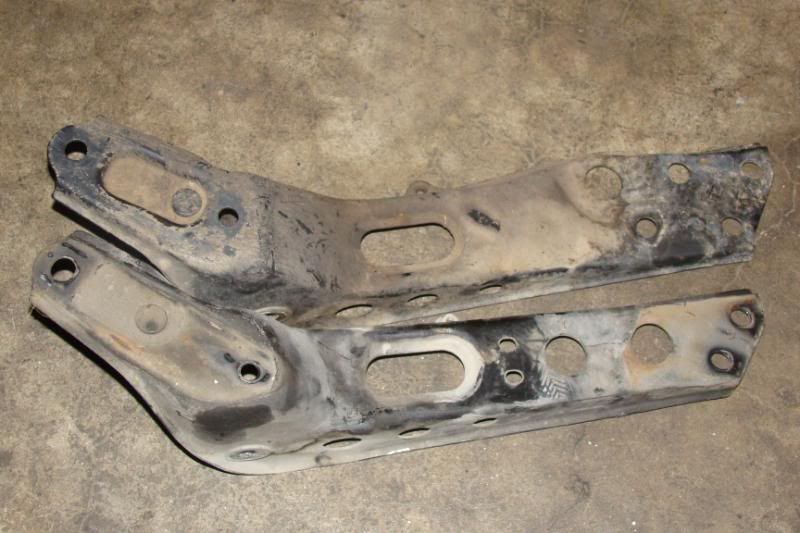 So this is a pic of s14 tension rod "on top" vs s13 tension rod "on bottom" The main difference is that the s14 tension rod is longer, and will reach to the s15 radiator support. 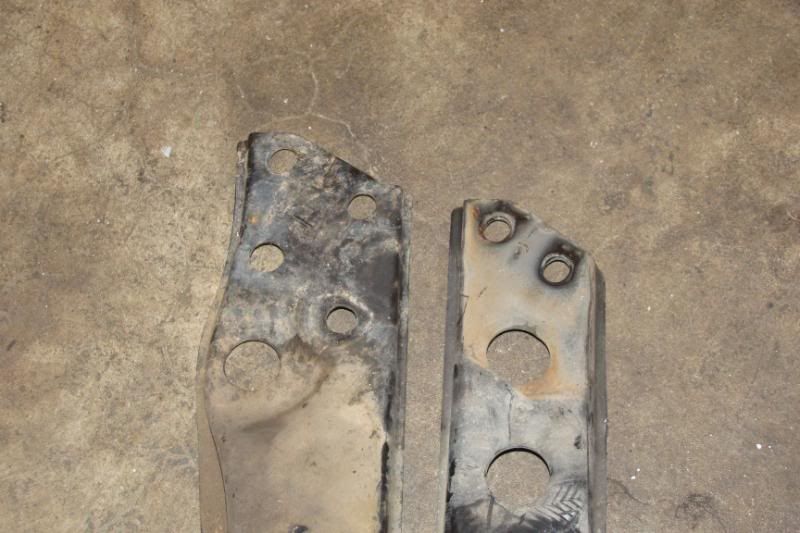 The S14 tension rod "left" will bolt up with no problem to the s15 radiator support, but the S13 tension rod "right" would have to be modified if I decided to use the s13 tension rod 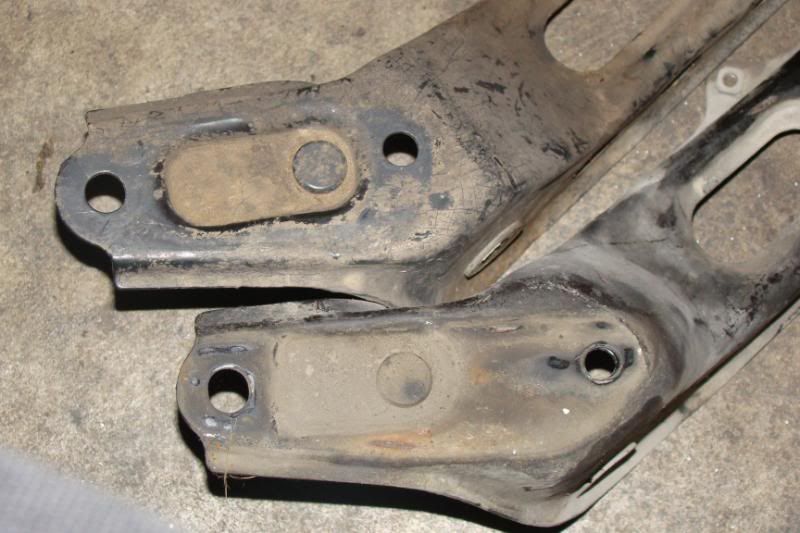 If I went with the S14 tension rod "top" then I would have a problem with bolting it to the frame rail because it's shorter than the s13 tension rod "bottom" 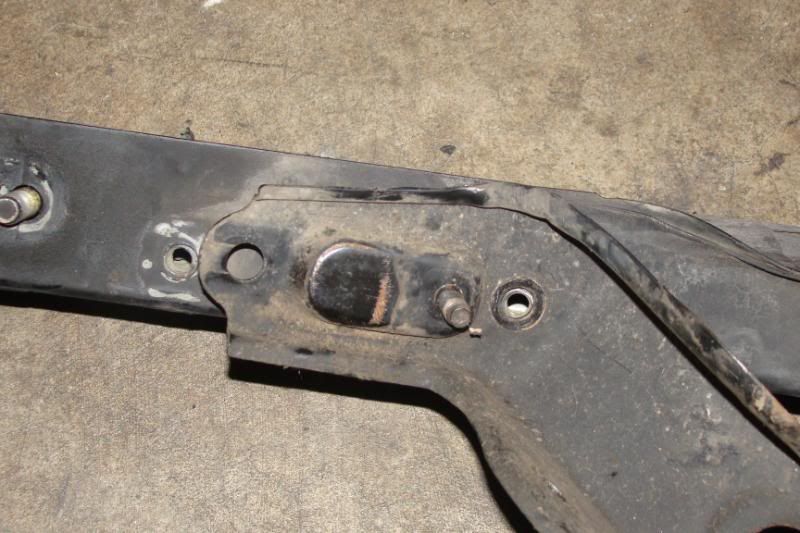 S13 tension rod to s13 frame rail "obviously no problems." S13 tension rod to s13 frame rail "obviously no problems." 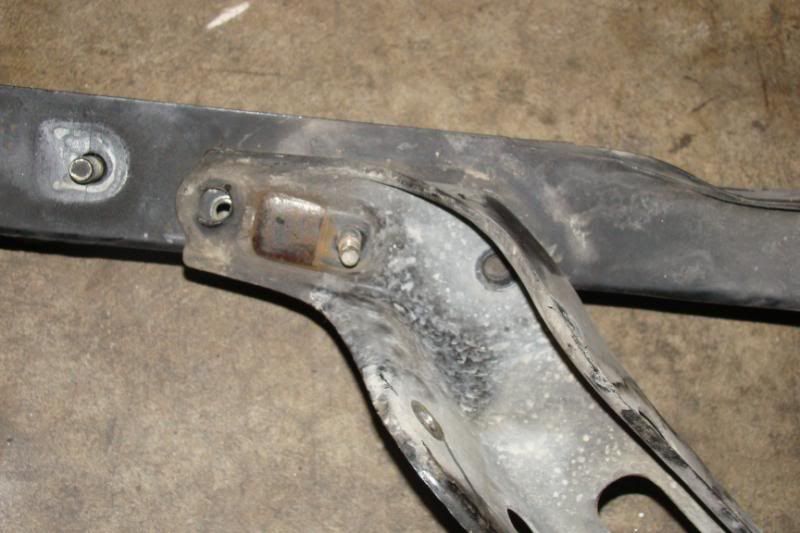 S14 tension rod to s13 frame rail shorter thus not reaching to the other bolt hole. In the end I will most likely have to modify either the s13 or s14 tension rod either way to make it work with the s15 radiator support. 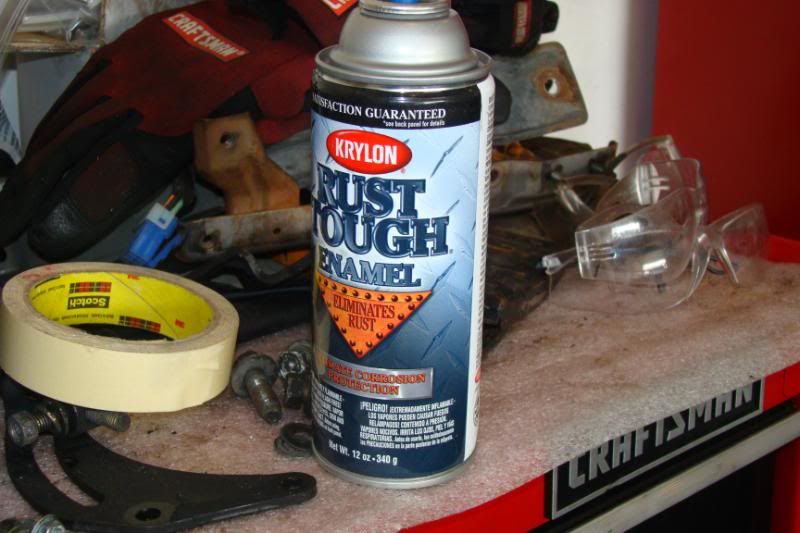 I decided to spray some rustroleum where ryan welded at, so that it wont rust over a period of time. 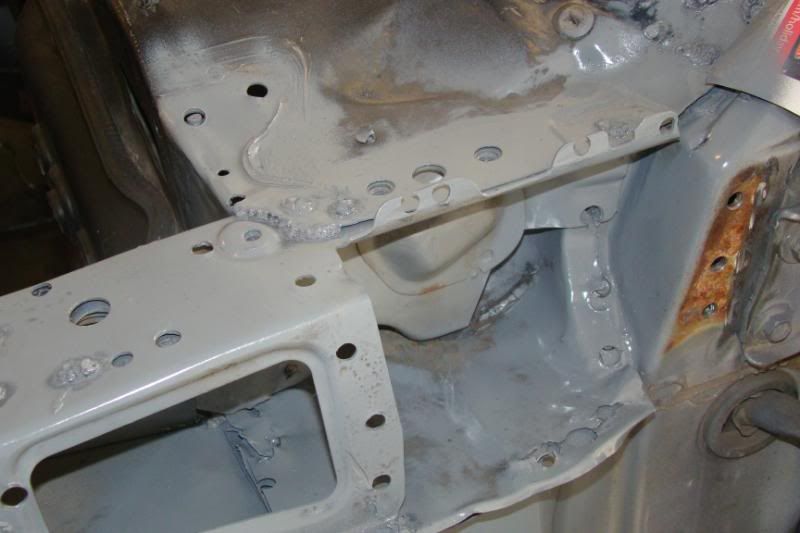 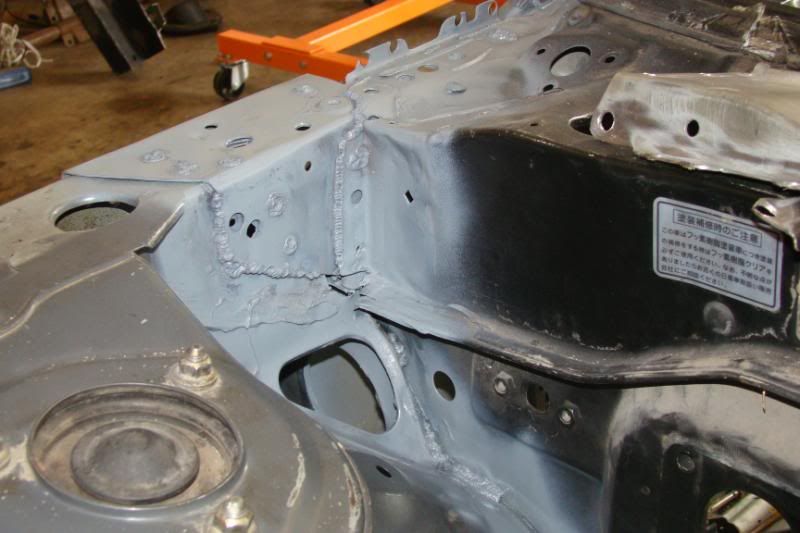 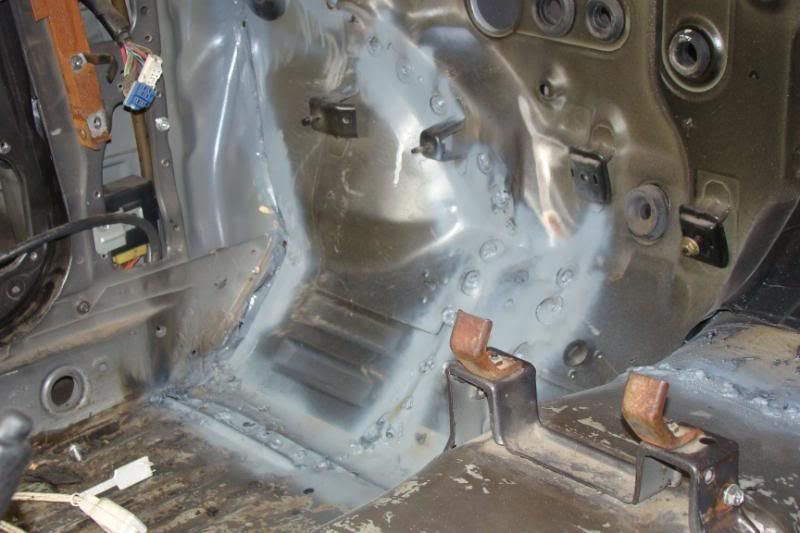 Plus it's probably a good idea to spray some in this area before I have him weld these brackets back on. 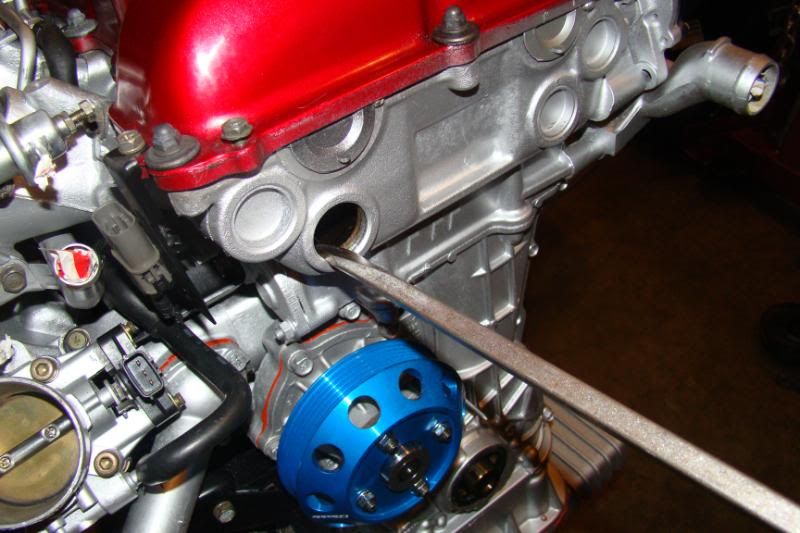 I decided to replace all my freeze plugs, You have to be very careful doing this normally this is done when rebuilding the engine. As you can tell, I popped my first plug right into my engine dammit. 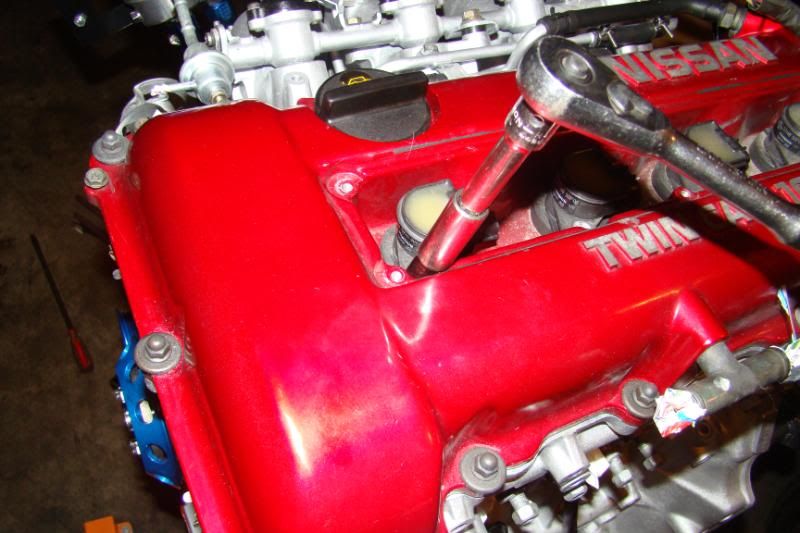 Sooooo... I decided to remove my valve cover, so that It would be easier for me to take out some freeze plugs. I started by removing the coil packs with a 10mm socket wrench. 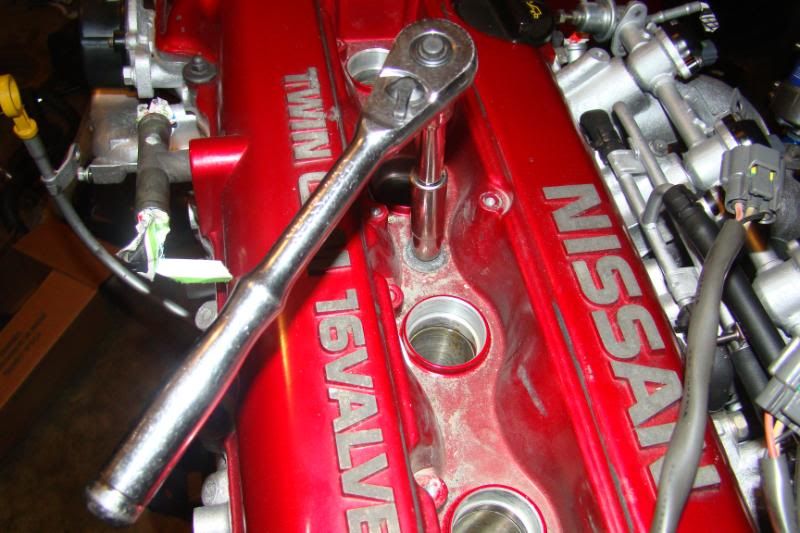 Then remove all 13x 10mm bolts holding the valve cover in place, I started with the middle bolt first then proceeded to work my way around the valve cover. "Remember don't forget to have a ziplock bag in hand for all the bolts" 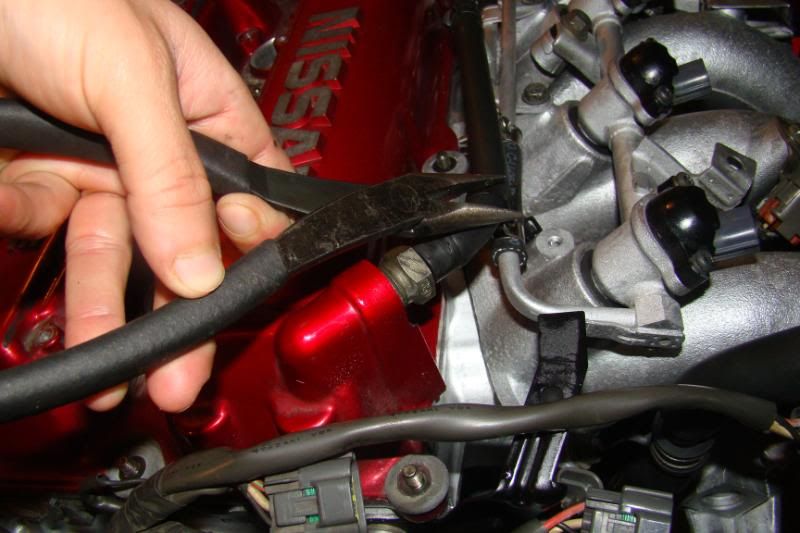 I then removed this hose that connects to the pvc valve, I believe thats what it's called. 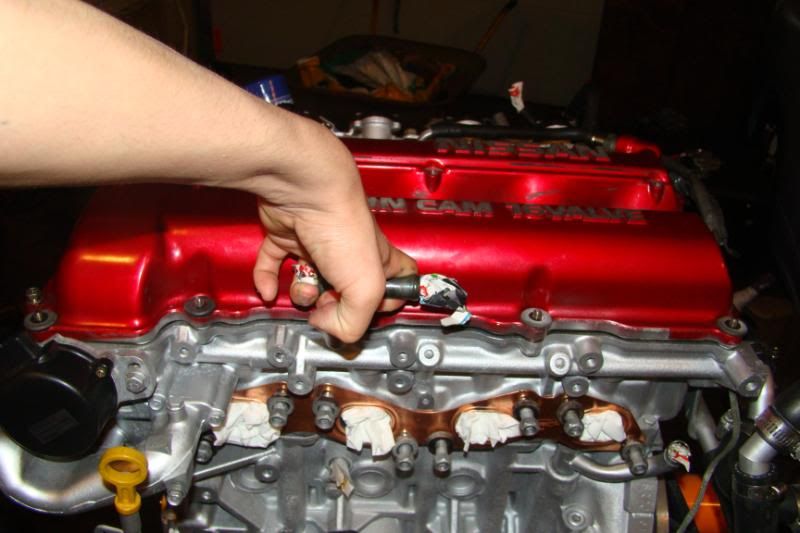 Then give it a tug to break the gasket seal and remove the valve cover. 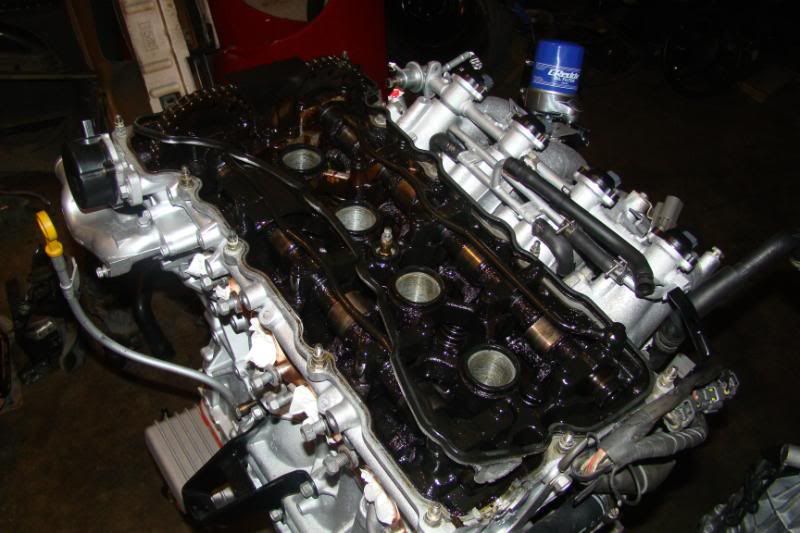 OMFG! This is absolutely unacceptible, I really want to rebuild my engine although it is currently not on my top things to do, so what i've decided to do is simply. Do what I had intended to do FIRST then go back and see if it's in my budget/time to rebuild it or not. Sooooo moving on... 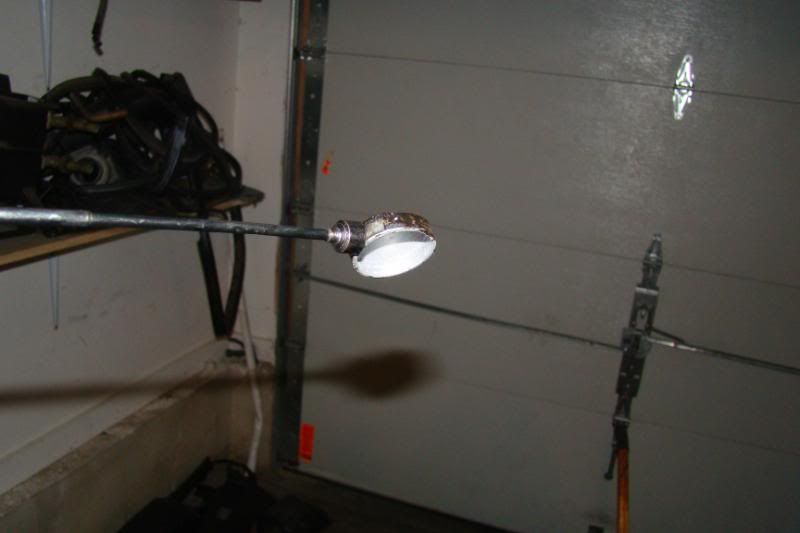 I managed to find the freeze plug, I accidently popped into my engine. 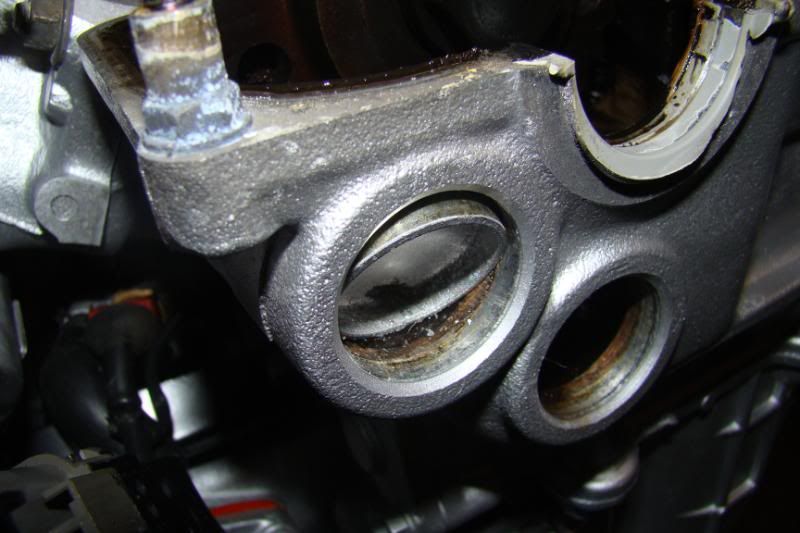 What you want to do is SLOWLY tap one corner of the free plug with a flathead screwdriver and hammer until it looks like this. 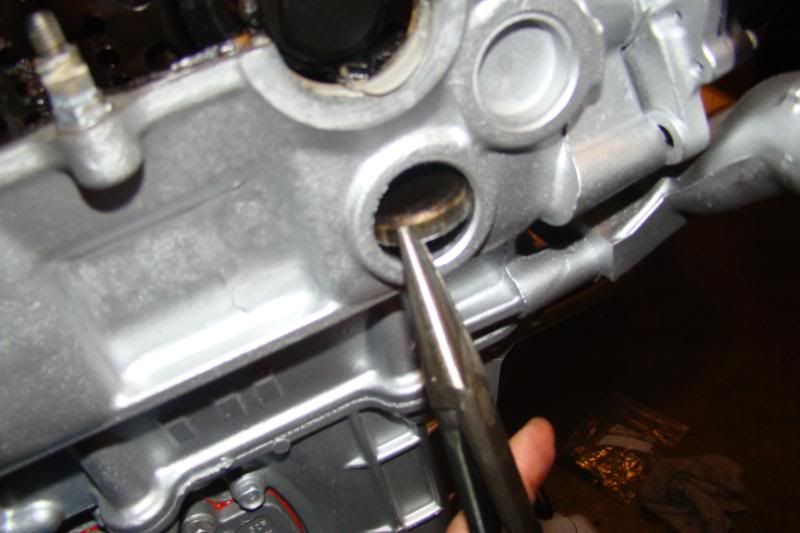 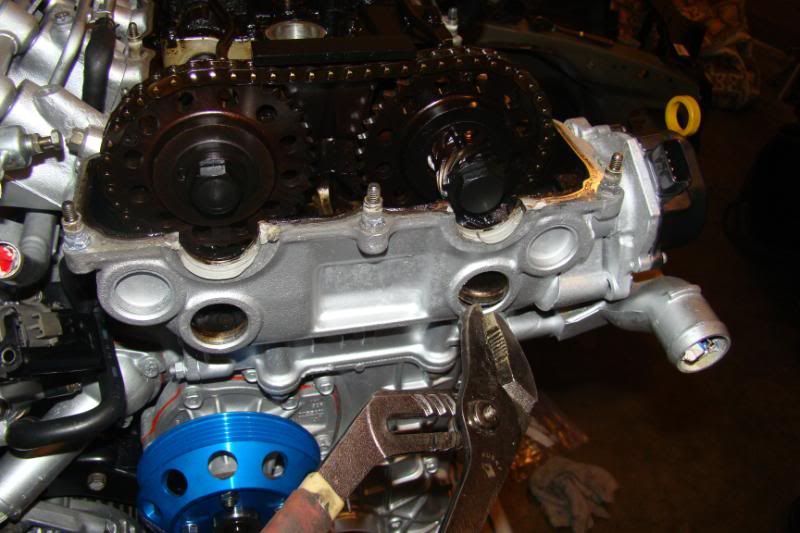 Then use a combination of needle nose pliers and normal pliers to pry out the freeze plugs. 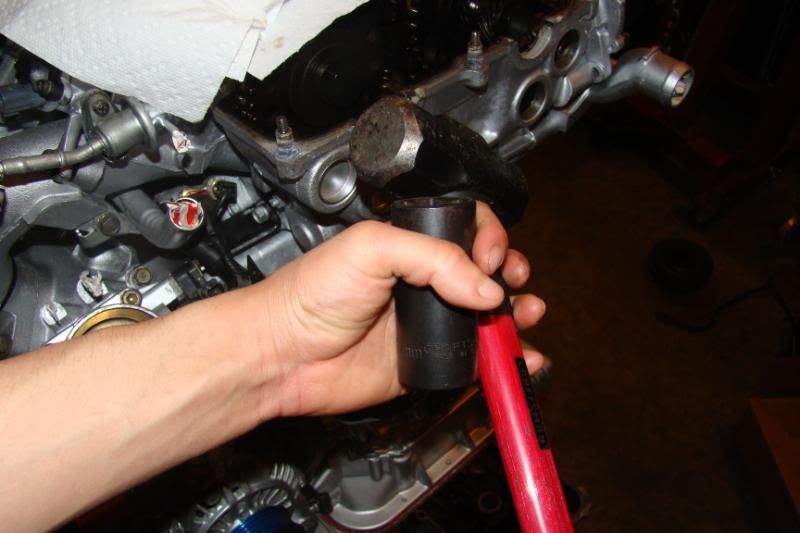 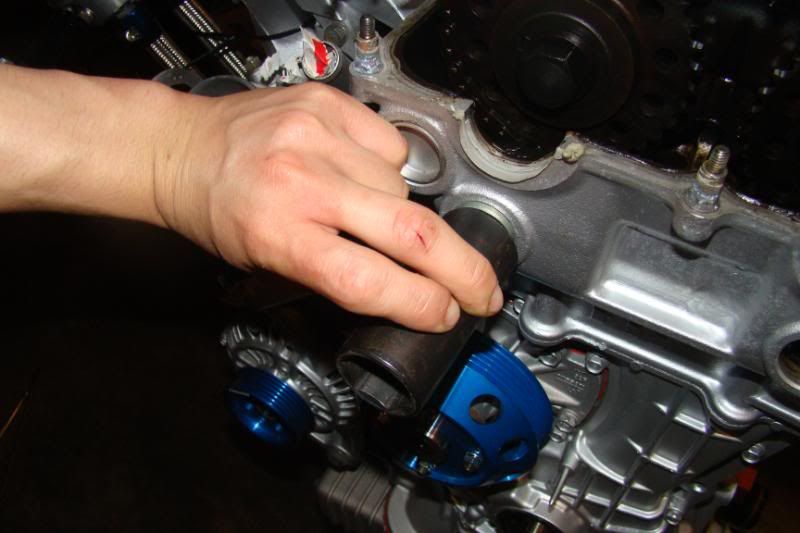 Once the freeze plug is out clean the surface area where your going to put the new freeze plug in and use a combination of a 21mm socket and hammer to "seat" the new freeze plug in. 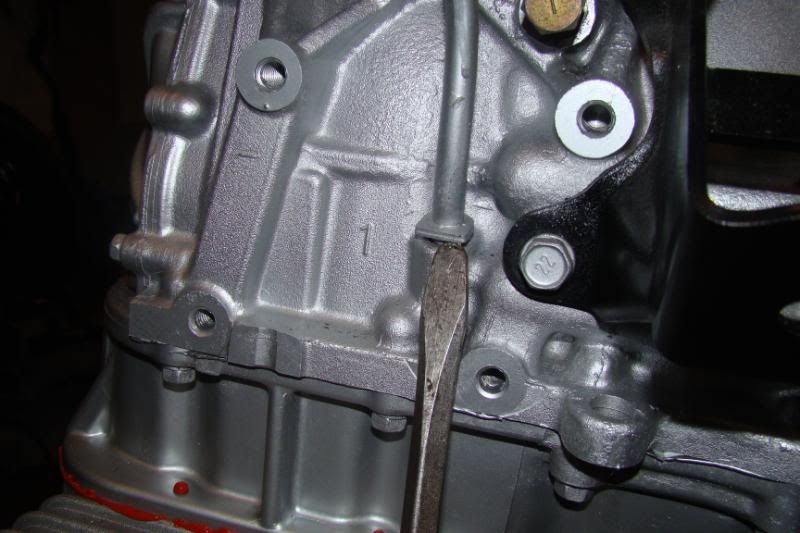 In order to get to one of the exhaust side freeze plugs I needed to tap out the oil tube, I used a large flat head and a hammer to tap it out. 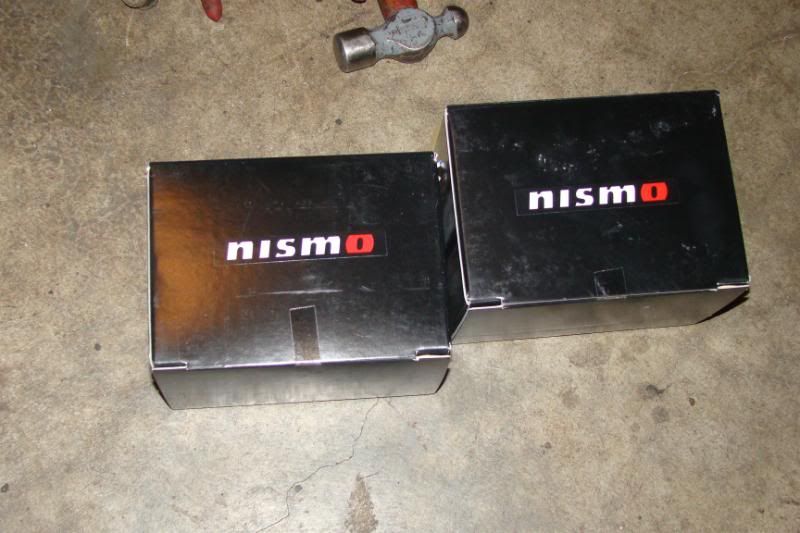 Moved on to install my Nismo motor mounts. 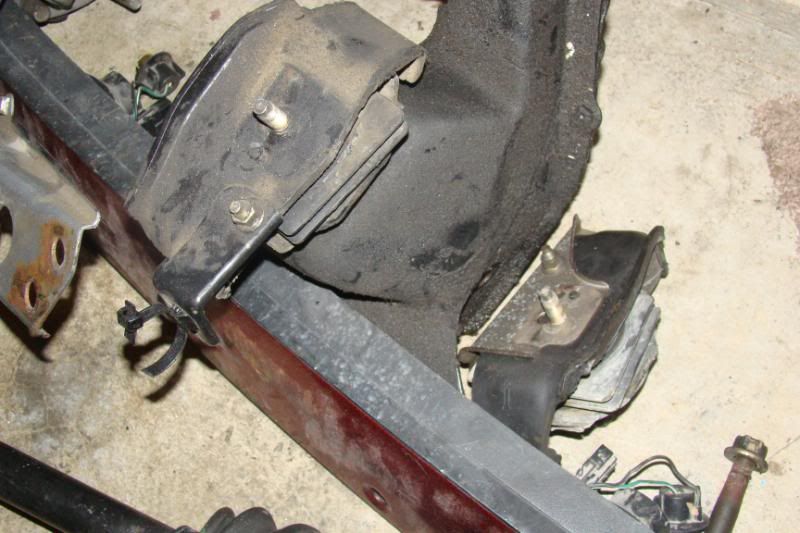 The Nismo mounts did not come with the brackets that are on the OEM ones, so you need to remove the brackets that are on the OEM mounts and install them to your Nismo mounts. 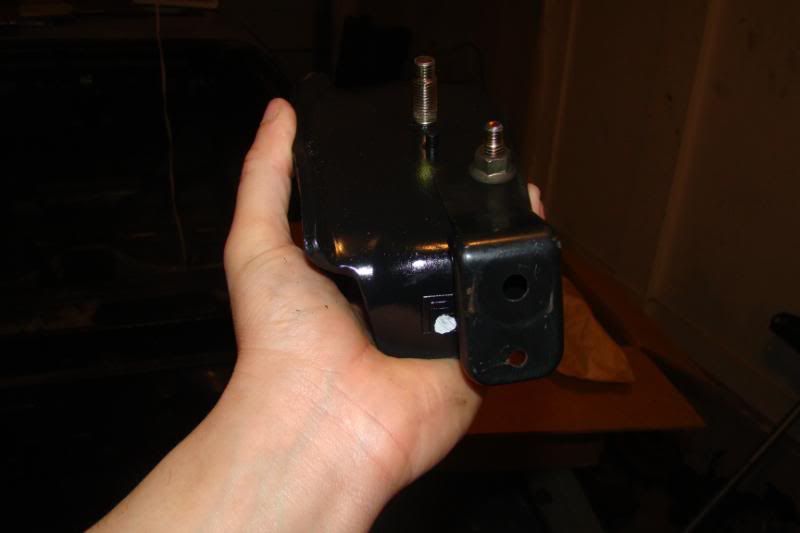 "Instake side" bracket installed on the Nismo mount. 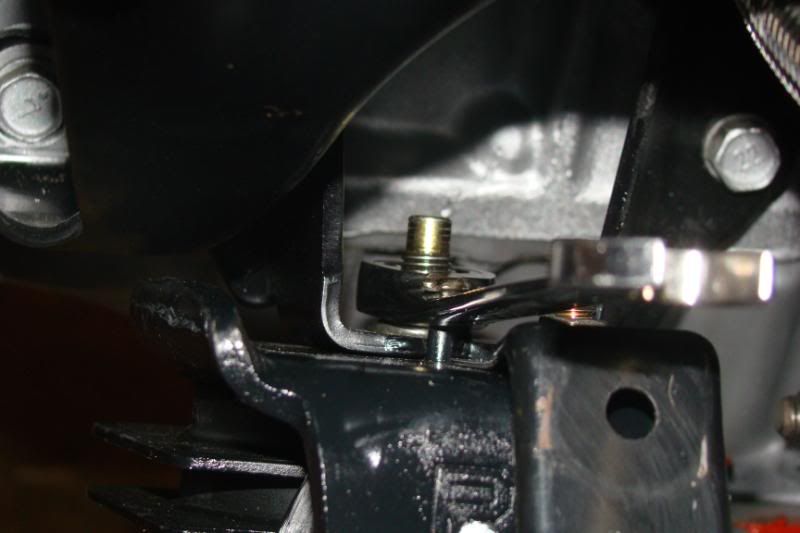 Nismo mount "intake side" installed onto the motor mount bracket, you need a 14mm wrench. 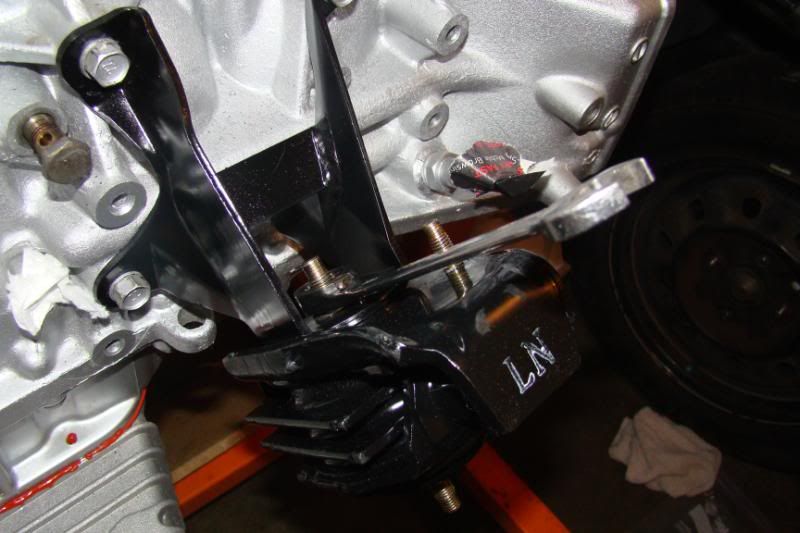 Nismo mount installed "exhaust side" onto the motor mount bracket, you need a 14mm wrench. 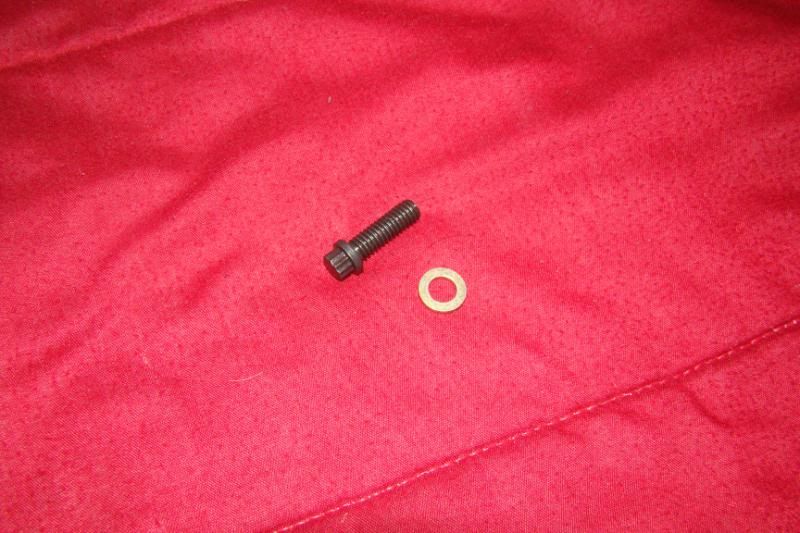 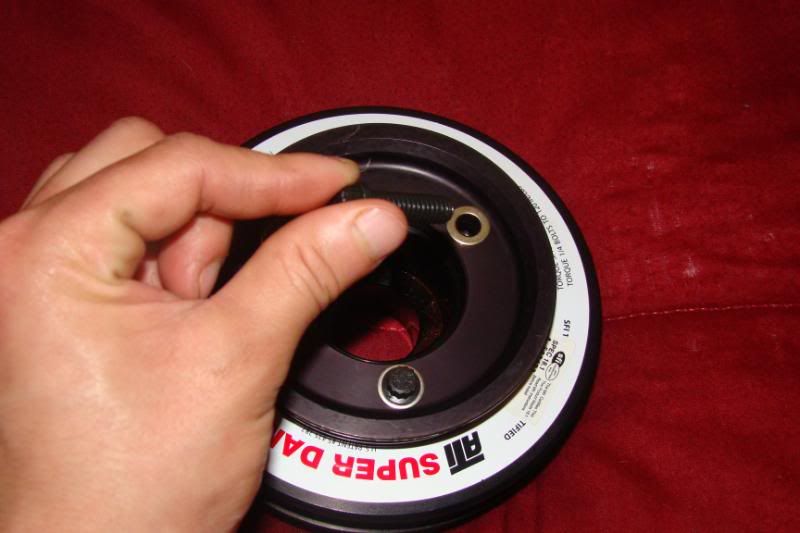 ATI Super Damper Install! First I just used the supplied bolts to just hand tighten the p/s pulley to the crank pulley. 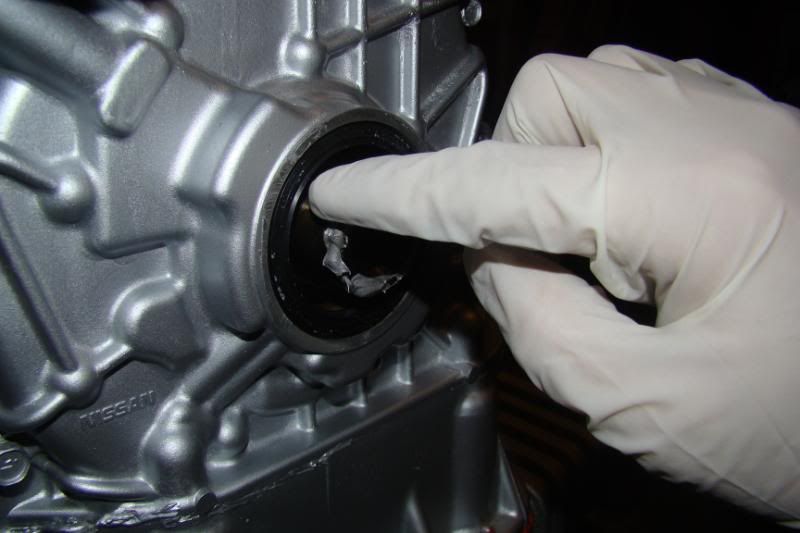 Then thoroughly clean your crankshaft and apply a small amount of antiseize. 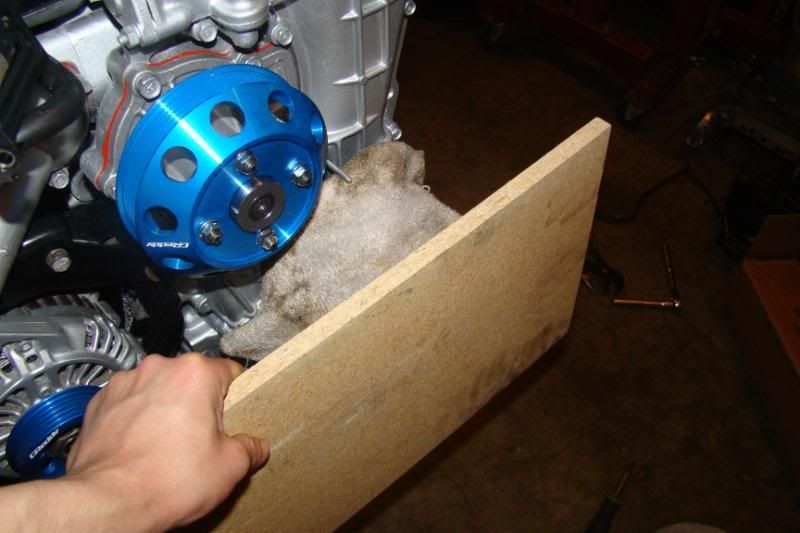 Theres only one way to put the pulley on and unlike the OEM crank pulley the ATI crank pulley is a tight fit, so to get it started I used a rag on the pulley then placed a board and hammered it till it was on securely. 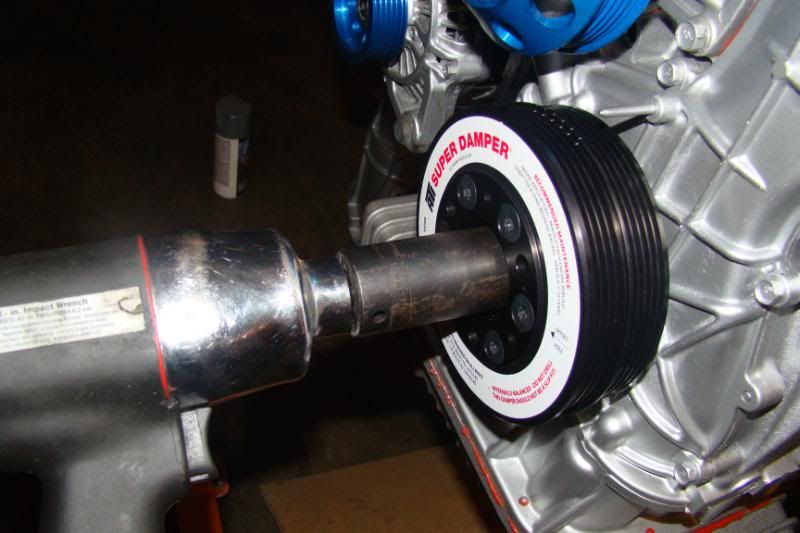 Then used the impact gun to completely "seat" the pulley in place, I used a 27mm socket btw. 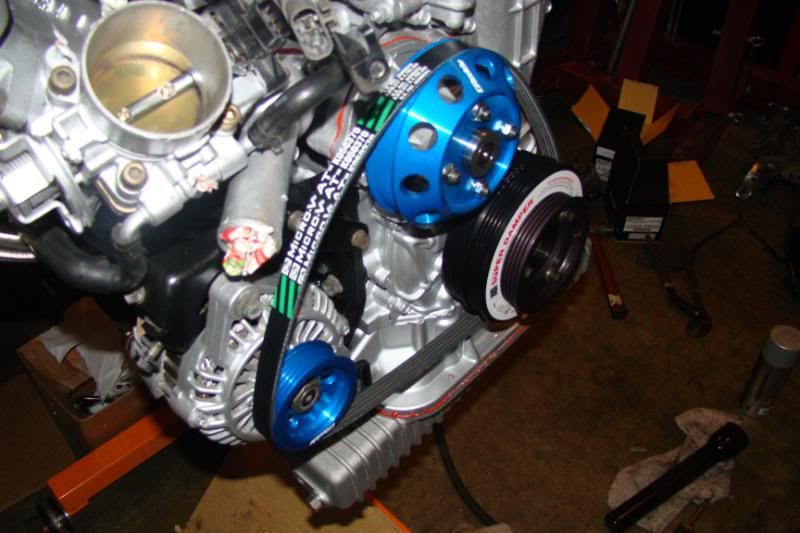 Then I threw the new belt on thus concluding my day. Last edited by xharobikeslifex; 09-19-2013 at 10:09 PM.. |
|
|

|
|
|
#43 |
|
Zilvia Member
 |
Removing the Side Mirrors
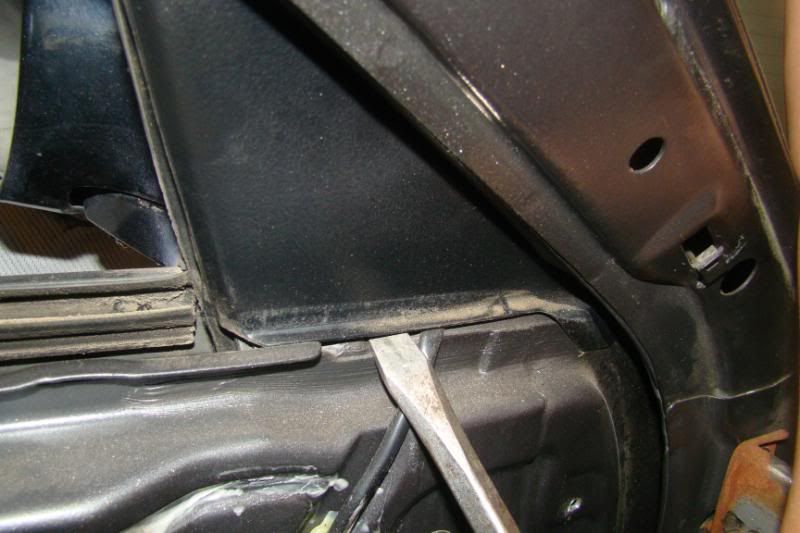 First Remove this trim piece to uncover Bolts 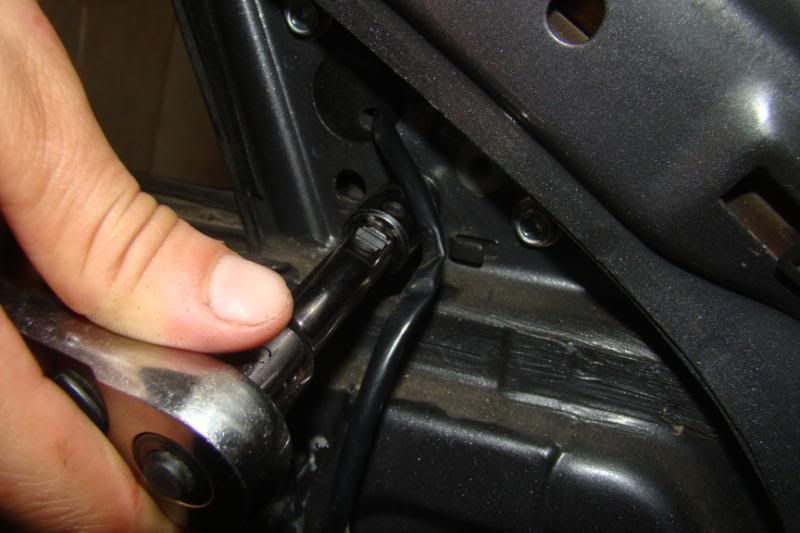 Then Remove the 3x 12mm bolts with a 3/8 racthet and 3/8 ext. 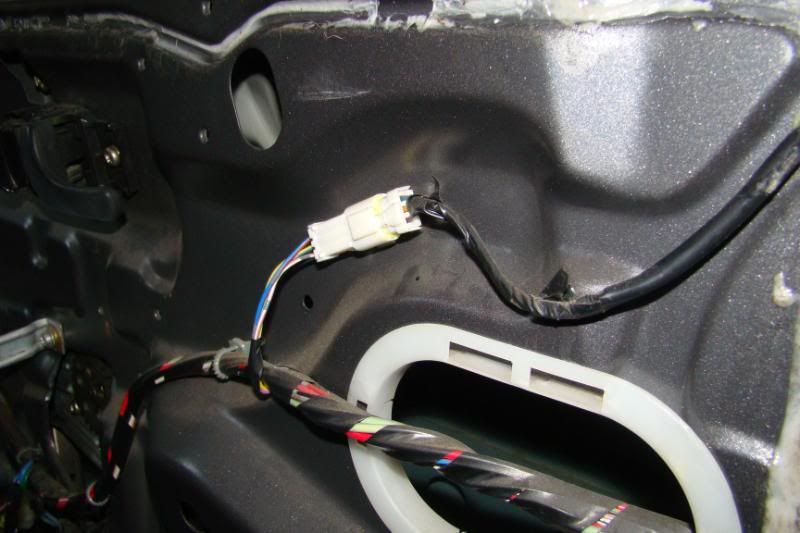 Before pulling out the side mirrors when the bolts are removed don't forget to disconnect the connector inside the door panels 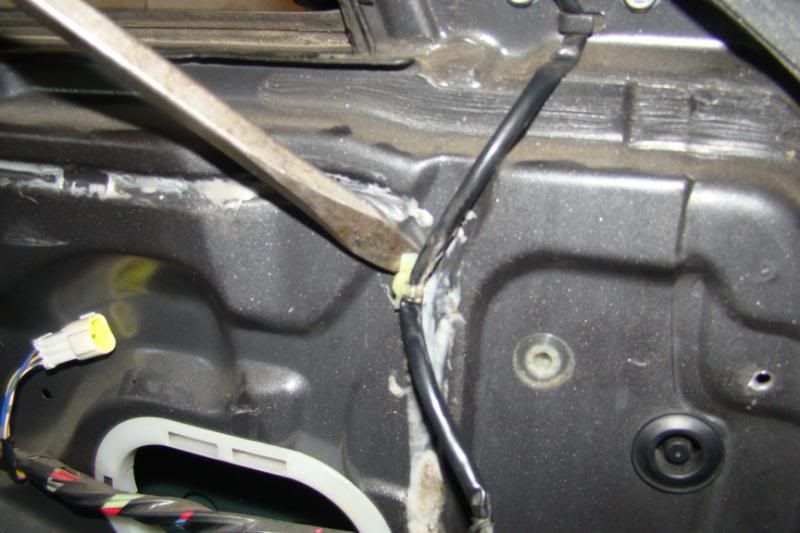 As well as any plastic pieces holding the wires to the door. 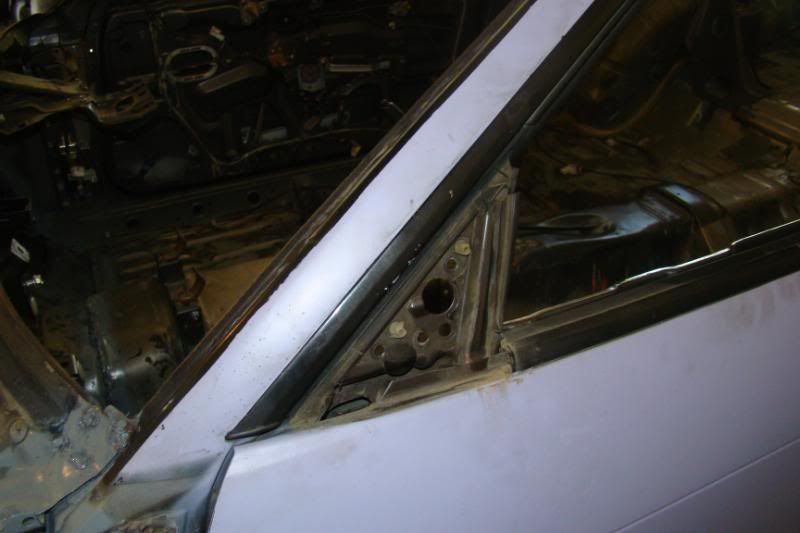 Then finally you can remove the mirrors. Removing the Doors 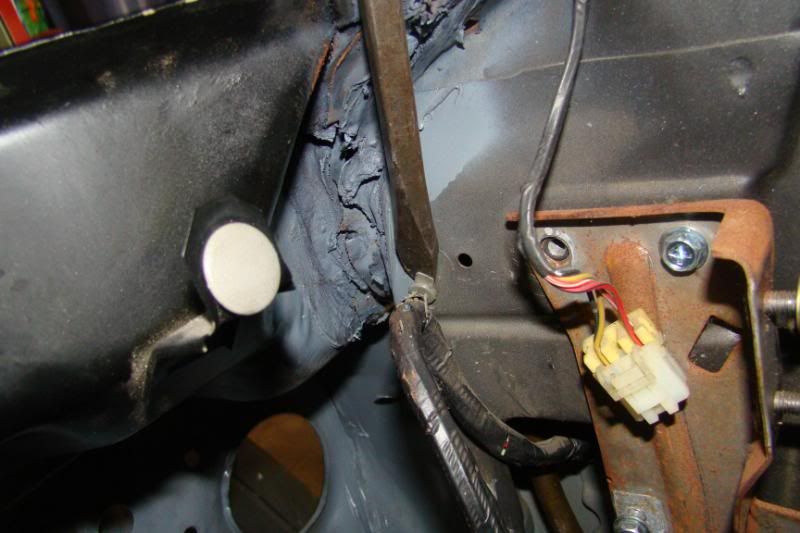 First thing I did was remove the plastic piece holding the wire to the chassis of the vehicle. 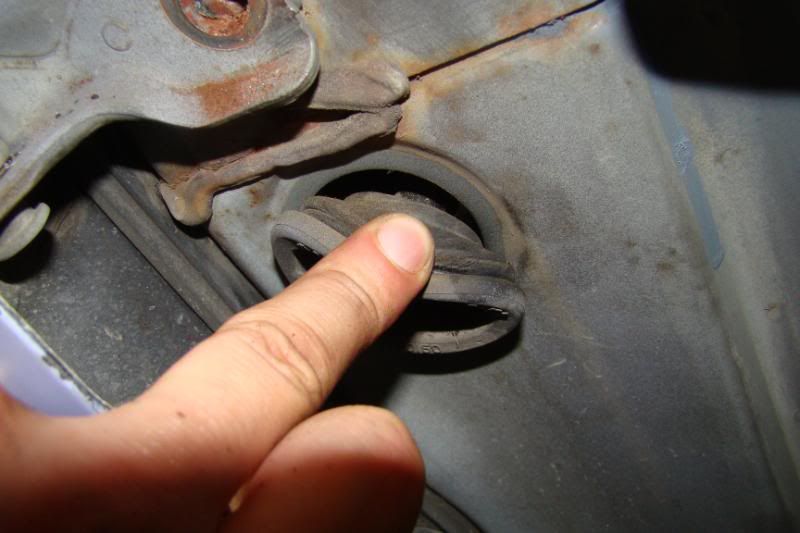 I then pulled the rubber grommet out and snaked the door connector out. 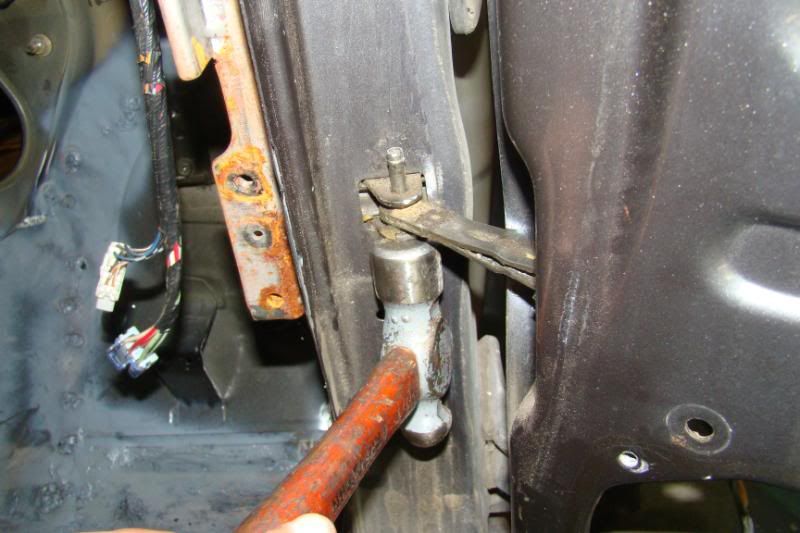 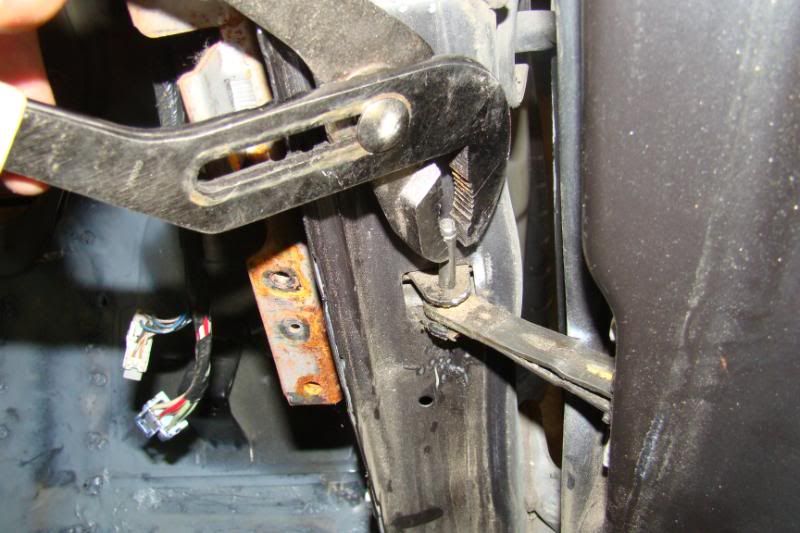 Open the door and remove the pin as shown in this pic by taping the bottom with a hammer and prying it out with some pliers. 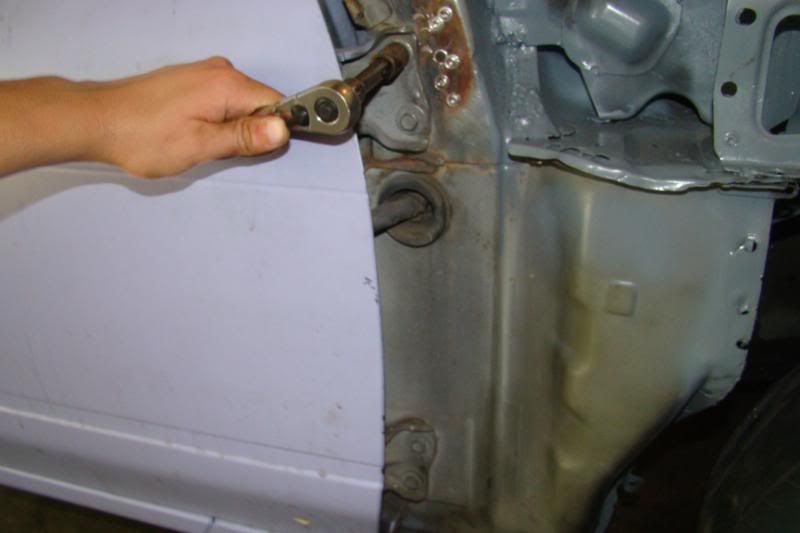 Then Finally remove the 2x bolt hinges thats holding the door to the frame. There's 2x bolts on top and 2x bolts on bottom. Use a 14mm socket with an extension. 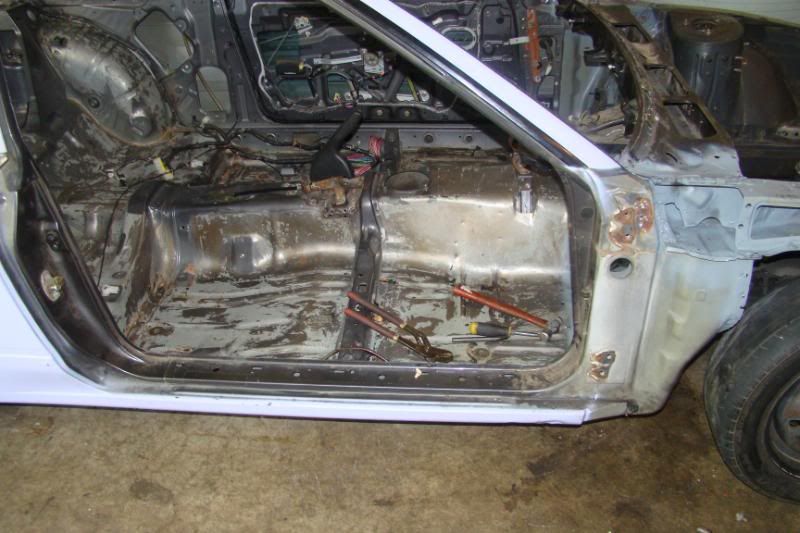 Now finally the doors should come off with ease, but be careful there pretty damm heavy. Removing the Quarter Windows 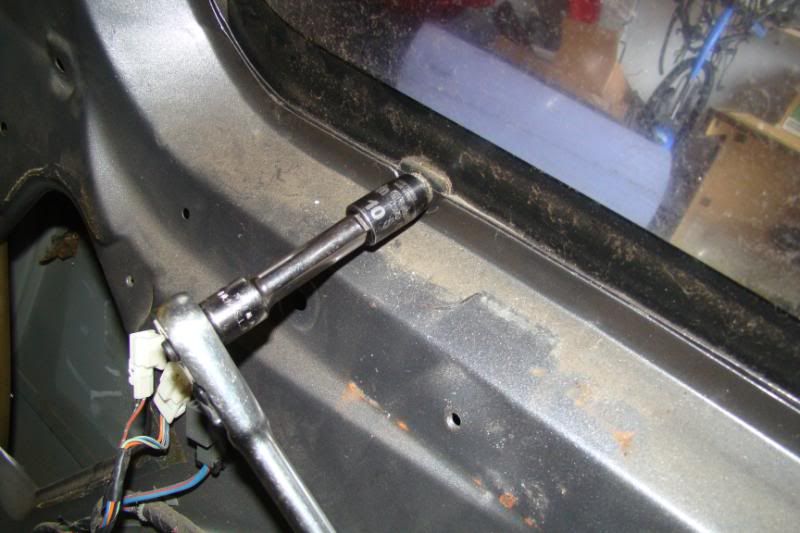 First remove the 10mm bolt inside the vehicle. 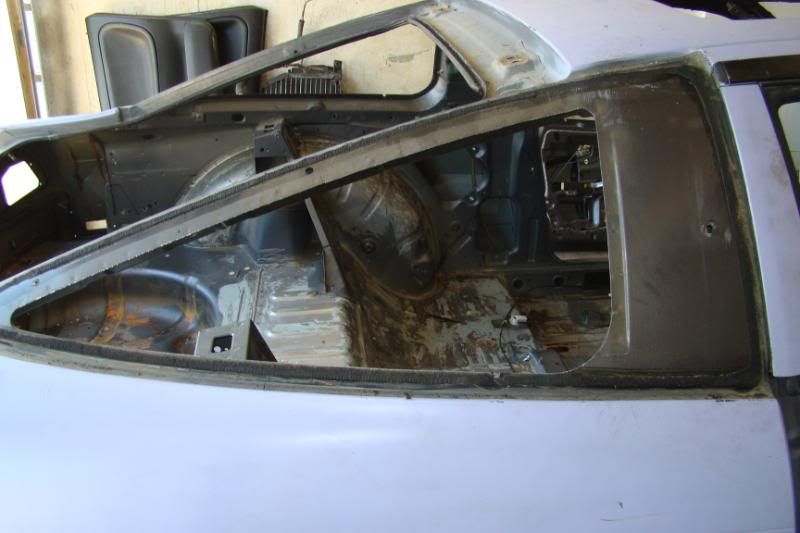 Then it should come right out! haha j/k I used a windshield remover kit I bought from harbor freight all I did was wedge a wire and began sawing all around the window until it was loose to remove. Sorry 4 not taking pics it was difficult to take pics while doing it. 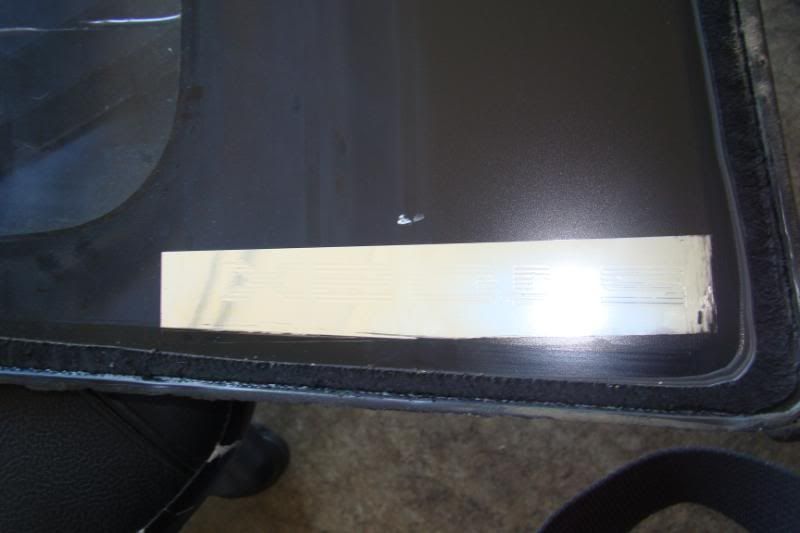 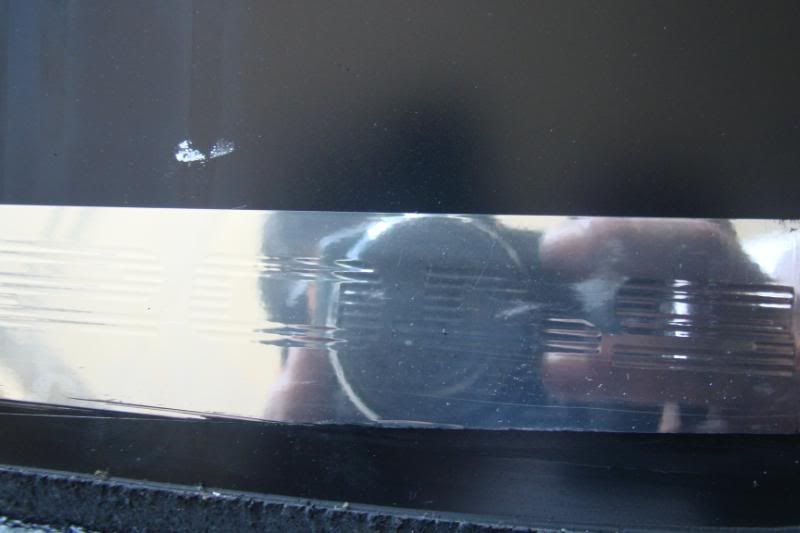 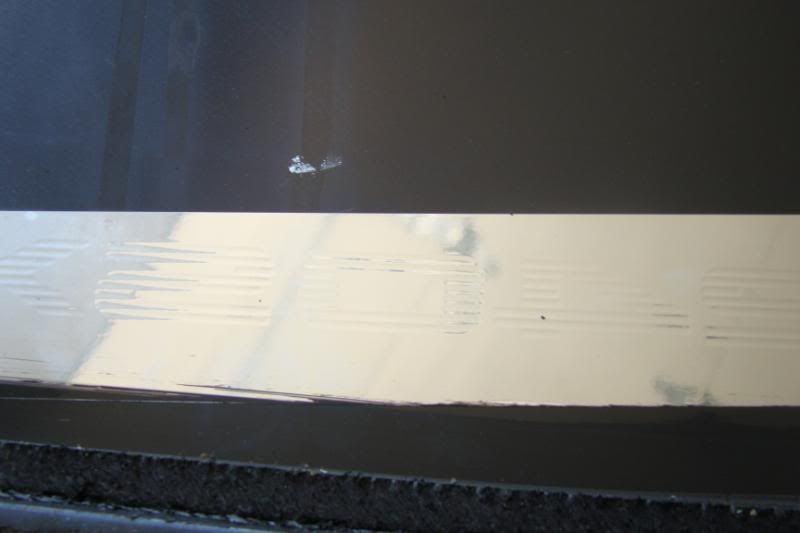 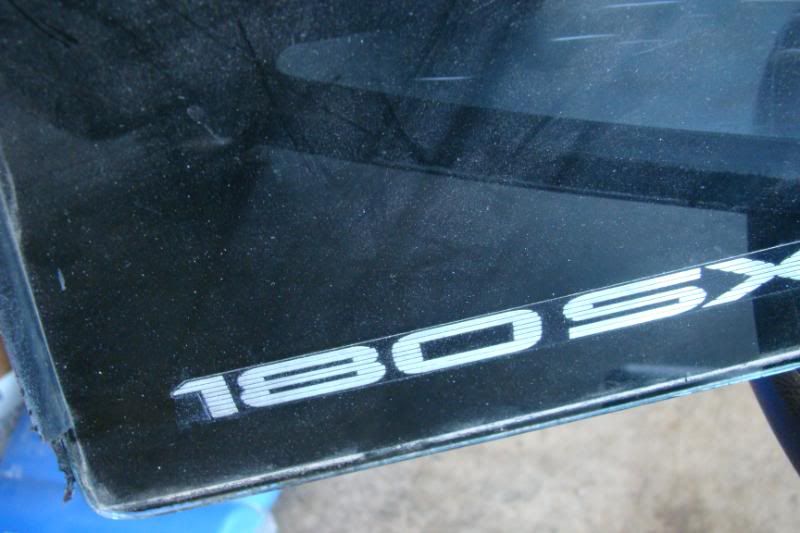 I did notice that my 180sx windows turned out to be 240sx windows with a 180sx sticker fooled me for a lil bit until i rubbed against the window and felt a slight incline on the 180sx part haha ooo well. 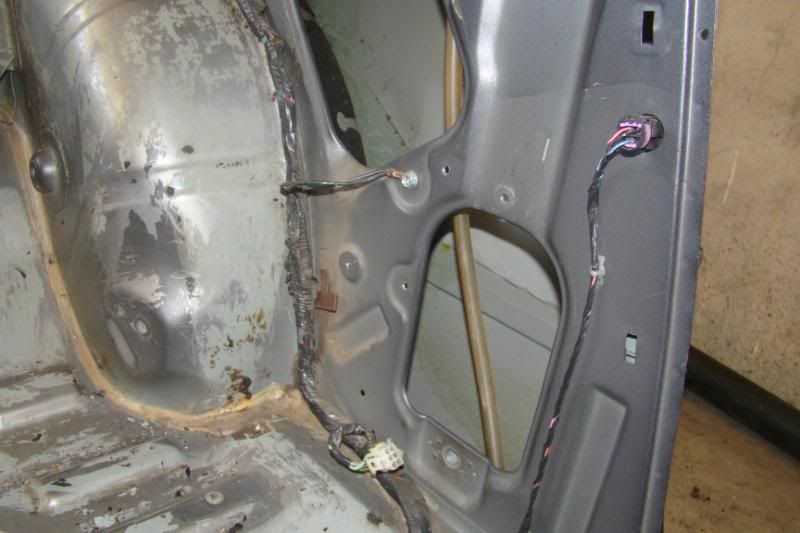 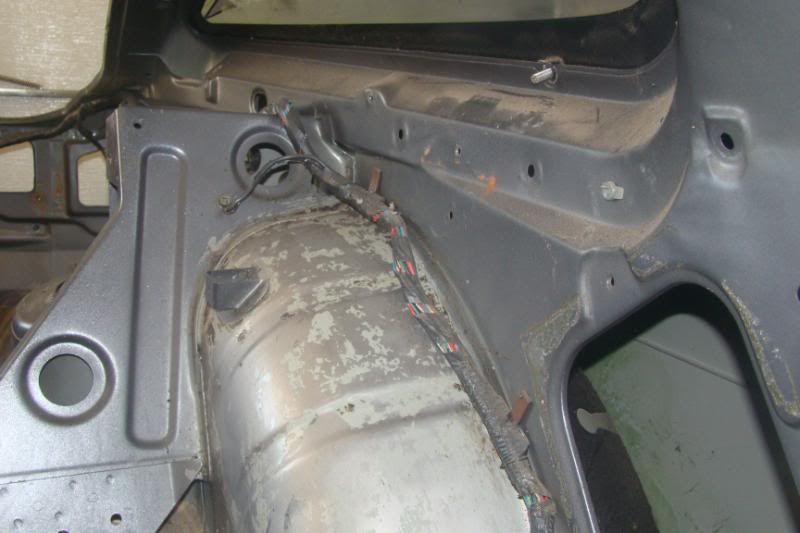 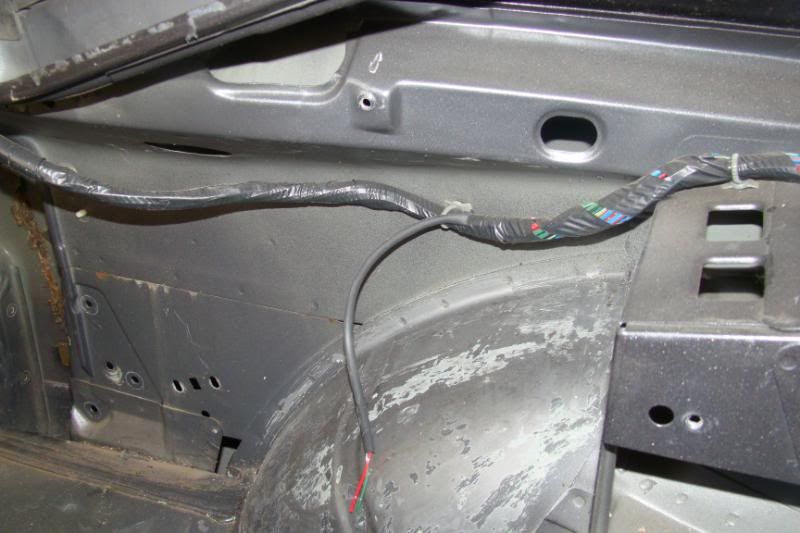 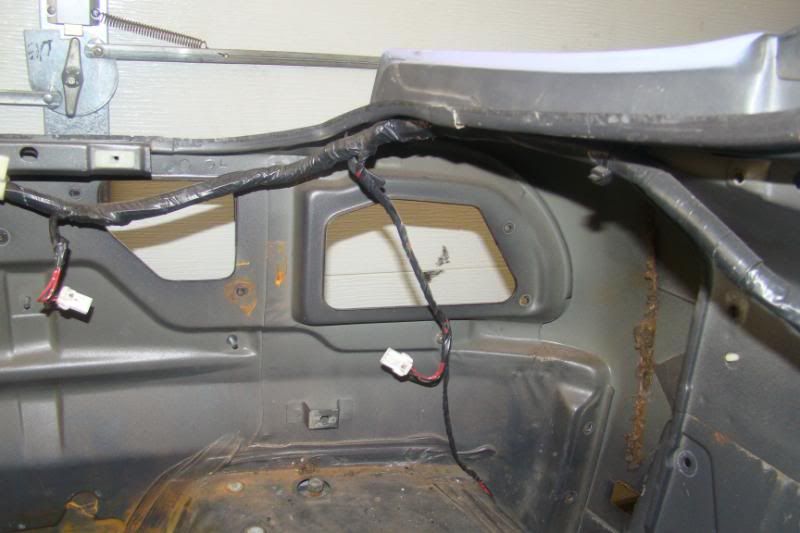 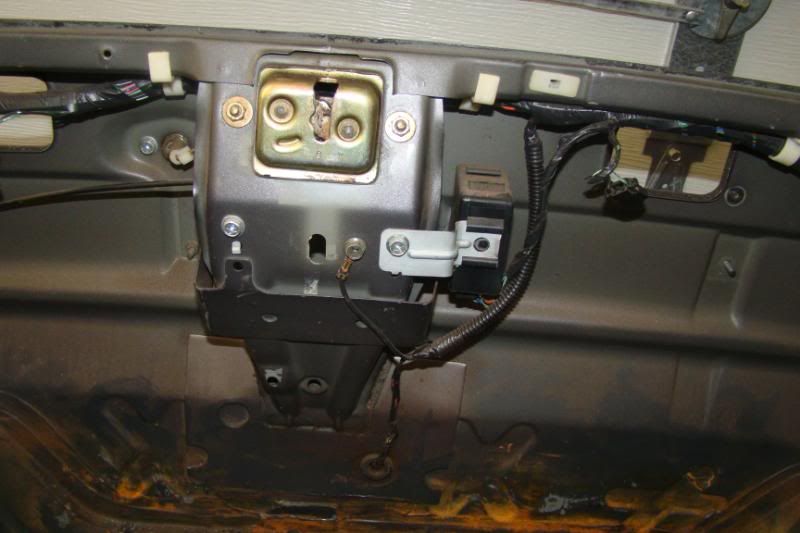 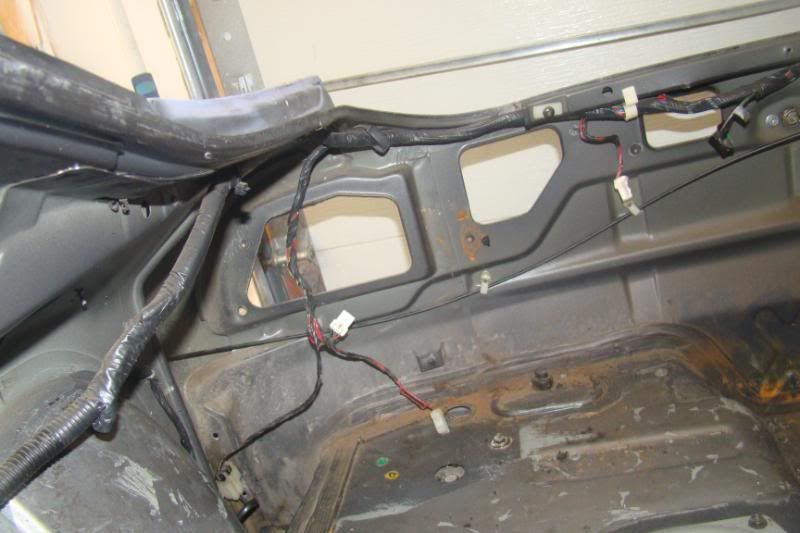 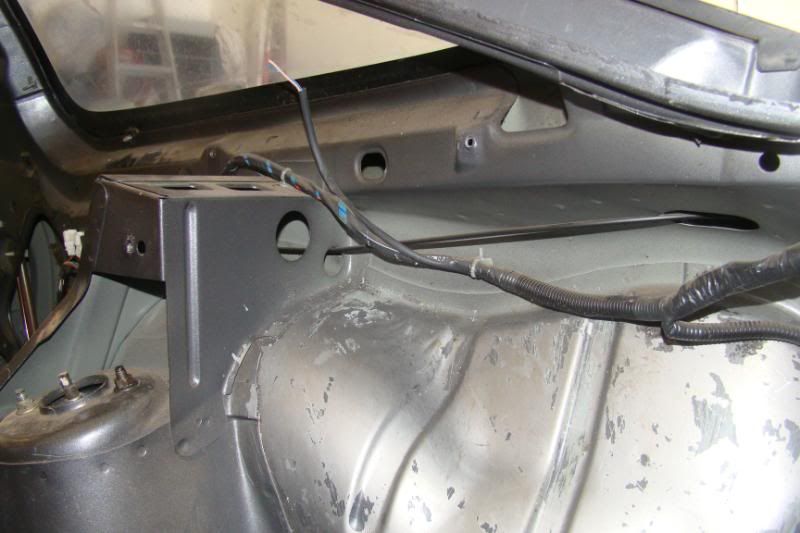 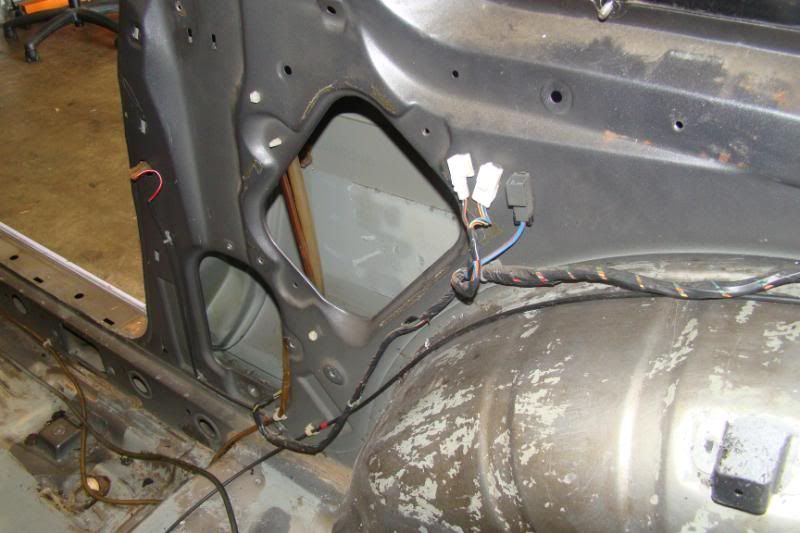 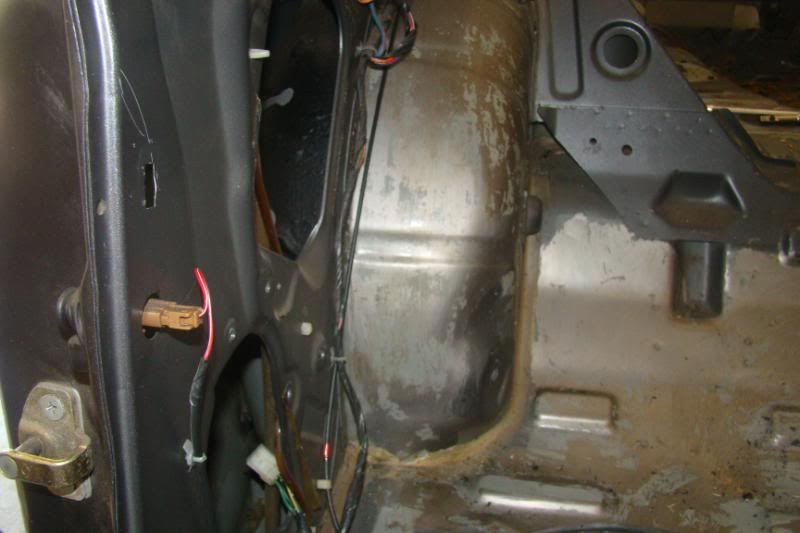 Now these pictures are more for my reference, but I simply removed the rest of the chassis harness, so it wouldn't get in the way when it comes time to paint this bad gurl. As you can see from the pictures I started from the driver side and worked my way around to the passenger Rear Seat Bracket Removal 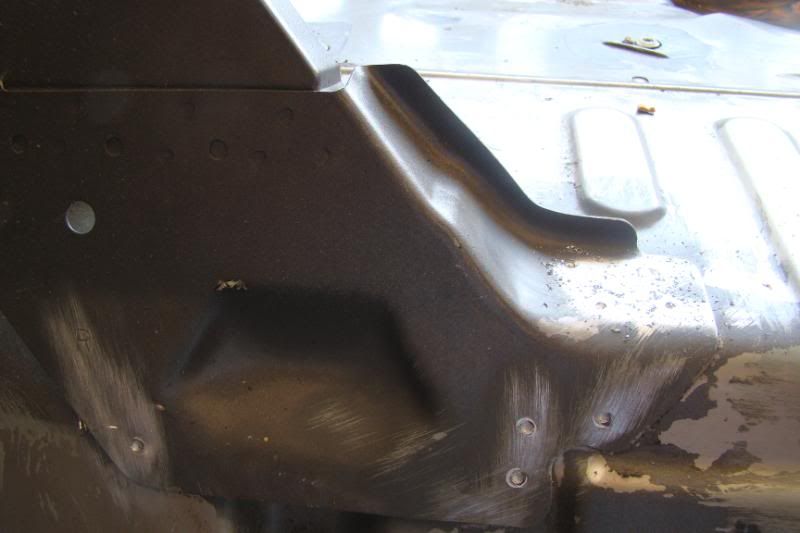 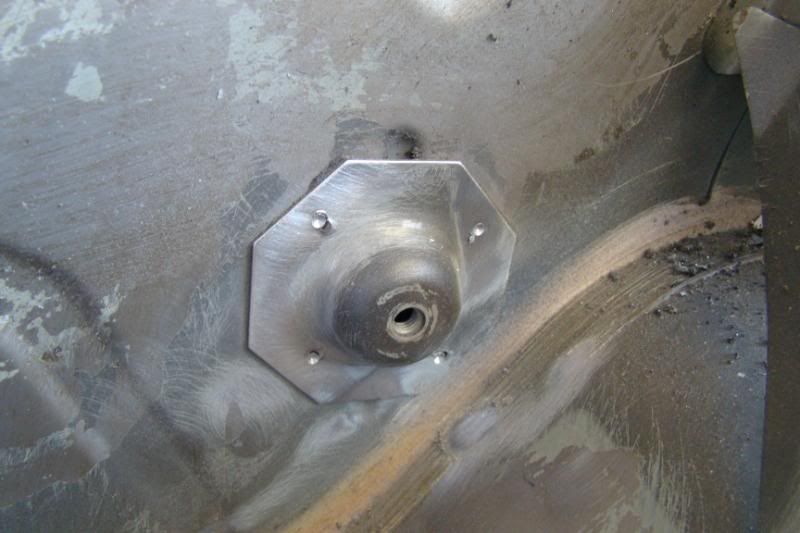 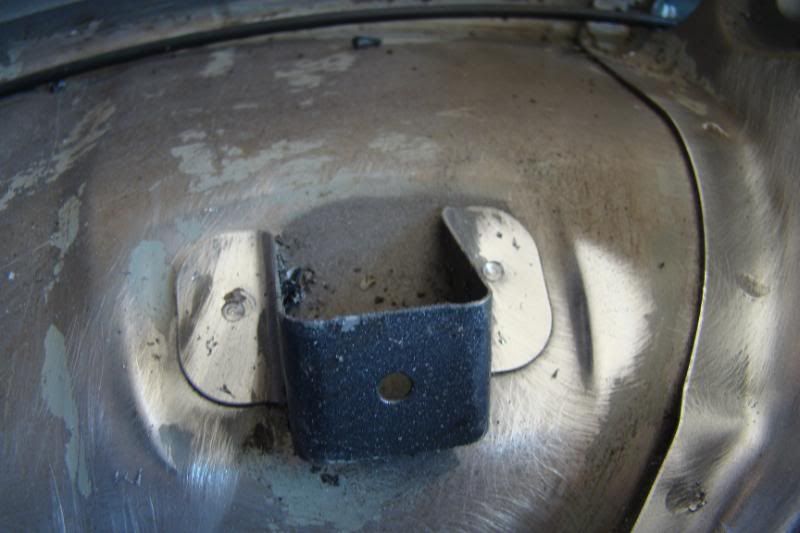 The Process is the same like the firewall. First I used a steel braided wheel to sand down the paint to locate the spotwelds, I then marked the spotwelds with a permanent marker and began drilling them out with a spotweld drill bit. After all the spotwelds were removed I then used a combination of a wood chisel and hammer/ air hammer to remove the brackets. 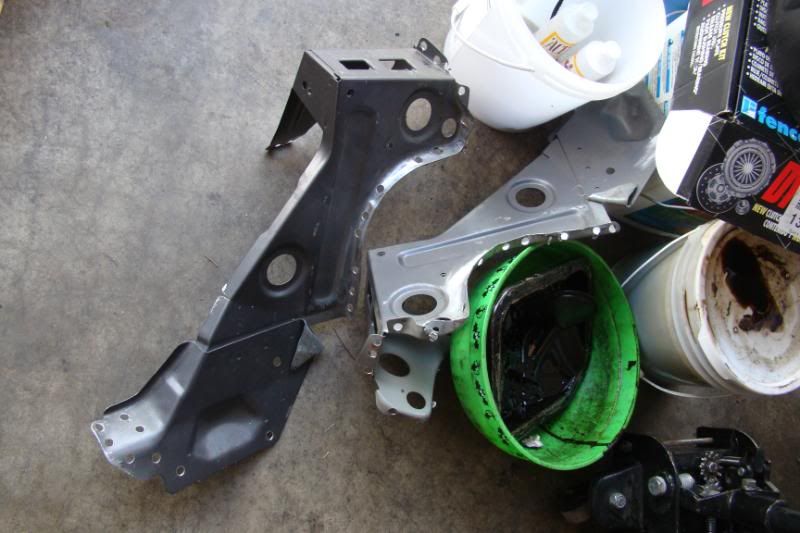 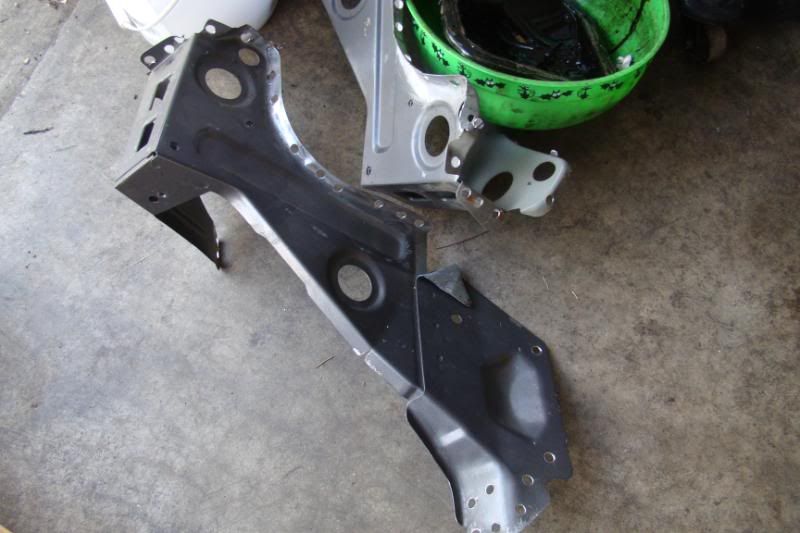 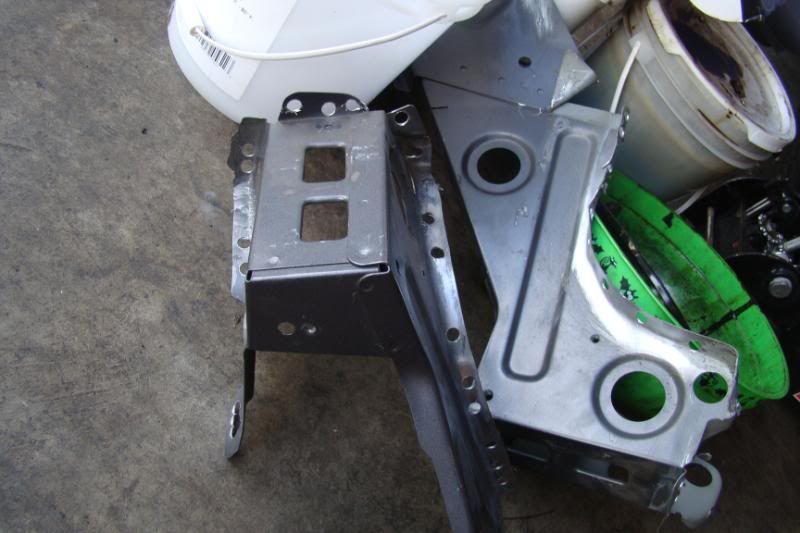 After an hour or 2 this is what you end up removing. 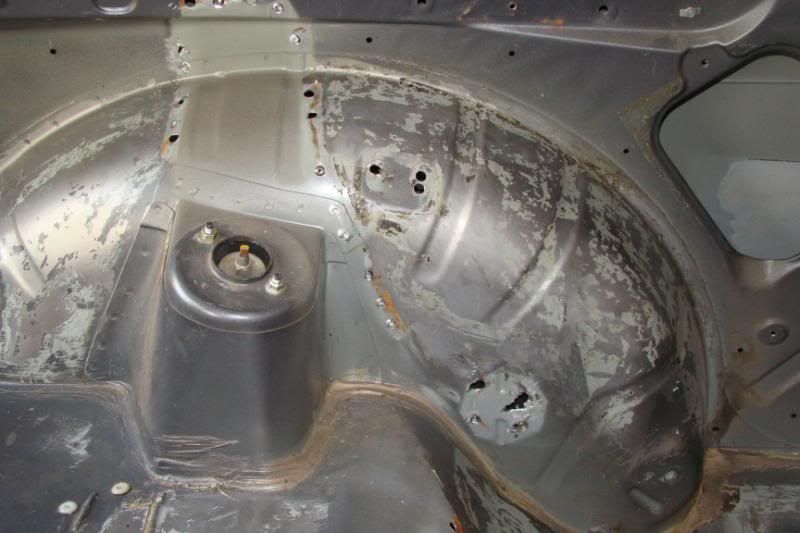 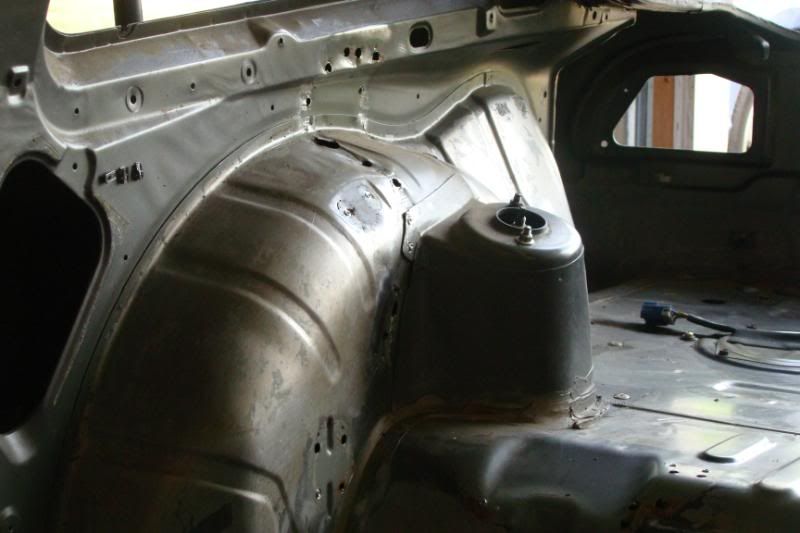 Here's photos of what it looks like without the rear seat brackets. Oh it's sure going to be fun filling all those holes when it comes time to prep the car.   But in the end it's worth it. It's the little things that count that will make this car stand out then others. Last edited by xharobikeslifex; 09-19-2013 at 10:11 PM.. |
|
|

|
|
|
#44 |
|
Zilvia Member
 |
I received my parts I sent off to go get powder coated from "Bone Head Performance" the other day. Let me know what you people think of the color I chose.
Valve Cover: Anodized Red W/ Polish Lettering CAS Cover: Anodized Blue Injector Caps: Anodized Red Valve Cover Washers, Brackets, and etc: High Gloss Black I also ordered Stainless Steel Valve Cover Bolt Kit from them as well. 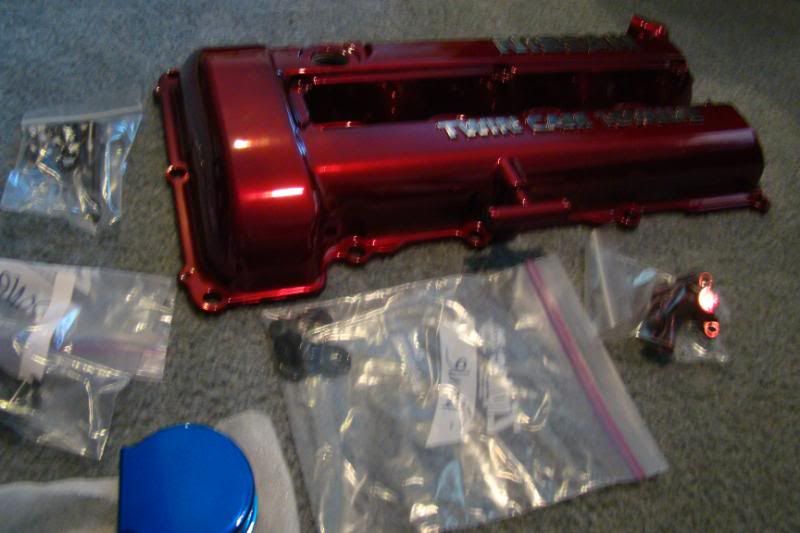 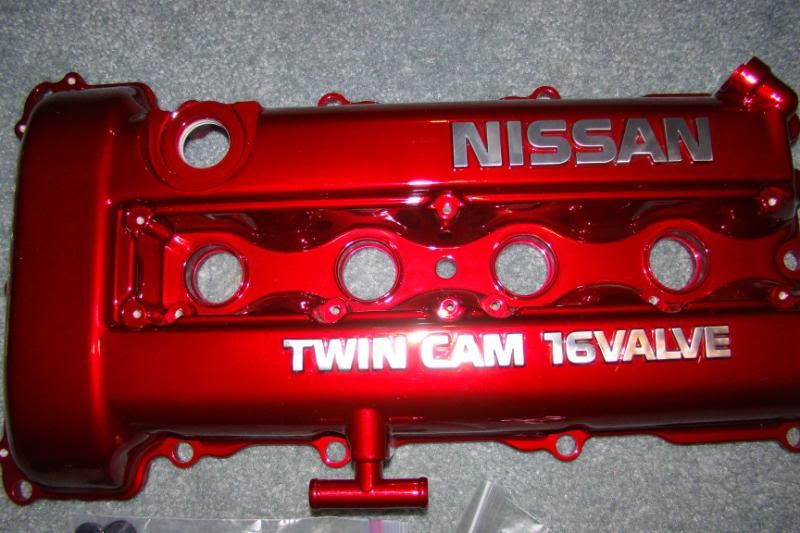 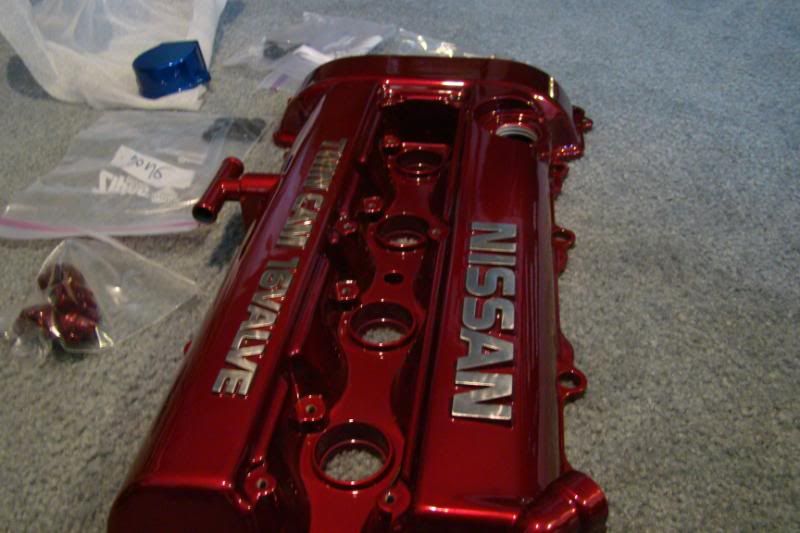 Last edited by xharobikeslifex; 09-19-2013 at 10:13 PM.. |
|
|

|
|
|
#45 |
|
Zilvia Member
 |
Yesturday Derek and I knocked out a few things I had to put on my engine.
RAS Installation 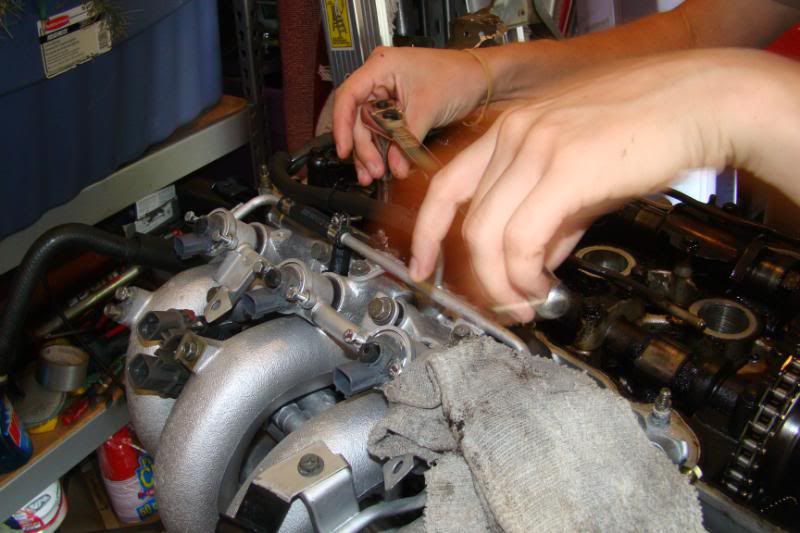 First thing was tackling the HKS RAS. In this pic Derek is figuring out which RAS goes on which side. If i'm not mistaken they only go on one way, so don't get worried if you might of installed them incorrectly. 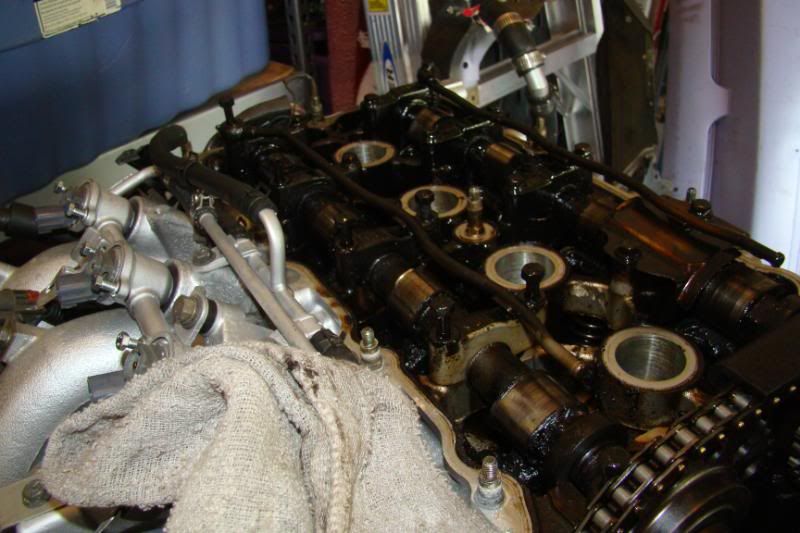 Now begin to loosen the cam bolts in alternating order. 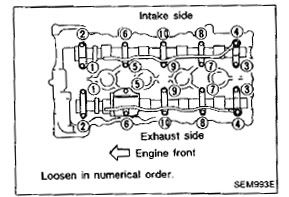 Refer to your fsm for the procedure. 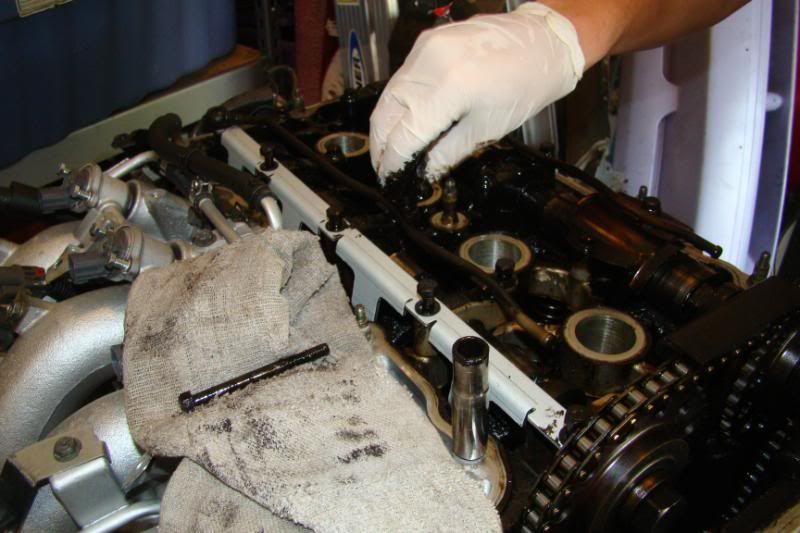 Once you have loosen and removed the bolts Install the RAS as shown  This pic was suppose to be the 2x washers we added on the two bolts on the intake side, so the oil squirters would be level, but I failed in showing which two bolts it was. 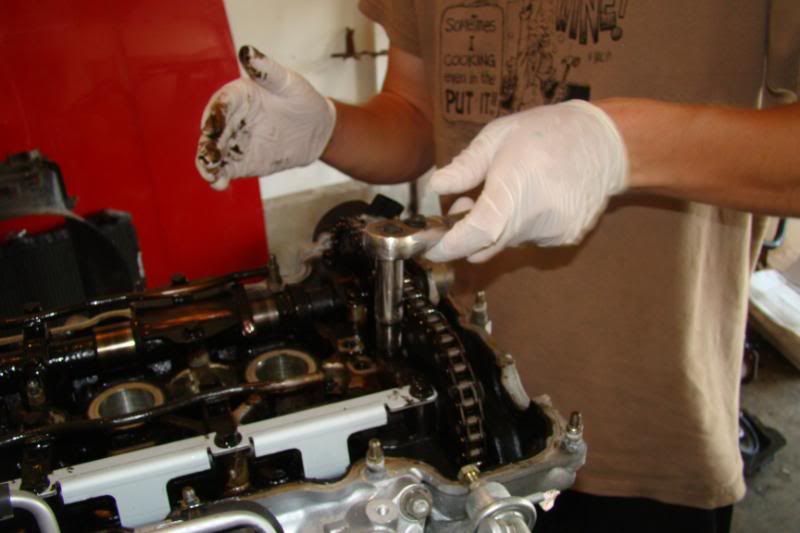 In Order to get to one camshaft bracket bolt we had to remove the bracket that was above the timing chain. 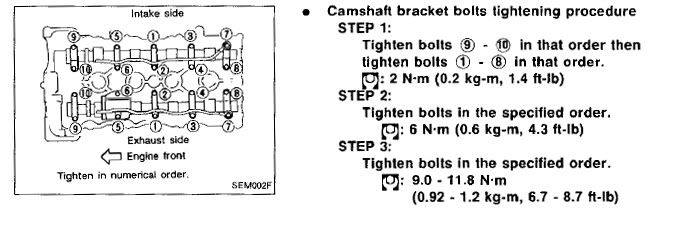 Now torque down the camshaft bolts by refering to the fsm 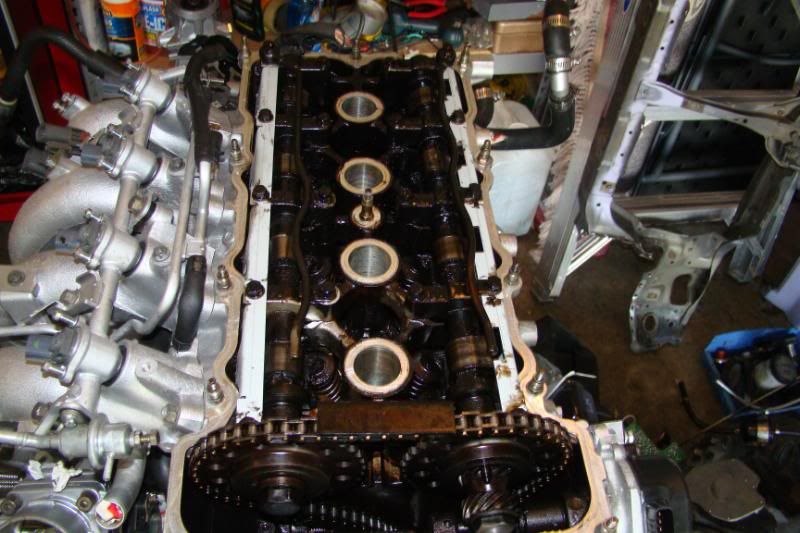 HKS RAS Installed and torqued down. Note on the exhaust side the baffle plate is deleted. Valve Cover Installation. 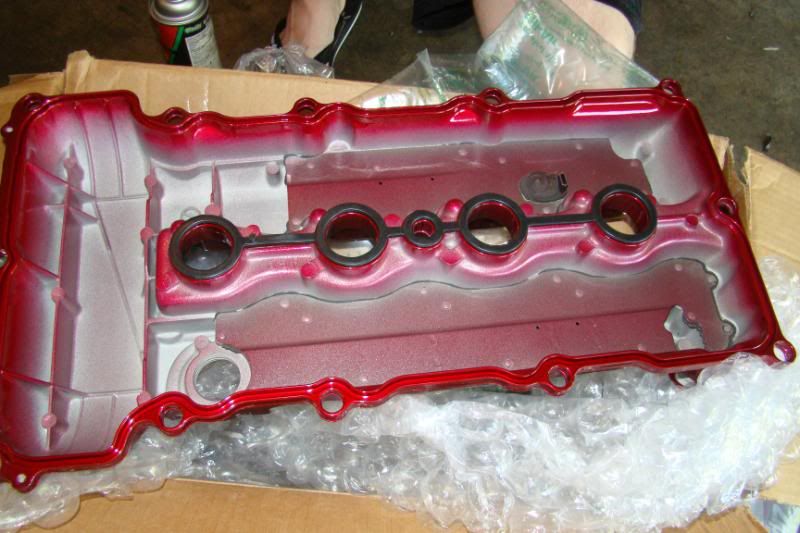 Put on both new valve cover gasket and spark plug well gasket. 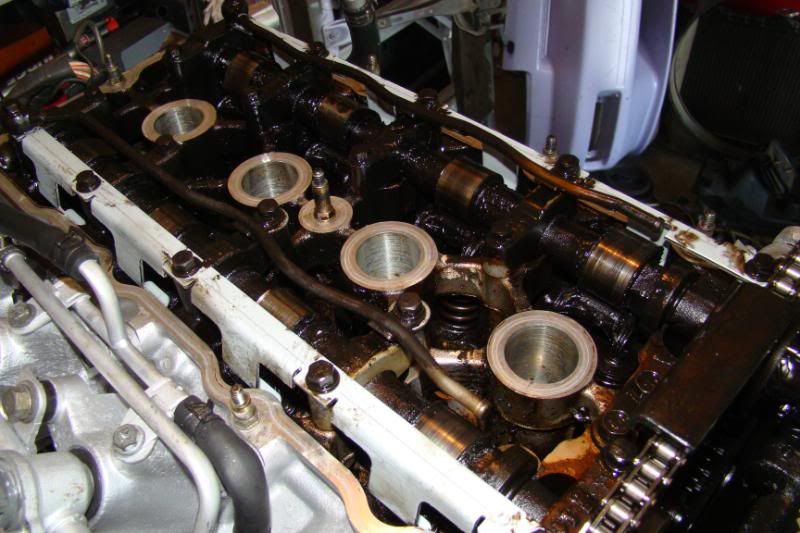 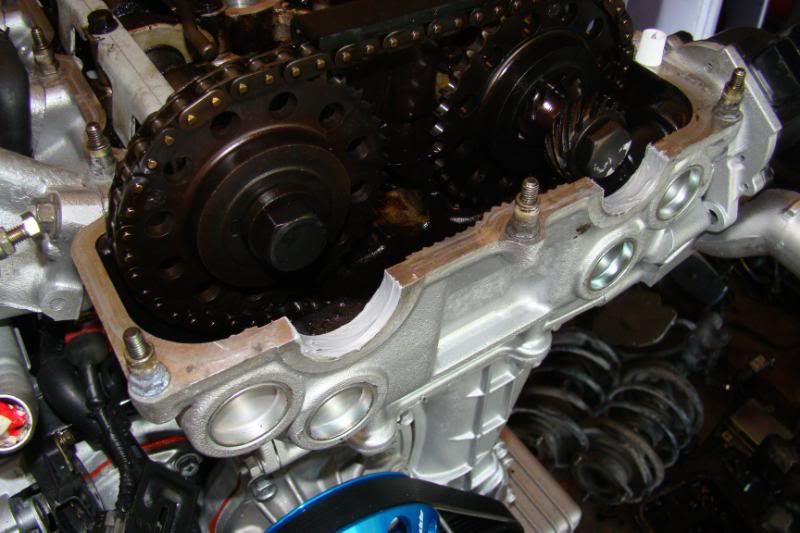 Make sure you scrape off all of your old gasket with a razor blade and clean off any debris or oil by using a towel with brake parts cleaner sprayed onto it. 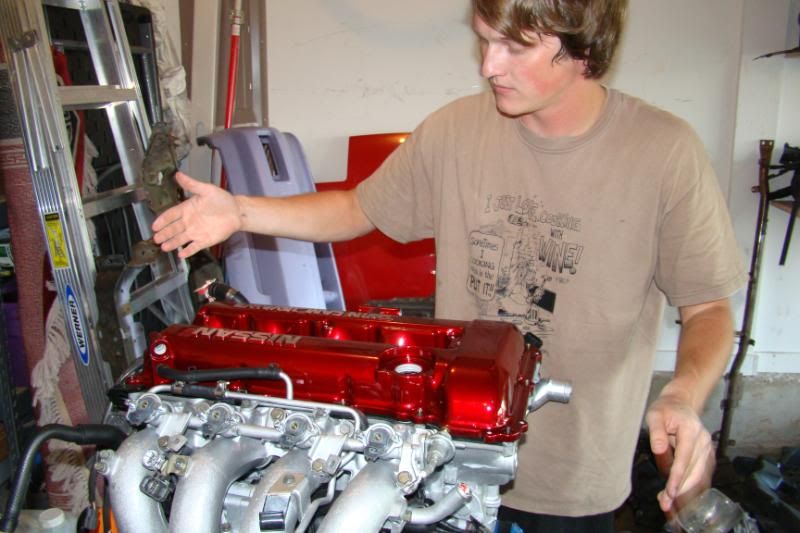 With a Wave of the hand the valve cover should magically appear onto the head. Don't forget to use the grey type of gasket sealer on the "half moons" there should be two in the front and two in the rear. Refer to the FSM for torquing the valve cover down correctly. 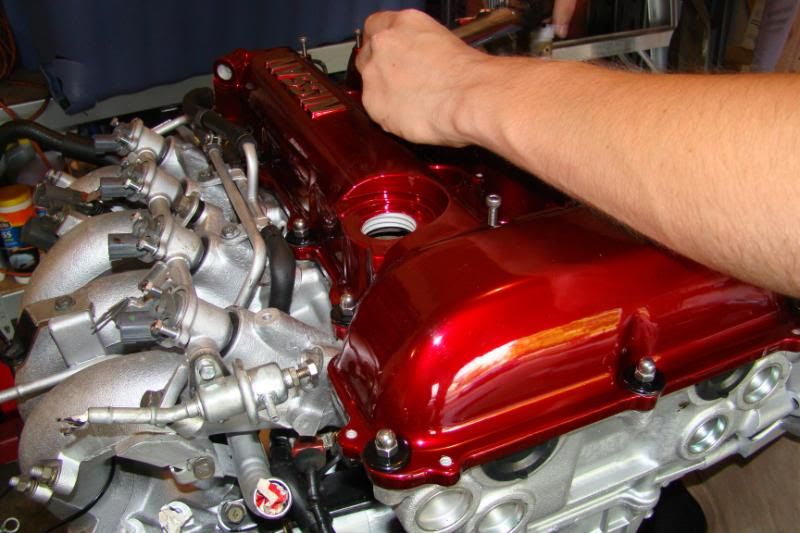 Derek installing the NGK Iridium IX Spark Plugs with a heat range of 7 don't forget to anti-seize them before you tighten them. 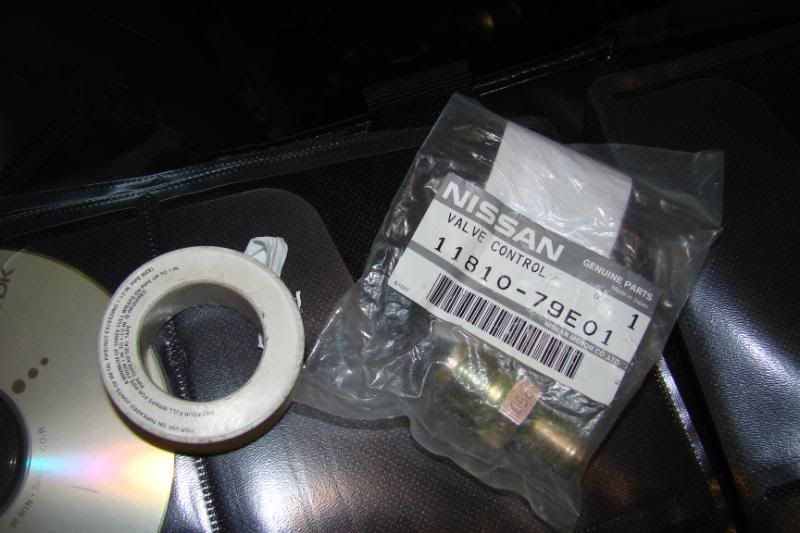 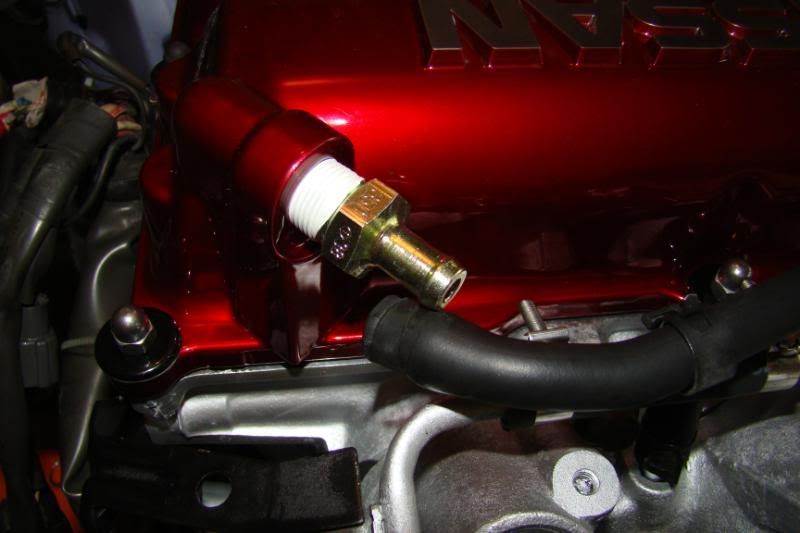 Use the sealer tape and thread it around the threads and get a 19mm wrench and tighten it snugly to the valve cover. 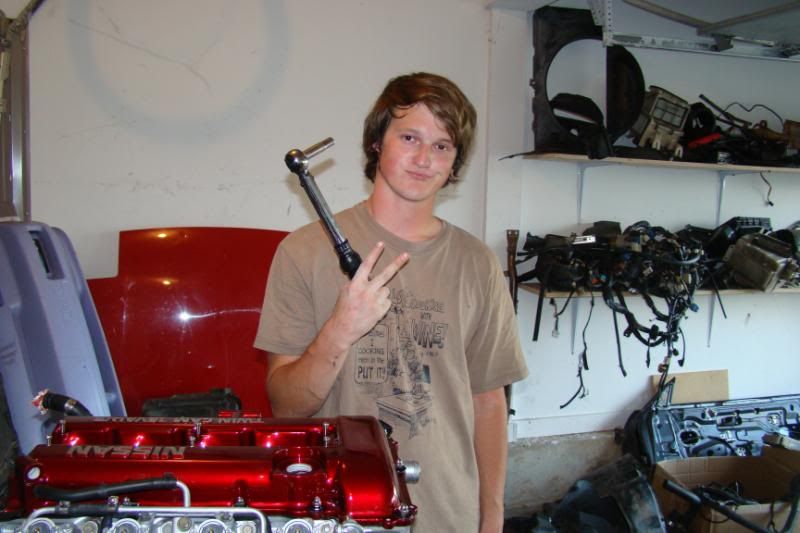 "This is fo my homies" (Derek Fint.) 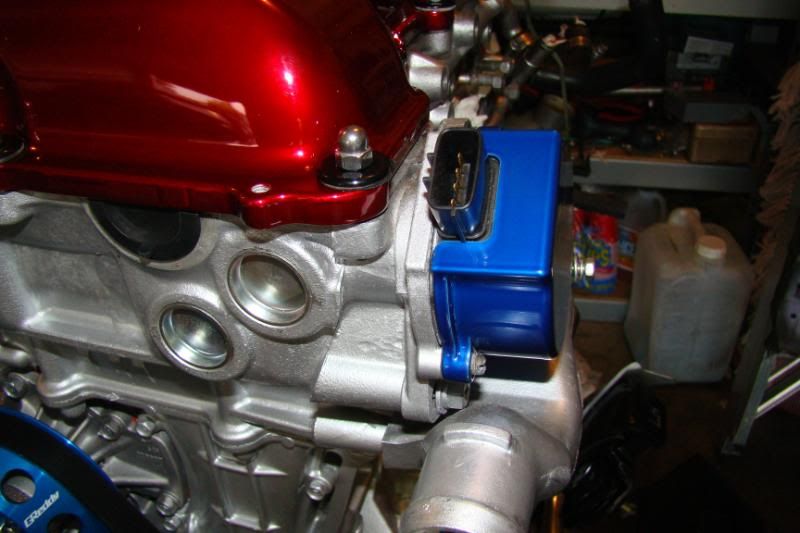 I got rid of my oem CAS cover and purchased a circuit sports CAS cover powder coated Candy Blue. 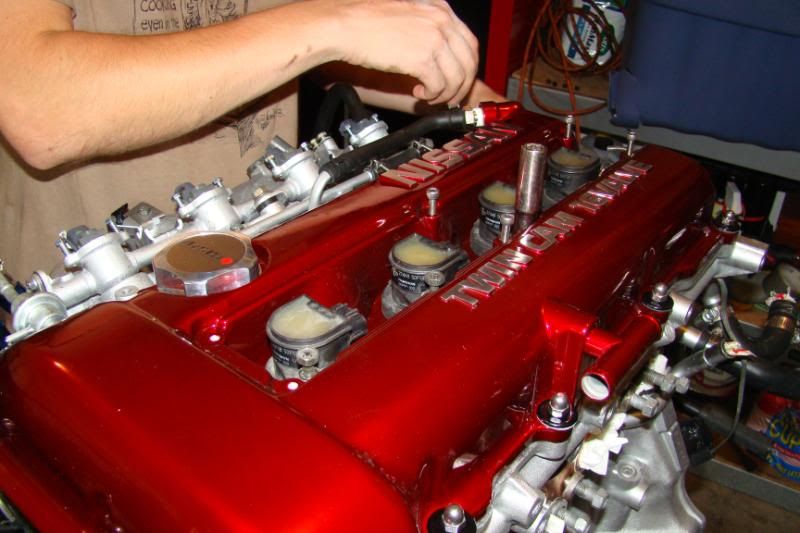 Added a Nismo Oil cap and removed the bolts to the coil packs. 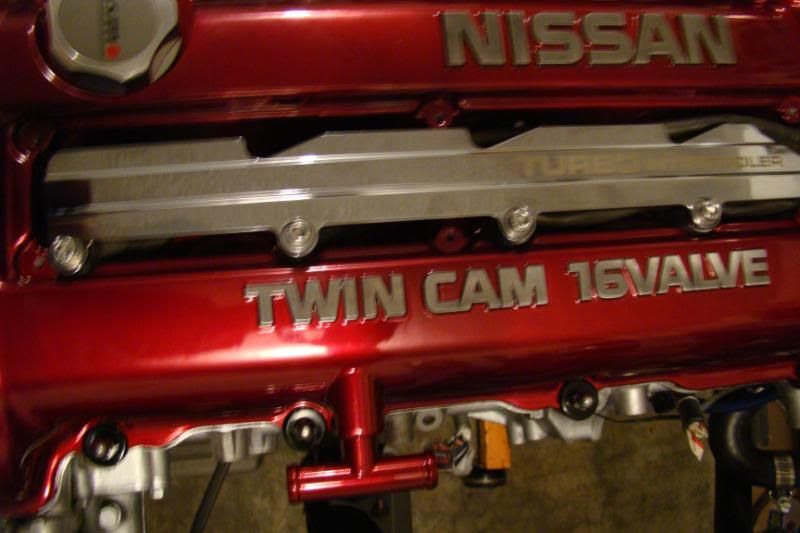 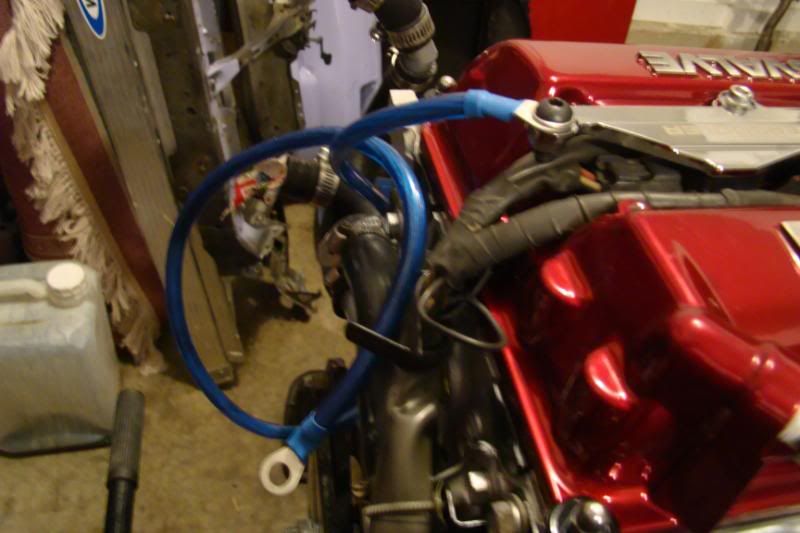 Circuit Sports Grounding Plate was then Installed. 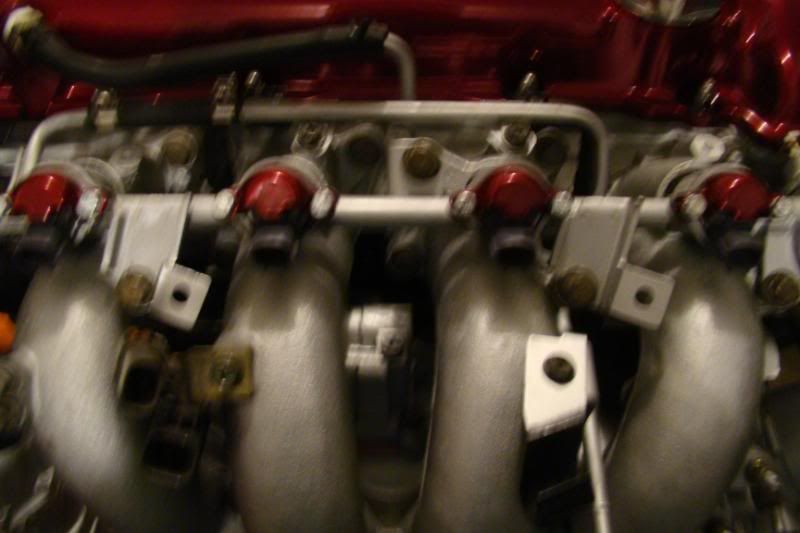 Anodized Red Injector caps Installed. Even though now I plan to buy a HKS Fuel rail. 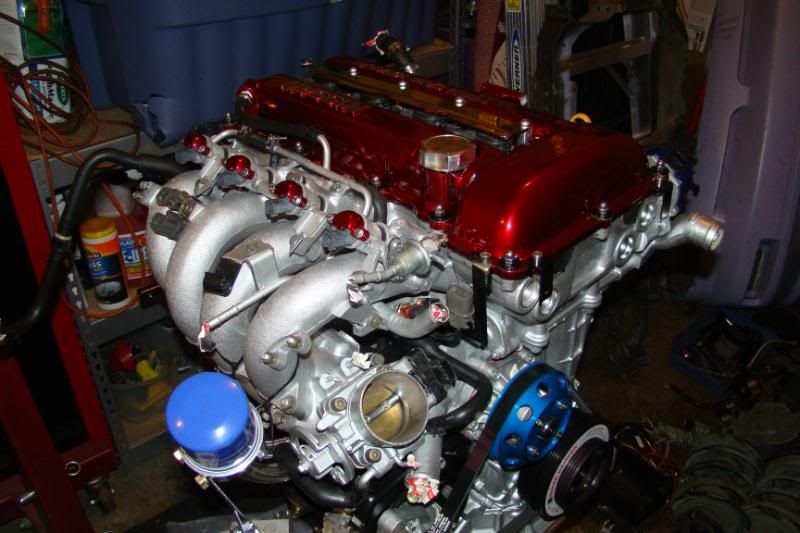 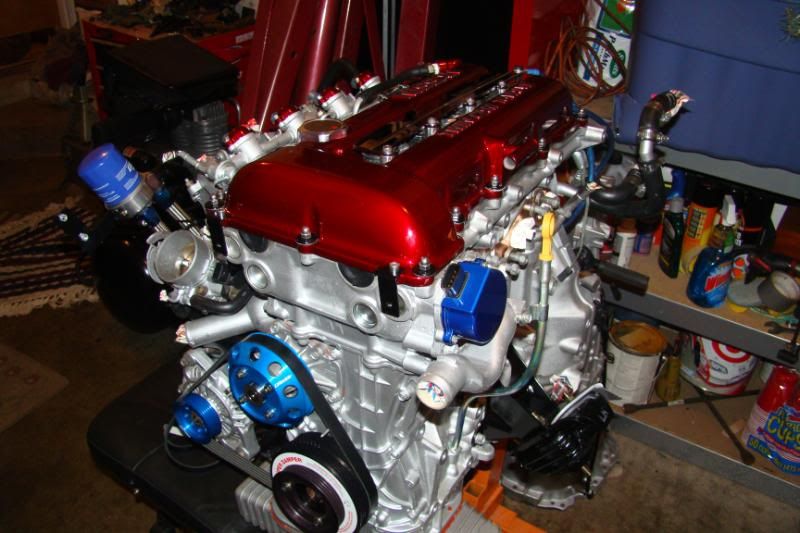 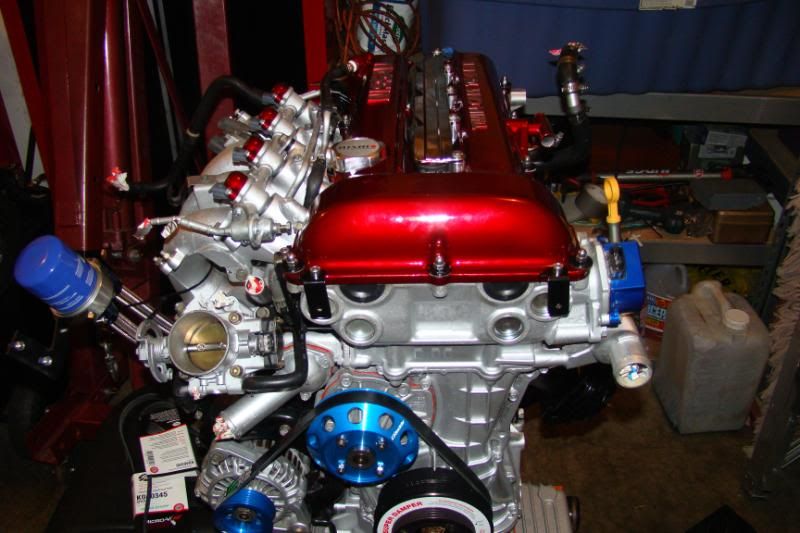 And finally the 2x brackets installed on the front of the Valve Cover, and a new oil dump tube was put on as well. 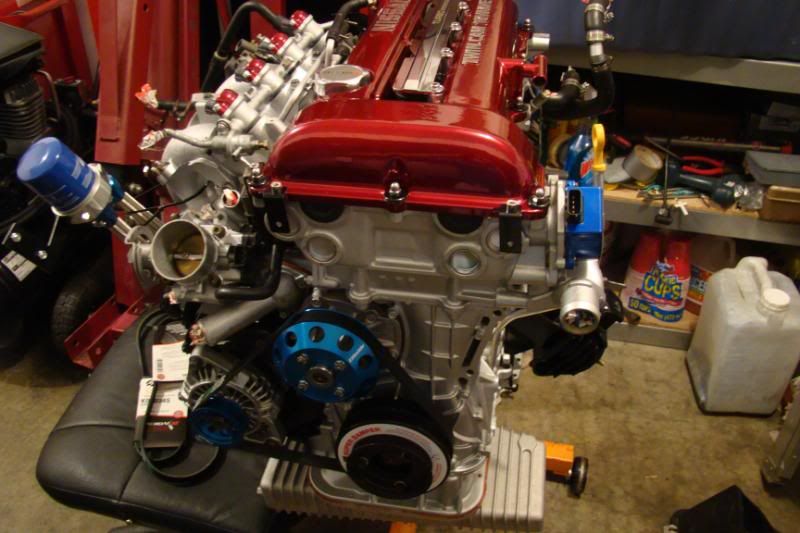 I'm effy on the CAS cover I'm thinking about wrapping it in gold film like Dereck did on his "whip" But overall I don't find it looking that bad. Ahhh I Cant wait to get and install my turbo setup! Last edited by xharobikeslifex; 09-19-2013 at 10:20 PM.. |
|
|

|
|
|
#46 |
|
Zilvia Addict
 Join Date: Sep 2009
Location: Nor Cal
Age: 37
Posts: 720
Trader Rating: (10)
 Feedback Score: 10 reviews
|
Nice build man I applaud you on doing everything right the first time, im diggin the color on the valve cover & injector caps.
 I meant to ask since ive never seen it done but what is the purpouse of the HKS shifter springs? I meant to ask since ive never seen it done but what is the purpouse of the HKS shifter springs?Cant wait to see the car all put together, GL & keep updating. |
|
|

|
|
|
#50 | |
|
Zilvia Member
 |
Quote:
And thank you all for the nice replies I didn't get much of any replies from my other forums  |
|
|
|

|
|
|
#51 | |
|
Zilvia Addict
 Join Date: Sep 2009
Location: Nor Cal
Age: 37
Posts: 720
Trader Rating: (10)
 Feedback Score: 10 reviews
|
Quote:
 does that kit work for any Nissan trannys? (RB) does that kit work for any Nissan trannys? (RB)Also this isnt just your regular forum thats why lol  |
|
|
|

|
|
|
#52 |
|
Zilvia FREAK!
 |
i dig this man!
oh hell yeah!
__________________
cONtRol FReAkS |
|
|

|
|
|
#53 |
|
Post Whore!
 Join Date: Sep 2004
Location: Granada Hills, CA
Age: 43
Posts: 6,990
Trader Rating: (15)
           Feedback Score: 15 reviews
|
you and the teflon tape man *facepalm*
Seriously It's going to be surprising how long this motor lasts, I've never seen a used engine with so much sludge in it before, it should be a miracle if the rings aren't toast in this thing. Have you ever heard this engine run before, you seem to be doing all of these upgrades and making sure everything is all nice and pretty on the outside. I hate to break it to you but all of that shit is going to get dirty when you have to tear the block and head down to rebuild it. I see nothing but a road of high temps ahead for you when this thing is running again. |
|
|

|
|
|
#55 |
|
Leaky Injector
 Join Date: Feb 2008
Location: GRESHAM,OREGON
Posts: 122
Trader Rating: (1)
 Feedback Score: 1 reviews
|
Nice build man I have a similiar one going on to.I put all the best parts I could on the engine to drive it and then when it's time to build I will have most of the components to compliment the build.
|
|
|

|
|
|
#57 | |
|
Post Whore!
 Join Date: Dec 2006
Location: Misawa, Japan
Posts: 6,815
Trader Rating: (8)
           Feedback Score: 8 reviews
|
Quote:
That valve train looks nasty, looks like the oil wasnt changed in 15 years and it was cooked inside Cams look overheated and scared
__________________
 後輪駆動車1番 後輪駆動車1番1989 Built SR GT2871R -363whp 1998 S14 W/RB25- 250ish (For Now) 1986 SR86 - 200ish 1990 R32 GTR - 320hp Don't Buy Engines from JDM-Online http://zilvia.net/f/businesses/207457-jdm-online.html Don't Buy XS-Power or SSAC Shit |
|
|
|

|
|
|
#58 |
|
Post Whore!
 |
one thing i must point out that no one did. He used SO much RTV Seal Maker on the oil pan. You do realize, that excess that oozed out when you tightened it ON THE OUTSIDE, is also going to be bad ON THE INSIDE. You're supposed to do like a 1mm-2mm thick bead all around, not 5mm thick with 4mm tall fat ass straw sized bead. It'll eventually break off and potentially clog up your oil pump lines, starving the motor. I recommend redoing that oil pan gasket with a smaller bead.
/end wall of text
__________________
street dancer. GLEAM |
|
|

|
|
|
#59 | |
|
Post Whore!
 Join Date: Sep 2004
Location: Granada Hills, CA
Age: 43
Posts: 6,990
Trader Rating: (15)
           Feedback Score: 15 reviews
|
Quote:
|
|
|
|

|
 |
| Bookmarks |
|
|