|
|||||||
| Tech Talk Technical Discussion About The Nissan 240SX and Nissan Z Cars |
|
|
Thread Tools | Display Modes |
 06-24-2008, 11:14 PM
|
#1 |
|
Zilvia FREAK!
 Join Date: Mar 2003
Location: Miami
Age: 40
Posts: 1,590
Trader Rating: (7)
  Feedback Score: 7 reviews
|
How to paint your car in 5 easy steps
Just kidding its more like 30 steps, but what ever. Thought this might help most of you guys wanting to paint there own car. Now i am no professional and i do this in my backyard, but i get fairly decent results. So if you are a pro please chime in with any discrepancies. As i said i am not a pro so do this at your own risk. Im doind the whole car but so far only have finished the engine bay, interior and trunk. Anyway here goes...
What you need spray gun This is a widely debated subject there are many types available, i use a harbor frieght HVLP (high volume low pressure) special Compressor Also widely debated, just make sure its got enough cfm (air flow) to feed whatever fun you use Sanding aparattus ( this means sand paper) you need a few different types including scuff pads ( these are some what like sponge pads with texture for sanding Bondo , no body really uses bondo any more its really a plastic filler Primers I like two types DTM direct to metal ( for bare metal) And 2k primer (overall primer) Paint and clear I use urethane basecoat and clear coat. First thing i do is gauge what i want to do with what im working with, IE any repairs and what not. Here is my engine bay before (I started to take pics partway thru) so the narration might not match but you get the idea 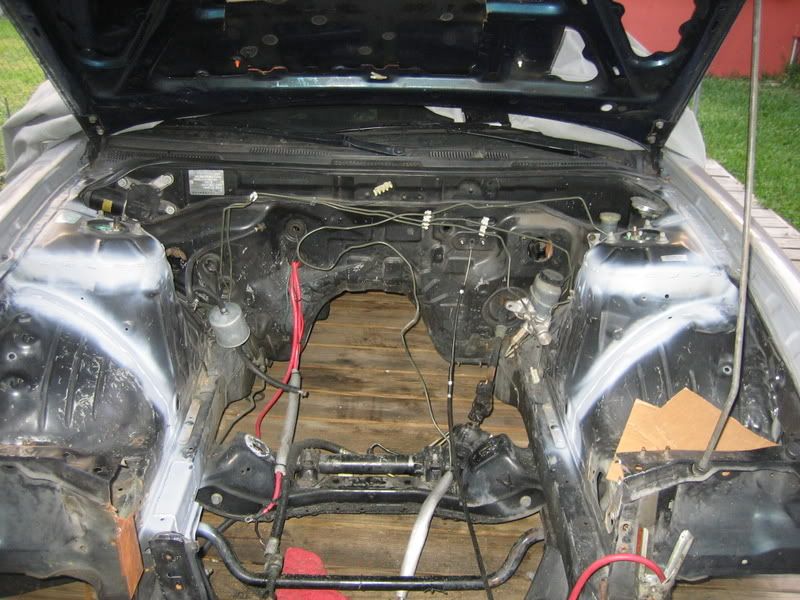 I decided to stitchweld the engine bay and remove the battery tray, also to cut the front fenderwells and stretch them out to create more tire clearance also to cut the front fender areas out and weld panels in place to get rid of the holes Sticth weld 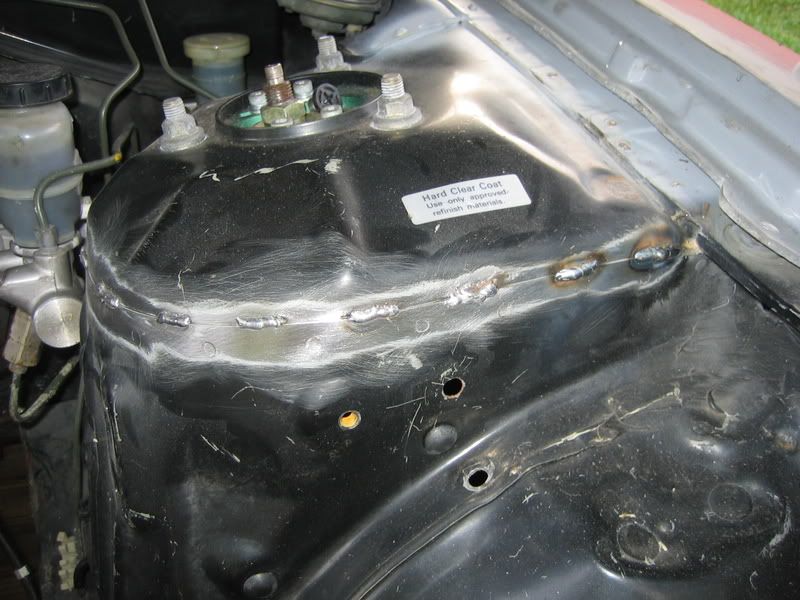 Make sure to apply direct to metal primer, any where you have gone thru to bare metal 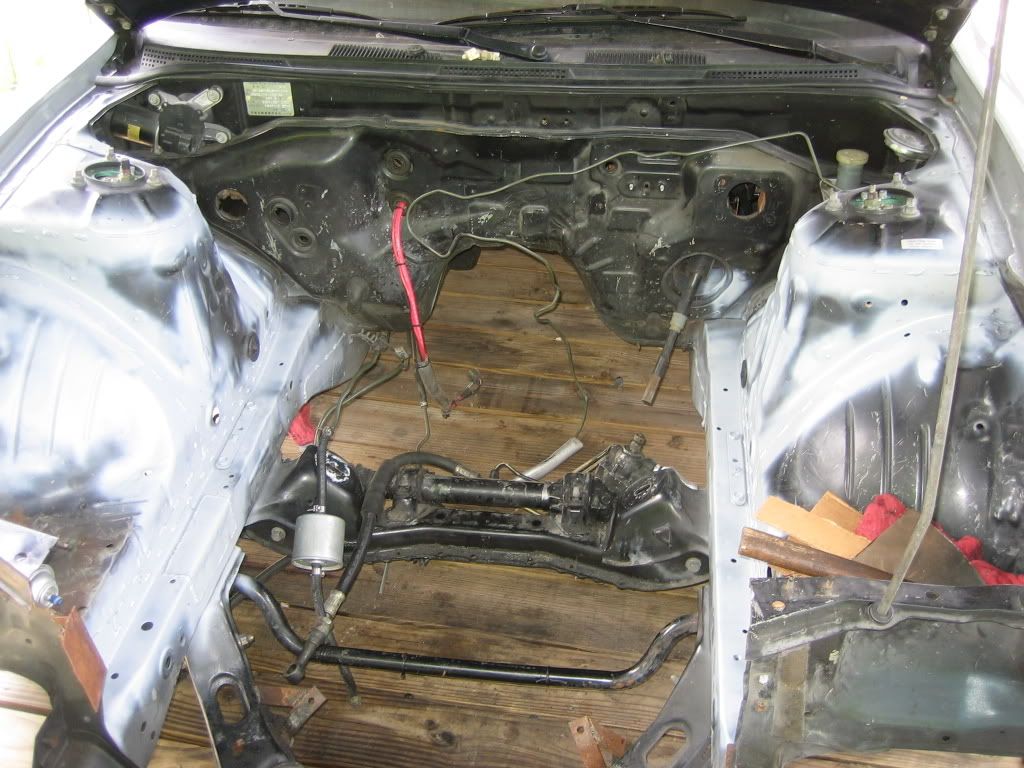 Next i welded these panels more for decoration than anything else, but maybe the would add support 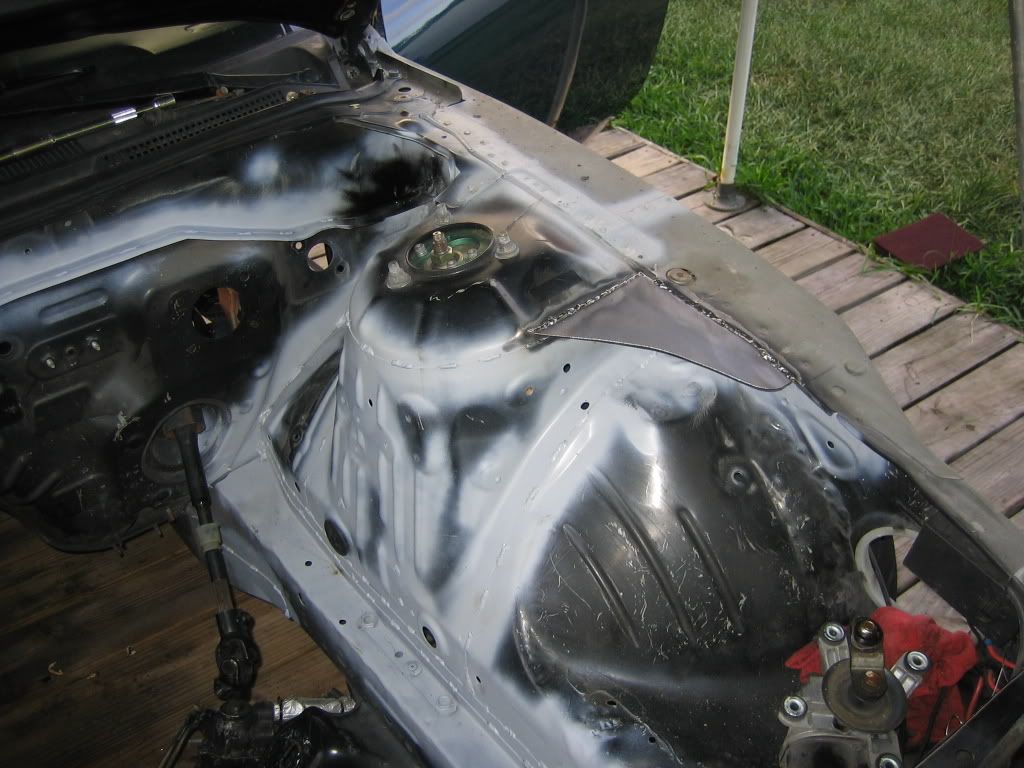 Next i decided to change the radiator support, so i drilled out the spot welds and reinstalled a used one from the junkyard 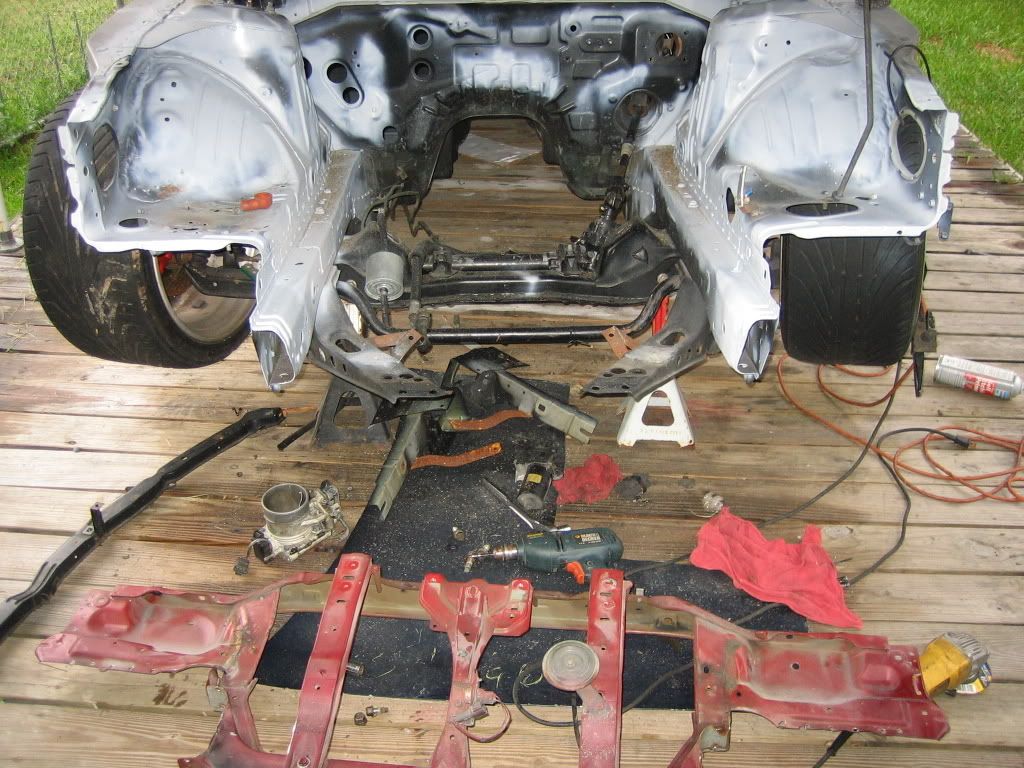 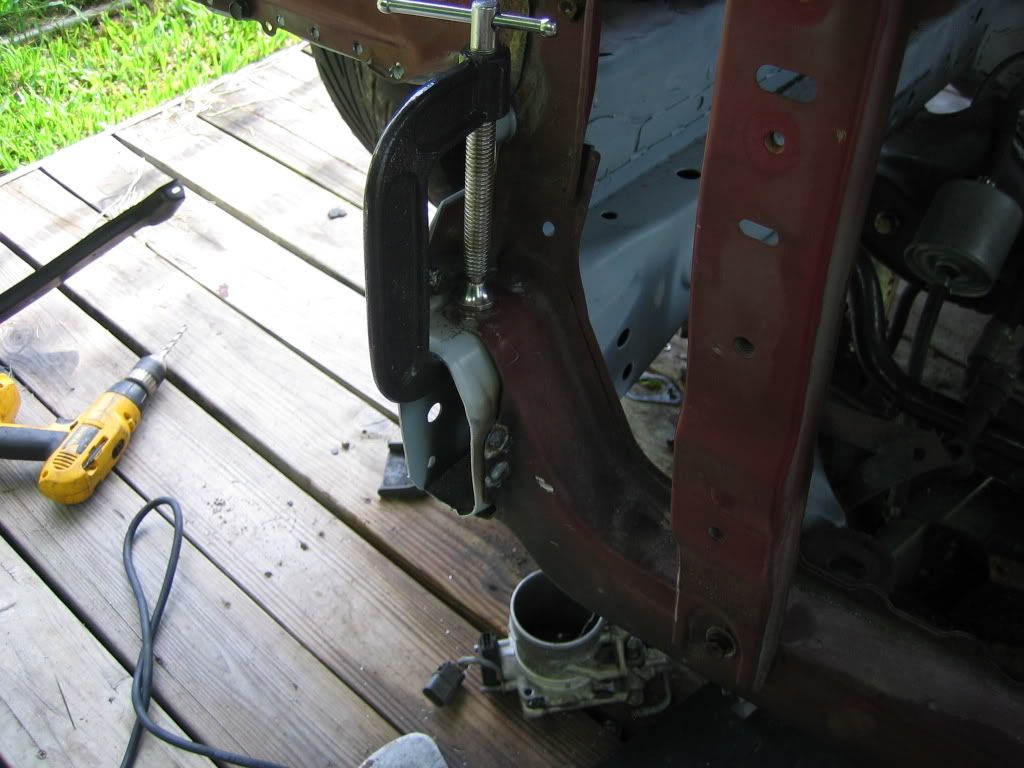 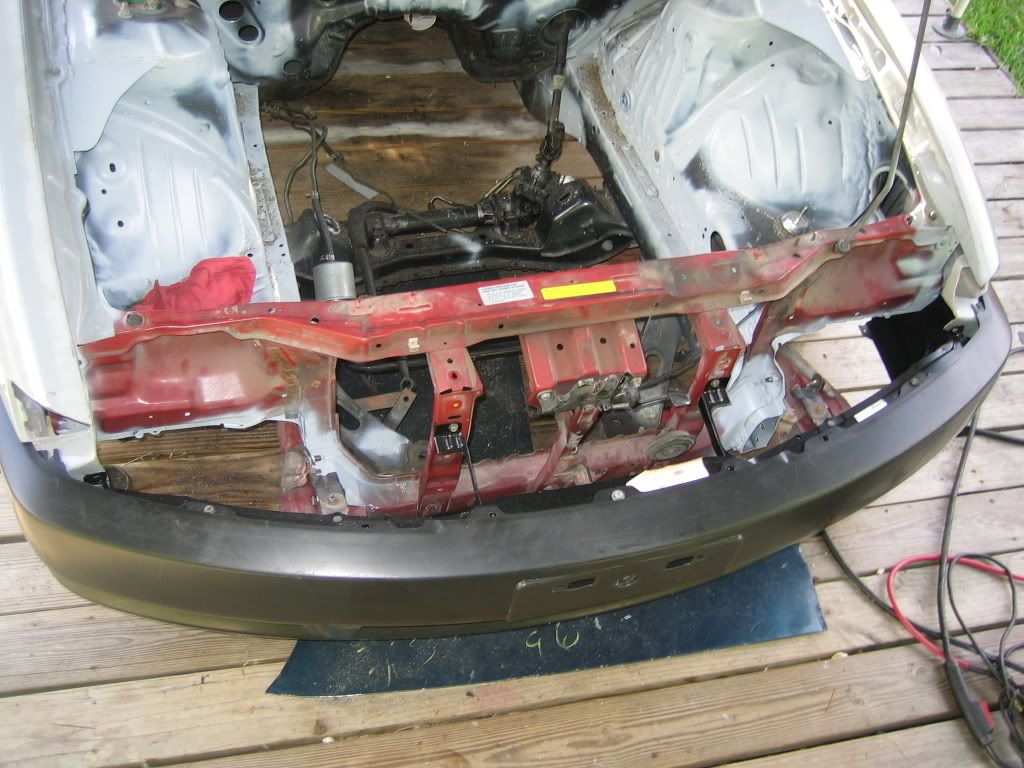 I got tired of having clearance issues with the 265/275s up front and was to lazy to do a full front tub, so i cut the front fender well bent it forward added some metal then smoothed it, placed some filler and done. Have plenty of clearance now. 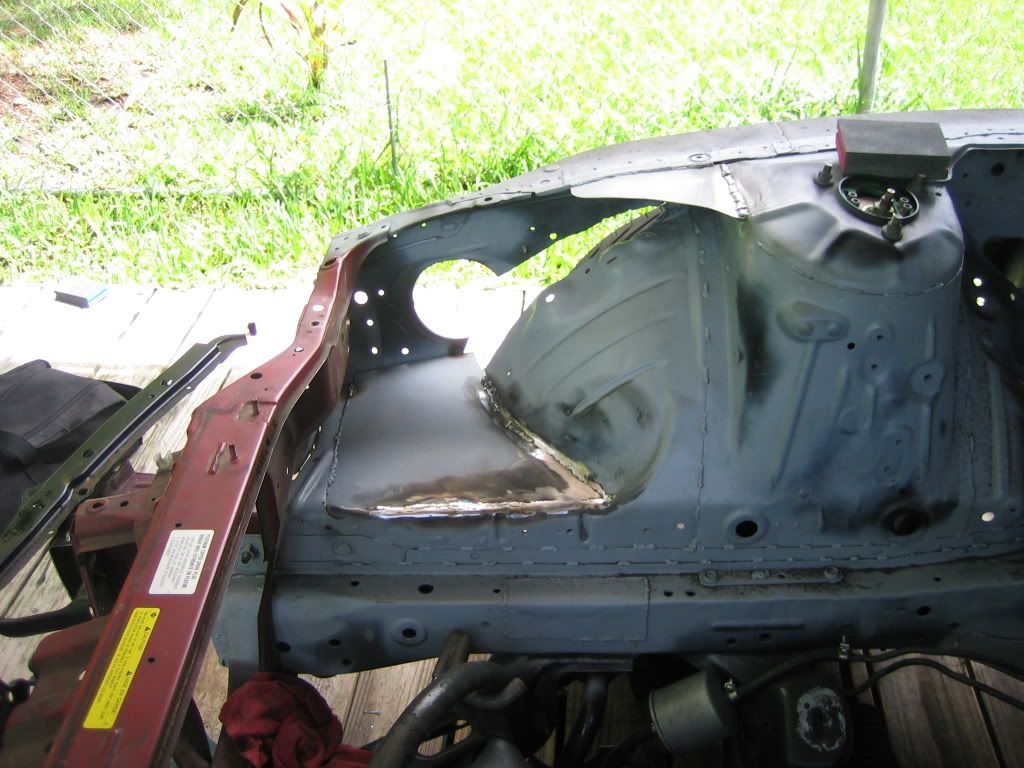 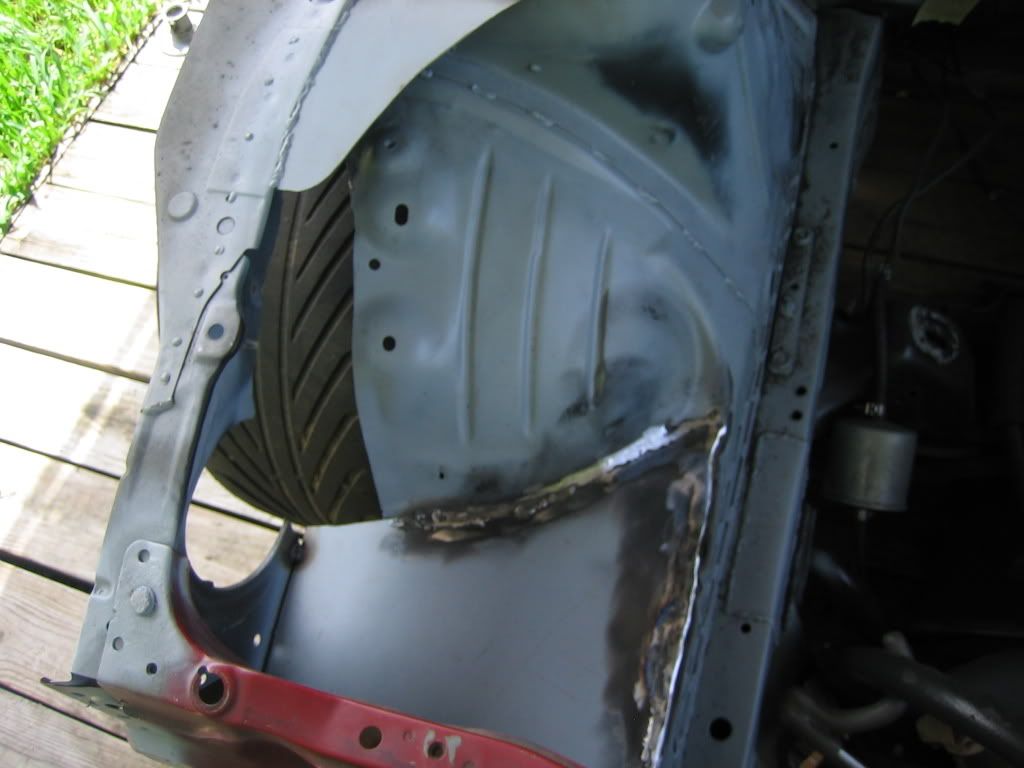 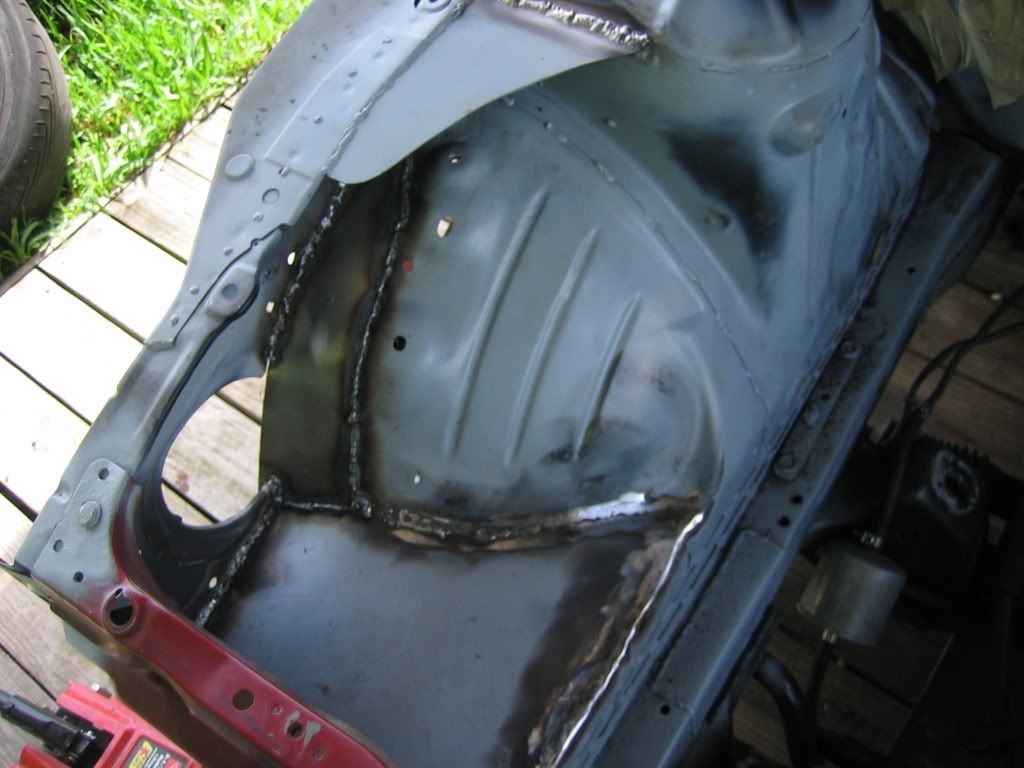 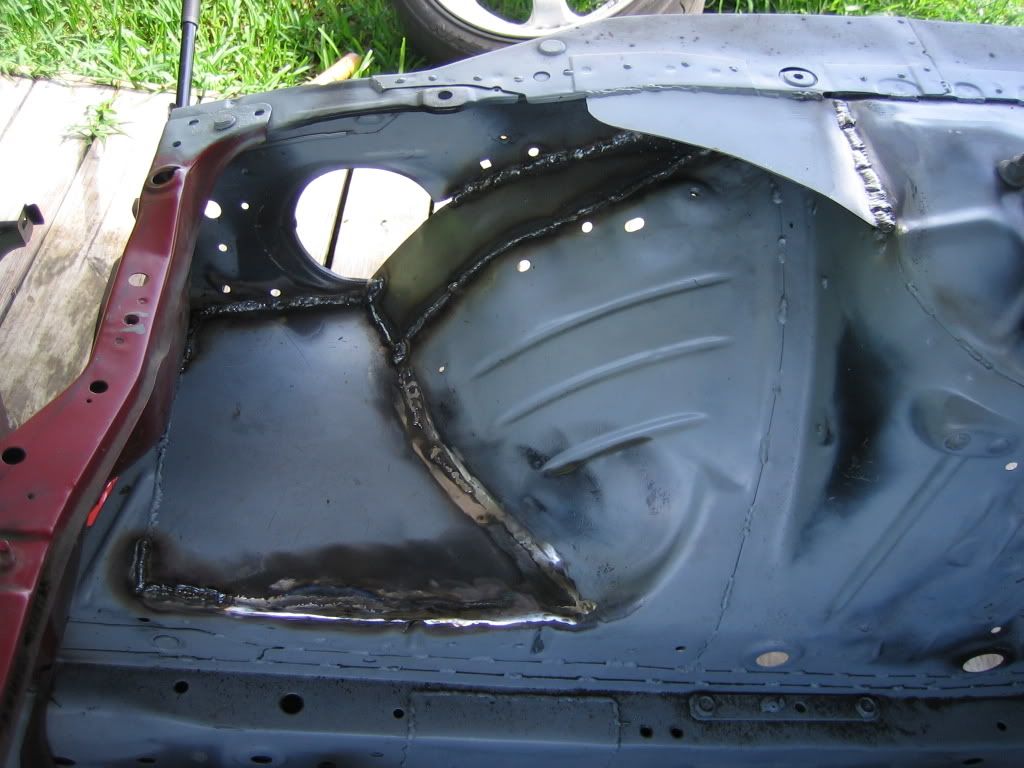 Now onto filler, i am no expert on this stuff. I avoid using it when at all possible. Reason being is that in this area i struggle alot, it ussually takes me a few tries to get it right. Just follow the instructions on the can and you should be good 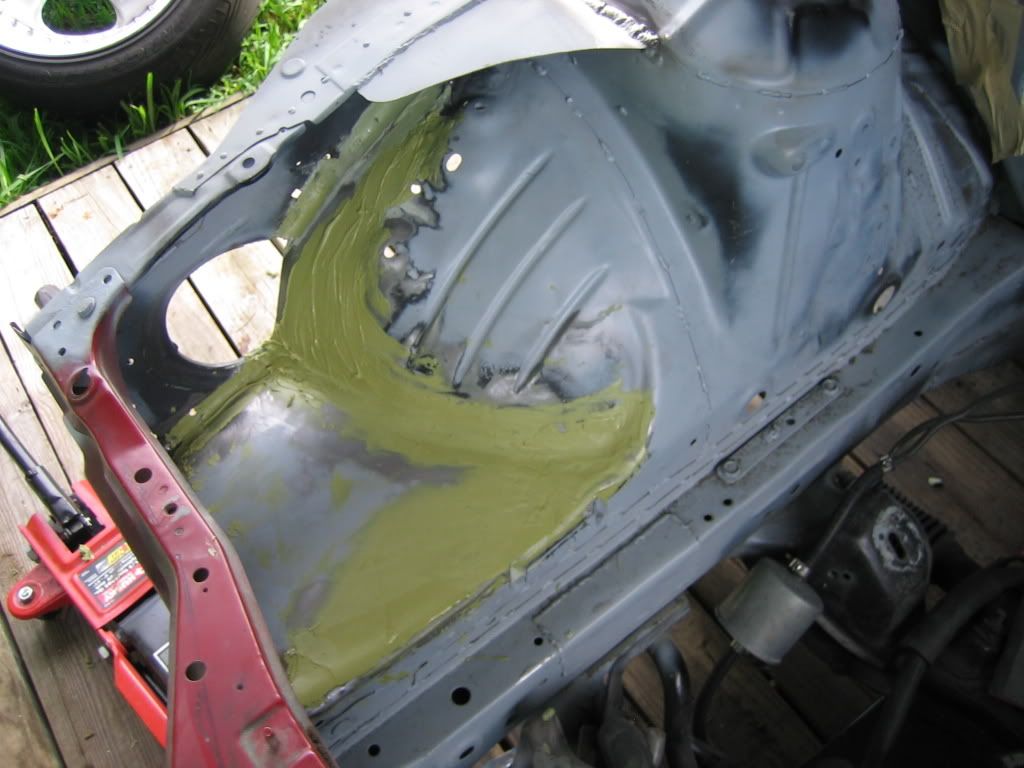  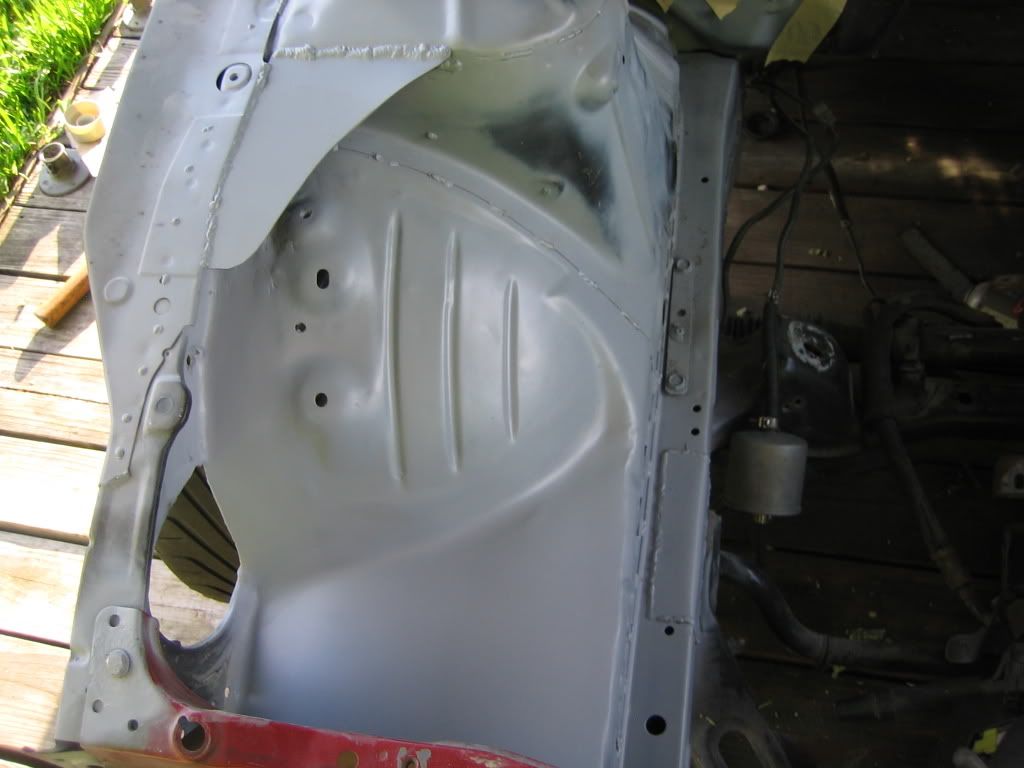 Ok at this point all repairs have been done and we are ready for primer. What i like to do is scuff the surface very well with a 3m scuff pad. They have a few different types, I use here the red one which is the coarsest. The idea is to give the surface some texture for the primer to bite on to. For primer i used some dupont urethane 2k primer. Here is the primer layed out 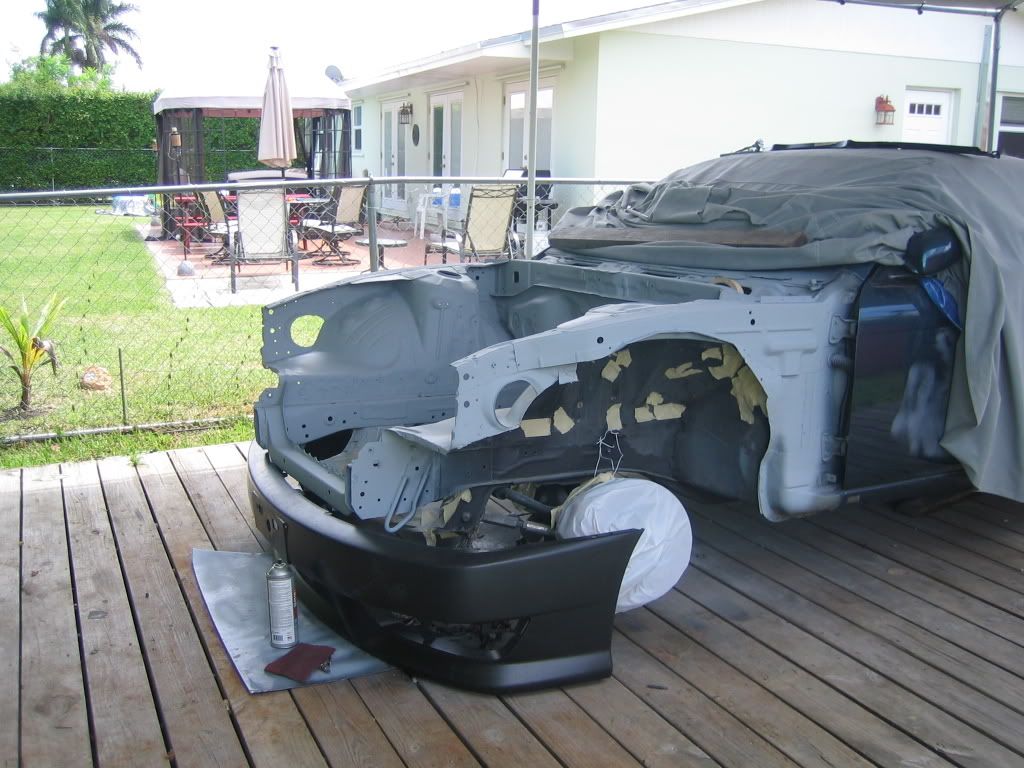 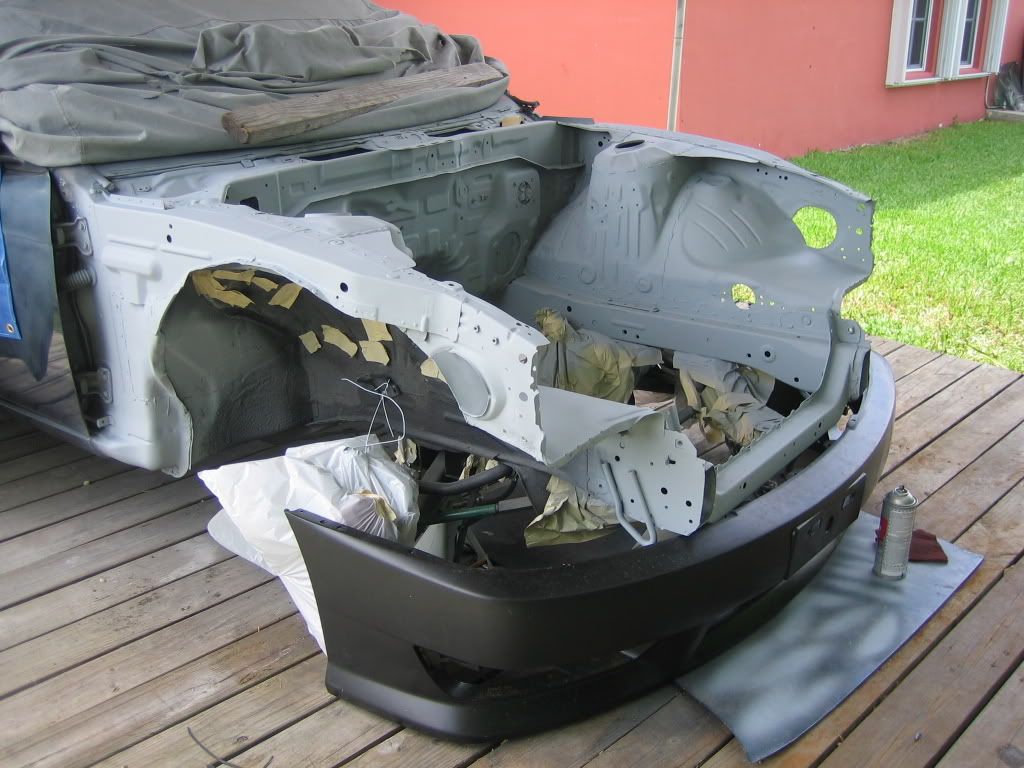  At this point you have your primer and it needs some sanding. You want to smooth out the surface as much as possible so the basecoat will go on flat. You want to wetsand this as it will make the process easier and save sand paper. Hopefully if you layed your primer flat enough you can start with a 320 gritt and sand everything you primed. If your doing an engine bay or something like that it gets to be really hard to get into those hard to reach places but do your best. After im done with the 320 grit i wet sand with a 600 grit to get the surface as flat as possible. At this point your ready for paint. For paint i chose to use duponts chromabase system. I purchase one gallon of chromabase basecoat. It is supposed to be reduced 1 to 1 so i also purchase one gallon of chromabase high temperature reducer. Reducer is sold by temperature ranges, its 95 degrees in miami, so i chose the high temp reducer. One gallon of paint once reduced turns into two gallon. In reality you probably only need two quarts ( reduced to one gallon) to paint a car, however i wanted to have extra paint as this is a race car and would probably get messed up. Also I purchased One gallon of dupont chroma clear with 1 quart of hardener. This is mixed 4 to 1. I also purchased one gallon of duponts final klean. This is a cleaner that you use right before you paint as to clean the surface. Heres a pic of all the products. Cost on these items is arount 550.00 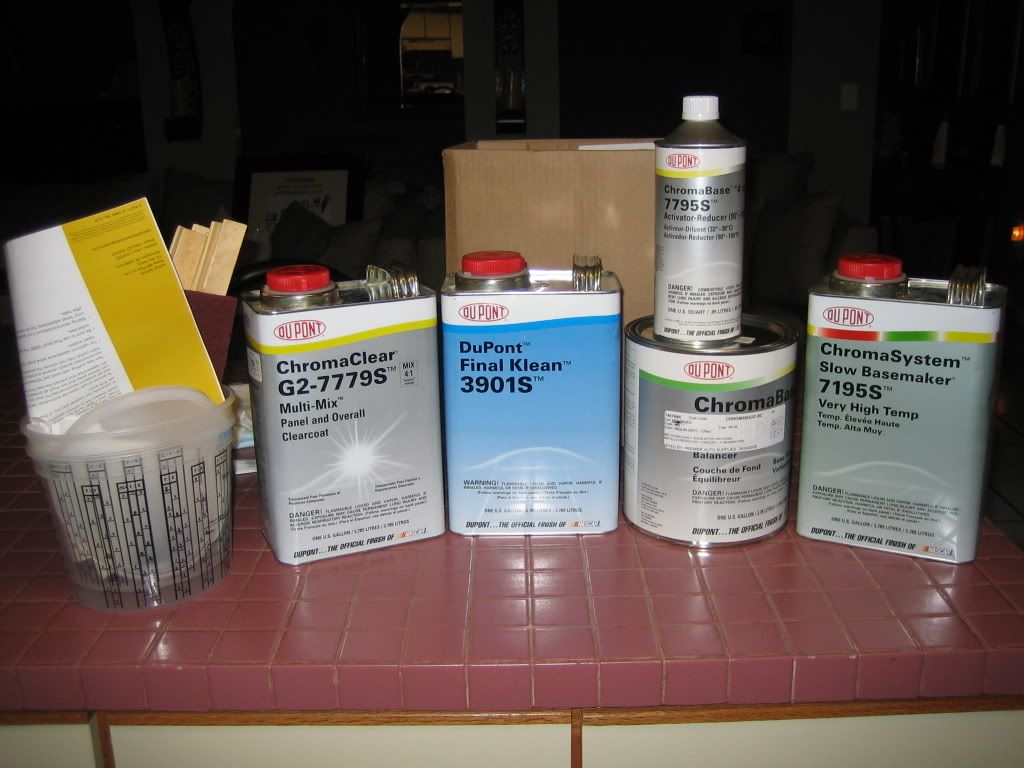 First thing you want to do is blow the area your about to paint with air to remove any dust or debris. Then you wipe down the area your about to paint with the final klean. After your done you wipe up any residue with a clean rag. This will be the last time your touching the surface with your hands other wise you will have to redo this procedure. Well now your ready for paint, its best to do this in a enclosed enviroment but whatever i did it outside. First you want to mix the base coat with the reducer remember to do it per the instructions recomended by the manufacturer. first coat you want to spray very lightly your not looking for complete coverage you just want to get the surface wet for the subsquent coats. Important is to pay attention to flash times, this is the time between coats. On the dupont paint its 10 minutes. 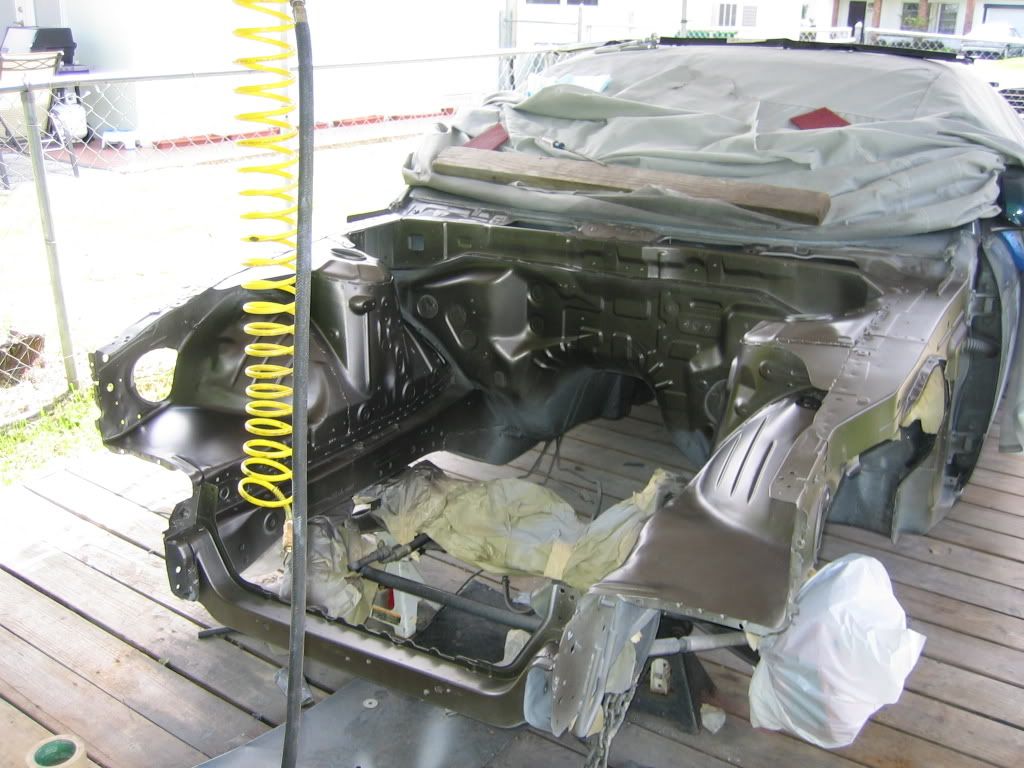 Then most people will spray two coats, but i typiclly spray for coverage. As much paint as required to cover the surface. When spray mettalics its good to do a fog coat, like really fast about 18 inches off the surface just to even out the mettallics. Here it is after coats two and three 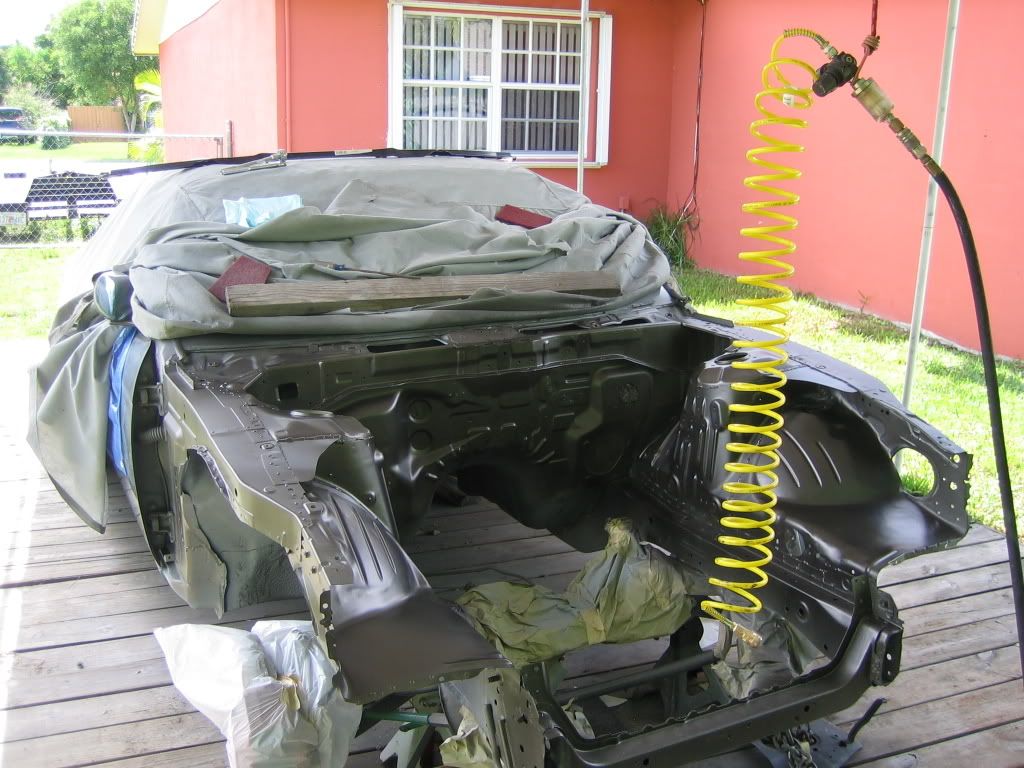 Yuca saying oh snap that looks hot 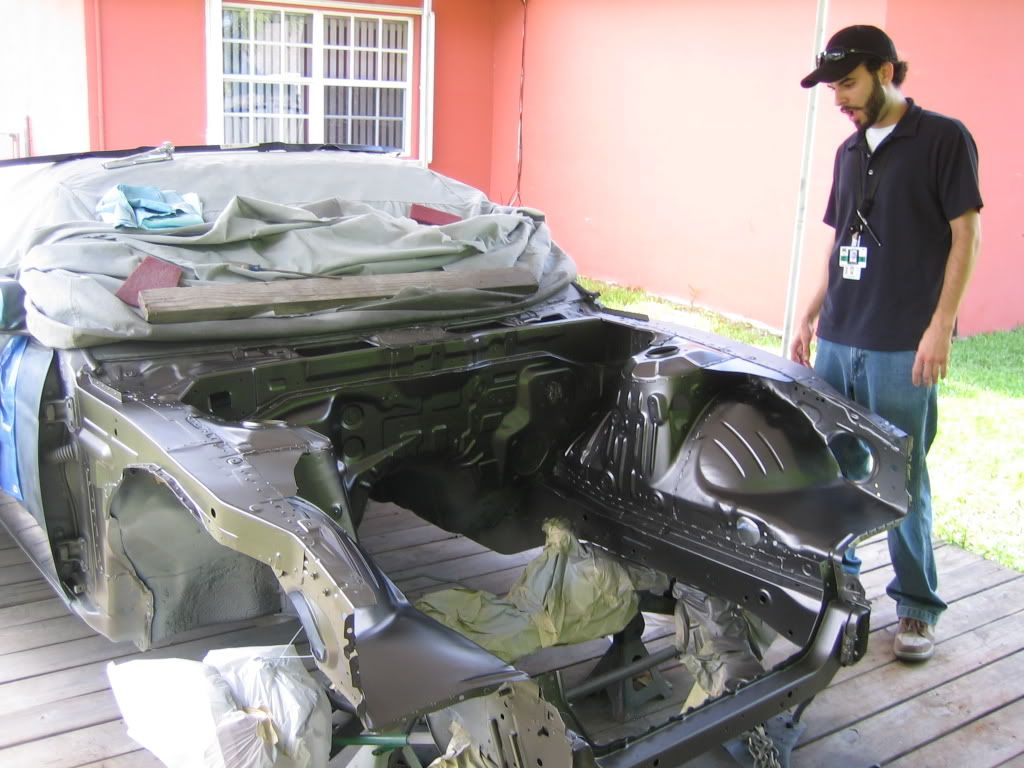 Now at this point if you have no runs or drips your ready for your clear. You should wait at least 30-45 minutes to clear. The clear mixes 4 to 1. So you mix again per manufacutres directions and shoot. This stuff goes on pretty wet so becareful as to not get runs. The flast time for this is also ten minutes but i wait about 15-20 minutes to ensure its good and ready. I sprayed 3 coats of the clear. Here aree the pics spraying first coat 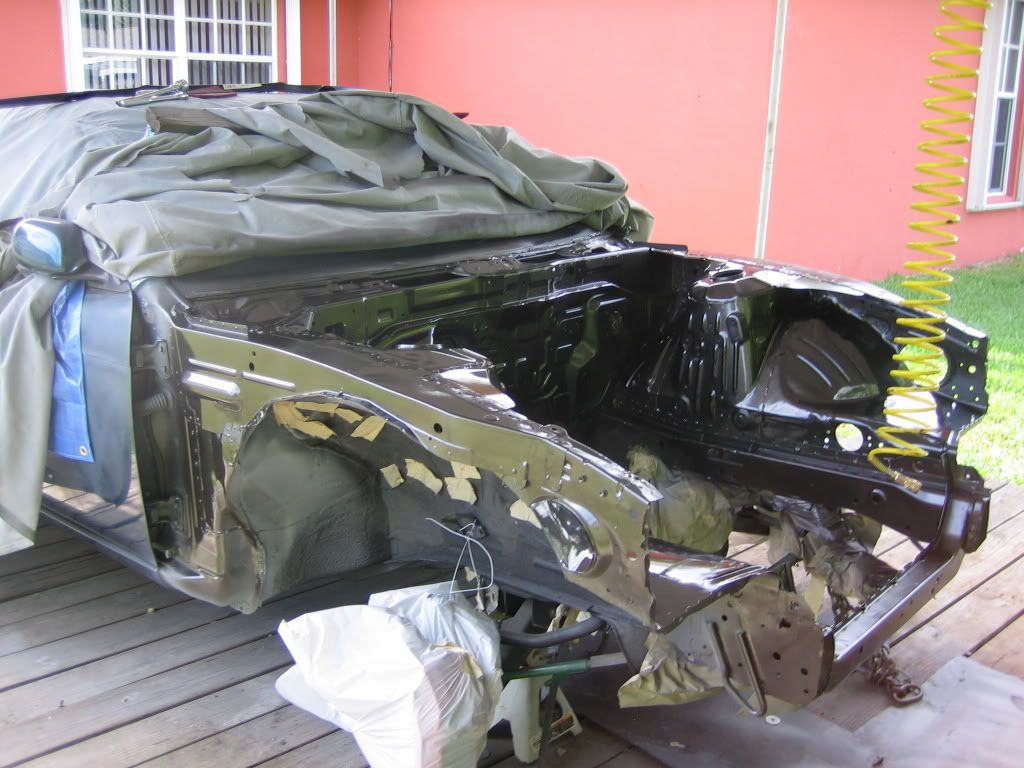 second coat and third coat 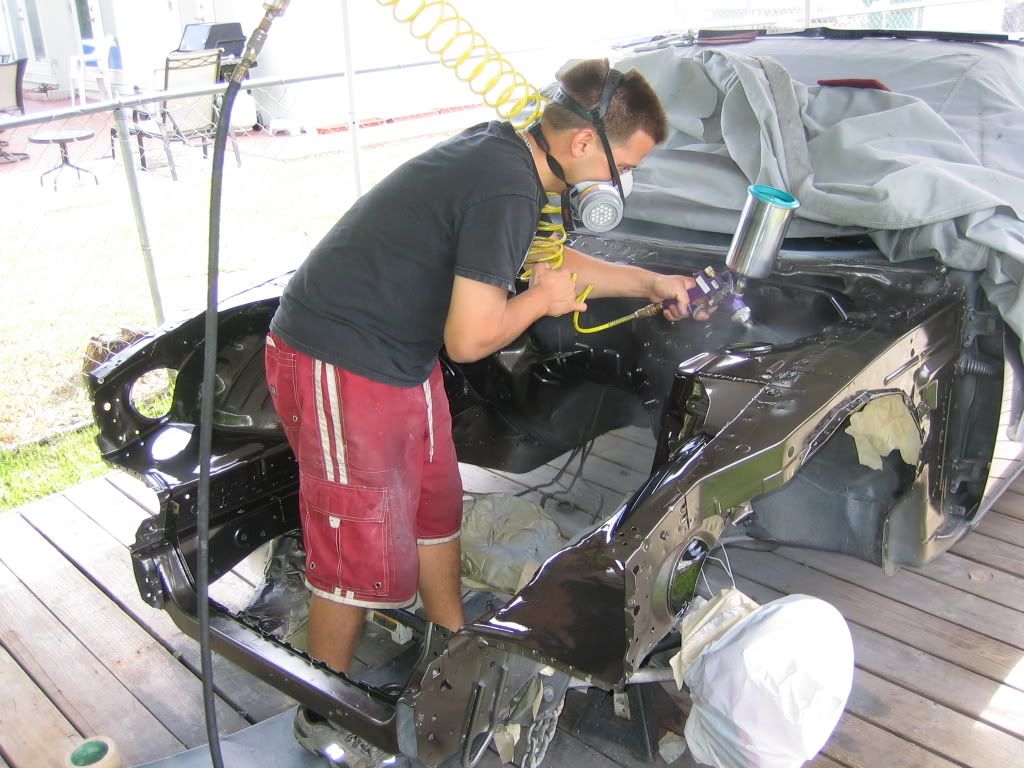 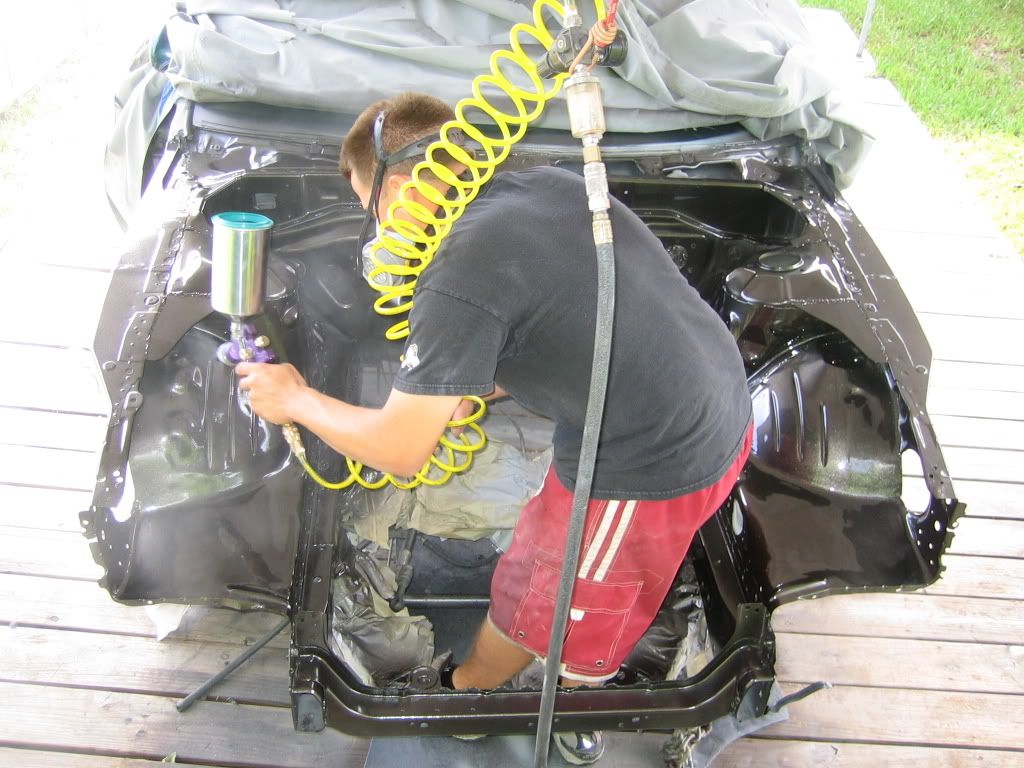 Now you just sit and wait for it to dry. Typically you can handle it in 2-3 hours and its fully cured with in 24 hours. Since this is the engine bay i will not be wetsanding and buffing it, i will cover that later as i do the rest of the car. Heres pics of the finished product 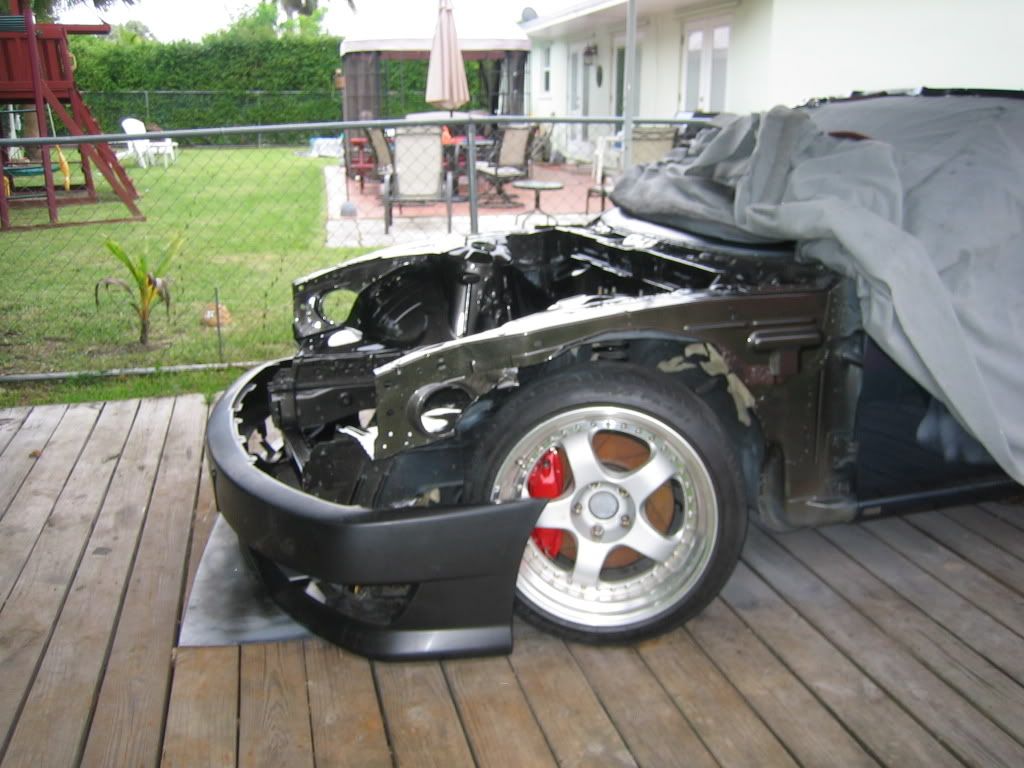 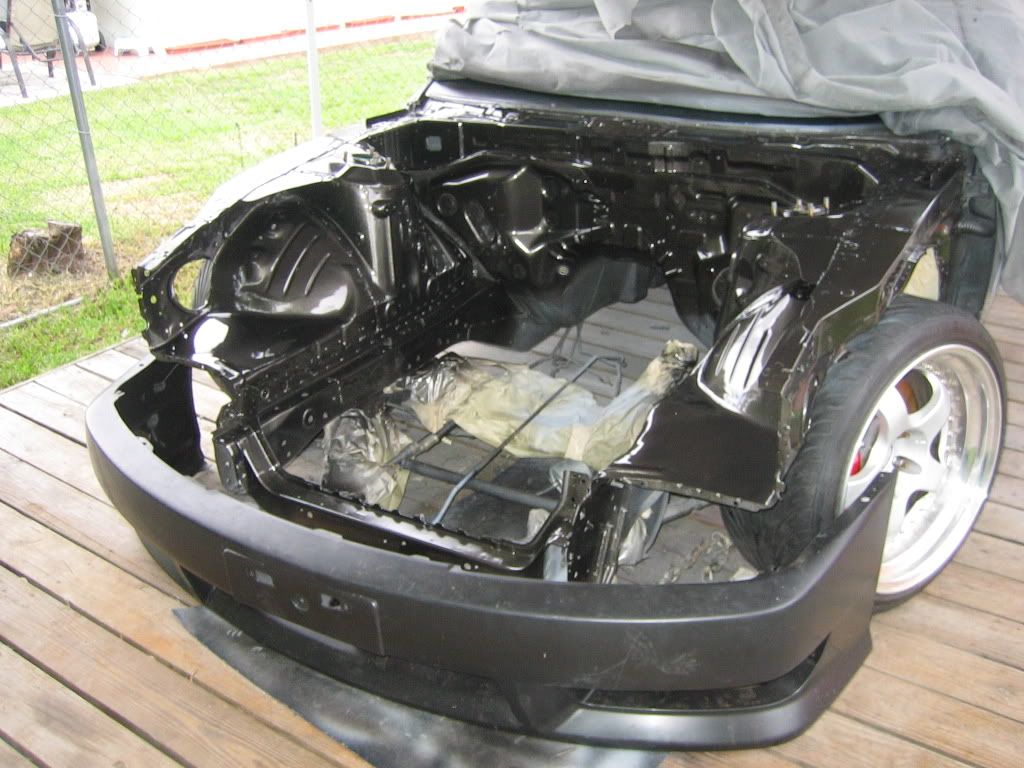 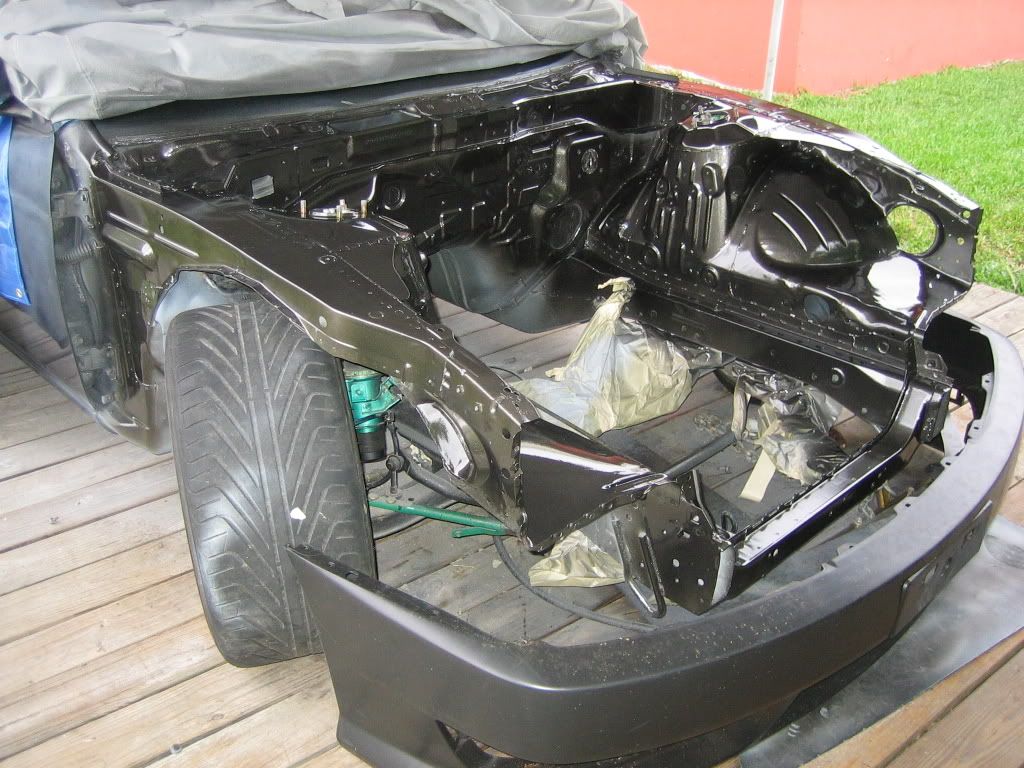 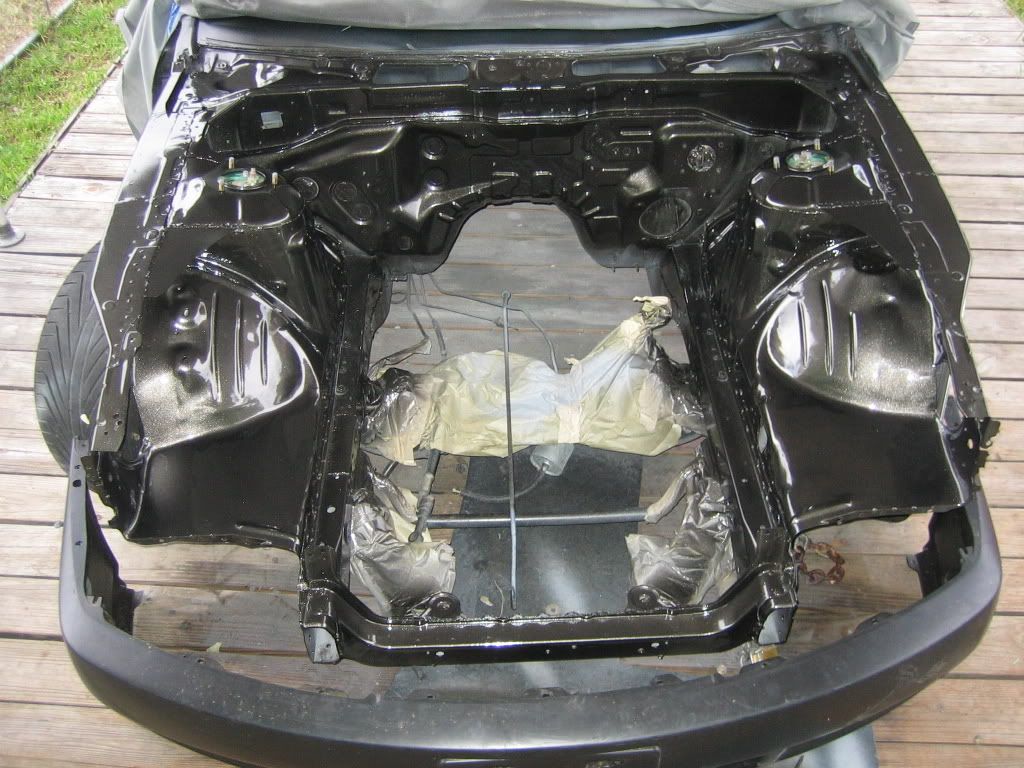 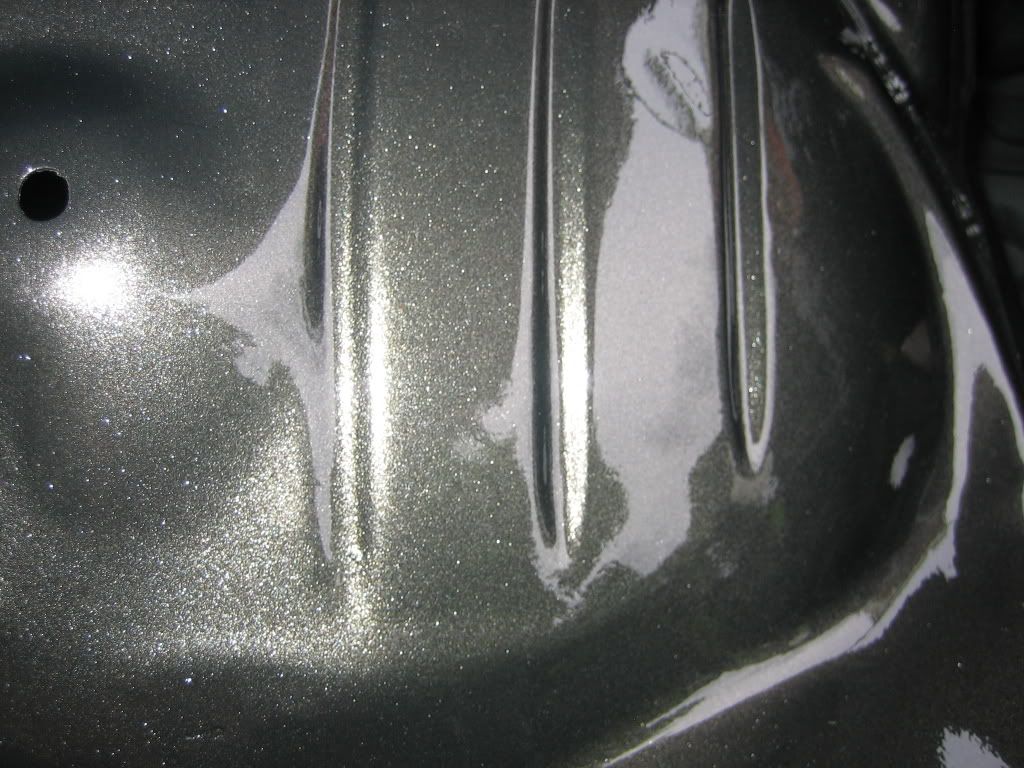 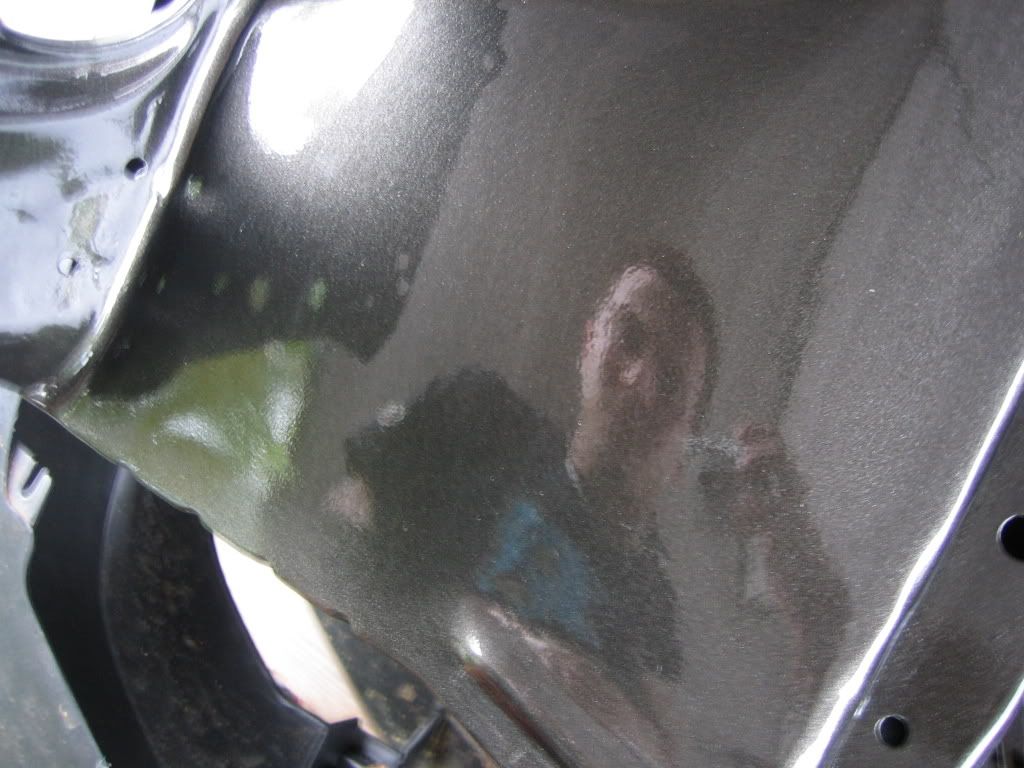 Now this is somewhat vague i understand, however you guys can get an idea of the work involved. Hope this helps.
__________________
ANTI-STRETCH NAZI Vortech Supercharged Vh45de S14 V8nissans.com |

|

|
| Sponsored Links |
| Bookmarks |
|
|


 Threaded Mode