|
|||||||
| Builds (and builds only) Got a build thread? It goes here, build threads anywhere else on the forum will be locked and never moved. |
 |
|
|
Thread Tools | Display Modes |
 06-03-2012, 07:40 AM
|
#151 |
|
Zilvia Junkie
 |
Heres the part that came from Japan I was harping on about. Had just been working on finishing up spot welds with the linager. Also removed the spot welds on the rail cap where the new section will be going in. Also used some extra hands to do a rough fit of the dash and get ideas on how I'll trim it accurately to fit the cage. I think I've come up with a solid idea to cut it in the correct places before it goes in.
I found this youtube vid which should help abit the gaps on his are where my front cage legs will go so it should turn out well and look pretty neat. [media]http://youtu.be/1yrOJu62FMk[/media] Anyways, some pics! Rail, we ordered the same section for the other side. The floor profile is the same so will fit perfectly. It is going to be slightly tricky though as its inside the other rails at both ends. 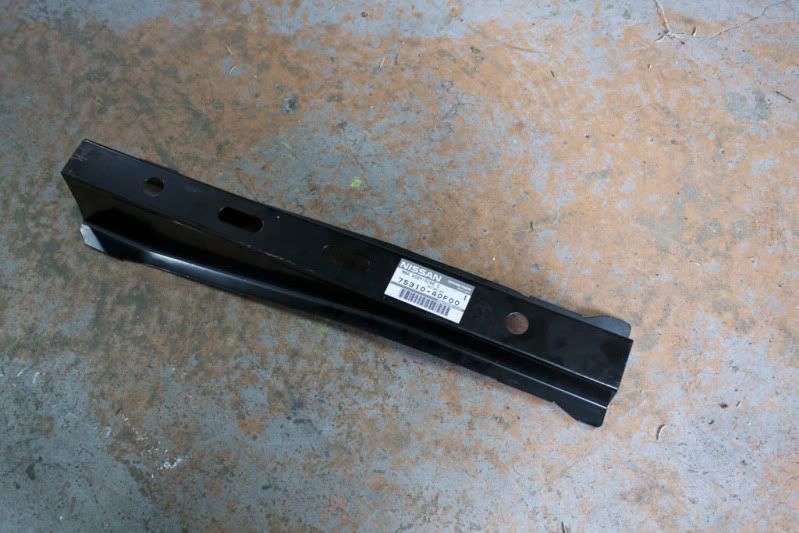  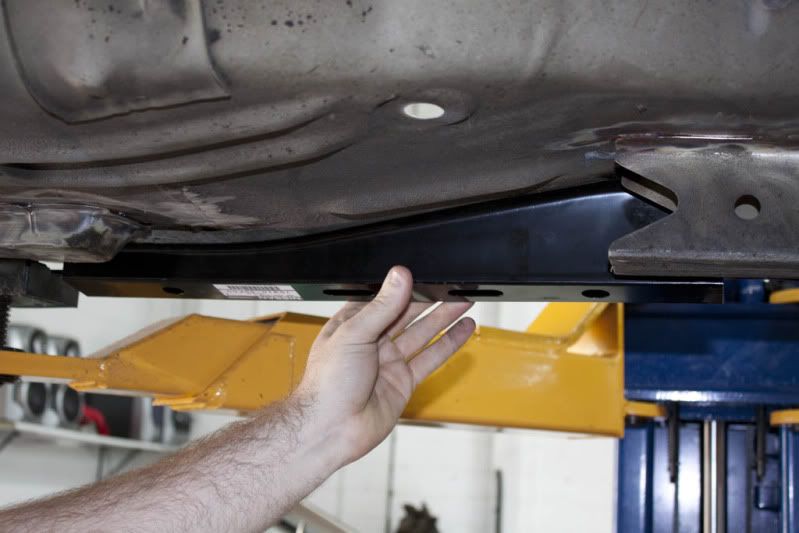 The stock rail cap removed so we can go about fitting the new section. 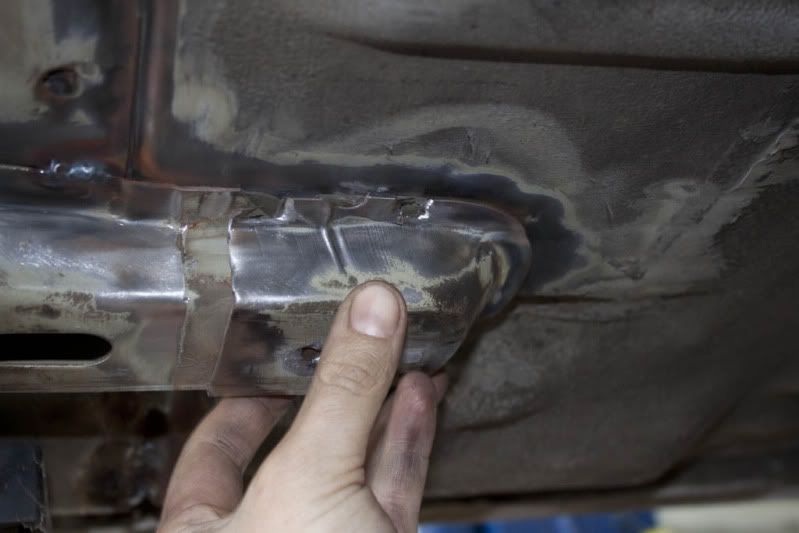 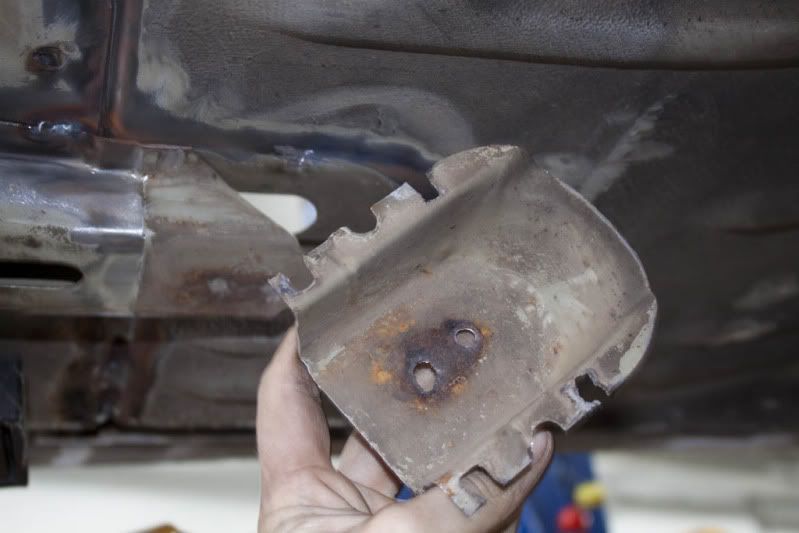 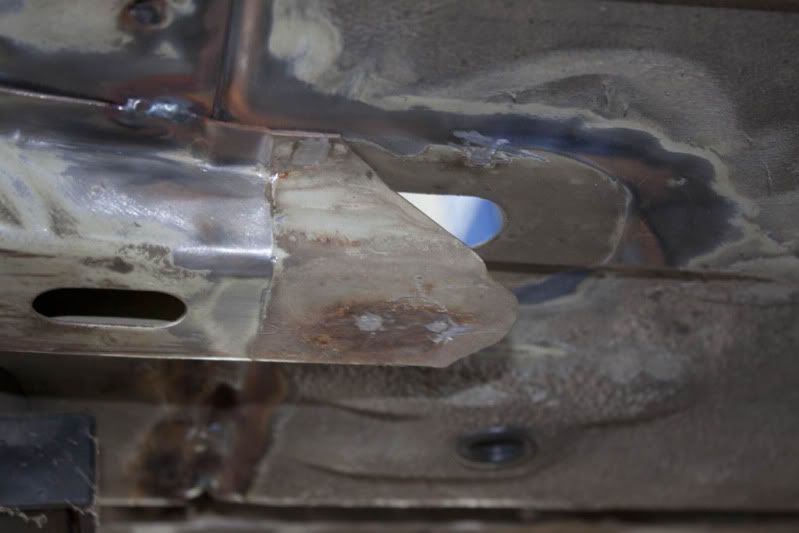 MMMMmm spots =) 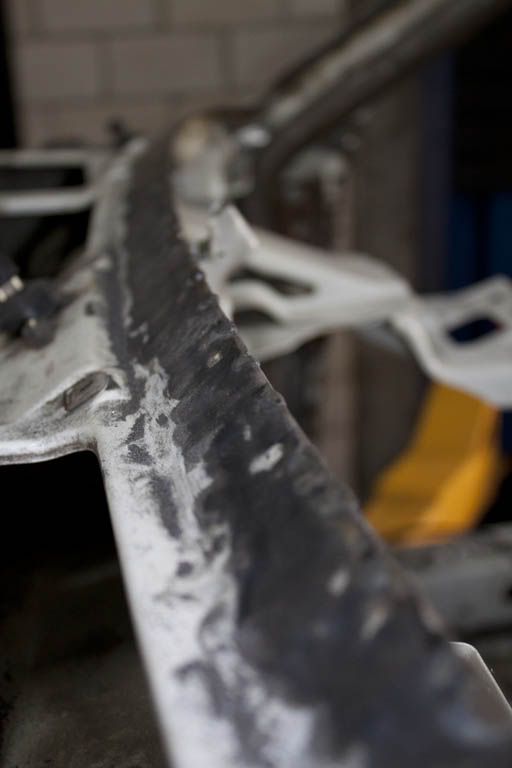 Test fit, looks good the plan is to use this dash until I have time to attepmt a carbon layup of the S13 dash which is the end goal.  More soon! |

|

|
| Sponsored Links |
|
06-03-2012, 09:44 PM
|
#152 |
|
BANNED
|
Been meaning to read through all of this for quite some time now. Finally accomplished that tonight.
I gotta laugh at the assbag who has literally nothing else to bitch about other than how the welds look... Good. Hate on hater. |
|
|
|
|
06-04-2012, 08:18 AM
|
#153 |
|
Zilvia Junkie
|
The new chassis rail was now in place ready to be welded in I was super happy with how it has turned out. I managed to rust convert most of the drivers and passengers door sills I just need to do the tops of them now which may prove difficult as gravity is against me!
Some pics Trim trim 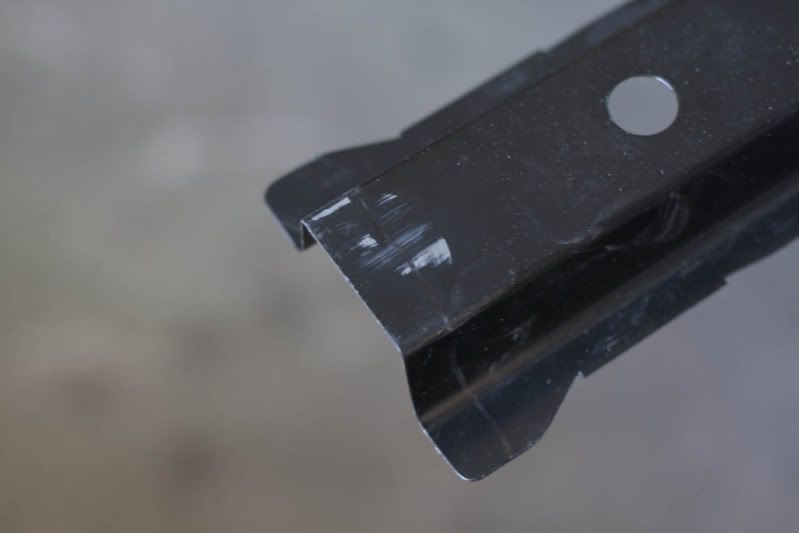 trim  draw 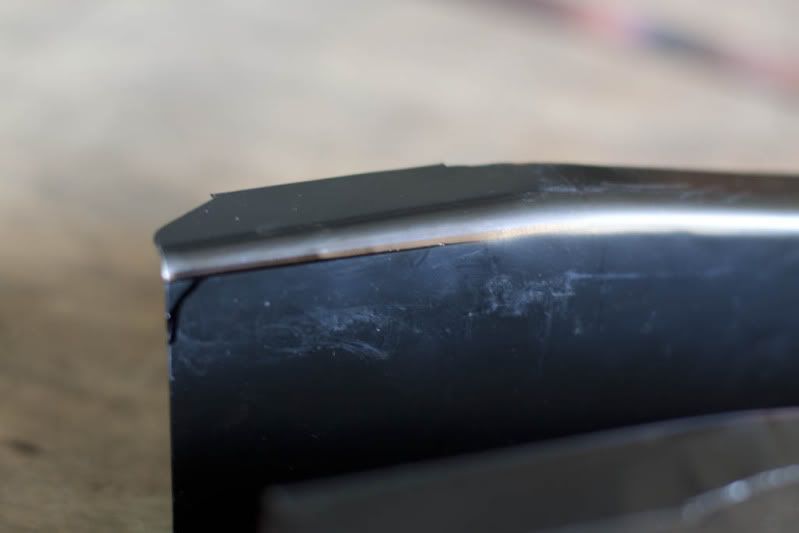 test  trim 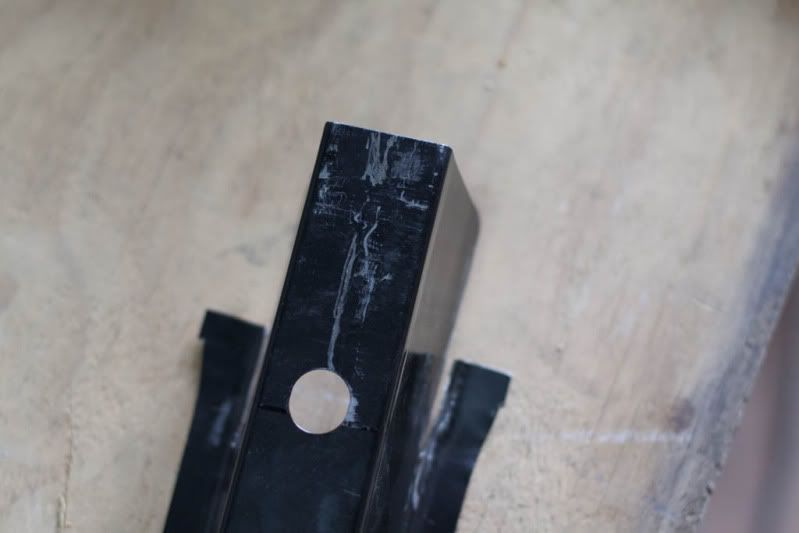 draw 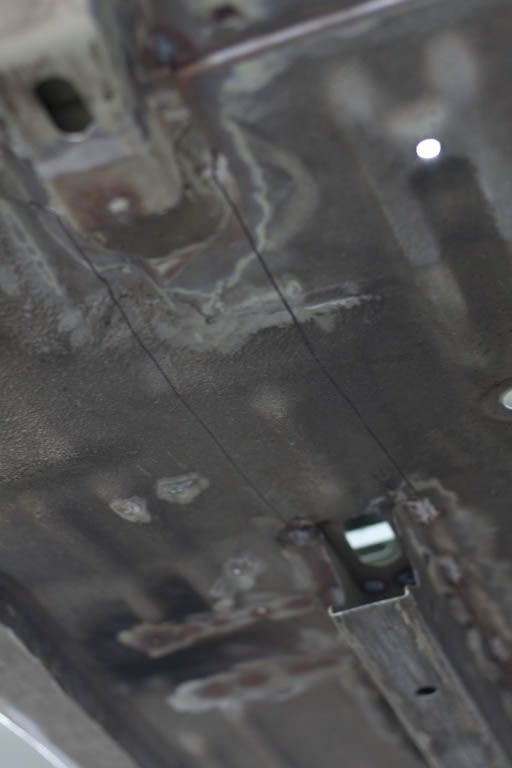 clean 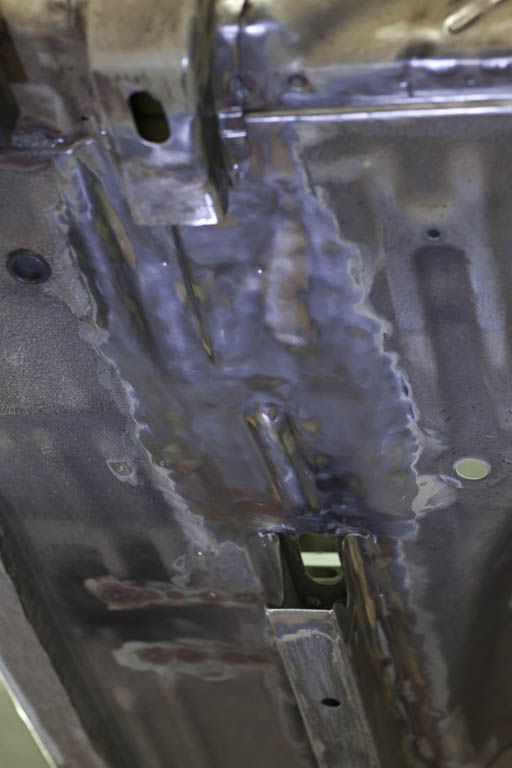 clean 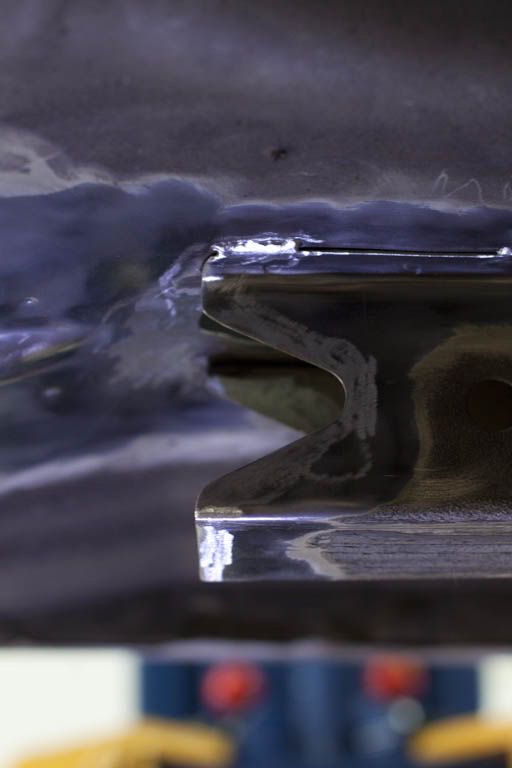 Clean 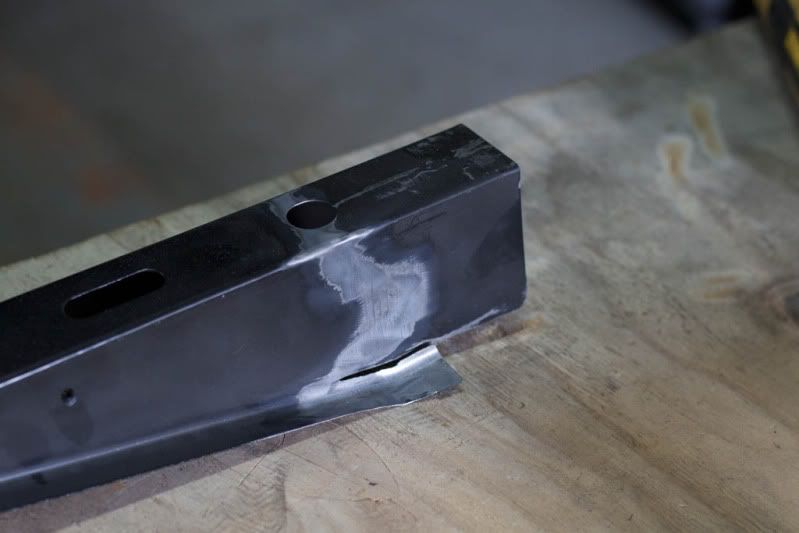 Clean 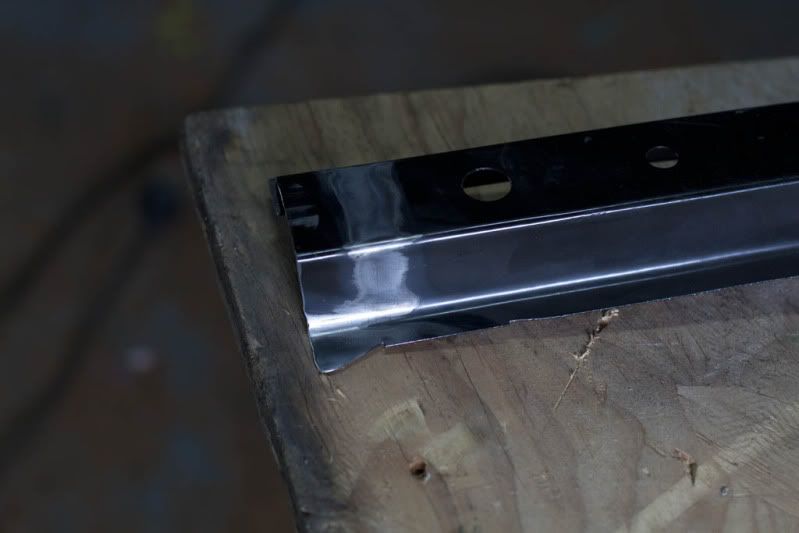 Fits perfectly still needs to be welded in but looks so factory its not funny. The contour matches the floor perfectly!  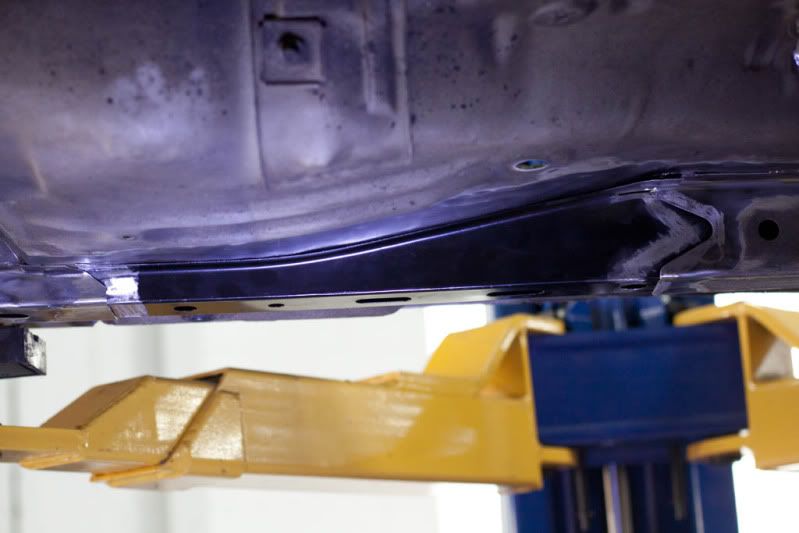 Down, down down down down. Mild sign modification :P  The plasma cutter was used to cut out plate sections to cover holes in the firewall. Once the car is rewired no wiring will be in the wheel arches at all anymore. I hadn't seen one used before they're a pretty cool bit of kit! 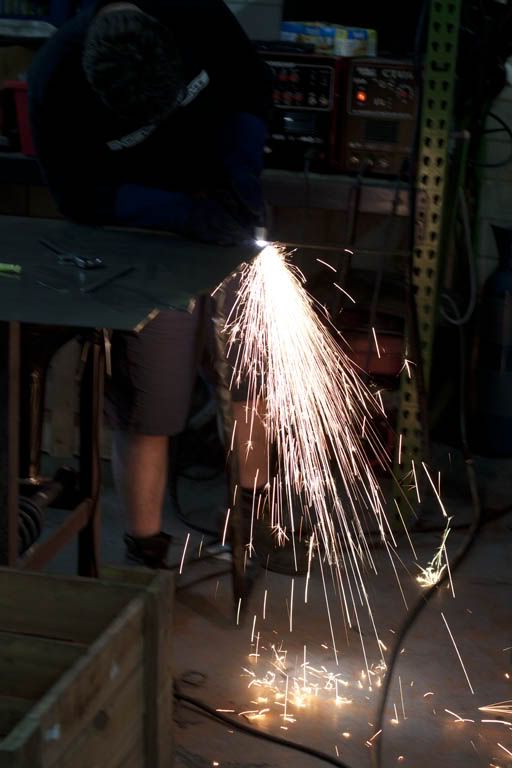 More soon! |
|
|
|
|
06-07-2012, 08:43 AM
|
#154 |
|
Zilvia Junkie
|
The plates we cut from the sheet turned out quite neat no more giant holes in the front wheel wells anymore. I started treating all the seam welds with rust convertor to minimize the risk of rust later on also going to go nuts with fish oil once all the welding has stopped. Getting the rust convertor in was quiet a tedious task I had to use the syringe to do it ugh.
Spot welding has almost finished up. I went and bought the seam sealer and 1k primer this week from VG paints. I think I'll probably have to go back and get at least one more tube of the sealer from him though after looking at how much there is to seal back up. Cleaned all the paint of the triangle gaps they'll have plate welded into them as they are no longer needed for wiring. Some pics! 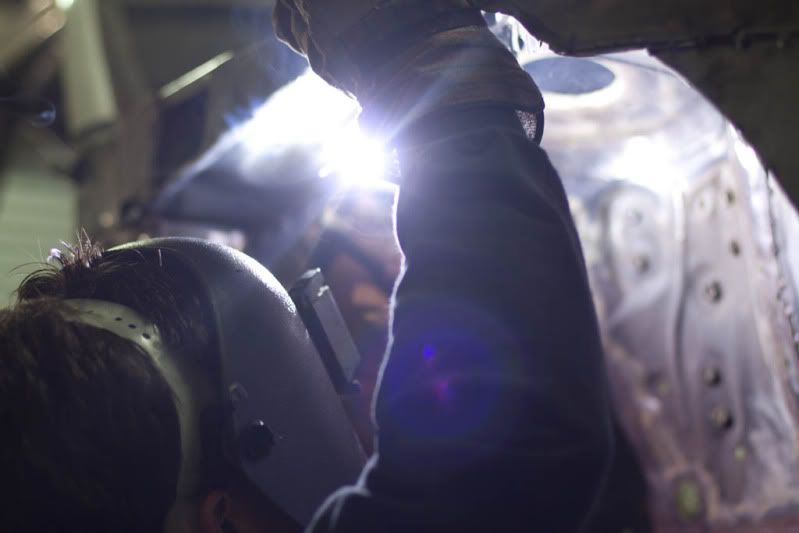 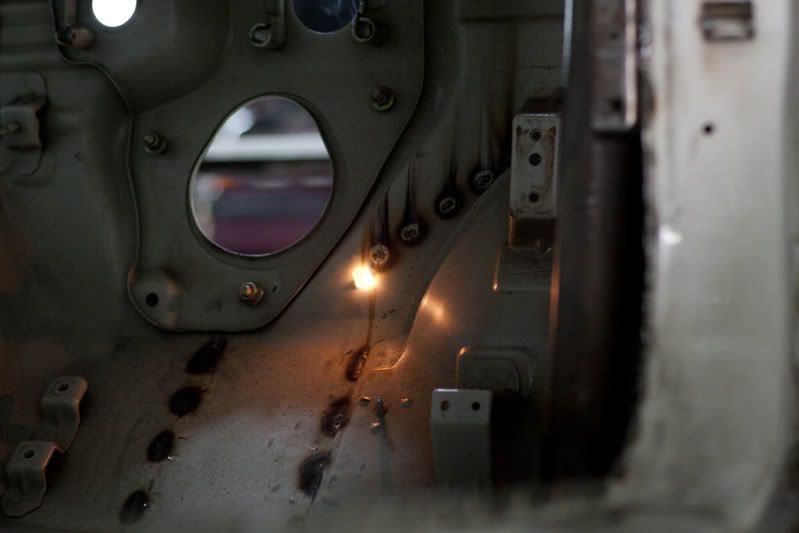 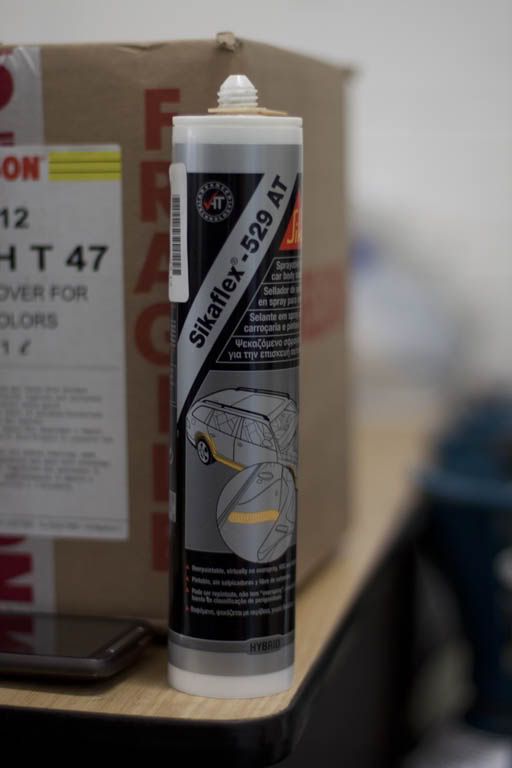 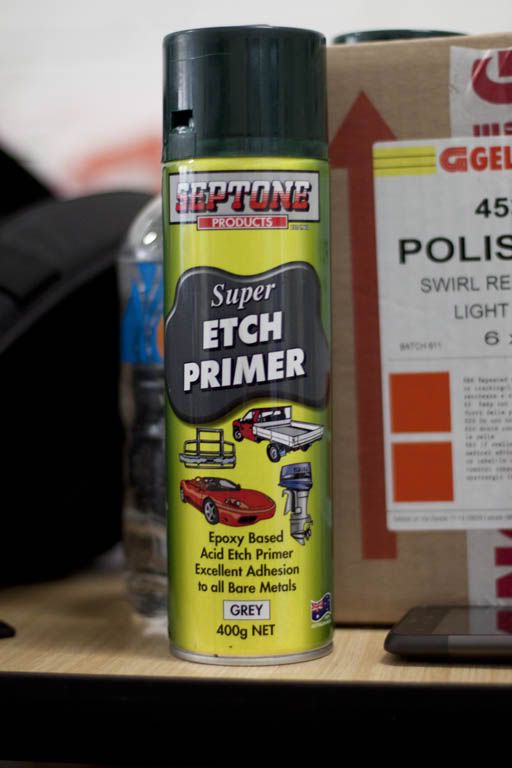 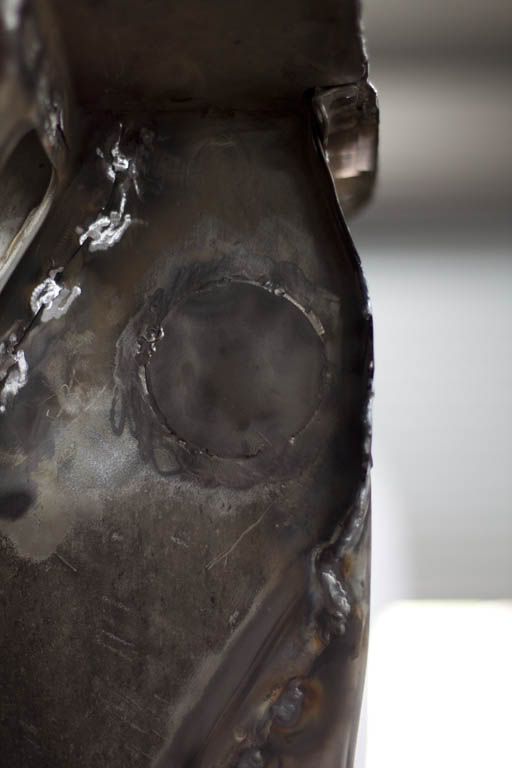 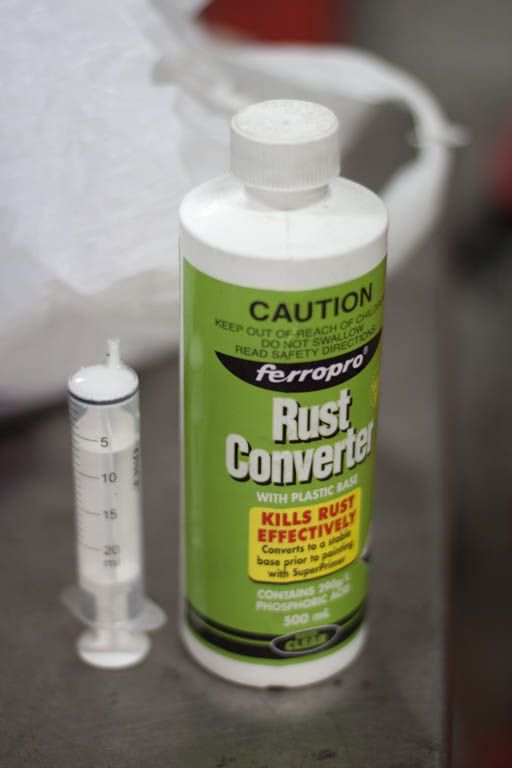 More soon! =) |
|
|
|
|
06-11-2012, 09:26 AM
|
#155 |
|
Zilvia Junkie
|
So the next part was a super busy period on the car. All the rust protection priming and sealing had to happen in three weeks before the car went off to get some bodywork done. I'd been doing 7 day weeks on the car currently ranging from a min of 2.5 hours a day all the way up to 8 hour days on the weekends and days off. Lots of work has been getting done though! =D
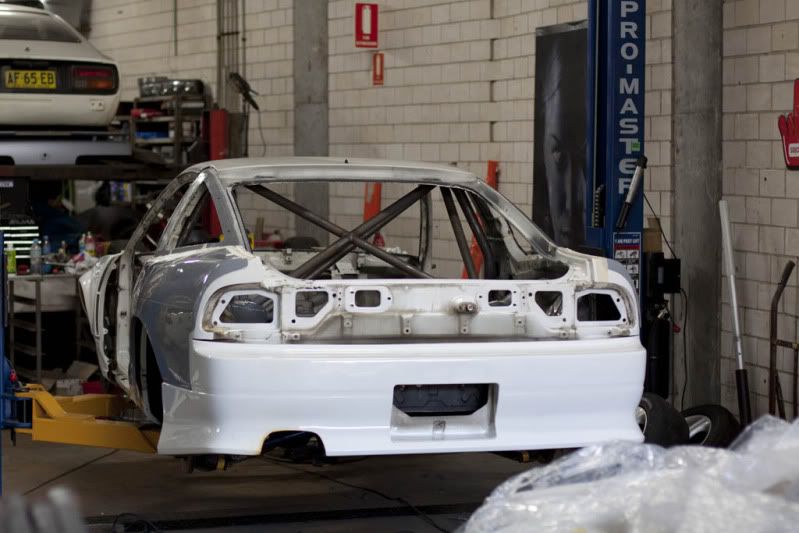
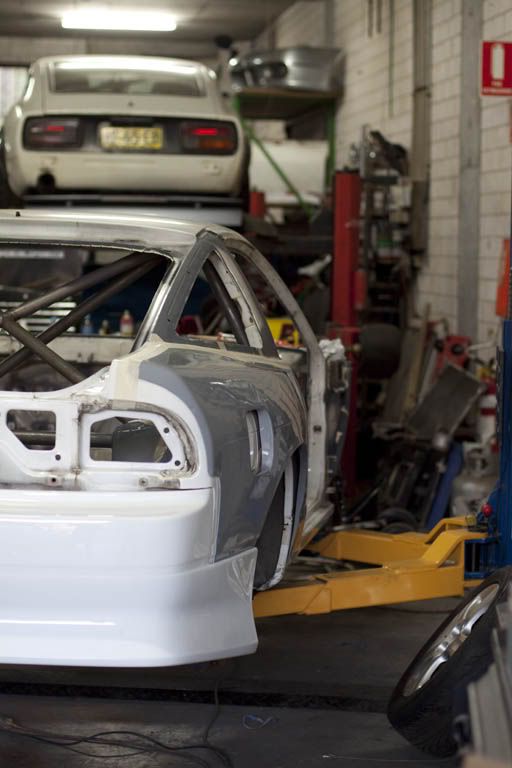
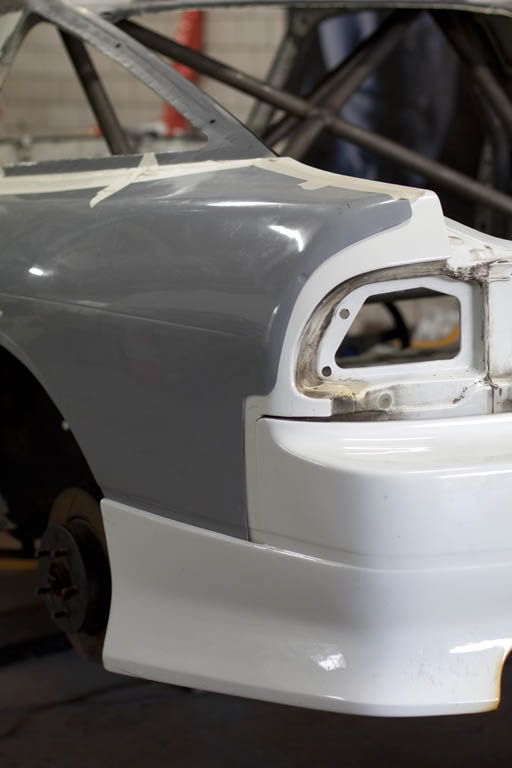
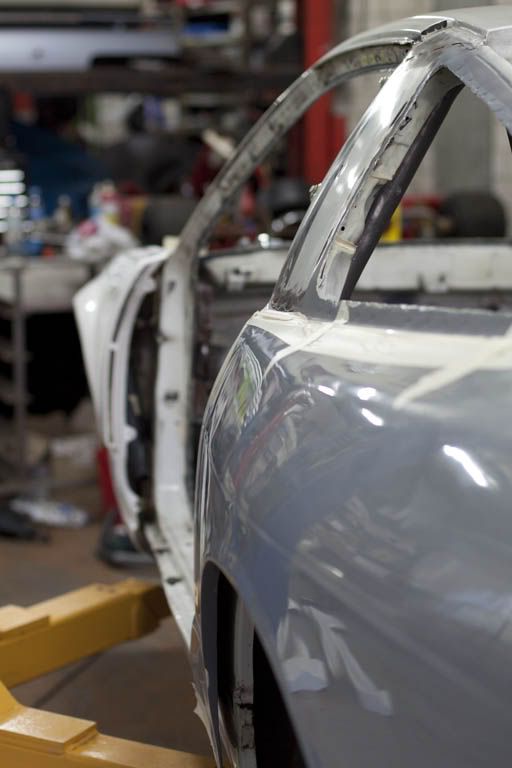
The shell had the spots linaged back, rust treated, sanded, vacuumed, cleaned with solvent and then primed. This was an epic job and this doesn't include sealing which is another massive task in itself. It was really starting to come together now and not look so much like scrap metal though. =D The following Monday was the deadline for the body shop so it had to be rolling again by the Sunday prior. This was now very achievable with another big week stuck at it. Oh and huffy sliders are fkn mad fun we wasted afew hours one night on those. =) Some pics! 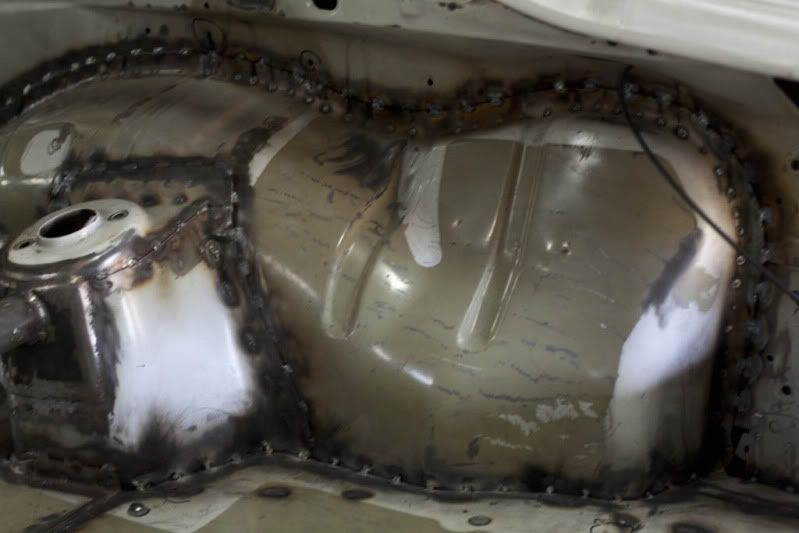 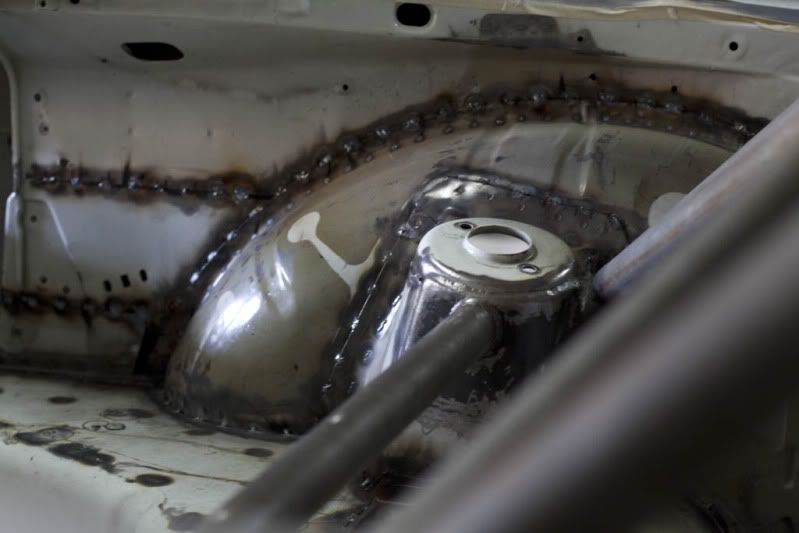 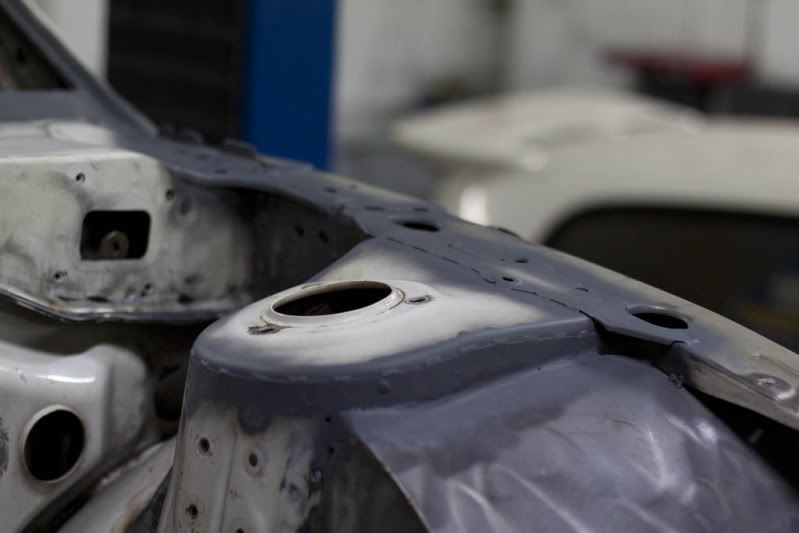    Taped up the strut holes so I didn't get primer everywhere while spraying underneath. 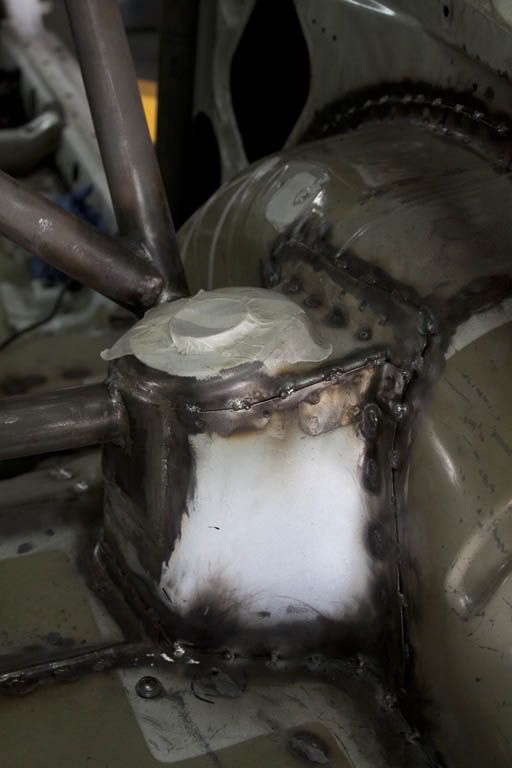 Primed! 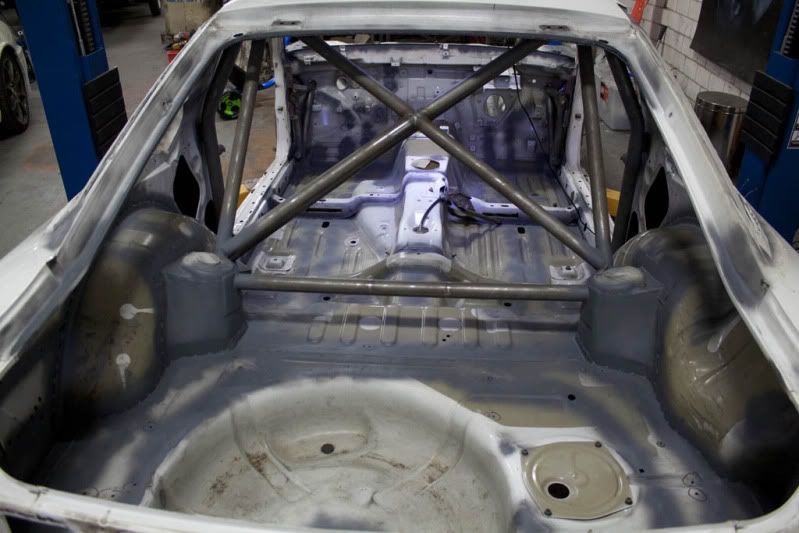 same 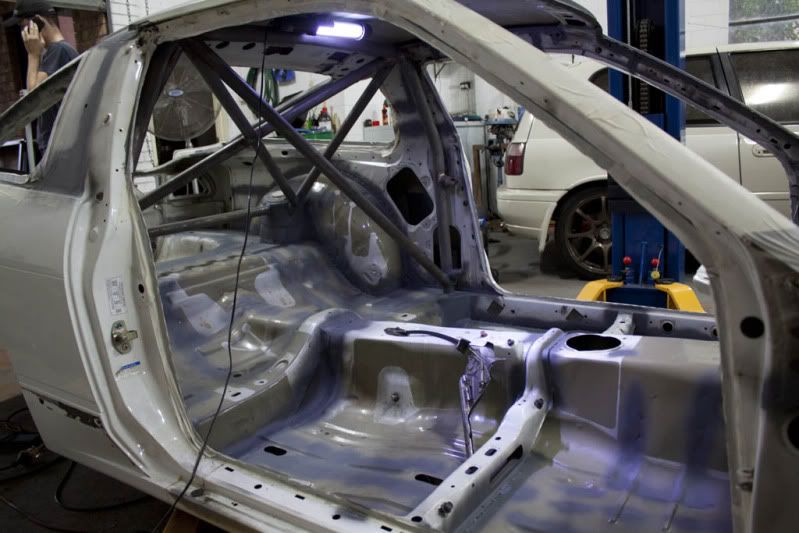 More soon! =) |
|
|
|
|
06-12-2012, 07:30 AM
|
#156 |
|
Zilvia FREAK!
 |
lookin damn good man!
__________________
cONtRol FReAkS |
|
|
|
|
06-13-2012, 03:23 AM
|
#157 | |
|
Zilvia Junkie
|
Quote:
|
|
|
|
|
|
06-14-2012, 10:07 AM
|
#158 |
|
Zilvia Junkie
|
Sealing!
I managed not to get this all over myself accept when James decided to plaster my leg with it while looking the other way lol. Very happy with how the front towers came out yesterday the rest of the engine bay is way time consuming cause I wanted it to look as neat as possible =) The engine bay and the interior remained then I needed to get the suspension/running gear in so the car can the towed easily. Some pics! 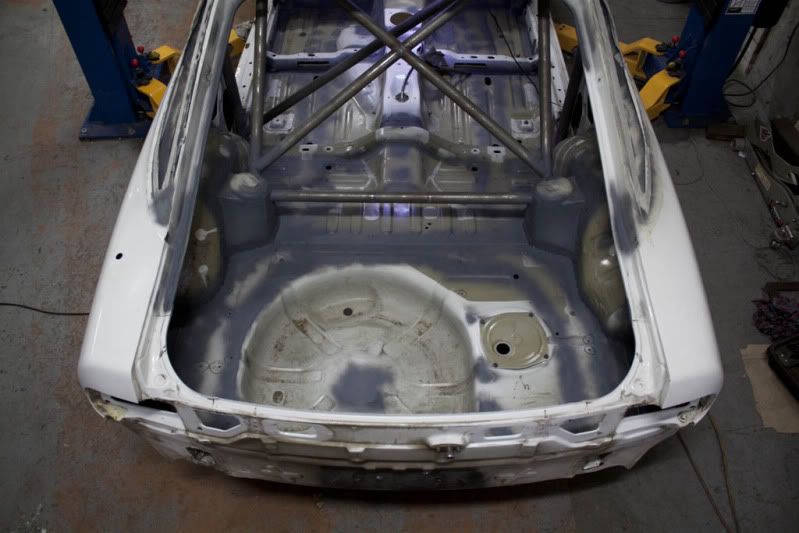 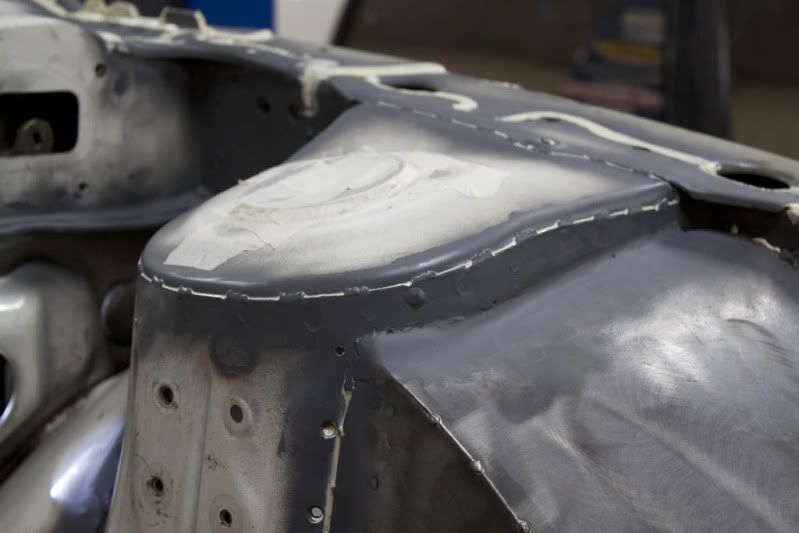 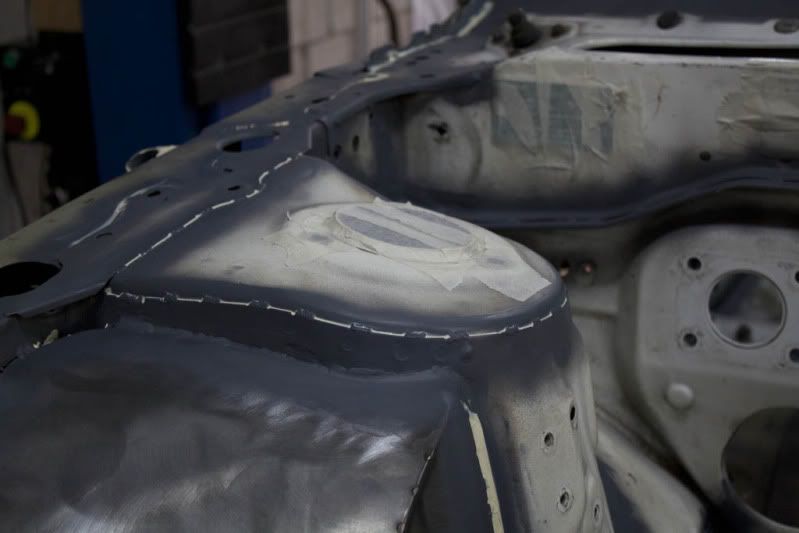 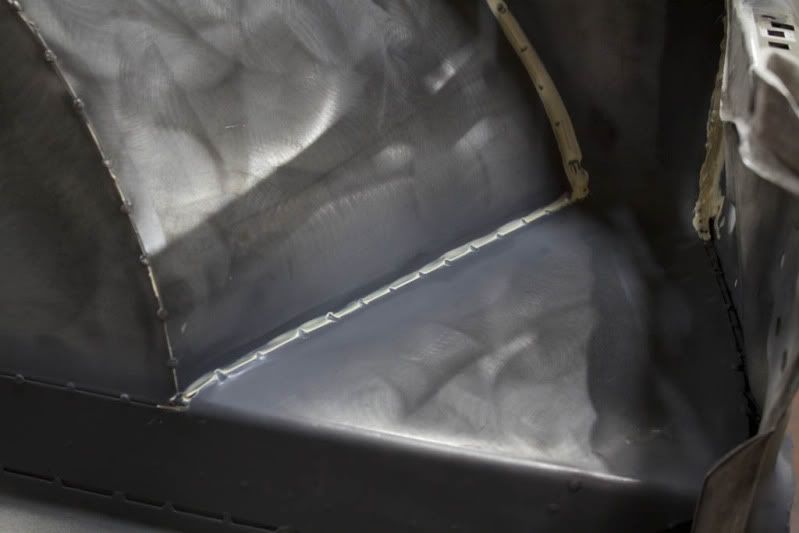 More soon! |
|
|
|
|
06-16-2012, 11:06 PM
|
#159 |
|
Zilvia Junkie
|
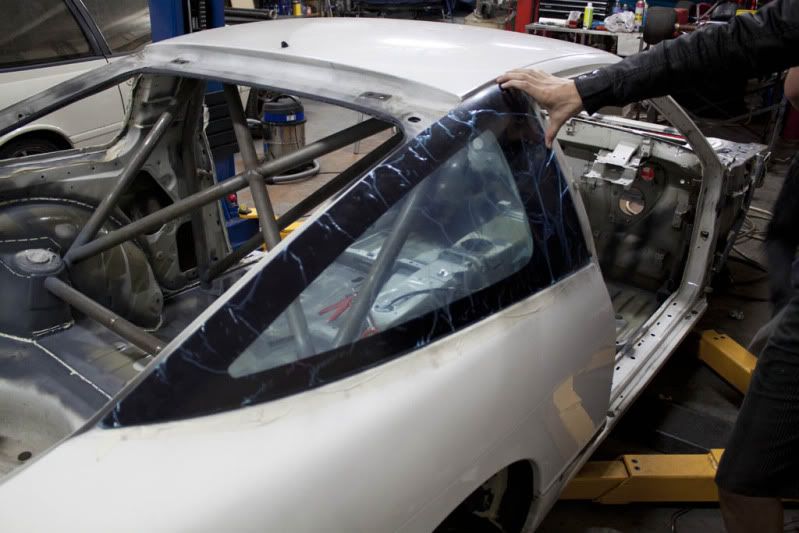
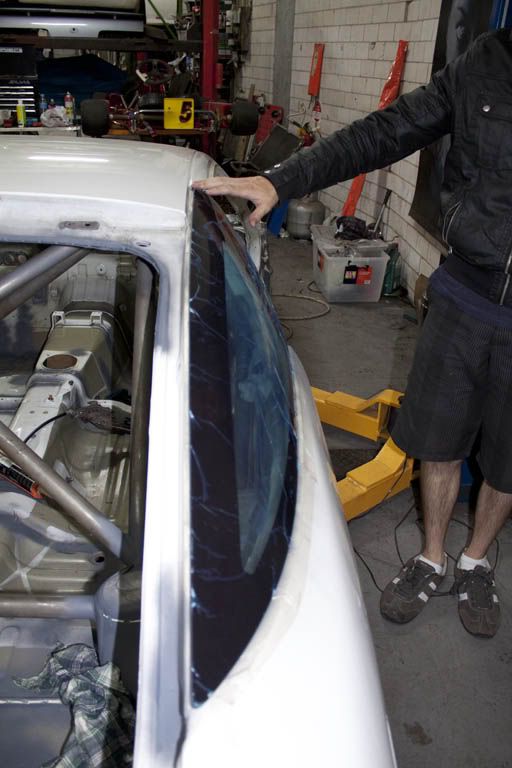
The next week I got a surprise delivery from the UK, I wasn't expecting these so soon. Poly carbonate very light less than half the weight of the standard glass at a guess if not less.
I did a test fit on the rear hatch. Fits very well with the seal on there it should look very close to standard. Its awesome how they come with the black coloured in sections like standard glass does as well to hide all the pillars. =) Some shots. 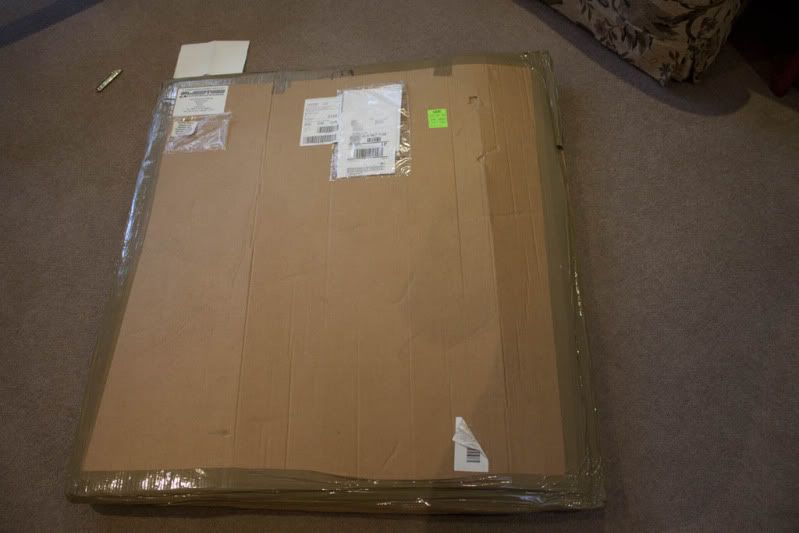 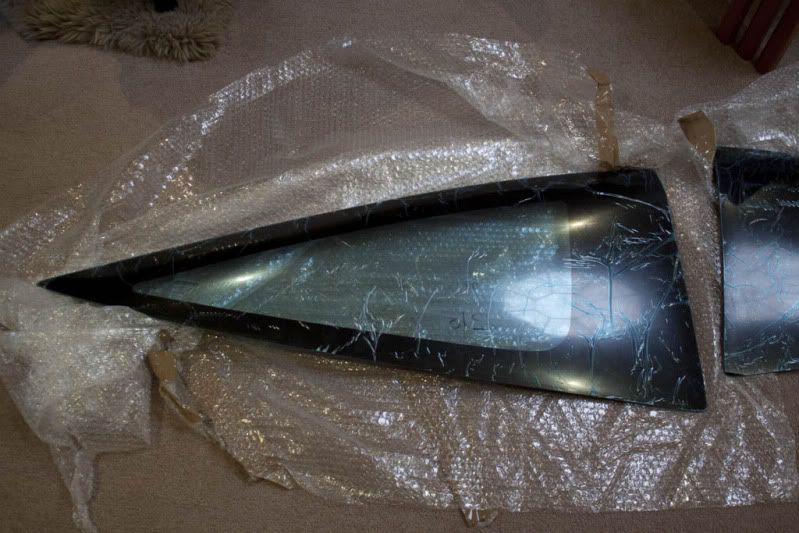 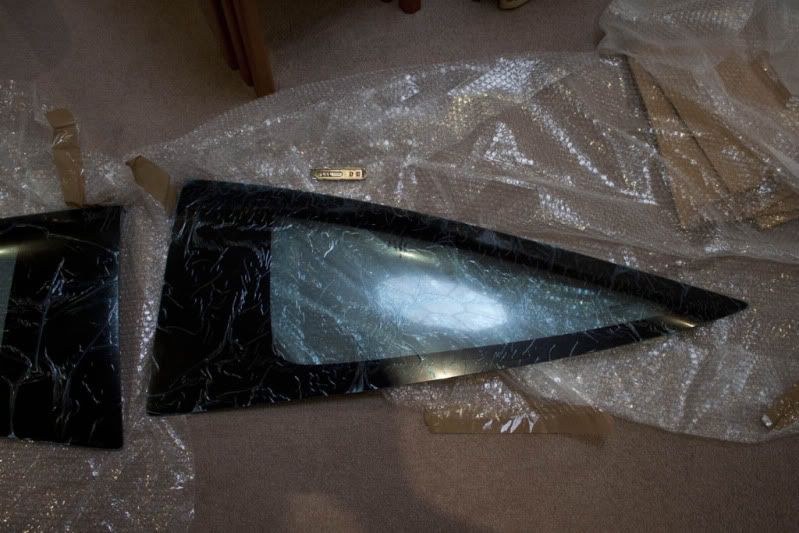 I sat it over the rear hatch to get an idea of fitment. They're pretty damn good I'd highly recommend them. Just keen to see how well they go with some time on the car and scratches. They comes with a scratch resistant coating as an option which I got. I might see if I can run some tear offs on them still anyhow as lexan ones look shitty once they get all scratched up. 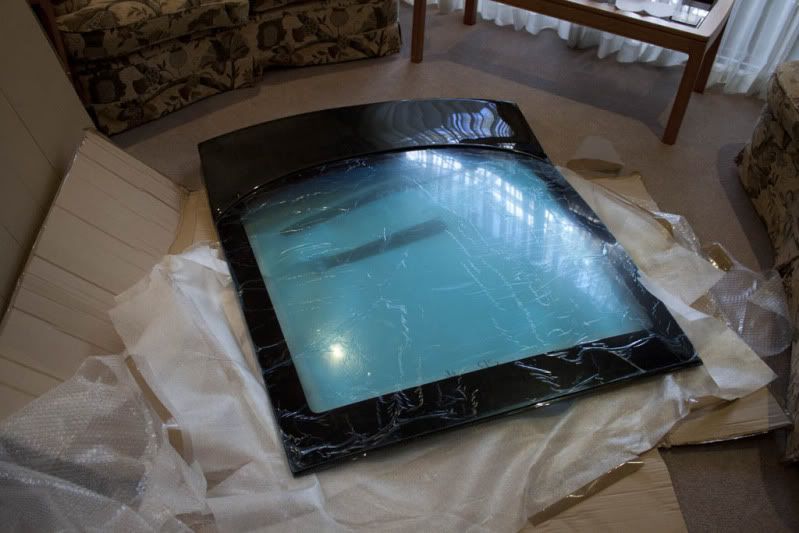 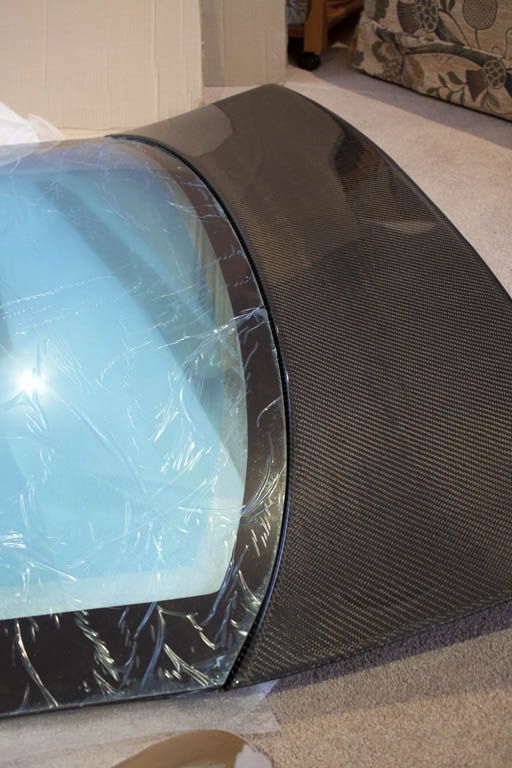 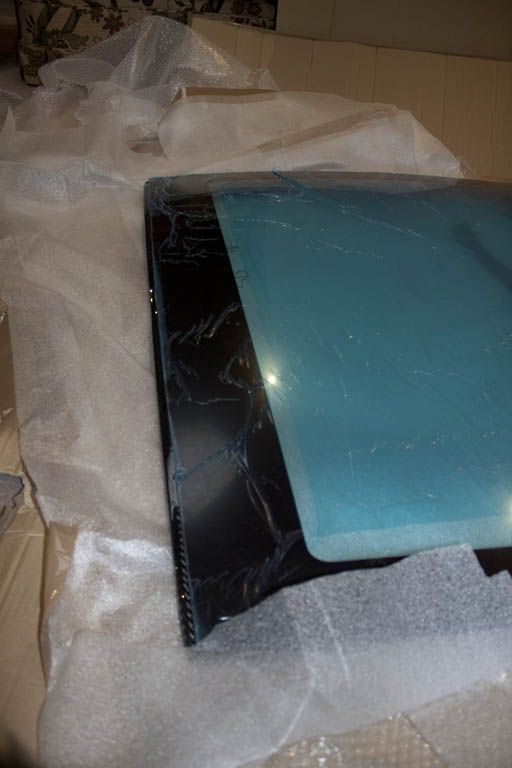 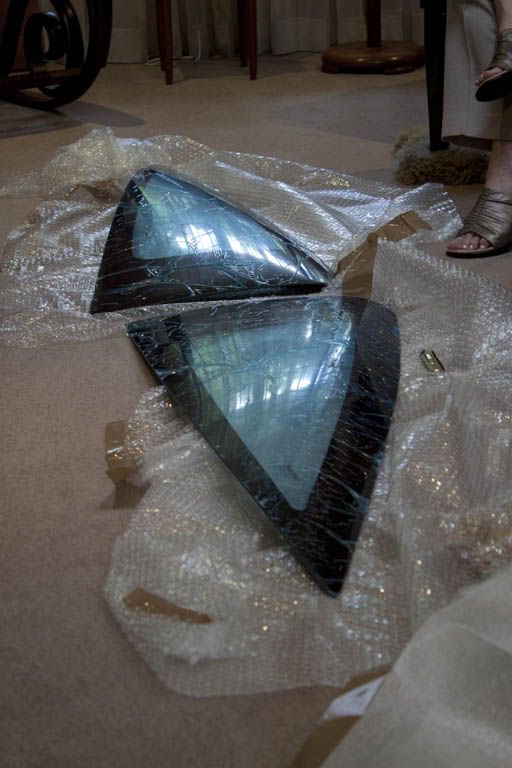 More soon. |
|
|
|
|
06-22-2012, 07:35 PM
|
#162 |
|
Zilvia Junkie
|
Another big day on the caulking gun was had again. James came to lend me a hand too which was a big help. (thanks) =)
The interior is I would say 90% done there are only a few more seams which need to be done and then some fix up work in afew spots I'm not quiet happy with. Then the doors, steering column, front guards, running gear and suspension all needed to be refitted so the car was back to a rolling shell. Anyhow some pics of the sealing work. I'm really happy with how its turned out its looking about as neat as I could hope for.  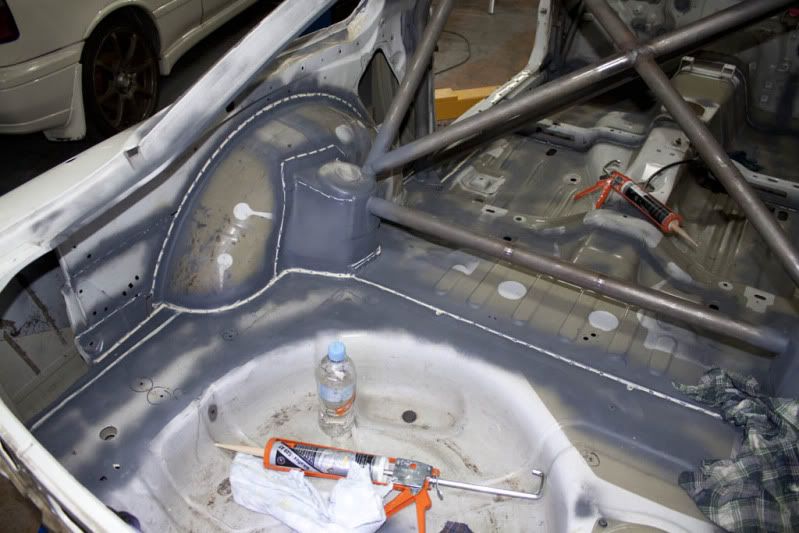 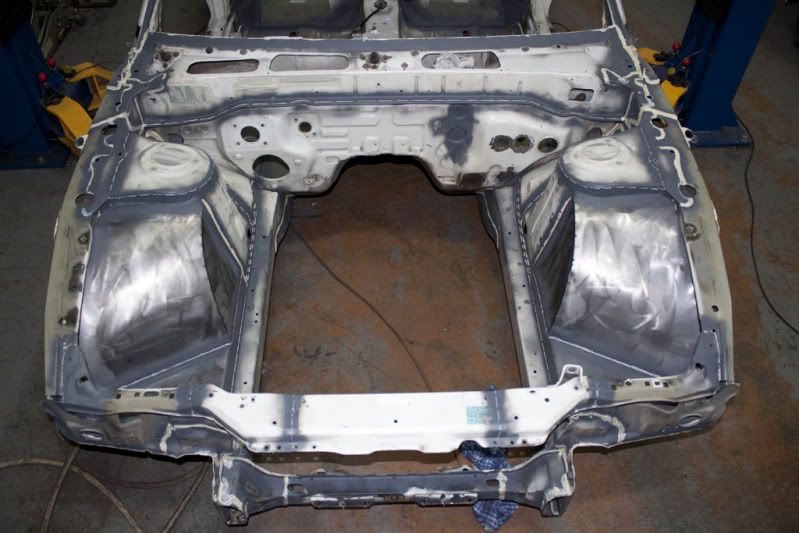 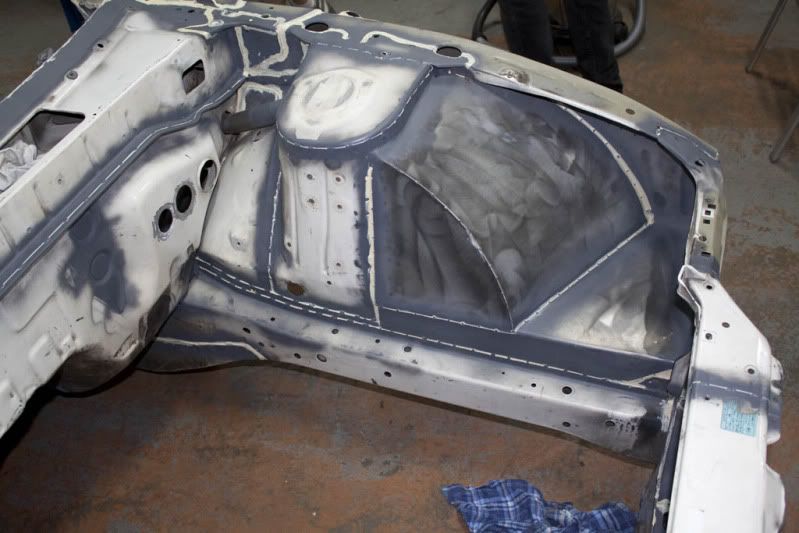 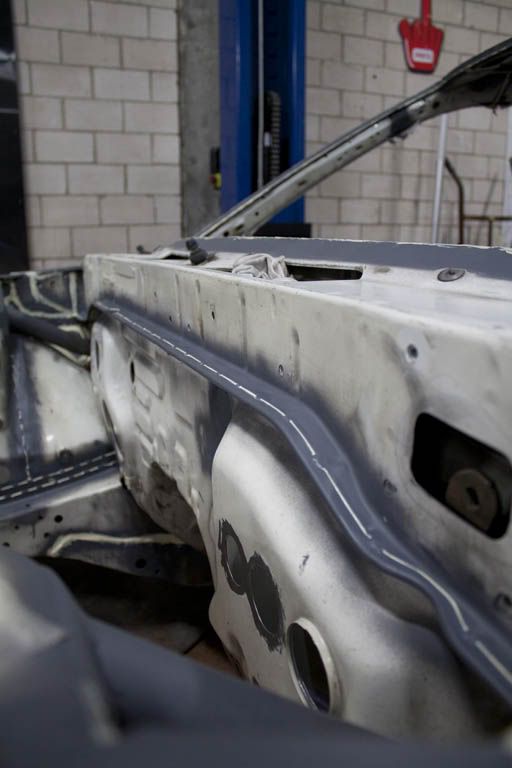 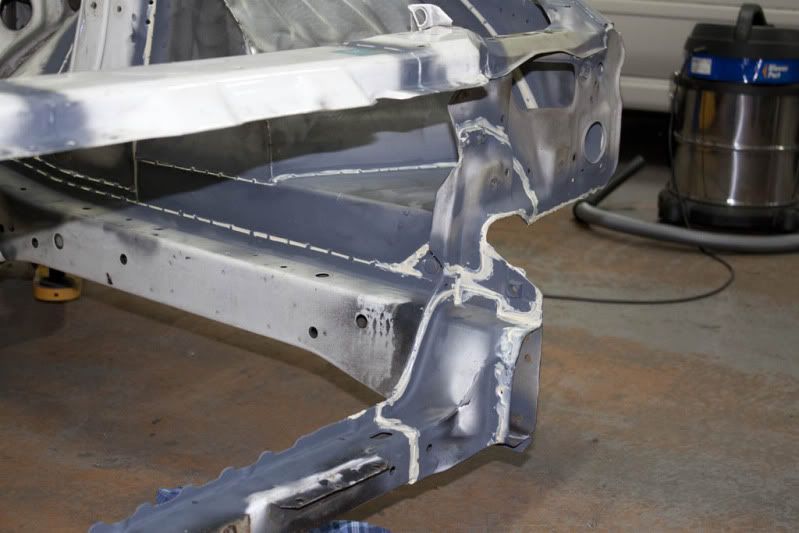 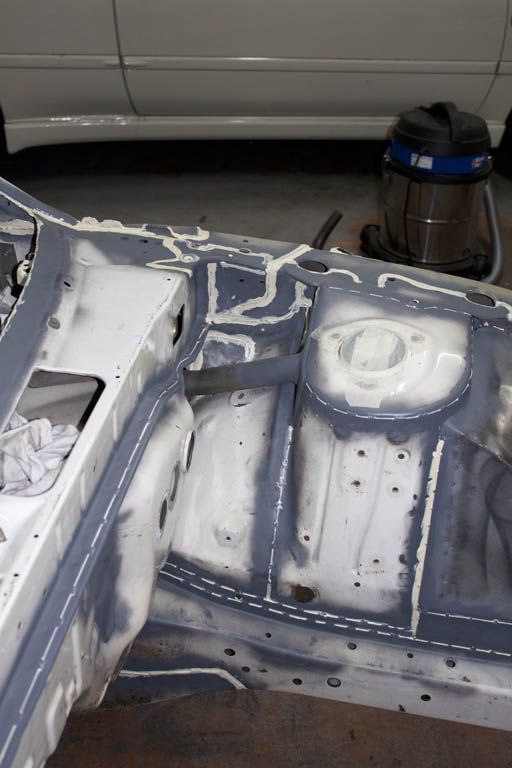 More soon! =) |
|
|
|
|
06-24-2012, 09:14 AM
|
#163 |
|
Zilvia Junkie
|
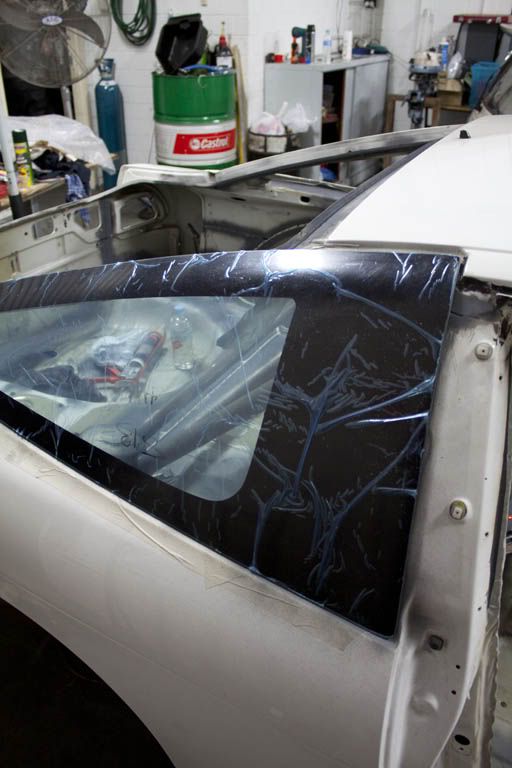
Did a test fit of the rear quarter windows we pretty impressed with how they fit up. Basically identical to stock windows once they're fitted up with window seals.
   More soon. |
|
|
|
|
06-24-2012, 04:20 PM
|
#166 |
|
Zilvia Addict
 
|
I'd love to have your car just as it sits. Love how you actually sealed the seams after you stitched welded them. For whatever reason, most similar builds are never properly re-sealed.
|
|
|
|
|
06-24-2012, 06:42 PM
|
#167 | |
|
Zilvia Junkie
|
Quote:
 |
|
|
|
|
|
06-24-2012, 06:47 PM
|
#168 | ||
|
Zilvia Junkie
|
Quote:
Quote:
Yeh I've noticed that but fear they all face rust issues after not too long cause the factory paint gets burned during the process so everything needs to be treated and oxygen kept away. I've put alot of effort into trying to do that so hopefully this can avoid issues later on. Time will tell though I guess! |
||
|
|
|
|
06-25-2012, 08:48 AM
|
#170 | |
|
Zilvia Junkie
|
Quote:
So much to do so little time!! |
|
|
|
|
|
06-25-2012, 11:17 AM
|
#171 |
|
Post Whore!
 
Join Date: Oct 2008
Location: MI
Age: 38
Posts: 3,916
Trader Rating: (131)
  Feedback Score: 131 reviews
 |
Man, just took the time to read through this. Great parts selection and amazing dedication- awesome build!
I wish you were in the states so that I could swing by on trash day and grab those 180SX windows, lol! |
|
|
|
|
06-25-2012, 07:10 PM
|
#172 | |
|
Zilvia Junkie
|
Quote:
Nah you wont find those in the trash! Will be kept for a rainy day :P |
|
|
|
|
|
06-27-2012, 10:44 AM
|
#173 |
|
Zilvia Junkie
|
Had a massive weekend following, picked up the old side skirts and rear bar from Matts who has been kind enough to store them for me since I stripped the car. (thanks again Matt)
Got the car back to a rolling state as well, just put the S13 frame back in so I didn't have to get all the new S15 arms dirty at the body shop. I've got my concerns about fitting the kit there is a fair amount of work involved to get it to a stage I'm happy with. The origin guards are far from a perfect fit. Also did a bodge trial fit of a 18x9.5 +22 CE the new guards swallowed it whole. You could almost fit your head in the gap! Should fit 11's without much hassle I think! Have to get up and organise a tow truck the following morning. Some pics. Sex =)  NOM NOM NOM! 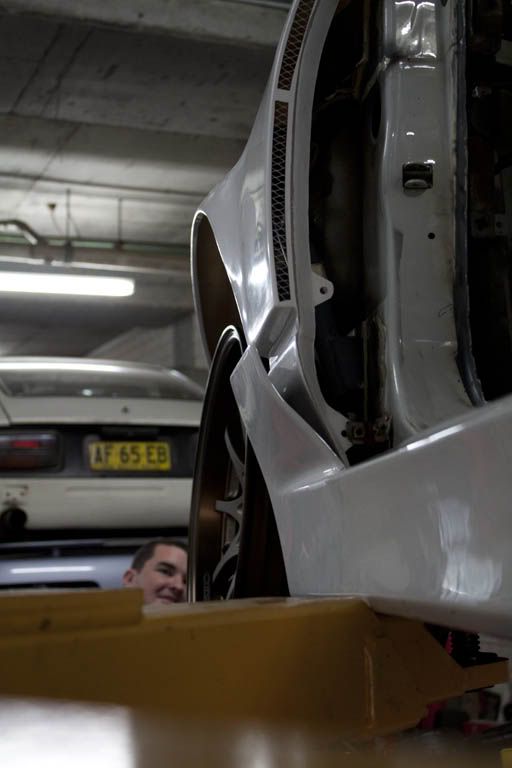 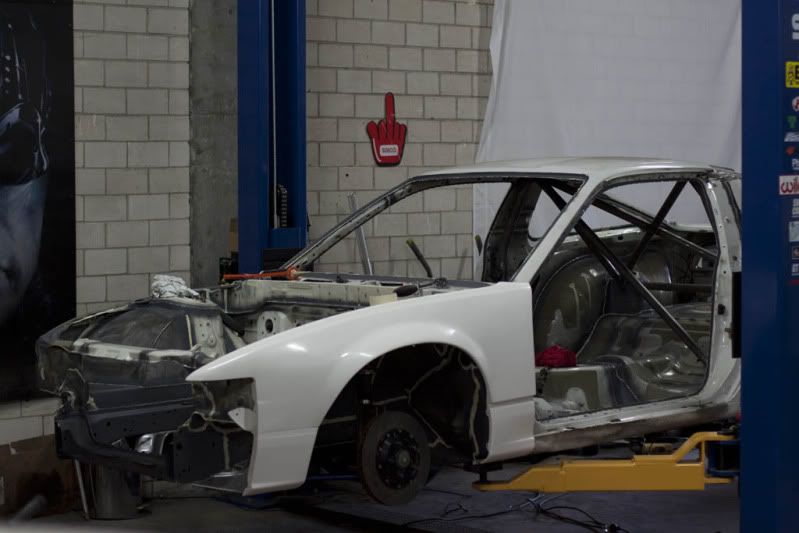 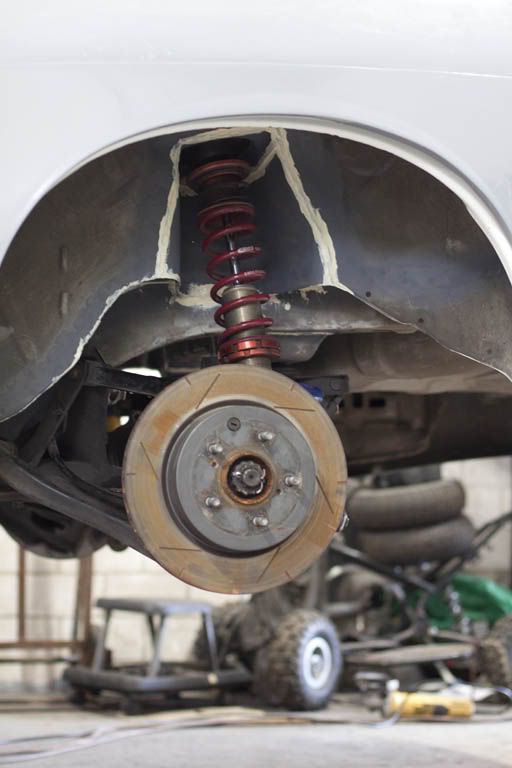 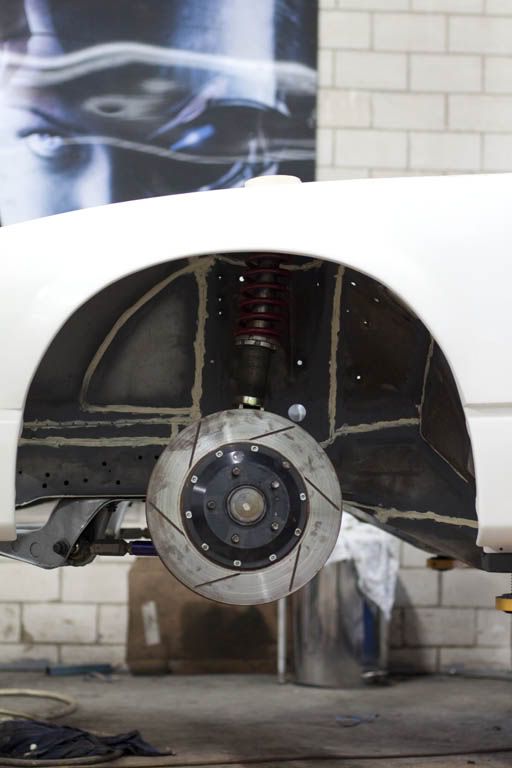 More soon! |
|
|
|
|
06-29-2012, 10:21 AM
|
#174 |
|
Zilvia Junkie
|
Basic idea of what it should look like. Not super happy with the fitment though will need some fine tweaking.
     All sealed up again, passenger door.  This is now back in too. =)  More pics soon! |
|
|
|
|
07-05-2012, 12:01 PM
|
#175 |
|
Zilvia Junkie
|
So the car was back out of my hands and over at Bodyform. It got towed over and slightly sprinkled on but I whipped out the car cover and also dried it down with a rag once the cover was on. The steering is now bodged up and its much easier to move around.
The front koguchi power guards going on have no top pin line through them so I'm considering removing it from the doors and rear guards too. My gut feel is it'll look good but I was slightly worried it might look odd without it as the rest of the panels are so plain. 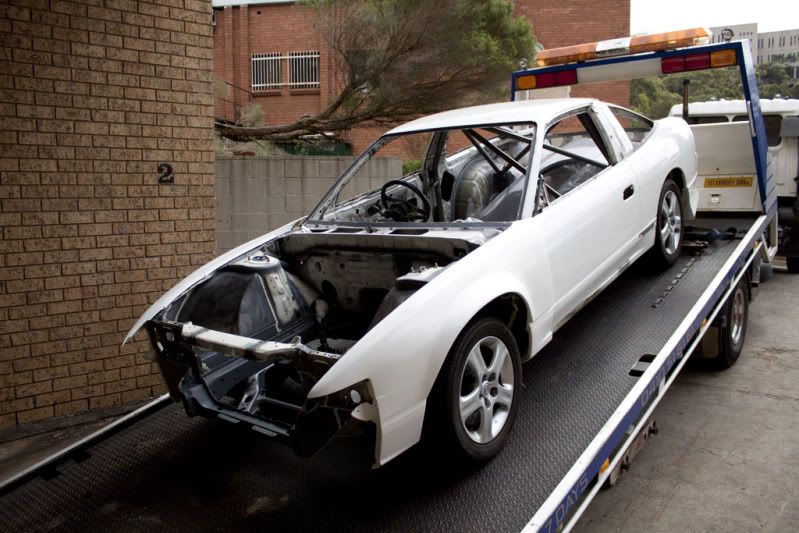 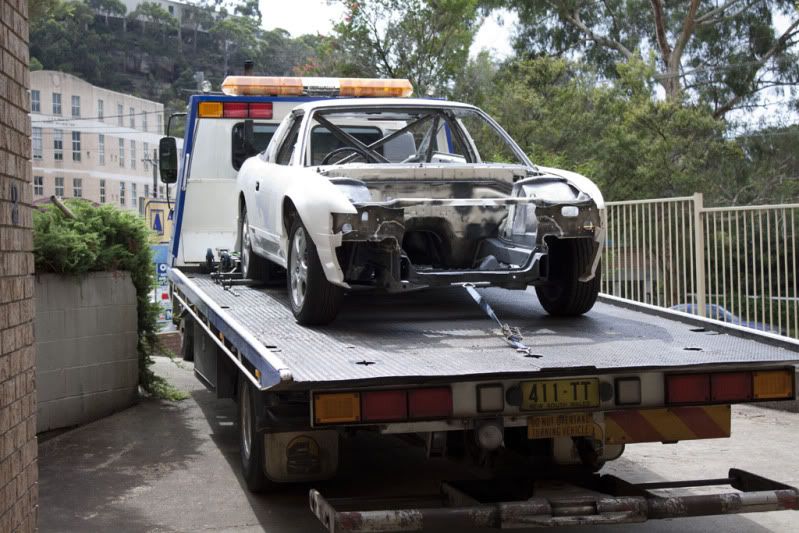 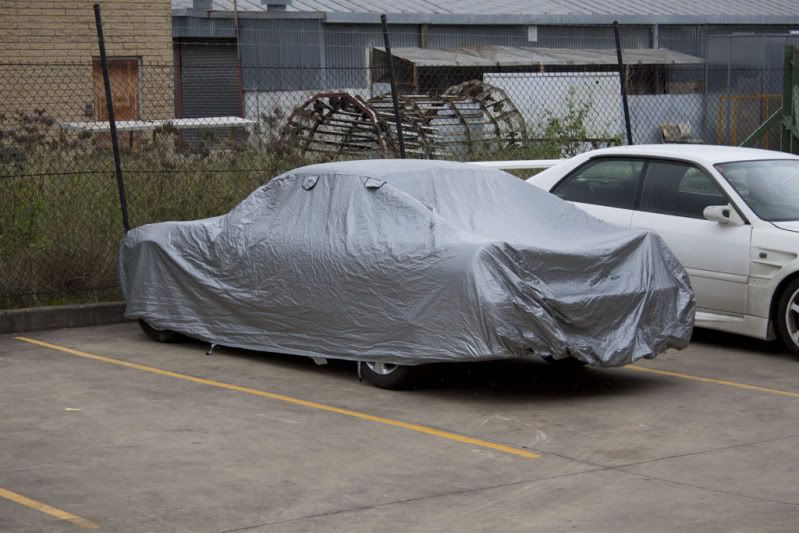 Was looking forward to a few weeks of much less strenuous work! |
|
|
|
|
07-06-2012, 10:25 AM
|
#176 |
|
Zilvia Junkie
|
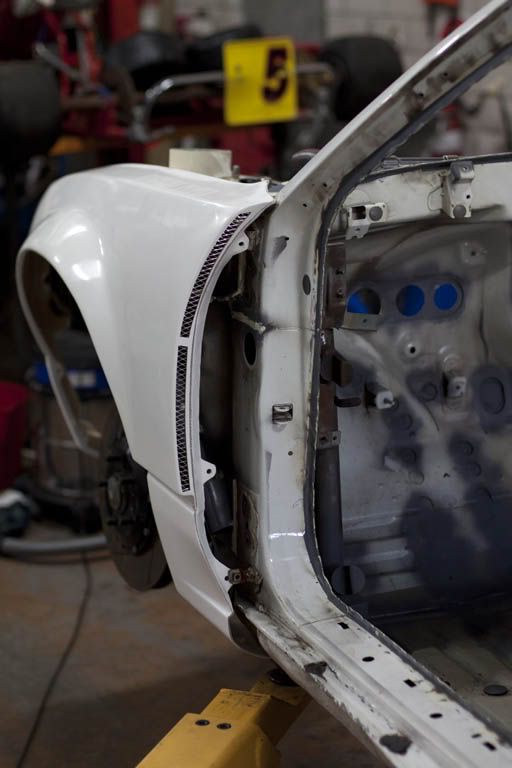
The car sat at Bodyform for a lot longer than I'd initially expected which was rather frustrating as there was plenty of other stuff I could have been doing with the same time. After afew weeks Peter free'd up some time and got stuck into making the new inner guard out of the old guard. I popped over on a Tuesday to drop off some wheels that came in from Japan. The outer skin of the guards had already been cut.
You can see how much has been cut away from where in inner skin still sits. 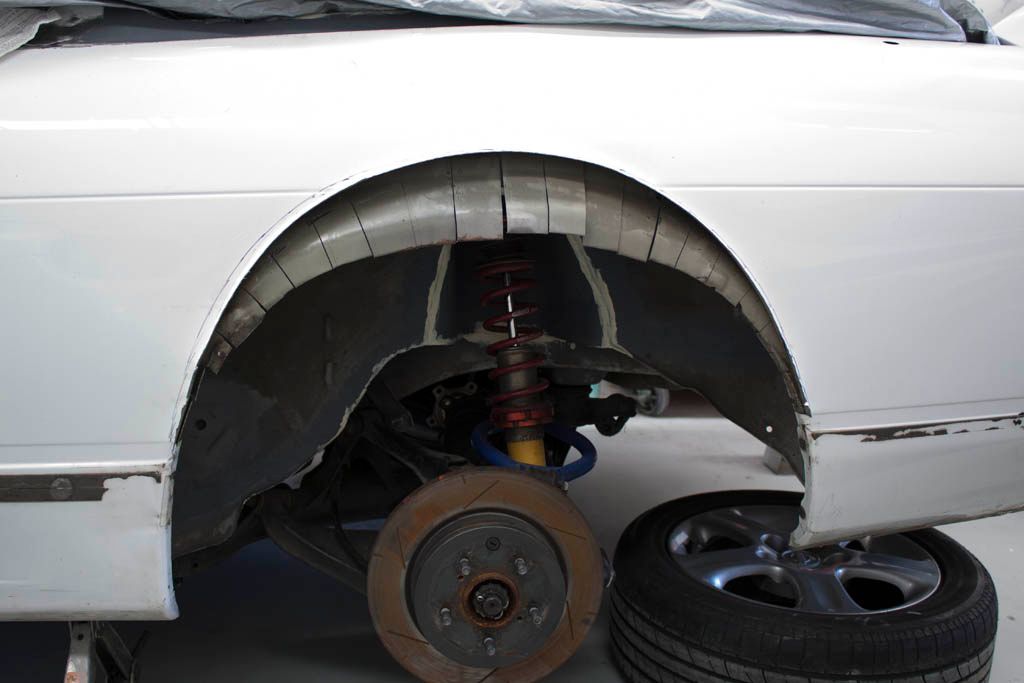 This bend is to give the inner guard a lip to rivet too and the whole thing more strength. 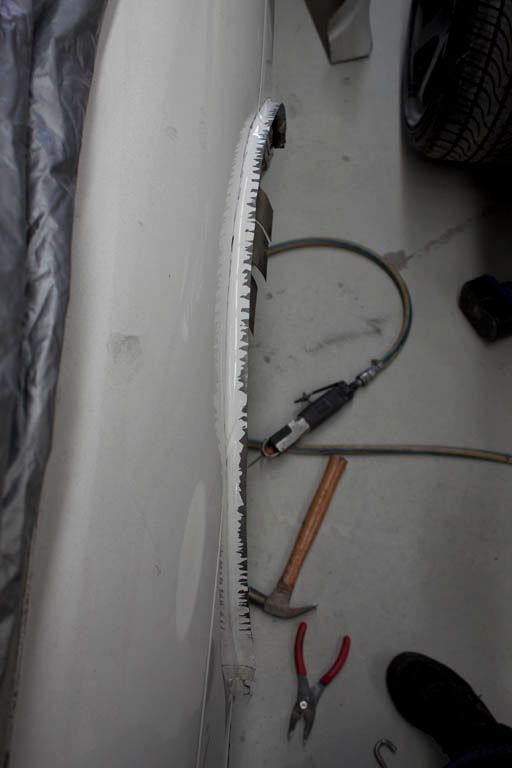 I was pretty surprised how thin this metal actually is, so piss weak its not funny! 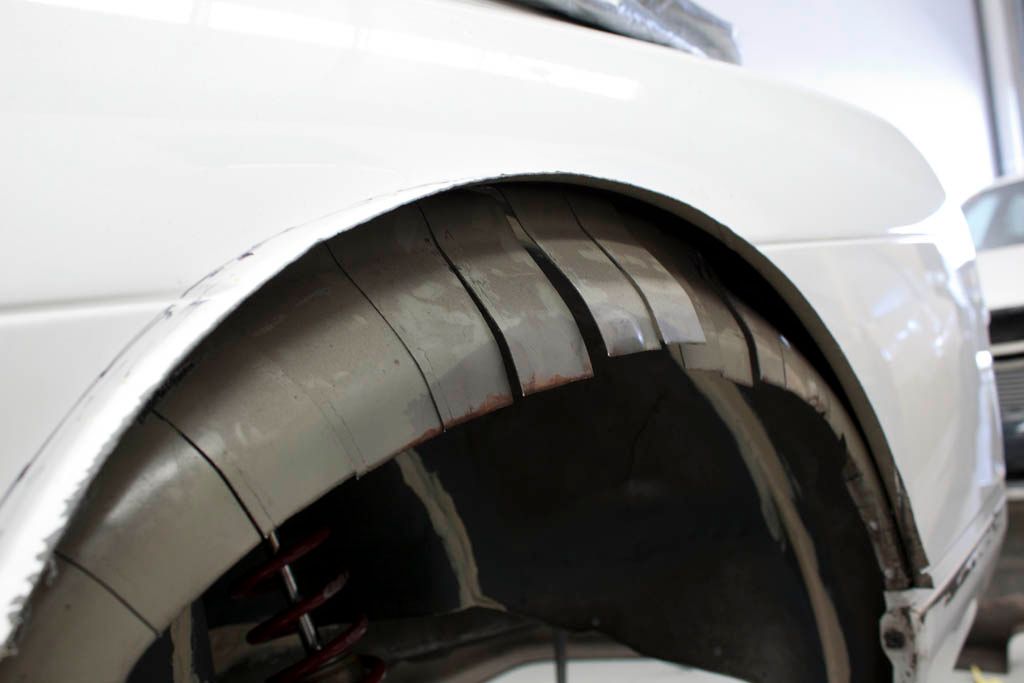 Reminds me of the garage sale flyers with the tear off tabs :P 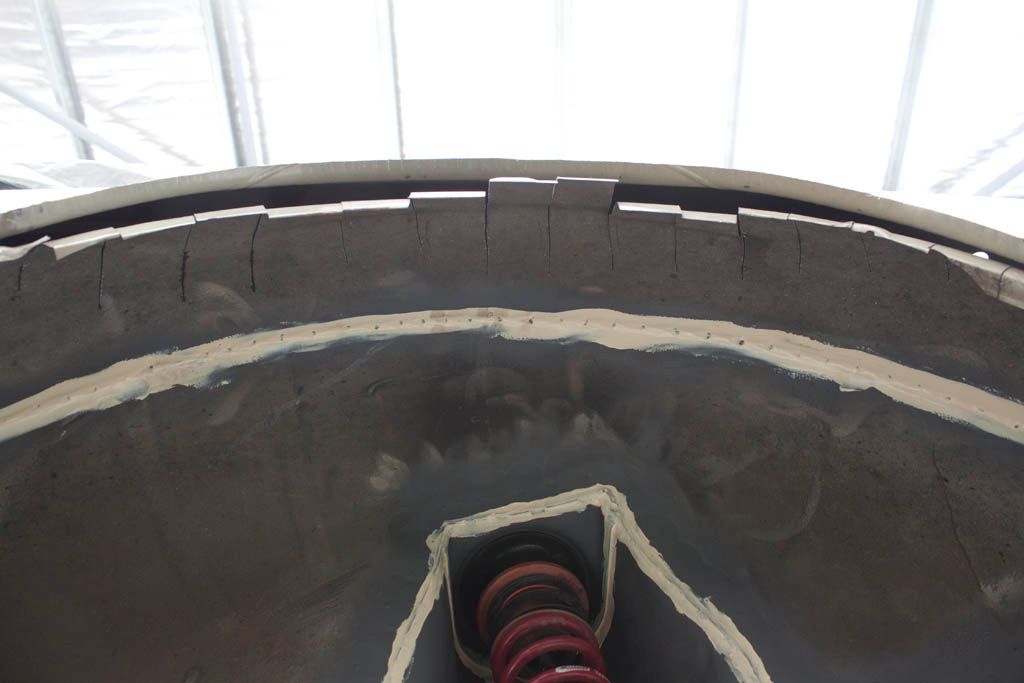 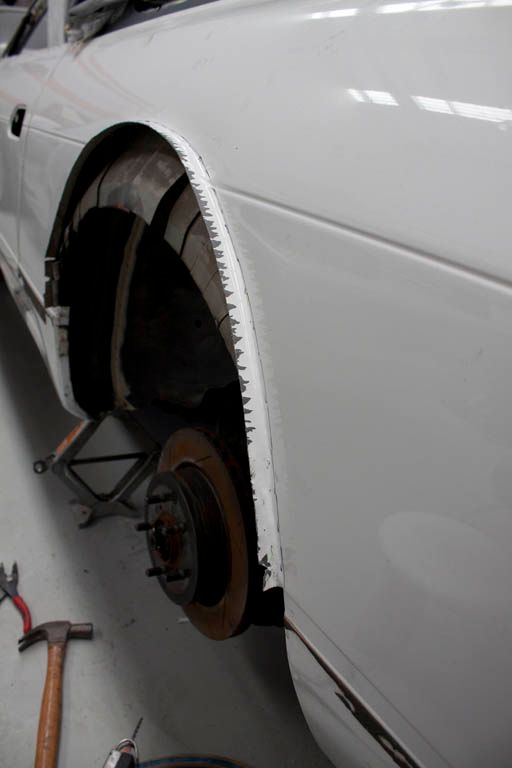 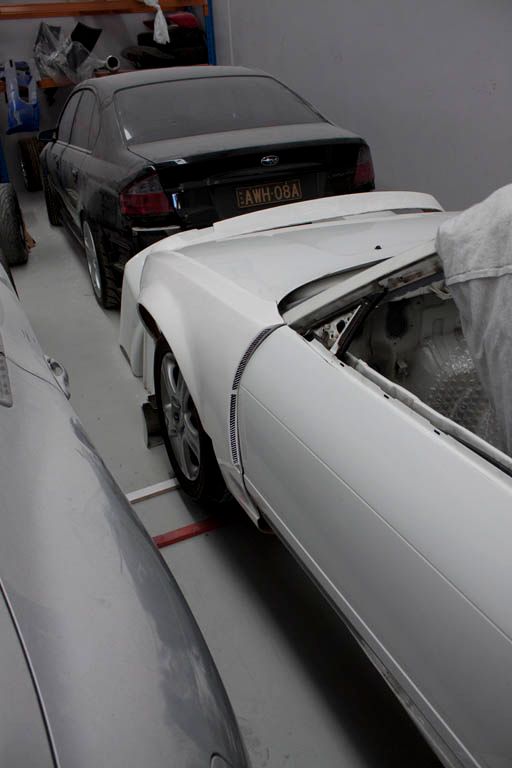 You can see in this shot he car is actually stiff enough now that where jacking it from this point the front wheel lifts off the ground well before the rear. I really need to get the rear droop shortened though when the Bilsteins get a makeover in the not too distant future. The current rear droop is total overkill and is more just an annoyance when trying to jack the car up than anything else. 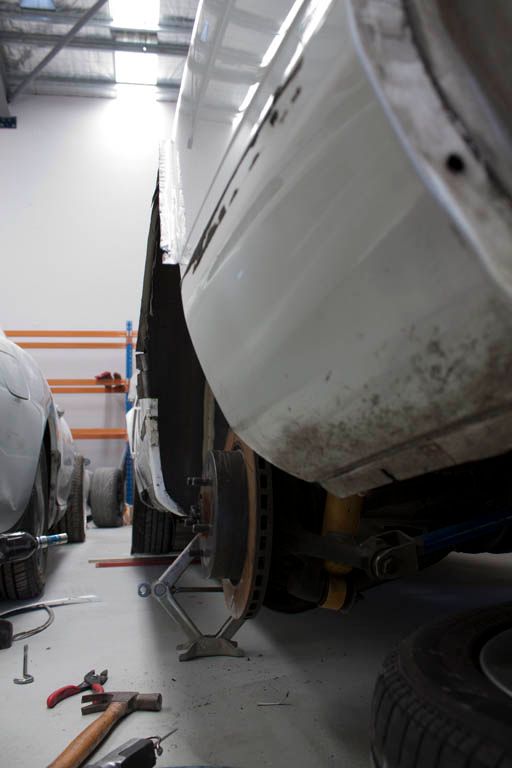 Should be alot more room in there soon! =) 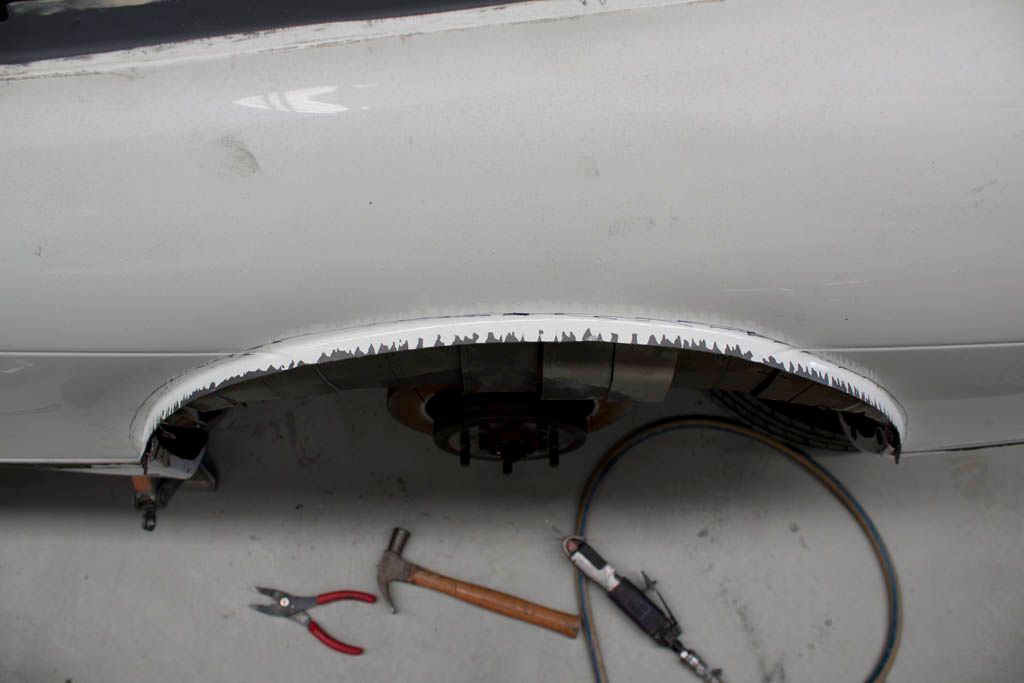 More soon! |
|
|
|
|
07-09-2012, 08:36 AM
|
#177 |
|
Zilvia Junkie
|
So the next time I went back Peter had riveted the inner guard to the new lip on the outside already and cut the excess off. The origin panel had been stuck on with afew self tappers to line it all up and see how it fitted. It was actually better than I thought when we did our bodge tape on method which was a pleasant surprise, usually its the other way around. :P
Looking up in the guard at the new riveted inner guard with the widebody panel on. 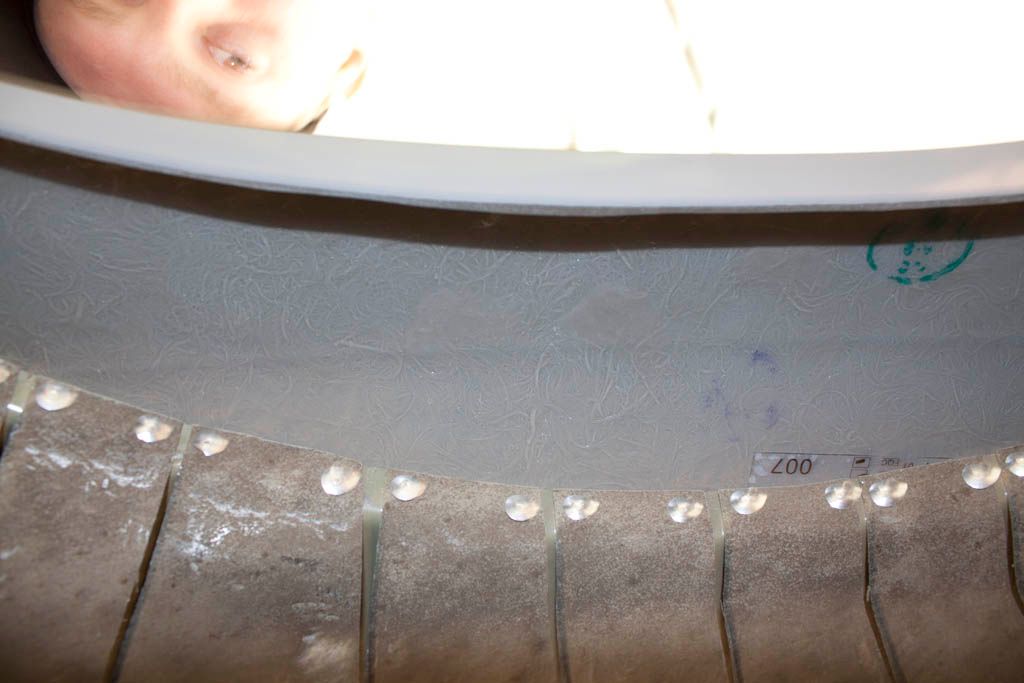 Lots of tiny cuts mean over all the whole thing can have a nice rounded transition. This will all get tied together with urethane paste once its done so it wont fill up with water.  The gap to the outer guard will be covered with a new section of fiberglass. 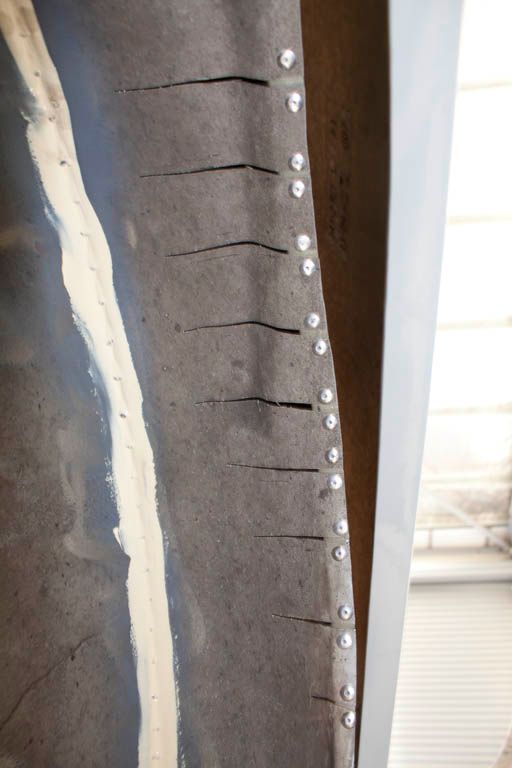 How the panel will sit. 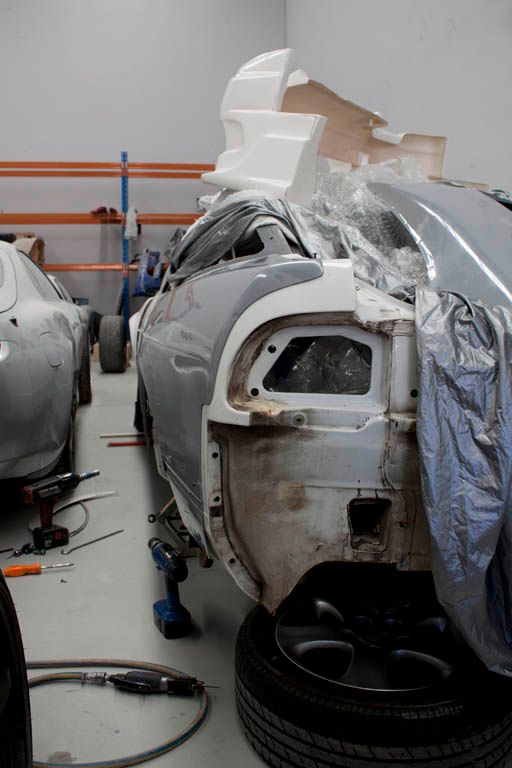 You can see a dip in the back of the panel. Average glass work, will need to be skimmed with bog. =/ 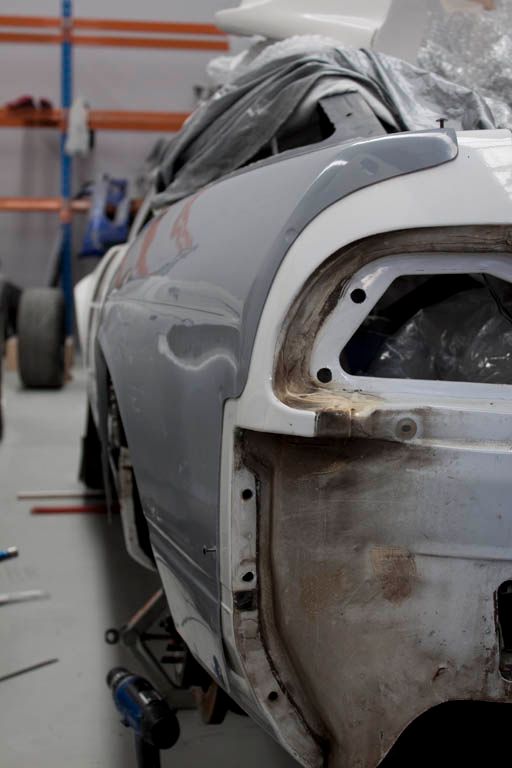 So while we were there with the guard on I thought we'd try on one of the 19x11 -9 SSR rims I'd ordered for a Mate of mine. At full droop this looks like it wont quite fit but once the suspension is compressed it should easily. I've heard the S15 rear subframe pushes everything out 15mm odd further each side though so I'll need to get that in before I can do a proper fitment and order some wheels. 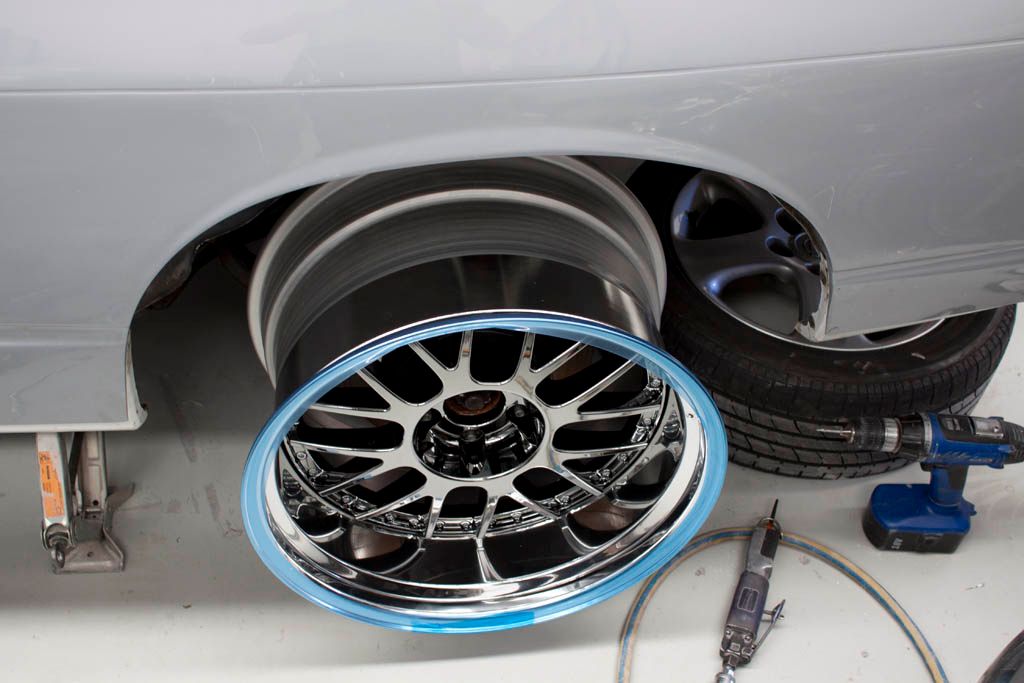 I wish we could have jacked the wheel up. But nothing was handy to do it with that didnt risk damage.  There is a good 25mm or so space on the inside to the strut helped by the 19" size though. I'll probably stick with 18" wheels though so this might be a much tighter squeeze when it gets to ordering wheels. I'll have to wait and see though. 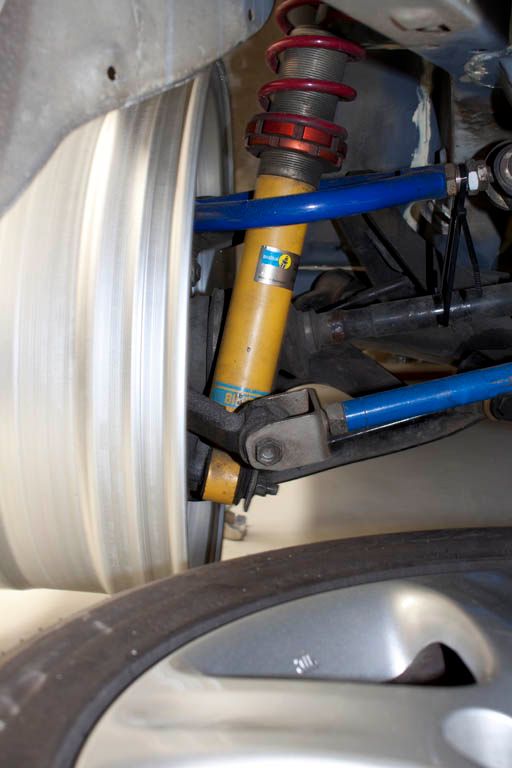 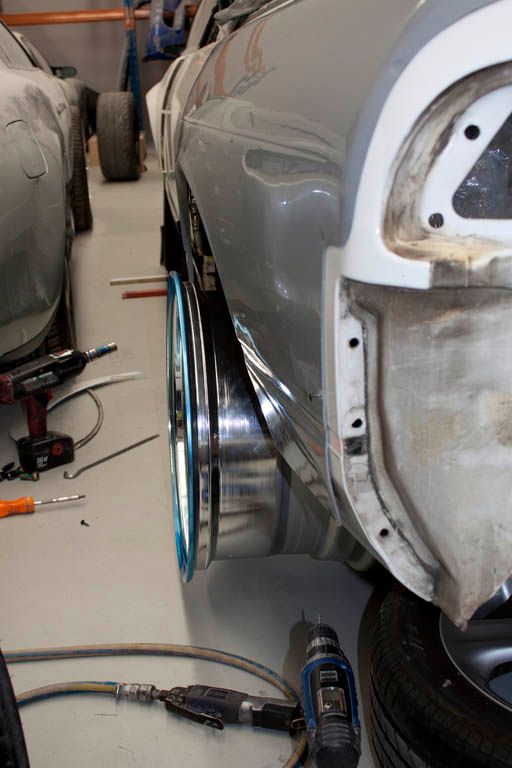 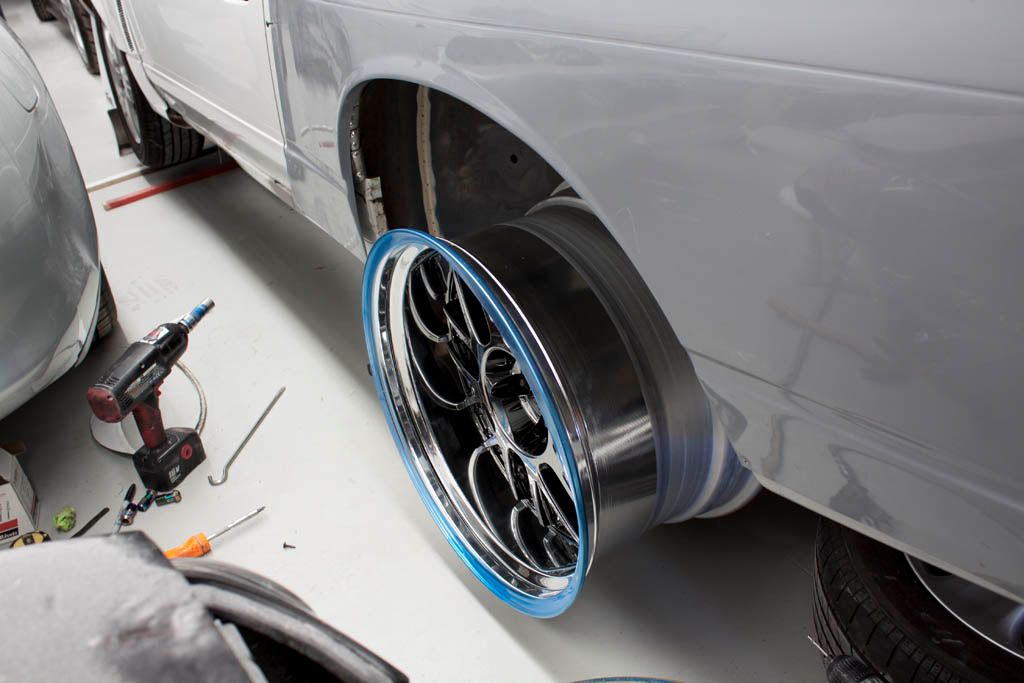 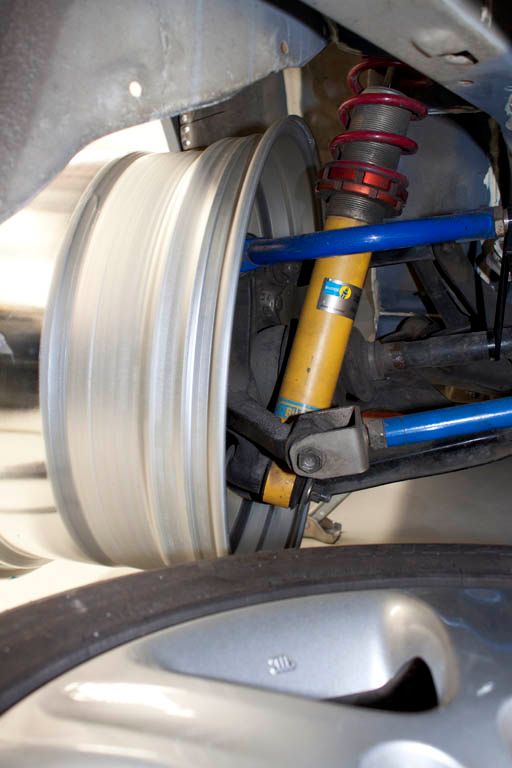 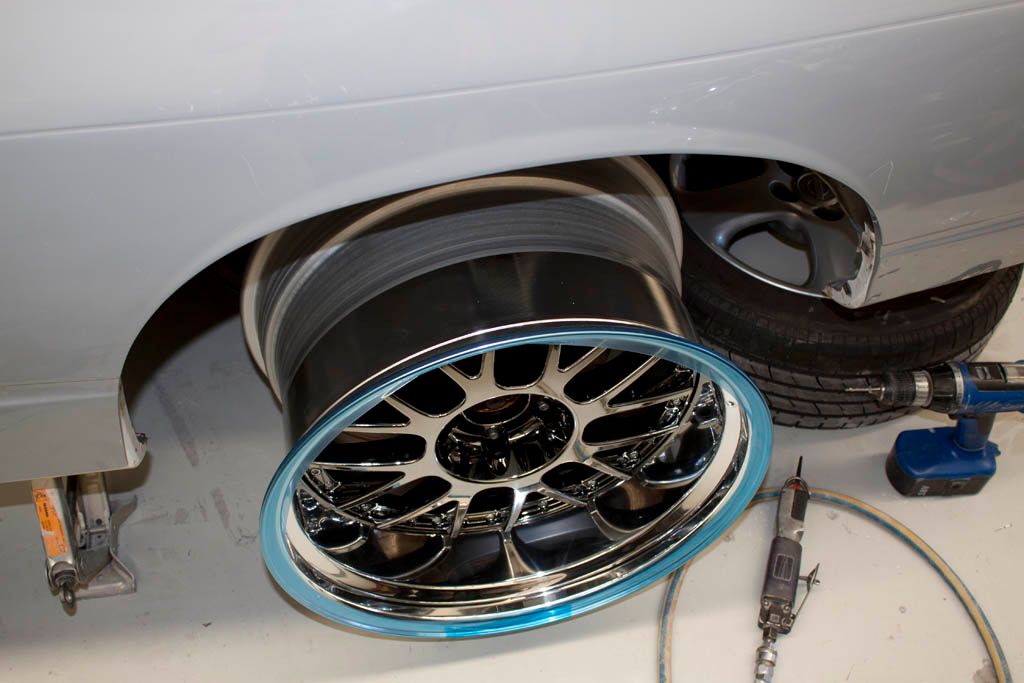 More soon! =) |
|
|
|
|
07-13-2012, 12:00 PM
|
#179 |
|
Zilvia Junkie
|
I went over to see the car and check how things were going again the week after wasnt quite as much as I was hoping for but there had still defiantly been big steps forward. The guard had been sanded back on the underside and re-glassed evenly making the fit tighter and the guard much more sturdy. It was also glued onto the car with epoxy resin before the glass resin had set so the new position on the car is where the glass will set. Rivets were applied for an extra tight fit as well.
A new fiberglass inner guard has been made and glued in bridging the gap between the new metal inner guard and new glass outer guard. There is still a tiny gap but this can be filled with sikaflex. Very happy how its turning out there is still alot of sanding and probably a light skim of bog through the panel to remove all the waves and give it a nice glassy finish once painted. I was trying to organise with Jimmy to go over and check it out and show him what lay in stall for us to work on. Some pics. 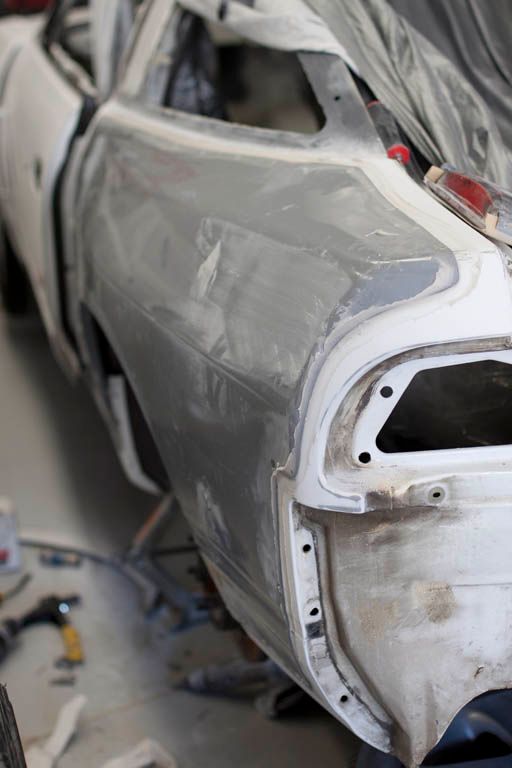 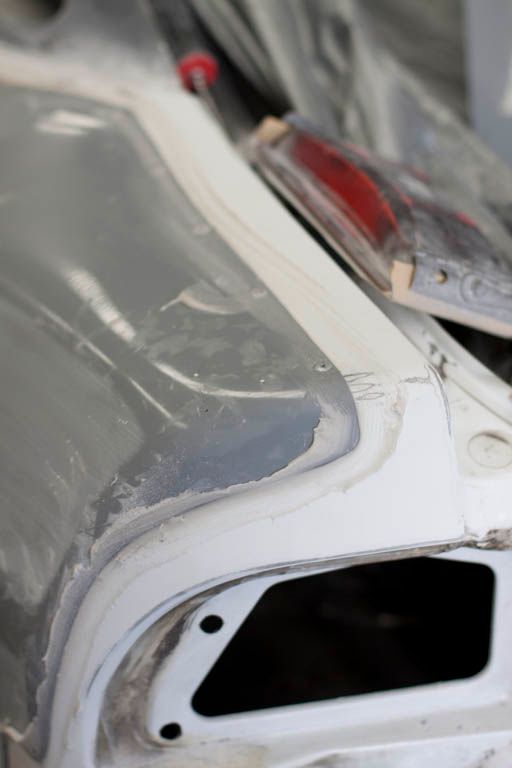 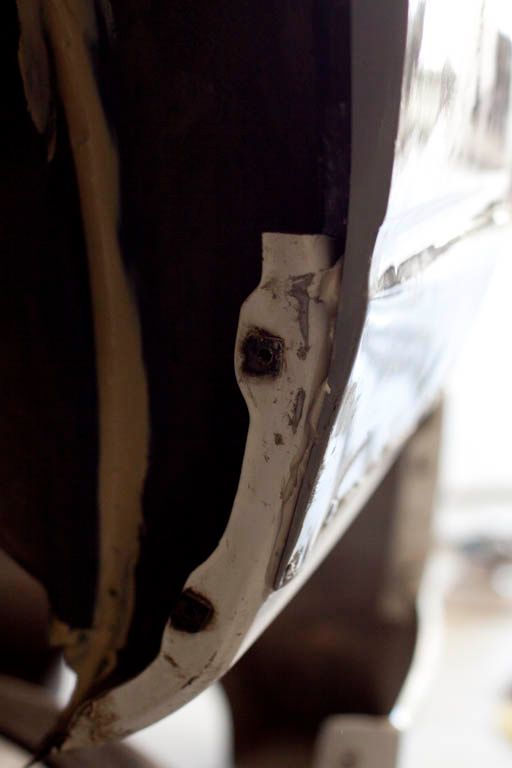 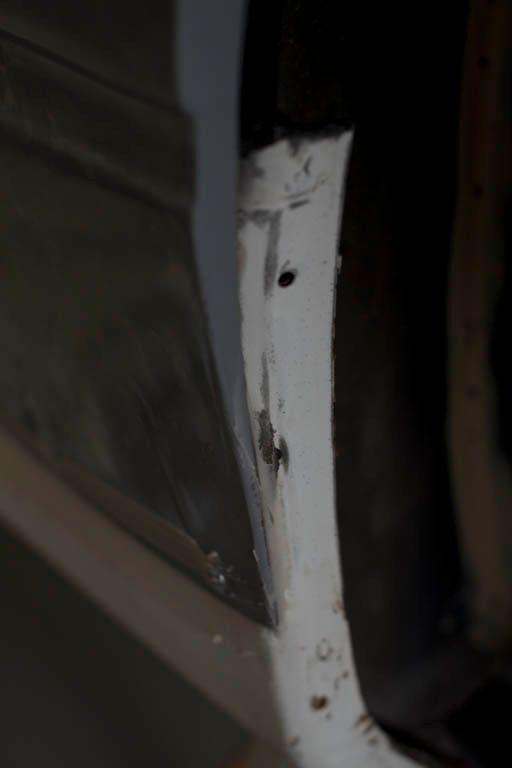 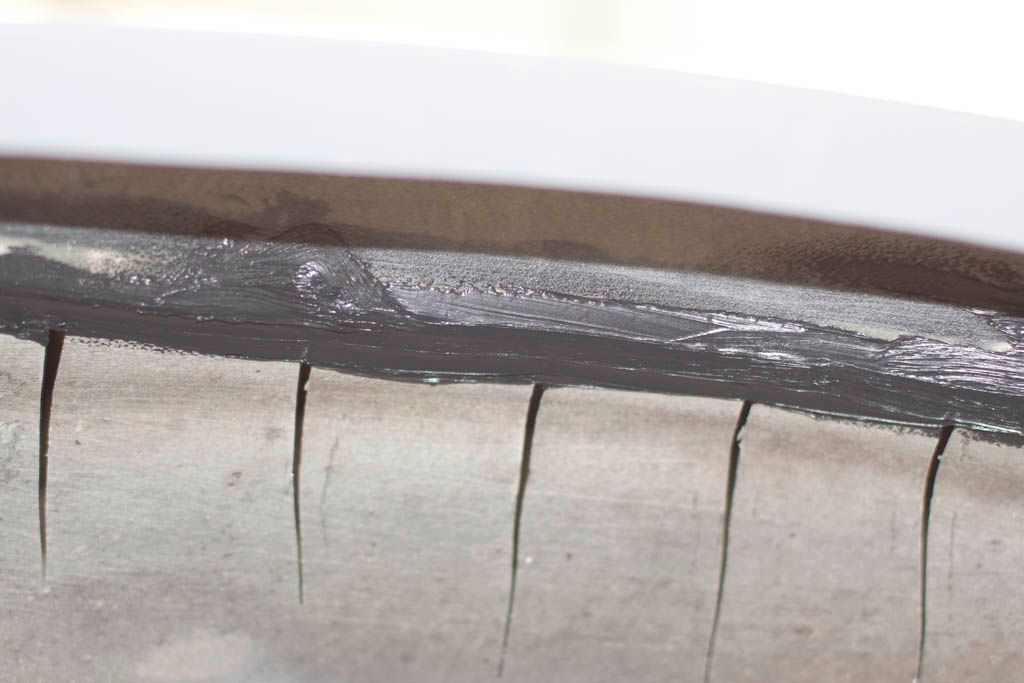   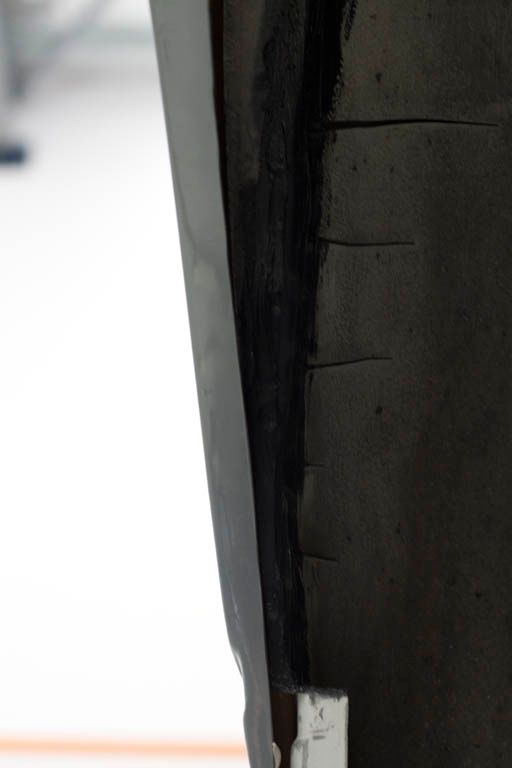 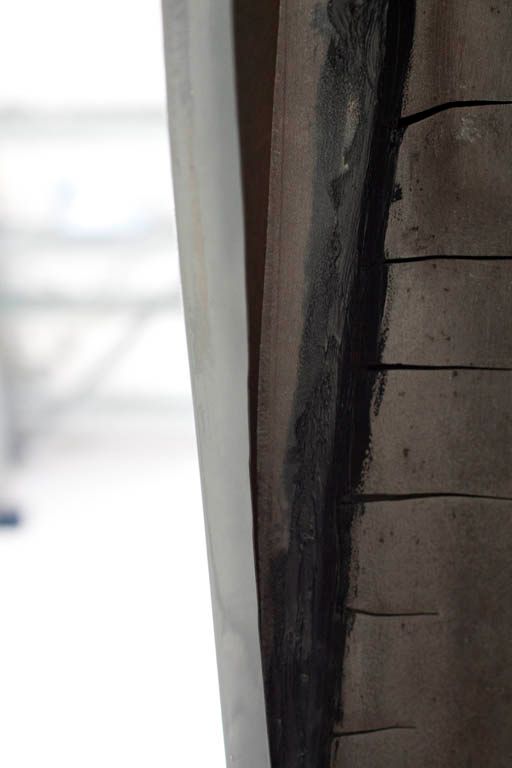 More soon. =) |
|
|
|
|
07-14-2012, 07:05 PM
|
#180 | |
|
Zilvia Junkie
|
Quote:
|
|
|
|
|
|
| Bookmarks |
|
|


 Linear Mode

