|
|||||||
| Tech Talk Technical Discussion About The Nissan 240SX and Nissan Z Cars |
 |
|
|
Thread Tools | Display Modes |
 06-04-2007, 03:47 PM
|
#31 |
|
Oh, I thought you meant how did we extract them... Yea, for mine I just sprayed some break-away on it and put a breaker bar on it... it took a lot of force, but the other 3 just broke loose... then the one just felt like it was coming and then the breaker spun around and the nut and part of the bolt dropped out...
|
|

|

|
| Sponsored Links |
|
06-04-2007, 09:42 PM
|
#32 |
|
Well, I worked on it for a couple hours and made little progress. I'm glad I had the pictures in this thread to go buy, I didn't have to do any measuring to drill the hole... however, the bolt wouldn't press out like i planned, so I began drilling it. i made my way up through the bits to about 1/2 inch and then i ran out of bits! so tomorrow im going to borrow some more larger drill bits and start again... ive got to be pretty damned close to getting the head of the stud off, so once that happens ill attempt to hammer it from the top I guess....
|
|
|
|
|
|
06-05-2007, 10:10 PM
|
#33 |
|
Well guys... worked on the car again tonight with bigger drill bits and STILL no luck... I drilled the crap out of the stud head and i cant for the life of me figure out why it wont bust loose... im running out of ideas... any help would be much appreciated!
|
|
|
|
|
|
05-04-2009, 10:50 AM
|
#34 | |
|
|
Quote:
|
|
|
|
|
|
05-04-2009, 12:27 PM
|
#35 |
|
Zilvia FREAK!
 
|
^^^yes
From the inside of the car soak the stud head in PBblaster, maybe grind up some candle wax and dump it in the 2" hole. Use a torch and heat that sucker up untill it breaks the bond with the chassis. Same concept as changing out your wheel studs. I still need to do this on my S14, which I fear is almost 2x harder to do than an S13 for the rear since you have to drill into the frame rails. Proceed to get solid subframe bushings -not spacers and get a bolt that will fit nice and snug inside the aluminum bushing. This way you have a larger thread to work with. Maybe get a grade 10.5 bolt. Use some washers to space out the pressure Installation is super easy, get one person in the car with a breaker bar to hold it in place, then you get under the car and torque it to spec. If it ever snaps in the future you can swap the bolt out in 5 minutes. I would leave the 2" hole -champfer the edges for paint and just put some rust bullet on that sucker. done and done This thread should be archived - anybody know the exact point to drill on the S14 chassis for the rear studs? I thought nissan put some kind of dimple marker. |
|
|
|
|
05-04-2009, 12:37 PM
|
#37 |
|
Zilvia FREAK!
|
Your going to need to drill a 2" hole above the studs. Do me a favor and take a picture if you do get it right, i need to know where you drill.
Lots of heat, use 2 cans of pb blaster and soak that mofo like crazy. Dont just spray it all at once, use it in cycles. Soak, let sit for 5 minutes, torch the crap out of it evenly, imediatly soak again, let sit etc etc. That will be the majority of the work. I live in the rust belt, you have no idea the types of seizing ive encountered. Do it enough and you can start to see the candle wax or PBblaster bubbling out of the hole. Thats how I snapped the subframe stud. I didnt use enough heat and pb blaster, went to quick. Next time I touch the studs, Ill head/soak untill I see the pbblaster bubbling out of the nut/threading. either way, the stud was on its way to the grave, if you look at the stud where it snapped, its usually rusted through. Excellent time to replace the stud with a grade 10.5 bolt and never worry again. Use some antiseize if you plan to do any subframe work. or use loctite if you dont plan to drop the subframe again (which if you do, use lots of heat to break the loctite bond.) |
|
|
|
|
05-04-2009, 03:40 PM
|
#39 |
|
Zilvia Junkie
 
Join Date: Sep 2007
Location: Germany
Age: 37
Posts: 371
Trader Rating: (0)
  Feedback Score: 0 reviews
 |
here's what i would do:
1.measure one of the intact studs. 2. take measures to a machine shop and get another one fabbed up (without the knurls (sorry, don't know if thats what its called)). 3. slide fabricated stud in from the top. 4. weld the new stud to the frame that would probably be the best solution if you're not able to source another one anywhere. |
|
|
|
|
05-04-2009, 07:43 PM
|
#40 |
|
Zilvia FREAK!
|
or just get a fatter bolt, which would probably last longer. I wouldnt even weld in a stud, what happens if that one snaps? At least get a flangenut bolt the same size of the fat portion of the stud, get someone with a breaker bar to hold it in place while you torque from the bottom.
|
|
|
|
|
05-05-2009, 12:10 PM
|
#43 |
|
Zilvia FREAK!
|
It will get done, dont drill, just keep soaking the stud on both sides...did you drill a 2" hole on the other side where you can draw the stud out? Heat the stud, I usually put my hand on the gas tank to see if the heat is reaching the tank. If you have a decent torch you shouldnt have to worry since the heat is directed.
After you heat the stud A few times, heat the metal around the stud. Dont pound to hard because you dont want to warp the hot sheetmetal. All the heat is doing is breaking the bond, and giving the pbblaster room to work. Hit it dead on- straight up, if you hit it at an angle you could pound your ass off, and it wouldnt budge. |
|
|
|
|
05-05-2009, 12:33 PM
|
#44 |
|
Zilvia Member
 Join Date: Jan 2008
Location: bonertown
Age: 43
Posts: 254
Trader Rating: (1)
Feedback Score: 1 reviews
|
cant really help much with your problem but ive always started spraying the crap out of it with deep creep everyday a couple times a day a week before i want to pull that nut off the stud if its super rusty. just for future referance lol.
|
|
|
|
|
06-09-2009, 02:05 PM
|
#46 |
|
Leaky Injector
|
^^ yea, however did you drop the subframe? or are you just pounding the bolt with the subframe in?
Usually the stud is seized to the subframe bushing. Alot of heat and candle wax usually breaks it free if you have the subframe out, and a hole drilled |
|
|
|
|
06-09-2009, 05:09 PM
|
#48 |
|
Zilvia FREAK!
|
Its just like a wheel stud, it may be siezed, thats why you need to use a full propane torch and about 2 bottles of pb blaster. Heating and cooling will break the rust. Grab a few bottles of compressed air so you can flip it upsidedown and freeze the stud after you torch up the studs surrounding area real nice.
Or just freeze the stud with something like dry ice and then blast it with the torch. You have to alternate. I had a strut bolt sieze 2 days ago, it was fully rusted through the spindle. I had a 5lb sledge adn it wouldnt budge. I torched the surrounding cast iron and cooled the bolt with some pbblaster. Did that cycle for about 6-7 hours and finally it started breaking loose. Once you unseize a couple bolts/studs you will get the trick down. I found the candle wax works amazingly. So in short to technically break the bond you want to; Heat the surrounding metal up real nice, since its completely bonded via the rust/corrosion, the stud will also transfer the energy, however when you blast the stud it self with the compressed air upsidedown, you make a difference in temps. Do this enough to break the seal between the sheetmetal and the stud. Use the pbblaster to penetrate through the rust. |
|
|
|
|
07-05-2009, 09:15 AM
|
#49 |
|
|
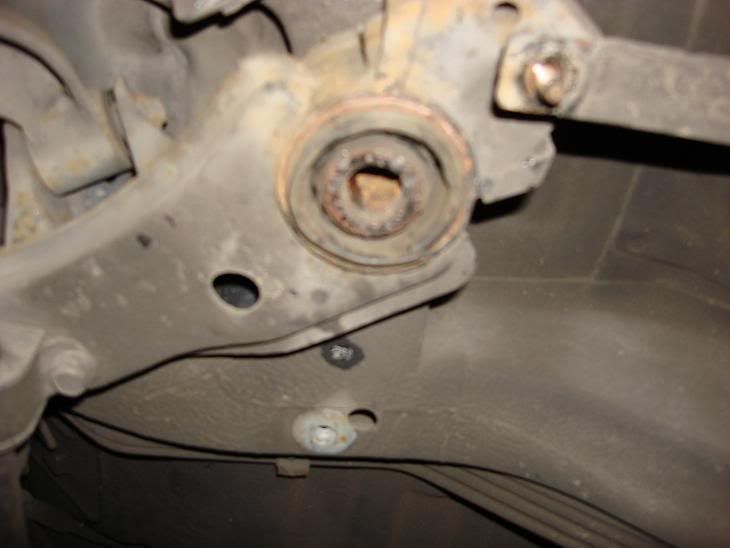
i think i figured it out after recieving a replacement stud tht was cut out of a parted car
the plate that is welded to the frame is holding the stud down and therefore would have to get the plate removed to get the stud out...lookin at the pic from the s13 doesnt have a plate so it popped right out...hopefully after months of waiting ill get this fixed on friday |
|
|
|
|
07-28-2009, 12:51 PM
|
#50 |
|
|
ok so after mnths of struggling with this. i got the stud from a part out.
yesterday i took it to this kick ass classic car restoration shop and got them to deal with it. 2 hours later i left with my baby back to normal. for 1 that stud is a bitch to get out even with heating and pounding it took 1.25 hrs till it popped out and what he ended up doin was using an air chisel and beating away the head then putting a metal pipe over it and a bottle jack under it and beat the hell out of it till it popped. yes it is just like a wheel stud but a hell of alot stronger. after that he cut the weld from the washer and the rail from the part i got and dropped it in welded and it was over.. FINALLY Pics (in random order) for those who need reference : 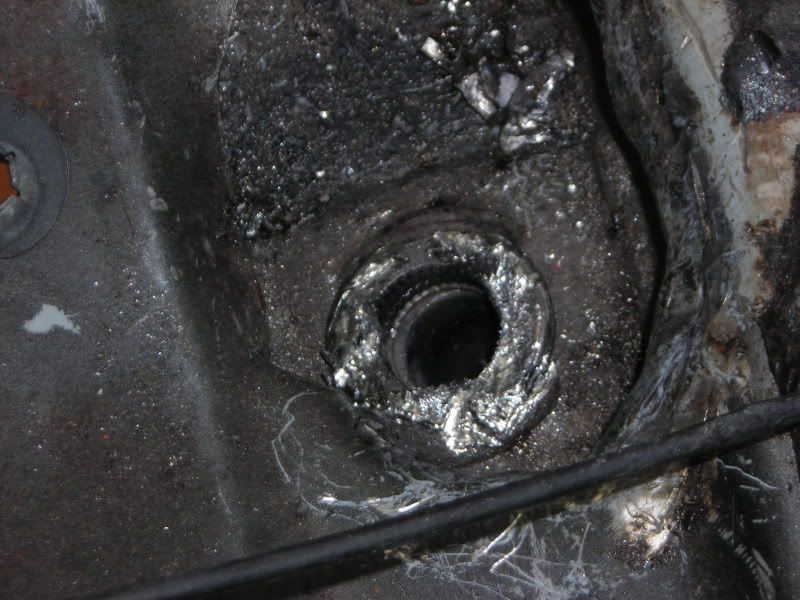 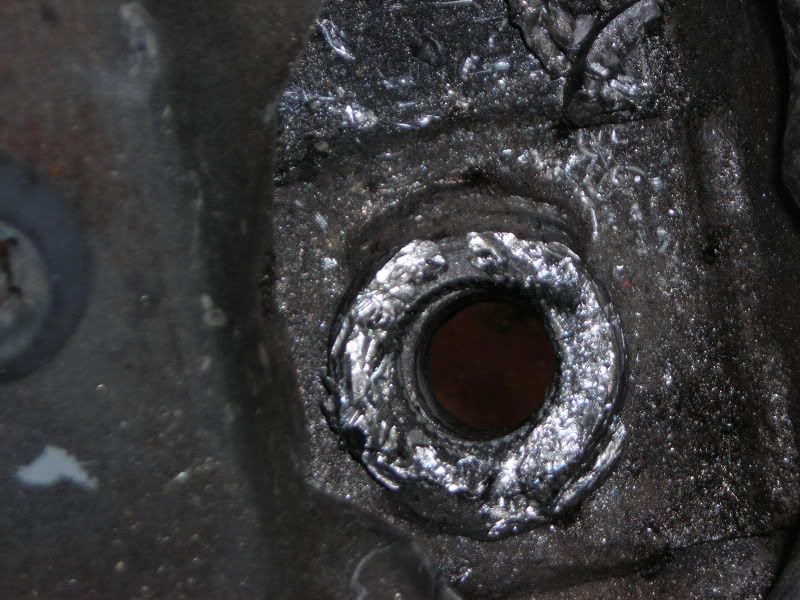 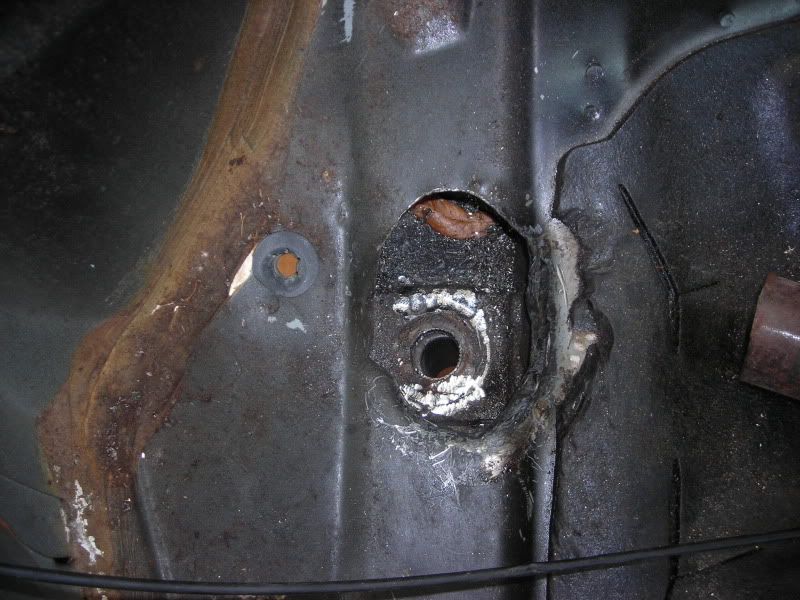 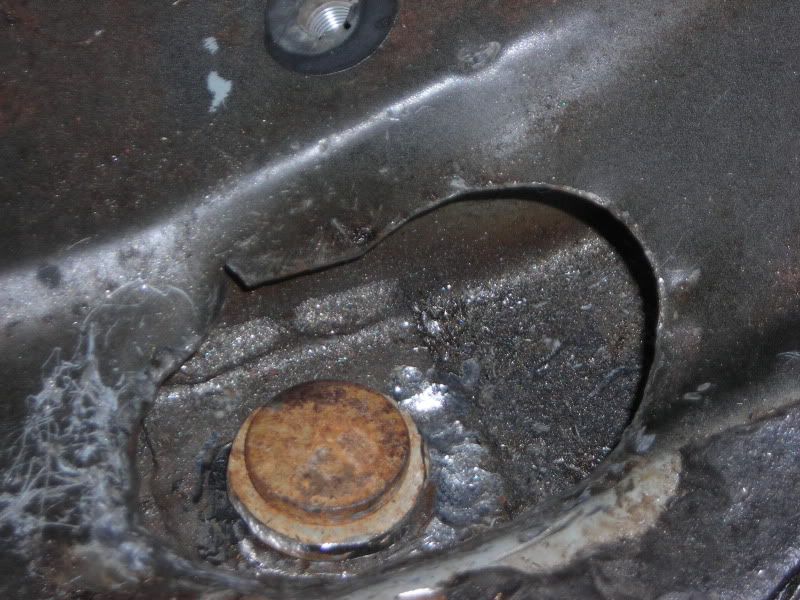 Finished product !! 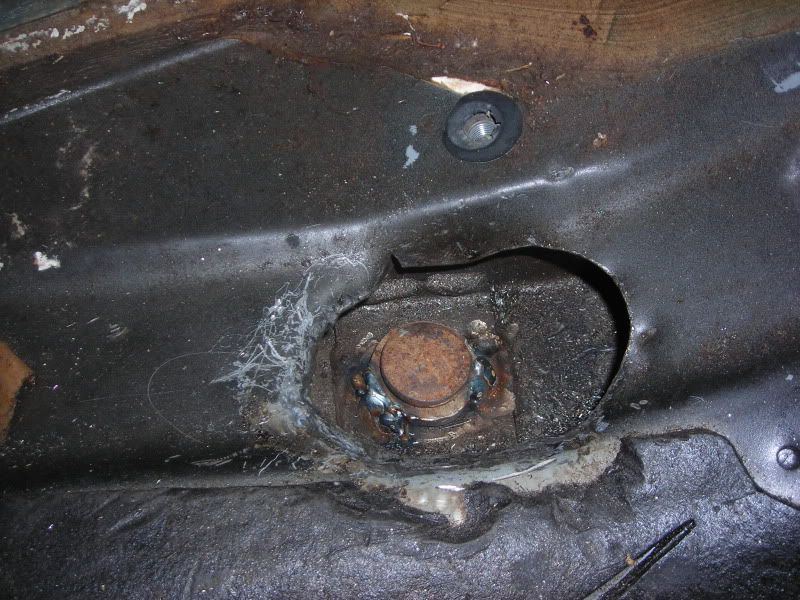 |
|
|
|
|
07-28-2009, 09:53 PM
|
#53 |
|
Zilvia Addict
 |
Thank you guys for this thread. Before I forced tighten the nut after installing new subframe collars, I searched for this thread incase I snaped the bolt. The nut was being stubborn while i was trying to tighten it with a breaker bar, and I see and opening to the other end of the stud incase of a snap.
|
|
|
|
|
| Bookmarks |
|
|


 Linear Mode

