|
|||||||
| Builds (and builds only) Got a build thread? It goes here, build threads anywhere else on the forum will be locked and never moved. |
 |
|
|
Thread Tools | Display Modes |
 09-25-2013, 09:04 PM
|
#1 |
|
Leaky Injector
|
DarrenB’s 1uz Itasha zenki s14 build
Hey everyone, decided to do an s14 build. A little background information about myself, I have no formal education on working on cars but since the beginning of high school have always been working on building cars. I have learned a lot through experience and reading up . I have dabbled in drifting in the past but never had the funds to forgo it. I’m now 26 years old and have decided to finally build my dream zenki s14 in my house garage to test my knowledge and passion for building cars.
I would like to also give a big thanks to Touge Factory, powered by max, Brett Collins, SNTRL, Diamond Vinyl, Broken motorsports, and my friends for being a big support in my build. When I first got her, just a shell and a hideous lime green engine bay. 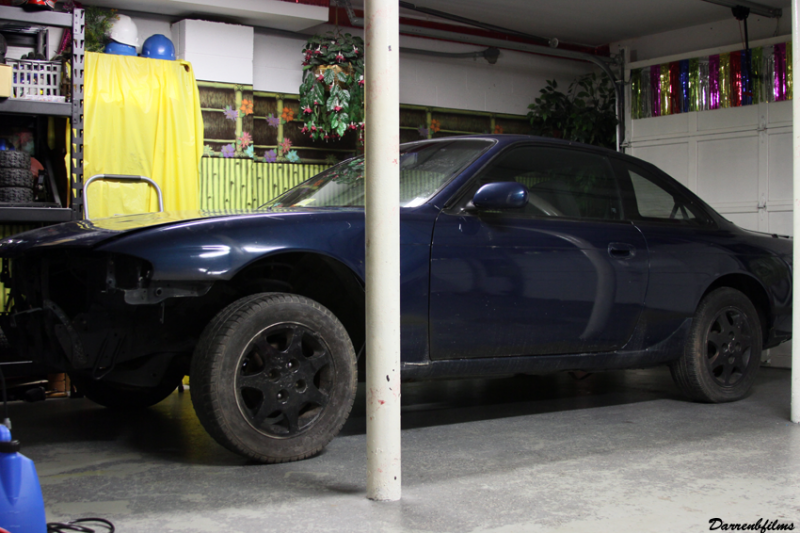 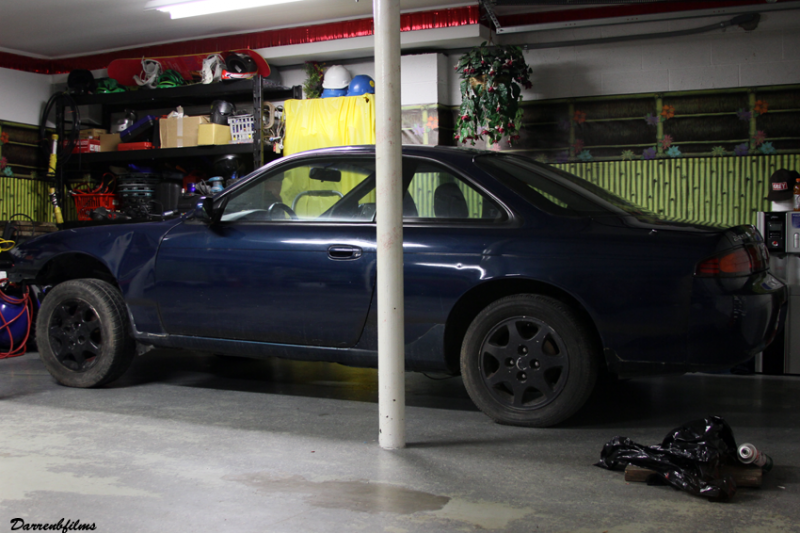 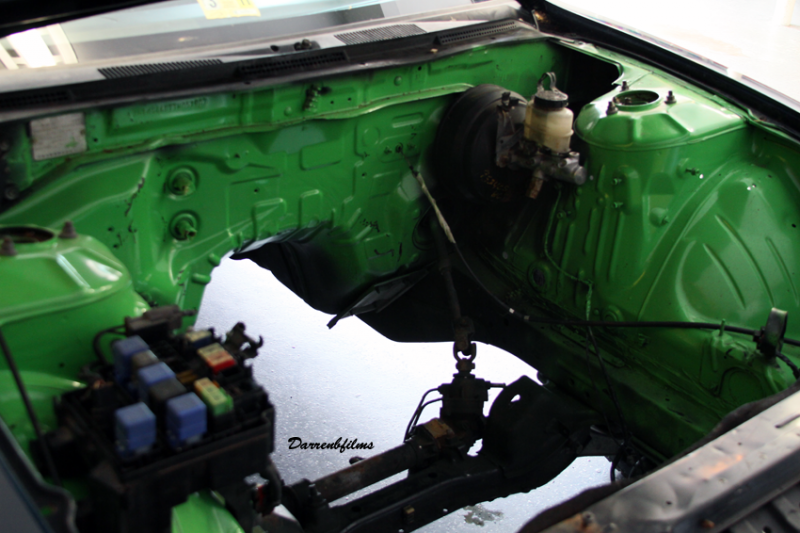 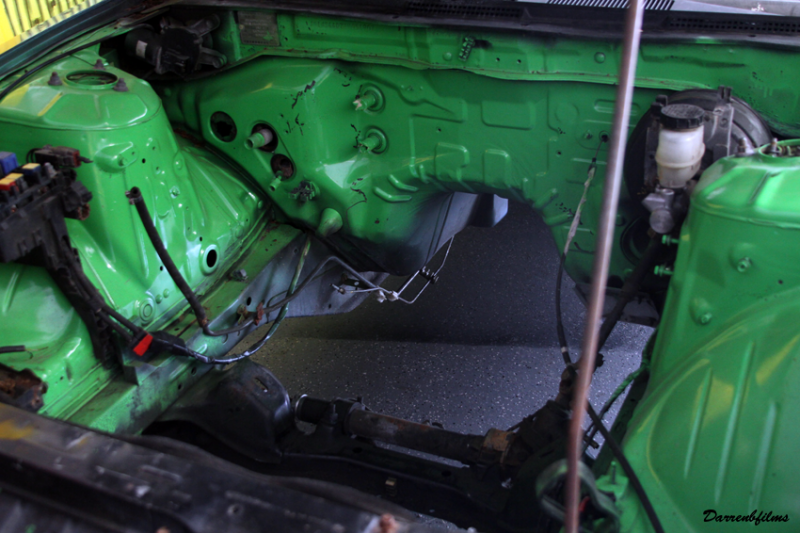 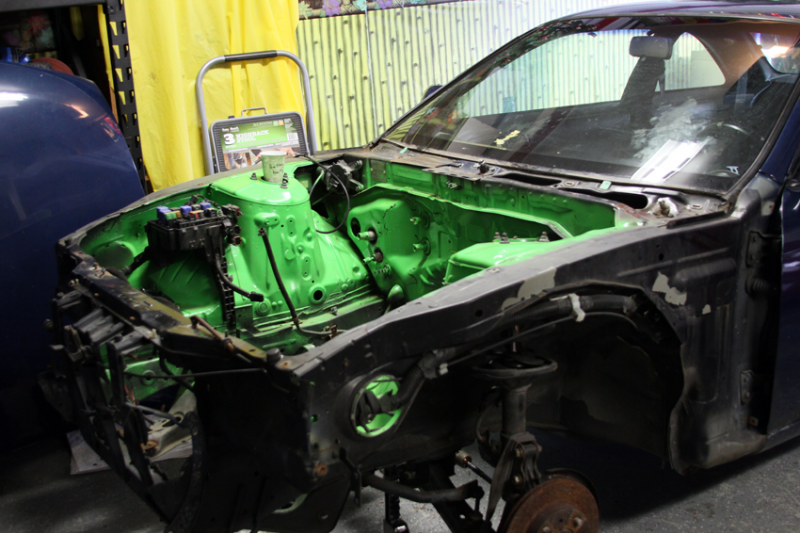 The full interior  Started stripping the interior and the chassis harness since I’m doing a switch panel 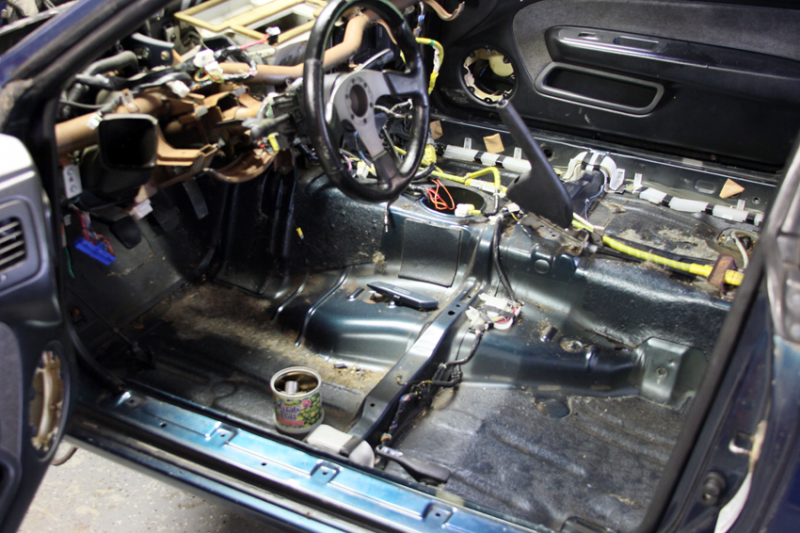 Took out the rear and gas tank and started rust proofing/removing rust on the undercarriage. 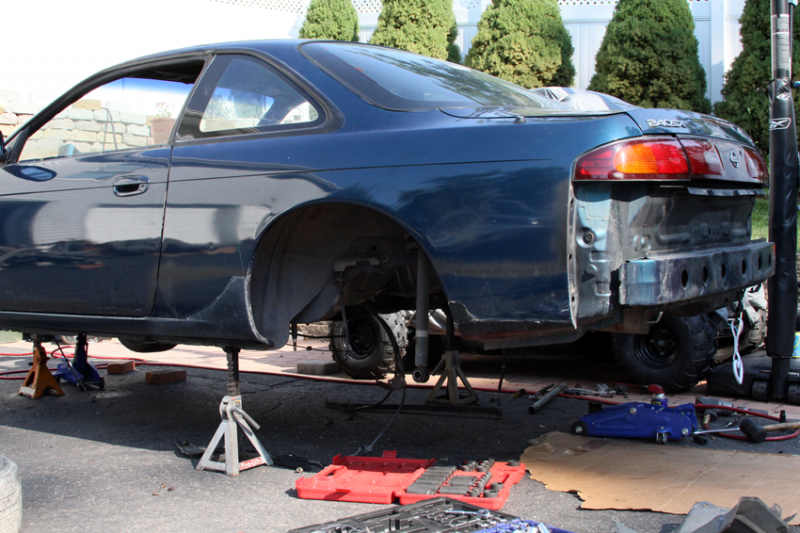 Undercarriage wasn’t bad at all 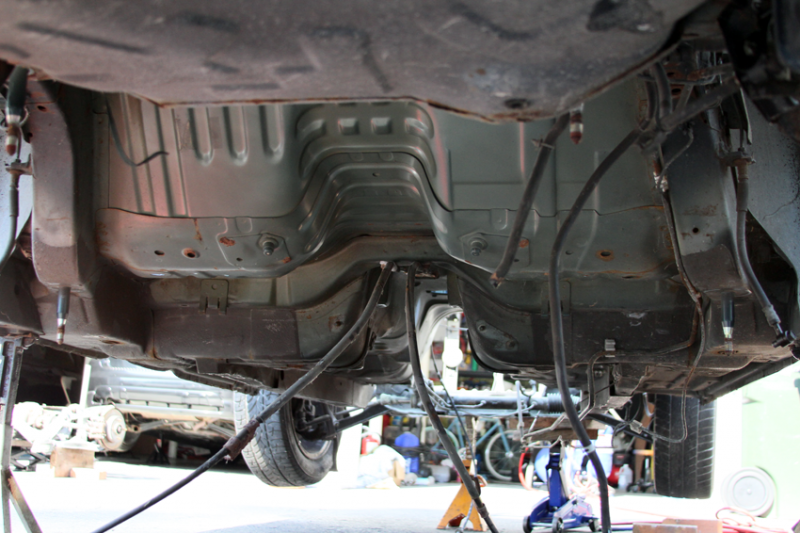 Blasted and metal washed. 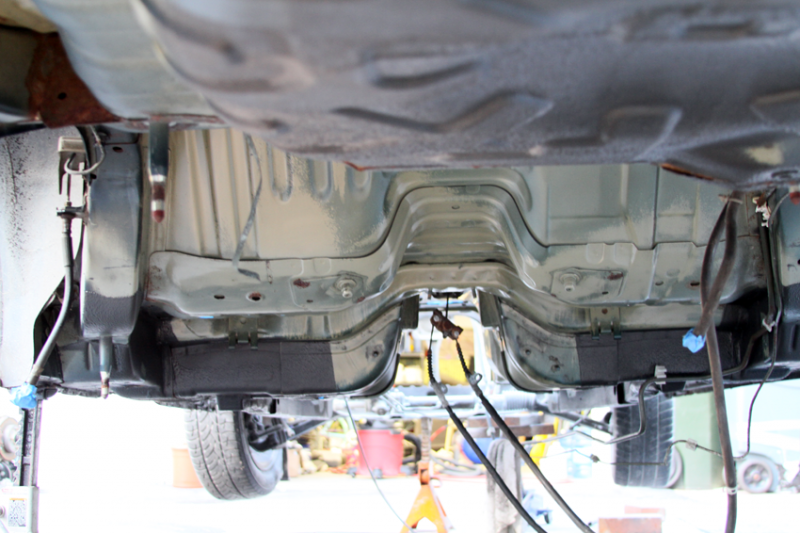 Por15’d 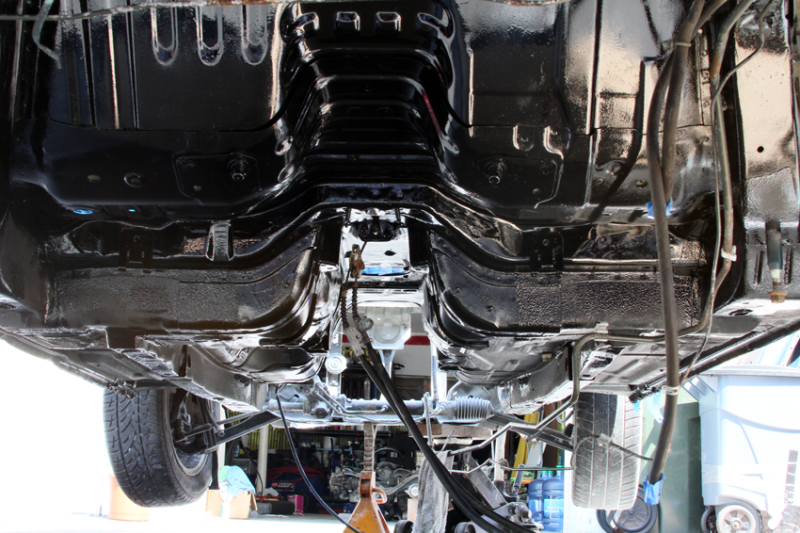 Did a restoration job on the gas tank Before: 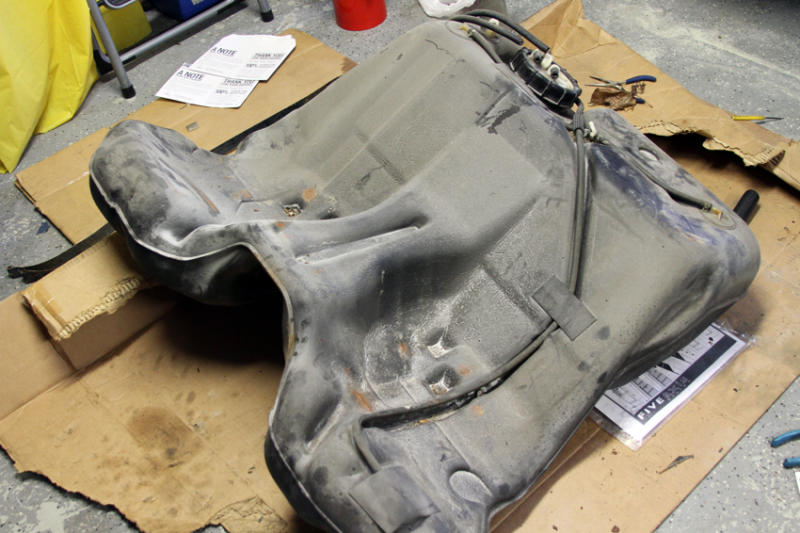 After: 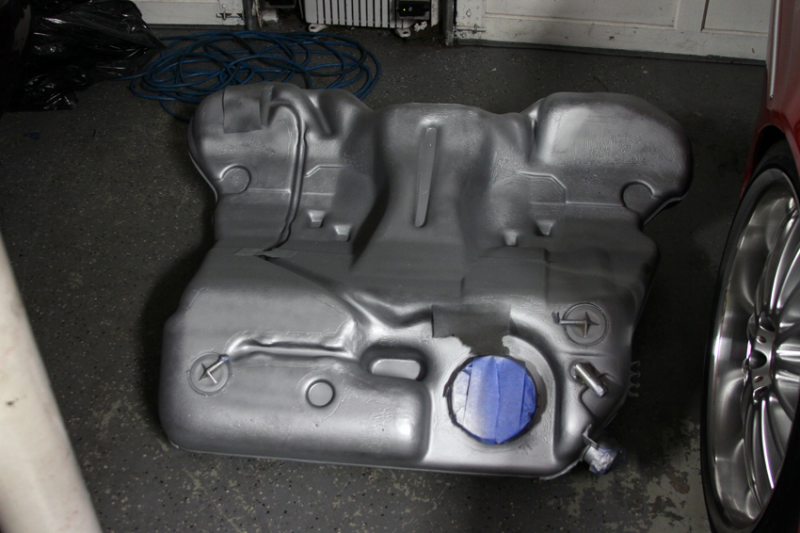 Did the same to the heat shield as well Before: 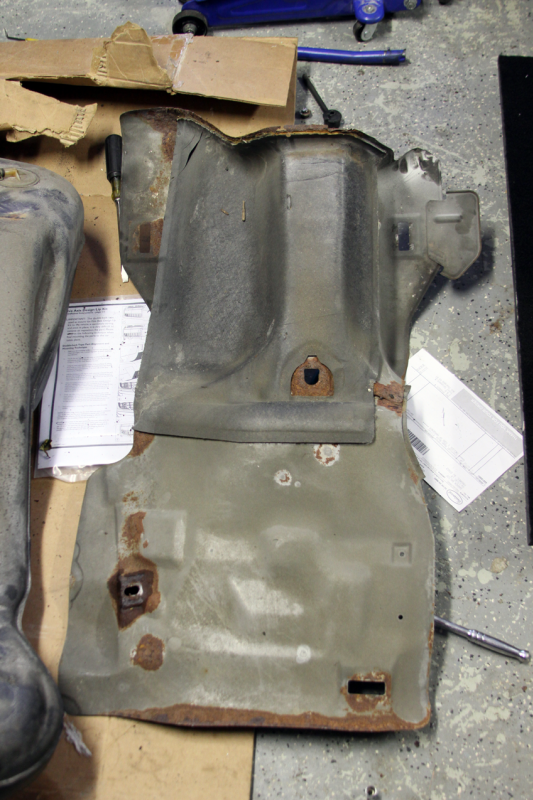 in process: 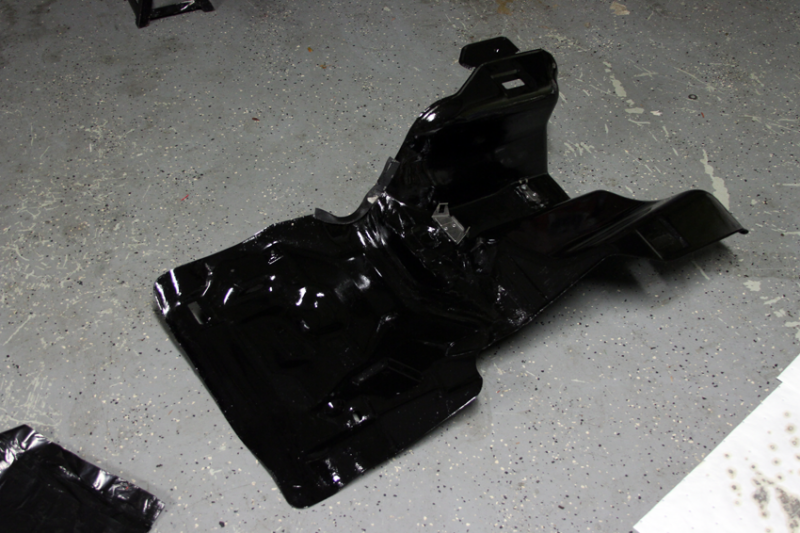 After: 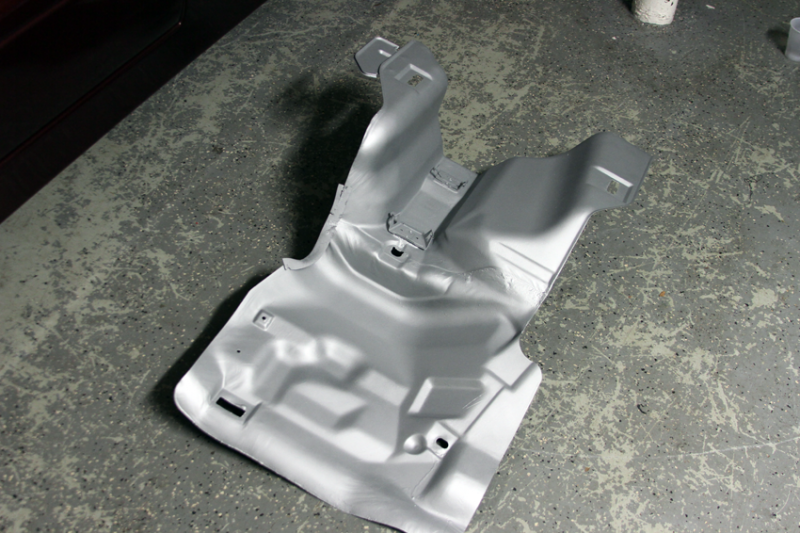 Next it was roll cage time, I’ve welded a few times but don’t have easy access to bending tools and metal. So I decided it was more cost effective and easier to have a place that specializes in building cages do the Job. I trailed the shell to my friend Bill over at Broken motorsports and had the cage with NASA rules, FD reg and my specs built. 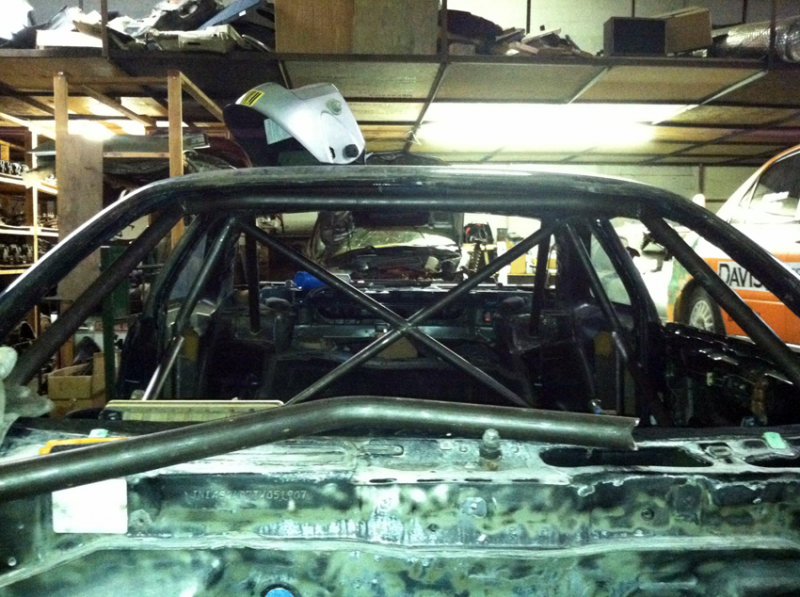  While the car was at the shop I decided to work on the 5 lug hubs I purchased, the rear were used and the fronts were new. New bearings, and cleaned them up 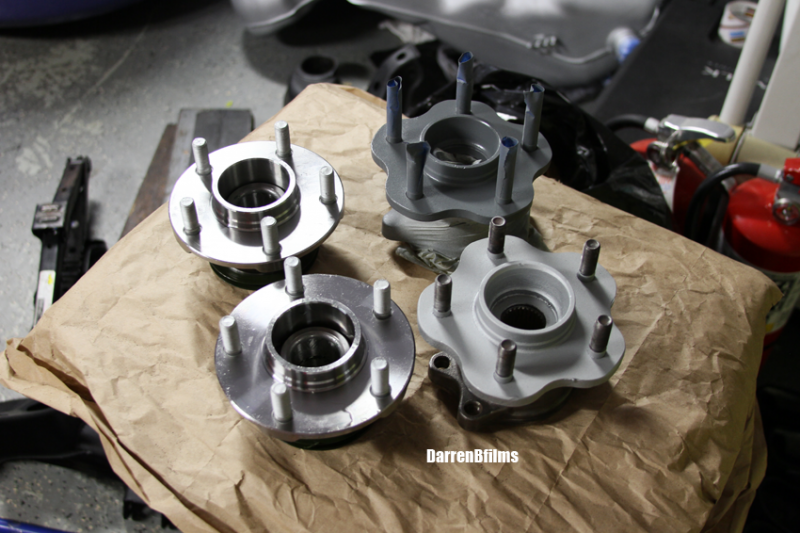 Now parts started arriving. My whole suspension is all PBM with the exception of the RLCA, rear traction arm, and rear knuckles. Some of the first parts that came in 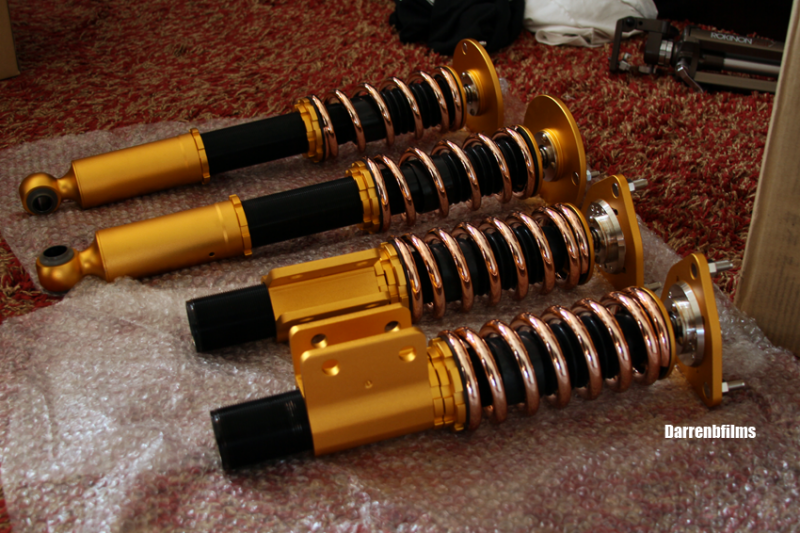 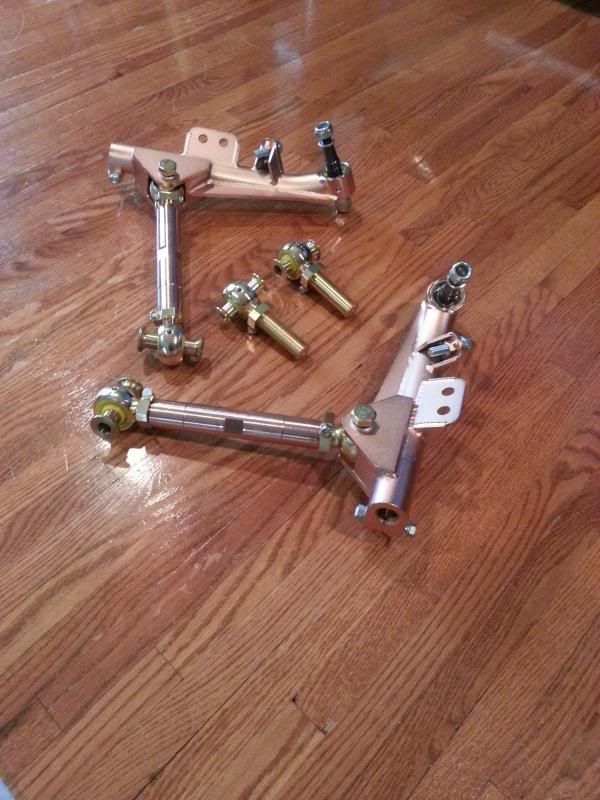
__________________
@phoshizzl3 Last edited by Darrenb; 09-28-2013 at 11:17 PM.. |

|

|
| Sponsored Links |
|
09-28-2013, 11:12 PM
|
#2 |
|
Leaky Injector
|
I originally decided to go with an rb25det and did research and found that the 1uz would fit my needs better, wasn’t looking for anything to crazy in hp. I wanted something with good torque, light, and budget friendly.
Picked up the motor and the transmission 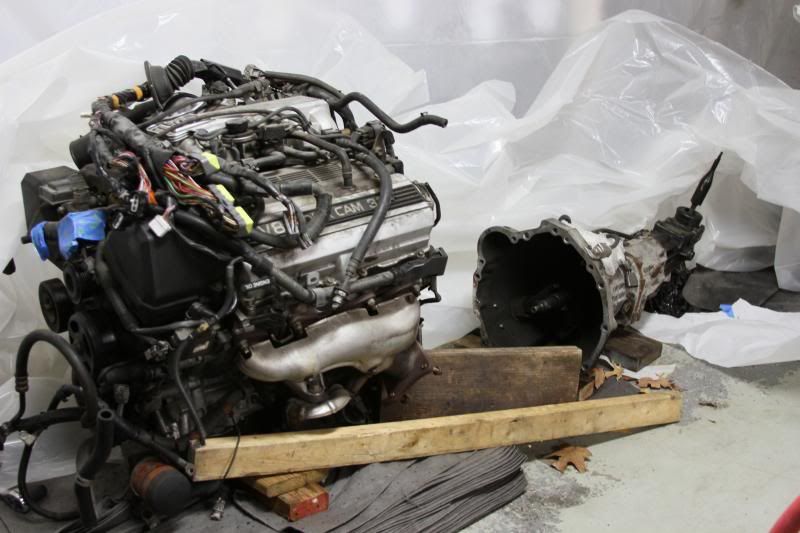 I finally got the car back and decided to start painting the interior. I went with the Toyota super white 2 paint. 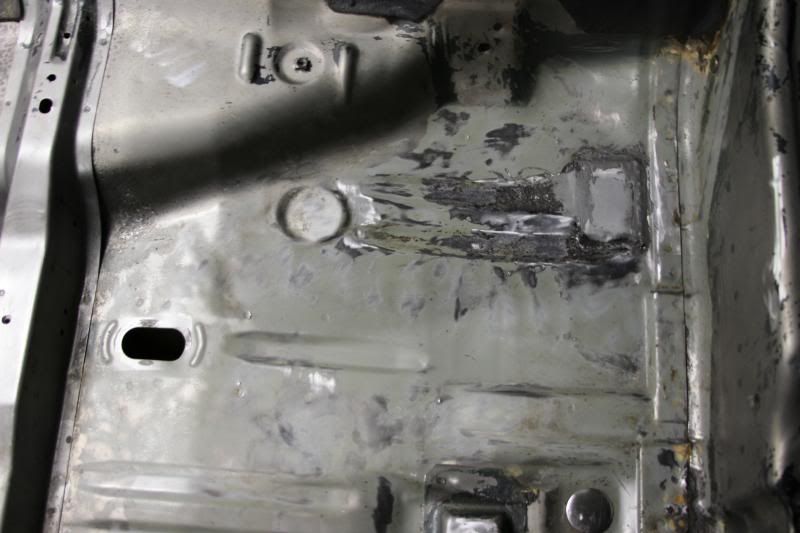 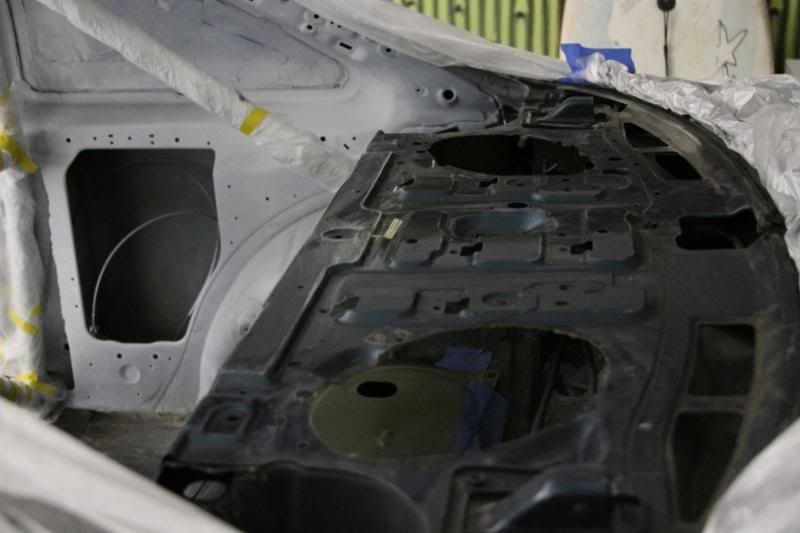 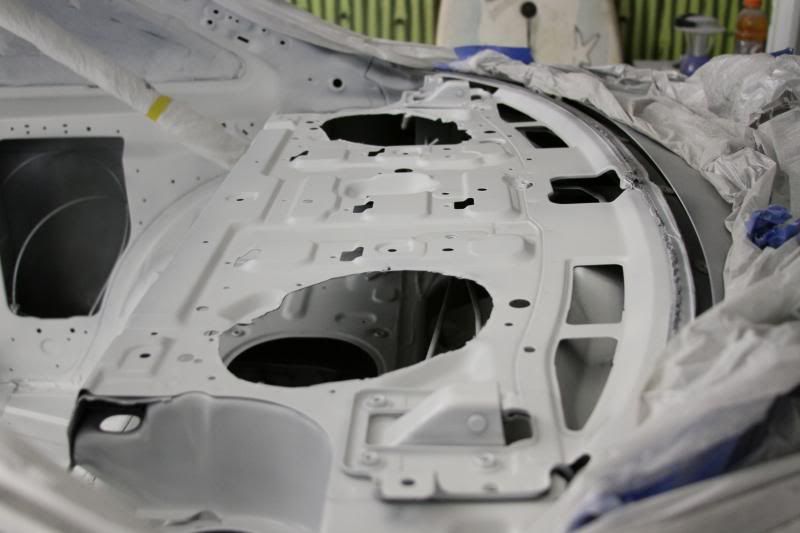 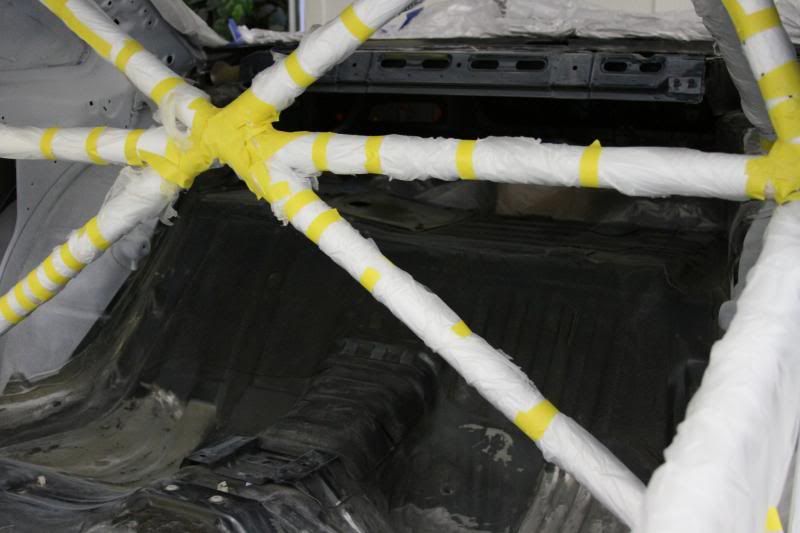 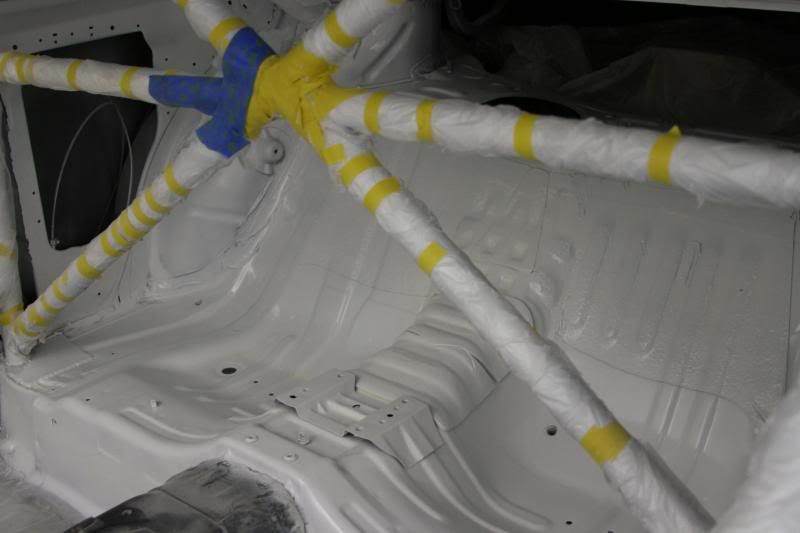 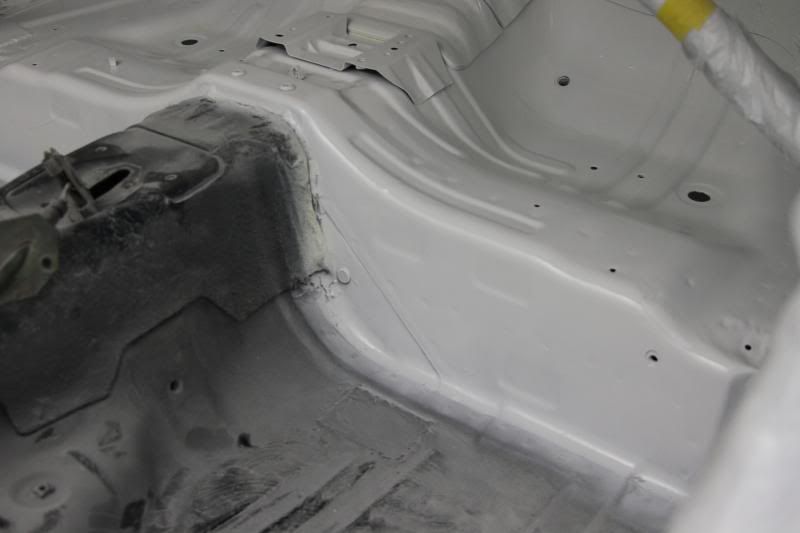 por15’d the floor 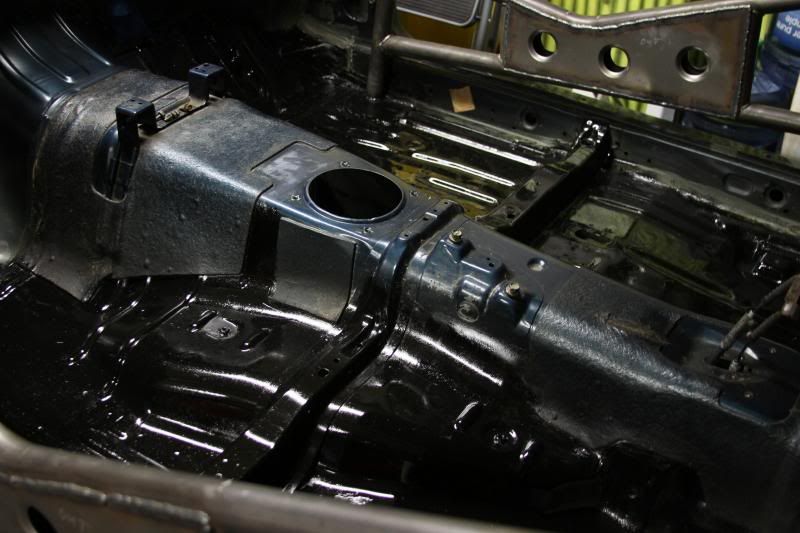 floor painted 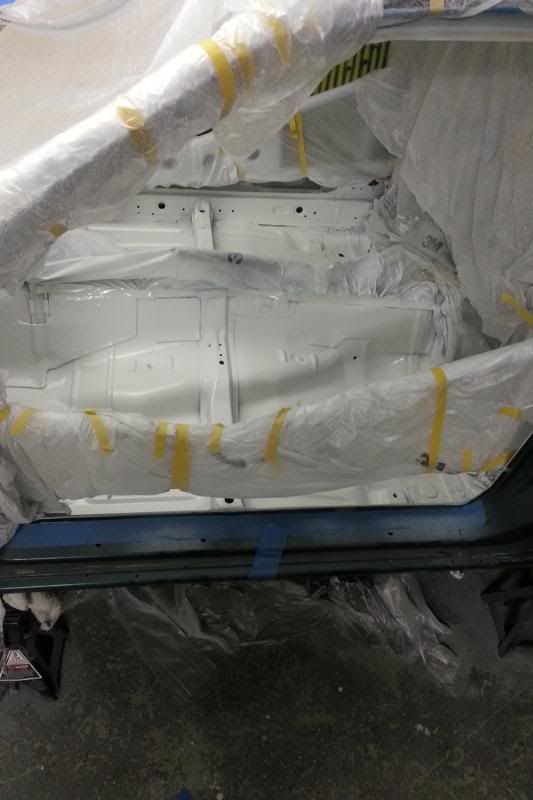 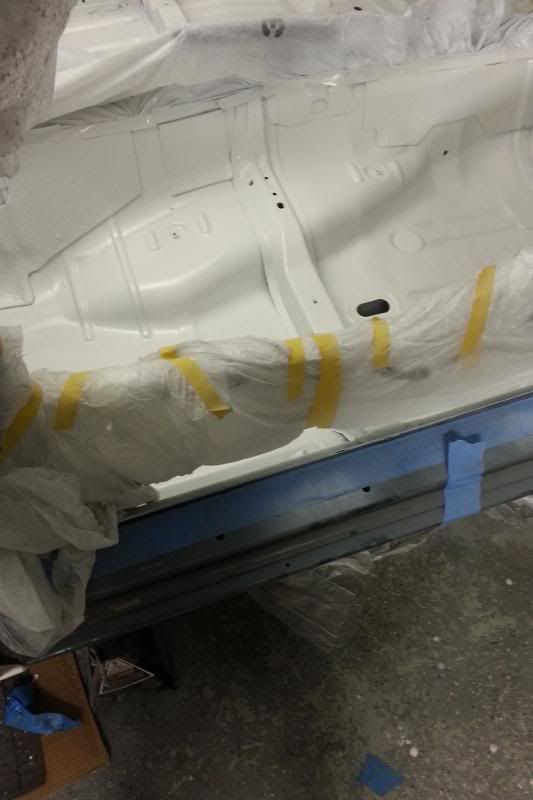 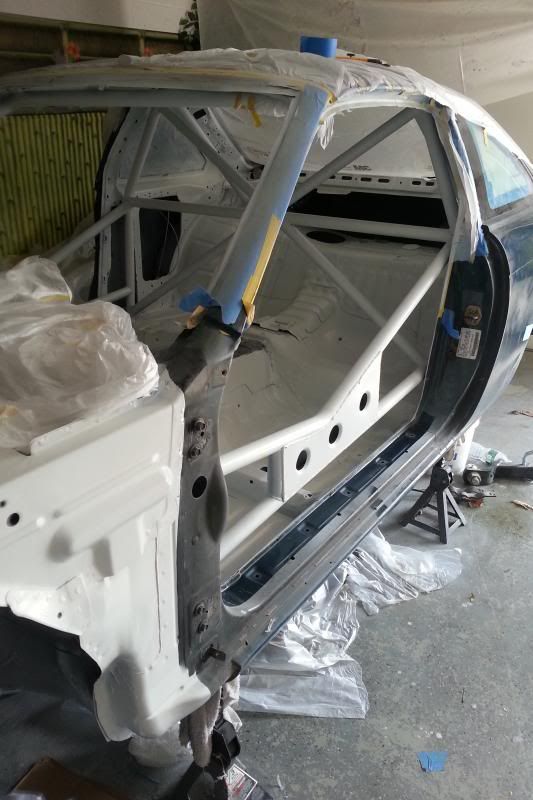 Did he dash support as well. 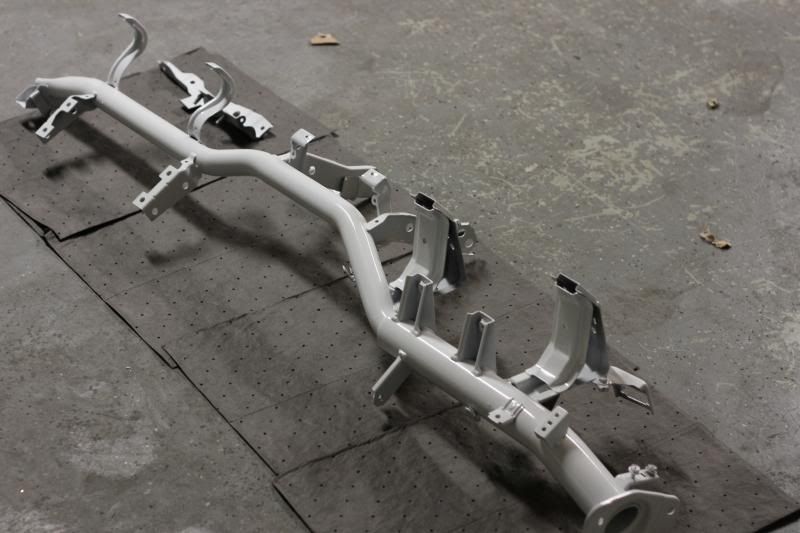 Also did the engine bay as well, cut out tubs and had broken motorsports put in brace bars. I media blasted that hideous green bay and welded most of the holes shut. Unfortunately don’t have any pictures of the bare bay. Primered 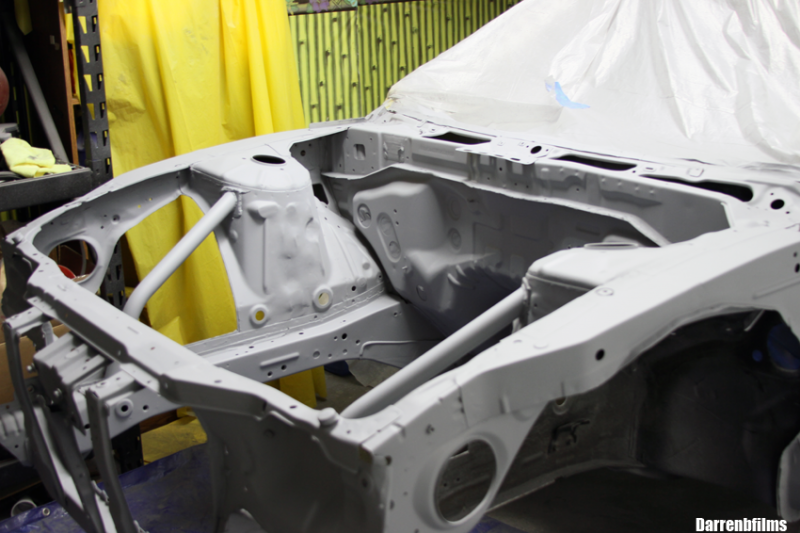 Painted:  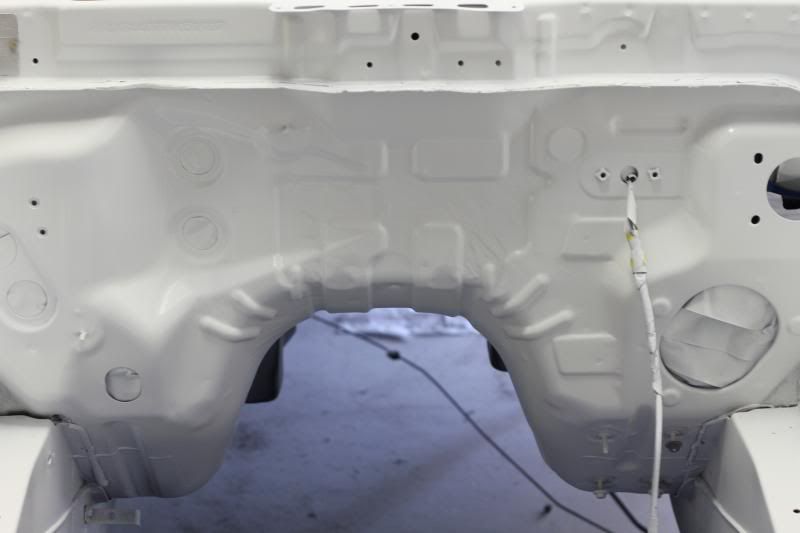 Worked on the subframe, had some rust. I removed all the rust, then coated it in gold 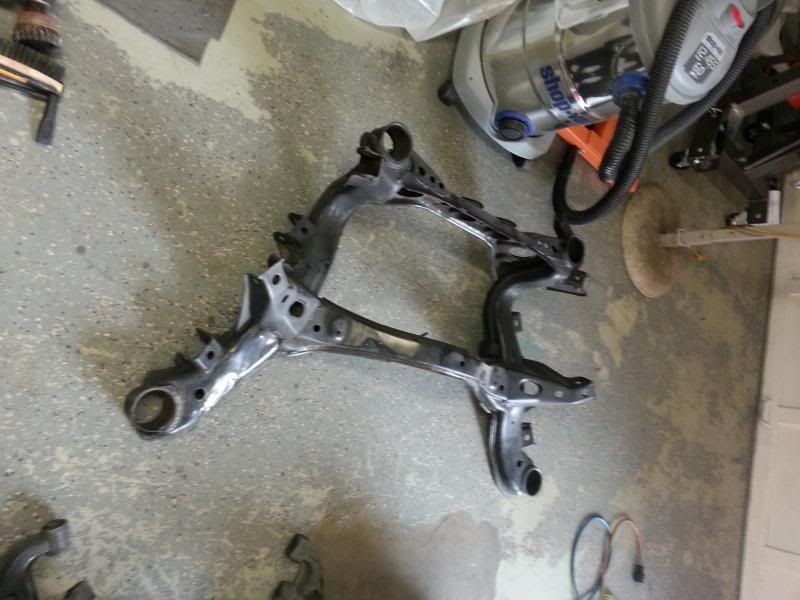 After with the PBM stuff on 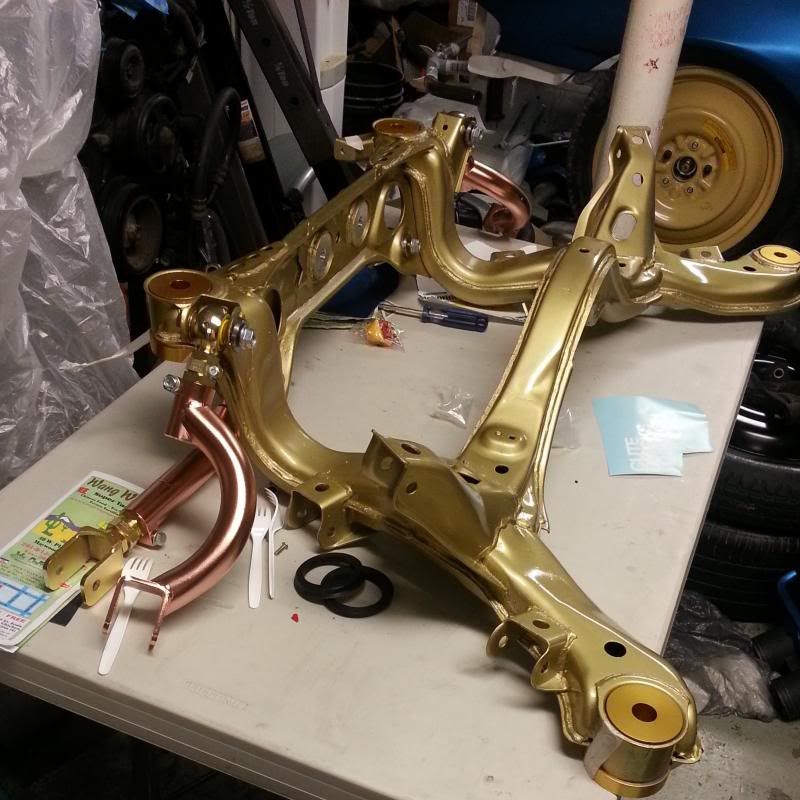
__________________
@phoshizzl3 |
|
|
|
|
09-28-2013, 11:19 PM
|
#3 |
|
Leaky Injector
|
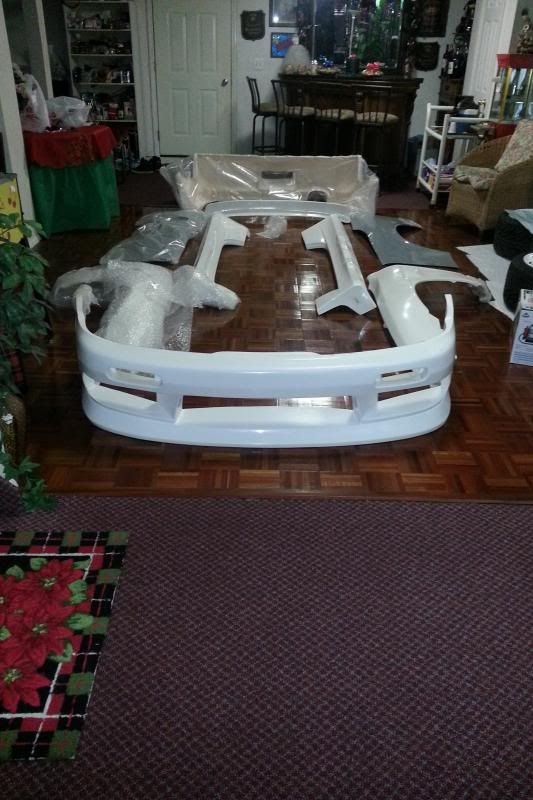
After a couple of months of waiting, the kit has finally arrived. It was a mix of the rocket bunny and origin body panels
 Yay, more goodies 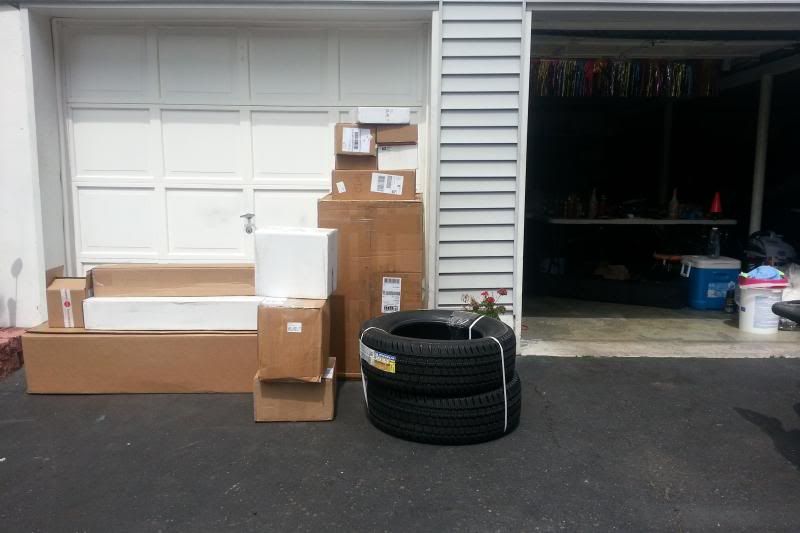 Got bored waiting on more parts and did a small restoration job on the steering rack and crossmember. cleaned up 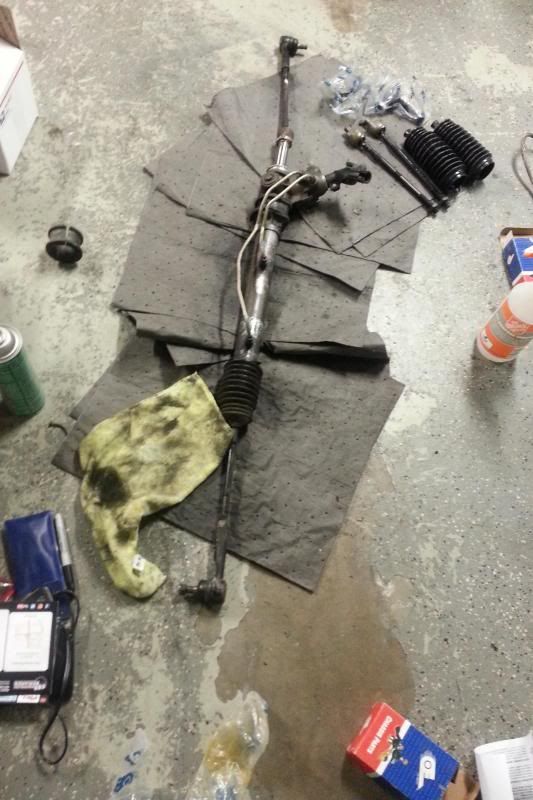 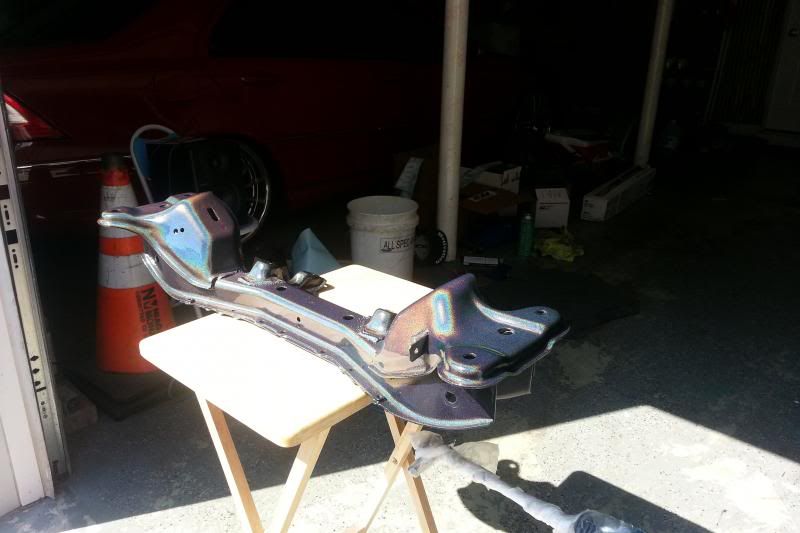 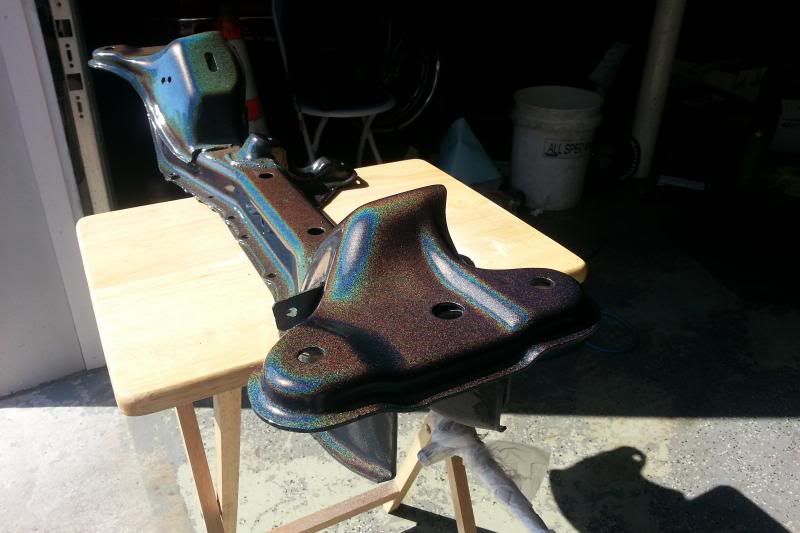 I finally test fitted the panels, some required some work to get them to fit well. 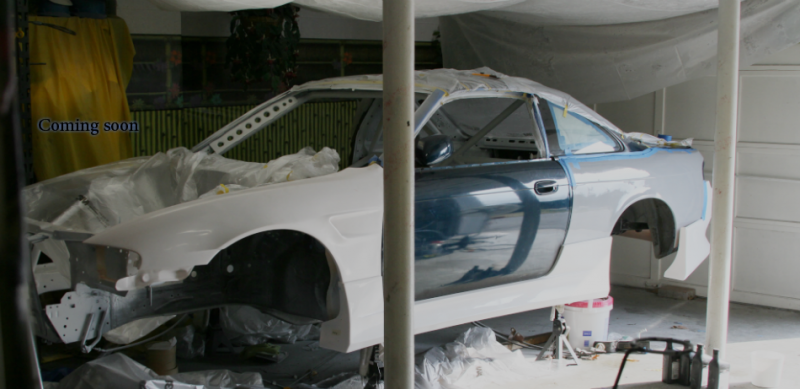 I then did work on the rear knuckles Before: 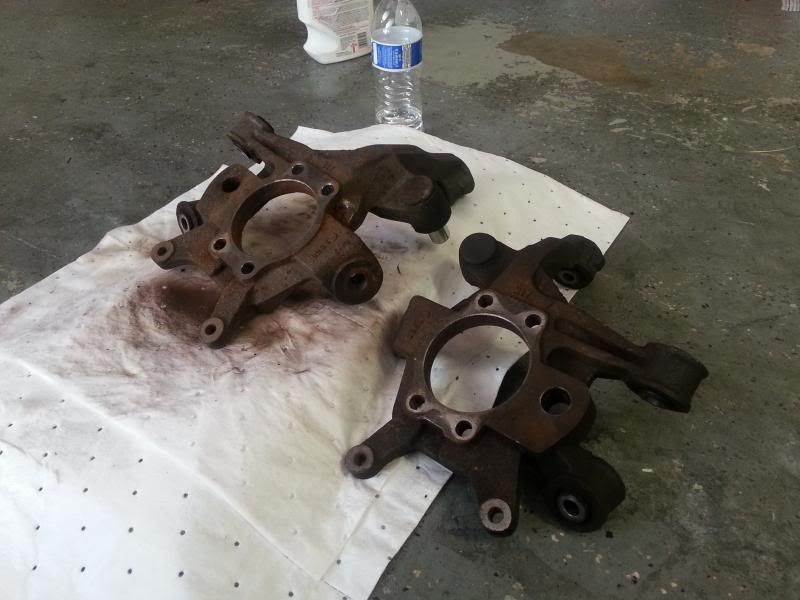 After: 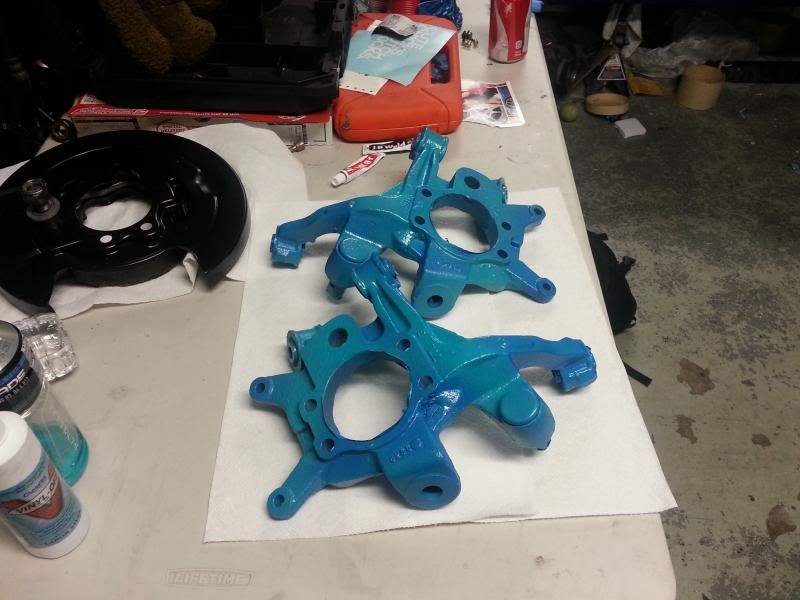 The passenger door on the s14 was all banged up and it was too far gone to save, so I got a door from someone selling one in NYC. While I focused on installing everything on my car, my friend and owner of Diamond Vinyl started wrapping the car as well as the body panels Swapping the parts to the new door 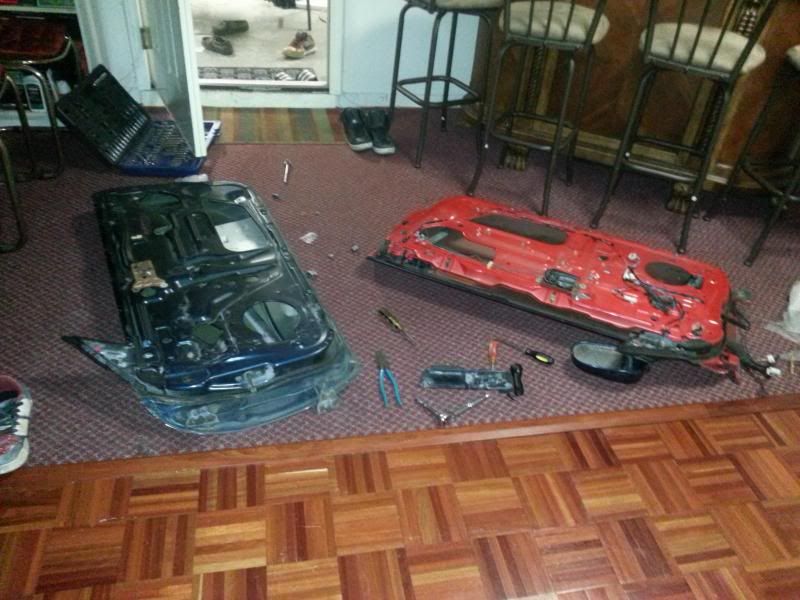 After much anticipated wait for PBM’s new forged knuckles, they have finally arrived.  Mocked up the chasebays brake booster eliminator kit with the z32 brakes. 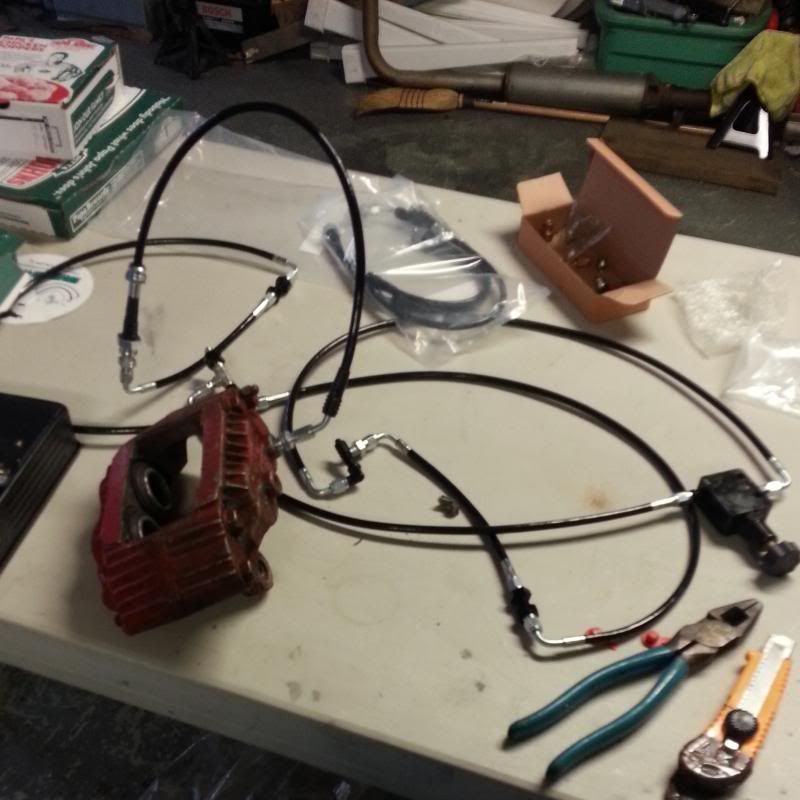 Once that was all done finally went ahead and put in the brake booster eliminator kit, the front crossmember and the steering rack I cleaned up. 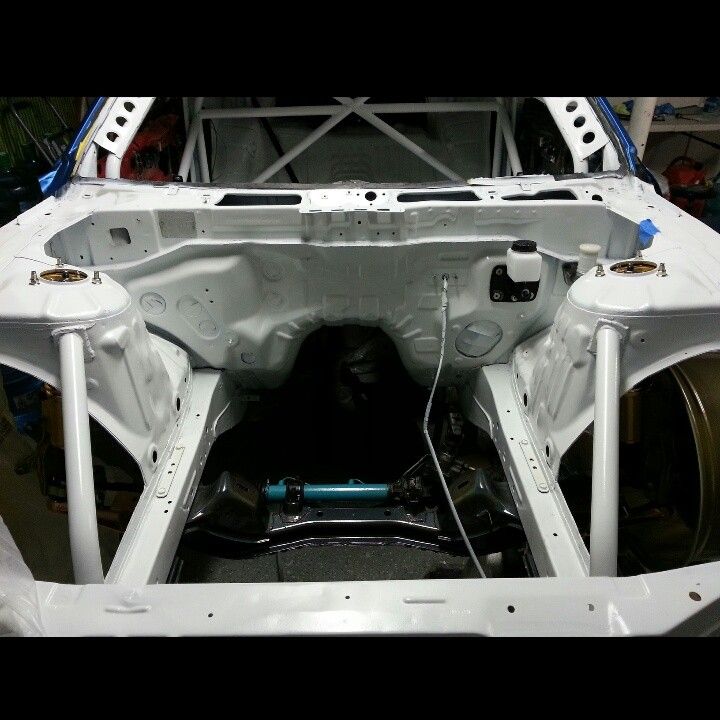 Rolled the chassis outside for some light.  My friend finally finished wrapping everything. 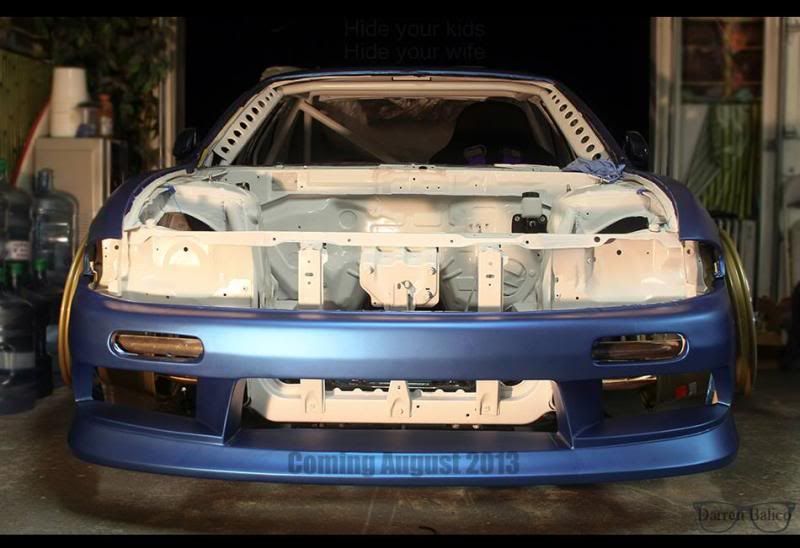 Mounted the tires to the wheels and my awesome Abercrombie motorsports outer tie rods came in. 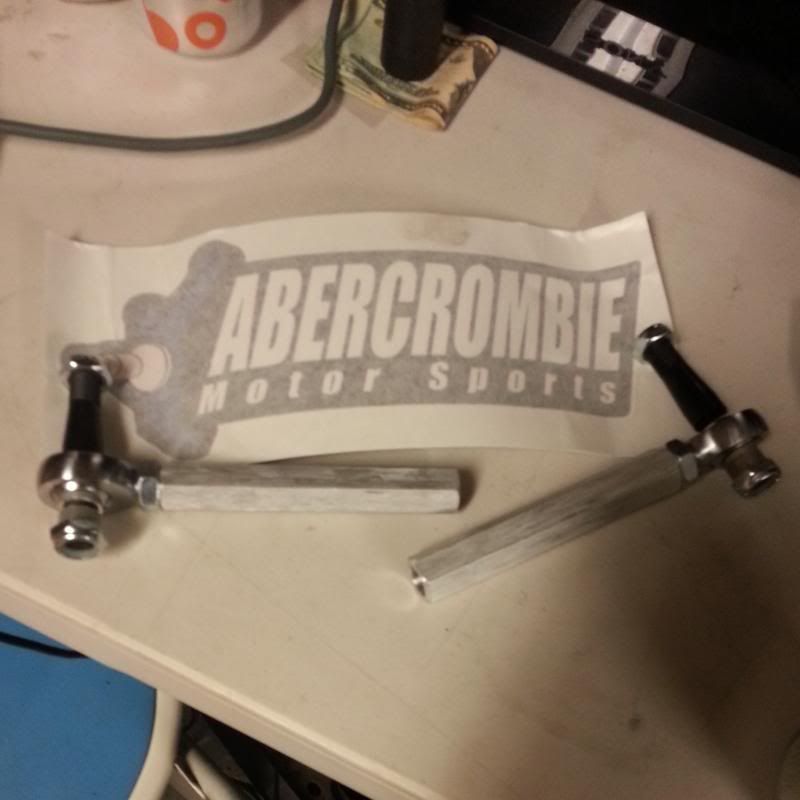
__________________
@phoshizzl3 |
|
|
|
|
09-28-2013, 11:30 PM
|
#4 |
|
Leaky Injector
|
Interior all finally went in (switch panel, seat, and etc).
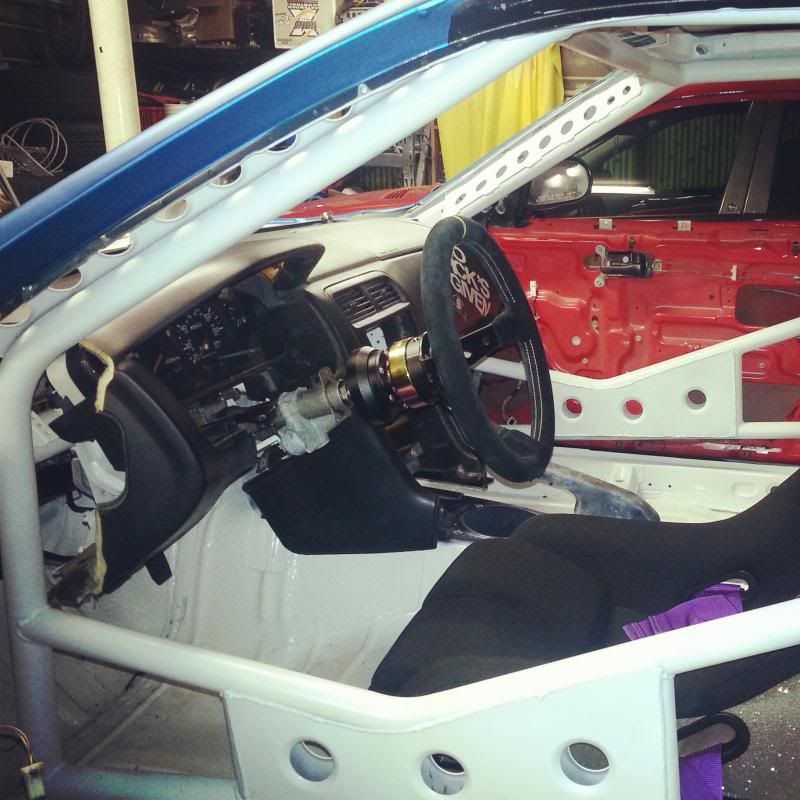 Then installed the rear subframe and everything else under the car (r33 ebrake cables, rear nismo 2way diff, and etc) 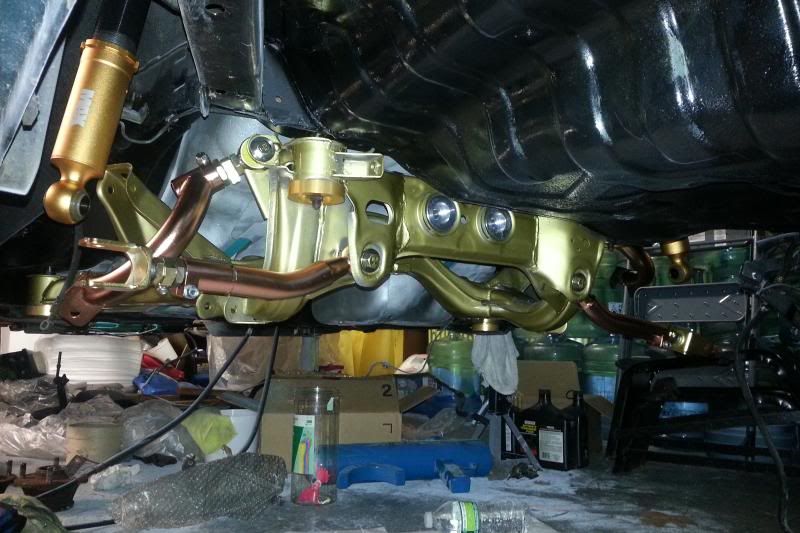 Now that all of those things are done, time to work on the motor. Big thanks to Bret Collins for all the swap parts. 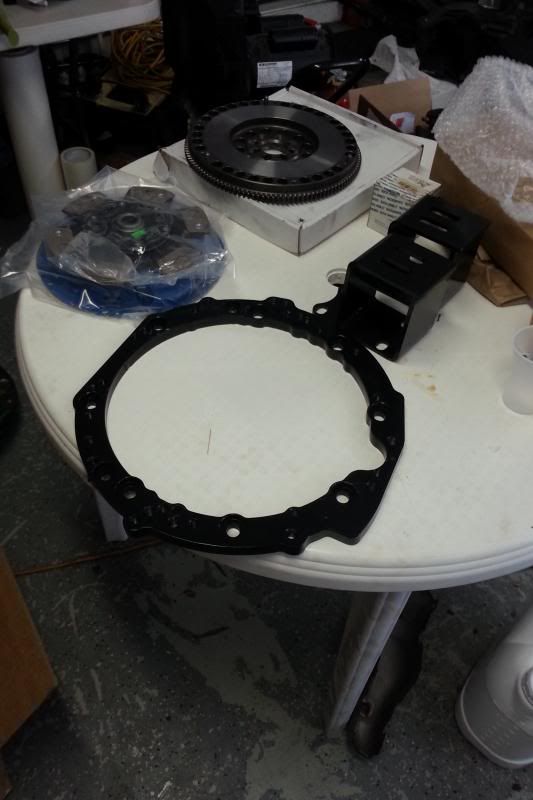 Cleaned up the motor and switched the sump from rear to front sump. 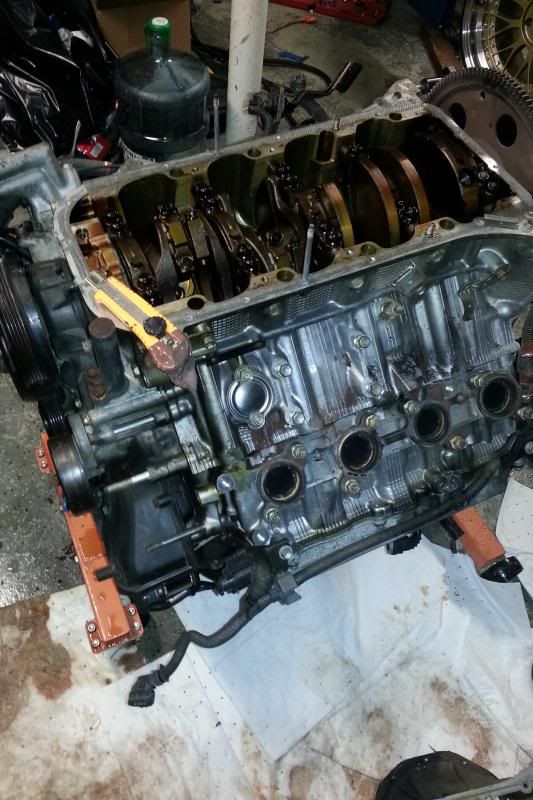 Putting on the final touch, the oil pan. 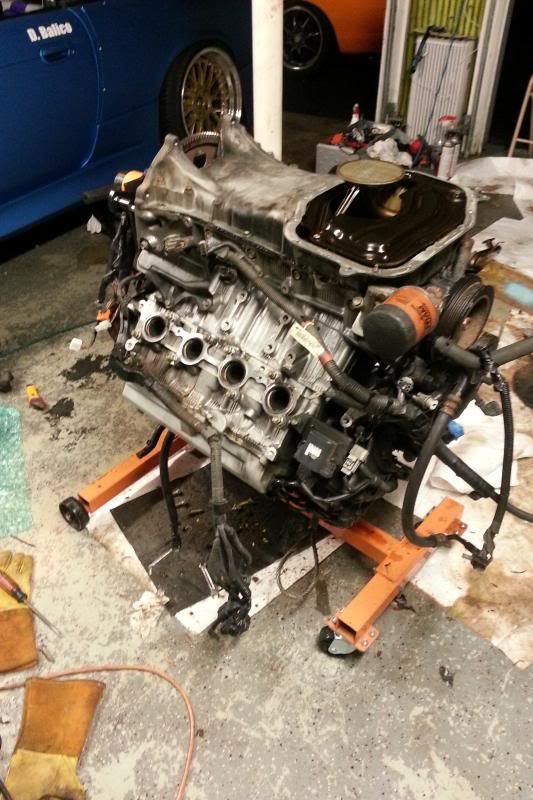 Now, working on the top end of the motor. 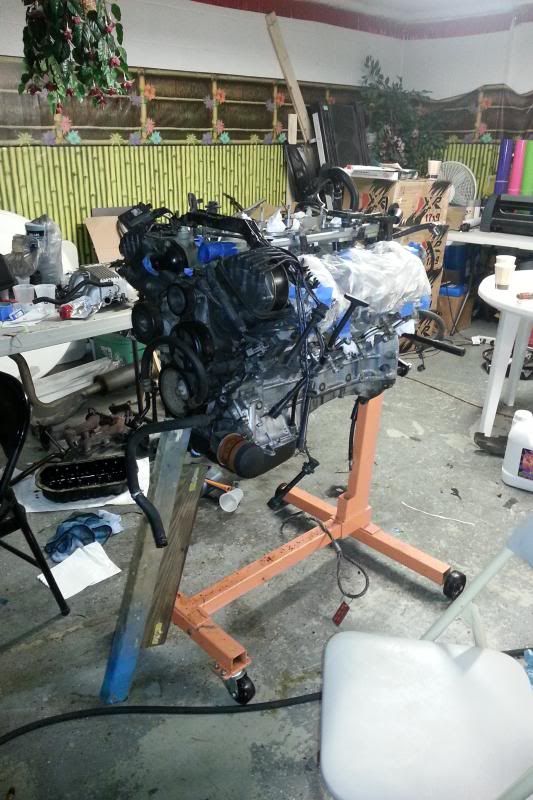 Motor going in. 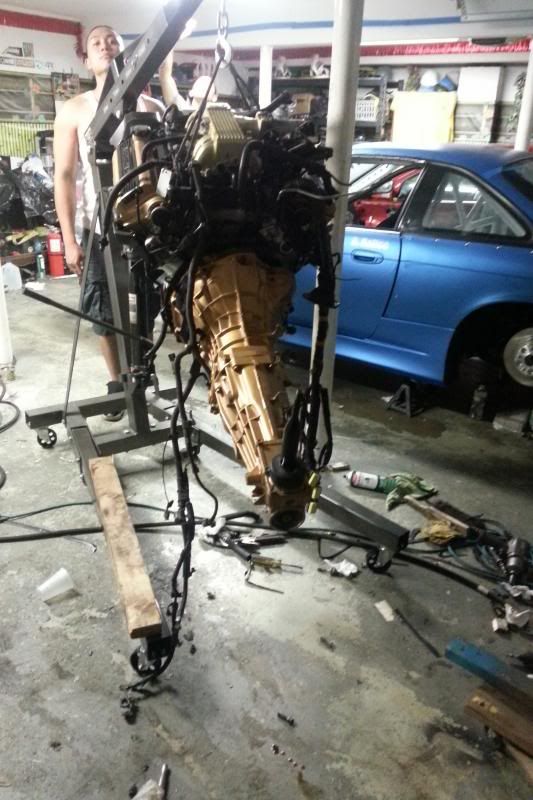 Once the motor was put in, the itasha HOTD graphics finally arrived, around 1am which was laid on and done by 3am. 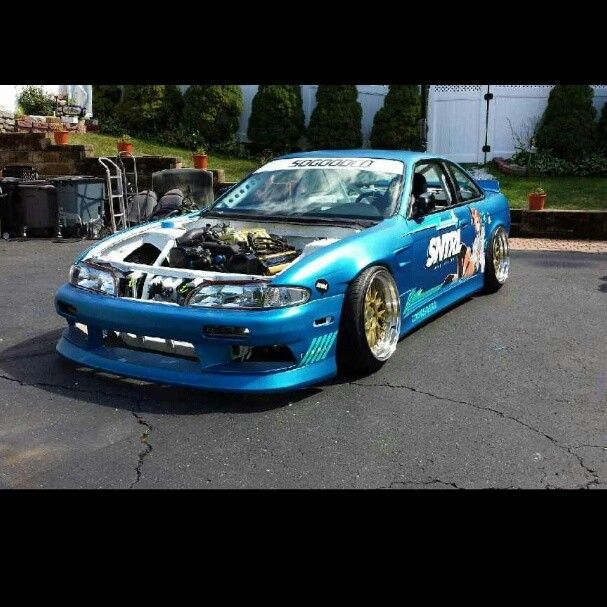 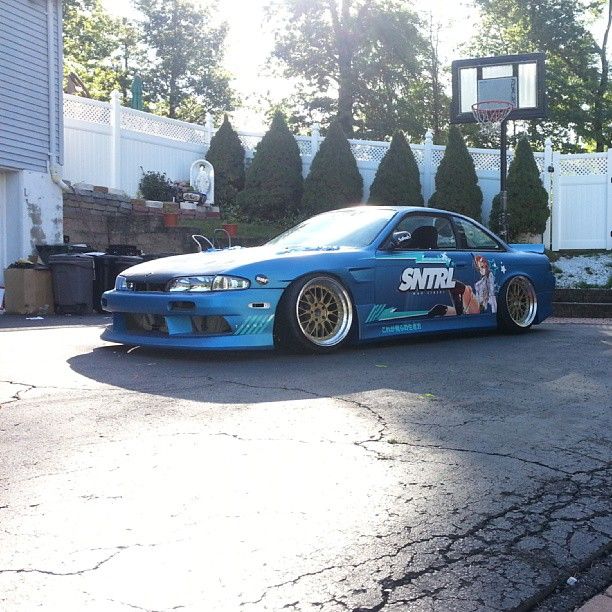 A few pics from Import Expo where I unveiled the car. Unfortunately some key parts needed for the motor to run didn’t arrive in time. 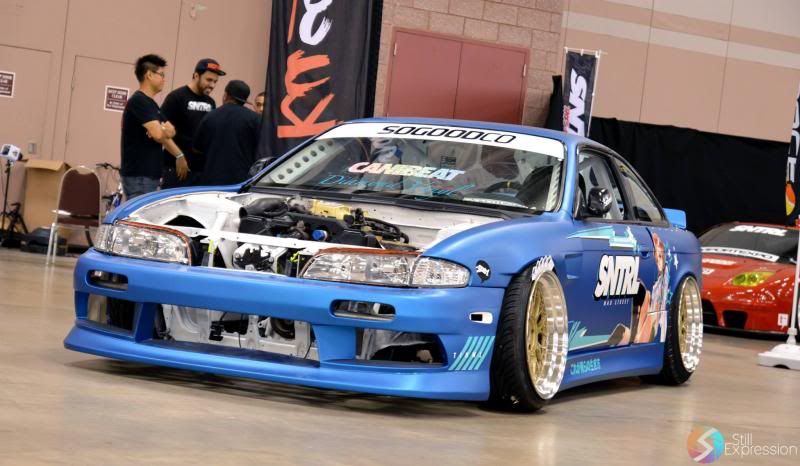 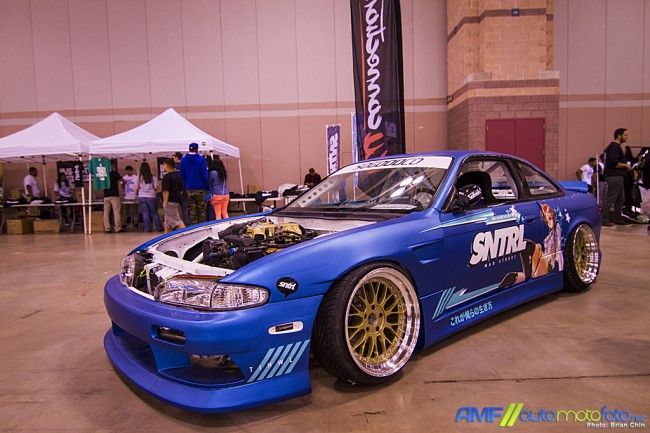 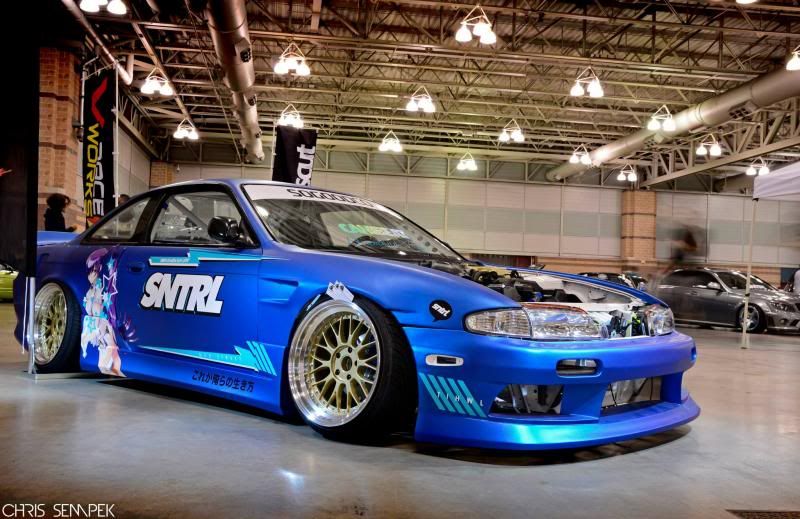 Still waiting on my chasebays radiator. A few of the key parts have finally come in. I should start putting the key parts in this week.
__________________
@phoshizzl3 |
|
|
|
|
09-29-2013, 01:33 PM
|
#6 | |
|
Leaky Injector
|
Quote:
__________________
@phoshizzl3 |
|
|
|
|
|
09-30-2013, 12:03 AM
|
#10 |
|
|
Hey wicked build man! I'm too currently rebuilding my 95 s14. I was hit by a drunk driver on the front passenger core support and now tubing the front end. By any chance are you gonna give a list of what you put in for your build? Also for the 1uz which tranny did you use? Curious cause I just have the stock KA24DE and not sure which power plant I want to do.
|
|
|
|
|
10-01-2013, 03:08 PM
|
#13 | ||||||
|
Leaky Injector
|
Quote:
Quote:
Quote:
Quote:
Quote:
Quote:

__________________
@phoshizzl3 |
||||||
|
|
|
|
10-02-2013, 05:55 AM
|
#14 |
|
Zilvia Member
 Join Date: Mar 2009
Location: holland
Age: 36
Posts: 160
Trader Rating: (0)
  Feedback Score: 0 reviews
|
sweet car man! i saw your car on instagram an started following you. i am doing the same swap in my s13, but i was wondering, how are you going to do the wiring?
|
|
|
|
|
10-04-2013, 09:16 AM
|
#17 | |||
|
Leaky Injector
|
Quote:
Quote:
 Quote:

__________________
@phoshizzl3 |
|||
|
|
|
|
10-07-2013, 05:35 PM
|
#19 | |
|
Leaky Injector
|
Quote:
__________________
@phoshizzl3 |
|
|
|
|
|
11-02-2013, 11:11 PM
|
#21 |
|
Leaky Injector
|
Update: Finally a few key parts have arrived. Wiring the ECU and the switch panel right now, hopefully will test fire the motor this Wednesday.
In the mean time, I was hoping to buy a vented hood but needed to address some parts for the motor so instead I did some work on my original busted hood. Sanded, cleaned and prepped for primer 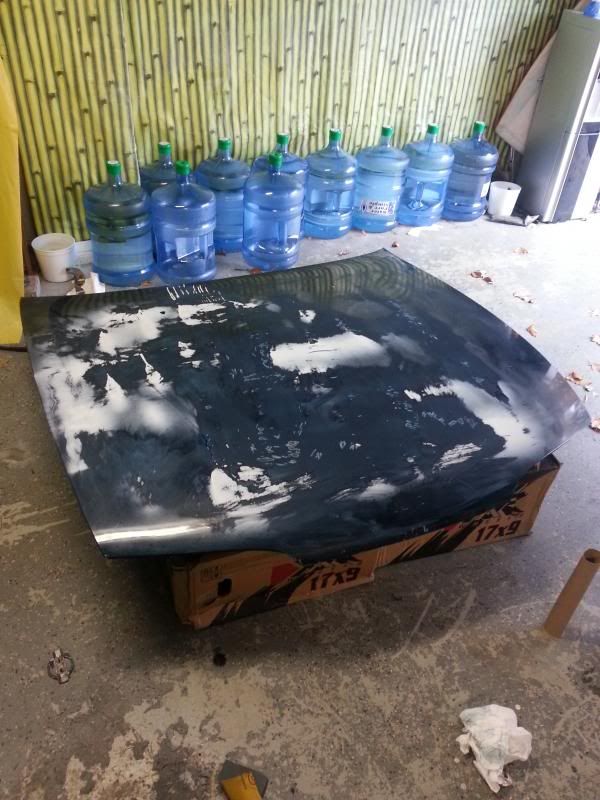 filler primered 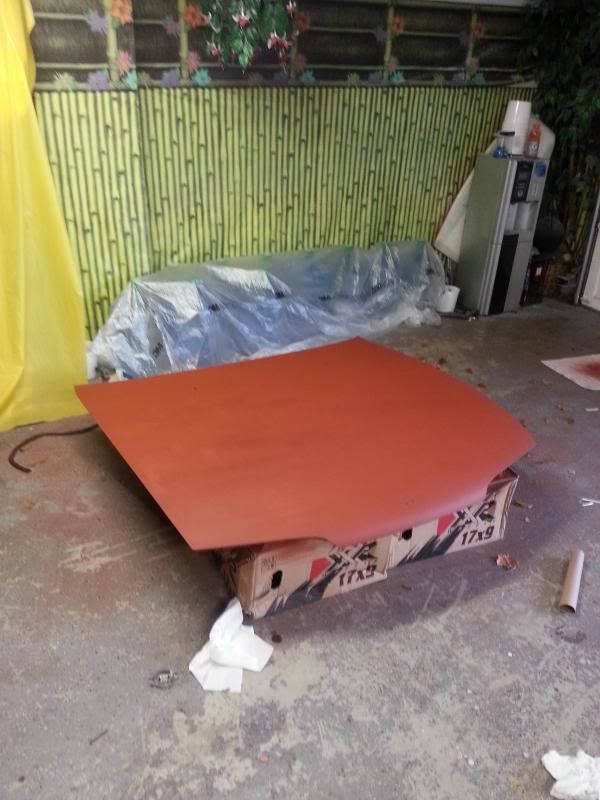 topcoated 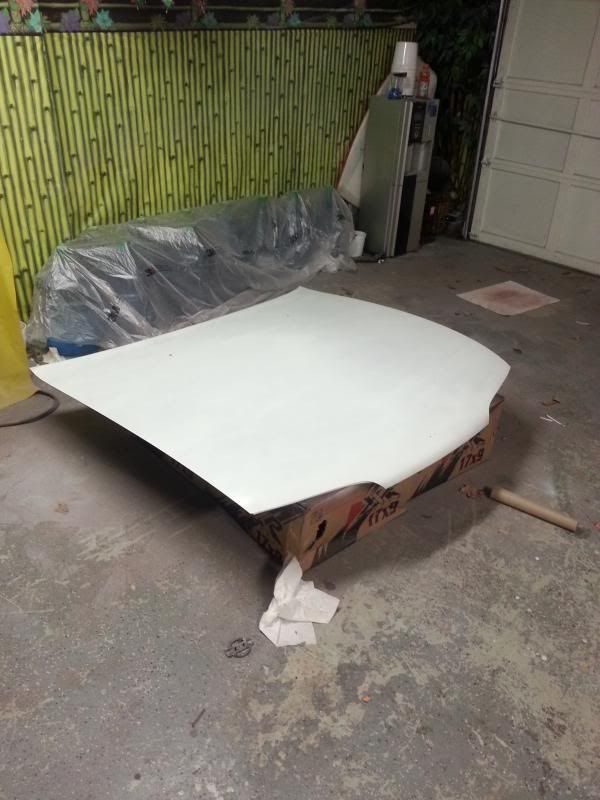 All finished 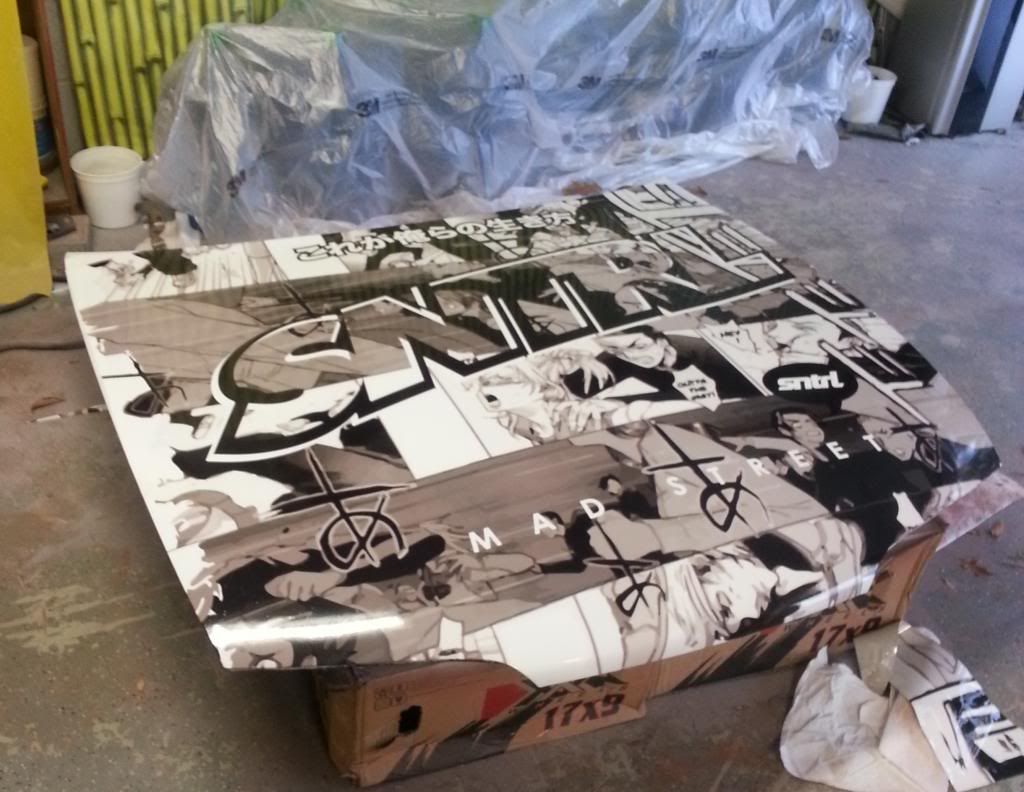 How it looks on the car 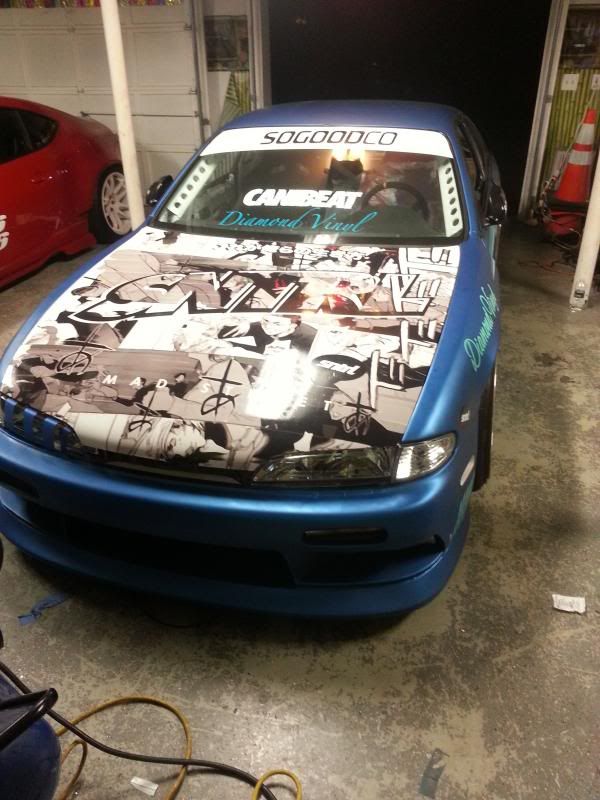
__________________
@phoshizzl3 |
|
|
|
|
11-03-2013, 01:18 AM
|
#22 |
|
Zilvia Member
Join Date: Jul 2012
Location: Woodstock
Age: 41
Posts: 176
Trader Rating: (0)
Feedback Score: 0 reviews
|
Hey,I love your build! I am doing the same engine build for my S13. Got most done, working on the wiring and such now. How much does a wrap like that cost? It's awesome!
|
|
|
|
|
11-03-2013, 08:58 AM
|
#23 |
|
Leaky Injector
Join Date: Jun 2011
Location: Booneville, MS
Age: 34
Posts: 61
Trader Rating: (2)
Feedback Score: 2 reviews
|
The car looks so sick. I dont really like the hood but the quality looks amazing.
What switch board are you going with? Painless or something different? |
|
|
|
|
11-05-2013, 11:18 PM
|
#25 | |||
|
Leaky Injector
|
Quote:
 . A wrap like this costs around $2,000-$3,000 by shops around me. . A wrap like this costs around $2,000-$3,000 by shops around me. Quote:
Quote:
__________________
@phoshizzl3 |
|||
|
|
|
|
11-09-2013, 01:06 PM
|
#26 |
|
Leaky Injector
|
Well I had my good friend Matt Petrie come by to take some test shots for an overseas feature. Still need to clean up a few wires in the engine bay, and still need to go out and get some radiator hoses, and cut the driveshaft. On a better note, the igniter module for the motor came today, unfortunately I'm away this weekend. Also can't wait to finally get my 3 piece wheels soon.
 Going to test fire the motor this Monday and will keep you all posted. Going to test fire the motor this Monday and will keep you all posted. Some teaser shots. 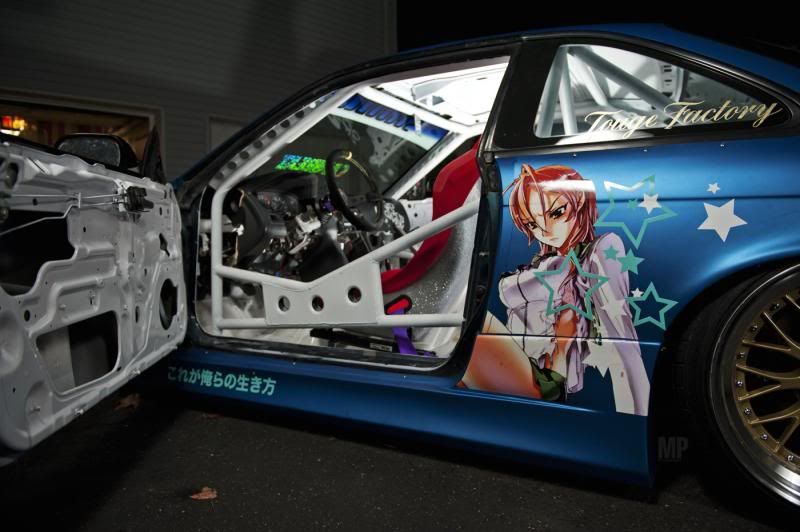 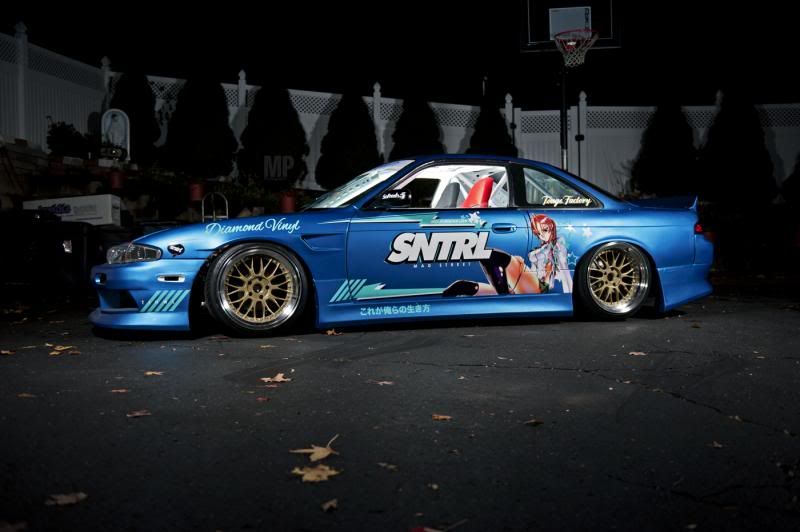 Don't worry, doing a projector retrofit soon on the headlights. Also motor is abit off centered because I didn't tighten the right mount yet. 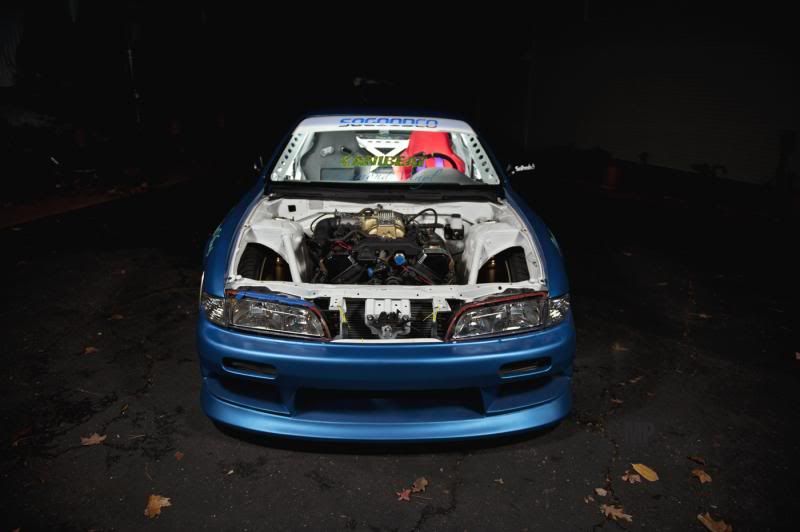
__________________
@phoshizzl3 |
|
|
|
|
11-17-2013, 04:58 PM
|
#27 |
|
Leaky Injector
|
Well finished wiring up the motor, ecu and switch panel. Motor finally runs. Still waiting on MAF, rad hoses. I am also building custom headers. Aside from those things, all that is left is shortening the driveshaft, making the harness for the exterior lights and hooking up the gauge cluster.
Start up video (Don't mind the wires, going to clean up the wiring in the engine bay) https://www.youtube.com/watch?v=Z6gMLE81RlQ
__________________
@phoshizzl3 |
|
|
|
|
| Bookmarks |
|
|


 Linear Mode

