|
|||||||
| Tech Talk Technical Discussion About The Nissan 240SX and Nissan Z Cars |
|
|
Thread Tools | Display Modes |
 12-18-2012, 10:46 AM
|
#1 |
|
Post Whore!
 |
How To: Half Manual / Half Power Window
Ok. This is THE guide to a simple modifcation that I like to do to my S13's. Half manual / half power window. I have always loved the ability to roll up the window, but hated to have to lean over to roll down the passenger side window. This is the solution.
Supplies needed: Power window regulator. Power window door panel. Power window switch. Power folding mirror switch. 2 bosch relays. 12ga wire. 18ga wire. Soldering iron. 20A fuse. 30A fuse holder. Electrical tape (or heat shrink).  I'll try to make this as simple as possible. First thing is first. DISCONNECT THE BATTERY!!! Make sure you have all the supplies you need to make solid electrical connections. Here is the diagram we will be working with:  Thanks to zooopreme for the optimization. Bosch Relay guide: 85 = ground switch signal 86 = constant 12V 87 = constant 12V 87a = ground 30 = to window regulator (up/down) Here is the list of connections to make amongst the relays and both switches: I will label the relay that controls the window up function as UP and window down function as DOWN. [UP][87] ==> 12v [UP][86] ==> 12V [DOWN][87] ==> 12v [DOWN][86] ==> 12v Join all these wires together with a 12gauge wire. You will be running this directly up the firewall into the engine bay to the battery. You will join this wire to a fuse holder, which will be holding a 20A fuse. The other end of the fuse holder will be the connection to the battery. Do this as you see fit for your application. [UP][87a] ==> Ground [DOWN][87a] ==> Ground Join these together with 12gauge wire and ground them onto the door somewhere. [UP][85] ==> Green wire of pass. switch + black wire of console switch. You will join the green wire from the passenger switch with the black wire of the power folding mirror switch together with 18gauge wire and then join those two together to the UP relay's [85] position. [DOWN][85] ==> Blue wire of pass. switch + blue w/ white stripe wire of console switch. You will join the blue wire from the passenger switch with the blue w/white stripe wire of the power folding mirror switch together with 18gauge wire and then join those two together to the DOWN relay's [85] position. You will shortly see how you need to route these wires from plain sight. Removing the glove box is a must! [UP][30] ==> Green wire of regulator [DOWN][30] ==> Blue wire of regulator Now, if you don't have the pigtail for the power window regulator. You will need to figure out which wire does what based on polarity. I don't remember off hand. You can do this by directly applying power and ground to the regulator's plug but be careful not to touch them together! The only other connections left to make are the actual ground sources for the switches. At this point you will need the center console off and the glove box as well. For the power folding mirror switch, take the purple w/ white stripe wire and ground it somewhere to the chassis in the ebrake area. You will see a few locations to do this. Choose one that suits your needs. For the passenger side switch, take the white w/ black stripe wire and ground it to the passenger door somewhere. Thats it! Before putting everything back together, plug the battery in and make sure both switches as well as the relays are functioning as they should. Here are some pictures to go along with this process to better help... 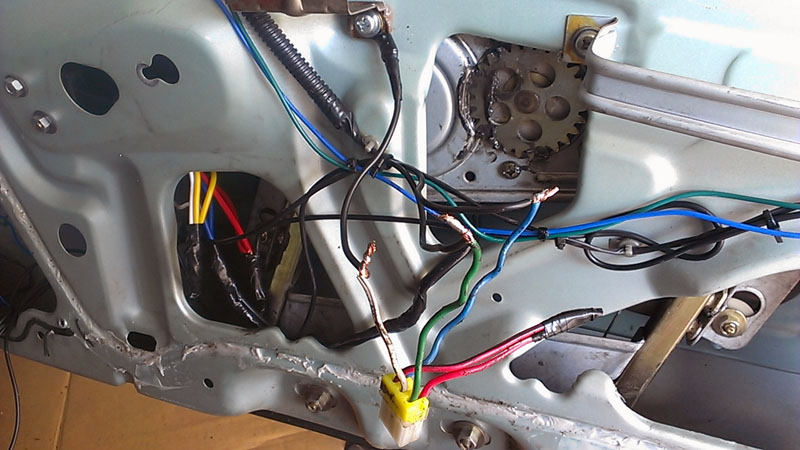 As you can see, these are the connections for the pass. window switch pigtail. 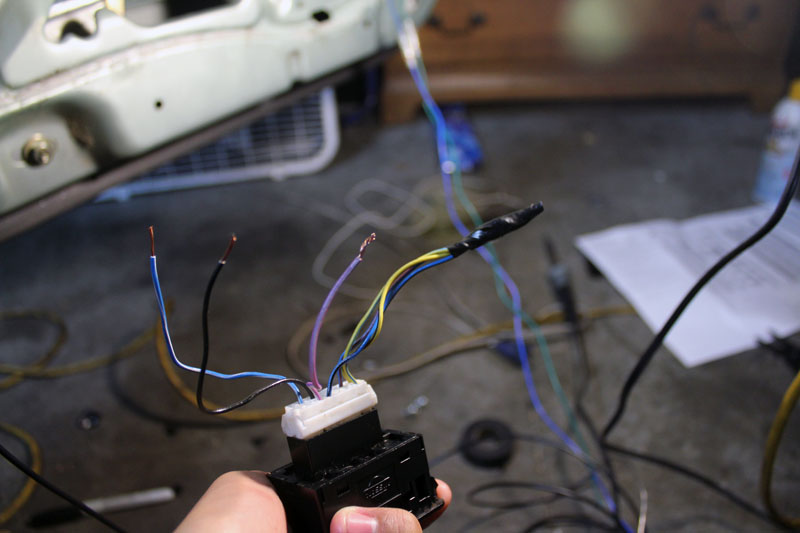 This is the power folding mirror switch, only three wires are used. The rest are taped up and tucked away. 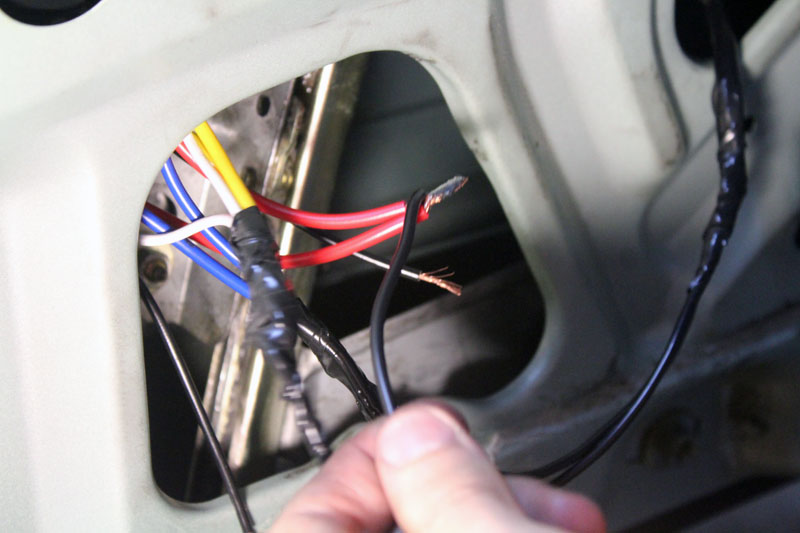  Here you can see the [87a] wires from both relays connected to a single ground wire which is grounded to the door. 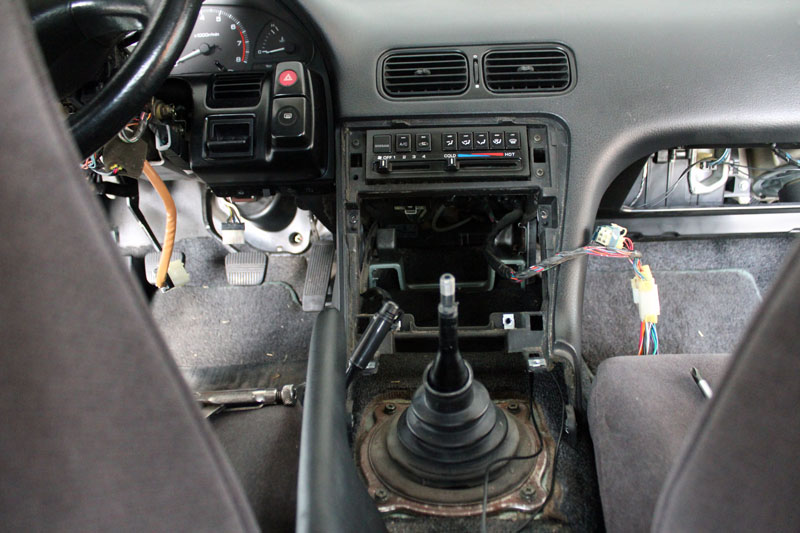 Center console and glove box removed. And the finished product... 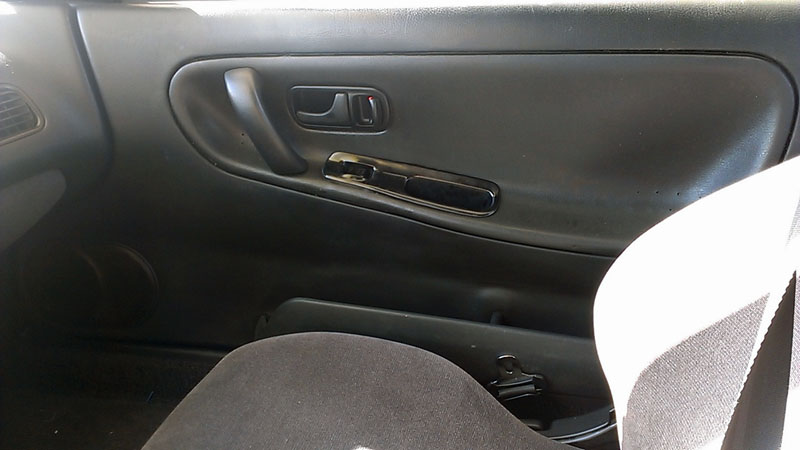 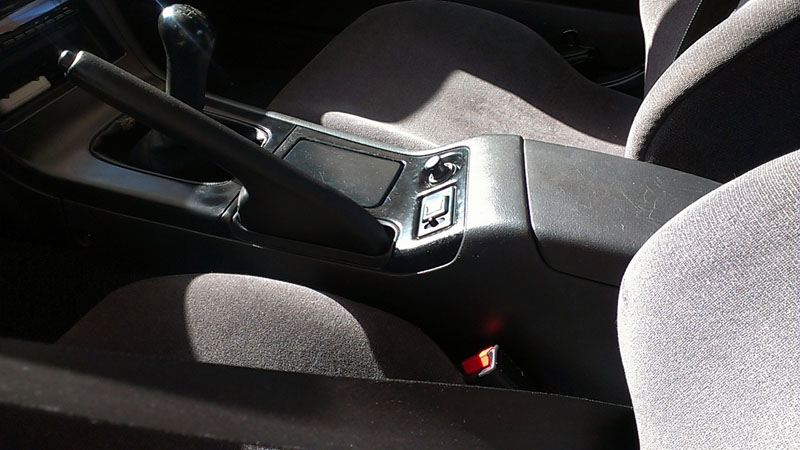 I'm sure there will be plenty of questions so don't hesitate to ask! Thanks for reading! 
__________________

Last edited by KiLLeR2001; 12-18-2012 at 06:38 PM.. |

|

|
| Sponsored Links |
| Bookmarks |
|
|


 Threaded Mode