|
|||||||
| Builds (and builds only) Got a build thread? It goes here, build threads anywhere else on the forum will be locked and never moved. |
 |
|
|
Thread Tools | Display Modes |
 01-26-2015, 06:40 PM
|
#1 |
|
Leaky Injector
 Join Date: Jan 2011
Location: Seattle
Age: 36
Posts: 124
Trader Rating: (2)
 Feedback Score: 2 reviews
|
S14 1JZ Vvt-i drift car build
I have always wanted to make a build thread, so here it is.
I wanted to document this on zilvia because I always find the information I seek on here and I'd like to try to give back to the car community, and if I can help anyone great. Granted what I am doing is a little different because this is a track car, but some of the information is still the same. Any insightful comments are appreciated I will be posting some random tech tips in this thread as well The build will be relatively simple, stock turbo (aiming for 14psi and whatever power that gets me great, I hope the neighborhood of 300whp would be nice), stock everything running on AEM V2, with a Z33 6 speed transmission. The car previously had a S14 SR with a Garrett GT28rs, Z33 trans, power fc (and many supporting mods). I'll only post my favorite picture of my car:  When I received the engine:     To remove a flywheel or flexplate use a open box wrench, use the close end and thread a bellhousing bolt through it and use another bolt to thread through another bolt on the flexplate (I also had to use a nut behind the flexplate since it's not threaded, with a flywheel you can just use the pressure plate bolt), set it up in a manner where the flywheel can't spin counter-clock wise, and loosen the bolts using a breaker bar, this is assuming you don't have an impact wrench. You can also use this to break the crank bolt loose.  On the JZ when you remove the A/C compressor, the power steering pump looses one of it's brackets for support, now some people don't care and just run it that way, I will be using a Xcessive manufacturing bracket for this, however if you are trying to save some money you can take apart the compressor, and only use the front cover to properly hand the power steering pump: 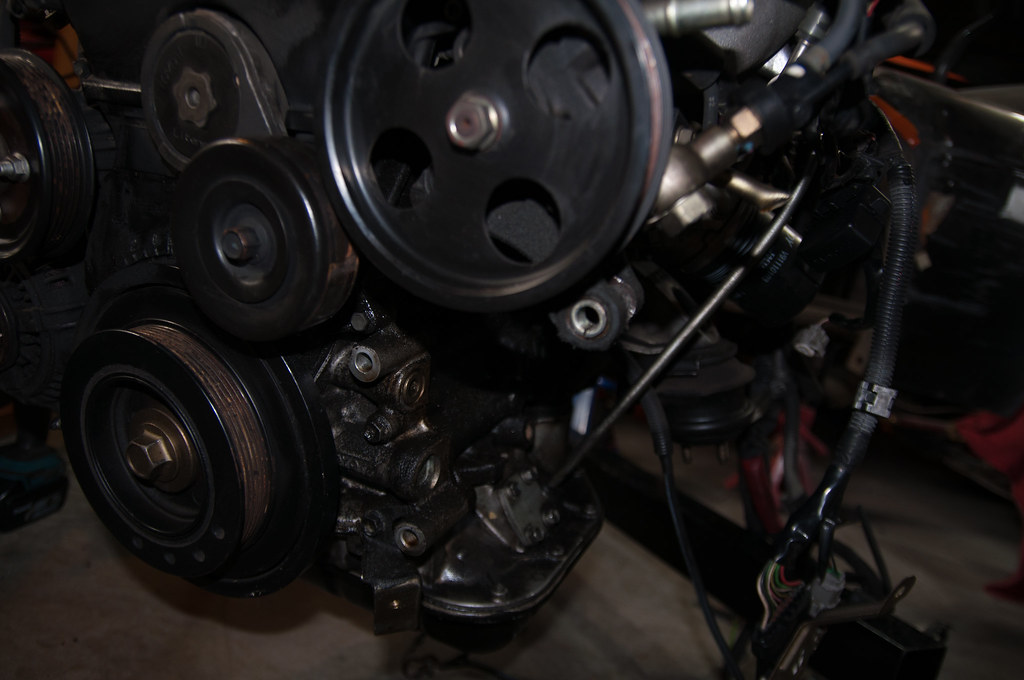     This is my McGiver idea for removing the crank pulley without a puller:  This is more for myself than anything, but here are the timing marks for the engine: Crank (see the notch on the oil pump lines up to the slot on the crank gear):  Exhaust cam gear:   Now this is one of the heater core lines coming off the cylinder head, I will not run a heater core, so I decided to weld the plug shut, you could also just remove the pipe, thread the head and put a plug there:  And this is the water outlet for the coolant running through the throttle body, I modified mine to remove TRAC so I won't need this, I just welded it shut  Since I will not be running a MAF sensor, I won't need to recirculate the air back to the intake, so I modified the turbo outlet to remove the pipe that brings the air to the bov/intake. I am deleting trac and I wanted to remove the extra plate in the throttle body, and try to give myself more room in the engine bay, I did not do a very good job of cleaning and the welds did not come out so great.. but I don't really care, as long as it's sealed. Welding cast sucks...   However when you modify the throttle body this way the wheel can turn much further without actuating the flap itself, so I tacked the back to prevent this from happening:  This is just the beginning more later |

|

|
| Sponsored Links |
|
01-27-2015, 09:31 PM
|
#2 |
|
Leaky Injector
Join Date: Jan 2011
Location: Seattle
Age: 36
Posts: 124
Trader Rating: (2)
Feedback Score: 2 reviews
|
Made a bit more progress today
I bought some XXr 968 wheels, and after putting them on and off twice I had problems with the hub bore being so big and the lug nut hole being so small that I almost stripped a couple of studs, so I ordered hubcentric rings, now since I don't want them to come off I made them oblong and pounded them on the hub, this is to help prevent them from coming off every time I switch wheels:   I then continued taking apart the motor, removed the intake for the turbo and removed the sandwitch plate, off of the motor with the coolant cross over pipe (from back of waterpump to oil cooler):    Then I removed the oil cooler assembly and took it apart, now you can use a ford part to get rid of the assembly to use an oil cooler (which is what Im doing), the part screws on the block so you can use any sandwich adapter, I took it apart cut the bolt to set the length and re-welded    Then I had another couple of bungs to plug up, one goes from the stock oil cooler to the block, the other goes behind the water pump, so I cut the pipe clamped it shut and welded both:   |
|
|
|
|
01-30-2015, 07:03 PM
|
#5 |
|
Nissanaholic!
 |
bad ass man, its sick seeing other vvti builds!
I need to update mine! My 1j vvti is gonna be seeing a nice new manifold along with an efr turbo!! |
|
|
|
|
02-03-2015, 08:45 PM
|
#6 | |
|
Leaky Injector
Join Date: Jan 2011
Location: Seattle
Age: 36
Posts: 124
Trader Rating: (2)
Feedback Score: 2 reviews
|
Quote:
Here is a small update  I replaced the bearing on the drive belt drive pulley   I took apart the stock timing belt tensioner and put the roller and bolt/nut on the MVP motorsports billet tensioner. If you don't know about these look them up, while I won't make enough power to have a problem with this it is a real issue and I want reliability so why not. The stock one can crack and break, causing catastrophic damage.  Next was to rebuild the VVT-i cam gear, I followed this video and honestly I was a bit concerned I would mess up, but you can't really re-assemble it wrong. The only advice I have is to mark the pulley to the center before you take it apart  And last I continued to take apart the engine, I did remove more than this picture and found other parts I need. now to search and order more parts! |
|
|
|
|
|
02-05-2015, 10:40 AM
|
#7 |
|
Leaky Injector

Join Date: Mar 2014
Location: Arizona
Age: 34
Posts: 116
Trader Rating: (0)
Feedback Score: 0 reviews
|
I was unaware that MVP did the billet tensioner for the 1j. I know a guy on FB makes them. I bought one way back. Never got around to putting it on. Making 755whp at 39psi. Been going good for 3 years now.
Just making sure you didn't buy the 2jz billet tensioner. As they are different. The 1jz timing belt tensioner pulley BRACKET is different then the 2jz BRACKET The 1jz bracket has a steeper bend to it that allows is to sit further towards the turbo side of the motor. The 1jz timing belt DID NOT fit when I bolted up the 2jz tensioner pulley. I believe you can run a slightly longer Timing belt IIRC
__________________
~755whp 1jz.~ Proefi 128, e85, 1200cc, 6265, 39psi |
|
|
|
|
02-05-2015, 10:42 AM
|
#8 |
|
Zilvia.net Advertiser
 
Join Date: Oct 2003
Location: Chicago, IL
Posts: 1,511
Trader Rating: (27)
 Feedback Score: 27 reviews
|
Nice Hubcentric rings!
 Great start on the build!
__________________
Performance Parts // Track Prep // Fabrication **Follow us on Instagram @TFWorks For all the latest TF★ news visit our blog!! 
|
|
|
|
|
02-08-2015, 10:24 PM
|
#10 | |
|
Leaky Injector
Join Date: Jan 2011
Location: Seattle
Age: 36
Posts: 124
Trader Rating: (2)
Feedback Score: 2 reviews
|
Quote:
|
|
|
|
|
|
02-08-2015, 11:54 PM
|
#11 |
|
Post Whore!
 
|
Cool build, I always think of going 1j vvti myself.... but do you plan to eventually swap turbos and push for higher numbers? Just figured the SR would be a cheaper/lighter/better choice at ~300whp. If you put 400+whp and wanted response and reliability then I'd understand completely.
What adapter/kit are you going to use with the Z33 trans? Also interested in seeing how tuning the vvti turns out if going for higher numbers. |
|
|
|
|
02-09-2015, 02:40 PM
|
#13 |
|
Leaky Injector
Join Date: Nov 2009
Location: Scotland, UK
Age: 34
Posts: 130
Trader Rating: (0)
Feedback Score: 0 reviews
|
awesome work so far
 if I was to do my 1j swap all over again I'd pretty much be along the same lines as you, I.e delete the coolant pipework etc
__________________
http://zilvia.net/f/builds-builds-on...1jz-build.html |
|
|
|
|
02-09-2015, 08:53 PM
|
#14 | |
|
Leaky Injector
Join Date: Jan 2011
Location: Seattle
Age: 36
Posts: 124
Trader Rating: (2)
Feedback Score: 2 reviews
|
Quote:
I am VERY keen on midrange power. My sr was put together with as much low end torque and mid range in mind, the response was incredible. It had a Gt28rs .63ar, PBM intercooler, PFC, and tomei pro cams (256 I+E). The came on HARD at 3800rpms, and 5000 was max power, around 6800 it would start to peak out. The idea behind the JZ is to maintain this midrange power/low end torque without going V8. I don't like how V8s sound, but other than that it's a no brainer on a drift car. I can't go much further past 400whp because I can't afford it (tires go too fast haha). I went VVTi because thats what my SR had (notch top) and that helps a lot. I am using Maverick Motorsports kit Thanks for the kind replies guys. |
|
|
|
|
|
02-10-2015, 12:18 AM
|
#15 |
|
Post Whore!
|
^Sounds like you and I have the same goals. Love the torque of the V8 but having a hard time with how they sound lately, not to mention everyone and their mom going V8.
Keep it up. Can't wait to see how this turns out. May just go 1j vvti afterall. |
|
|
|
|
02-10-2015, 10:00 PM
|
#16 |
|
Leaky Injector
Join Date: Jan 2011
Location: Seattle
Age: 36
Posts: 124
Trader Rating: (2)
Feedback Score: 2 reviews
|
Alright guys so this is how far down I am taking this thing, anything past this is unnecessary for me (really all that is left is headgasket and a few random gaskets here and there.
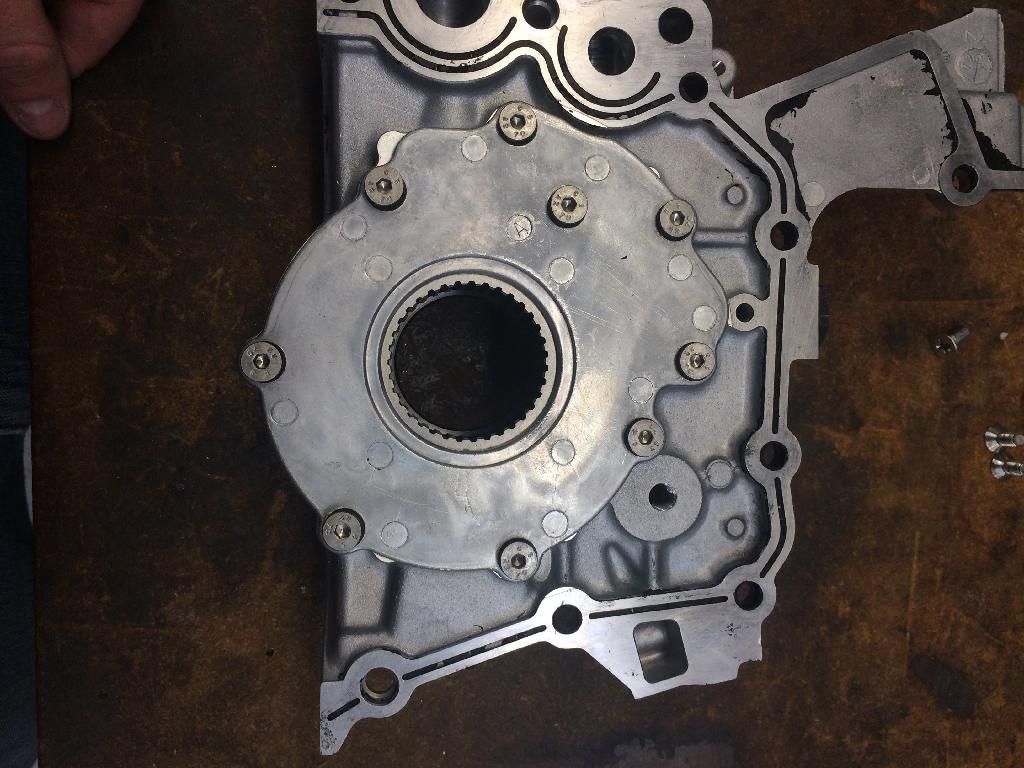
 I removed cleaned all the gasket material and started cleaning the oil pump as best I could. I also removed the "pressure limiting" bolt/spring combo and resealed it (had to reuse the o-ring)  Then I removed the rear main assembly, cleaned it and replaced the seal.   Removed cleaned and sealed the lower oil pan, pickup and lower pan baffling  Since I will be running a oil temp gauge I thought about using the location where the stock oil level sensor is on JZs, but my sender/probe is not nearly as long as Toyota's so I decided to add a bung I had laying around to the lower oil pan, about midway, and I will tap it to 1/8 -27npt at work Welded  And added a quick coat of high temp engine paint  It is confirmed that I bought the wrong roller bracket from MVP, however I am fairly certain I can grind it down to match the angle of the 1JZ. I will try it and post! More soon |
|
|
|
|
02-12-2015, 09:47 PM
|
#17 | |
|
Leaky Injector
Join Date: Mar 2014
Location: Arizona
Age: 34
Posts: 116
Trader Rating: (0)
Feedback Score: 0 reviews
|
Quote:
 My car now sits at 60psi idle cold, 40psi hot (40wt) and is at about 90psi when i hit 9000rpm. I WOULD HIGHLY recommend not removing that spring/bolt combo. Not only with the oil pump just keep bypassing oil back into the pan through the top breather, but it may bypasses too much oil to actually hurt or lower oil pressure at idle. Leave it in and add 3mm worth of washers. cant go wrong, ive done about 20 of them, Good to hear on the idler. Modifying should work.
__________________
~755whp 1jz.~ Proefi 128, e85, 1200cc, 6265, 39psi |
|
|
|
|
|
02-16-2015, 12:16 AM
|
#18 |
|
Leaky Injector
Join Date: Jan 2011
Location: Seattle
Age: 36
Posts: 124
Trader Rating: (2)
Feedback Score: 2 reviews
|
Oh I'm not removing it haha, I took it off because it appeared to be leaking, I took it off to clean it that's all.
I saw the modified oil pans, real interesting stuff, and good looking out on the bracket though. |
|
|
|
|
02-16-2015, 08:58 PM
|
#19 | |
|
Leaky Injector
Join Date: Mar 2014
Location: Arizona
Age: 34
Posts: 116
Trader Rating: (0)
Feedback Score: 0 reviews
|
Quote:
__________________
~755whp 1jz.~ Proefi 128, e85, 1200cc, 6265, 39psi |
|
|
|
|
|
03-03-2015, 09:40 PM
|
#20 | |
|
Leaky Injector
Join Date: Jan 2011
Location: Seattle
Age: 36
Posts: 124
Trader Rating: (2)
Feedback Score: 2 reviews
|
Quote:
Alright guys small update, as pointed out the 2JZ and the 1JZ timing belt billet tensioner bracket are different. Luckily the 2jz one has a lot more metal than the 1jz so I made up a "jig" for it to make sure the angles were right, and used my grinder to cut down the excess metal keeping in mind the angle at which the tensioner pushes on the bracket, I then used 3m whizzy wheel to get a more polished look/smoother surface under it     And then I made a little more progress on the engine, installed lower oil pan, water pump assembly and alternator  I didnt put on the upper water neck because I am installing my water temp gauge in it, so I need to drill and tap it. More later! |
|
|
|
|
|
03-17-2015, 10:33 PM
|
#21 |
|
Leaky Injector
Join Date: Jan 2011
Location: Seattle
Age: 36
Posts: 124
Trader Rating: (2)
Feedback Score: 2 reviews
|
update:
Got the water temp sensor installed and installed the water neck on the engine  I was confused as to where each of the cam seals went (the part numbers online keep saying the exhaust is intake and vice versa depending on where you get your info from)... but when you set them on the motor it's completely obvious haha  Installed both cam gears and torqued  Then I went on to install the valve covers aaaaand broke a corner like an idiot... so I removed it, cleaned it as best as I could and welded it   I then got excited and went to town and forgot to take pictures of the install of the timing belt, crank pulley, covers etc. Here is a picture of the Xcessive manufacturing PS pump bracket and the idler pulley lock (unnecessary for my power goals, but I dont want my belt jumping around)  Torquing the crank pulley was a damn nightmare, I am using a Fluidampr pulley and it calls for 239ft/lbs on the jz. I locked the crank from the flywheel side using my prybar and a couple of bolts, that didn't work, so I tried a few different combinations to get it torqued to spec. A bolt on the crank, a prybar and a bolt on the bellhousing did the trick. This is how the engine sits as of right now, I ordered the spark plugs and will replace those, that is the last thing I need to replace before dropping the engine in (still got intake manifold and wiring to do, I need to figure out exactly what wires I need to run the engine and nothing more so I can do a moderate tuck and clean up the engine bay as much as I can)   More in a couple of weeks (hopefully) |
|
|
|
|
03-18-2015, 12:08 PM
|
#22 |
|
Zilvia Junkie
 
|
Nice dude! We are at very similar positions of the build. I'm finishing up my timing and maintenance this week. When's your estimated completion date? Or no rush, whenever it happens?
__________________

|
|
|
|
|
03-18-2015, 12:37 PM
|
#23 |
|
Zilvia Junkie
Join Date: Apr 2009
Location: Gainesville, FL
Age: 36
Posts: 354
Trader Rating: (5)
Feedback Score: 5 reviews
|
How does the z33 tranny line up in the s13s and s14s? I was thinking about going rb25 but a 1j with a z33 6-speed sounds fun.
__________________
Never Due |
|
|
|
|
03-18-2015, 10:36 PM
|
#24 |
|
Leaky Injector
Join Date: Jan 2011
Location: Seattle
Age: 36
Posts: 124
Trader Rating: (2)
Feedback Score: 2 reviews
|
Bmaddock I don't have a date set in mind, I want to catch the season peak though, so I hope it's done by May? But yeah not in a hurry, been working a lot and got other projects too.
Jrex I'm going to find out soon, I hope it all lines up tits and I don't have to modify the engine mounts. I hope the engine sits pretty far back, fingers crossed. But my sr wad a totally different monster with the z33 behind it, I loved it |
|
|
|
|
04-05-2015, 02:27 PM
|
#25 |
|
Leaky Injector
Join Date: Jan 2011
Location: Seattle
Age: 36
Posts: 124
Trader Rating: (2)
Feedback Score: 2 reviews
|
Update from last weekend:
removed the ignition coils, inspected them and put new spark plugs in (BKR7EIX), the pistons have some carbon build up, but not too bad. Sadly the bolts were stripped from when the engine was compression tested at the importer, so I cleaned the threads up and installed slightly longer bolts and they are good.  Installed the pilot bearing and pilot bearing adapter:  then I installed the adapter plate on the engine, and tried to install the starter, it didn't quite fit, I had to grind down the adapter, the starter and the bellhousing here are some pictures:   Then I drilled the threads off of the starter, since how the starter is bolted in from the starter side to adapter, I had to make sure the bolts didnt go through all the way otherwise the trans doesnt sit flush with the adapter. I'll measure the bolts later so I can give you guys a good idea of length   I then looked and looked and looked for the torque spec of the aluminum flywheel included with maverick's kit, and could not find it, he wasn't answering his phone so I went ahead bolted the transmission to the engine, I had to grind down the dowel pins so the transmission sat completely flush against the adapter plate, then I started playing the "lets see what doesnt fit" game, and pull the engine in and out  so first off the sway bar hit the oil pan, I dont think it will fit anymore, then the second "bridge" on the oil pan was hitting the steering rack (I think this is happening because of the PBM eccentric spacers, so I ground that part down  Then I started to jack up the transmission to see where it would sit, it sits even further back than when I had the SR in it, and this is with the Excessive brackets all the way forward, I will have to clearance out the brackets for the trans cross member because I want the transmission as high up into the chassis as possible, I will post pictures later. Here is where the transmission sits (after I cut out another part of my trans tunnel:   So the sad news is, my initial plan to use the old trans cross member and driveshaft will not work. So I have to get the engine sitting exactly where I want, clearance everything, make my trans cross member, and then measure the end of the transmission to the input flange of the differential and send that info to shaftmasters.com and they will make me a driveshaft. More soon |
|
|
|
|
05-24-2015, 04:17 PM
|
#26 |
|
Leaky Injector
Join Date: Jan 2011
Location: Seattle
Age: 36
Posts: 124
Trader Rating: (2)
Feedback Score: 2 reviews
|
Small update of big proportions, made the transmission corss member, it didnt turn out as pretty as I wanted it to, but its solid and it places the transmission exactly where I want it, so I'm ok with it:
  Then I made the fan shroud, I am going to use Infiniti G37 fans controlling them with AEM/a couple of 25amp relays. These move a lot of air, and hopefully it's enough to keep this thing cool. They are bigger than the actual radiator, so it looks a bit goofy  Now I have to remake my whole tube front, so I bought a bender and notcher, I still need to buy the material, so at this point the updates may slow down a bit. But I will post with updates as they come |
|
|
|
|
05-25-2015, 05:08 AM
|
#27 |
|
Leaky Injector
Join Date: Oct 2014
Location: AZ/ South Korea
Age: 36
Posts: 121
Trader Rating: (0)
Feedback Score: 0 reviews
|
Looking really nice man. It seems there are more and more 1j builds coming along in here. I can't wait to get back to the states and put the finishing touches on mine and take a bunch of pictures.
|
|
|
|
|
04-20-2016, 03:25 PM
|
#29 |
|
Leaky Injector
|
Is your trans internal or external slave cylinder? The mavericks guy told me I would not need the concentric slave cylinder spacer using the full kit but I have a significant gap between my throw out bearing and clutch diaphragm.
|
|
|
|
|
04-21-2016, 10:32 AM
|
#30 | |
|
Zilvia Junkie
|
Quote:
|
|
|
|
|
|
| Bookmarks |
|
|


 Linear Mode

