|
|||||||
| Tech Talk Technical Discussion About The Nissan 240SX and Nissan Z Cars |
|
|
Thread Tools | Display Modes |
 02-10-2009, 07:03 PM
|
#1 |
|
Leaky Injector
Join Date: Oct 2008
Location: Anaheim
Age: 44
Posts: 79
Trader Rating: (0)
 Feedback Score: 0 reviews
|
S14 core support replacement how to
First off this is for all the people who say cut it off and weld in a new one. I am betting half of those people have never done a core support right.
This is the proper way to do a core support. If you need a write up on how to take the front end apart or do not know how to weld, this should not be done by you. Also if you have no body work experience, again not to be attempted by your self. step one assess the damage. Take everything off the front up to the fuse box. fenders, hood, and every thing in between.Leave the bolts in the tension rod brackets. 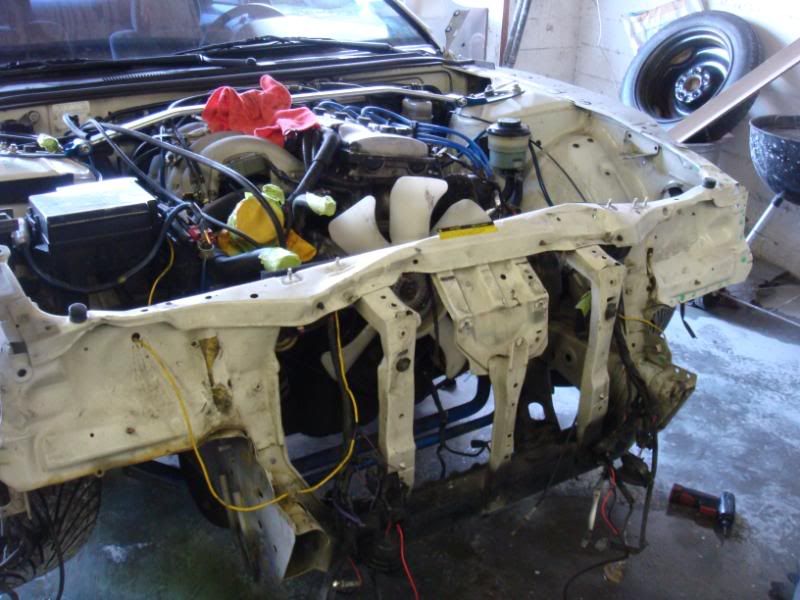 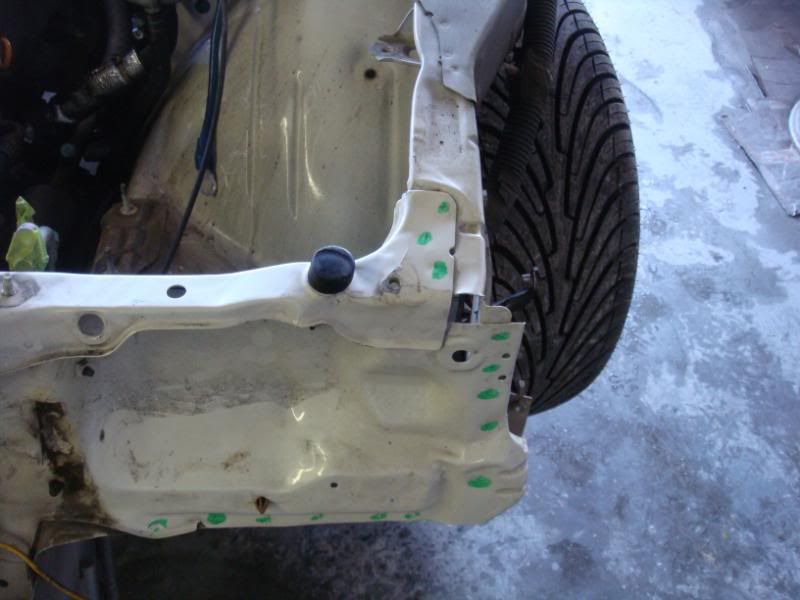 If your changing your core support, chances are the aprons and various other parts connected to the core support is damaged. Before you start cutting anything. Hammer, pull, push the core support back close to its original shape as possible. This will take out a lot of the damage caused by the core support. Also cover all lines with tape/paper/gloves. This will prevent alot of crap from entering your lines.  Don't forget to cover the front end with a welding blanket. Unless you like having a broken windshield.  Next is to remove the core support. The green dots show the positions of the welds that are need to be removed.  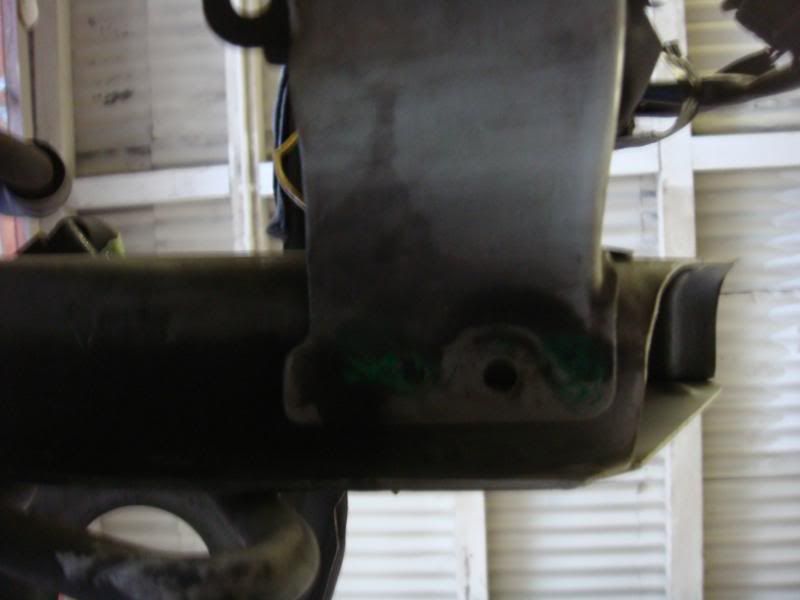 there is 3 on top of the core support 5 to the side of the headlamp area 6 to the lower part of the headlamp area 1 by the reinforcement mount 2 on top of the rail 2 the side of the rail and 2 below the rail tools used 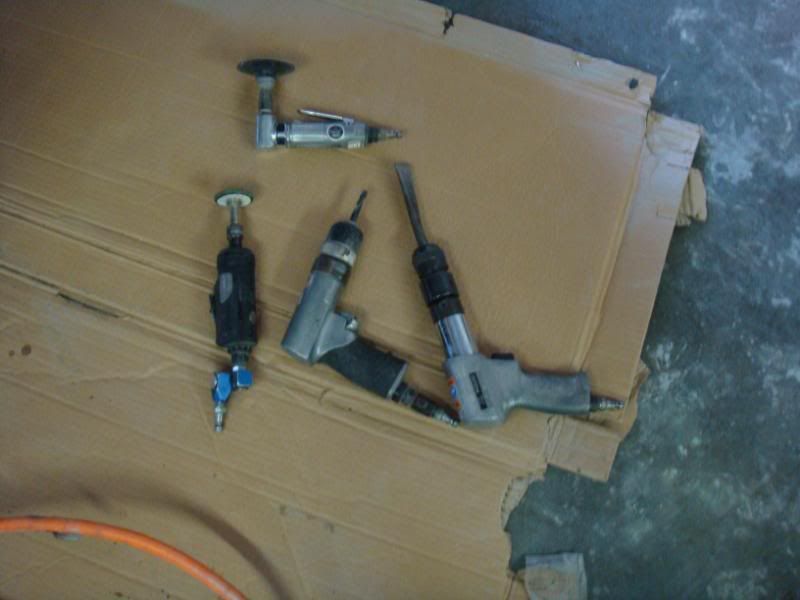 I use two different methods for removing spot welds. The first method is the fastest but takes a lot of practice. Using a grinding disk, the area of the spot weld is ground away until the bottom metal is just barely visible. 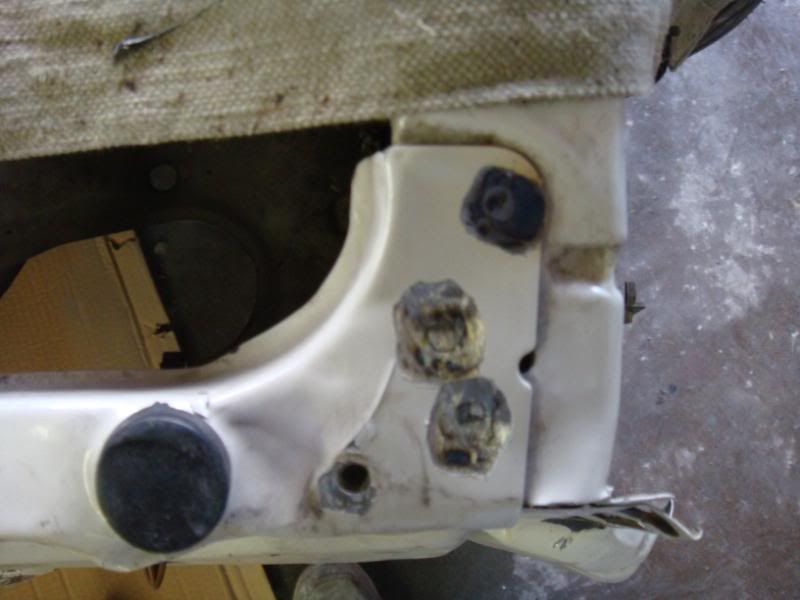 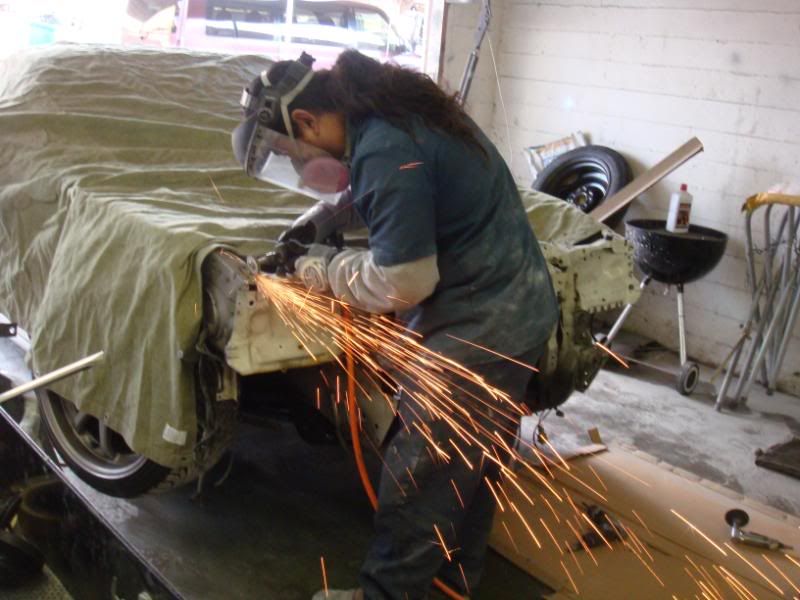 remember to use proper safety equipment, Face shield, gloves, ear plug and a dust mask. the second is using a spot weld drill bit. This can be found here. Wurth Red Label :: Machining :: Drill Bits :: Spot Weld :: Spot Weld Drill Bit HSS 8mm just use a slow speed between 600-800 rpm. The bits are flat with a centering tip. Just drill enough of the weld out to barely expose the metal underneath. 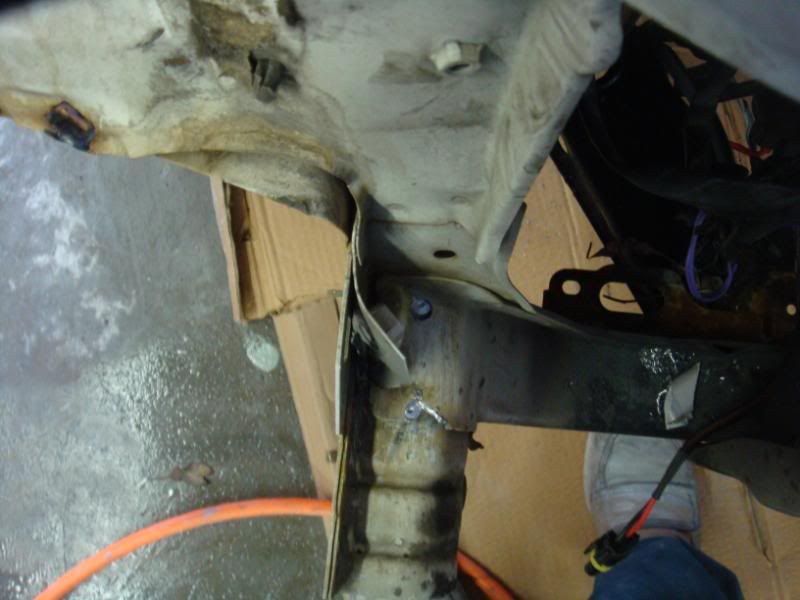 I had to use the drill on the welds on the rail. Now unbolt the tension rod brackets. and yank on the core support. It should come off with minimal effort, if the welds were separated correctly. 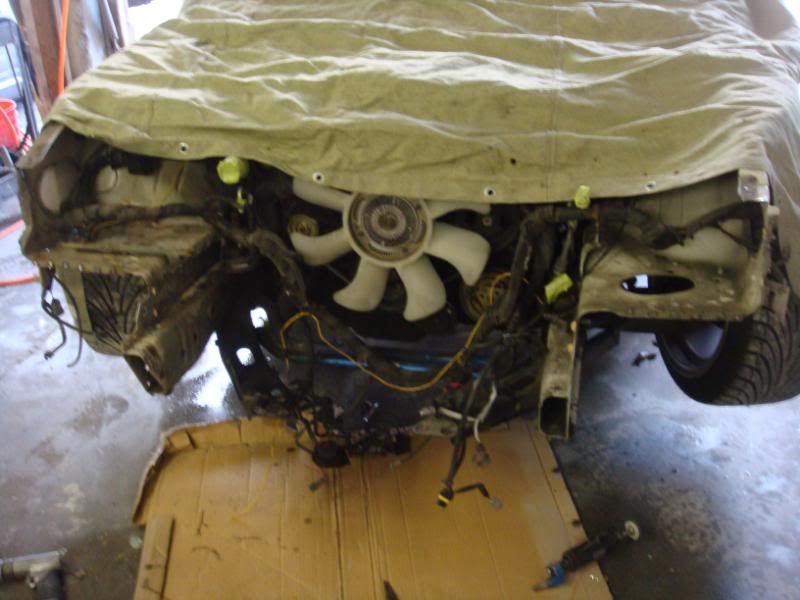 Time to look at other damage. This particular car has the aprons damaged. 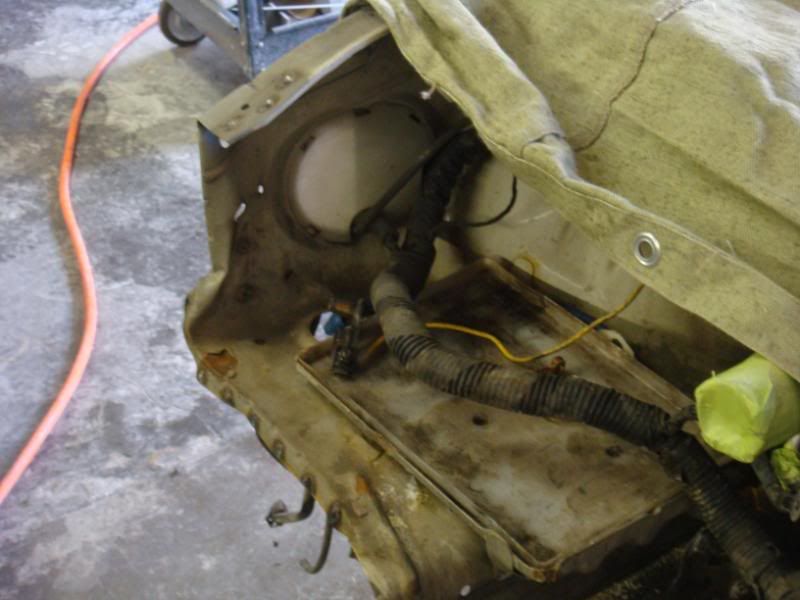 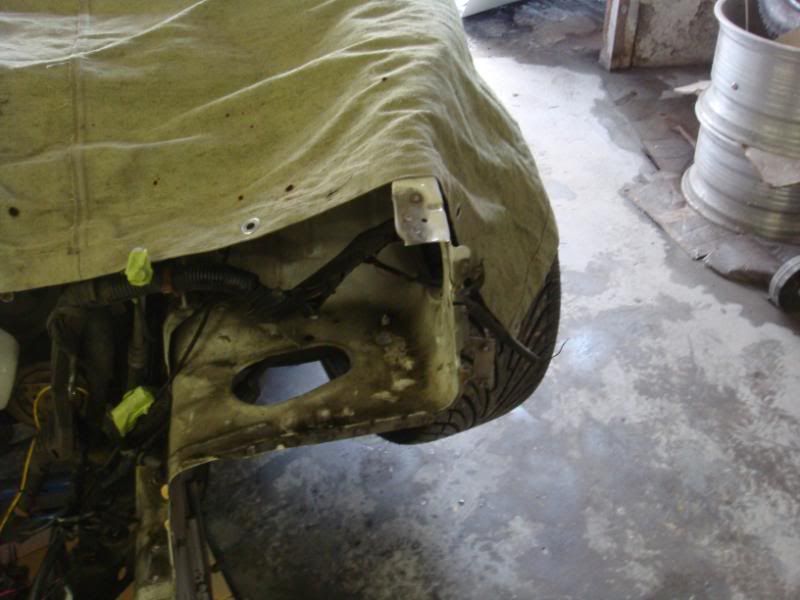 Hammer the damage back to its original shape, using the new core support as a reference. 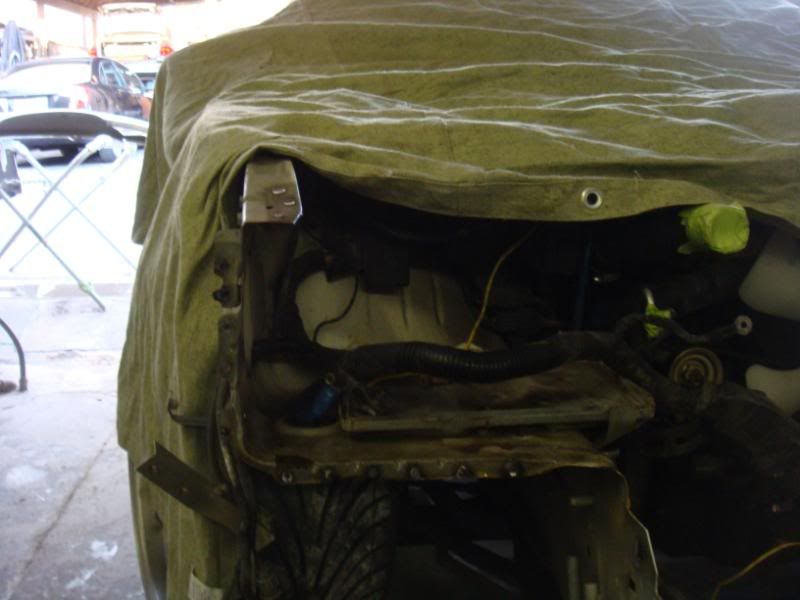 Time to prep. Look over the spot weld areas where the core support came off from. Grid down the welds that are sticking out, being careful not to grind away the old paint marks. Next take some weld through primer and brush it on the exposed metal, again being careful not to cover up the old paint marks. 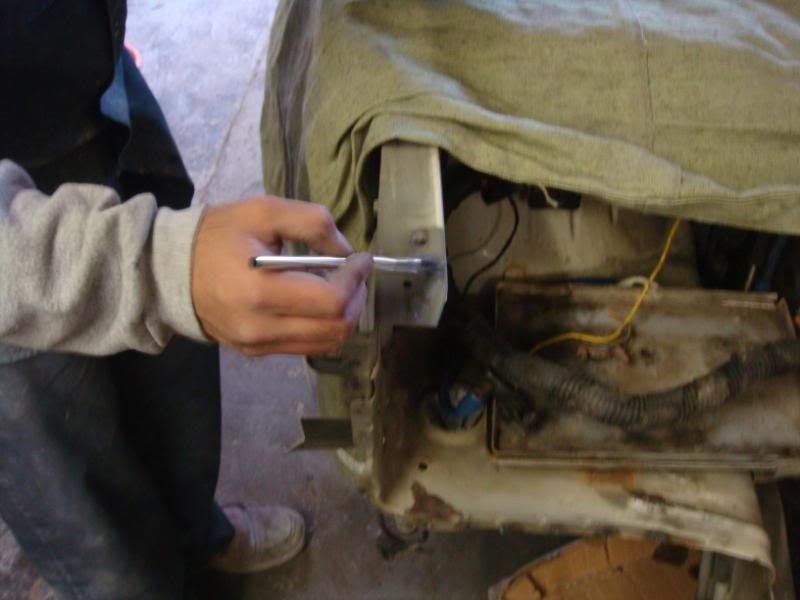 Prepping the new core support. All the welds that were removed need to be replaced on the new core support. Start by putting holes in the core support corresponding to the welds you removed, use a 5/16 drill bit. If you have access to one, a hole punch makes this process a lot faster. 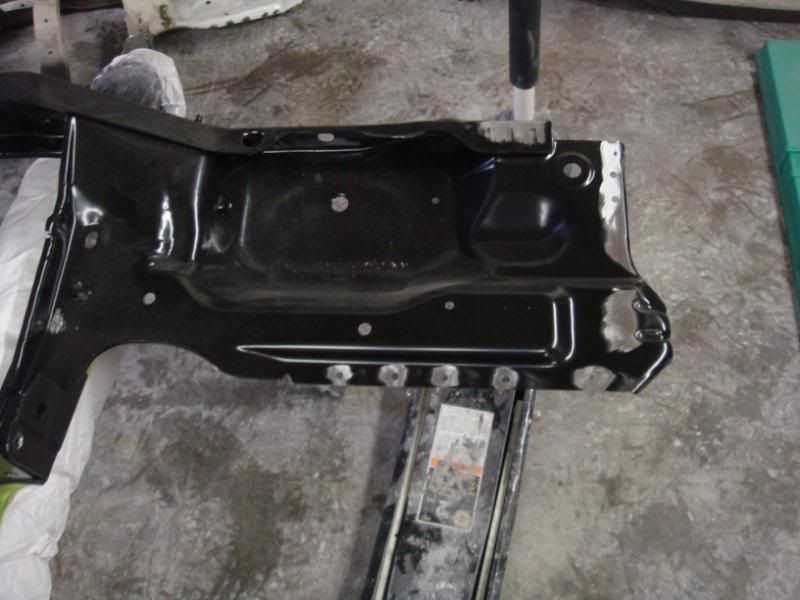 clean up the area around the holes with a scotch bright wheel. Put the core support on the car. Use the old paint marks as a reference to set the core support in place. Time to measure. Measure the distance on the fender holes. The hole furthest back to the center of the front hole. Take that measurement and make sure it corresponds to the mounting points on the car. Do this for both sides. 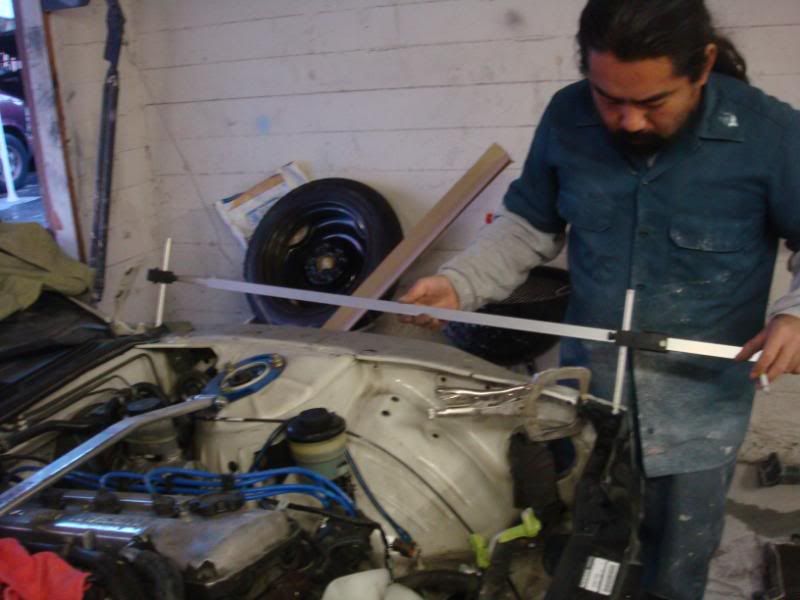 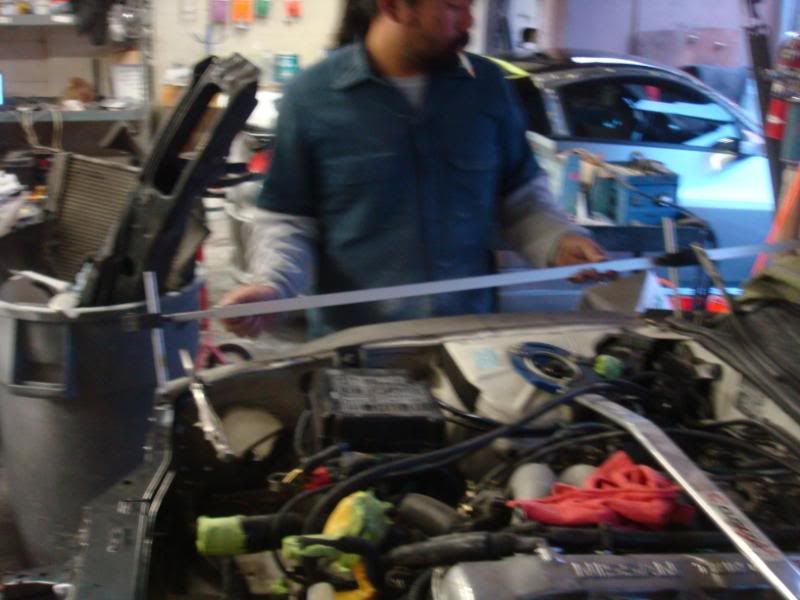 Secure in place using vice grips.  Next take the cross measurement to make sure the front is square. Measure from the rear fender mount to the front fender mount on opposite sides. 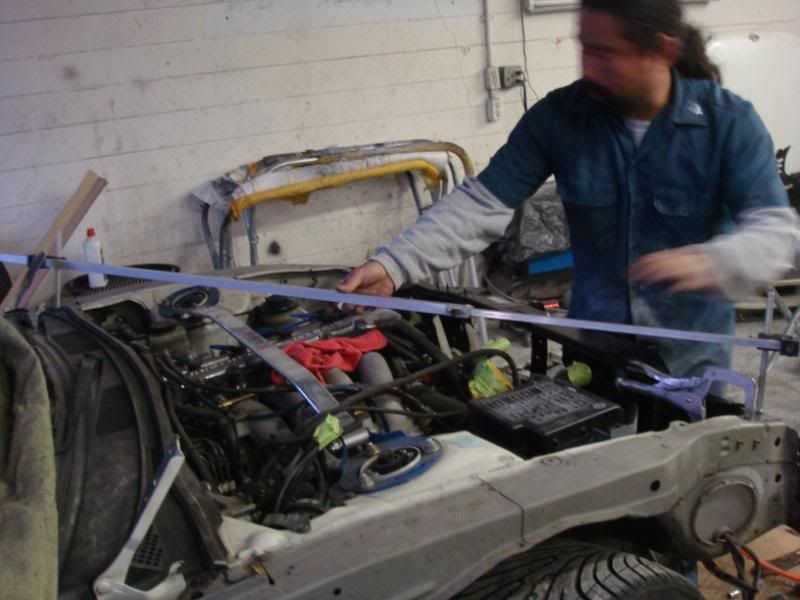 do this for both sides. if any of the measurements are off you will need to move some metal around to make it even all around. It is very important to get this dead on as it will determine the way your sheet metal fits on the car. After the top is squared and secured in place line up the lower crossbeam by bolting it down to the tension rod brackets. Check the reinforcement mounting points to make sure the bolts will go in the holes. 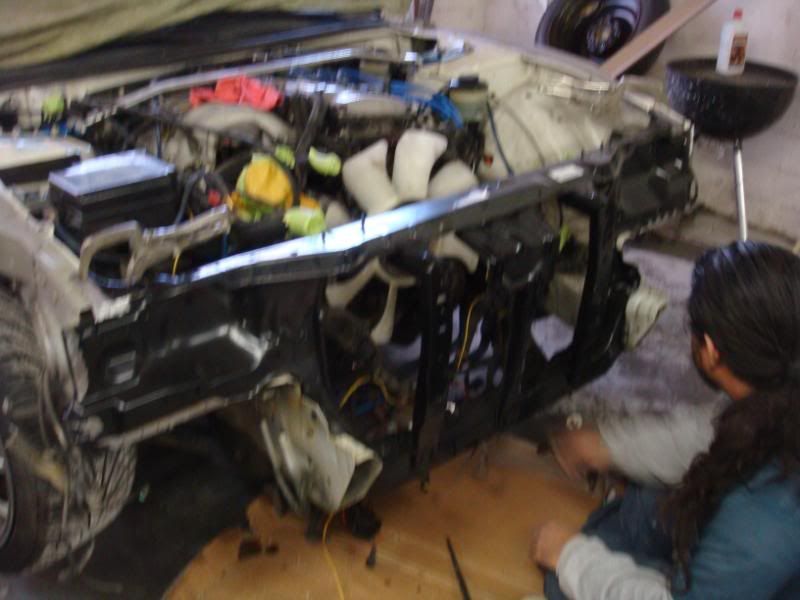 Use the spot weld drill to clean the welds. 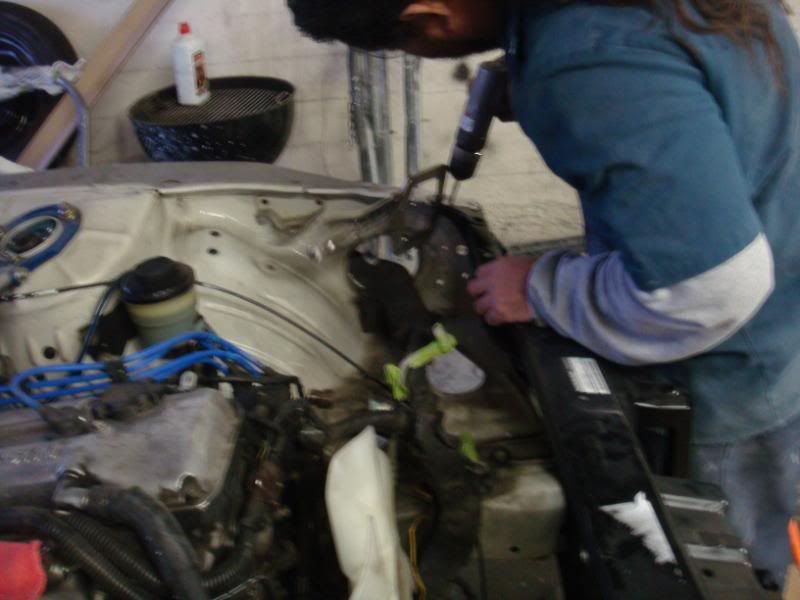 Time to start welding 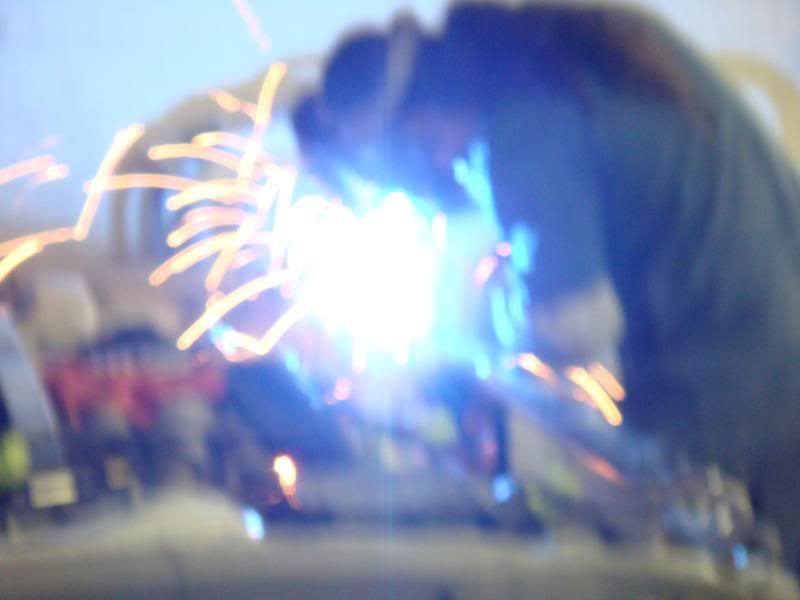 Weld the top of the core support first on both sides. Then the ones on top of the rails. Then finish up the rest of the welds. Make sure to skip around as not to build up too much heat in a single area. 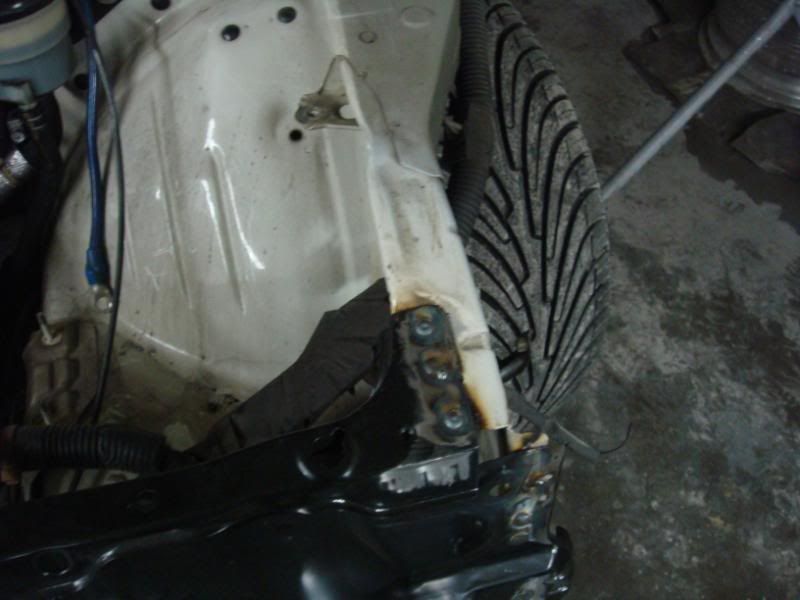 grind down the welds as to leave a little bit of the weld exposed, then using a scotch bright wheel clean up the grinding marks. If done right this will look exactly like factory spot welds after its done. This next step is optional but some thing i always do for extra rust protection. Prime all the bare metal areas. 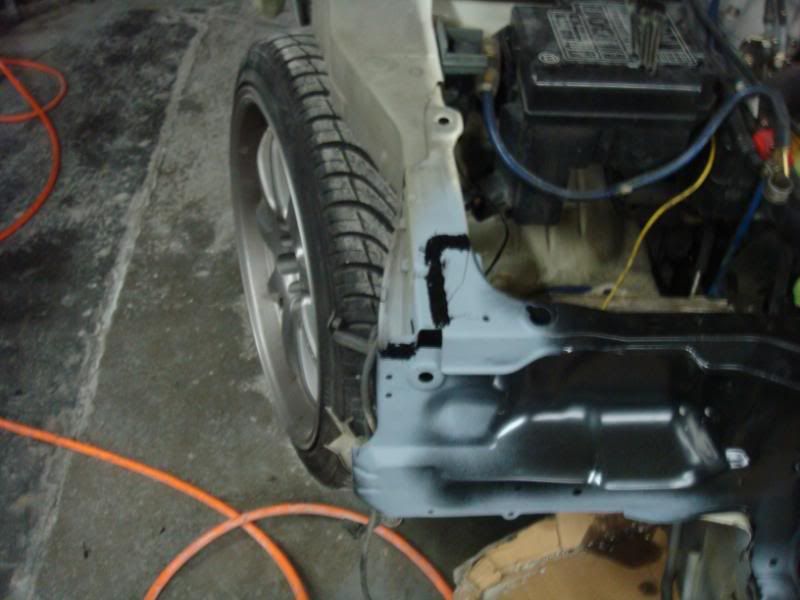 usinga seam sealer seal all the areas of the repair area. 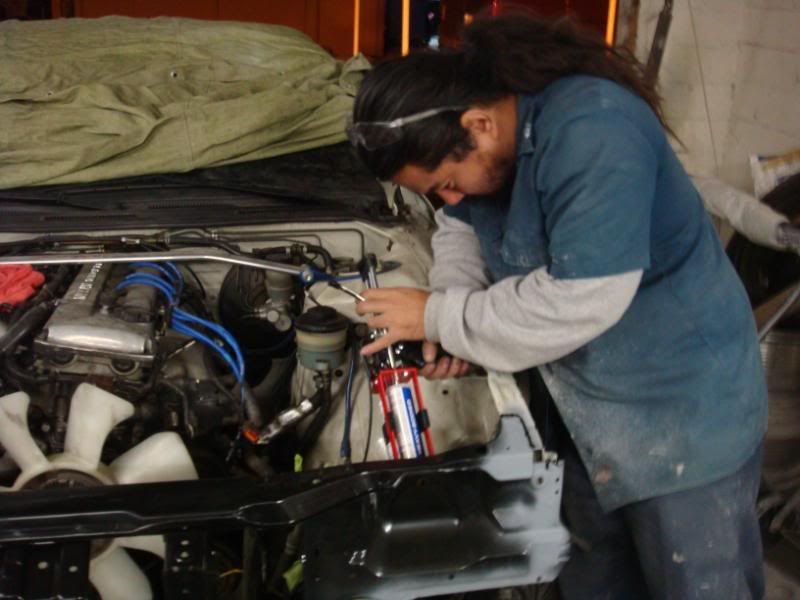 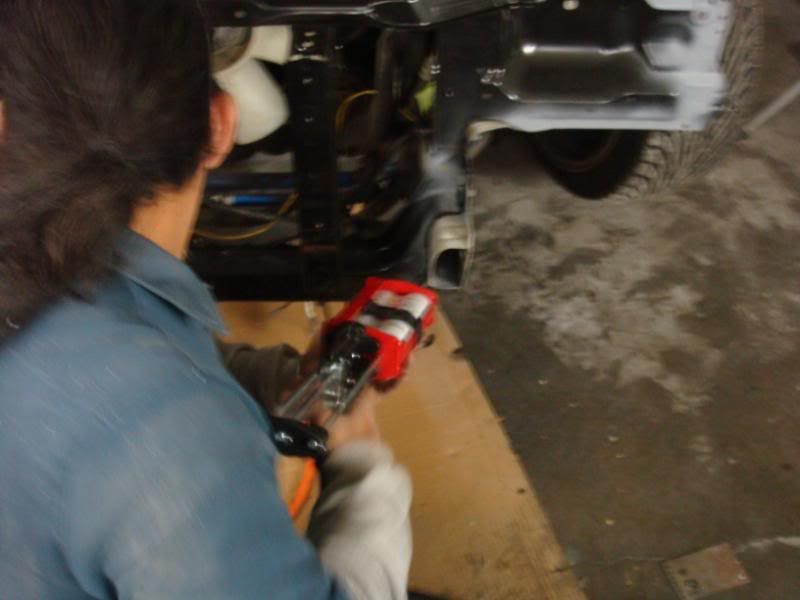 let it dry for about 1 hour scuff everything up with a gray scotch bright pad. wipe everything down then mask for paint. 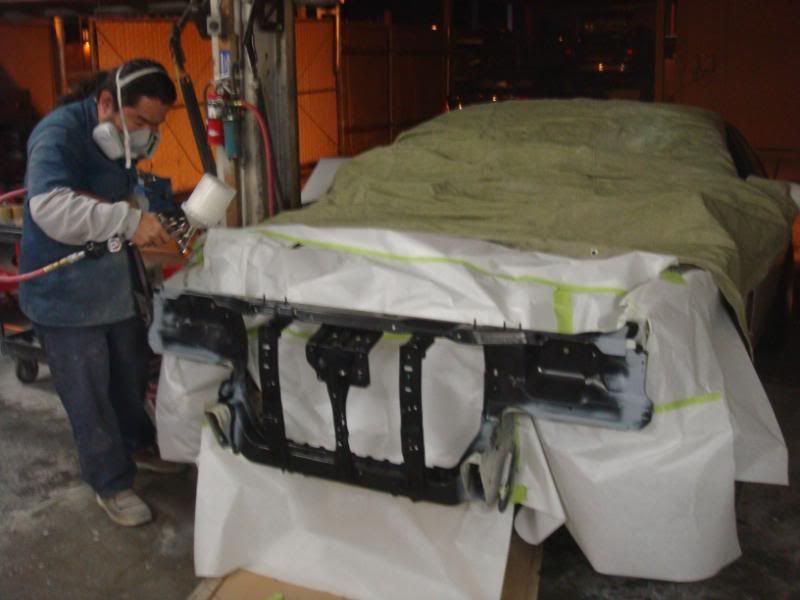 All done. 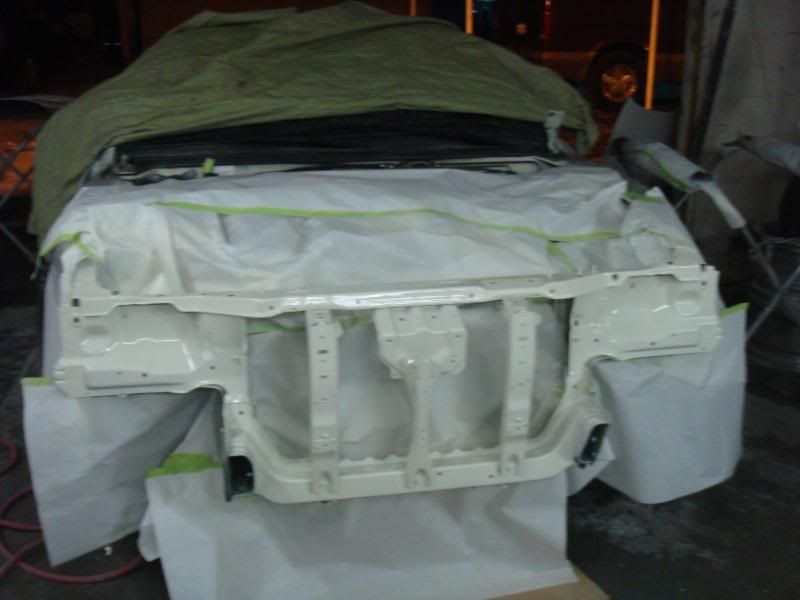
__________________
We do "Awesome" Last edited by AngryPanda; 02-10-2009 at 08:20 PM.. Reason: grammer/pictures |

|

|
| Sponsored Links |
| Bookmarks |
|
|


 Threaded Mode