|
|||||||
| Builds (and builds only) Got a build thread? It goes here, build threads anywhere else on the forum will be locked and never moved. |
 |
|
|
Thread Tools | Display Modes |
 01-05-2015, 11:47 AM
|
#32 |
|
Join Date: Aug 2013
Location: Ontario
Age: 29
Posts: 41
Trader Rating: (0)
 Feedback Score: 0 reviews
|
thanks guys! As for not knowing shit you are right but i am definitely learning as I go. and the JZ will not happen with this chassis
 the coolest i'd get is rb20 or ka-t, but we'll see what the summer brings when I graduate school. the coolest i'd get is rb20 or ka-t, but we'll see what the summer brings when I graduate school.anyway, update friends (in no particular order): First off thanks Steve (Dutchy) for sticking it out with me from the early morning until the early morning pretty much every day over the last few days working on this heap. Although I couldn't get some things I wanted done, I got a ton of shit finished and feel super accomplished and learned a bunch. So ya, here we go. These are my tension rods, one s13 another s14. This is what happens when you ball out on some things and your budget eventually says no. Thanks for the free multilink brandan and Masashi you guys are rad. Took them completely apart, wire wheeled and anti seized and adjusted them to the same legnth  I also swapped my trusty old differential for an s13 pumpkin with an s14 rear cover. the reason for this is that the s13 differentials do not have the bushings in the pumpkins, so they make the rear end feel that much stiffer, and its alot more cost effective than buying solid bushings for the s14 rear diff.  Little things seemed to take the most time, bolting down the ball joints took alot of time because they just kept spinning, even with the impact gun. We also had a rude reminder that this is a 20 year old nissan (haven't had one of these in a while) in taking out the drivers side tension rod, it had to be cut out in pretty much every place, bushing burned out, at one point my car was on actual fire (for like, the sixth time since the rockers). Idk, shit happens. but its done!  did hotrod style hockey puck motor mounts. After installing the 248/232 can (Steve installing it since I have no idea what I'm doing) I noticed how undeniably terrible my engine mounts were. So I looked around and then did some research and decided on a set of mounts, but, with Christmas time here to budget said no. 2.5 hockey pucks per side along with some hardware does just fine. That being said, with the cam and pretty much solid mount the car feels aggressive. Literally everything moves. It's awesome.  I got the car basically aligned, threw an s13 diff in there with a new axle, got my fans in, fixed a tensioner, got my stubborn ball joints finally bolted down, the cam in, engine mounts and all that's really left to do is some wiring for my HIDs, battery relocate and efans  now all i basically have to do is wiring of the fans, HIDs and battery, which i will be doing inside and just taking out to my car since its freezing outside. Thanks for reading! More pictures soon. |

|

|
|
01-07-2015, 01:50 PM
|
#35 |
|
Leaky Injector
 Join Date: Dec 2014
Location: St. Paul
Age: 31
Posts: 101
Trader Rating: (0)
Feedback Score: 0 reviews
|
GOOD WORK DUDE ! sounds a lot like me in that article …. reading all these build threads thinking i have to have a complete monster when I've never even ran at a track yet.
|
|
|
|
|
01-08-2015, 11:18 PM
|
#36 | |
|
Join Date: Aug 2013
Location: Ontario
Age: 29
Posts: 41
Trader Rating: (0)
Feedback Score: 0 reviews
|
Quote:
|
|
|
|
|
|
01-11-2015, 11:16 PM
|
#37 |
|
Join Date: Aug 2013
Location: Ontario
Age: 29
Posts: 41
Trader Rating: (0)
Feedback Score: 0 reviews
|
Got to do some fun stuff today. started by going out and picking up some brakes, found a good deal on the local classifieds. Seller was awesome, brakes are brand new so thats pretty noice
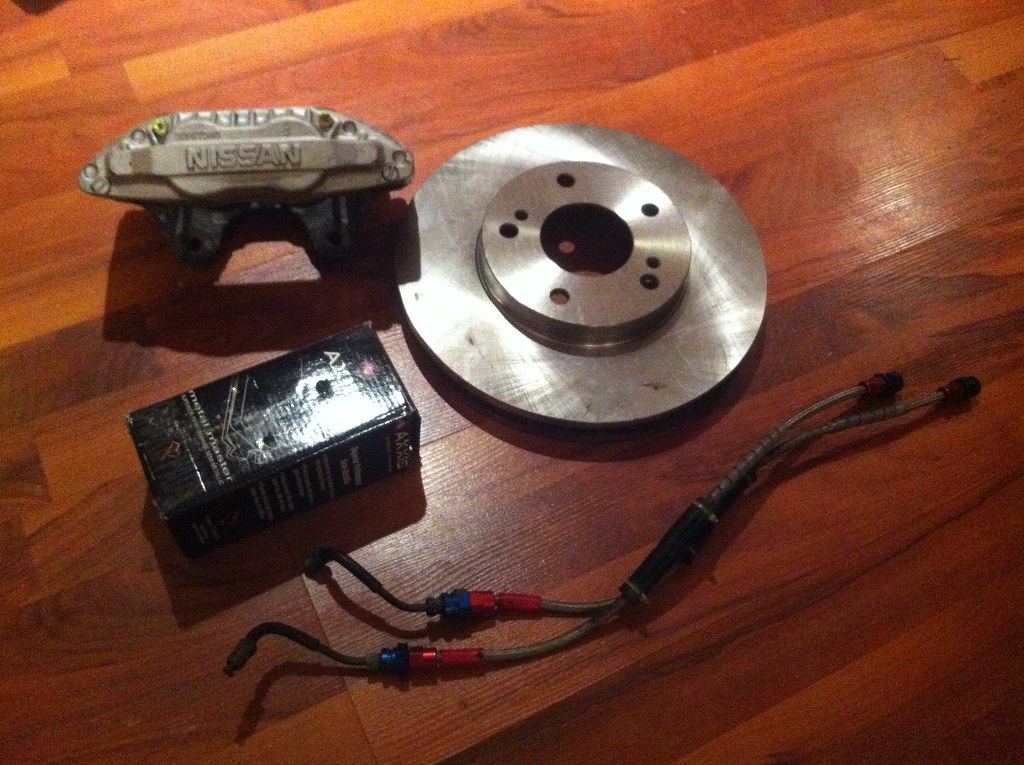 I cannot get over how giant the brakes are compared to the ones I have on the car now. Its just ridiculous 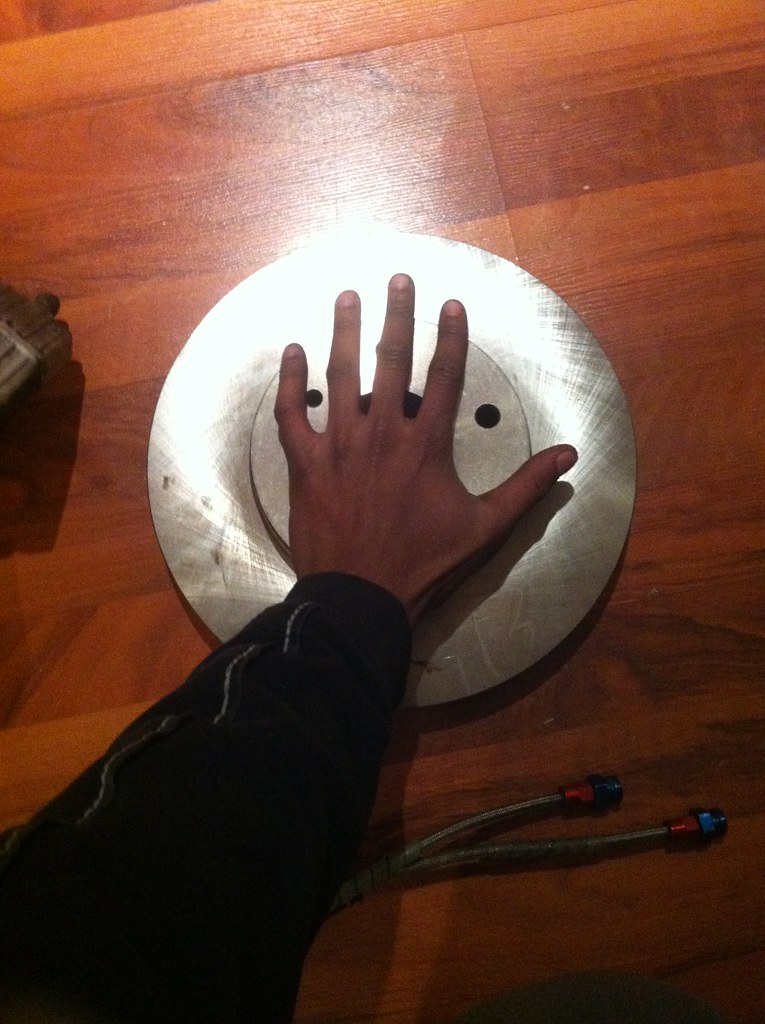 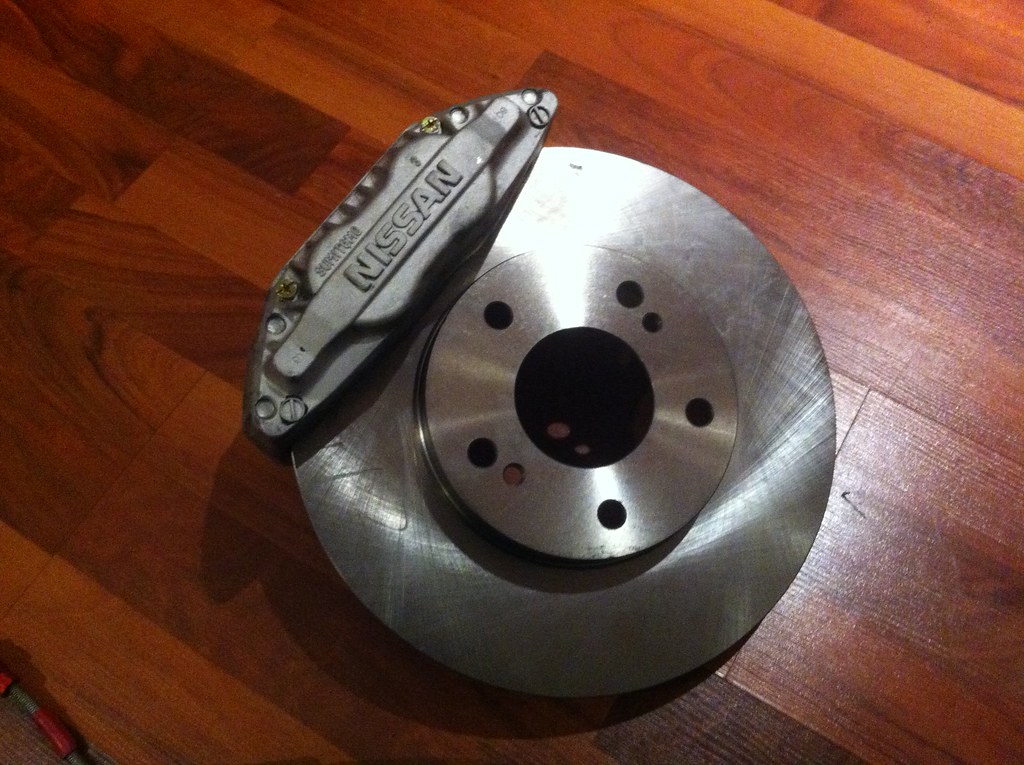 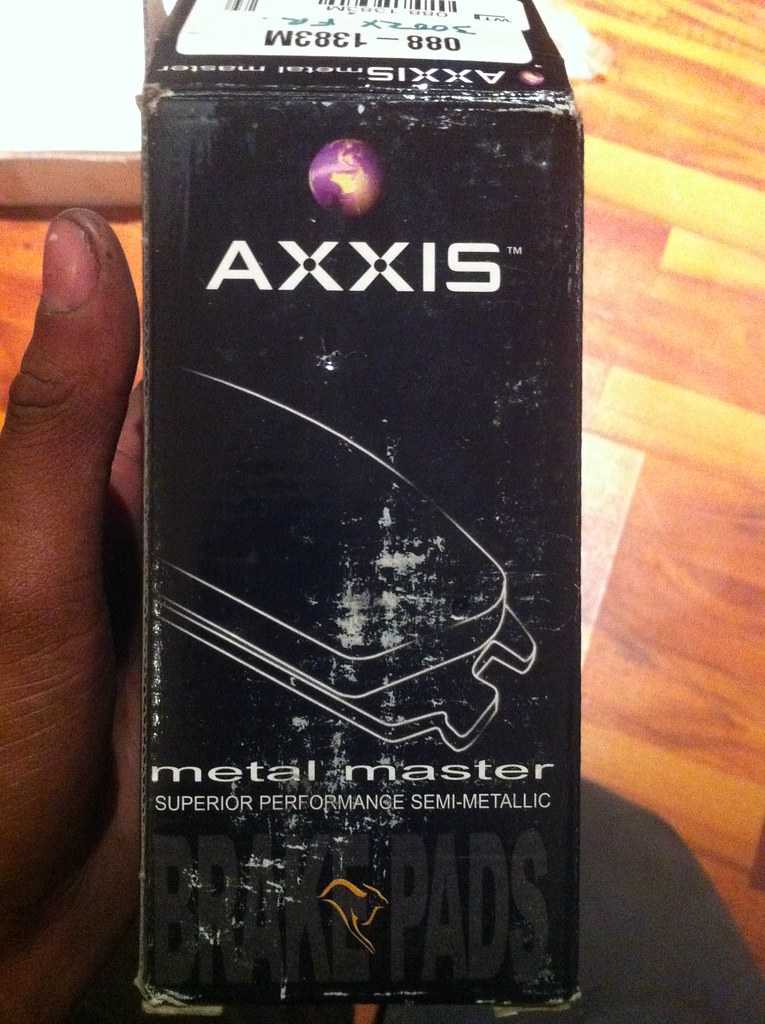 all I need is to paint the calipers, then Ill just wait for a day warm enough to install em. Then I did some scary stuff with my hood. The idea behind it is that it pulls air through the rad when I'm driving, so it cools down my engine and keeps under hood temps low which is nice I started by gutting the hood 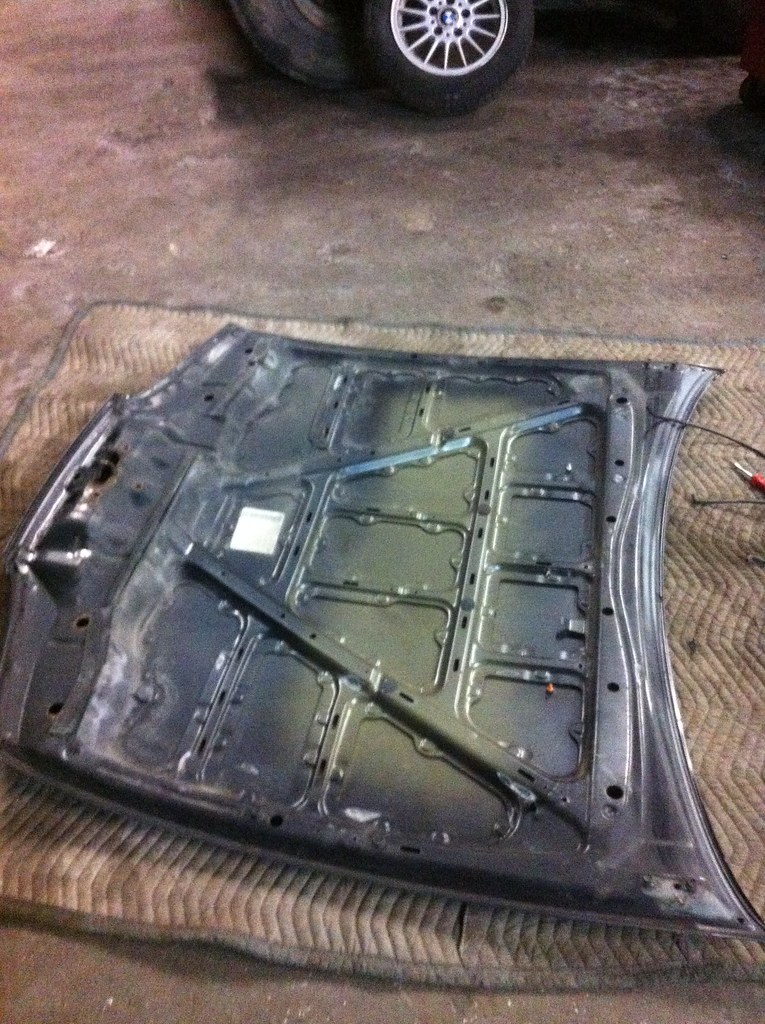 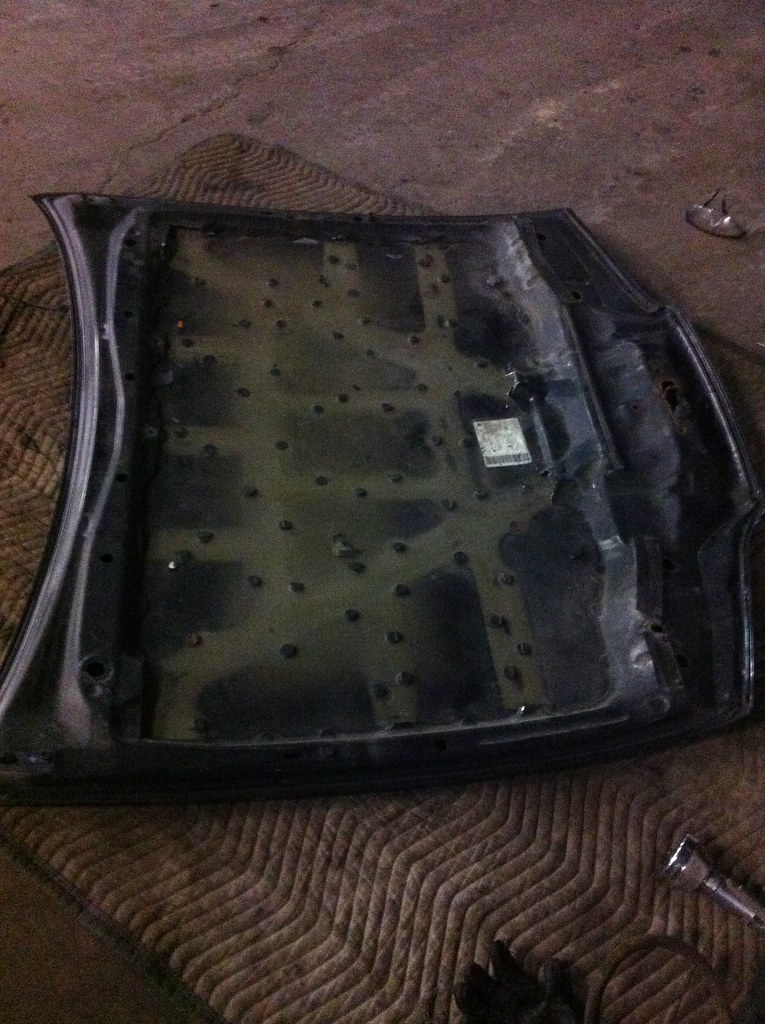 then I measured and drew out my cuts. this took the longest, measuring stuff out on a non flat surface really sucks, but I got it straight. I used the spray nozzles for reference 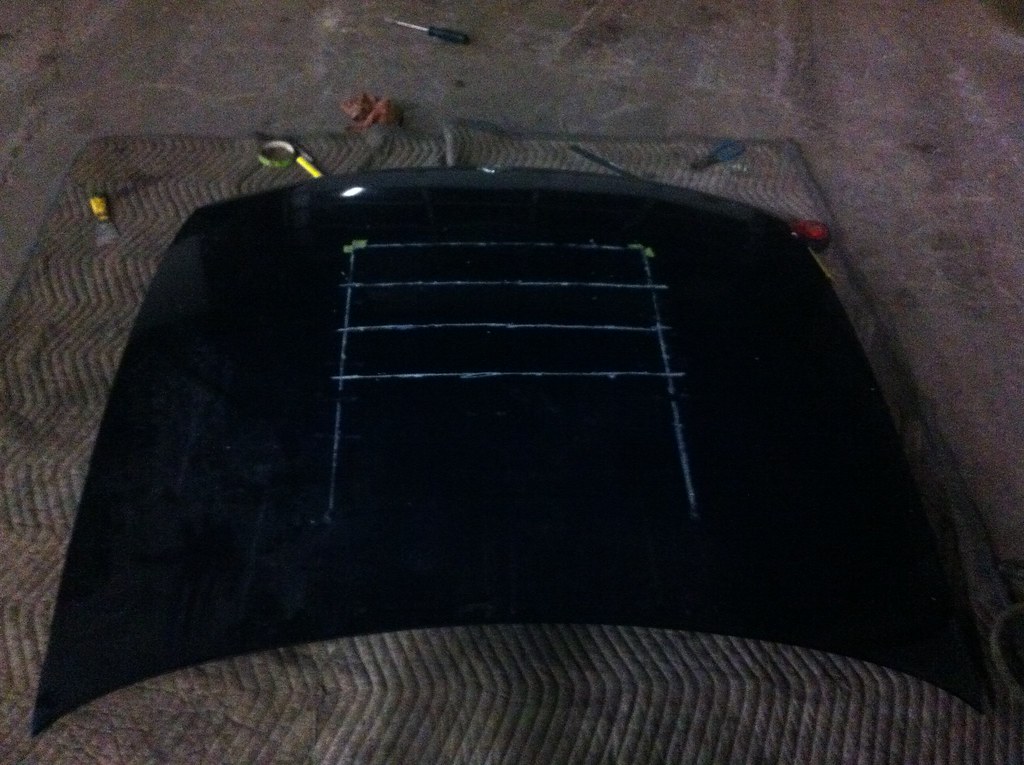 I then taped the edges so I had a straight line to cut on. 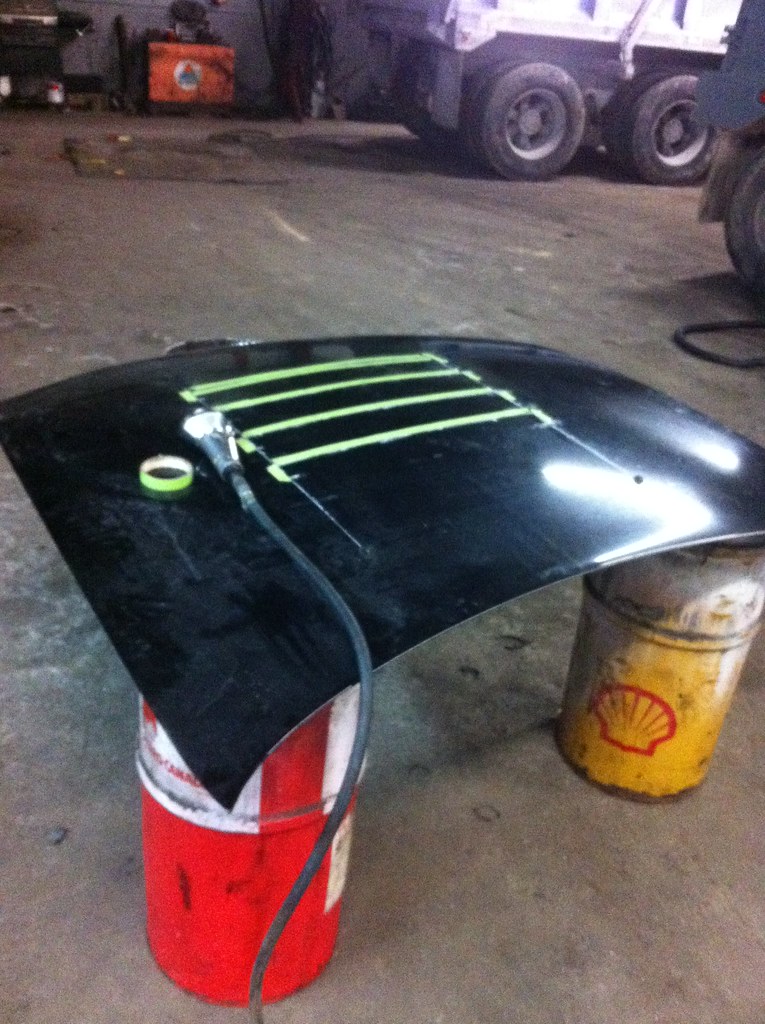 and whammy, vented hood 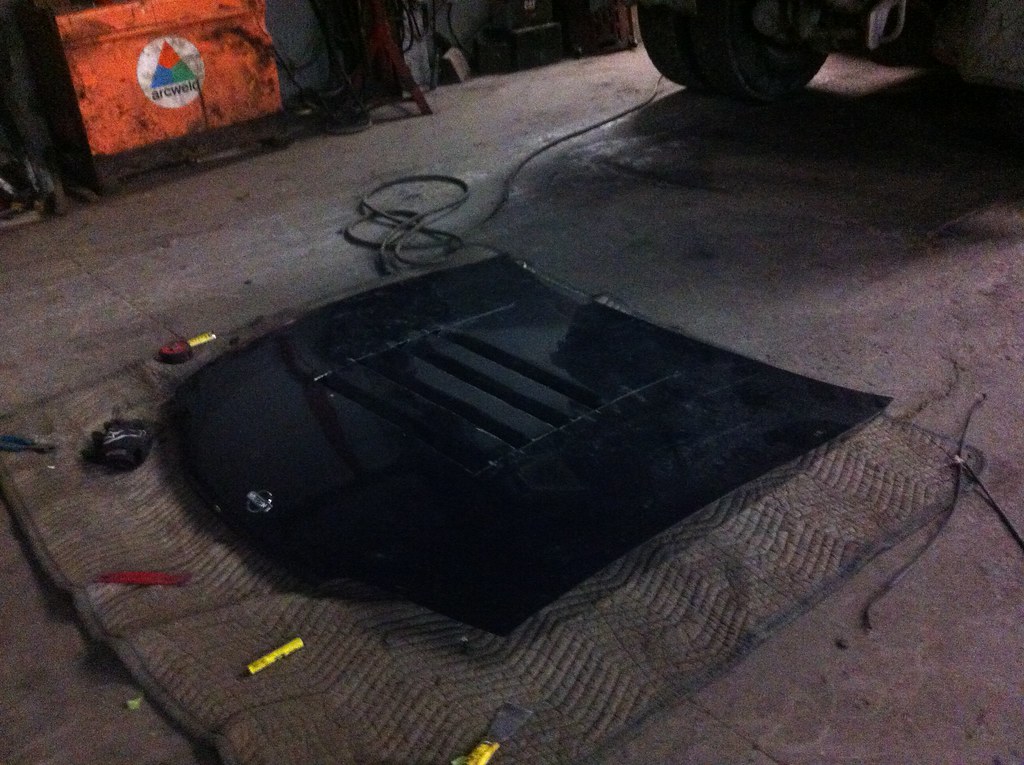 I still have to smooth out the edges, and im not sure if i should cut more up the hood and make the fold longer and less aggressive. I'll put the hood on the car and see, for now I like it. oh, I also got an aluminium rad  |
|
|
|
|
01-12-2015, 11:48 AM
|
#40 | |
|
Join Date: Aug 2013
Location: Ontario
Age: 29
Posts: 41
Trader Rating: (0)
Feedback Score: 0 reviews
|
Quote:
|
|
|
|
|
|
01-14-2015, 08:09 PM
|
#41 |
|
Join Date: Aug 2013
Location: Ontario
Age: 29
Posts: 41
Trader Rating: (0)
Feedback Score: 0 reviews
|
good news and potentially really really shitty news
i installed my hood and it looks friggin great with the vents  bad news: I may have killed my engine jk i just havent timed it yet so its flooded with fouled plugs and doesnt like running atm. |
|
|
|
|
03-25-2015, 12:02 PM
|
#44 |
|
Join Date: Aug 2013
Location: Ontario
Age: 29
Posts: 41
Trader Rating: (0)
Feedback Score: 0 reviews
|
so i've been gone for a while, ill just do a big update... i think im going to keep the thread updated here from now on, since this is a way cooler website than stanceworks.
so, on to the update. my friend steve and i had an agreement that would lead to me being able to use his shop/hands for some help on a ton of shit and loose ends (this is my first car, dont forget). this time, on the list of shit to do was 1)Hot cam swap (done) 2) replace bummed axle 3) battery relocation 4)ALIGNMENT 5)Vent Hood 6) tie up any other noticeable loose ends 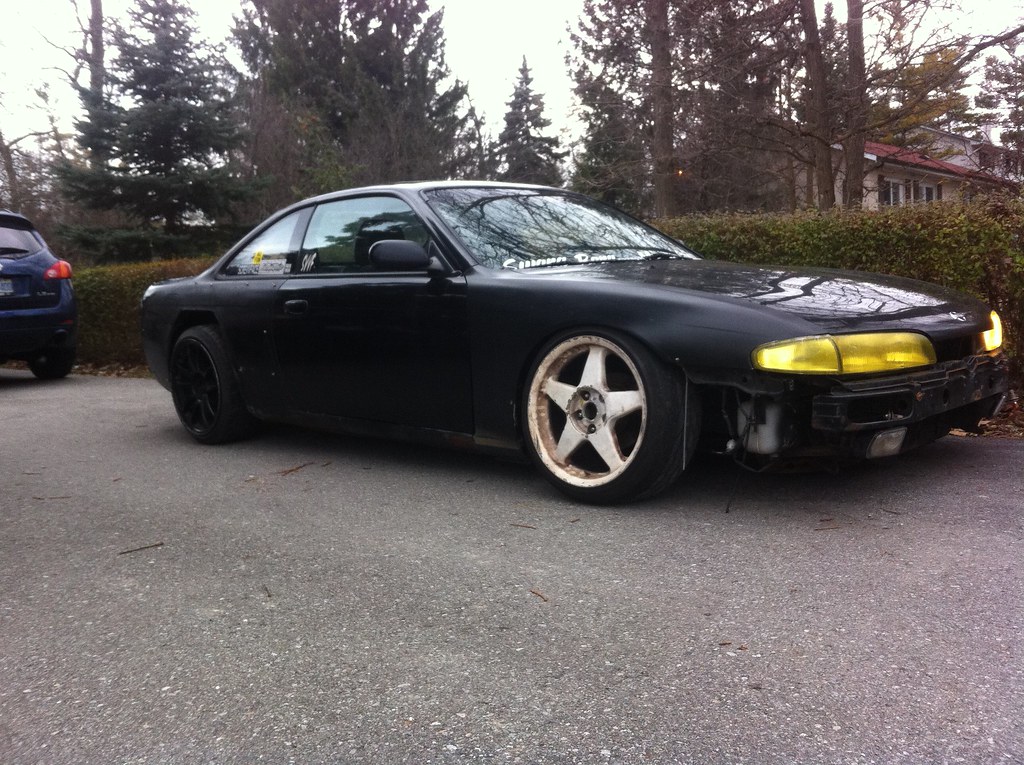 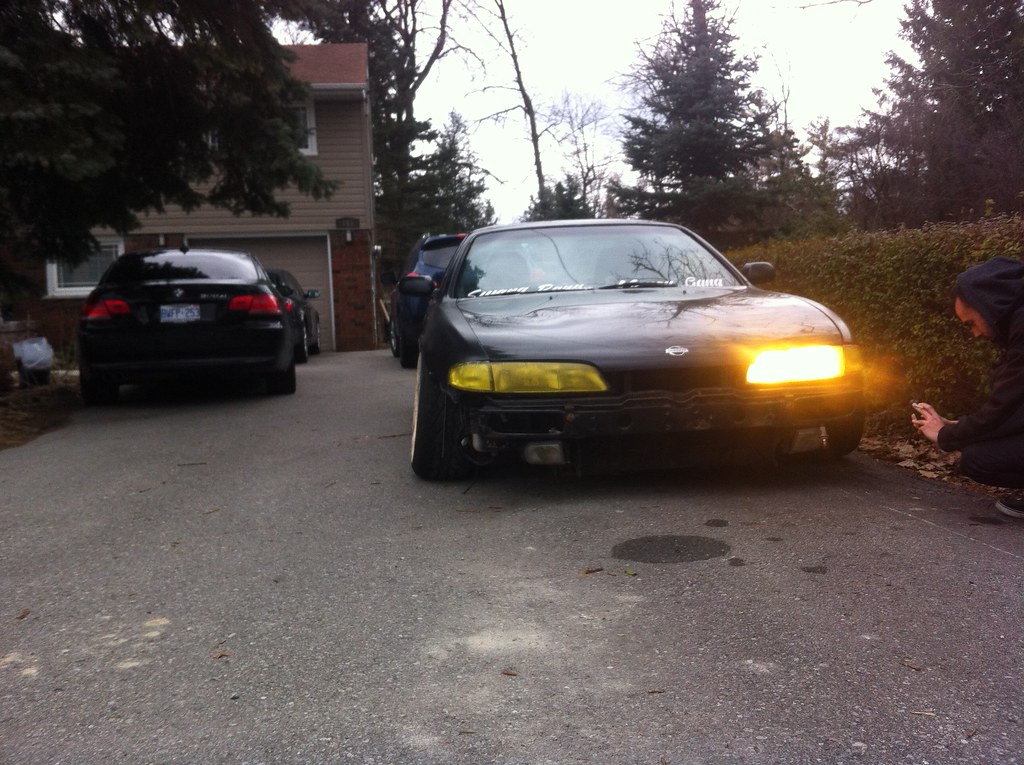  so onto alignment: the first step was rebuilding the tension rods i got (i got them for free) which wasn't a big deal at all. got em all free'd up, layered in anti seize, and ready for the alignment guy to take hold. next i swapped my s14 diff for an s13 one, due to the solid carrier bushing. still welded, but now less rubber in the driveline. i also fixed and replaced a bummed axle. one thing i will say is that those back bolts are super lame to get to with the subframe risers! damn spare tire well gets in the way. then we put the cam in, i realized how deadly my engine mounts were, so i started taking care of them while i removed my stock tension rods lol hockey pux they certainly dont look the best, but work great. then i aligned it and brought the car home, my work schedule really conflicted with me being able to use the shop. engine still out of timing, and other loose ends undone. also the car was unalignable due to the stock s14 inners with the spl outers and stock knuckles. while the car was sitting at my aunts i started piecing together a z32 bbk managed to get the calipers, pads, rotors and lines all said and done for under 300 bucks which is nice i then cut and vented my hood, mostly because of looks but i know it provides coolings too then a few days later i got an aluminum rad for a pretty good deal, shits cash, since my old rad was stock and wonky. here it is with the hood/vents installed then at one point after doing tons of reading on the internet i thought i bent my valves, but the car just ran out of gas *lol)  got it figured out (obviously) one thing i will say about the 248/232 cam swap, dont bother reading anything online about it. not one forum, thread or video has helped me at all with this. all the install how to's are misleading and leave out super important information. the fact is, the car will idle like junk no matter what. we timed mine at 20* (stock timing) and although the cam is in and it idles cool and shit, i would not do this again. i honestly do not notice the power, and having a car with a surgey idle is NOT AT ALL AS COOL AS I THOUGHT IT WOULD BE. /rant anyway i was going through some shit, so i decided to retail therapy and bought this cool bumper.  i also sold my steering wheel, and bought a new wooden one with a quick release    the car is quite wide  then i took some actual photos of it   (these are actually shot with film) (i took out a spacer, my front fitment isnt that aggressive anymore. shit was undrivable) |
|
|
|
|
03-25-2015, 12:03 PM
|
#45 |
|
Join Date: Aug 2013
Location: Ontario
Age: 29
Posts: 41
Trader Rating: (0)
Feedback Score: 0 reviews
|
got funny stickers printed as well
 support team money gang and buy one. 5 bucks. anyway, back to the build: found a cool racing seat (ya its not a sparco but w/e mismatched shit seems to be a theme with this car) got it for a steal at 100 bucks. its literally mint.  then it snowed, so i just didnt cars for a while  took a pic of all the stickers i compiled  then i took it to the shop again for more work, 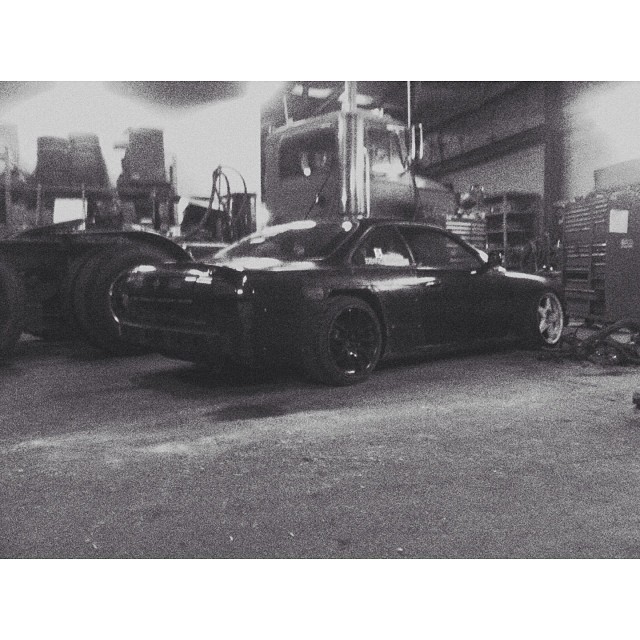 decided to do some general maintenance, especially since i ran the car clean out of gas (who knows whats in the bottom of that tank) plugs, fuel filter, battery relocate, wire in efans, HIDs, install z33 inner tie rods with rack spacers, z32 brake upgrade, overall bolt check 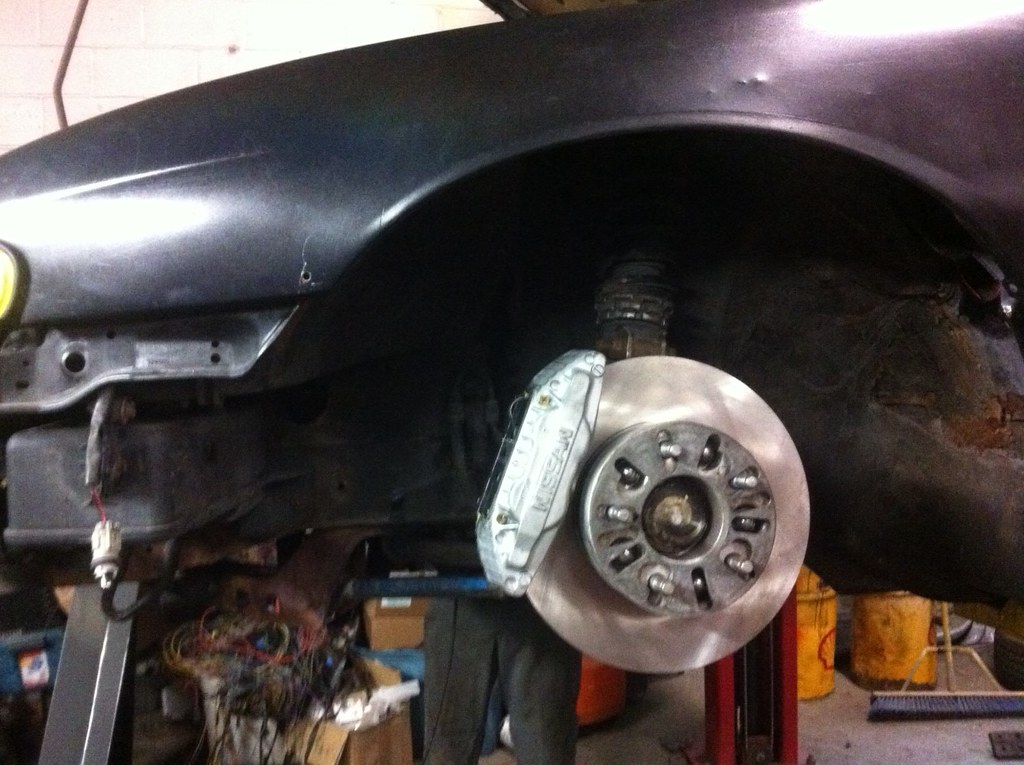 my brother was also around so i got him to put the stickers on (he's 12) 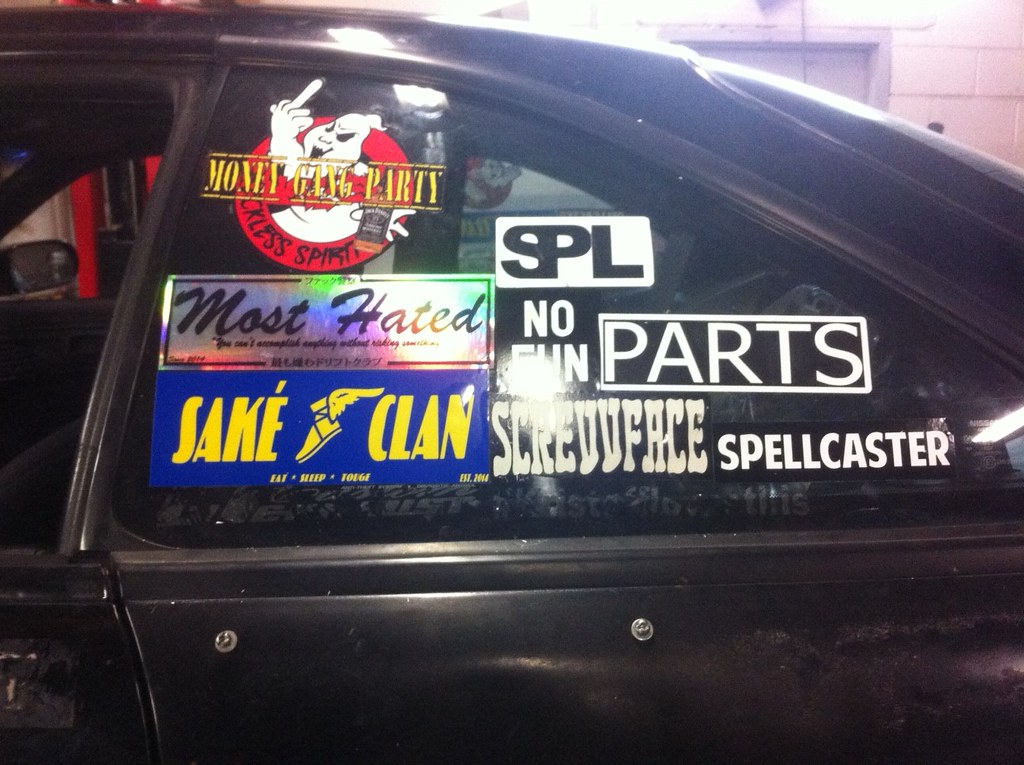 then while running the engine to warm up to time so i could drive home, power steering hose took a total poop 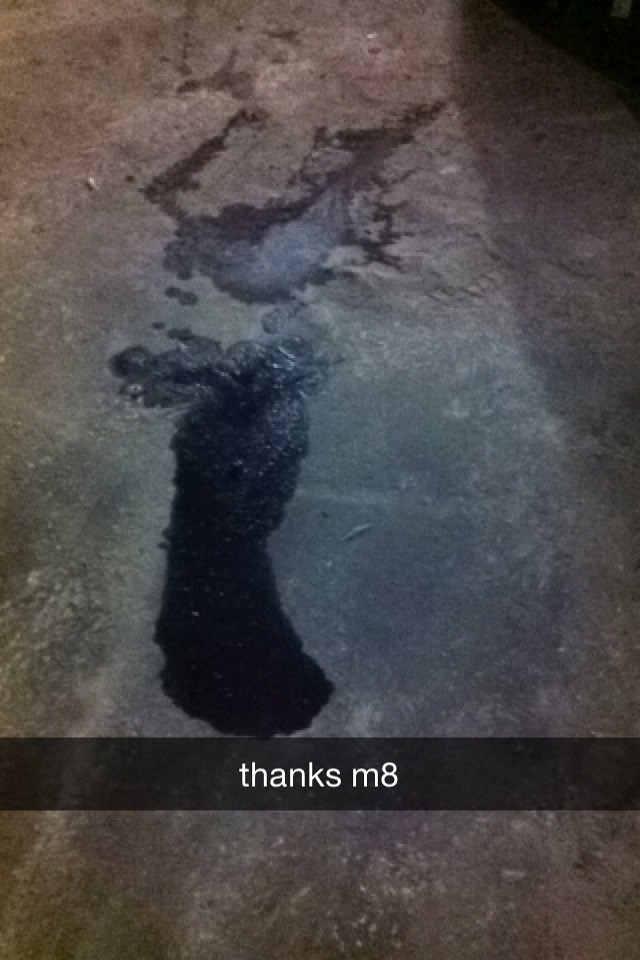 left ps fluid everywhere, i was so happy i jumped for joy 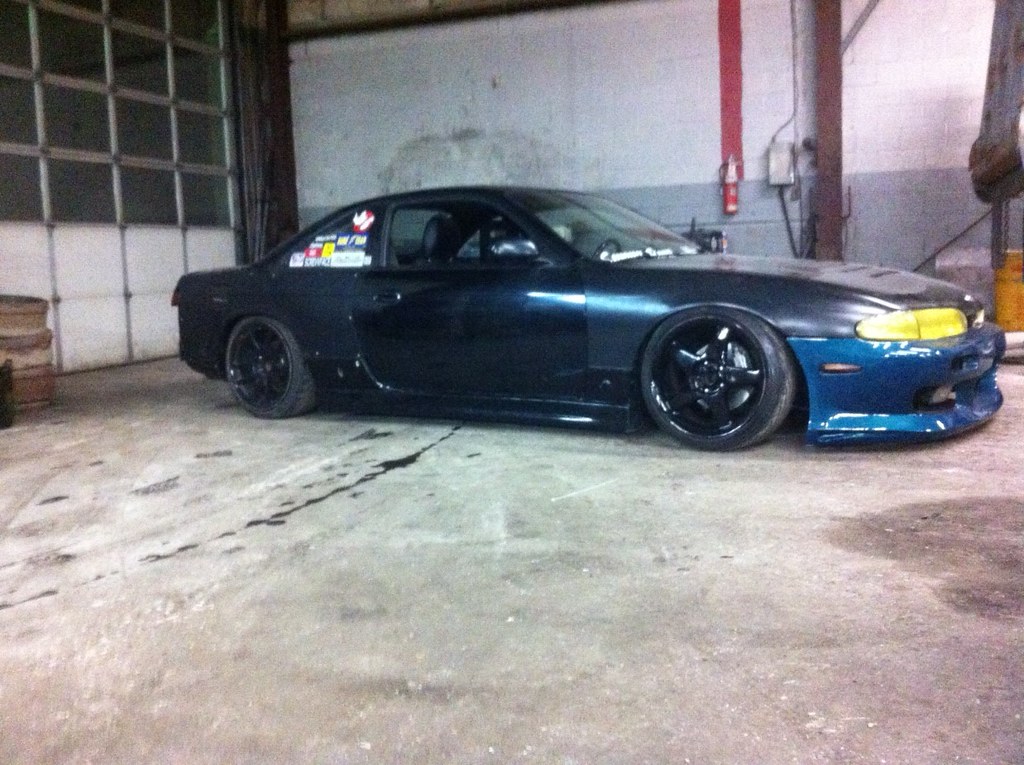 at least it looked cool.  test fit steves wing, might grab one of these in the summer. no, its not BCL. so since i did not modify my knuckles, the only combination of inner/outer tie rod I could get was SPL Outers with Tein Z33 inners, with a rack spacer; Z33 because they're substantially shorter than S14. SPL outers are also way way longer than stock. So since I was getting my control arms extended 30mm I needed the longer outer. which lead to me getting the shorter inner. feel me? so I get em all installed and steve points out that im at the end of the threads on both the heim/shank side and inner tie rod side of the spl outers. Which is scary. Having only two or three threads on a tie rod is deadly. I dont want to hit a bump and have that shit go flying. and that was just eyeballing it; what if im not even at zero toe? So i started spitballing solutions. 1) Weld nut onto the end of the center hex of the outer tie rod 2)Cut the hex piece down the center, weld a piece of metal tubing in the middle I opted for option 2 since A) it would be much stronger B) aluminum bolts are tough to find C)I got a piece of aluminum tubing thats the exact size of the outer for 2$ I opted to have them lengthened one inch on each side; plan of attack was to cut them right down the center and weld the tube in the center, using a spare tie rod to keep everything all lined up. onto the pics spl tie rod end for reference; the black part is what we had to extend we threaded one half + the tube onto the cut off threads of a random z33 inner i had lying around (dont ask), welded it together, then flipped it and did the same to the other side. 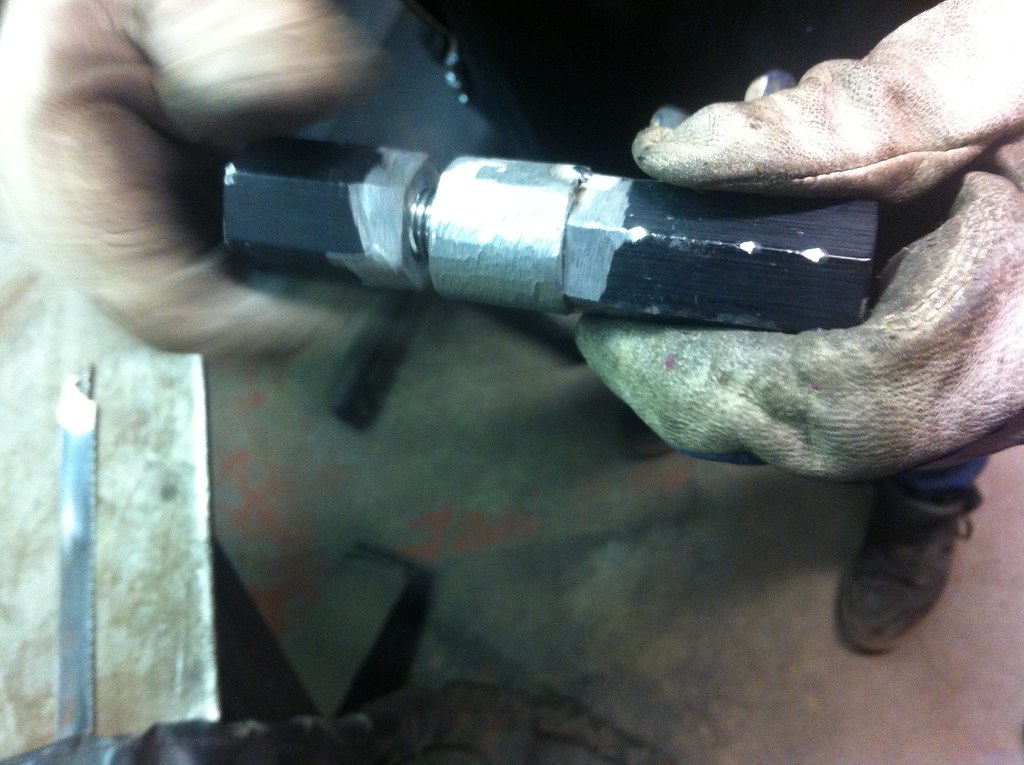   [IMG]SO. if you have an s14, want some more lock and poke and extend your control arms 30+mm, and want to keep stock knuckles, what you need is SPL outers, with a longer hex piece (either do this or take the piece to a machine shop to be replicated), and z33 inners with a rack spacer. I spent months trying to fucking google that shit and ended up just having to find out the hard way, so hopefully this helps someone out in the future[/IMG] edit: i also realize ikeya formula make inners that would have worked, but spending 200 bucks on inners is not my style. got em installed, took it for a test run and some highway onramp skids and its great. had to zip tie the crank to the water pump though, haha. kind of sketchy, but it works for now. drifting with no power steering is really shitty.  |
|
|
|
|
03-25-2015, 12:20 PM
|
#46 |
|
Leaky Injector
|
Cool thread man, not a bad solution for the tie rods. At my work we have a good bit of hexagonal hard stock in different sizes, I've chucked it on the lathe drilled and tapped to make control arms for my jeep with heims. It's funny seeing those SPL rods cause they are like identical to what I made for my jeep, mine just much larger. Guess I'll be making some tie rods for the 240 sometime too!
also what front bumper is that, ballistix? Been looking at getting the same one |
|
|
|
|
03-25-2015, 12:42 PM
|
#47 | |
|
Join Date: Aug 2013
Location: Ontario
Age: 29
Posts: 41
Trader Rating: (0)
Feedback Score: 0 reviews
|
Quote:
it is a bomex bumper, btw. looks alot like hippo-sleek. |
|
|
|
|
|
03-25-2015, 12:53 PM
|
#48 |
|
Leaky Injector
|
I can make a few sets, what length did you end up with?
And what diameter are those from flat to flat? Gotcha, thanks for the info, the one I've seen is the same just different brand ViS. looks pretty slick tho. |
|
|
|
|
03-25-2015, 01:01 PM
|
#49 | |
|
Join Date: Aug 2013
Location: Ontario
Age: 29
Posts: 41
Trader Rating: (0)
Feedback Score: 0 reviews
|
Quote:
[email protected] |
|
|
|
|
|
| Bookmarks |
|
|


 Linear Mode

