|
|||||||
| Builds (and builds only) Got a build thread? It goes here, build threads anywhere else on the forum will be locked and never moved. |
 |
|
|
Thread Tools | Display Modes |
|
|
 09-16-2012, 12:26 PM
|
#1 |

|
The Mob Theory Street Car Build
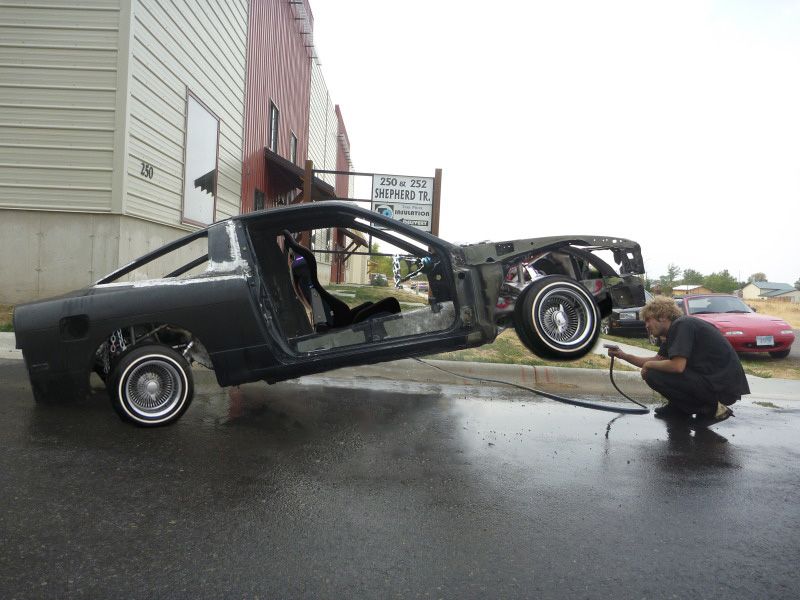
We are building a demo car for our shop. It is Dani's 1992 Nissan S13 240sx Hatchback. Built redtop SR20DET, adjustable suspension, and widebody conversion. Should be in the neighborhood of 350-400 whp/tq. This thing has to be ready in 33 days from the time we are writing this. Triple Crown Drift's Driftoberfest in Colorado is October 19-20. We have quite a lot to do, but we'll get it there. We'll be updating the thread as the build progresses. Looking forward to seeing it all come together. We're offering wicked deals on any parts we use in our street car. Everything from any of the companies below is on sale until the end of 2012! Contact us for more details.
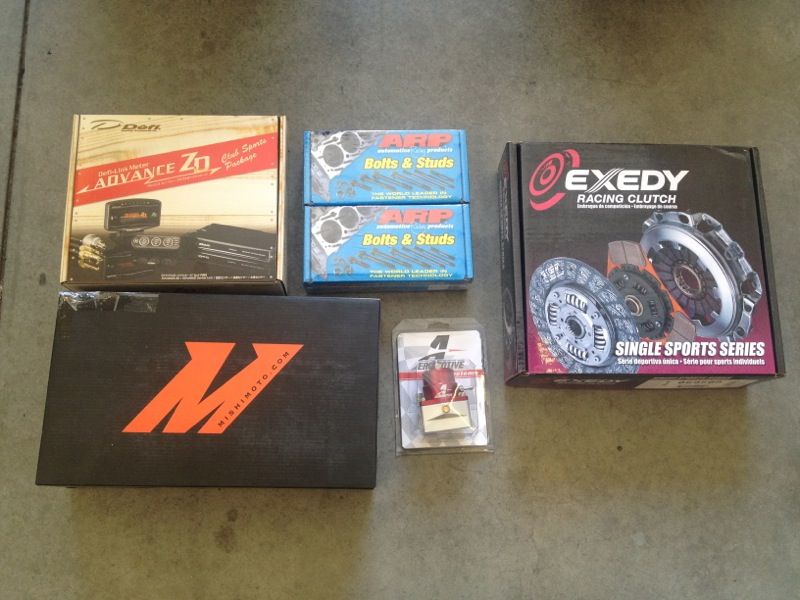 Sale Parts (subject to change as build continues) DefÃ* Exedy Whiteline Mishimoto ARP Aeromotive CP Eagle Brian Crower Megan Racing Circuit Sports ACL Cometic Gates Stance Origin -TJ & Dani [email protected] 406.551.5073 250 Shepherd Trail #B 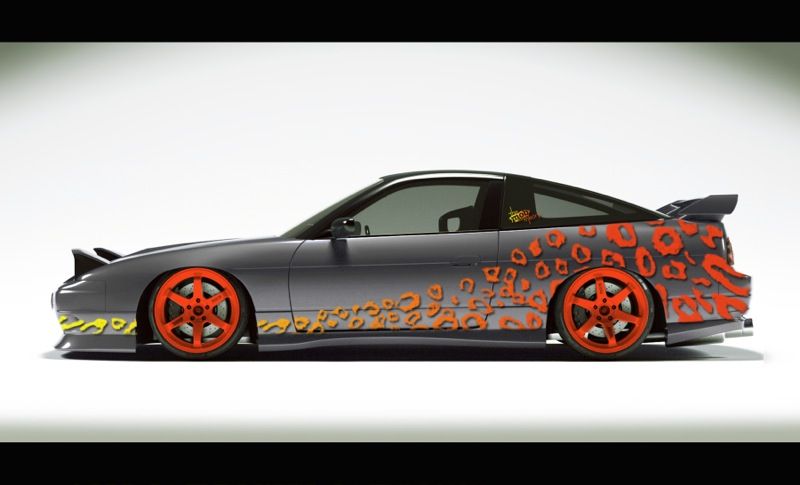 Last edited by themobtheory; 09-27-2012 at 01:45 PM.. |

|

|
| Sponsored Links |
|
09-18-2012, 03:42 PM
|
#2 | |
|
Future Moderator
 
Join Date: Jun 2007
Location: Places
Age: 36
Posts: 12,900
Trader Rating: (17)
  Feedback Score: 17 reviews
   |
Given you have 33 days to finish I will approve thread. Also IMO if the above is what is supposed to clean like it would be 400X cleaner without the paint down the side.
__________________
Quote:
|
|
|
|
|
|
09-19-2012, 12:17 PM
|
#3 |
|
|
The last couple days have been simply stripping the car down to the bare chassis so we can start the process of removing sound deadening, seam sealer, and undercoating. Following that will be the new front wheel tubs, along with stitch welding the seams. These cars are decently built cheap sports cars, but they are spot welded together and half of what rigidity they do have comes from the seam sealer. Below are the first pics of the process.
All torn down. 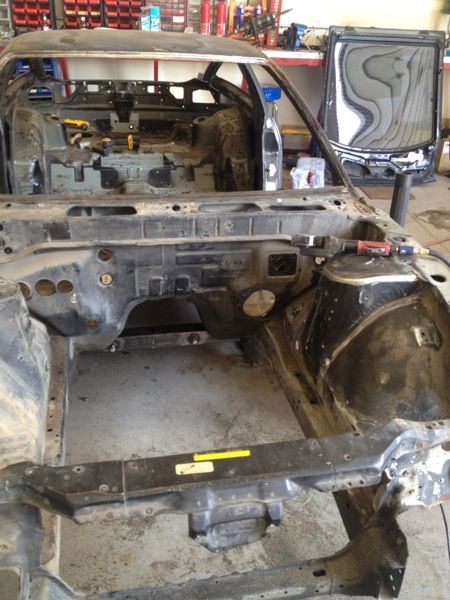 Dani removing the sound deadening from the interior while I prep the engine bay for wheel tubs and stitch welding. 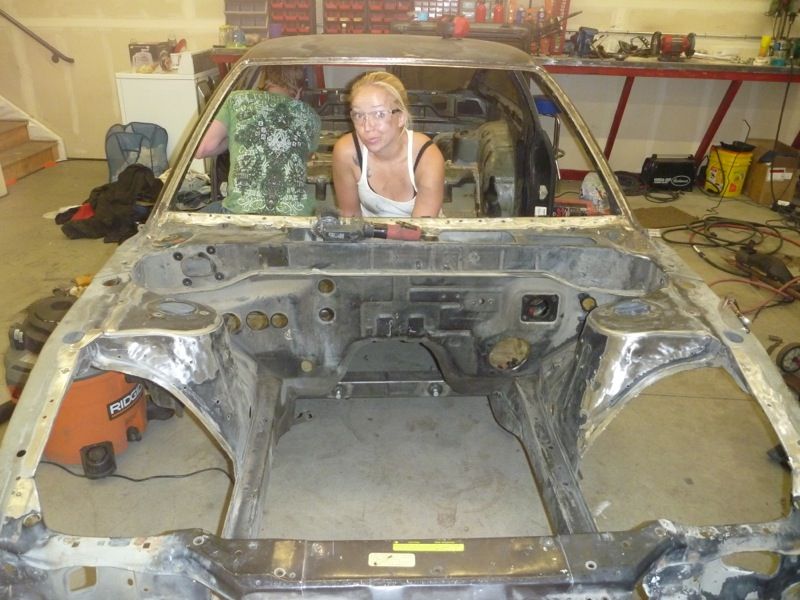 Tubs are beginning to take shape. Just tacked for now. 16g a sheet metal comes from Pacific on Monday to close everything in. Trailer fenders work very well for the tubs, and they help prevent wrinkling a flat sheet that we would try to bend ourselves. Saves a lot of time. 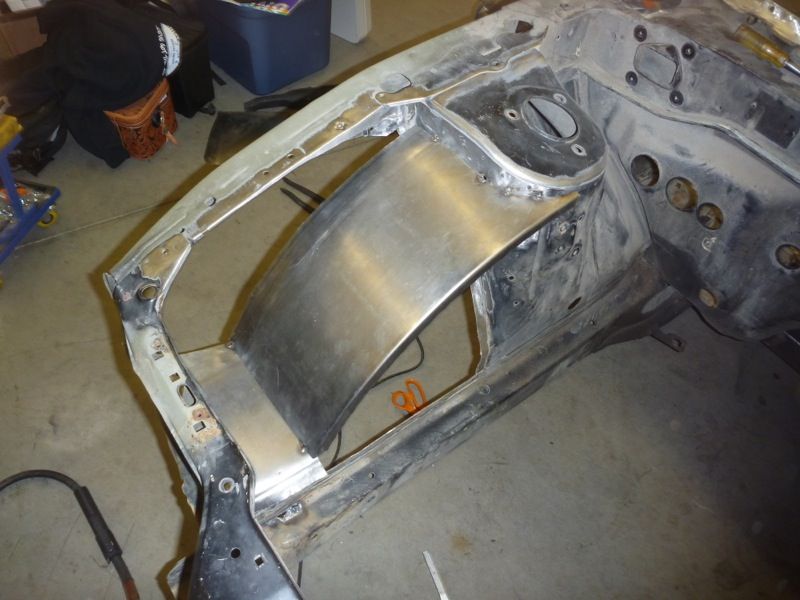 Stitch welding commence! 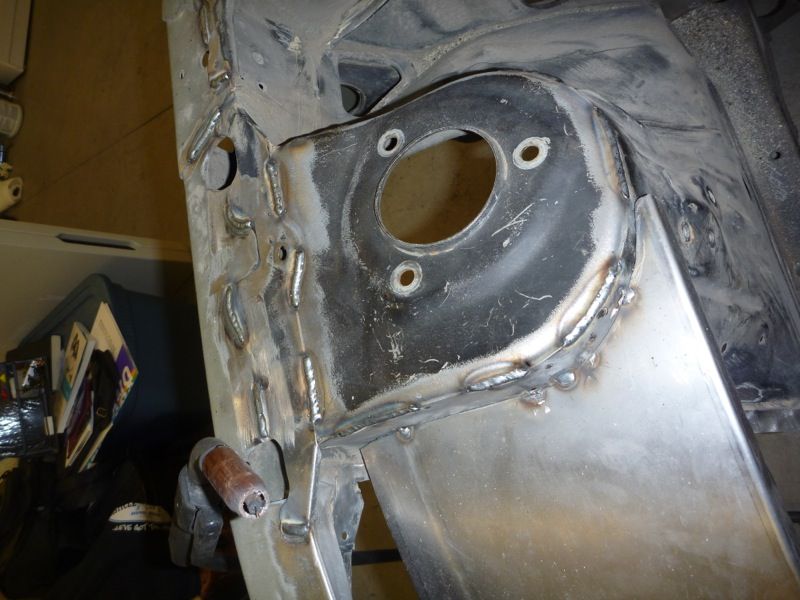 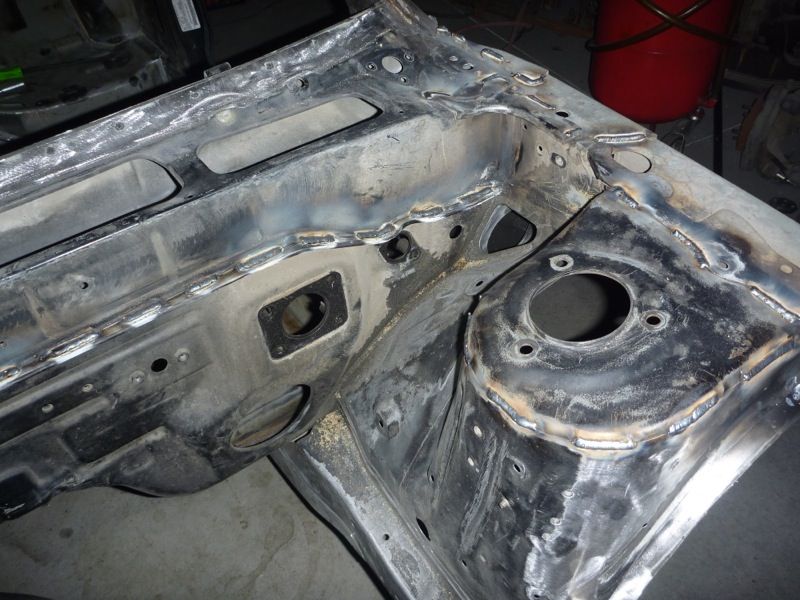 Overall engine bay last night at around midnight. 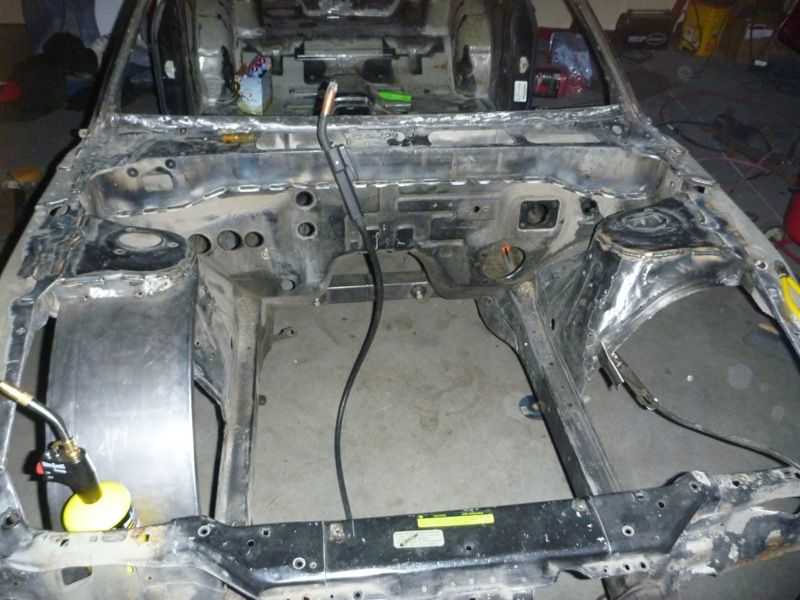 |
|
|
|
|
09-19-2012, 01:07 PM
|
#4 | ||
|
Zilvia Junkie
 
Join Date: Jan 2011
Location: Mililani, Hawaii
Age: 40
Posts: 459
Trader Rating: (0)
Feedback Score: 0 reviews
|
Front wheels yellow would look cool with the side graphic idea!
In for speed build
__________________
#0191 "Lin'da" 2AMR>  2AMR> 2AMR>Quote:
Quote:
|
||
|
|
|
|
09-23-2012, 08:48 PM
|
#11 |
|
|
3 days strait of grinding removing all the interior sound deadening and undercoating. The undercoating is quite resilient, and for anyone looking to take it off, I'd recommend paying the extra cash to have it sandblasted or acid dipped so that you can save your back. And if you don't have a lift, forget about it. Not worth it. But between all the sound deadening and the undercoating we saved almost 100 pounds of dead weight, so it was actually well worth the effort. Tonight and tomorrow we are working on the front tubs and the cage. cage will be wrapped up and the car headed to paint ideally early this week. Getting crazy around here!
Dani trying to avoid the dust. The stuff gets everywhere.  Working on the front wheel well.  Front wheel well done.  Rear wheel well done.  This is, hands down, the best tool we've found for the undercoating.  You can see the difference it makes. When this goes to paint, it'll look much more professional and it'll be easier to clean the underside.  The mostly cleaned underside. We'll be coating it using POR-15. Stuff dries rock hard and is almost impossible to chip. Should work well with all the gravel they use on the roads here in Montana.  After an hour of trying to cut off the factory tow hooks, we broke out the plasma cutter. 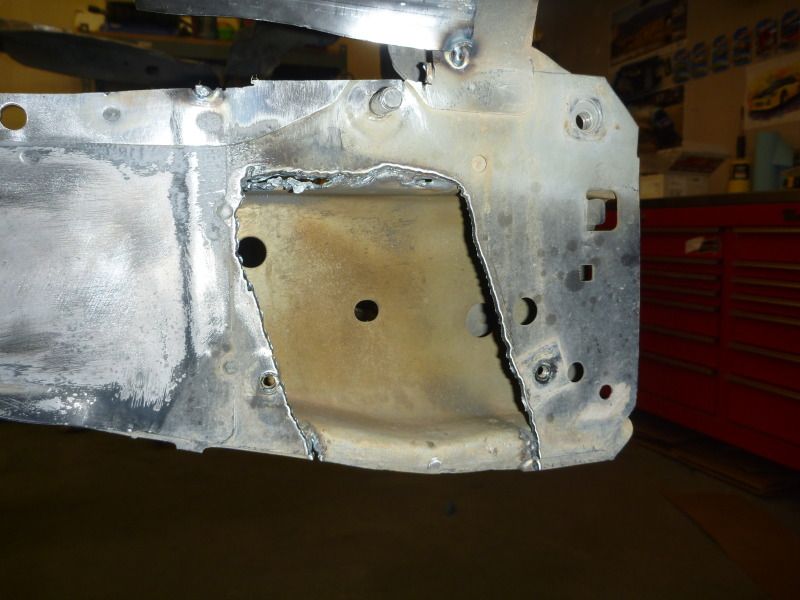 The dust that the undercoating produces is rather substantial. Instead of blowing it all off with the air, we rolled it outside and hosed it down. 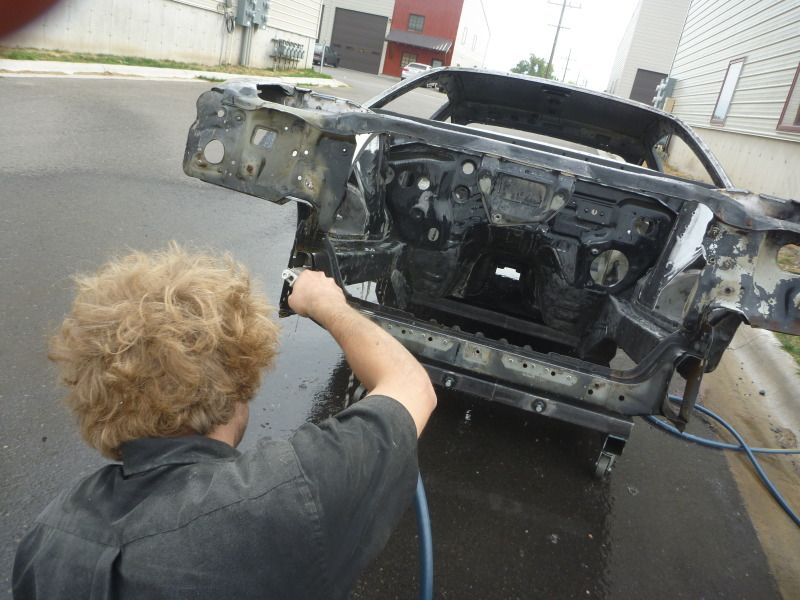 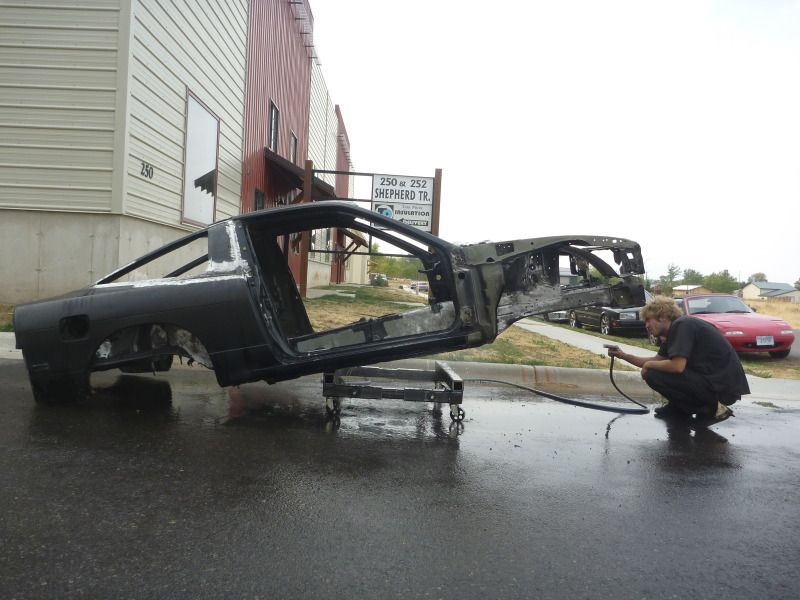 |
|
|
|
|
09-24-2012, 01:32 PM
|
#13 | |
|
Zilvia Addict
 
Join Date: Apr 2010
Location: kelowna, bc, canada
Age: 48
Posts: 680
Trader Rating: (1)
Feedback Score: 1 reviews
|
Quote:
Good luck with the build... subbed for quick updates  |
|
|
|
|
|
09-26-2012, 10:30 AM
|
#16 |
|
|
finally finished the stitch welding last night. unfortunately, since bozeman doesn't have an acid dip facility large enough for an entire chassis, the seams still contained enough seam sealer to cause problems with welding in certain areas. Fortunately, the contamination can mostly be burned/melted out with a torch. It just takes an incredibly long time. We also were able to prep the rusted areas along the windshield inlay and the passenger rear quarter glass with POR-15. Took every precaution and still ended up with a small amount on my hands. Stuff won't come off so I'll just wait it out. On the up side, the rust is taken care of and looks great! Cant wait to do the underside with POR-15.
Today is onto the front tubs, and then the cage. Dropped of the CP pistons to Wes at Internal Combustion Machine and should have the block back soon. Looking forward to making more progress! Paint has arrived and it looks AWESOME. I'll try and get some photos of it today. The CP 9:1 86.5mm pistons. Best quality control I've ever seen from a piston company. 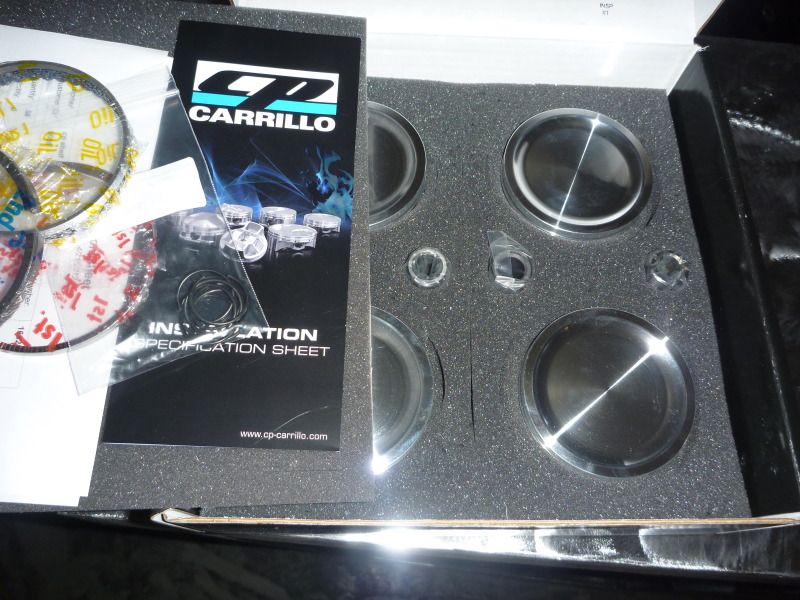 Car up on the lift for the final stitching job. 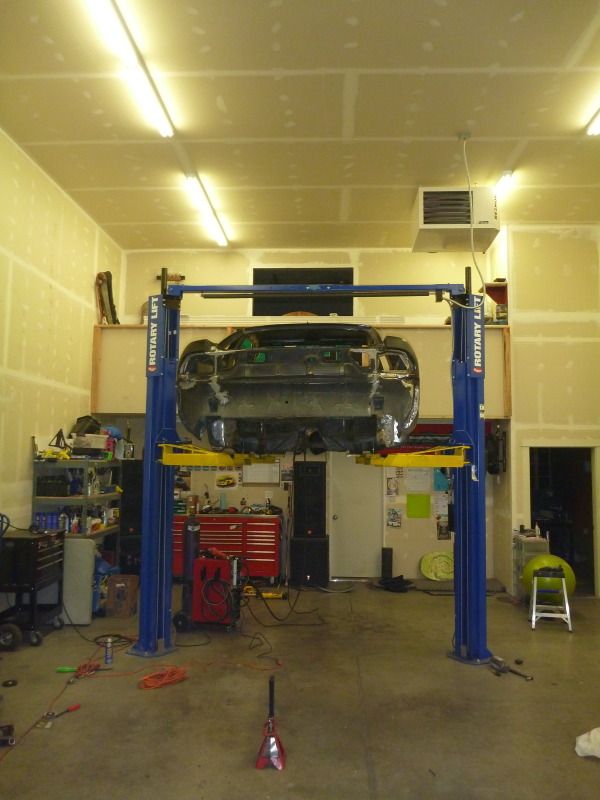 Despite the contaminants, we still got decent penetration on the welds. 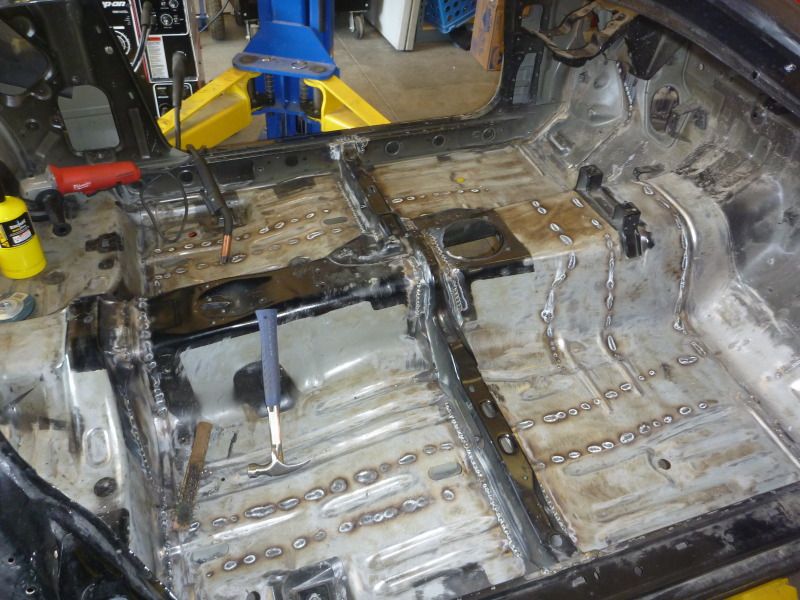 Rear Trunk area. 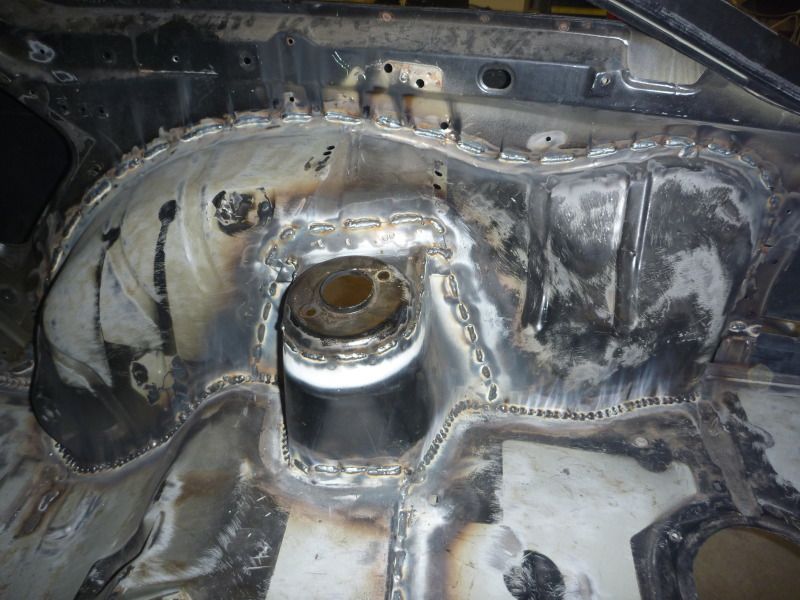 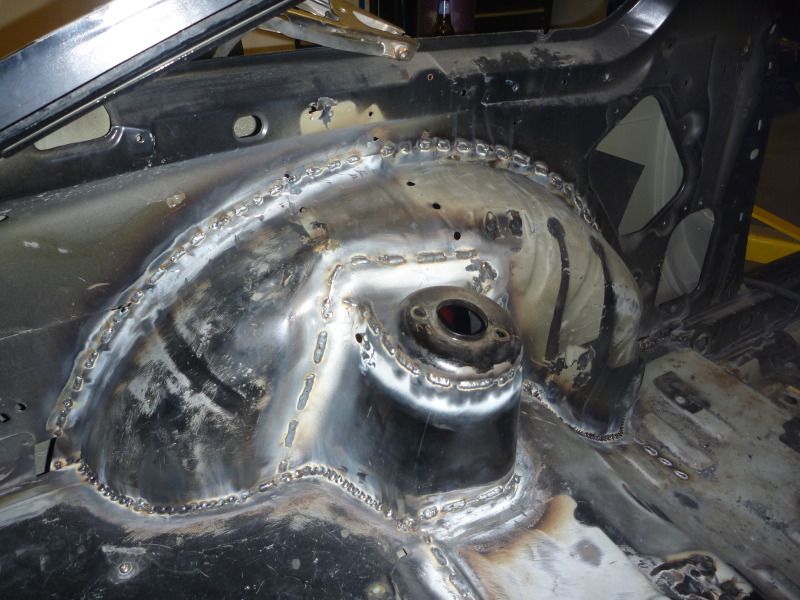 Wheel well with decent penetration as well. Considering the conditions we were welding in, I'm satisfied with the final product. 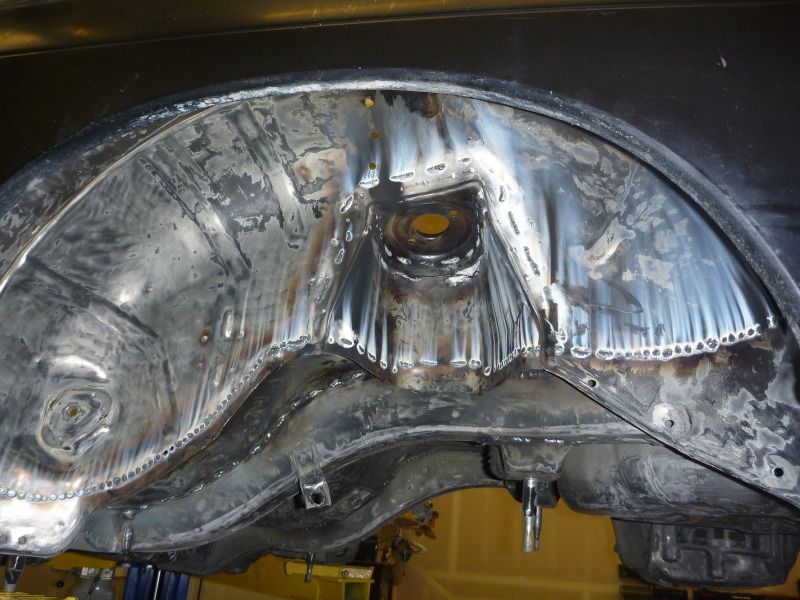 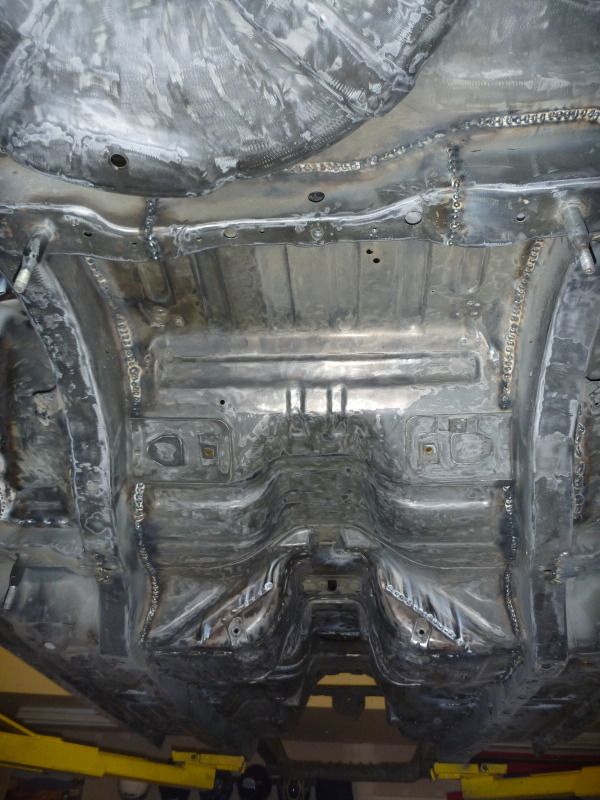 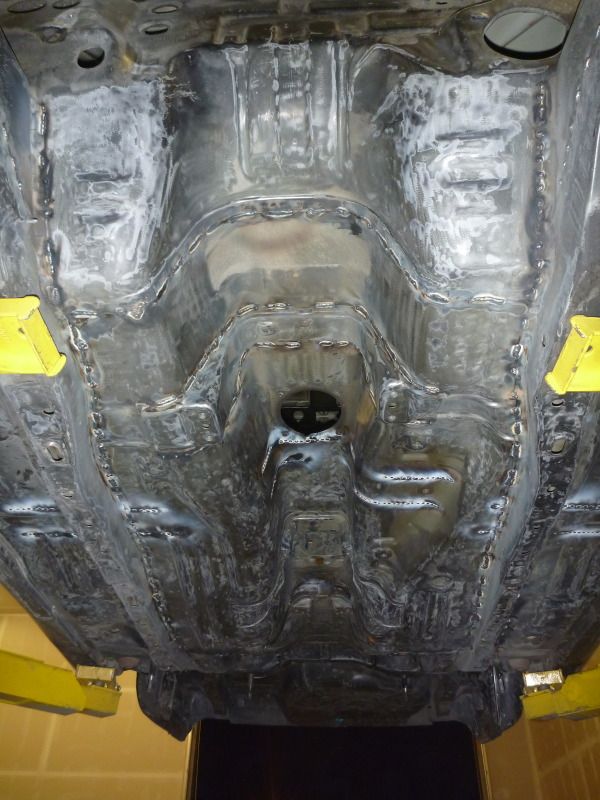 Removing the rear subframe bushings. Old weak rubber out, Aluminum subframe inserts, in! 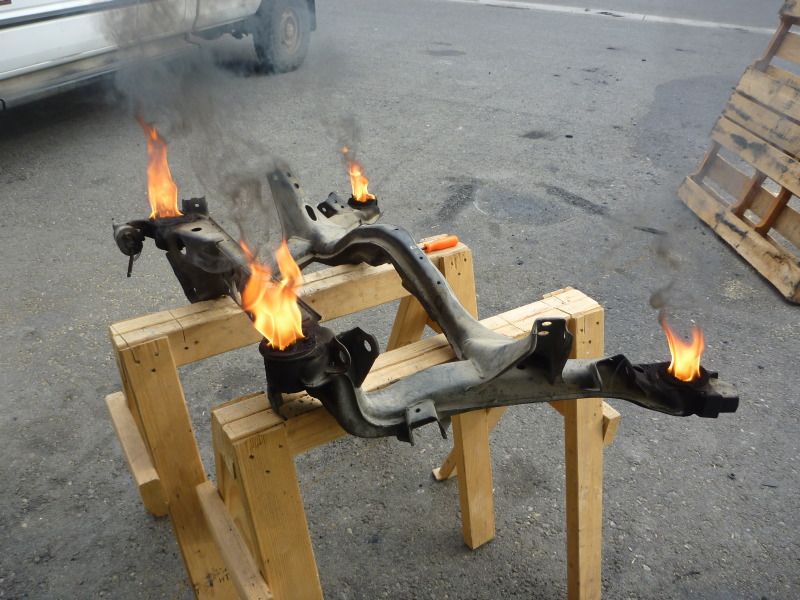 The POR-15 on the rusted areas. That is not POR-15 dripping down the side of the car, it's just the surface prep. 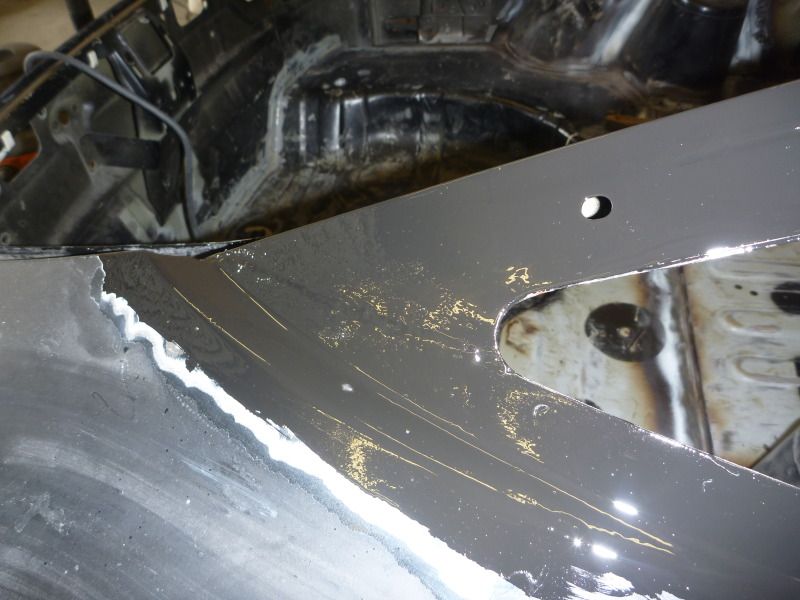 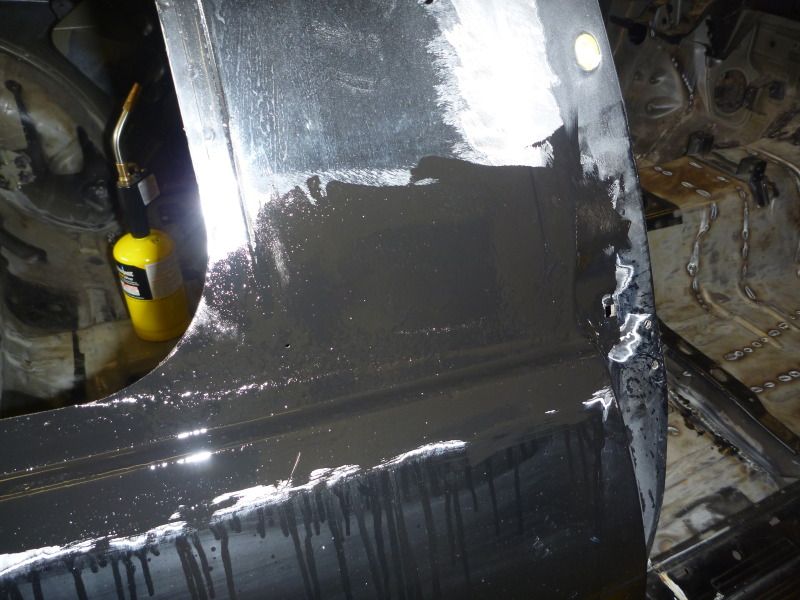 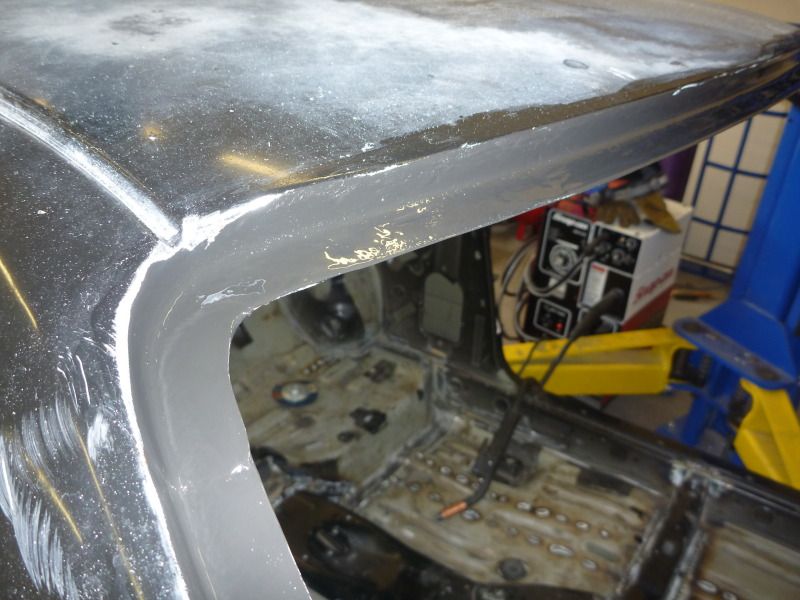 |
|
|
|
|
09-26-2012, 01:57 PM
|
#20 |
|
Post Whore!
 
Join Date: Oct 2008
Location: MI
Age: 38
Posts: 3,916
Trader Rating: (131)
Feedback Score: 131 reviews
|
Are you guys familiar with Black Smoke LLC out there in Bozeman? My cousin works there and her BF owns it. She told me there is a 240 shop next door, so I was just curious lol.
Build looks awesome- wild tear down! Good luck with the rest of it. |
|
|
|
|
09-26-2012, 03:53 PM
|
#21 | |
|
|
Quote:
|
|
|
|
|
|
09-27-2012, 11:27 AM
|
#22 | |
|
Post Whore!
Join Date: Oct 2008
Location: MI
Age: 38
Posts: 3,916
Trader Rating: (131)
Feedback Score: 131 reviews
|
Quote:
|
|
|
|
|
|
09-27-2012, 12:25 PM
|
#23 |
|
|
Yesterday and last night was devoted to the front wheel tubs. I picked up a couple trailer fenders to use as they are curved from the factory and adds quite a bit of quality to have the curved edge bent, not welded. Using the CAD skills I've acquired over the years (cardboard aided design) we cut the fenders into shape, and assembled the sheet metal around them to close off the engine bay. For anyone wondering, the tubs allow for much greater steering angle without contacting the factory bodywork. Sent off our front knuckles to GSR Autosport in Lake Forest, CA to be modified for further increases in angle. They have a jig based on the driftworks knuckles and they can correct for roll center. Plus, GSR is much cheaper than most of the other highly known knuckles modifying companies out there. Enough plugging, now for the pictures.
CAD being put to good use on the passenger tub. 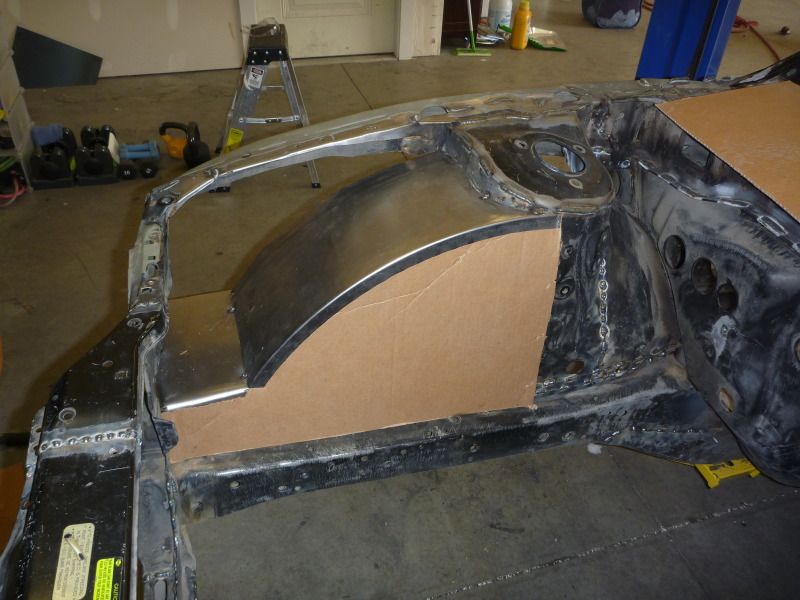 Tacking everything up and getting ready for final welding. 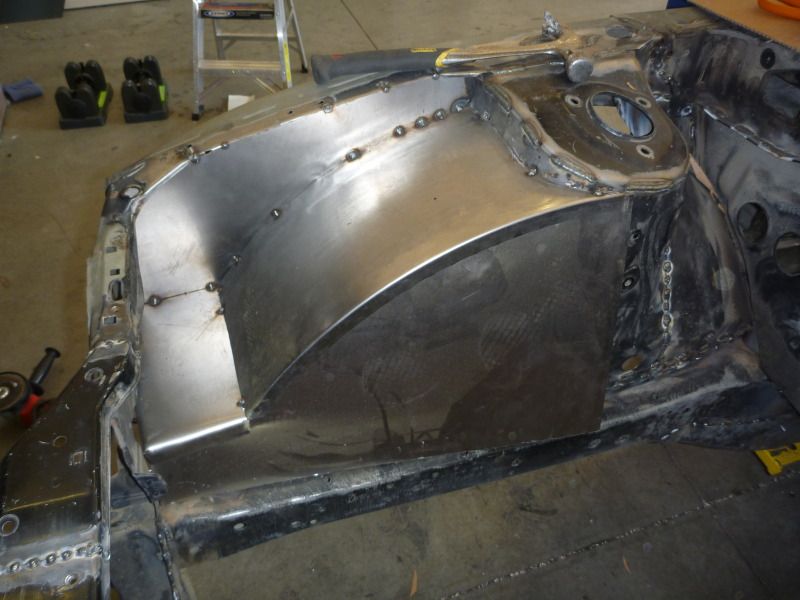 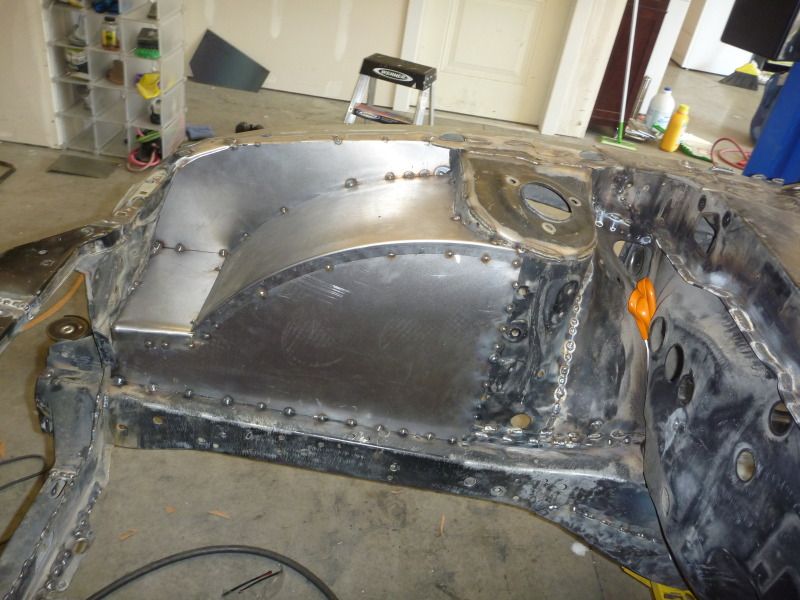 Welding complete. 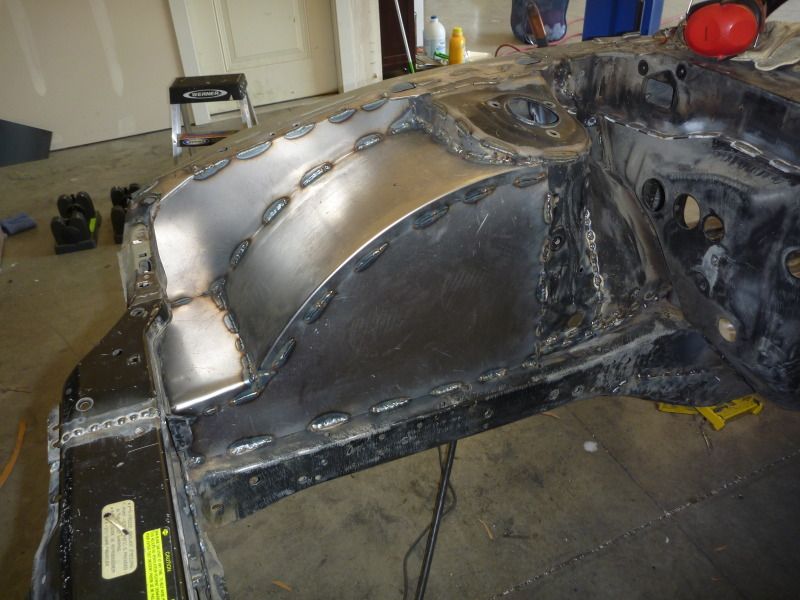 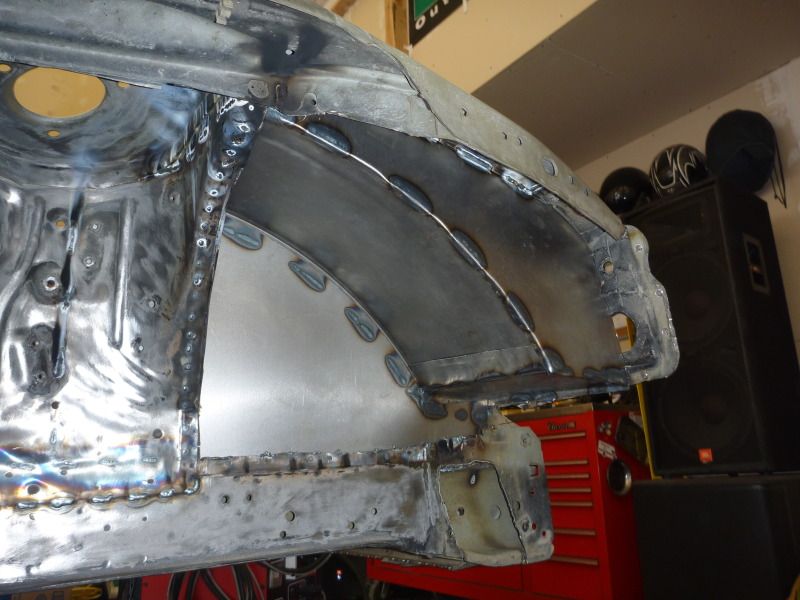 Driver side commence. 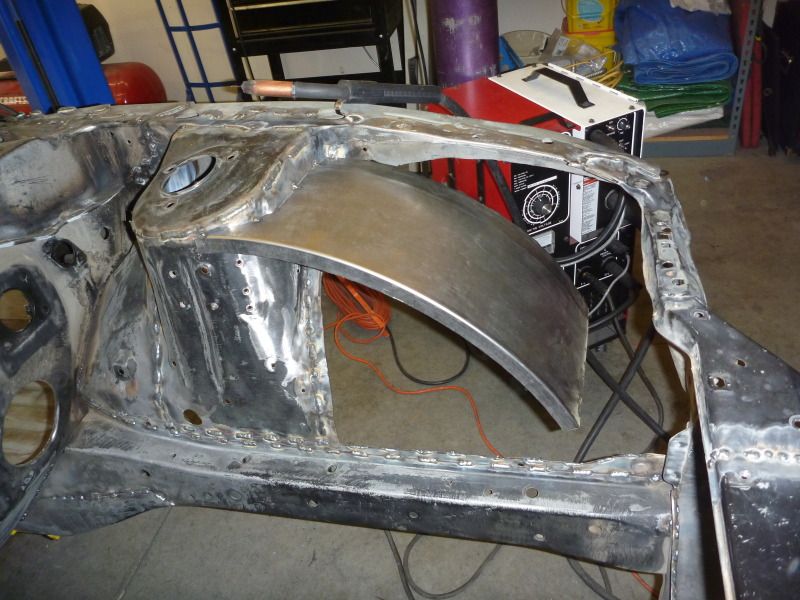 Second side always goes faster sine the templates are so similar to each other. 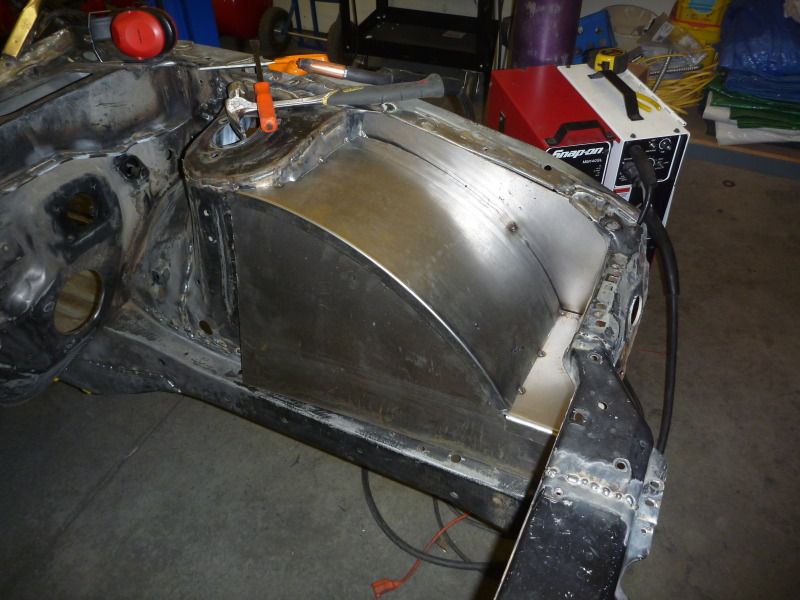 Tubs last night.  After some research, we decided to add some support from the top of the tubs to the strut towers. Word is that some guys have been having issues with stress fractures in their welds at this juncture. Extra support can't hurt. 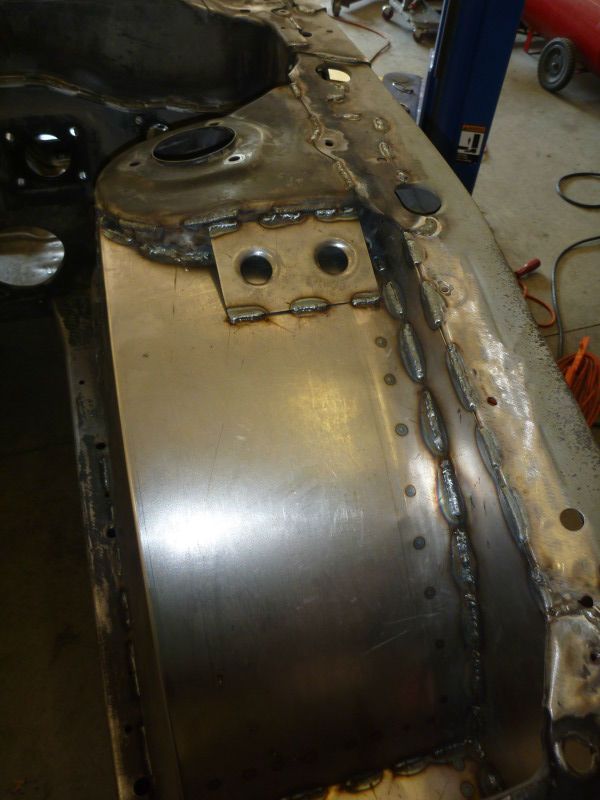 |
|
|
|
|
09-27-2012, 12:35 PM
|
#24 | ||
|
Zilvia Junkie
Join Date: Jan 2011
Location: Mililani, Hawaii
Age: 40
Posts: 459
Trader Rating: (0)
Feedback Score: 0 reviews
|
one of the reasons I come to this site...
__________________
#0191 "Lin'da" 2AMR> 2AMR>Quote:
Quote:
|
||
|
|
|
|
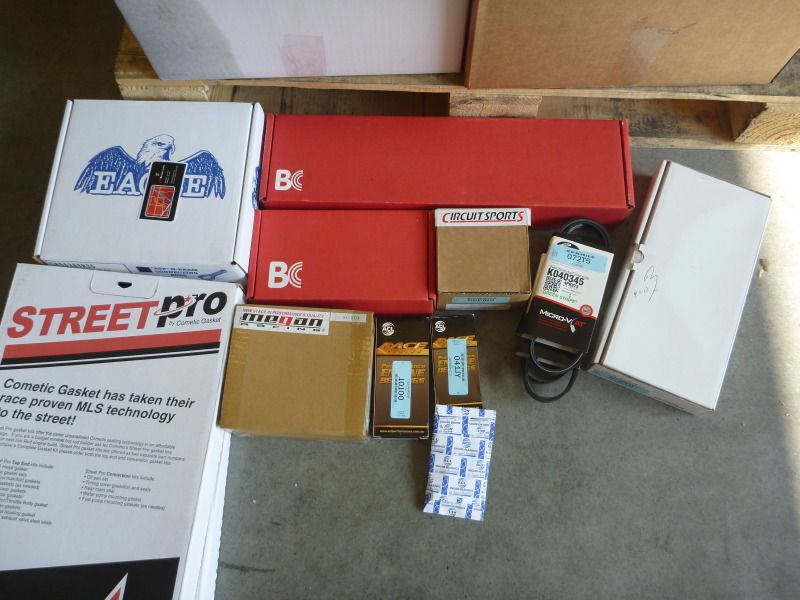
09-27-2012, 01:55 PM
|
#25 |
|
|
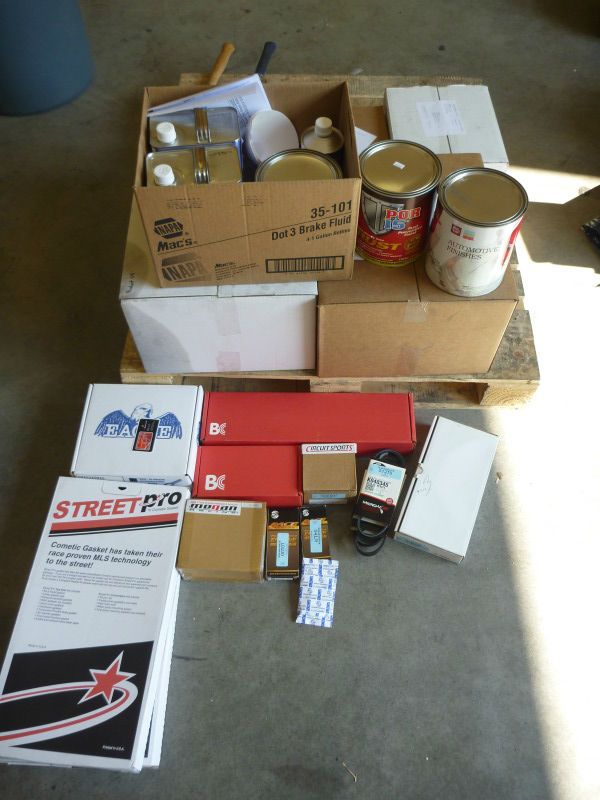
just got in more parts for the car. Big thanks to FRsport.com! Paint came in as well, and it looks awesome. Tons of metallic, but not so much as to be obnoxious. Looking forward to getting this bad boy sprayed!
  |
|
|
|
|
09-30-2012, 10:26 AM
|
#26 |
|
|
Last couple days have been rather hectic. Running a shop while doing a record-time build is proving difficult. Finished off the tubs, and started on the cage, but had to take a while to handle some business issues. Here is the first part of the cage build.
Dani starting on the base plates. Card stock is much easier to cut precisely than cardboard. 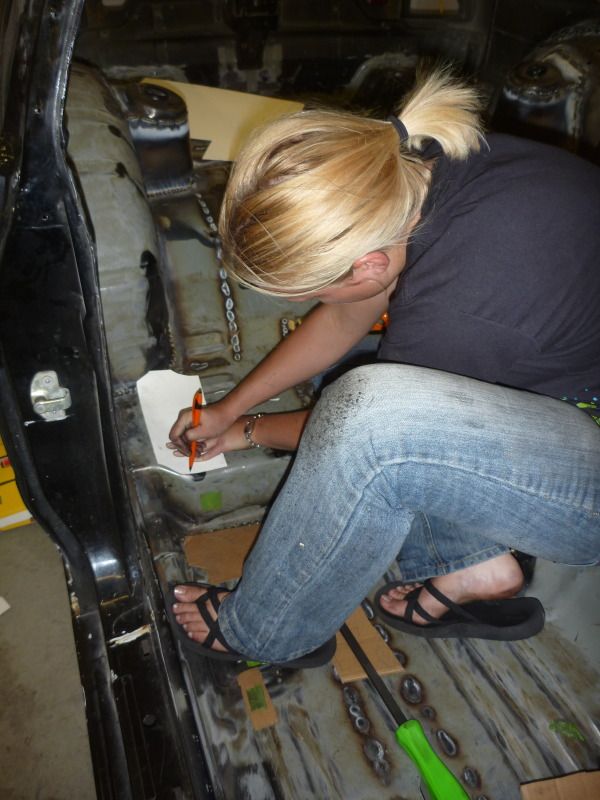 The final plates. 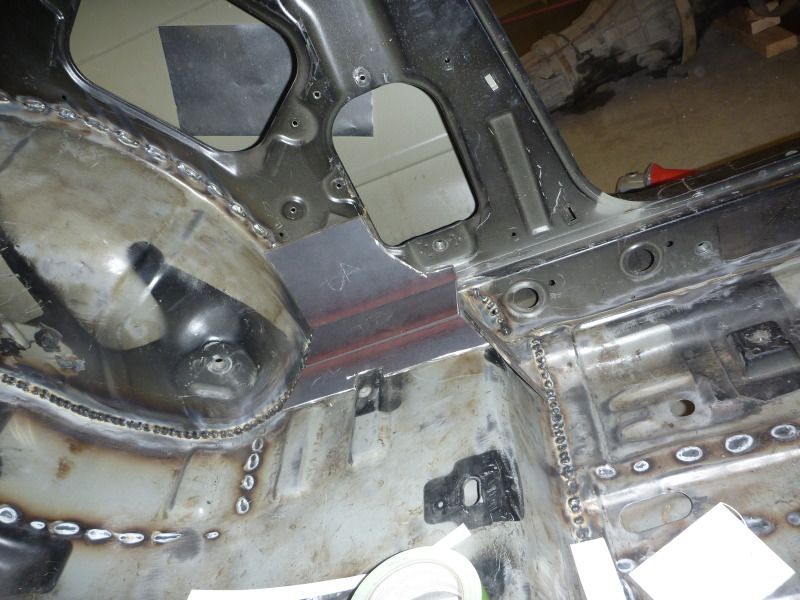 Baileigh makes the best notcher out there, in my opinion. Lots of them work very well, but this particular one is thin and grips tubing along bends very easily and allows rotation very easily. The other benders I've used have been more difficult to perform simple adjustments. I love this thing.  I use the extra tripods I have laying around from 10 years of video production to finitely adjust the height on the bar support for the bender. This lets me keep the bends perfectly level and take some strain off of the bender and the die. 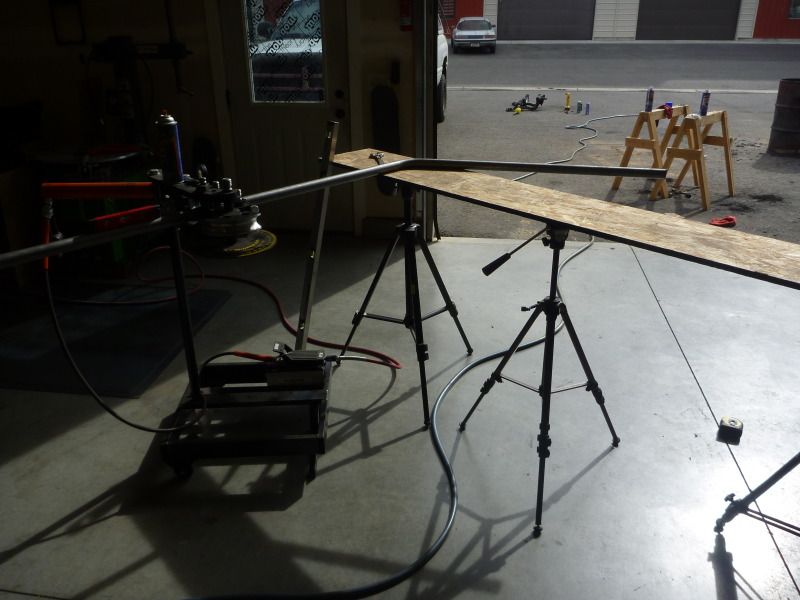 Main hoop finished, using the flat floor and straight line method. fits like a glove. So tight that we have to ratchet the ends to get it to fit in. 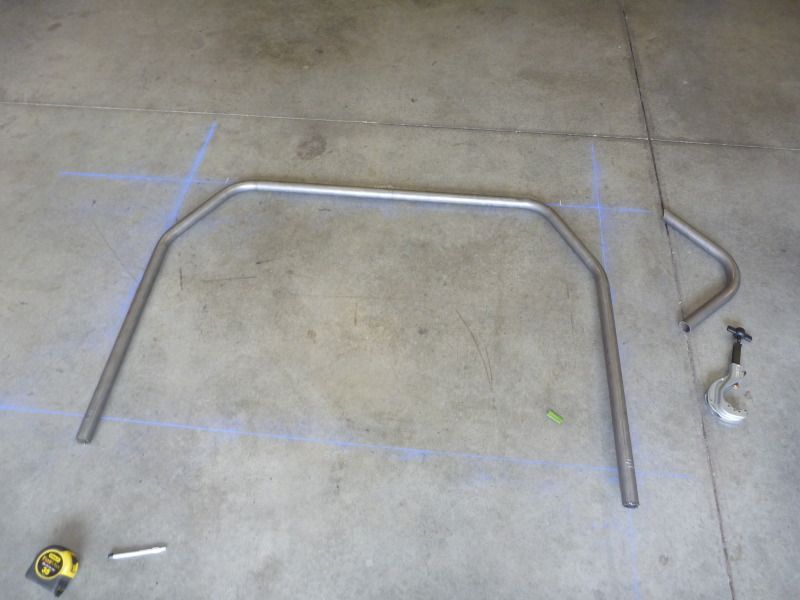 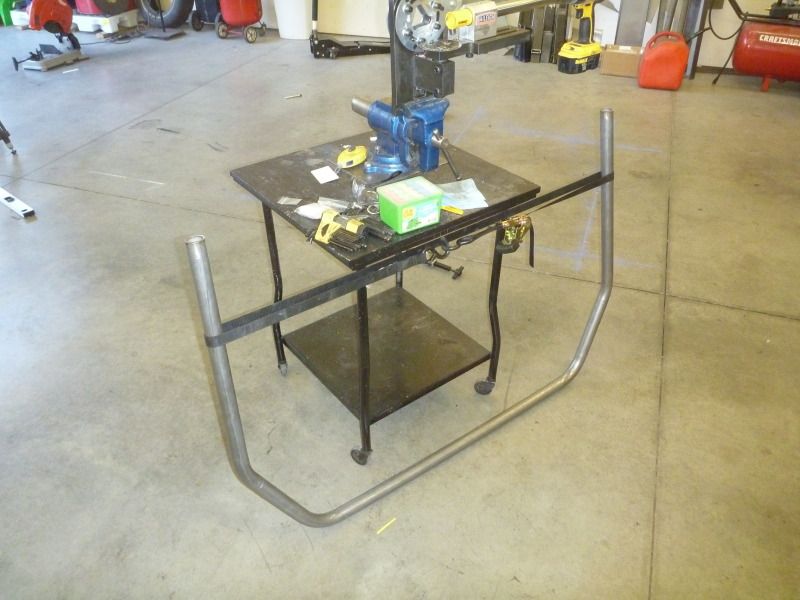 The A-pillar bars are the most difficult bars to bend since they are compound bends. I used some extra tubing laying around to tack up a template and get as close as possible to the angles and rotation that we needed. 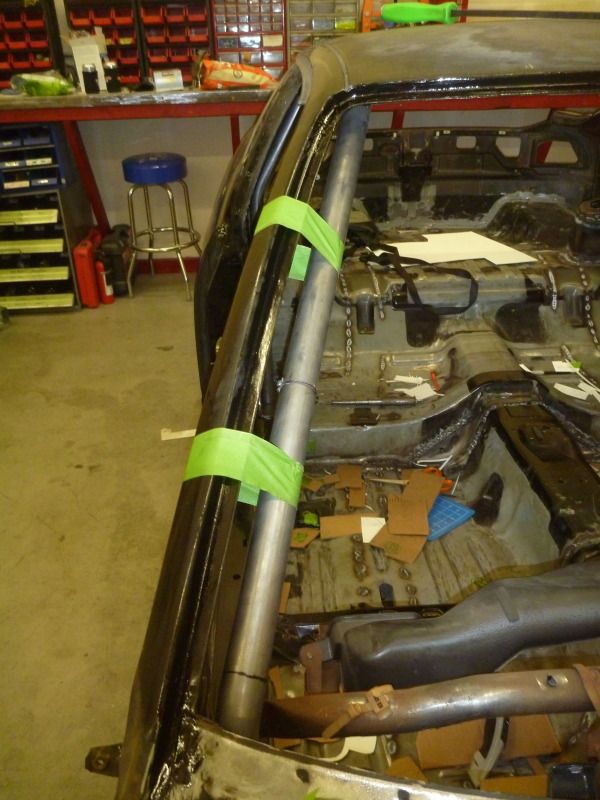 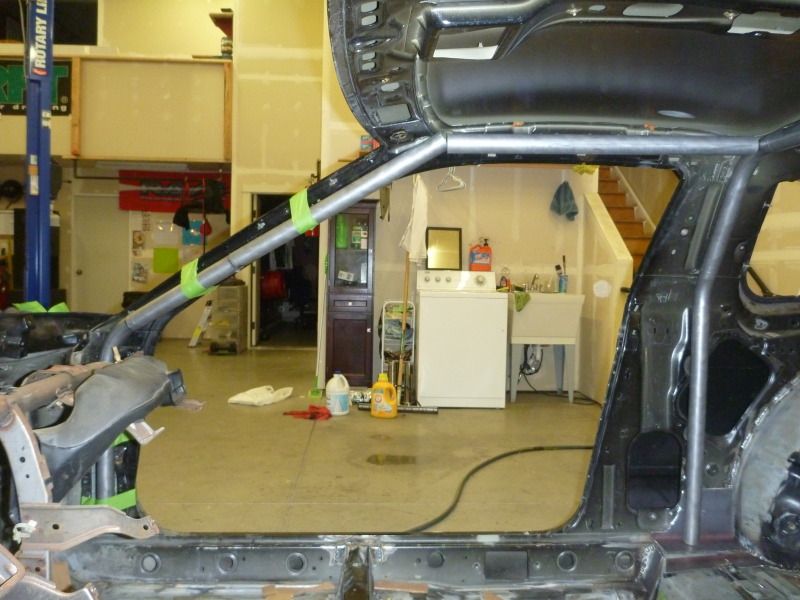 Was able to translate all the template angles into bends and the final 21 degree rotation for the front bar. Doing it this way takes more time than a halo, which eliminates the compound bends, but I think this looks more professional and while it may not be any measurable amount of safety increase, I feel it is a safer method, as you eliminate welds in two very critical corners of the cage. 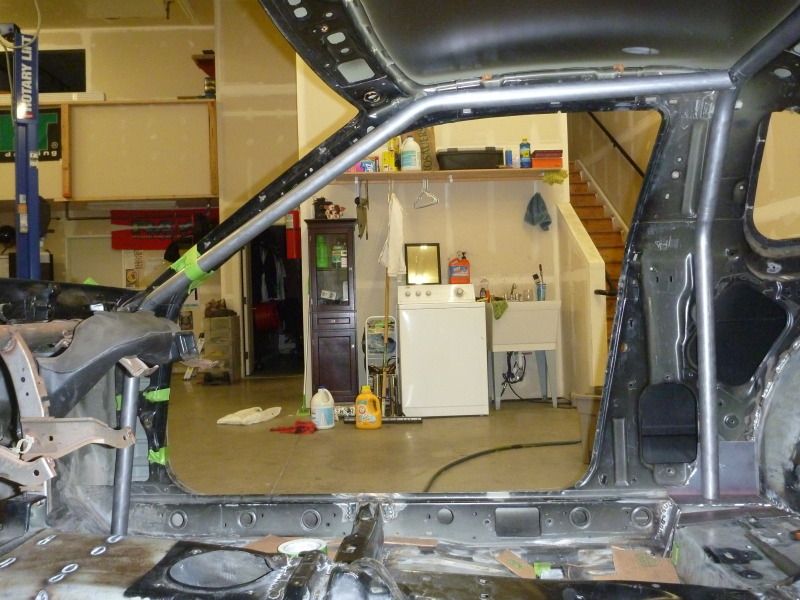 Here you can see the final bend and how much it jogs because of the compound bends. 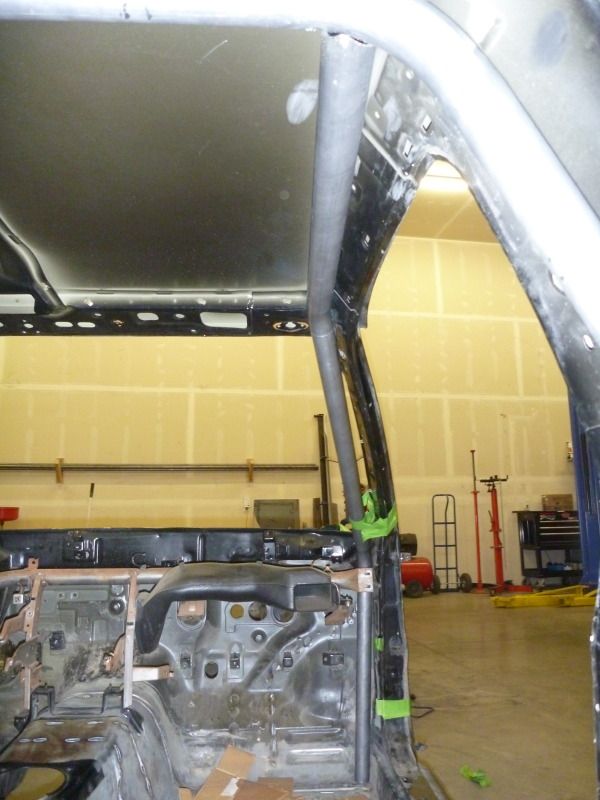 |
|
|
|
|
10-01-2012, 12:29 PM
|
#29 | |
|
|
Quote:
|
|
|
|
|
|
| Bookmarks |
|
|


 Hybrid Mode
