|
|||||||
| Tech Talk Technical Discussion About The Nissan 240SX and Nissan Z Cars |
 |
|
|
Thread Tools | Display Modes |
 01-27-2008, 07:23 PM
|
#1 | ||
|
Zilvia Junkie
 
|
My friend and I are building a 89 240sx coupe track car. The car will be used for drifting and maybe some autoX. The purpose of this thread is to give people some ideas for building their cars and for people to give us their ideas and constructive criticism on this build.
Here's the basic plan: strip and stich weld the chassis install a 6 point cage, fire wall, fuel cell, fiberglass dash, gauges and seats install coilovers, 2-way diff, 5 lug, bushings, RUCA's & tension rods install sr20det (basically stock for now), v-mount, 3" exhaust silvia front end, some light body work, and paint As of right now we have stripped most of the car. I already have the following parts: silk road coilovers kaaz 2 way lsd front & rear 5 lug 180sx front brakes ES polyurathane bushings silvia front end (we still need a hood) Corbeau racing seats fn01r-c wheels 17x8 & 17x9 sr20det (need to be rebuilt) apexi power fc I also have a gt2871r, but I'm waiting for more $$ and more seat time before that goes on. What I still need to get: RUCA's toe arms Traction rods tension rods spl subframe bushings fuel cell and plumbing piping for exhaust, cage and IC We spent this weekend taking the car apart. I now live 306 miles from my friends house where the car is, so updates to this thread and the car will probably only come 1 or 2 times a month. On the next work weekend we will finish stripping and start cleaning and preping the chassis for seam welding. The budget recently got a little tighter, but I still would like to get spl tie rod ends and possibly sway bars and traction rods. To the people who track their cars, do you have or think I need bigger sway bars? Let me know what you think and why. This is the car last week when we towed it home. It was not running and cost $550.  So I open the door before we move the car into the garage and this happens: 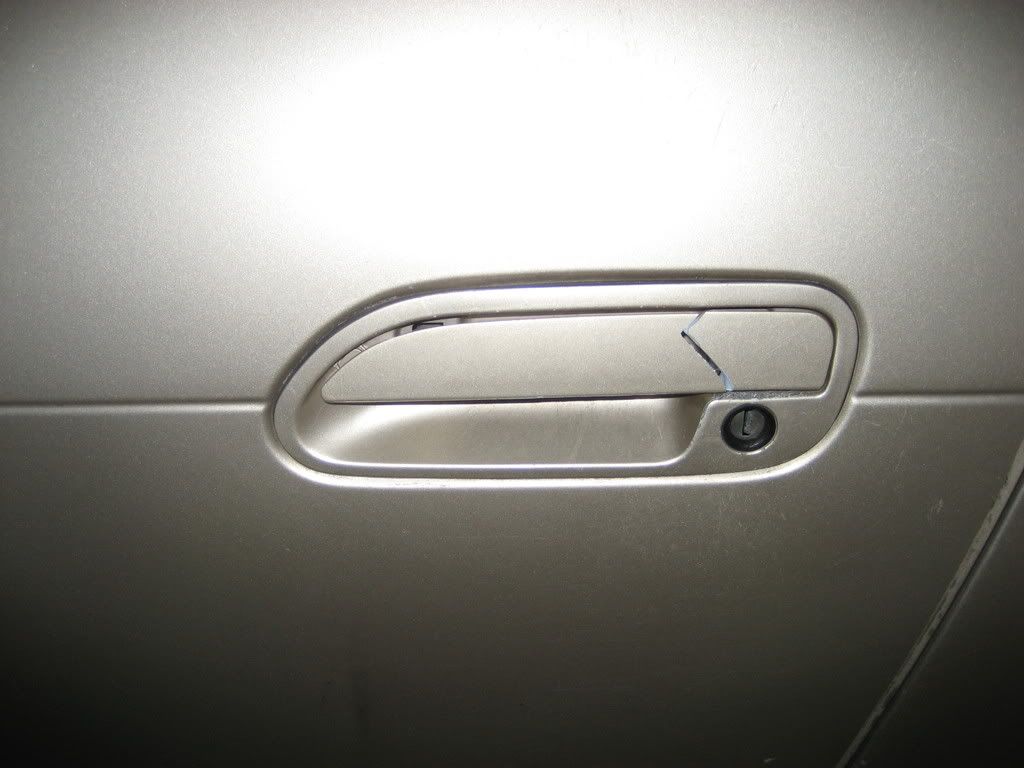 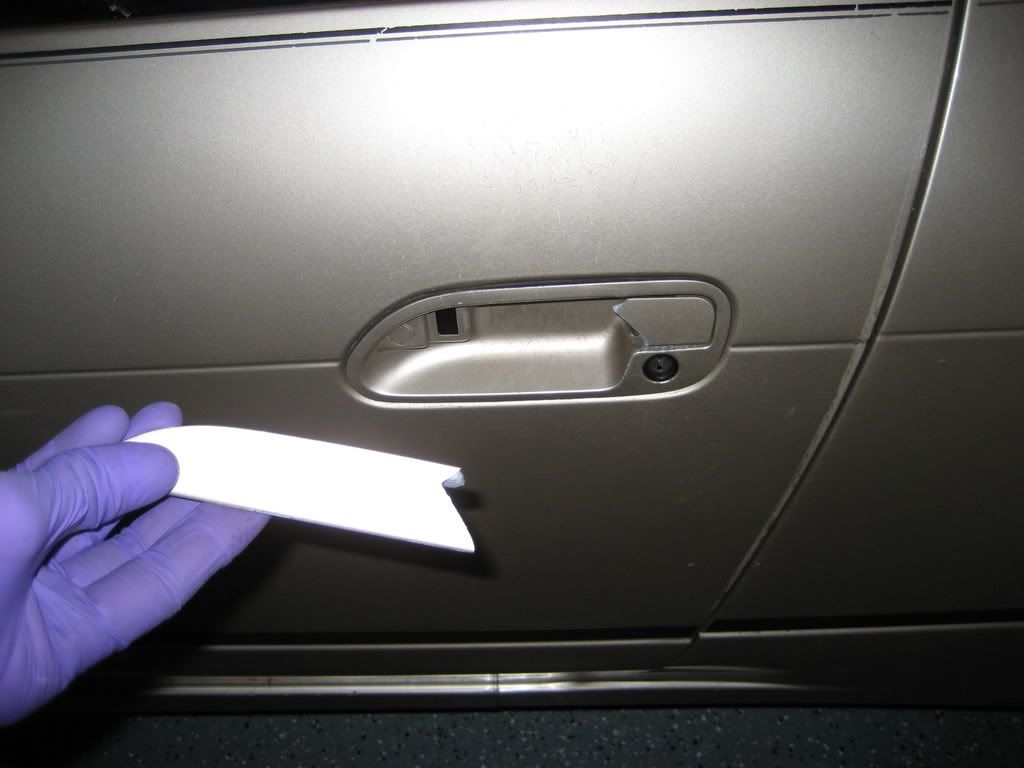 anyone have a door handle for sale? Here's friday Pictures: 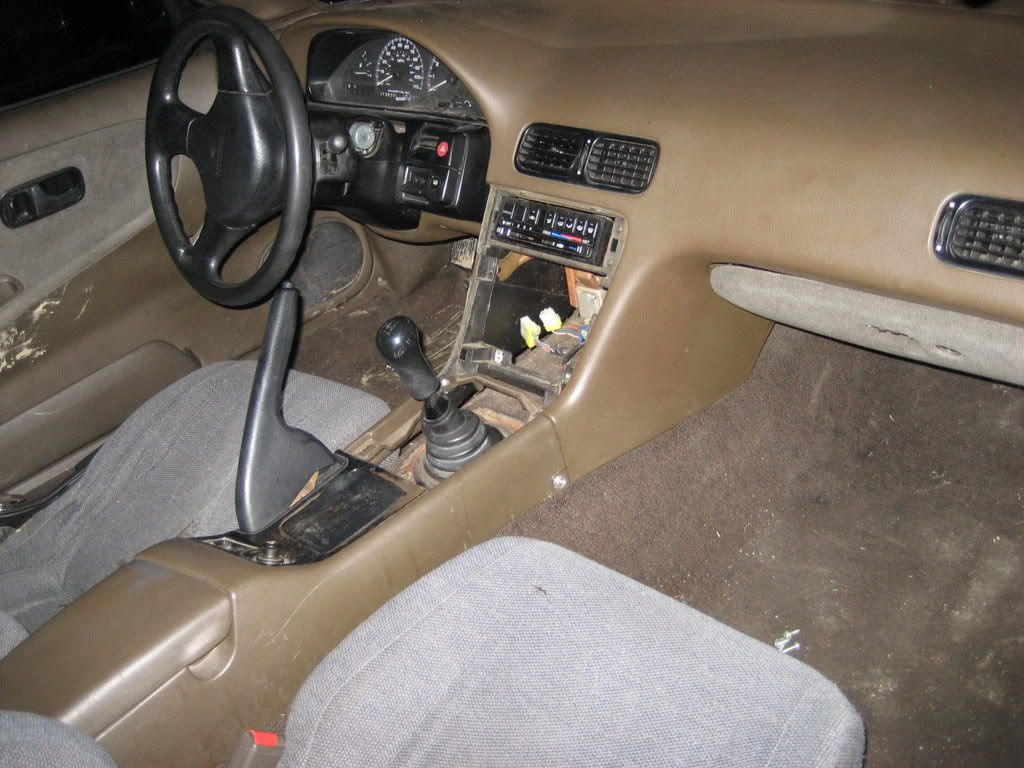 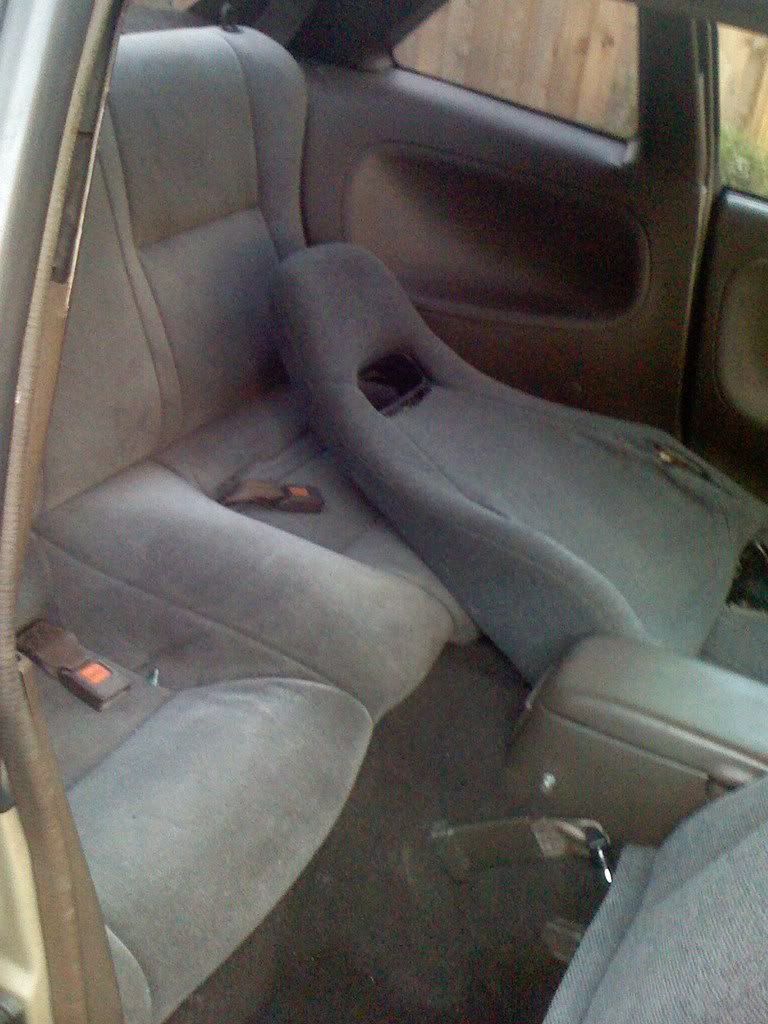 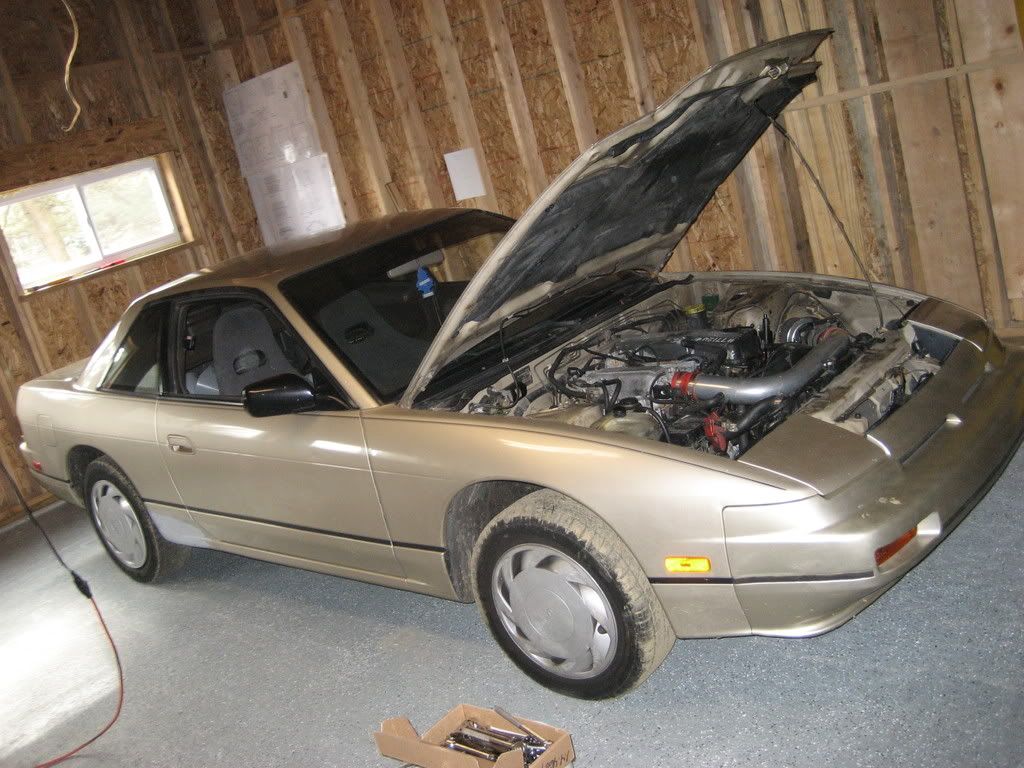 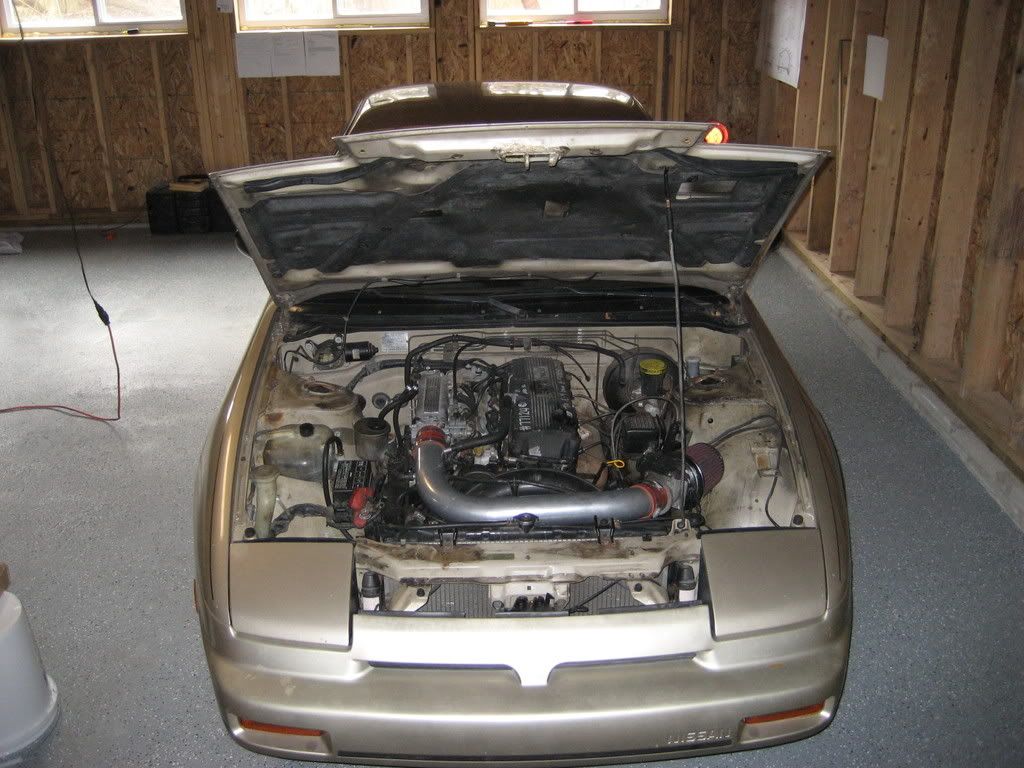 Saturday:  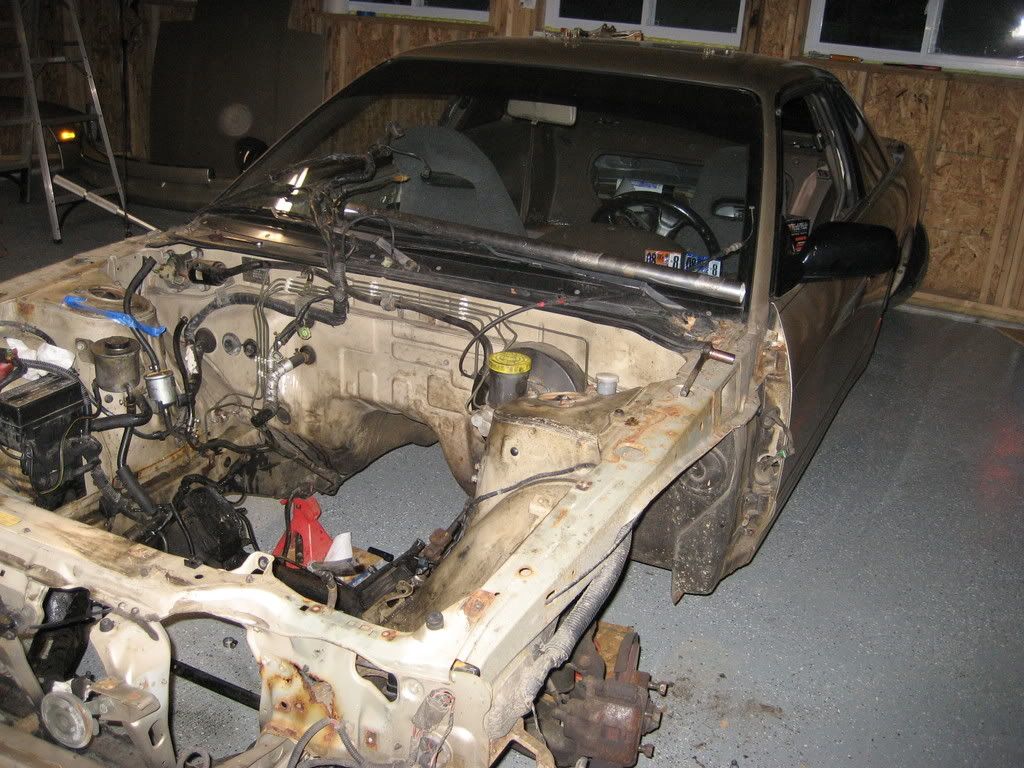 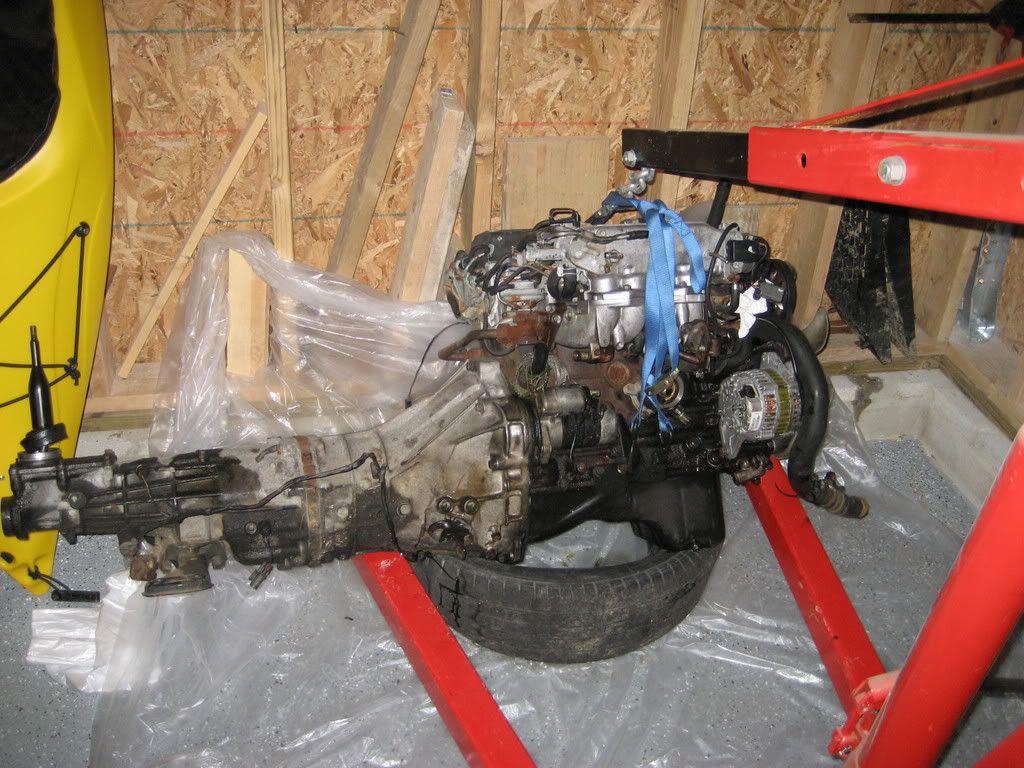 Sunday: 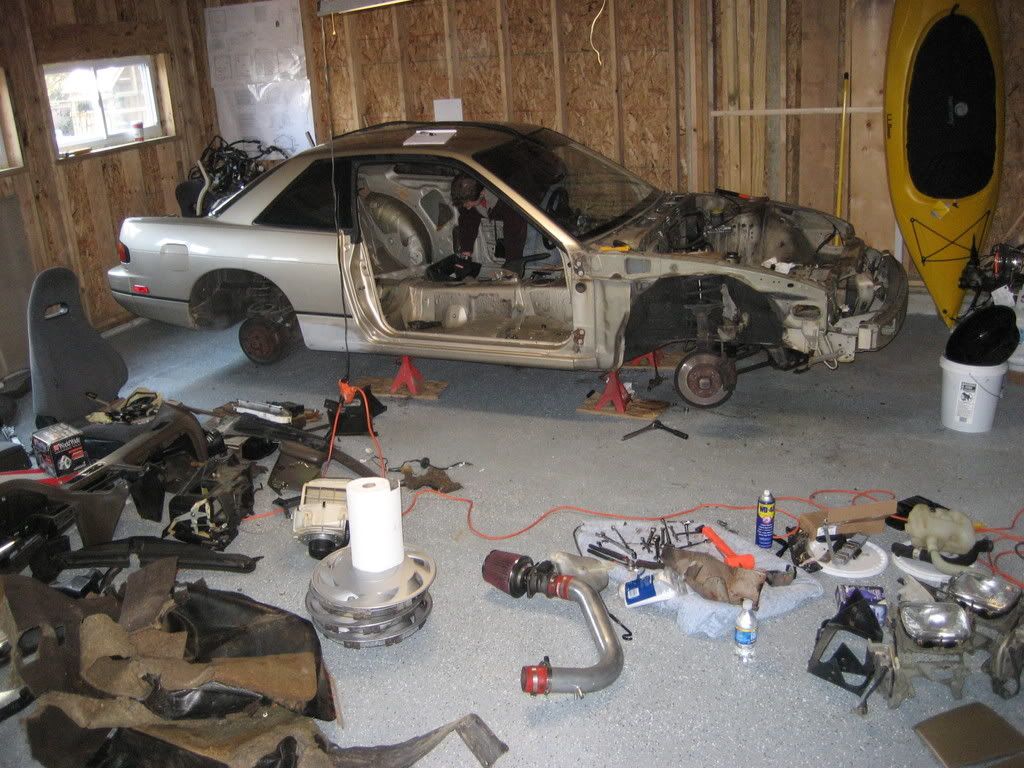 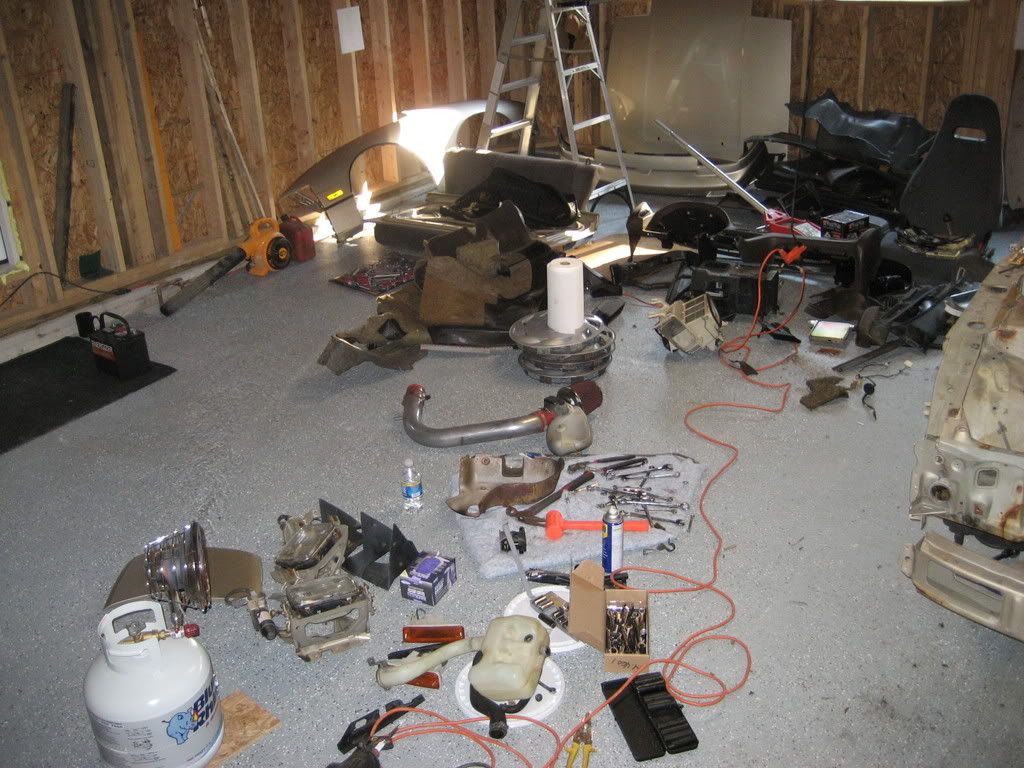 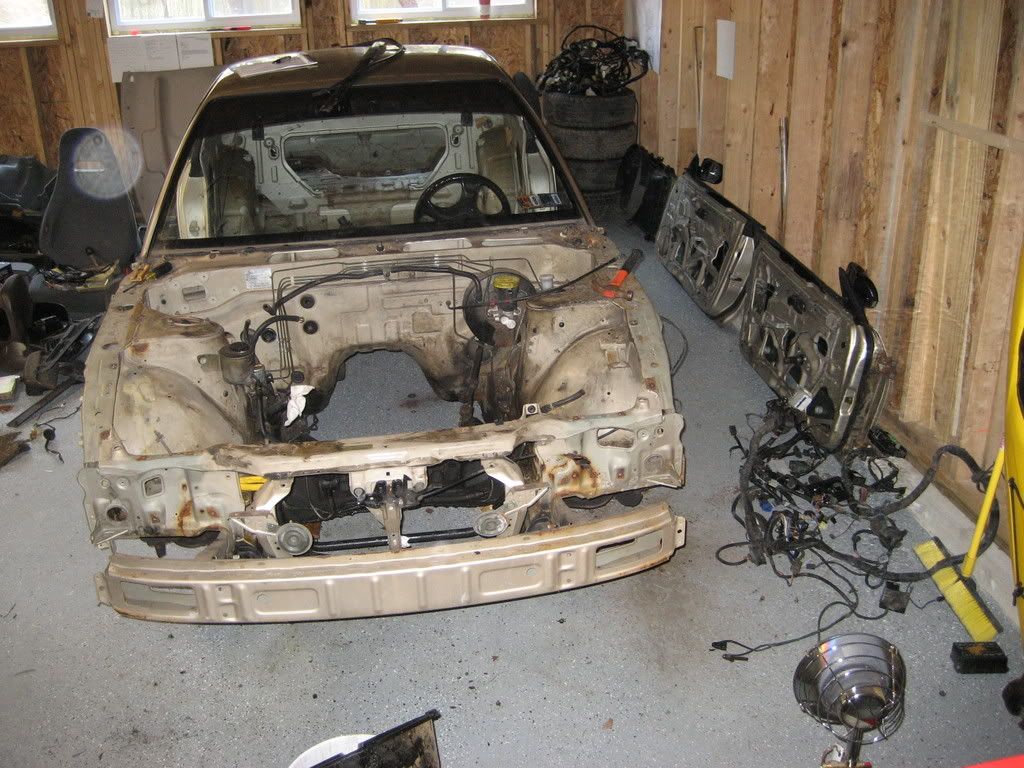 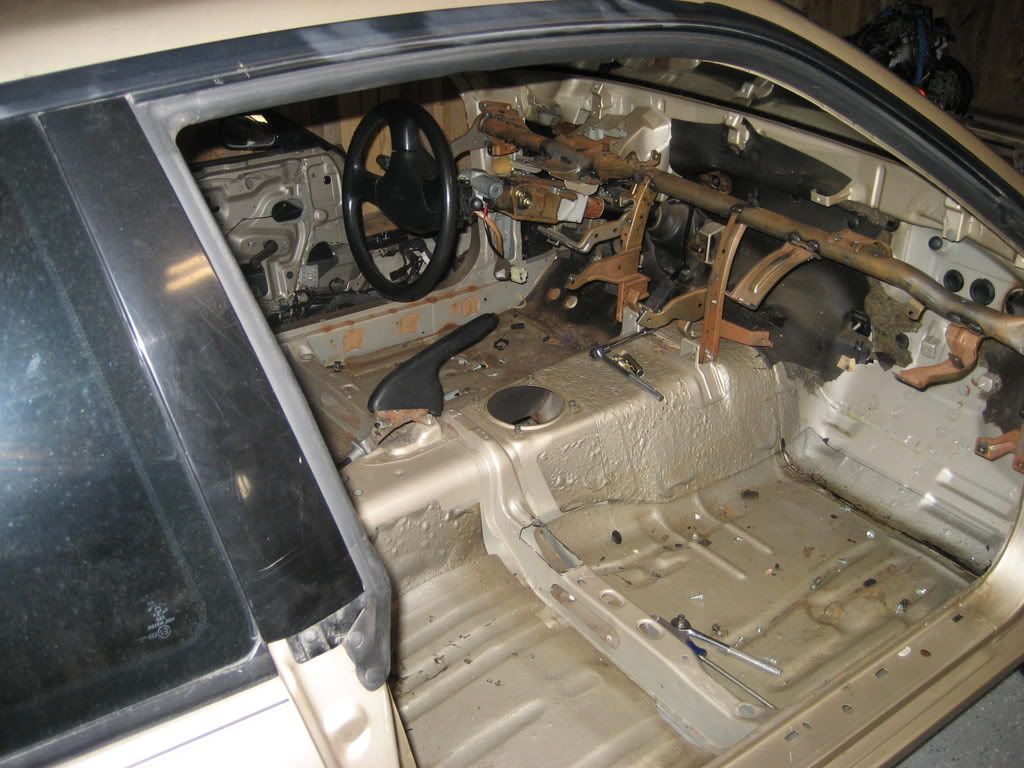 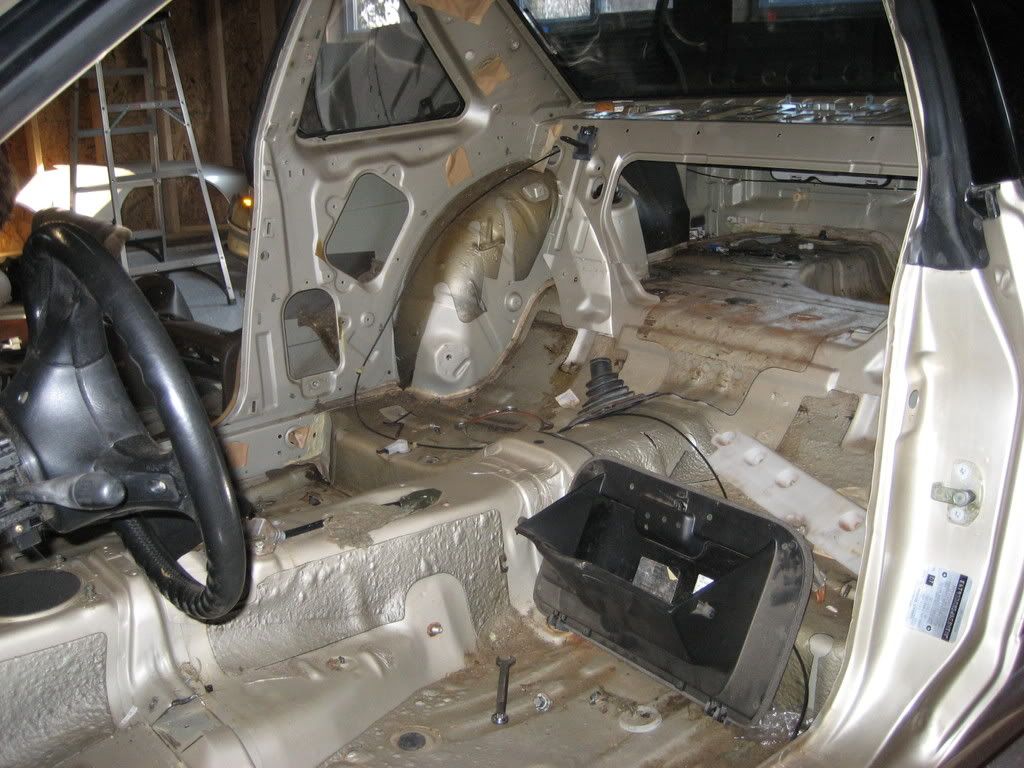 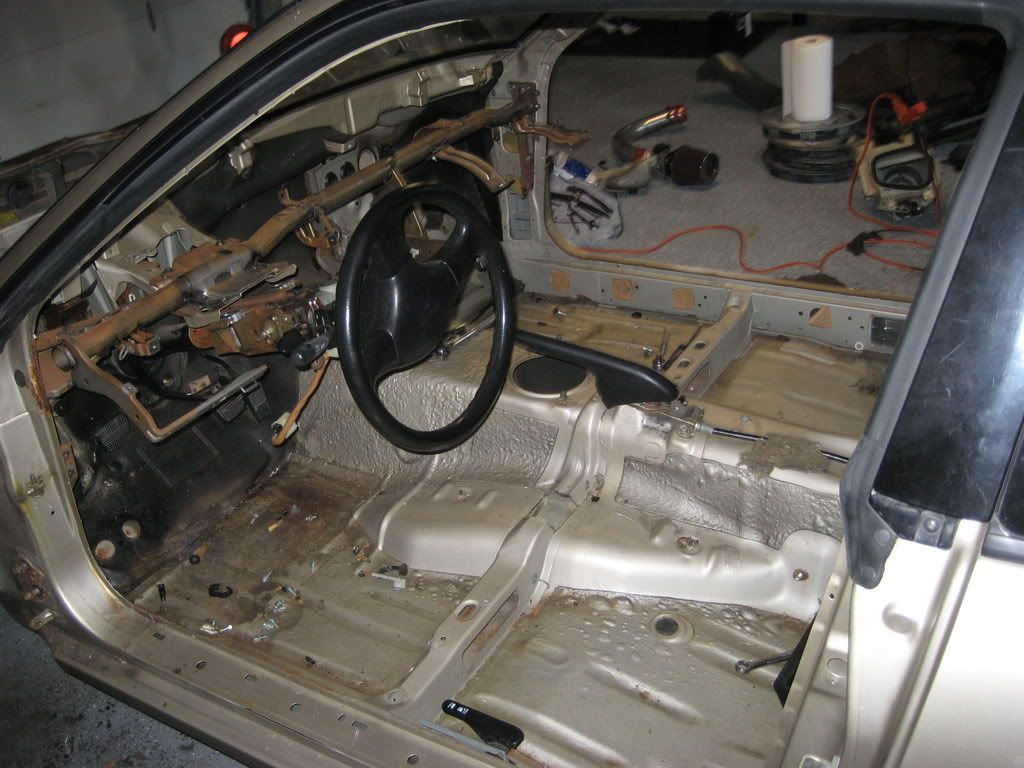 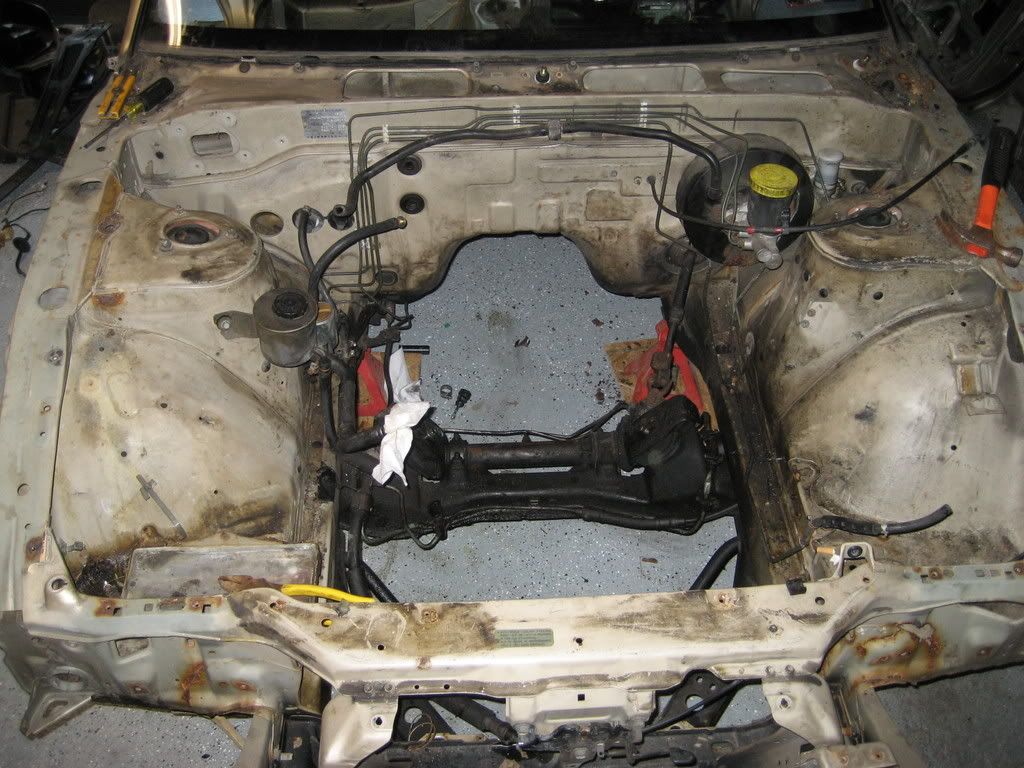 and just for fun: 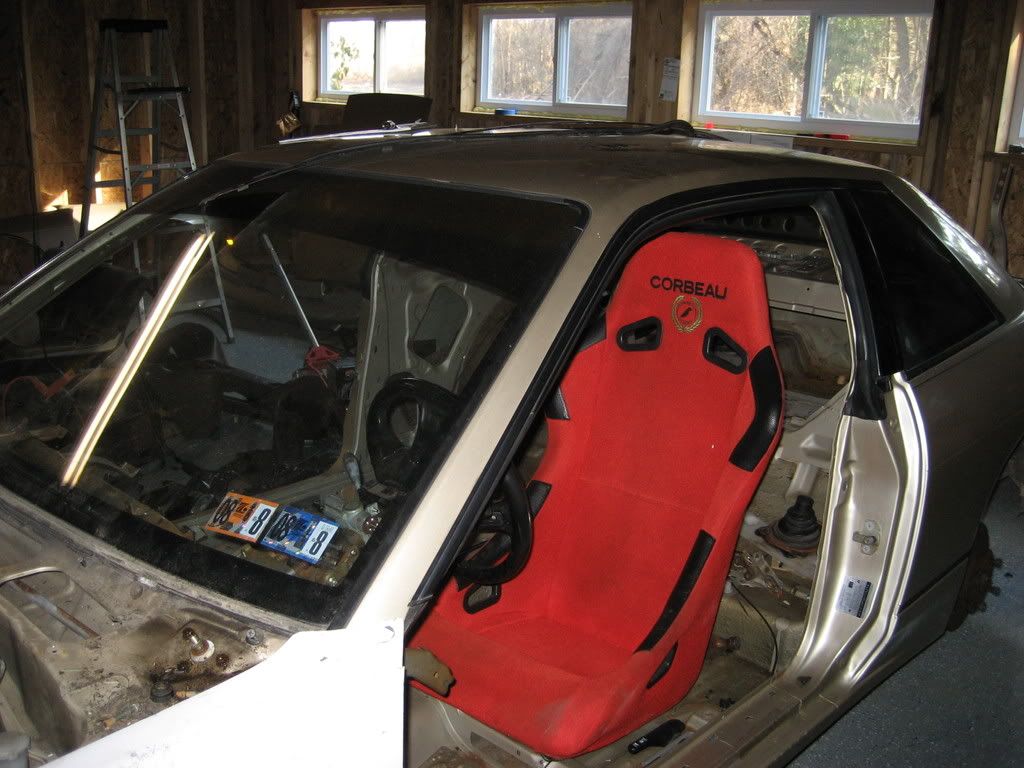 Quote:
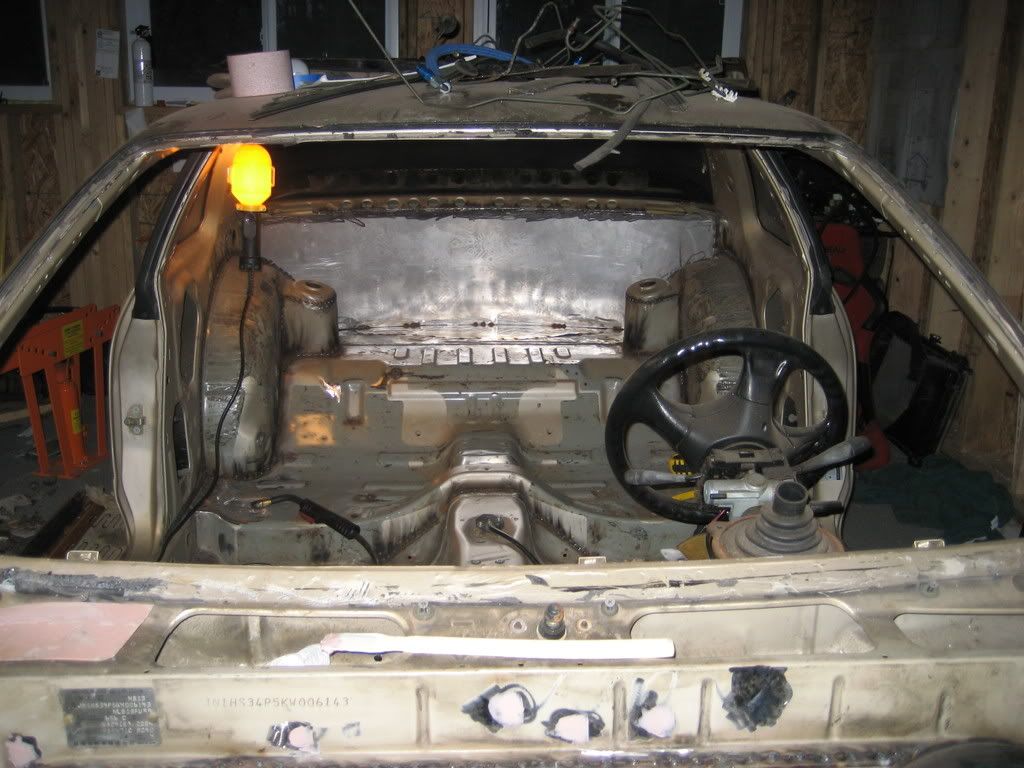
The heater's nice when you stand next to it, but no insulation and openings between the roof and the wall keep it about 30 degrees in there! I finally got a long weekend to go down and work on the car. First problem, one of the sub-frame bushings froze to the stud. I cut the bushing out while it was on the car so we could drop the sub-frame, but now the inner metal sleeve is still stuck on the stud. Does anyone have any ideas for getting that off? I'll try to get a picture of it, I forgot before I left. So we dropped the subframe, took all the suspension off of it and sand blasted so it's ready for paint. 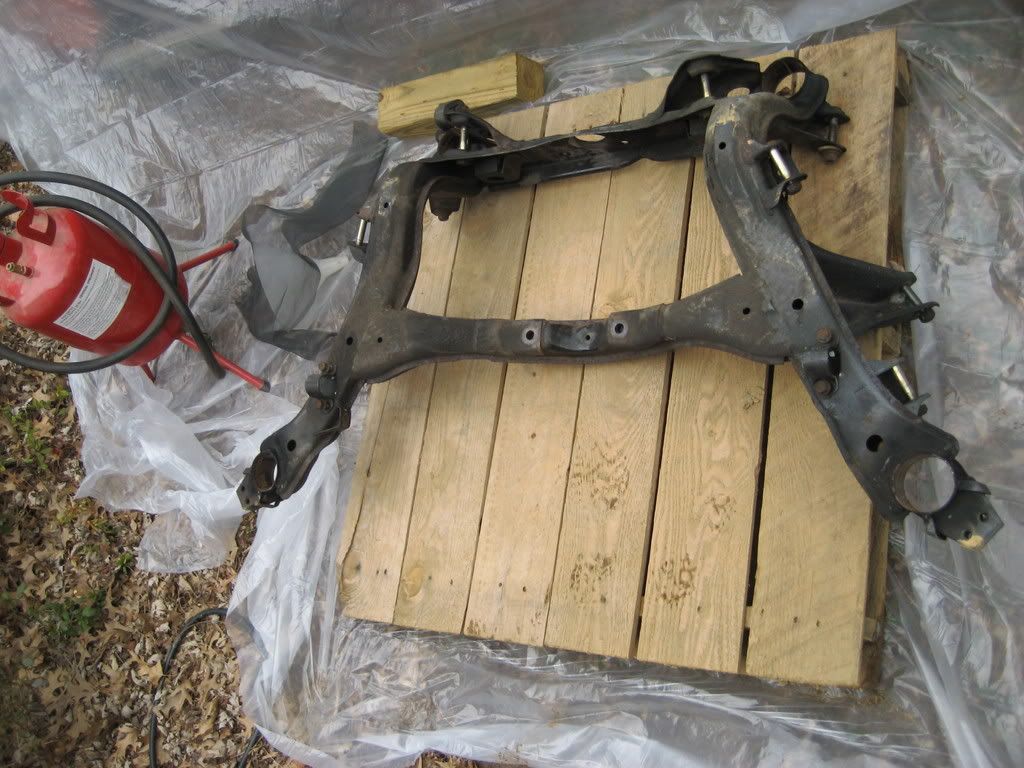 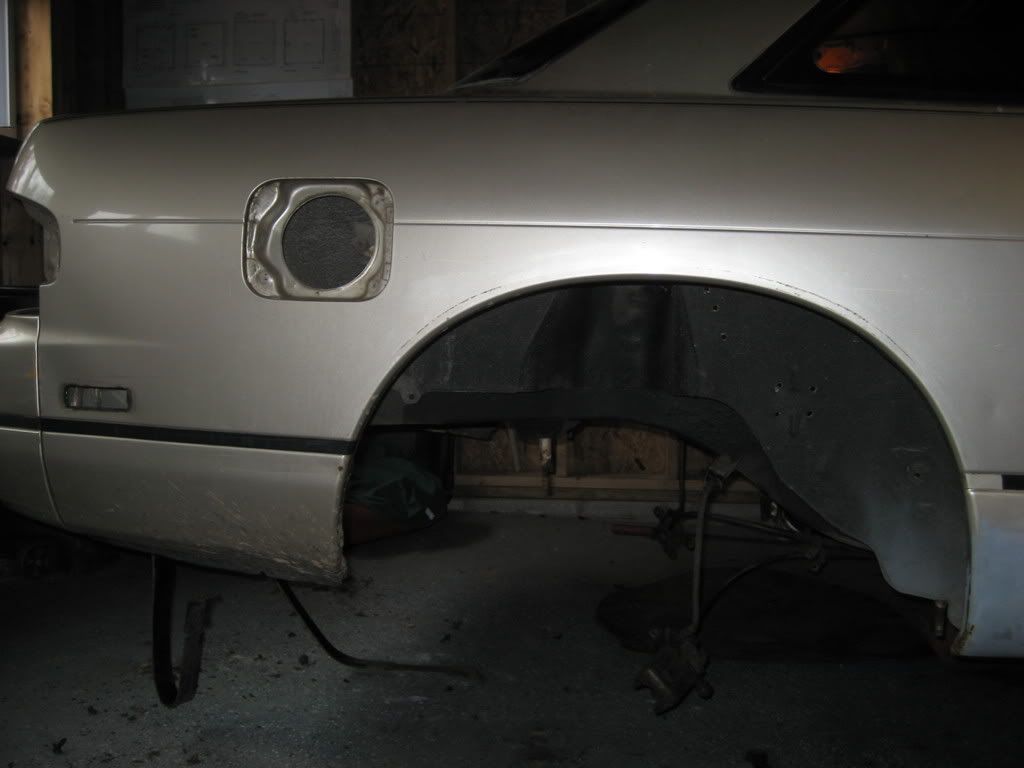 We also took out the front corssmember and started cleaning the engine bay for seam welding and paint. 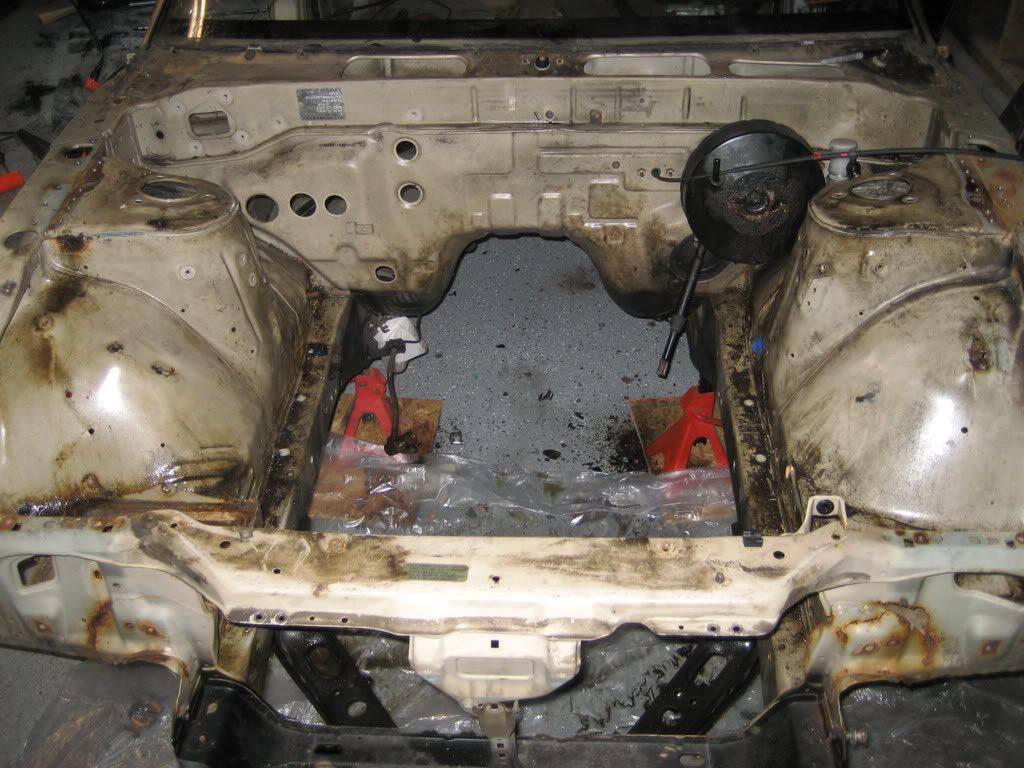 We also removed the sound deadening. That was a bitch. We used dry ice, which helped a bit for the big flat sections, but it took a lot of work to get that out. We still have to clean it up some more and then we can stich weld and install the custom cage. Then came the fun part. We took out the windshield. We tried to take it out in 1 piece so we could put it back in. It broke, that was fun. Then we started cutting out extra metal. We cut out the spare tire well. We are going to square off the cut and weld in a flat piece of sheet metal to mount the fuel cell to. We also cut out the rear seat suports, that will give us more room for the cage and rear firewall that's going in next. 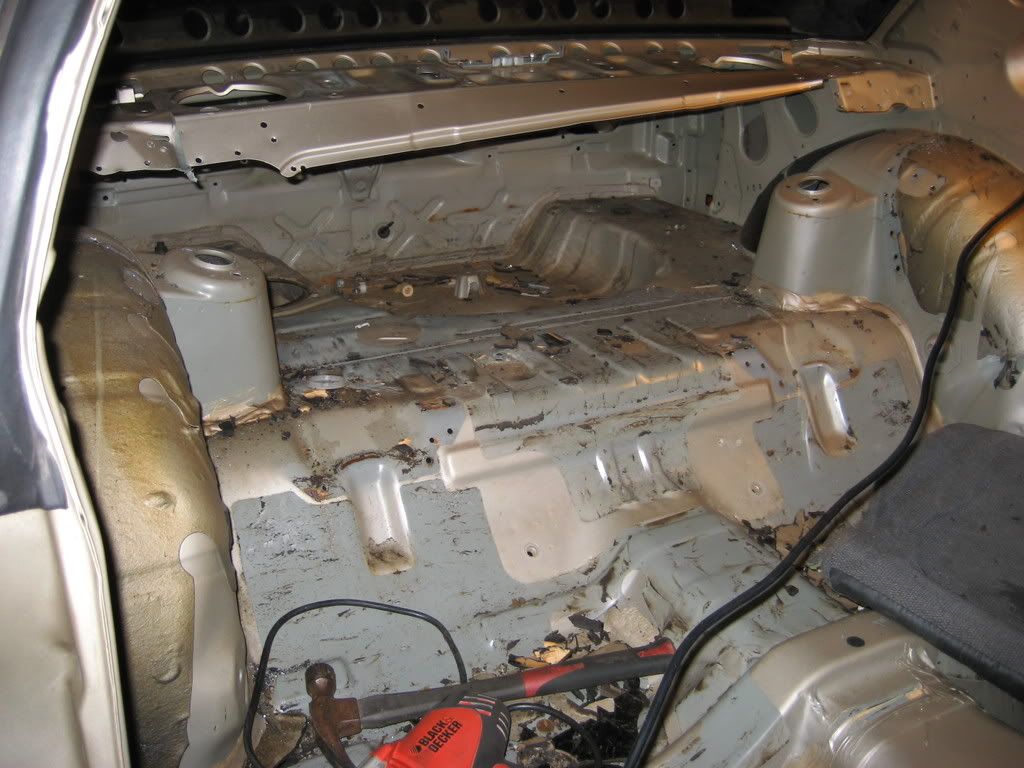 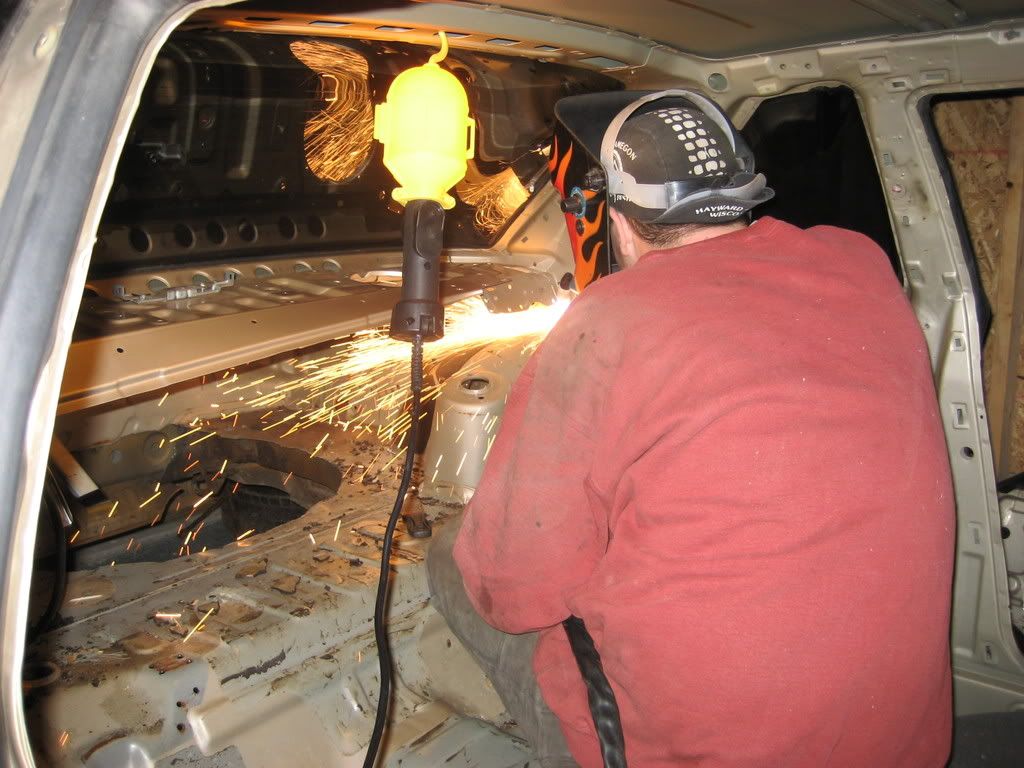 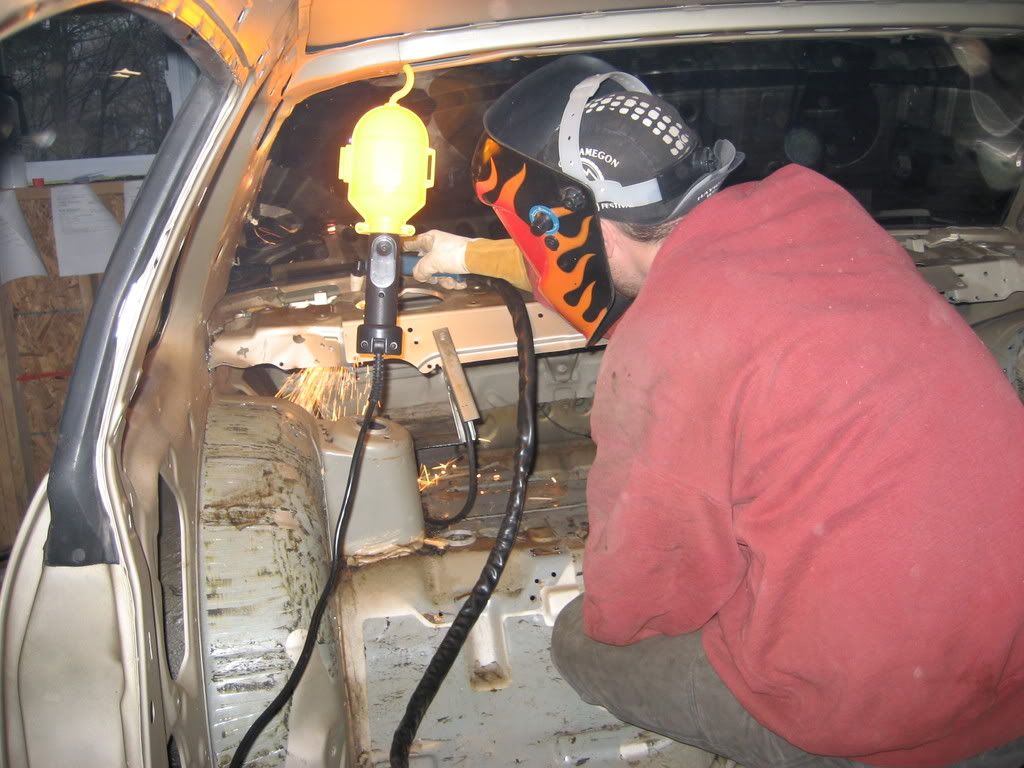 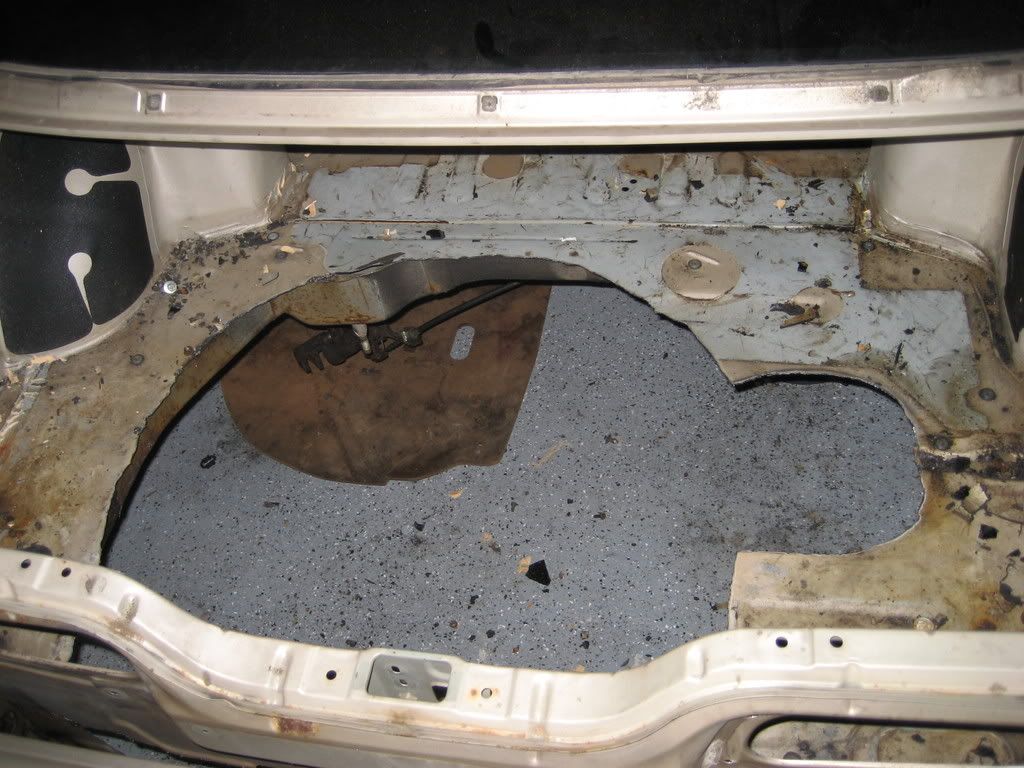 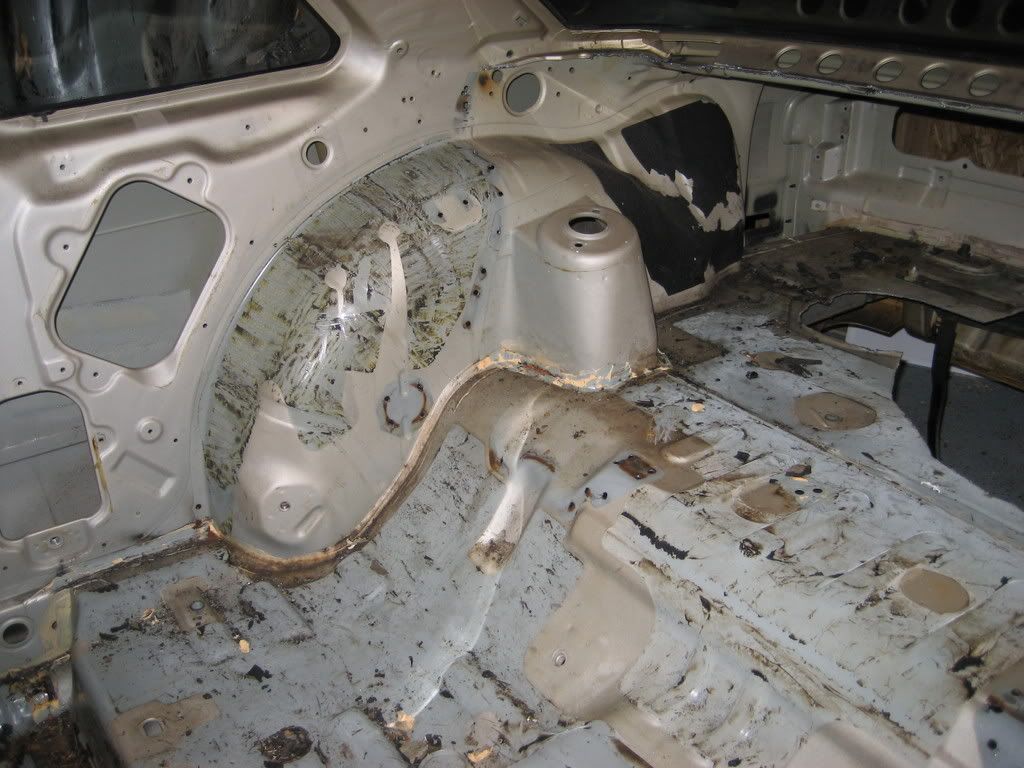 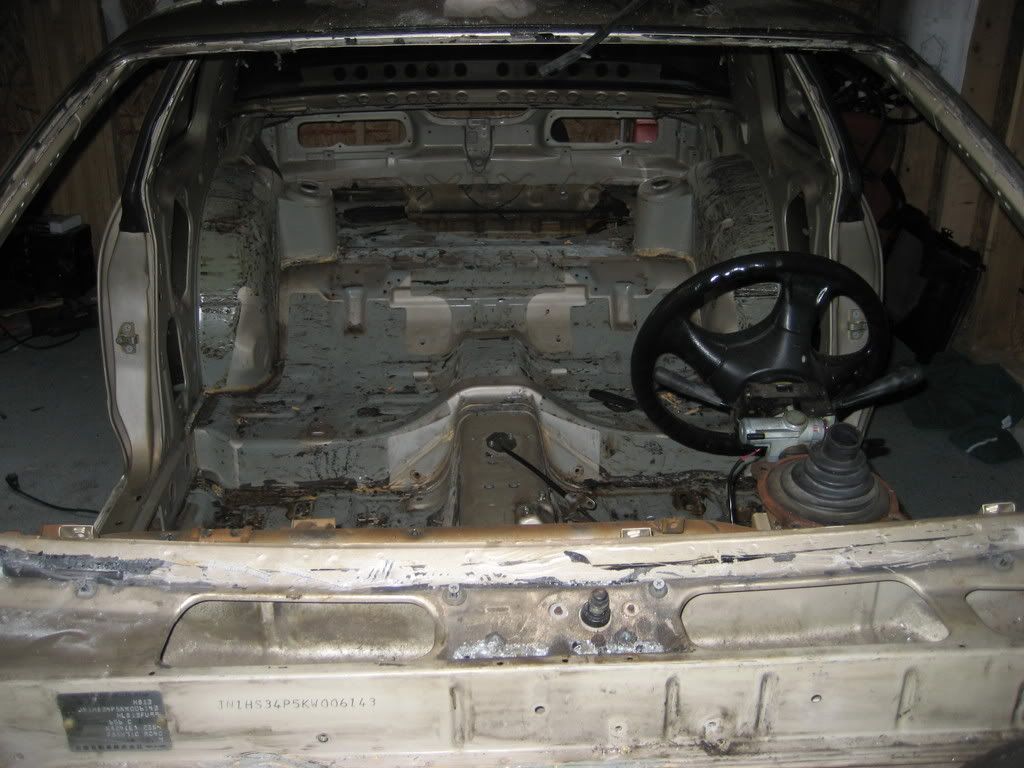 Over the next 2 weeks my friend is going to start seam welding and also take the block to the machine shop. Next time I go down we will start some of the fabrication. Now that we're done ripping it apart we can start putting it back together. For the rust in the engine bay, it's just surface rust so we're gonna grind the rust off, then prime and paint. We have a couple spots on the floor where it's rusted through. For that, you want to cut out all the rust, then weld in a patch pannel (cut a piece of sheet metal to fit the hole in the floor then weld it in place). If yours is rusted through and you don't have a welder, just take the car to a body shop and see how much they want to fix it for you, probably won't be too expensive. My friend and his buddy (a professional welder) stich welded the chassis this weekend and started filling holes in the engine bay. 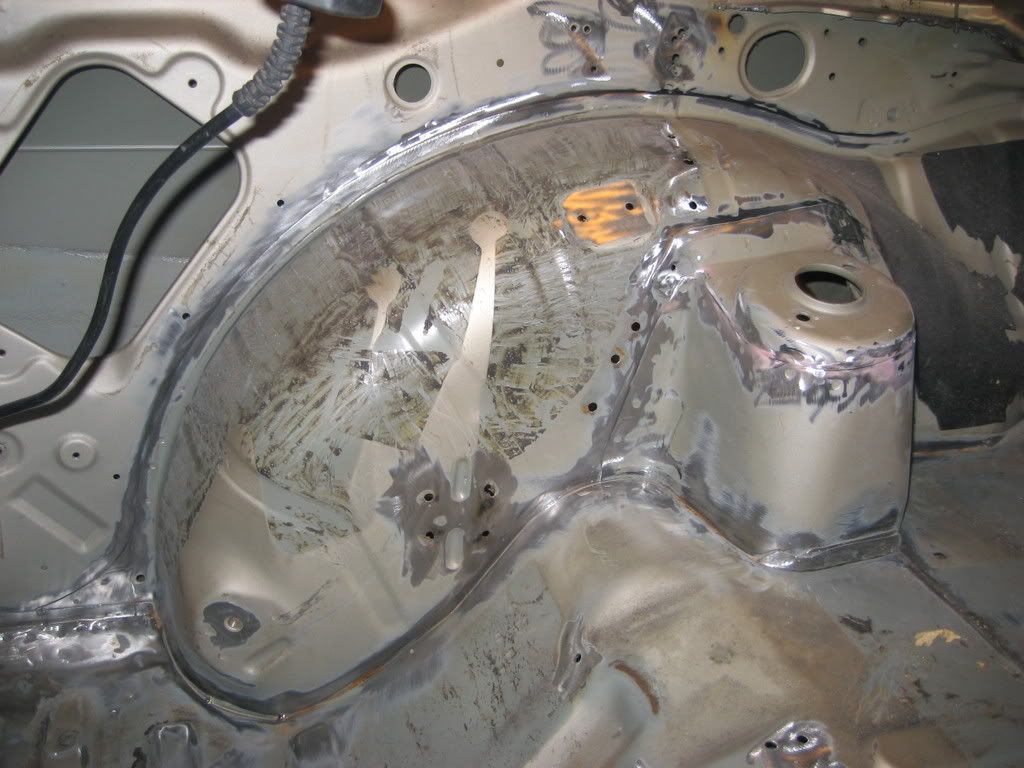 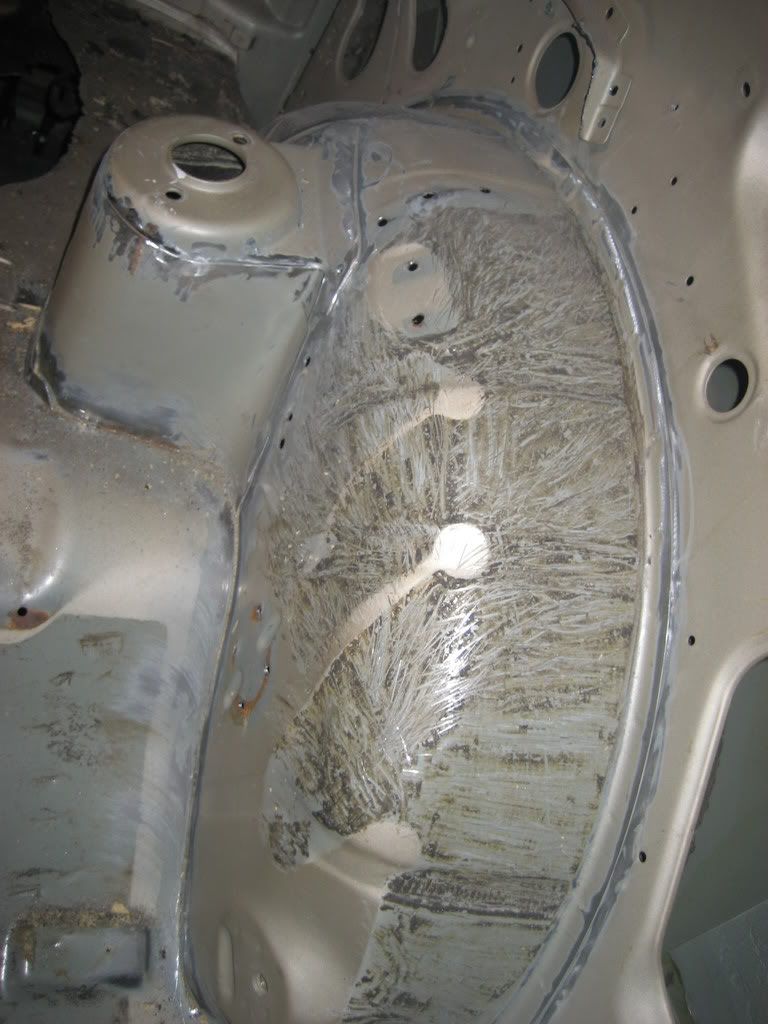 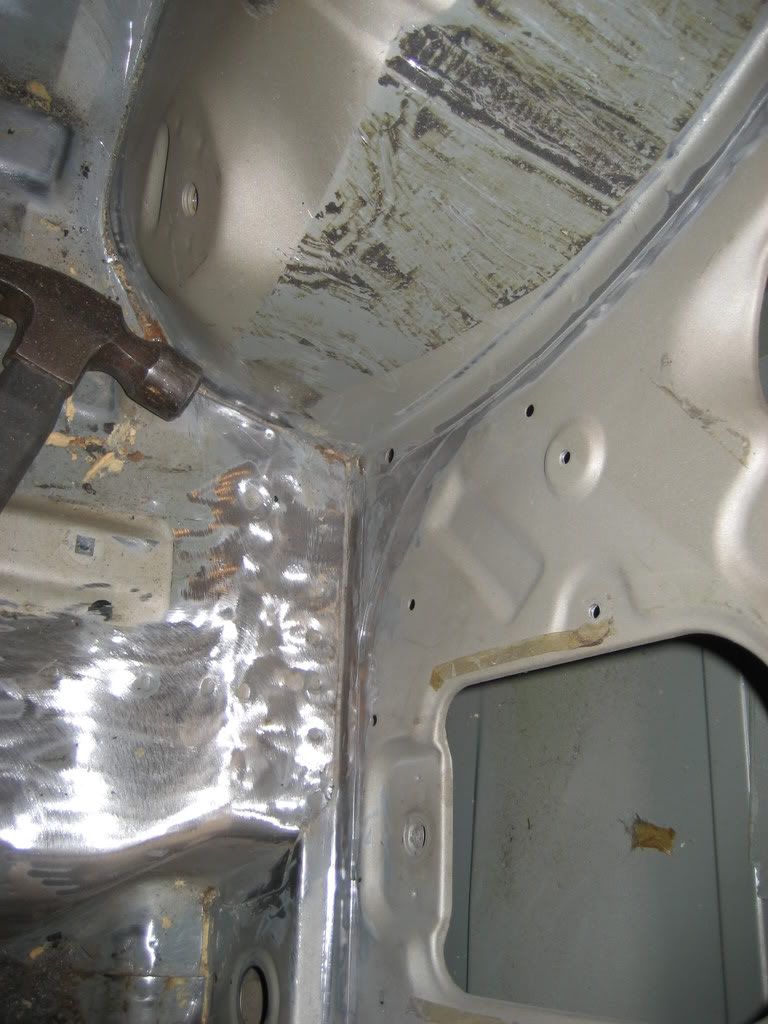 This guy is awsome: 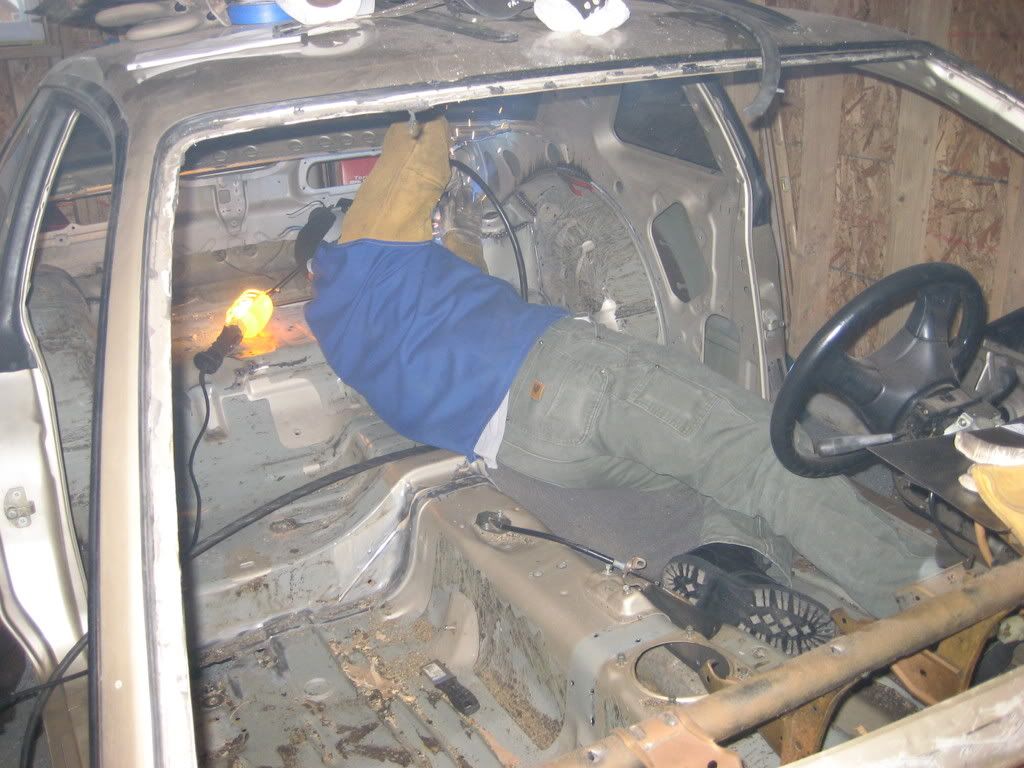 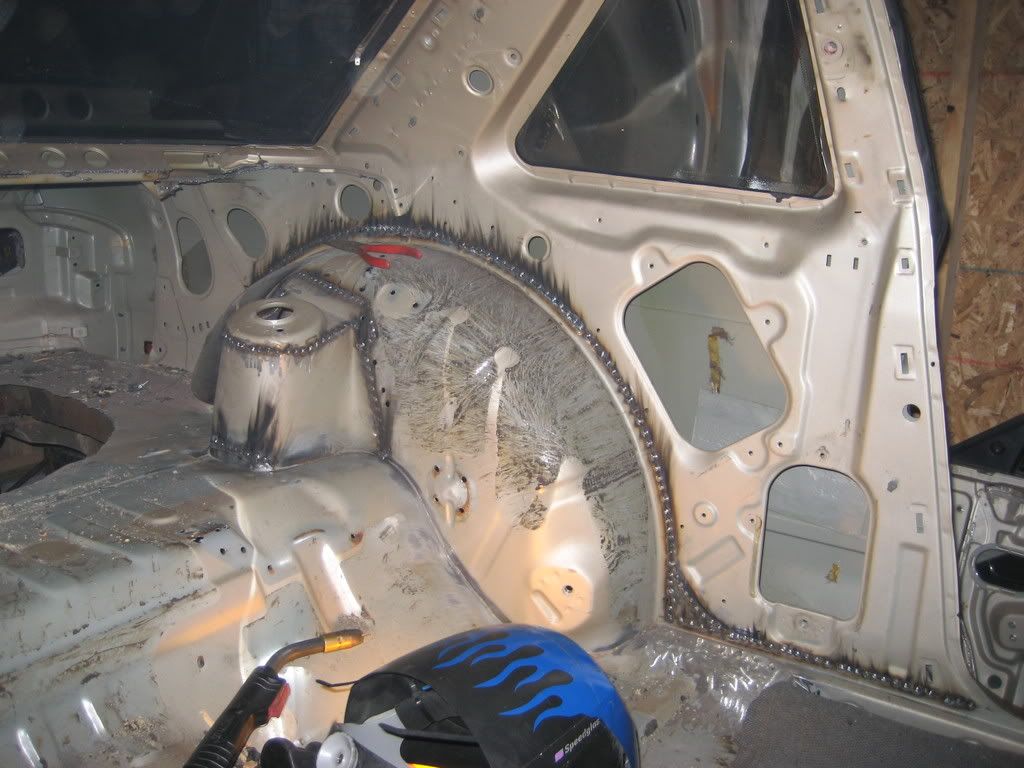 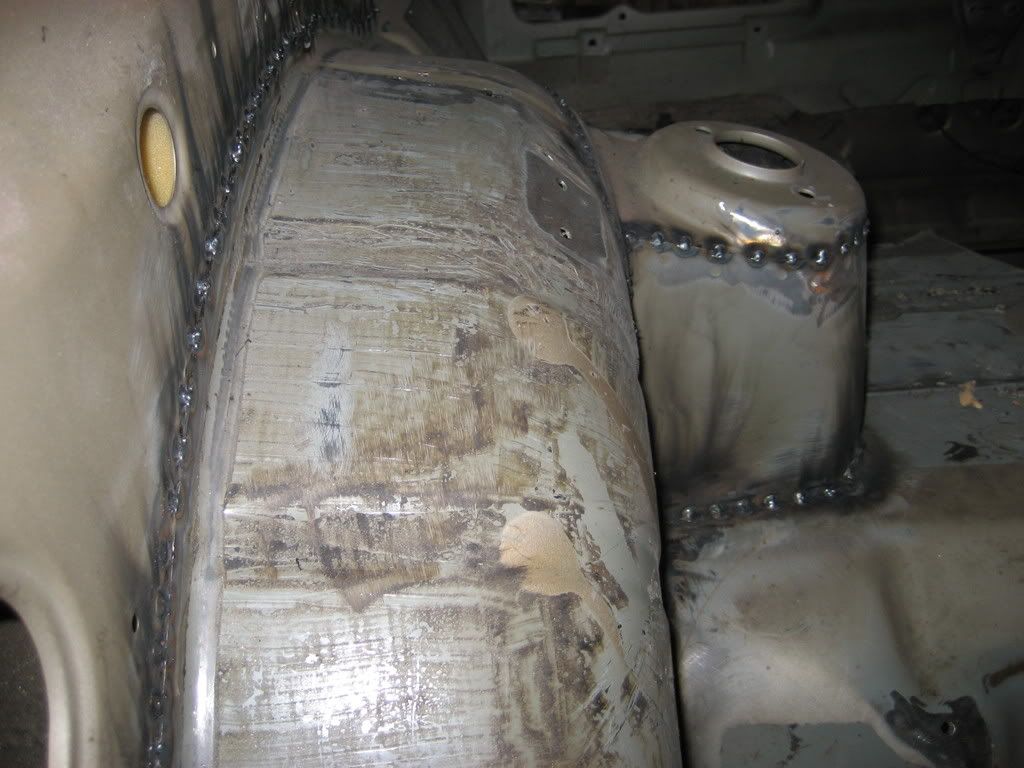 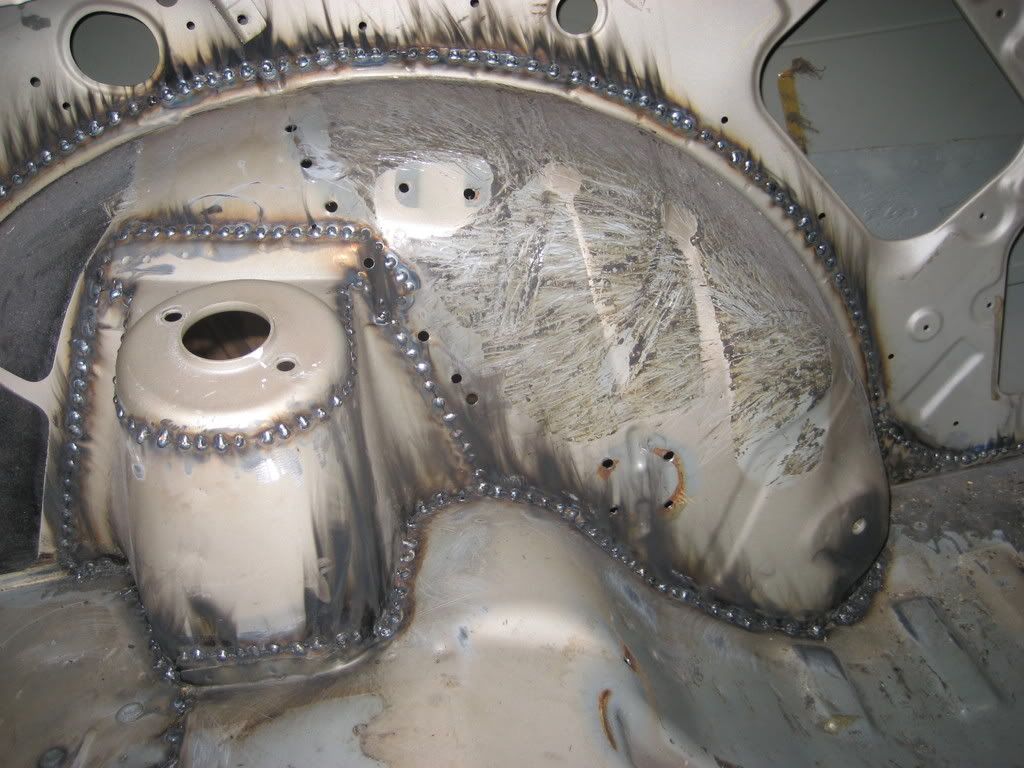 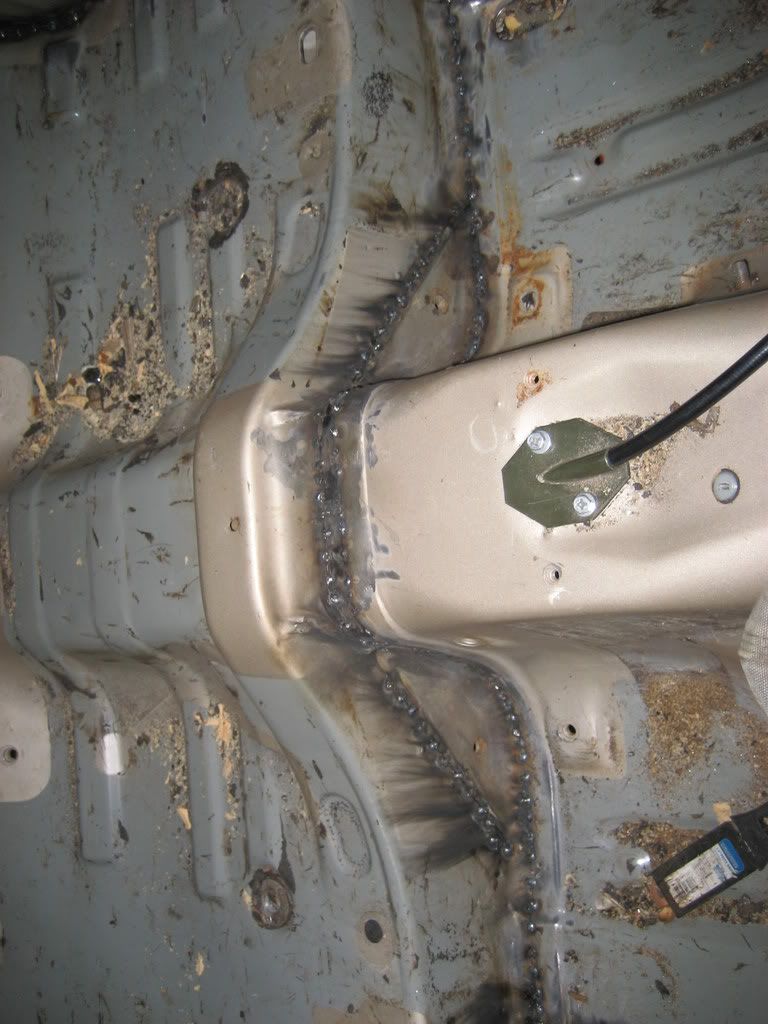 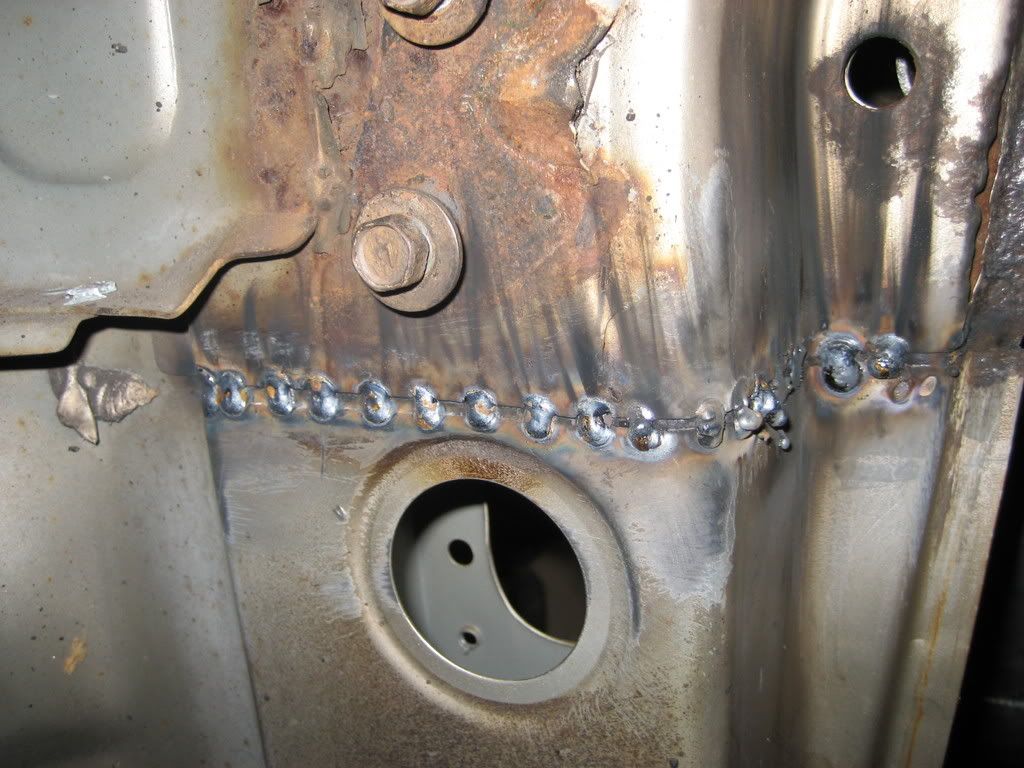 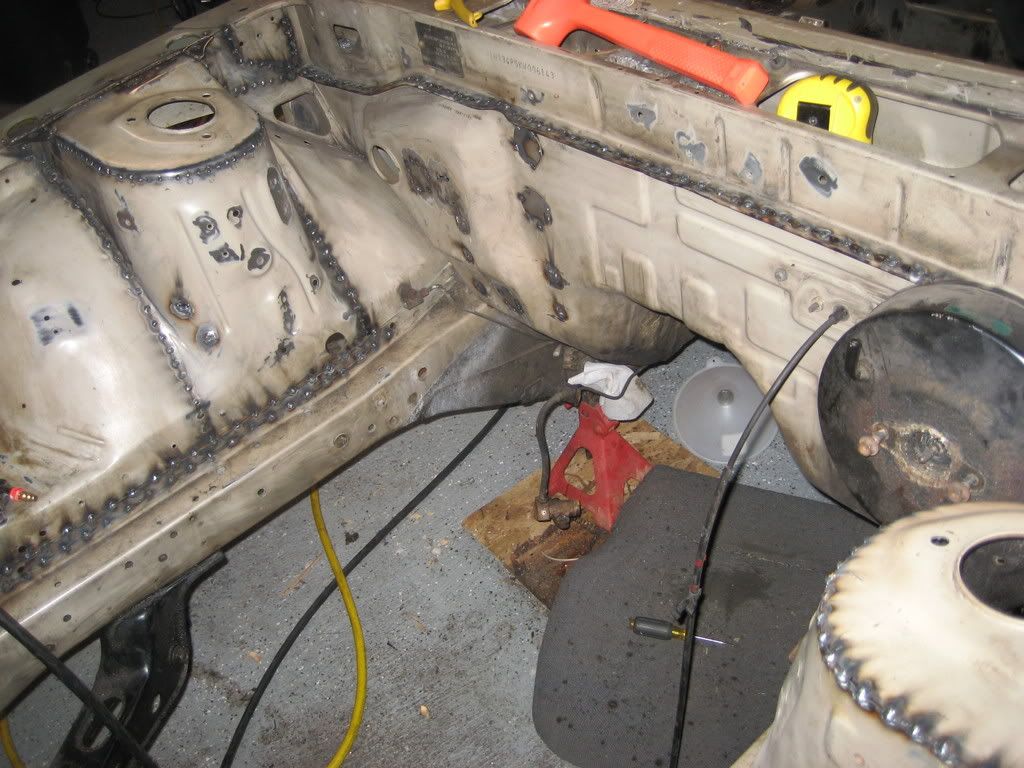 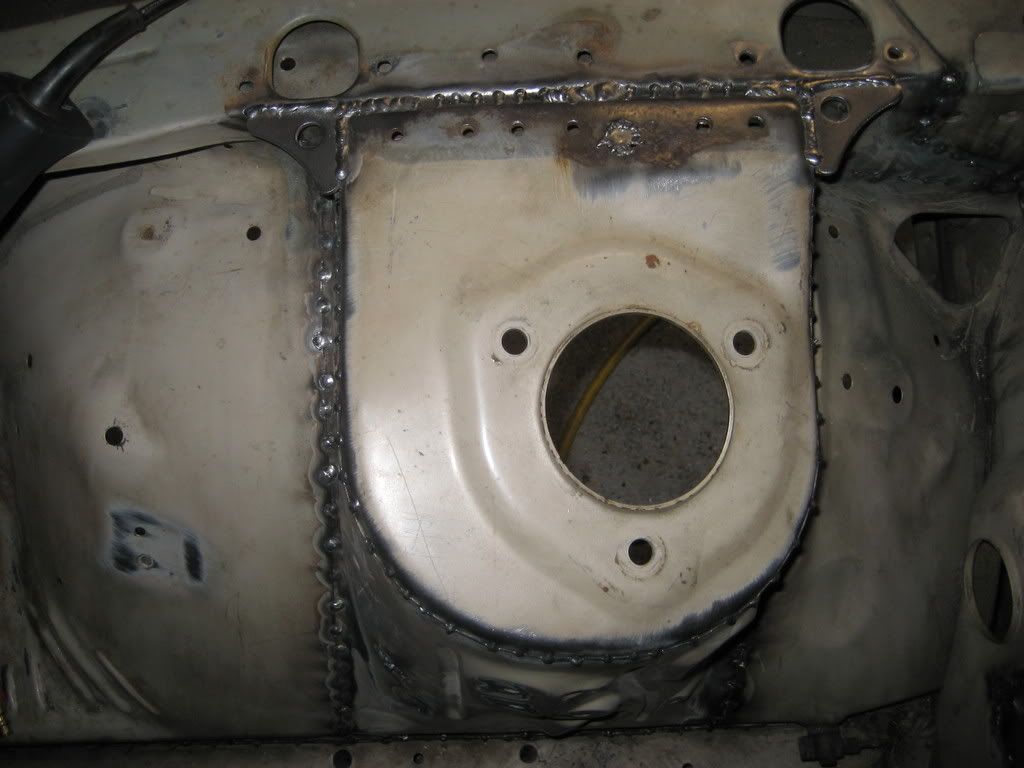 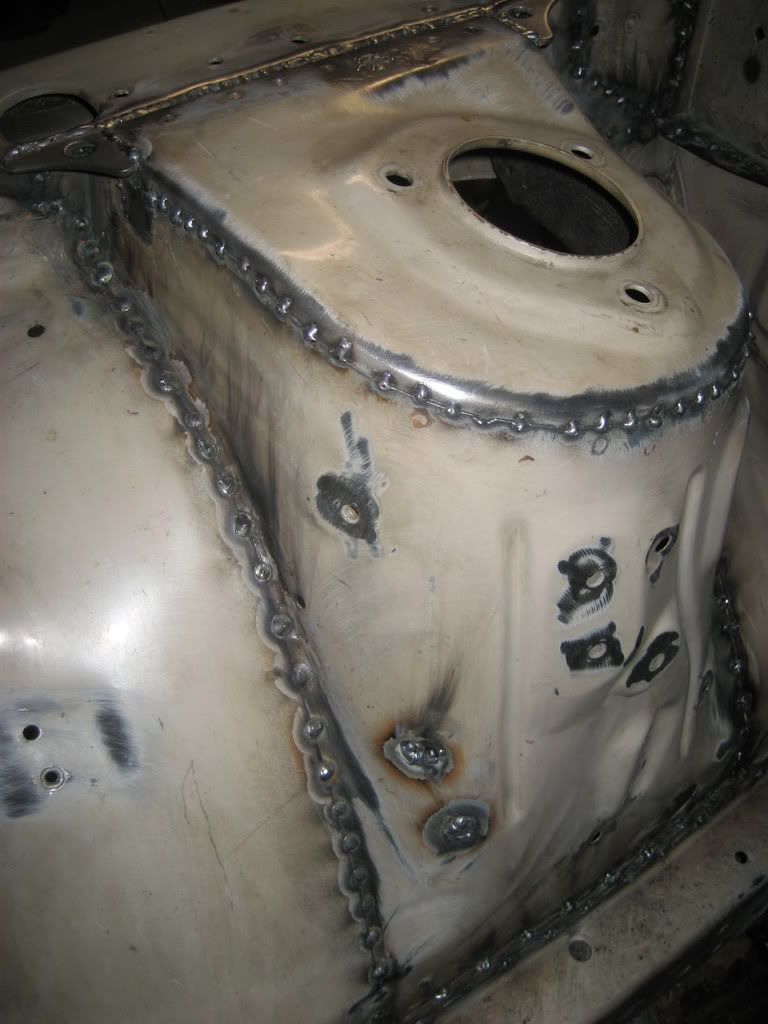 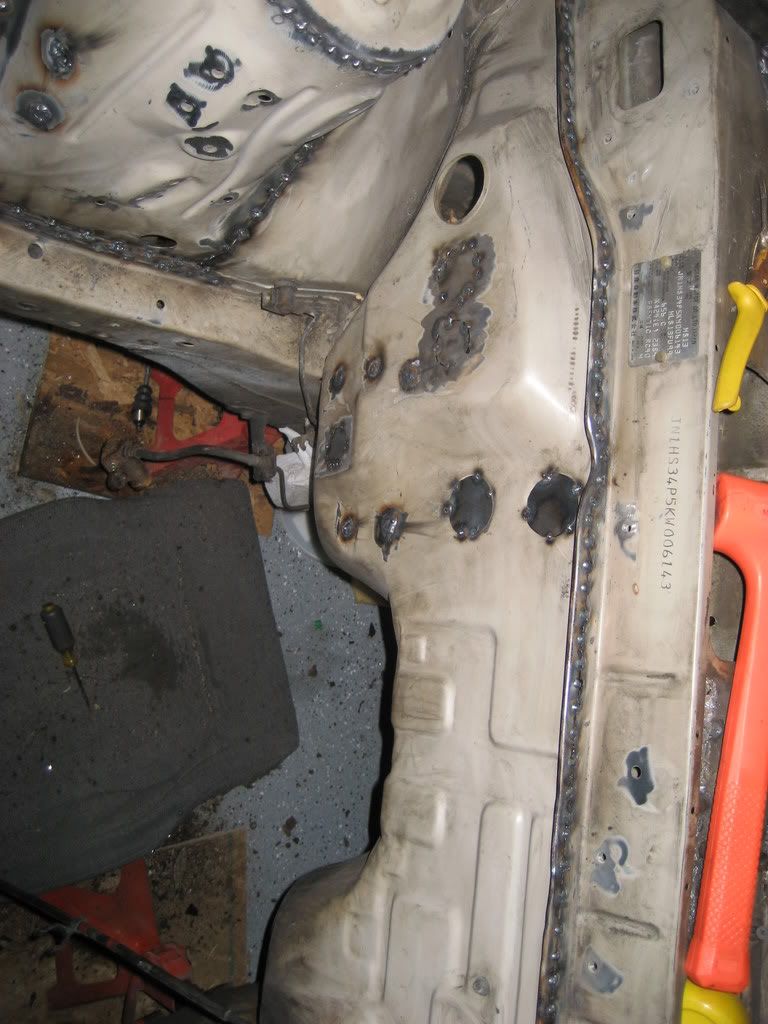 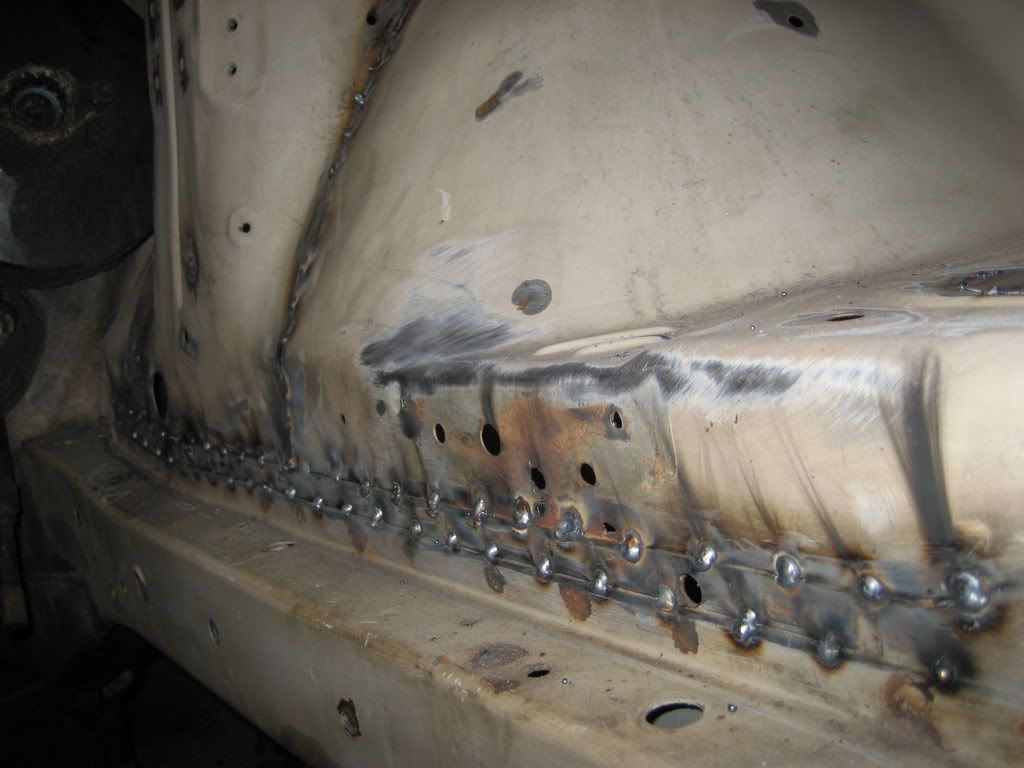 It took us about a day to get everything prepped and another day to get most of the welding done. Then my friend has been working on it an hour or 2 a day after work here and there. We're going to prime it this weekend, then hopefully get it painted in march. Quote:
Last edited by noname7198; 02-15-2009 at 05:43 PM.. Reason: cleaning up |
||

|

|
| Sponsored Links |
|
01-28-2008, 07:19 AM
|
#3 |
|
Banned from the Marketplace
 Join Date: Jan 2008
Location: New Hampshire
Age: 34
Posts: 803
Trader Rating: (0)
  Feedback Score: 0 reviews
|
good start bro. im doing the same with my s14 at the moment, i have it stripped down to what you do but wokring on tubs and what not for the enigne bay since i messed up at the first set. but keep up the good work and post more pics when you make more progress please
 |
|
|
|
|
01-28-2008, 04:34 PM
|
#6 | |
|
Zilvia.net Advertiser
 
Join Date: Nov 2005
Location: Michigan
Age: 36
Posts: 5,573
Trader Rating: (16)
Feedback Score: 16 reviews
 |
Quote:
Go to www.splparts.com and order 17x9+20 FN's for the front and rear. No reason to run an 8 inch wide wheel on the front a track car. Looks pretty good. Looks like what I did to my fastback, hahaha. Just make sure you're organized. I totally have one of those heater-on-the-propane-tank things too.
__________________
Build: http://zilvia.net/f/showthread.php?t=643065 Friends don't let friends buy knock-offs. |
|
|
|
|
|
01-28-2008, 04:43 PM
|
#7 |
|
Zilvia Junkie
Join Date: Jul 2007
Location: Long Island, NY
Age: 39
Posts: 568
Trader Rating: (0)
  Feedback Score: 0 reviews
|
i love build threads. noname, i suggest you look at Gavster's and CursedGTR's builds for ideas/insparation. their builds are effing awesome.
550 is steal for a chassis in such good condition. have fun with the build!!
__________________
1993 KA24DE for sale with 180k..running when pulled.... need to get rid of ASAP...i'm moving |
|
|
|
|
01-28-2008, 08:31 PM
|
#8 |
|
Zilvia.net Advertiser
Join Date: Nov 2005
Location: Michigan
Age: 36
Posts: 5,573
Trader Rating: (16)
Feedback Score: 16 reviews
|
Oh, nice price!
I take it you already bought the wheels. Too bad.
__________________
Build: http://zilvia.net/f/showthread.php?t=643065 Friends don't let friends buy knock-offs. |
|
|
|
|
02-19-2008, 05:59 PM
|
#10 |
|
Zilvia Member
 |
dont forget toe links in ur set up...if u plan on getting a good alignment ull be stuck with only a limit of toe adjustability due to the stock restrictions..i only say this because once u put on aftermarket RUCAs the toe can only be corrected with aftermarket toe links...
as for sway bars i personally have tanabe and noticed a significant difference but alot of guys on the forums say that the stock ones are beefy enough and have just enough play to make the car handle well...maybe just get some sway bar endlinks and main bushings? |
|
|
|
|
02-19-2008, 07:23 PM
|
#14 | |
|
Zilvia FREAK!
 
Join Date: Nov 2006
Location: South Fulton, TN
Age: 33
Posts: 1,043
Trader Rating: (4)
Feedback Score: 4 reviews
|
Quote:
__________________
92 vert converted 5speed and other little things 
|
|
|
|
|
|
02-19-2008, 07:25 PM
|
#15 |
|
Join Date: Nov 2007
Location: Decatur (eastside of atlanta)
Posts: 23
Trader Rating: (0)
Feedback Score: 0 reviews
|
looks like a fun project, the only advise i have for auto-x is do your research on where the 240 is most competitive and make sure a mod that you really don't need doesn't bump you up to a higher class.
|
|
|
|
|
02-25-2008, 12:25 PM
|
#17 |
|
Zilvia Addict
Join Date: Sep 2007
Location: SF, CA
Age: 36
Posts: 966
Trader Rating: (6)
Feedback Score: 6 reviews
|
Wow, this is like looking at my future (this year's) build.
Stitch welds look good. How long did it take total to clean, grind, and stitch everything? I'm fucking subscribing to this build for sure.
__________________
MADE IN JAPAN |
|
|
|
|
02-25-2008, 12:53 PM
|
#20 |
|
Zilvia Junkie
Join Date: Jul 2007
Location: Long Island, NY
Age: 39
Posts: 568
Trader Rating: (0)
Feedback Score: 0 reviews
|
now that is some badass stich welding. the best i've seen yet! love the build so far man, can't wait to see some more progress!
what are you gonna use to protect the welds from surface rust?
__________________
1993 KA24DE for sale with 180k..running when pulled.... need to get rid of ASAP...i'm moving |
|
|
|
|
02-25-2008, 06:27 PM
|
#22 |
|
Zilvia Member
Join Date: Apr 2007
Location: philly
Age: 43
Posts: 206
Trader Rating: (4)
Feedback Score: 4 reviews
|
build
I am the other guy working on this build. I have to say that the professional welder, Brad, who helped us really did a great job of stitch welding. He welds for a fab shop that makes exhaust for exotics. So stepping down to weld on a 240 chasis is great for us. I finished up when he had to leave and mine may look ok and be functional but he spent half as much time as me. JKP
|
|
|
|
|
02-26-2008, 05:54 PM
|
#23 |
|
Zilvia Junkie

Join Date: Sep 2005
Location: Memphis, TN / Osaka, Japan
Age: 37
Posts: 375
Trader Rating: (2)
Feedback Score: 2 reviews
 |
I am doing the same thing. wondering about all of the tar that still remains after removing the sound deadening. how do you get that out? it looks so stupid haha. need that clean look.
|
|
|
|
|
02-26-2008, 07:49 PM
|
#24 | |
|
Leaky Injector
|
Quote:
|
|
|
|
|
|
02-26-2008, 08:26 PM
|
#25 |
|
Zilvia Junkie
Join Date: Jan 2007
Location: W Mass.
Age: 36
Posts: 561
Trader Rating: (3)
Feedback Score: 3 reviews
|
Excellent build, do you plan on racing any scca events at all in the northeast??? Stitch welds look amazing BTW
__________________
d-faction.com |
|
|
|
|
02-27-2008, 06:09 PM
|
#26 |
|
Zilvia Member
Join Date: Apr 2007
Location: philly
Age: 43
Posts: 206
Trader Rating: (4)
Feedback Score: 4 reviews
|
sound deadening
I guess I should be commenting a bit more on exactly how we are doing things. Most people know that dry ice works well to remove the bulk of the sounddeadening on the flat surfaces. I used 5 lbs. Elbow grease is definately another part of it. There are also aircraft strippers that work well for that last bit of tar but I wanted something a little less toxic and user friendly. I used Klean Strip Premium stripper, it worked great. Very fast acting, aerosal can, and turns that tar into an easily removable jelly. I just used a paint scraper and very little effort. I also let it sit overnite on the tar patches on the back of the rear fender wells and it softened the adhesive to the point that a dull chisel scraped it right off with very little residue. There is also the issue of all the caulk in the seams. For this I used a wire twist wheel on a 7 inch angle grinder. A little scarry but very effective. Bothe the wire wheel and the stripper were purchased at Lowes. JKP
|
|
|
|
|
02-27-2008, 06:13 PM
|
#27 | |
|
Post Whore!
 |
bravo!
a lot of work im keeping watch of this thread! Quote:
__________________

|
|
|
|
|
|
02-27-2008, 07:54 PM
|
#28 |
|
Zilvia Junkie
Join Date: Mar 2004
Location: Fresno, CA, USA
Posts: 403
Trader Rating: (0)
Feedback Score: 0 reviews
|
man super clean out the engine bay..i mean fill ALL the extra holes and shape it a bit...then you can compete with the honduh guys for cleanest engine bay
l8tz josh
__________________
Buy the best, none other compares! 
|
|
|
|
|
03-04-2008, 05:37 PM
|
#29 | |
|
Zilvia Junkie
|
We spent last weekend getting the new trunk floor and rear fire wall fitted and welded in.
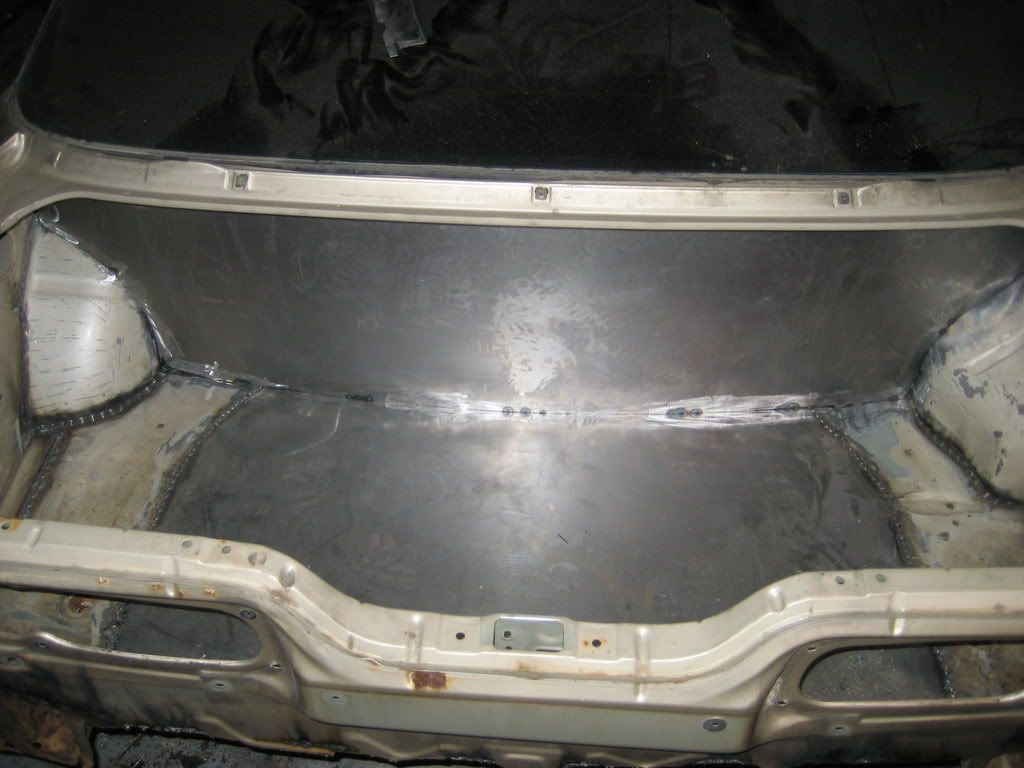 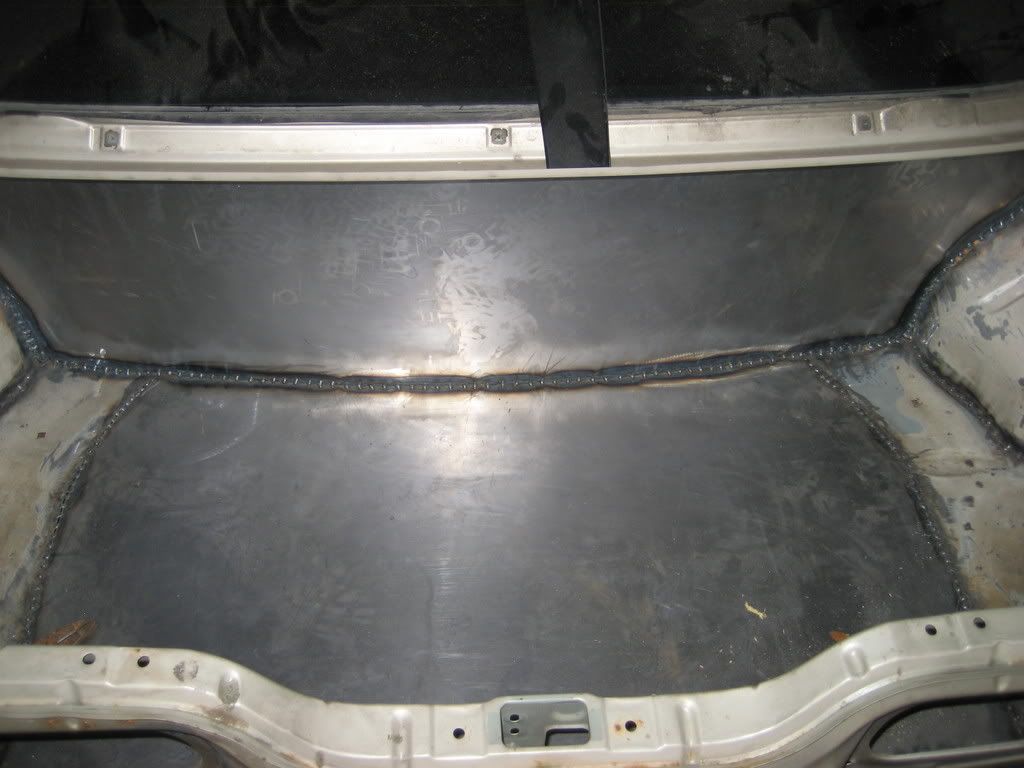  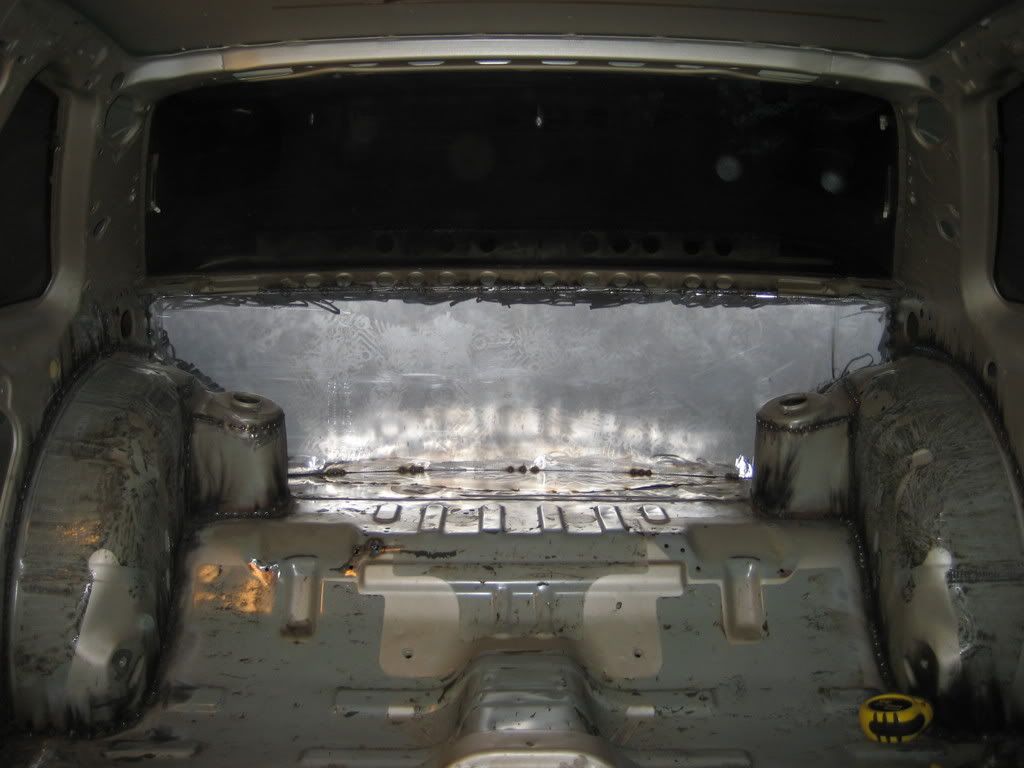 Then started on the cage. Our pipe bender didn't really work (it crushed the pipe) so I had to pay a shop to make the bends. It doesn't fit as perfect as I would like, but it's coming together nicely. 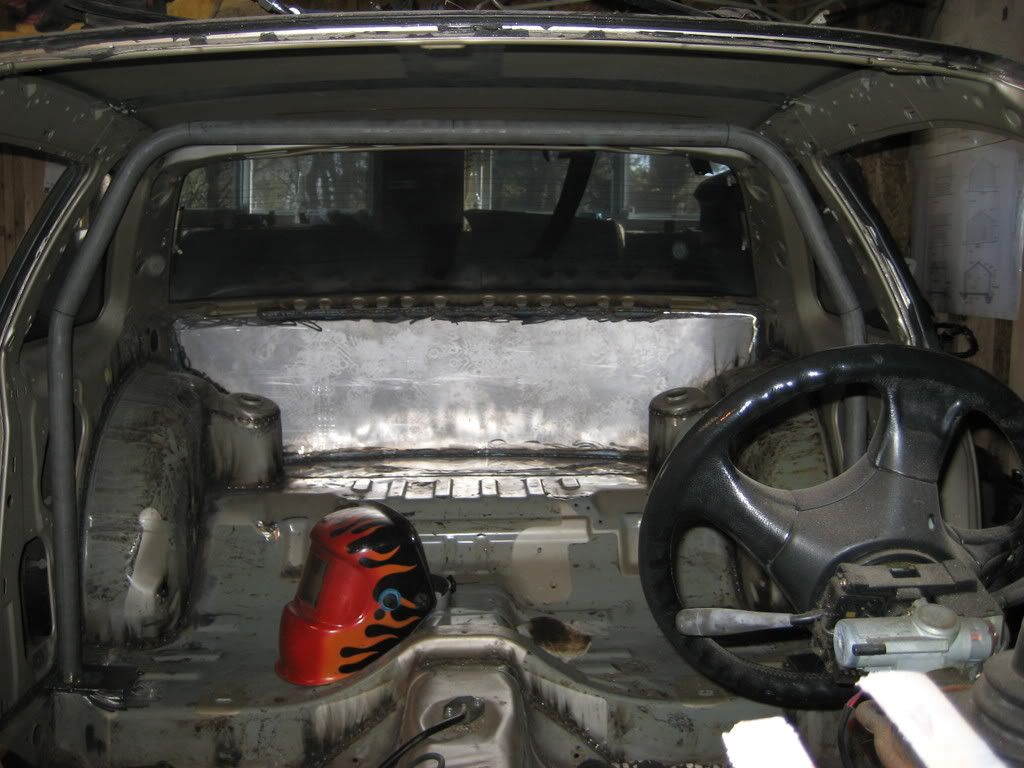 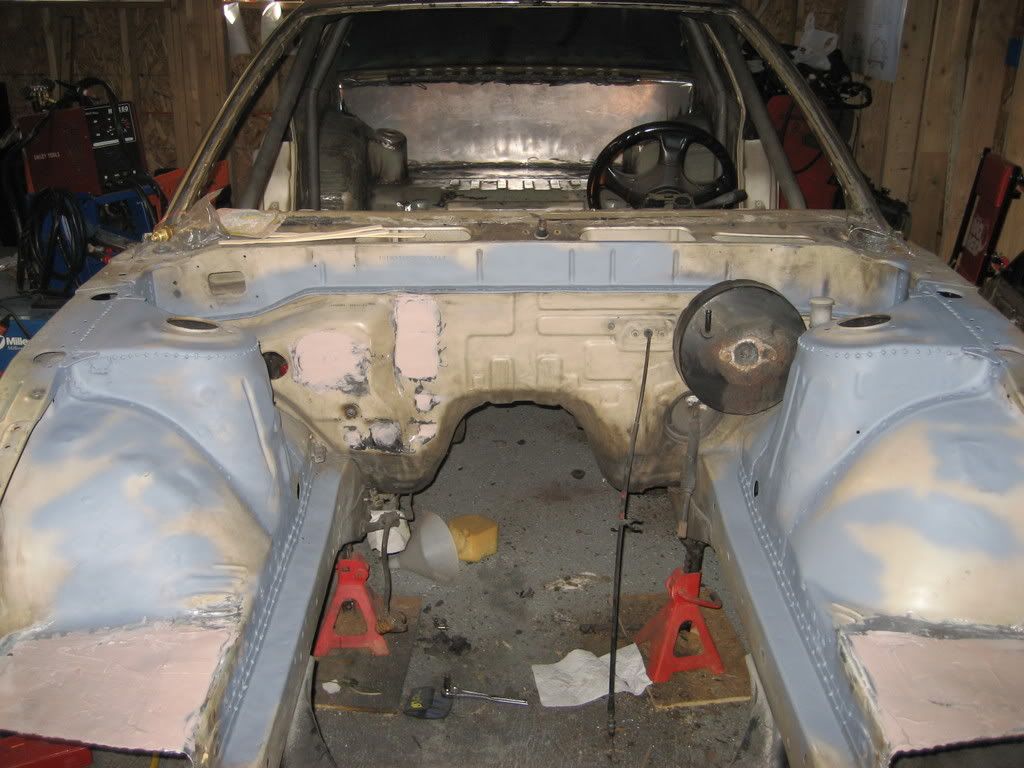 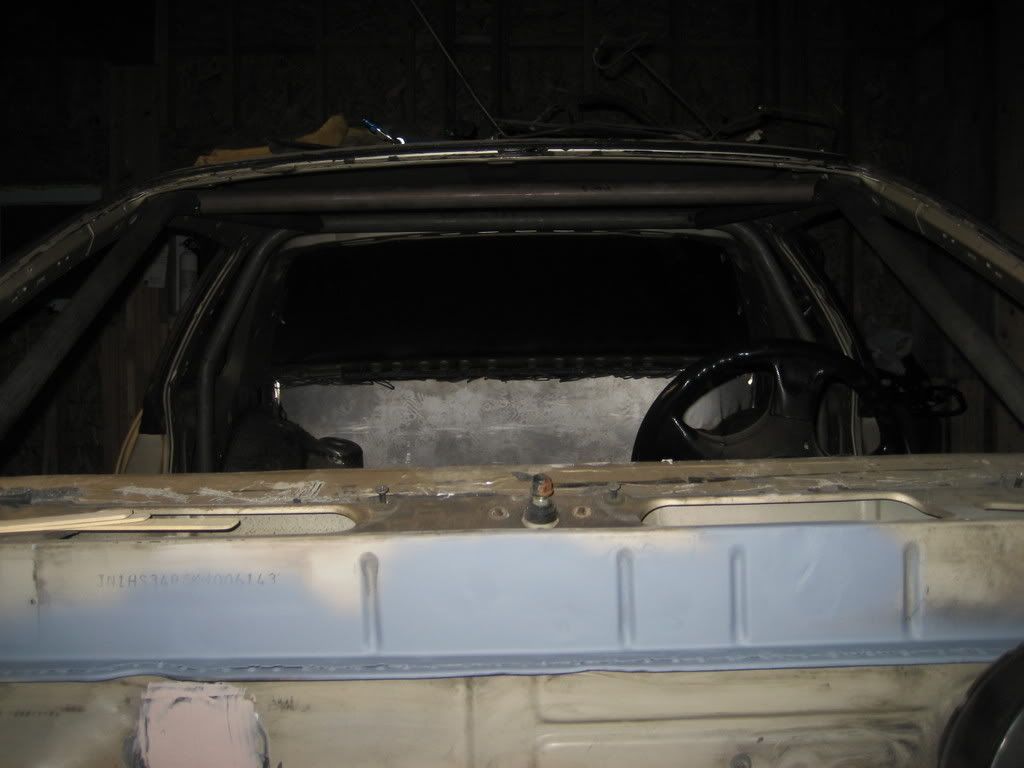 I started to prep the engine bay for paint. We welded over all the unused holes, ground them down, then used filler to smooth them out. It's still a work in progress, but it's starting to look better. 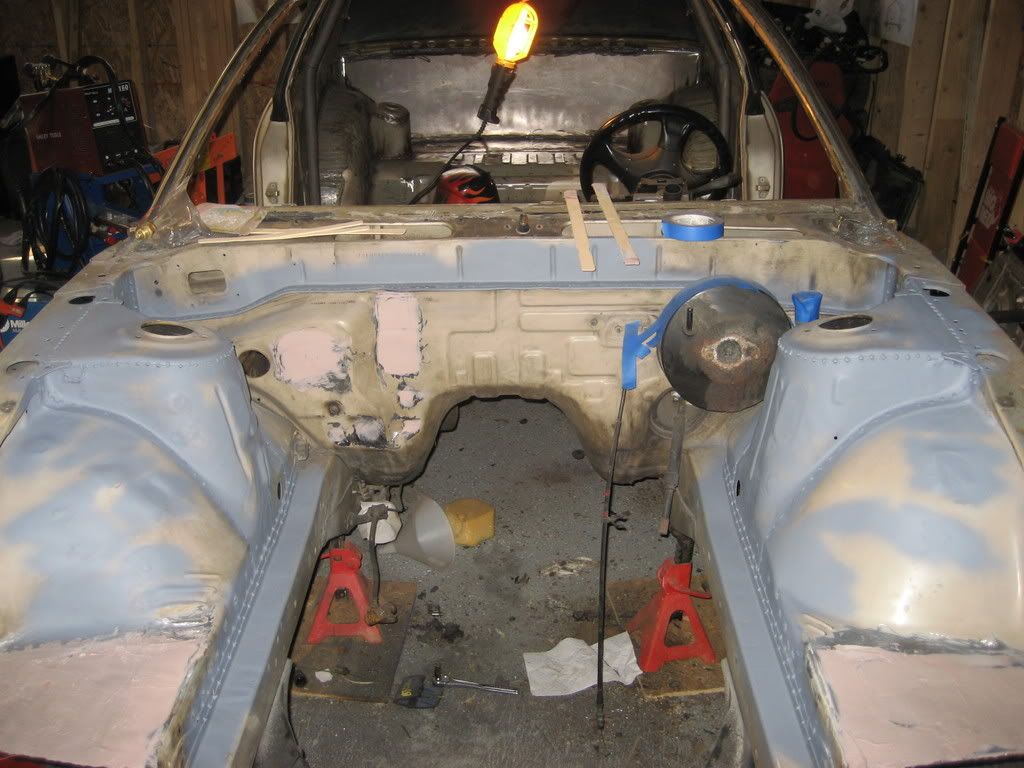 And since I don't have any money left over for adjustable traction rods, this will have to work for now. 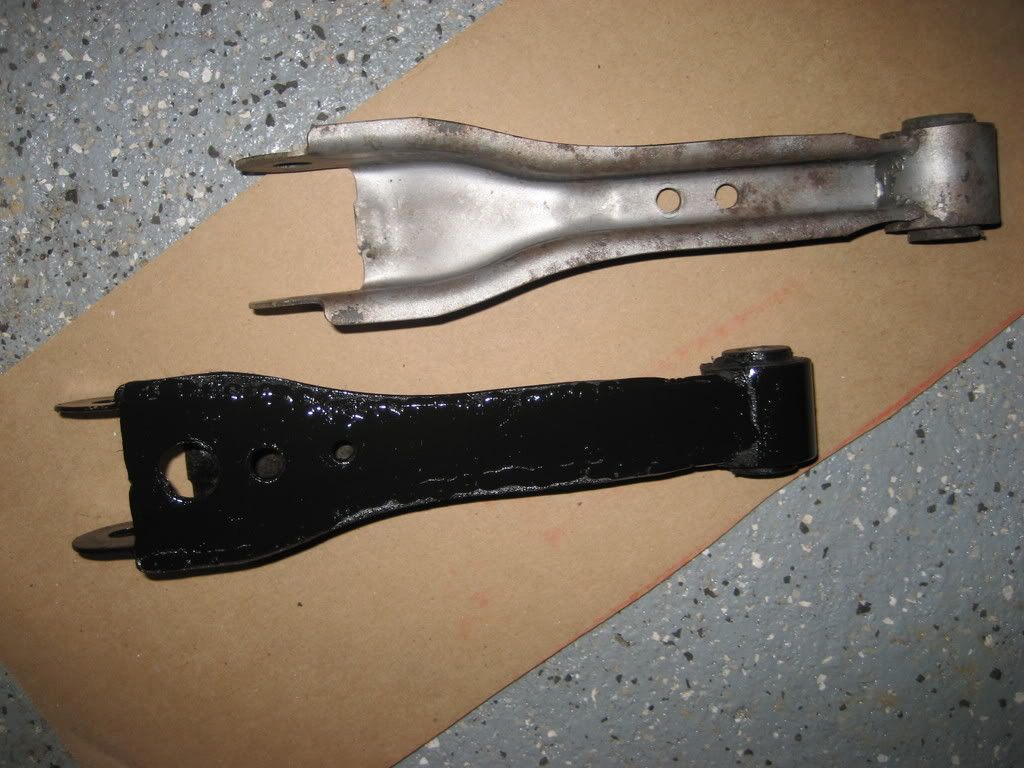 no ac or heat or any other luxury's for that matter. It's a track car, so nothing extra. I'm not sure about the welder, it's not mine. The cage is just tacked in right now to make sure everything fits. It'll be a little closer when it's all done. It looks worse in the pictures than it really is. More pics will come as we get more done. Quote:
The cars main purpose is drifting, so that's why the 2 way. I'm looking for a hicas rear sway bar, and thinking I'll keep the stock front for now. I'll try that out and see how I like it. As for weight reduction, all the sound deadening is gone, pretty much everything is gone at this point. Is there anything else you can see in the pictures that you would remove? We got some more done last week. Still finishing up the cage. Put the subframe back together and back on the car. I'm almost finished prepping the engine bay for paint. I painted under the new trunk and primed the inside of it. We also cut out and adjusted the floor for the fuel cell sump. Here are a couple new pics. I'll post more when my friend puts them up on photobucket. 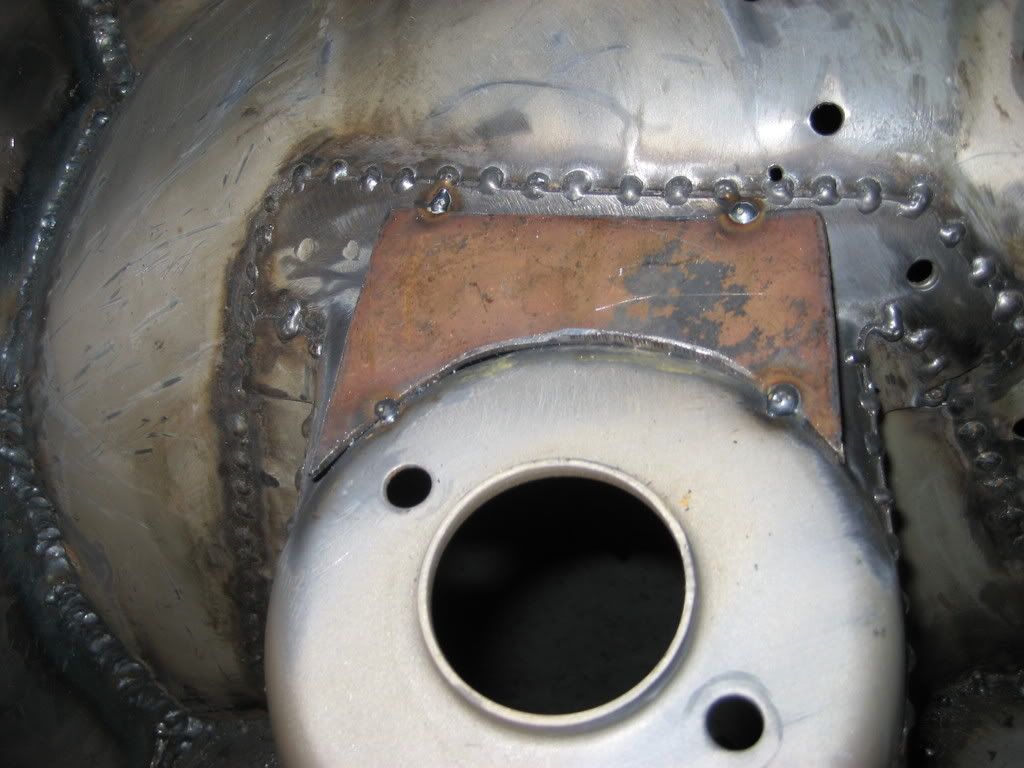 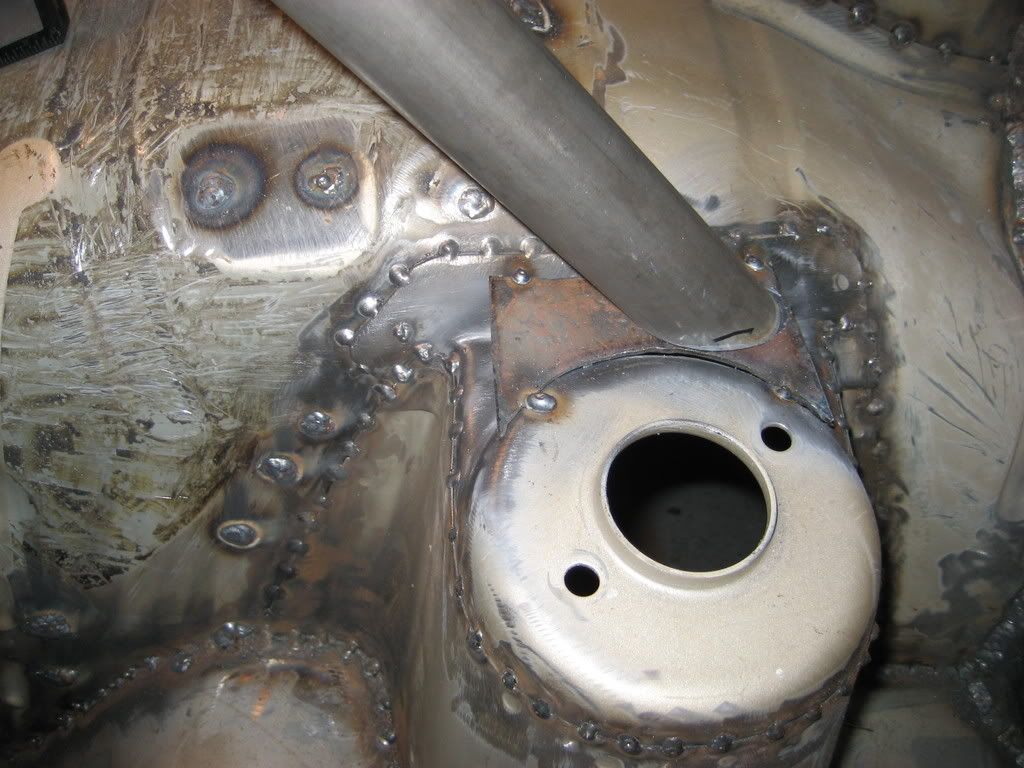 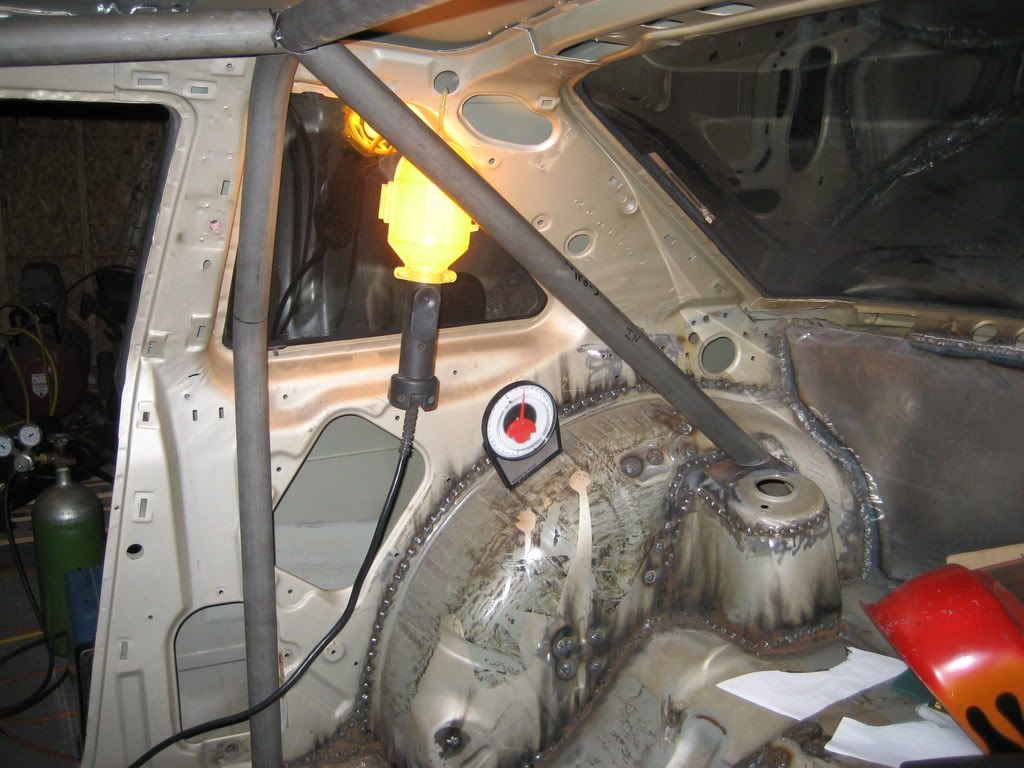 engine bay almost ready for paint: 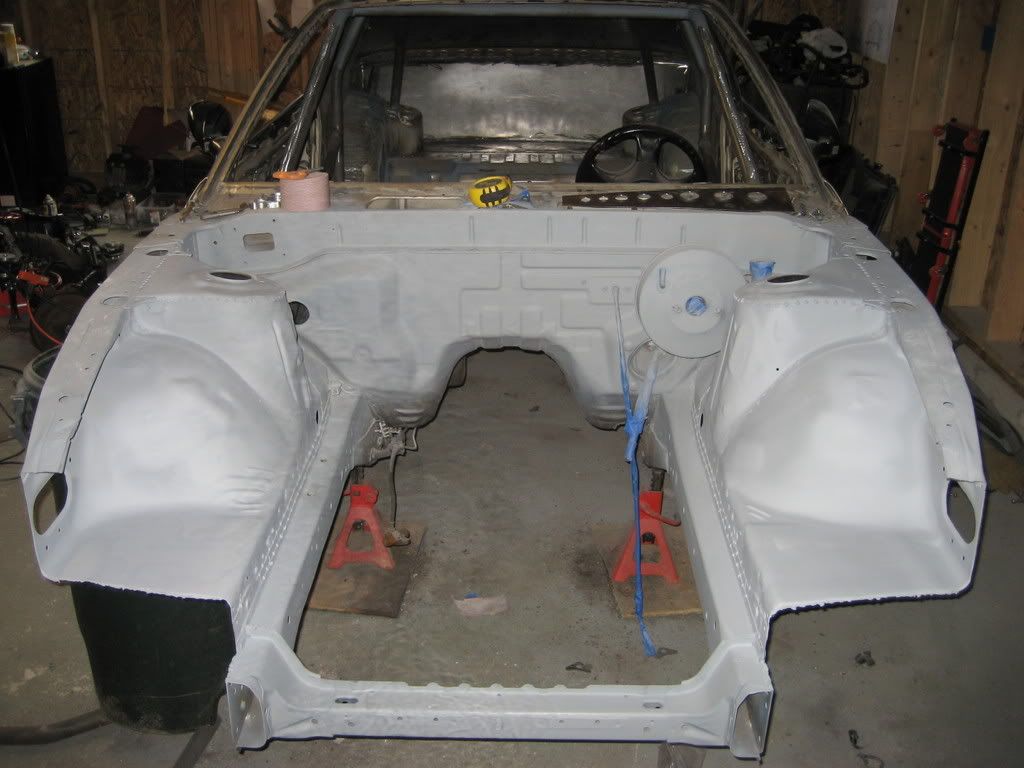 fuel cell: 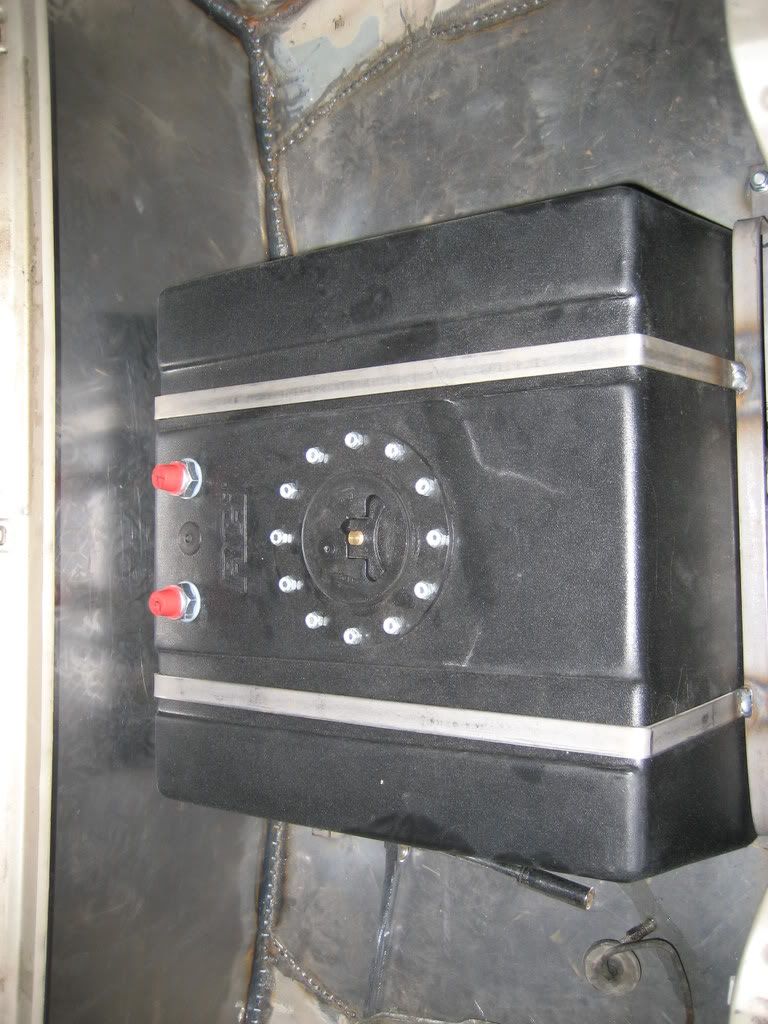 Under trunk floor: 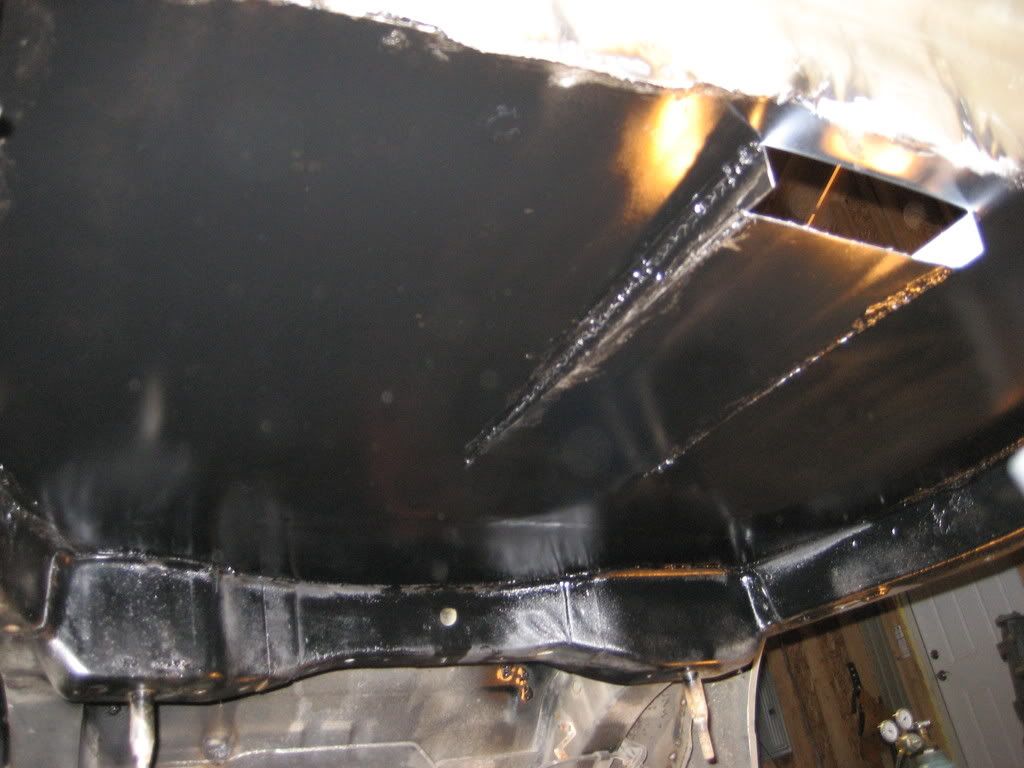 Trunk ready for paint: 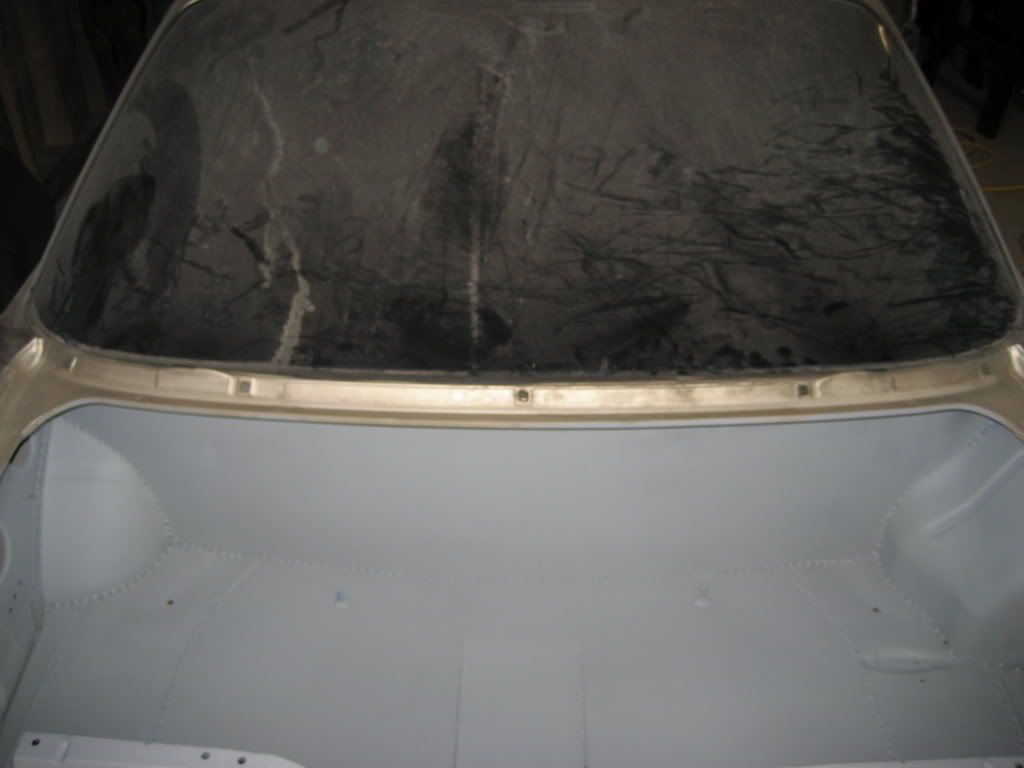 Trunk lid: 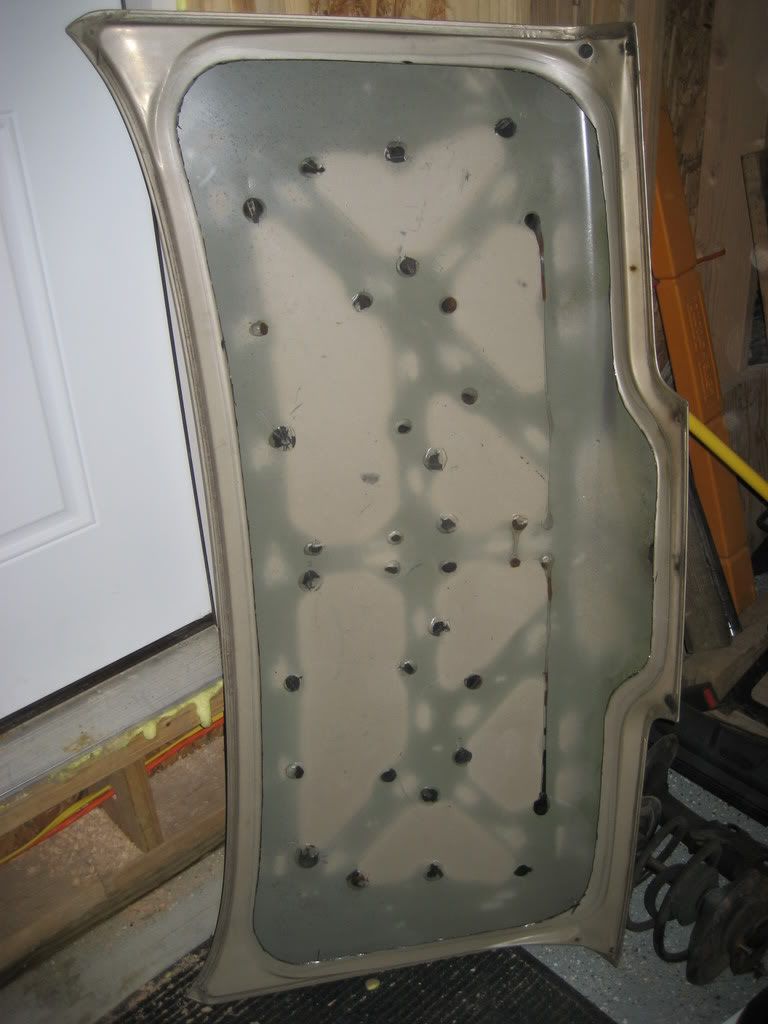 Our custom knock off nismo brace: 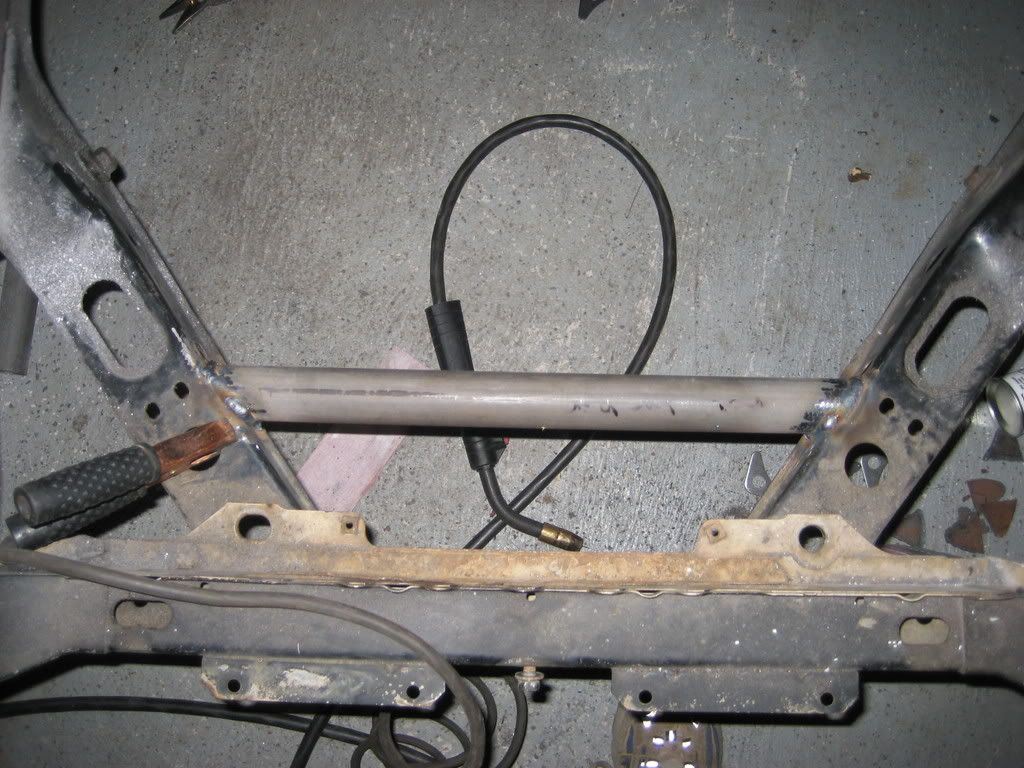 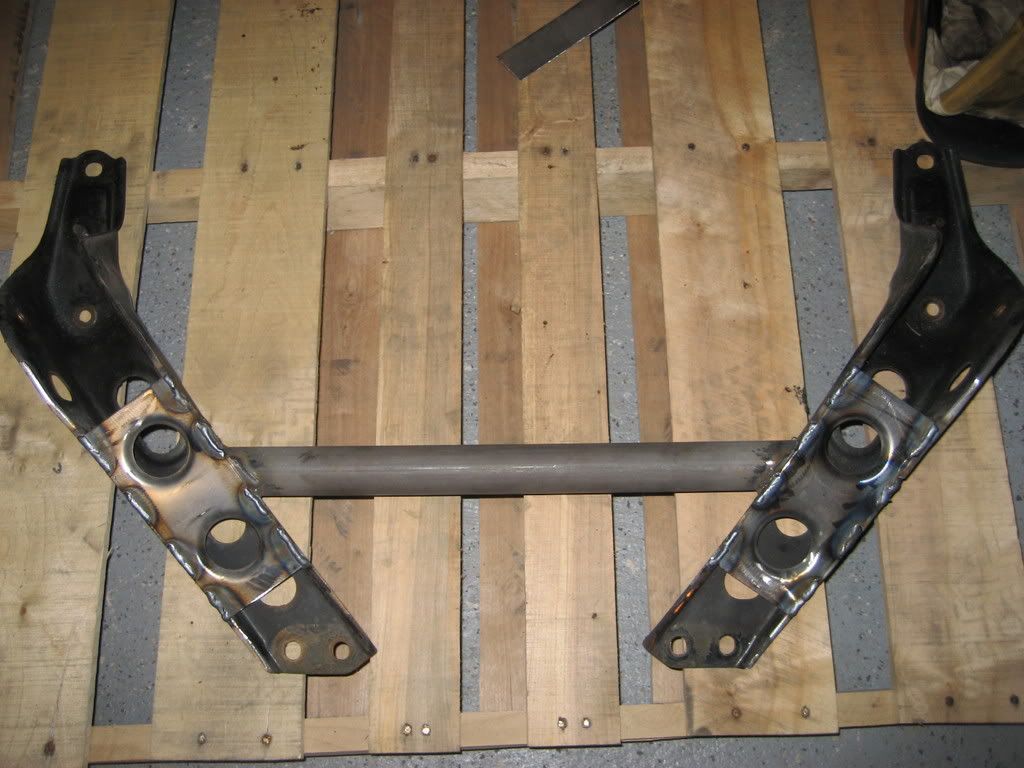 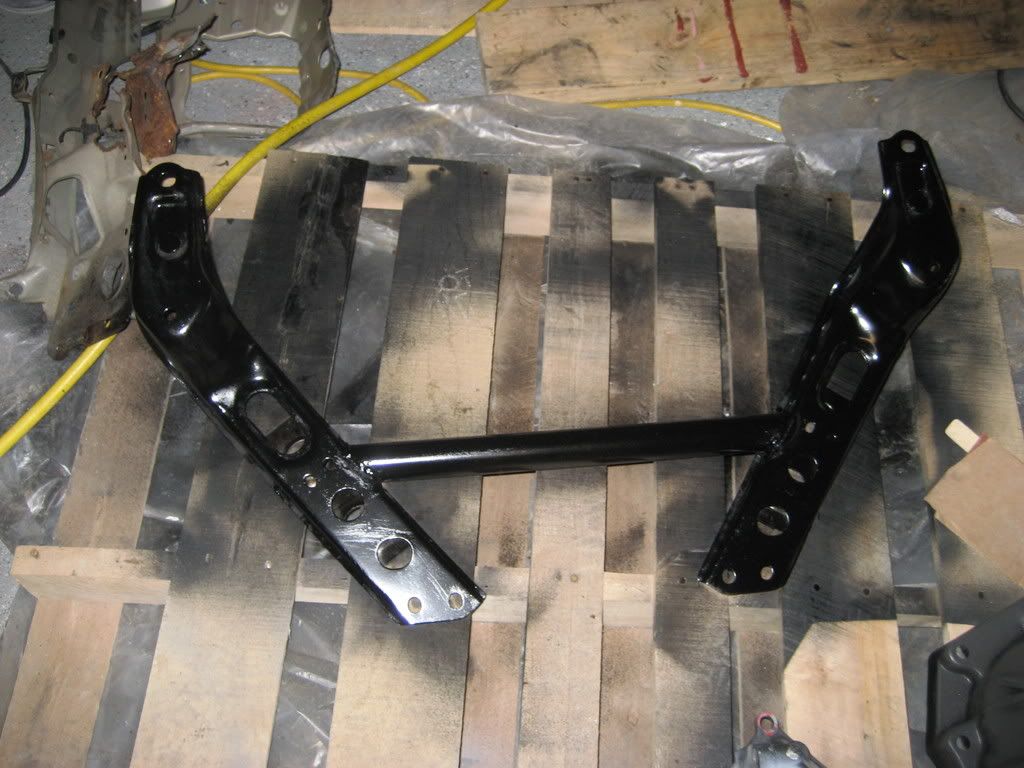 Sub-frame ready to go back in: 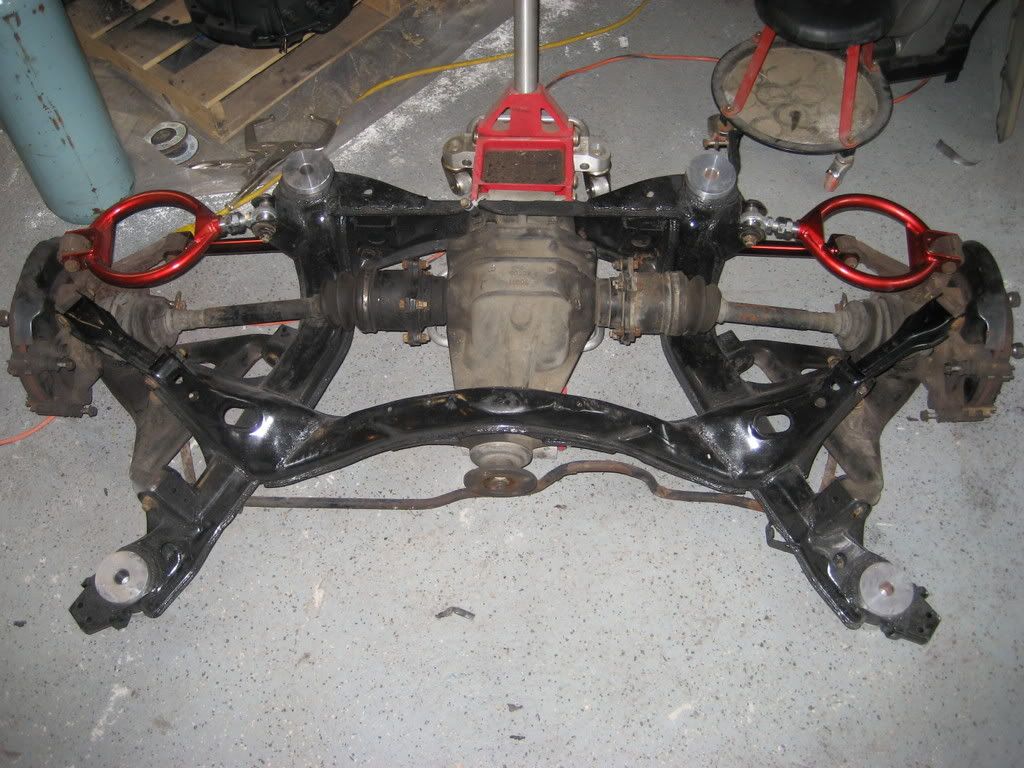 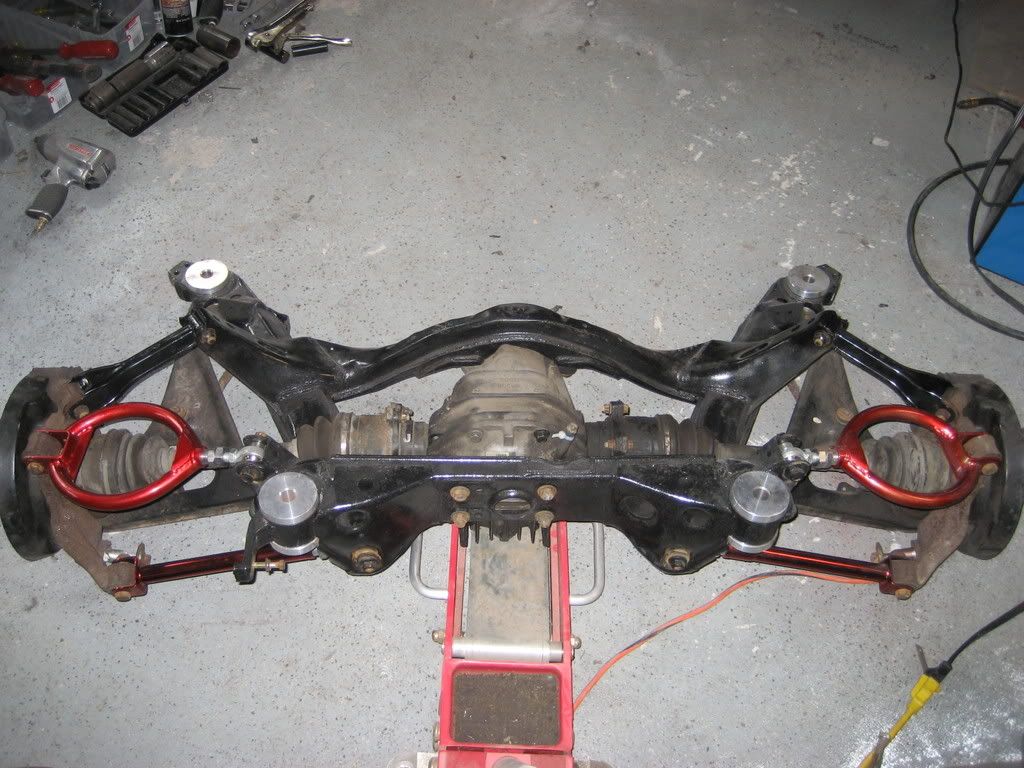 Roll cage: 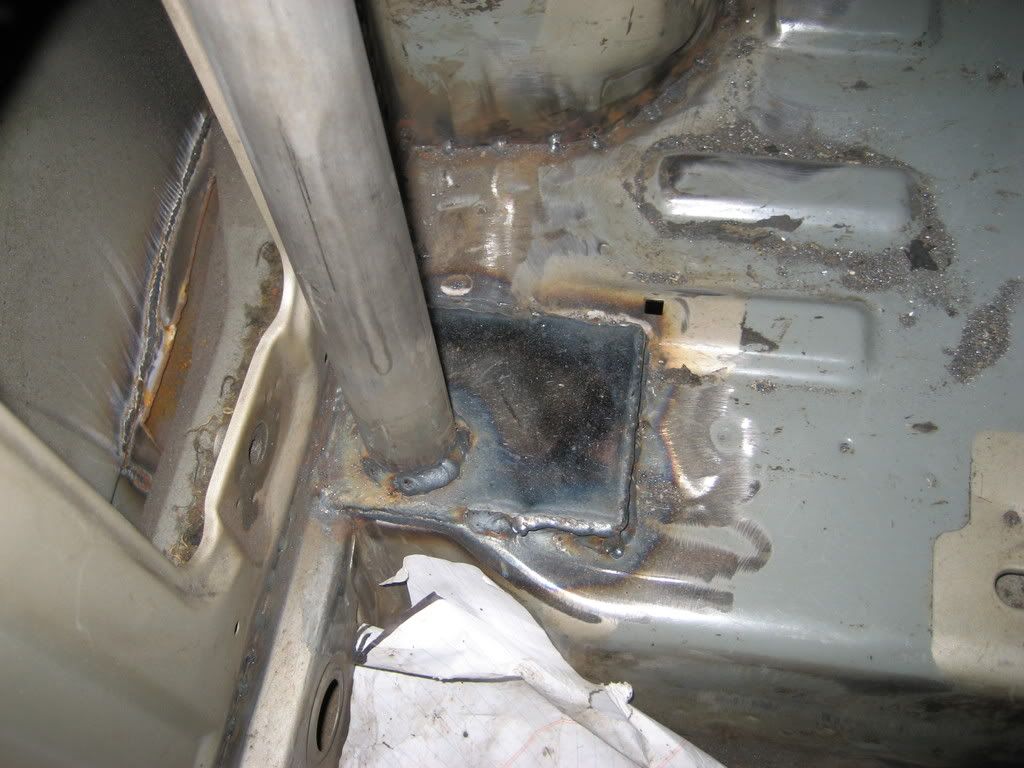 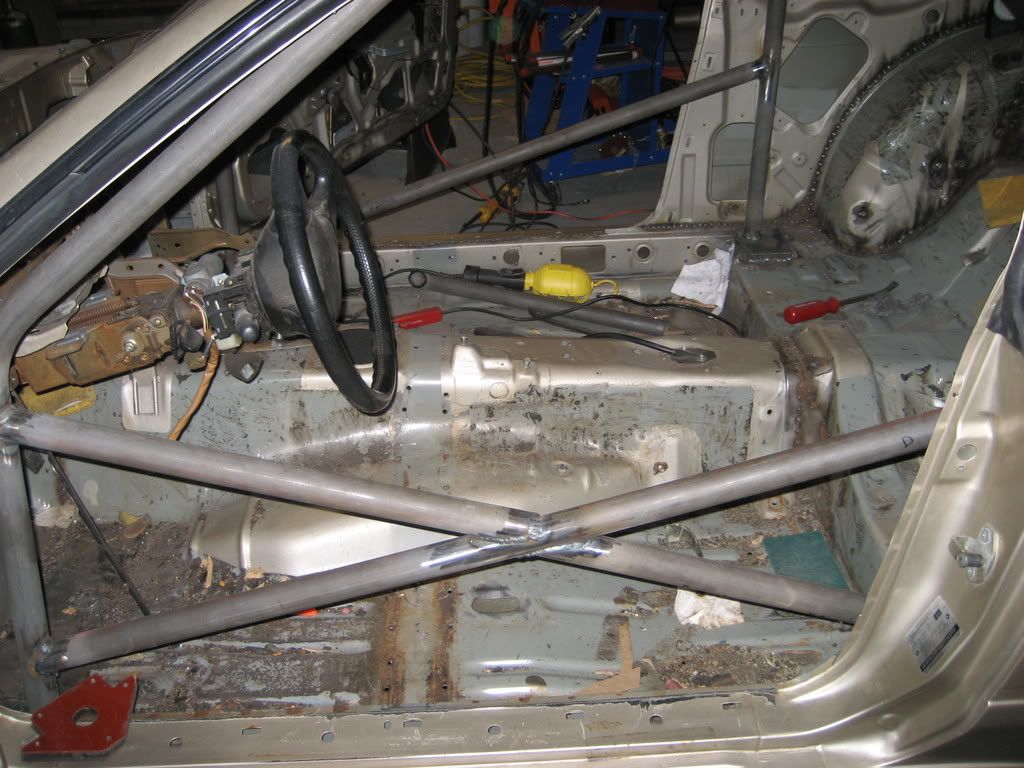 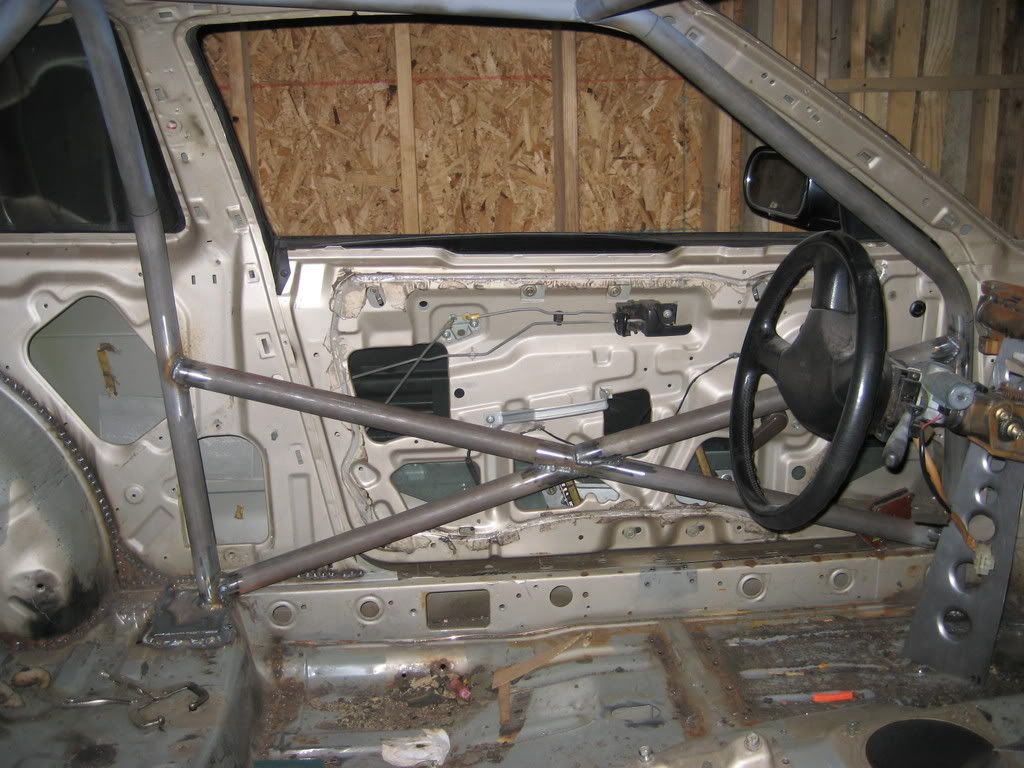 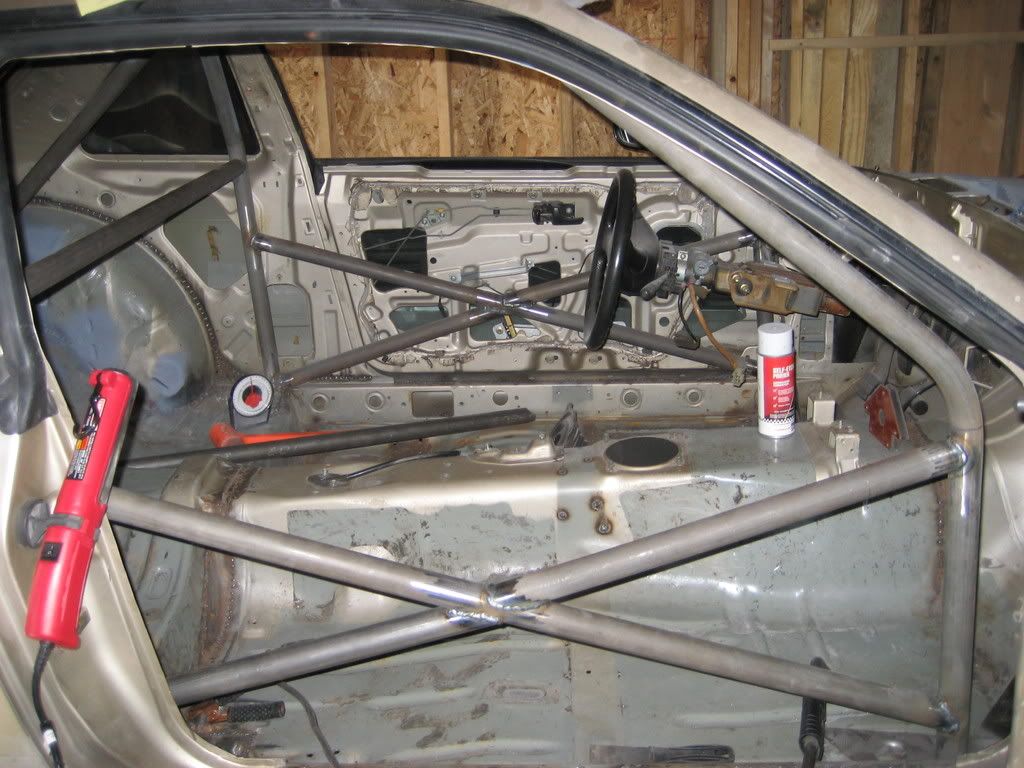 Apperently Jason doesn't sleep and just works on the car. Last weekend he finished the cage and fabbed the new radiator support. 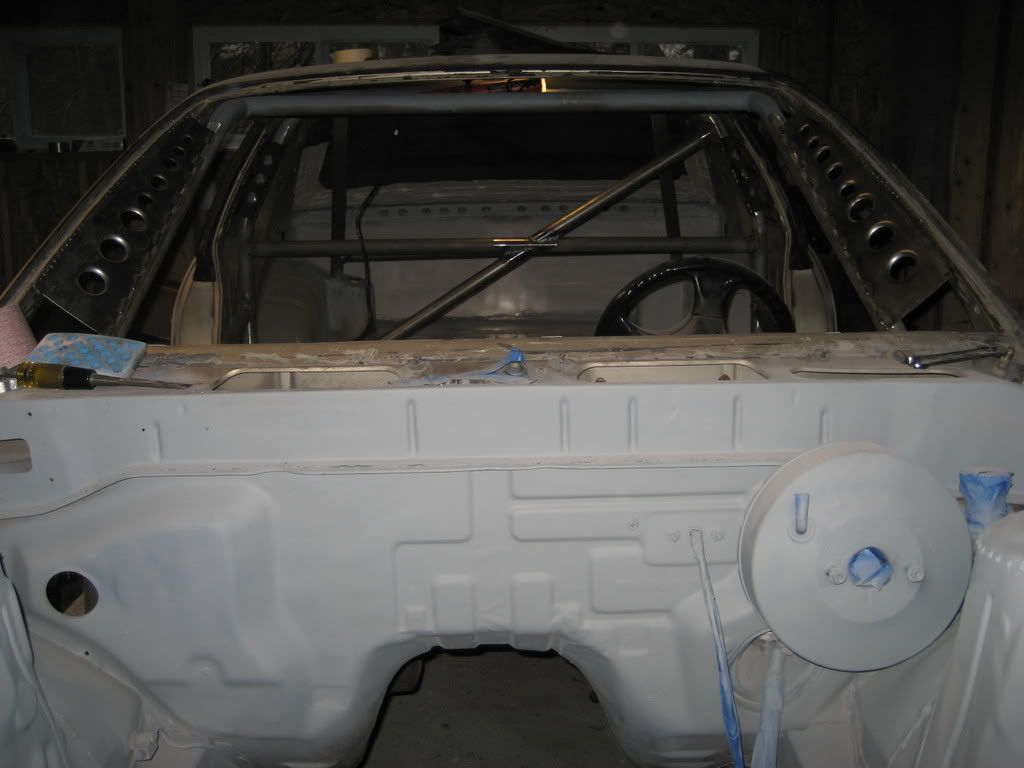 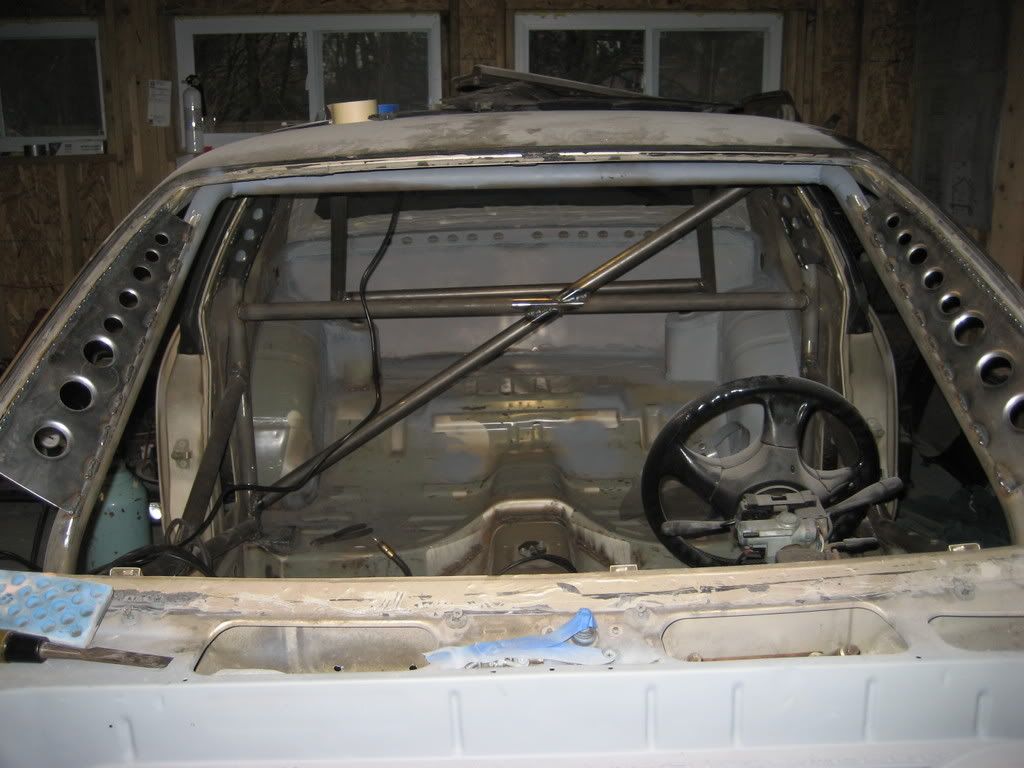 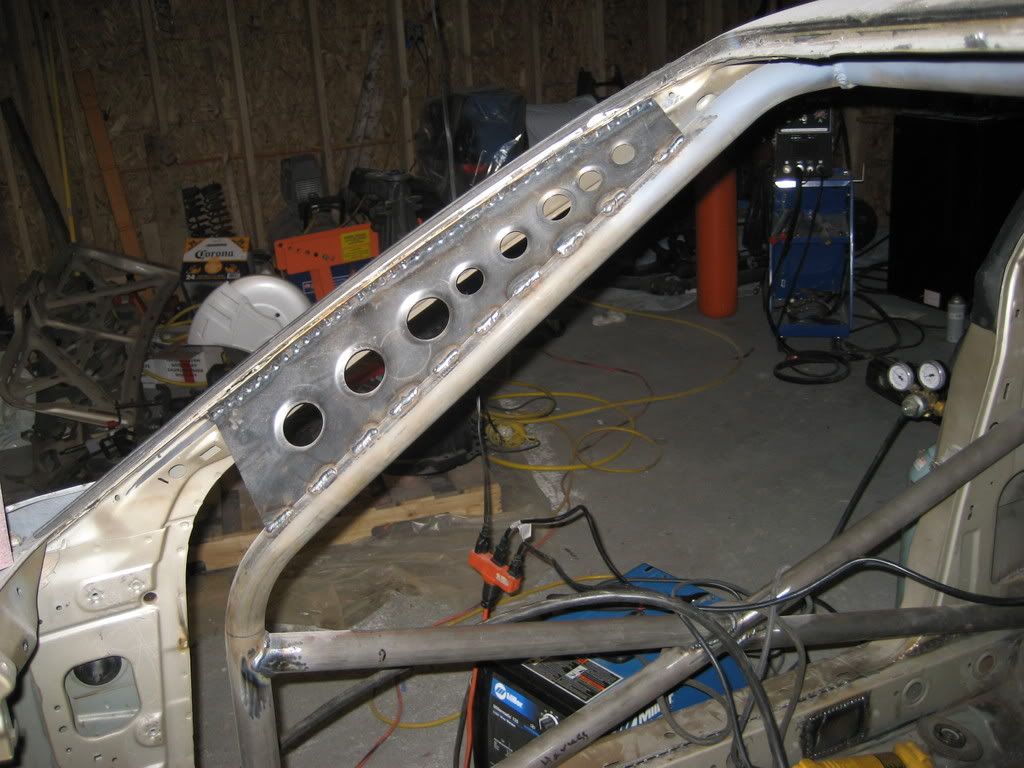 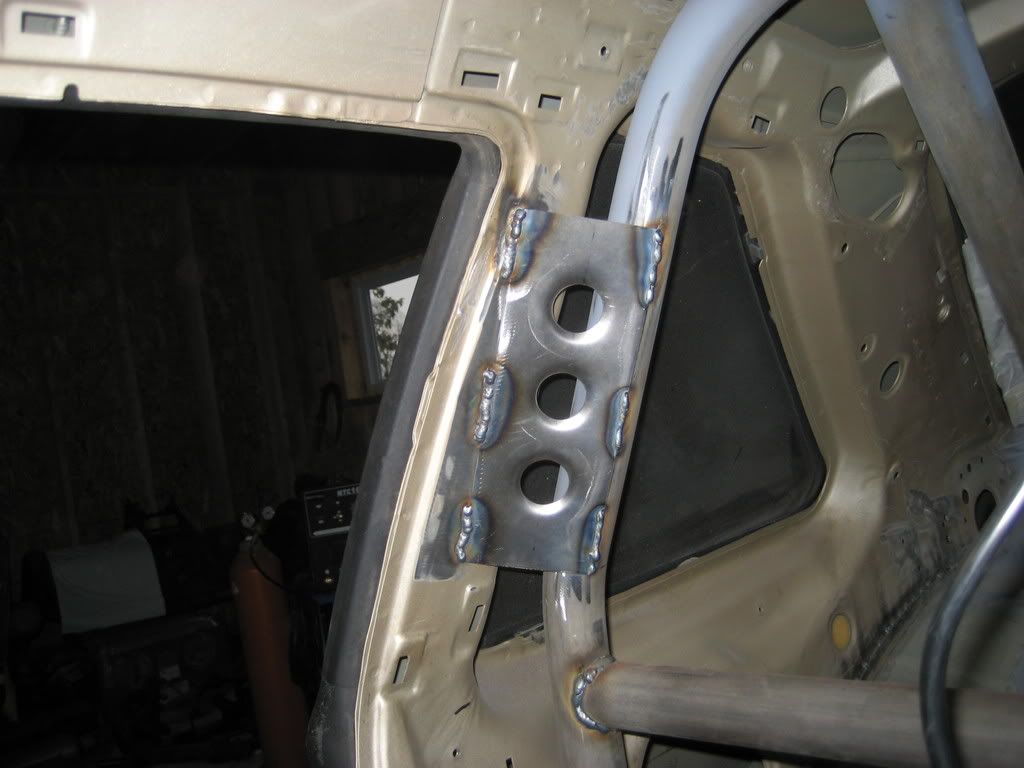 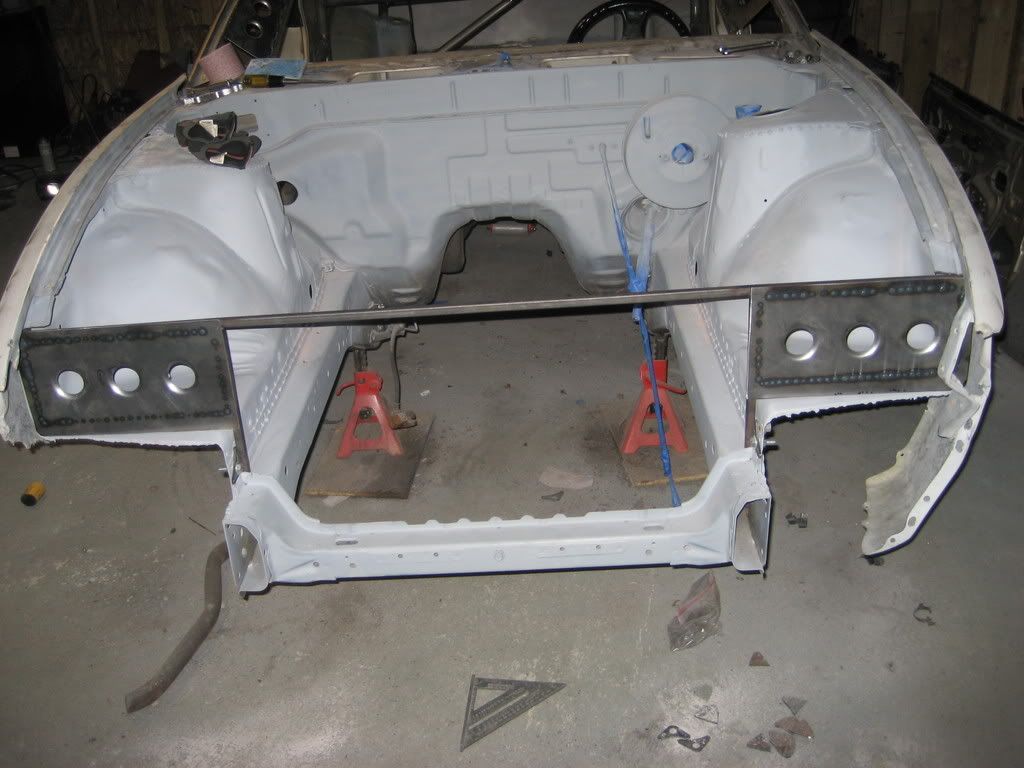 He's gonna finish prepping and prime the interior so we'll be ready for paint this weekend. Then all we have to do is fit the front end, re-install the front crossmember, make a dash and door pannels, plumb the fuel system, rebuild the motor, fix the harness and a whole lot of wiring and hope it runs. Then a shit ton of body work and some suspension tuning and we're done... For now. We fabbed up the new seat brackets. Here are some pics of the seats bolted into place. 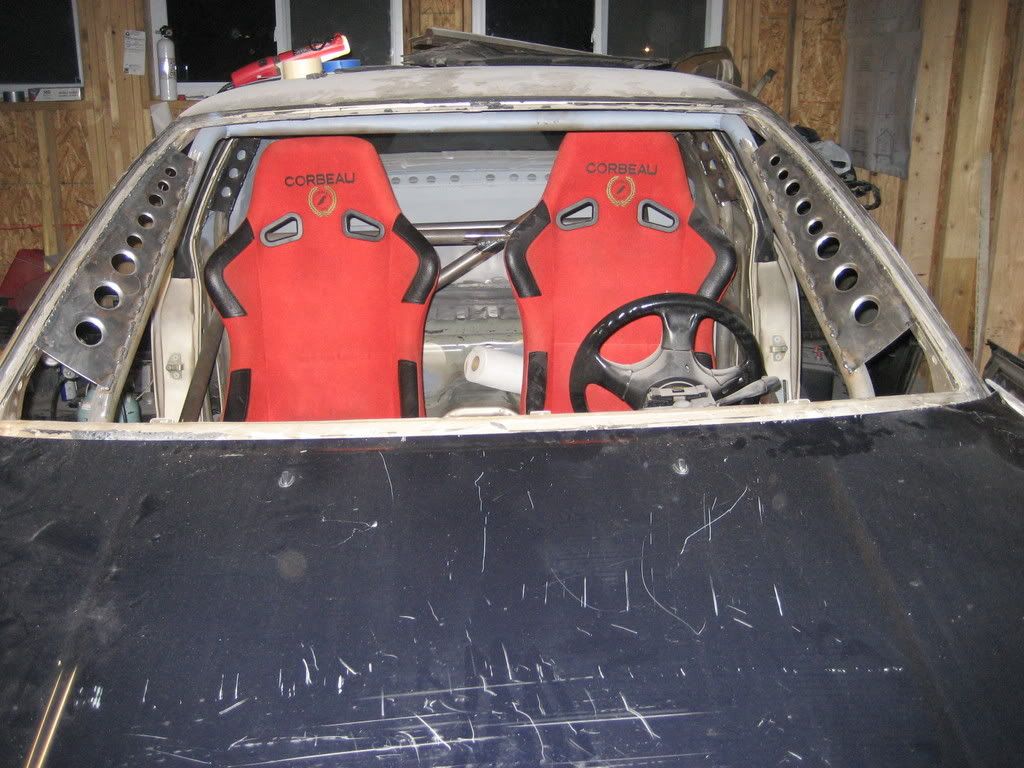  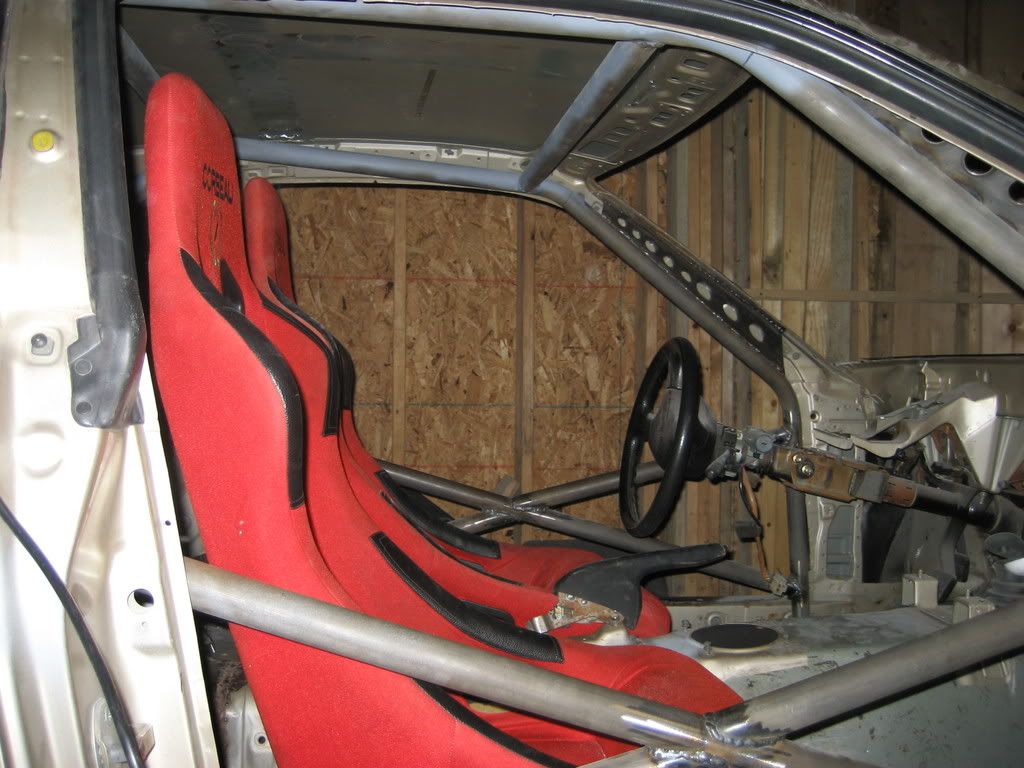 We painted the trunk, interior and engine bay this weekend. 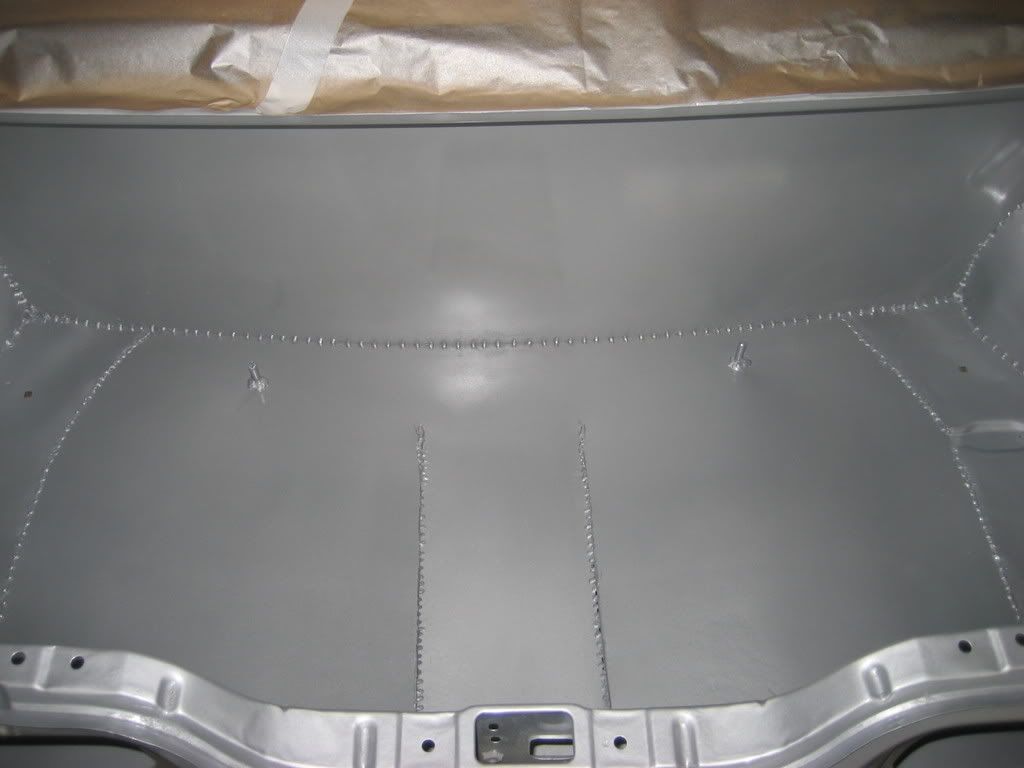 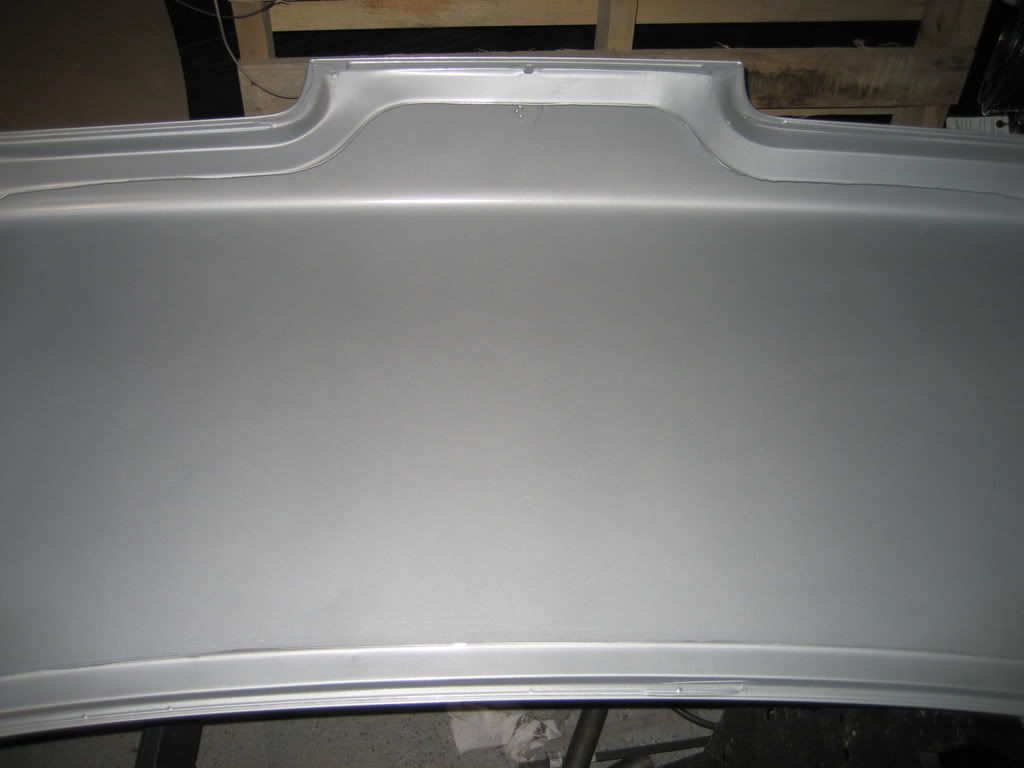 Painting around the cage was a huge pain in the ass, but it turned out really nice. 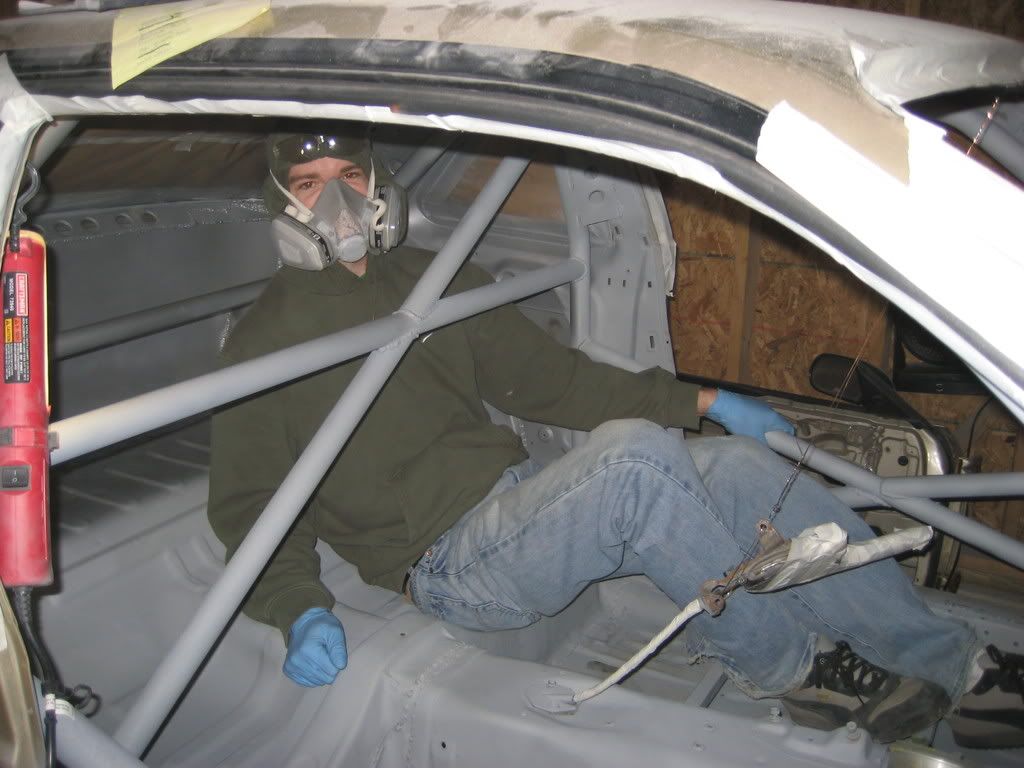 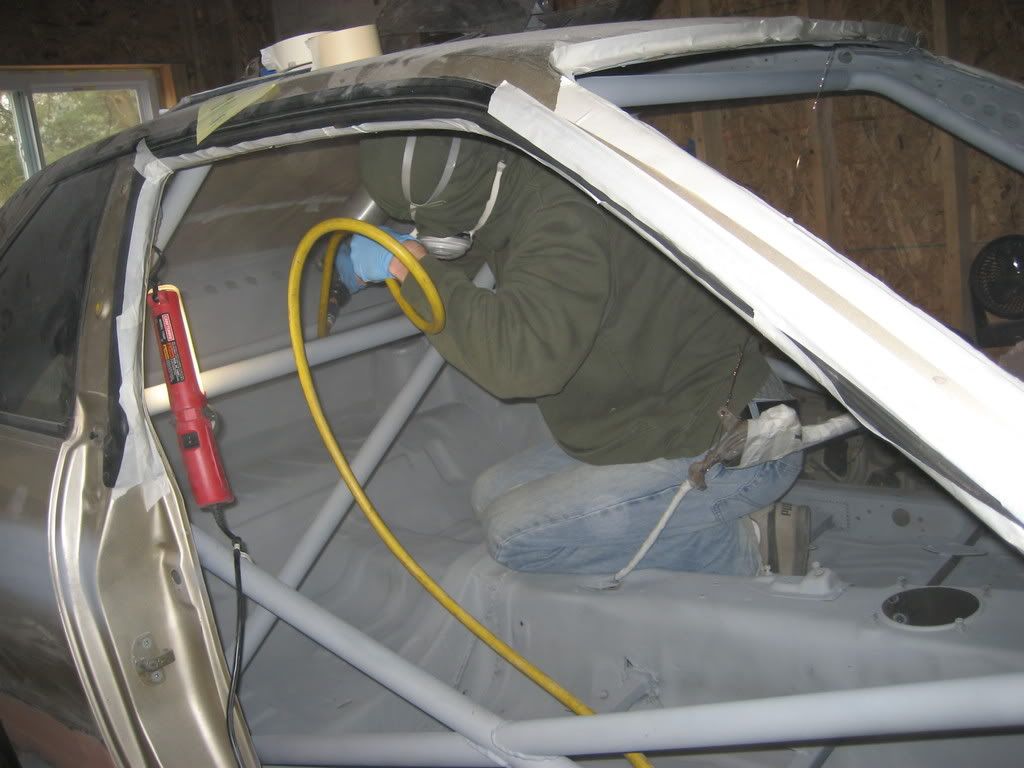 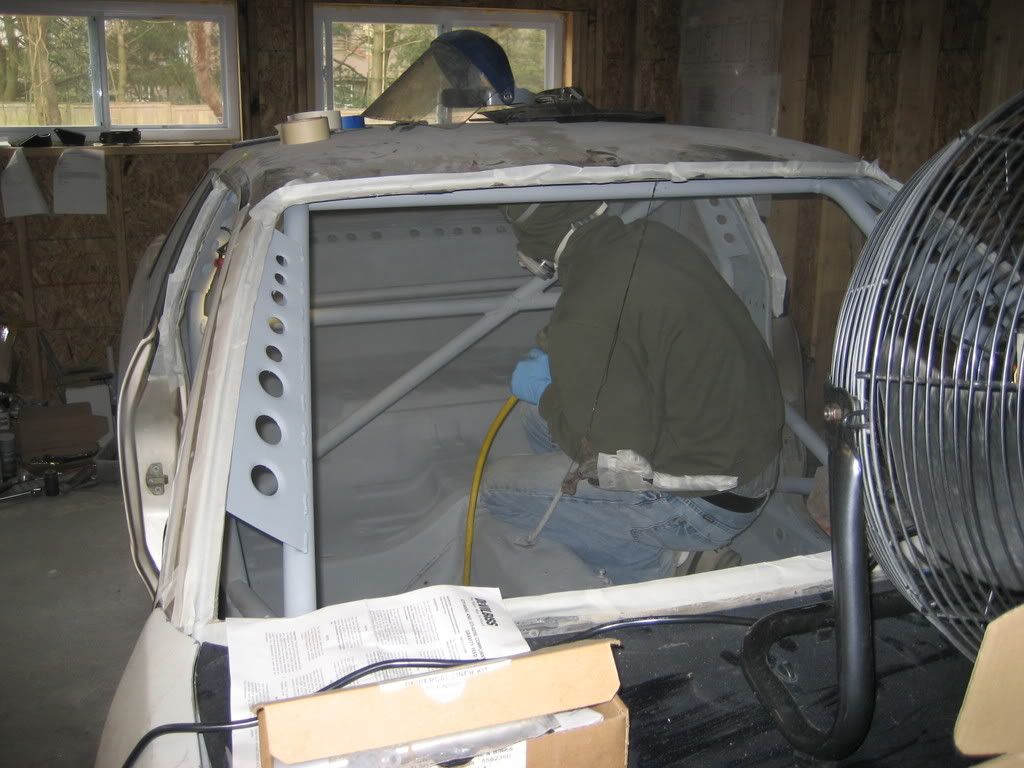 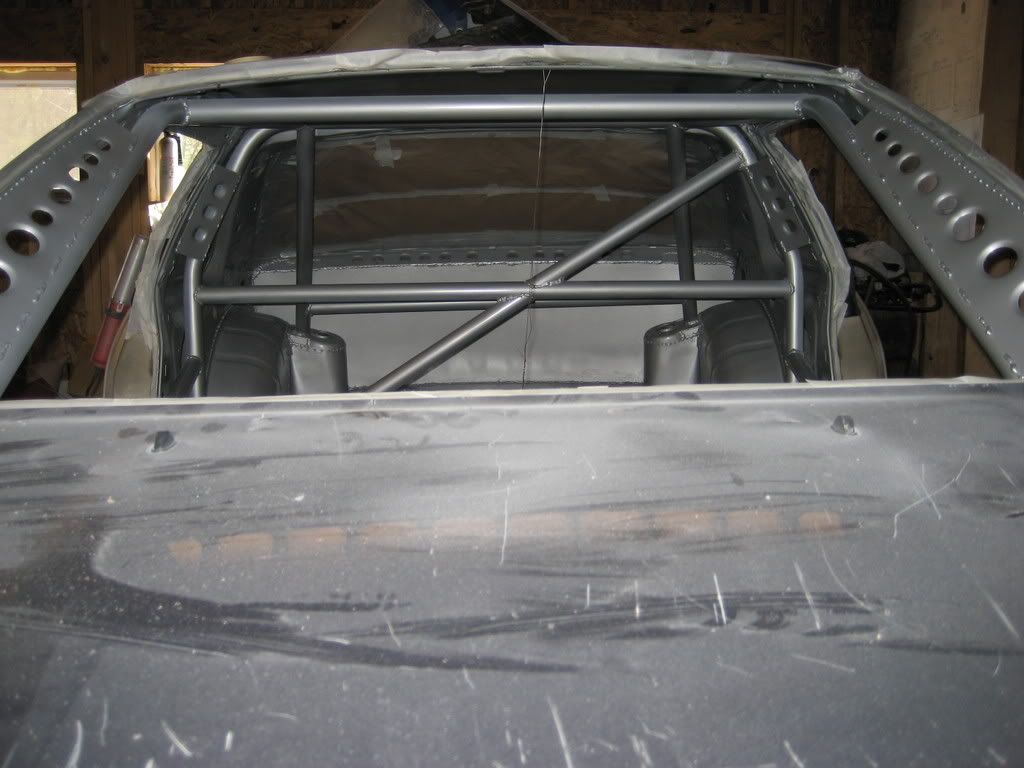 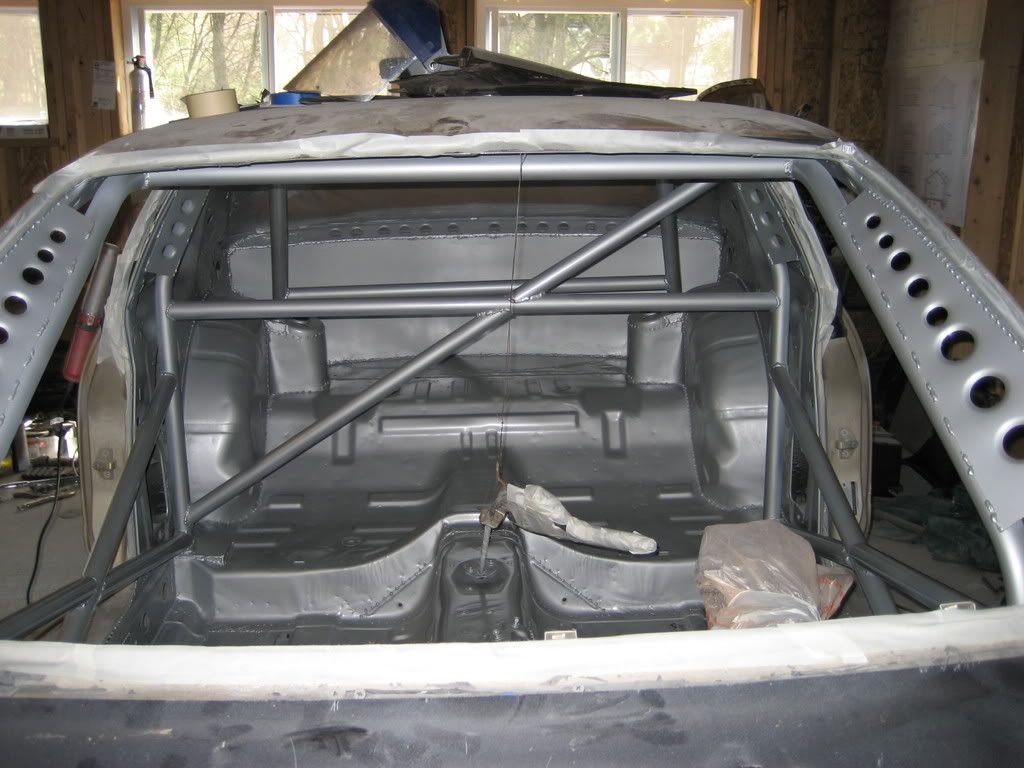 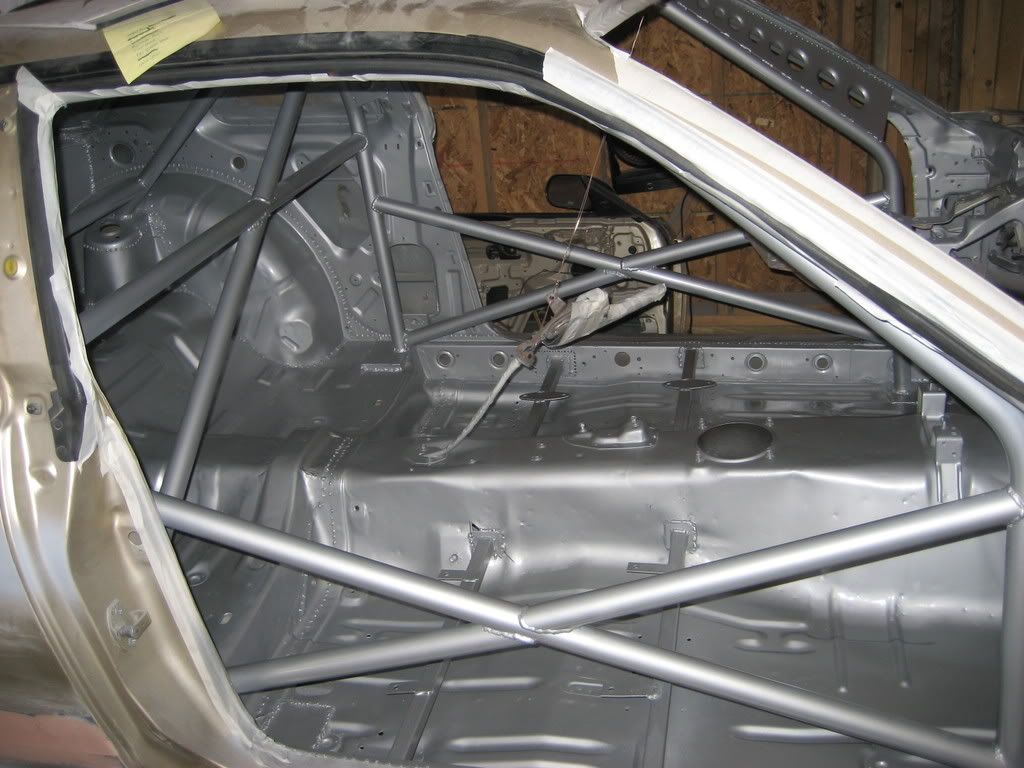 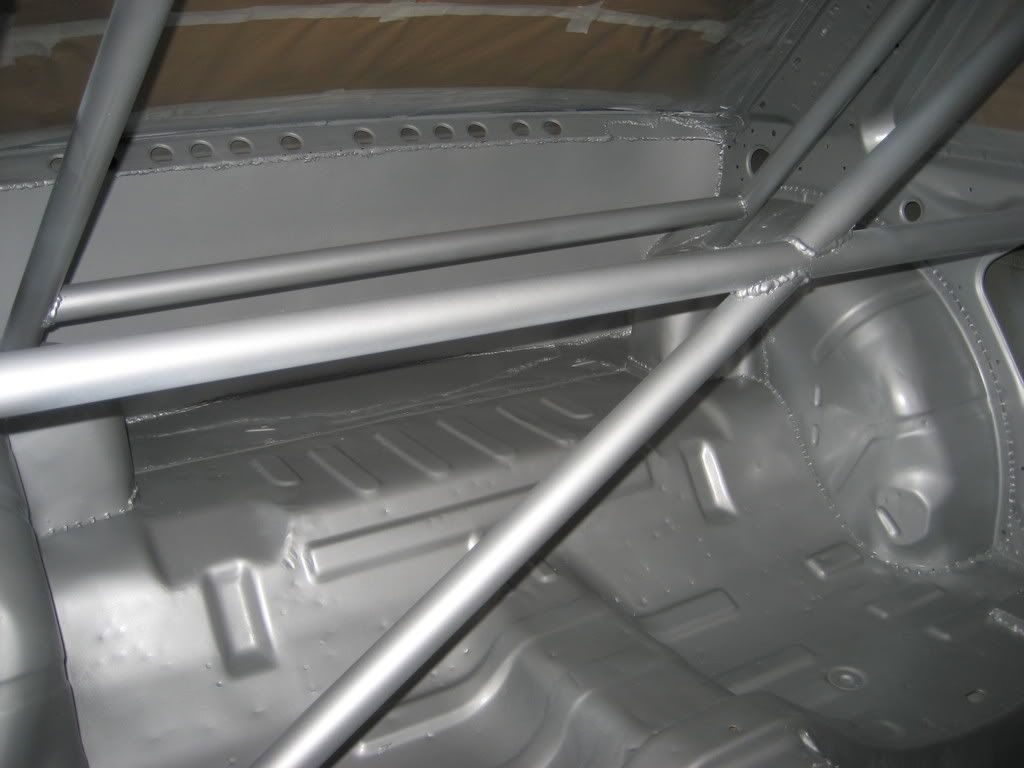 and the eninge bay:  We also started fitting the front end: 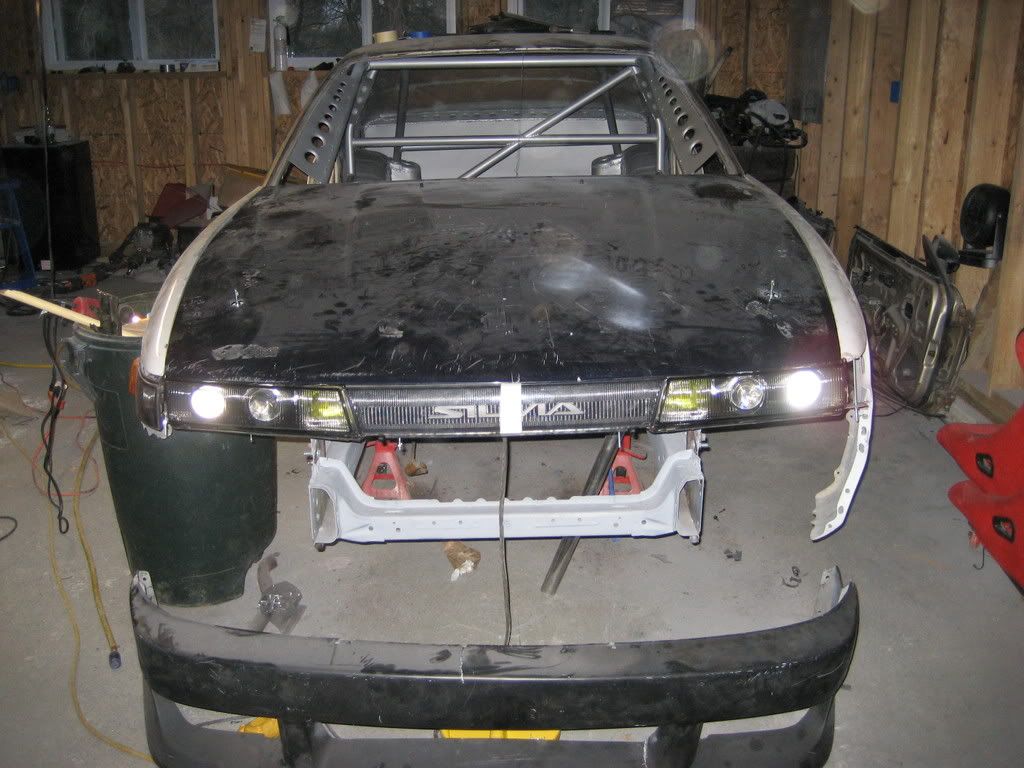 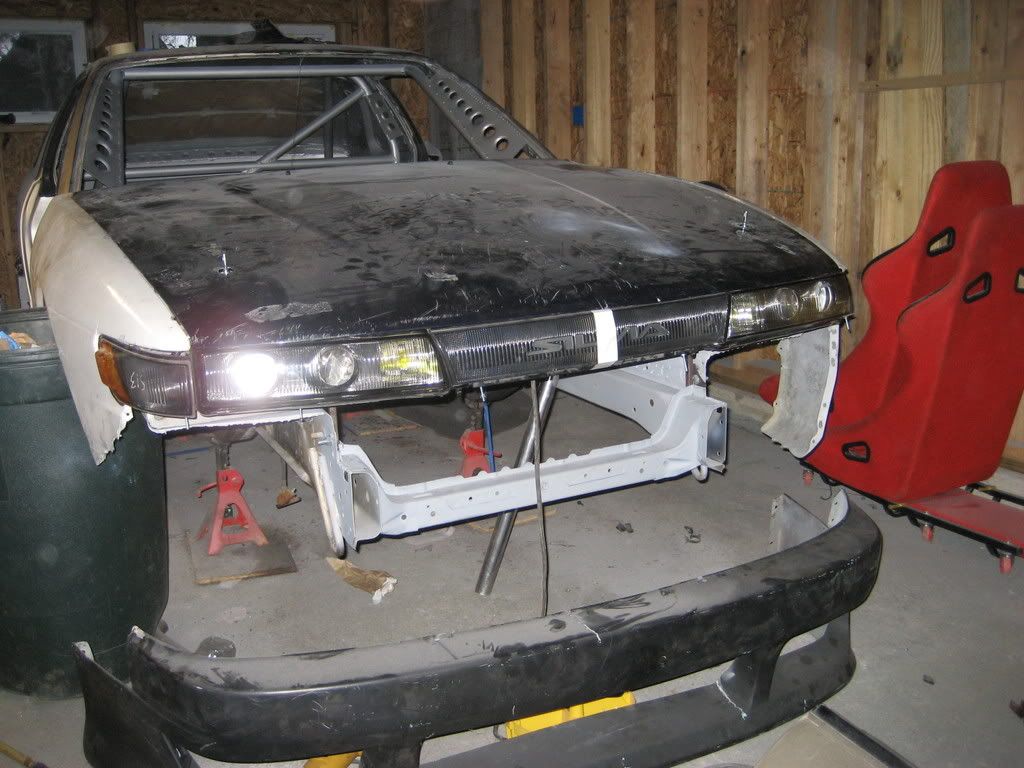 The exterior is going to be blue. I'm leaning toward Daytona Blue (factory 350z color) or maybe something a little more metallic. Last edited by Phlip; 04-13-2008 at 05:48 PM.. Reason: cleaning up |
|
|
|
|
|
03-04-2008, 06:04 PM
|
#30 |
|
Zilvia Junkie
Join Date: Jan 2007
Location: W Mass.
Age: 36
Posts: 561
Trader Rating: (3)
Feedback Score: 3 reviews
|
I really like that traction arm idea. Good improvment over stock for now. Also i like what you did with the interior and the rear firewall, im going to design something similar to that in my car.
__________________
d-faction.com |
|
|
|
|
| Bookmarks |
|
|


 Linear Mode

