
 |
|
|||||||
| Builds (and builds only) Got a build thread? It goes here, build threads anywhere else on the forum will be locked and never moved. |
 |
|
|
Thread Tools | Display Modes |
|
|
#121 |
|
Zilvia Junkie
 Join Date: Oct 2012
Location: Irvine, CA
Age: 36
Posts: 490
Trader Rating: (5)
 Feedback Score: 5 reviews
|
Yes
 I'll be putting the greddy pan back on; I had the stock one on there while the motor was sitting on the tire and for the install just in case I beat it up on accident |
|
|

|
| Sponsored Links |
|
|
#123 |
|
Zilvia Junkie
 Join Date: Oct 2012
Location: Irvine, CA
Age: 36
Posts: 490
Trader Rating: (5)
 Feedback Score: 5 reviews
|
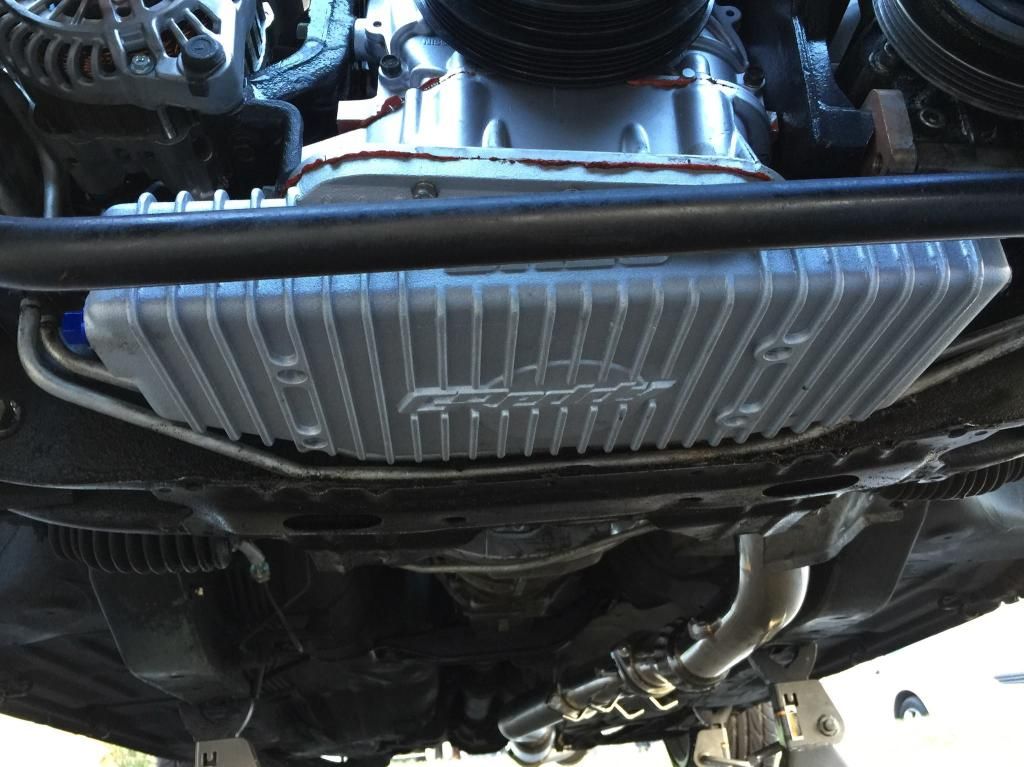
Got my greddy pan on and exhaust bolted up
 Old rusty battery tray 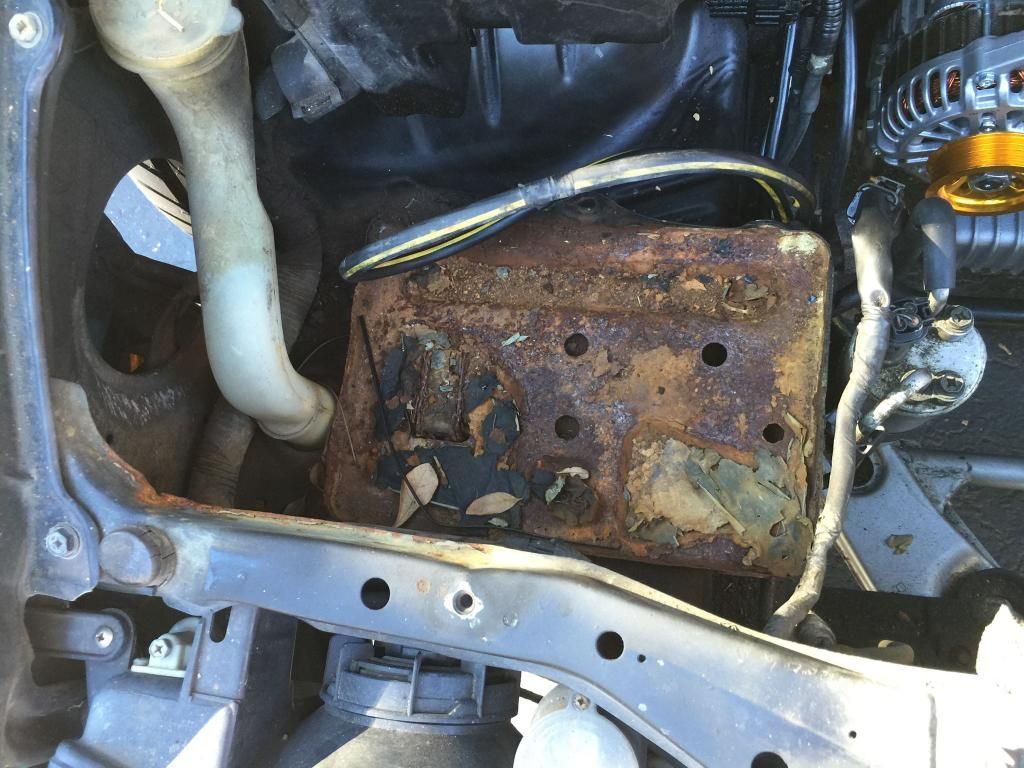 My friend helped with the tray removal...he basically made a few small cuts and then ripped it out by hand. Spot welds?? pshhhh. Anyways, it was pretty rusty underneath. Im going to have to cut it out and weld a plate in. 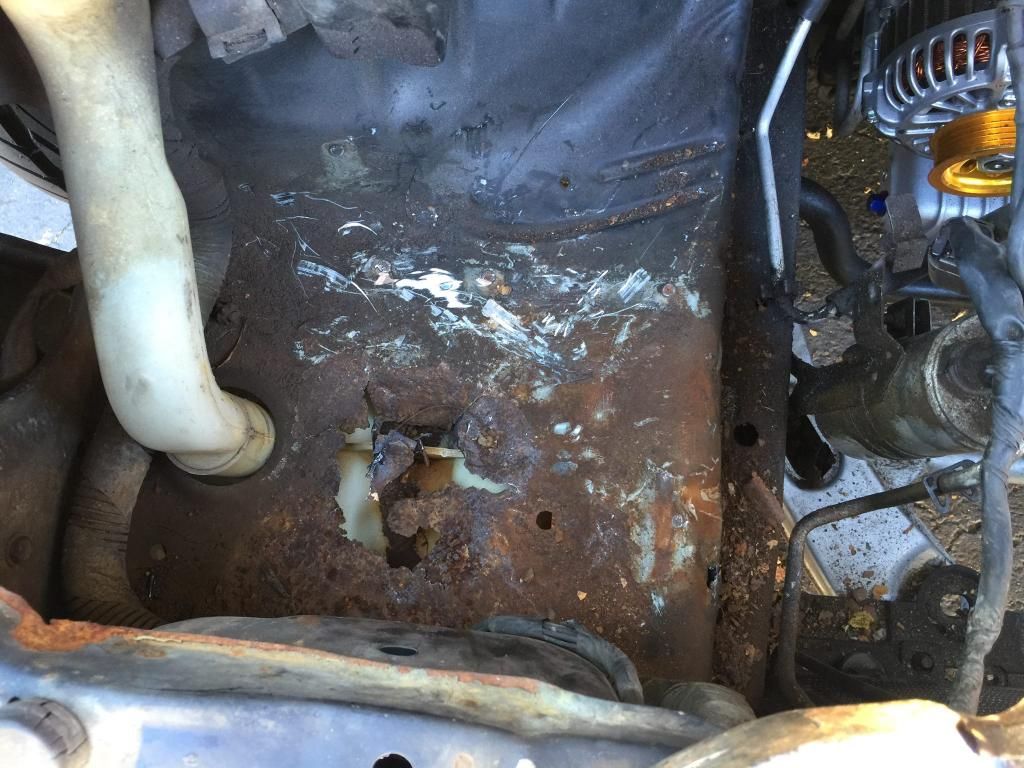 Belts on  Old coolant overflow 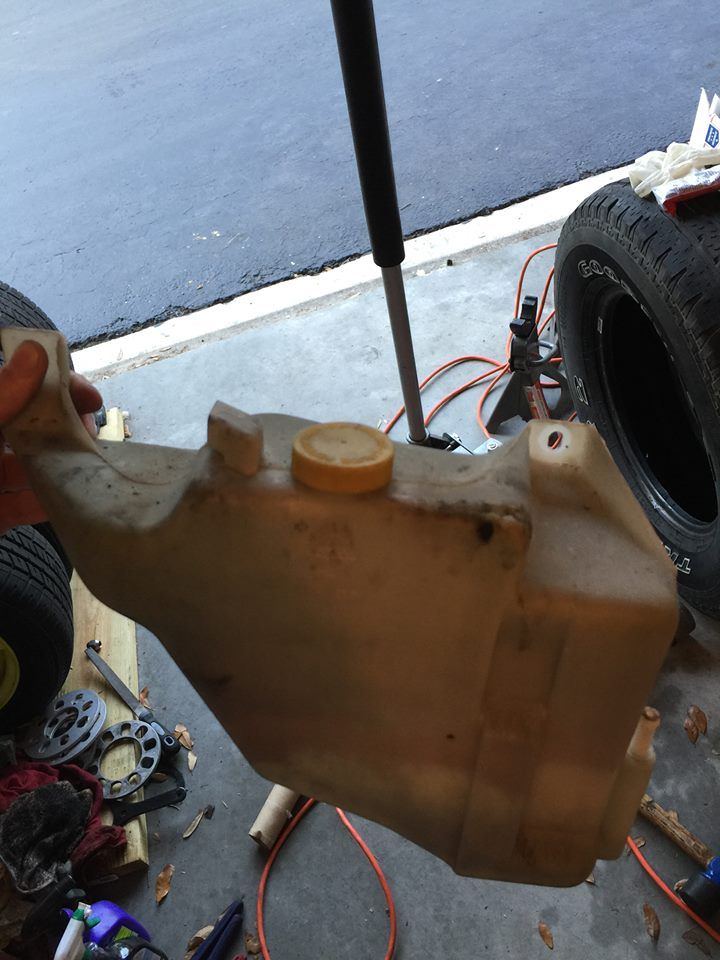 New coolant overflow 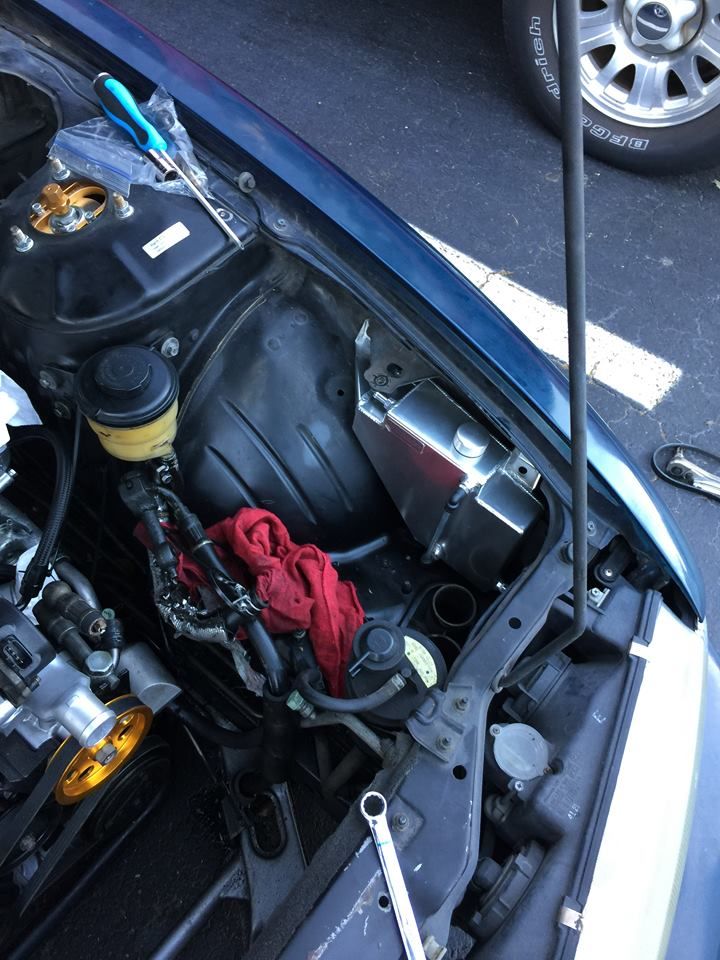 and mocking up kouki skirts and valances..again. I was bored (EDIT: thats right, I was trying to see if the exhaust piping was visible with the sideskirts. It hangs kind of low)  |
|
|

|
|
|
#125 |
|
Zilvia Junkie
 Join Date: Oct 2012
Location: Irvine, CA
Age: 36
Posts: 490
Trader Rating: (5)
 Feedback Score: 5 reviews
|
Shoot man, I've been telling myself I'm so close for a year now
 . The original plan was to wire it myself, it doesn't appear to be too difficult. However, I was looking on eBay at the prices of sr harnesses and ecu's and I'm thinking that if I can sell my ka and sr harness as well as the sr ecu then it will basically pay for the wiringspecialties harness with all new clips and wiring so it might be worth it. I threw them up for sale on a local fb page with no bites so I suppose I'll post them on here soon . The original plan was to wire it myself, it doesn't appear to be too difficult. However, I was looking on eBay at the prices of sr harnesses and ecu's and I'm thinking that if I can sell my ka and sr harness as well as the sr ecu then it will basically pay for the wiringspecialties harness with all new clips and wiring so it might be worth it. I threw them up for sale on a local fb page with no bites so I suppose I'll post them on here soon |
|
|

|
|
|
#126 |
|
Zilvia Junkie
 Join Date: Oct 2012
Location: Irvine, CA
Age: 36
Posts: 490
Trader Rating: (5)
 Feedback Score: 5 reviews
|
Still around. Moving slowly but getting things done here and there. Working on the intercooler now -- I didn't realize how much cutting was involved to make things fit but I guess that's why they call it custom.
Picked up this guy from harbor freight: 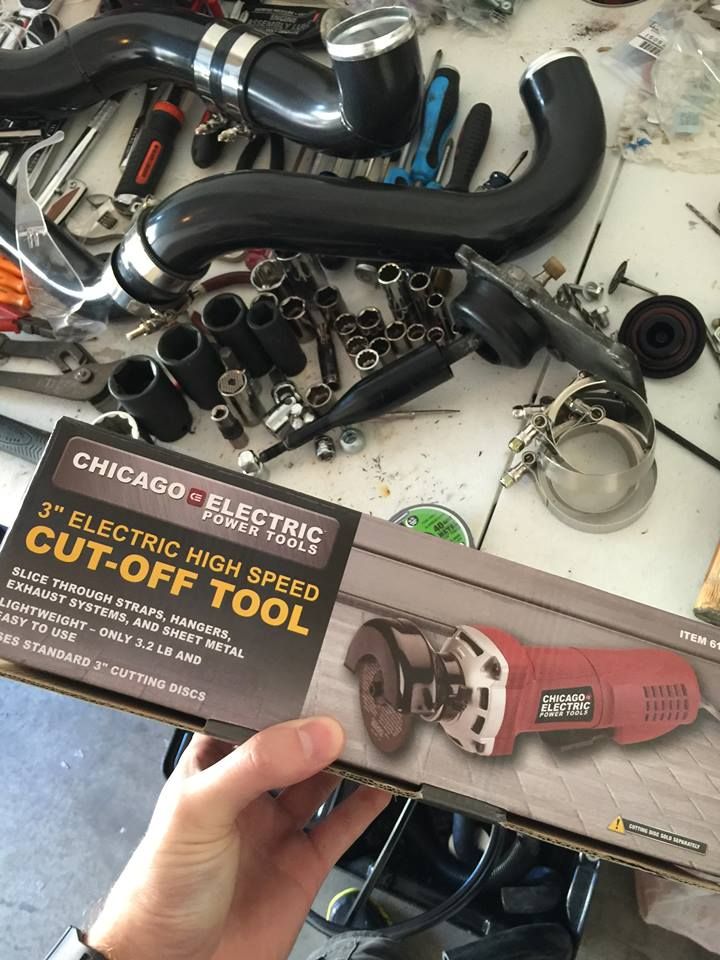 Went to town cutting out that rusty spot that was underneath the battery tray 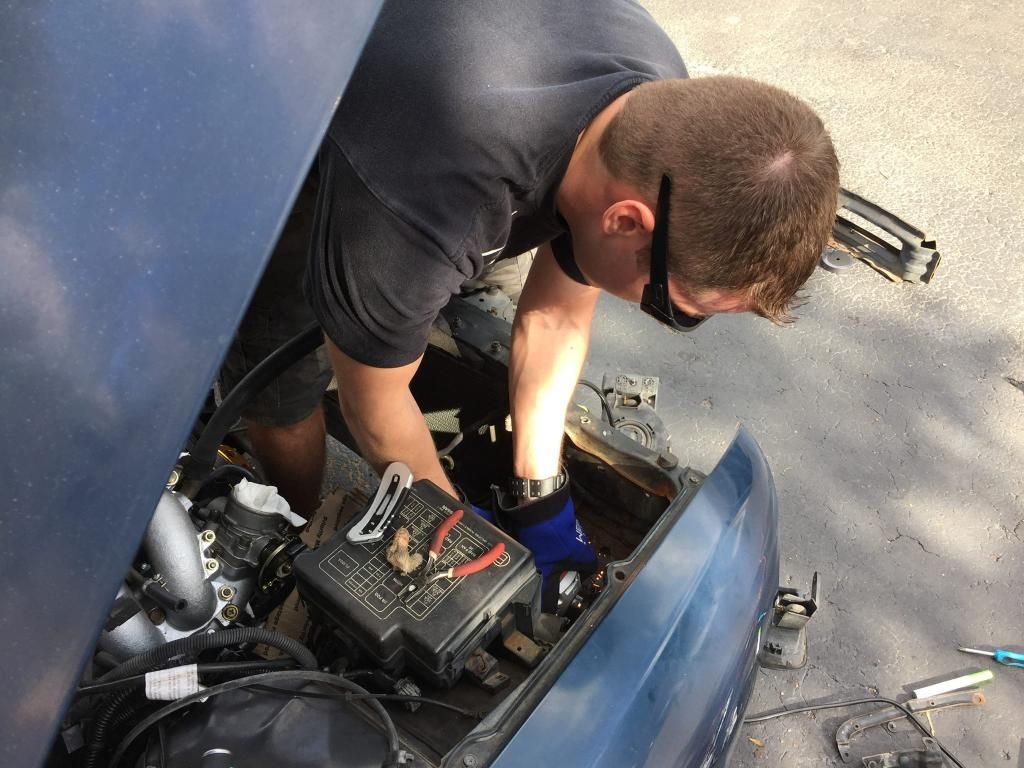 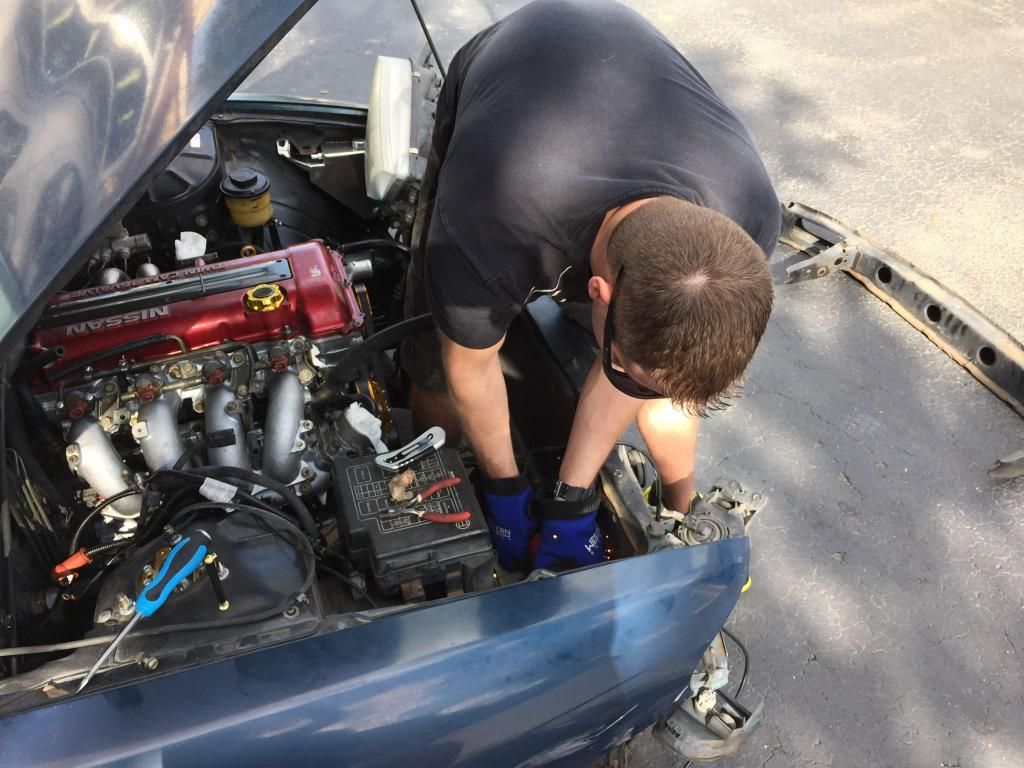 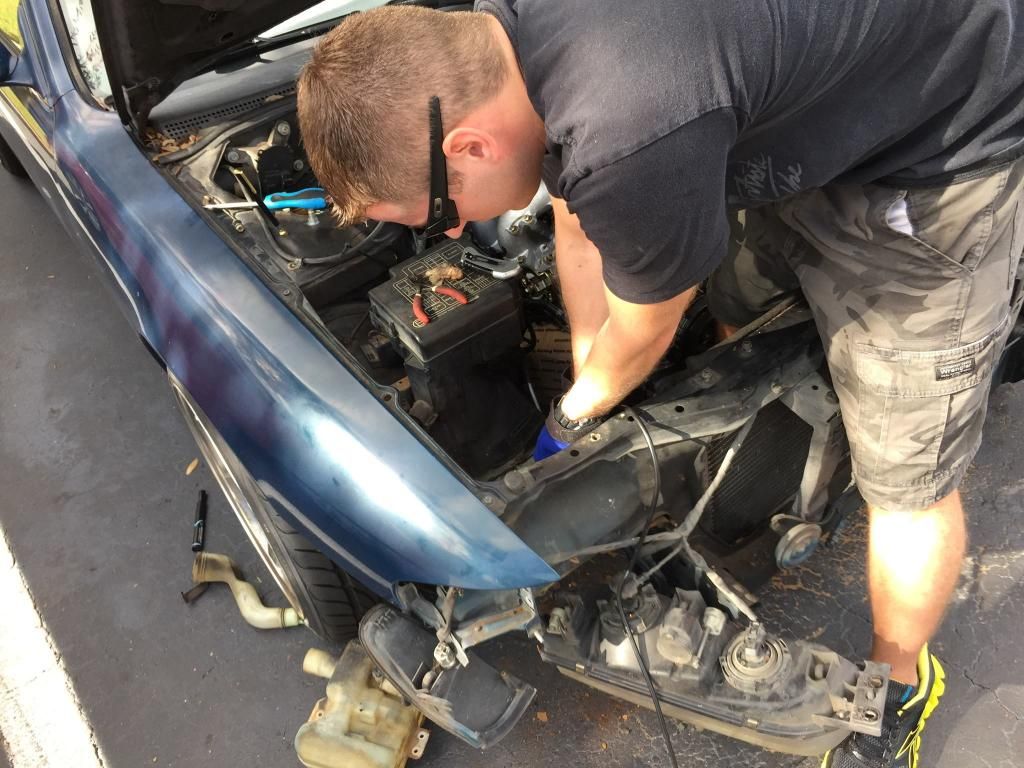 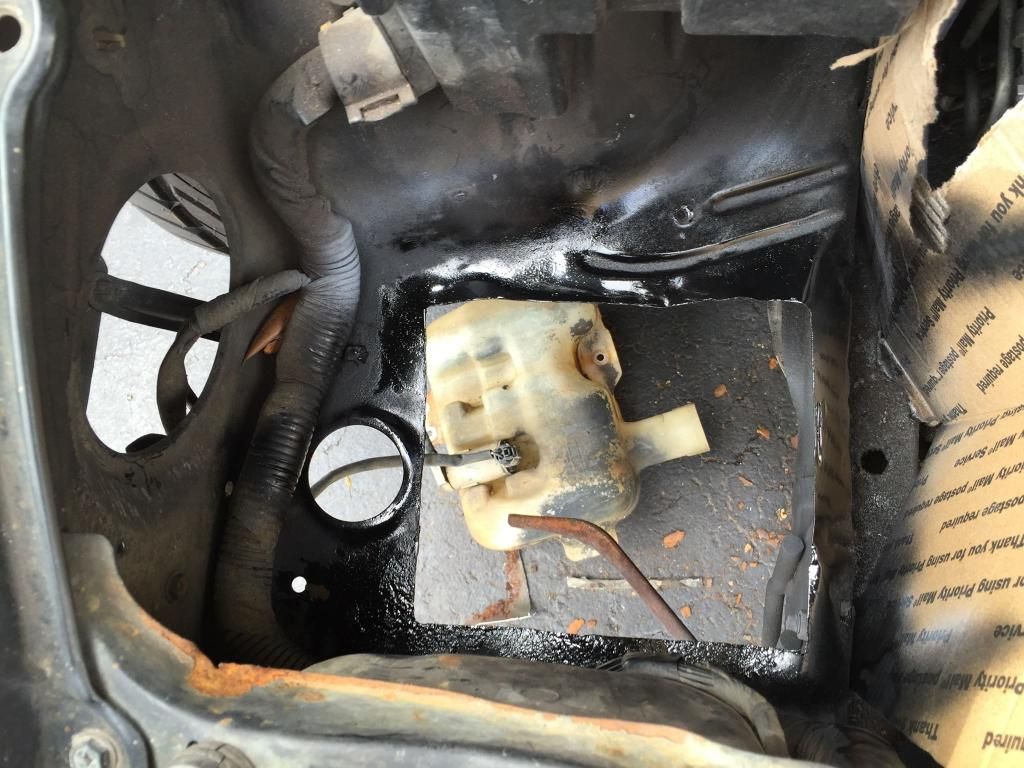 Plan is to eventually get a plate welded in there, but it'll do for now 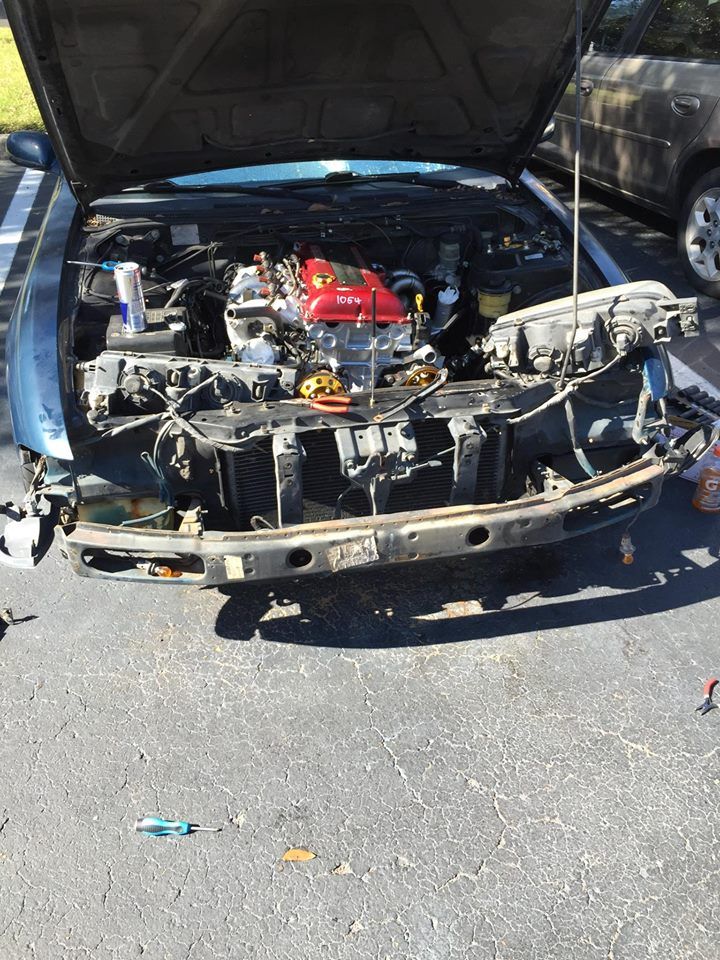 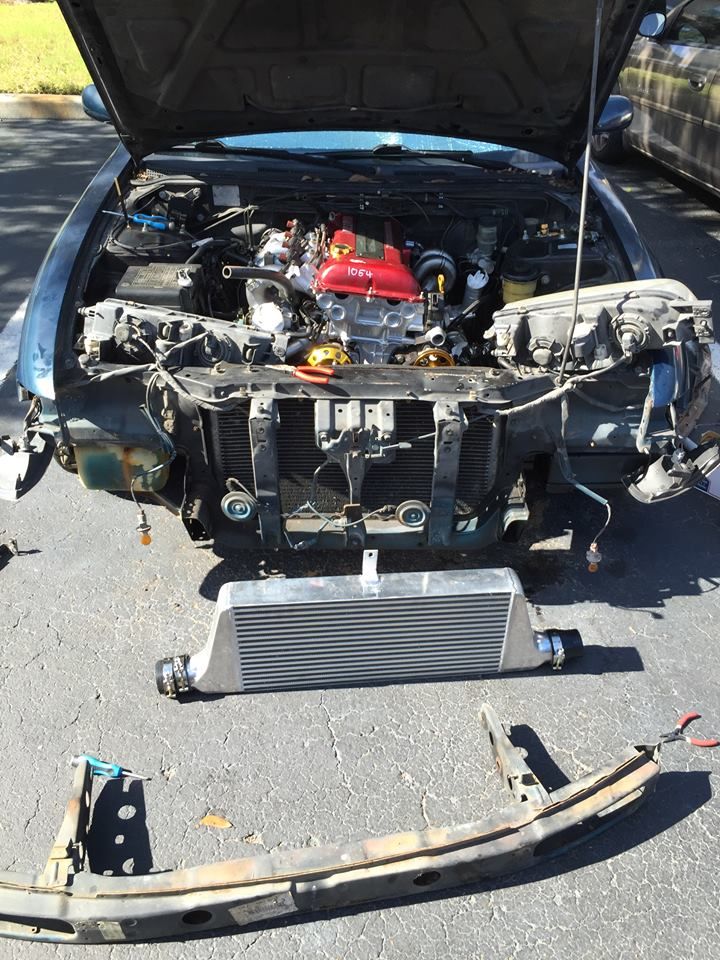 I initially cut out what I thought was a good amount from the bumper support 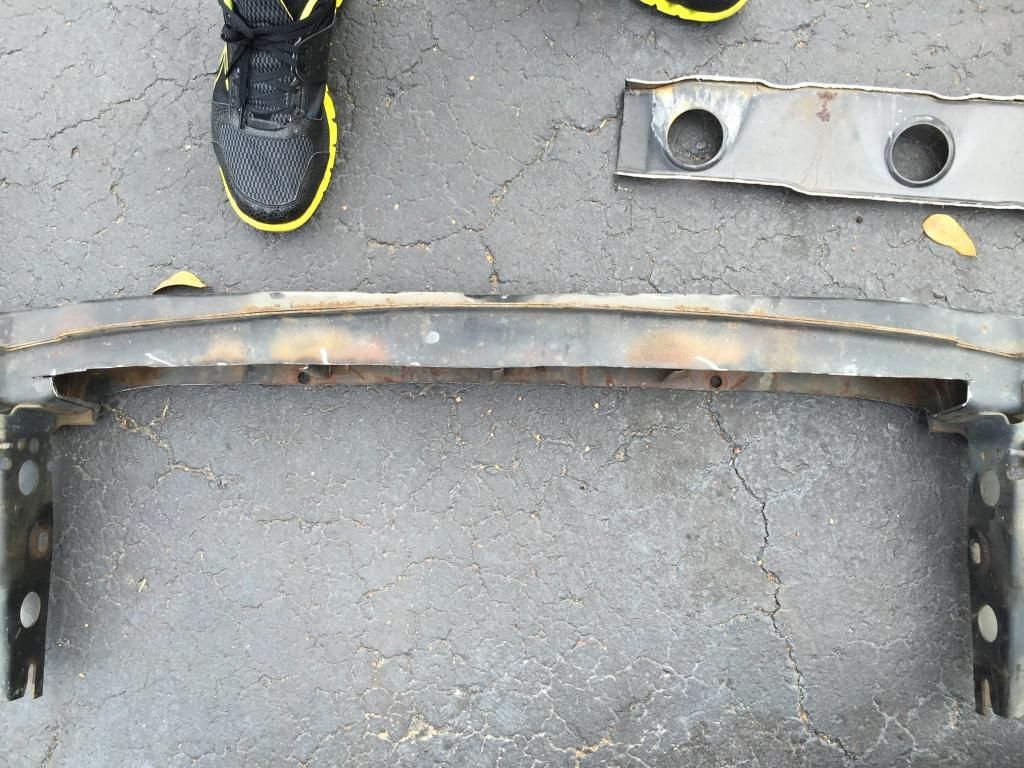 it ended up needing A LOT more cut out to fit the intercooler 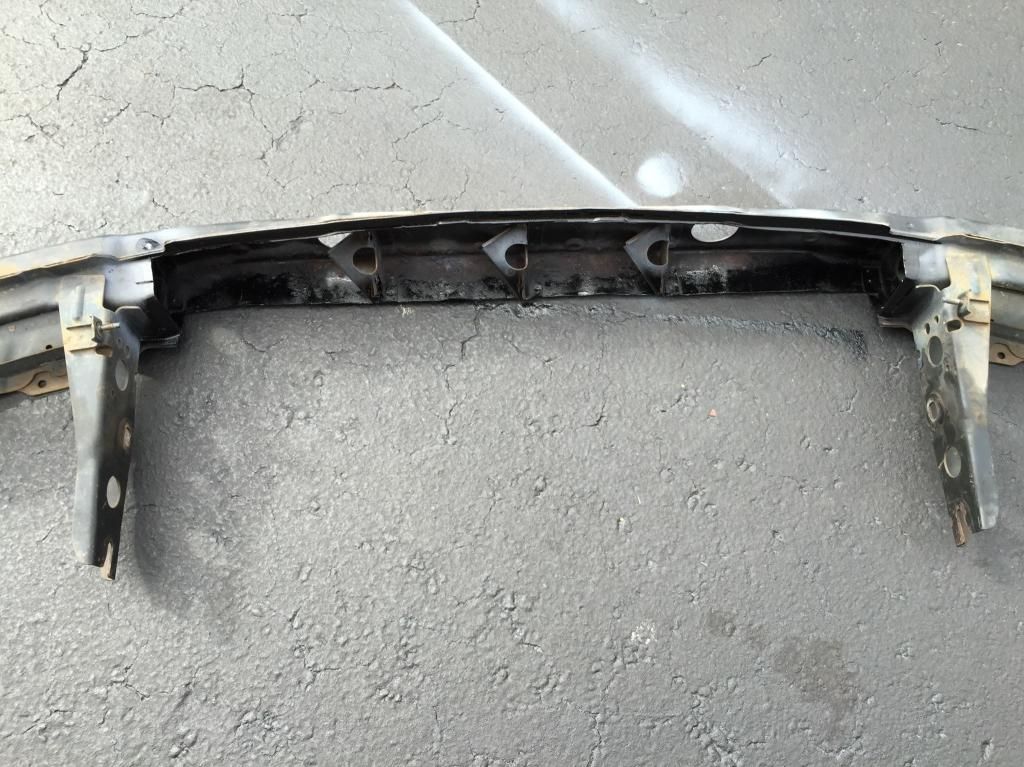 I initially cut out just the insides of this part of the "frame" 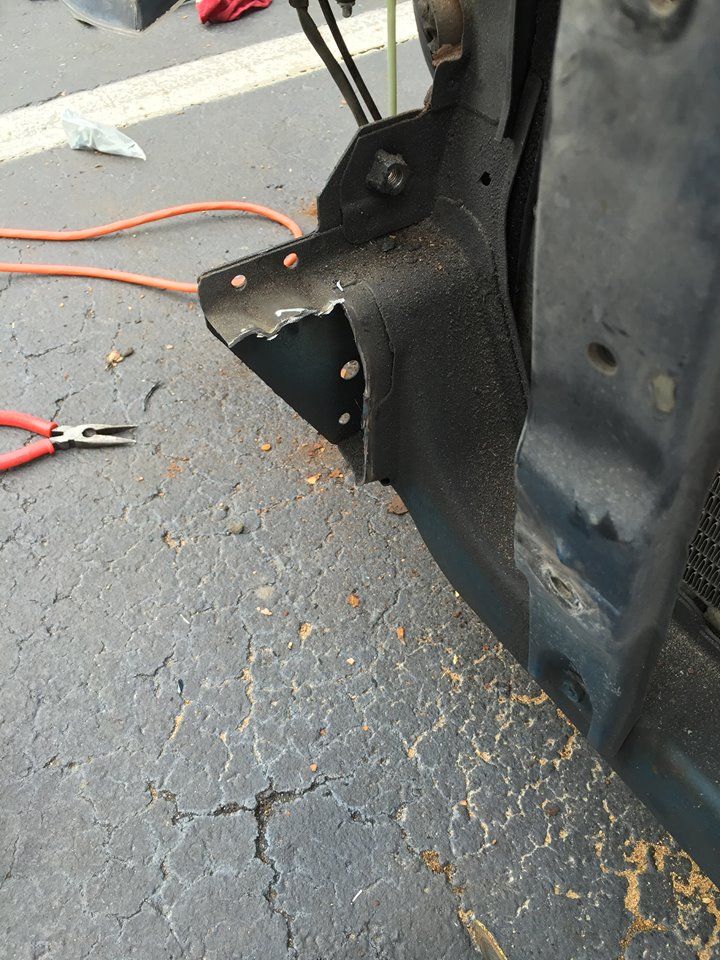 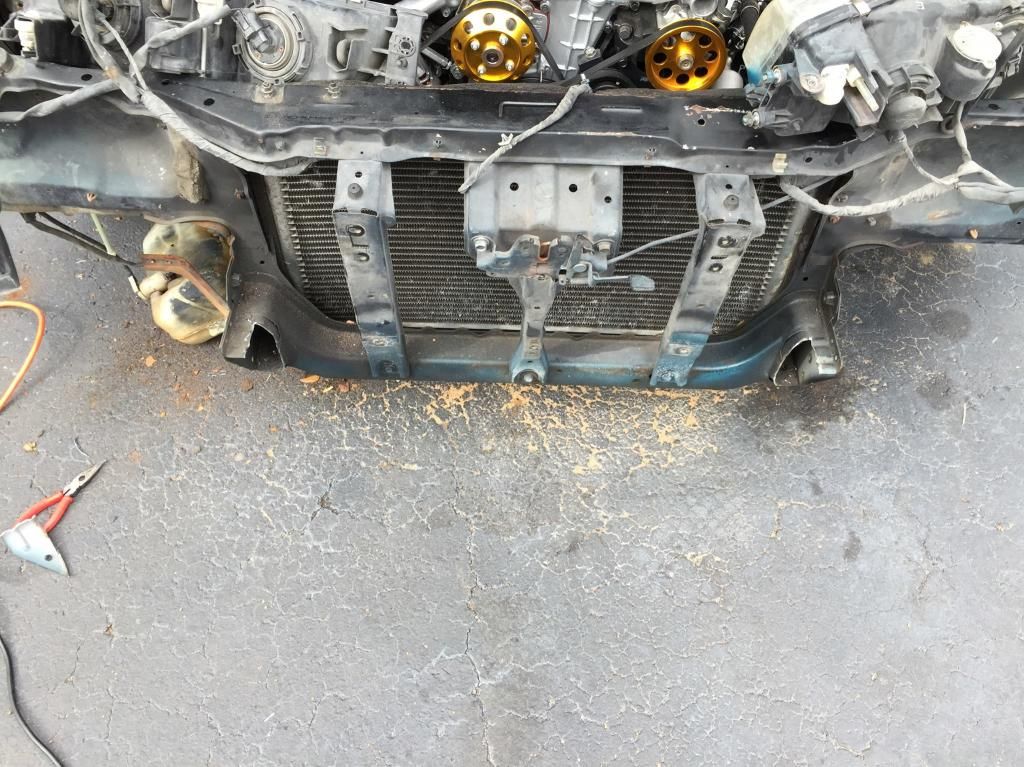 The end caps of the intercooler were still resting on the outside sections, so I chopped them off as well 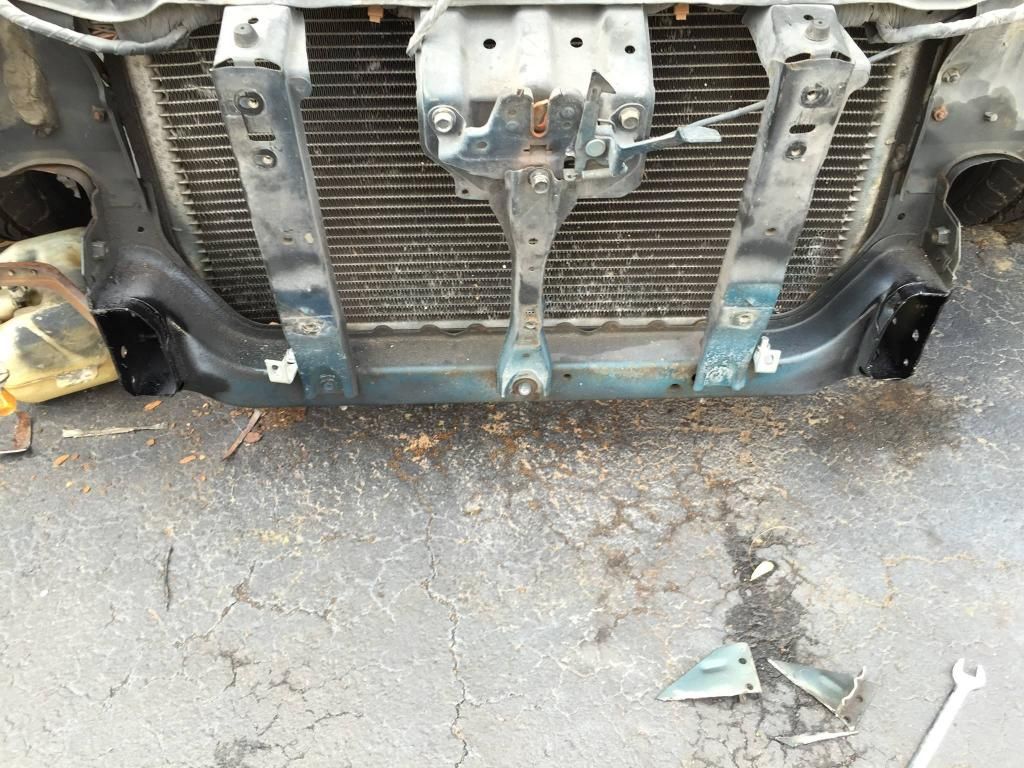 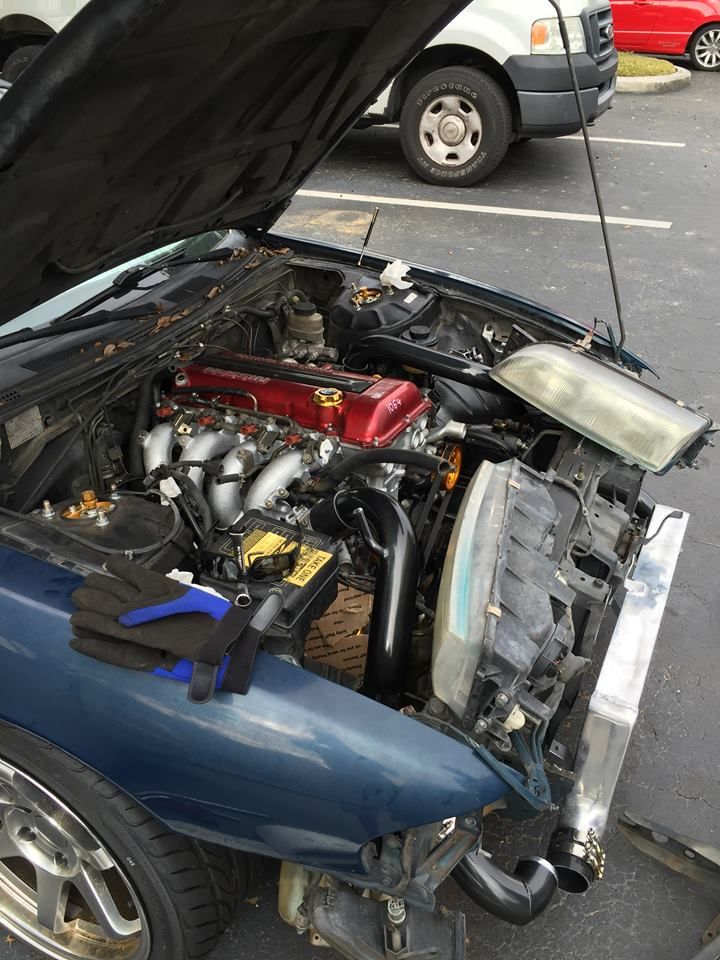 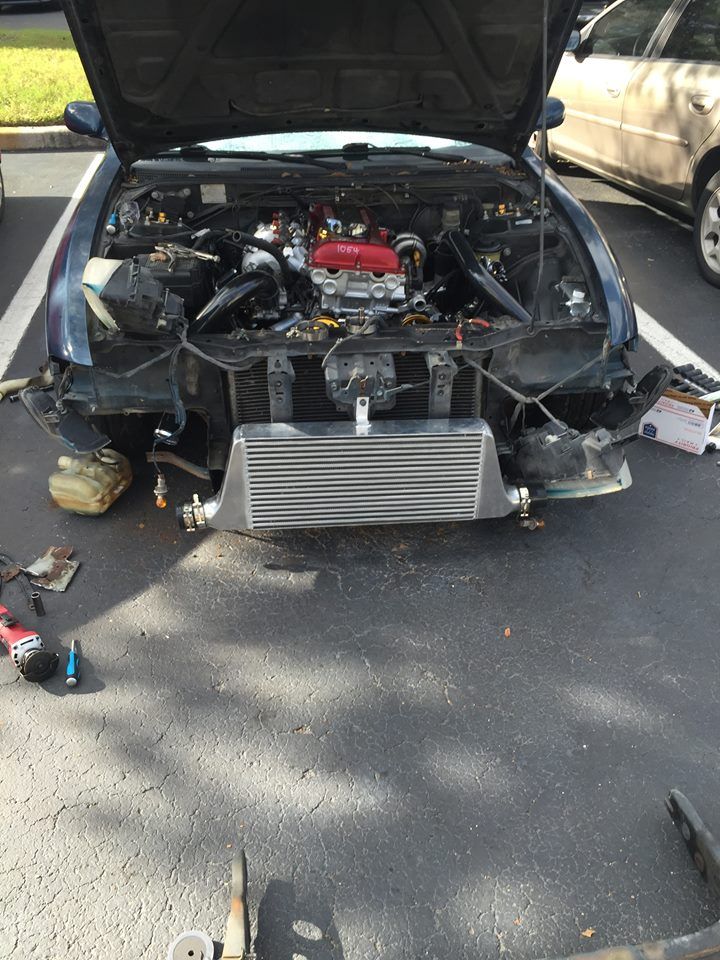 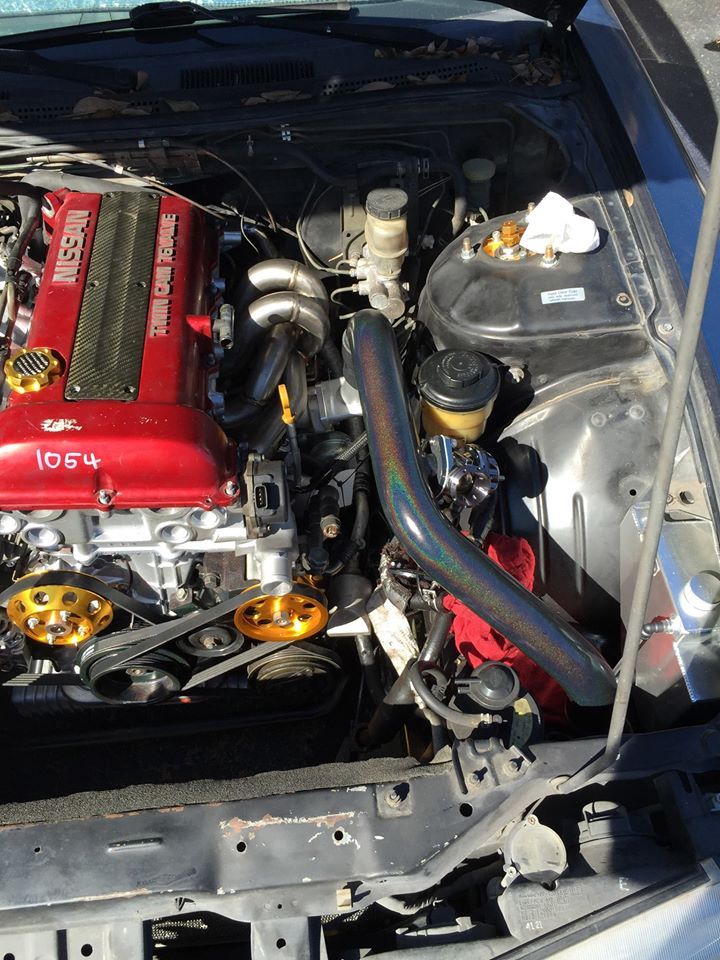 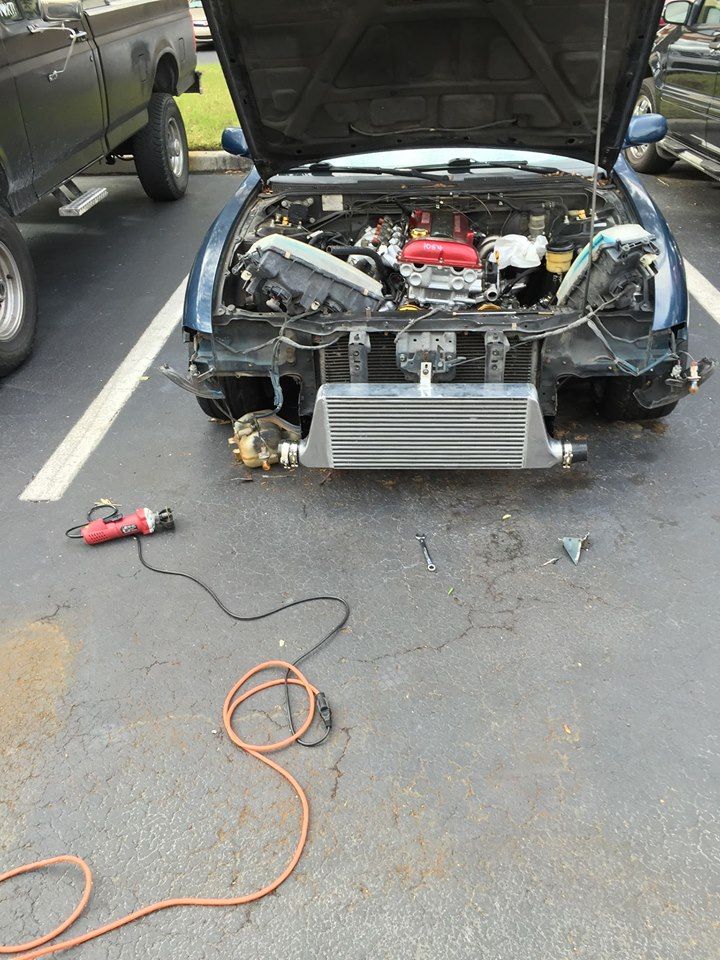 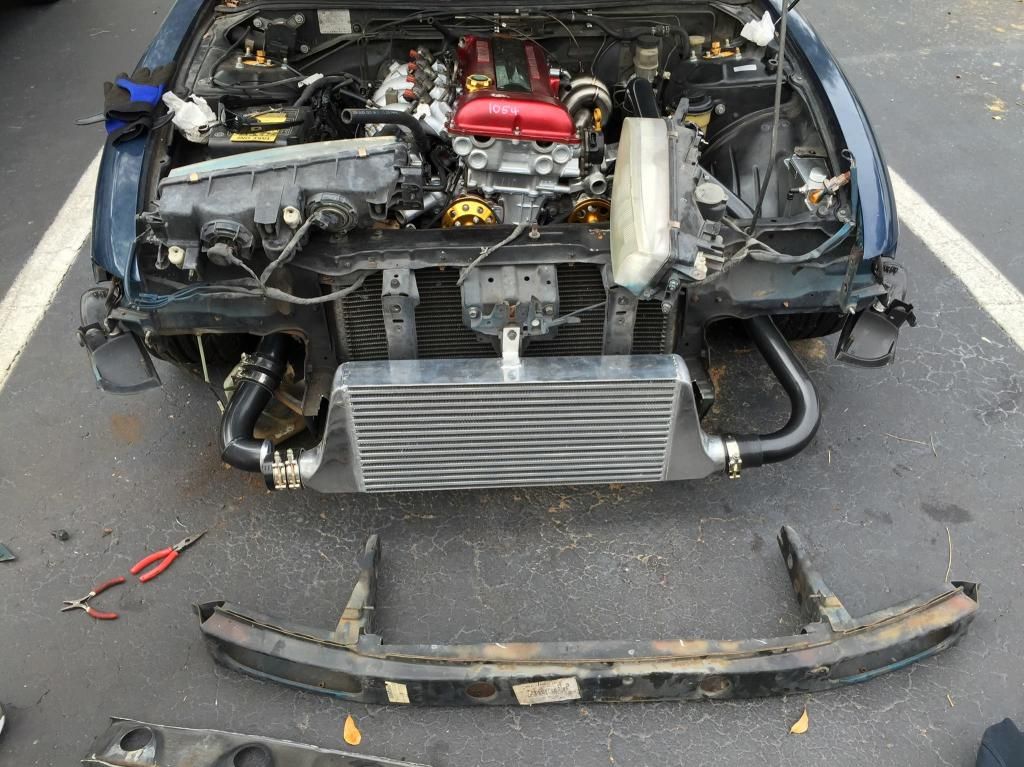 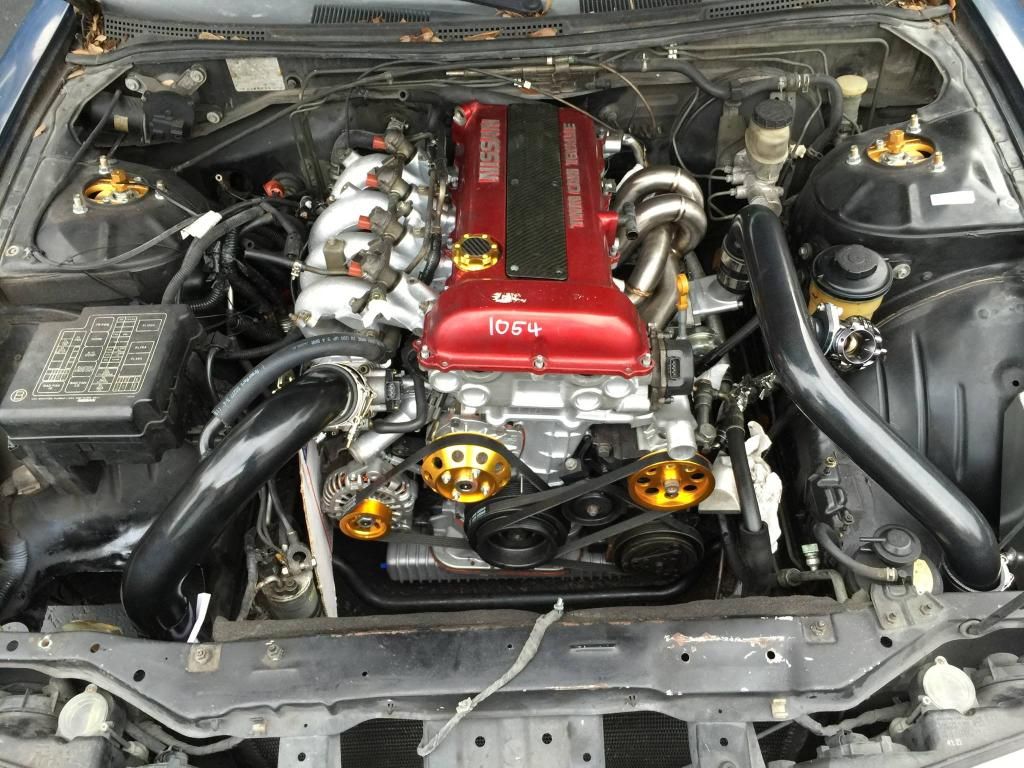 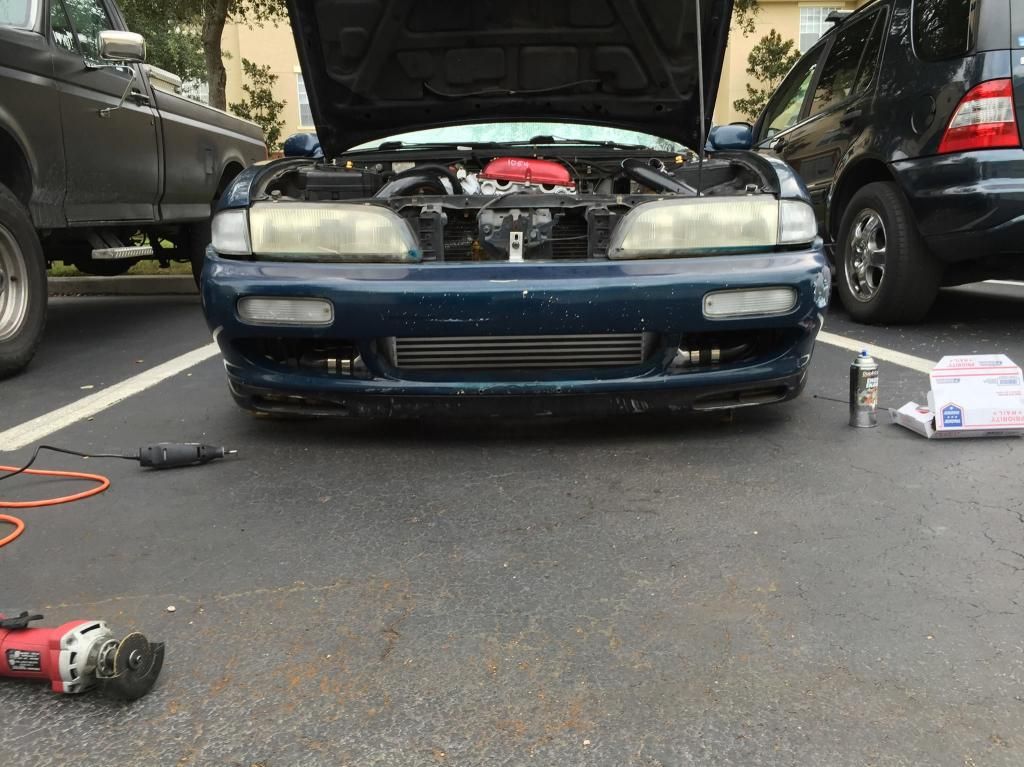 Everything is finally on there and lined up. I ended up drilling a new hole underneath the original one on the top mounting tab of the intercooler. Then I ended up slotting that hole to lower it a bit more as the headlights were right ontop of the cooler. As of now, I need to do a little bit of trimming of the inside of my bumper to get it to line up. I also need to cut one of the brackets off of the metal bar that connects the front bumper to the bumper support. Also slightly modifying the wiper reservoir mounting spot to clear the intercooler piping. Stay tuned! |
|
|

|
|
|
#128 |
|
Zilvia Junkie
 Join Date: Mar 2013
Location: Athens, Greece
Age: 45
Posts: 580
Trader Rating: (0)
 Feedback Score: 0 reviews
|
you should get some metal plates and reinforce the parts you ve cut, or cap them with metal. too much cutting just to fit an intercooler dude.
__________________
My Build |
|
|

|
|
|
#129 |
|
Leaky Injector
 |
Nahhh it's fine, the those little bits of the end that you cut off the rails aren't even structurally significant. especially if you're still keeping the bumper beam.
|
|
|

|
|
|
#131 |
|
Zilvia Junkie
 Join Date: Oct 2012
Location: Irvine, CA
Age: 36
Posts: 490
Trader Rating: (5)
 Feedback Score: 5 reviews
|
I got some more work done this weekend.
I feel stupid because I didnt take pictures of the majority of the work.. As the bumper was already off I decided that in order to save my time in the near future that I would go ahead and flatten that metal lip behind the fenders and tuck the wire harness in the driver side wheel well. I was having issues before when trying to roll my fenders; the roller would get stuck on that metal lip. So we got the fenders off and my friend and I each beat up a side. A normal hammer sucked for the job. I had purchased a 4lb rubber mallet that worked a little better but not by much. We ended up using some 2x4's resting ontop of our knees and placed against the metal lip and hit those with the hammers. At the end, in order to bend that corner piece thats closer toward the firewall, I ended up grabbing vice grips for the job and it worked fantastically. In hind sight, I should have used the vice grips on the metal lips first and then flattened them with the hammers. Just an FYI to anyone looking to do the same. But yeah, no pictures of any of that. Since we had the fenders off, I wanted to get a look at how the s15 fenders line up. They actually just about fit perfectly. I was under the impression that everything was way off and that the shape where they meet the door is way different -- not so. If you were to cut about an inch off of the bottom of the fender, closest to the door, it would basically line up with all of the bolt holes. The only difference is where it meets the A-Pillar, there isnt anything there whereas the s14 fenders have material that goes up a bit higher. My friend almost convinced me to chop them up and just look into getting a small piece fabricated to fill in the gap by the a-pillar lol. 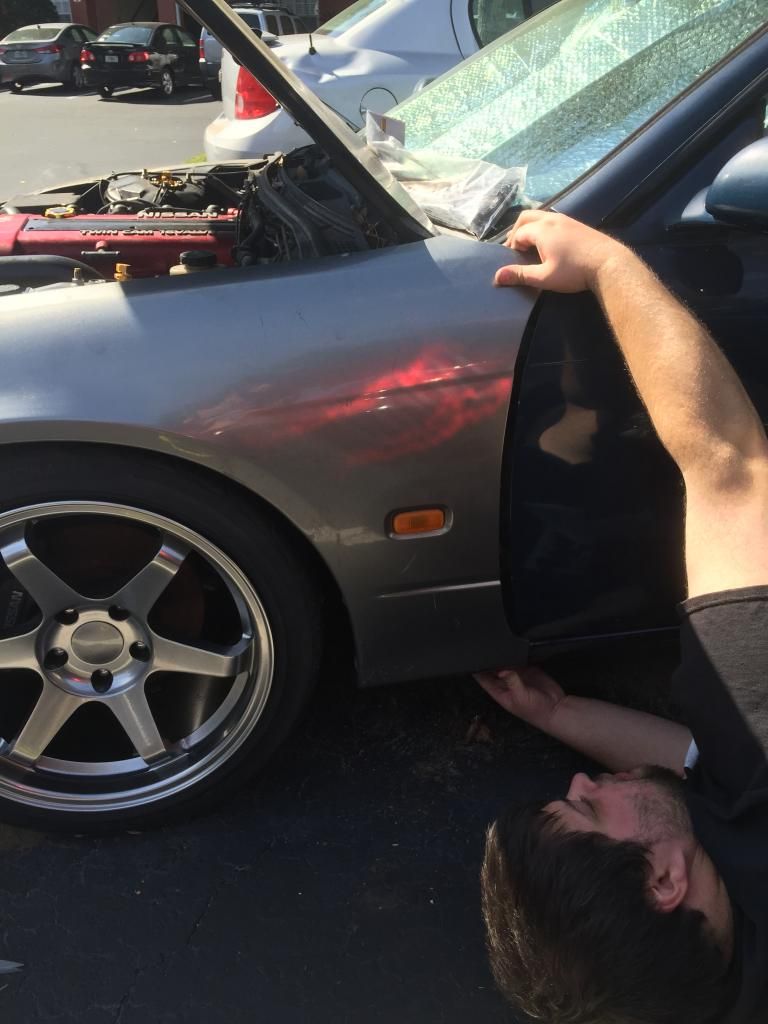 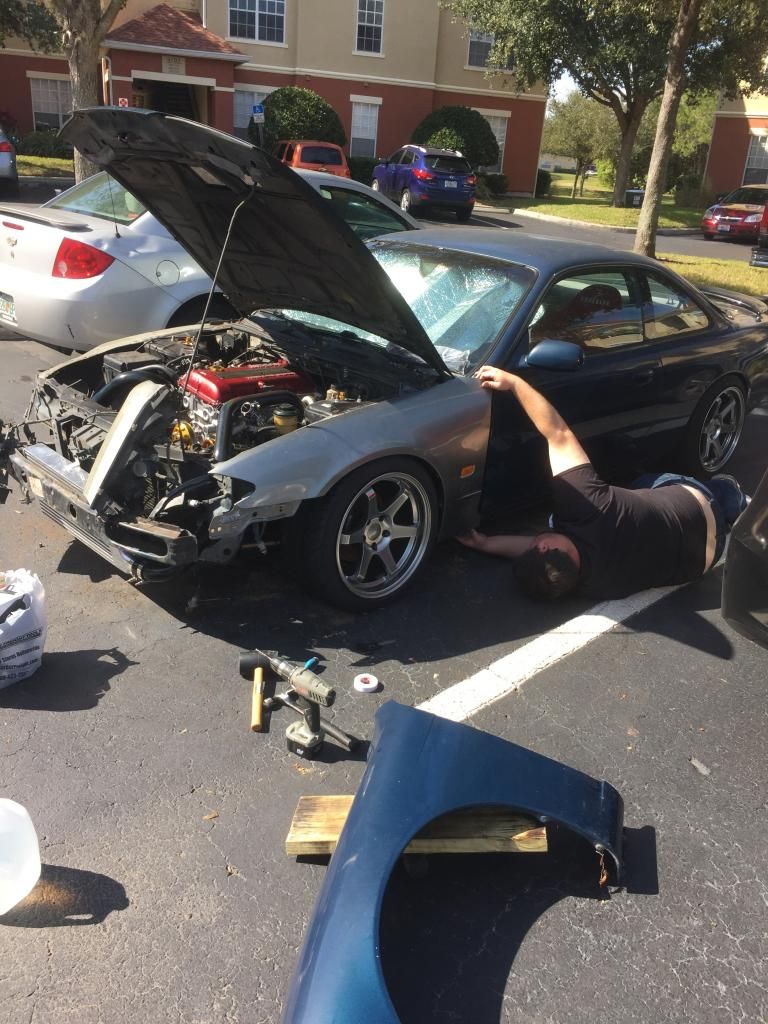 Anyways, I got my radiator mounted. I'll need to cut a few ribs off of the silicone outlet hose as its about 1-2" too long. The inlet hose fits perfect though. Also need clamps for them. 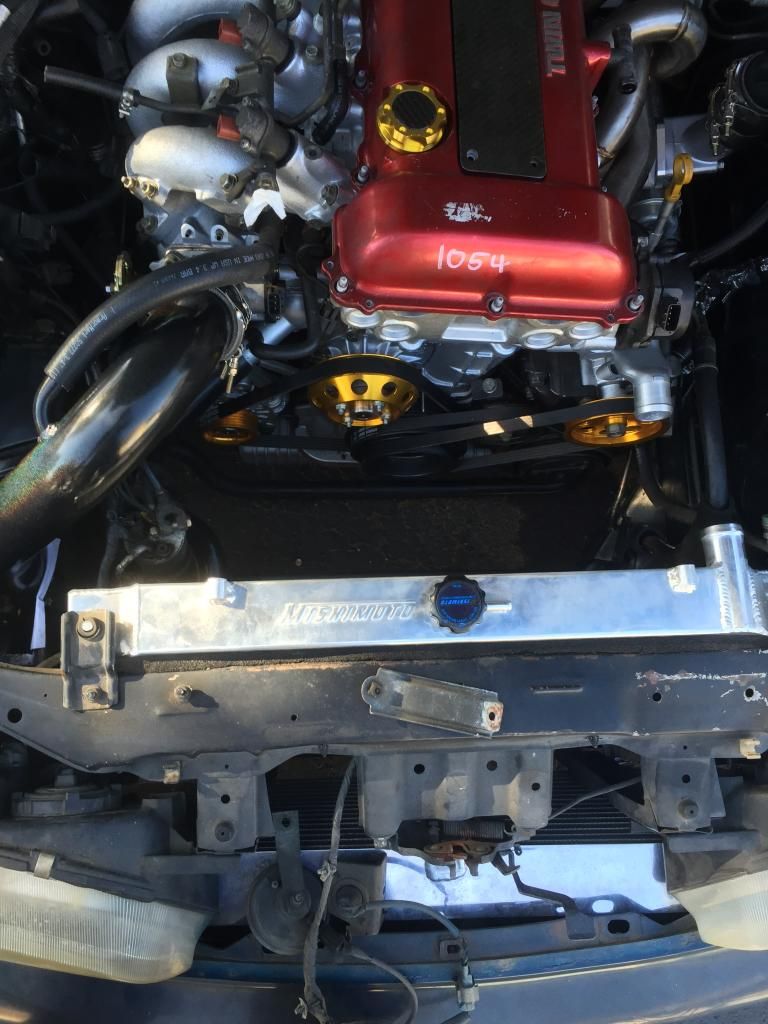 Also got the e-fans set in there but not bolted up. Was pretty worn out at that point and called it. 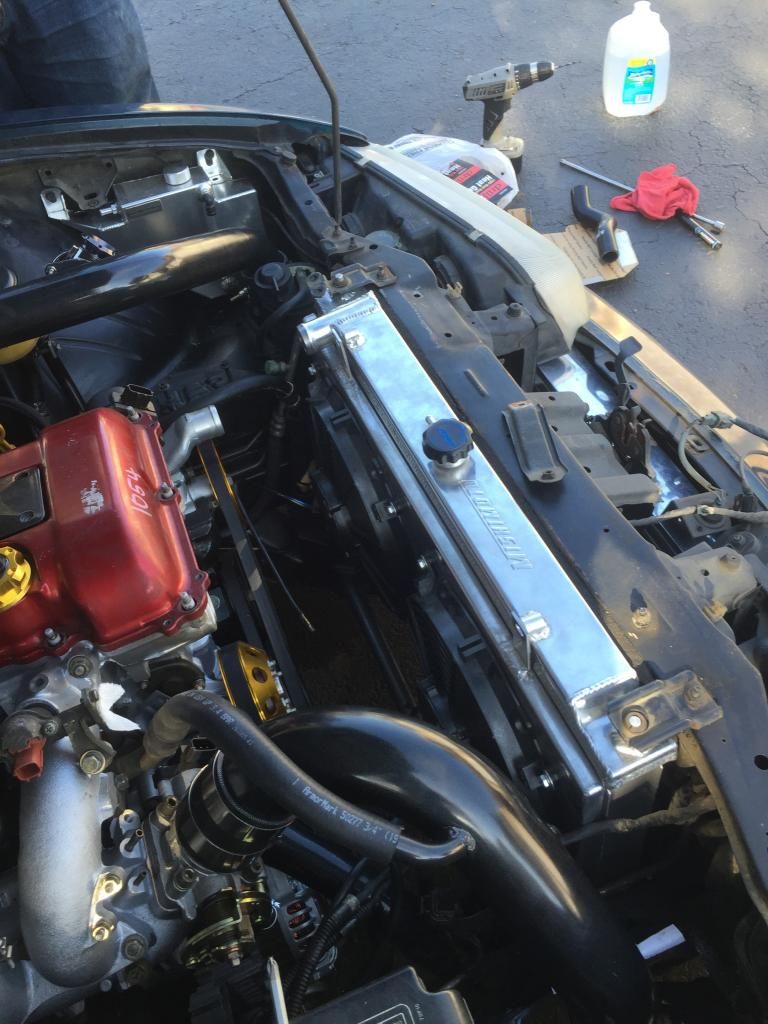 Almost forgot, I had to chop up the bumper retainer piece that bolts onto the bumper support. No pictures of that either. I wasnt able to get things to fit so I basically cut off the left and right portions and bolted them up to make it work. Afterwards I realized that was a mistake as now the grille has nothing to mount to, haha  |
|
|

|
|
|
#133 |
|
Zilvia Junkie
 Join Date: Oct 2012
Location: Irvine, CA
Age: 36
Posts: 490
Trader Rating: (5)
 Feedback Score: 5 reviews
|
Working on my harness and honestly it has been such an up and down rollercoaster that I wish I had the spare cash for the wiringspecialties harness right now
 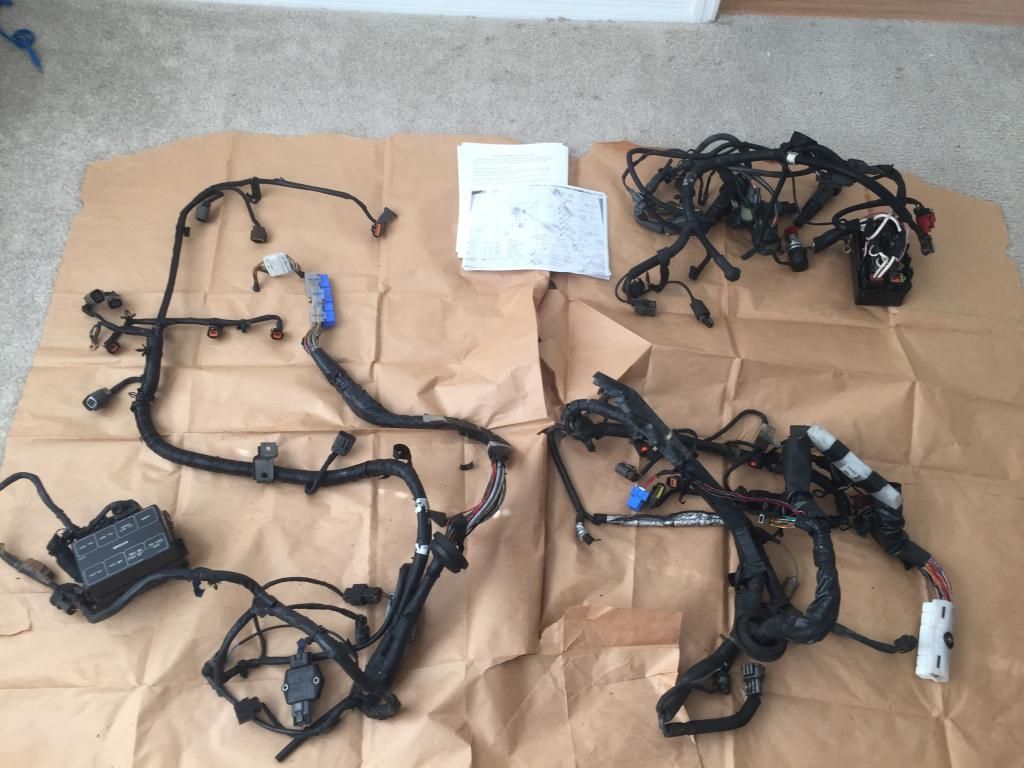 Here are the 4 clips to remove from the KA harness: F2, F9, F7, F3 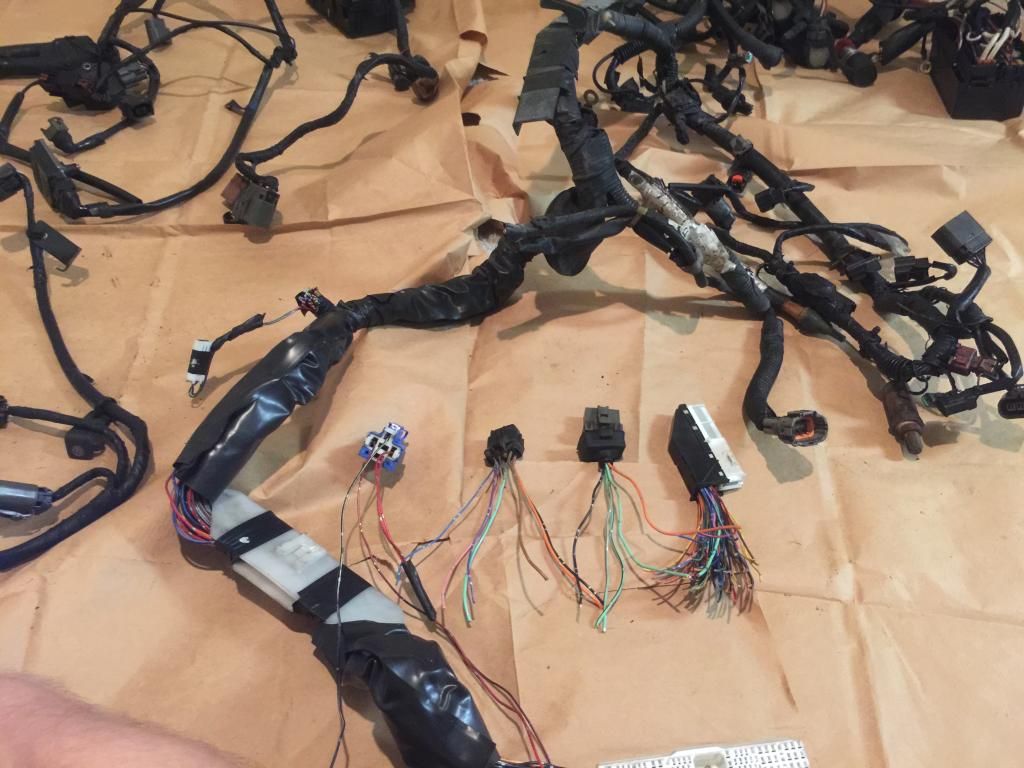 It was a little daunting when I unwrapped a lot of the wires that needed to be unwrapped 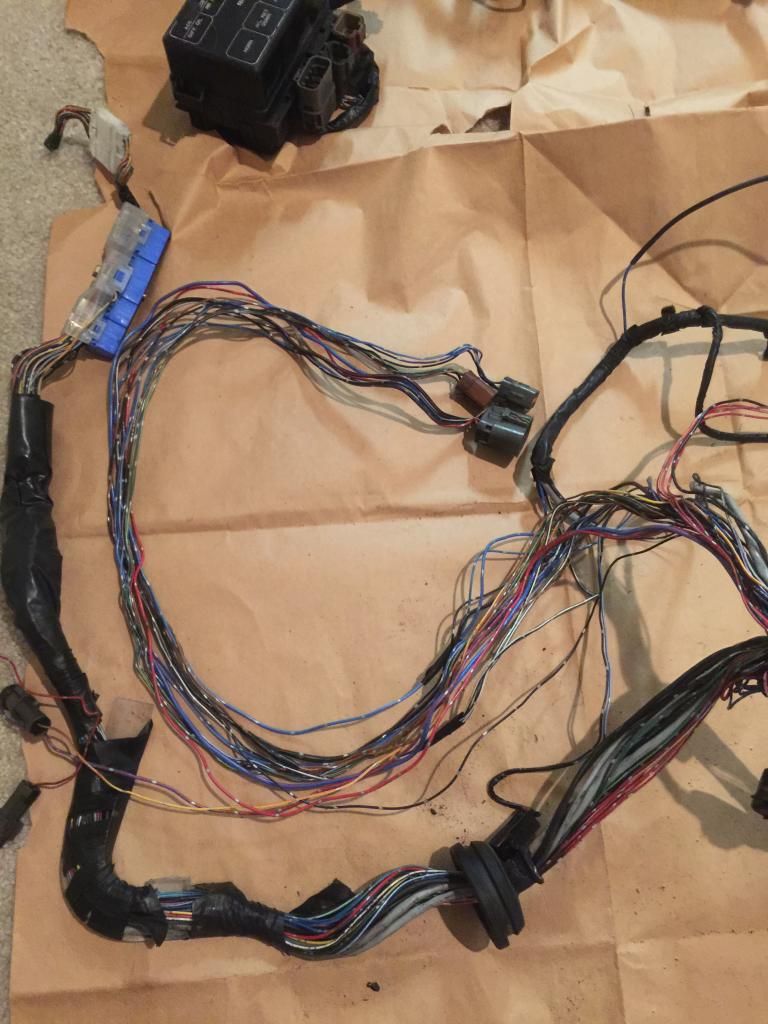 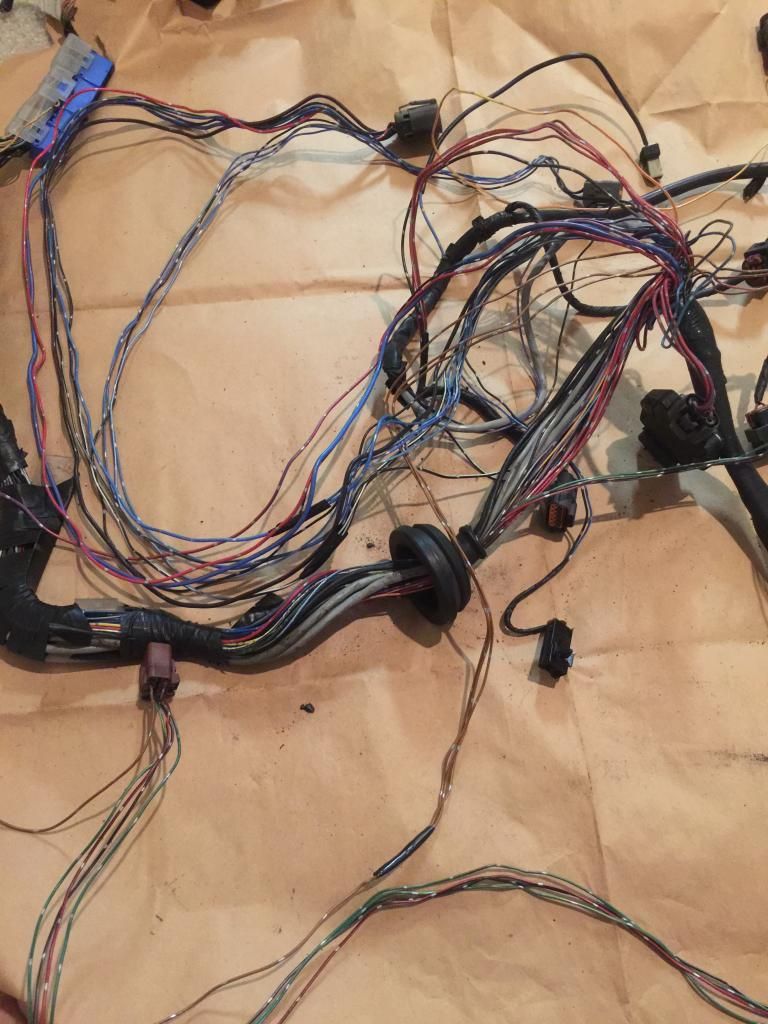 Basically 2 out of 3 of these clips that go to a relay box in the s13 engine bay (F8, F10) need to be rerouted into the cabin. Then the clips are cut off and they are wired into the KA's F3 clip.  Here is the F3 clip with the black plastic piece removed 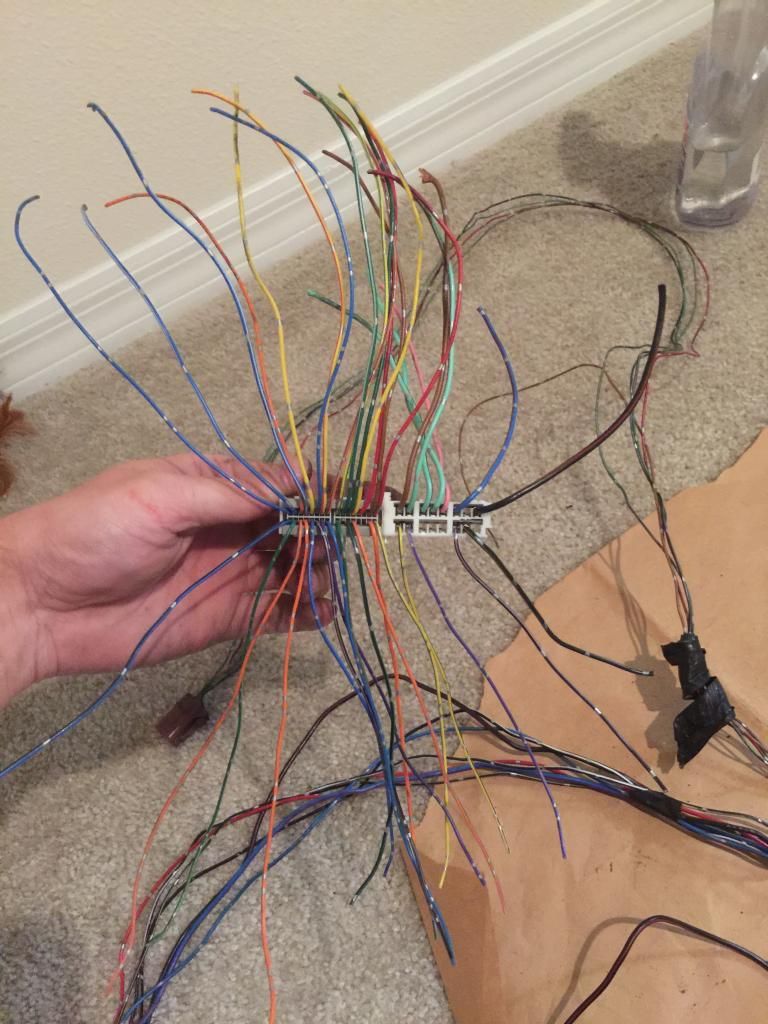 And here are all of the clips stripped for splicing 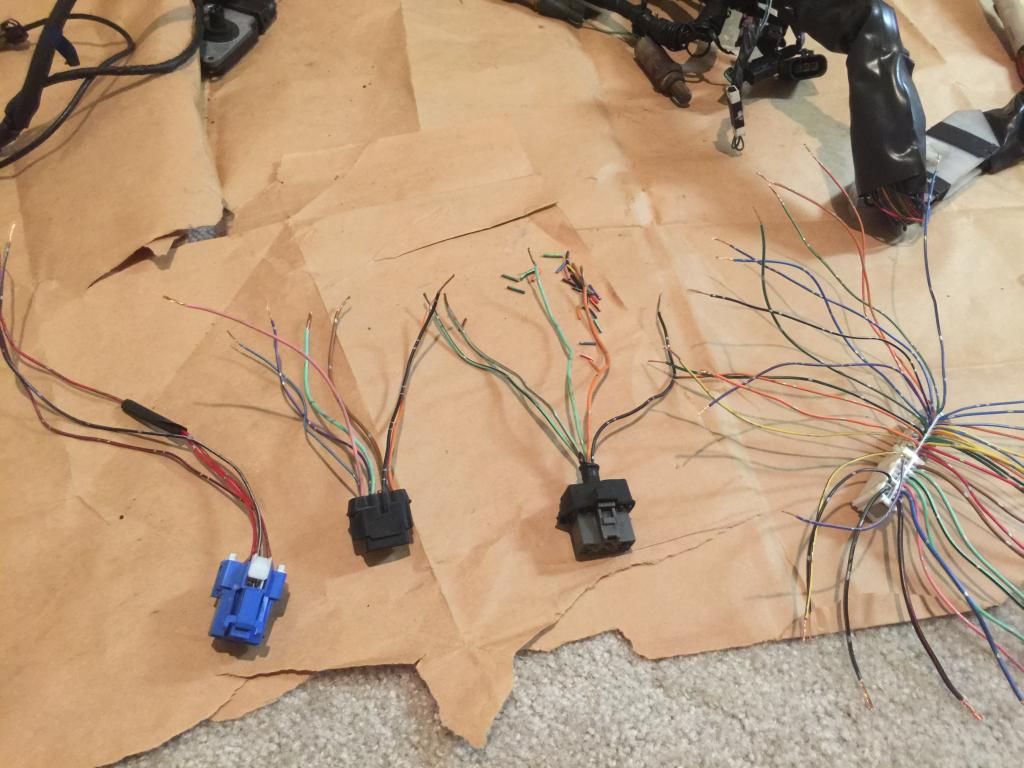 I got confused for the longest time because I was missing wires. The F3 has 39 in total. F2: 3 F7: 5 F8: 5 F9: 7 F10:6 So there are 26 / 39 wires Then I found the white clip on the SR harness next to the ecu clip. Luckily it had both male and female parts of the clip, so I can retain the clip without hard wiring. This has 12 wires 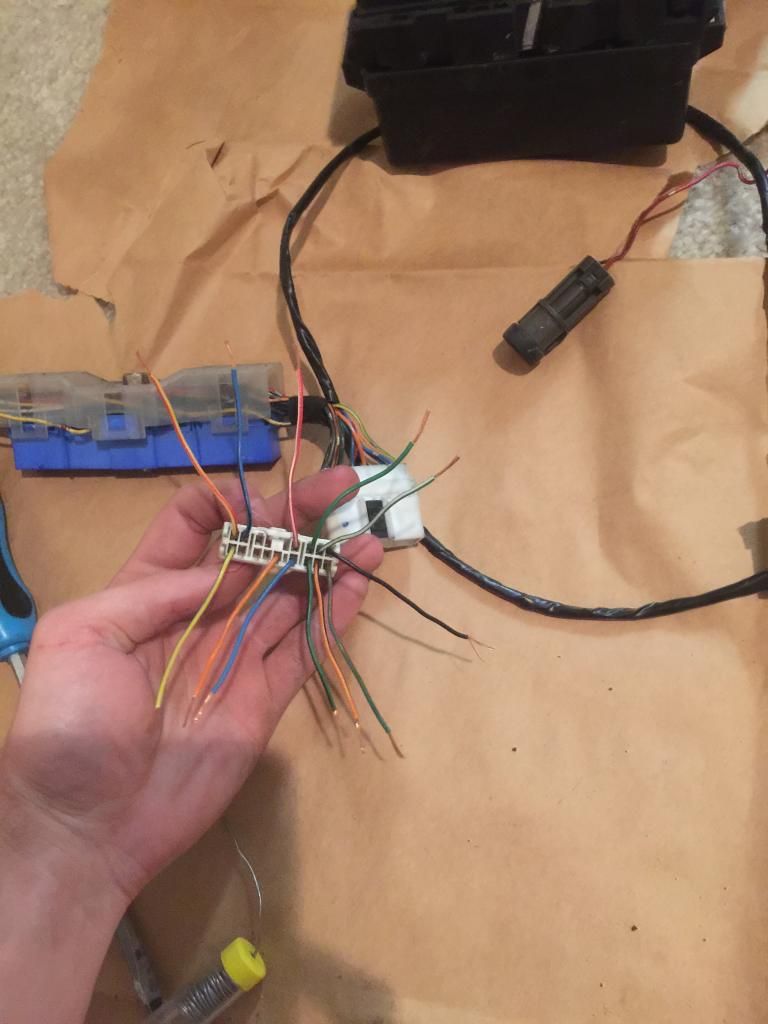 And that's where I am at. 38/39 wires accounted for.. :'( |
|
|

|
|
|
#135 |
|
Zilvia Junkie
 Join Date: Oct 2012
Location: Irvine, CA
Age: 36
Posts: 490
Trader Rating: (5)
 Feedback Score: 5 reviews
|
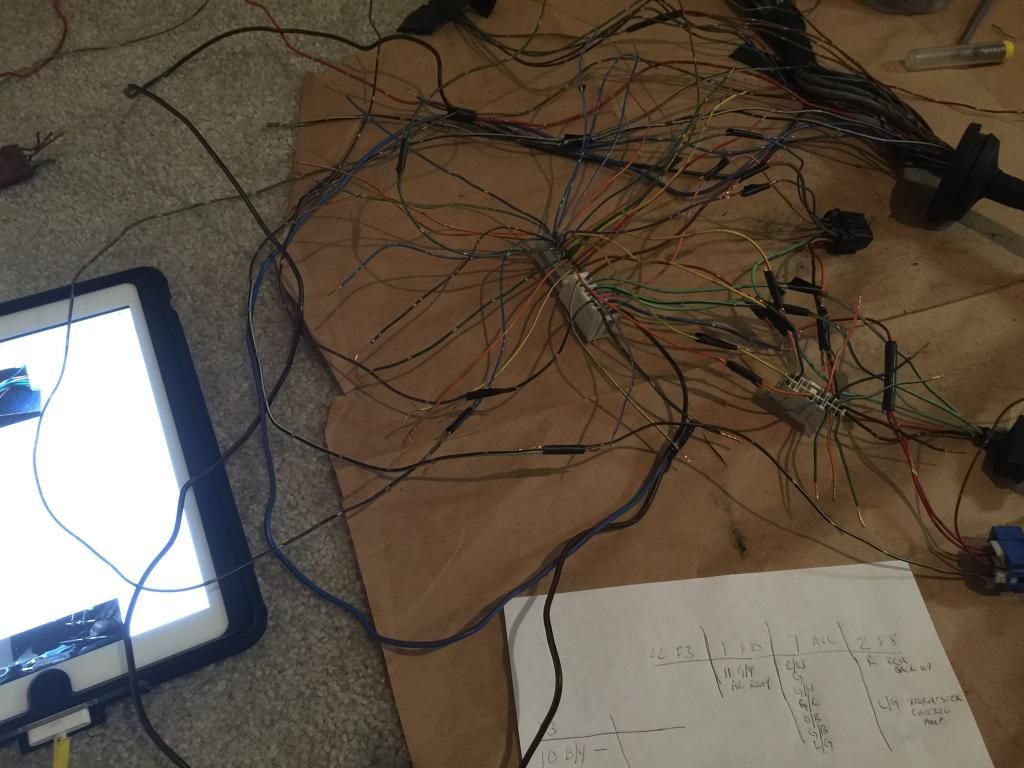
Still working on my harness, just haven't had a good chunk of time to dedicate to it. I was pretty stumped, but finally found some information that cleared up most of the wires as being unnecessary (consult wires, accessories handled by the s14 body harness). Still haven't soldered anything, just taping where they go while planning.
 I kept feeling like I half assed my painting by leaving the fuel rail untouched when its right there for everyone to see and I had already painted a ton of stuff that nobody will be able to see. So, I pulled it and hit it with some paint. It was really cold that night (for FL), it was about 58 out and the paint didnt cure that well. I havent checked it out in the day time yet, but here's how it looked that night 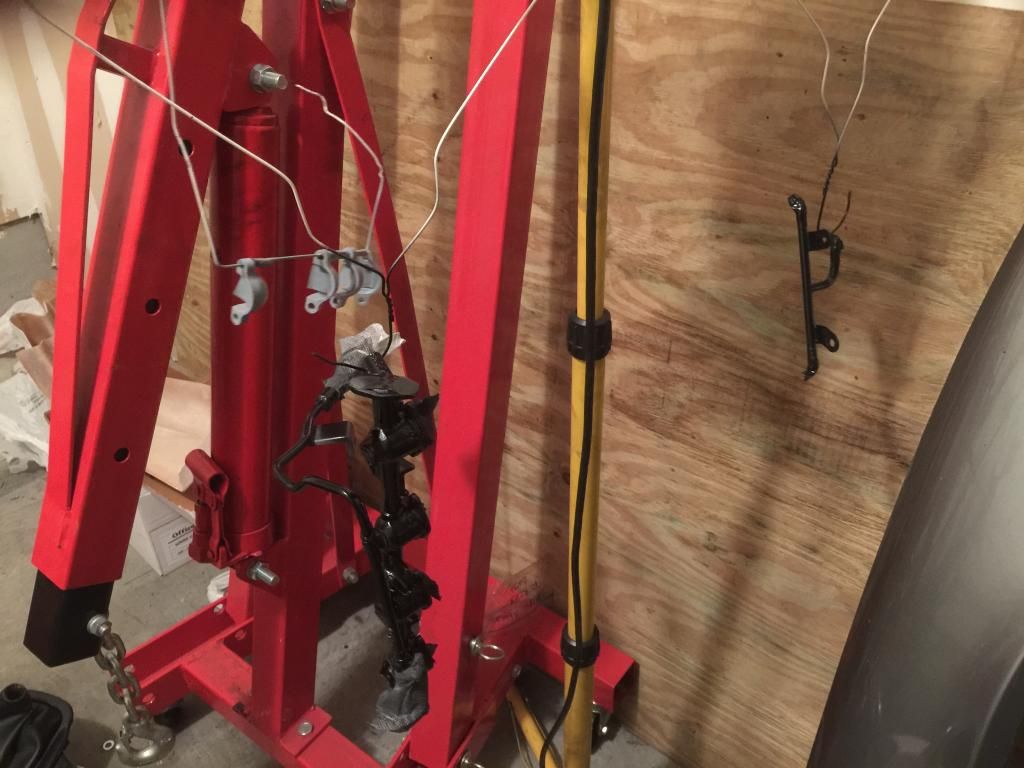 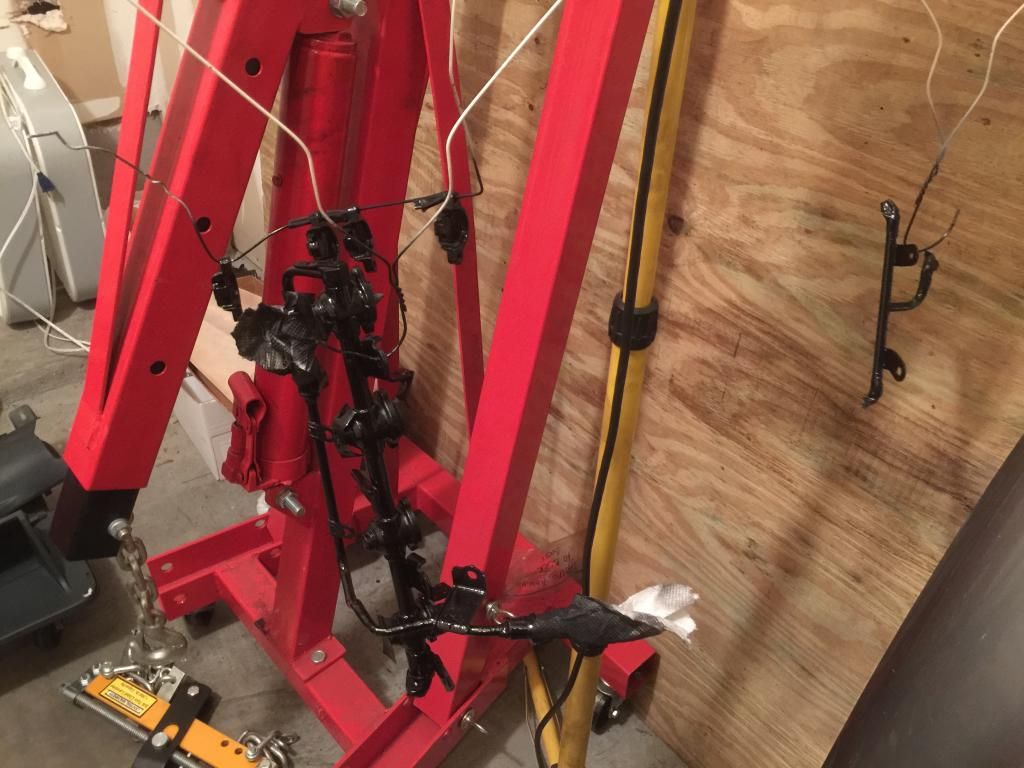 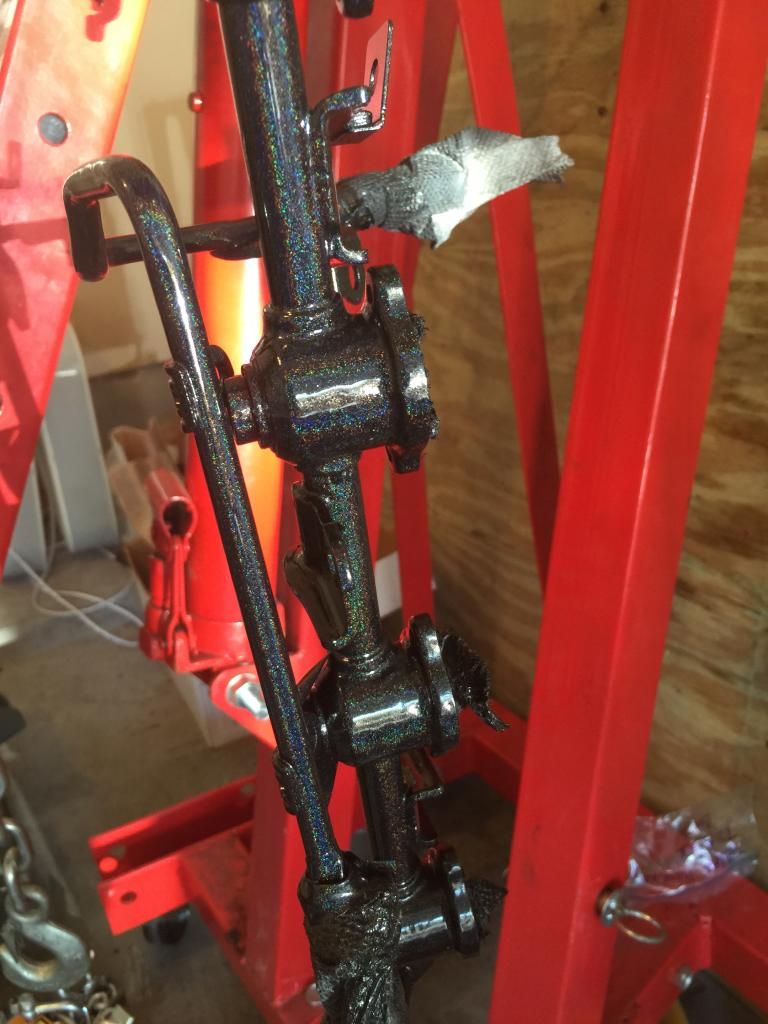 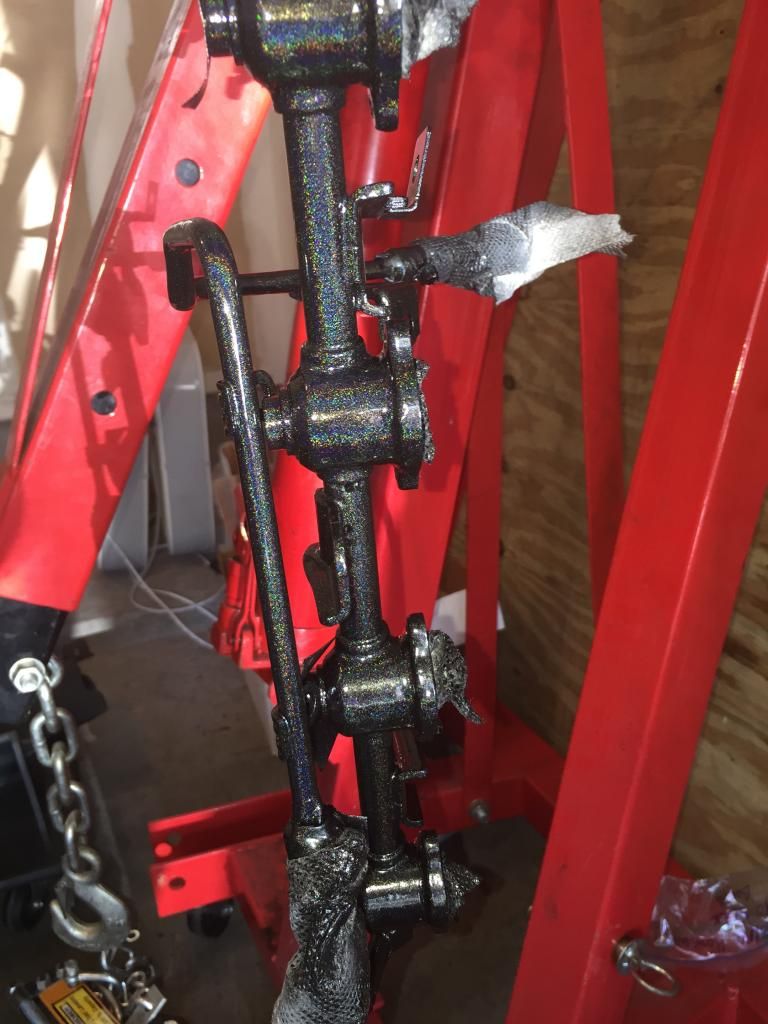 Got around to swapping my fuel pump out for the walbro  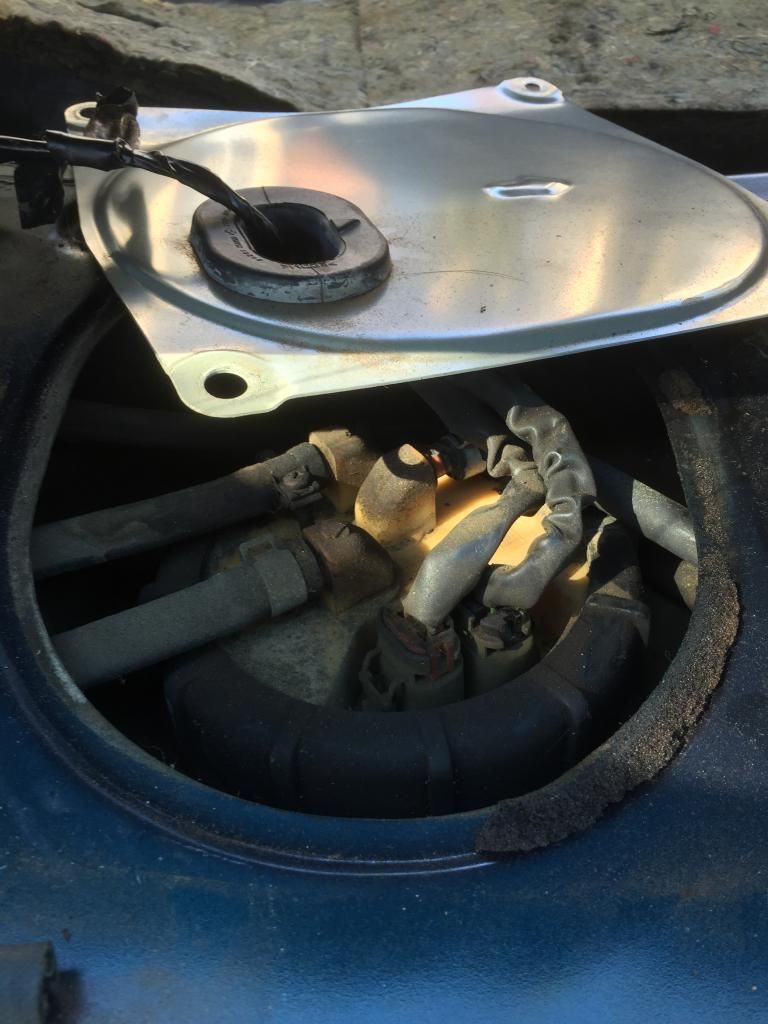 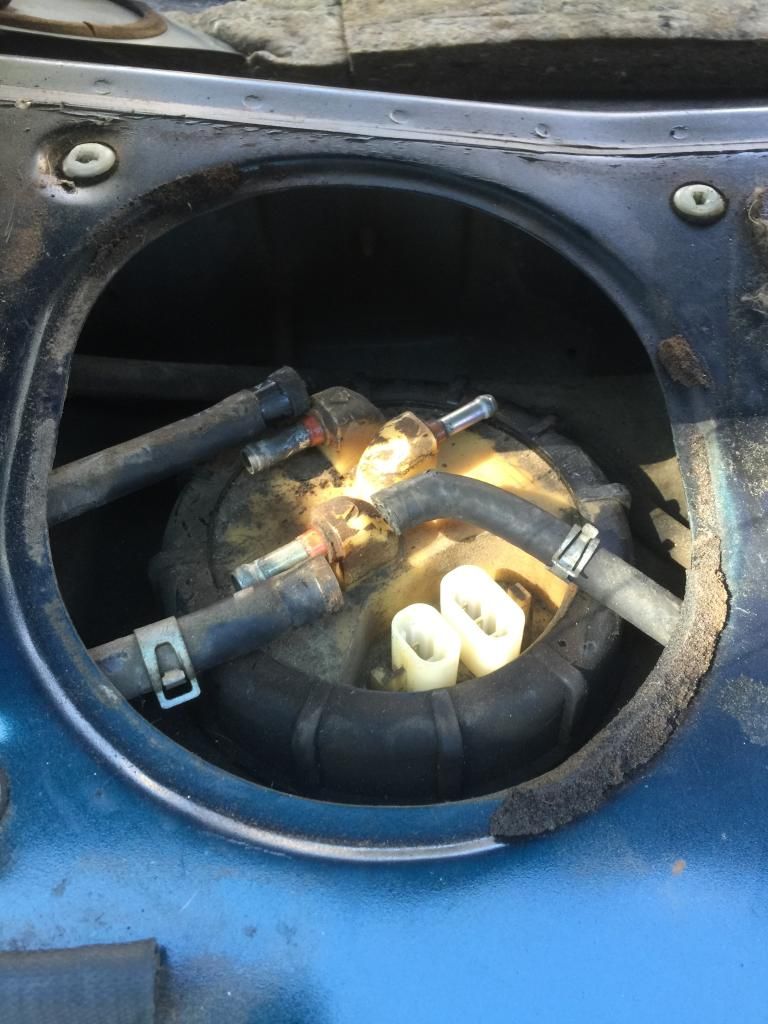 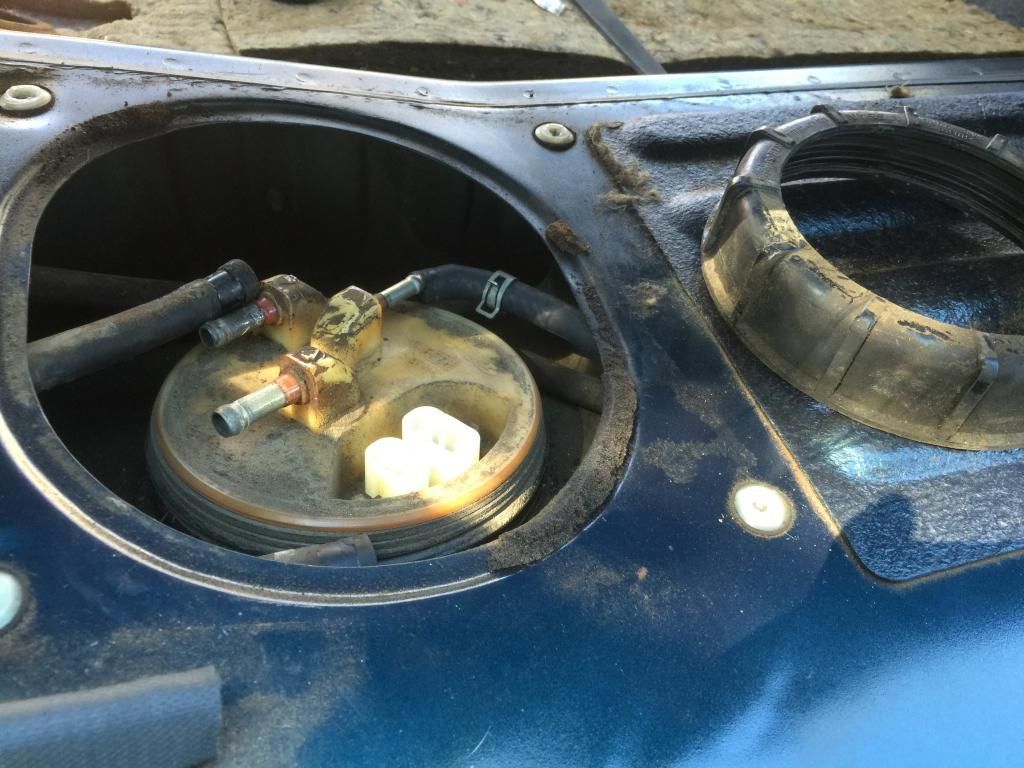  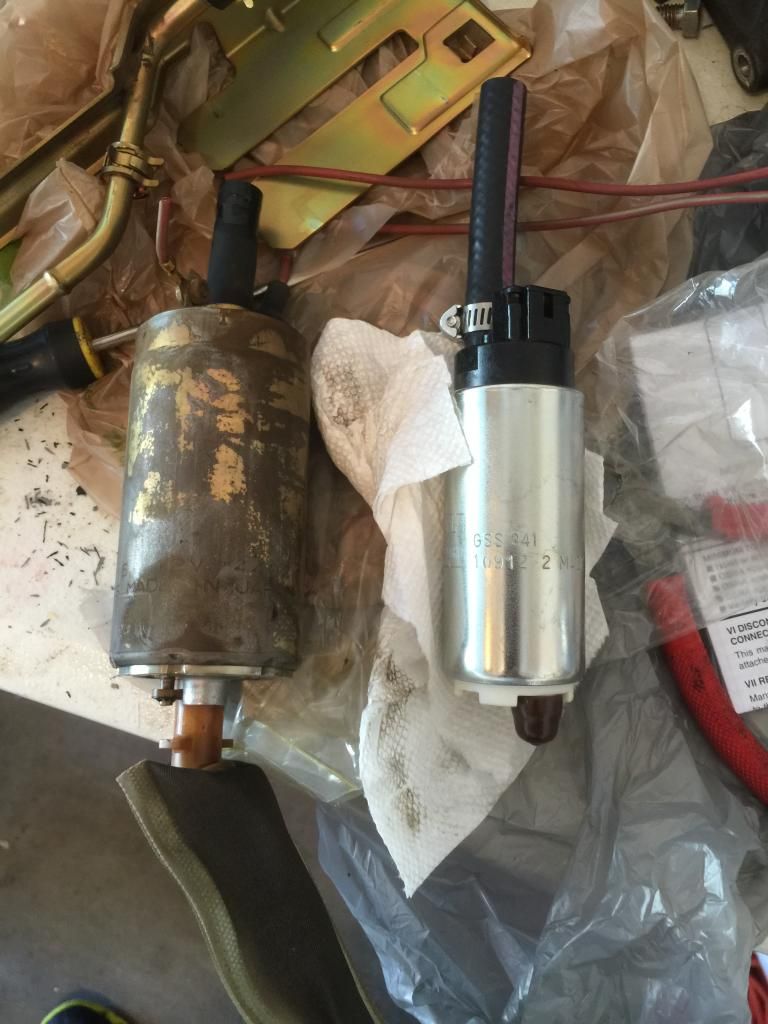 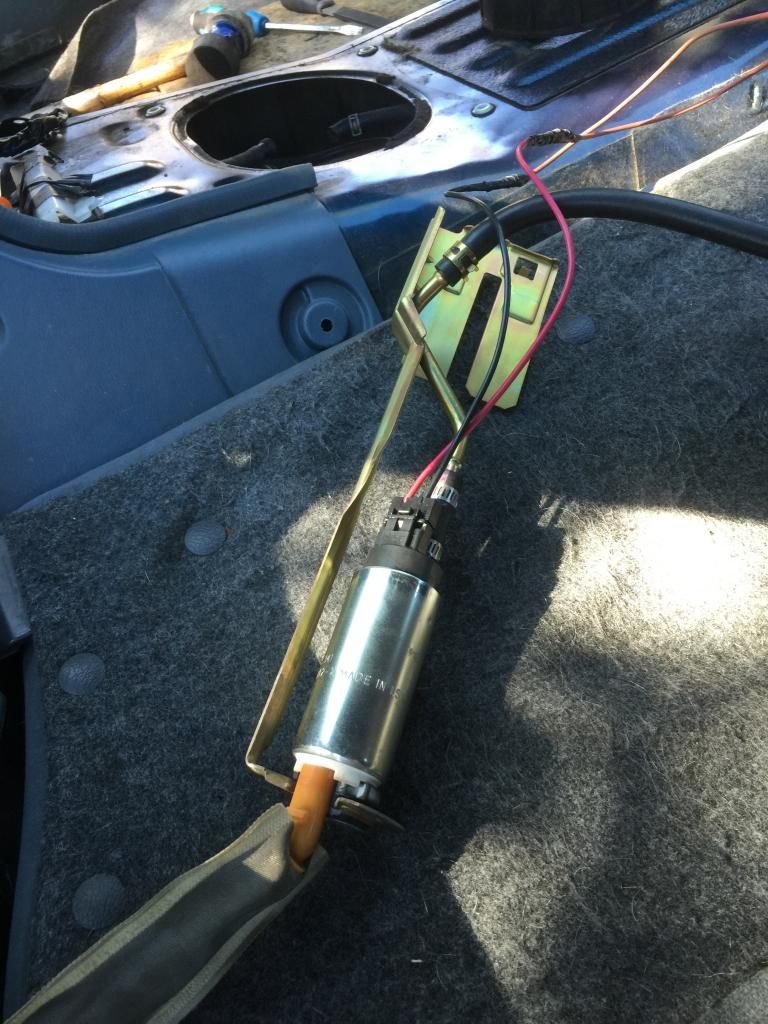 Swapped out my fuel filter for the much larger z32 filter 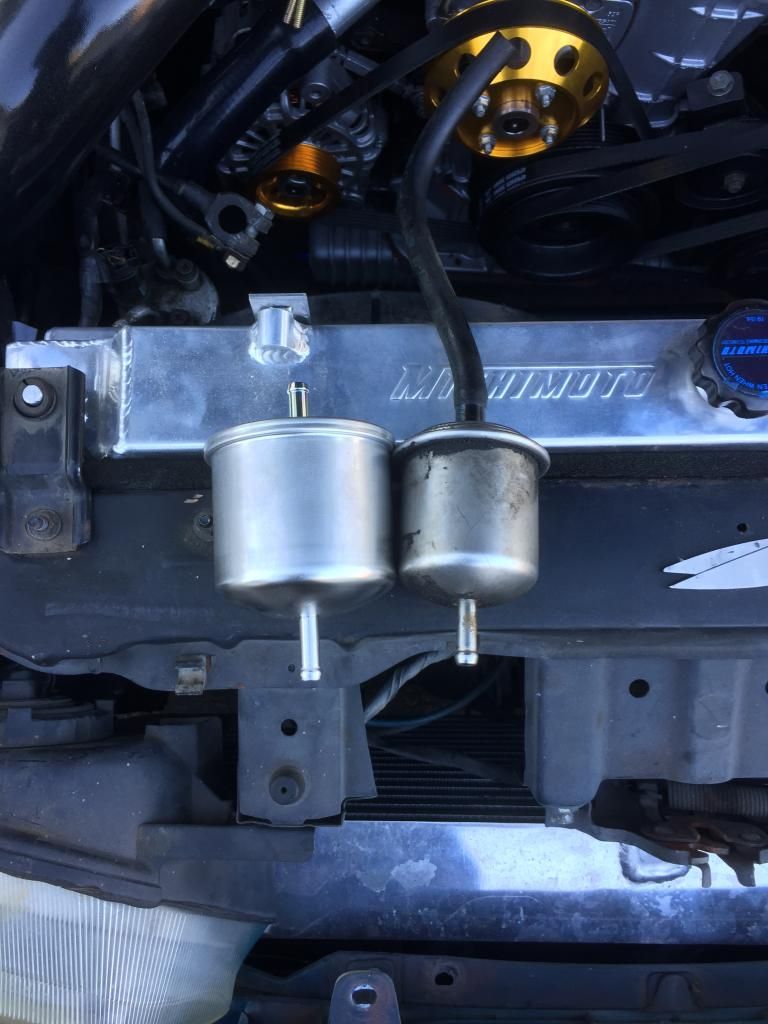 More work this weekend. Looking to mount my battery box in the trunk, run the heater core hoses, and then see where Im at with time. I'd also like to mount my oil filter relocation kit, FPR, and vacuum manifold. |
|
|

|
|
|
#138 |
|
Zilvia Junkie
 Join Date: Oct 2012
Location: Irvine, CA
Age: 36
Posts: 490
Trader Rating: (5)
 Feedback Score: 5 reviews
|
Yeah possibly looking to sell them, still waiting to hear back from the vendor "drautomotive" on here as im not positive these are the correct model for front hubs..
|
|
|

|
|
|
#139 |
|
Zilvia Junkie
 Join Date: Oct 2012
Location: Irvine, CA
Age: 36
Posts: 490
Trader Rating: (5)
 Feedback Score: 5 reviews
|
Didn't get much accomplished yesterday.
Replaced a broken pintle cap on one of my injectors. 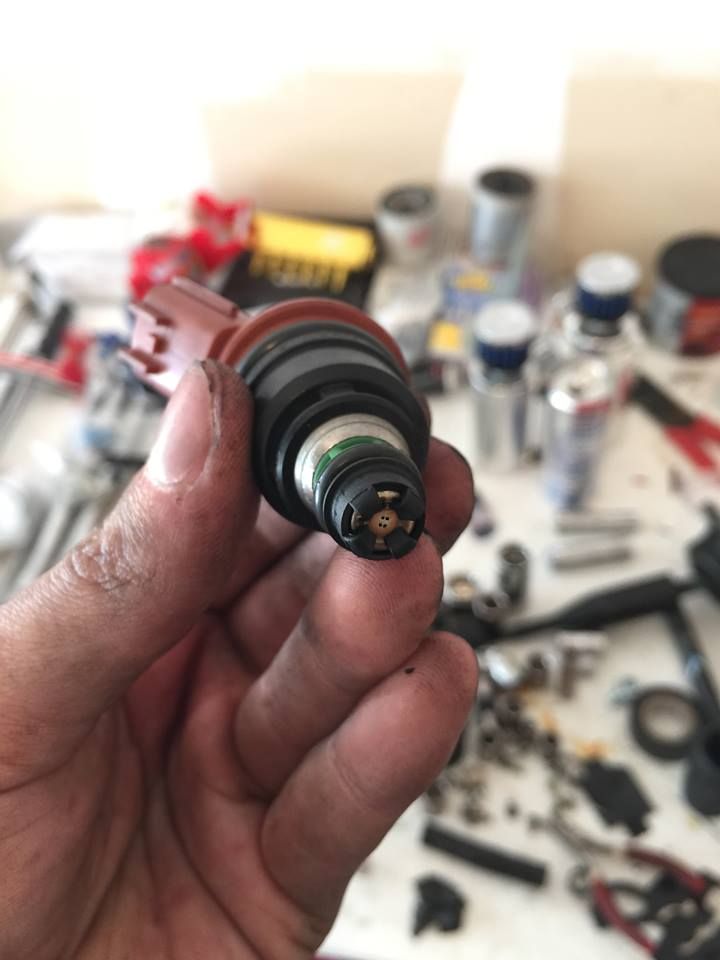 Threw on my painted fuel rail and inserted the injectors 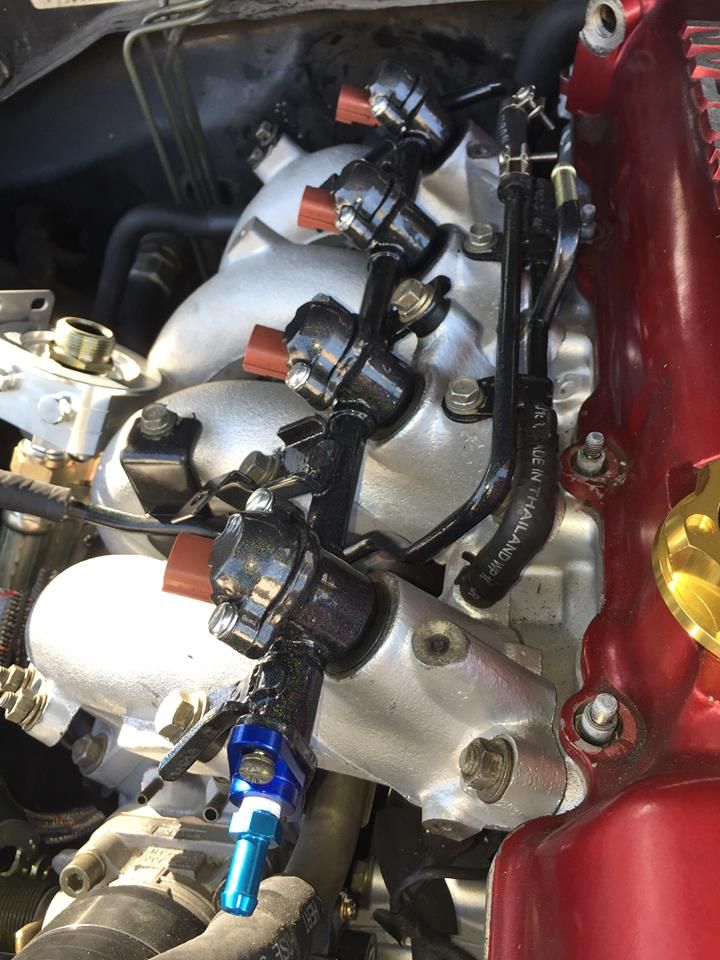 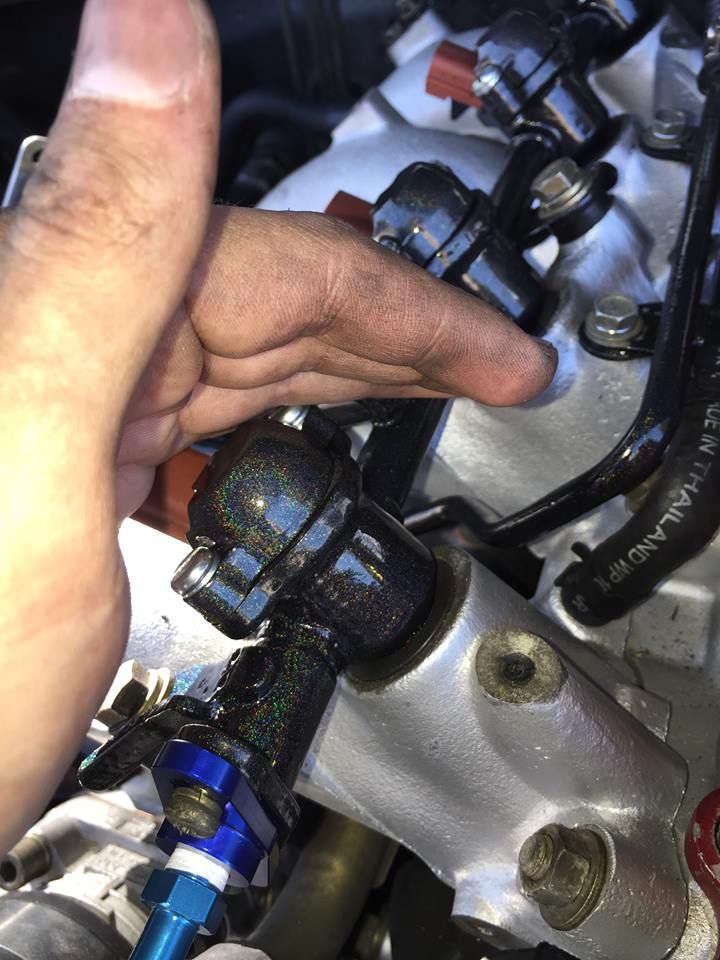 Found a powdercoater that is actually open on the weekends; looking to drop off my valve cover next weekend hopefully. Its on the pricey side though, $150 for a single color and keeping the lettering aluminum. Anyways, heres one last "before" picture  I ran my heater hoses.... 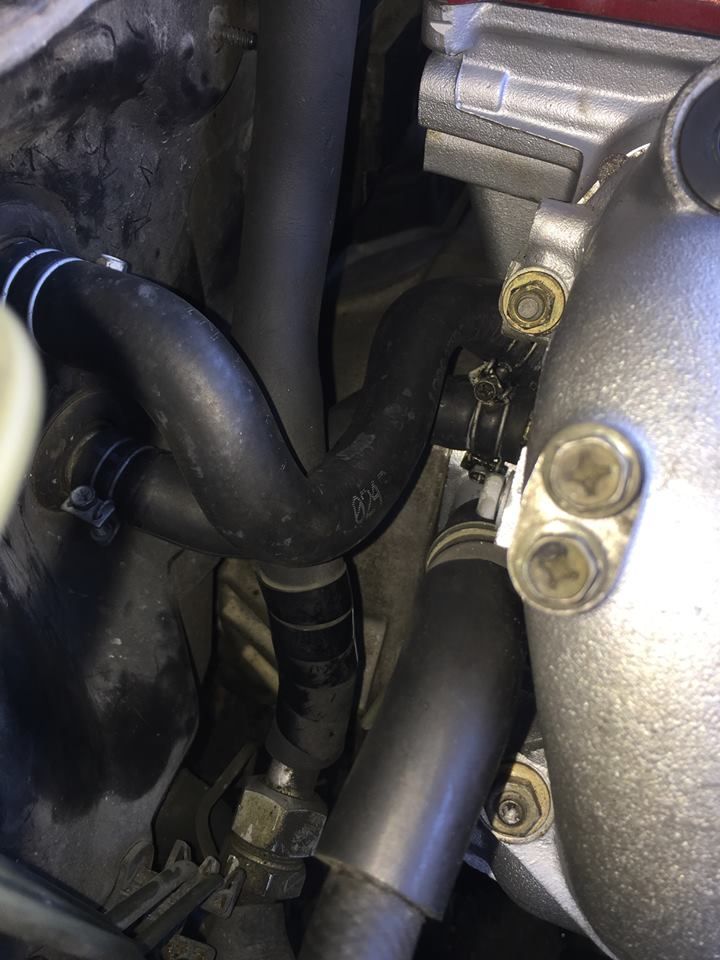 I ditched that water cock / control valve at first. After getting back home and doing some reading, it seems like I might need to keep it (this is a 95) if I want my heat functioning and want my car to get to normal operating temperatures? If anyone has any advice on this, please chime in! Thanks! |
|
|

|
|
|
#140 |
|
Zilvia Junkie
 Join Date: Oct 2012
Location: Irvine, CA
Age: 36
Posts: 490
Trader Rating: (5)
 Feedback Score: 5 reviews
|
Decided I wanted to keep the heater control valve. Couldnt find any pre-bent hoses that I think would work, so I picked up a 6ft length of 3/4" heater hose and some L pieces to make my own.
 Got my oil and tranny fluid 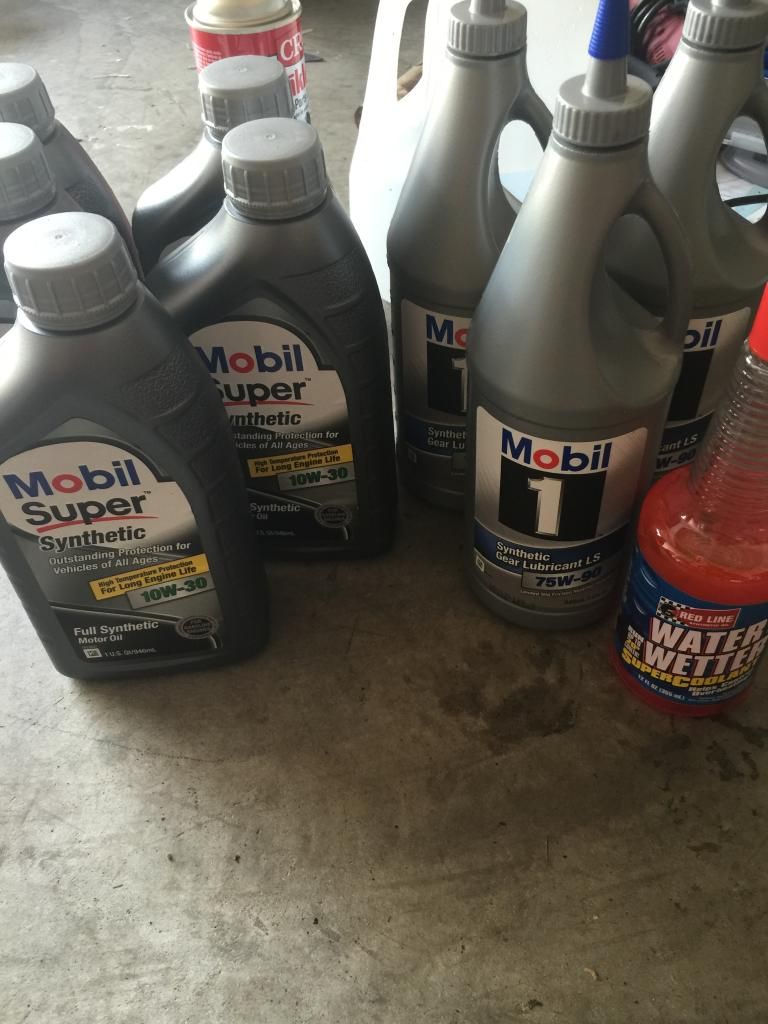 Valve cover fresh from the powder coater  With stuff on it 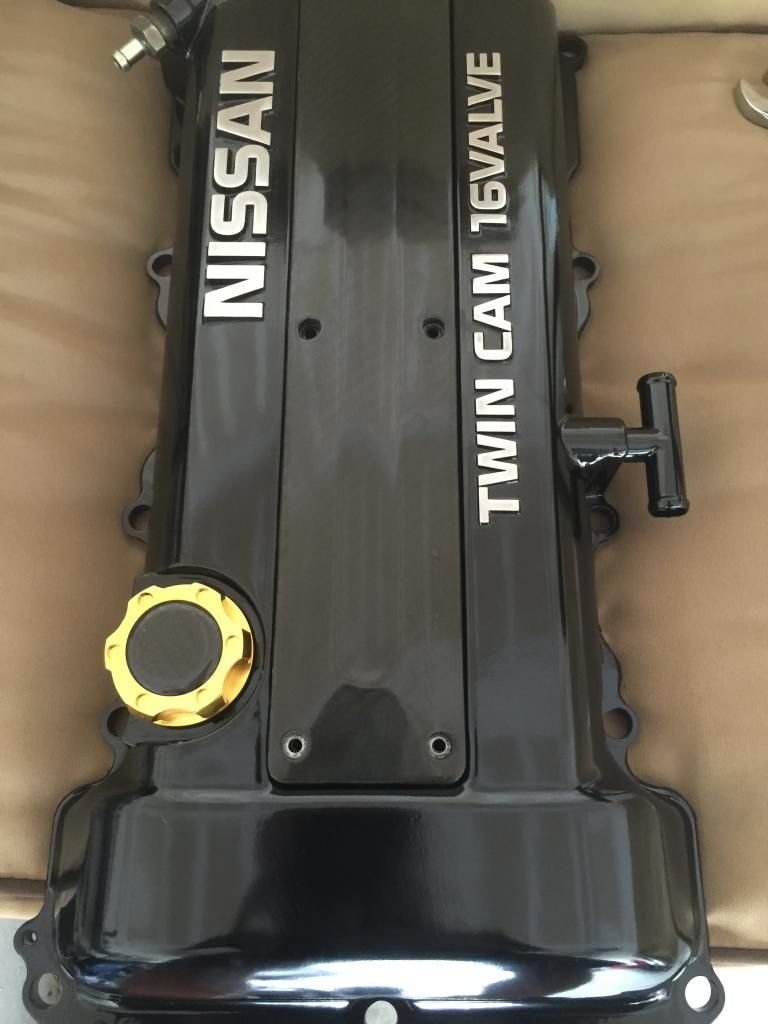 On the motor 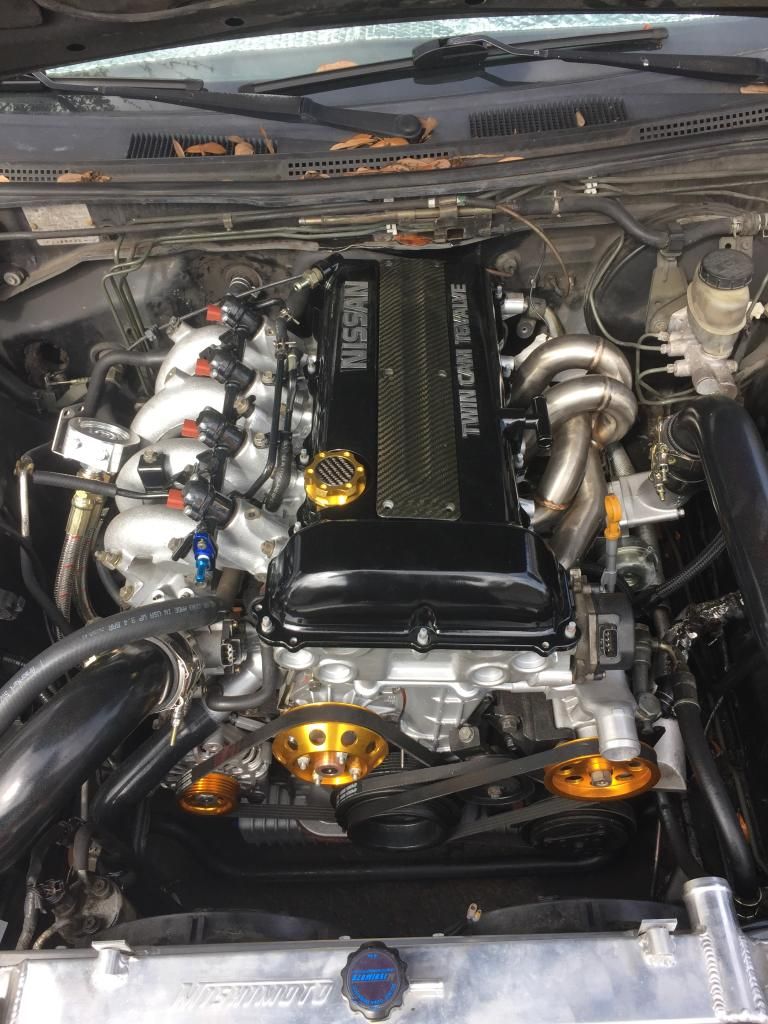 Did some little things. Mostly finished with mounting my battery box in the trunk, didnt grab pictures but I will when I wrap it up. Bent the bracket on the oil filter relocation kit and found a good spot to mount it on the strut tower. Need some smaller self tapping screws to finish that up. No pics yet. Got some hose clamps for some lines...the one on the cold pipe is now clamped. Cut my radiator hose down to size and clamped both of them down. Again, no pics right now. Having troubles figuring out how to place the air intake pipe. It seems to be a very tight spot between the power steering reservoir line to the pump, and then the AC line (specifically the lo-port filling point). How in the world do people fit it in there? |
|
|

|
|
|
#141 |
|
Zilvia Member
 Join Date: May 2009
Location: San Jose, Ca
Age: 35
Posts: 211
Trader Rating: (2)
       Feedback Score: 2 reviews
|
Great build dude, brings back a lot of memories about my first SR swap. I also got my redtop from Jspec and it came with a blown t25..... maybe thats just there signature hahahahaha
|
|
|

|
|
|
#142 |
|
Zilvia Junkie
 Join Date: Oct 2012
Location: Irvine, CA
Age: 36
Posts: 490
Trader Rating: (5)
 Feedback Score: 5 reviews
|
Haha yeah, Im not sure that it was blown but the oil in the intake wasnt a good indicator. I rebuilt it with that gpopshop kit (first time doing that) and sold it. I never did hear from the buyer so I can only assume that it has been working. I would have liked to hear it running but oh well
 |
|
|

|
|
|
#143 |
|
Zilvia Junkie
 Join Date: Oct 2012
Location: Irvine, CA
Age: 36
Posts: 490
Trader Rating: (5)
 Feedback Score: 5 reviews
|
Looking forward to getting some things wrapped up tomorrow!
I did a small task tonight after dinner lol - swapping out for a new shifter bushing. I read a thread where some guy cracked like 2 or 3 of them trying to press it onto the shifter. They came up with a fix of heating up the bushing to expand it some. This worked for me. I pulled off the old bushing: 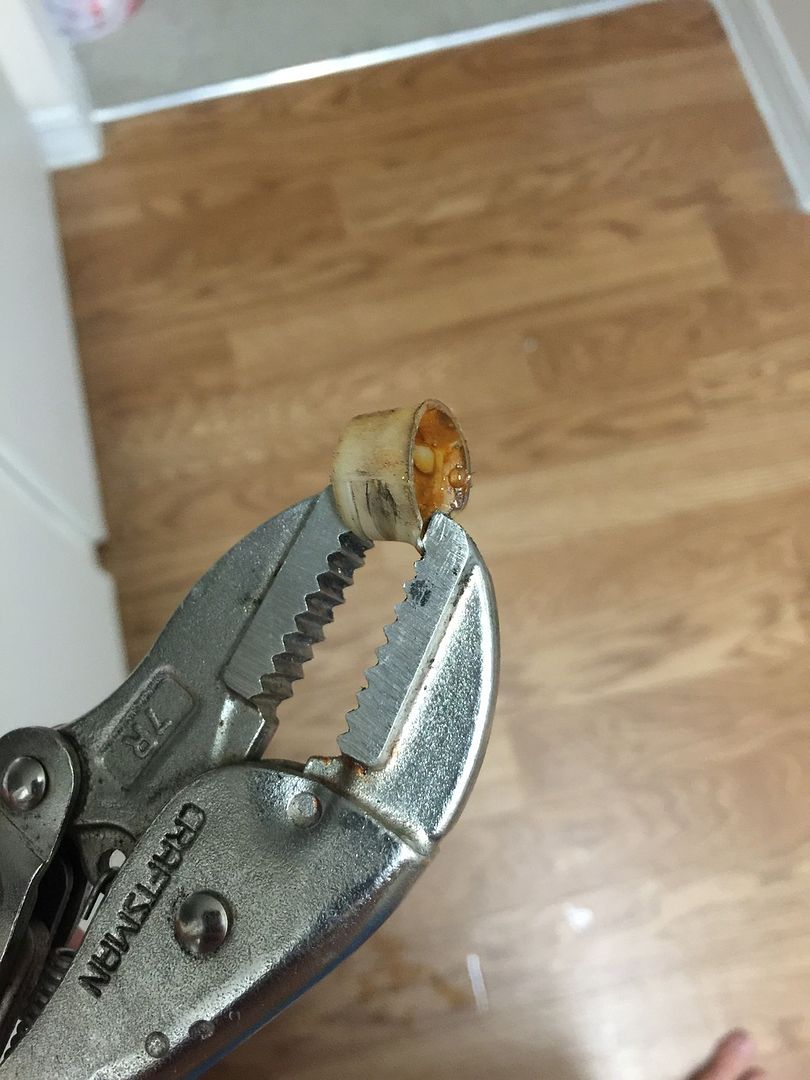 I have no idea what kind of lube was used but it was brown/rust colored and nasty looking. I squirted and smeared some engine assembly lube on:  And then slipped the bushing onto the tip, put it on my kitchen counter and pressed down until it popped on: 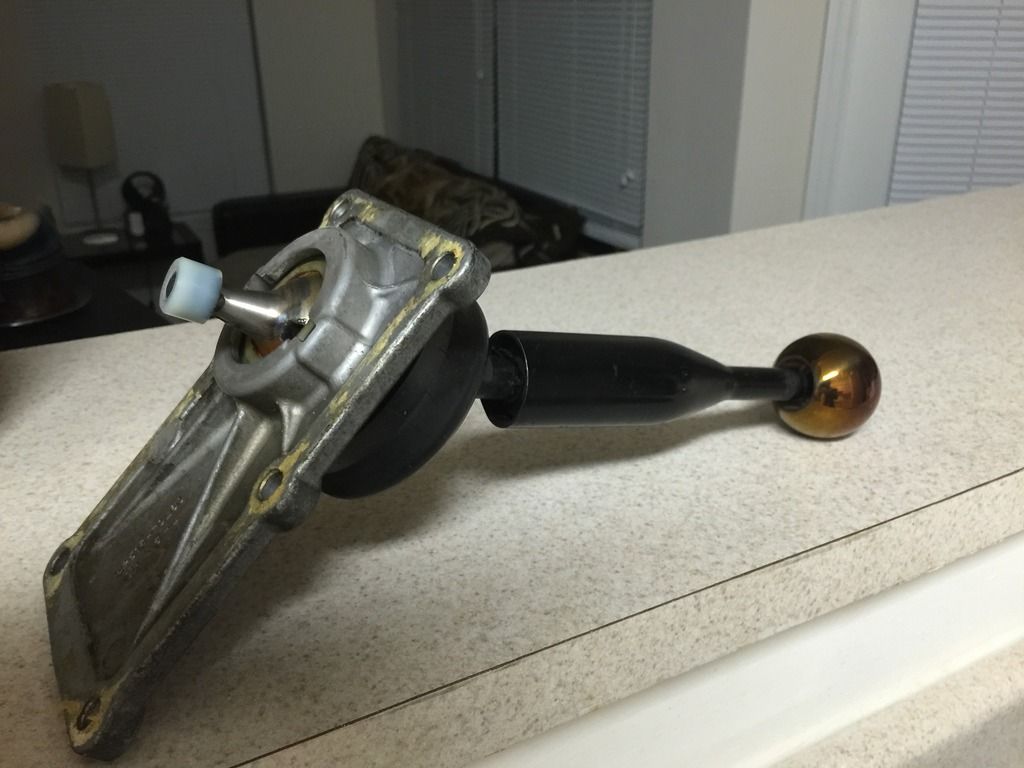 Now, after thinking about things...is it going to be a pain to bolt down the shifter plate with the transmission in the car? Specifically the two front bolts that are kind of far away? Any tips for this, maybe being under the car or bending the metal "lip" up to reach in there better? Thanks |
|
|

|
|
|
#145 |
|
Zilvia Junkie
 Join Date: Oct 2012
Location: Irvine, CA
Age: 36
Posts: 490
Trader Rating: (5)
 Feedback Score: 5 reviews
|
Yeah, its installed now. I didnt have the plate on when I installed it because I still had to throw on the new shifter bushing and I figured it would be easier to fill the fluid with the plate off rather than using the fill port
|
|
|

|
|
|
#146 |
|
Zilvia Junkie
 Join Date: Oct 2012
Location: Irvine, CA
Age: 36
Posts: 490
Trader Rating: (5)
 Feedback Score: 5 reviews
|
Finally actually sealed my valve cover:
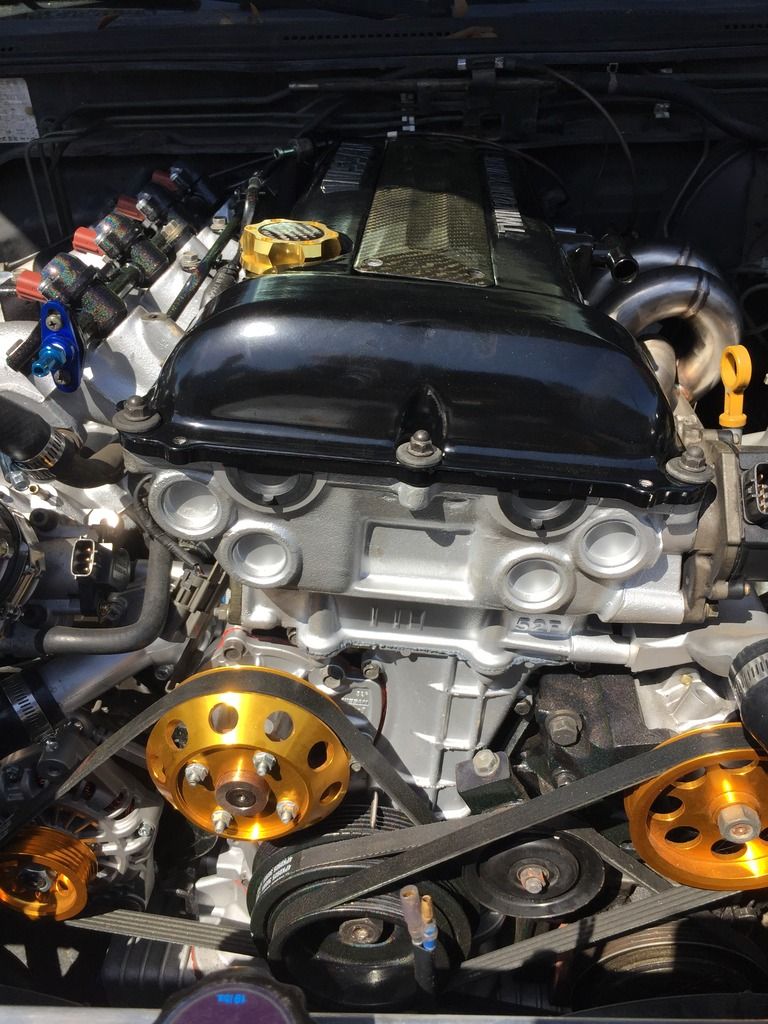 Drilled a hole and JB-Welded a barbed fitting onto my hotpipe for the line to run to the boost solenoid for the AEM Truboost: 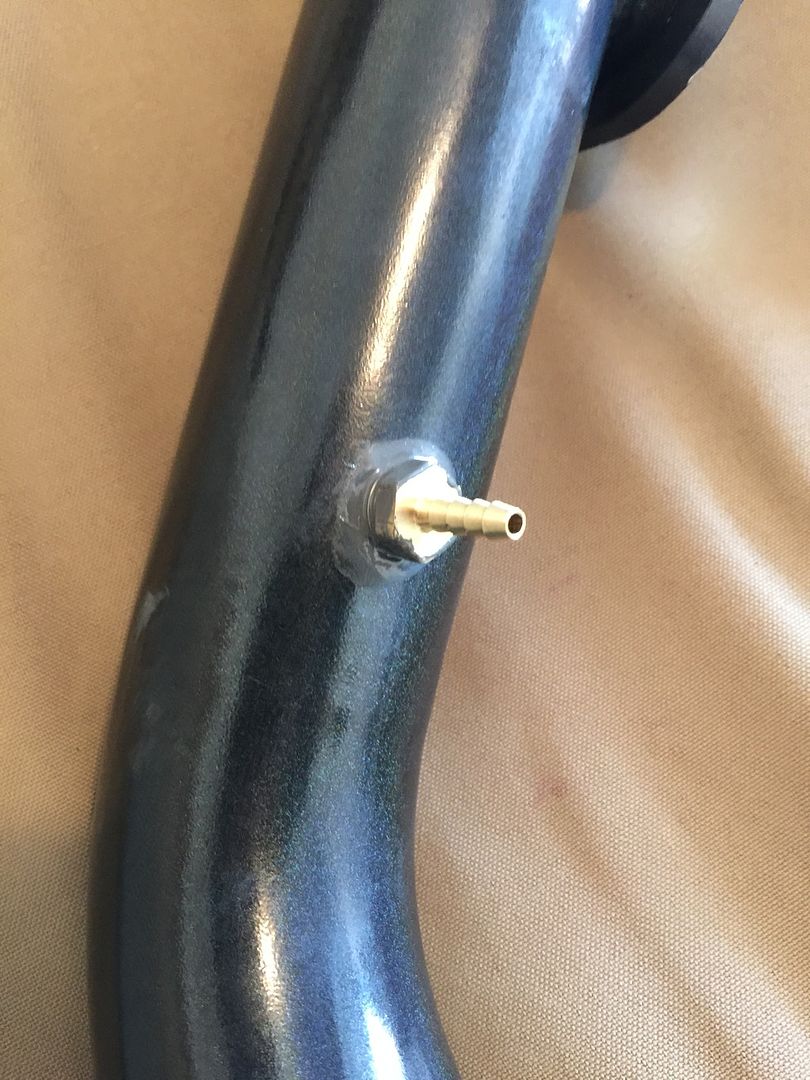 Couldnt get my intake pipe to fit with a 90 degree coupler. Picked up a 45 and cut about 3 inches off of the bottom and 2 inches off of the top. It finally fits: 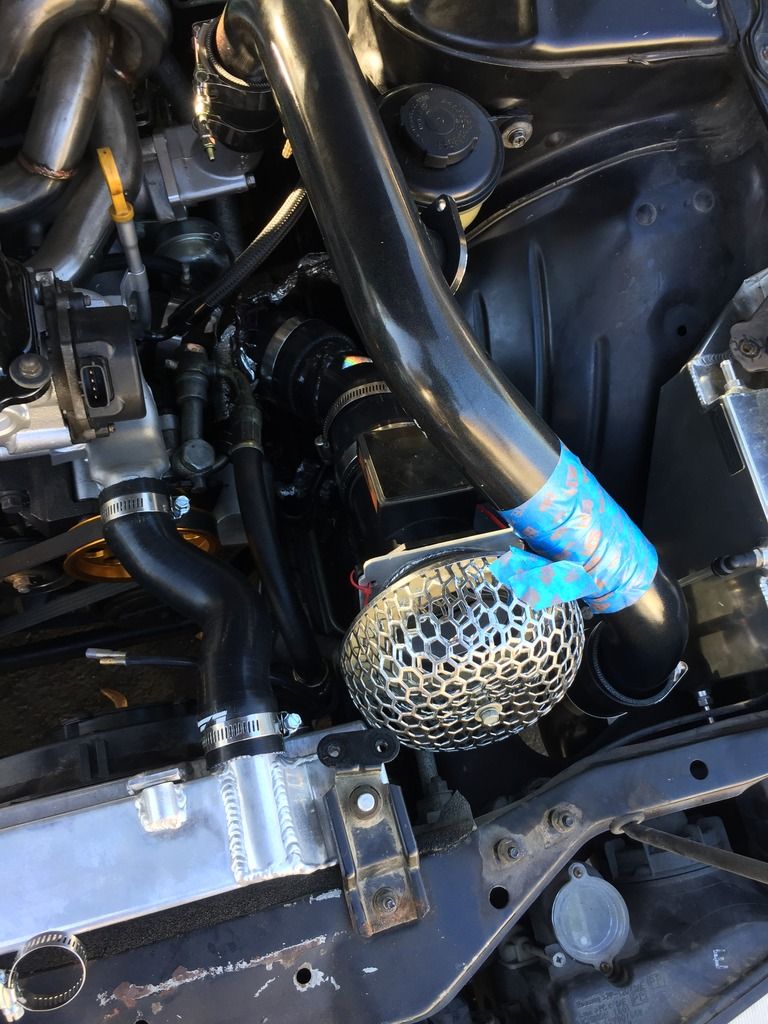 Picked up some correct sized self tapping screws and got the oil relocation kit secured: 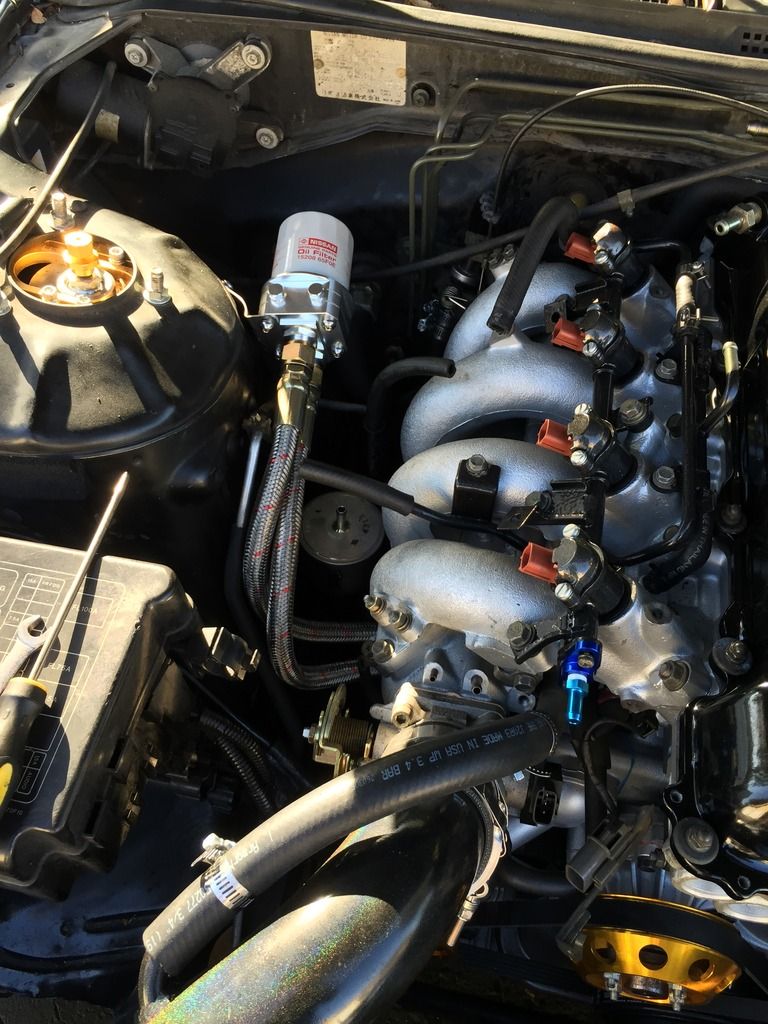 Just about finished with "building" my heater core hoses. Those L pipes are great but I had to cut the fat ends off of them to make them a little more compact. I should be finished tomorrow, my back and knees were just starting to hurt from all of the bending over my car. Looking to finish those, mount the FPR, finalize battery box setup, and look into some of the wiring tomorrow. Finally making some good progress  Stay tuned Stay tuned |
|
|

|
|
|
#147 |
|
Zilvia Junkie
 Join Date: Oct 2012
Location: Irvine, CA
Age: 36
Posts: 490
Trader Rating: (5)
 Feedback Score: 5 reviews
|
My crazy tube factory heater hoses. I ran out of clamps and need 4 more because of all of the L pipes
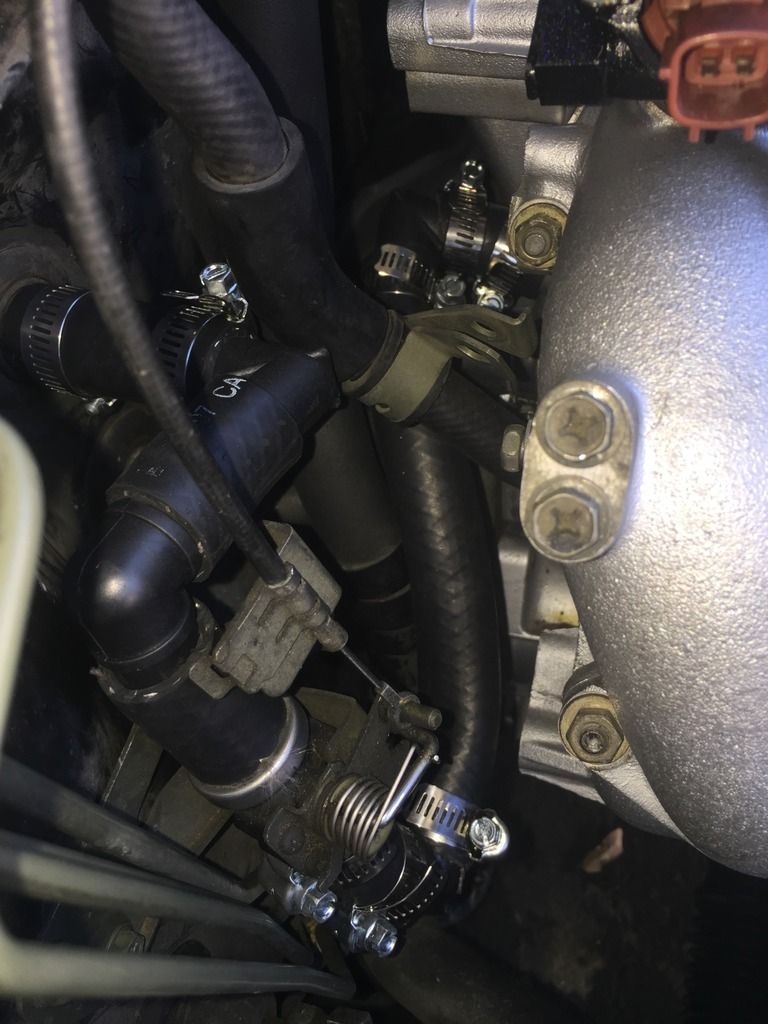 FPR mounted. I had a bolt in my firewall here and could not remember what it held before. Works great for this application 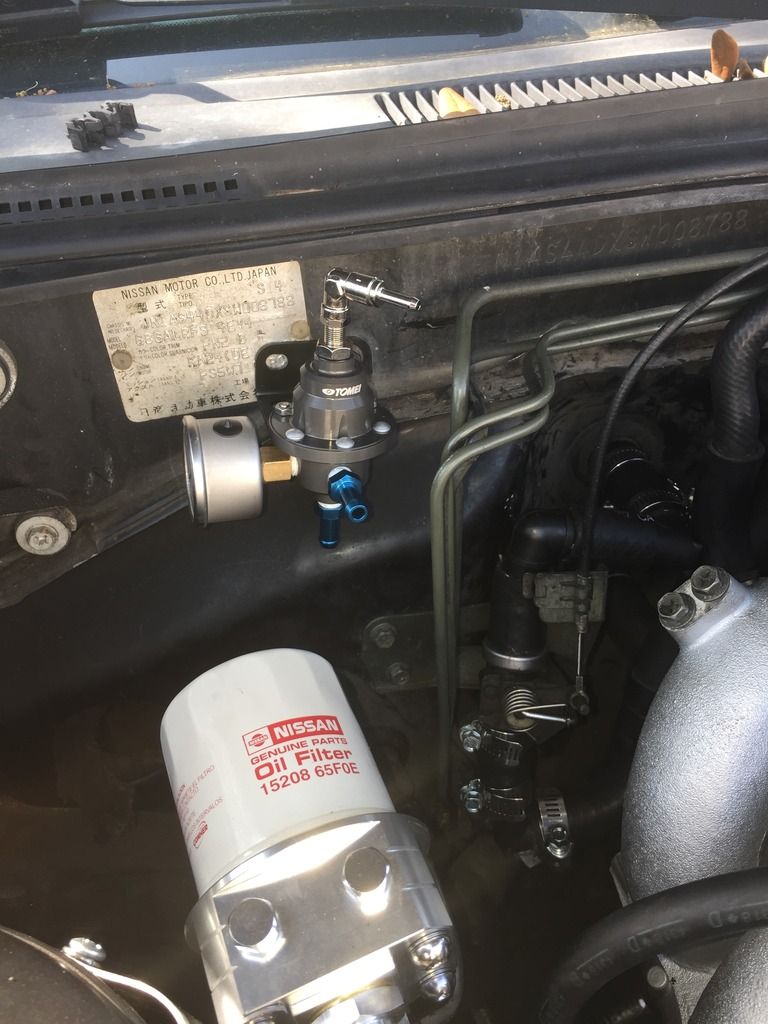 Put two holes in the P/S reservoir bracket and zip tied the aem truboost boost solenoid 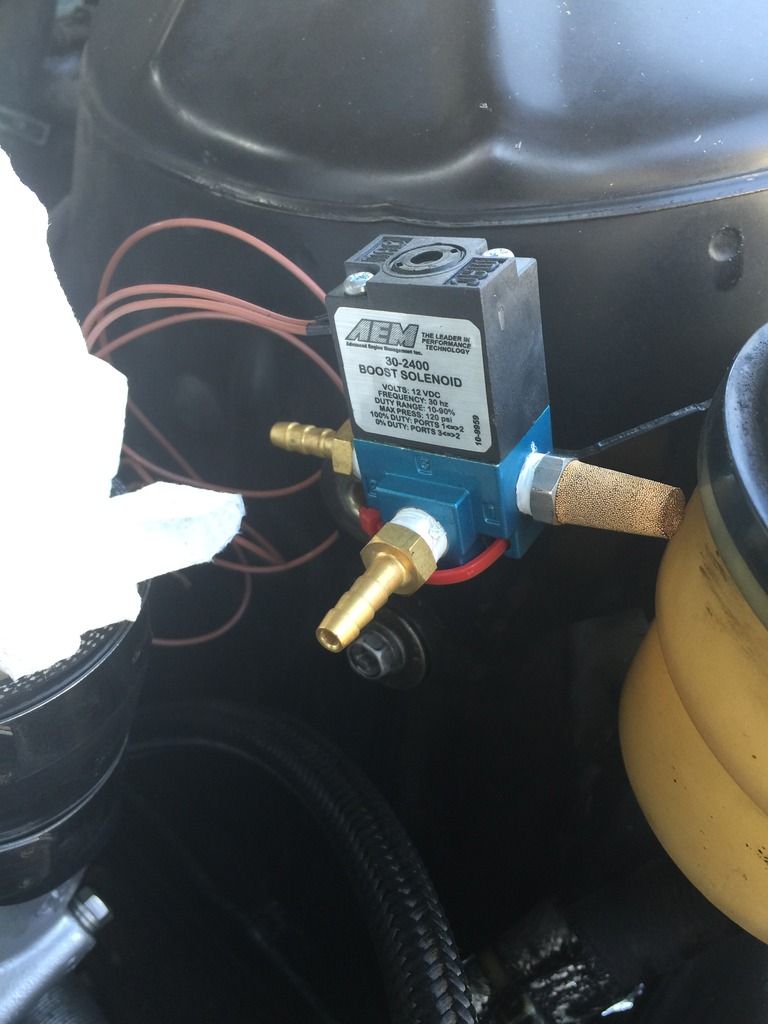 Ran a few lines here. Fuel line from rail to filter. The one on the PCV valve. Line to the FPR (cant see it but theres a T tucked in the hardlines to run across and into the cabin for the gauge. Boost line for BOV. I was going to do the lines for the solenoid but the barb on my wastegate is way larger than the line provided with the gauge. 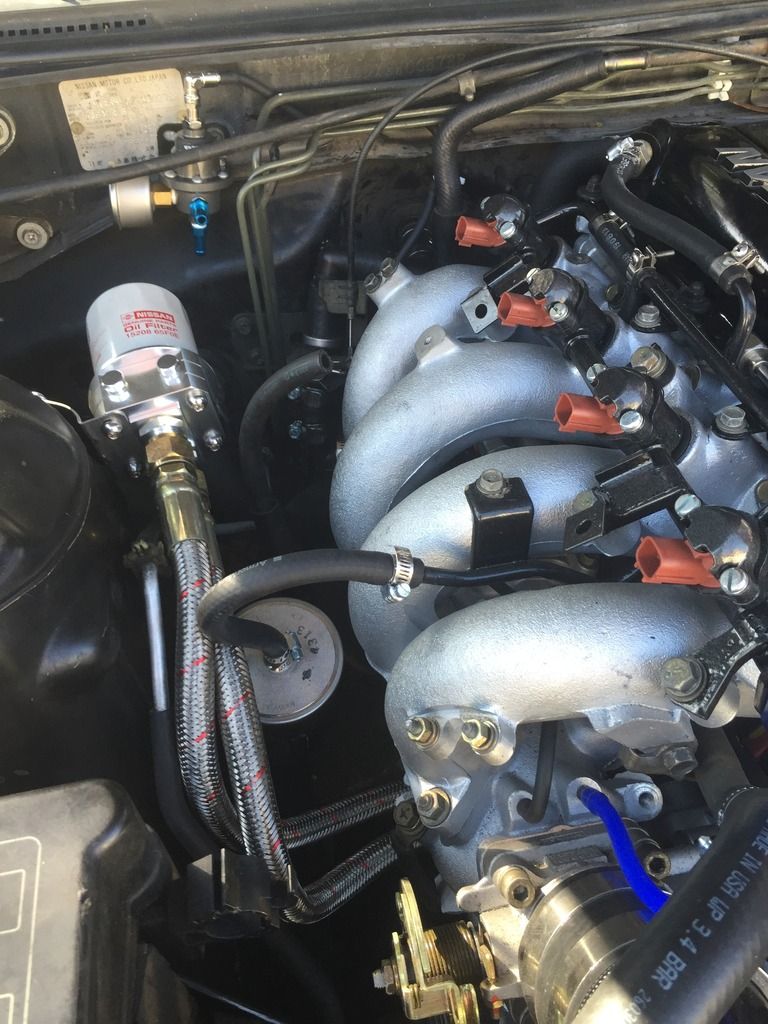 That's it for this weekend. Things are coming along, not a whole lot left |
|
|

|
|
|
#148 |
|
Zilvia Junkie
 Join Date: Oct 2012
Location: Irvine, CA
Age: 36
Posts: 490
Trader Rating: (5)
 Feedback Score: 5 reviews
|
I met some guys a few weeks ago who have been helping out a ton with wrapping up this build. Big shout out to Drift and Flash! This weekend we got the power cable ran through the car and into the bay. I also scored a great deal on a WS harness as I just wasn't having the time to complete my conversion job. Because of the awesome new harness we were able to get most things hooked up and a bunch of the little things knocked out. I didnt snap too many pictures but here's a couple
 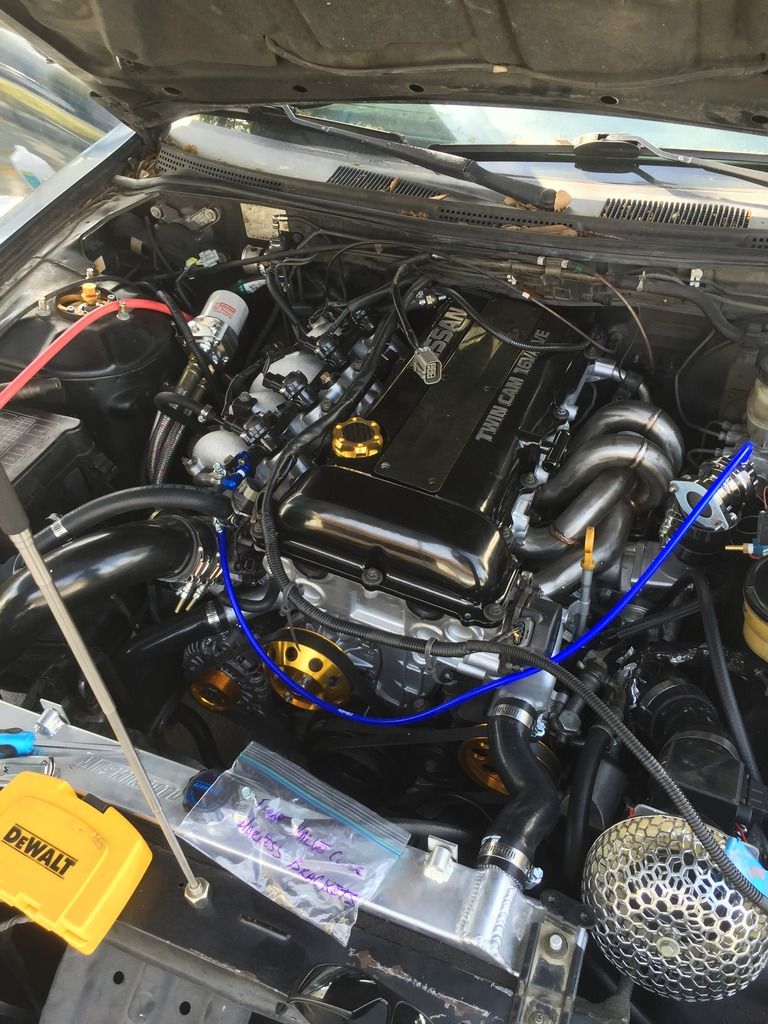 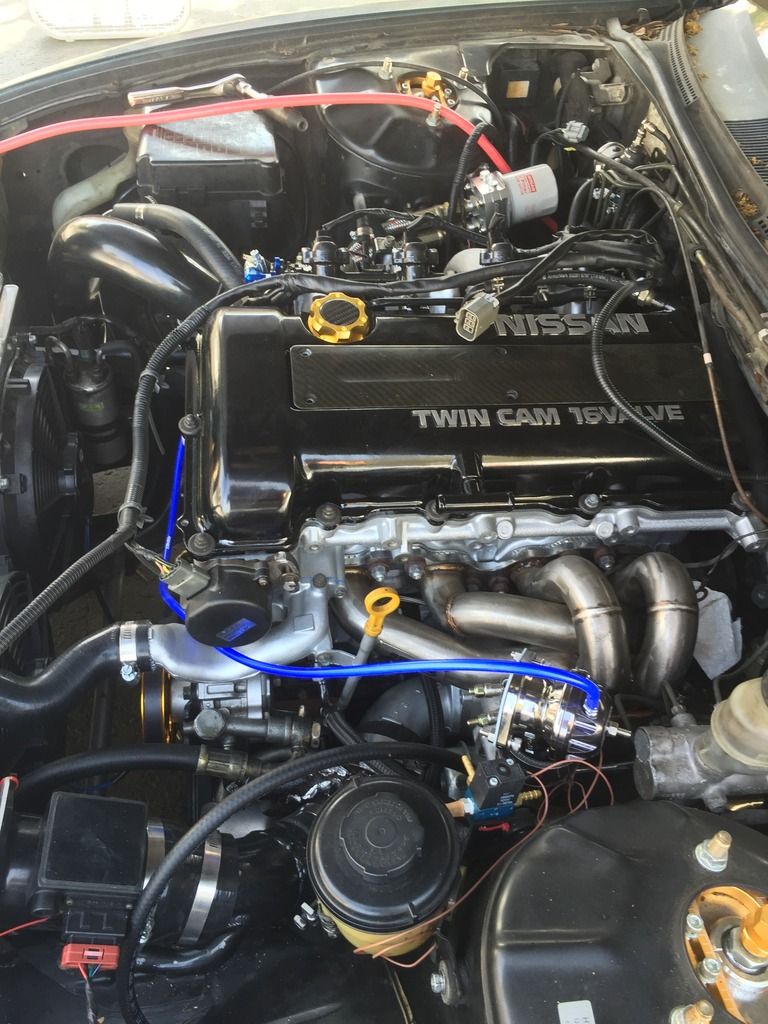 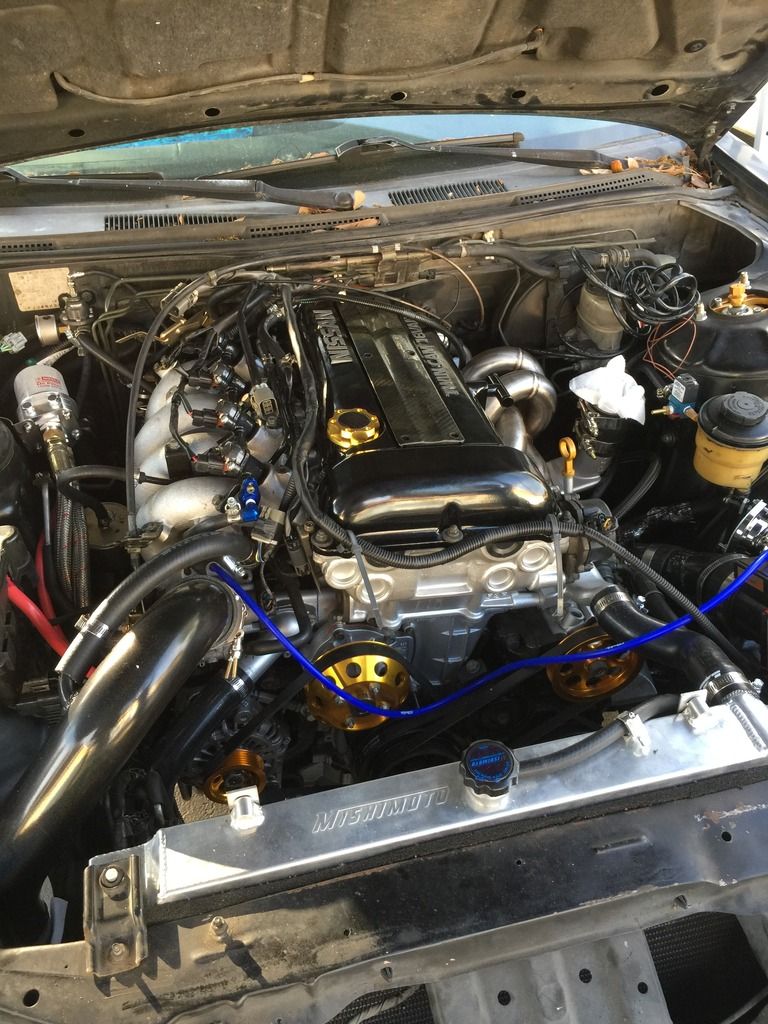 There's just a few small things left. Wiring for the e-fans and gauges, mounting the a catch can and those lines, putting filter element into air intake and tightening down those clamps, put hot pipe back on / bolt on BOV / run vac line from nipple to boost solenoid, fill up oil and coolant, prime everything and crank it. Hopefully it will start! |
|
|

|
|
|
#149 |
|
Zilvia Junkie
 Join Date: Oct 2012
Location: Irvine, CA
Age: 36
Posts: 490
Trader Rating: (5)
 Feedback Score: 5 reviews
|
Sorry my updates have been really slow. I have been stupid busy.
My friends helped me mostly wrap up my wiring. We got everything into the cabin for the UEGO/TruBOOST, just need to route it over the hump and up behind the wheel for the gauge pod. No pictures of this yet. The painless fan wiring kit that I had involved tapping somewhere for the huge temp sensor so I gave it to my buddy. I picked up a few relays and inline fuse holders and I'm just going to wire my fans to be always on. I know its not 100% ideal but that's the route that I'm going. 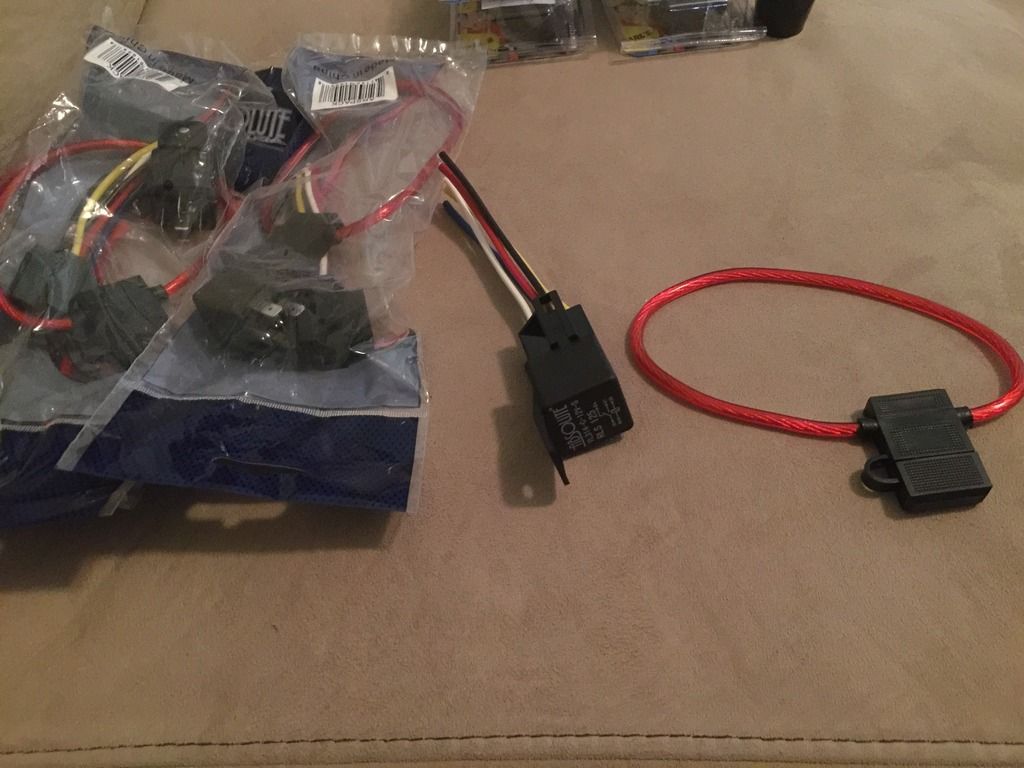 My brake hardlines are really close to my manifold and I'll probably need to adjust them slightly. I was worried that things will heat up too much so I picked up some of this heat tape. 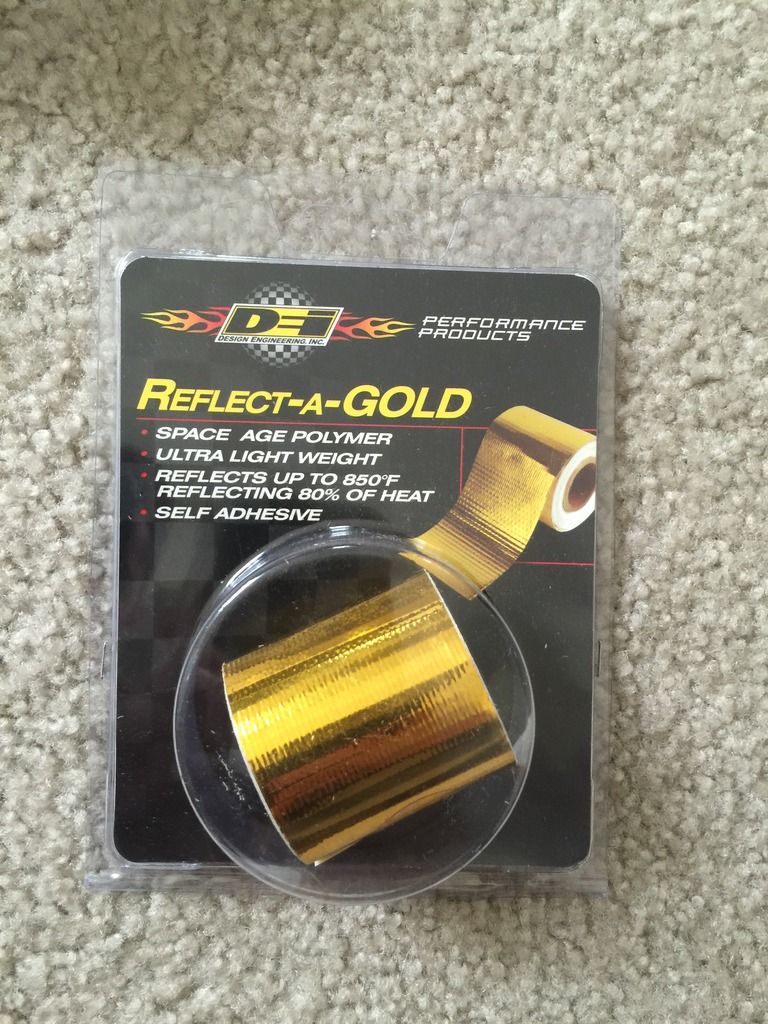 I also picked up that circuit sports heat shield 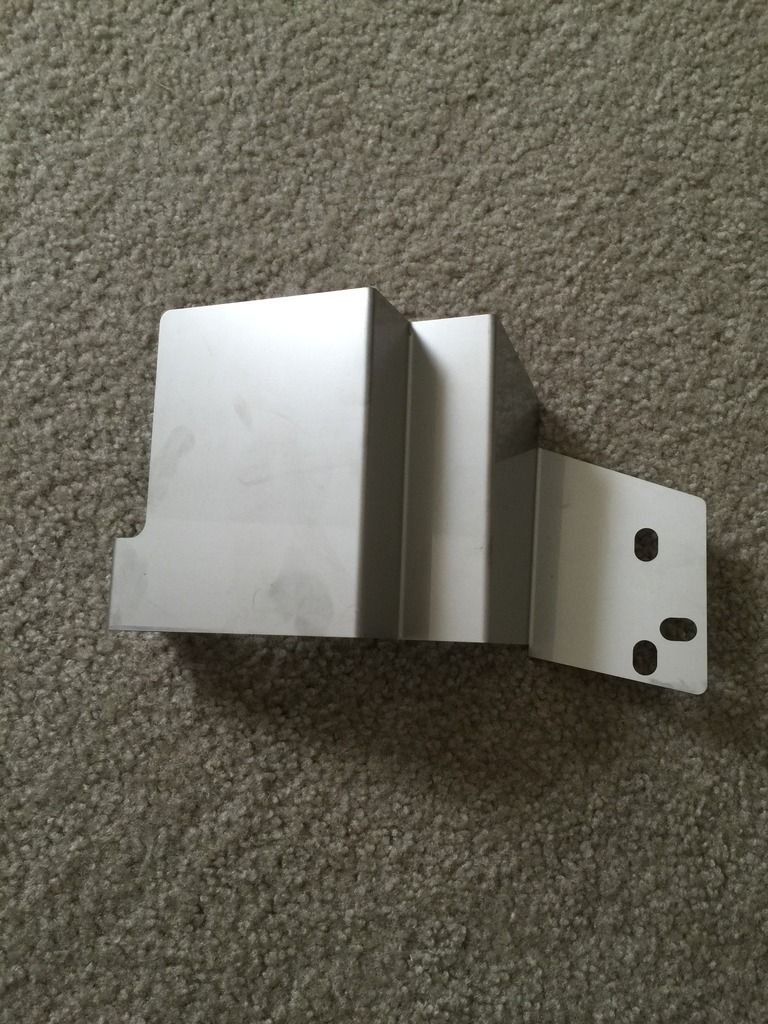 And started covering it with the tape 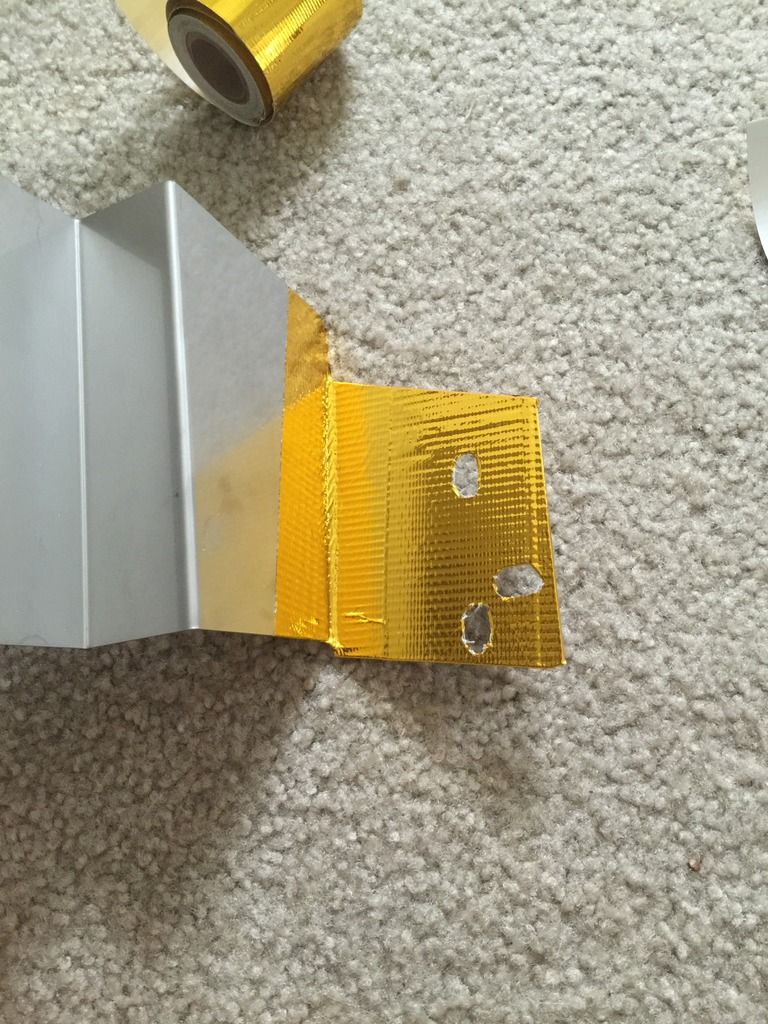 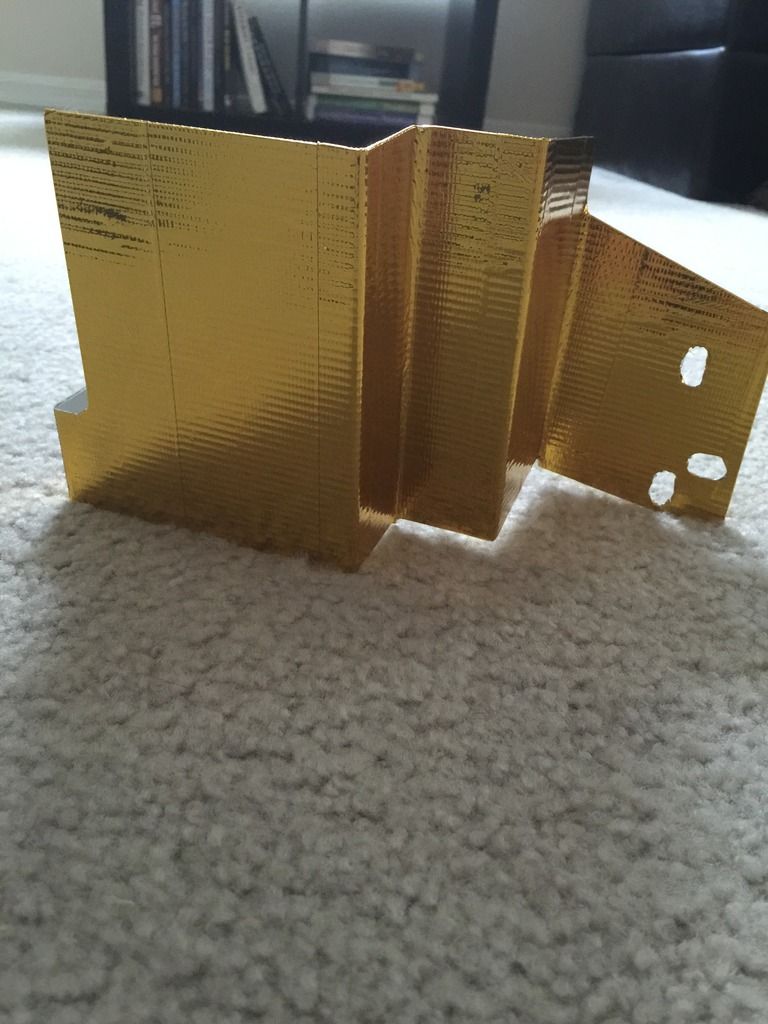 One of the last things left to do is mount my catch can. I didn't like the clear "fish tank" hoses that came with it, so I picked up some black wire loom stuff to put over them. It didn't look too bad but after thinking about everything, I wasn't sure how it would hold up to heat as well. So I picked up some -12 AN braided stainless line 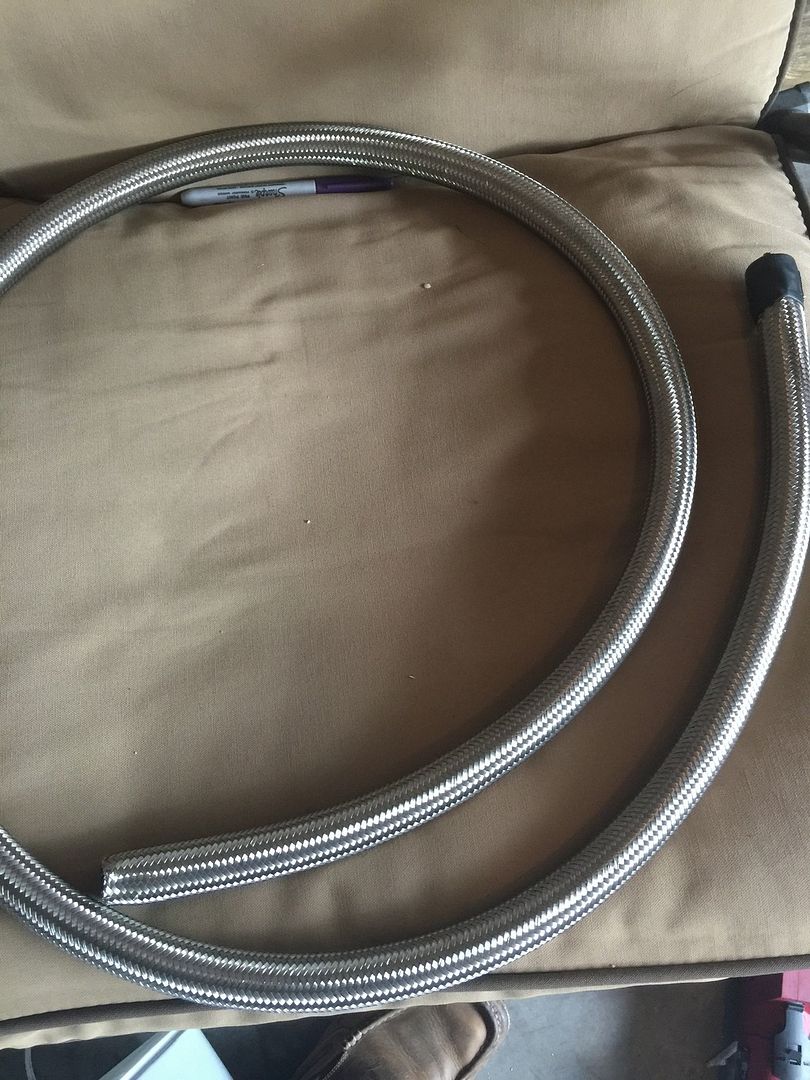 And some of these fancy Earl's worm clamps that look like AN fittings lol 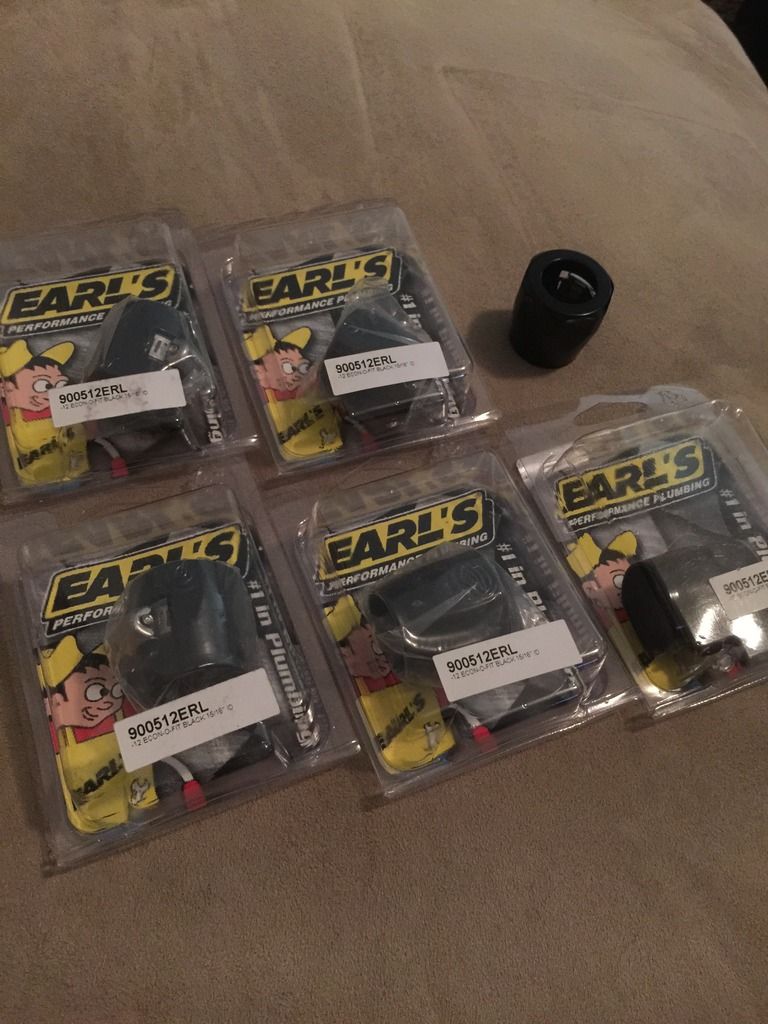 Tomorrow, as long as it doesnt rain, my friend is coming over and we should be able to knock out the gauge wiring and mount the catch can. If it all goes smoothly I may pour in the rest of my fluids and attempt to crank it.. I'll take a video if I do. |
|
|

|
|
|
#150 |
|
Zilvia Junkie
 Join Date: Oct 2012
Location: Irvine, CA
Age: 36
Posts: 490
Trader Rating: (5)
 Feedback Score: 5 reviews
|
Alright so my friend got my gauges wired up while I messed around in the engine bay:
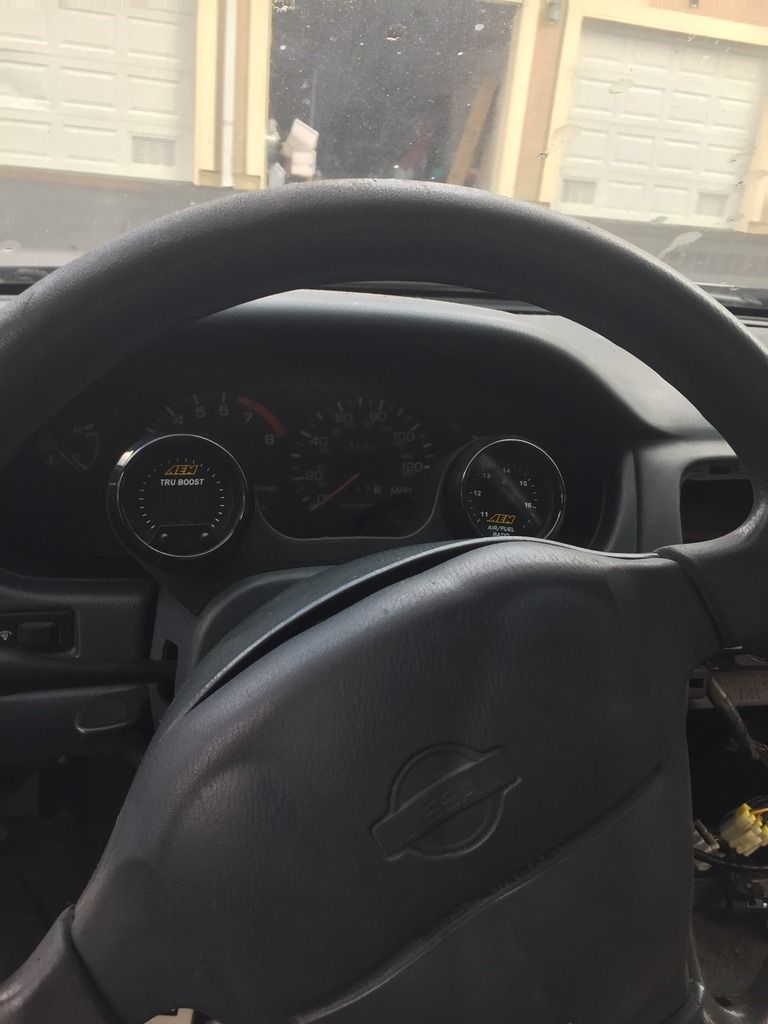 I got my heat shield mounted and the air filter secured. Chopped up some of that braided hose and got the valve cover T taken care of. My catch can isnt mounted yet, its just sitting there. Its going to be really hard to get a piece of that braided hose going from the can to the air intake bung just due to the angles. 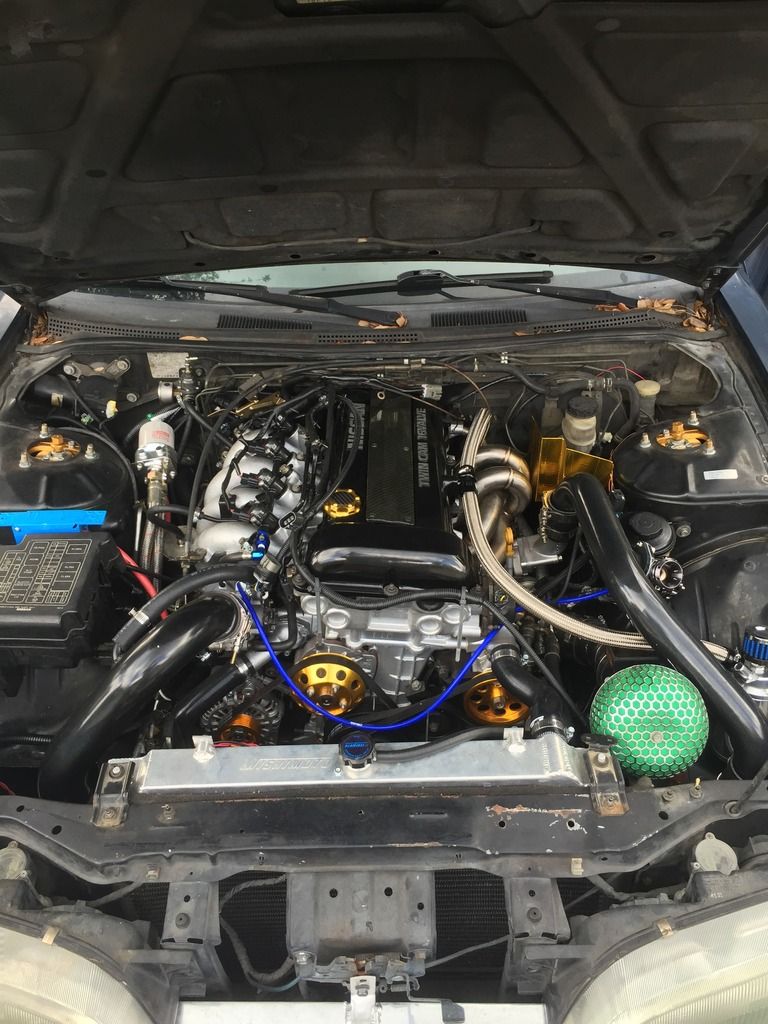 Didnt get to finish the fan wiring because we couldn't find my soldering iron so my friend took the relays with him to his house to work on. I keep thinking this, but maybe 1 more day! lol |
|
|

|
 |
| Bookmarks |
|
|