|
|||||||
| Tech Talk Technical Discussion About The Nissan 240SX and Nissan Z Cars |
 |
|
|
Thread Tools | Display Modes |
 01-08-2012, 05:39 PM
|
#1 |
|
Zilvia Junkie
 
Join Date: Mar 2010
Location: Goodyear AZ
Age: 38
Posts: 480
Trader Rating: (6)
 Feedback Score: 6 reviews
|
This is the DIY thread for paint and body work, if posting a "how to" please be very descriptive step by step with pictures.
How to paint your car inside a garage Step 1: after sanding your primer-ed car down with 320grit sand paper, prep the surface with wax and grease remover and tack clothes. Once your surface is clean mask any areas off that does not need paint with 18" masking paper and 3m green tape. Step 2: Turning your garage into a booth: the easiest cheapest way is clear plastic drop cloths. Cover your walls and floor with the plastic, using 4 or more fans and filters( same amount of fans as filters) place two fans with filters in front of them in the opening of the garage and two fans with filters before them on the exit door or window of the garage. This will have air being pushed in and sucked out.    Step 3: Once your booth is ready and your car is masked off, wipe the car down again with wax and grease remover and tack rag. Using a HVLP spray gun , spray your primer sealer onto the car in a even coat with a spray pattern 6-10 inches wide with a 50% overlap of each pass, keep your surface distance about 6-8 inches from the surface and move with a steady speed. Primer sealer seals off everything under it keeping blistering and wrinkles down and if gives a uniform color for the basecoat to go on to. Sealer does not need to be sanded unless you run it, once it has a dull appearance it is ready for base coat.   Step 4: Spray your base coat even coats with 50% overlap on each pass. base coat goes on medium wet , if spraying metallic s do not apply wet this will cause blotchy looking paint. To fix this, back your distance off a few inches.     Step 5 : Allow the base coat to air dry for atleast 30mins before moving to the next step( as it drys the base coat will have a flat color look). If your doing a two tone or stripes mask your design off with 1/4" masking tape and use masking paper to cover the areas not needing the new color and apply the base coat using the same steps as above.    Step 6: Your car is now ready for clear coat once the base coat has a flat look to it. Apply the clear coat using the same steps above, be careful not to go over the same area more than once on each coat of you will get runs. Apply 2-3 coats of clear to the car with about 20mins between each coat. Allow the car to sit for 8hrs before demasking.     Supplies: 320grit sand paper masking paper masking tape wax and grease remover tack cloths automotive towels base coat clear coat mixing cups strainers respirator air compressor plastic drop cloths filters and fans Last edited by buentellomma; 08-12-2012 at 04:42 AM.. |

|

|
| Sponsored Links |
|
01-08-2012, 06:03 PM
|
#3 | |
|
Zilvia Junkie
Join Date: Mar 2010
Location: Goodyear AZ
Age: 38
Posts: 480
Trader Rating: (6)
Feedback Score: 6 reviews
|
Quote:
|
|
|
|
|
|
01-08-2012, 06:15 PM
|
#4 |
|
Zilvia Addict
 
Join Date: Feb 2009
Location: Riverside
Age: 37
Posts: 647
Trader Rating: (8)
Feedback Score: 8 reviews
|
Awesome I was just gonna do a seach on what to do to prep ur car for primer and paint! U read my mind and your car came out amazing!
Sent from my BlackBerry 9810 using Tapatalk |
|
|
|
|
01-08-2012, 06:18 PM
|
#5 | |
|
Zilvia Junkie
Join Date: Mar 2010
Location: Goodyear AZ
Age: 38
Posts: 480
Trader Rating: (6)
Feedback Score: 6 reviews
|
Quote:
|
|
|
|
|
|
01-08-2012, 06:44 PM
|
#9 | |
|
Zilvia Junkie
Join Date: Mar 2010
Location: Goodyear AZ
Age: 38
Posts: 480
Trader Rating: (6)
Feedback Score: 6 reviews
|
Quote:
|
|
|
|
|
|
01-09-2012, 01:01 AM
|
#10 | |
|
Zilvia FREAK!
 
|
not bad. Most people have gotten away from shooting base over 320 now a days tho. Its usually finished off with like 4-600 but thats also due to the waterborne materials that are becoming more and more used. Looks like it turned out pretty good tho, I expected a lot less when I clicked on this thread, but overall Im slightly impressed. lol
__________________
Quote:
|
|
|
|
|
|
01-09-2012, 01:09 AM
|
#12 |
|
Nissanaholic!
 
Join Date: Nov 2004
Location: Alberta, Red Derp
Age: 43
Posts: 1,729
Trader Rating: (0)
 Feedback Score: 0 reviews
 |
You may want to mention that its good to let the paint 'cure' before driving the car too hard or too fast. A bumblebee will ruin a paintjob if its not cured enough. so, drive with ease for the first few hot sunny days.
Two really good books.  
__________________
KA-T  ORG-Function over Flush ORG-Function over Flush
|
|
|
|
|
01-09-2012, 03:09 AM
|
#14 | |
|
Zilvia Junkie
Join Date: Mar 2010
Location: Goodyear AZ
Age: 38
Posts: 480
Trader Rating: (6)
Feedback Score: 6 reviews
|
Quote:
|
|
|
|
|
|
01-09-2012, 03:12 AM
|
#16 | |
|
Zilvia Junkie
Join Date: Mar 2010
Location: Goodyear AZ
Age: 38
Posts: 480
Trader Rating: (6)
Feedback Score: 6 reviews
|
Quote:
 |
|
|
|
|
|
01-09-2012, 03:18 AM
|
#17 | |
|
Zilvia Junkie
Join Date: Mar 2010
Location: Goodyear AZ
Age: 38
Posts: 480
Trader Rating: (6)
Feedback Score: 6 reviews
|
Quote:
|
|
|
|
|
|
01-09-2012, 03:03 PM
|
#18 |
|
Zilvia Junkie
Join Date: Mar 2010
Location: Goodyear AZ
Age: 38
Posts: 480
Trader Rating: (6)
Feedback Score: 6 reviews
|
Remove and Replace a rusted section
For this post I am going to show how to properly remove a rusted section on a quarter panel and replace the section with new metal and prepare it for paint.( this is the way i do it and I was trained while I was in automotive collision school.. this is NOT the only way but just one of many ways this can be properly done) step 1: locate your damage area  step 2: remove the quarter glass and trim, then mask off the area you need to cut out , and then remove it using a air resip. saw. ( I used welding wire and two screw drivers for handles and I pushed the wire through the urathane window sealant and used a back and forth sawing motion )   step 3: making a template for the damaged area. use masking tape to make a transferable template on to a sheet of metal. make sure to mark where each bent is so it will be easier to bent into the shape needed. step4: after you insert is bent to shape, test fit it and then tack weld it to the area to make sure everything is good.   step5: continue welding in a random stitch welding pattern until all the welding is complete.( make sure to take your time and only do one stitch weld at a time or you will over heat the panel and cause it to warp. automotive metal is super thin be careful and take your time) you may have to take a body hammer and shape it more during this step. I had to beat the crap out of this to fit good.  step6: take a grinder and smooth out the welds to prepare for bodyfiller( aka not bondo... bondo is a brand not a product)    step 7: remove the paint around the area for a thin application of fiberglass kitty hair body filler( this is to add some strength and prevent corrosion to the welded area... this is what i like to do, it can be done with or without this. Make sure its thin, this stuff gets very very hard and is difficult to sand)  step8: sand the fiberglass filler, find your high and low spots and take the paint layers out more if needed.( highs will be metal showing in or right outside your filler area)  step9: if you have high spots use a body hammer and lightly tap them down step10: apply the body filler to the area   step11: sand down the filler and shape the body line, use 45 degree downward or upward sanding motion with a block. the end should look like a cross hatching pattern in the filler. you can use 36 grit to knock down the filler but then 80grit is used to shape it and remove the 36grit scratches. after shaping and sanding with 80 grit, use 180 grit to final finish the surface for primer. 36 grit, 80 grit, 180grit is all you need to get your filler area ready for primer.    step12: prep the surrounding painted area that was 180grit sanded with 320grit to final prep for primer . be sure to slightly go over the filler area as well. |
|
|
|
|
01-09-2012, 03:05 PM
|
#19 |
|
Zilvia Junkie
Join Date: Mar 2010
Location: Goodyear AZ
Age: 38
Posts: 480
Trader Rating: (6)
Feedback Score: 6 reviews
|
How to mold or repair plastic bumpers:
this is how i mold / repair plastic bumpers and or parts step 1: identify the area needing molding or repairing  step 2: prep the area with 80grit and apply a 2 part epoxy adhesive designed for plastic repair( fusor is what i like to use, 3m is good also) in this case i had a filler piece to work with, you may also use other bumper pieces to make your own. trim and fit the insert and apply the epoxy to the part and the bumper, clamp it down and allow to cure 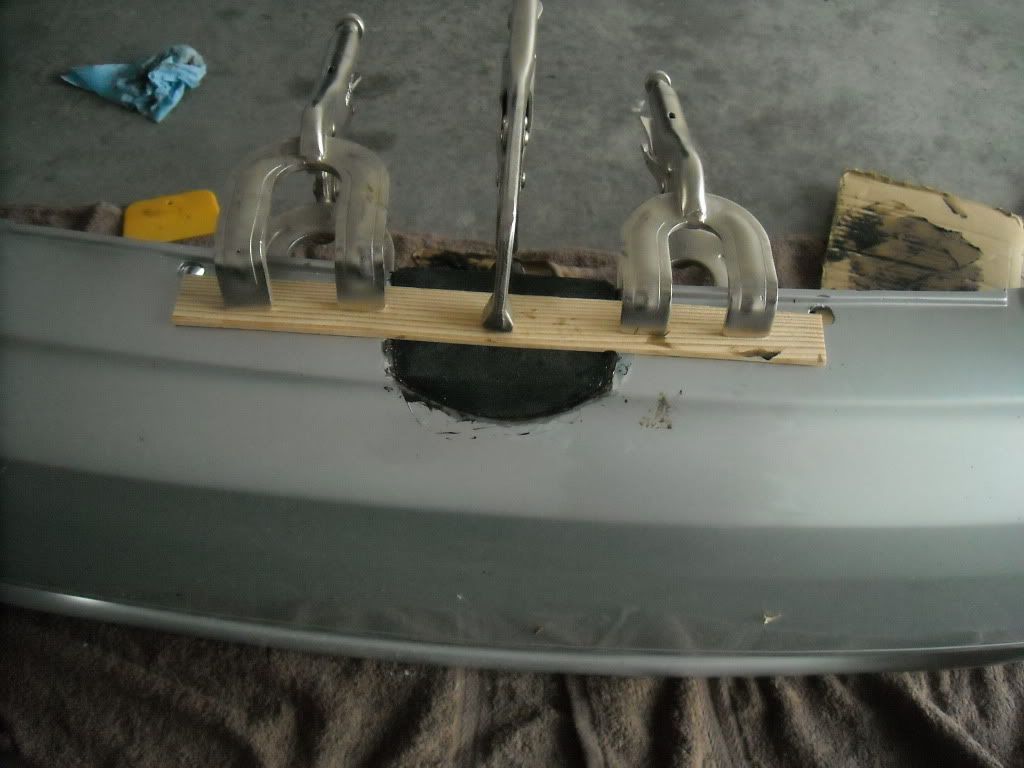  step 3: once the epoxy is cured, remove clamping hardware and sand the extra epoxy with 180 grit, then apply a light coat of body filler to obtain a smooth surface.   step 4: sand the filler to shape the body lines and fill any small voids, use 80grit sparingly it will cause the outside plastic to rough up. use 180grit and 320grit to sand using 45 degree angles creating a cross hatching look. prep the area outside the repair with 320grit and mask off for primer. ( be sure to reverse mask, apply the tape and paper away from the repair and then flip it over, giving it a round surface for the overspray primer to go under not leaving a hardline)   step 5: demask and allow the primer to cure  |
|
|
|
|
01-09-2012, 03:07 PM
|
#20 |
|
Zilvia Junkie
Join Date: Mar 2010
Location: Goodyear AZ
Age: 38
Posts: 480
Trader Rating: (6)
Feedback Score: 6 reviews
|
How to fill in side marker lights
step 1: prep the area to be filled, remove all coating to bare metal within an inch or so of the area to be filled. make a filler plate out of thin steel( same thickness of the original area being worked) test fit the filler plate. Using a mig welder , tack weld it into place to verify fitment .  step 2: after verifying fitment , patiently weld it into place using random stitch welding and allowing the panel to cool down between welds so as not to over heat and warp it.  step3: once welding is complete , use a grinder to smooth down the welds until they are even with the surface of the panel( be careful not to dig into the panel and damage the surface of the filler or the original metal)  step 4: once the filler welds are smooth , apply a thin coat of fiberglass body filler to the repair area( this stuff gets very hard very quick so do not cake it on unless you fill like sanding a while)  step 5: sand the fiberglass body filler using 80 grit sand paper until smooth with the surface, using 180grit sandpaper feather out each layer around the repair leaving 1/4" of each layer in a step condition, clean off the fiberglass dust and apply bodyfiller to the area  step 6: sand the body filler smooth using 80 grit in a 45 degree angle upward and downward until smooth with the surface, repeat this step using 180grit to remove the 80grit sand scratches. prep the surrounding area around the repair with 320grit for application of primer.(note: the pictures below the whole car is being striped down due to having too many previous paint jobs. the area does not need to be that large just to apply primer)   |
|
|
|
|
01-09-2012, 03:08 PM
|
#21 |
|
Zilvia Junkie
Join Date: Mar 2010
Location: Goodyear AZ
Age: 38
Posts: 480
Trader Rating: (6)
Feedback Score: 6 reviews
|
How to restore/repair a bodyline
This is one way I like to do this: step 1: after repairing the damaged area use masking tape to mark the bodyline needing to be reformed  step 2: after masking the line off apply a light coat of body filler on the area making sure you apply it all the way to the masking tape( this will help create the edge of the line) remove the tape as the bodyfiller is curing  step 3: once the tape is removed you will notice the bodyfiller now has the shape of the edge of the tape, using 180grit sandpaper lightly sand and shape the bodyfiller to form the line. ( a hard sanding block can be used to sand the flat areas and if you dont have a soft block, a paint mixing stick can be used with sandpaper around it. the mixing stick will form to the surface area on curves)   |
|
|
|
|
01-09-2012, 03:10 PM
|
#22 |
|
Zilvia Junkie
Join Date: Mar 2010
Location: Goodyear AZ
Age: 38
Posts: 480
Trader Rating: (6)
Feedback Score: 6 reviews
|
How to two tone doors and door jams:
Step 1: Remove all door rubber seals, door strikers, door panels, window moldings etc.. anything that you dont want to have to mask off and risk having paint lines on. Step 2: Scuff sand the areas with 320grit sand paper, using wax and grease remover, clean the jams using wet cloth dry cloth method. Use a tack rag to remove any dust left behind before you begin the masking process. Step 3: Mask off the door opening and the inside of the door where the door panel goes, this will prevent paint from entering onto the glass and latch. Step 4: Tack rag again before spraying primer sealer, apply a thin even coat of sealer to the entire areas being painted. Sealer does not get sanded unless you get a run or a lot of trash on the surface. Step 5: Spray the top base coat to the areas that need that color.  Step 6: Allow the base coat to air dry for 20-30 mins then using 1/4" masking tape lay out the two tone lines. apply 3/4" masking tape to the 1/4" line and then apply 18" masking paper to protect the first basecoat.      Step 7: apply the other base coat to the masked off areas. Make sure to spray all the hard to get areas first so not to touch wet paint when trying to spray them.     Step 8: demask the two tone masking and apply the clear coat. once the clear has cured for 30mins or so remove the masking, be sure not to let the doors shut or touch anything until the paint has cured for atleast 8hours   |
|
|
|
|
01-09-2012, 03:11 PM
|
#23 |
|
Zilvia Junkie
Join Date: Mar 2010
Location: Goodyear AZ
Age: 38
Posts: 480
Trader Rating: (6)
Feedback Score: 6 reviews
|
How to tint head lights/ tail lights
step1: prep the part being painted with 1000grit or finer using either wet or dry sand paper. mask off the areas that do not need paint.  step 2: mix up clear coat ( professional automotive clear) with a black base coat. do a few test sprays on another part to get the tint right( add more basecoat a little at a time). once your tint is right, apply the mixture to the part via a hvlp spray gun.   step 3: clean your hvlp and allow the tinted clear to sit on the part for 15-20 mins, during this time mix up some un tinted clear coat and spray it onto the tinted surface.  step 4: carefully demask the part and allow it to cure for the recommended cure time   note: the more coats of the tinted clear the darker the part will get, spray it lightly so not to get a run. enjoy!! |
|
|
|
|
01-09-2012, 03:11 PM
|
#24 |
|
Nissanaholic!

|
What size compressor are you using? I have a 26 gal 4hp. I did my bumper in primer i need to buy the paint i need. Can't wait to add my own tips.
Before; Sand the ugly ass spray bullshit paint off with 80 grit. 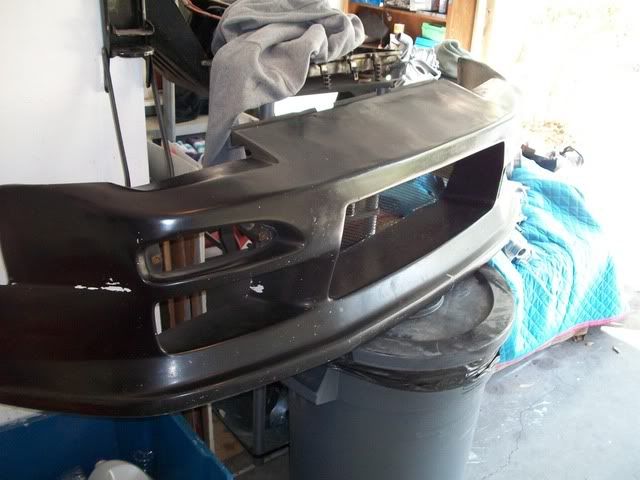 Apply body filler to trashed spots, in my case one corner was bent up from the way it was mounted. Since it's fiberglass and is going to get trashed again i decided to just blend the area using 80/180 on a long sanding block and some bondo as there is no crack/flex in the area. The long sanding block can conform slightly to large open surfaces, like the nose section of the bumper, which was also filled. 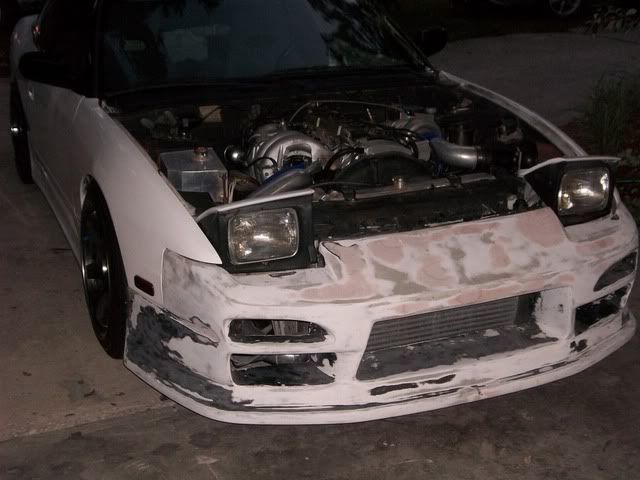 For the crack on the chin of the bumper, sand the area surrounding with 80/180 grit. I chose to dremel out the middle area of the crack for a good fill in the middle. Tape the crack from the front and fill behind with glass/resin 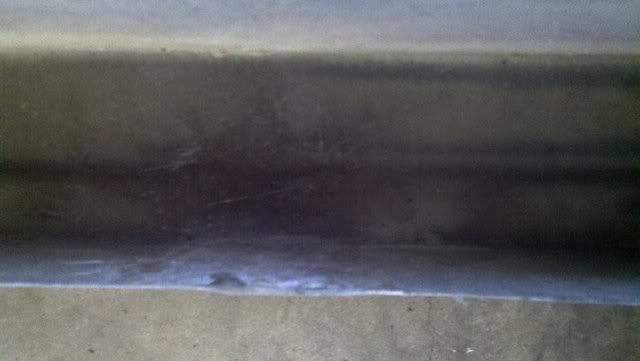 Any other areas that are cracked or weak can be strengthened with some glass/resin. 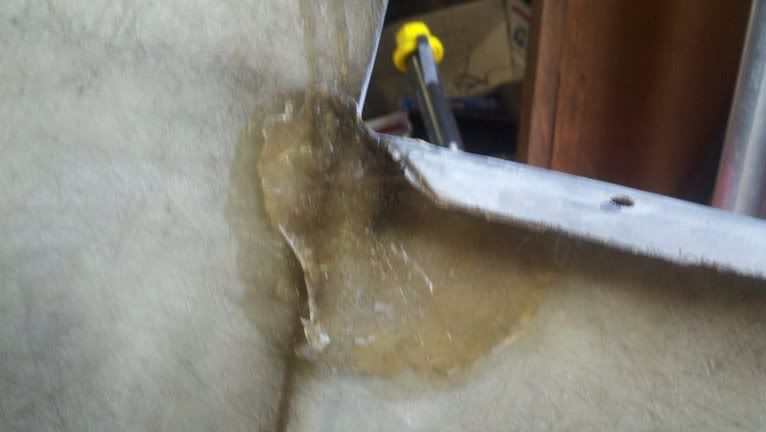 Sorry i don't have a picture right before paint with all the paint stripped/bondo smoothed. Clean the piece off with soap and water, let dry then de-grease and tac Use the HVLP gun with proper mix and 50% overlap or so (primer isn't that picky) Now you'll see where all the fucking pin-holes are. Shit always happens with fiberglass. Hit the little fuckers with some spot putty and 320 grit and they'll be gone in a jiffy. Spray a bit more primer and viola After 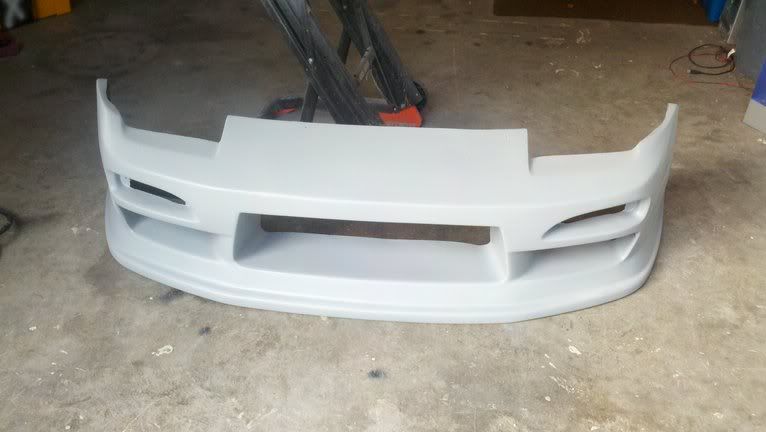 |
|
|
|
|
01-09-2012, 03:17 PM
|
#25 |
|
Zilvia Junkie
Join Date: Mar 2010
Location: Goodyear AZ
Age: 38
Posts: 480
Trader Rating: (6)
Feedback Score: 6 reviews
|
33 gal 1.5 hp craftsman is what i use........ so did you not read the first line? where is your step by step on what you did to the bumper? how is before and after pictures going to help anyone?
 |
|
|
|
|
01-09-2012, 03:19 PM
|
#26 | |
|
Nissanaholic!
|
Quote:
I'm currently using in-line desiccant water trap and ebay HVLP guns |
|
|
|
|
|
01-09-2012, 03:59 PM
|
#30 | |
|
Zilvia Junkie
Join Date: Mar 2010
Location: Goodyear AZ
Age: 38
Posts: 480
Trader Rating: (6)
Feedback Score: 6 reviews
|
Quote:
 PM me if you have any extra questions on painting or making a booth |
|
|
|
|
|
| Bookmarks |
|
|


 Linear Mode

