|
|||||||
| Builds (and builds only) Got a build thread? It goes here, build threads anywhere else on the forum will be locked and never moved. |
 |
|
|
Thread Tools | Display Modes |
 04-24-2016, 10:57 PM
|
#32 | |
|
Leaky Injector
 Join Date: Jan 2011
Location: Seattle
Age: 36
Posts: 124
Trader Rating: (2)
 Feedback Score: 2 reviews
|
Guys, sorry there have been no updates, a bunch of crazy shit happened at work and I was freaking out so I didn't touch the car and it just sat for about 6 months. Now things have calmed down and I am ready to get back to working on it! So here is an update.
I got my ass kicked by the tube front, measuring a 3 dimensional space is the most difficult thing I have ever done.. And only having a tig welder makes things pretty interesting when welding at very awkward angles.  This is the shot to the factory frame rails, mine are f'ed since the car has been in quite a few crashes. This was the most difficult part to weld and not blow through 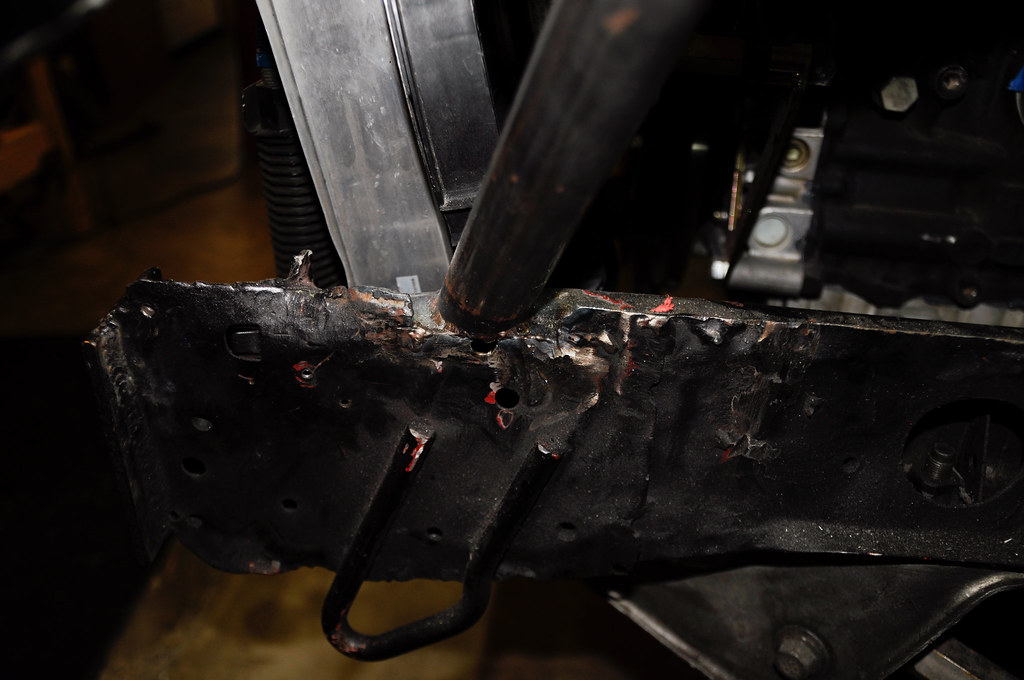 Then I set off to make the hood pins and radiator support, this is when my OCD started to cringe. I tried my best, but from side to side it's uneven which means things are not completely symmetrical. It took me a good 7 hours to make both side hood pins, and another 4 hours to make the radiator support, which after all said and done did not fix the headlights correctly.. So rather than re-making it, I just said screw it and cut the headlights to fit (thank got I dont do this for a living) 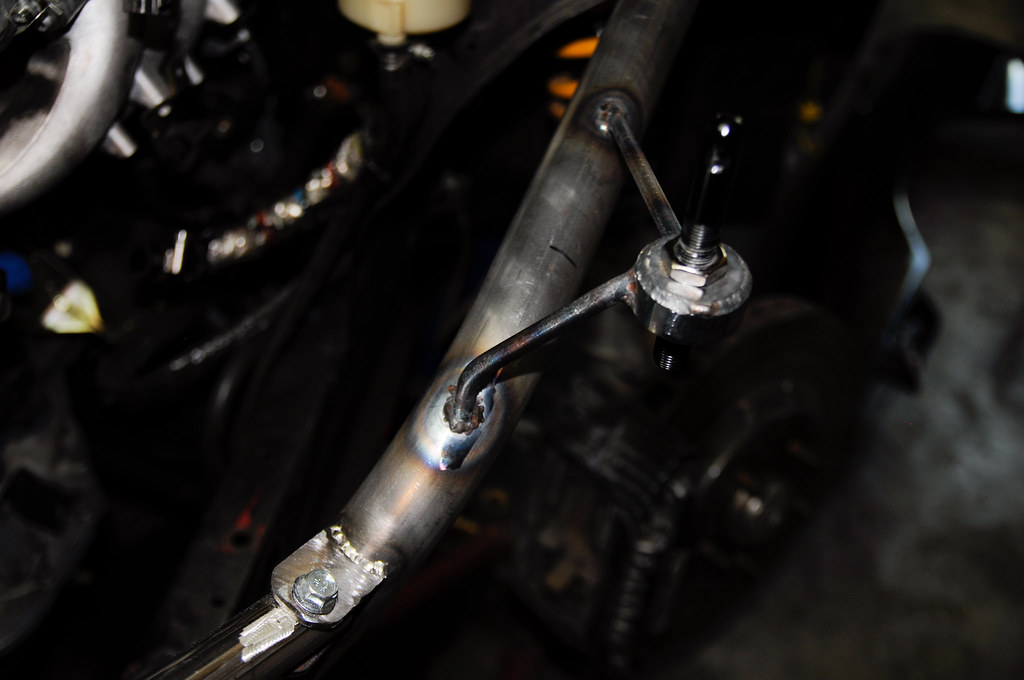 I also ordered the CXracing aluminum upper radiator hose. Seen here 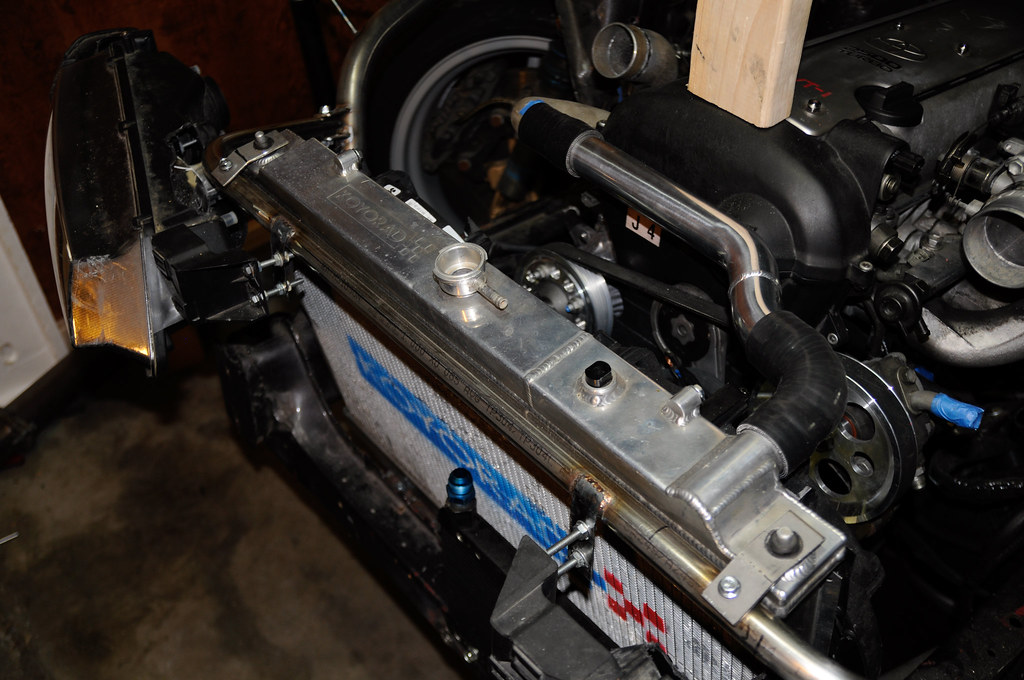 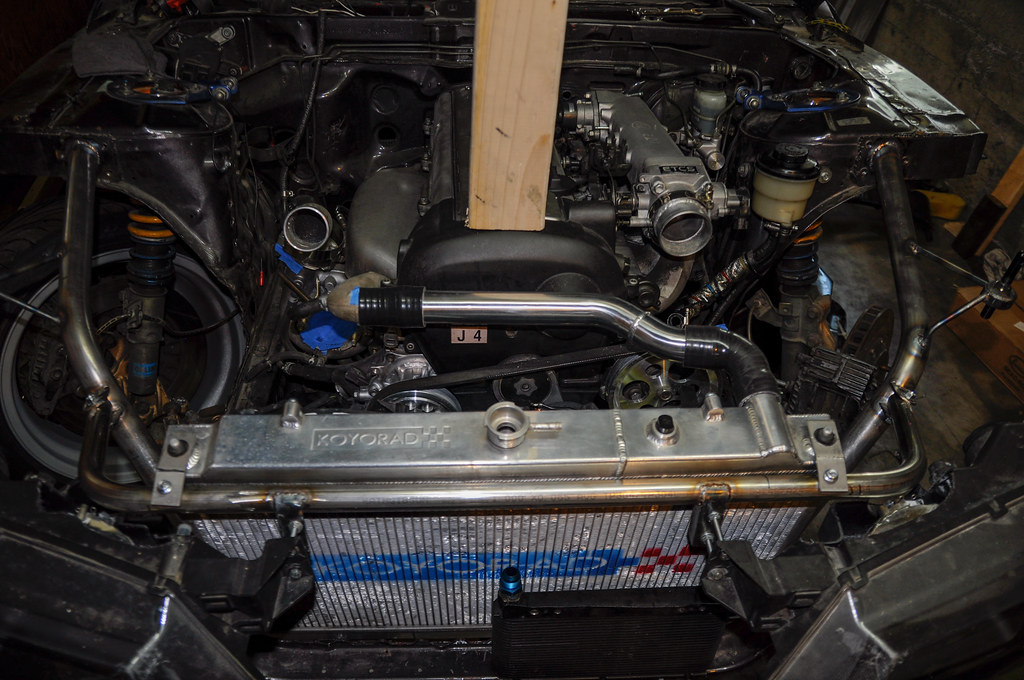 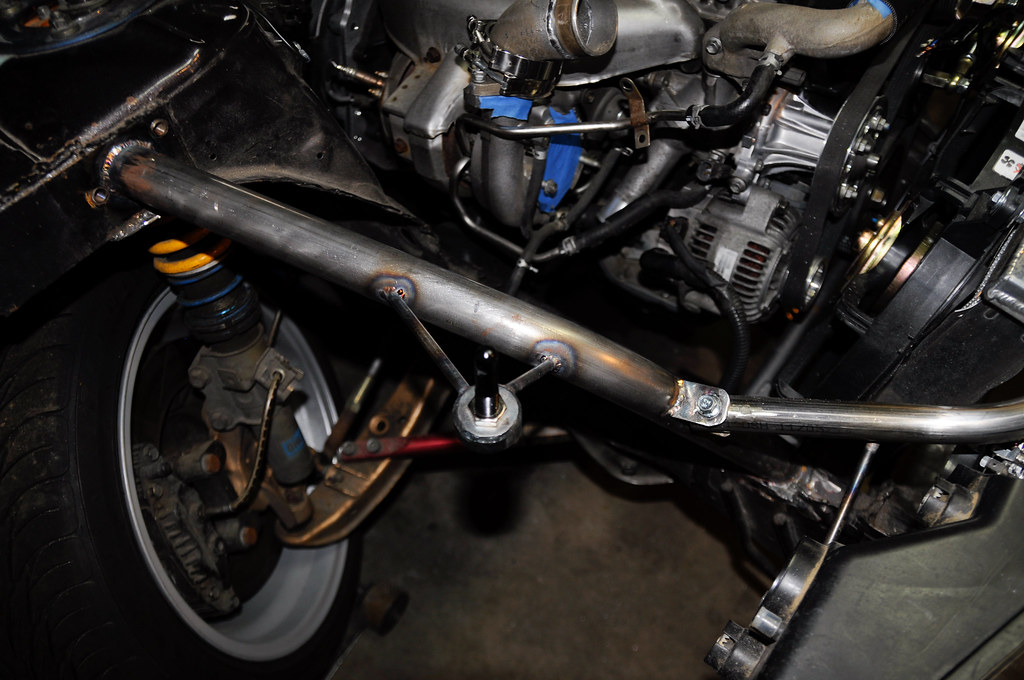 Then it was time to make the throttle cable work. My engine came with a cut jzx100 cable, so I took the factory cable and measured from the firewall to the cut section on the existing cable and cut it. Then on the inside I just used bycicle brake cable stops, I don't like the look, but it should do the trick. If all goes to hell I am going to weld a washer to the end of it.  I don't like that the brake booster nipples comes out of the wrong side in the JZs, I know everyone just routes the hose that way and calls it good, I decided to cut the nipple off and flip it to the drivers side. I also trimmed the coolant lines that run through the idle air control valve. 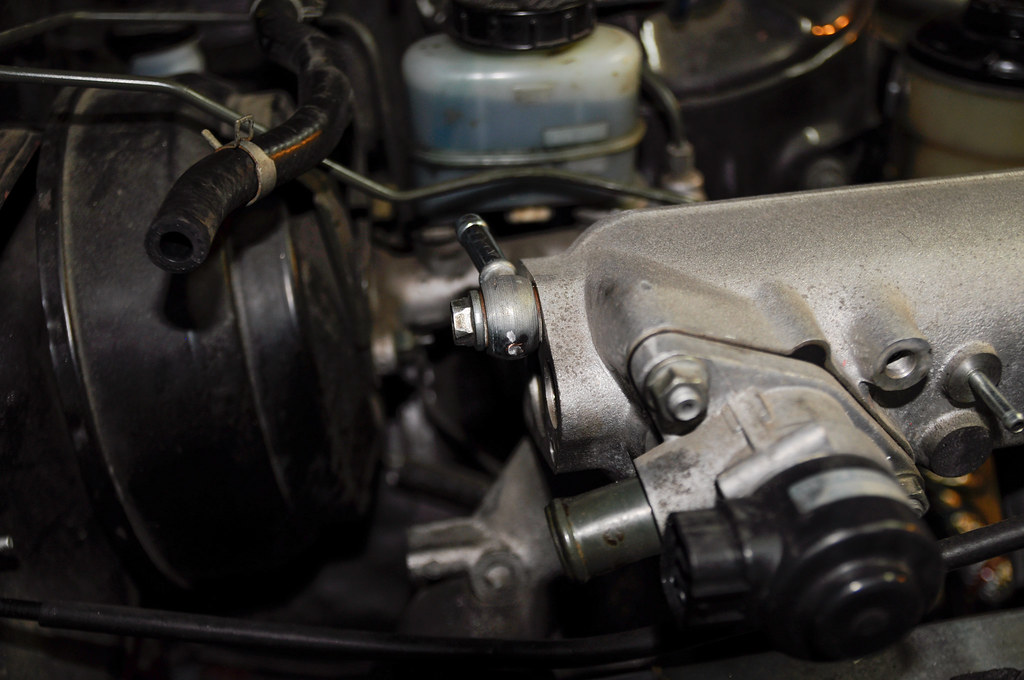 I mounted the oil cooler where it used to be, except flipped it inward because I had to get rid of my powered by max high mount intercooler since it no longer fit (I was pretty bummed out), so I had this intercooler laying around, it's enormous but it will have to do. If you note I drilled a hole and welded a nut to the factory cross rail so I can bolt the FMIC on it. I also routed the lines, cut them and attached the AN fittings, they go to my thermostatic oil cooler sandwich adapter whatever you call it thing, and yes, I will use a NISSAN oil filter haha  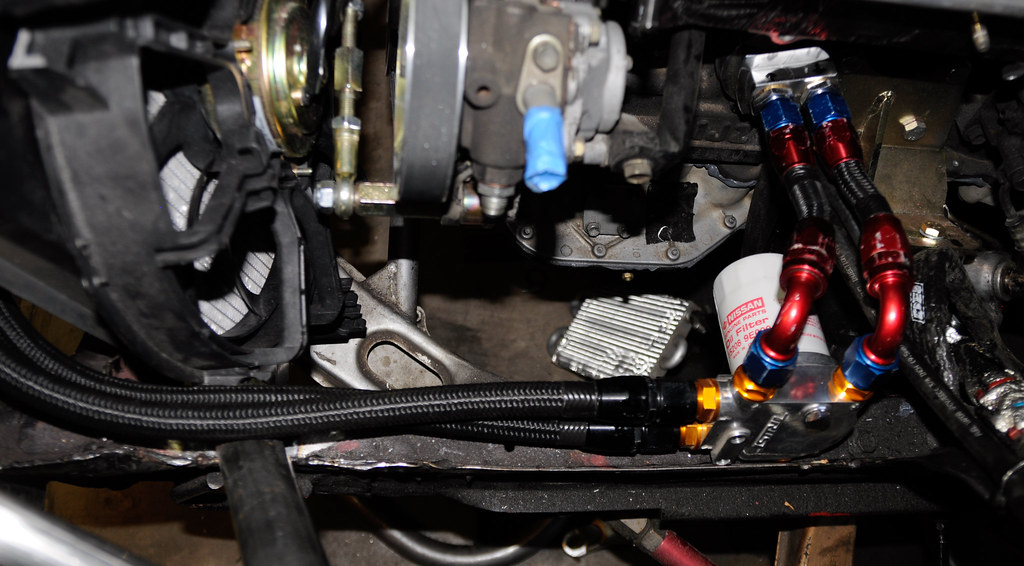 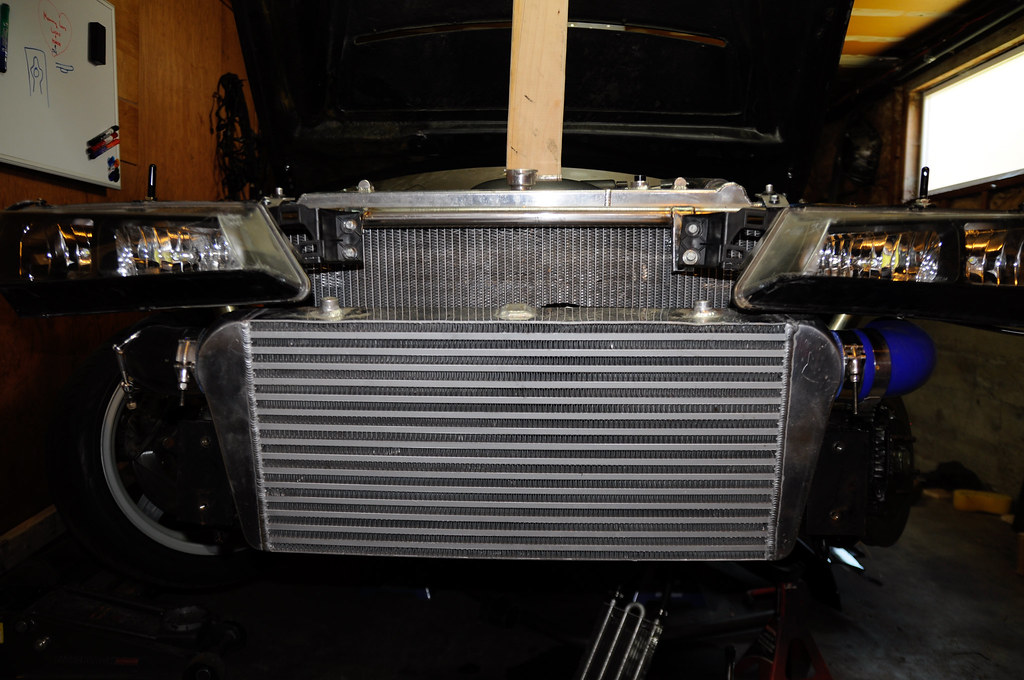 Next was intercooler pipes, I had some stuff laying around, but had to order some stuff, once it arrived cut and welded it. The guys sent me the wrong coupler (blue instead of black....god damn idiots). I will be runnning my old synapse bov. Later i will try to polish up the pipes so they look clean. 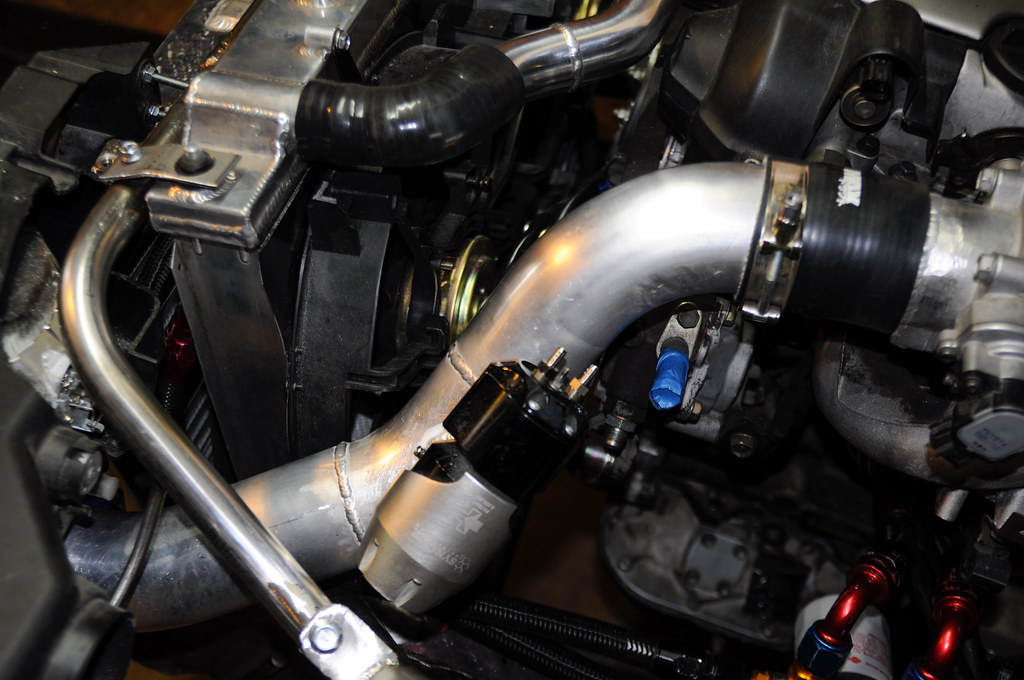 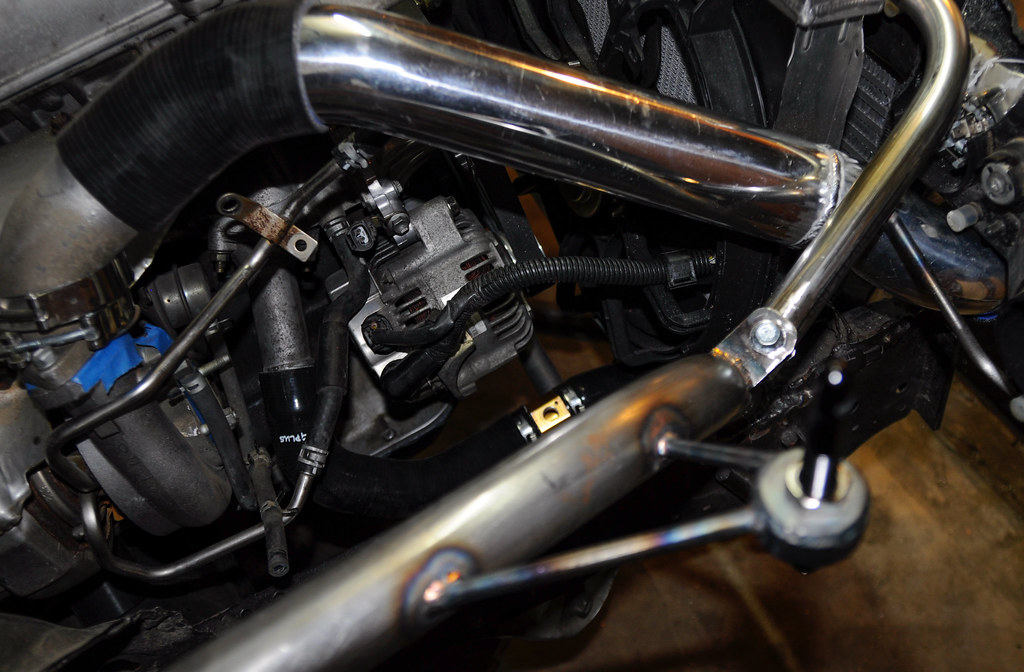 Then lastly, the intake. what I did was I cut the factory turbo intake plenum deal and just cut it right at the entry of the turbo, took some bent piping and put the air filter just behind the bumper, I may have to run one of those air filter water sock things when it rains (hope I remember)  Sorry it took so long! Quote:
|
|

|

|
|
04-29-2016, 01:26 PM
|
#33 |
|
Leaky Injector
Join Date: Apr 2015
Location: San Antonio, TX
Posts: 61
Trader Rating: (0)
Feedback Score: 0 reviews
|
Looking good so far. Curious on how the g37 fans fit with the Koyo radiator. I'm currently swapping a 2j into my s14 and worried about how hot it might get crammed in there. Any better pictures of the fans mounted and how close they are to the belts?
Looking forward to more updates! |
|
|
|
|
04-30-2016, 09:56 PM
|
#34 | |
|
Leaky Injector
Join Date: Jan 2011
Location: Seattle
Age: 36
Posts: 124
Trader Rating: (2)
Feedback Score: 2 reviews
|
Quote:
I'm also running a excessive damper lockout so that doesn't help any with clearance |
|
|
|
|
|
05-01-2016, 11:39 AM
|
#35 |
|
Great build! for the starter, there are 2 styles I believe. you are using the "closed" style. there is an "open style".
http://my.prostreetonline.com/2015/0...cd009-starter/ Just FYI  Last edited by NorcalAP2; 05-02-2016 at 12:39 AM.. |
|
|
|
|
|
05-01-2016, 11:25 PM
|
#36 | |
|
Leaky Injector
Join Date: Jan 2011
Location: Seattle
Age: 36
Posts: 124
Trader Rating: (2)
Feedback Score: 2 reviews
|
Quote:
Update: I removed all the fuel lines from the right side of the car and cut them and used a double flare tool to flare the ends and tried my very best to keep them as safe as possible, and as close as possible to the body and away from danger, I am not a fan of fire. It is so difficult to take pictures under the car, so I apologize in advance for the shitty shots. I removed the fuel lines, hard lines and everything, I then rotated the pump to face toward the drivers side, ran the lines above the tank and droppped them close to the tank, where I am concerned about contact with the car I cut old hose and wrap it. It's the best way to keep an eye on any fraying or anything that could go bad. 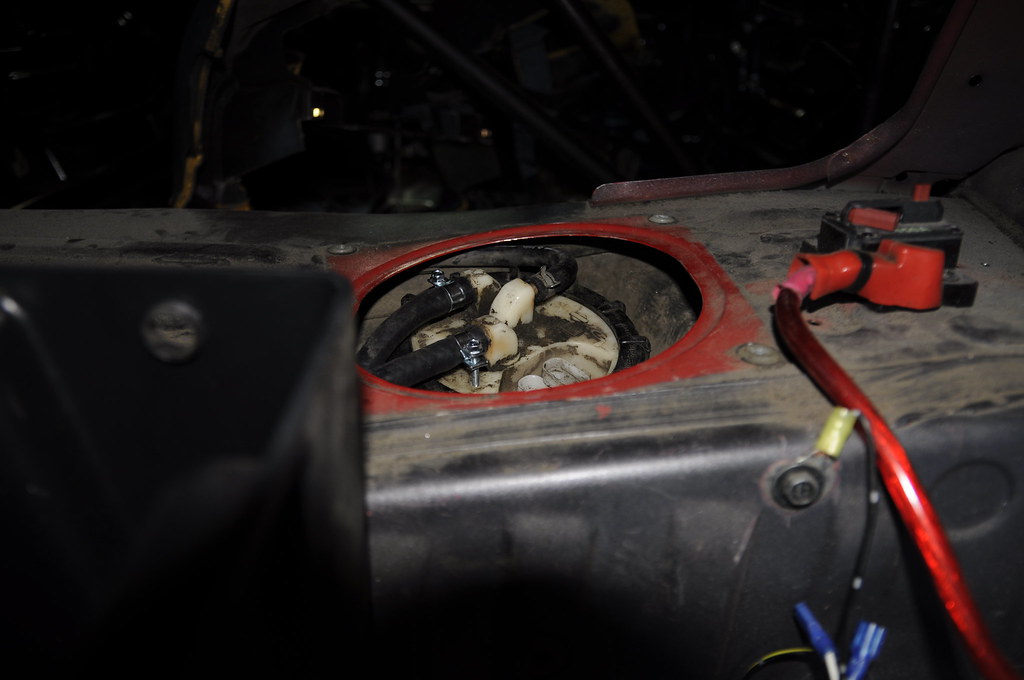 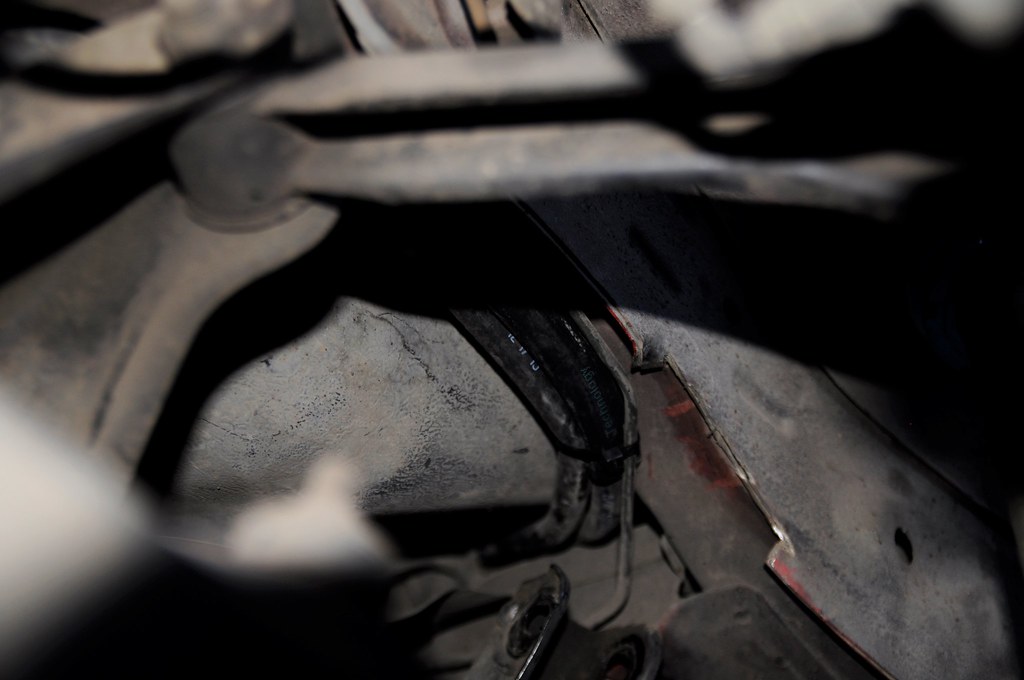 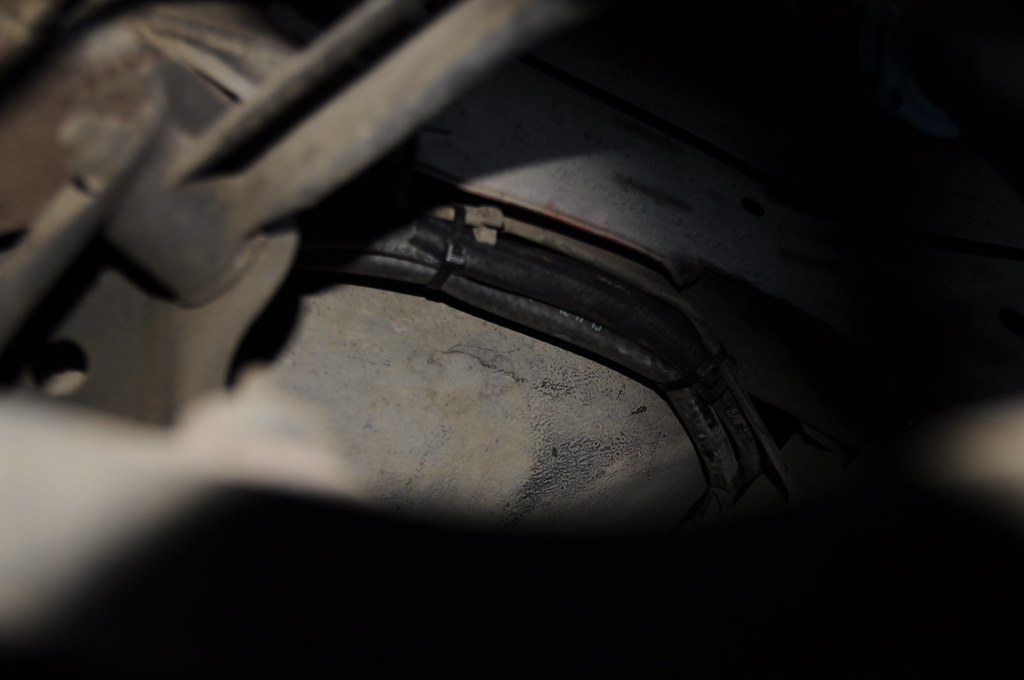 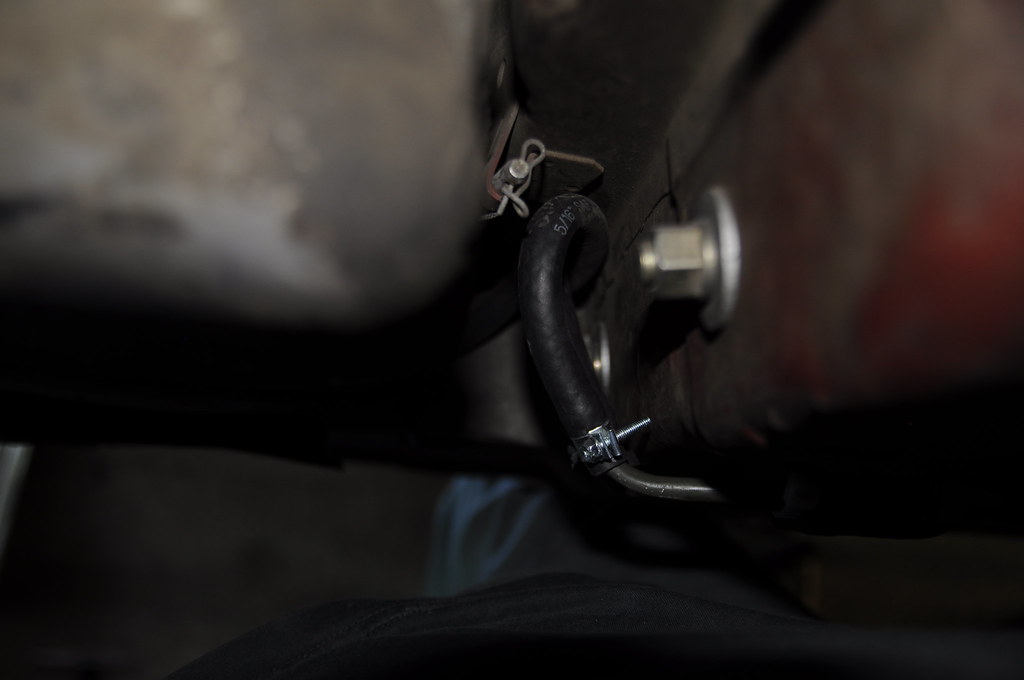 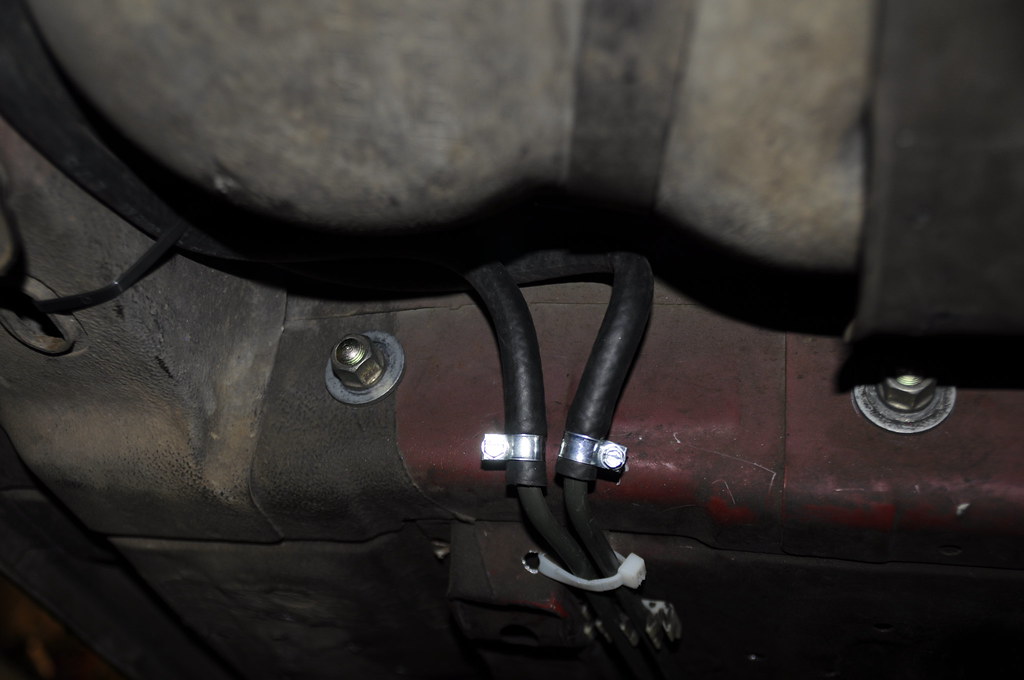 Aaaaaand Zip ties. 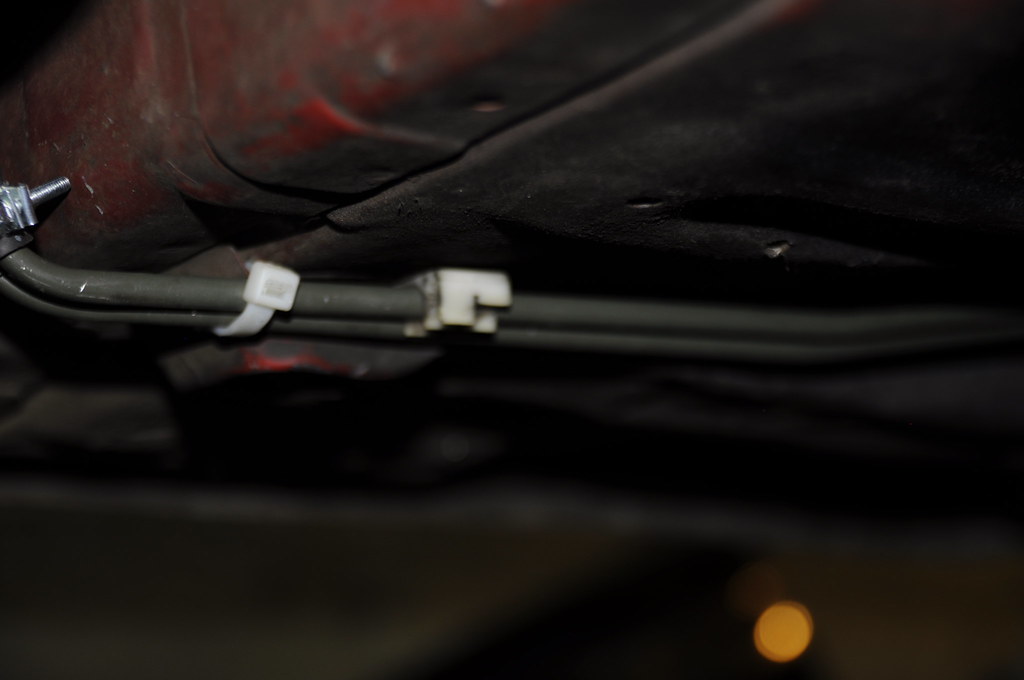 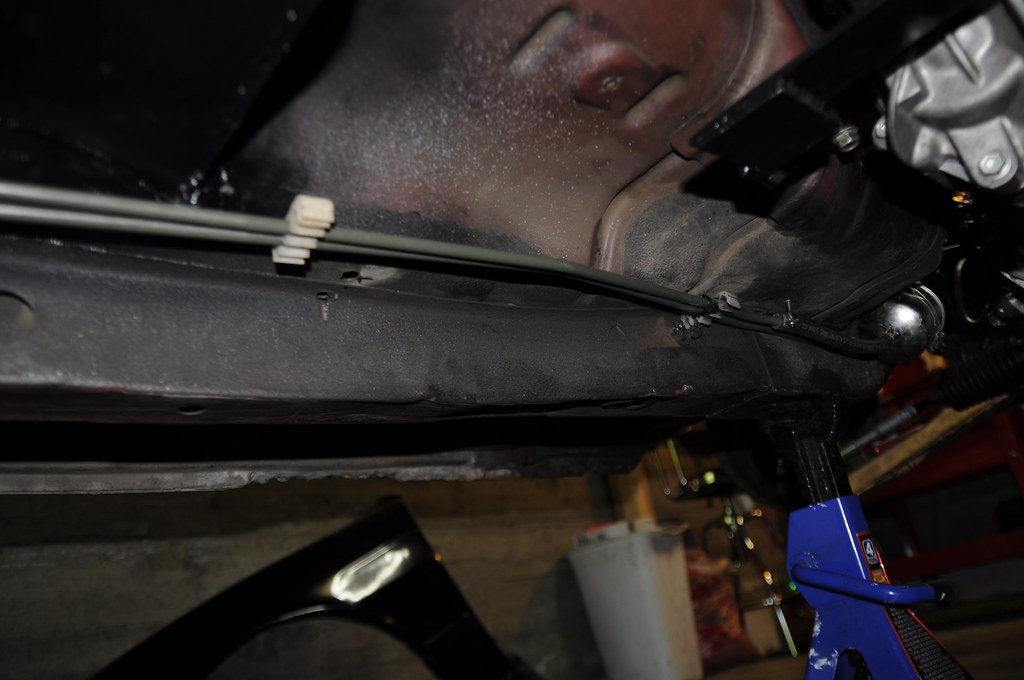 For the fuel filter I used the stock filter holder but cut a slit on it to put a hose clamp around it, the last thing I want is for it to pop out of the holder and hit the ground. 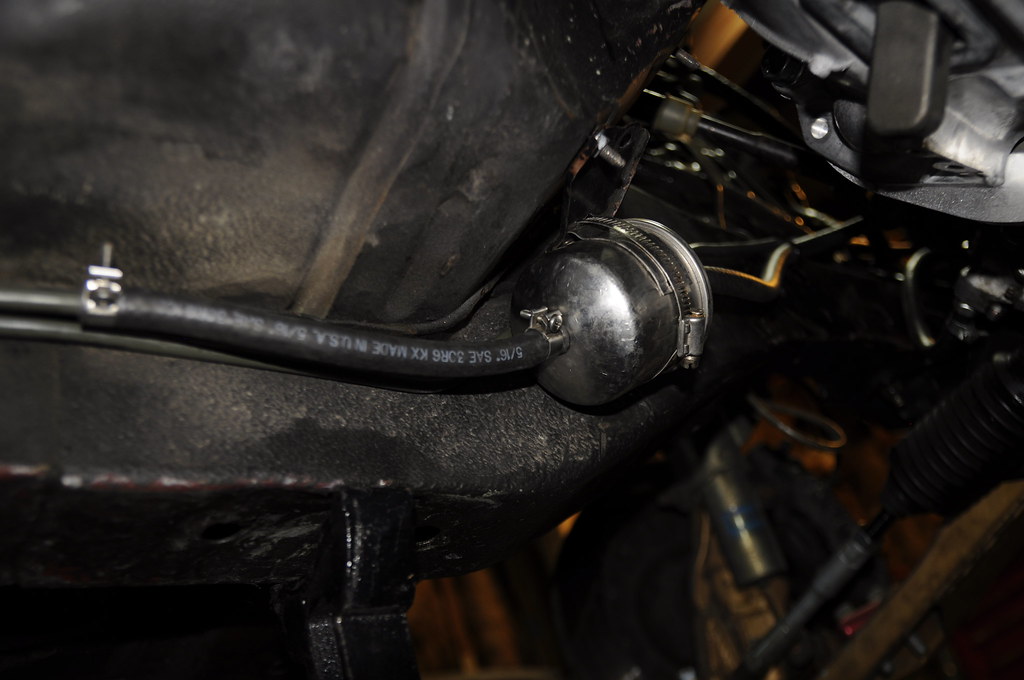 This is where I will add the fuel hose condom I explained above and get it tight to the frame so it doesn't get caught on the steering column 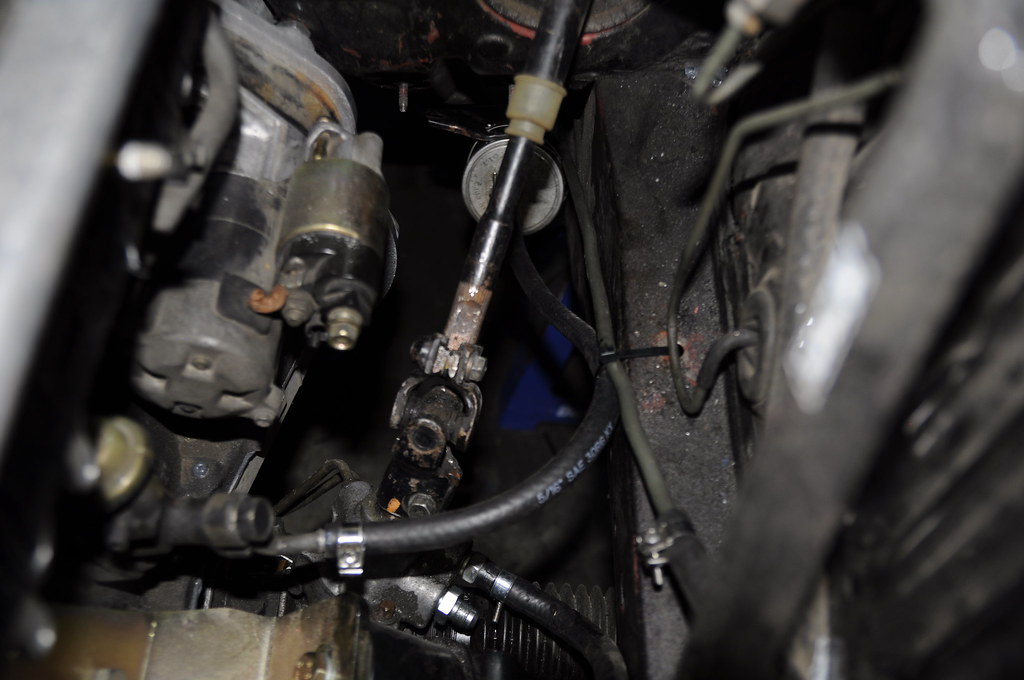 Here I cut the crimp so I could reuse the banjo bolt that toyota put there, i am not 100% sure what that thing is, I can only assume is a damper of some sort, anyway, it'll stay in for now. (if someone actually knows tell me, I am curious!) 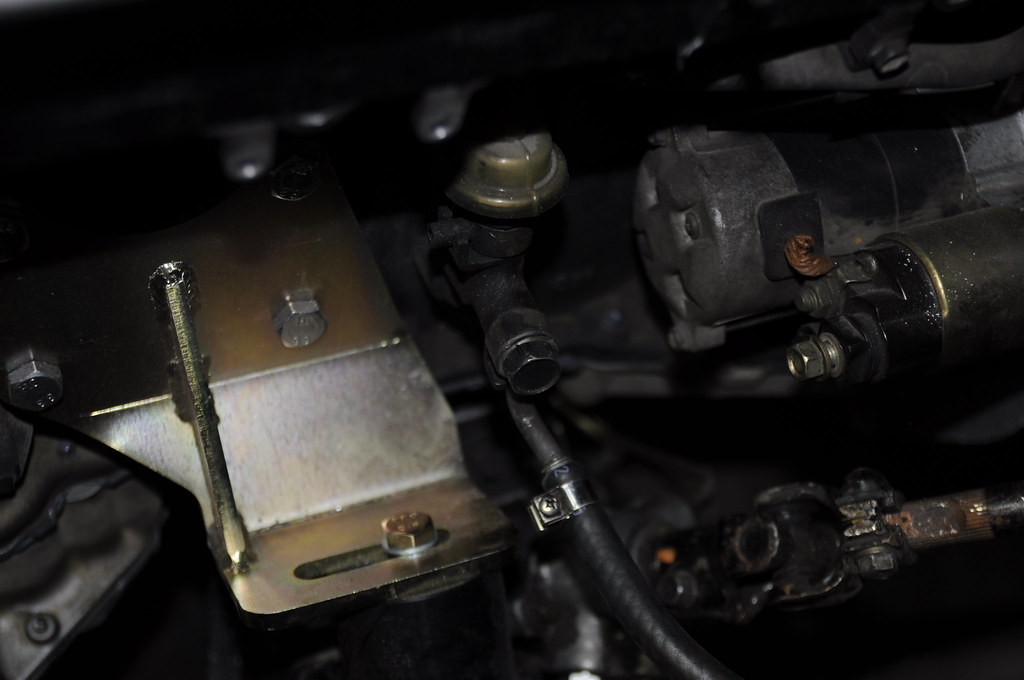 Lastly, the return line, which is longer than I wanted it to be, but it'll be under the manifold so it's out of sight 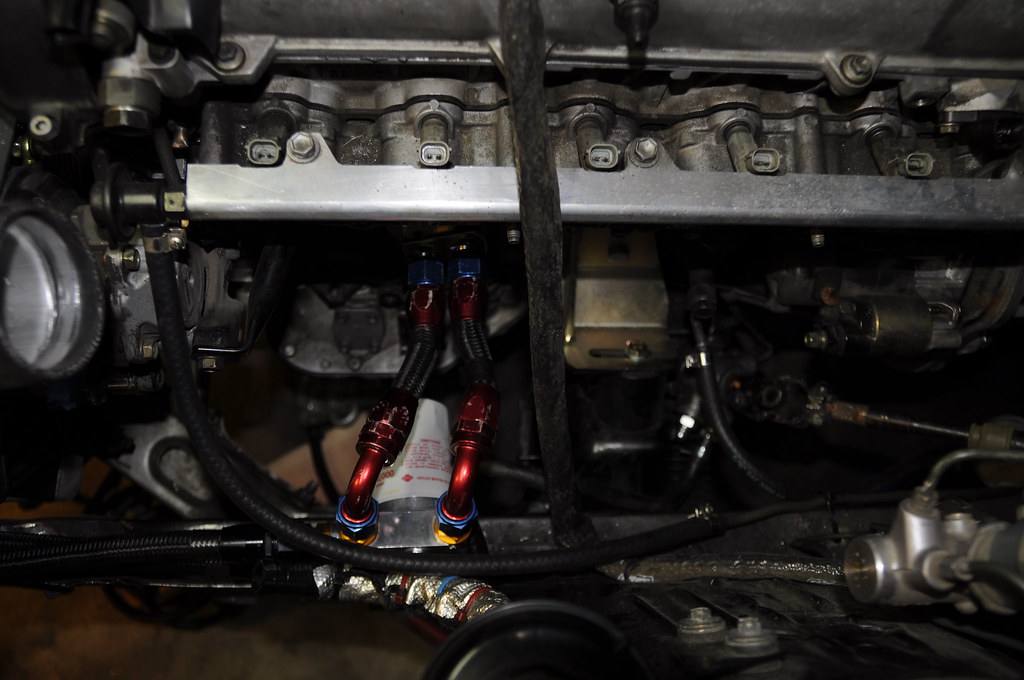 |
|
|
|
|
|
05-02-2016, 08:29 PM
|
#39 | |
|
Leaky Injector
Join Date: Jan 2011
Location: Seattle
Age: 36
Posts: 124
Trader Rating: (2)
Feedback Score: 2 reviews
|
Quote:
Pm me your PayPal info, I'm sending you beer money |
|
|
|
|
|
05-03-2016, 09:56 PM
|
#40 | |
|
Quote:
Personally I remove it/bypass on all my JZs and haven't had an issue yet. |
||
|
|
|
|
05-05-2016, 02:33 PM
|
#41 | |
|
Leaky Injector
Join Date: Jan 2011
Location: Seattle
Age: 36
Posts: 124
Trader Rating: (2)
Feedback Score: 2 reviews
|
Quote:
Thank you |
|
|
|
|
|
05-05-2016, 02:57 PM
|
#42 |
|
Zilvia Junkie
 
|
+1 to Press22. I kept mine and have no issues. Sounds like it's up to you if you want to remove or keep it.
Good progress dude! I like how you did the fuel lines, I might copy you haha.
__________________

|
|
|
|
|
05-09-2016, 11:17 PM
|
#43 | |
|
Leaky Injector
Join Date: Jan 2011
Location: Seattle
Age: 36
Posts: 124
Trader Rating: (2)
Feedback Score: 2 reviews
|
Quote:
More progress: Made the coolant reservoir bracket, and realized I bought the wrong T-fitting for my coolant system, derp. I will be running the "live" cooling system in hopes it will further decrease the chances of coolant cavitation and keep air out of the system, who the hell knows it it'll work but we'll see! 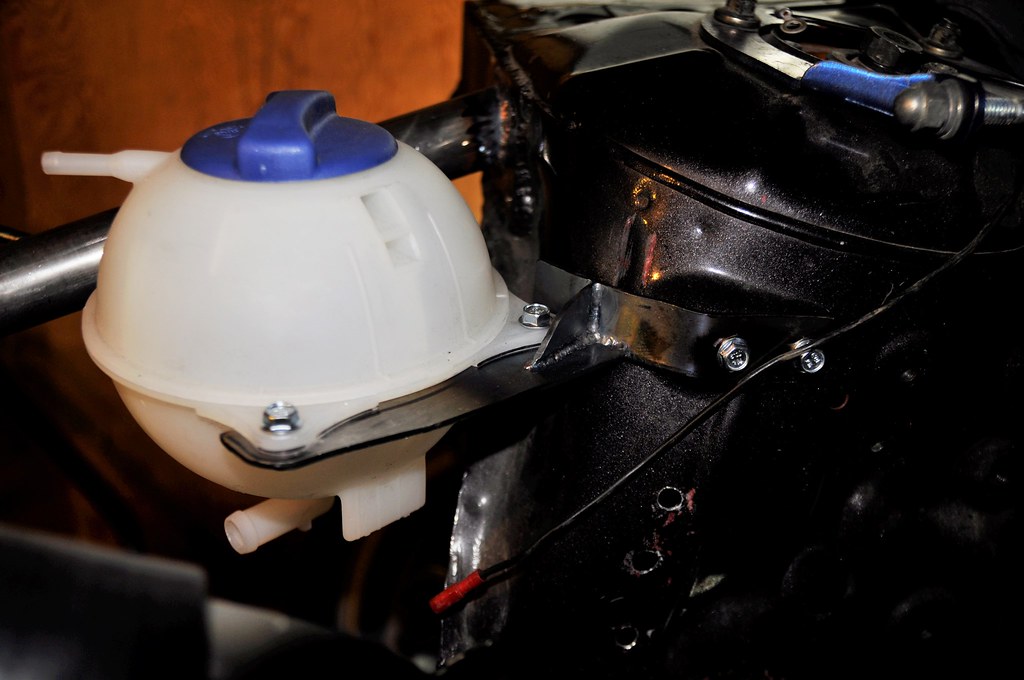 And modified the sway bar, this is pretty scary honestly, but I ran it by the girlfriend who is a mechanical engineer and she is not worried about it, so if it breaks I can yell at her for it! Haha. The sway bar needed to be extended toward the ground so it would clear the oil pan, while I was doing that I figured I'd get the PBM sway bar brackets as well. First and biggest issue is when done the sway bar sits inboard toward the frame more, so I needed to extend the sway bar link, I don't particularly like the idea of extending the bolt, so I welded a nut to the end of the sway bar and ran another one in front of it as a locking nut. 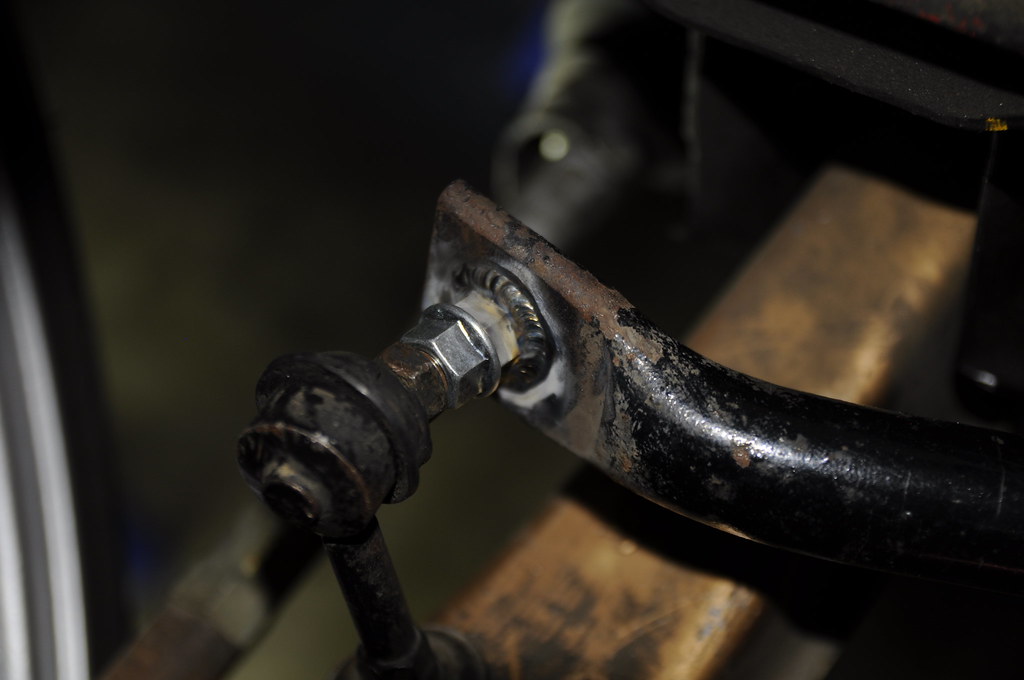 Next was extending it downward 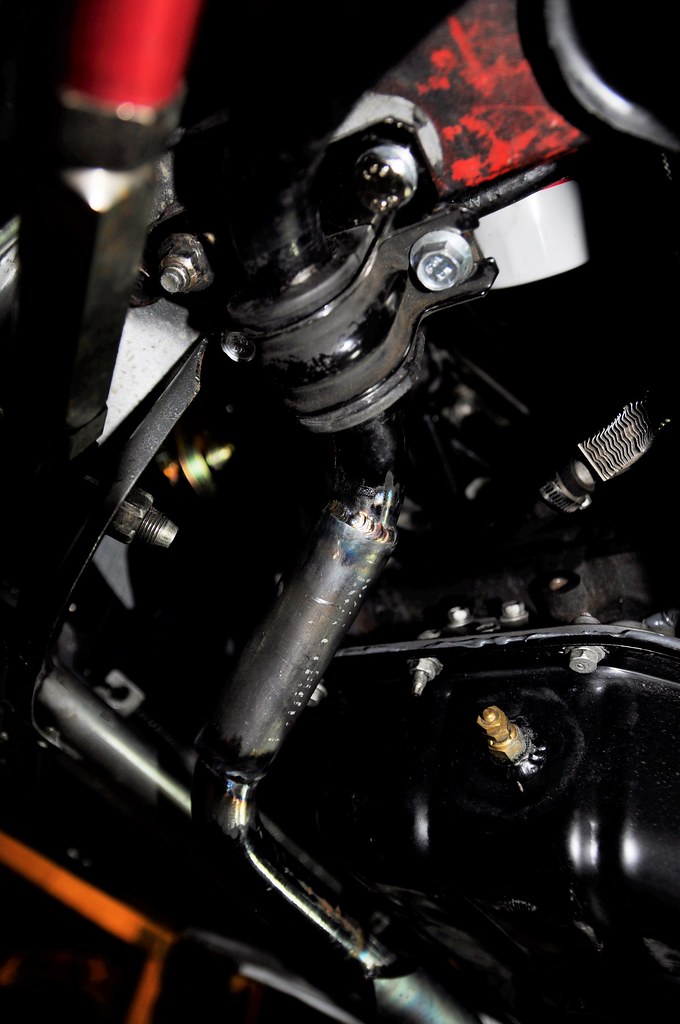 And the sway bar strength deal that PBM sends with their kits, not sure why the angles look so weird on this picture, but it's straight haha 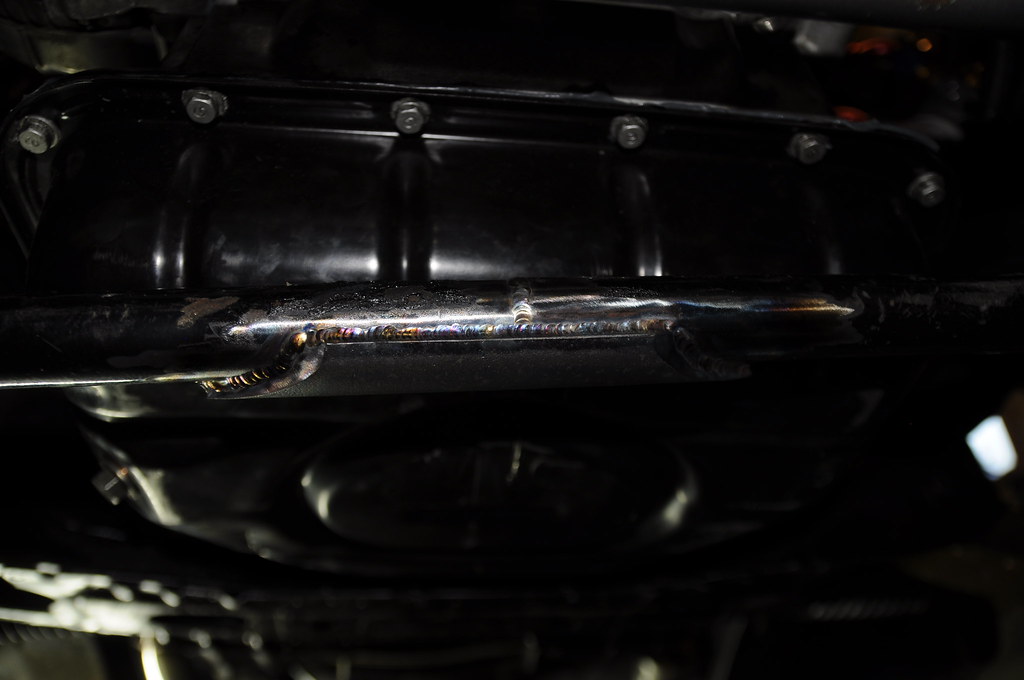 and the end result, clearance wise 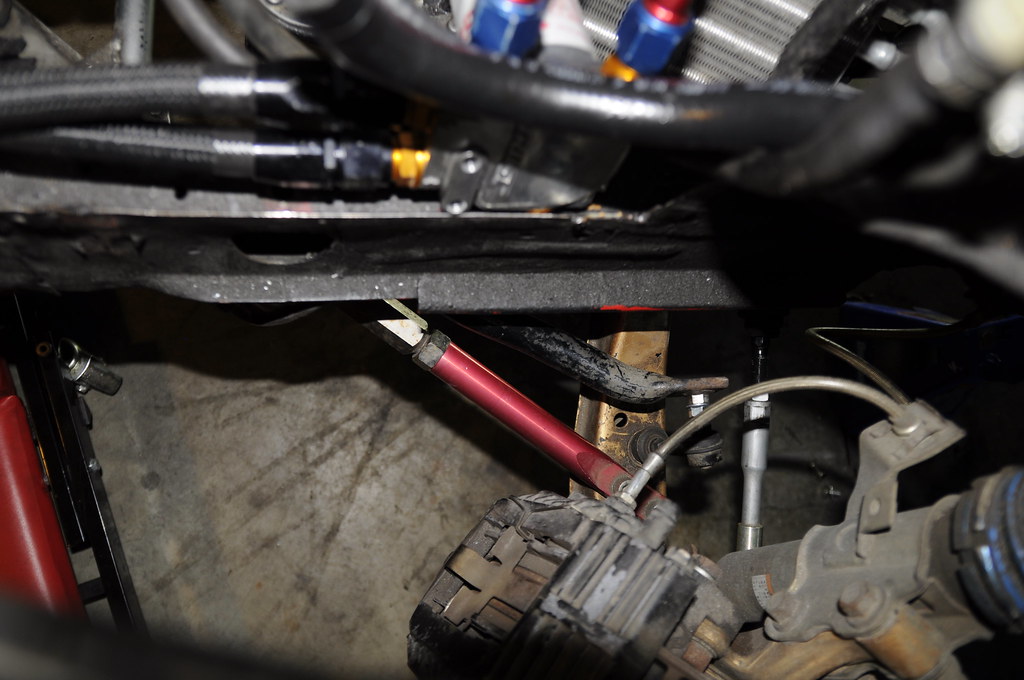 I started making the exhaust, but ran out of argon for the welder... more next week |
|
|
|
|
|
05-10-2016, 10:59 PM
|
#45 | |
|
Leaky Injector
Join Date: Jan 2011
Location: Seattle
Age: 36
Posts: 124
Trader Rating: (2)
Feedback Score: 2 reviews
|
Quote:
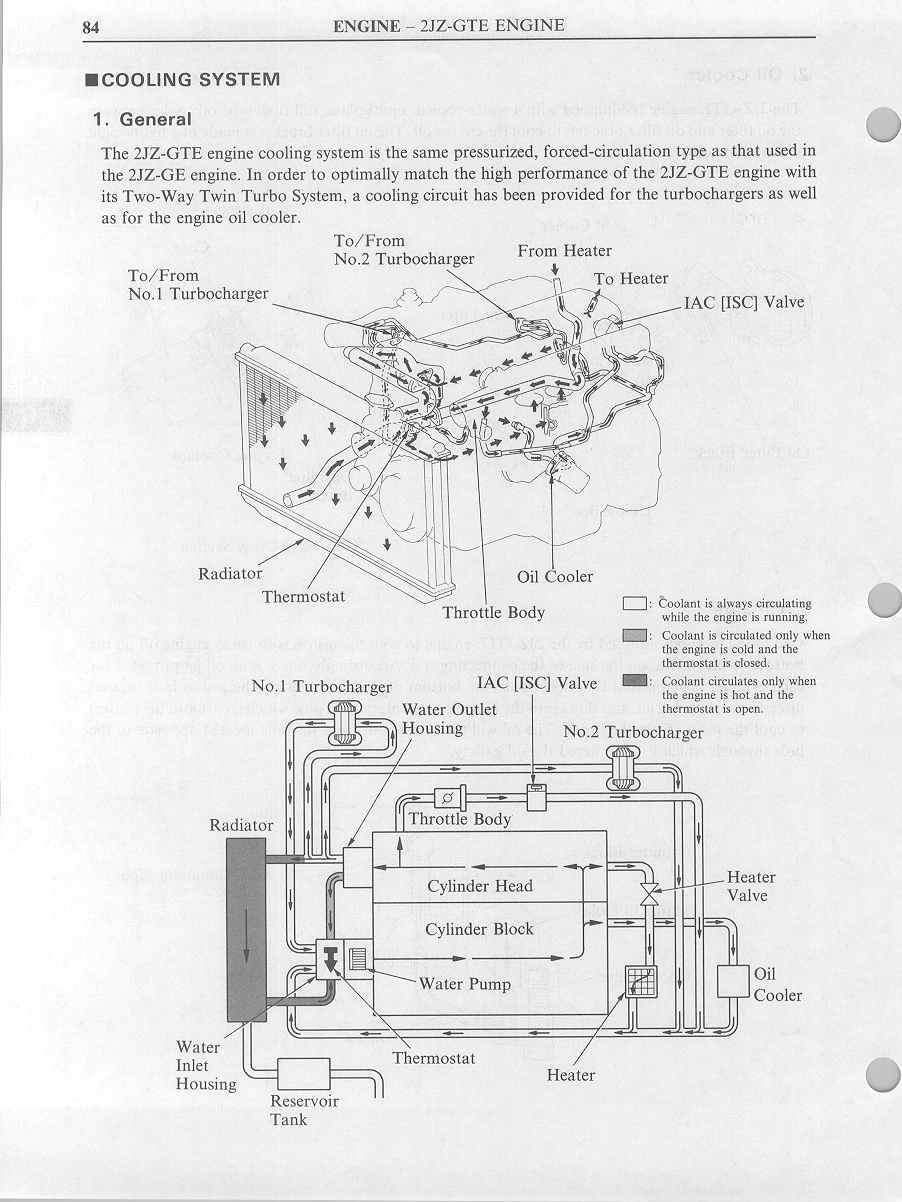 The diagram shows what I cut off, and basically the coolant will flow the same route except it will go from inlet (water pump) through the block, then head, thermostat and radiator, and to the turbo. That's it. I know what you mean, and I am slightly concerned about it, but them FD nerds are all blocking this stuff off, so I am pretty confident it'll be fine, otherwise I will be buying a VVTi head when I replace the headgasket on it! Haha |
|
|
|
|
|
05-11-2016, 08:22 AM
|
#46 |
|
Gotcha, I've actually had it blocked off on mine for a year but my car ran hot... which is possibly unrelated, it's just really hot in Vegas.
I'm now building a second 1JZ car and wanted to weld a AN bung on there to cap it off (I can't weld though  ) ) |
|
|
|
|
|
05-11-2016, 06:41 PM
|
#47 | |
|
Leaky Injector
Join Date: Jan 2011
Location: Seattle
Age: 36
Posts: 124
Trader Rating: (2)
Feedback Score: 2 reviews
|
Quote:
I can barely weld haha, gotta start somewhere tough! |
|
|
|
|
|
05-18-2016, 10:25 PM
|
#48 |
|
Leaky Injector
Join Date: Jan 2011
Location: Seattle
Age: 36
Posts: 124
Trader Rating: (2)
Feedback Score: 2 reviews
|
Finshed the exhaust last night. I bought the CX racing downpipe added a brace to it, so it would bolt to the trans cross member (I learned on my SR that if you don't hang your downpipe, you are going to be replacing exhaust gaskets constantly. The weight of the pipe pulls down on it just enough to loosen the bolts and the gasket gives out).
The downpipe ends about halfway down the transmission, so I decided I wanted to make the exhaust out of aluminum, bought the flange, piping and rod to make the hangers. The piping is .065" wall and 3" OD. The reviews are extremely mixed, I wouldn't try this if it was a street car, but I am very intrigued. My main concern is cracks over time, so I will just have to keep my eye on it. I am happy with how close it sits to the car, since clearance is very important, I need to do more research on welding aluminum, the start/stop makes it very difficult to lay down consistent beads, but the welds won't break, that's for sure. and I apologize the pictures are out of focus and dark 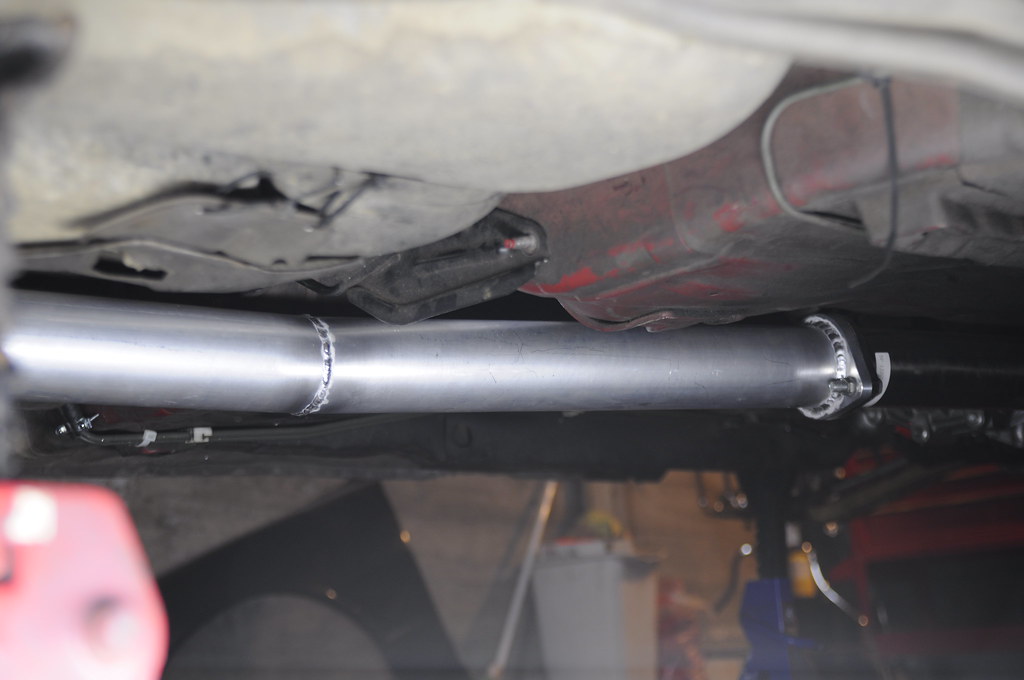 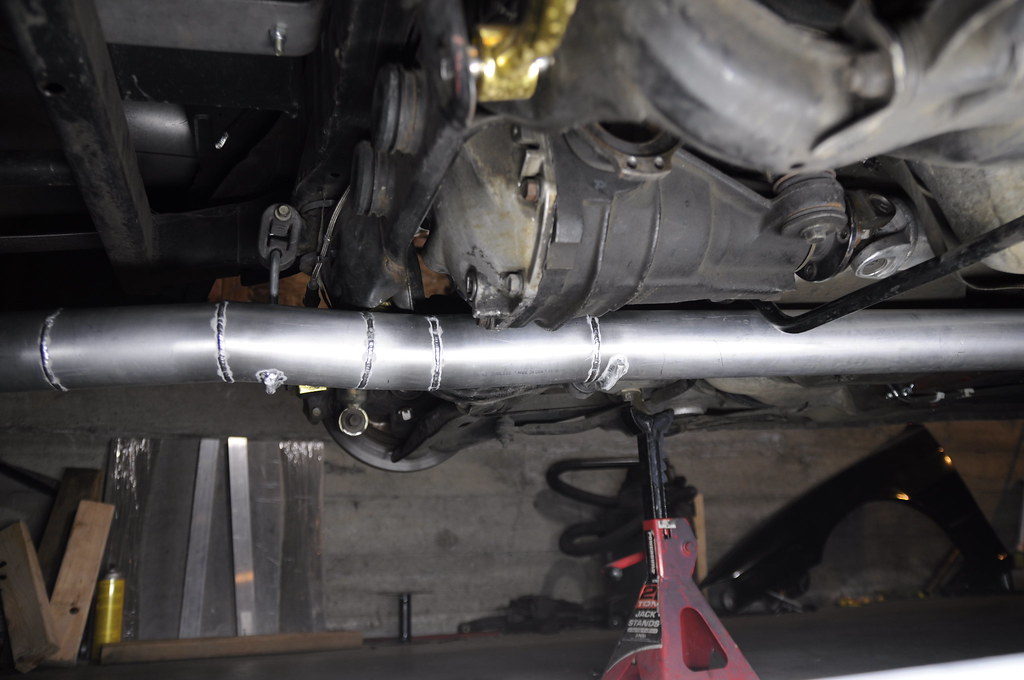 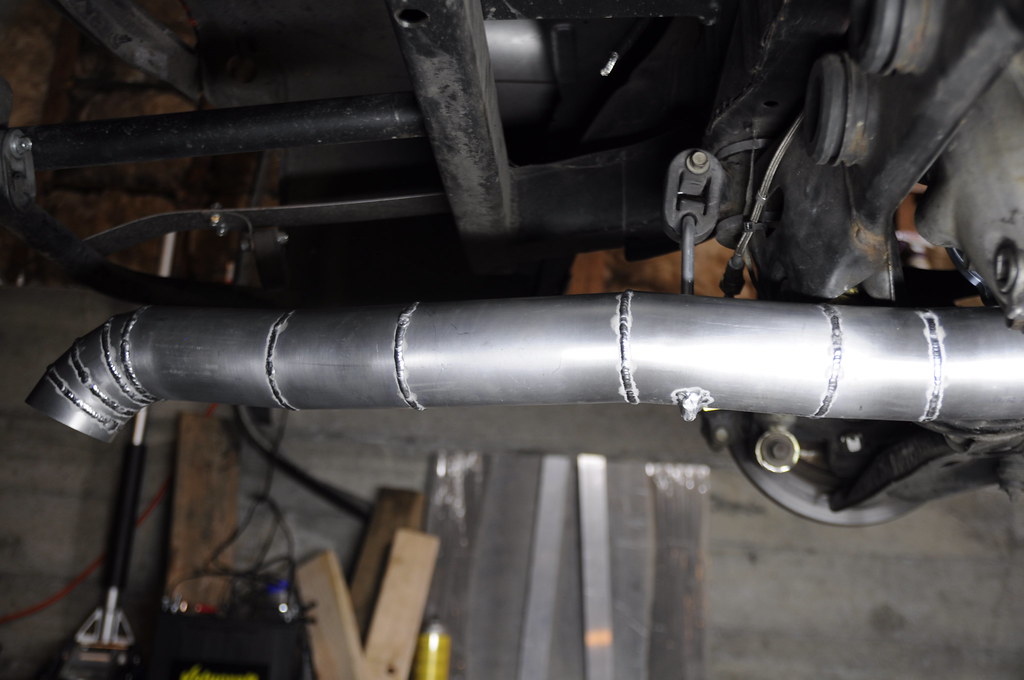 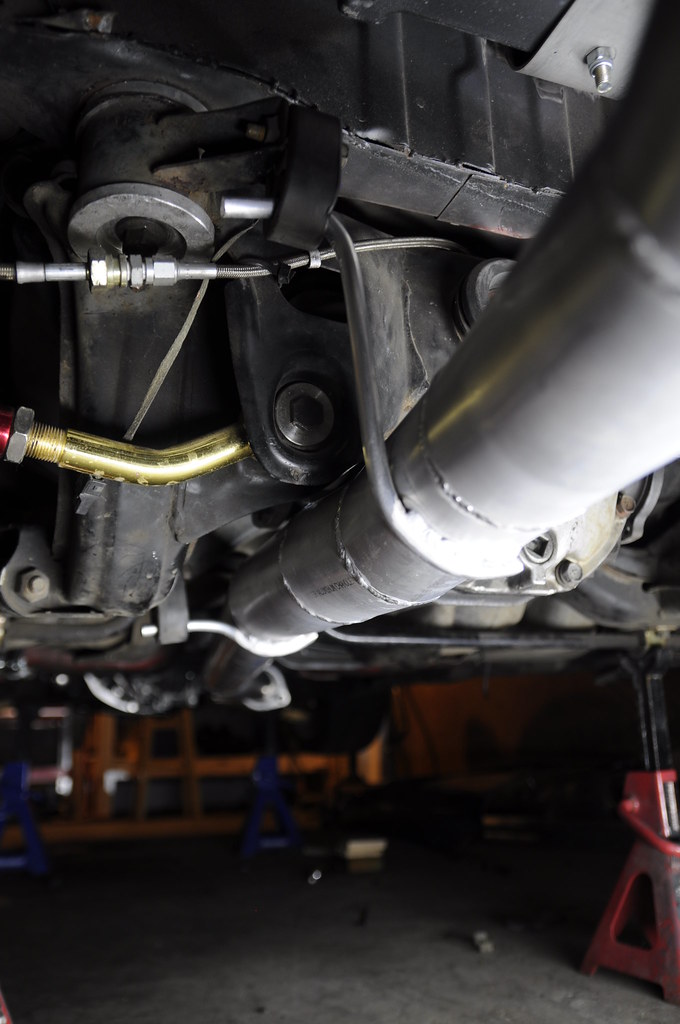 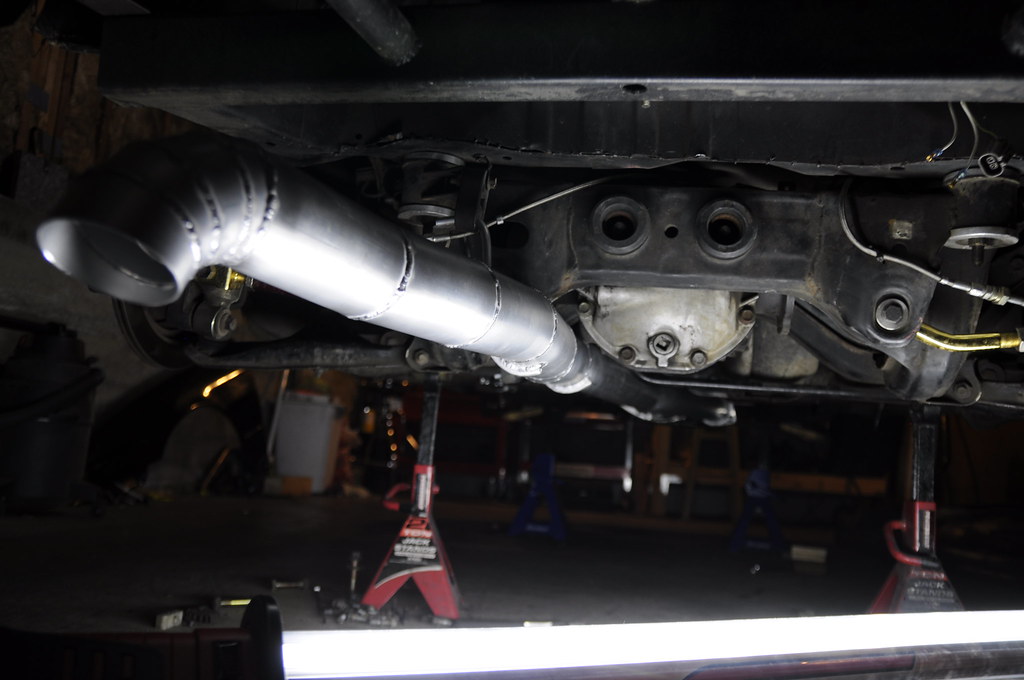 |
|
|
|
|
| Bookmarks |
|
|


 Linear Mode

