|
|||||||
| Builds (and builds only) Got a build thread? It goes here, build threads anywhere else on the forum will be locked and never moved. |
 |
|
|
Thread Tools | Display Modes |
 02-09-2013, 02:15 PM
|
#1 |
|
Zilvia Junkie
 |
Tyler Cox Memorial Build thread, SR20 2.34 monster tube machine
Late in 2012 a friend of mine passed away. In an effort to keep his memory alive I wanted to share his new car build he was working on with people from around our drift and 240sx community. Many of you probably had a chance to meet him in person, most of you didn't. I am writing this little intro post them I am going to straight copy paste out of the original thread I am posting in to make this easier on myself.
Tyler never had a build thread for himself anywhere that I can think of, even though his car was FAR beyond the average builds of the time period. When we were going built LS1 in my drift car back in 2006 or 2007, he was making more TQ and HP than my built V8 out of a 2 liter, and managing to drift it! When Falken Drift Showoff came to town, he made more smoke than any of their cars! When normal kids were posting about getting their first set of xxrs and going to their first local event, this lucky kid was getting to tandem with his JDM heros like Daigo Saito and Ken Nomura in the D1GP USA series. He was ricing the streets of Atlanta in his drift car and then going to Nopi Nationals Drift comp and doing their whole series. I got the opportunity to travel most of the nation with the kid. 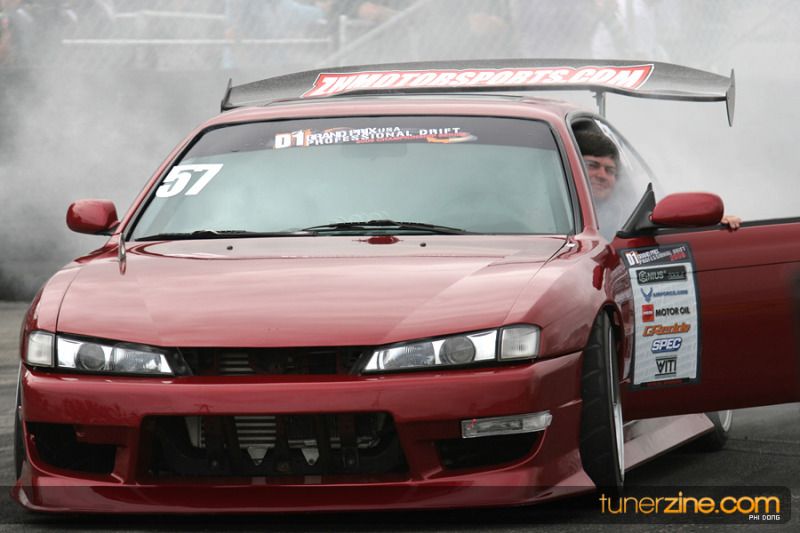   Mind you those pics were taken back in 2009 or so, that car was mind blowing back then! It is mind blowing now! And so I give you Tyler Cox. The man the myth the legend. The drifter that everyone classified as the Texas oil kid, and the legend of the boy who burned off more tires than anyone else his age. Last edited by aaronlosey; 02-11-2013 at 07:25 PM.. |

|

|
| Sponsored Links |
|
02-10-2013, 04:32 PM
|
#2 |
|
Post Whore!
 
Join Date: Dec 2006
Location: Misawa, Japan
Posts: 6,815
Trader Rating: (8)
  Feedback Score: 8 reviews
|
I knew Tyler, really cool guy. Watched him drift and hung out with him a little bit at some of the local events in Louisiana and tried to tandem with him 6 cars deep once lol
He will be missed.
__________________
 後輪駆動車1番 後輪駆動車1番1989 Built SR GT2871R -363whp 1998 S14 W/RB25- 250ish (For Now) 1986 SR86 - 200ish 1990 R32 GTR - 320hp Don't Buy Engines from JDM-Online http://zilvia.net/f/businesses/207457-jdm-online.html Don't Buy XS-Power or SSAC Shit |
|
|
|
|
02-10-2013, 04:59 PM
|
#3 |
|
Zilvia Junkie
|
Ok, from here it is copy paste!
--- Earlier this year a friend of mine, Tyler Cox, passed away. Drifting brought us together nearly 7 years ago, and we had a great time running around the country and drifting all over the place. When I was asked to speak at his funeral, I retraced our steps and discovered I had covered 27 US states with Tyler. Some of those states like Louisiana, California, Nevada, Georgia, and Florida we frequented quite a lot. We spent so much time together people thought he was my little brother multiple times, and he used to pick up my mannerisms constantly. Those were great times. Everyone that came into contact no doubt has stories about him, as he was quite the character. Now that might sound like a generic thing to say, but if you knew him, it was an understatement. Everything that happened around him got out of hand in some way, and for better or worse everything turned into an adventure. To say his life was all about cars would also be an understatement. His loving family indulged his love of cars in a way that makes all of us in the drift scene jealous. We all wish we had parents that would support our love of such foolish things as drifting with enthusiasm and excitement instead of confusion and questions. Of course cars are silly, and traveling the country playing with them is a waste. But when life is over and there is no time left, I would rather I didn't spend it in front of a desk shuffling paper and instead embarked on ridiculous adventures that left me cold, hungry, and lost. These silly car adventures have given me so many beautiful sunrises in distant lands, so many interesting moments, and so many emotions. And above all, so many friends all over the globe. But this is going to be a fairly long story, and it is going to be about Tyler's last car his was lusting over, a replica and better version of his first and awesome S14. This story is about me trying to finish his last car up since he isn't able to do it himself. This photo was taken at D1GP Anaheim in California, circa 2009. This was probably considered the glory days for the Texas boys, and truly the glory days for his S14. Amazing times! .jpg) Tyler's run of the D1GP USA series was cut a little shorter than the rest of us, when he totaled out his car in Florida that same year. The car was working amazing and he was having a fantastic time, but the track was wet and the that was that. He still continued driving that weekend, but after the event decided the chassis was done even though it still functioned, and tore it down. He had been driving full steam for about 4 years at this point, but he slowed down a lot after this. He picked up a few lesser cars to have fun with, but after having an SR20 with nearly 500whp, it is hard going back to 200whp cars and not get caught up in the modification game again. He dreamed of rebuilding his car bigger and better.    Around late 2009 to 2010 Tyler sent off a new chassis to be "caged" by Forrest Wang in Las Vegas. I thought Tyler was silly for sending a car all the way across the country for a cage, but Tyler loved Forrest's style and obviously wanted it incorporated into his new car. Most years I go to SEMA ( a trade show ) in Vegas, so each year for the last 3 years I would see the car very slowly coming along while I was out there. The first year the car was just a simple cage with lots of dimple dies. The next year the car was cut off front and rear and getting really serious, and way past what I thought the project was going to be. This quickly was becoming an insane full chassis build, nothing held back. I have pictures of lots of Tyler's friends, myself included, standing inside his new bare chassis in Vegas while he wasn't there. I can't find them at the moment though. But we were teasing him sending him progress pics years before the thing was finished. Well, actually, it still isn't finished. The pics are really cute, use your imagination. Then, before the car could be completed, Tyler passed away this summer, leaving the car unfinished and a world away. During long conversations with his father, I wasn't sure if it was worth finishing because it would be expensive and somewhat without purpose when it was done. However, his father decided to finish the car, which I am very happy with, and wheels were set in motion. I gathered up a posse to go retrieve it with me in Vegas. Josh Buckley and Fielding Shredder jumped in the truck with me and off we went. We scheduled it so we could attend the Vegas round of Formula Drift which worked out really well.   We stayed in the Stratosphere hotel, and this was the view out the window.   We ate at our favorite foodie spot out there, Hash House a go go.   And we picked up a sad looking neglected S14. It had a mountain of tube work done to the chassis, but it had taken a glacial 3 years or so to get to this stage. The motor was now a SR23 of some sort, we still aren't sure. And basically every nut, bolt, seat, fitting, mount, glass, fiberglass, and anything else not seen in the picture was missing. We would later find much of it hiding in Kilgore, but that would come along months later. It sat much like this from August until around the end of November. I and everyone else who volunteered to work on the car in their free time were simply too busy. I also around this time came to the conclusion that no one would ever really have time to devote hundreds of hours to finishing the car besides myself, and if the car was ever going to be finished, it would fall on me for the work and his dad for the finances. This poses a few problems as you can imagine. First if you know me, while I am always around cars, deal with them constantly, and know a lot about them, I am not a mechanic. I don't browse forums looking at builds. I don't dream about engine parts, suspension parts, or any of that stuff. My car has basically been the same for almost 5 years now without any real changes except fixing problems, and when any of that happens, my good friends Derrick or James see to it. I wouldn't really call myself your typical car guy.   So far in the picture below I had a week into fetching the car, and a few days loading, unloading, budgeting, and tinkering with the car. Not a huge investment in time yet, but I also hadn't accomplished much more than transporting the car around. This is the part of the story where I actually start pouring time into the car. It is hard getting motivated to work on a 240 with stock SE wheels on it, so I tossed on some of my fancy white wheels to add some contrast and spice things up visually. I spent a few days cataloging things, zipping across the state to pick up about 5K pounds of stuff including another car from Tyler's storage area. The process of putting the car together is daunting for me, so I chose to methodically pic apart one system at a time. I started with the steering system since it should be pretty straight forward.   So steering system, lets see how bad you look. No steering column in the car, completely trashed steering rack, trashed tie rods. Catch can, pump, and cooler are accounted for though, that is a big plus. Steering knuckles don't get within 2 inches of hitting anything to stop them, and only have about 40 degrees of angle even though they appear cut. Hmmmm…. At this point I should also mention pictures of this car are an illusion. It looks like an almost complete car. But I assure you, behind those wheels there is basically nothing. The car didn't even have lug nuts on all the wheels when I took possession of it. There were about 4-5 total lug nuts on the car. Stock worn out subframe in the rear with no brakes, no lines, rusty lugs. The interior is 100% empty. No fuel lines, just a fuel cell sitting in the trunk. The car is missing over 50% of the bolts on it. When I try and mount things the new tabs and holes don't really line up, and everything has to be coaxed together with some removal of material. But on the flip side there is already a mountain of work that has been done to the car. There are hundreds of hours of fab work, dozens of hours of prep and paint, and hopefully a functioning and built SR23 sitting in the engine bay. Not the we will able to tell for awhile though, as there is no tune, no wiring, nothing hooked up to the motor. The driveshaft is missing. Little details of the car give me a smile though. This is definitely at least Tyler's valve cover, I recognize the Porsche Turbo emblem residue.   After lots of cleaning I got his old baller hand made catch tank looking pretty good. Tyler didn't keep things clean LOL.   And I have piles and piles of his old stuff laid out for cleaning and cataloging so I can figure out what I need to order and what I already have. There is a mountain of missing stuff, and I have already at this point spent more than 20 hours just buying parts online, locally, and sending friends off to get them for me.   And so I purchased a cute little journal so that all my progress was recorded on paper, and so I can figure out what I need to order when I get home from working on the car at night.   So you can see I sketch out what I need, start labeling every piece of it, and anything I am missing spec wise I ask one of 3 people. Derrick, Marty, or Stew. I try to alternate through them so I don't bug each of them too badly, but each of them gets many texts a day from me. For example, this is what the page looks like at the shop, then I get home and figure out I need -6 to 14mm x 1.5 and -6 to 16mm x 1.5 for those two circle fittings in the middle of the page. Then two 45 degree AN fittings that are -6 over to a push lock, and the other to another -6. And on and on. I update my little drawing with all that info as I figure it out so I know what is what, even if I am not standing next to the car.   As I have been collecting items like the steering column, I test fit, find all the correct hardware, then lay them aside for fancy cleanup and paint. You can see in this picture the holes don't line up perfectly, so I carefully take everything apart and massage them in the direction they need to go a little.   Not difficult, just lots of time finding all the little things that are off. It also means you assemble, disassemble, and reassemble things over and over. Test fitting the steering rack required several hours locating some key missing pieces, clocking the waste gate dump tube, opening some holes, a trip to the junkyard, getting Anthony to find me a few parts, and the time to clean everything up. If this was my race car we would have spent 30 minutes bolting everything together and been done with it, but I am moving very slowly and methodically with this car.  As I work on the car I find things that I get stuck on for the simple reason I am worried what Tyler would do in the situation. For example, the brakes and wheels. Tyler always had this crazy set of $3500 Project Mu brakes, they embodied his style and persona. However, I am not going to subject his father to buying another set of $3500 brakes for the car, so what do I choose? Simple 300ZX brake setup? Tyler would go for that probably. 350Z Brembos? For some reason I can't see Tyler wanting those. I don't know why, but I get hung up on little details like this. I tossed my wheels on the car since it came with the worst wheels I have ever seen on a 240, and these help motivate me to work on the car since it looks better with them on it.   I purchased an assortment of nice zinc plated hardware to replace all the missing bolts on the car. The majority of the hardware on the car is going to be nice and new, or cleaned up and shiny. So all in all I am working hard on this project, methodically and carefully making through one part of the car at a time. I have in total maybe 100 hours into the project so far, and I am not very far into it. Most of those hours aren't really working on much mechanical, but I am about to get into that pretty heavily now that parts are starting to arrive. Just today I have had about 7 boxes arrive at the door, and it should keep up that pace for a week or so.   I will be continuing posting about this ongoing story as I make my way through it. I am glad to get the chance to work on the car, and happy that his father is interested in finishing the car. It has been good therapy for me as well as well since I feel guilt and other emotions now that Tyler is gone. I hadn't seen him much in the last year or two, our lives had drifted apart. This car is, in a way, an opportunity for me to put more positive effort into our friendship even after he is gone. |
|
|
|
|
02-10-2013, 05:00 PM
|
#4 |
|
Zilvia Junkie
|
2nd Entry, Dec 13 to Dec 20th.
This seven day or so stretch on the car has gone really well. My wife has been working nights at the hospital, and I find my schedule slipping farther and farther into the late hours of the night over at Autocomp. I am most productive with no one around, and any distractions and my productive level goes to about zero. So all in all I have been having really relaxing afternoons working on the car until around 2 am, then I stop by and see my wife for a short time, then order/research parts for an hour or so, then hit the sack. So lets get started here. I might have mentioned earlier that I have been agonizing over parts selection with the car. I want the car to be a reflection of Tyler, and what he would want, but also a reflection of what I am willing to put in the car. For example I am not willing to purchase $4,000 brakes ( which is what Tyler would want ), but I am willing to do something crazy with them. This leads to tons of research, an obsession with wanting to do something unique and interesting but also awesome. That, weighted with the concern that when I turn the car over to his father that I am not leaving him with some odd ball car with super difficult to service obscure racing parts. And then there is the point of not spending a ton of money, although the budget is substantial, and keeping things within reason. I poured over off the shelf brake setups from tons of retailers, piecing together a completely new Z32 setup, 350Z Brembos, and even trying to track down some Project Mu setups. They don't seem to sell the brakes where in the states anymore, and are an example of how difficult it can be to try and maintain and use awesome niche JDM parts. There are tons of problems associated with each setup, and nothing I really wanted to settle on. Then Stew turned me onto something really neat. The newer 370 and Infiniti cars come with a setup from a manufacturer named Akebono, and they are a great mixture of OEM clean styler and function, GIANT 14 inch front rotors and 13.8 inch rear rotors for bling, and fairly simple and straightforward to get onto the car. I think they would make Tyler both happy for the ridiculous bling factor, as well as keep the car functional and useful so that his father can enjoy and maintain it. That is a huge load off my mind, and I am excited to get them in the mail in a few days. Moving on to the physically laborious side of the project. As I browse through the pictures I am about to include in this I realize how productive the week has been! This is going to be good! As I am waiting for fittings and other parts to complete the steering system I moved onto other portions of the car. Tyler's dad is going to come take a look at it this weekend, so I really wanted to let him see the car start taking shape. Having a functioning steering system in a car that doesn't look anything like a car isn't very exciting, but having unfinished steering in something that is taking physical shape is something more visually appealing and I want him to feel the project is advancing. The car has been 3 years in the build at this point. So I grabbed the dash and starting soaping it up, scrubbing it as clean as I could. I then started to use tar and bug remover on the difficult parts, and spent a few hours bringing it up to the level of cleanliness that I am trying to keep the car at.   After getting it clean, I then needed to start chopping it up so it would fit in the car with the elaborate cage.   I very carefully fitted it to the car. Over and over I very carefully fitted it to the car! I kept having to make decisions which I didn't really want to make, such as how much material do I remove. Do I make it possible for someone to remove the dash once the car has the windshield in, or do I leave it stuck there forever? Do I potentially crack the dash getting it in because I cut the dash perfectly to fit the cage, and by doing so have to bend it terribly to install it? I ended up doing what I always do, which is use reason and logic to arrive at a fairly neutral middle ground to everything. I cut the dash enough to make it fairly easy to get in and out, but with close enough tolerances that you have to bend it substantially to get it in, but not TOO much. Of course I arrive at this AFTER trying to make it fit perfectly and being unable to install the darn thing. I was FORCED into the neutral decision : (   I have been going kind of crazy on the details in the project, and if you see the yellowish seam in the dash, which will be hidden by the windshield in most places anyways, I have been taking a magic marker to it. A huge magic marker. I looks really good from a reasonable distance of a couple feet. I have a lot more of it to do, but I was getting kind of high from the fumes so I procrastinated finishing the rest of it.   I cleaned up the steering column, getting rid of the rust and repainting it so it will be pretty…. even though you won't be able to see it when finished. I am using this logic for as many things as I can, just because you can't see it doesn't mean I am not spending a huge amount of time on it.   Pretty!   During one of my super late night shopping sessions I made a poor choice. Someone who shall be nameless told me that knockoff 30 dollar steering wheel quick release hubs are actually really well made nowadays. I did something that ended up costing more money in the end because I had to do it twice. I ordered the crappy knockoff ebay part and then was so disappointed in it after installation that I had to order a higher quality part to replace it. When assembled in the car it give the feeling of too much slop in the steering, way too much. It is one of the few things in the car you have a tactile relationship with, and needs to feel high quality and trust worthy. The last thing I want is people thinking the car is terribly built because they simply feel the steering wheel and experience way to much slop in it, and write off everything else as poorly constructed. Plus this crappy part required hours of putting together. I had to chase out all the threads, assemble it multiple times to play with it and disassemble it, and figure out if I was doing something wrong or if it really was that sloppy. It was.   It looks cool assembled though.   Then as I was starting to mount the body panels I found a little present Tyler left me. He has been leaving me a lot in this car! I am sure he meant to fix it…. but then he painted over it…. Very Tyler. It is a broken bolt in one of the most important fender mounting holes.   This one little broken bolt took me about an hour of fussing with until it was completely drilled out and re-tapped carefully. Good as new now. That stitch weld next to the drill bit is mocking me. I know Tyler would have just not used the bolt hole and mounted the fender with just 2 bolts.  Tyler was rough on everything. Even the key to the car was mangled. Luckily a locksmith made a new one! Took a couple tries though. This is the key after it had already been mostly "unbent".   Everyday has been Christmas lately for this car. About 3-7 packages a day show up for this thing. They range from a simple can of spray paint all the way up to the seats. I am patiently awaiting that box with the brakes though!   ASD sent out a sweet handbrake for the car!!!!  And finally, we are getting to the fun ricey stuff. Mounting the fiberglass on a car is always fun. It changes the car so quickly into a finished looking car, and gives it volume and style it didn't have without the few pounds of FG hanging off of it.   Plus, you get to drill into a perfectly good car! That is always fun.   Don't mind the rear wheel fitment here!!! I tried to use the dog to cover it up, but you can still see it. : ( The front isn't too bad though, although I still have the width of a very large brake rotor this is about to be added. I even took the time to fit the gas tank cover, even though it has a fuel cell. Those cool little hell raiser things sticking out of the back fenders are called Clecos. They are like temporary rivets and are really neat, look them up.   And finally, today's work. I spent an entire day fitting the head lights. Considering the car doesn't really have a core support, this went pretty well. The mounts off the tube frame structure are pretty good, and only need about 1/2 an inch of adjustment at the middle part of the car, and maybe a bit more than that towards the corner lights. The intercooler had to be relocated about another half an inch, and the headlights had to be cut about another half an inch. Then the fenders needed to be cut in various places to fit around the tubes, and I think the hood is going to need to be clearanced a bit more. All this meant I had to assemble and disassemble, modify things, then repeat dozens of times. Each time I had to lift the hood off and set it aside, take the fenders off, remove the head lights, corner lights, and make my adjustments. But it is definitely coming together. I love the style of the car, and I love working on it. I can't wait to fabricated a bunch of little items for the car such as a catch tank, brackets, mount the seats, etc. I am going to go spend some time practicing my TIG skills, and get to it. I hadn't really paid attention to the welding on the car much, but everything so far was done with a MIG at the previous shop, so it will be fun to add some delicate TIG work.  If you made it this far thanks for reading! I hope you didn't mind the fact that I have been documenting a lot of the build with my iPhone shooting with Instagram. I have a fancy DSLR camera but it is so much faster and more fun to shoot with my phone. I can just pull it out of my pocket and fire away and keep working without fiddling with my settings and changing lenses. Also, I get some fun dramatic shots with drills and stuff, shooting with one hand and drilling with the other! I would like to throw some quick shout outs to Autocomp Racecars for letting me take up space and use their tools to work on this sweet chariot. I would like to thank Amazon and Ebay for insanely easy shopping LOL, I buy most parts and consumables while I am working. I have only made ONE parts run during this entire build, and that was only to see what kind of bolts Autozone carries out of curiosity. Everything is ordered online from zip ties to spray paint. I simply move on to something else and budget my time accordingly. I have more than enough work to do this, and it hasn't been a problem yet. Just like cell phones, email, computers, and everything else have changed how we do everything, this is really the first time I have really taken advantage of ordering everything from my phone as I work and not stopping. It has saved me probably 20+ hours of parts runs, not kidding. |
|
|
|
|
02-10-2013, 05:02 PM
|
#5 |
|
Zilvia Junkie
|
So here we are again! It has been a few weeks since I have posted the last batch of pictures, and I have been all over the place. I went on a snowboard trip with my wife, I ran all over Texas multiple times, and finally got a chance to get back to work on the car.
After installing some of the body work and lights, I moved back onto less glamorous parts of the car, namely the rear subframe. I needed to install some control arms and solid subframe bushings, so I figured it would be a good time to pull the entire subframe out and clean it up. Shaun and Fielding swung by and we started by dragging it outside and setting the rubber portions of the subframe bushings on fire to get rid of them. It was about 25 degrees out and windy, and the burning rubber was absolutely terrible smelling.   That was the only big part of the assembly of the car I let anyone help with so far, as I needed extra muscle to move the thing around. I really am enjoying working on this car mostly by myself, everything is done by one person and hopefully less is overlooked that way. During daylight I started the process of cutting and forcing the subframe collars to let go of their contents.     They went back together without too much fuss, but the whole process from start to finish was probably 10 hrs of physical and noxious labor. To spoil the car, and since it had no hardware when I got it, I purchased assortments of fancy zinc plated metric hardware, as well as a cleko set since I was monopolizing the ones at Autocomp. Thanks Marty!  Here you can see how rusty and beat up everything in the subframe is. It took massive force to break the rusty parts free, and when I did rust simply poured out of the stuck joints. I mushroomed the end of an axle shaft nut thread forcing one, but luckily I have race spares so it isn't a big deal.  Here I am prepping for some sand blasting, which I have been doing a ton of! Marty showed me this sweet technique for getting edges really nice with tape. I didn't want sand to get into the bearings at all, so I had to be careful with prep.    That sequence is pretty self explanatory. : ) Next we needed to move and shuffle cars around in the shop, so I reassembled the subframe and got things moving again. This is the first outside time the car has seen in quite some time. You can see we have quite a few drift cars up here now.   Moving back to work again, I just put a new steering rack in the car since the old one was junk, and I got to install some fancy new AN fittings that I ordered early in this post. About this time I found out that more things didn't really function in the engine bay, as the turbo oil return line was hopelessly in the way of the steering coupler and shaft, so I need to order a 45 degree angle AN to clear that and shorten the line. Some other little items need attention too. I forgot to take pictures of me installing all the AN pushlock fittings and plumbing the power steering rack, cooler and reservoir. I learned that AN pushlock hose and fittings are proprietary sizes by just a TINY amount, which makes it freaking impossible to put them together properly and completely if they don't all match in brand. That was a big pain.  I got to make some cool brackets to mount some stuff too. Not done yet with this one yet, but it is pretty fun. I need to do a little brace on it, but it came out really nice for a piece of scrap aluminum in the junk bin. I was planning to remake it, but I think I will keep it.    ------- On a side note, I swung by Tyler's garage space for his toys and picked up a chassis. Of course it would end up being a snow day in Texas, and take 20 hours to complete the journey. You can see a pic of Tyler's original chassis just hanging out. And also a pic of my old chassis being moved over to a spare chassis Tyler had lying around. That counts as three of my cars now in one building getting worked on! And over at Autocomp, I have 4 that I am storing or working on. I think I have a problem!    ----------- And we attended a wedding where Tyler was mentioned in both the service and the program. This isn't all I have accomplished on the car lately, but all the stuff I remembered to take pictures of! |
|
|
|
|
02-10-2013, 05:06 PM
|
#6 |
|
Zilvia Junkie
|
Little update....
 So I tried to get the second Tyler S14 running so I could take it out to play with it soon, his old missile car. Of course it wouldn't start, and after tracking down electrical problems, charging the battery, checking the oil, and figuring out the car has no ignition key we finally got it started. But then it would never restart again, except for that one time. So I figured it was the starter. So I pulled it off and went to go toss the racecar starter on it to see if it would fire up again, and low and behold after something like 30 minutes of attempting to bolt it up to no avail, I realize the threads had been drilled out of the starter mounts so it could be reverse mounted!!! LOL. Oh well, with the electrical system working a bit better and a battery in the car, I attempted to finally get the windows up, but it has a bad window motor. Getting a bit frustrated and wanting to accomplish something I took it upon myself to clean up the headlights. They looked like this.  Now they look like this. Basically I bought one of those little head light cleaning kits and followed the directions carefully. They came out pretty darn well in person, I was really pretty happy with them. Takes about 30 minutes of sanding per headlight, and some other steps. Not difficult at all. Everyone with crappy headlights should do it. I then did a bunch of little stuff like gather up some Zenki body panels for it, and tried to make a list of things it needs. It is in pretty terrible shape, blown turbo, tons of broken parts, more broken parts, but I want to go drive it for some reason. I started ordering parts for it in the hopes of making it running again.  Back to the main car, the blue one. I used my contacts with our BC Racing Racer Program to get a set of custom setup coilovers for the car. I had Chelsea Denofa take my list of wishes for how I want the car to behave, along with the power and tires I plan to put on the car, and he put something special together. The box was custom modded too. Big thanks to the guys over at BC Racing for hooking up so many of our drivers with discounts this year.  I started mounting the coilovers and lots of other cool parts on the car, such as Derrick Rogers Knuckles ( Tyler got to the modded knuckle scene a bit late, swearing them off as a crutch and making other drivers boring, but when he came around, he fell in love with the idea of knuckles and silly angle ), custom extended tie rods, new bearings and hubs, and lots of other cool little stuff. I had been holding back on some of those things until the coilovers got here, but now I figured I would put them on. That goes for the brakes too. I am still really proud of the brake choice, I really think Tyler would like these things. He probably would have painted them a crazy sparkle color or something, and they aren't quite the full Project Mu effect, but they are matched front to rear and hopefully much more functional, maintainable, and enjoyable.  Here is one of the front brackets being lined up for the Akebono big brake kit. With no instructions, and tons of parts, I just sat on the ground for about an hour making piles of where I thought everything went, fitting things and testing them over and over, then beginning the assembly. The kit is really nice, with giant aluminum brackets that mount the calipers that normally wouldn't even come close to fitting on the car. A few things to note: The calipers are giant and won't fit 17 inch wheels up front. There is some trimming involved even if you use the crazy extra spacer pieces the provide which I didn't really use. You will need to trim the caliper in addition to where they already trimmed it. In addition I had to trim one of my rear spindles due to what I imagine is a casting tolerance issue or something, but I had to take a few MM off of it with a flapper wheel. The calipers are very light and aluminum. I really like them. The rotors though, dear lord are they heavy. If they slid off during the fitting they probably would have broken my leg. The fronts are 14.8 inches, and extremely heavy. If this car was going to ever really get raced, I would switch them over to aluminum hat multipiece thingies.  My mess of parts figuring out where things go.  Making some clearance for opposing bolt heads that mount the bracket to the spindle. They did provide a half moon 1 + inch aluminum spacer for the feint of heart that don't want to make room for like this, but I decided this was a much cleaner look than a giant extra washer in an odd shape.  And here is a corner of the car all buttoned up! I think only one corner actually got the brake line attached at the moment, all the other sides had missing or broken bake lines! I have fancy stainless ones but there isn't anything to attach them to, just like everything else on the car! Everything has to be made from scratch, or found at a junk yard, or ordered online.  Here you can see the clearance created in the caliper for a bolt head. This was provided by the kit company, and had to be slightly modified as they didn't fully fit over my rear spindles. All in all a very nice kit that had to only be lightly massaged onto the car with slight cutting of a couple mm at most.  I had to modify some spacer pieces a bit, so I tossed them on the lathe. Thank goodness Autocomp has so many tools and lets me use them!!!  |
|
|
|
|
02-10-2013, 05:08 PM
|
#7 |
|
Zilvia Junkie
|
So I need to weld aluminum for some upcoming parts of the project. I made a bunch of little tiny pieces of aluminum by cutting apart formula car body panels, sanding off all the paint, cutting them into tiny pieces, and then welding them back together. I won't show you tons of this stuff like the shark box catch box I made, but this piece looks decent lol. The more complex stuff doesn't look as nice. I feel like I can finish up some bracket stuff I was working on, and continue on with some of the front end stuff I want to make.
 A HUGE amount of my time is cleaning, cleaning, cleaning. The car literally came with no bolts, and I keep scrounging what I can or buying them. The scrounging requires so much cleaning!  I have been meaning to fix some small mistakes I made with the power steering system. I put together some AN Pushlock hoses with non-matching brands which caused some problems with proprietary non-interchangeable hoses, even though everything was the same size. So I purchased the corresponding same brand fittings, and rebuilt the lines. Here I am laying them out. This is low pressure power steering stuff, ignore the hose clamp in the bottom of the picture, that hose was temporary and a used piece of hose for fitting and routing.  I wanted to fit a 90 degree curve problem with the factory style hose setup since things have been rerouted quite a bit. This involved cutting up the stock low pressure feed into the power steering pump, I got rid of some length and the barb...  Putting an AN fitting into a lathe. A dash 8 male Earl fitting if you are curious.   Then opening the backside of it up so the powersteering feed slides directly into it so it will be a better welded joint.  Then WEEEEEEEEEEEE!   And here we go, final routing correcting some problems in the engine bay.  For your information it is a dash 6 coming out of the high pressure side, feeding into the rack, coming out the low pressure side over to the cooler, coming out of the cooler in another dash 6 line into the reservoir, and out in a dash 8 and over to the return low pressure inlet which is a dash 8. All the low pressure hose is Earls Super Stock push lock hose, in both dash 6 and 8. The high pressure side is a premade piece, since I can keep a hose from exploding at 1000 psi. ----- Some fun facts. 1. I have now pulled a trailer in the quest to finish this car over 3500 miles. That includes going to Vegas, going to Kilgore, going to College Station, etc. All with a trailer and a diesel truck. Tyler traveled out to Vegas quite a few times and probably drove a combined 10,000 miles to work on the car and transport it around. Each trip to and from Vegas is over 2400 miles. 2. The front suspension has been pulled apart more than 10 times. Tyler probably did that as well. 3. The new brakes have been on and off the car probably 5 times so far. Tyler never got to see the brakes, and took the stock ones off and threw them in the trash, he didn't have to fuss with those. 4. The head lights have come on and off more than 20 times for fitment, and I am only about halfway there on that. It takes me 20 minutes to assemble and disassemble those little guys. Tyler loved HID's and probably fussed with them on every car he ever owned. 5. I have received more than 50 packages from online retailers. I am a LONG way from done. Tyler probably received that many a month! |
|
|
|
|
02-10-2013, 05:10 PM
|
#8 |
|
Zilvia Junkie
|
So here comes another big update! I keep meaning to do these more often, but I just get so caught up in working on stuff 12 hours a day that I am exhausted when I get home. A couple months ago I understood that Tyler's car wouldn't be done anytime soon since I am doing everything myself and I am incredibly slow at mechanical stuff, and since my S13 has been dismantled, I figured it was a great time to bring Tyler's missile car back to life. I need a vehicle of his to spread his ashes in out at Mineral Wells, as well as to entertain his friends and family at the memorial event coming up in April. More info on that will be posted soon.
So knowing that I needed some serious help with Tyler's car I first made a list of what really needed to be fixed. Blown turbo. Condition of motor was unknown and after spending a day getting it running it puked all its oil out. The car only had a side mount intercooler from the factory. Starter wasn't working for some reason. Window regulator was messed up. Hood wouldn't release and the hood cable was messed up. Door wouldn't close. Trunk wouldn't latch and close. Power steering system needed attention. Car was hot-wired to run with broken ignition setup. Plugs were fouled. Car wasn't charging and alternator wasn't working, battery was dead and wasn't tied down or captured. Motor mount is broken. Leaks everywhere and motor soaked and caked in oil. Car has Derrick knuckles on it but steering isn't setup correctly and the wheels rub everywhere, tension rods need to be modified, fenders banged out, alignment done, larger wheel spacers added. Ebrake isn't working well enough. Wiring is SCARY SCARY SCARY. The wiring is really really really bad. Radiator isn't actually mounted to the car with anything but 1 zip tie. Fan shroud is broken. And on and on. So I asked Derrick if he would come down for a weekend and tackle this with me, and thank god he said yes. I am really excited to get the car going immediately and to pilot a simple SR20 car again for the foreseeable future while my new chassis is being built. Marty at Autocomp was super inviting and let us do everything at his shop, which is an amazing place to get to work on my projects at! So Derrick came over to give me a hand and that is where we begin the pictures. So I started by pressing out a bearing on the old Autocomp press and getting ready to swap in a new bearing.  That left me with a race I had to cut off and a bearing to throw away.  I super carefully cut away the race and then put a crack in it, being super careful not to contact the material of the hub itself and the surface I was going to put a bearing back onto, although it probably wouldn't have been too terrible had I nicked it.  Now a peak at the car in question. You can see it had no bumpers, a trunk I have to hold down with a tire, and a permanently downed window. It has lots of dents I am temporarily going to ignore, but I have a plan for those. Many of you guys will remember this car as the one Tyler brought out to GGP and a few other venues a few times to play with. It was T25 at the time and probably 14 psi through a side mount! Too much for the little turbo to take! He drove amazing well in the car though, and we tossed him into single qualifying runs with everyone at GGP and he qualified 1st or 2nd and then bowed out since there was no cage. That was without driving with us for a year in a really ragged out car with maybe 200 whp.  I go through all the effort of pulling the starter and ordering a new one from Courtesy Nissan and carefully explain what I needed, telling them over and over again I needed a RWD SR20DET starter, blah blah blah and they send me a FWD one : ( That took a week to sort out, and was a time suck!  Tyler's catch can setup! Mine is a Starbucks tea cup!  We compression checked the motor to see if we should even bother putting all this work into such a ragged out salvage title car that has so much damage to it. And it checks out 170 across the board! Or at least that is what Derrick told me, as I was sitting inside the car working the key after we found a solution to our starter problem!   Poor little spark plugs. At least they weren't melted and destroyed from detonation!  We started breaking everything down on the car getting ready to put another turbo on it, and fix all the broken or neglected stuff.   Working on a table inside finally, since the car is in the backyard of Autocomp.  And now the fun of choosing a turbo out of my collection! This little turbo is too big. This little turbo is too small. This little turbo is JUST RIGHT. That would be the 2860RS or Disco Potato, otherwise known as a T28RS or something. Basically it is a T28 visually, but makes a bit more power. Sitting them side by side you really can't even tell a difference in size or anything. I chose the turbo because I wanted an enjoyable playful car that didn't make a ton of HP, had really quick response, and would let me show people they don't need to go V8 to tandem well and have an awesome time. The SR20 S14 is an amazing platform that can compete with the best of the cars in our series with just 250 whp, and can keep the build budget in check. A fantastic S14 can be had for 4-10K $, while building yourself a V8 car will cost something approaching 20k $ at the minimum. The turbo on the left is a GT3076R, next is the 2860RS, then the S15 T28, then the T25. The party starts from left to right at 4500 rpm, then 3500, 3000, and probably 3000.  I sand blasted the exhaust manifold to clean it up, found a Tomei turbo elbow to spice up the parts list and cancel out the Meagan manifold, and Derrick kept working on getting everything lined up and tacked together so it wouldn't fall apart.    I went to go inspect the fuel pump and see if it was up to par, and try and figure out why the fuel level wasn't working on the dash. Also, nothing else works on the dash, so there are probably enough reasons you can just take your pic. The car had a walbro and no fuel level setup, so I just put it back together and let it be.  We then tackled the fun part of all this, and the most time consuming. We took a knockoff front mount Greddy intercooler and turned it into a sweet mid mount intercooler.  This contraption was required at one point.... That battery mount is really neat! I stole it out of my E46 drift car I got off of Chelsea.   And then the cutting begins back at the front of the car! Have to make room for those intercooler end tanks... which we also had to cut off and remake.... I don't think I got a single picture of myself, it is always Derrick in the pics! Unless you see a POV shot, then that is me.    Then there was tons of measuring, cutting, stealing intercooler pipes for end tanks, etc to get to this pic.  And of course Sam the Autocomp dog is constantly looking for love, trying to show you things and get attention and scratching.  I hope he doesn't stare at this too much!!!  And finally after two days of building the setup and piping, it gets put in the car for ALMOST the last time! Notice how little intercooler piping there is, and how hidden away the setup is. I should be able to run into quite a few people without killing my piping hopefully, and sidelining me for a day.  TO BE CONTINUED.... |
|
|
|
|
02-10-2013, 05:11 PM
|
#9 |
|
Zilvia Junkie
|
So while this car isn't crazy baller like Tyler's new blue chassis, I think it is going to be a much more fun car to drive. The white car was giving Tyler the chance to be really aggressive with his driving, where I feel like the blue car was becoming too nice and far too prepared to really wreck once he finished it. And the fear of wrecking your car makes you a terrible driver. The mid mount setup is really similar to how the blue car has it's intercooler setup, and we are simply continuing to build the white car in a super budget conscious fashion that can be driven aggressively and often. Almost every part of what we are adding to the car is either from my junk pile, or just created with the skill Derrick has in his hands. Of course I still spent a couple thousand dollars in an argon bottle, lots of welding rod, food, fuel, spark plugs, hose, bolts, cooler, blah blah blah, but it is pennies on the dollar compared to the blue car. I am really lucky I have the resources of Derrick and Autocomp to pour into this project, otherwise the car wouldn't have turned out so well.
Before we get started with pictures and more story, here is a little teaser of what is currently sitting in front of Tyler's blue car. Will's 2013 FD build that Will and Marty are working on.   Also, I spent like 6 hours sand blasting my V8 headers with the wrong blasting medium.   And here you can see Derrick making the complex intake pipe for the MAF to turbo. We couldn't come up with the correct bends out of my intercooler parts pile, so he started pie cutting his way to victory. If you know Derrick, he does this a lot.  And at Autocomp we work almost exclusively with Snap-On tools! Baller, except for the constant fear of loosing a set of 200 dollar sockets LOL. I clean each tool every night as I tuck it back into the most ridiculous tool box I have ever seen. It is the same one team Falken pulls behind a truck onto grid at events.  Most of the power tools are Dewalt, as the Snap-On ones don't seem to fare as well for some reason.  Here I lay out the Tyler/Aaron exhaust pile and start picking parts. I ended up with basically a straight pipe on the car and need to revisit that soon, as I am going to try and drive this on the street some for fun.  Power steering cooler is getting sandwiched between the intercooler and radiator, and will hopefully get some airflow from the fan.  The steering rack had no boots on it, so I bought some replacement boots and slid them on.  Here is another more finished pic of the engine bay.  I stole an oil cooler off of my E46 as well and attached it to the firewall. I capped off the front t fitting on the valve cover and ran the hose around the rear of the engine, and capped the breather that comes out of the block down by the exhaust manifold.   We decided to run no blowoff valve after already putting one on the piping, so we deleted it. No BOV on this car of any kind! Sorry turbo, but you are going to sound RAD!  Oh Tyler! Leaving us surprises!  Game of latches. Not as interesting as Game of thrones, but it got sorted out with bending things. And now it closes! Still haven't really finished the door latch setup though. Not sure what is going on with that.   Had to resort to these a lot lately. Rethreading tools for those that don't know. it is for when you or someone you know royally screws up something that screws into something else.  And the Autocomp stomp shear! I call him stompy and I love him! Combined with the bending break ( or brake? ) I can make little bracket for fun to amuse myself. Fun times.   Here we are trying to figure out what in the world Tyler did to this poor window regulator. It took us about an hour of jigsaw puzzling, but it finally came back together. It was really bizarre, but something like this would not have kept his attention for more than the unbolting process. Hence why it didn't work. He did some really weird things with screws though that we couldn't figure out.  I was so proud of myself to procure a 1 piece driveshaft for the car.... and when going to install it I found it ALREADY HAD ONE. TYLER'S MISSILE CAR THAT IS A SALVAGED TITLE BLOWN T25 CAR WITH A STOCK SIDE MOUNT HAD A 1 PIECE DRIVE SHAFT ALREADY!?!?! Only in the world of Tyler Cox would a 2500 dollar car have a 500 dollar driveshaft installed, and baller coilovers. The coilovers and drive shaft alone were worth more than the car could be sold for when I started working on it. And finally, the street shot. Luckily this gas station is literally in the parking lot of Autocomp, and the street Autocomp lays on is pretty quiet other than security cameras. So we did a little night testing of the car and a lot of waste gate/boost controller stepup. The wastegate on my turbo was set at 18 psi, so we had to go and swap it after a couple pulls for another one, then add a boost controller. The motor is 100% stock inside with a stock ecu, stock injectors, 10 psi off the turbo, and a stock maf. I have Nismo 550s and a z32 maf that will get tossed on the car as soon as I get a mail in tune for it hopefully, then I will probably run around 12-18 psi when I go play with the car. I also picked up wide body for it, but will be running stock bumpers and skirts. The fenders are only to fit the larger wheels I run so I don't need yet ANOTHER clutch of wheels for yet another car. I probably have well over 20 wheels at this point, fitting a mixture of 4 cars.  I need to get some Tyler Cox Memorial Missile Car vinyl made up, if someone want to cut it for me I would appreciate it. I will design it! Things to get done when I get back from Utah, paint some stock bumpers, get some side skirts, put on all the sweet fancy marker lights and stuff I scored, enjoy the freshly redone head lights, maybe find a new stock hood and a front bumper lip, install the fenders, do an alignment, get the ecu and install some go fast parts, CLEAN IT, AND GO DRIFT IT!!! It will be at the FEB 17 event. |
|
|
|
|
02-10-2013, 08:14 PM
|
#11 |
|
Zilvia FREAK!
 |
ill cut that vinyl in a second for you.
You're an awesome person for doing this!
__________________
cONtRol FReAkS |
|
|
|
|
02-10-2013, 10:05 PM
|
#14 |
|
Leaky Injector
Join Date: Sep 2012
Location: new york
Age: 30
Posts: 77
Trader Rating: (4)
Feedback Score: 4 reviews
|
sorry for your lose bro but your doing it right by building this car and its coming out so sick. i will deff watch this thread. good job so far and good luck!
|
|
|
|
|
02-10-2013, 11:11 PM
|
#15 | |
|
Zilvia Junkie
|
Quote:
hopefully that link works! |
|
|
|
|
|
02-19-2013, 04:11 PM
|
#16 |
|
Zilvia Junkie
|
So another day, another day of working on one of Tyler's cars.... or finally, ACTUALLY DRIVING ONE!!!!!!! I actually felt bad about not working on the blue one lately, as I have put a ton of time into the white one. But, the white one is now drivable and awesome, and I had a blast in it this weekend, and that distracts me from the guilt of not working on the blue one too much in the past few weeks.
First of all, I have been wanting to build a drift car that has very little fiberglass on it so it is far more resilient to smashing into things. The E46 BMW that I picked up fits that bill well, but now that I am working on 240s at the moment instead, Tyler's Missile car gave me the chance to try it out. You will notice in the above pictures in one of the older posts that the white car had a crappy ebay URAS kit on it. This thing was ragged out and falling apart, and without cool wheels to back it up and a lot of work put into it, it just looks tacked on and bleh. I want to go in the opposite direction with this car, cool wheels to make the car with big tires, and stock looking body work that fits well and only rely on fiber glass for the fenders to fit the tires. So now you know my plan... I ordered up some Origin type 2 rear fenders and some origin front fenders. I am trying not to use ebay chinese stuff anywhere at all on the car. I got them in the mail and started really doubting myself. I didn't like the look of the type 2 rear fenders at all, and after mounting them, I was doubting myself even more.   I was pretty much like bleh, I don't think I want this at all. It was getting dark though because I got a late start that day, and it was the Thursday night before the event at Mineral Wells this weekend. Saturday I was teaching a class on drifting fundamentals, and Friday I reserved for finishing up the car and making sure everything was ready, as well as mounting tires and stuff. Oh, and Thursday earlier in the day I installed an Enthalpy tuned ECU, Nismo 550cc injectors, and a Z32 Maf. It all worked like a charm and is awesome. Back to the fenders. It was getting late in the game at this point if I wanted to drive Sunday, and I only had 1 pair of rear wheels which would fit the car with the stock body, some Battles in 17x9.5 +20ish or so. They would fit the rear fenders and barely run with 245s on them. Problem is I want to run 265 Kendas, the same as my V8 car. So with the pressure of meeting those guidelines I decided to cut the stock fenders up and mount the rear fiber glass fenders. Some super quick guidelines, no really plan except I have done this several times before and feel comfortable just going for it.  BZZZZZZZZZ plus sparks. Use your imagination.  Commitment.  And then it got too dark to really take pics with a cell phone. I was using the headlights of my truck to do all this! In the dark outside Autocomp because the interior is all full right now. SUPER FULL. I finished up the back fenders, although I didn't have time to actually seal them up completely, and drilled everything up and aligned/mounted the fronts. It all went pretty well except the corner lights and headlights which fought me a lot. The core support of this car is pretty bashed up and really needs some love of some kind. So does the wiring :sigh: Finally I couldn't take working in the dark anymore, after finishing mostly everything body related, and started the process of moving stuff around to get this car into at least the very edge of the shop. The car was starting to really come together.  A blurry pic of me mounting up some 265/35/18 Kenda tires for a T28RS car. Ballsy!!!  Tyler left behind a baller Longacre digital airpressure gauge for me! I was trying to decide what kind of air pressures to run at the track with this tire size. I started at 50 PSI actually, and immediately dropped them down to 30 hot after the first 2 runs. I will probably lower it a tiny bit more next time I go out, maybe 25 PSI or so. The car has amazing grip so far!  Loading the car up in the trailer I was still a little curious about how I liked the look of it, I wasn't sure. I hadn't seen the car in the light of day yet, and I couldn't see it from the side with anylight whatsoever on it. I was exhausted and tired and went home at around 5 am. Lots of stuff happened, I taught a class, still didn't a chance to see the car in daylight, worked on more stuff to get it to the event. Shaun and his friend replaced both motor mounts Saturday night for me, Derrick bounced into town and fixed some more stuff. I made little temp brackets to mount the front bumper and we used stock brackets to mount the rear one. We had some stud spacer problems in the rear we addressed, mounted tons of tires for everyone with the Autocomp tire machine ( thanks Marty!!!! ), bled the brakes, checked the cooling system, messed with the throttle body and cable setup, messed with a bit of wiring, and on and on. Oh, we loaded cones and loaded and unloaded trailers over and over too. Went to bed around 2 am or so. Then got up around 6 am to head to Mineral Wells. This is basically par for the course by the way. Still never really seeing the car and having no idea if I would like the way it looked or drove, we got to Mineral Wells and unloaded it from my enclosed trailer. I setup course and started getting people checked in, and then finally took the car for a few laps. This picture says it well I think. I love the way the car looks and drives. The wheels and tire fitment really pull the car together. It has extremely little actual setup time since I hadn't ever really driven the car before. But going off the principal that wheels make a car, it worked out. I love the stance, don't hate the ride height, I love monster trucking over cones if they are in my way and not worrying about body kits or fragile things. The motor is a little BEAST. It makes around 310 whp, but does an amazing job. You definitely don't need a V8 or big turbo to have fun still. And remember, this thing makes as much power as a stock LS1, with a cool little T28 turbo! Tyler would have been in LOVE with the way this thing drives!   It drove at huge angle all day. Like HUGE angle. The pics don't do it justice, but we were at lock with knuckles that have 60 degrees of angle basically every turn. It is a beast with grip, and I only spun it once all day, and that was on purpose just TRYING to.  I was being super careful in tandem since I didn't want to wreck into Anthony's Chaser while Josh Buckley was driving, but this thing can tandem like crazy. I was getting pelted by rocks in the face since my helmet wouldn't fit with me in the car, and I had to use a borrowed helmet while tandeming that was open face. Even keeping 20 feet behind the Chaser was pebble city lol.  Here is a little shot of the Chaser. Man is that thing beautiful!!!!  The next day I was working at the shop on the car again, fixing the alignment and Jake started sending me these pics he made in Forza!!! They were cracking me up!!!! We are going to have a Forza comp at Round 2 of our series with some cool prizes, and the drivers will be drifting in Tyler's cars replicated in the game!  So, the car was a raging success. It drifts AWESOME! The things I need to fix are: It overheats after 2 laps. I need to figure this out. I was running it around getting airflow on it after each lap and the temp would come right back down after about 30 seconds. Not a huge deal, but a drift car definitely shouldn't overheat. I don't fit in the car with my helmet, and I like my helmet. I need a racing seat in it. Not a big deal. With the rear fenders not sealed back up at the moment, the cabin fills with smoke, and this drives me nuts! I need to seal those up. The alignment is way off, and it chews through the inside of the tire waaaaay faster than the rear. We still got about 30 laps out of a set of new Kendas without a problem, but hopefully it will go up measurably when we start using the whole tire. Hopefully grip goes way up too, even though it already has amazing grip! We measured it Monday night and it had 1/2 inch of rear toe in and -2 degrees of rear camber. It needs to be about zero to or a tad in, and -.5 rear camber. Also, the rear upper control arms are installed upside down and hitting the frame rails! We figured that out working on the toe! Scary!  |
|
|
|
|
02-19-2013, 05:11 PM
|
#17 |
|
Zilvia Junkie
|
And now for some video from the event!!!! In the video you can hear me just running the rev limiter for long periods of time. This amused me so much for some reason I just kept doing it! I got some tandem in with the Chaser, but was super careful to keep my distance in a new unproven car. If it wasn't the Chaser I would have been driving into people's doors with this thing! The car is SOOOOOO much fun to drive, and is such a simple build for the most part. When you see Josh driving the car, watch for his hilarious smile towards the end of his run : )
I am excited that this car is going to be ready for April 20th when we spread his ashes while doing a giant burnout in it, T Cox style. Tyler Cox Missile car project test day on Vimeo |
|
|
|
|
02-19-2013, 10:06 PM
|
#19 |
|
Zilvia Addict
 
|
now this is a 'missile' car i can approve of. everything looks good on the build and the only reason to classify it as a missile would be lack of paint, which is the way it should be imo.
such a rad stance too, +1
__________________
* S14SR22 * 9.0 c/r * GT3071R * |
|
|
|
|
03-28-2013, 10:58 PM
|
#25 |
|
Zilvia Junkie
|
I took the missile car out for some fun at Round 1, it is quickly becoming the UN missile car. It had no problem at all keeping up with even the fastest of our local cars. Enthalpy sent me a tune to pop the rev limiter up to 8000 rpm. Still on 100% stock block, stock head, never popped the valve cover off. Turbo is set at 18 psi on a Garrett 2860RS, and unfortunately a .86 hot side. I completely spaced when I got the turbo from a friend and didn't realize what the hot side was when I put the turbo on the car. I ordered one of the new fancy GTX 2863 .6x turbos for the car, so that should be interesting!
Tire wear has been amazing, and the car is working great. I blew up the ring gear as I forgot to check if it had fluid, and of course, it didn't so it blew up the teeth on the ring gear. Live and learn and check your fluids before you take the cars out kids! The car has now been to 3 events and done great at pretty much all of them. Oh, and I fixed some more wiring, I will have to post that up. Turned out pretty well. Most of the car's wiring that is modified is not connected in any other way than twisting the two wires together, and possibly adding electrical tape! I don't think Tyler made those modifications though, I think the car came that way!    And here comes the memorial event! Click below for more info! Tyler Cox's Lone Star Drift Formula D Proam Event | Facebook  |
|
|
|
|
03-30-2013, 08:13 PM
|
#26 |
|
Zilvia Addict

|
My best friend said he would do this for me also if I ever died and still had my car.
You are a true friend and I express my condolences for your terrible loss. Keep up the good work, I've never met Tyler, but if he were here today I'm positive he would be proud of your work and dedication.
__________________
Two-Tone owner#011509-Lightly Modded 
|
|
|
|
|
04-02-2013, 12:55 PM
|
#28 |
|
Zilvia Member
 Join Date: Aug 2008
Location: huffman,tx
Age: 47
Posts: 213
Trader Rating: (11)
Feedback Score: 11 reviews
|
Aaron, I'm sure Tyler is proud of what your doing for him. See you at the next round of the Lonestar series!
-James Mckiddie
__________________
S14 Turbo LS1/t56 http://www.playloudclothing.com/ |
|
|
|
|
| Bookmarks |
|
|


 Linear Mode

