|
|||||||
| Home | Rules & Guidelines | Register | Member Rides | FAQ | Members List | Social Groups | Calendar | Mark Forums Read |
| Tech Talk Technical Discussion About The Nissan 240SX and Nissan Z Cars |
 |
|
|
Thread Tools | Display Modes |
 01-24-2008, 04:54 PM
|
#181 | |
|
Quote:
I agree. I would stay away from a flapper wheel though. It would be really easy to grind through the thin metal. I used a propane torch, putty knife, and a wire wheel with great results. I prefer using small tacks mayber 3/4" to 1" long if for no other reason it looks better. I think the small little spot welds looks shitty. I tried to find more pics of mine but am having no luck. A fire extinguisher is a great idea also. My undercoating kept catching on fire while I was welding my car alone. That shit gave me a headache. |
||

|

|
| Sponsored Links |
|
01-24-2008, 05:37 PM
|
#182 |
|
Zilvia Junkie
 |
How did no one mention acetone and a rag, probably one of my favorite tools. Pick up a cheap spray bottle from Home Depot/Lowes/etc and fill it up.
As for other tools, beefy wire wheel on an angle grinder or the tattoo remover (I don't know the actual name, but its like a wire wheel except all the wires are a little thicker and stick straight out, it can remove everything). A torch is good to help break up the sealer in tight spots, then I use o-ring/dental picks to dig it out. A variety of scrapers and razor blades. Scotchbrite of varying roughness, scotchbrite disks on the 90* die grinder. And I'm sure there's some other things. I pretty much clean it off and dig out as much as possible. Wipe it down with acetone and scotch brite to scrub off anything else and then wipe it down with acetone and a clean rag. And then the area is ready to weld. I usually get the metal shiny so I know its clean. As for how to do the actual welds, I've seen so many different ways. I like the small beads, 3/4-1" long. Spread around the seams that are getting welded. Just make sure to move around a lot and not just do one place at a time. It was said before, but should be said again. Putting too much heat into the sheet metal could pull it and tweak the chassis. And if you haven't done it yet, you'll soon realize that nissan sheetmetal sucks. It's not consistent and you may have trouble with blowing through. I stitched a car, granted it wasn't the cleanest chassis in terms of rust which I was also fixing, but I would use the same settings and I would weld a little, then come back to that same spot a little later and the next bead would blow through. I usually end up doing several tacks on top of each other instead of a continuous bead when it gets like this. |
|
|
|
|
01-24-2008, 05:40 PM
|
#183 | |
|
Zilvia Junkie
|
Quote:
The second one is also a very good recommendation. I know I've had stuff burst into flames near where I was welding many times. Usually it's the acetone soaked rag that I just cleaned the area with. Occasionally it has been what I was wearing. One time it was the hood on my sweatshirt. Tim |
|
|
|
|
|
01-24-2008, 06:27 PM
|
#184 | |
|
Quote:
 I should take some pictures of all the holes in my attire. I should take some pictures of all the holes in my attire.Have you ever had a weld bb go down your ear? That fuckin sucks. Imagine the sound of sizzleing skin (kinda like bacon) but amplified because, well.... Its in your ear! I also have a very good habit of wearing earplugs everytime I stick or mig weld. It will only take you one time and you will do the same. |
||
|
|
|
|
01-24-2008, 09:31 PM
|
#186 |
|
Post Whore!
 Join Date: Dec 2002
Location: Campbell, Ca
Age: 41
Posts: 5,010
Trader Rating: (3)
  Feedback Score: 3 reviews
 |
TO be honest. If I were in your shoes I would chop everything out. Clean it up as much as possible, then go find a empty front clip for $20 from a 240 guy and practice making some tubs, and stitch welding those.
Luke
__________________

|
|
|
|
|
01-24-2008, 09:53 PM
|
#187 |
|
BANNED
 
|
My New OLD! welder
1973 Airco 300amp heliwelder watercooled very nice got it at a VERY VERY VERY GOOD Price, good enough to drive 9 hours. I will be adding a lot of posts to this thread in future! need to find a good metal supplier! and go from there...TIG is by far the best.   |
|
|
|
|
01-24-2008, 10:00 PM
|
#188 |
|
Post Whore!
Join Date: Dec 2002
Location: Campbell, Ca
Age: 41
Posts: 5,010
Trader Rating: (3)
Feedback Score: 3 reviews
|
Ok. So I have not posted pics in a few days. Here is why. I was designated to fab the header from hell.
This is a full custom header to compliment the passenger side one I made last week. This is why it is the header from hell. The runners are 2-1/4" in diameter  and they have to fit between a big block and the frame. O did i mention that there is a 1" diameter steering shaft going down the middle? That leaves me with only 2-1/2" max on each side of the shaft. and they have to fit between a big block and the frame. O did i mention that there is a 1" diameter steering shaft going down the middle? That leaves me with only 2-1/2" max on each side of the shaft.Fun  Anyways. So after bolting the flange to the head, I started on the 3rd runner.  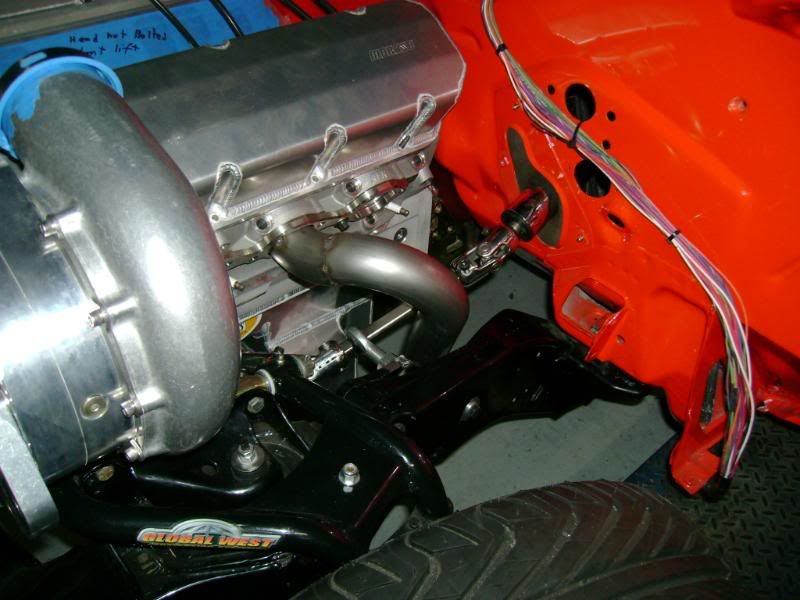 Then mocked that up. Shit this is going to be fun. Not much room. Keep in mind this single runner is larger than a 240sx stock exhaust. 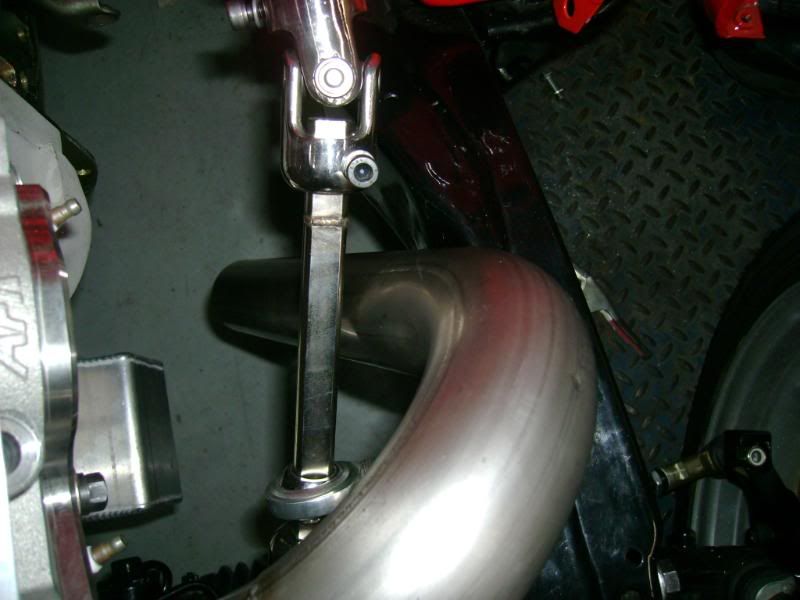 Then I got really buisy and didnt have time to take pics. So here is after making the rest of the 3rd runner, and the other front tubes. 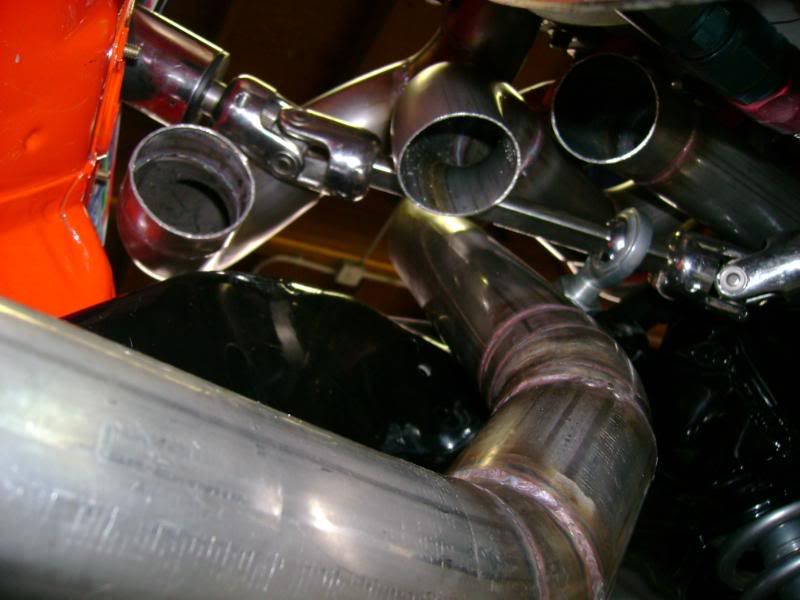 Then i made the 4th runner. Cut some madrel bend 304 stainless. 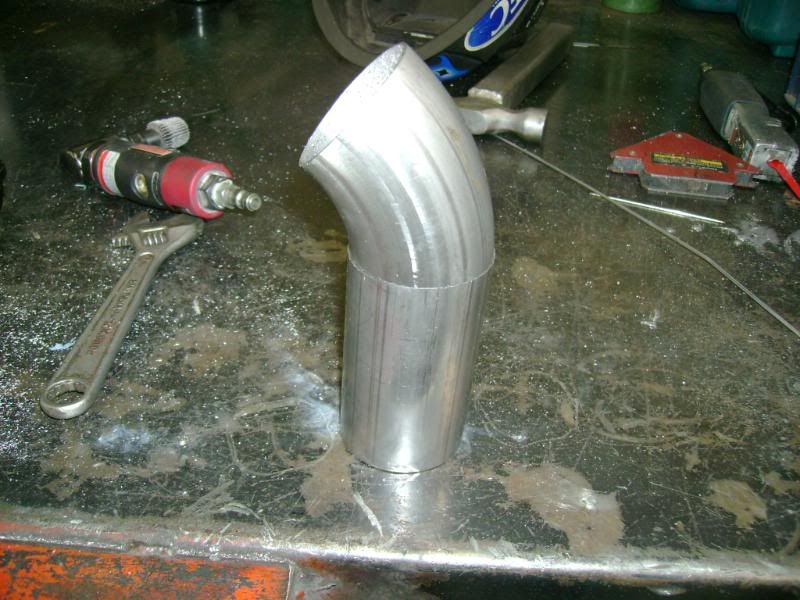 Then I welded it up. Here is my back purging setup. Allways back purge with stainless. 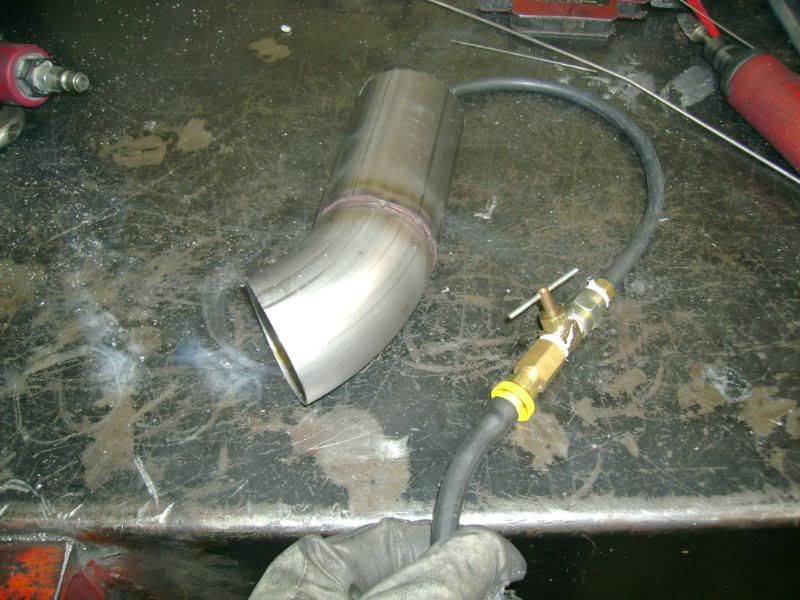 Added the down tube. 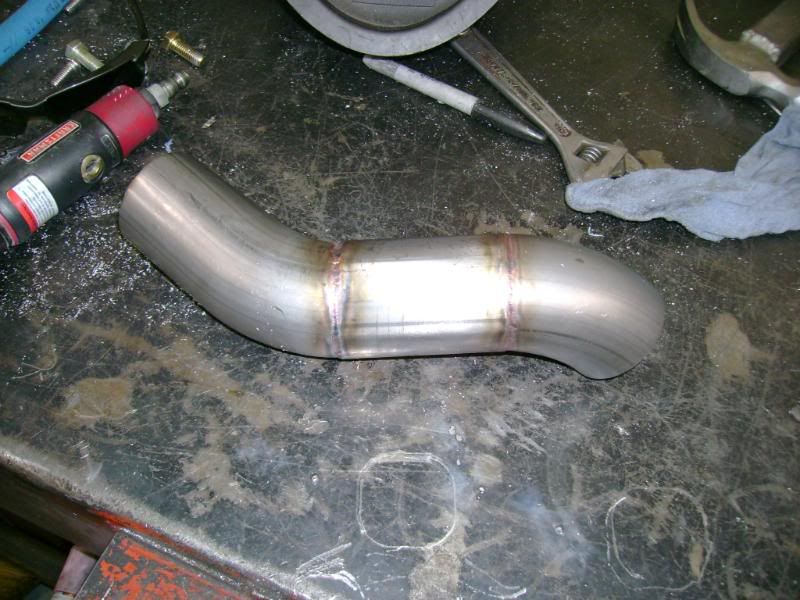 Tig welding goodness. Sorry my camera sucks and wont focus on the bead. 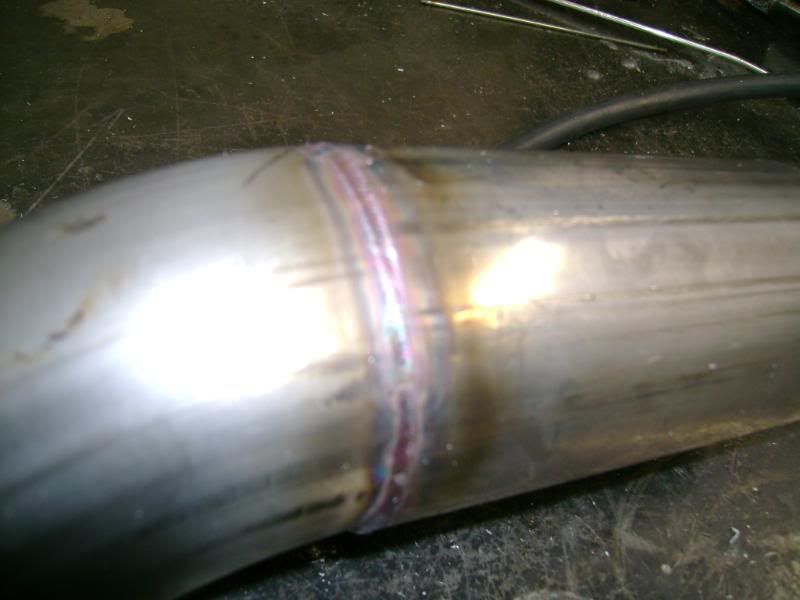 Just to give you guys an idea on the bead size. Here is a comarison pic with a sharpie cap in the pic. Yes the beads on the welds are smaller than the diameter of the pocket clip on the pen cap. So about the diameter of a tooth pick.  Yes it fits. 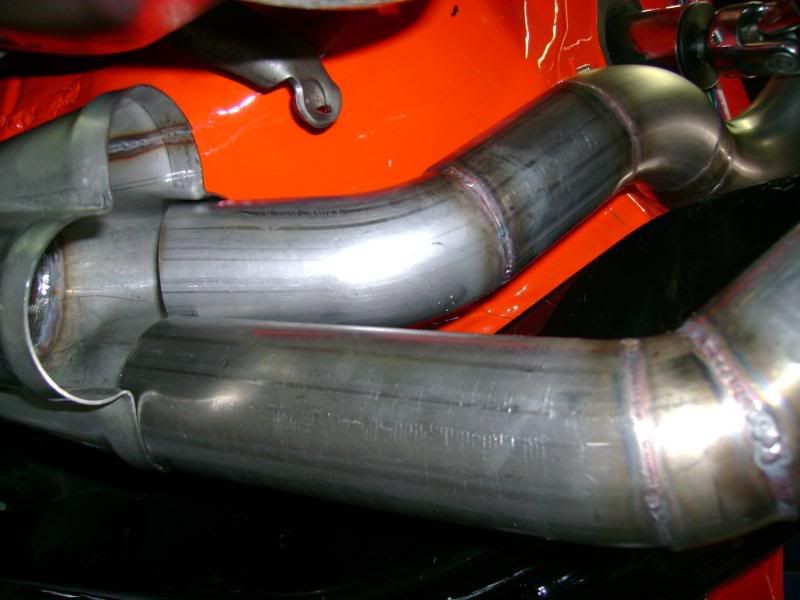 2nd runner made. 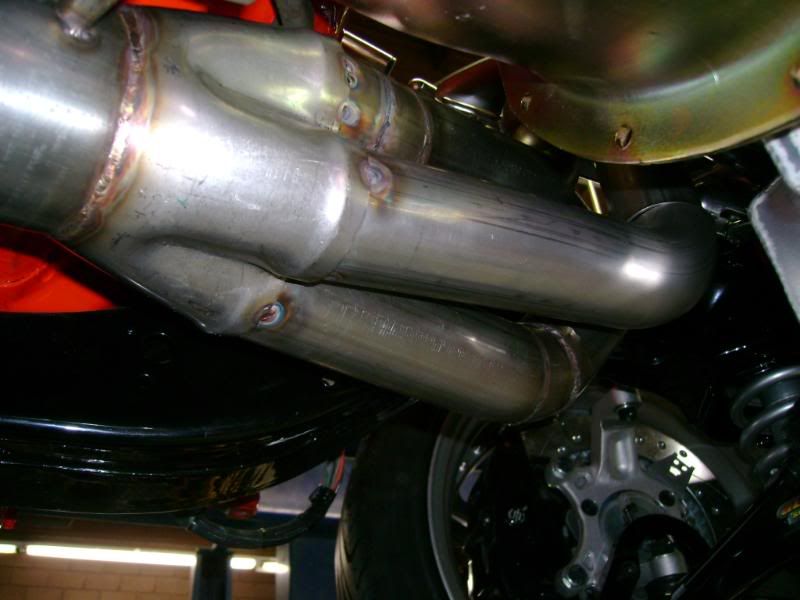 More gangster shit. 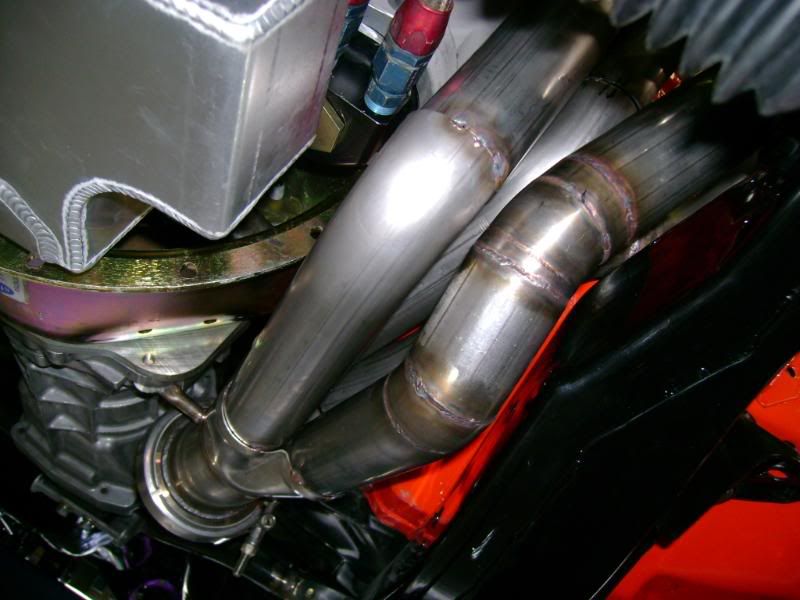 Then I went to mock up the oil filter relocation bracket and noticed the custom aluminum oilpan does not clear.  So I threw it on the mill and made some room. So I threw it on the mill and made some room.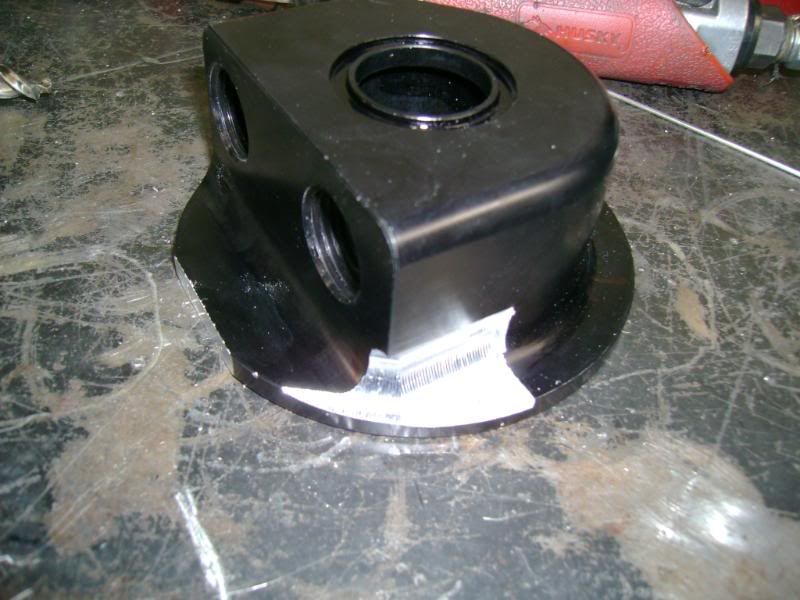 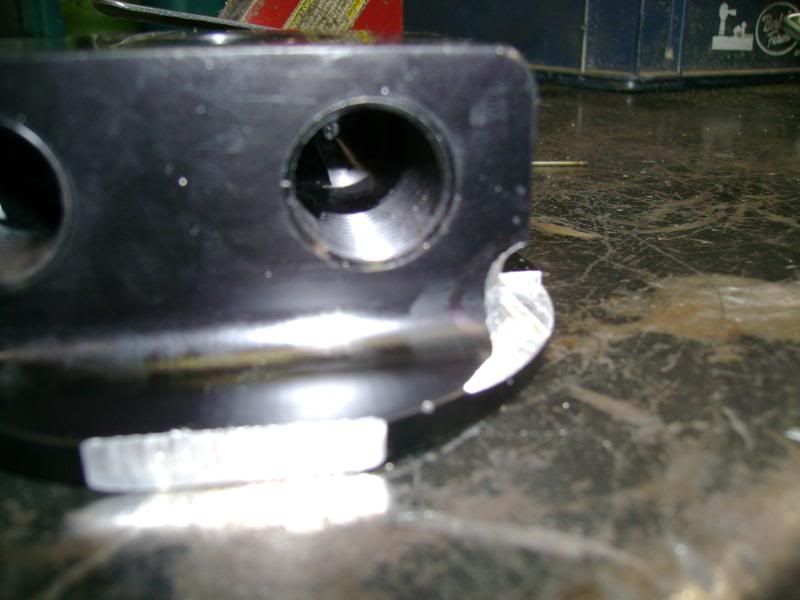 Then I went insane and mocked up the remaining tubes. 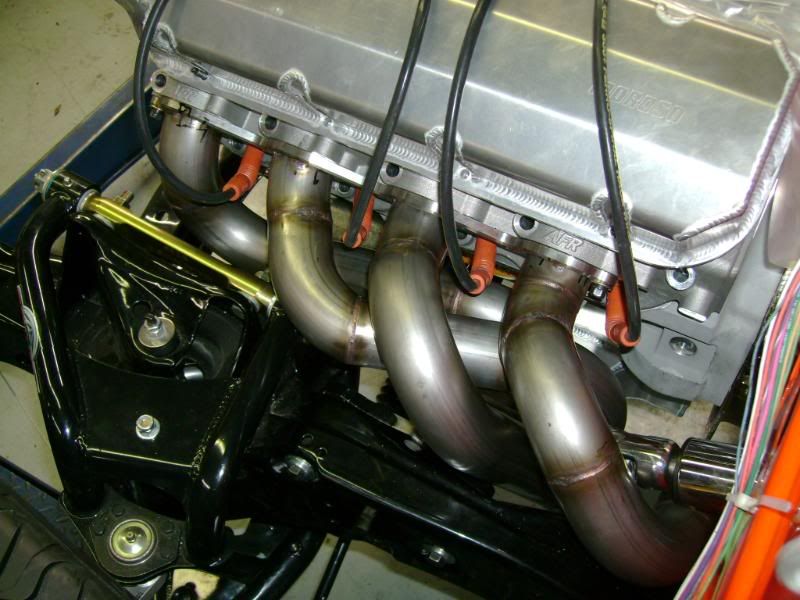 Sexy 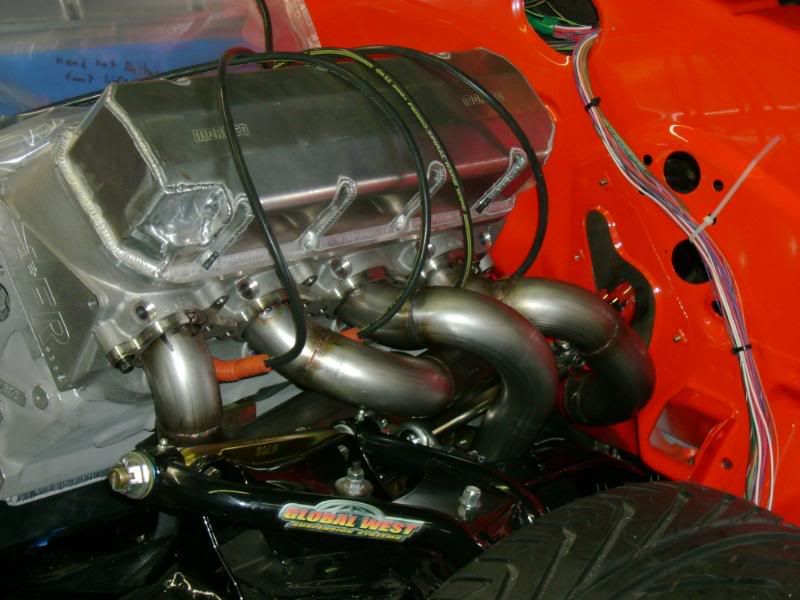 Wow 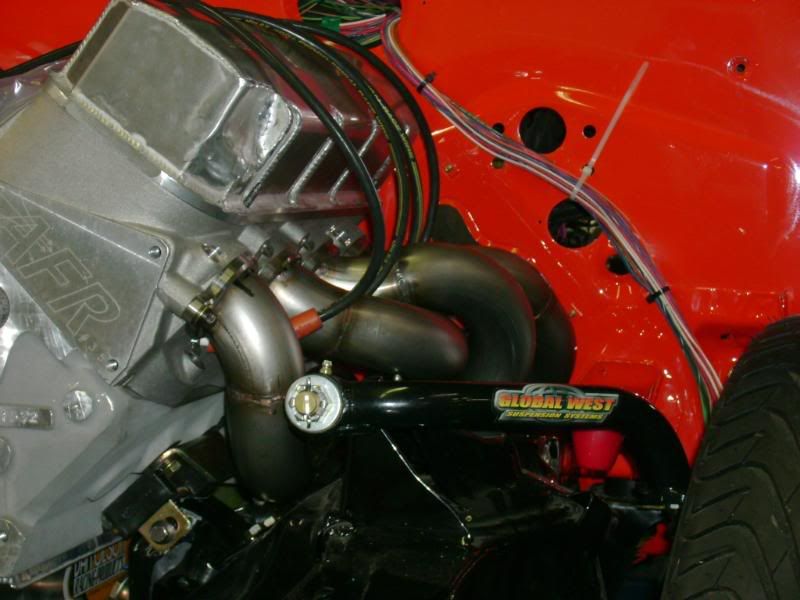 Floppy pasta. 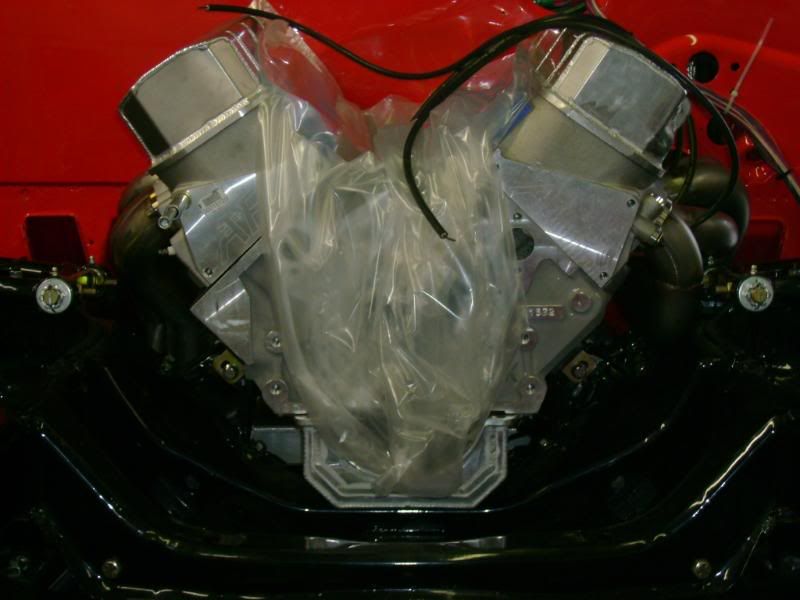 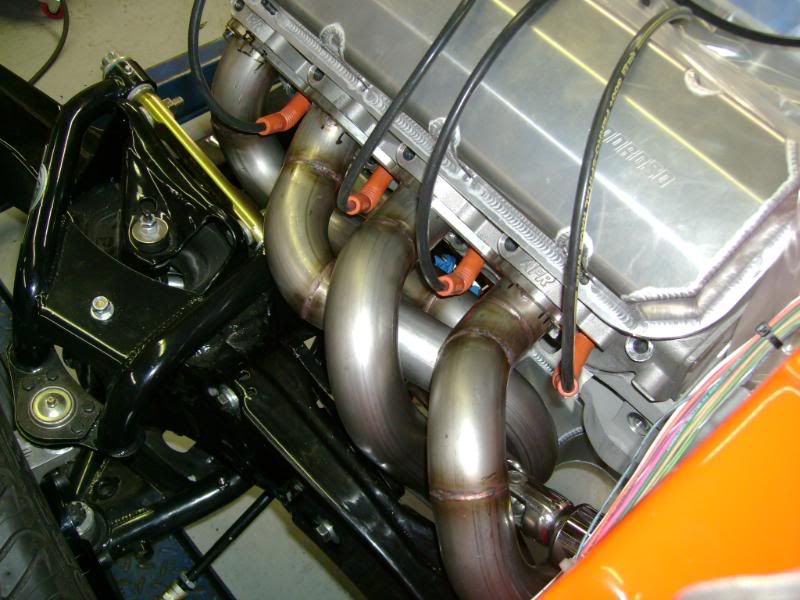 Porn 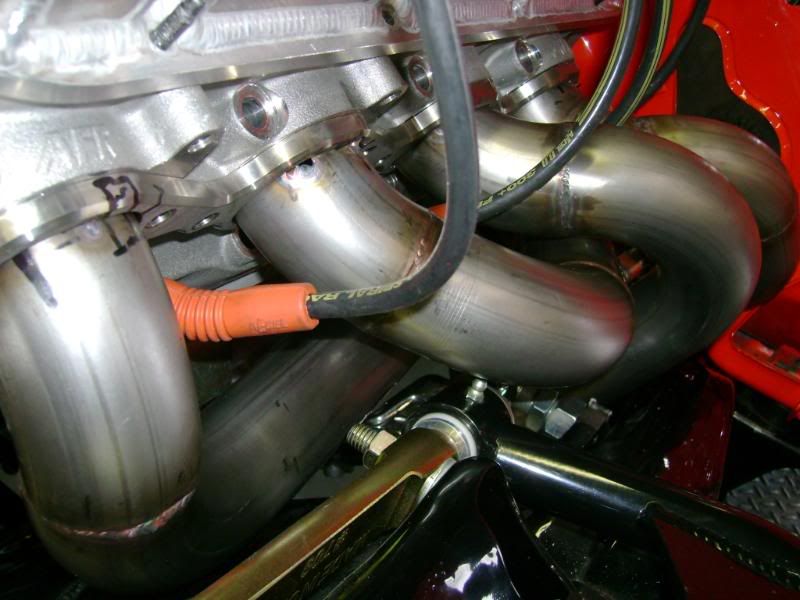 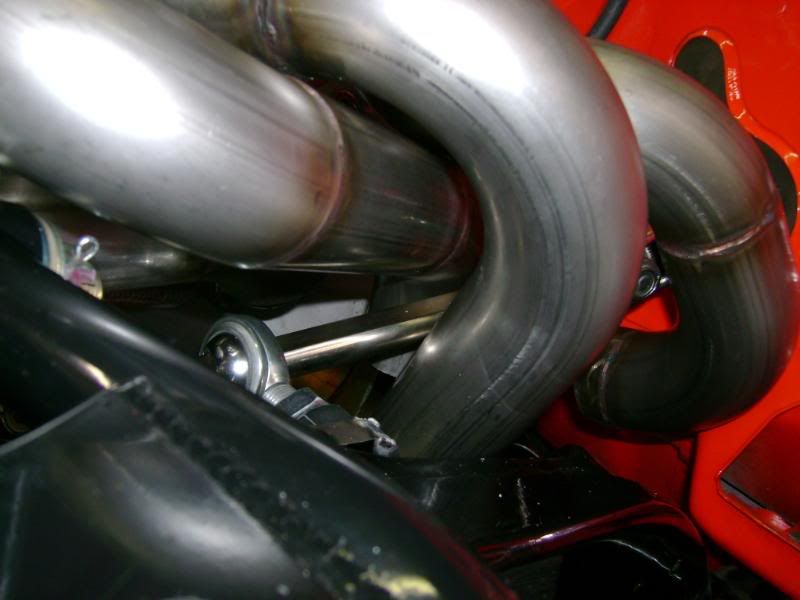 With the blower. 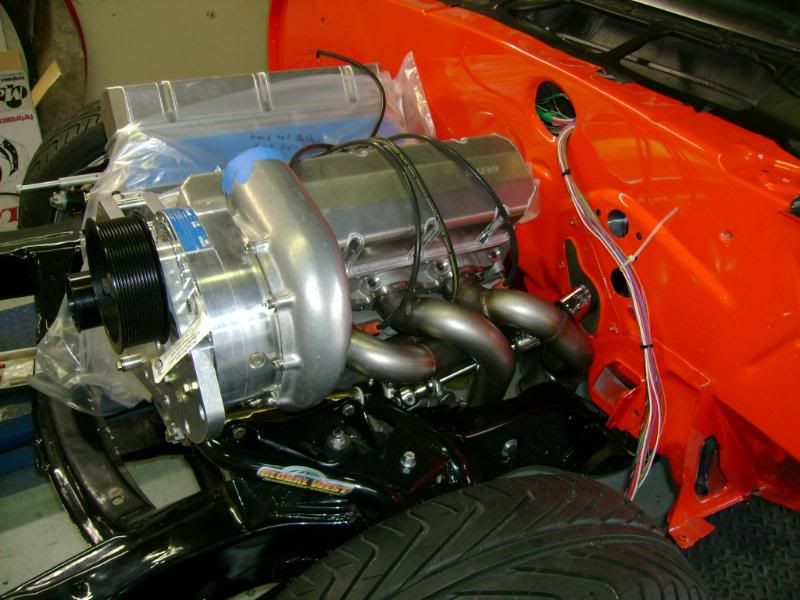 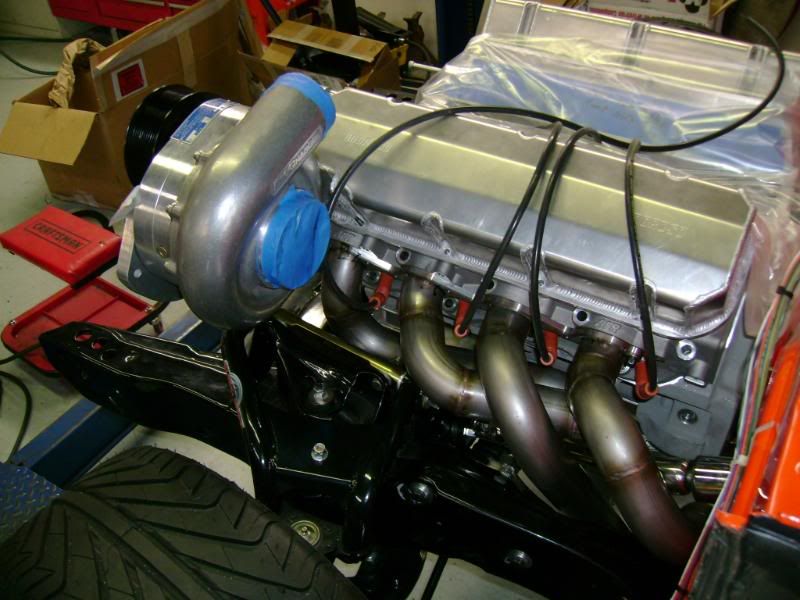 Skeet 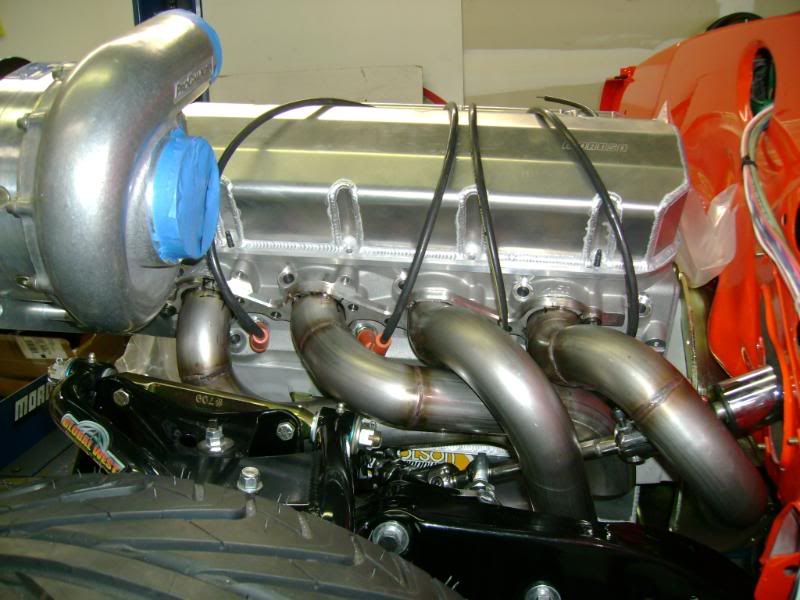 Yum 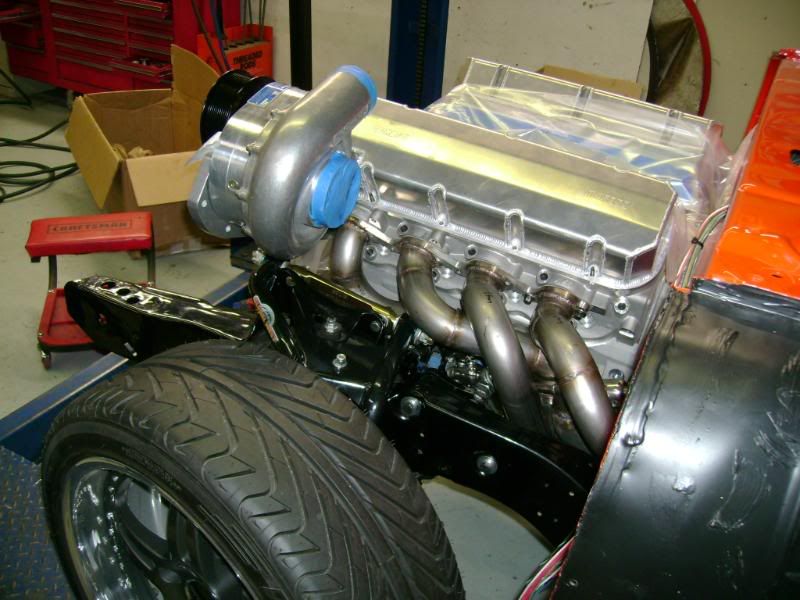 Cool temper colors on the welds. 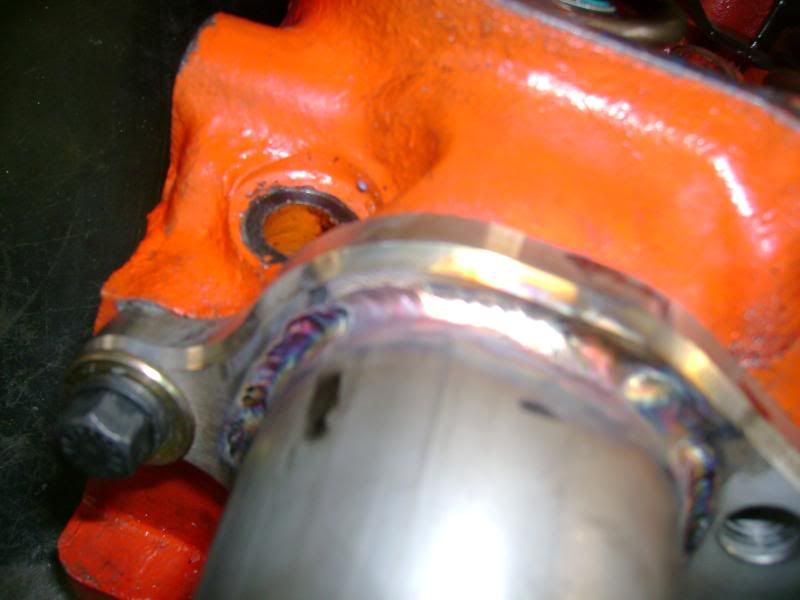 While welding the tubes. 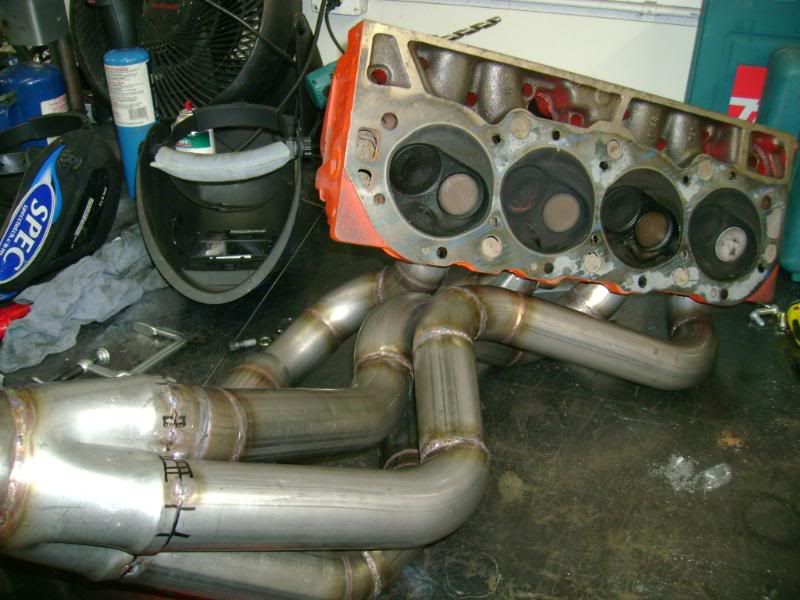 O yea then after kicking ass on that header and making the owner of shop excited, I finished the firebird dash that I fabbed up last week. 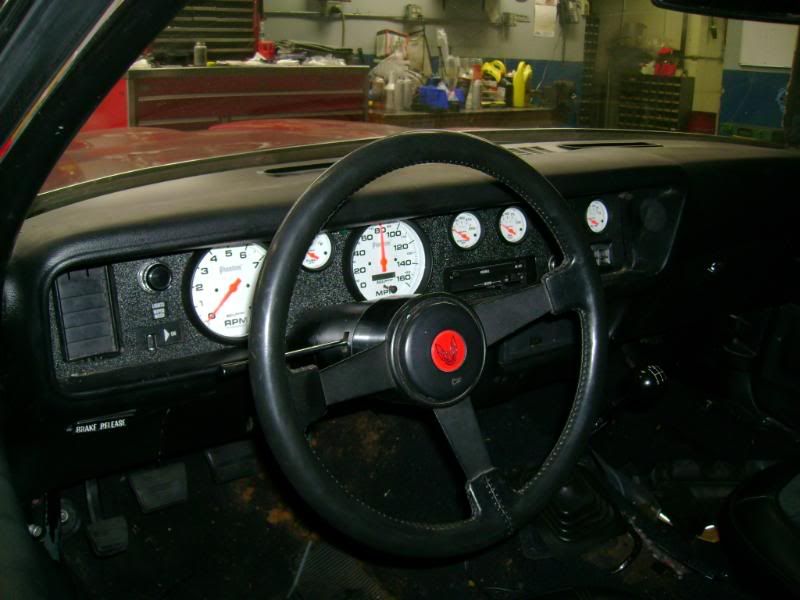 Whew, what a day. Please comment guys. 
__________________
|
|
|
|
|
01-24-2008, 10:08 PM
|
#189 |
|
Zilvia Junkie
|
Nice header. But I don't think those suspension bearings are going to like that much heat right there. Are you planning on shielding them at all. I'm talking about the upper control arm one that looks like it's zerk fitting has been blocked by the header and that rod end holding the steering shaft in place. That also looks like a really steep angle on the lower u-joint on the steering column. I mean it would be fine for street driving, but if the thing will see any performance driving it could lead to some weird feedback at the steering wheel due to the big difference in angle between the two u-joints.
But the header looks sweet. Tim |
|
|
|
|
01-24-2008, 10:15 PM
|
#190 |
|
Post Whore!
Join Date: Dec 2002
Location: Campbell, Ca
Age: 41
Posts: 5,010
Trader Rating: (3)
Feedback Score: 3 reviews
|
Tim. That steering system is actually a rack and pinion setup if you look closely. The camaros came with a steering box setup. The angle is fine, and there is no bind in the setup. The manufacturer of the steering system is Unisteer. Everything on the steering is set to thier specs.
The zerk fitting for the upper control arm has about 1/2" clearance and will be fine from the heat. We are also double heat barrier coating the headers.
__________________
|
|
|
|
|
01-24-2008, 10:20 PM
|
#191 |
|
Zilvia Junkie
|
Luke, I didn't mean that the steering would bind. I mean weird feedback due to out of phase motion from the big differnce in angle on the u-joint. Meaning that there could be some loss from the steering wheel to the rack throughout the range of steering angle. It's kind of hard to explain, but it can be a problem with u-joints. Essentially a non-linear wheel angle to rack travel curve.
And I figured you were going to heat shield/wrap/coat the headers. It just looked like one of the runners was sitting on top of that zerk fitting which would probably get that grease hotter than it's supposed to be and cause it to break down much earlier than expected. Tim |
|
|
|
|
01-24-2008, 10:23 PM
|
#192 |
|
Banned from the Marketplace
 Join Date: Jan 2008
Location: New Hampshire
Age: 34
Posts: 803
Trader Rating: (0)
Feedback Score: 0 reviews
|
okay ill go kill myself now after seeing that haha. i think ill cut out the tub and remake a smaller one and take a bit more time on it. thank you blu808 ill start with cardboard this time and make sure this shits done right and then repost a new pic for ya
|
|
|
|
|
01-24-2008, 10:24 PM
|
#193 |
|
Post Whore!
Join Date: Dec 2002
Location: Campbell, Ca
Age: 41
Posts: 5,010
Trader Rating: (3)
Feedback Score: 3 reviews
|
Haha. I just looked at the pics. In those pics it is sitting on the fitting. After adjustment and now welding them up it has 1/2" clearance.
Good eye. As for the steering shaft angle creating different force per rotational angle I agree. But this is actually going to be a power steering setup, so it should be fine. But yea.. On a manual rack it would be noticable.
__________________
|
|
|
|
|
01-25-2008, 09:24 AM
|
#196 | |
|
Post Whore!
 
|
Quote:
Luke, when you take close up pictures like that, find the button on your camera that looks like a flower. Turn that on, then your camera will focus on the close up shit. That's the macro button, it tells your camera that you're trying to take close up pictures of something, so it will focus to shit that's close to you. I have no idea what the macro length is on your camera, so I cannot say definitively you can take pics of things that are only an inch away from the lense, but it should help you taking focused pics of like the beads and stuff like that. Just remember to turn it back off before you try to take normal "far away" object pics, or else it won't focus. |
|
|
|
|
|
01-25-2008, 07:35 PM
|
#199 | |
  Quote:
 Who welds in dockers and a dress shirt? That thing is a dinosaur. Who welds in dockers and a dress shirt? That thing is a dinosaur. |
||
|
|
|
|
01-25-2008, 07:52 PM
|
#200 |
|
Hey blu, you tape off the ends of the pipe you are purging before welding right? Imo on some of that stuff I would use solarflux. It would be easier then purging, work just as good, and be more cost effective. What do you purge with anyway?
|
|
|
|
|
|
01-25-2008, 07:54 PM
|
#201 |
|
Post Whore!
Join Date: Dec 2002
Location: Campbell, Ca
Age: 41
Posts: 5,010
Trader Rating: (3)
Feedback Score: 3 reviews
|
thanks guys.
Yes I block off the end of the pipe where the hose is entered. Then I make a small opening on the other end to allow constant gas flow.
__________________
|
|
|
|
|
01-26-2008, 12:52 AM
|
#202 |
|
Zilvia.net Advertiser
Join Date: Apr 2003
Location: Dayton Ohio
Age: 42
Posts: 545
Trader Rating: (4)
Feedback Score: 4 reviews
|
Ill post up some pictures of the wheels tubs i started building tonight, i dont know if i am going to like the finished product, so i may spend all this time only to throw it in the dumpster. They might come out decent though, this is only my second or third time doing any real sheet metal fabrication like this.
Jon
__________________
http://www.forcedfabllc.com/ |
|
|
|
|
01-26-2008, 01:32 AM
|
#203 |
|
Zilvia Junkie
|
Jon, are you making the tubs from scratch or using some type of fender tub/pre-existing shape for the tubs?
If you're doing it from scratch, I have a good method that will make things easier for you. Cut the inside profile first. And then cut two thinner strips that are the same contour as the inside profile. Tack these two pieces to the piece that will make up the top of the fender tub. This will allow the fender tub to follow the exact contour of the inside profile. Then trim to fit, remove the ribs, weld in place and your done. Something like this:  Tim |
|
|
|
|
01-26-2008, 02:53 AM
|
#206 |
|
Zilvia.net Advertiser
Join Date: Apr 2003
Location: Dayton Ohio
Age: 42
Posts: 545
Trader Rating: (4)
Feedback Score: 4 reviews
|
Tim,
actually i did somthing similar ill get photos tomorrow. I cut out my main ARCH then i cut out my cover that is the tub,next i cut little .5-.75" wide strips of sheet metal and cut them to about 1" long and bent them into L's, i tacked them to the arch then tacked the tub to them along the contour of the arch, it actually came out really flush around the edges. The main part im focusing on tomorrow will be the flushed in fuse/relay box for the factory harness. i want to mount it in the tub sorta. I also plan on adding some Ribs that run left to right all through the inside of the tub to help reinforce it incase we shred a tire, i dont want it to beat the sheet metal all to hell. I am also dealing with a chassis that has been cut in the front and a new front welded to it right where the tubs seat, there is alot of weld/bondo/seam sealer all where i need stuff to fit tight. It kinda sucks, but nothing a grinder and welder cant fix. Jon
__________________
http://www.forcedfabllc.com/ |
|
|
|
|
01-26-2008, 02:55 AM
|
#207 | |
|
Zilvia.net Advertiser
Join Date: Apr 2003
Location: Dayton Ohio
Age: 42
Posts: 545
Trader Rating: (4)
Feedback Score: 4 reviews
|
Quote:
Jon
__________________
http://www.forcedfabllc.com/ |
|
|
|
|
|
01-26-2008, 03:04 AM
|
#208 |
|
Zilvia Member
 |
hi, just noticed this thread after being a member (lurker) for so long, so I thought I'd show a few humble jobs I've done over a while
650-ish hp civic fuel system and misc. brackets: 5/8" OD SS tubing for feed 3/8" OD SS for return various aluminum brackets (I prefer working with aluminum stuff since I don't have a belt sander yet and making little details like rounding off corners nicely is MUCH easier with alum.) 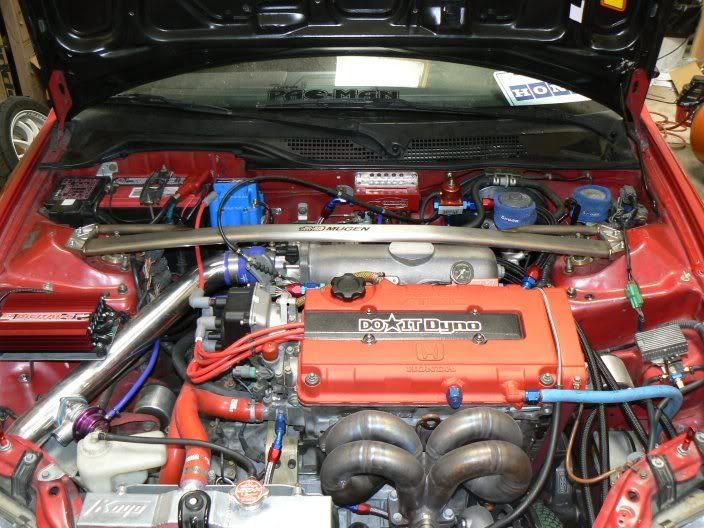 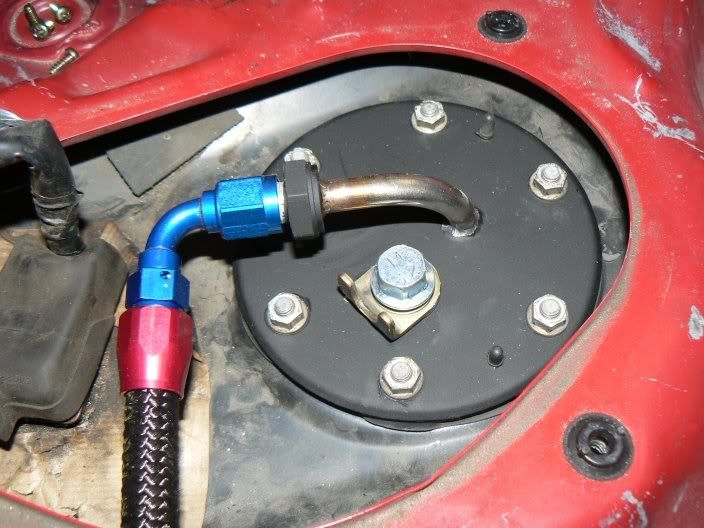 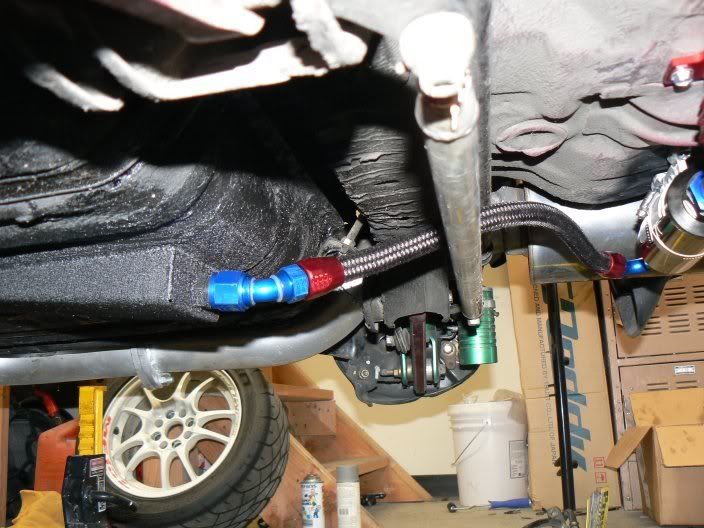 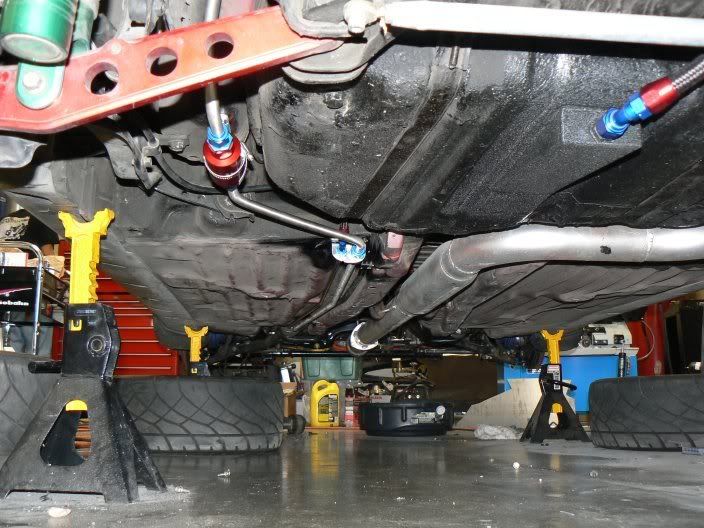 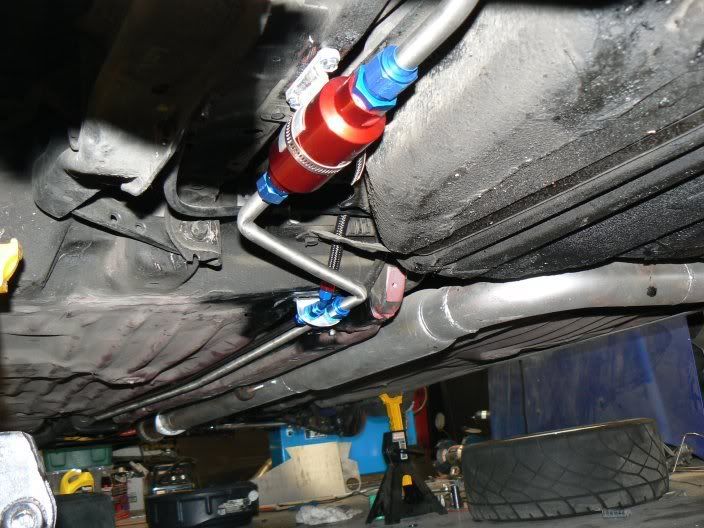 This bend right here is a PAIN!!!!!!! especially since I used SS tubing. 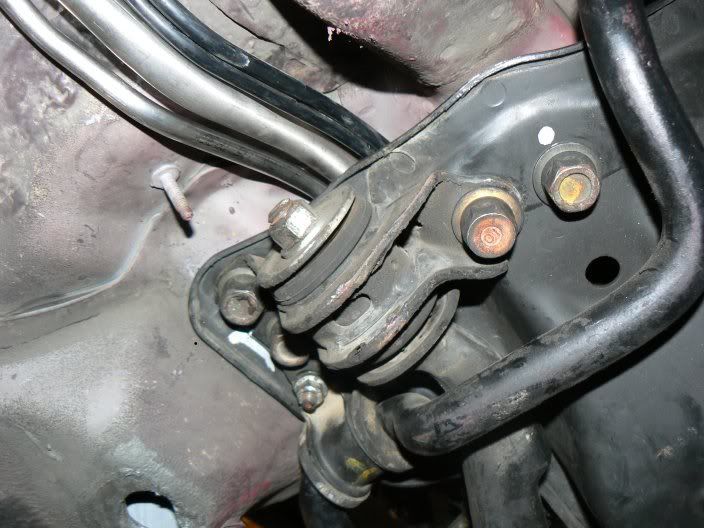 Wish I had a mill to make making brackets like these quicker and neater 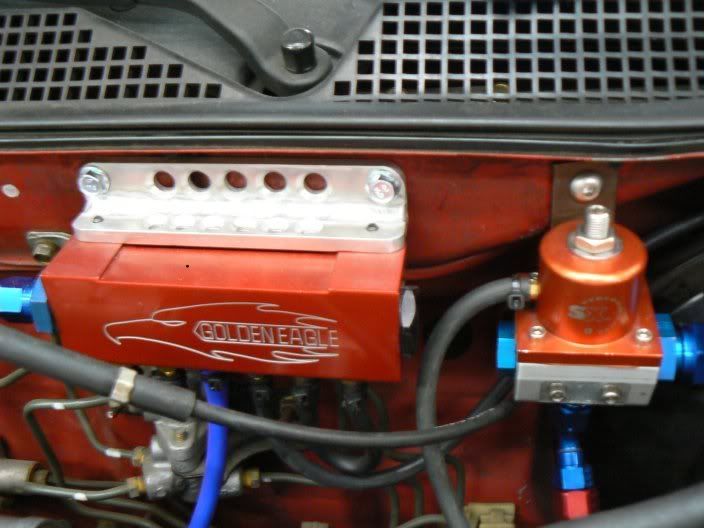 Bulkhead bracket is kinda hard to see....  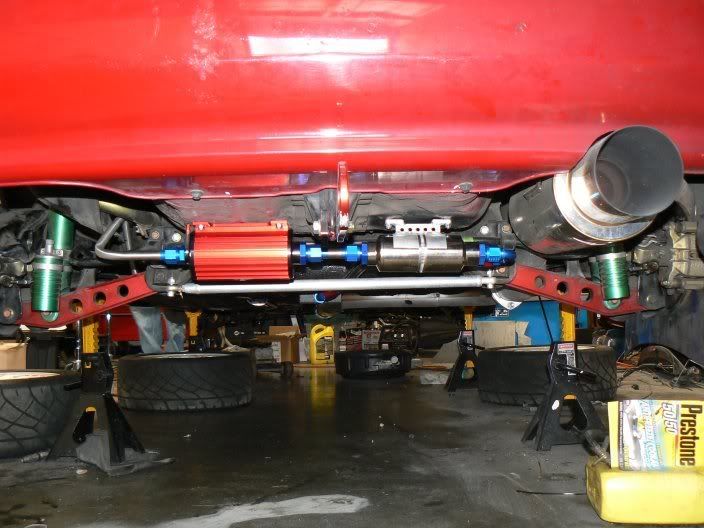 Can't find my photos for this other car, so I had to steal them from my customer on his forum Not much, just made the bracket for the oil tank. 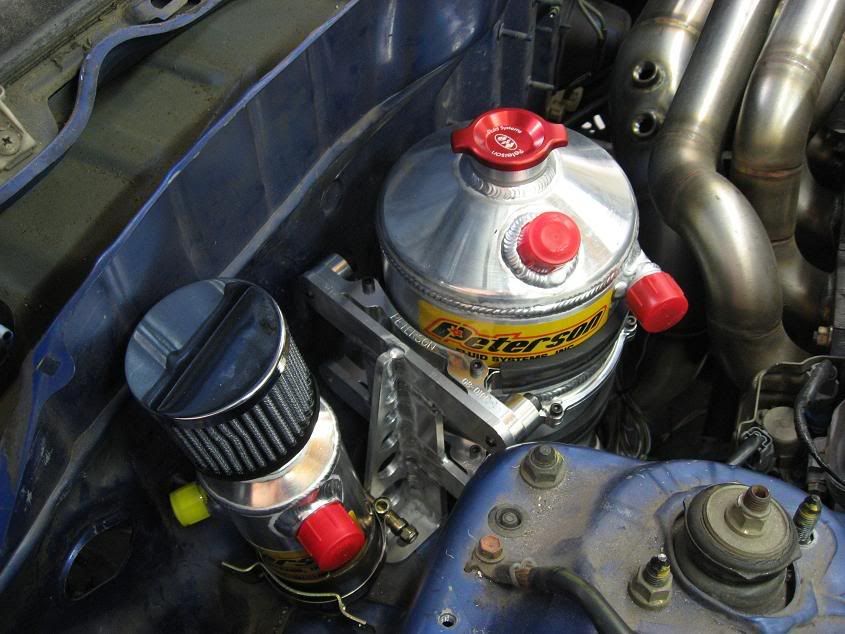 Line lock setup 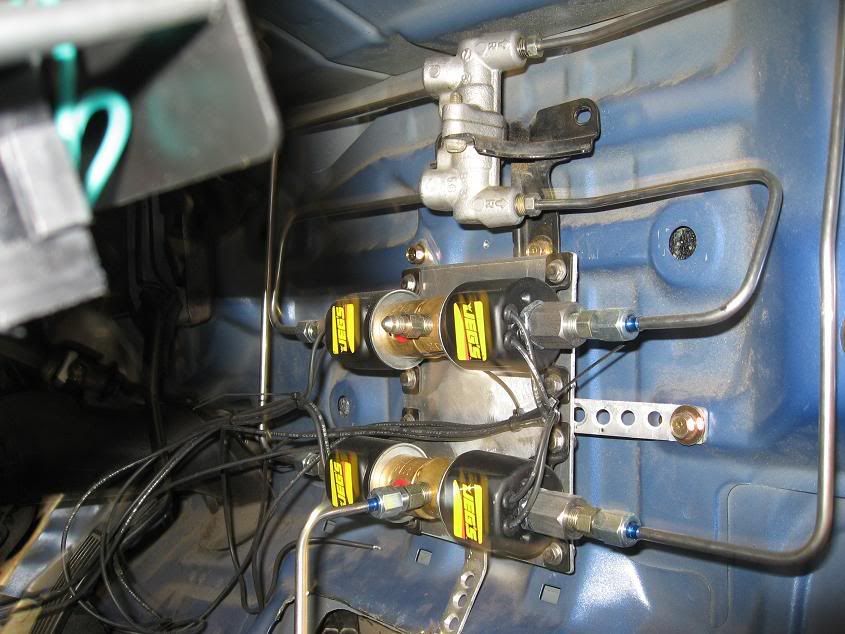 When I find my other photos I'll share some more if anyone's interested. I need to find that s13 I worked on a couple years ago. did a similar fuel line setup on that with a Weldon pump. Edit: and I'll try to find more weld photo's too, which seems to be what most people are looking for on this thread |
|
|
|
|
01-26-2008, 10:06 AM
|
#209 |
|
Post Whore!
Join Date: Dec 2002
Location: Campbell, Ca
Age: 41
Posts: 5,010
Trader Rating: (3)
Feedback Score: 3 reviews
|
fakts13: Really nice work. Those lines are awesome. That is usually where people skimp out. Did you really make that oil tank bracket? It is sick!
fromxtor: There is actually a chain of plastic stores in cali called tap plastics. They have a location next to my shop. One thing on the wheel tubs. Everyones work looks really good. One way to get the radius pieces for the fenders is to get a 55 gallon drum from a supply store for $20 and cut it up. They have enough metal to make about 12 fenders. lol. Sounds ghetto, but if you are making these at home and dont have a slip roller. Why not? 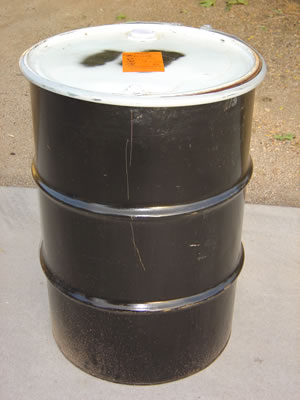
__________________
|
|
|
|
|
01-26-2008, 10:24 AM
|
#210 |
|
Zilvia Addict
|
OMG BLU808!! You have some mad skills. How long have you been doing this? Maybe I missed the answer to that Q on one of these pages. I can't wait to see a vid or something when the car is done. Great work
|
|
|
|
|
| Bookmarks |
| Thread Tools | |
| Display Modes | |
|
|


 Linear Mode

