|
|||||||
| Tech Talk Technical Discussion About The Nissan 240SX and Nissan Z Cars |
 |
|
|
Thread Tools | Display Modes |
 03-14-2011, 01:44 PM
|
#91 | |
|
Zilvia Junkie
 
Join Date: Jun 2006
Location: East Coast
Age: 38
Posts: 585
Trader Rating: (20)
 Feedback Score: 20 reviews
|
Quote:
 |
|

|

|
| Sponsored Links |
|
03-14-2011, 06:53 PM
|
#92 |
|
Zilvia Junkie
|
Great, thanks for your help. I really appreciate it.
Andrew
__________________
http://zilvia.net/f/chat/331550-slyd...pic-heavy.html |
|
|
|
|
03-24-2011, 07:49 AM
|
#93 |
|
Zilvia Junkie
|
Wanted to say thanks again and figured I would throw this up for ya...
__________________
http://zilvia.net/f/chat/331550-slyd...pic-heavy.html |
|
|
|
|
03-24-2011, 08:05 AM
|
#94 |
|
Zilvia Junkie
Join Date: Jun 2006
Location: East Coast
Age: 38
Posts: 585
Trader Rating: (20)
Feedback Score: 20 reviews
|
Looks great dude, I see you are using the Ballerbolts set as well. I had a problem where the outer toe rod bolt was too long and hitting the coilover. Did you get them recently, I think Ryan started using the nickel plating instead of the Zinc plating I have. Glad I could help
|
|
|
|
|
03-24-2011, 08:31 AM
|
#95 |
|
Zilvia Junkie
|
Thanks. Yea, I had ordered them about 3 months ago if that and then it took a month to get in due to some washers being out of stock or something.
__________________
http://zilvia.net/f/chat/331550-slyd...pic-heavy.html |
|
|
|
|
04-12-2011, 08:49 AM
|
#98 | |
|
Nissanaholic!
 
Join Date: Dec 2008
Location: Upstate NY
Age: 43
Posts: 1,699
Trader Rating: (15)
Feedback Score: 15 reviews
|
Awesome attention to detail, cant wait to start on mine!
I can also vouch for the B17, we had some wheels to strip and after media and all the off the self strippers I bought a 5 gallon tub of the Benco. Like you said, 3 minutes and the wheels were bare aluminum.
__________________
Quote:
|
|
|
|
|
|
04-21-2011, 05:56 PM
|
#99 |
|
Zilvia Addict
 
Join Date: Feb 2003
Location: brea, ca
Age: 43
Posts: 694
Trader Rating: (2)
 Feedback Score: 2 reviews
|
this write up is so awesome. question though doyle4281, in the energy suspension pdf it says to remove two inner rings for the subframes...but didn't seem like you did when you were doing yours. did you just not include it or is this part of the instructions that are "somewhat clear"?
|
|
|
|
|
04-21-2011, 08:00 PM
|
#100 |
|
Leaky Injector
|
I noticed that my rear subframe energy bushings are kind of loose in the hole but the front bushings are nice and tight is that normal or did I stretched them out with my prybar to much removing old colars?? Do you think it will still work once subframe is installed? Please say yes LOL
|
|
|
|
|
04-21-2011, 08:04 PM
|
#101 | |
|
Zilvia Junkie
Join Date: Jun 2006
Location: East Coast
Age: 38
Posts: 585
Trader Rating: (20)
Feedback Score: 20 reviews
|
Quote:
 |
|
|
|
|
|
04-22-2011, 06:54 AM
|
#102 |
|
Zilvia Junkie

Join Date: Oct 2007
Location: Chicago, Illinois
Age: 33
Posts: 329
Trader Rating: (4)
Feedback Score: 4 reviews
|
Not to sound like a dick or anything, but why did you get those links? I figured with so much work into this and what not, you would have gone with something like SPL.
|
|
|
|
|
04-22-2011, 08:39 AM
|
#103 |
|
Zilvia Member
 |
I would go with this if you want the best.^^^
Specialty Products Company - SPC Alignment
__________________
http://zilvia.net/f/chat/354550-nothing-easy-build.html |
|
|
|
|
04-22-2011, 11:51 AM
|
#104 |
|
Zilvia Junkie
Join Date: Jun 2006
Location: East Coast
Age: 38
Posts: 585
Trader Rating: (20)
Feedback Score: 20 reviews
|
Thanks for the input guys. Both of those companies are top notch, however they have a price tag to match. Yamato Garage makes a great product at a very reasonable price. They use the same QA1 heim joints as many of the best manufactures do, and use the same alloys to construct the arms. For an all out racing application, where extreme forces and speeds are present, I may consider a different setup. However, for a street and occasional track session, as the majority of us will be doing, Yamato Garage offers an unbeatable package.
|
|
|
|
|
04-23-2011, 06:45 PM
|
#106 | |
|
Leaky Injector
|
Quote:
|
|
|
|
|
|
04-24-2011, 07:39 AM
|
#108 | |
|
Post Whore!
 
Join Date: Apr 2006
Location: North Jersey
Posts: 5,481
Trader Rating: (55)
Feedback Score: 55 reviews
|
Quote:
 |
|
|
|
|
|
08-15-2011, 08:25 PM
|
#111 |
|
Zilvia Junkie
Join Date: Jun 2006
Location: East Coast
Age: 38
Posts: 585
Trader Rating: (20)
Feedback Score: 20 reviews
|
It has been awhile since I have posted updates, but here goes....
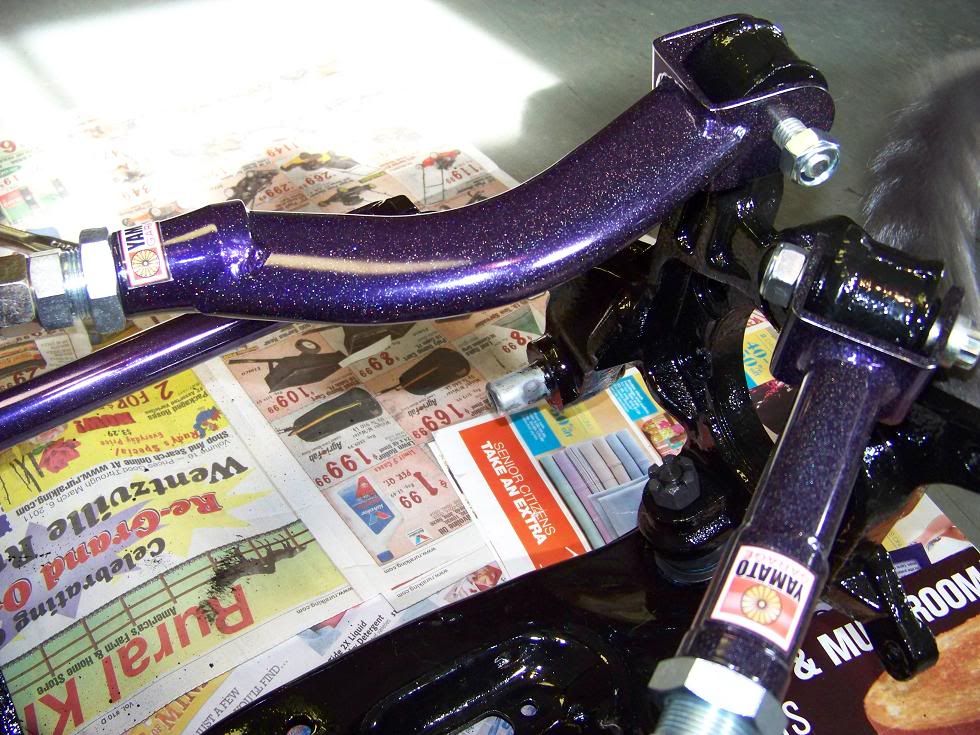
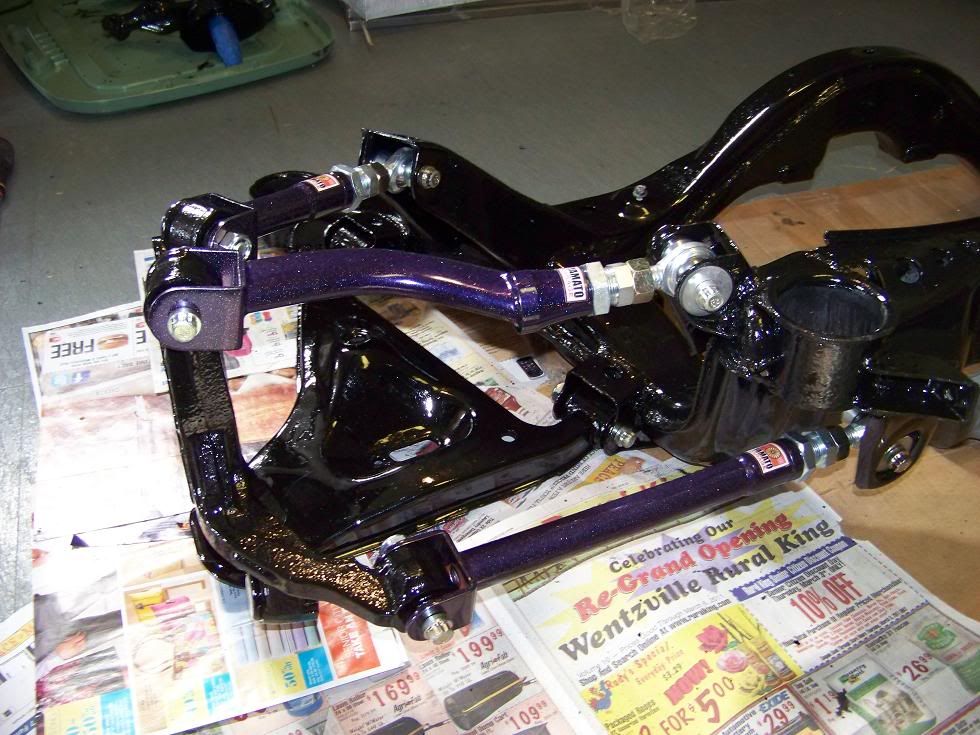
I believe the last updates were the beginning of the front suspension. Sorry if these updates aren't particularly detailed, as much of the work was done quite some time ago. Being pleased with the brakes on my Evolution, I opted to use the Brembo setup in the front, and the STI Brembo in the rear. As most know, used Evo Brembos aren't usually to cosmetically pleasing when purchase used, and mine were no different. After splitting, acid dipping, bead blasting, and taping, I powder coated them in Mirror Silver. 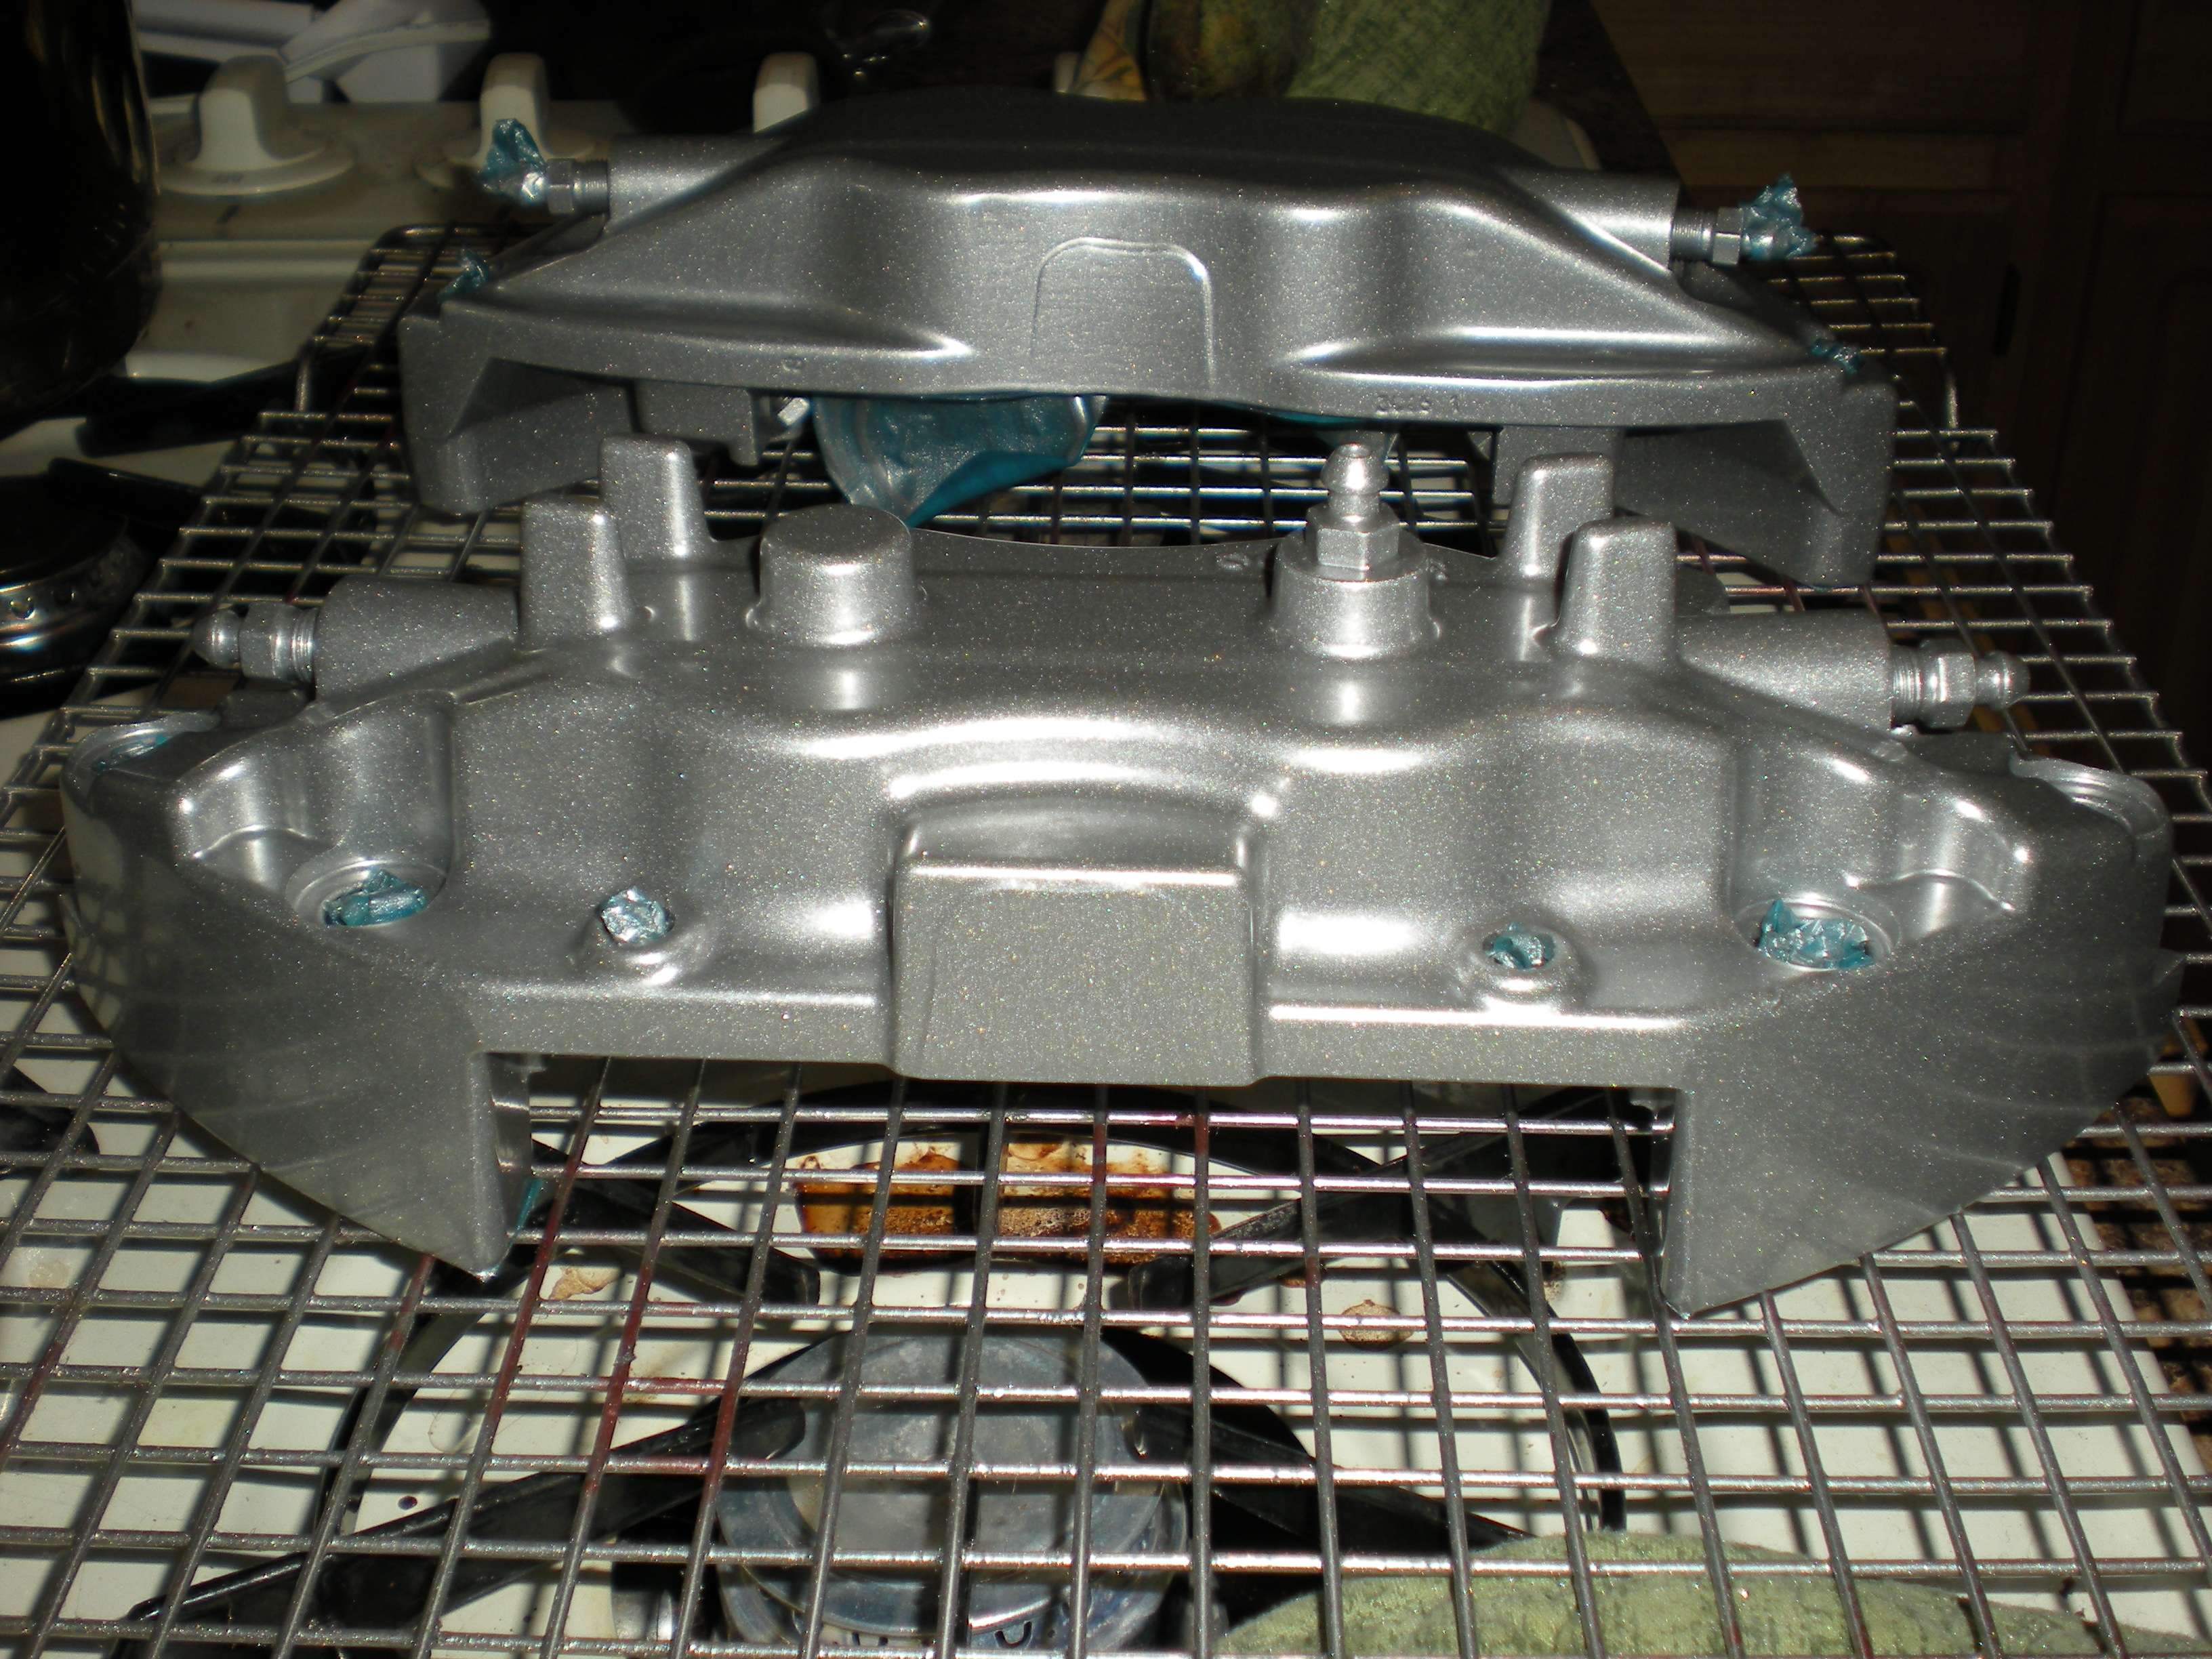 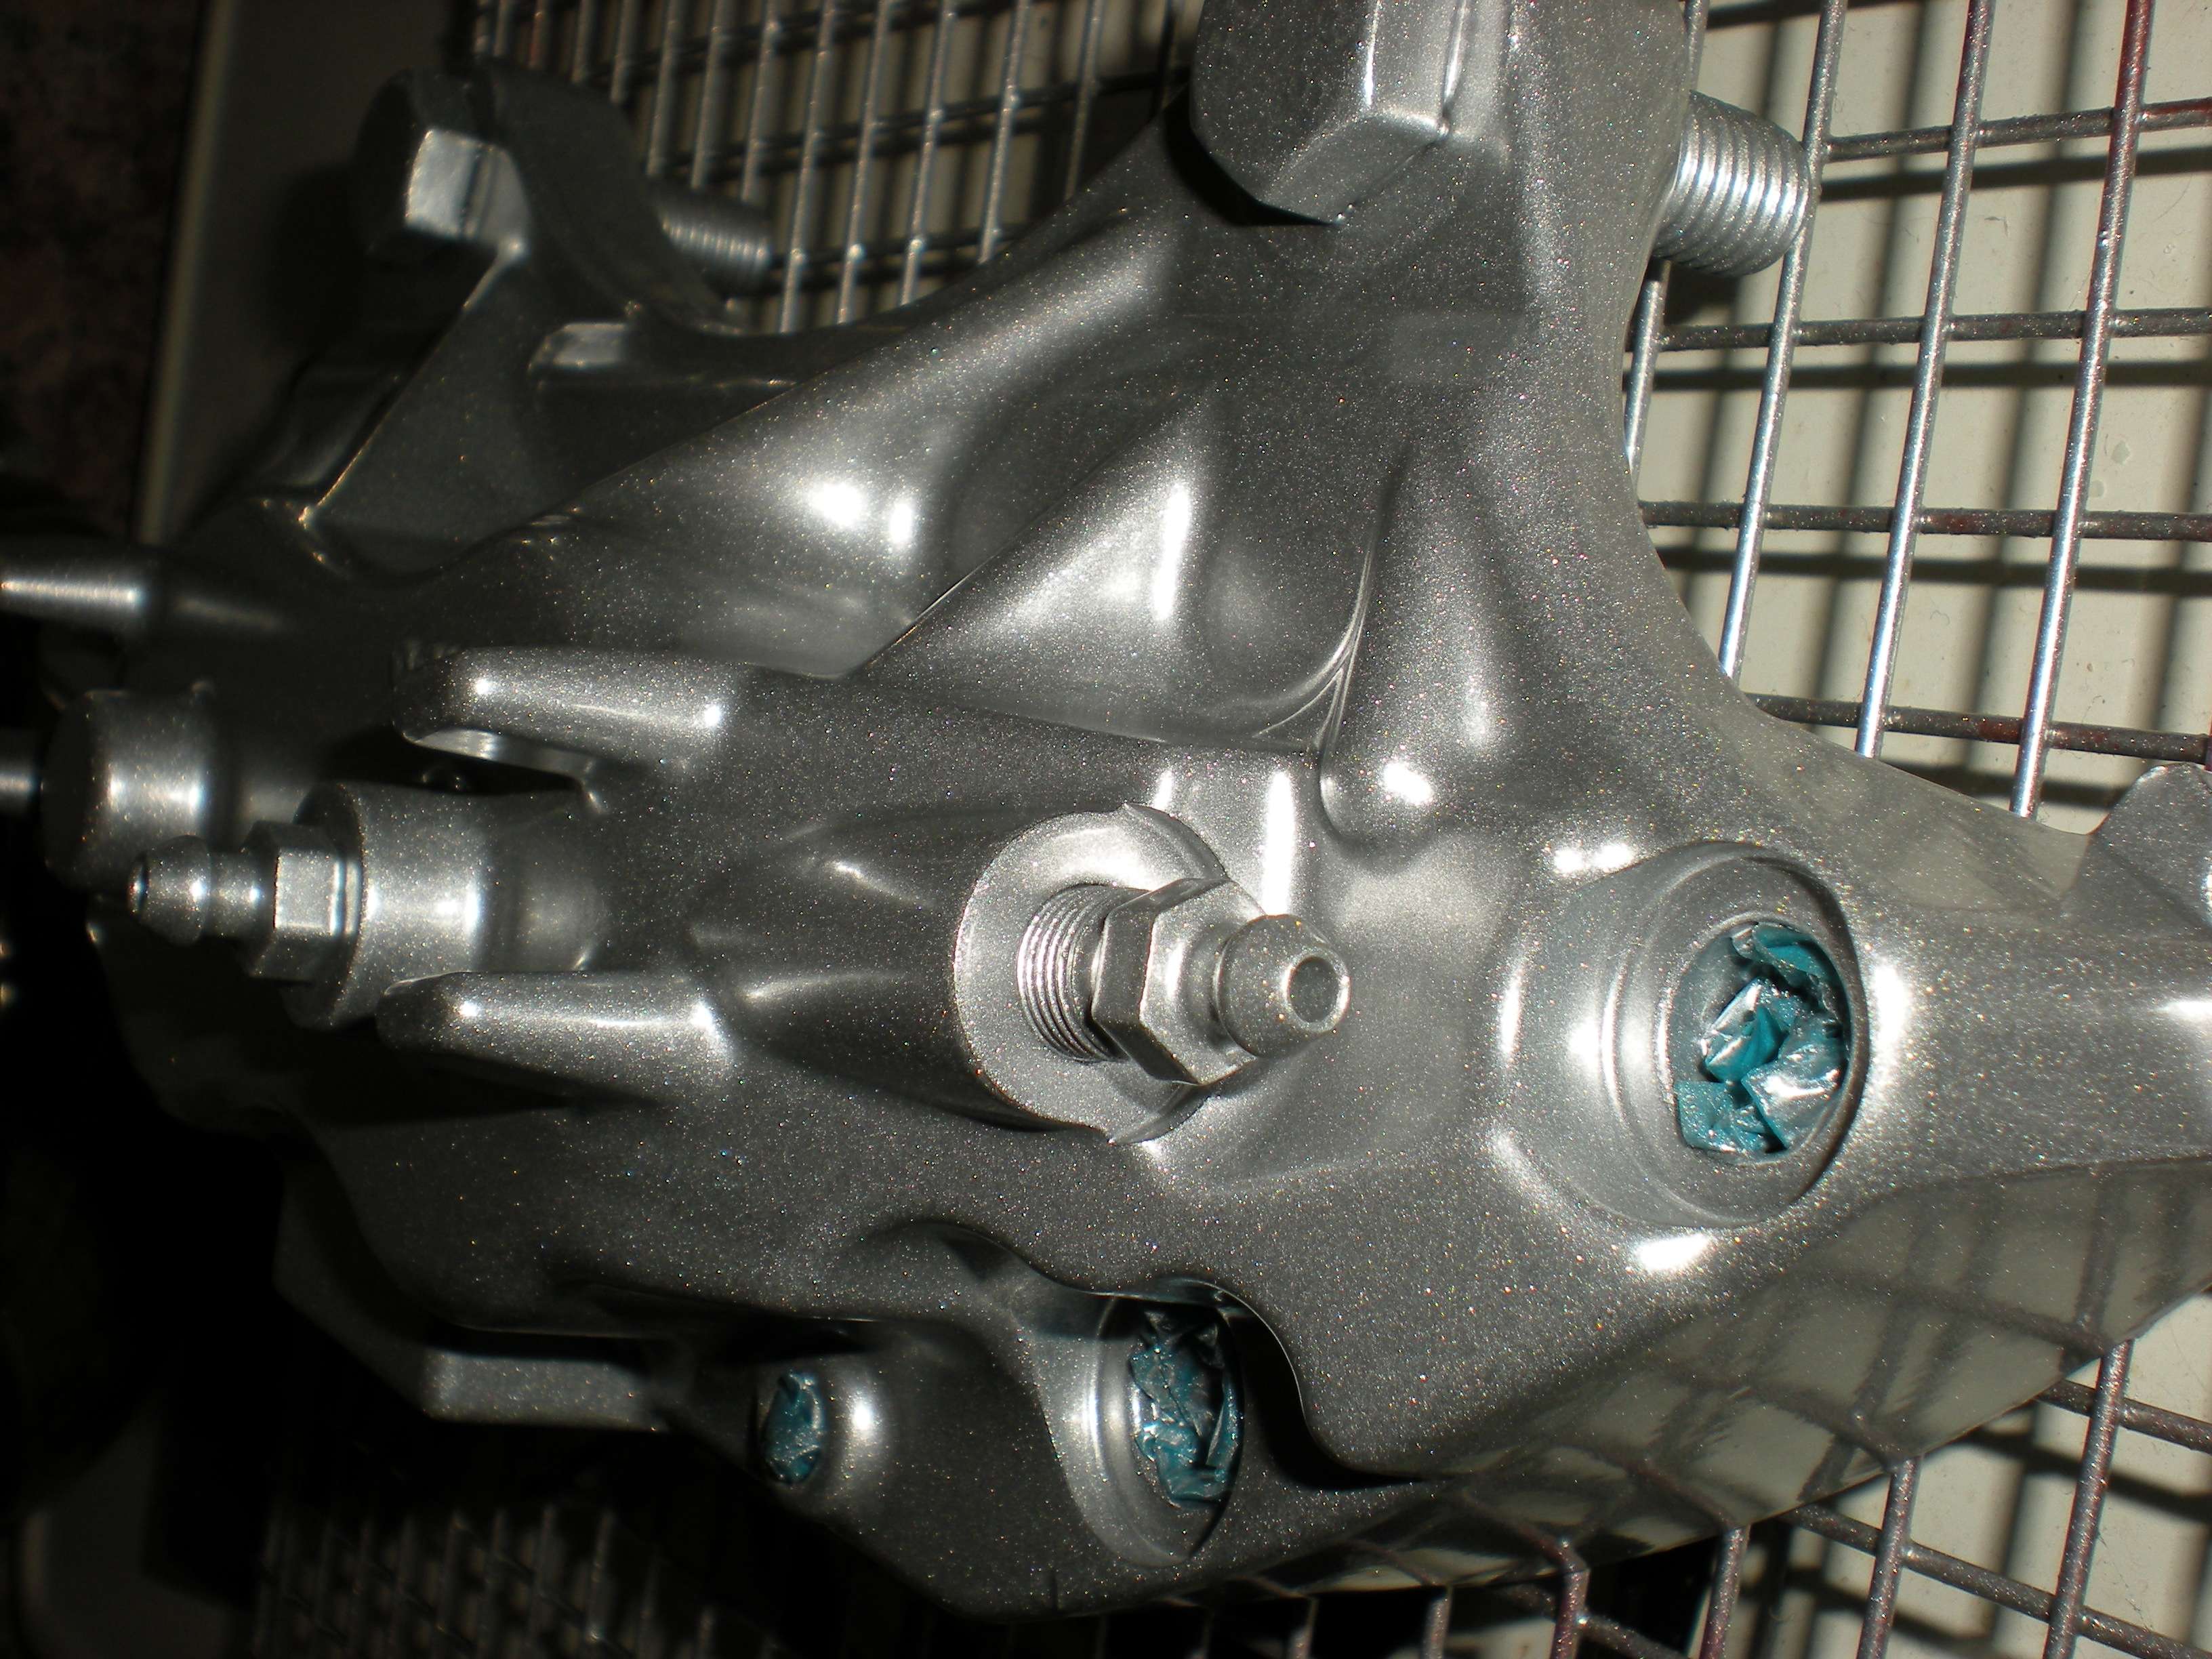 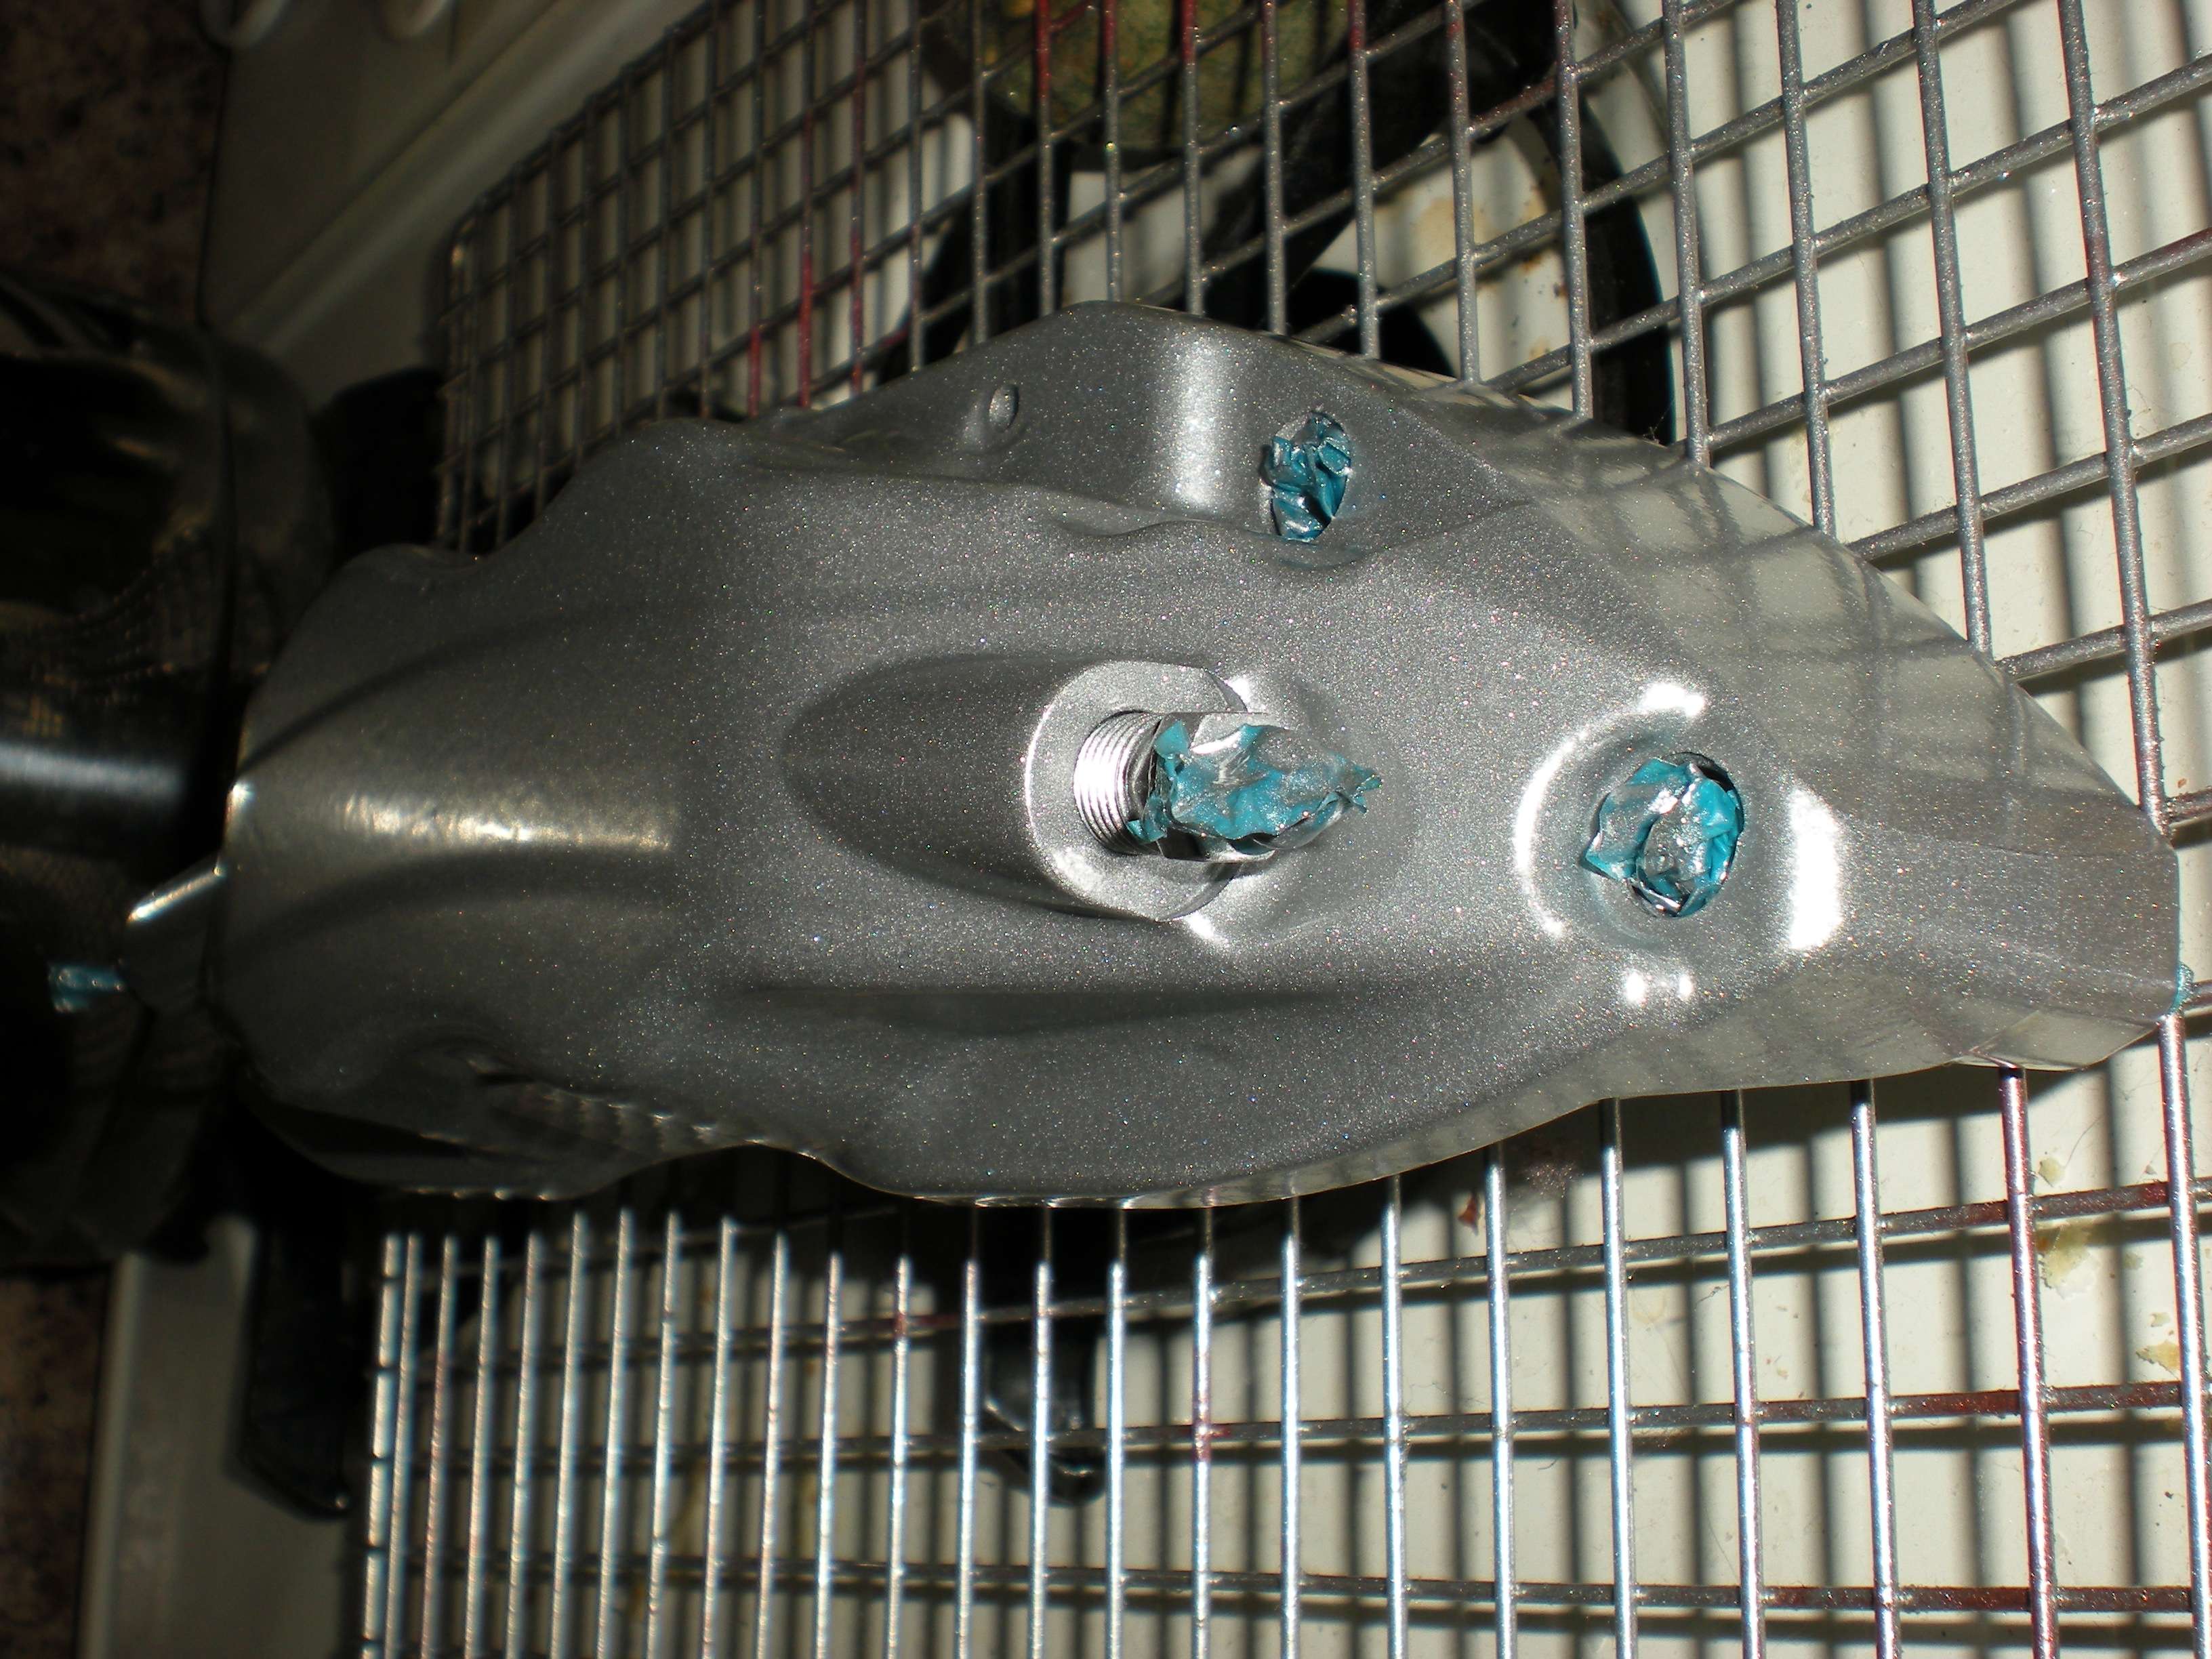 Note: I used different techniques when doing each front caliper. For one I separated the caliper into two pieces, and powder coated separately. For the other, I removed the pistons, seals, esc and powder coated all as one piece. The results from leaving it in one piece are BETTER! Since there are no seals between the halves, like Z32 calipers, seal damage is NOT an issue. Leaving them together allows you to coat the bolts as well, and helps hide the seam between the two halves. I recommend leaving them together. 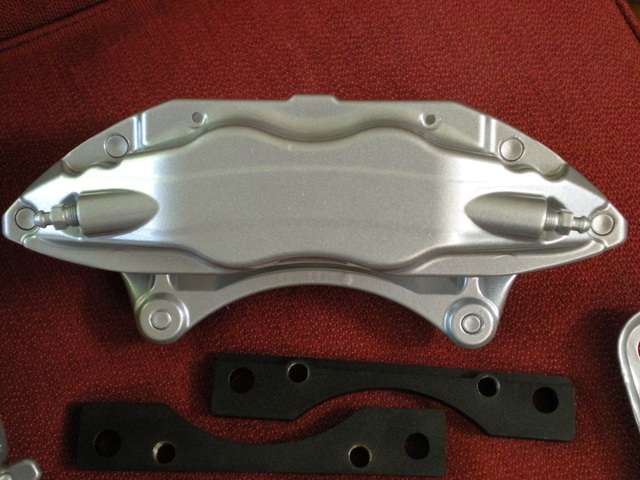 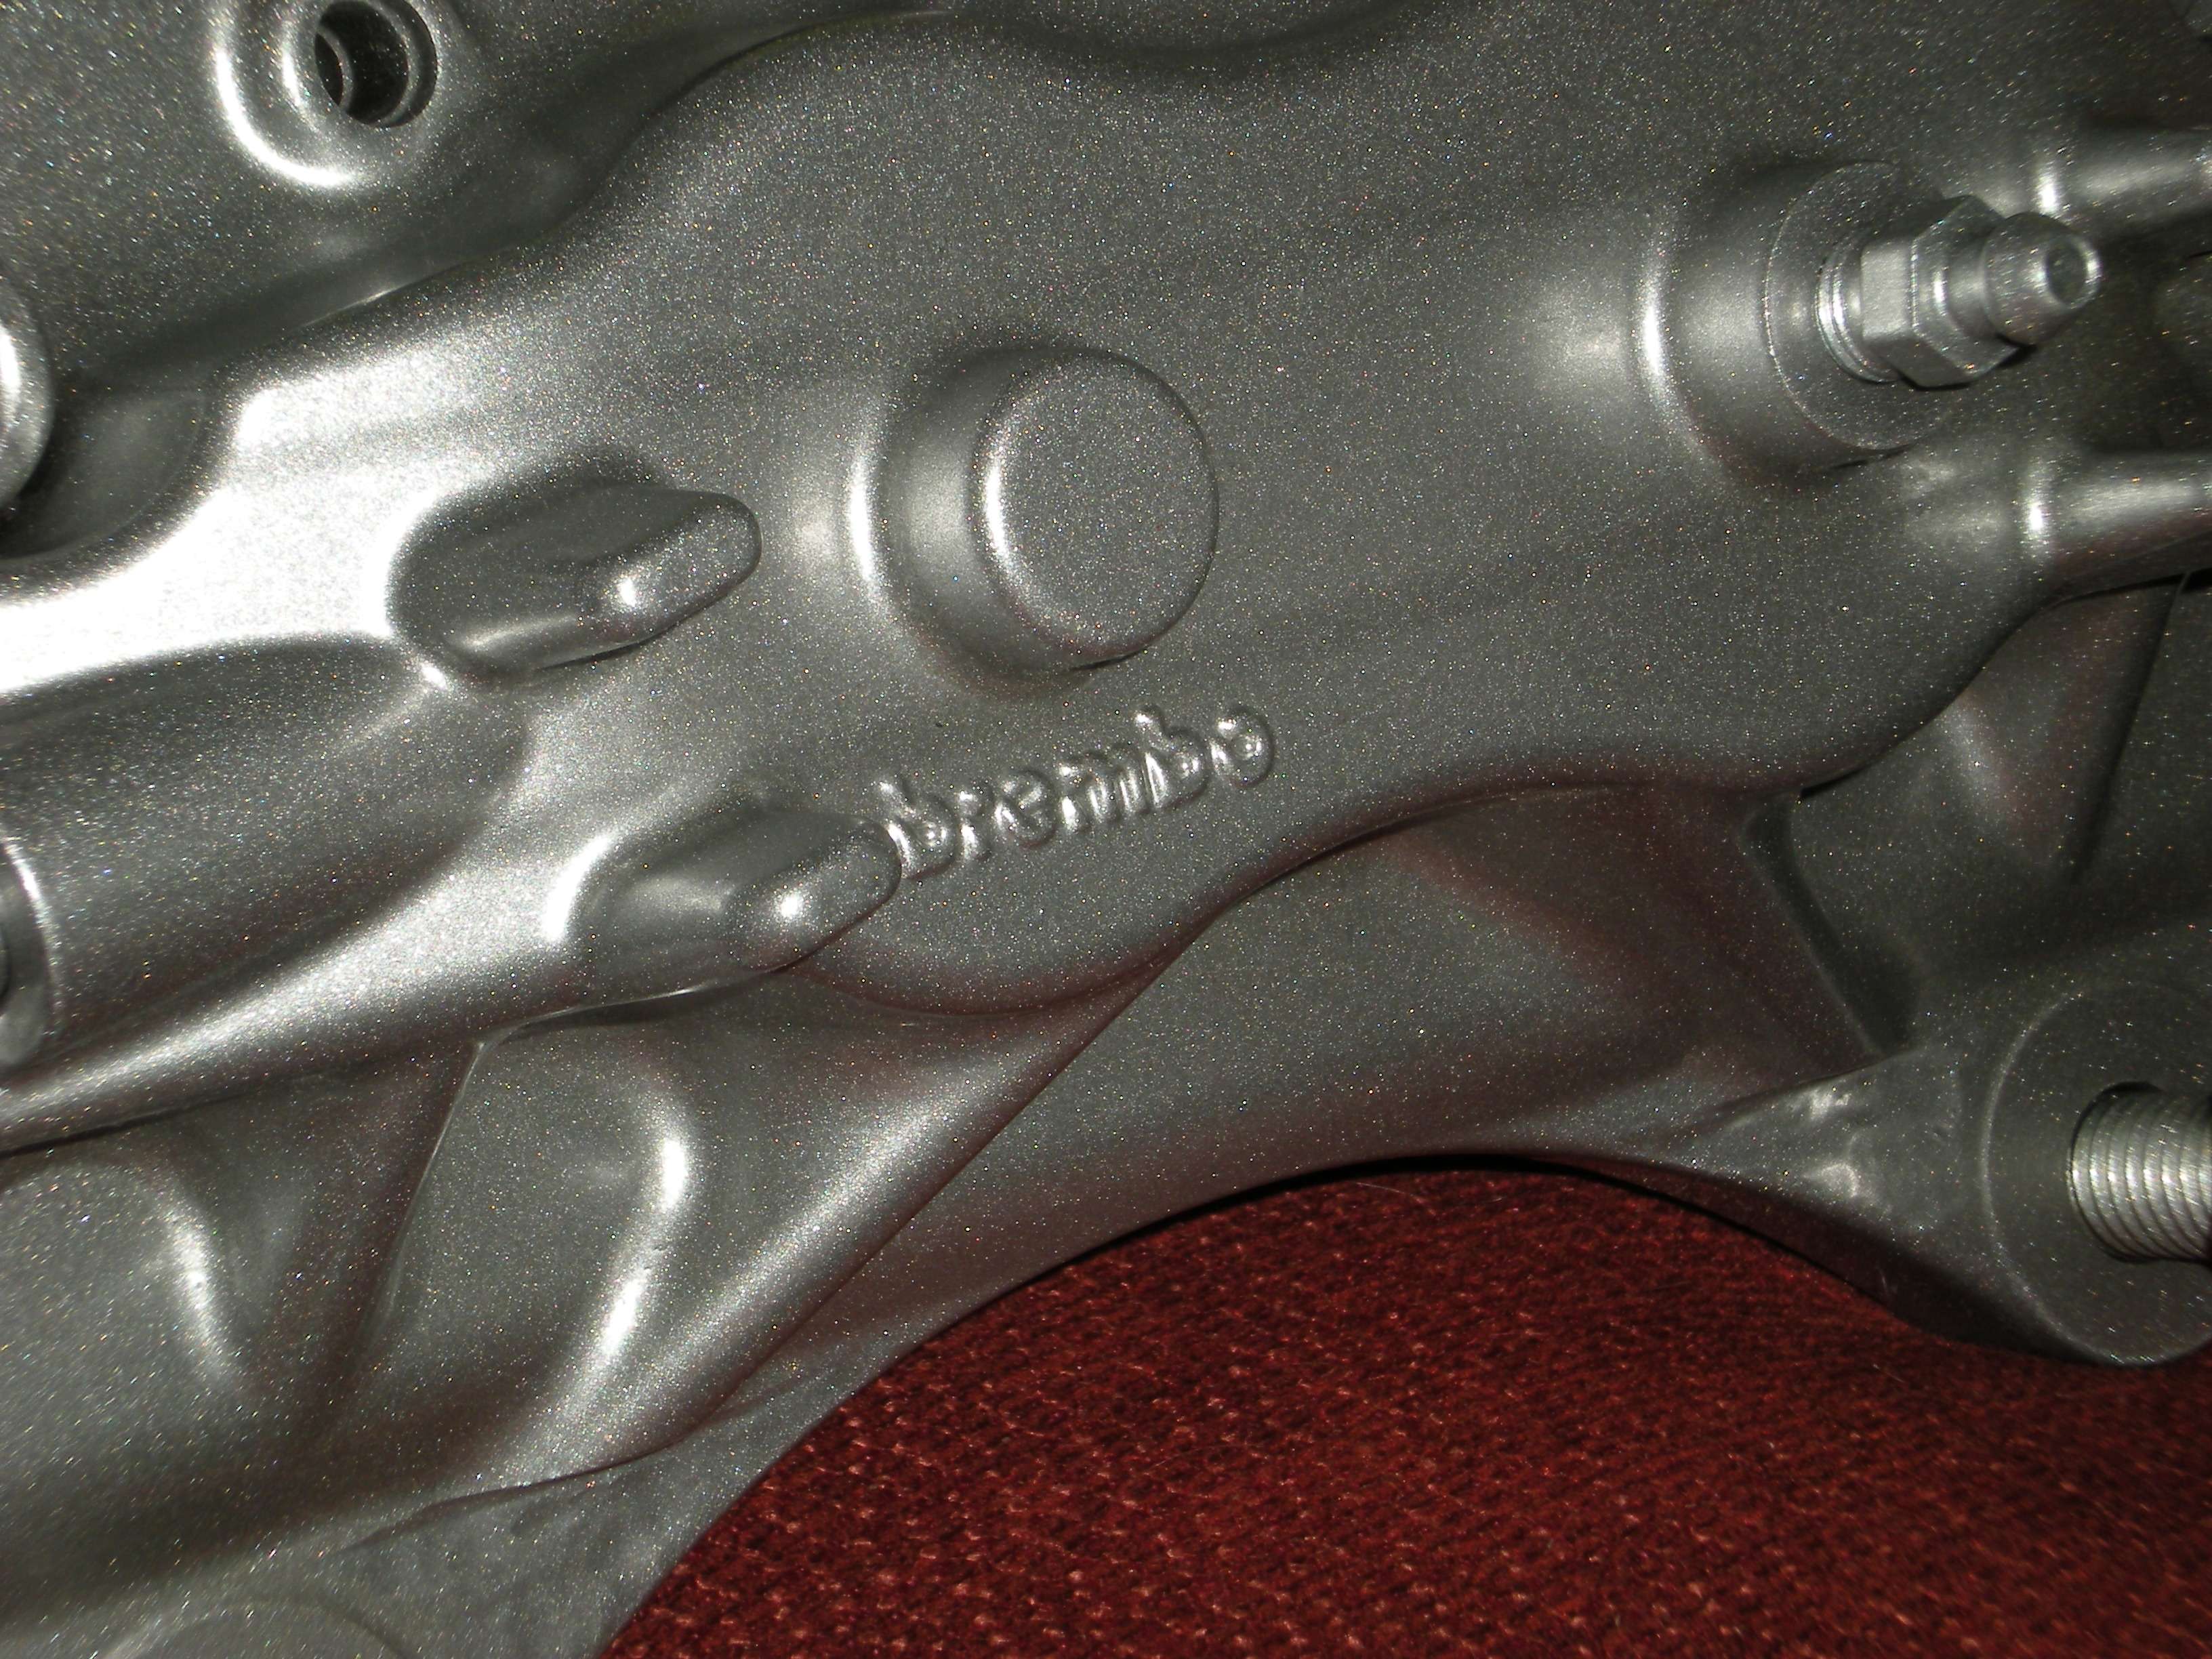 All together, and also coated the brackets which secure the rear subframe. 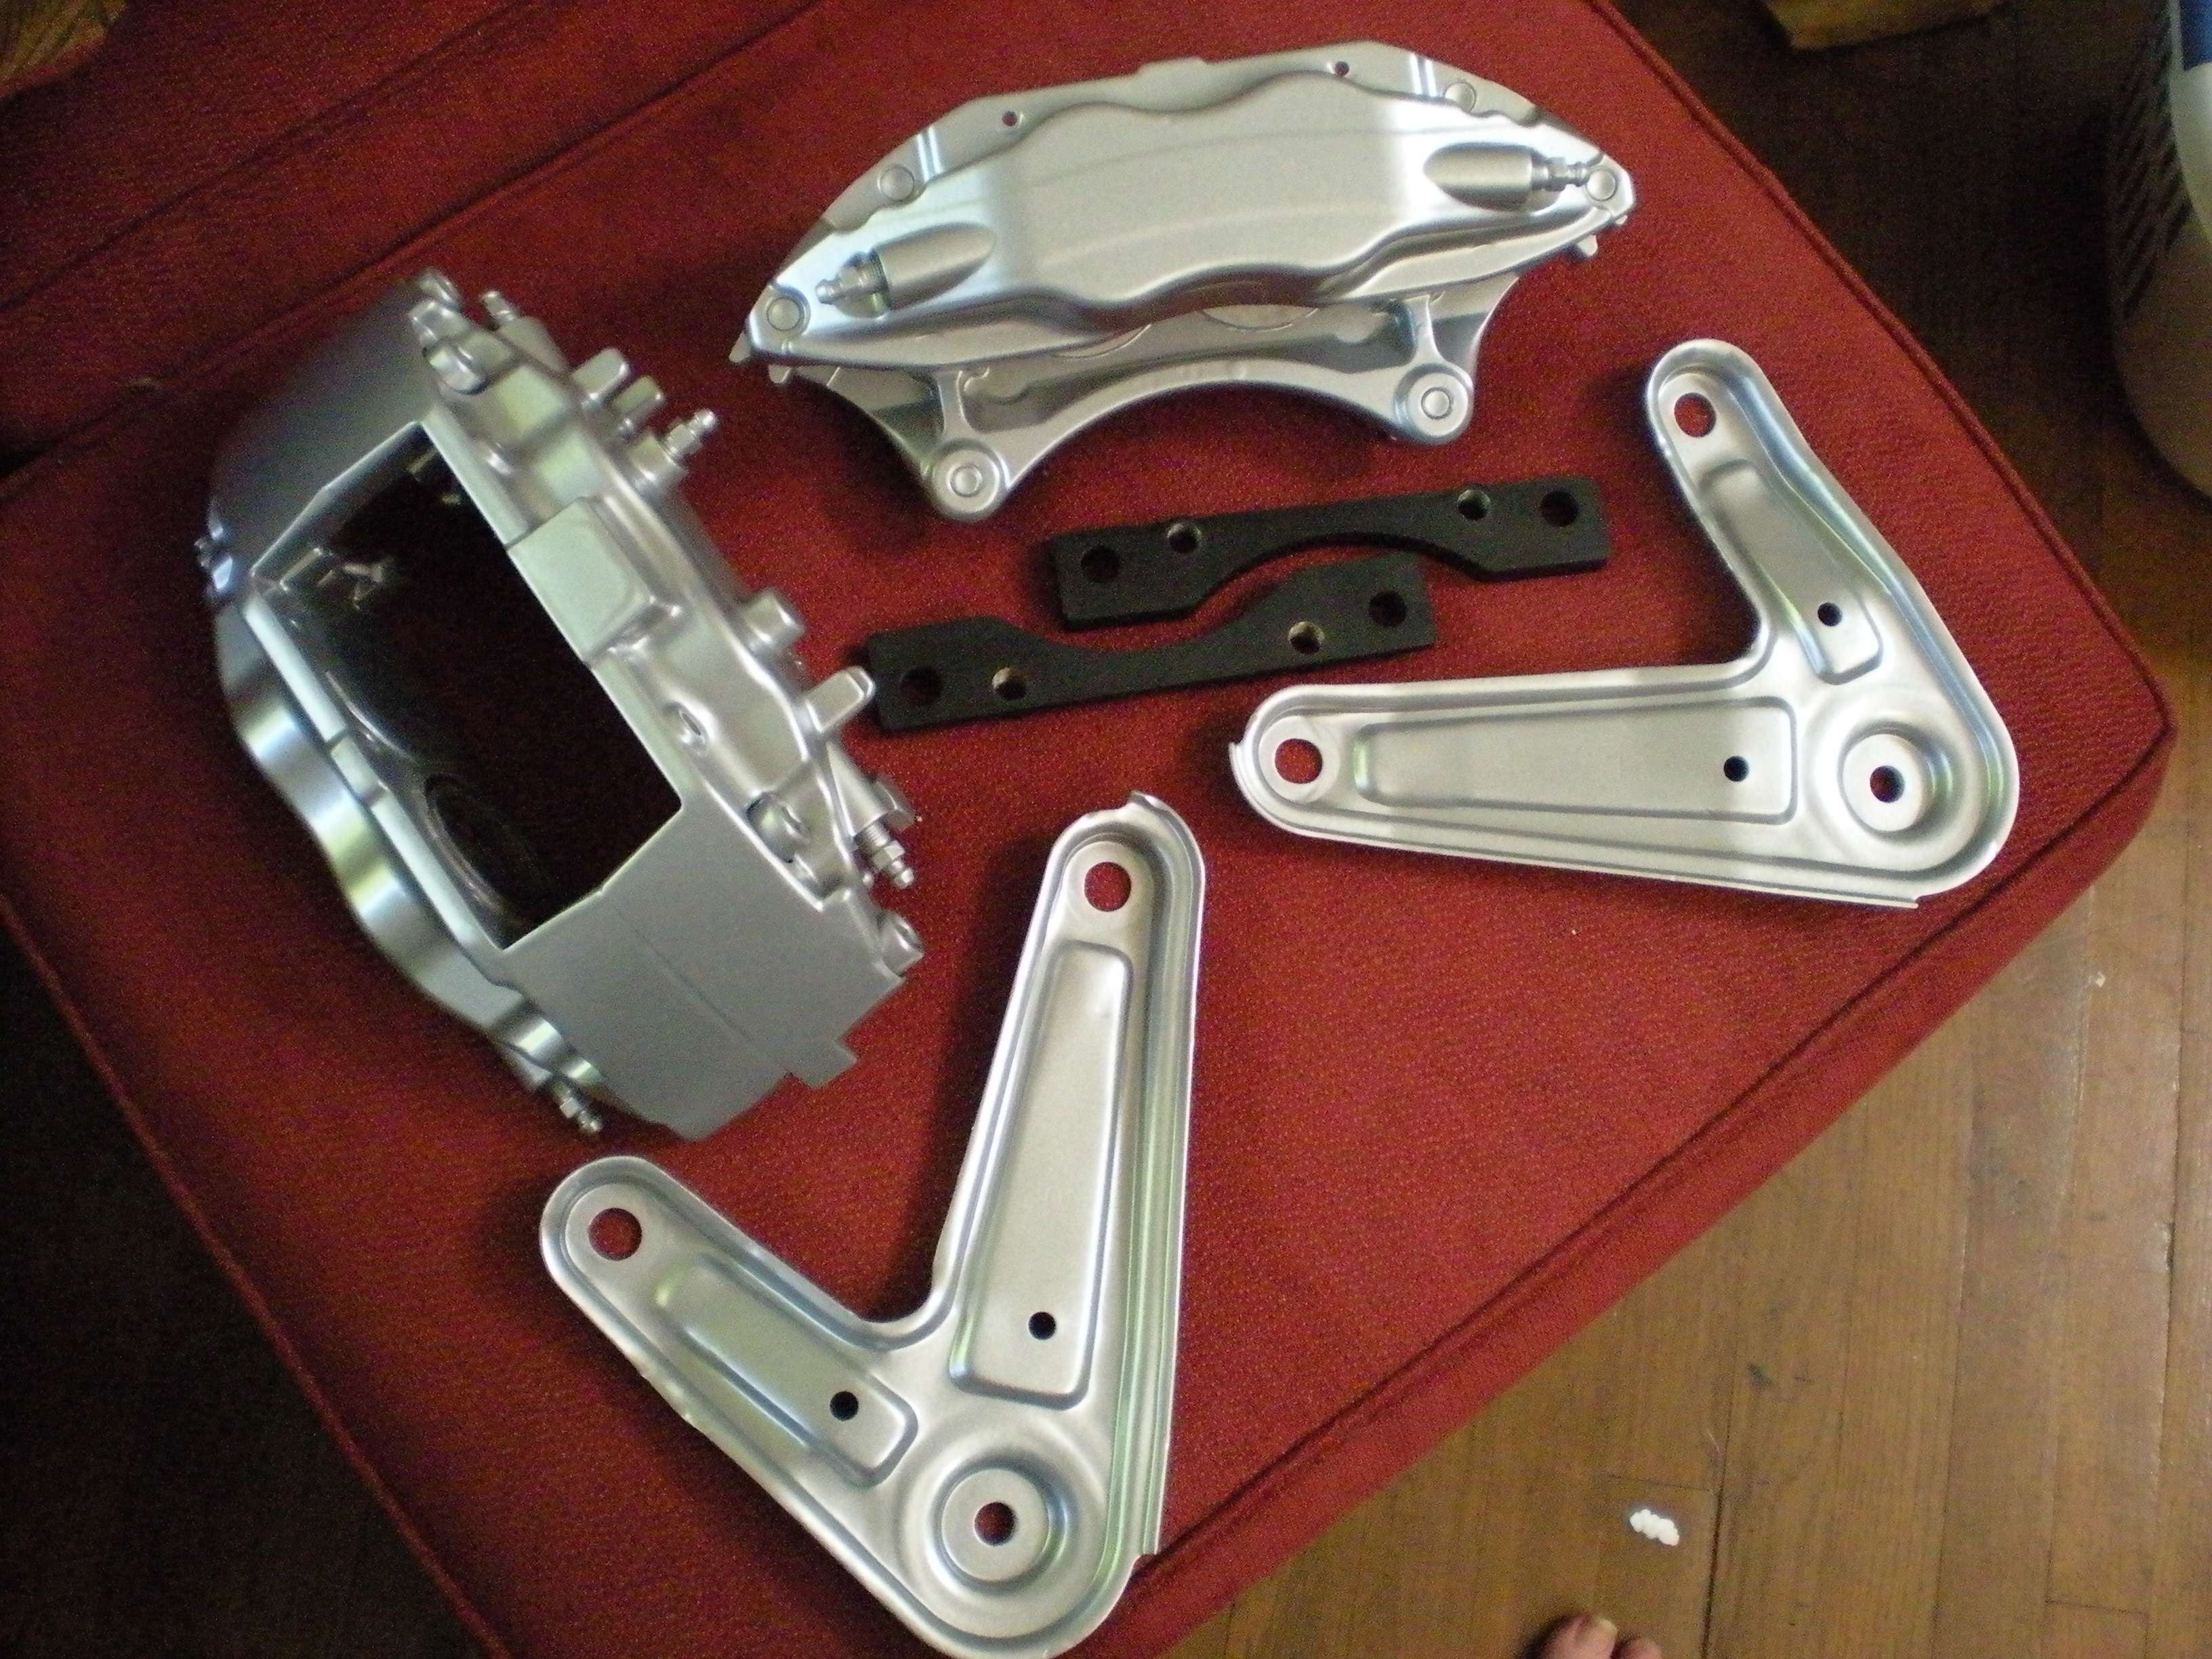 High Temp Brembo decals were then applied. I tried to match to match the Ruby Pearl paint as best I could. 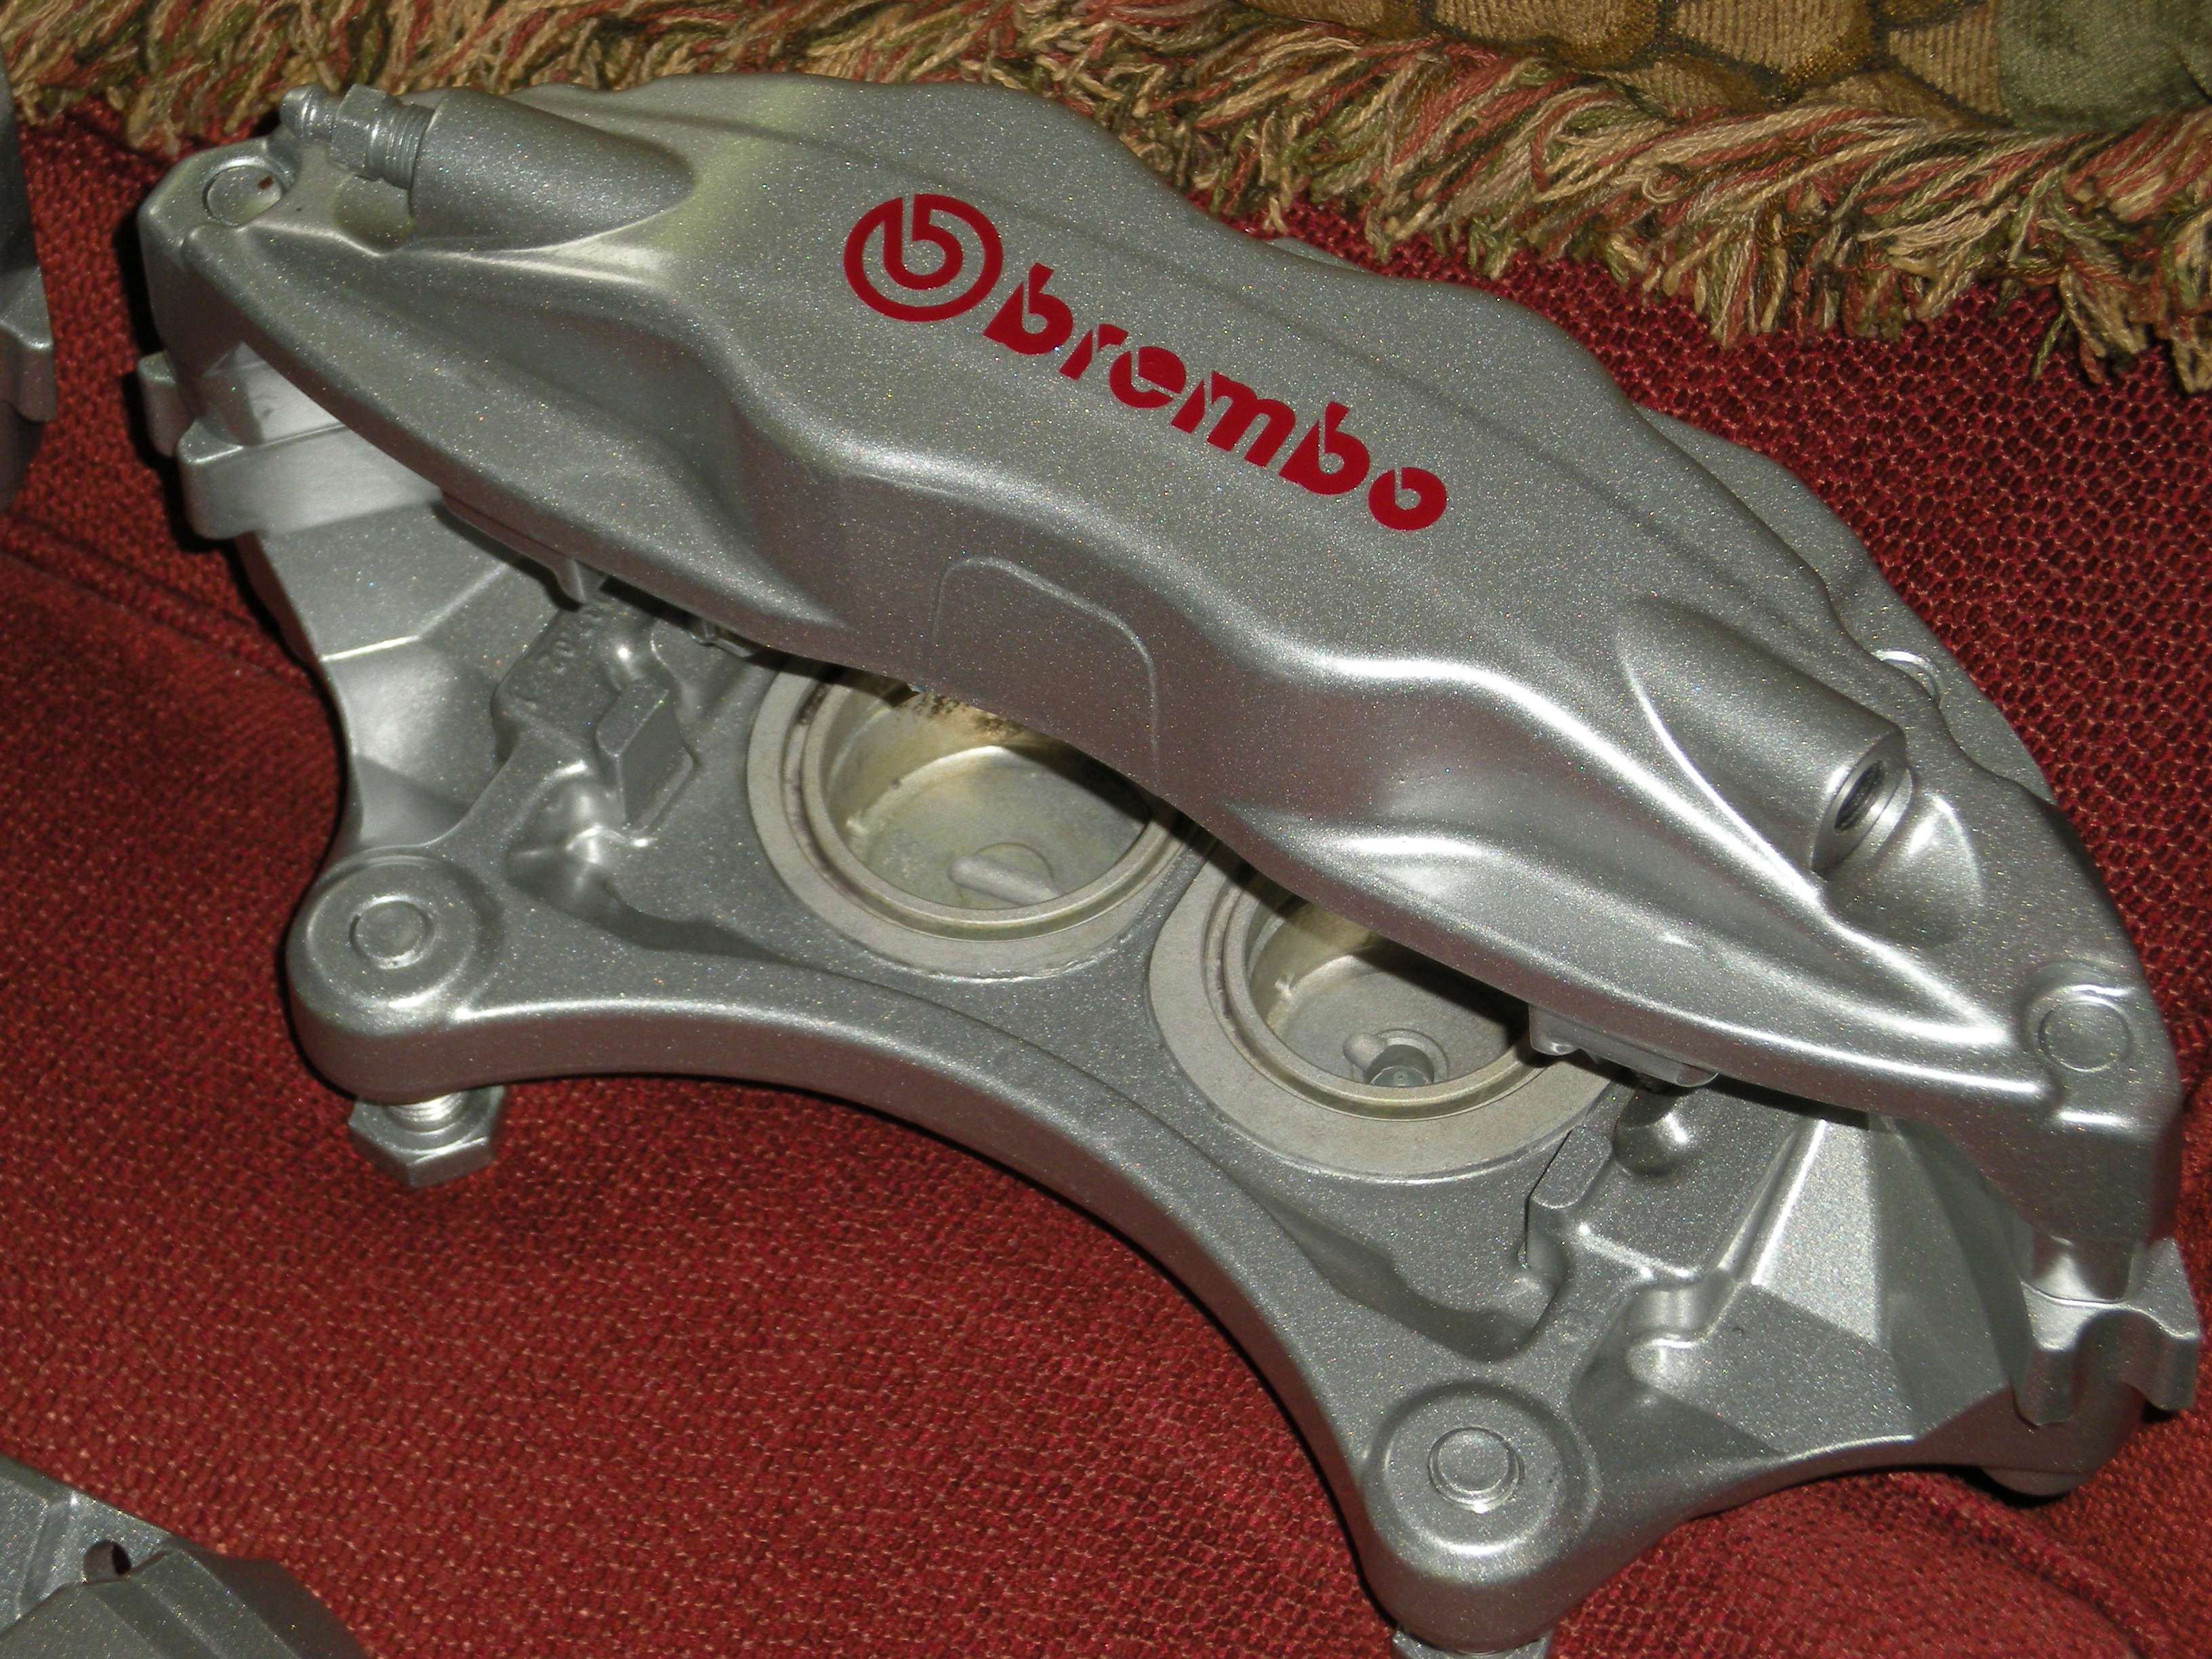 After the application of the decals, the calipers where then coated with clear powder coat. Be very careful when selecting your decals, as I have had some melt during the clear coating process. 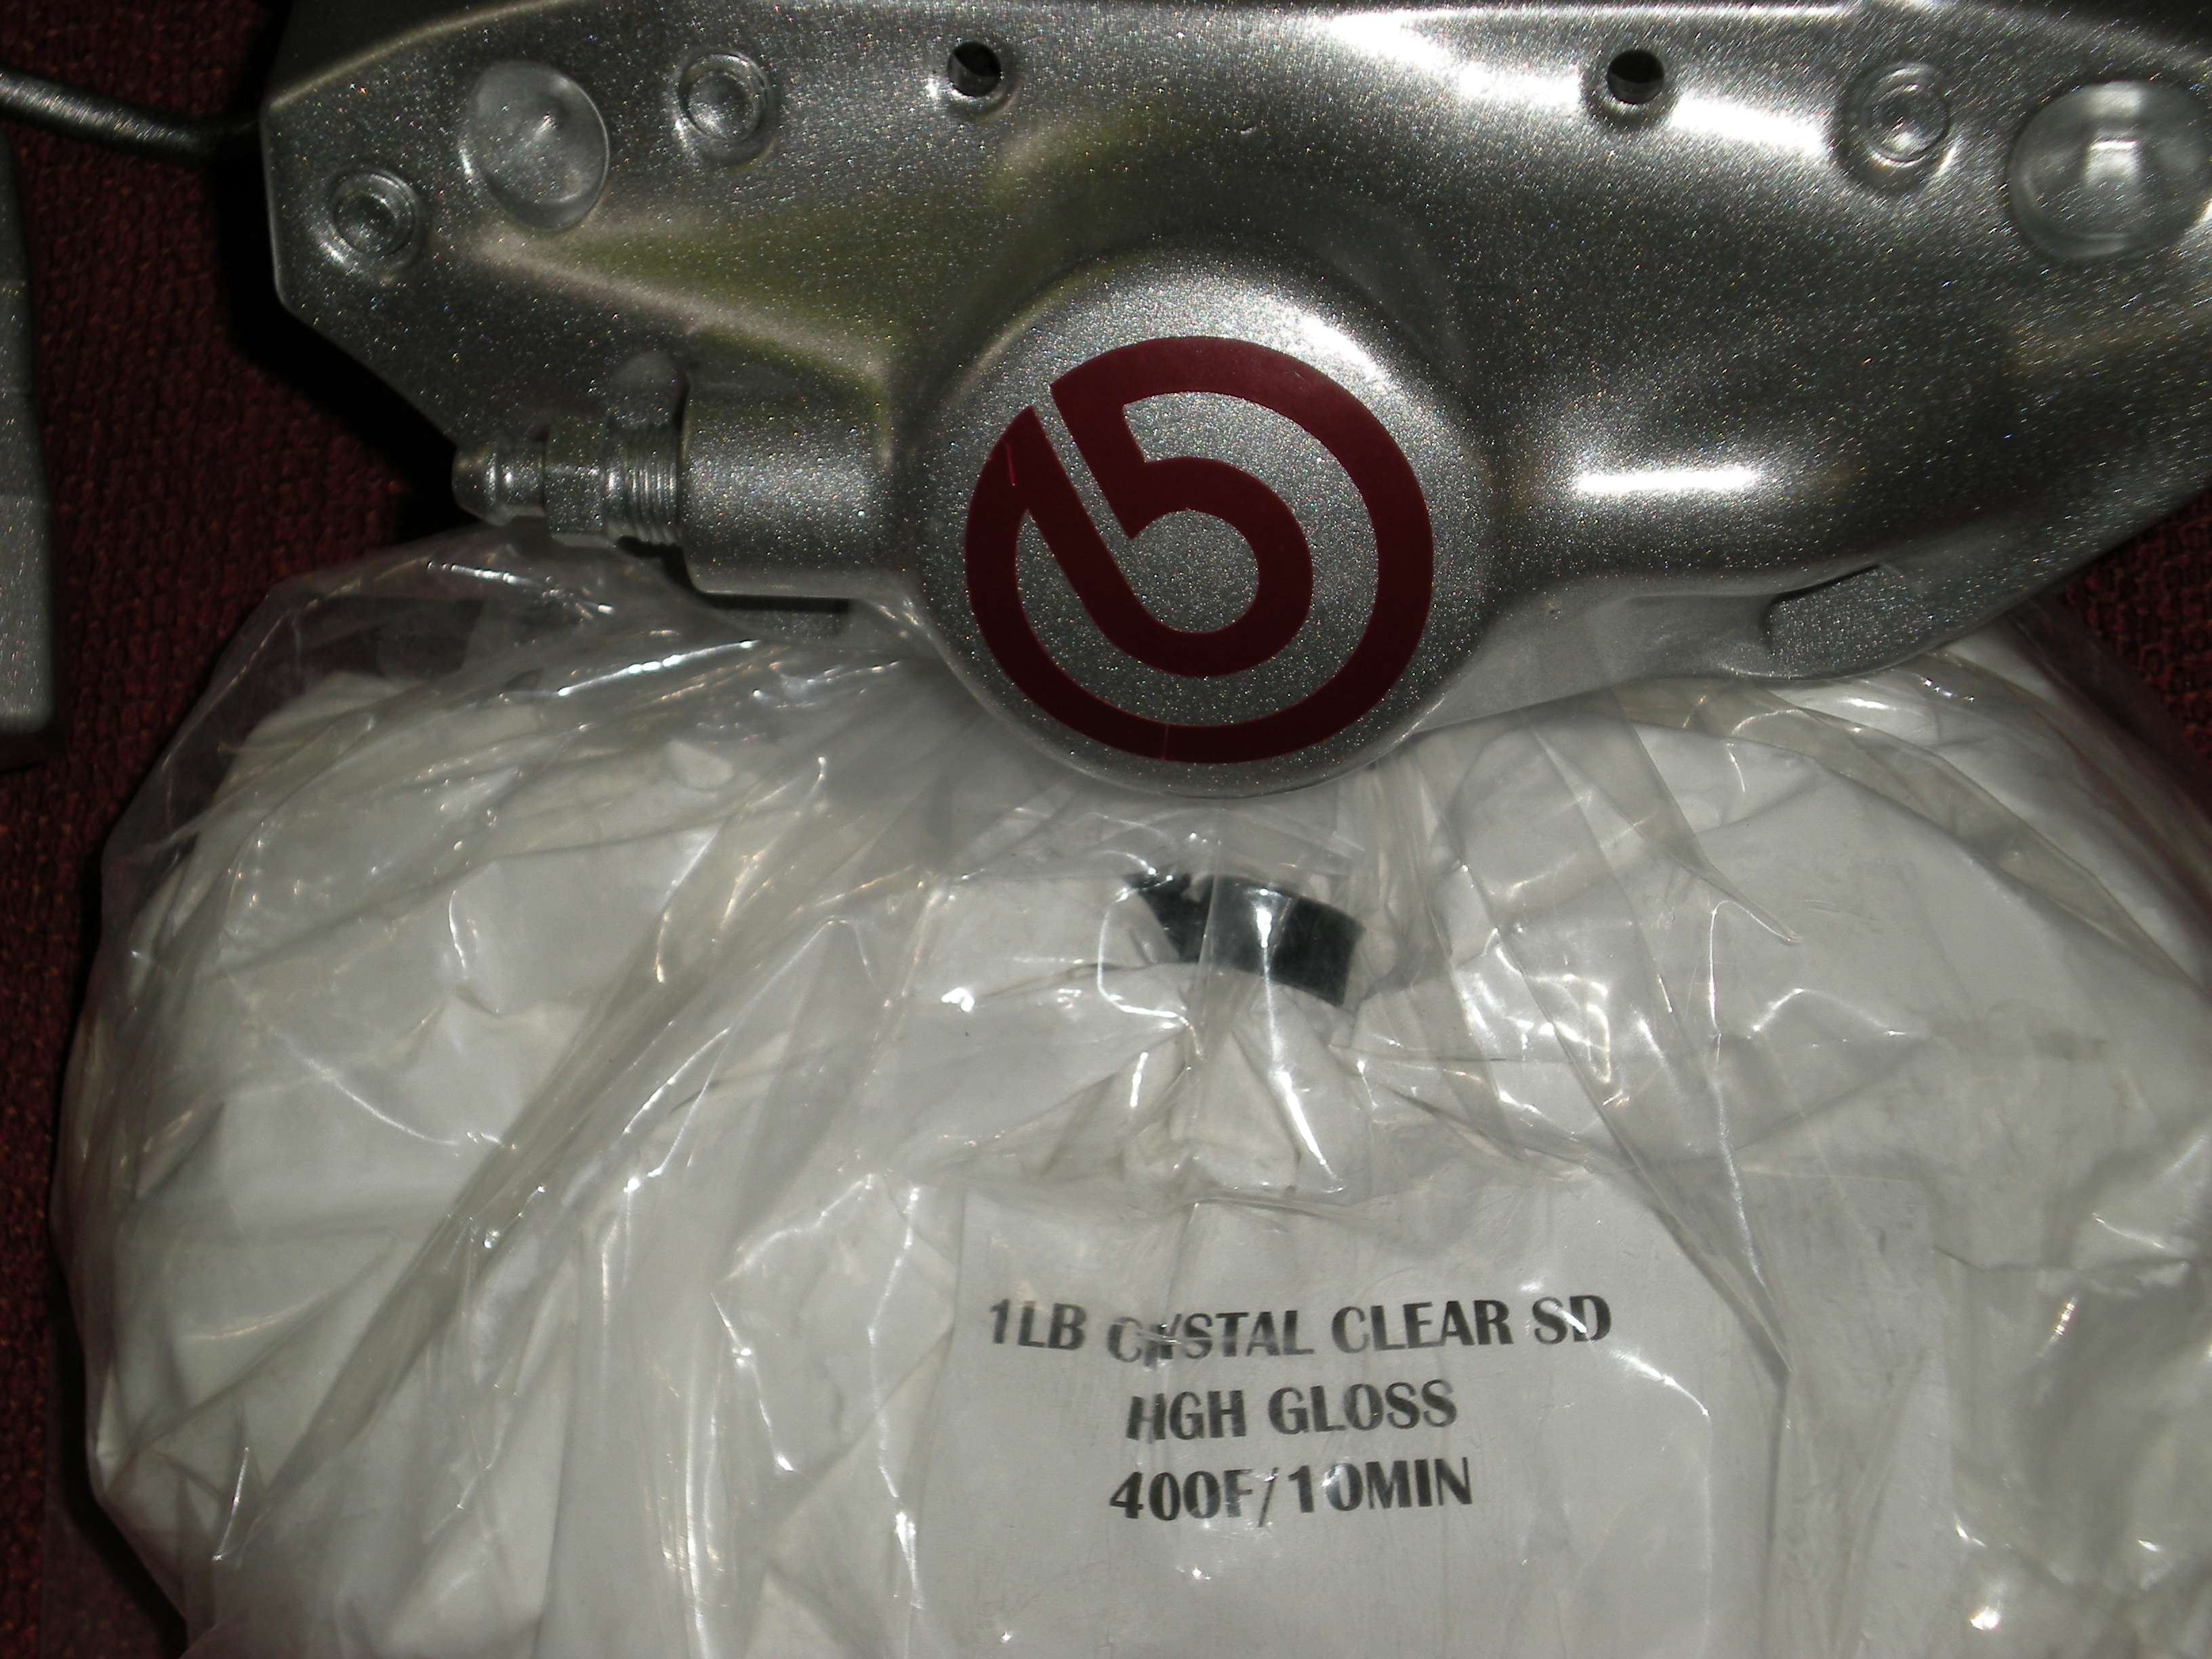 This is what they look like powder coated clear. Ready to install.... 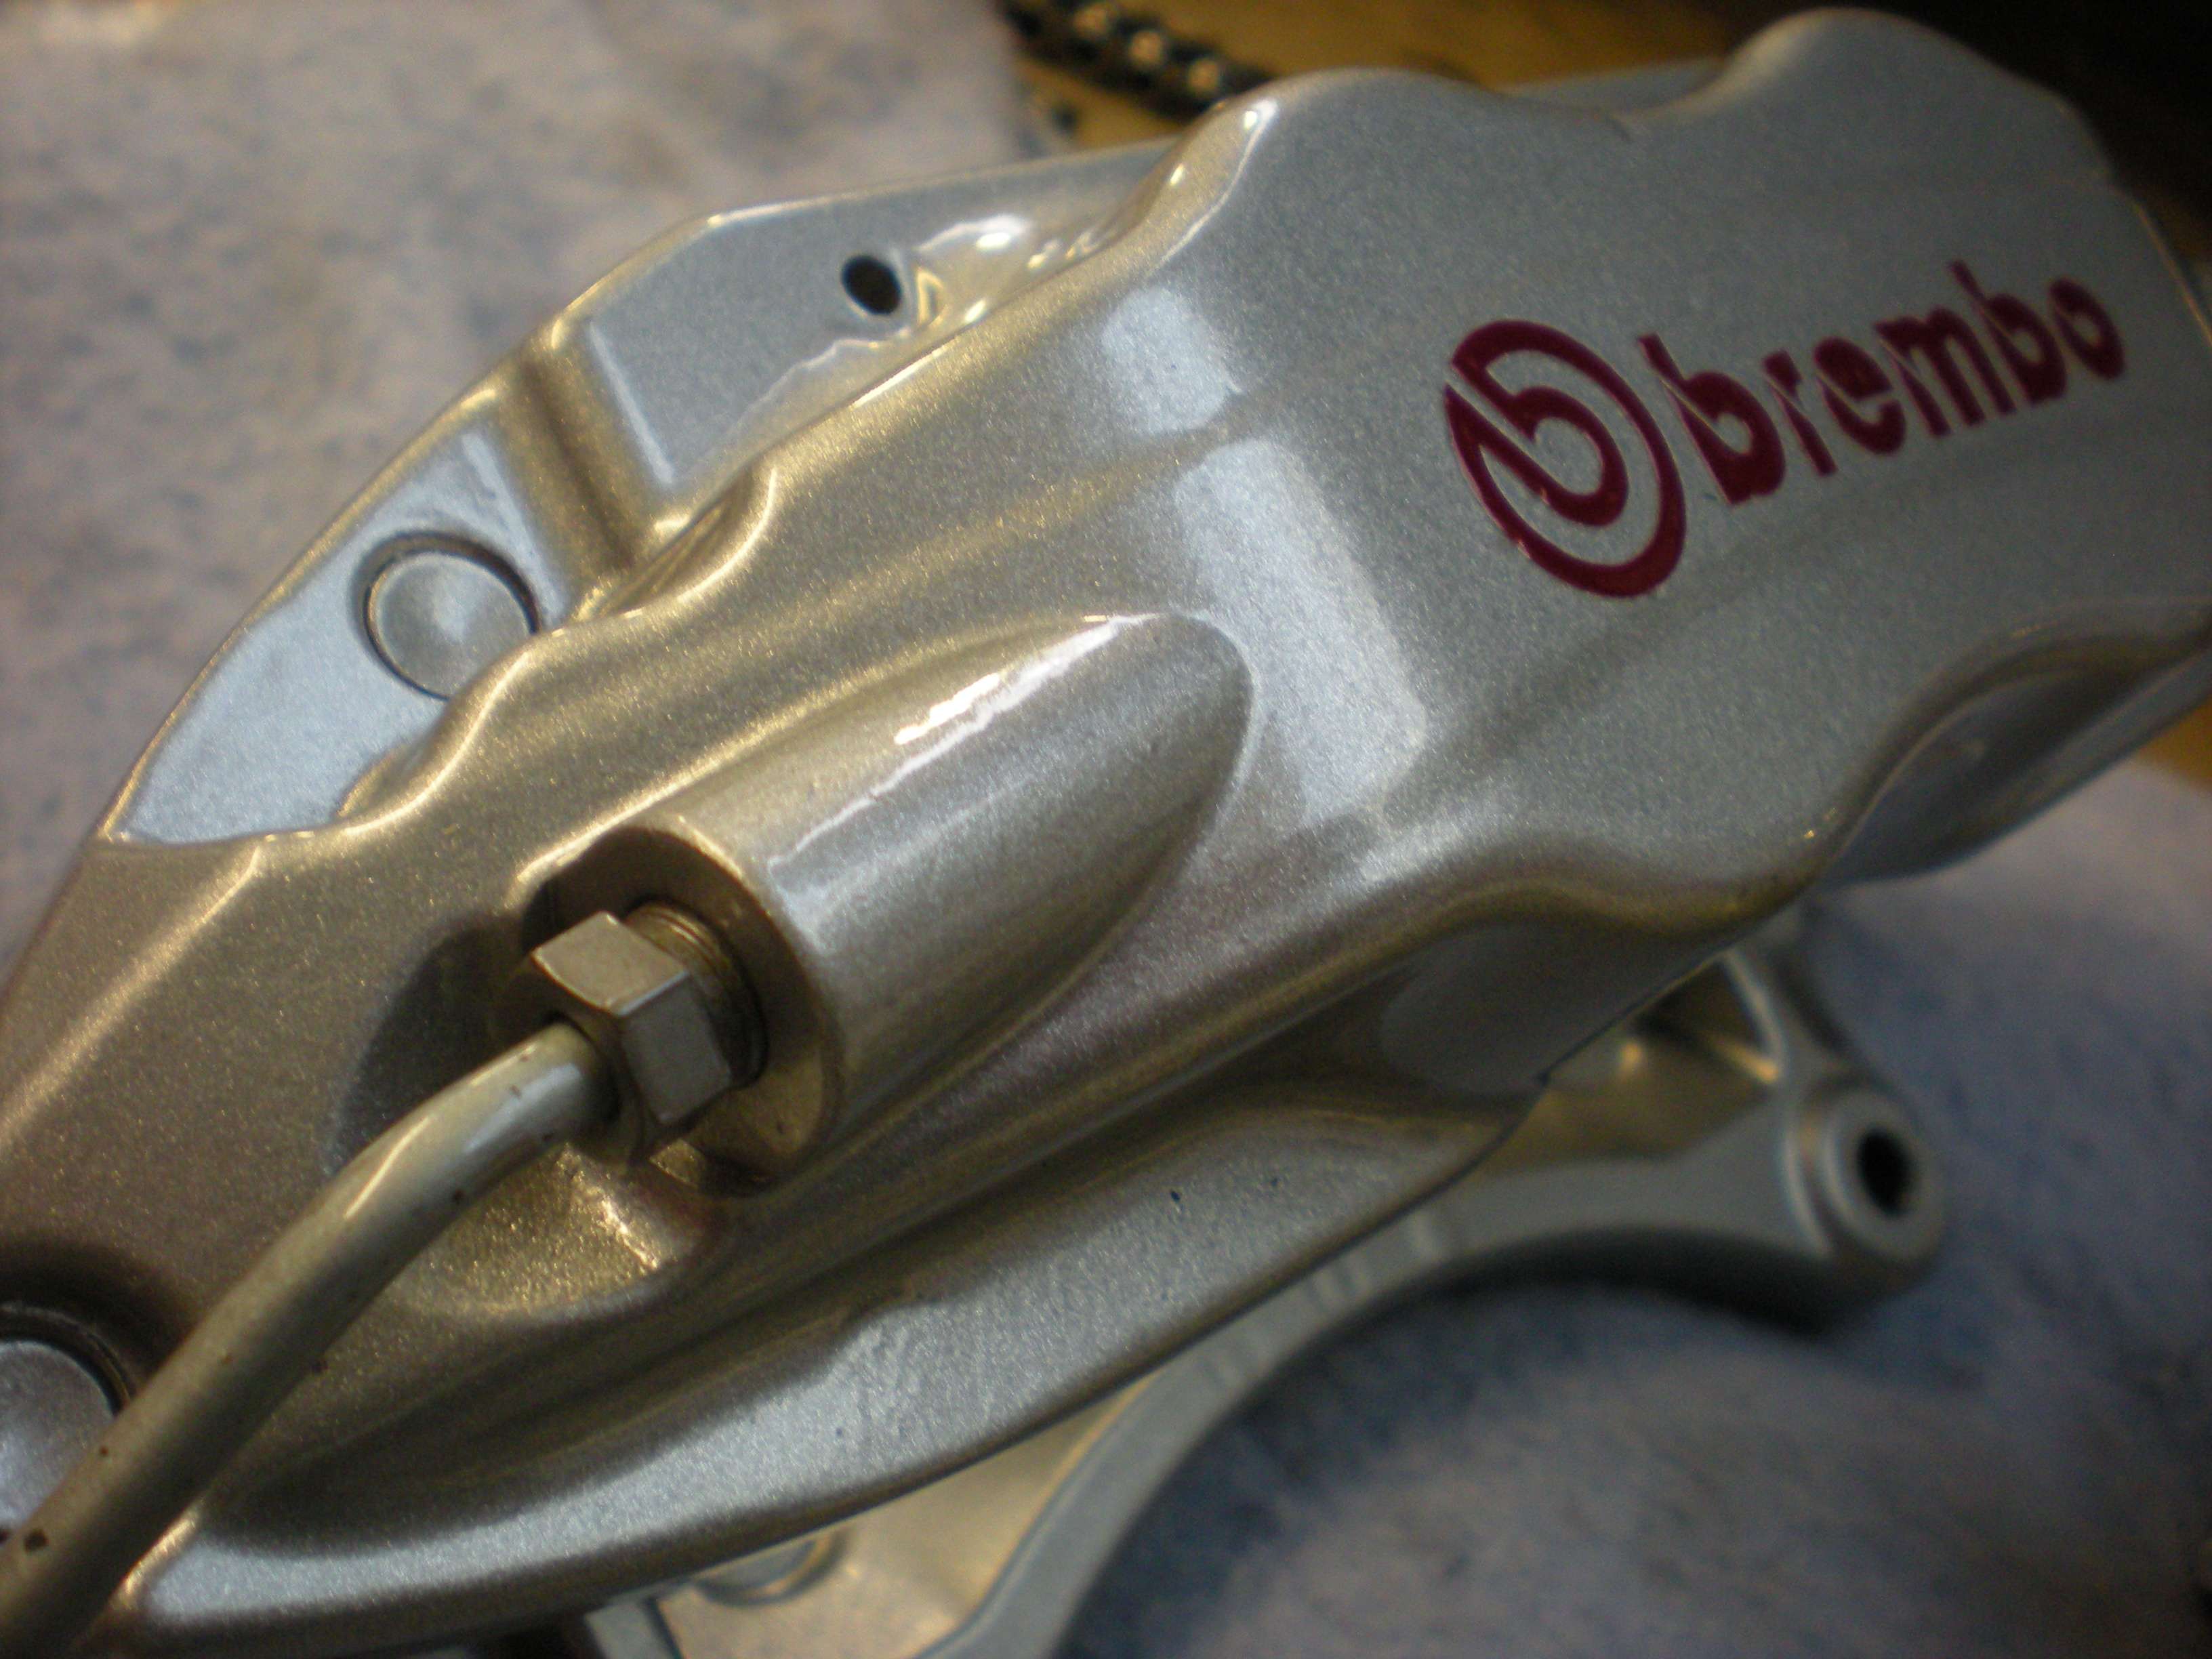 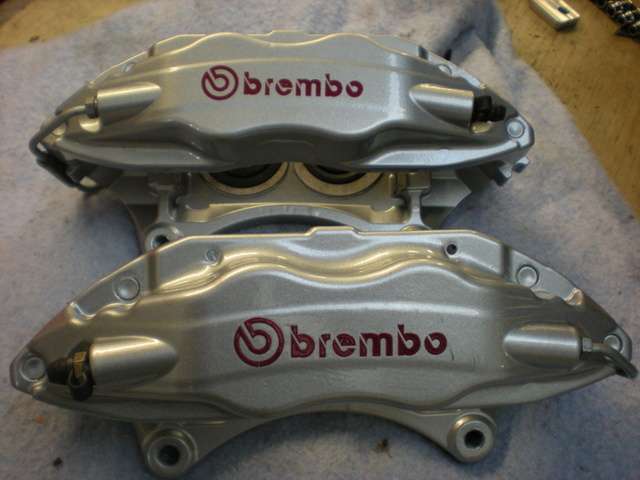 Touge Factory Evo Brembo brackets made the install very easy. They are extremely high quality, and are PROPERLY designed. After having some bad luck with a set of brackets purchased on this forum, these were a blessing.  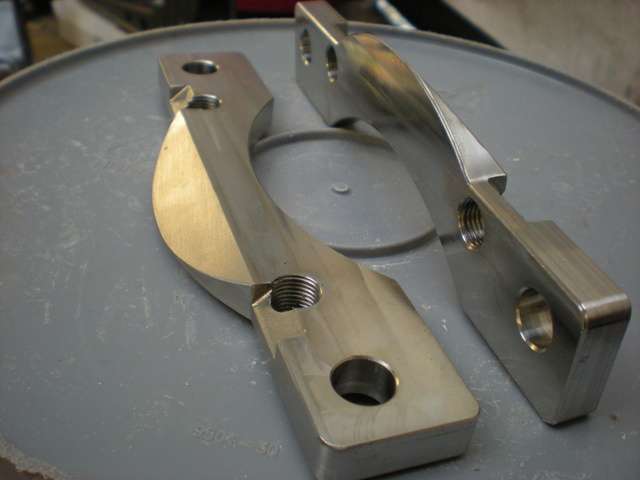 Rotora front and rear rotors.... 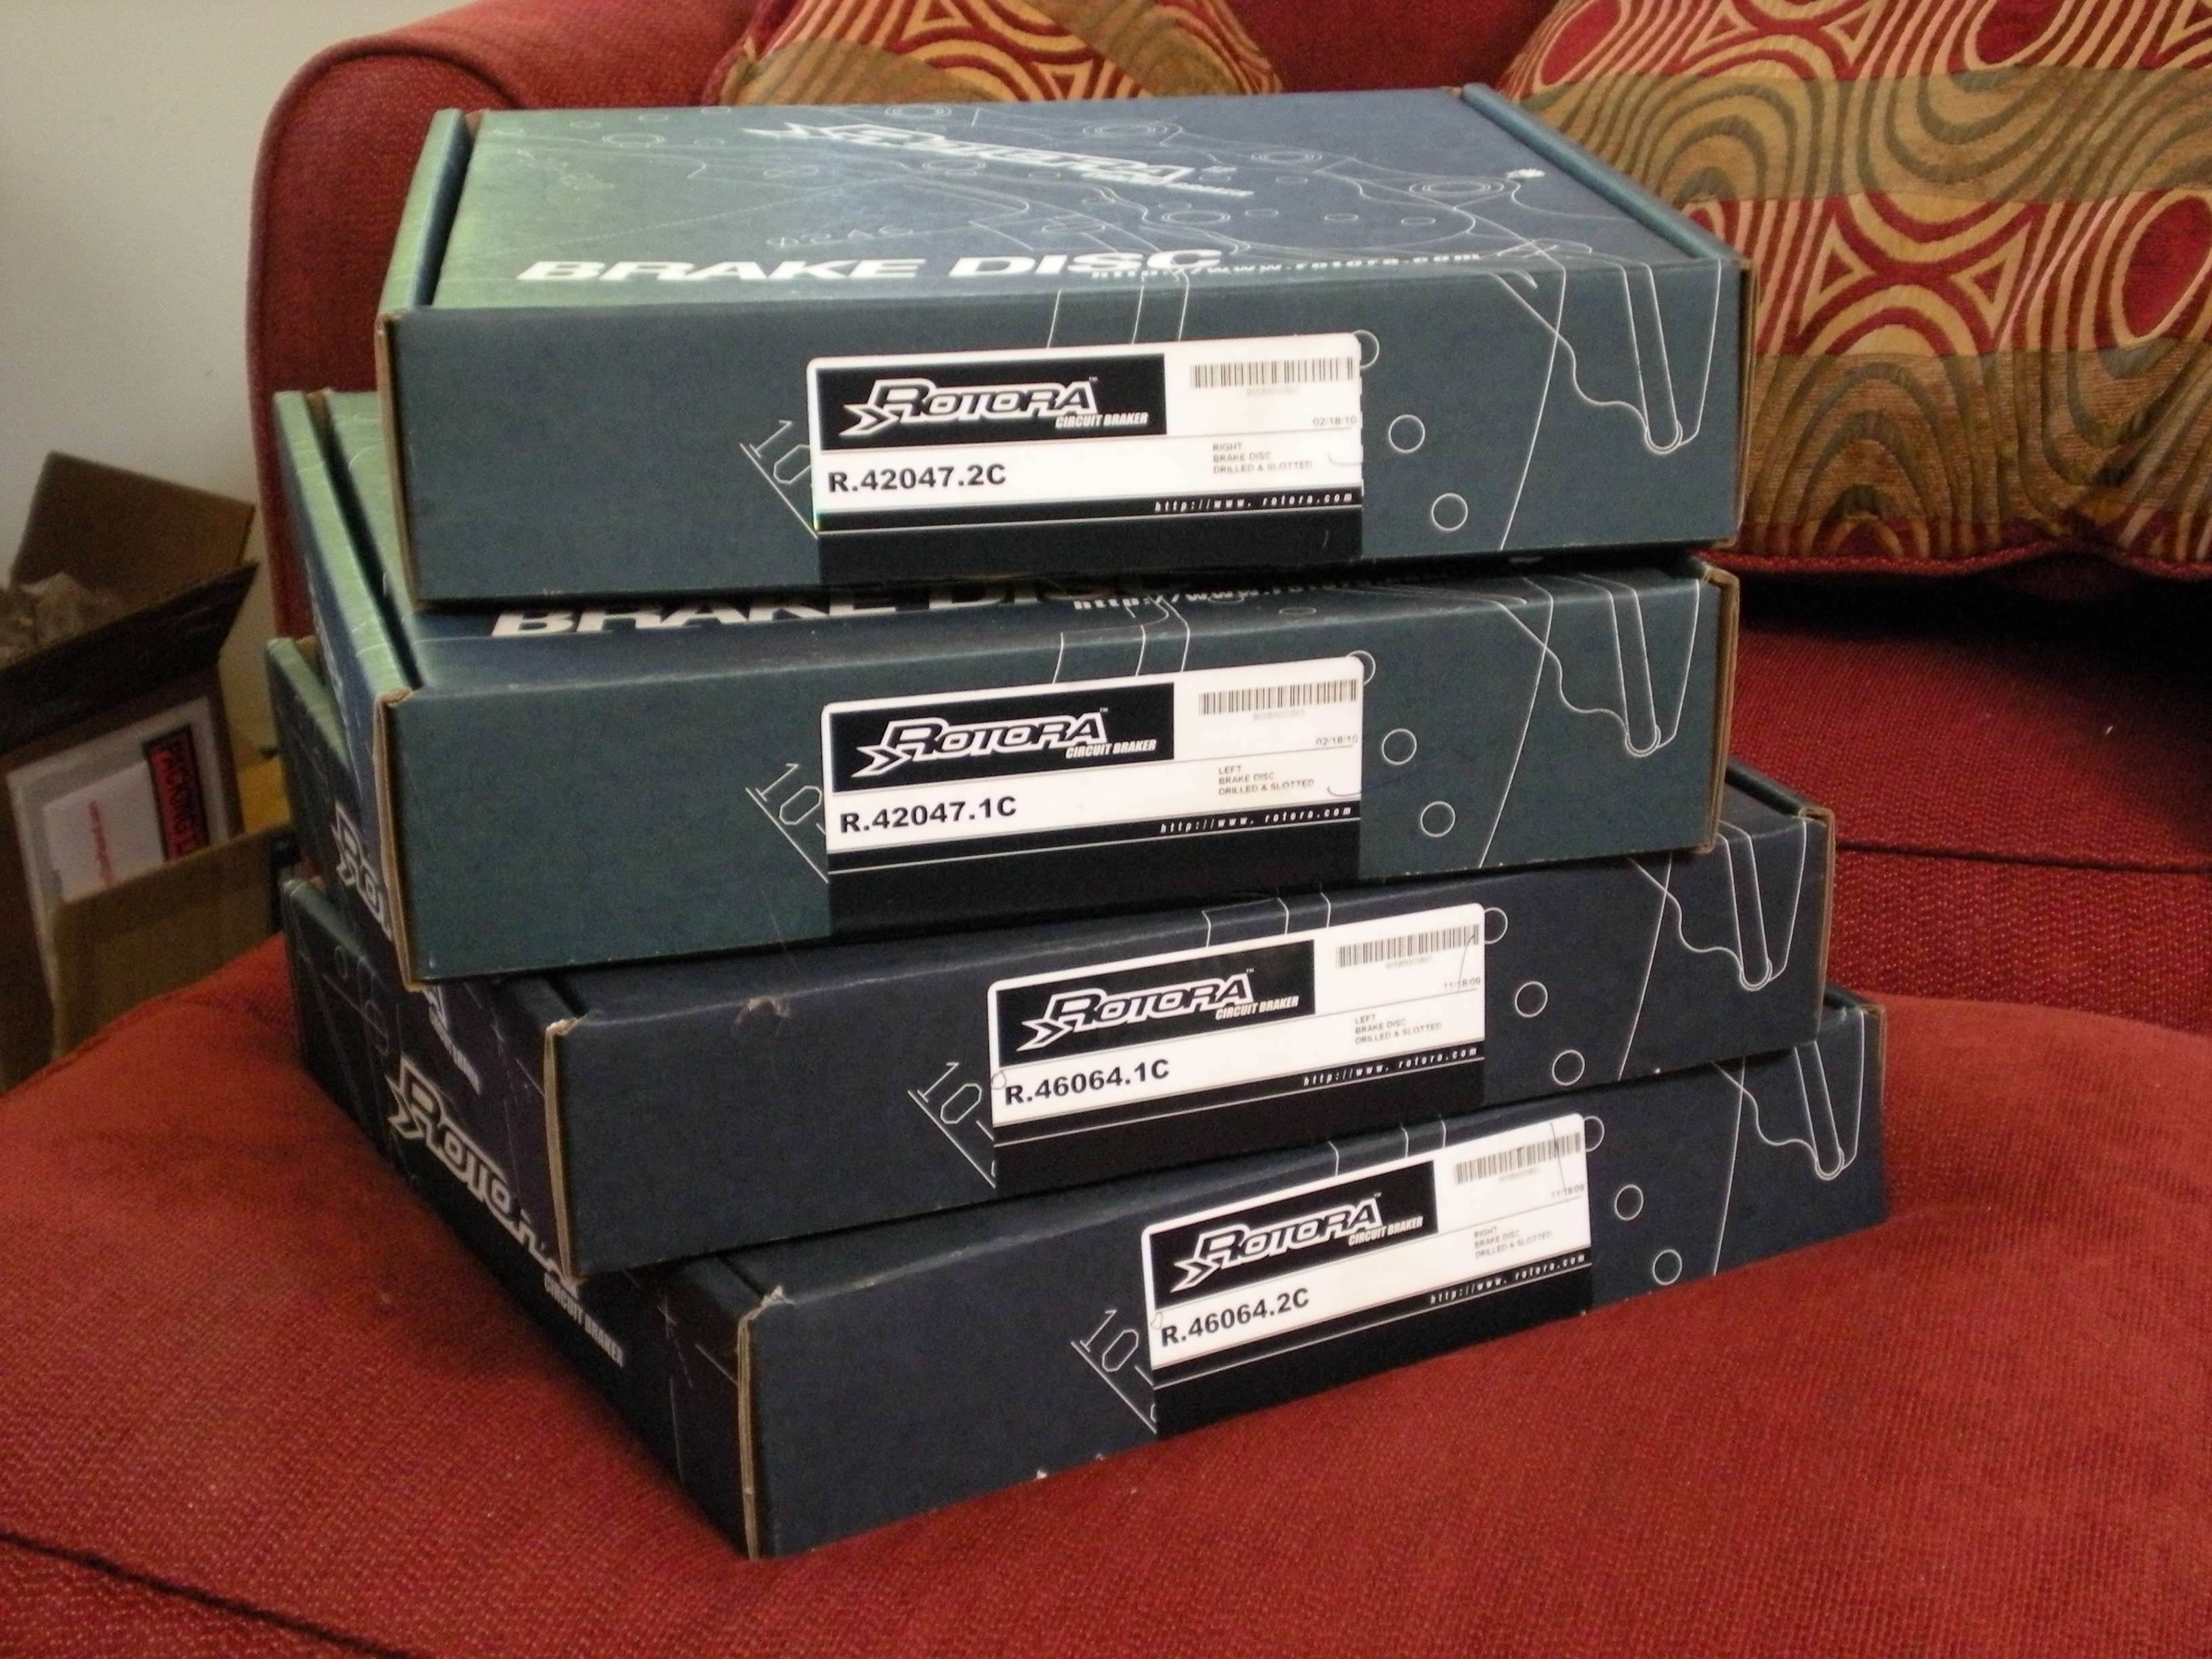 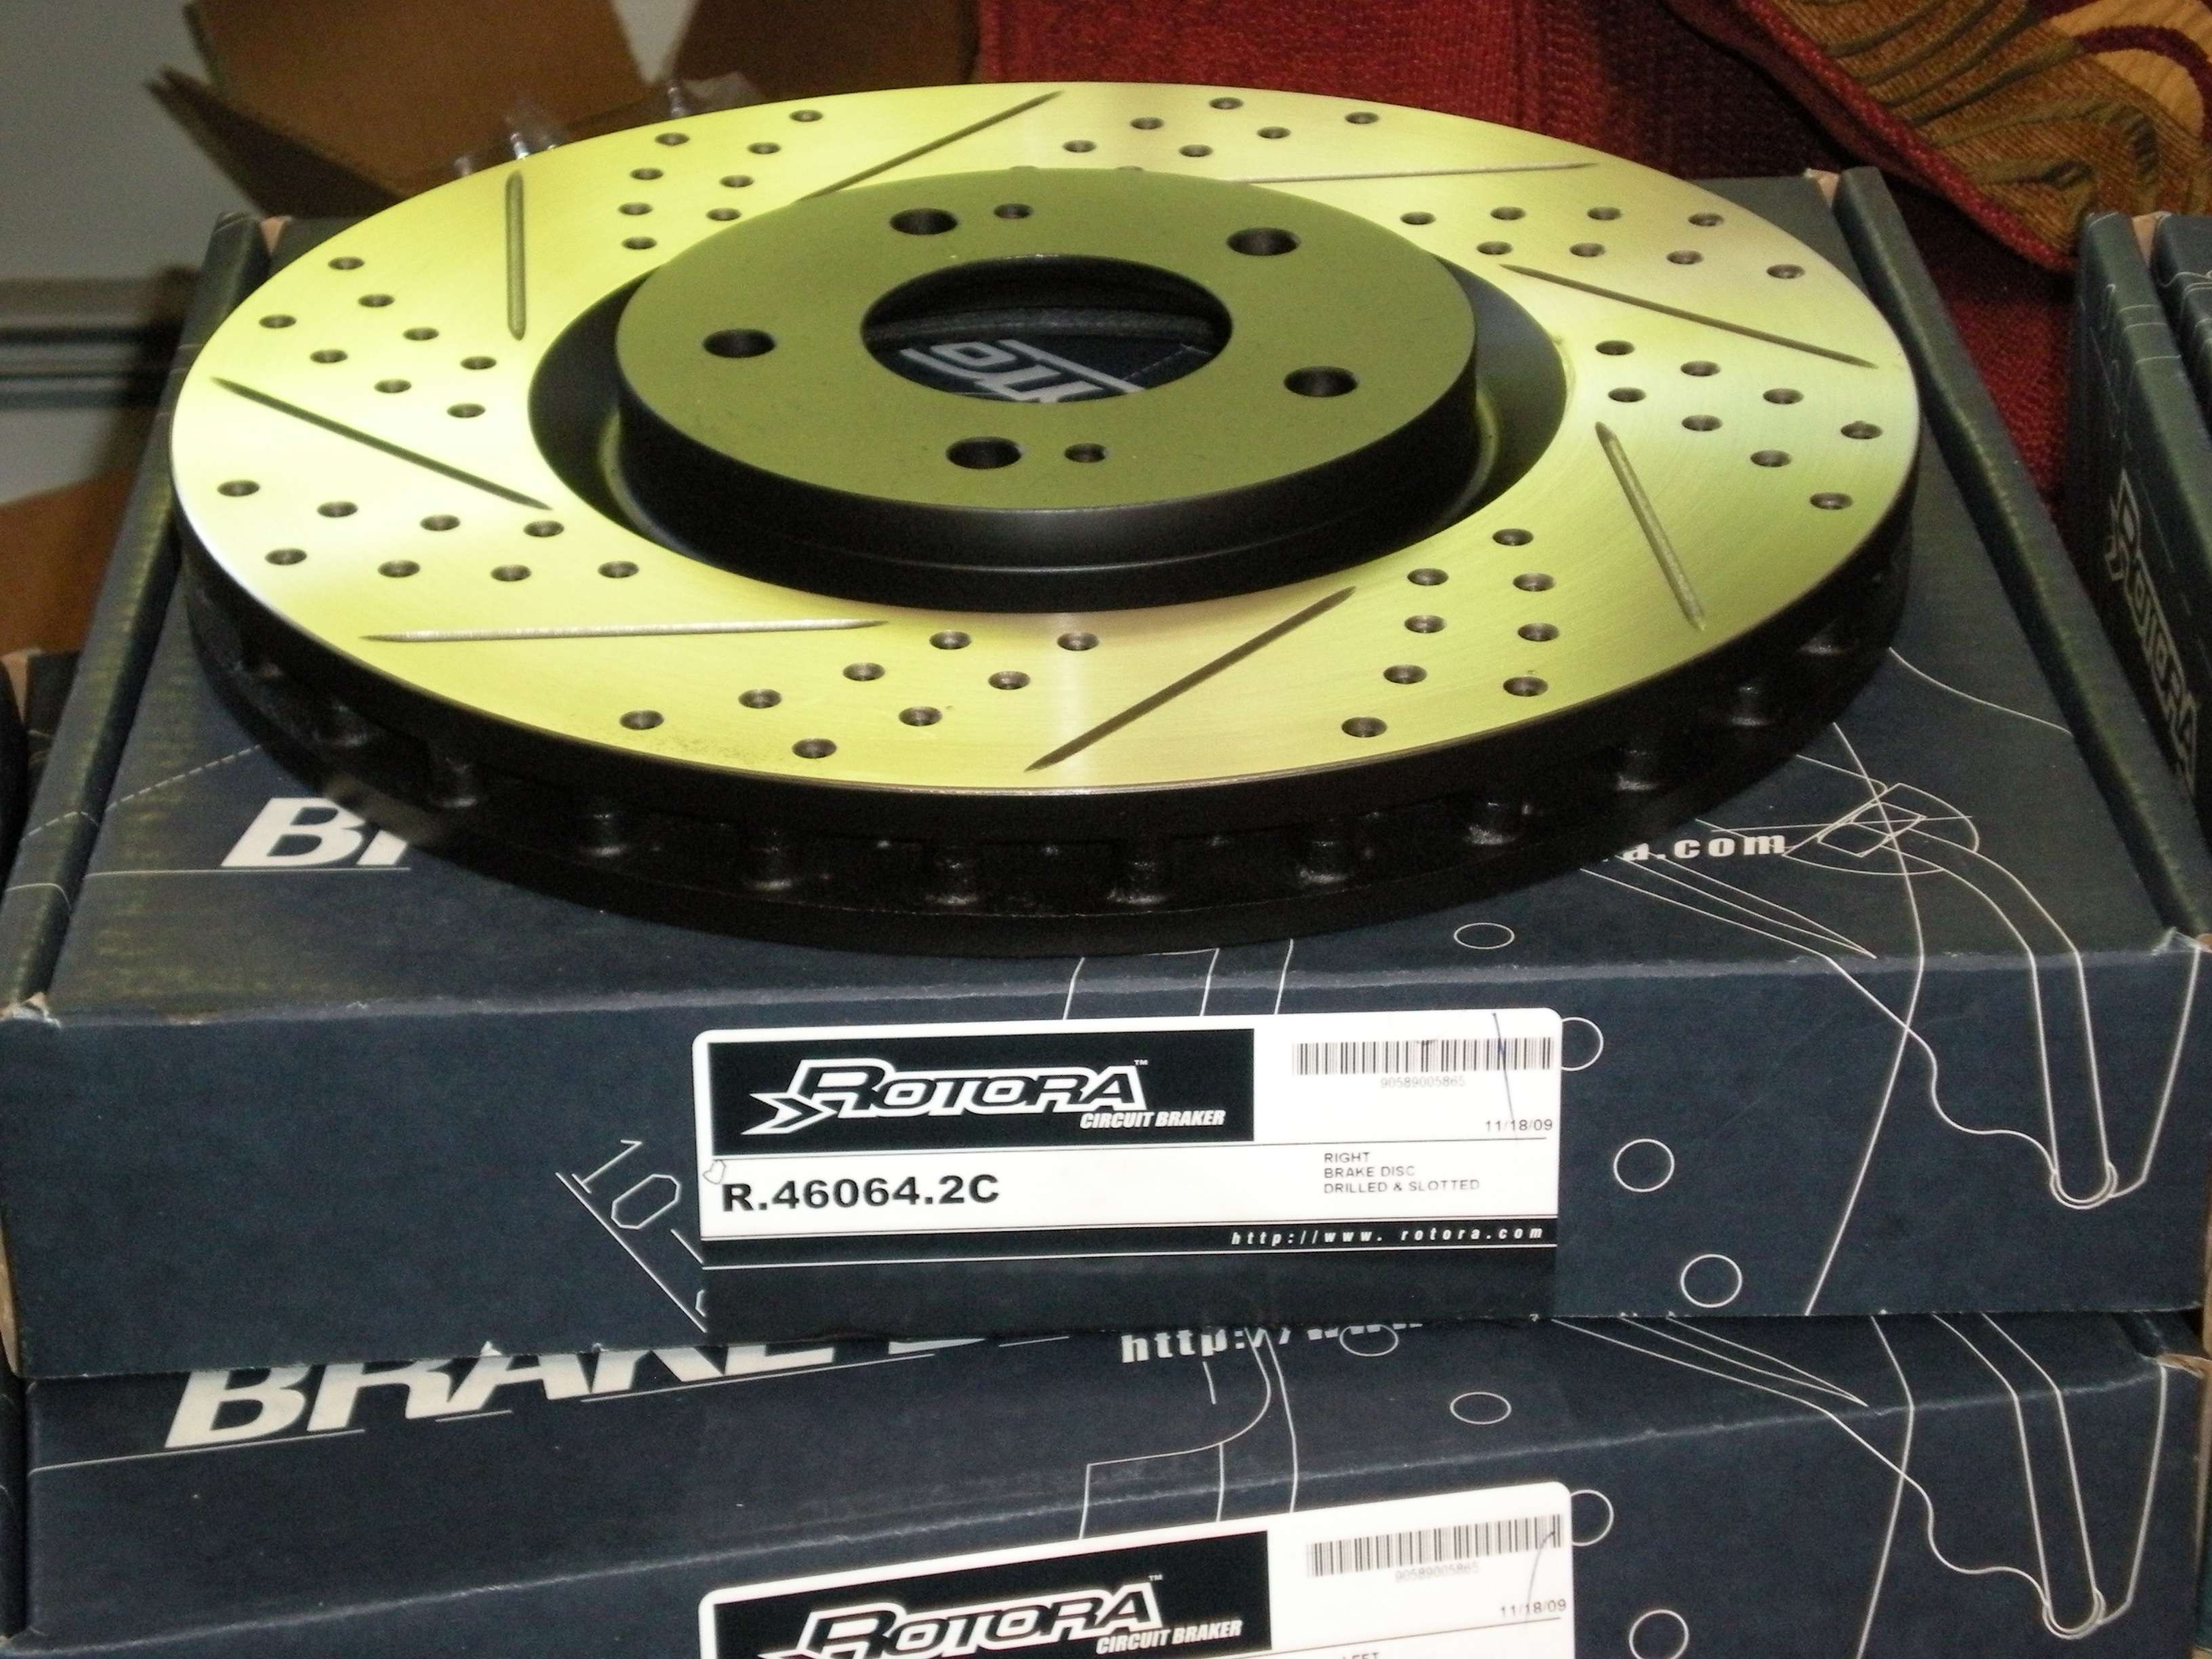 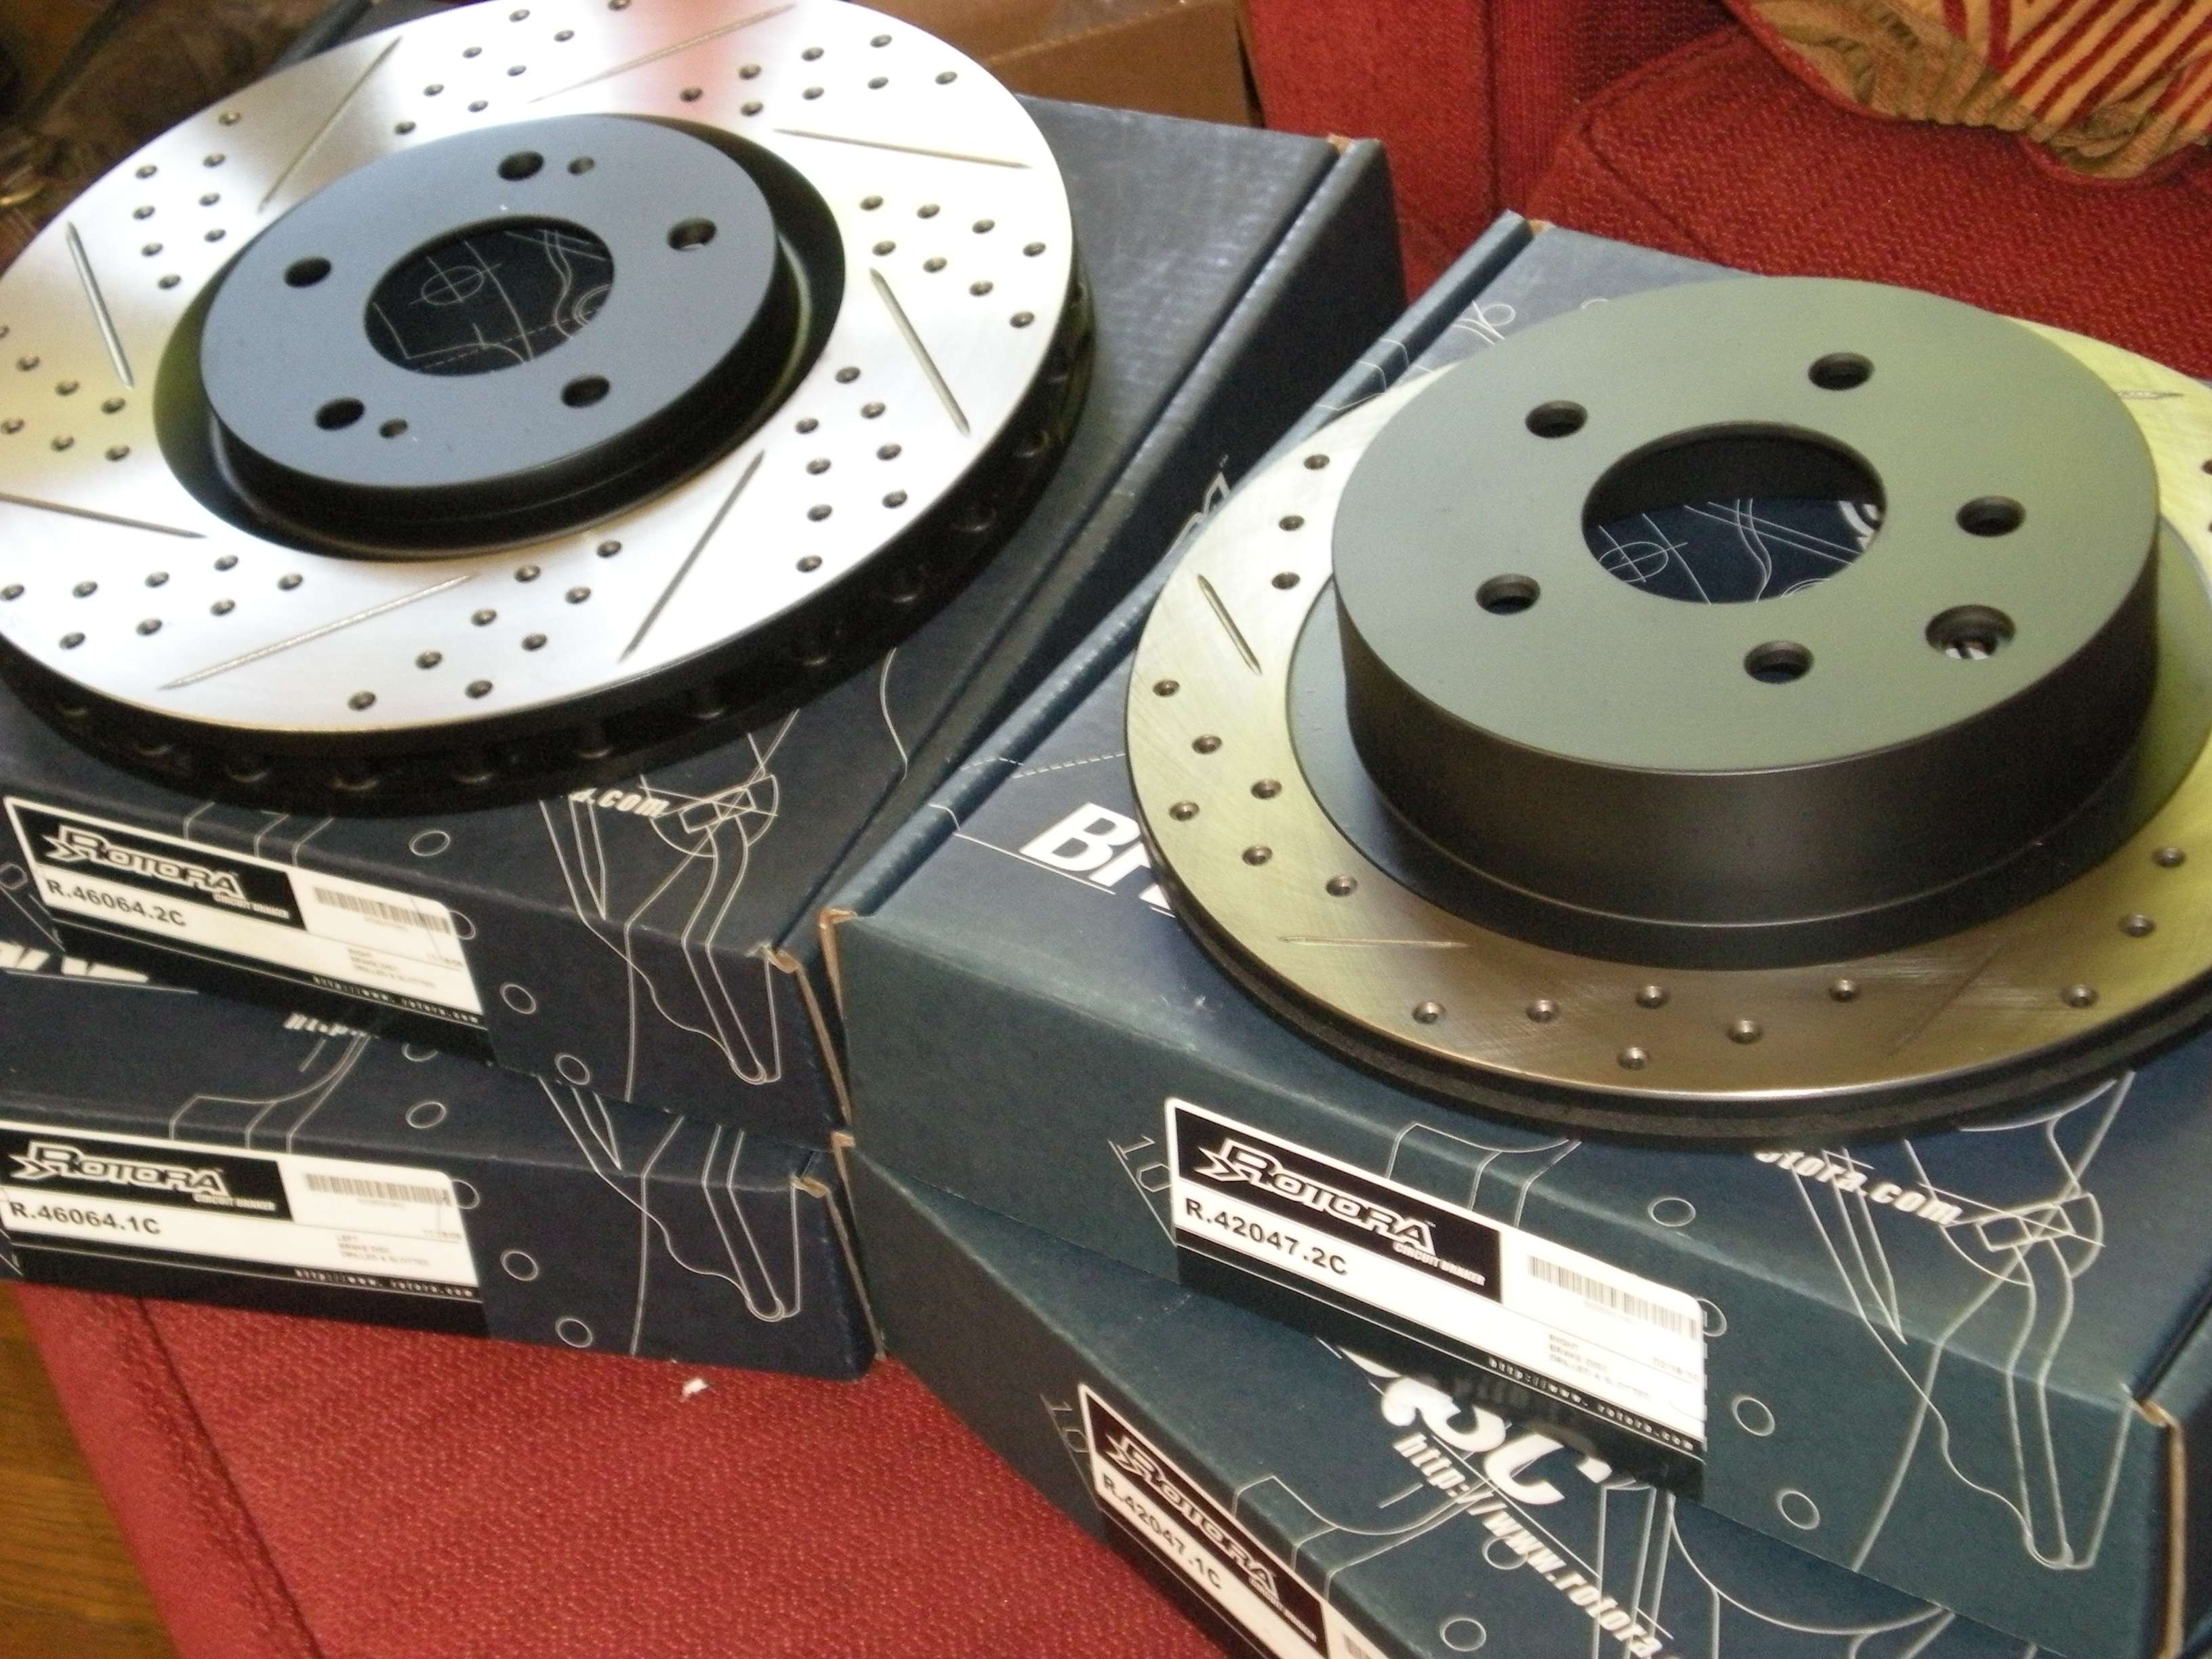 Racing Brake ET500 pads.... 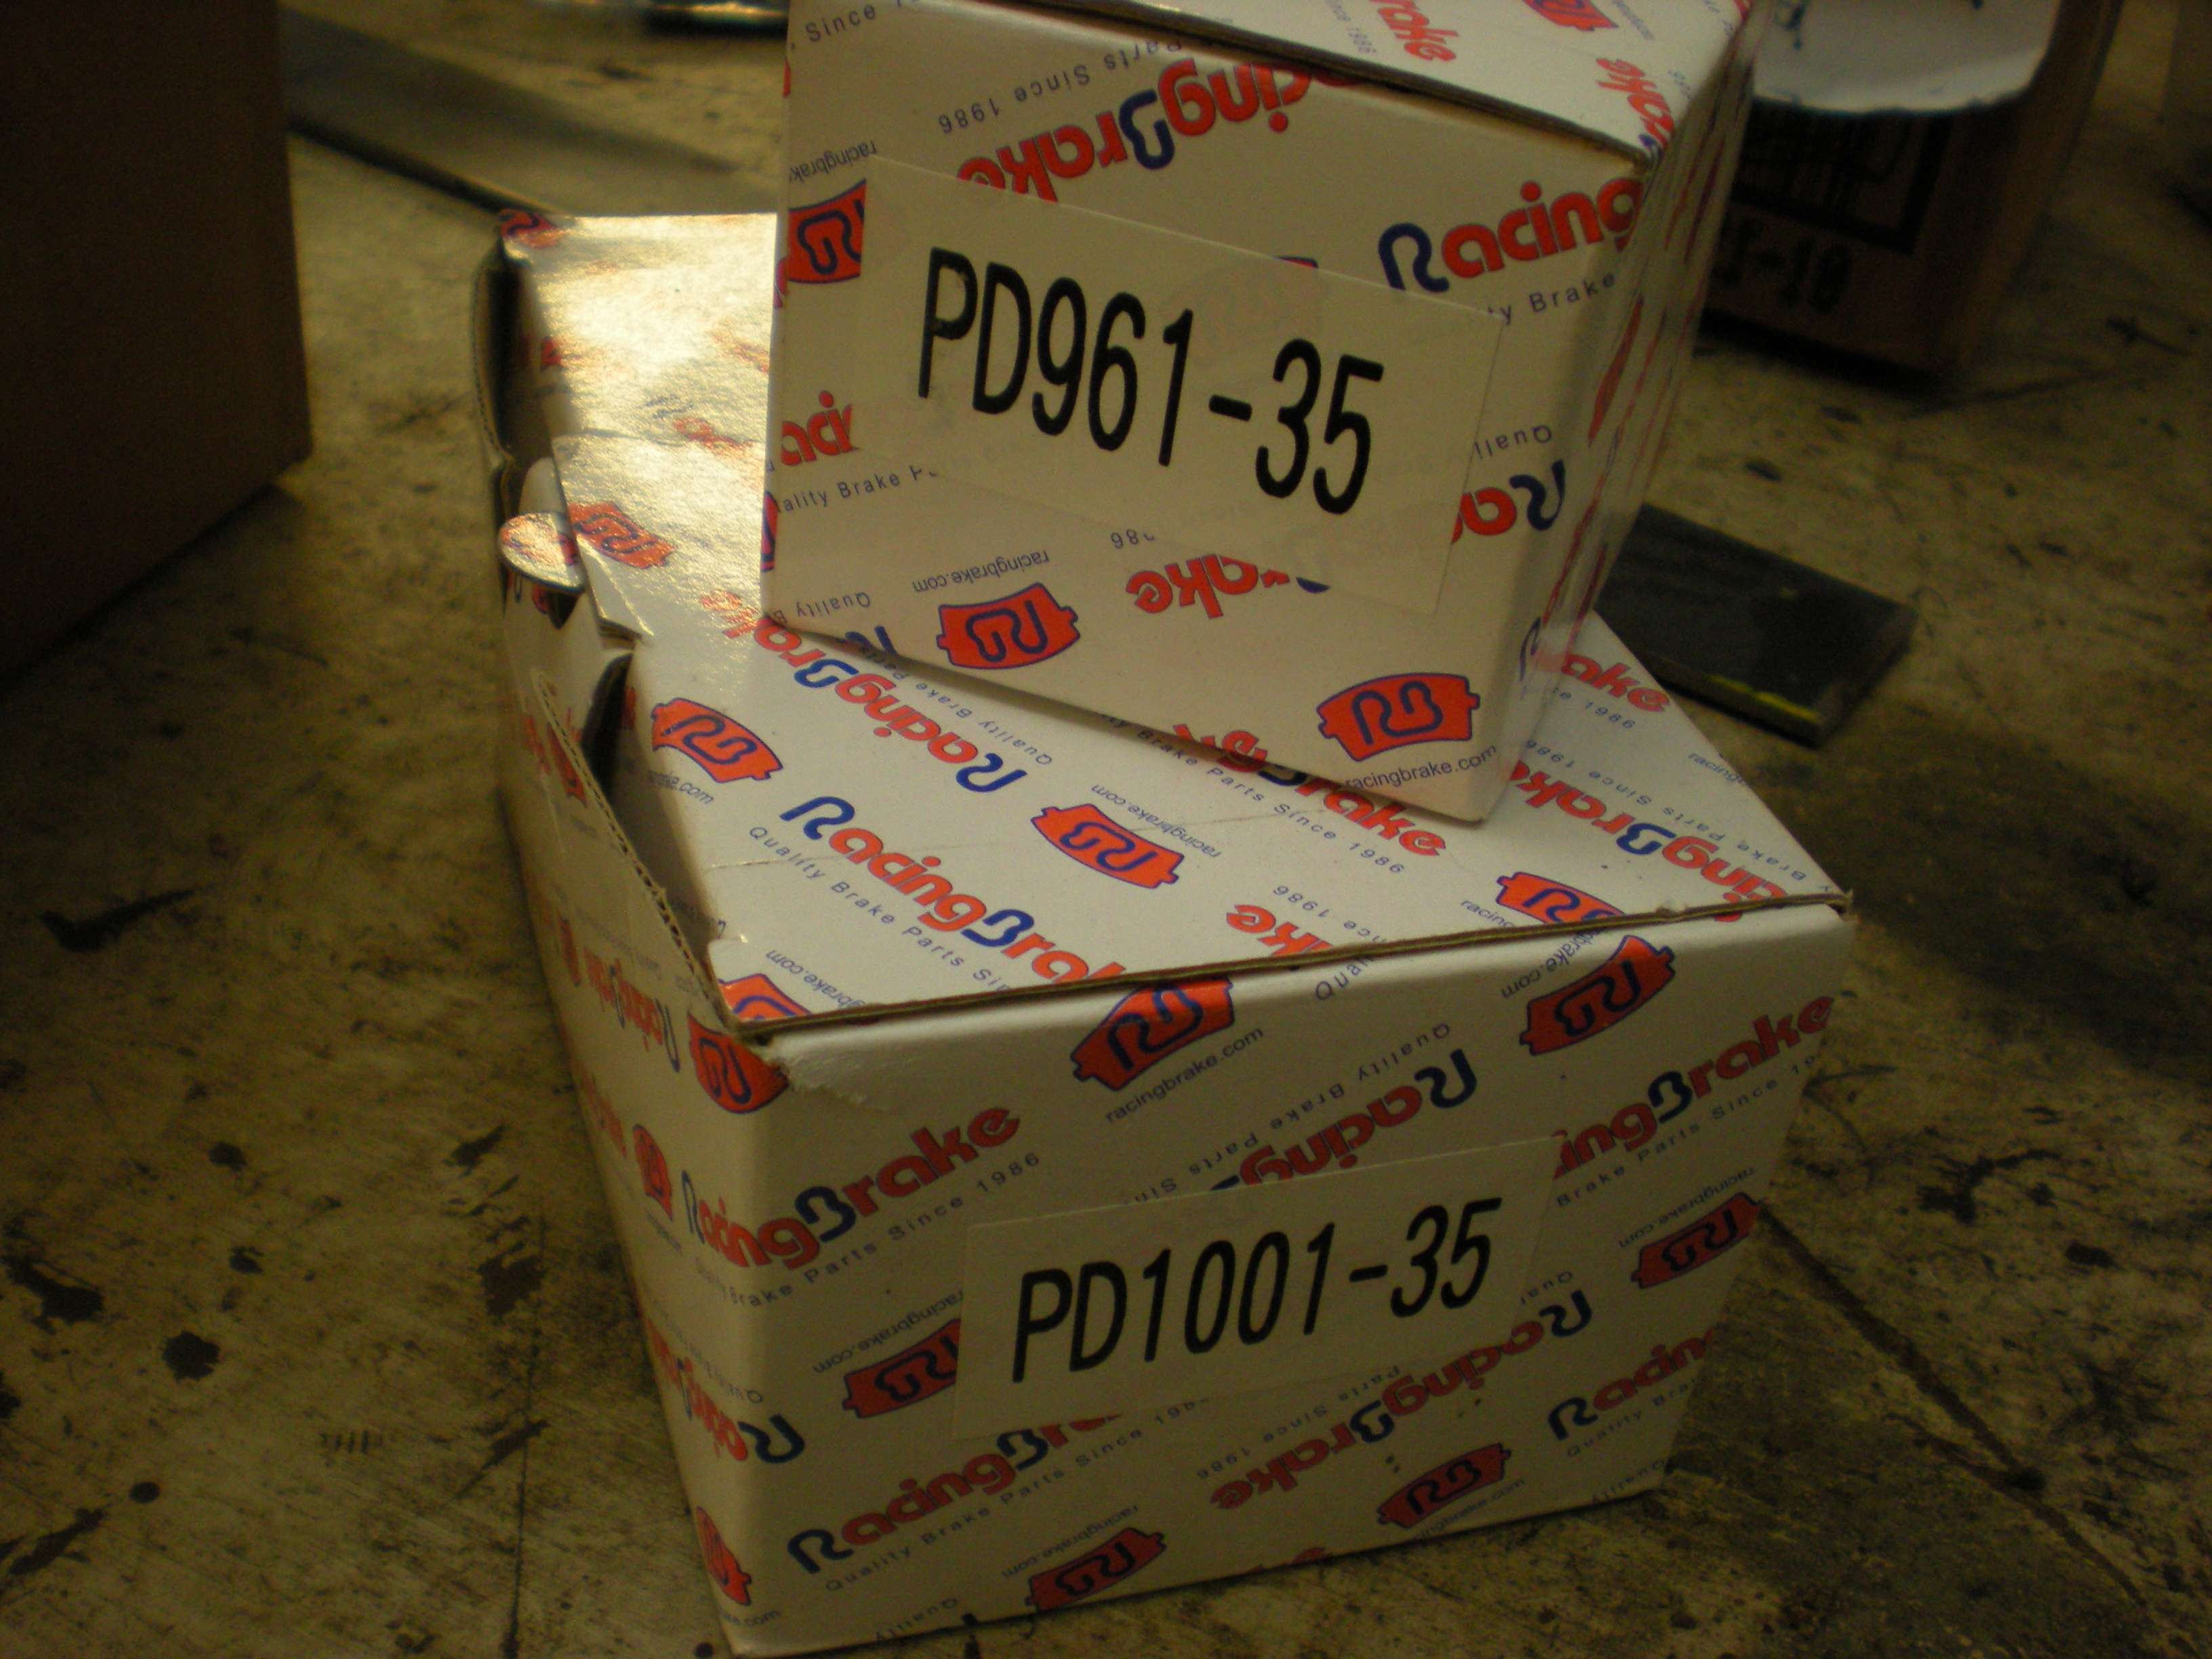 Calipers loaded and installed....  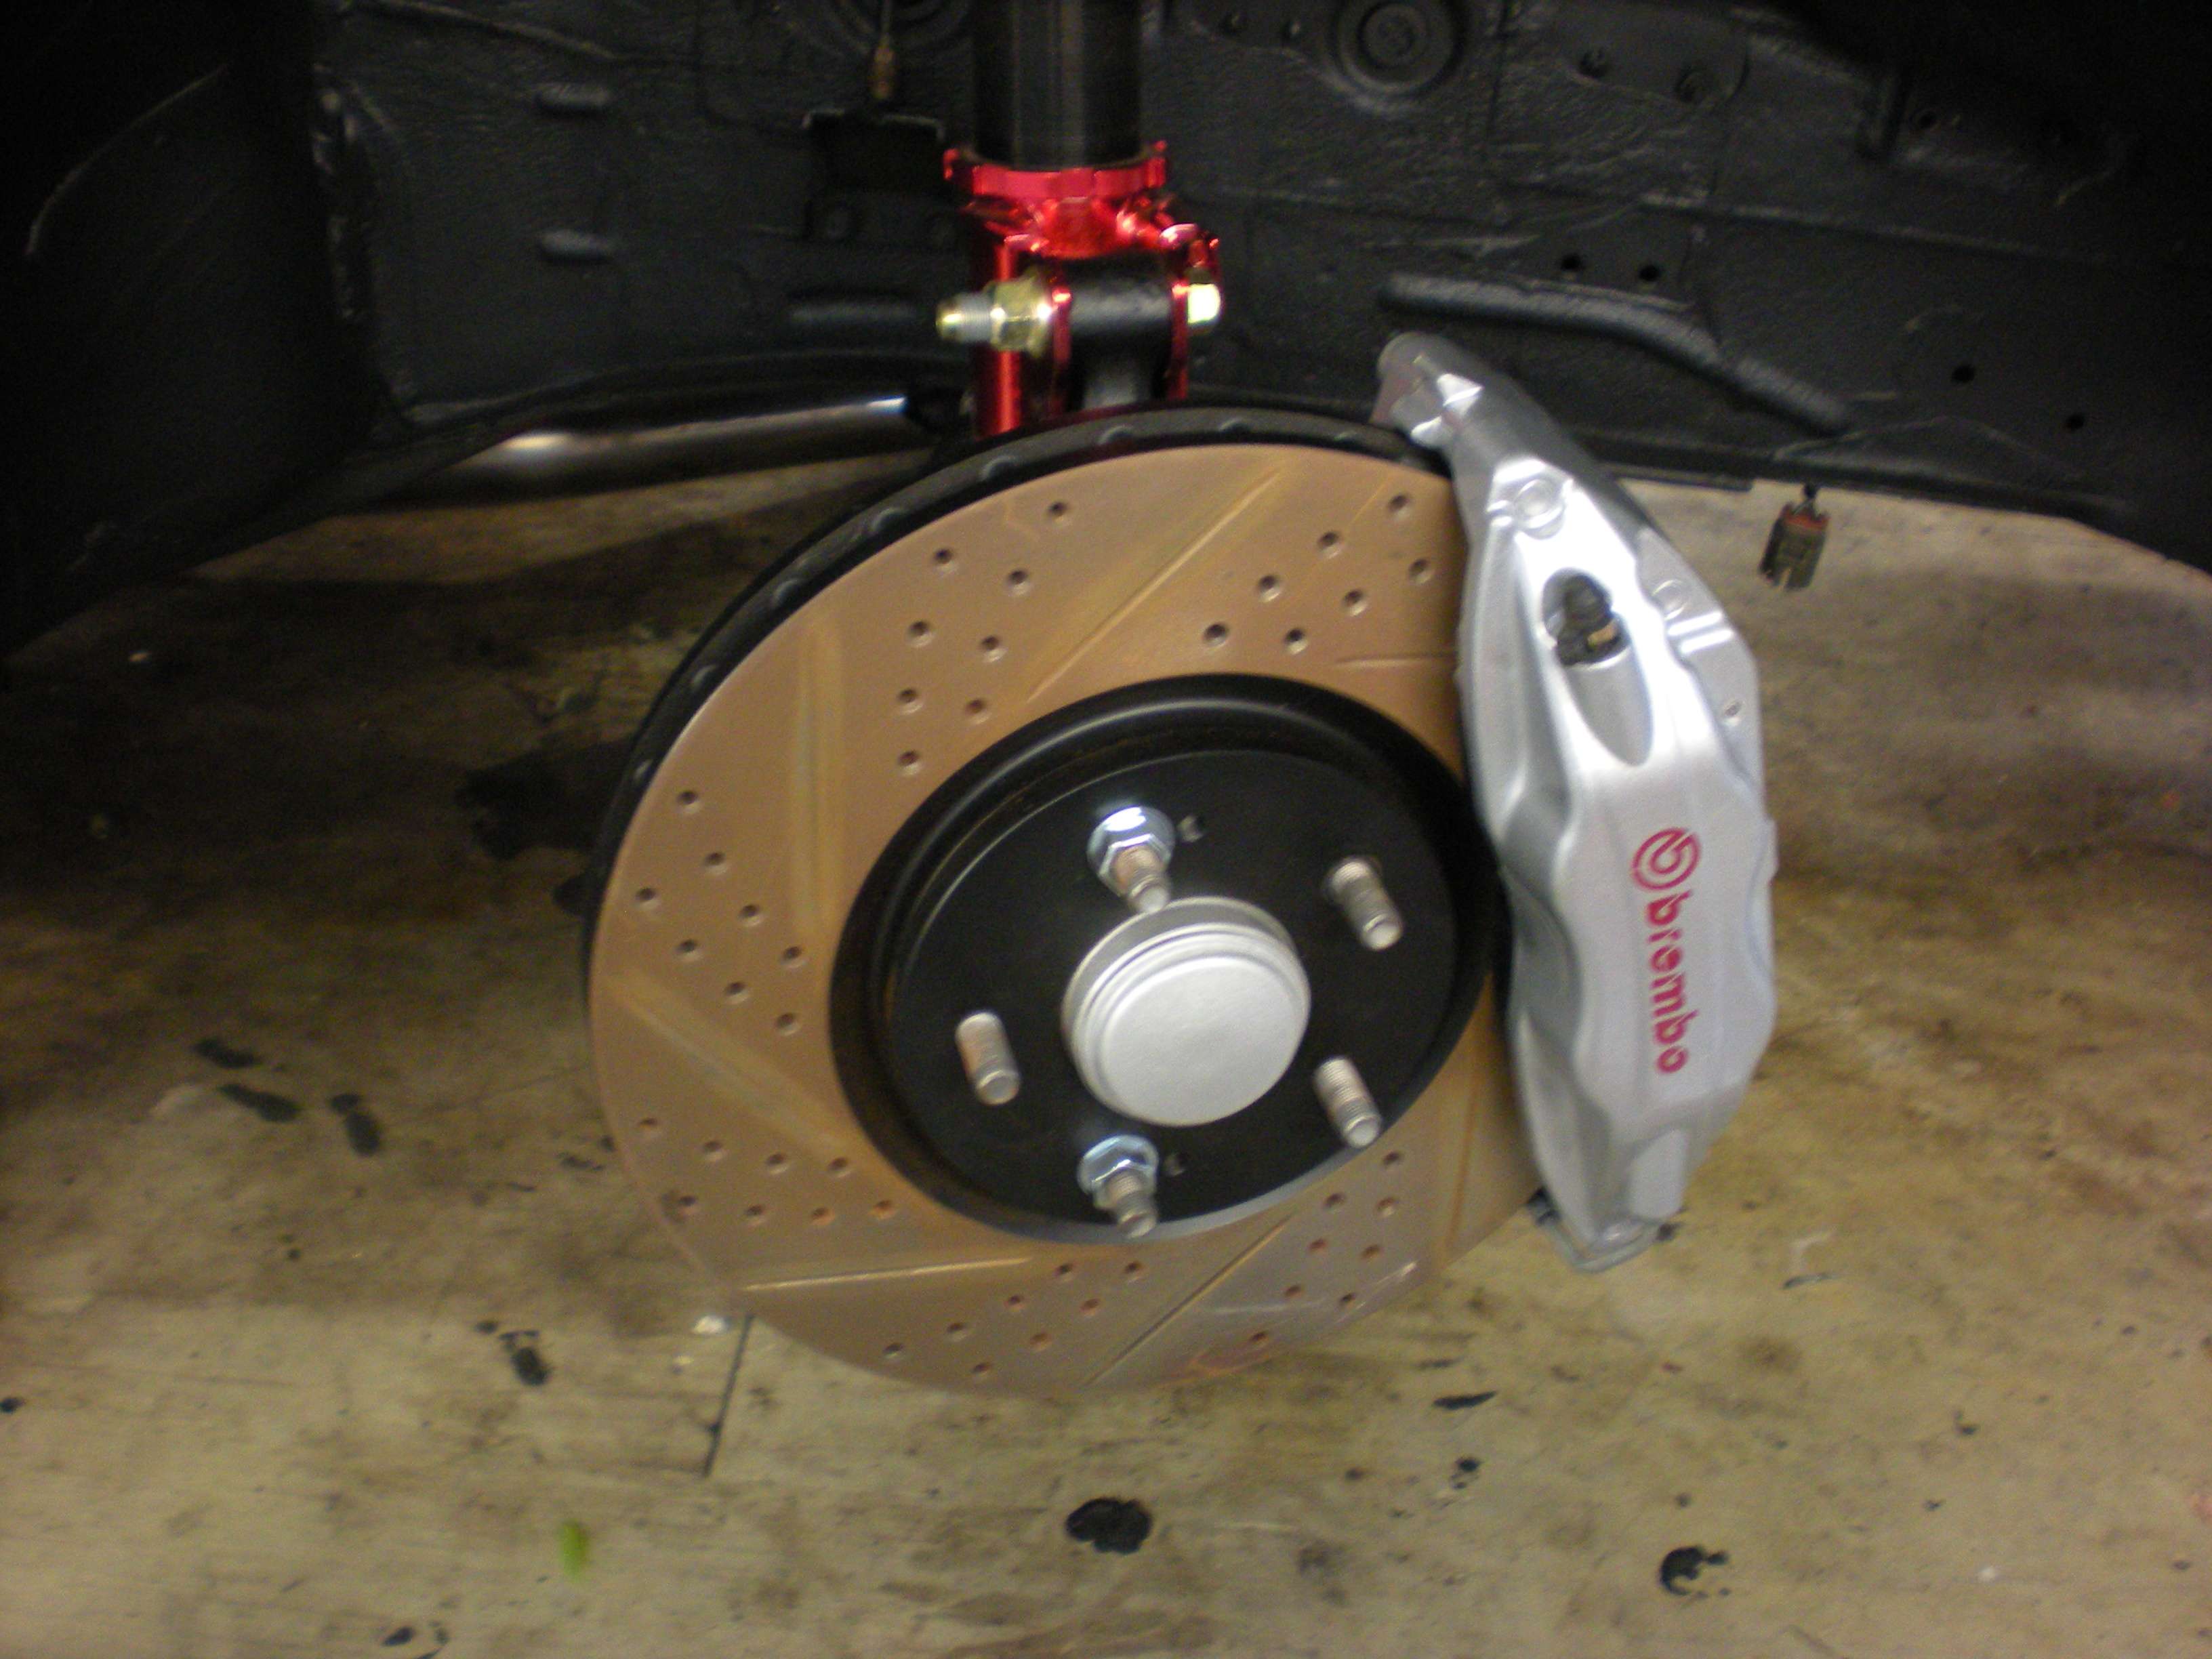 Megan Racing steering boot and Tein inner and outer tie rod assembly installed... 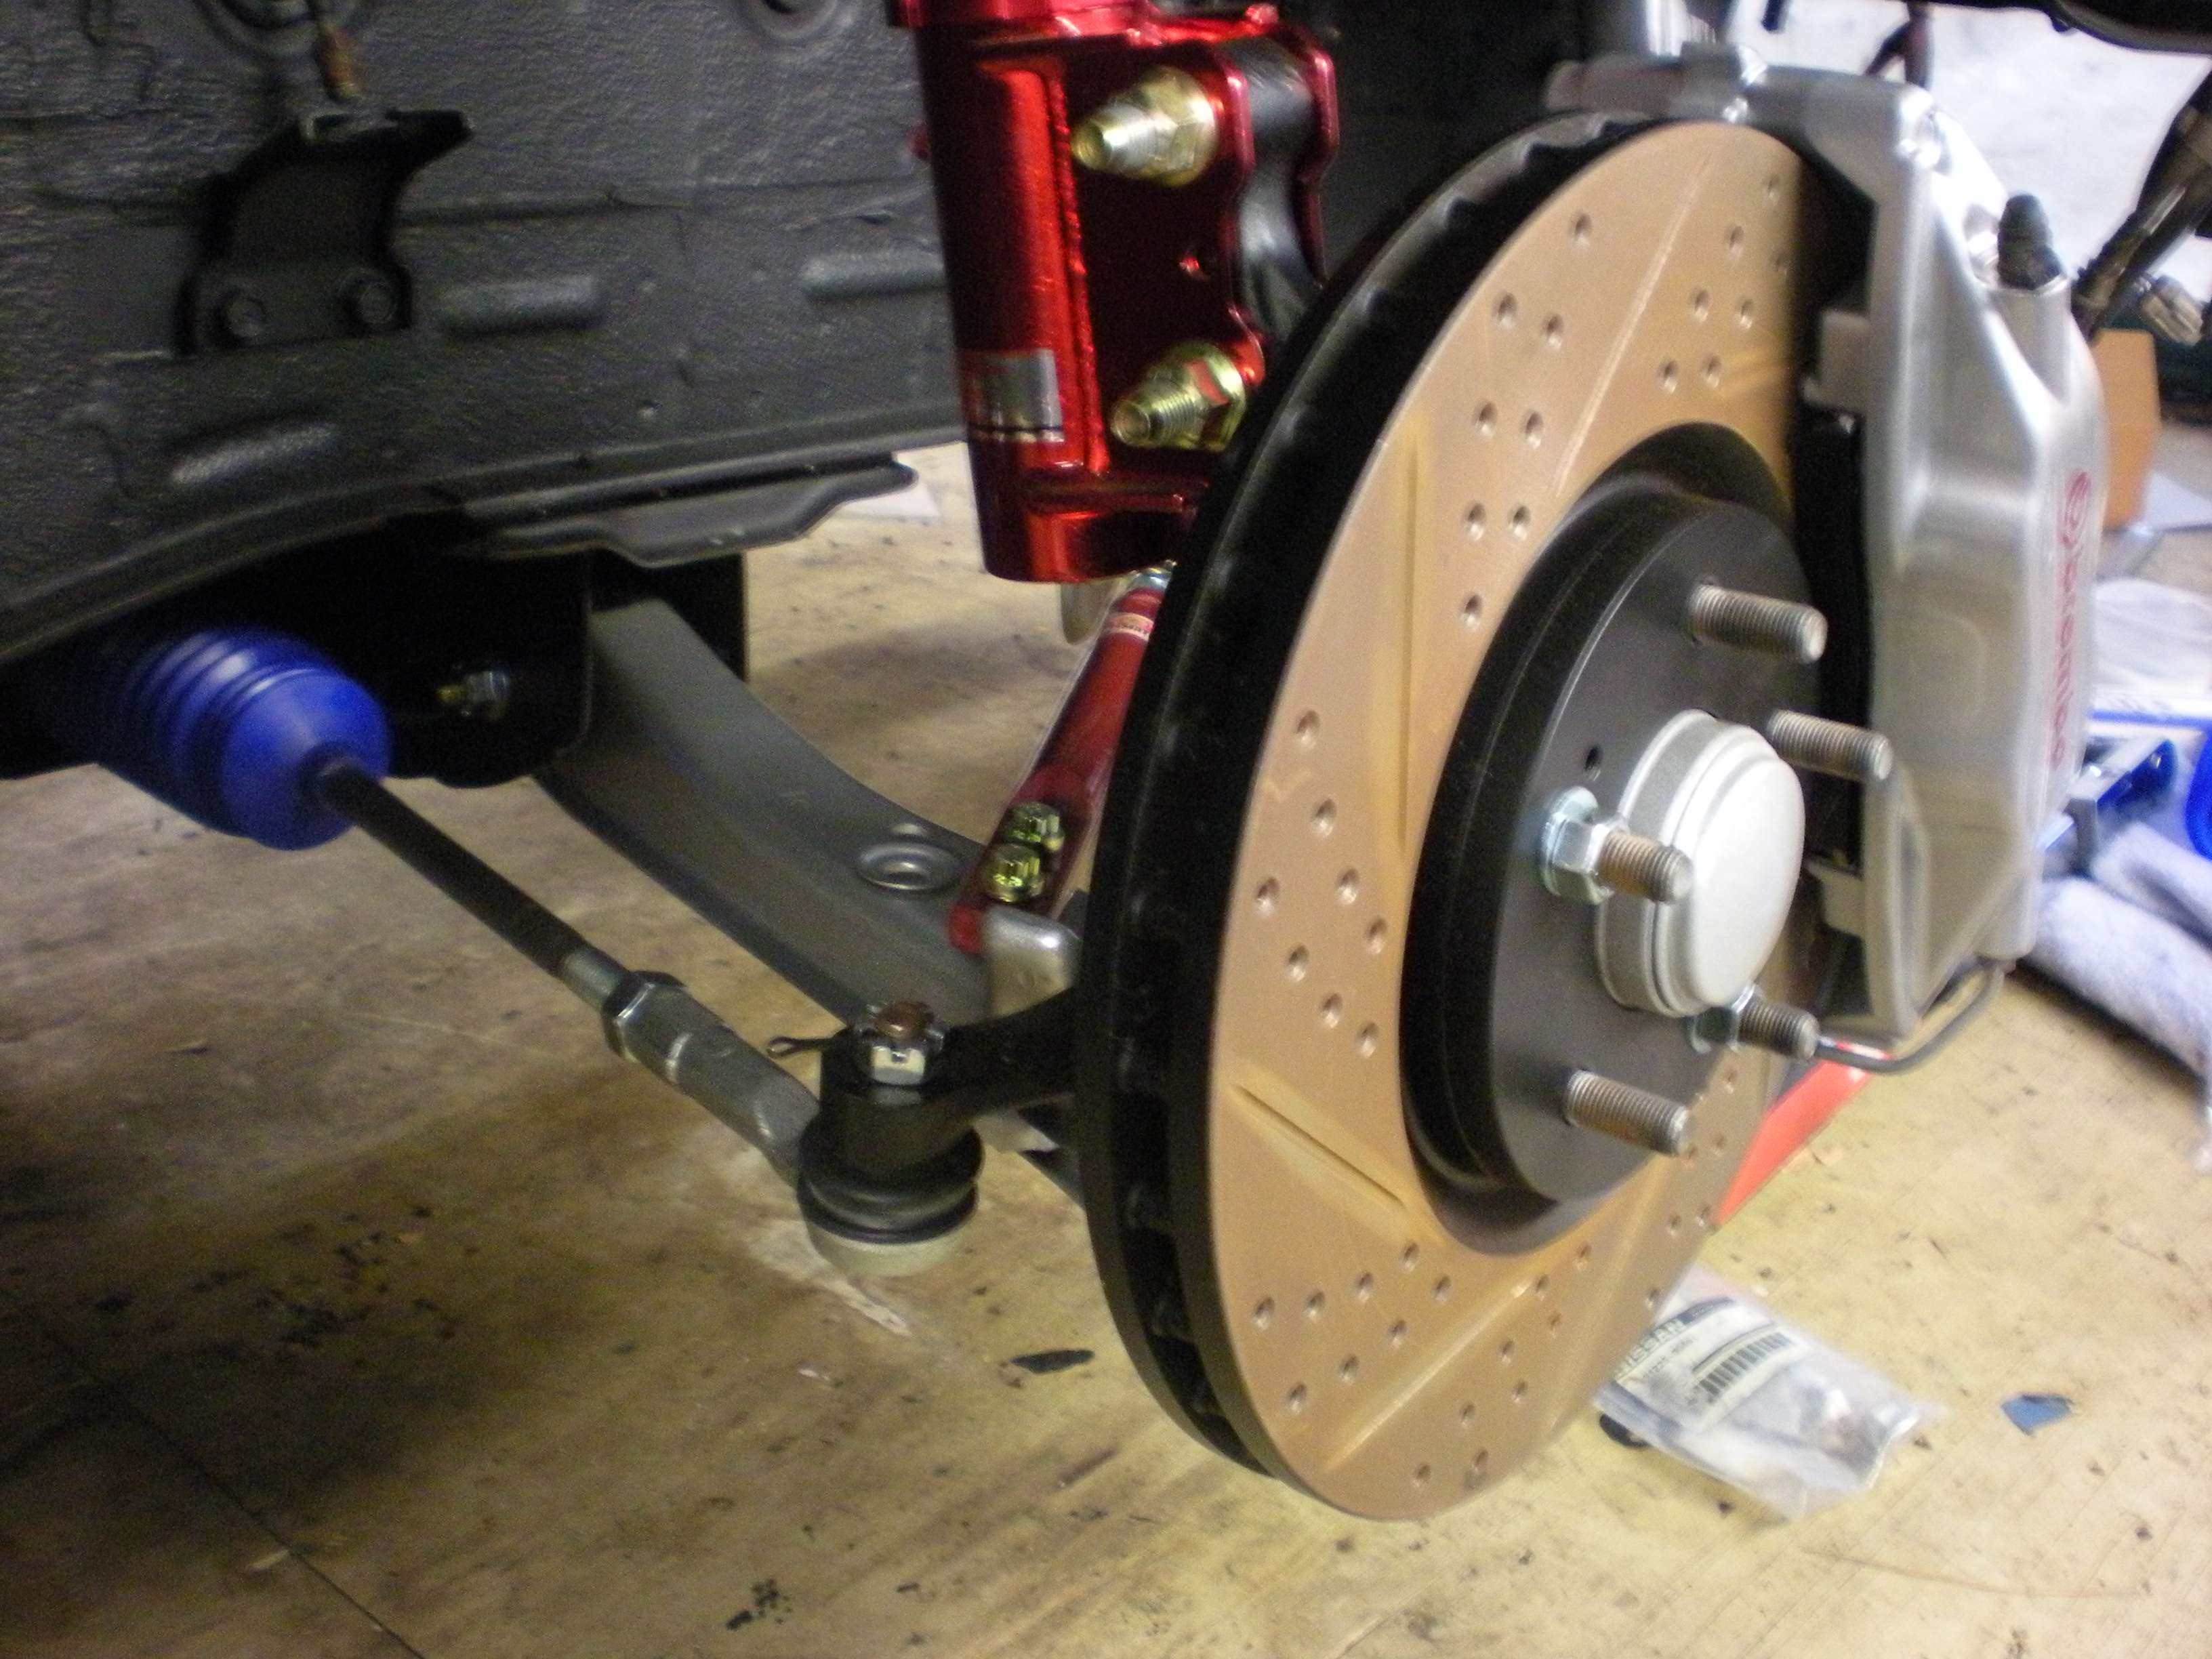 Yamato Garage tension rod, painted tension rod bracket, BallerBolts (rod to control arm), and new OEM tension rod bolts...  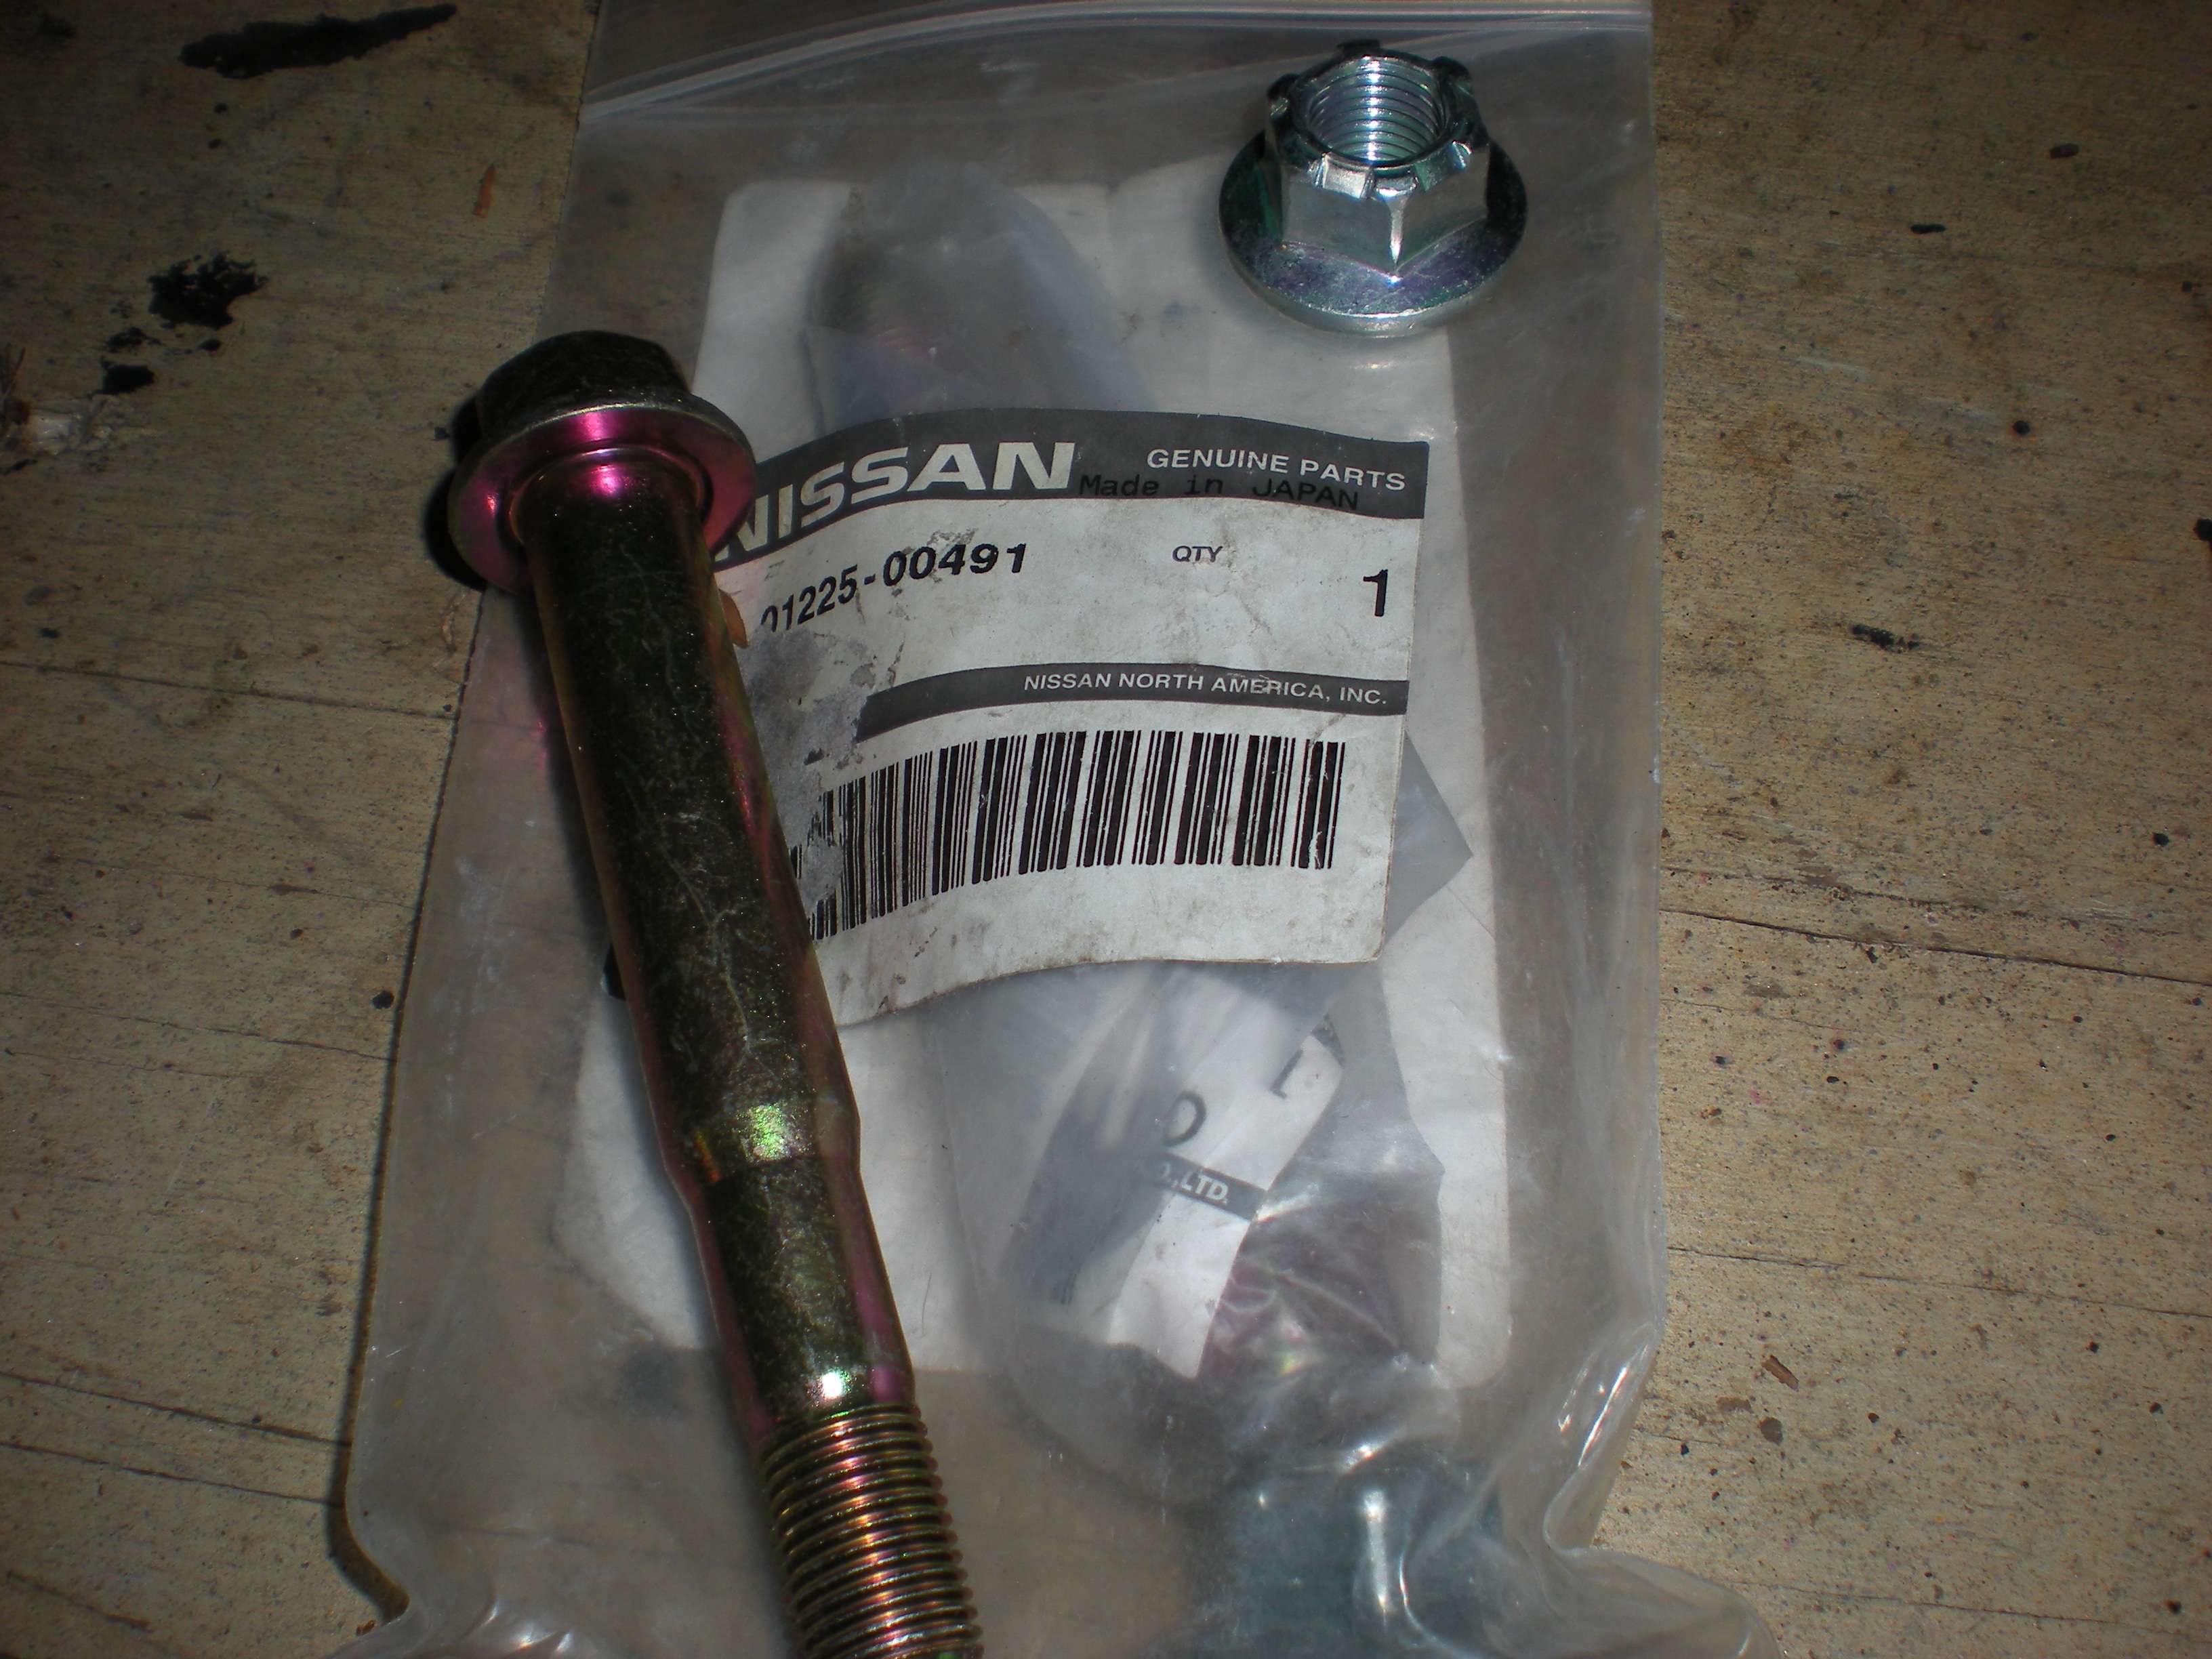 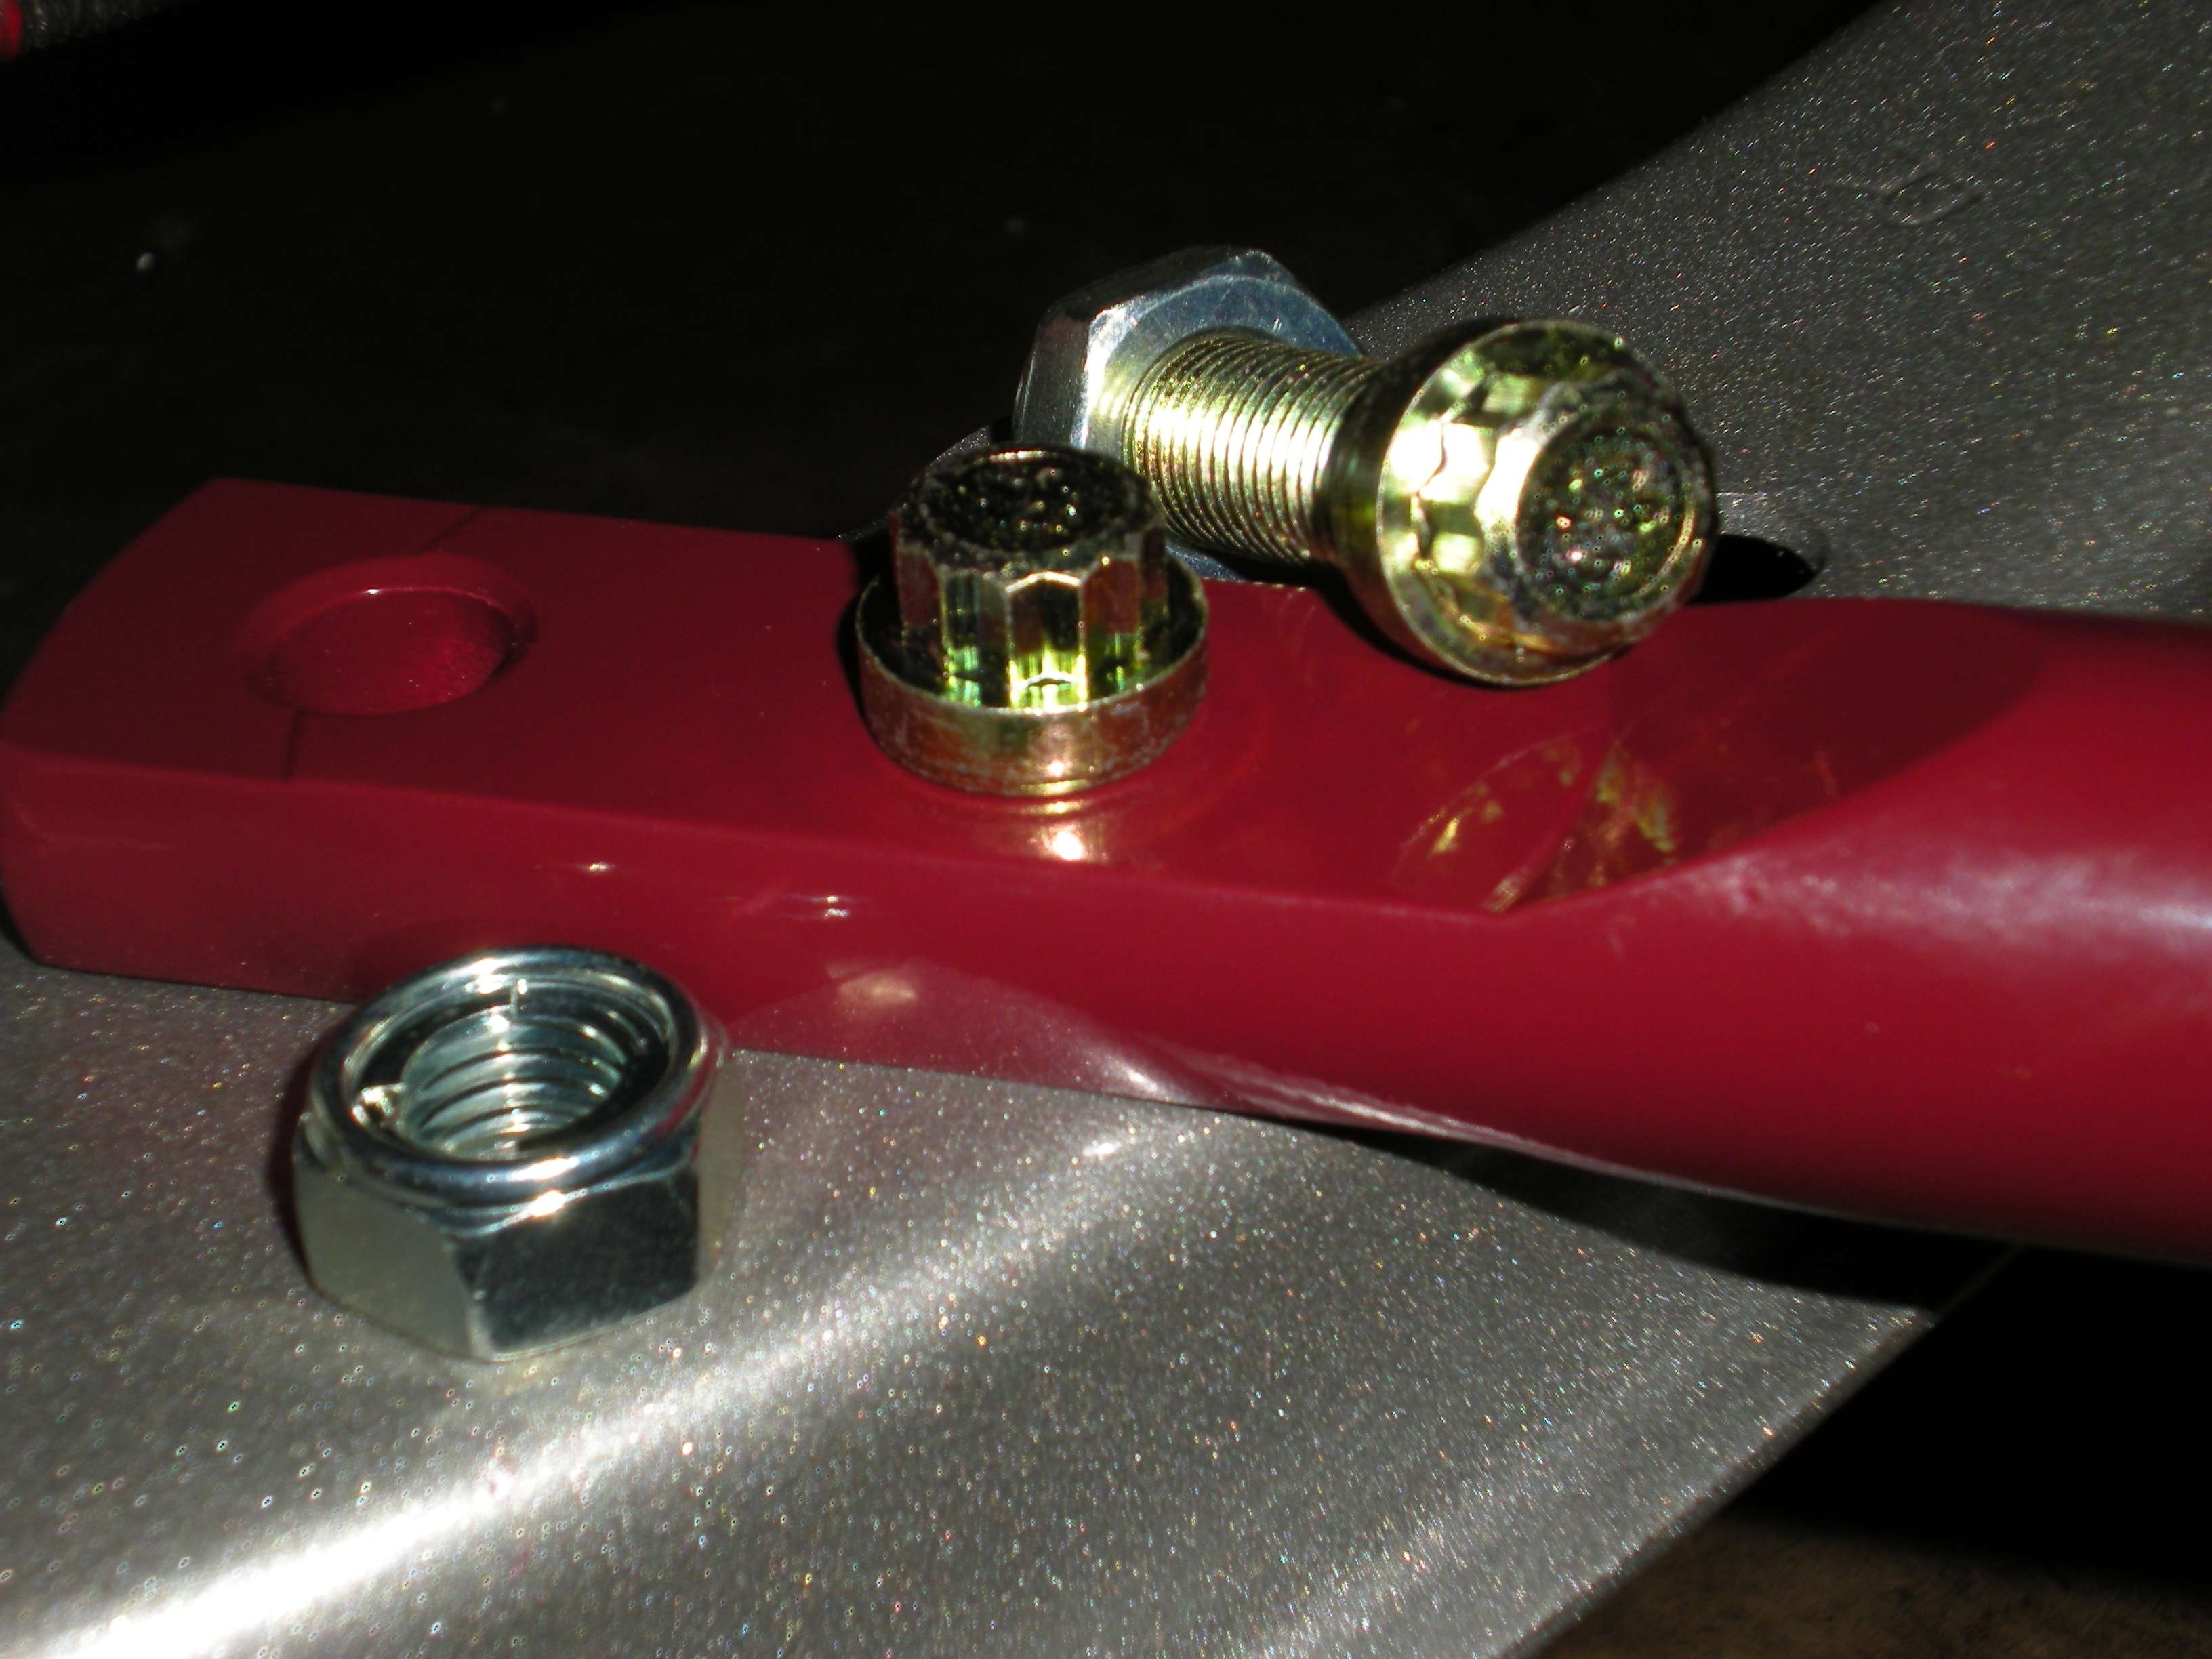 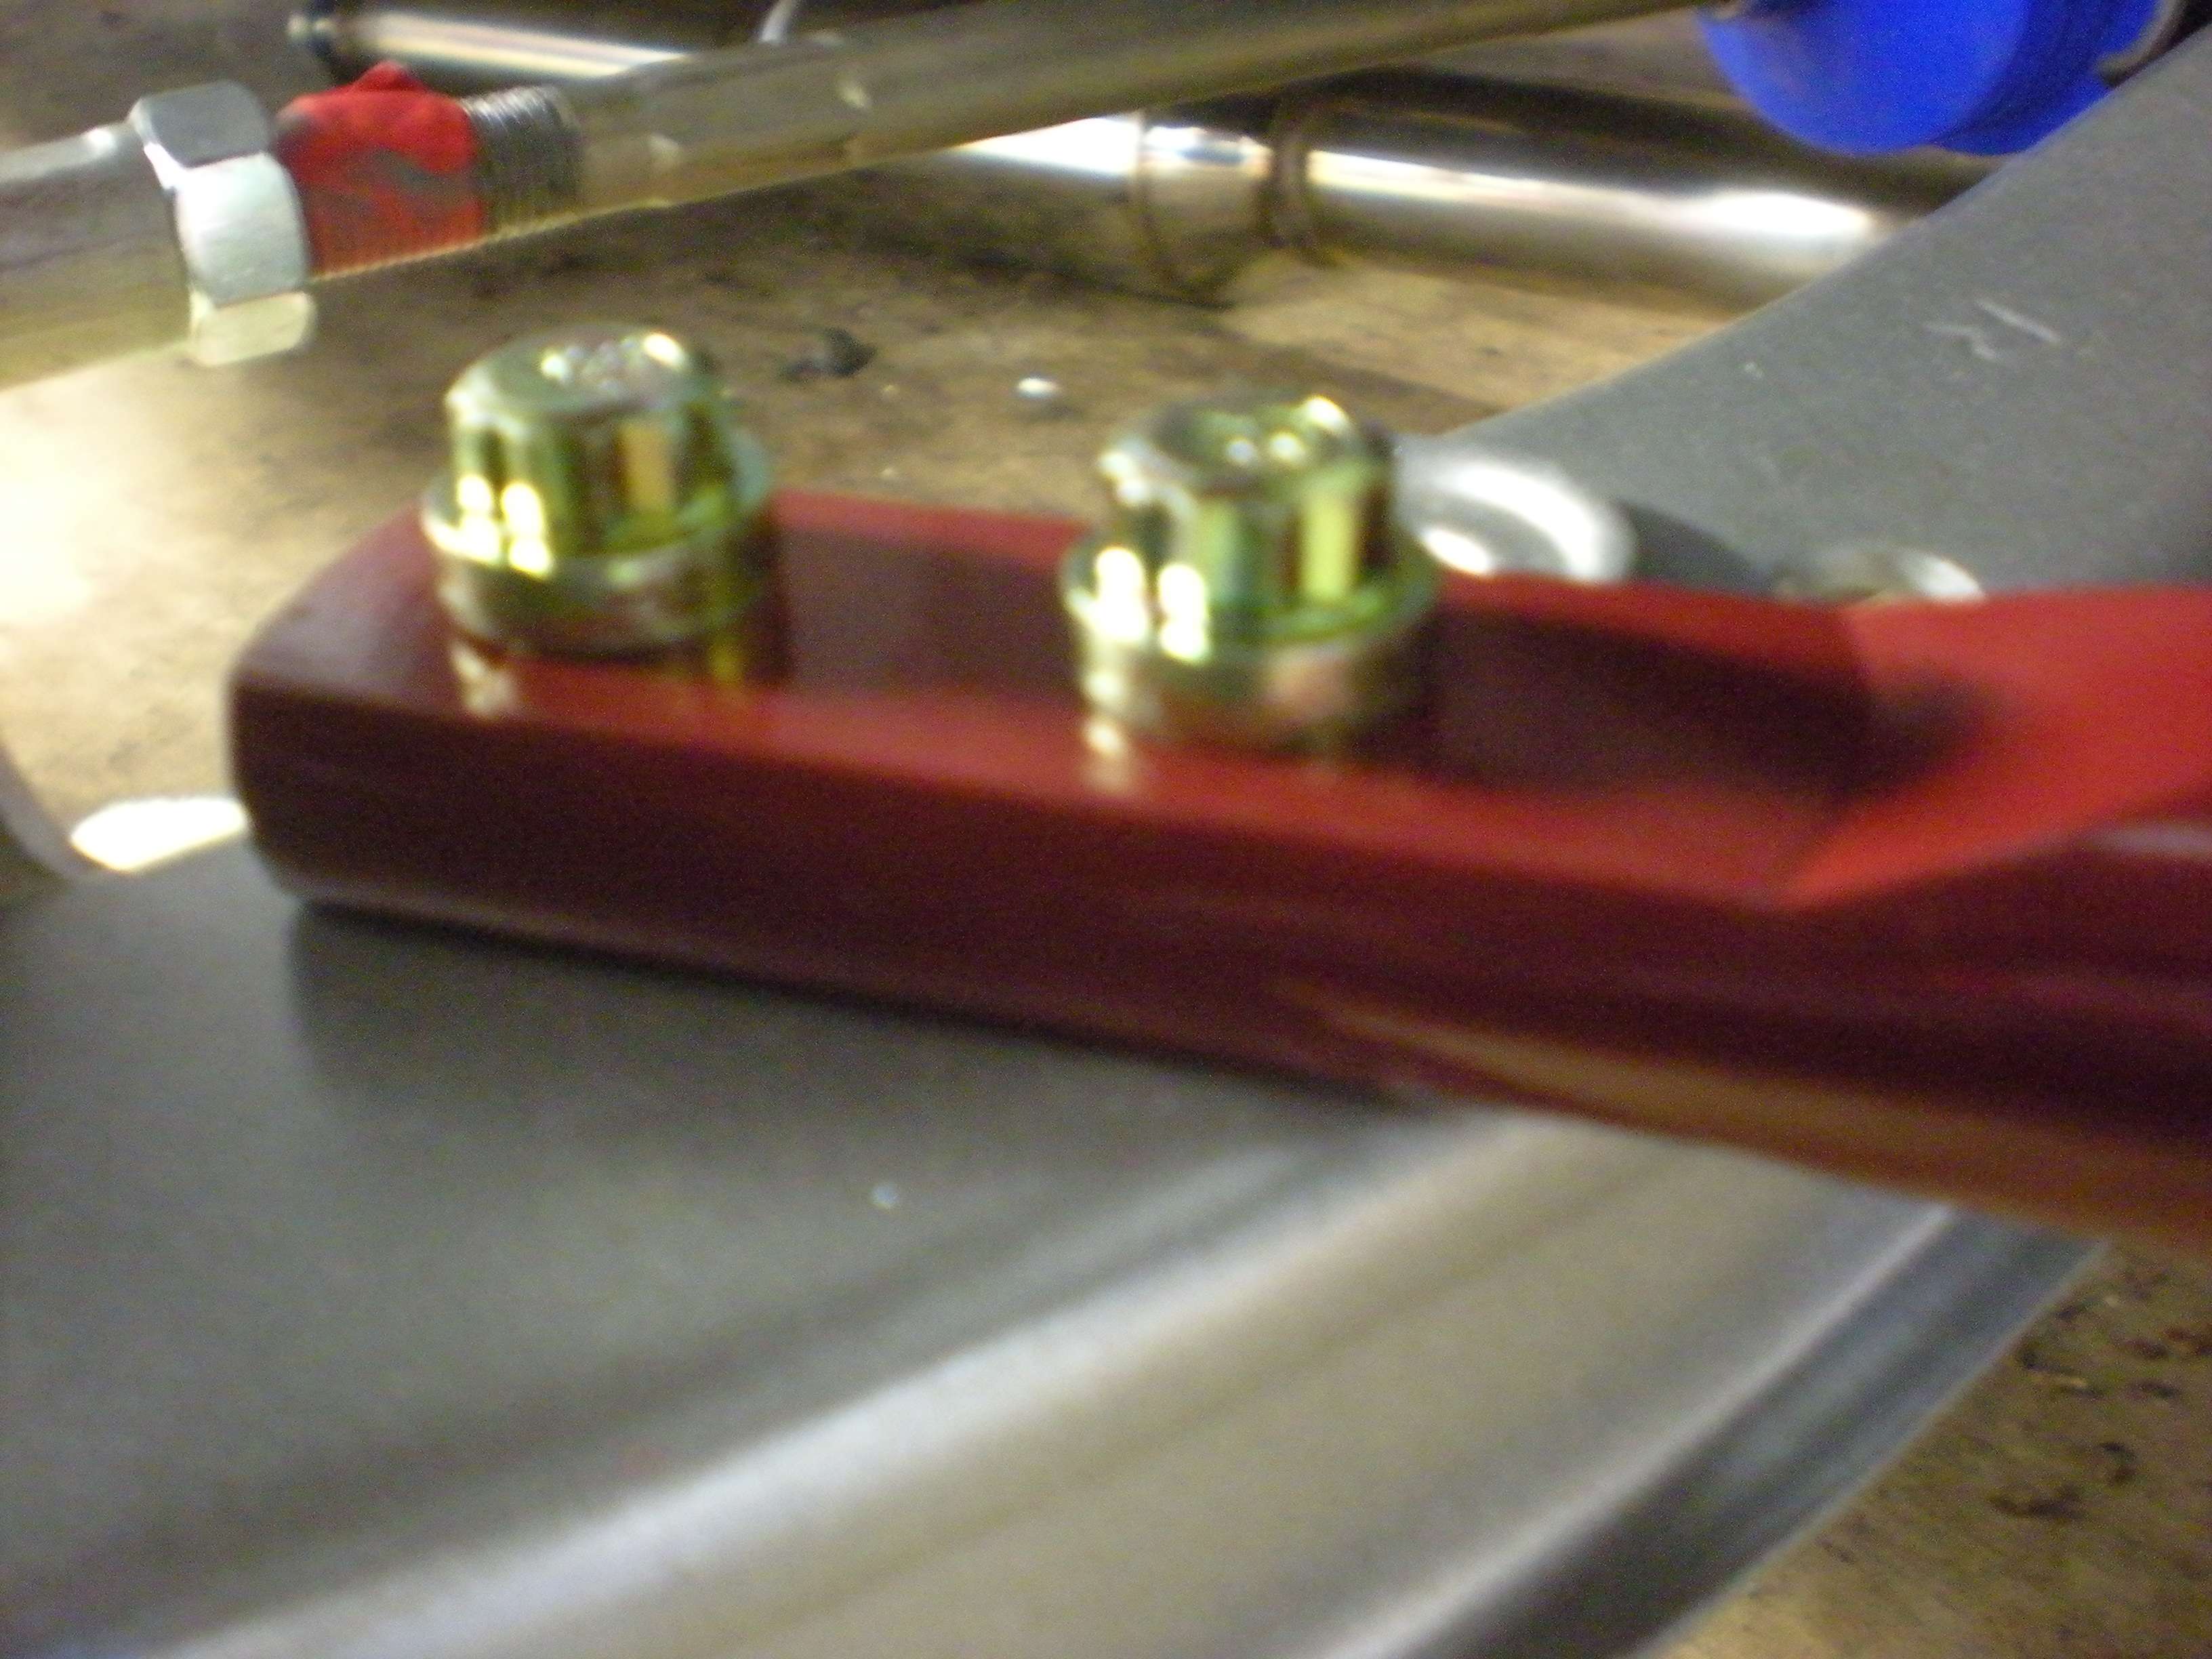 Even though I have not documented it, the front spindles were powder coated, Apexi coilovers were installed, along with new OEM fasteners... 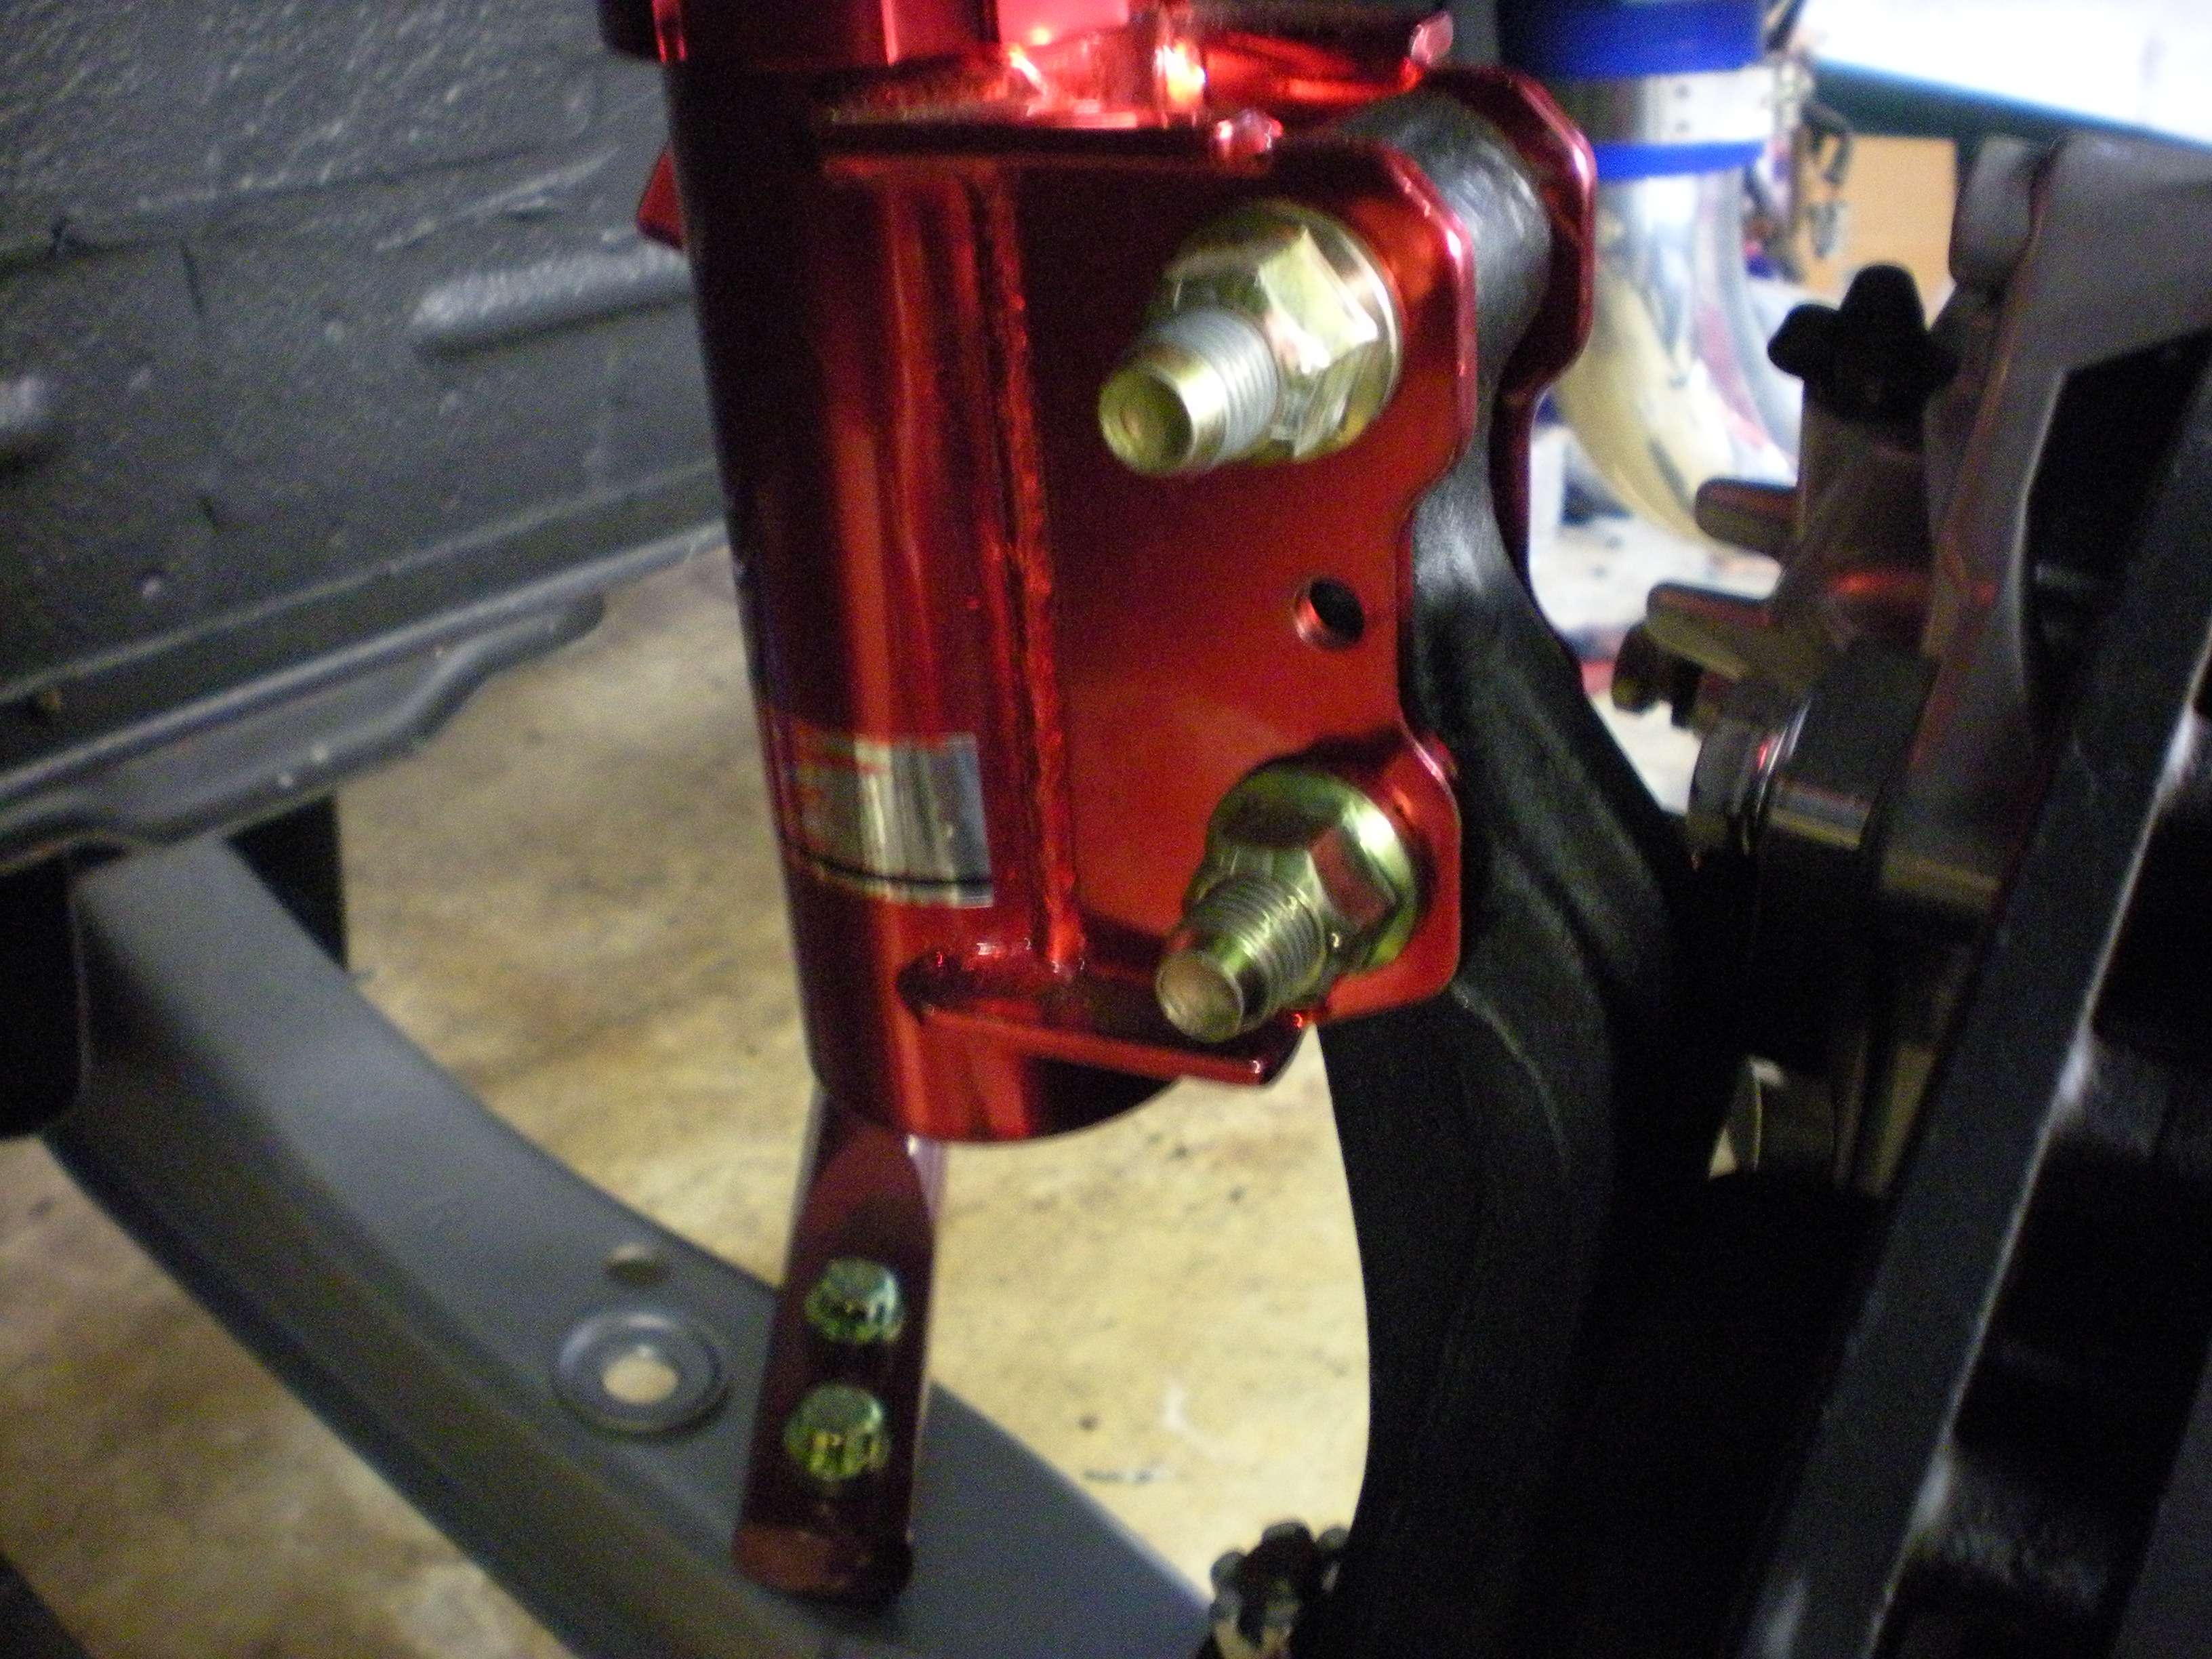 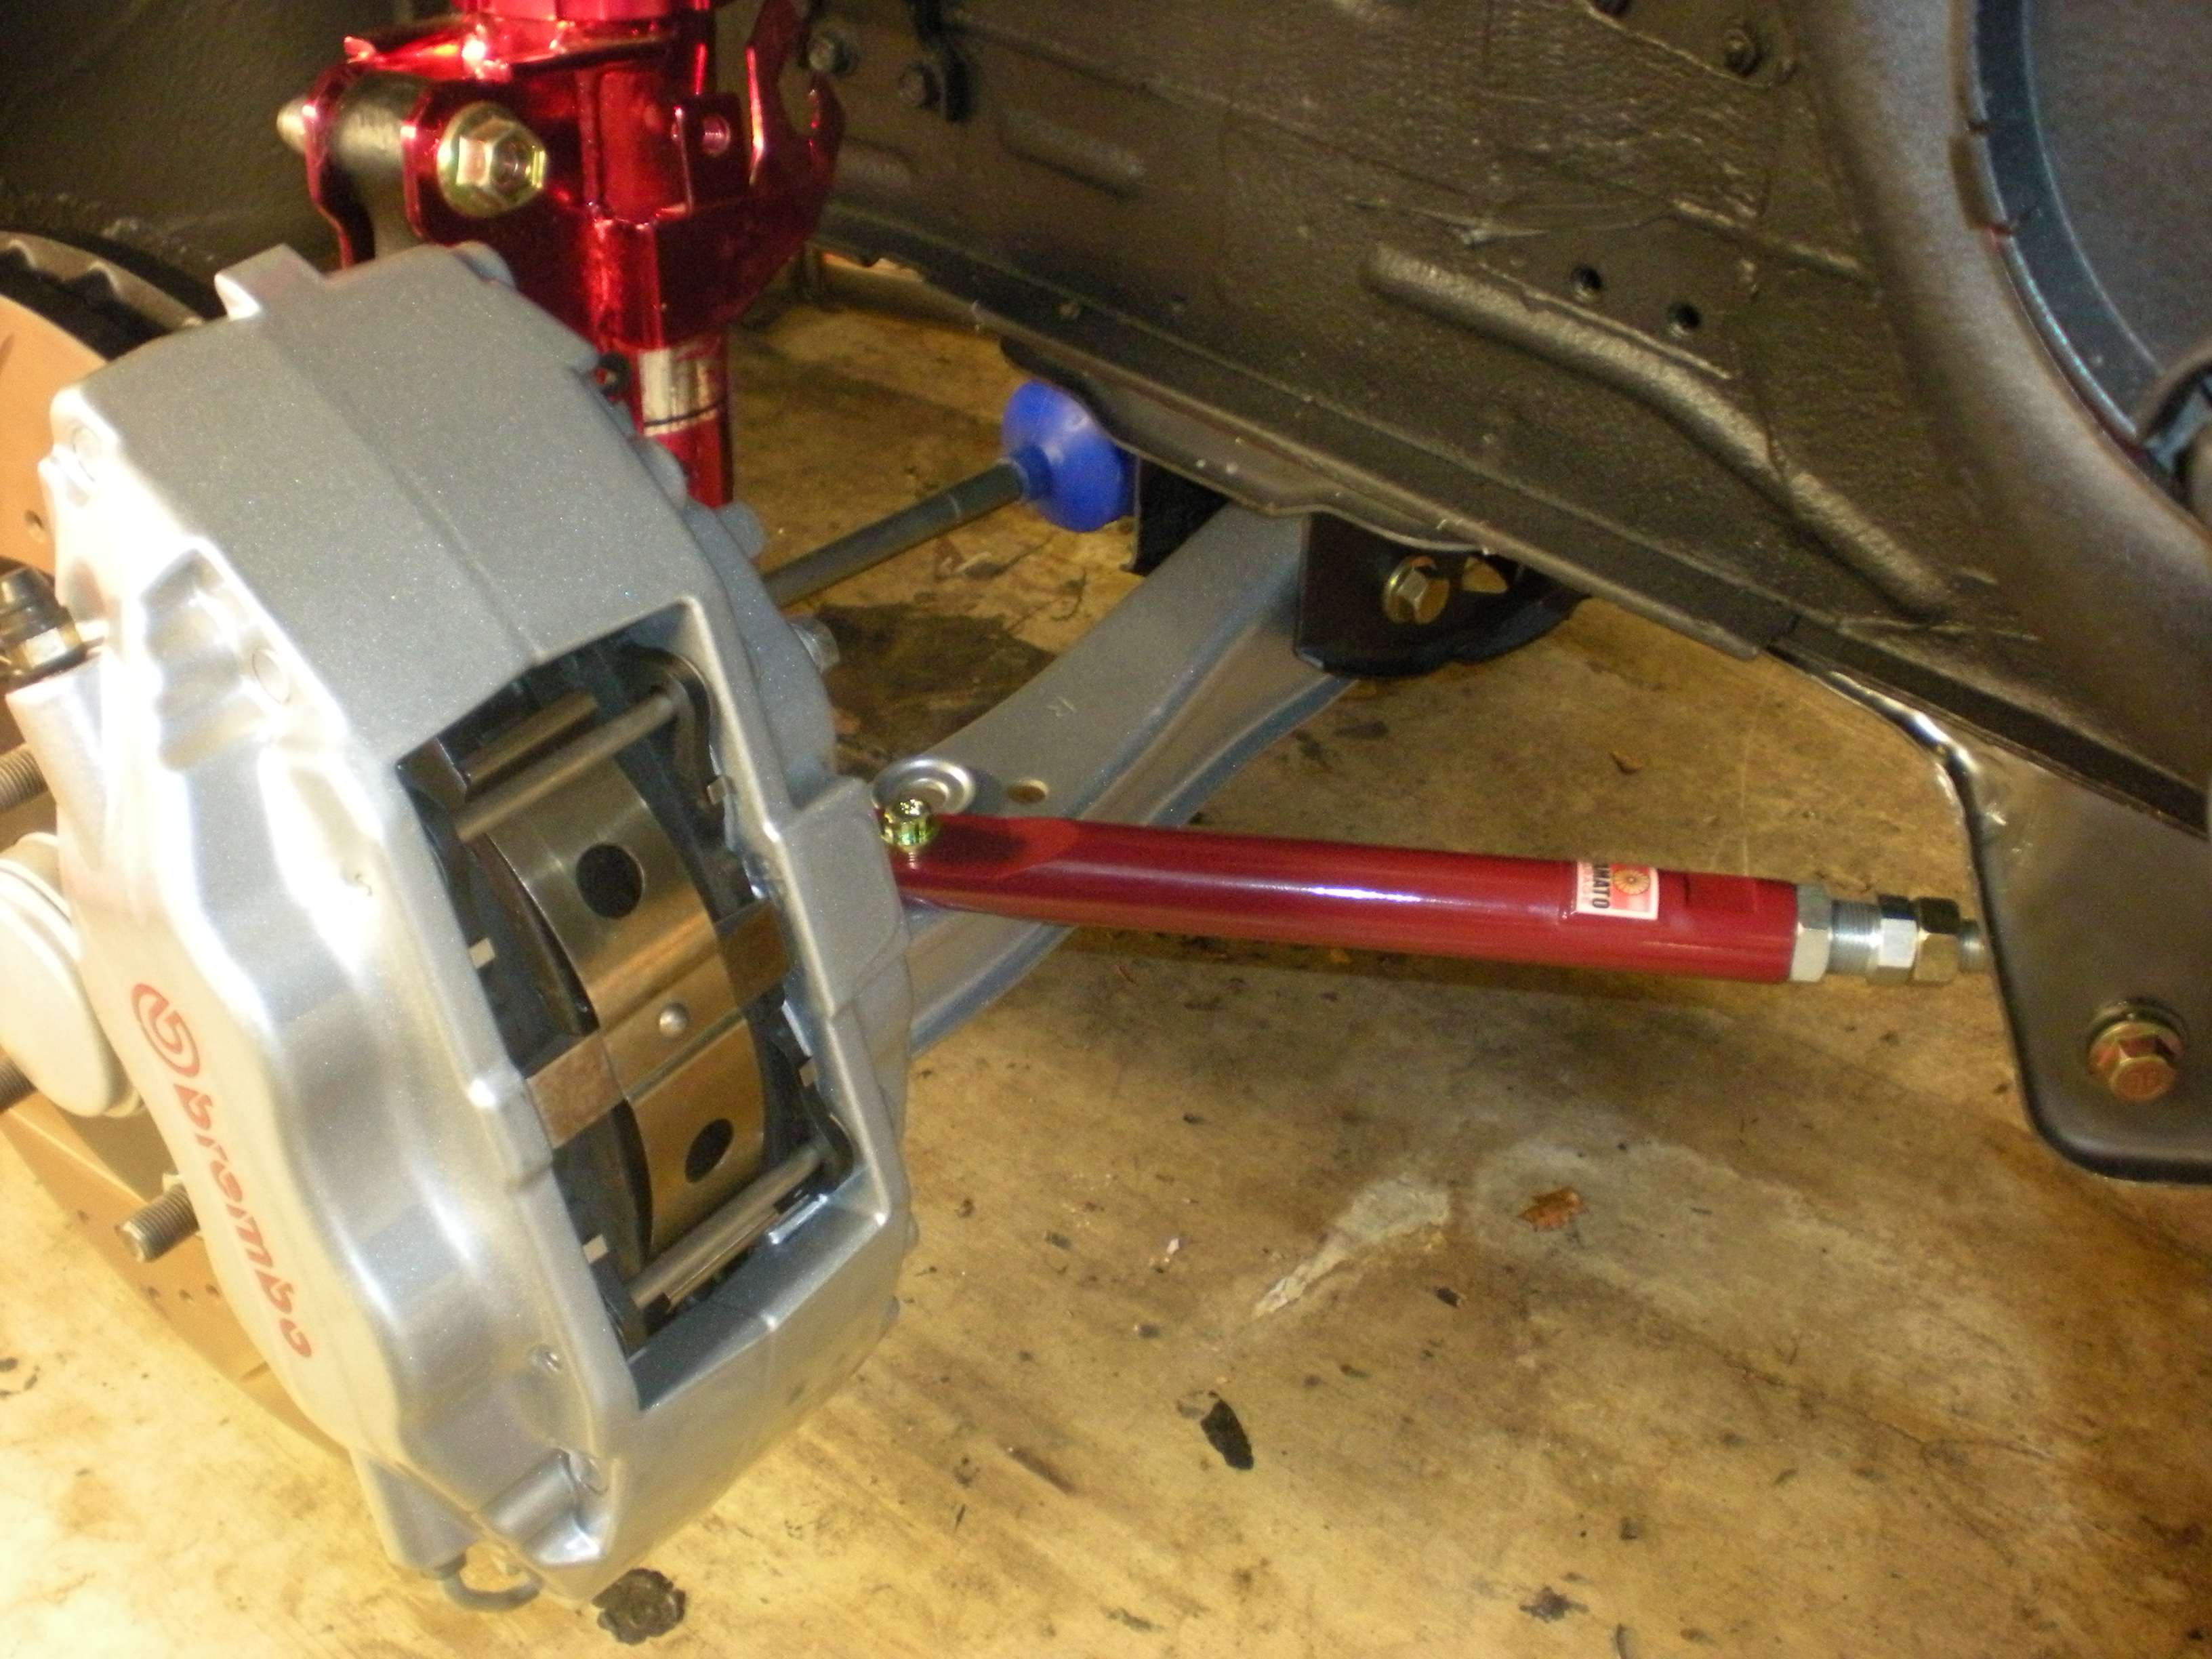 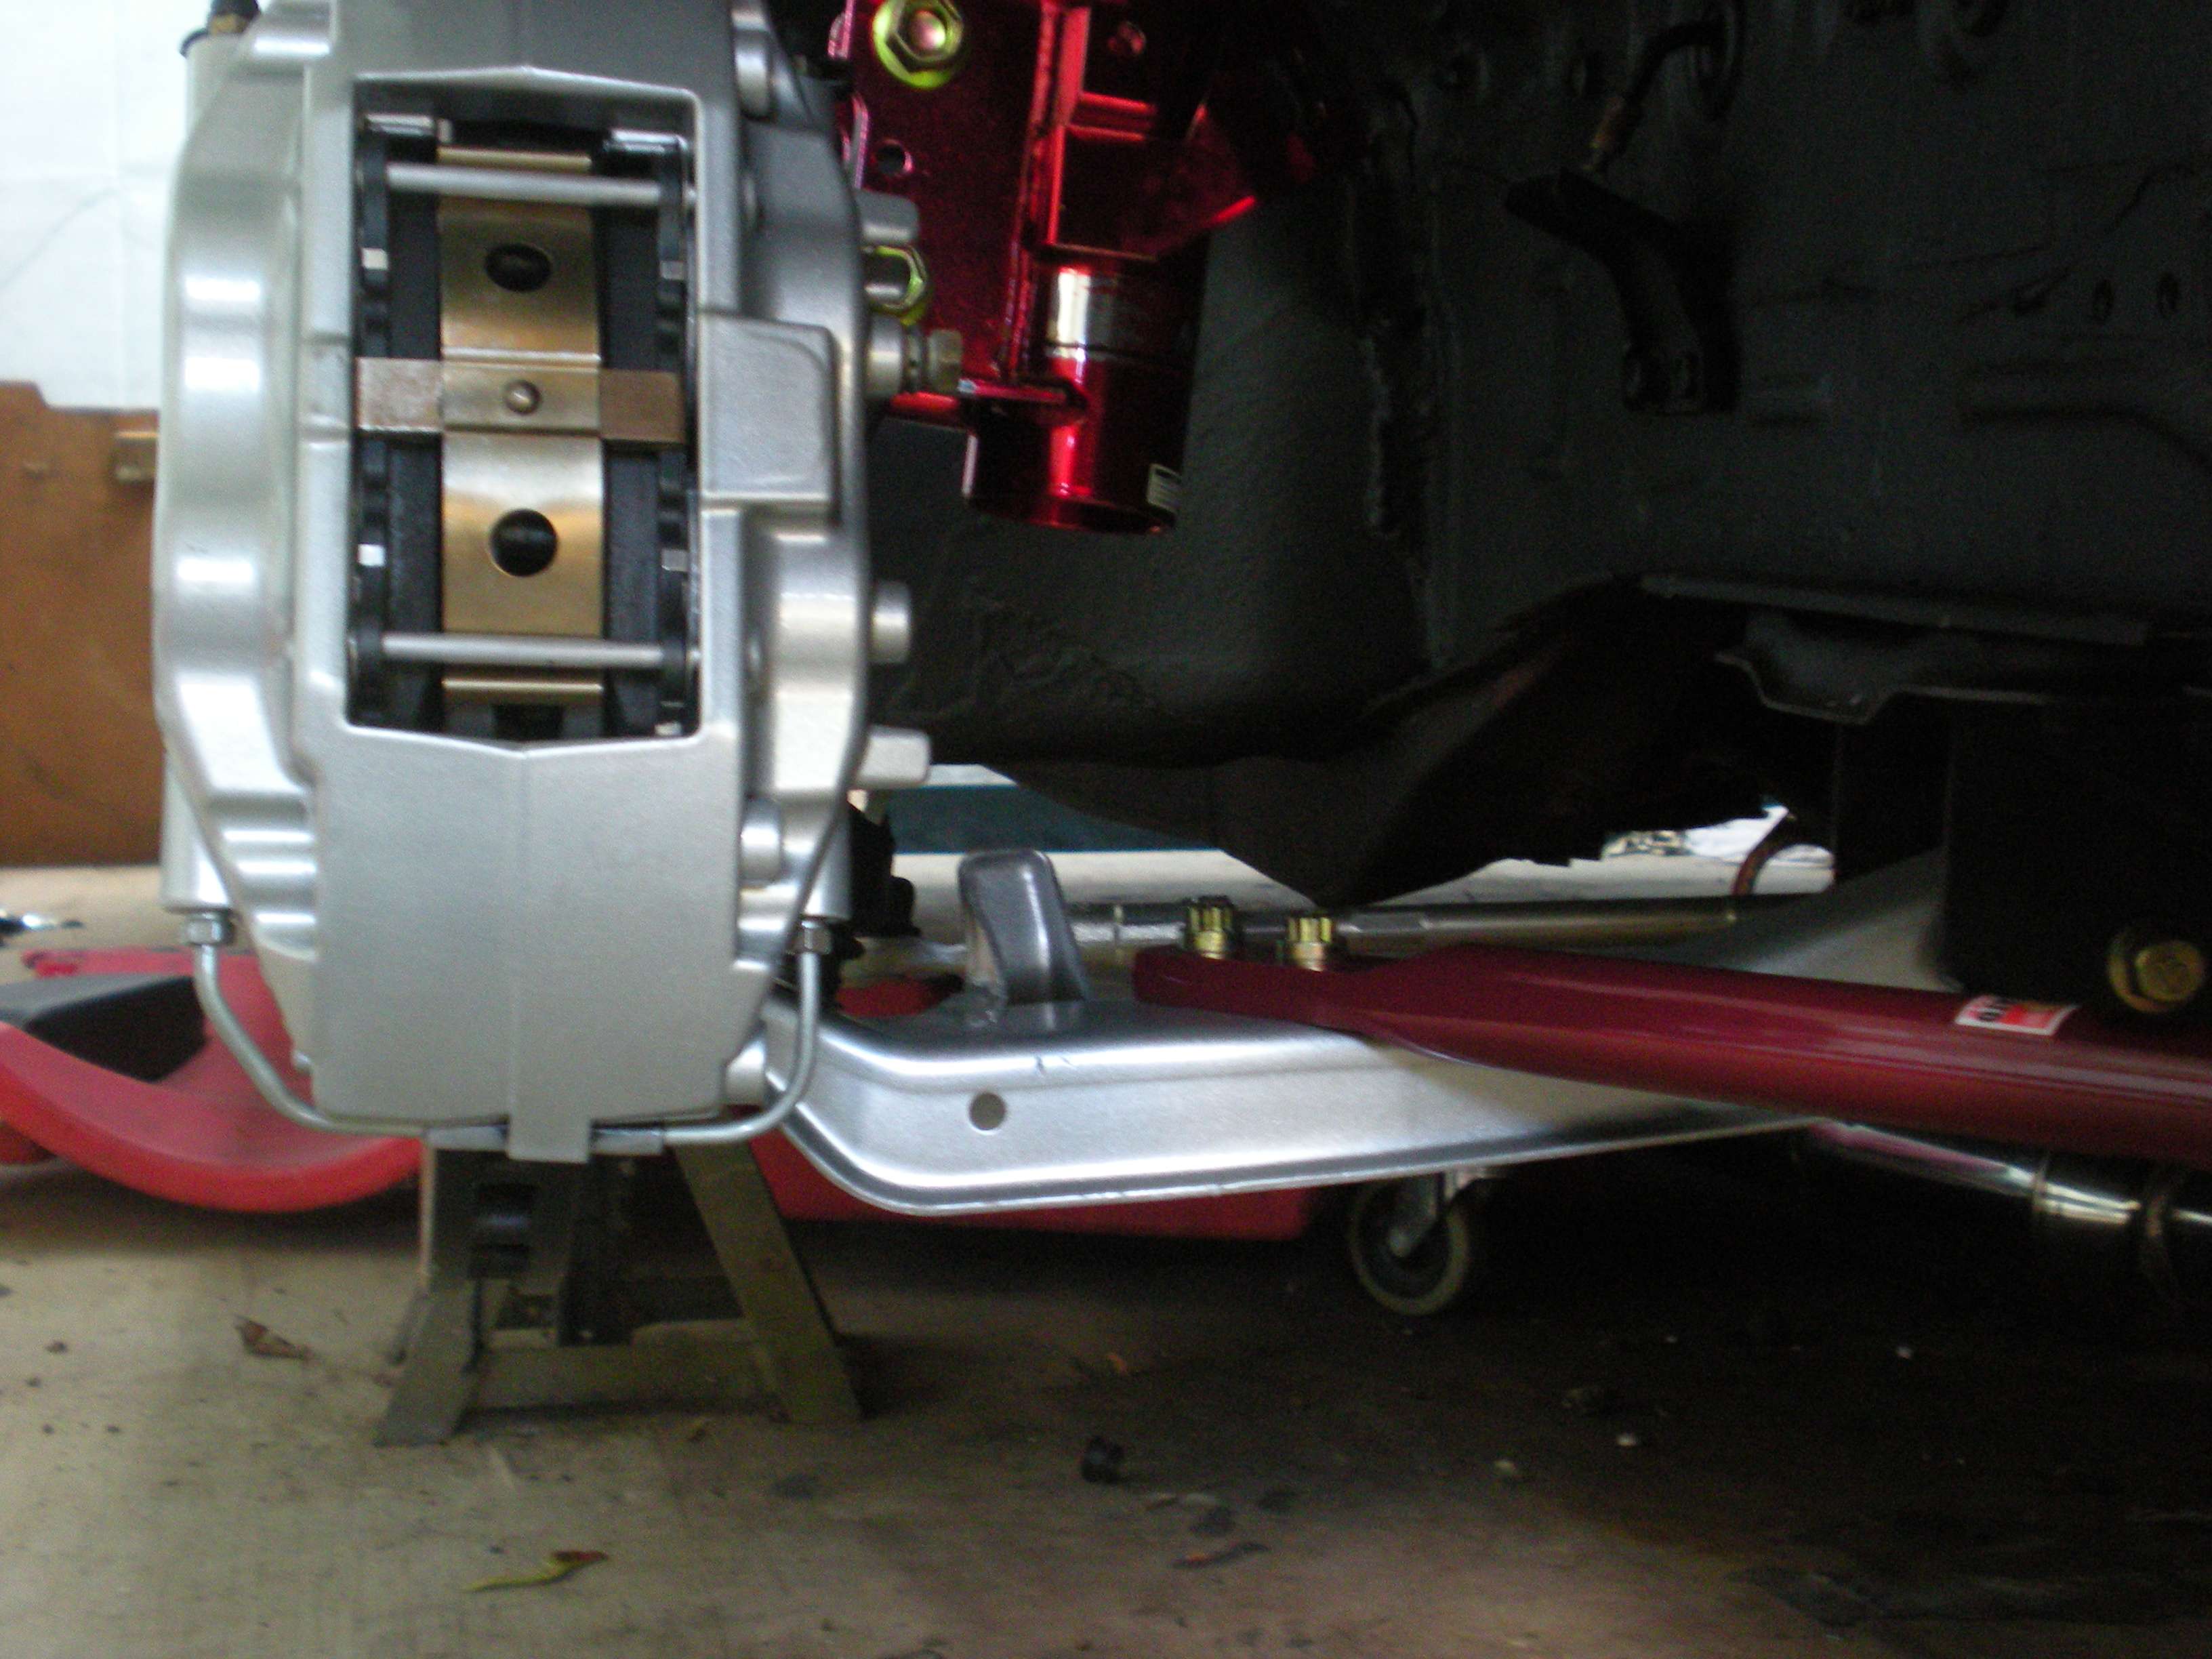 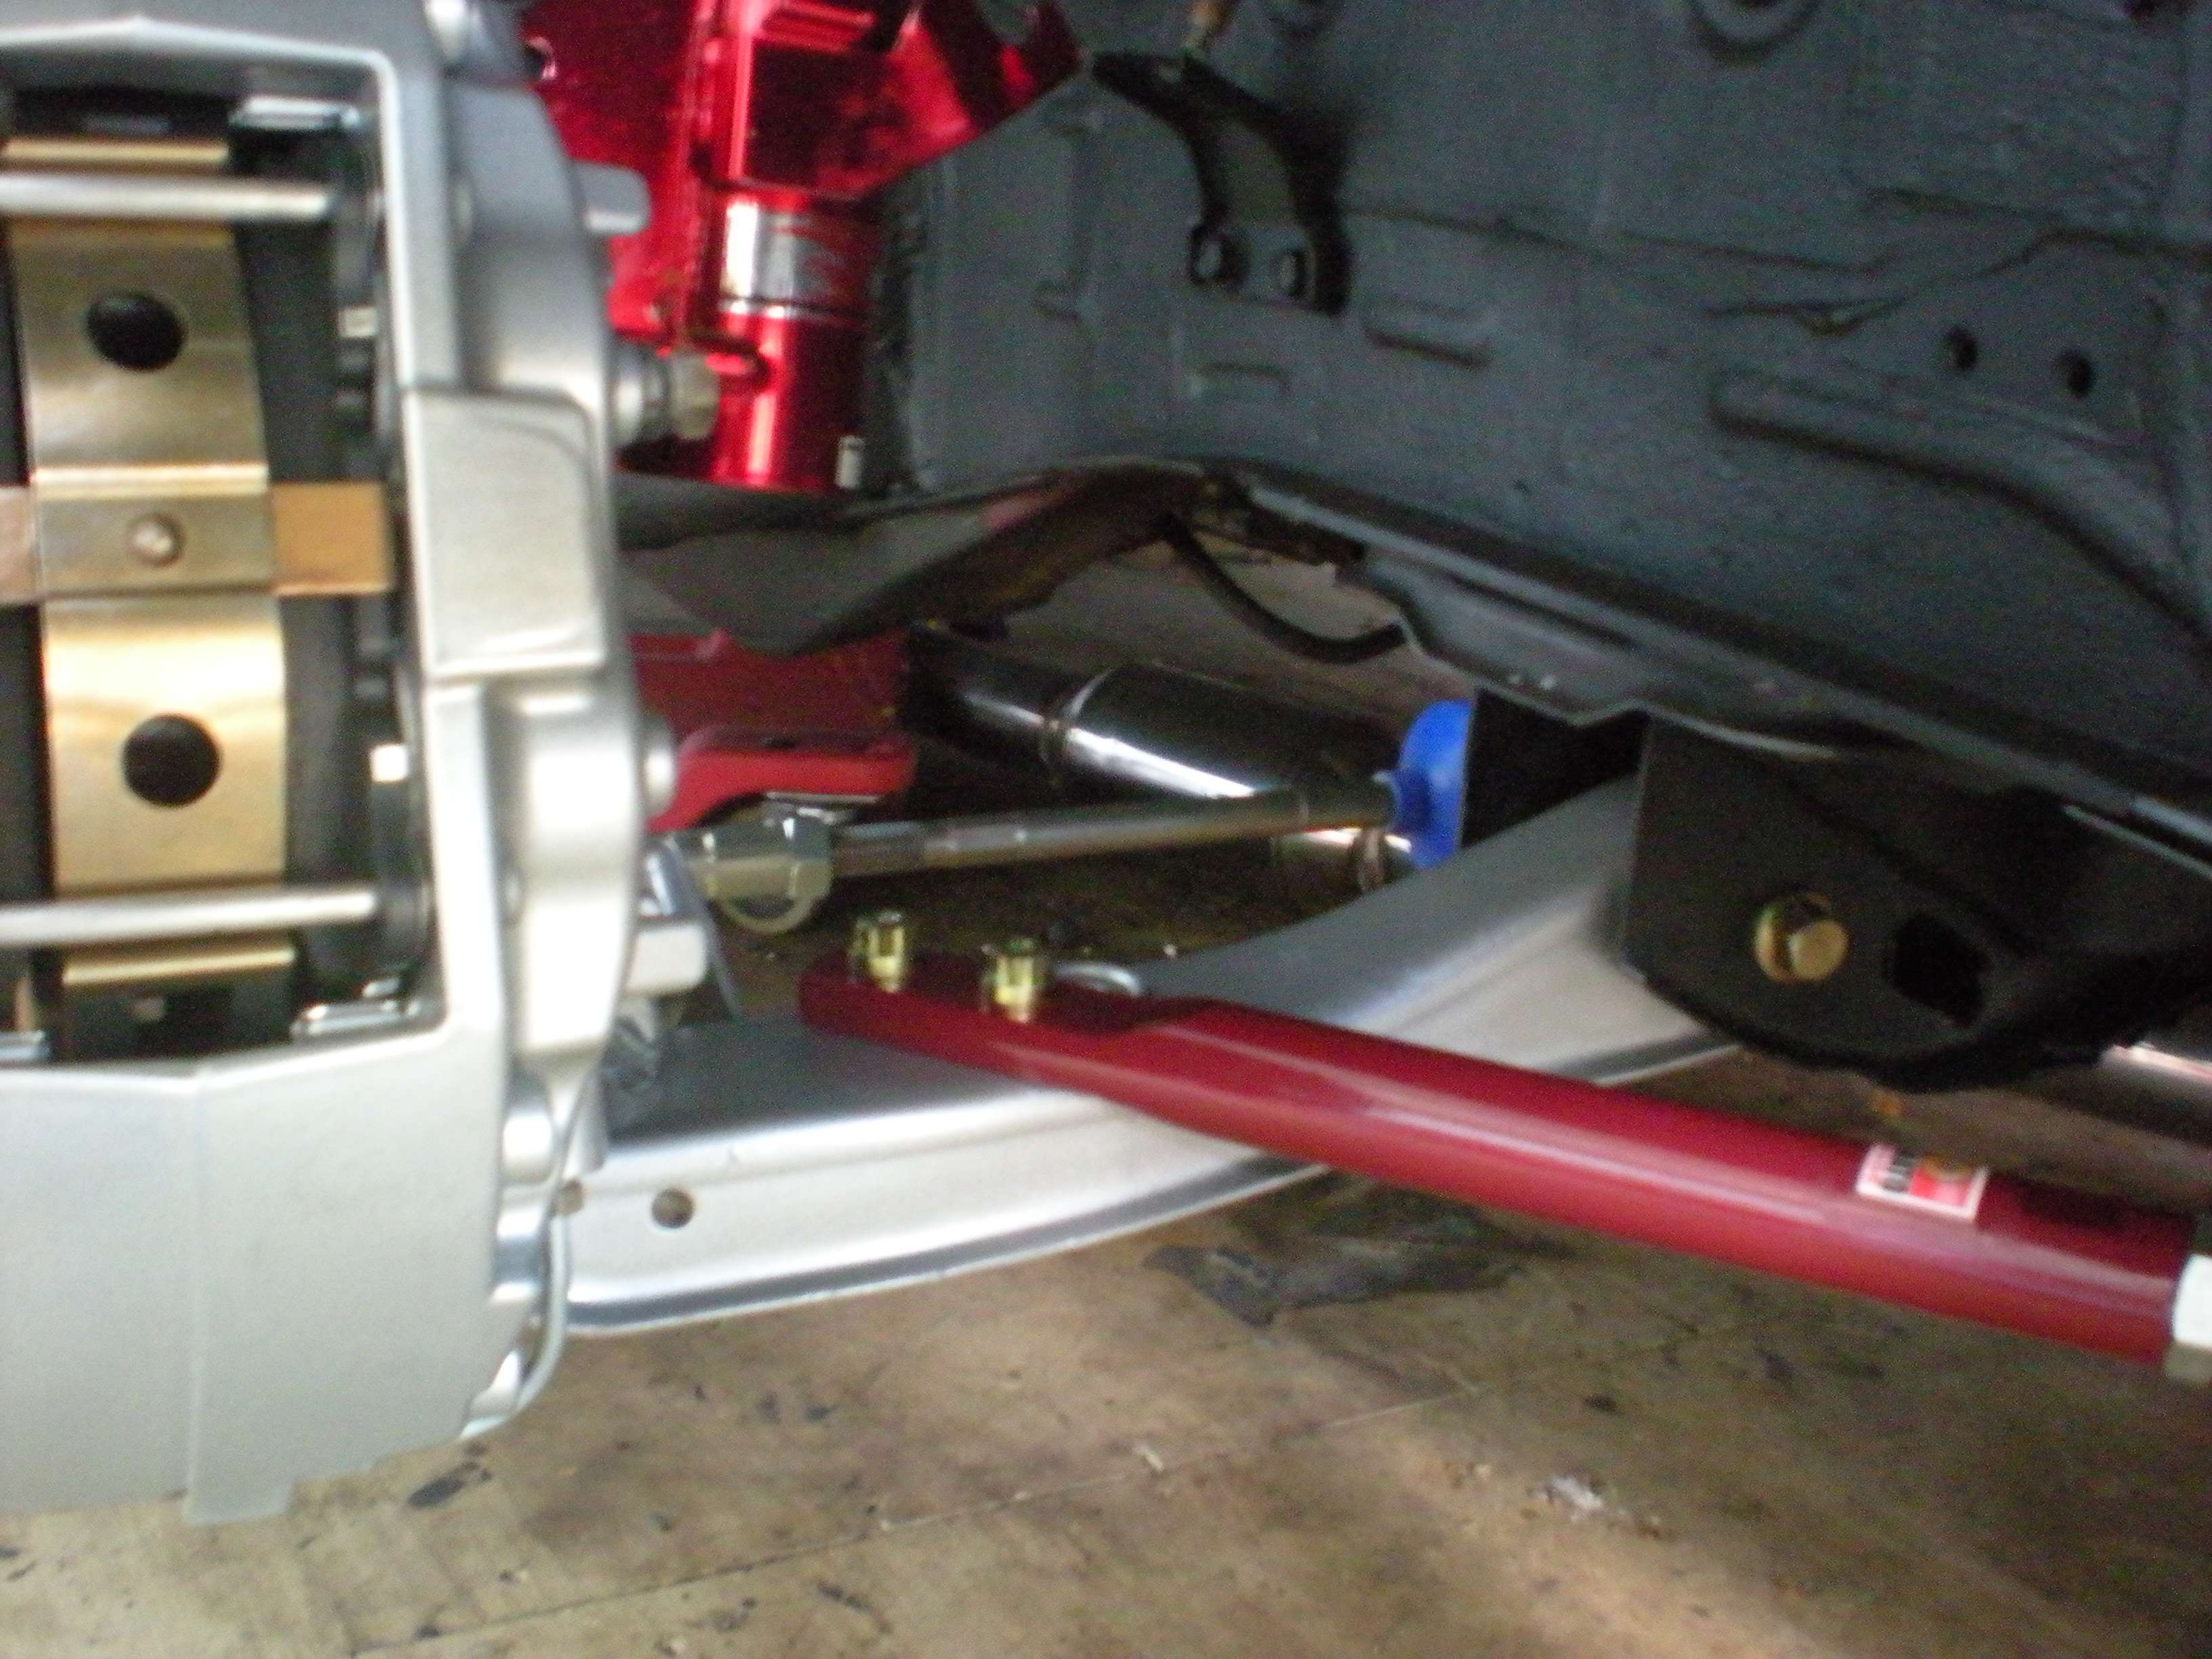 Last edited by doyle4281; 08-17-2011 at 08:39 PM.. |
|
|
|
|
08-15-2011, 08:32 PM
|
#112 |
|
Zilvia Junkie
Join Date: Jun 2006
Location: East Coast
Age: 38
Posts: 585
Trader Rating: (20)
Feedback Score: 20 reviews
|
Being that I have not adjusted everything yet, I need some advice concerning the tension rods. This may be normal, but I have noticed that the tension rods needed to be extended quite a bit. The adjustments are not at the end of their travel, but it seems excessive to me. Judging by the picture, does the adjustment seem excessive?
Last edited by doyle4281; 08-17-2011 at 08:25 PM.. |
|
|
|
|
08-16-2011, 06:40 PM
|
#115 |
|
Zilvia Junkie

|
looking great man!
|
|
|
|
|
08-17-2011, 08:57 PM
|
#117 |
|
Zilvia Junkie
Join Date: Jun 2006
Location: East Coast
Age: 38
Posts: 585
Trader Rating: (20)
Feedback Score: 20 reviews
|
The STI rear calipers where a similar procedure as the front, however it is recommended to split these, as there is a seal between the halves. The powder coating temperature is in excess of 450 degress F, so the seal could be harmed. It has been disputed that these seals can handle the heat, however they are nearly impossible to find, so I wouldn't take the chance.
Those who have disassembled these calipers know, that the torx fasteners that hold those 4 plates on, can be a pain to get out. In my case a few got damaged, they were replaced on every caliper. If anyone is interested, they are M6x1 12mm button head fasteners. 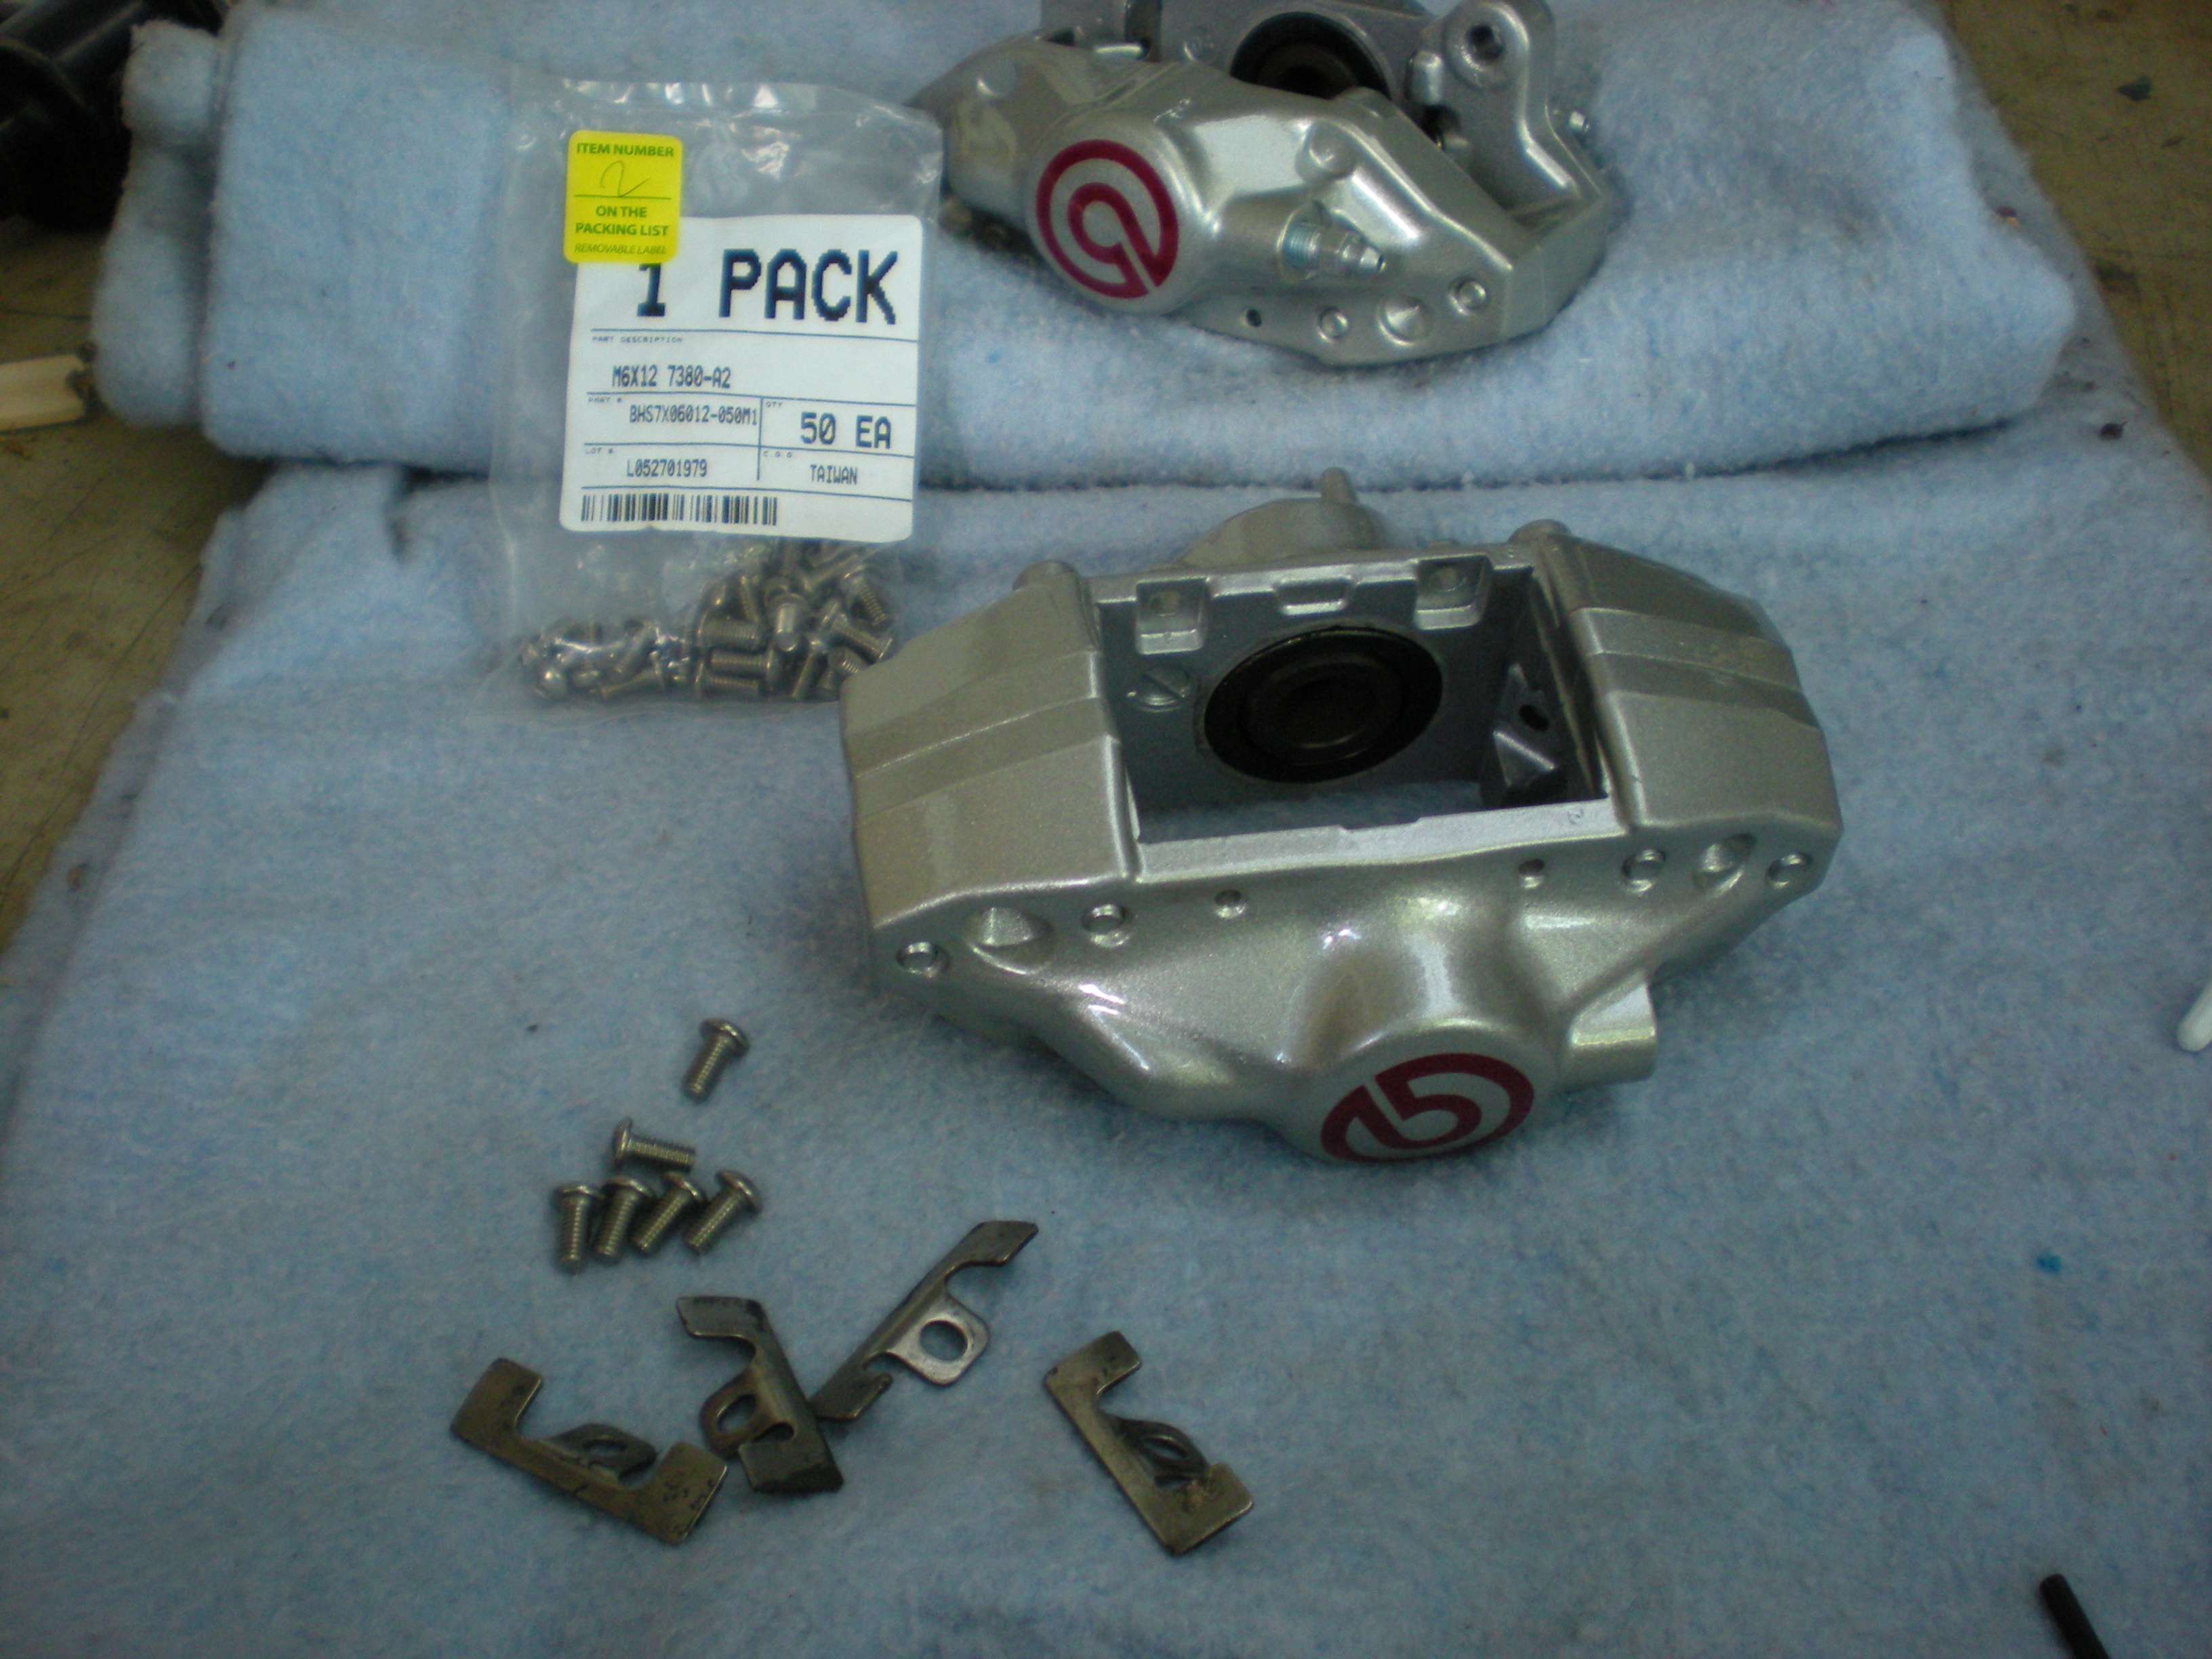 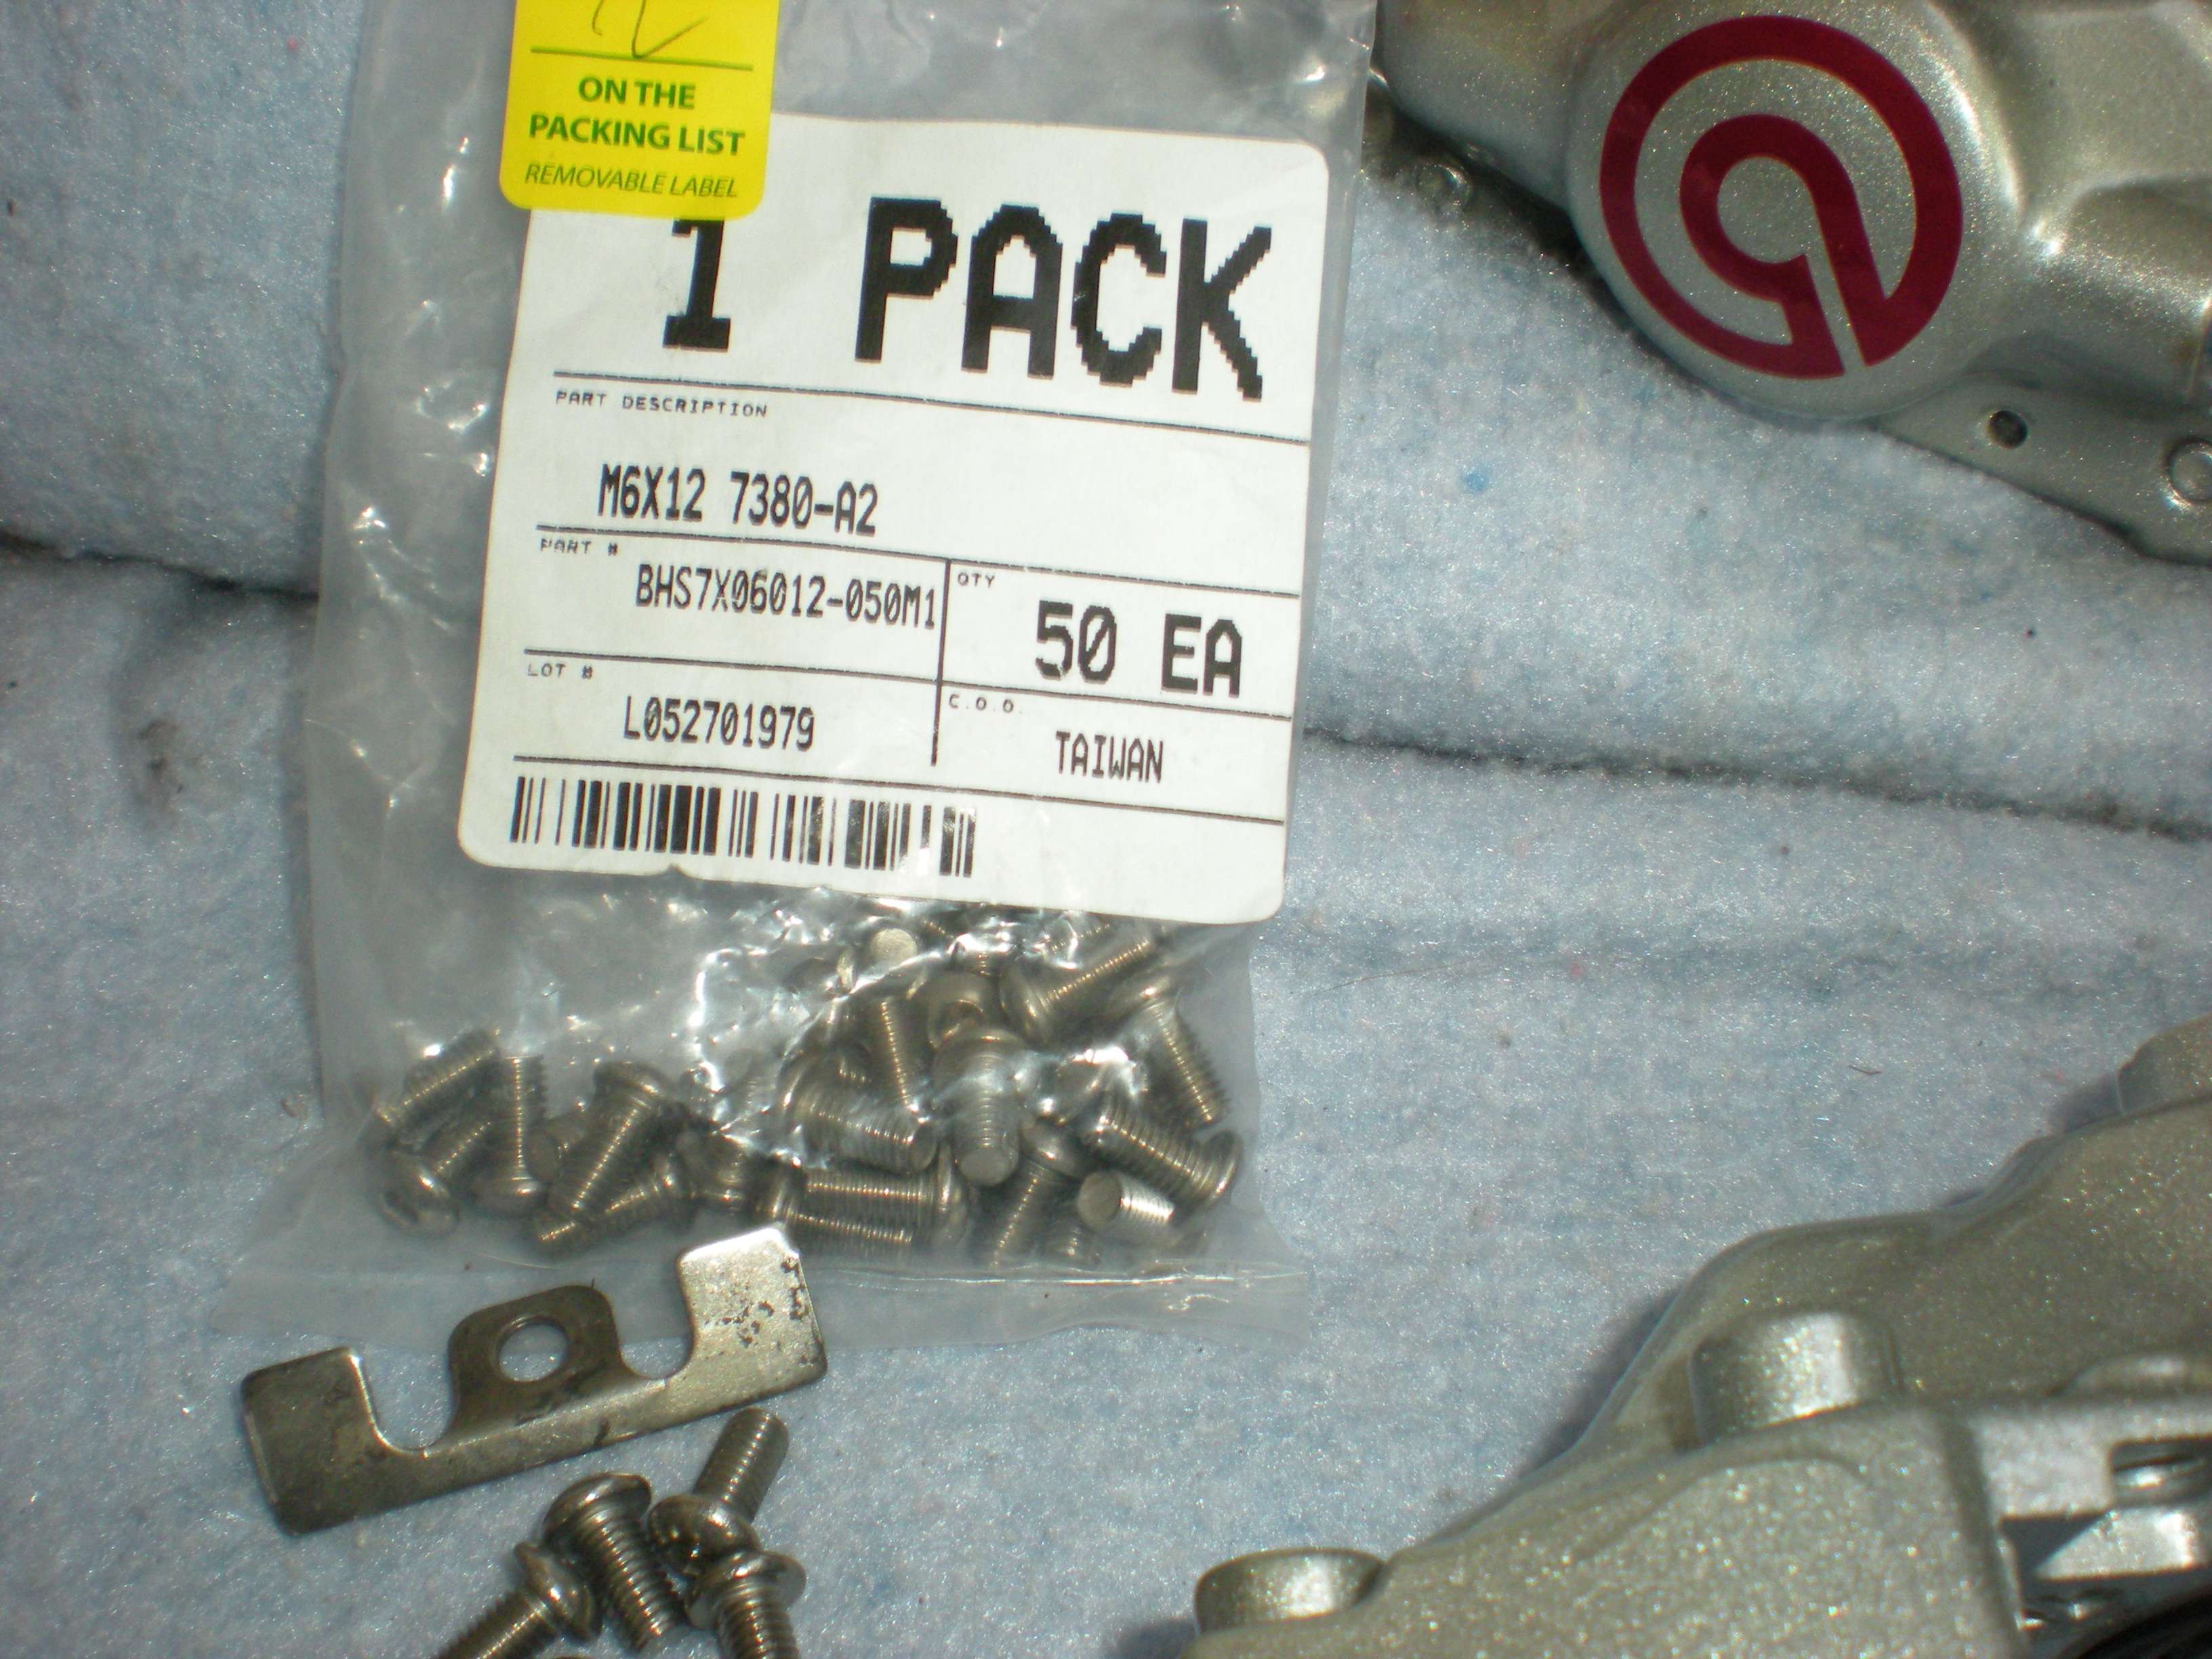 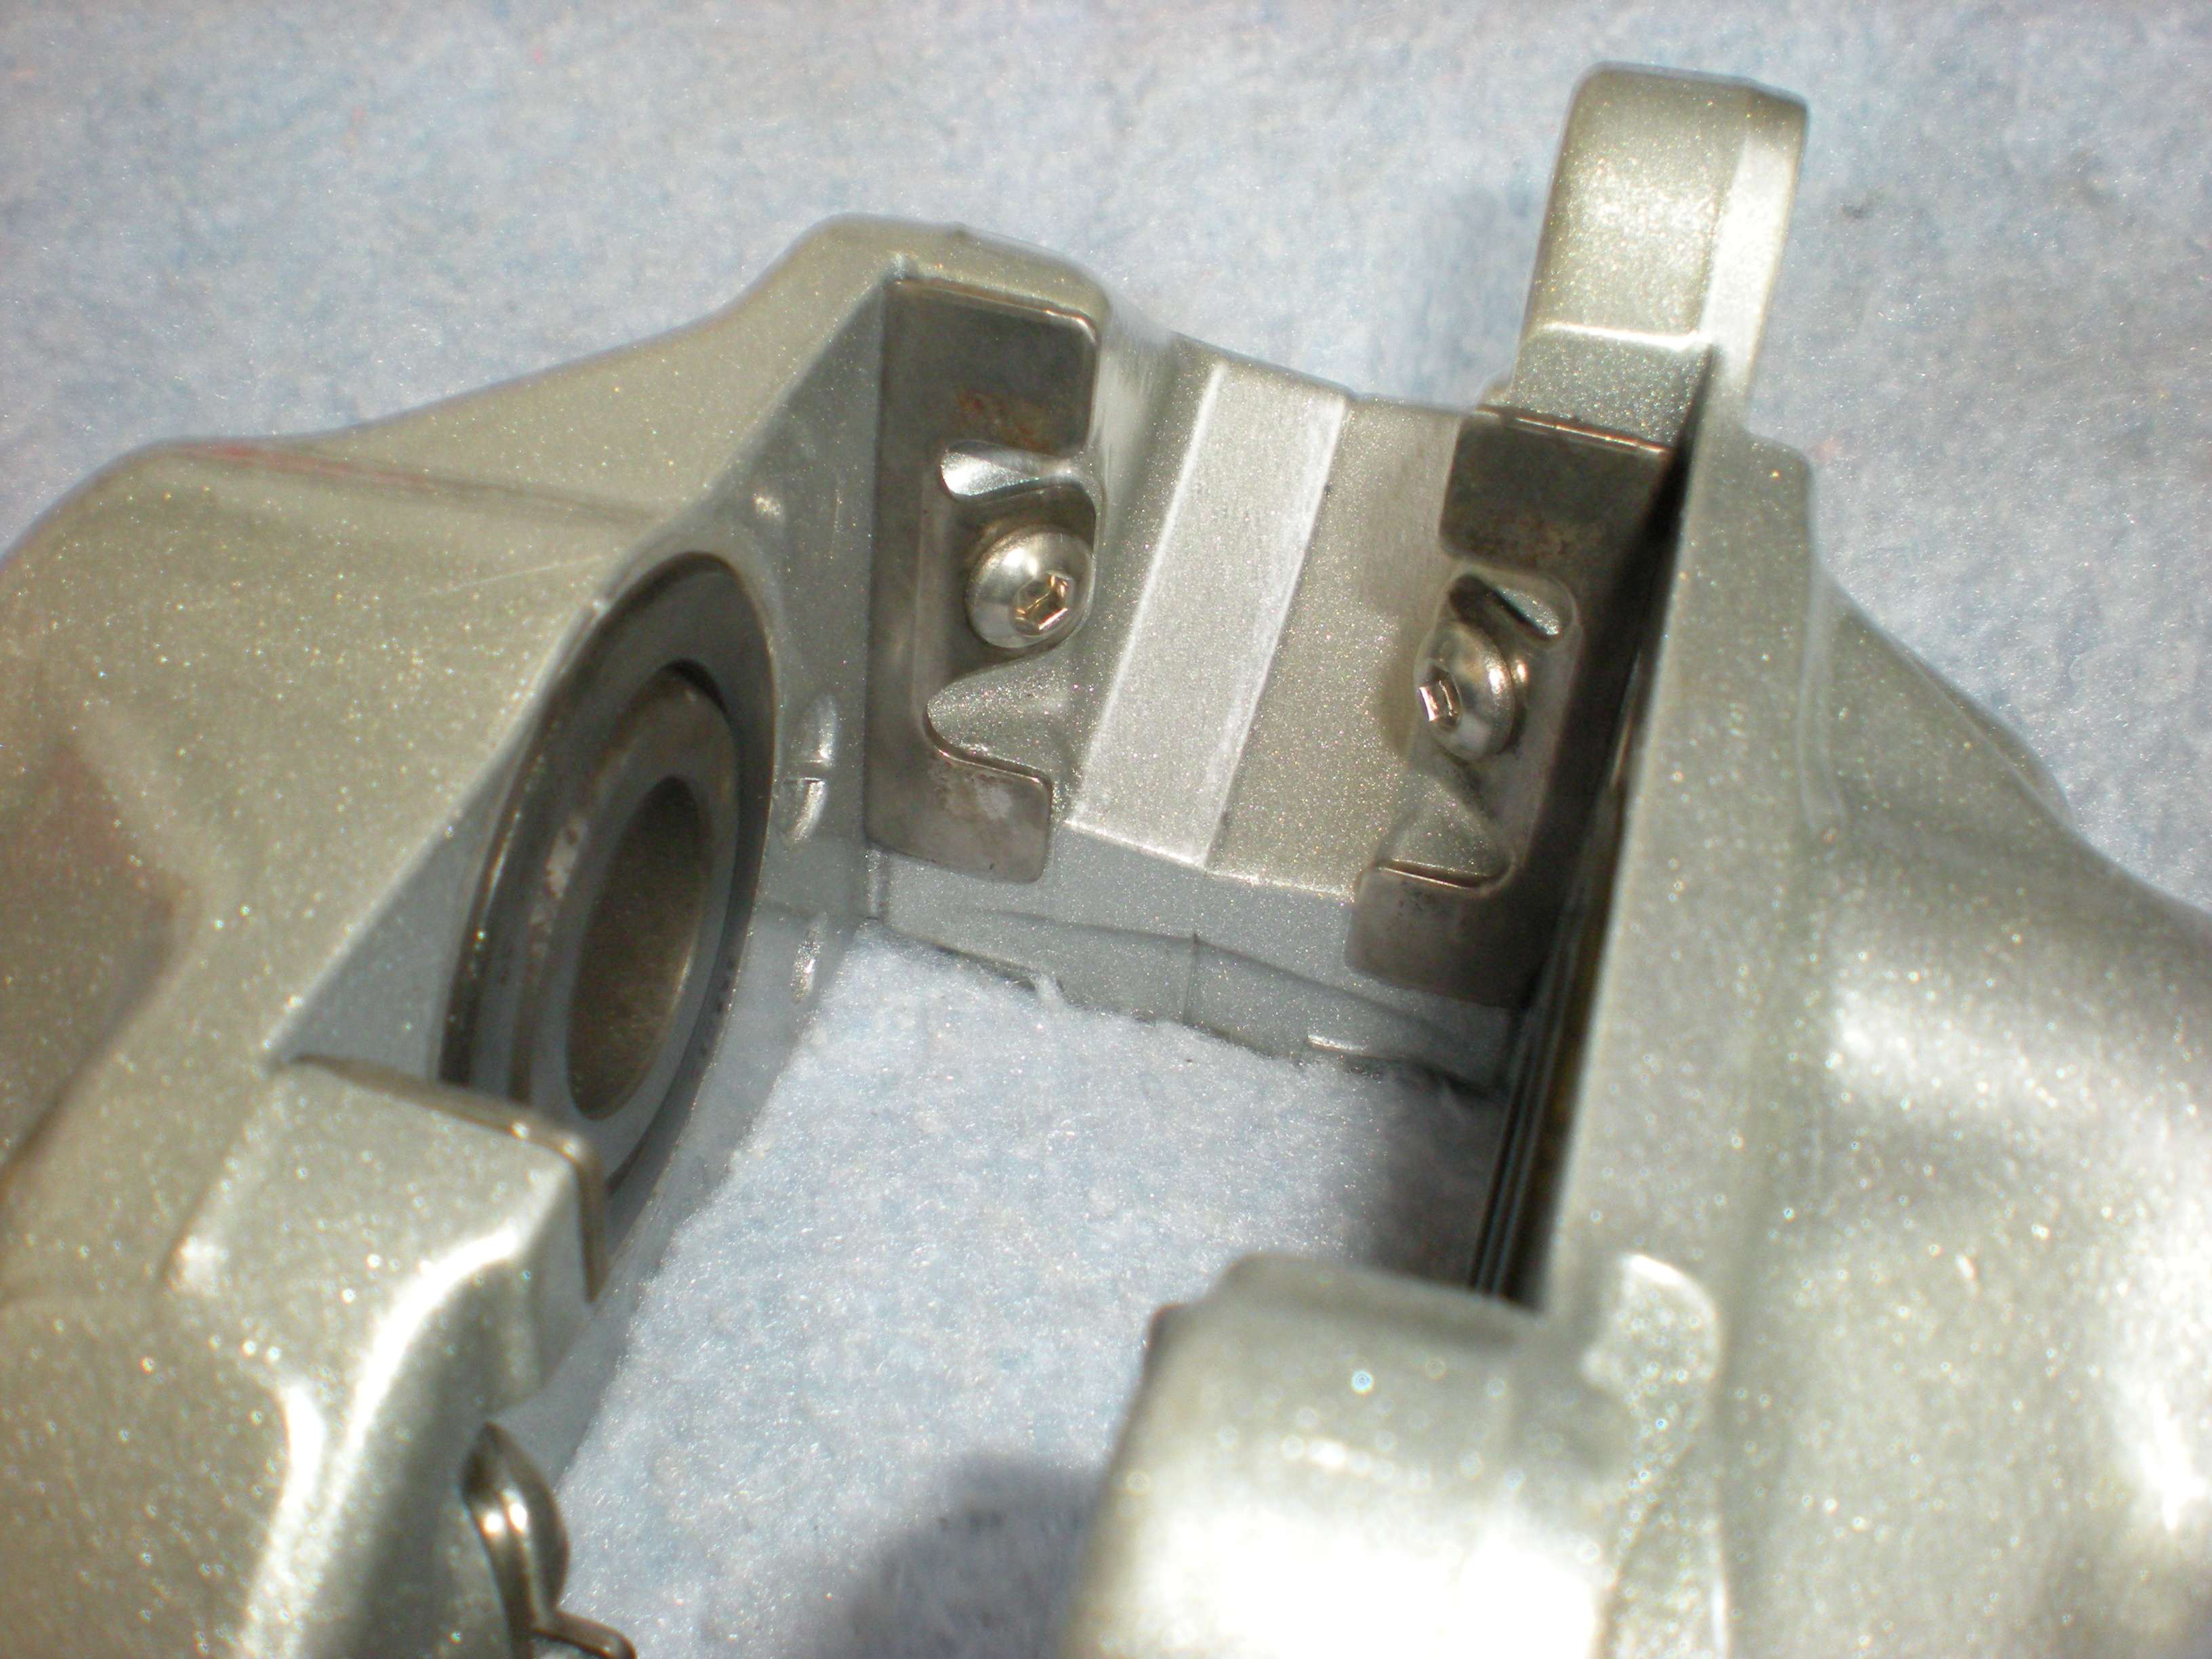 Ready to install....bolt on with no modification.... 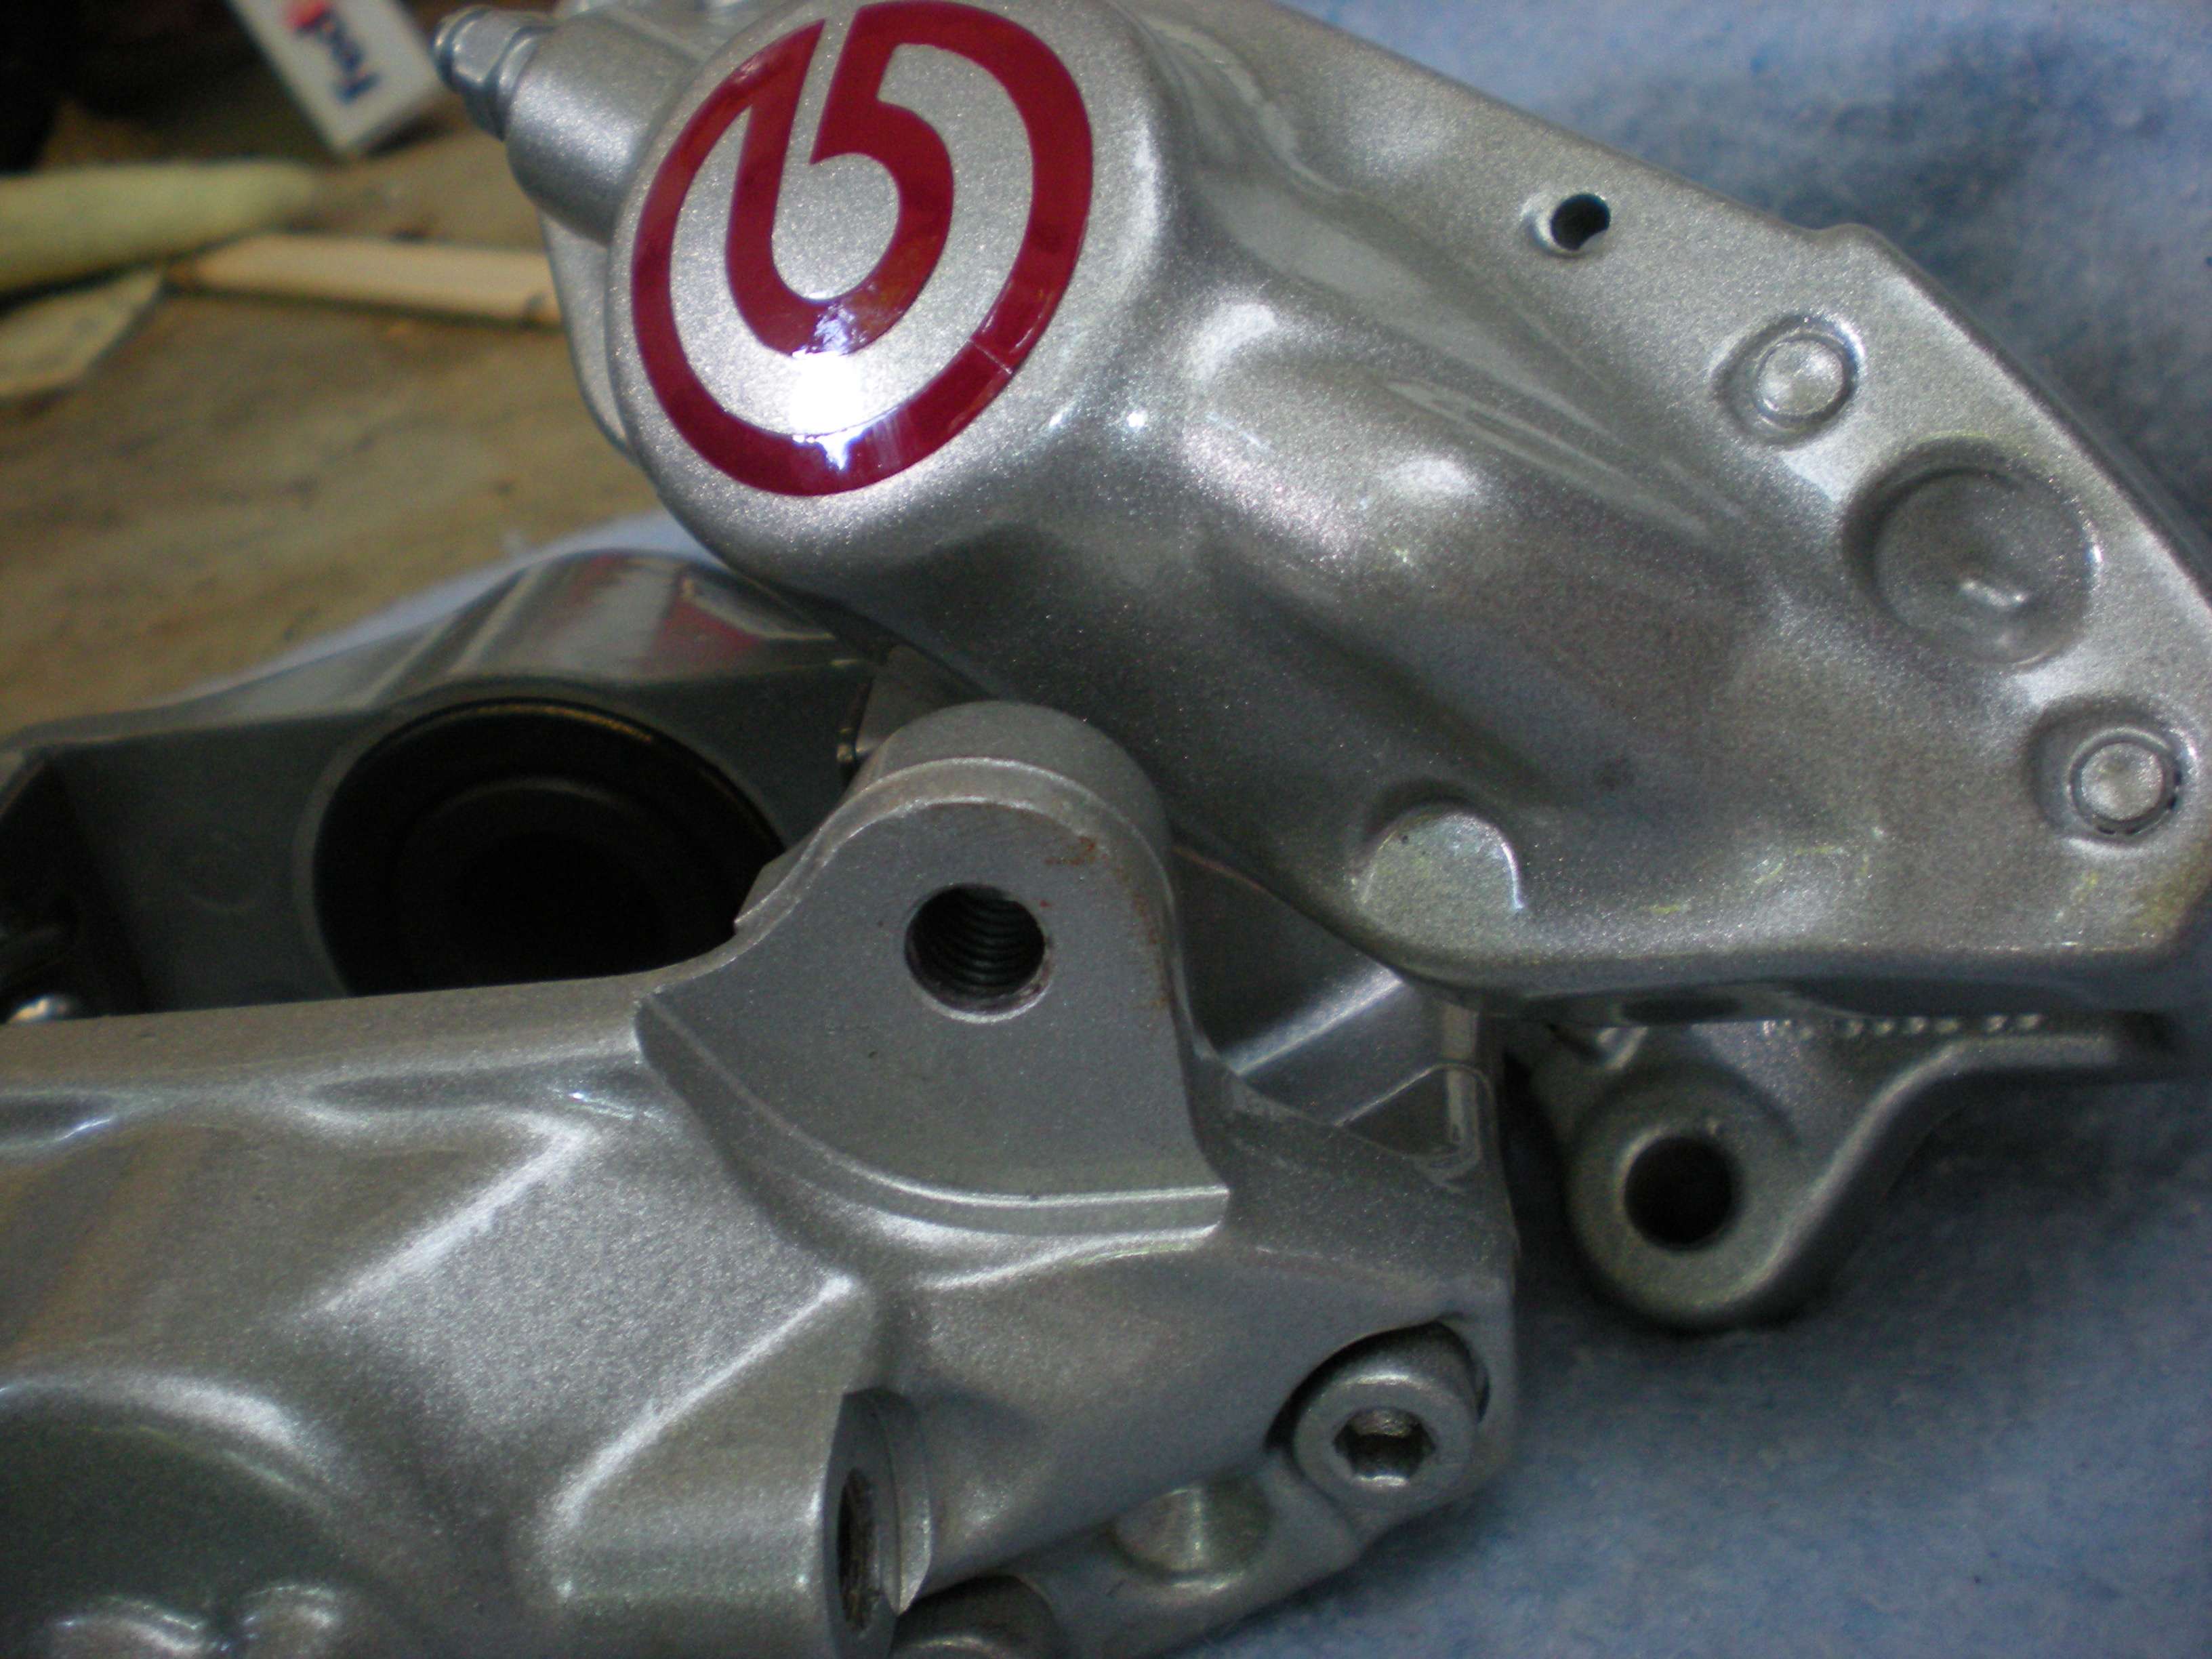  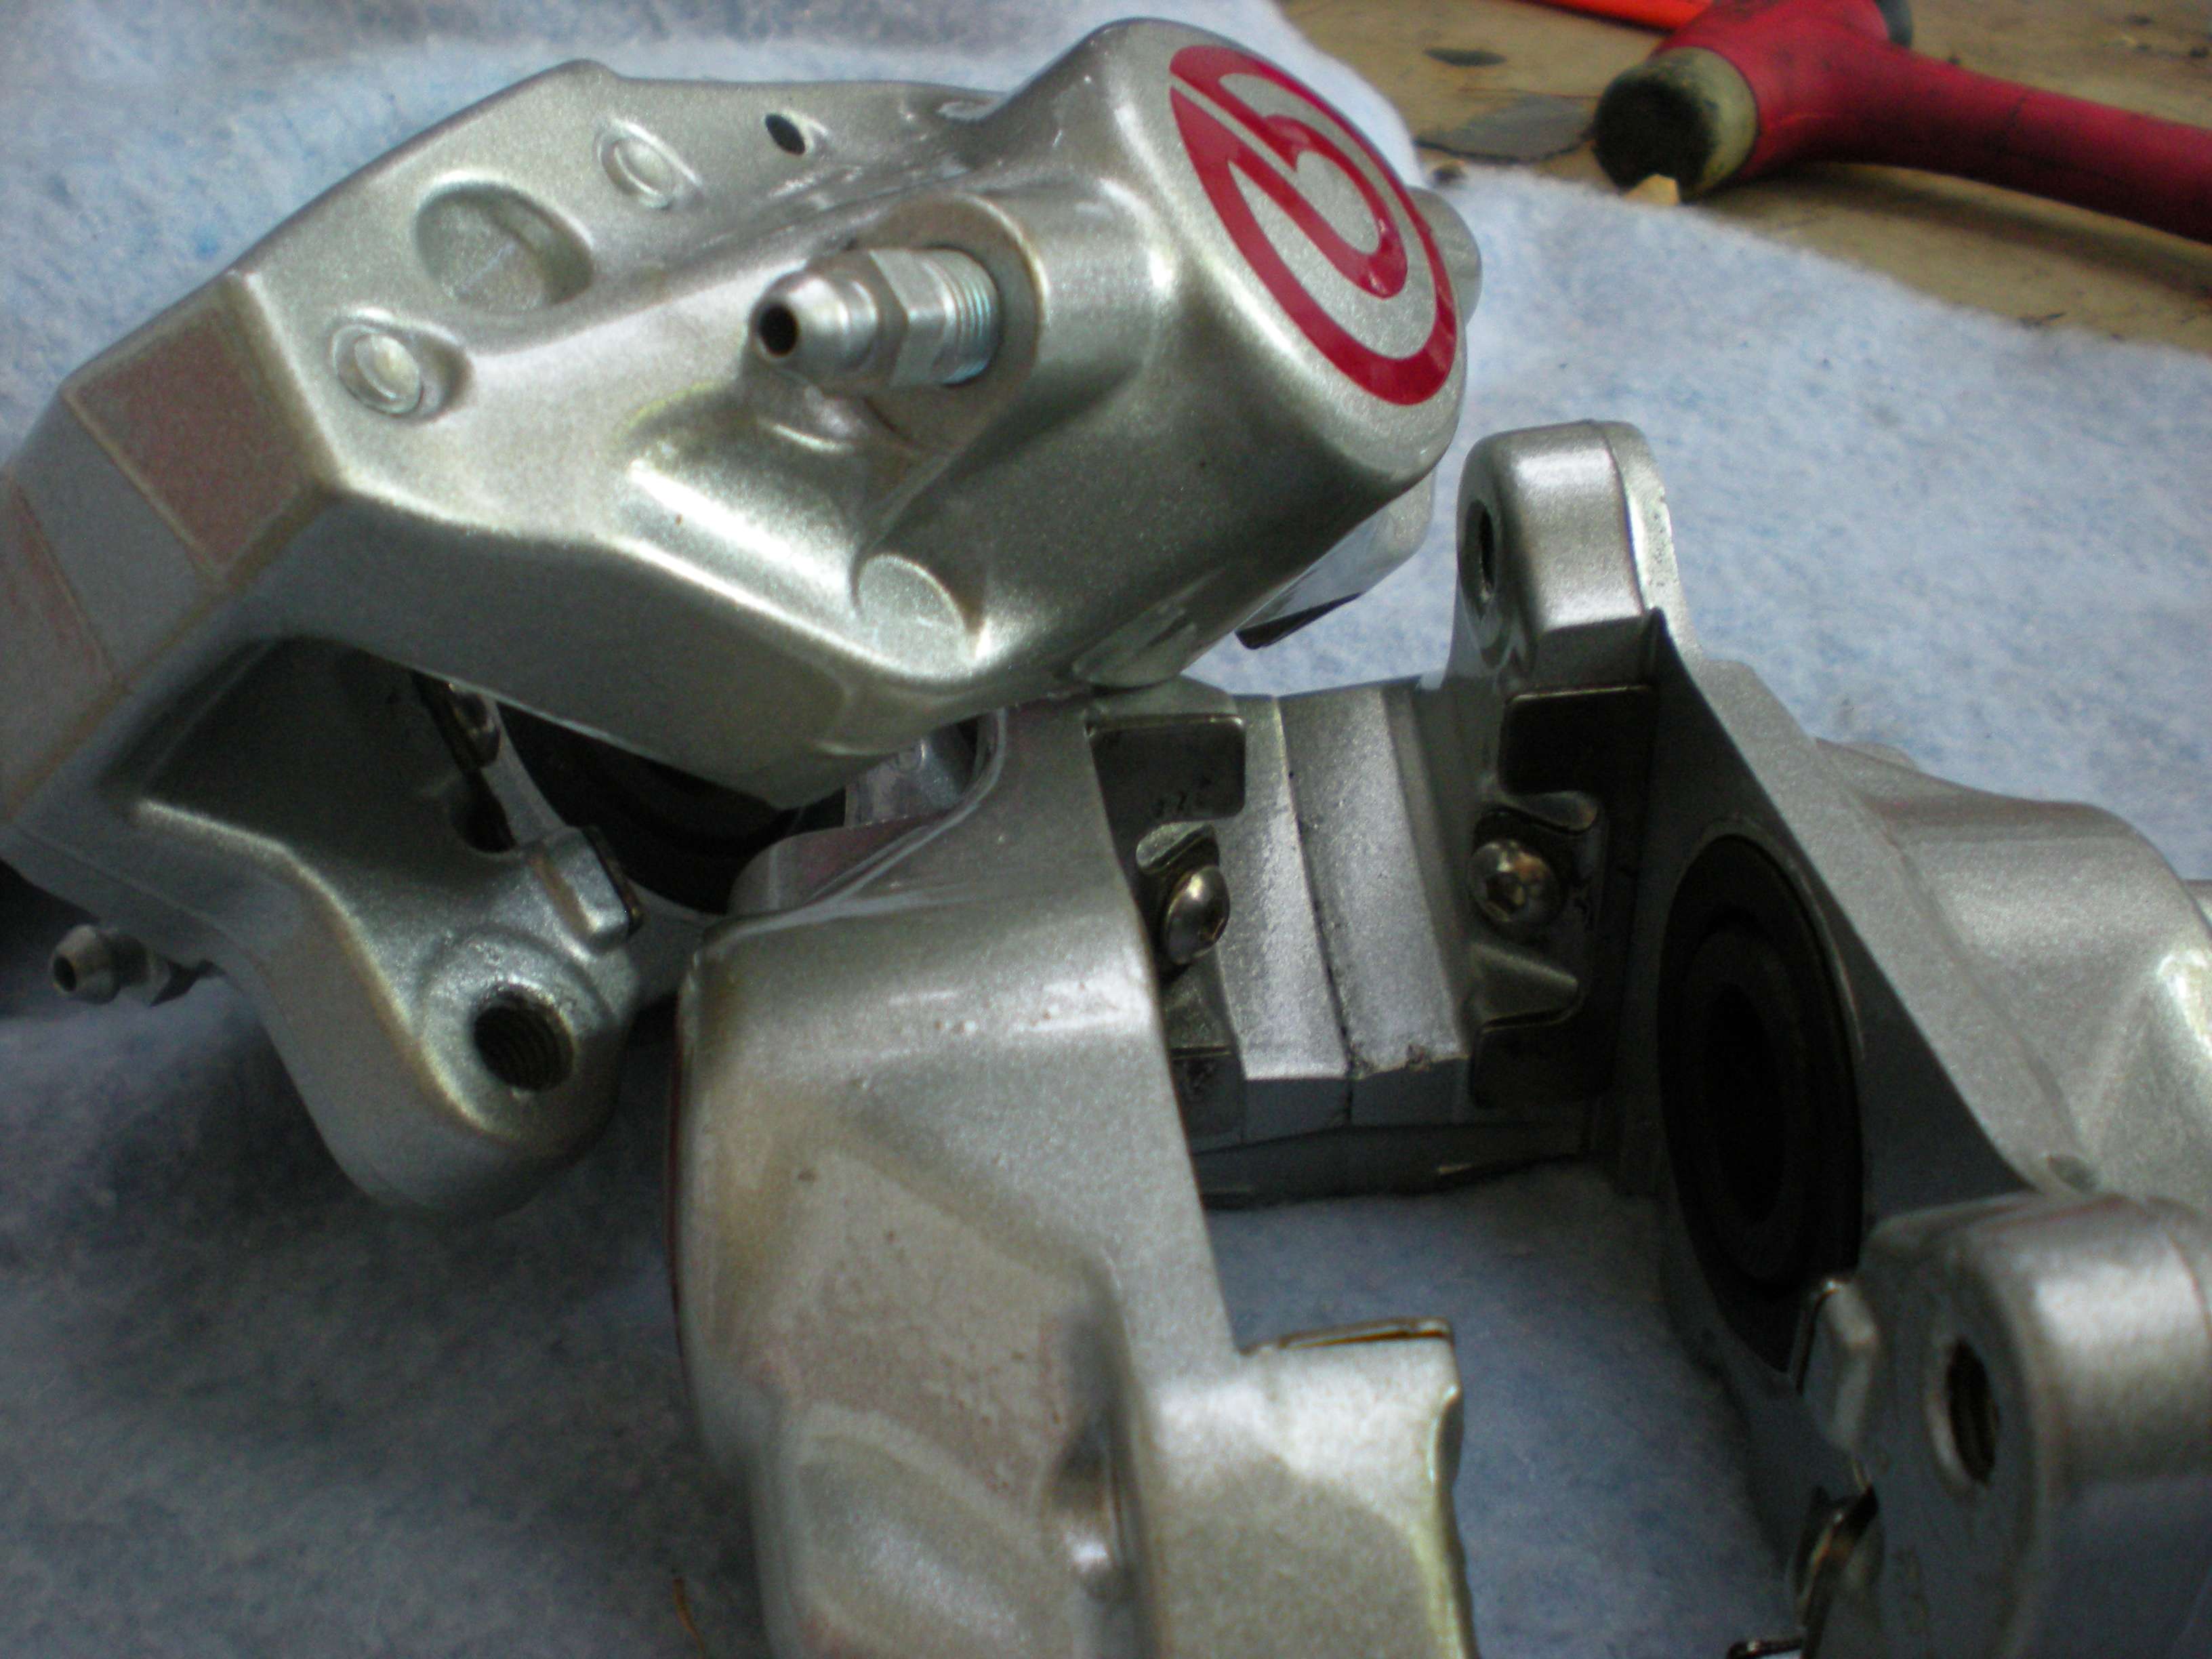 Installed... 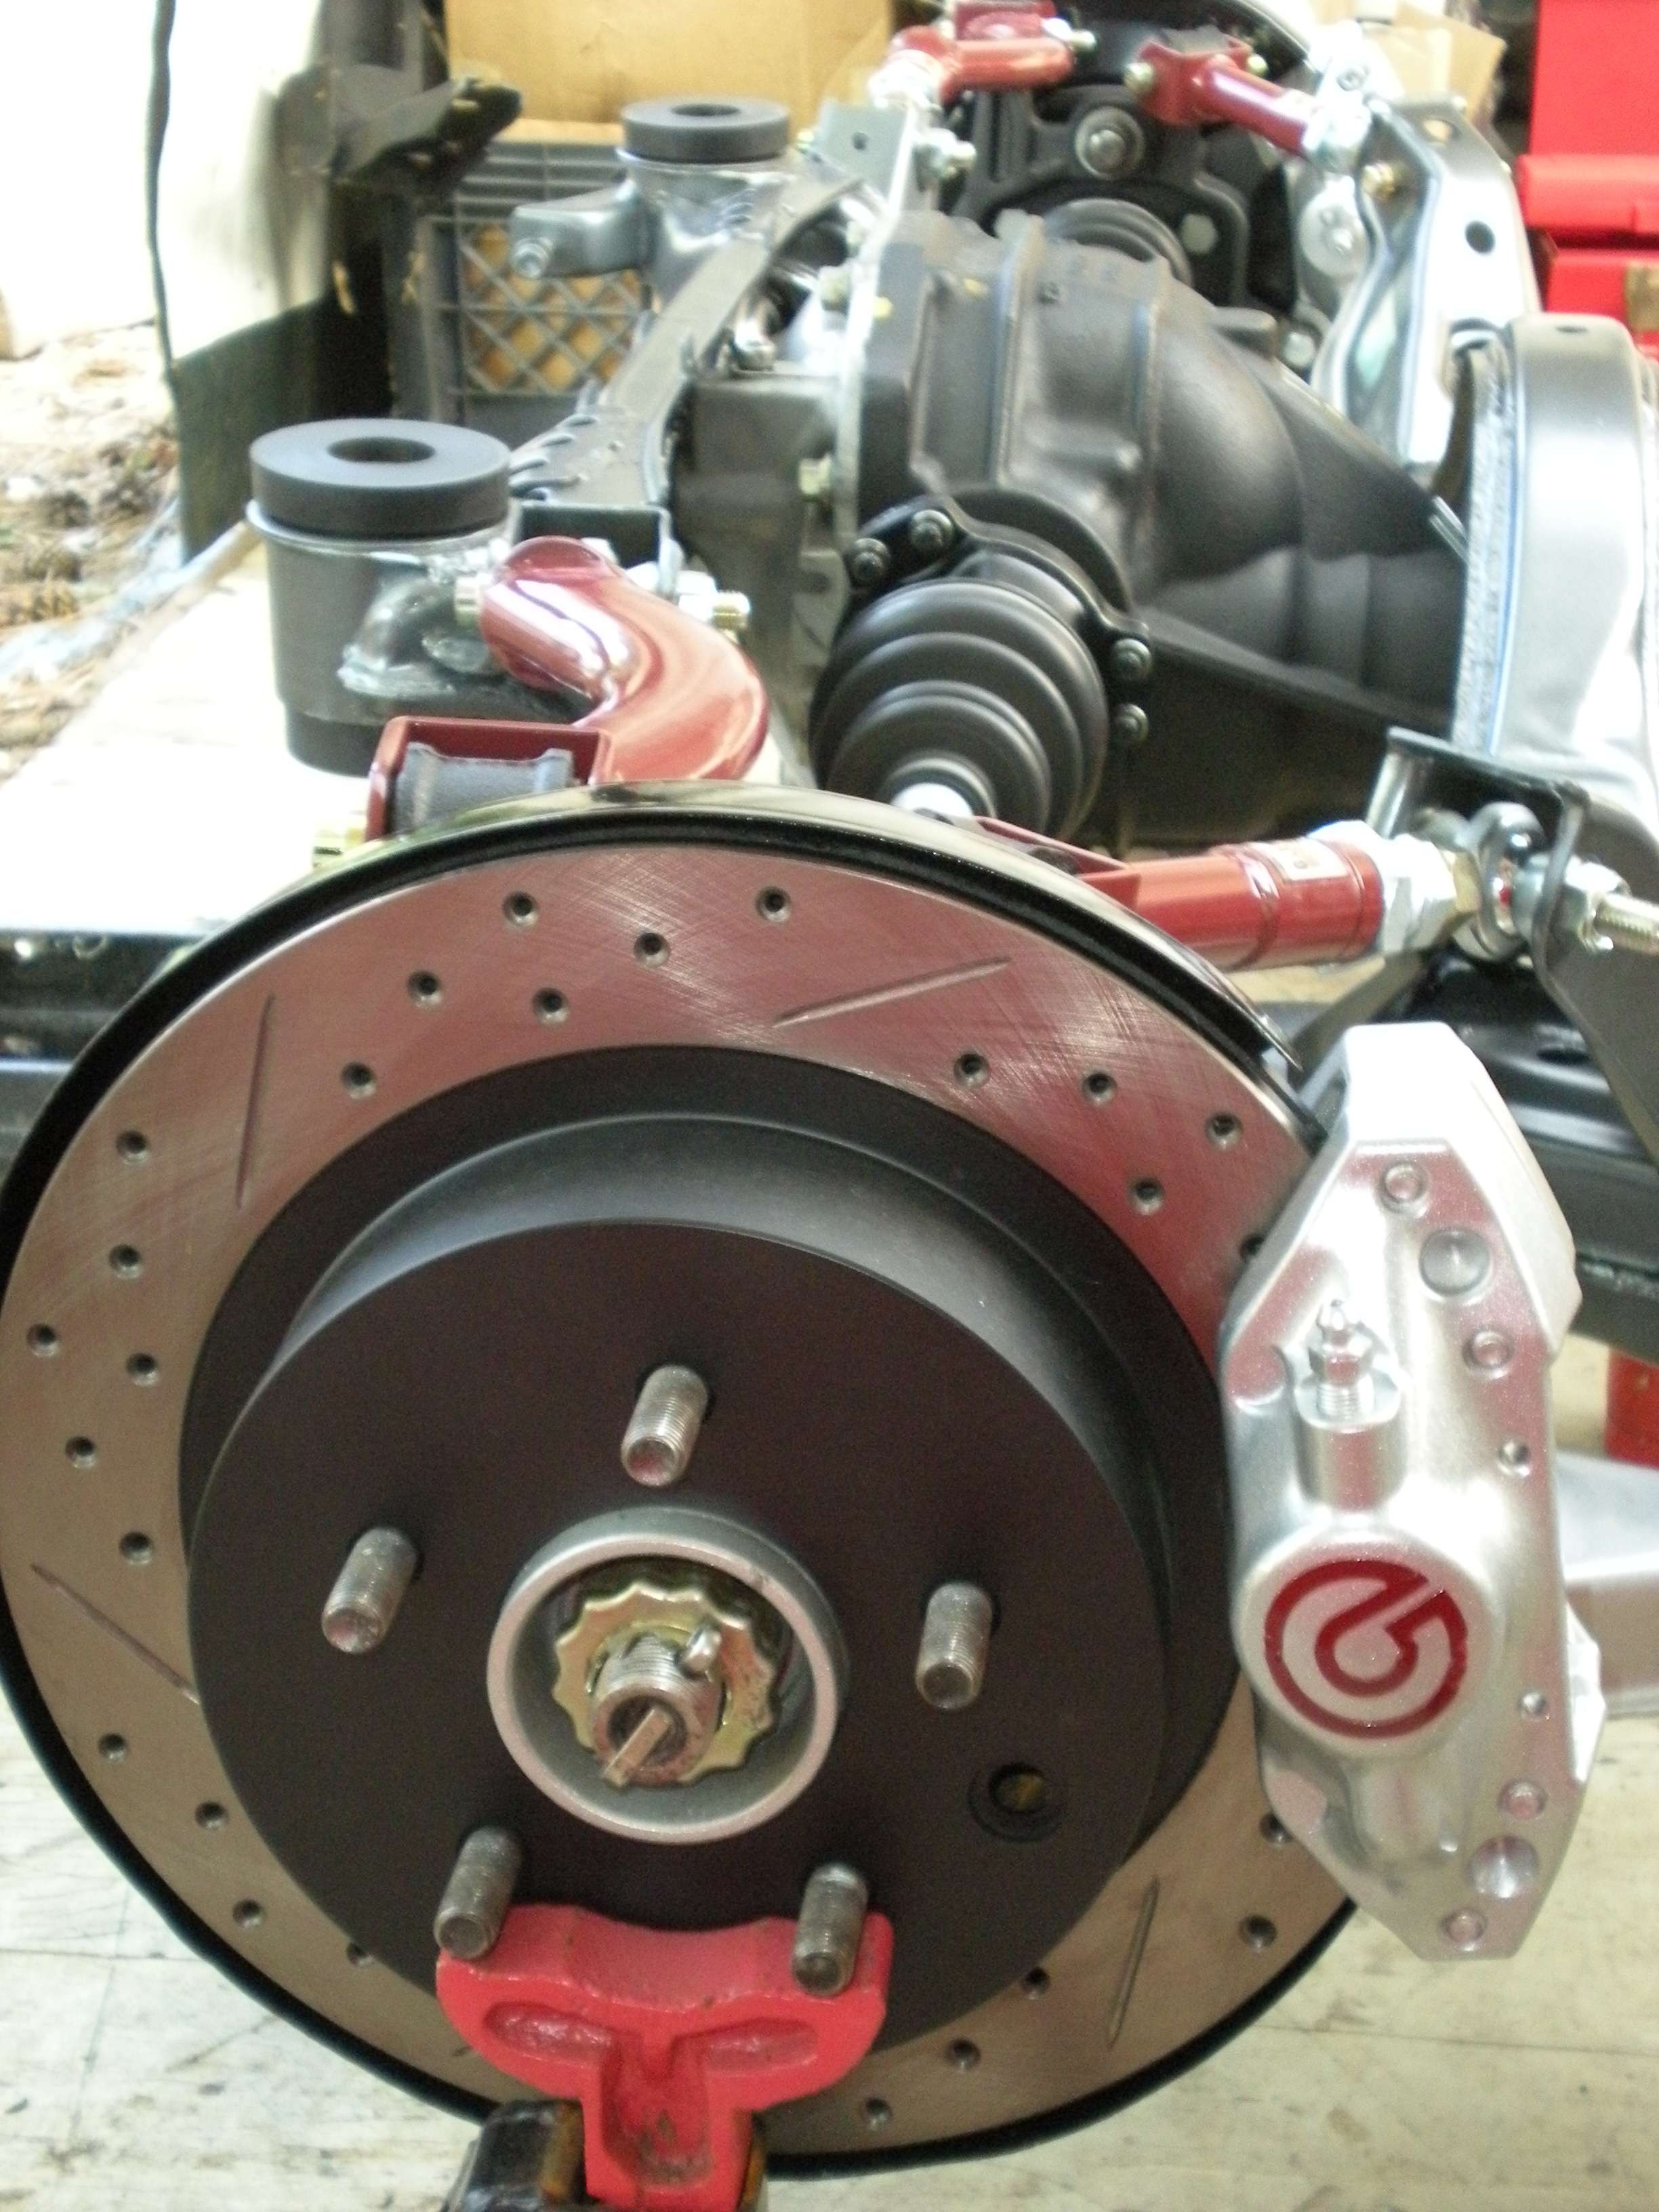 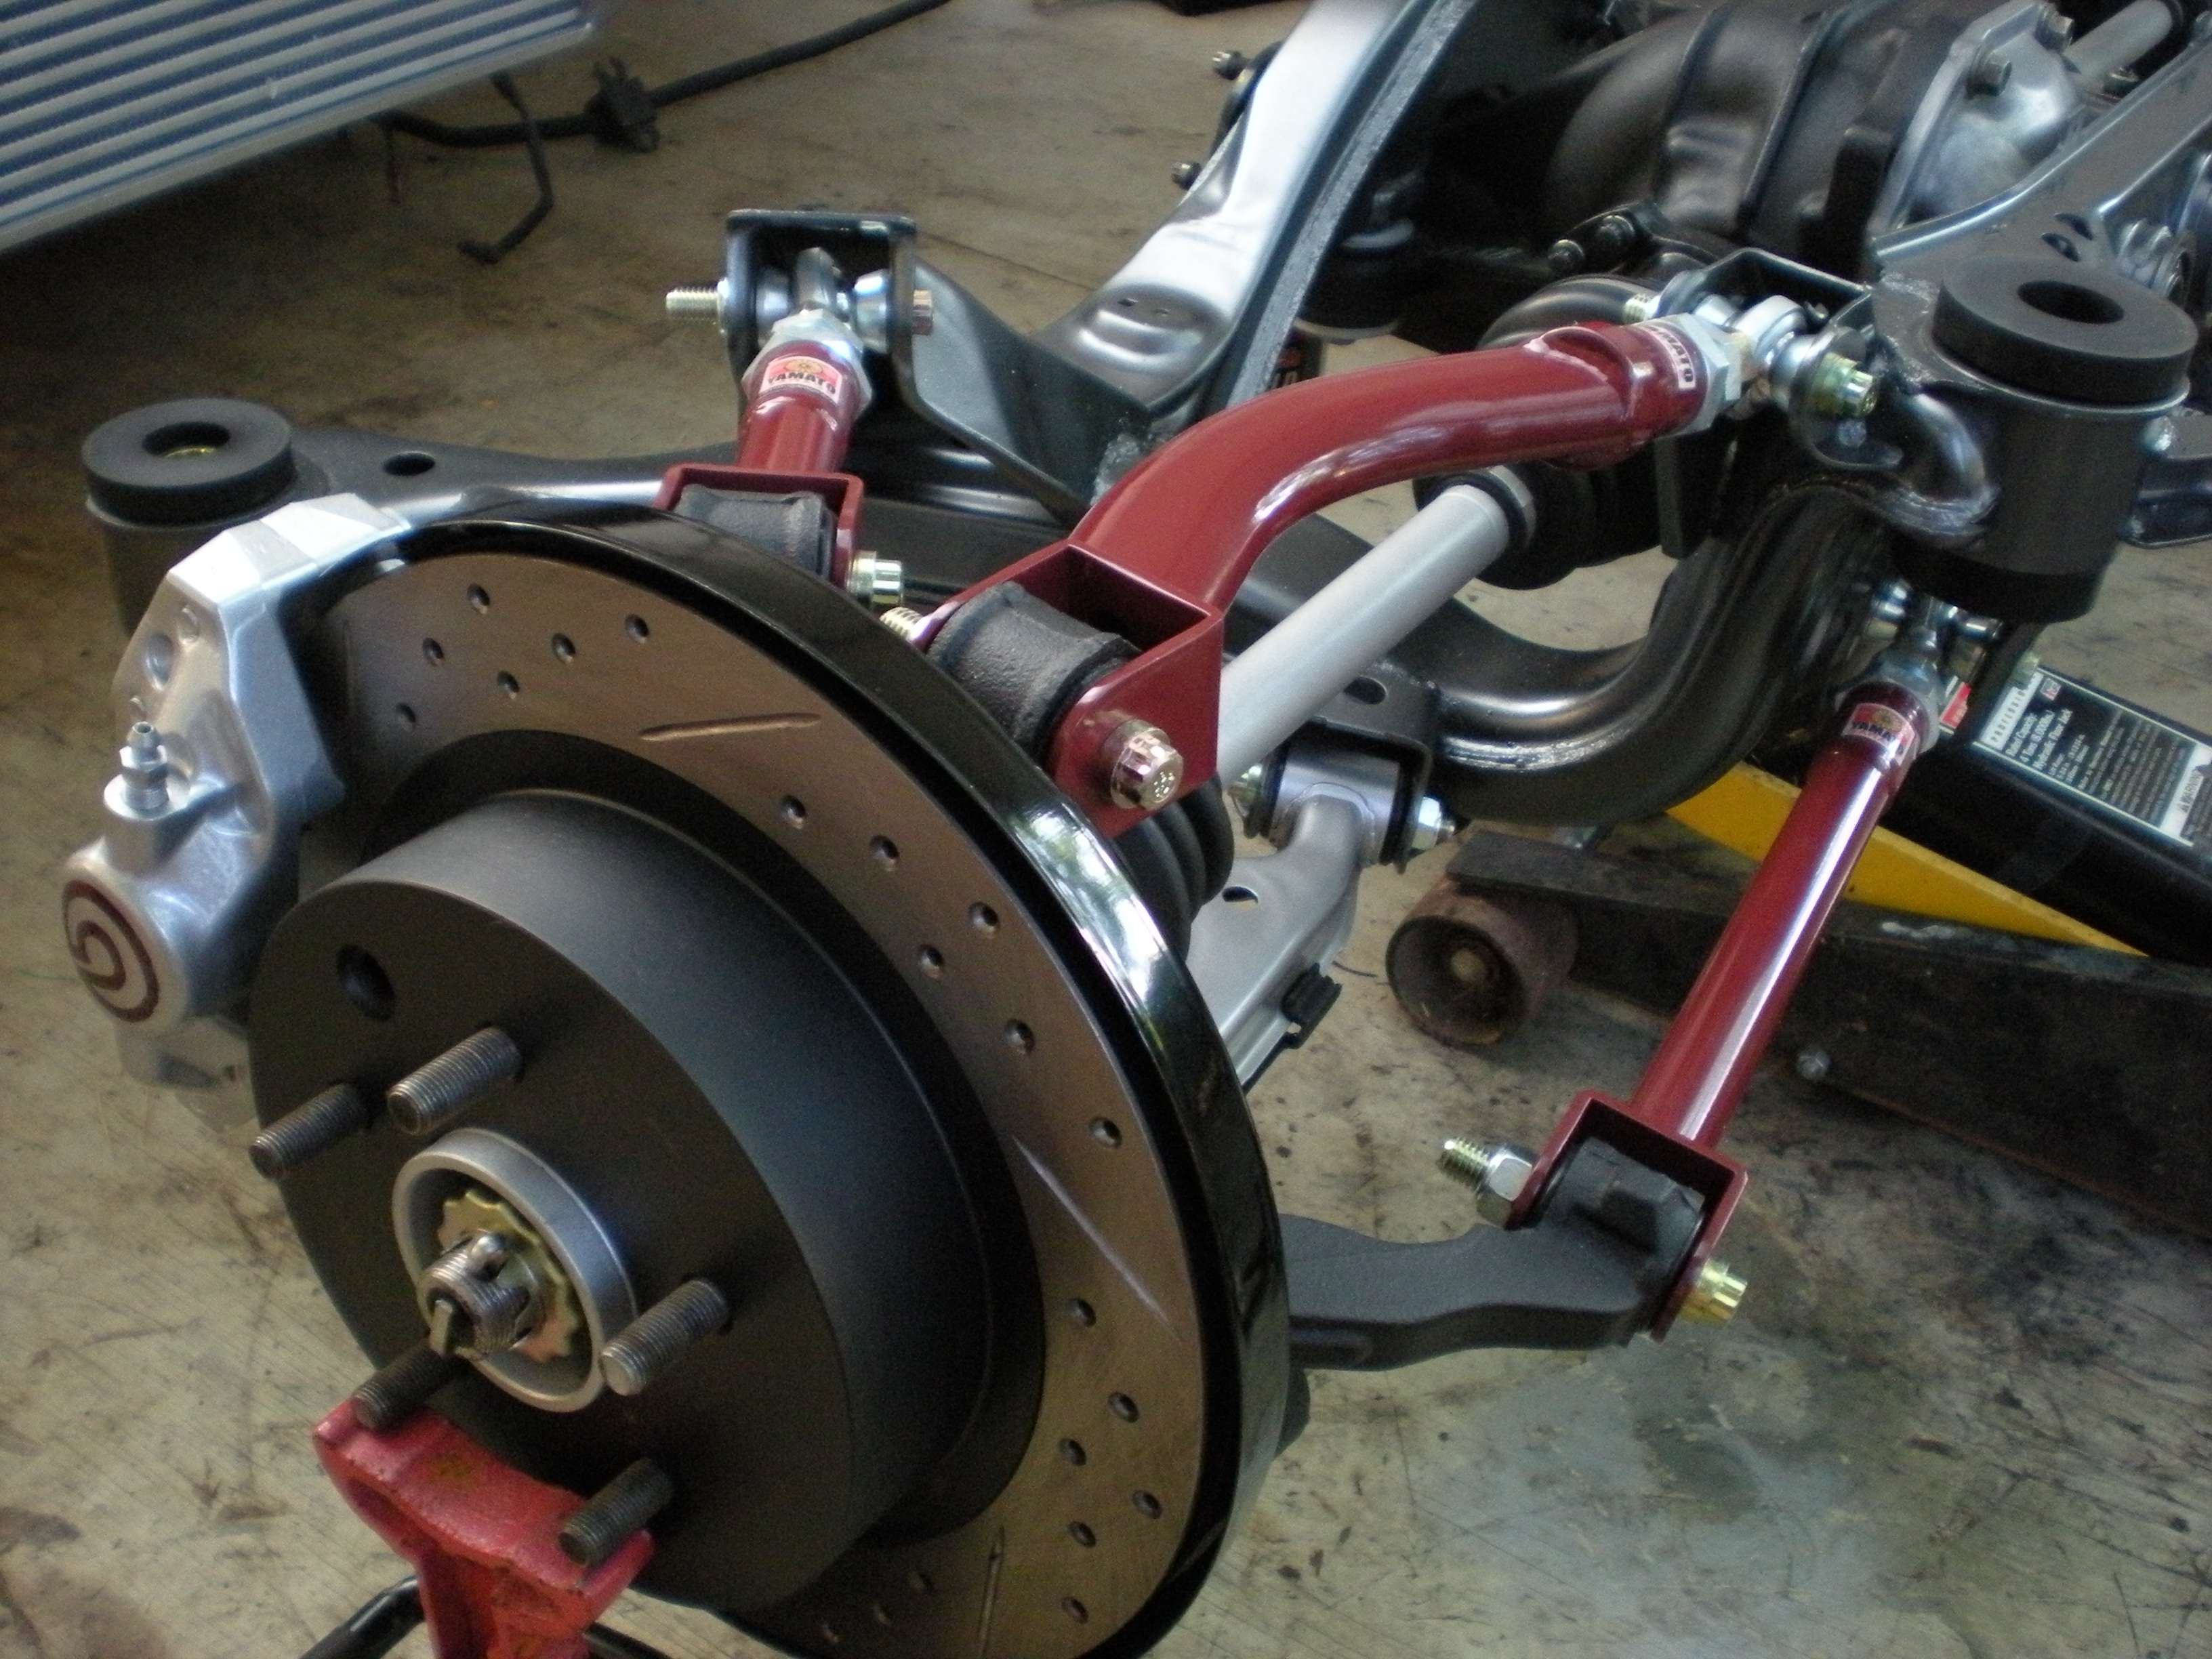 |
|
|
|
|
08-18-2011, 08:59 PM
|
#119 |
|
Zilvia Junkie
|
looks sick. I am also running the evo/sti brembo set up and will be putting them on my new s14. I know what you mean about the calipers looking kinda shitty after they have been used for some time...It's about powdercoating time for mine too. I may have overlooked it on here but what kind of BMC are you running?
__________________
http://zilvia.net/f/chat/331550-slyd...pic-heavy.html |
|
|
|
|
08-18-2011, 09:19 PM
|
#120 | |
|
Zilvia Junkie
Join Date: Jun 2006
Location: East Coast
Age: 38
Posts: 585
Trader Rating: (20)
Feedback Score: 20 reviews
|
Quote:
Thanks man, this project is nearing it's end, and should come out nice. I am using a 1" master cylinder. Originally, I had a Z32 setup, and thought the 1" master would provide a better pedal for a daily driven car. Since putting the Brembo setup on, I have thought the 17/16" bore would be more suitable. However, I feel the 1" will fine on a 240sx with a Brembo setup. Since we essentially have Evo 8 brake systems, you can base your sizing off that, and lucky for us the GSR and MR had 17/16" and the RS had 1". Both attainable bore sizes for the S14. The RS was a lighter car, so the 1" might be just fine on a 240sx, we'll see..... |
|
|
|
|
|
| Bookmarks |
|
|


 Linear Mode

