|
|||||||
| Home | Rules & Guidelines | Register | Member Rides | FAQ | Members List | Social Groups | Calendar | Mark Forums Read |
| Builds (and builds only) Got a build thread? It goes here, build threads anywhere else on the forum will be locked and never moved. |
 |
|
|
Thread Tools | Display Modes |
 11-04-2019, 06:13 PM
|
#181 |
|
Zilvia Junkie
 Join Date: Feb 2008
Location: Carry Water, Chop Wood
Age: 36
Posts: 507
Trader Rating: (0)
  Feedback Score: 0 reviews
|
update time.
Re-built the front and rear brakes, had to get an 8MM slip-on spacer for the fronts to clear the caliper-back of wheel. Rears were fine.  Decided it was time to see if the engine would start and run after putting in.  I put the rest of the parts on the engine to start it. I'm not sure why it takes full throttle blips to start while cranking, it runs perfect after starting though! I didn't even change any wires on the harness. I have the coolant lines looped and will need custom A/C lines made when the time comes to put that stuff back in. So, my girl and I both follow some wheel pages on Instagram and have shared mesh styles back and forth for her car... found these Volk Racing wheels for a good price from vrwheels. i had to test fit them on the car (nice change of scenery is good?) 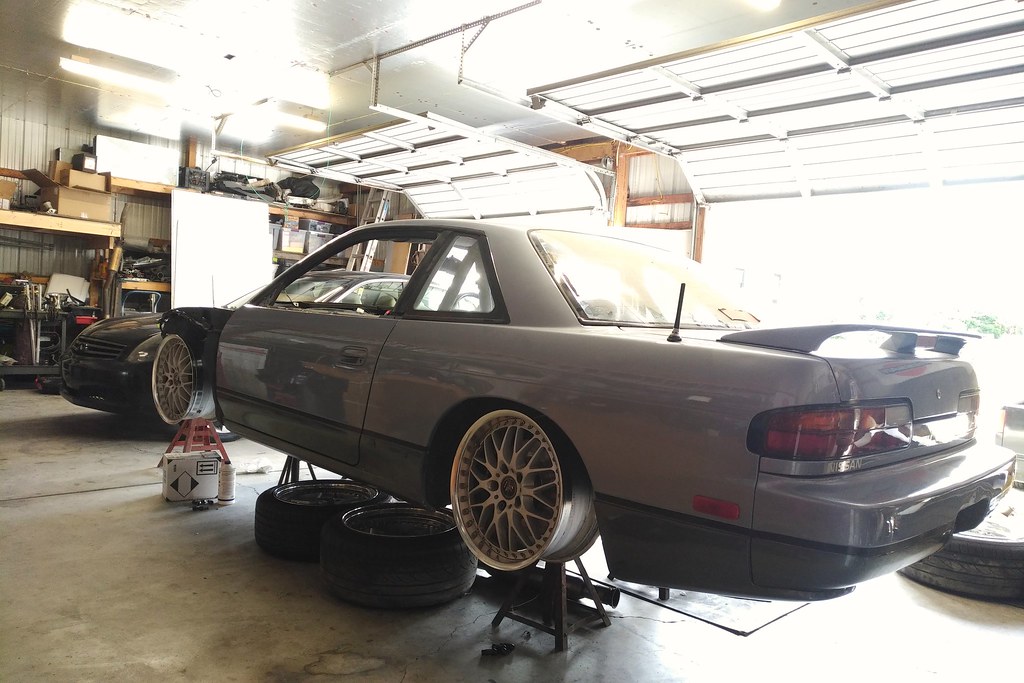 After i got the car running, i ran wires/relay for the fans (i used the old small headlight retract button from the 180sx as a switch for the fans instead of a thermo controller.--i need a new sticker of fan blades with arrows around it for the switch) and changed the steering rack bushing for a gktech alloy version. I will need to make a line loop for the power steering in/out at the shaft gear box and eventually de-power the rack properly with grease and adjusting the tension/backlash. pulled the car out of the garage (under its own power) for the first time in over a year!  then got it stuck on the apron (needed more wood down) pulling it back in  with no neighbors home or outside to call over, i had to get the jack out and lift the rear of the car and put more wood under the tires. It rolled back out of the garage, put more wood down and floored it, scraping the frame rails getting back in. with no neighbors home or outside to call over, i had to get the jack out and lift the rear of the car and put more wood under the tires. It rolled back out of the garage, put more wood down and floored it, scraping the frame rails getting back in. It is REALLY weird driving it on the right side of the car!  I Put the carpet in and finished up tucking the wiring to its final location and started trimming the glovebox to allow access to the fuses and relays if need be. I'm going to make finish panels for in the glovebox and mount the SAFC and A/F gauge. The water temp and oil pressure will be mounted under the radio or on the dash again, not sure yet.   Needed a seat bracket for the bride rep i have, (was gonna use it for a simulator but need a seat for the car) so i bought a Garage Star one and i'll probably get an s14 for now for the passenger side.  Since the engine bay was pretty much all together except cowl trim/wipers (still need the windscreen channel cleaned up before it goes back in), i bolted up the fenders,lights,grille, and new headlight covers i re-made.     There's a million other little things i want/need to do to the car yet, just wanted to share till they all get done and get around to post them in one shot. Next year i plan to have the body re-done and re-spray the same colors. i would like to drive it before then and break the car back in before the snow gets here in PA... -Jimmy |

|

|
| Sponsored Links |
|
11-04-2019, 06:52 PM
|
#183 |
|
Zilvia Addict
 
|
Solid update. PA's getting colder by the day, godspeed! Seems at this point you've created a good workplace to do shit over the winter. I've ran out of time to get a winter beater and may be driving my mint S13 in the salt if I don't figure something out soon.
|
|
|
|
|
11-07-2019, 08:33 AM
|
#185 |
|
Zilvia Addict
|
Look great Jimmy! The attention to detail is best!
__________________
|
|
|
|
|
08-01-2020, 08:35 AM
|
#187 | |||||
|
Zilvia Junkie
Join Date: Feb 2008
Location: Carry Water, Chop Wood
Age: 36
Posts: 507
Trader Rating: (0)
Feedback Score: 0 reviews
|
 It's been waaaaaay to long for an update! I have posted in a few other threads on here, but i just want to update my build thread! It's been waaaaaay to long for an update! I have posted in a few other threads on here, but i just want to update my build thread! Quote:
 Quote:
 Quote:
 Quote:
 --------------------------------------------------------------------------------- Next on the list of putting this puzzle back together was the cluster. Using the JDM silvia book to find what goes where for the chassis, and the S13 KA24DE engine harness diagram, i made my own pigtail with the deutsch connector off the back of the cluster. I bit the bullet and bought the crimp too that goes with the connector set and im glad i did. 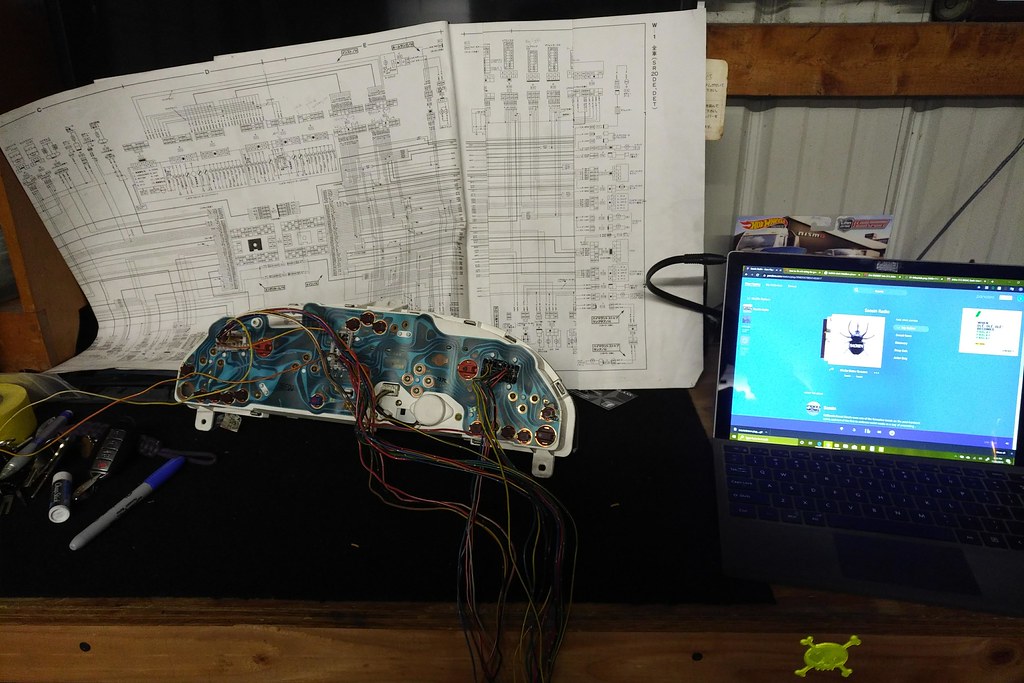  --------------------------------------------------------------------------------- On black friday 2019, Unique Auto Creations (UAC) had a sale that they were going out of business and wanted to get stuff specific to the RHD conversion like the carbon fiber cup holder and wiper motor cover. 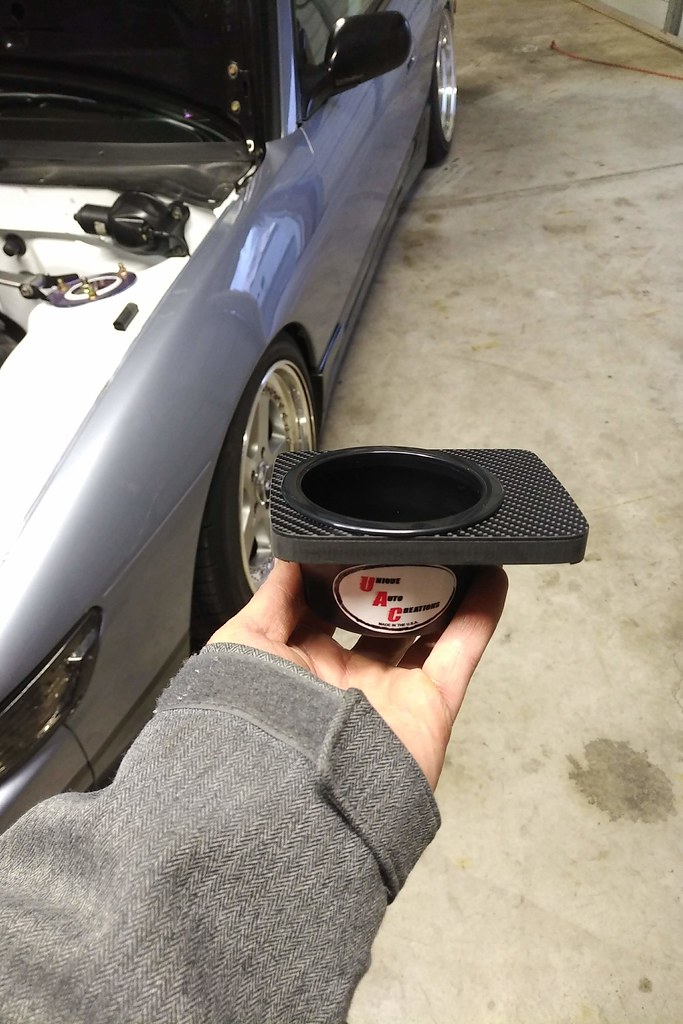  I made a panel where the double din goes temporarily (to hold the water temp/oil pressure gauges) since i sold the radio brackets and decided to not have the radio at the moment. I painted it black and put some carbon fiber vinyl to jazz it up and match the cup holder. The gauges will go back on the dash when i get the radio brackets.  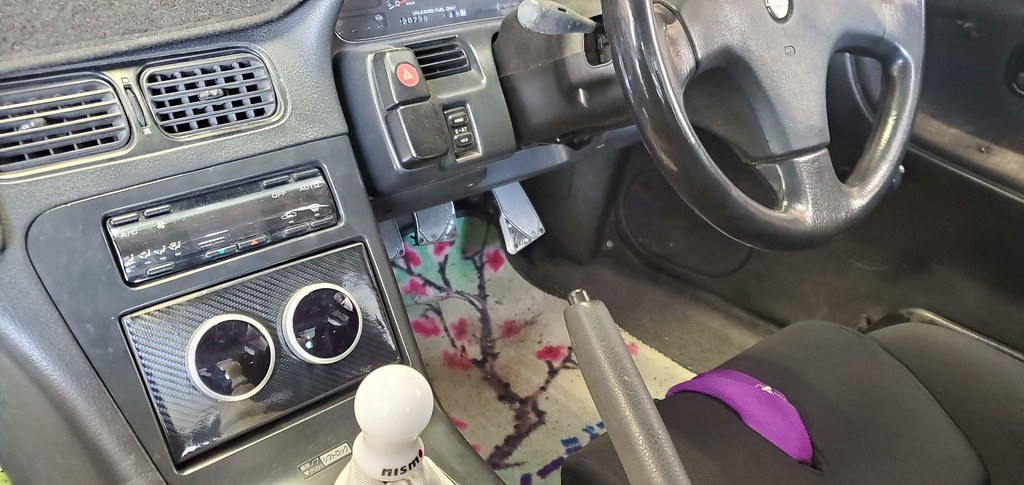 After just having the radiator sitting in the new bottom mounts, i made some for the top. maybe a revision later on but, it's functional and i polished it a little bit.  Another project i started but is just sitting is a spare upper intake manifold i shaved all the casting marks and threaded holes i'm not going to use.  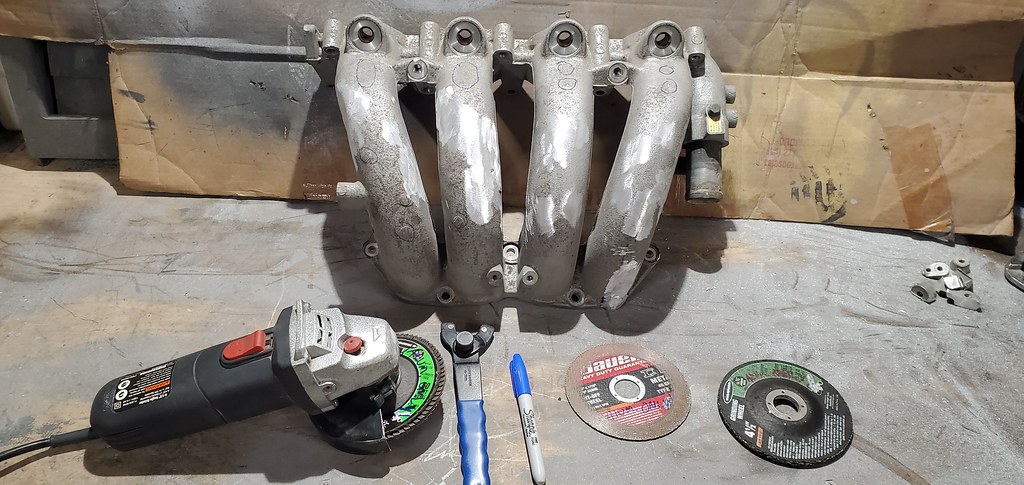 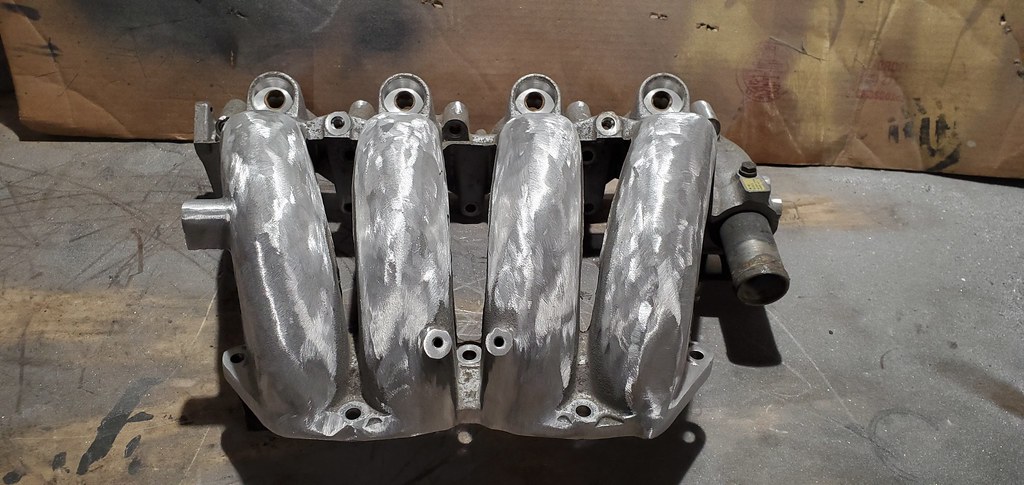 After all the grinding i used my sand blaster and used a really coarse media and it made the finish uniform and back to the rough cast finish but made it kind of shiny (which i will leave that way) and will powder coat it clear when the time comes. Also bought some stainless plugs for the pcv ports.  Back in like March/April, I Bought a Woodward Fab Manual Tubing bender and a 1-3/4" die set. I mounted it to the floor and it sat there for like 2 months until i got around to using it.  Something i'm kind of proud of doing myself is bending the front cage bars. Started making a rough template with some junk metal i had laying around to check angles and whatnot and started bending.   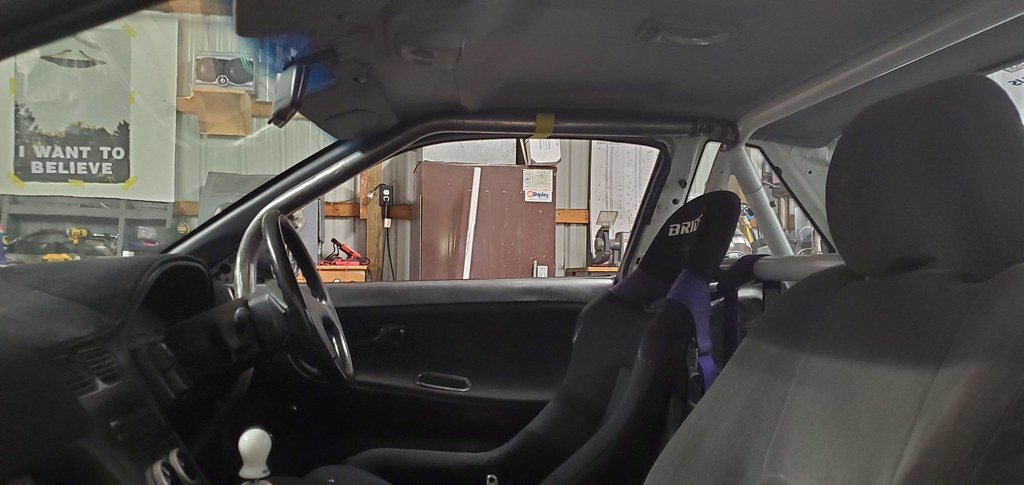 Had to notch some tubing pieces for the hinges   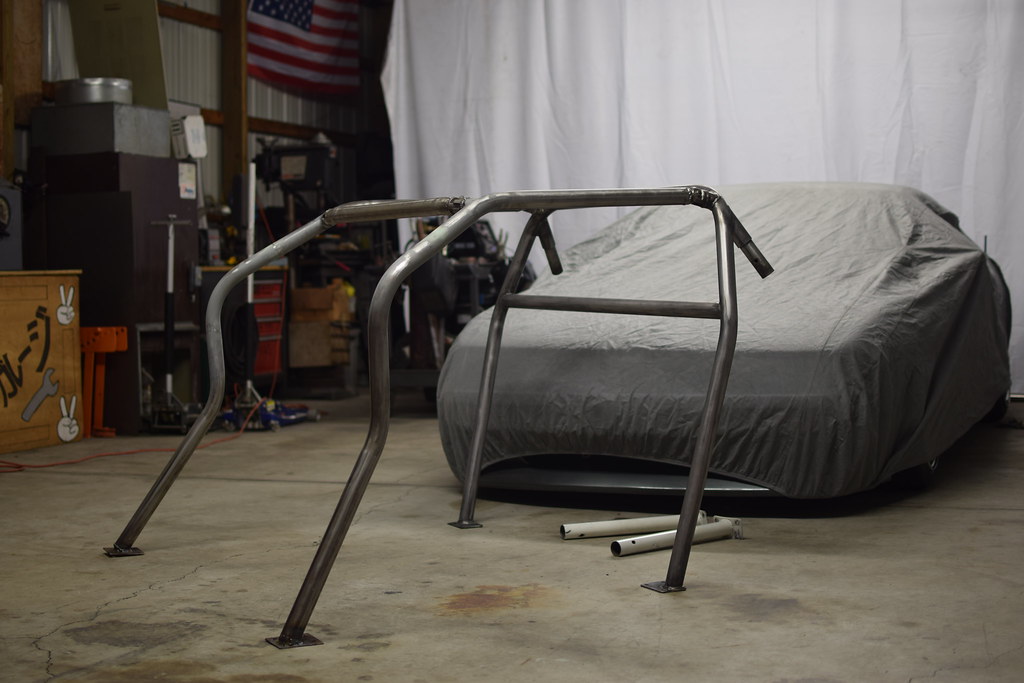  You didn't think I'd leave the dogs out of this update would you??? IZZY had to come out and supervise the manual belts i put in also.  When the cage was curing, i had the chance to put the rest of the interior in the rear of the car, although i thought the rear panels i made holes into were way worse than they are, they fit nice, but i needed rear seats. so, i picked them up locally along with new door panels with nicer vinyl and grey door inserts.  I took apart both pairs of door panels and re-sprayed the little pieces/pockets/knobs to re-fresh them to go with the nice(r) door panels.   After i put the rear pieces in, and the cage was in, i found some purple footwell lighting leds to go with the theme of the car...   I was collecting parts for the interior re-fresh... restomodninja decal sets for the wiper/turn signal stalks and an overlay for a button i re-purposed for the radiator fans!! I had a friend re-do the wiper stalks since he's done 1:24 models for a long time and was familiar with the water slide decals. (told me the restomodninja ones are really thin, and if you've never done water slide decals before, they can tear really easy) I also have some button decals coming for the others on the cluster surround. Decal for the radiator fan switch. Goal was to keep the on/off factory looking. 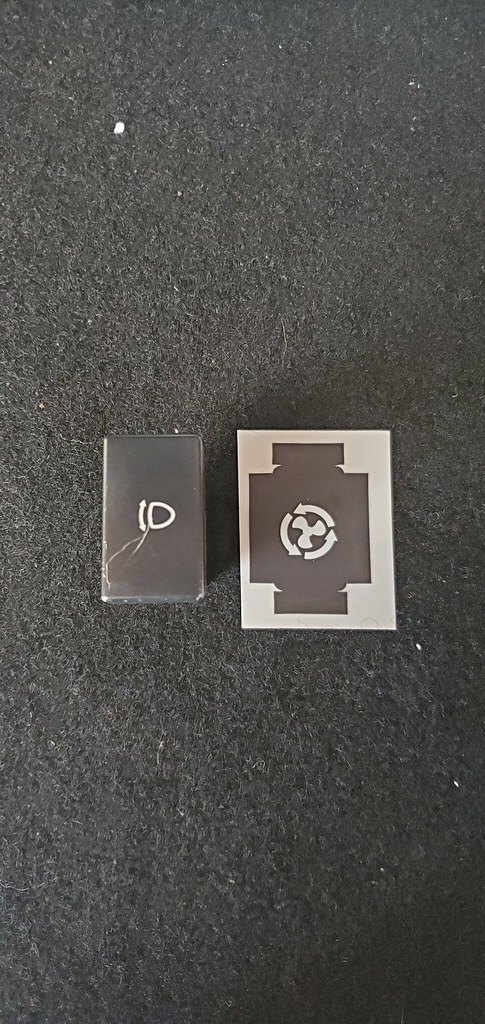   Since I put the car back together, i've driven it to a couple small events and taken some pictures with my camera (i got a new 35mm 1.8g lens).         My most recent purchase was this Alvis 365mm Wooden wheel. i re-furbed the spokes and polished them. they were pitted and oxidized but cleaned up with some 1500/2000 grit and some polish compound.  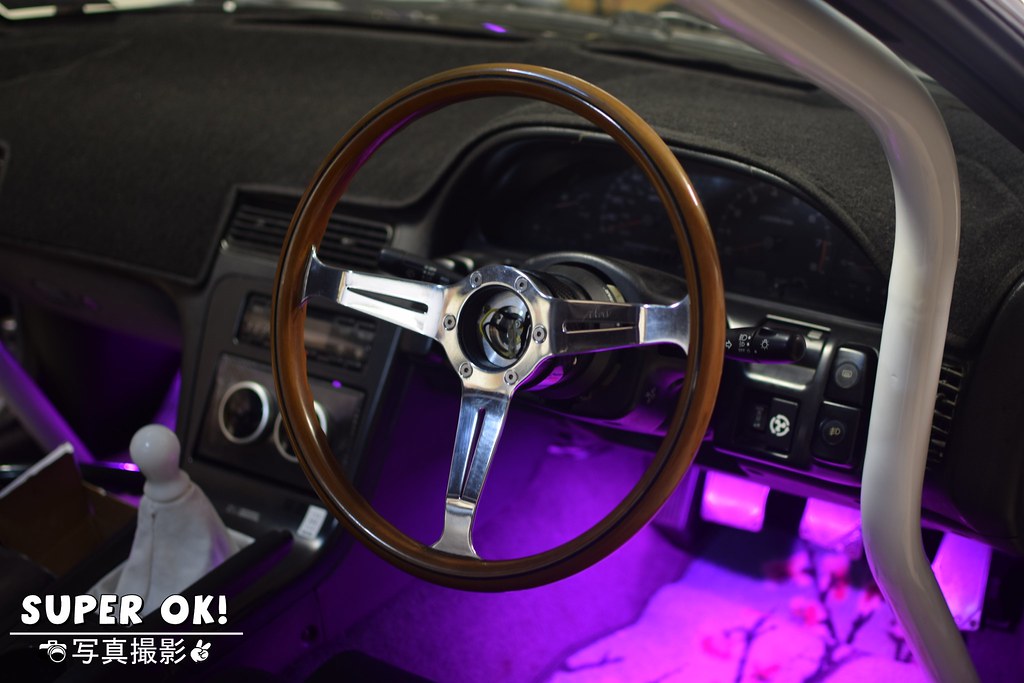  I have 2 more Lips coming for the rear wheels (eta was like 10-15 weeks from the email threepiece.us sent in the middle of july). They are 1" wider. I will be re-building the wheels, painting/powder coating the faces along with getting some rear overfenders OR having to modify the quarters/front fenders when i re-do the body work on the car. Next on the to-do list is the rear z32 Ebrake setup, and while i'm in there, new cv axle boots/steering rack boots i'm pretty sure i have all the parts, just have to find some extra time where i can take it all apart. i will have a 1 piece driveshaft made as well since im digging that far into the job, also re-coating the underside of the middle part of the car since it needs it.    |
|||||
|
|
|
|
08-04-2020, 11:33 AM
|
#189 |
|
Zilvia.net Advertiser
 
Join Date: Nov 2005
Location: Michigan
Age: 36
Posts: 5,573
Trader Rating: (16)
Feedback Score: 16 reviews
 |
Nice setup you've got here. I appreciate the time taken to make everything look smooth and clean.
__________________
Build: http://zilvia.net/f/showthread.php?t=643065 Friends don't let friends buy knock-offs. |
|
|
|
|
10-10-2021, 02:28 PM
|
#191 |
|
Zilvia Junkie
Join Date: Feb 2008
Location: Carry Water, Chop Wood
Age: 36
Posts: 507
Trader Rating: (0)
Feedback Score: 0 reviews
|
Hi Zilvia !
 I've been meaning to update this thread, I will be getting off mobile-social media for a while at least, and back to using the boards more. While it is nice to see everyones up-to-date builds on Instagram, its such a time waster for me and i think its progressed to that numbing point of mindless scrolling and the only way i feel not using it is quitting cold-turkey, pretty much like i did with Facebook. I'll still leave my page up and active but i just wont check it, if any. ---------------------------------------------------------------- Anyway, After the rear E-brake parts i pieced together and cv boots was accounted for, i dug into that job. the old boots were bad and definitely needed replaced.  And fuck the z32/q45/r32 rear drum e-brake assembly, holy good god !!   Went to a few end-of-year events and took some pictures of the car for what was a mild Christmas we had around PA... 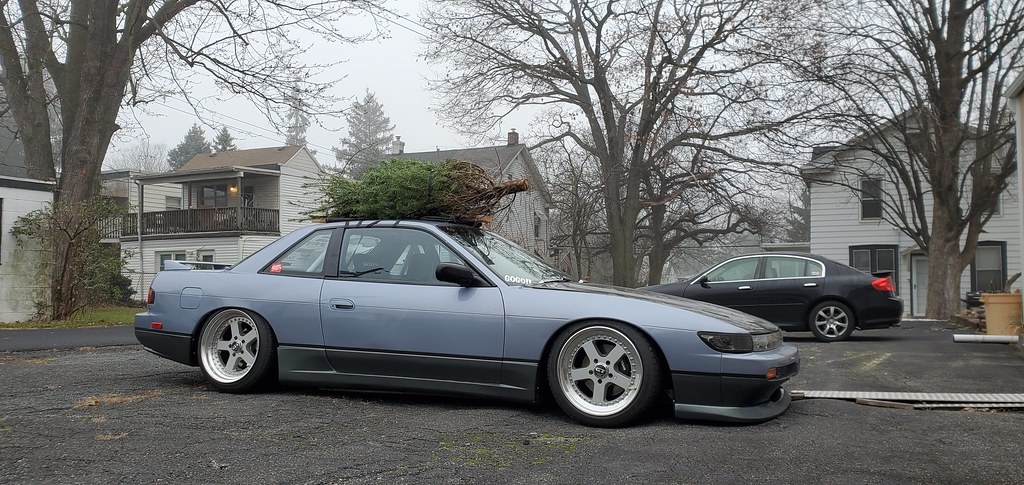  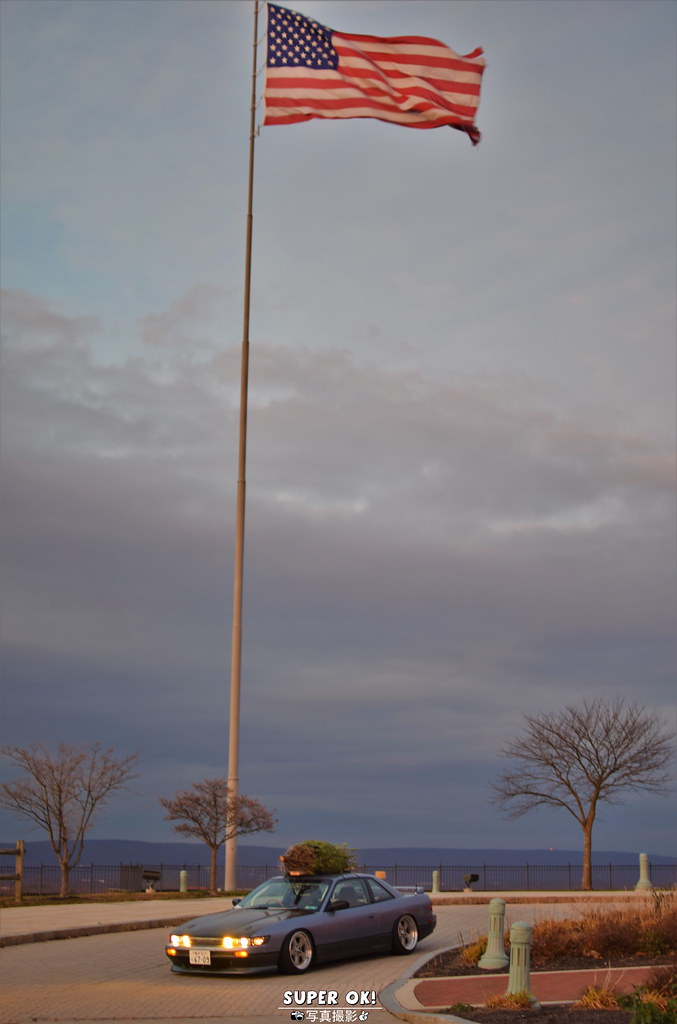 ------------------------------------------------------------------------- Around the beginning of February 2021, I FINALLY received the new lips from Threepiece.us. (ORDERED JULY 4th/5th 2020) While I was happy to have them, I think they thought they were doing me a favor (because of how long it took) by polishing and drilling the hole for the valve-stem (which i didn't want, incase they didn't drill it the correct size, and i was going to have them all Chrome plated anyway). **Spoiler, I ended up polishing them all again  !!** !!**  Since I had started prepping them taking them apart to clean the sealant off and clean/re-polish the hardware It was time... TEST FIT !    I realized that the body was definitely going to need work to fit them. Buy wheels and fit the car to them... Good thing is, it was still going to be mild for my taste... ------------------------------------------------- Another side project for the garage. I needed a new sandblaster that i could put bigger stuff into. Checking dimensions/options/mods of the bigger harbor freight model, i decided to make my own, I found the plans online and got some plywood.... It's roughly 22"x46" and the back is 30" tall. I also used some parts from the bench model I had (glass/frame, glove rings, lid latches). Started with the box and legs.  made the hopper out of rebar with the intent to line with sheet metal eventually, but the plywood works ok. just doesn't let the sand flow down quick enough sometimes. i might add a small electric motor with a counterweight to vibrate the sand down to the base as i blast. 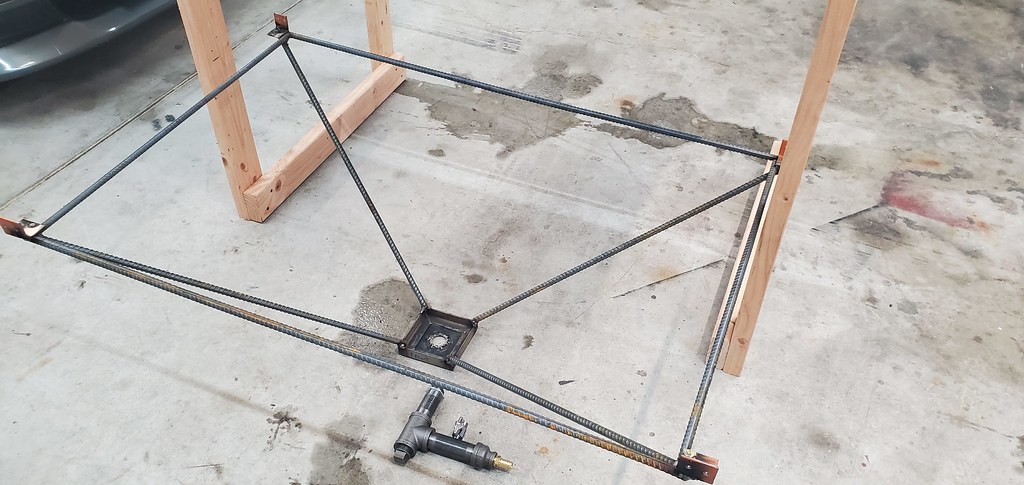 this is the sand metering valve i made with plumbing parts. This is a common mod on the harbor-freight model. i tack welded an electrical conduit nut to the hopper base inside and the other on the bottom threads locks it in place. the 1/2" ball valve meters the sand flow to the gun for performance  sealed it up with some all weather-flexible black gutter sealant.  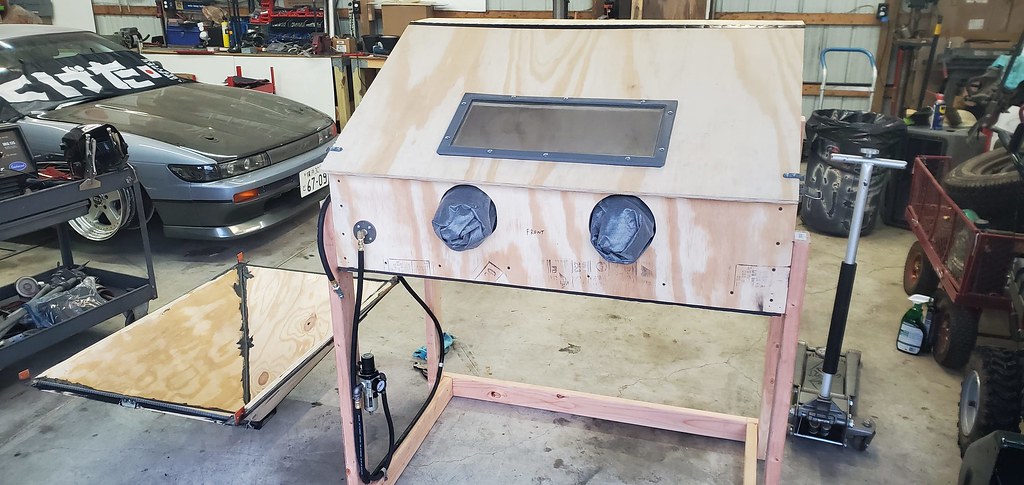 Added the air dryer/regulator on a leg+ routed the air line (3/8" coupler/line from the wall outlet to keep good flow) 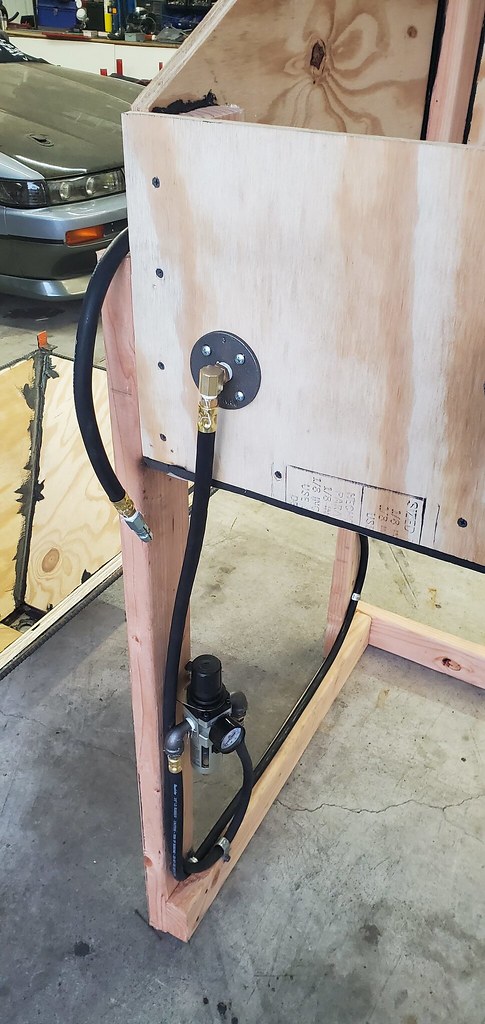 I also saw a popular HF mod was a cyclone dust collector, I found stuff to make one that i just attach my shop-vac hose to.. Its some buckets and pvc fittings. It reduces the dust into the vacuum by like 90%, like a pre-filter..  Cant forget to bend up the baffle to the hose outlet. 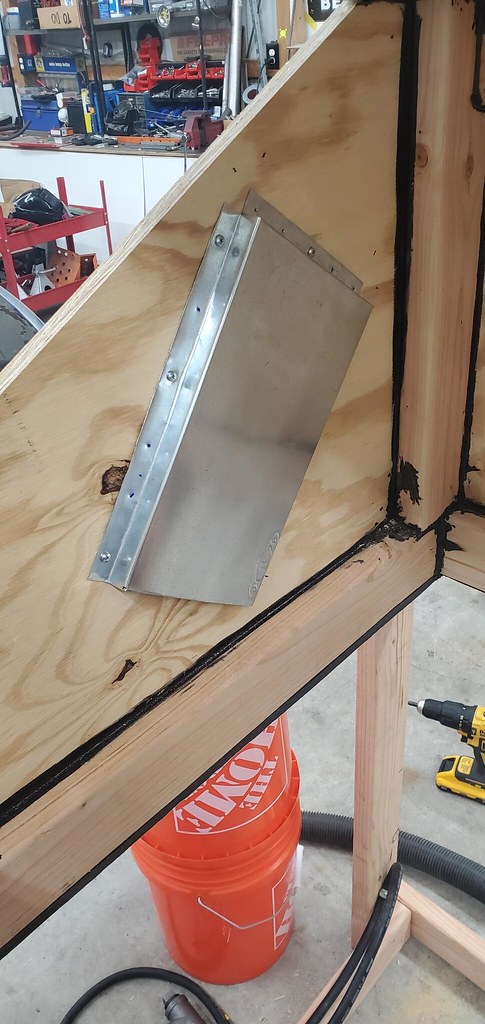 Next up, was the air supply to the gun. I wanted a foot air-control and a v-shaped gun, tons of other different styles, I like the feel of the v-style in my hand when blasting. I ended up making this... 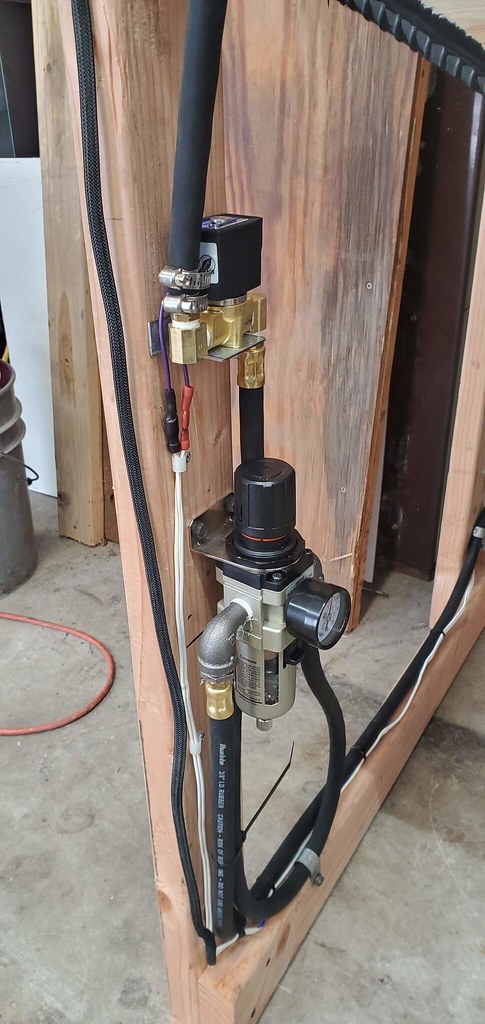 Its an electric solenoid valve that opens when i push momentary switch, which is on this..    It's a popular design and i can get different boron/ceramic nozzles on amazon/ebay for it.  Put some glass flood lights in some sealed sockets for light. 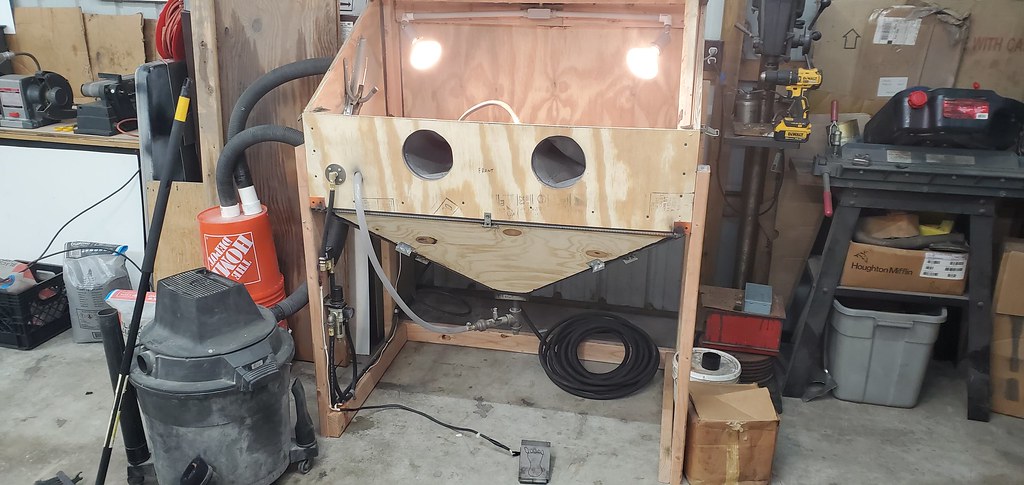  ----------------------------------------------------- Having the compressor running/filling constantly (but to exceed the duty cycle too much) i made this muffler with some wood/duct-work/iron pipe/fittings. It actually made it significantly quieter.  Ended up just making a cabinet for it and put rockwool inside for sound and a box-fan on top to pull the heat out when running.  ----------------------------------------------------- I ended up blasting the wheel faces and my lug nuts to powder coat them. I made the stand to hold the faces while I powdered them and then for after they baked and a piece to hold the lug nuts.   I had like 20 swatches sent to me for my faces and for the RSX/Volk faces to pick out from. The powder for the Panasport faces is Heavy Silver from Prismatic Powders. They also have clear powder on them, when i only baked the silver it was slightly textured, I wanted the depth/gloss and protection from the clear and it made them look really nice!! 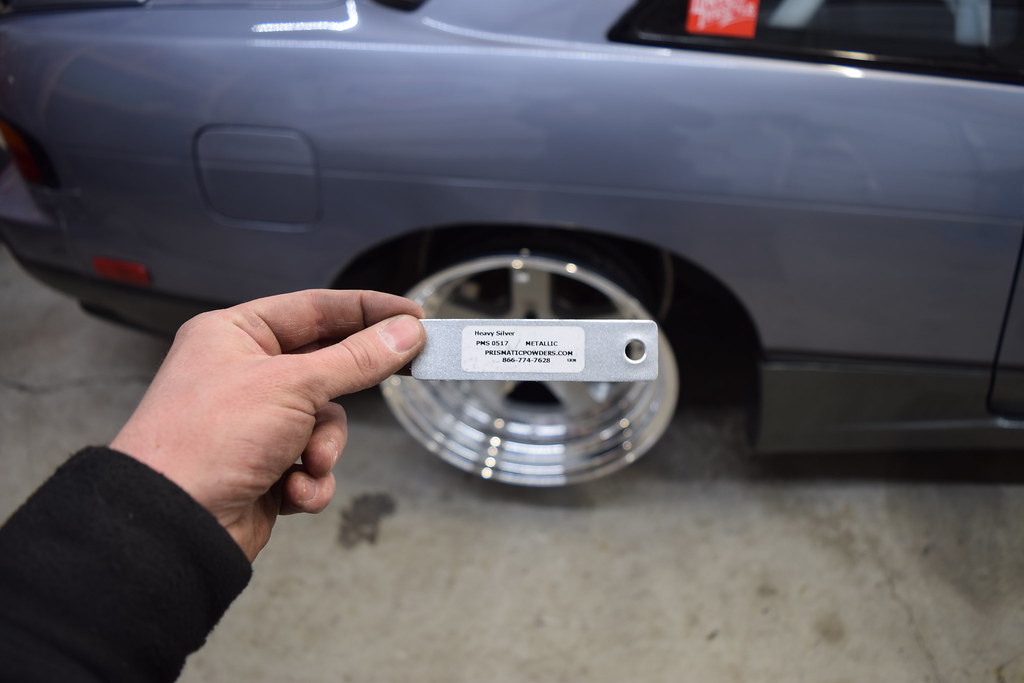 Fresh re-built, polished and sealed.      --------------------------------------------------------------------- To Be Continued ----> |
|
|
|
|
10-10-2021, 05:35 PM
|
#193 |
|
Zilvia Junkie
Join Date: Feb 2008
Location: Carry Water, Chop Wood
Age: 36
Posts: 507
Trader Rating: (0)
Feedback Score: 0 reviews
|
With the wheels nearing being done (minus tires) i started on the body around March this year... Found a local guy that has a warehouse that stocks FRP parts. Got some generic 30mm rear overs.
 Cue the, ***WHY CUT UP NICE QUARTERS COMMENTS***  Follow me and ill show you !!!  THIS  Back when the car was painted White/Grey and the body work was done, it had a bunch filler put on it so the quarters haven't always been clean metal... at least from the gas door area and behind/below. Started by cutting the outer body metal and arches. 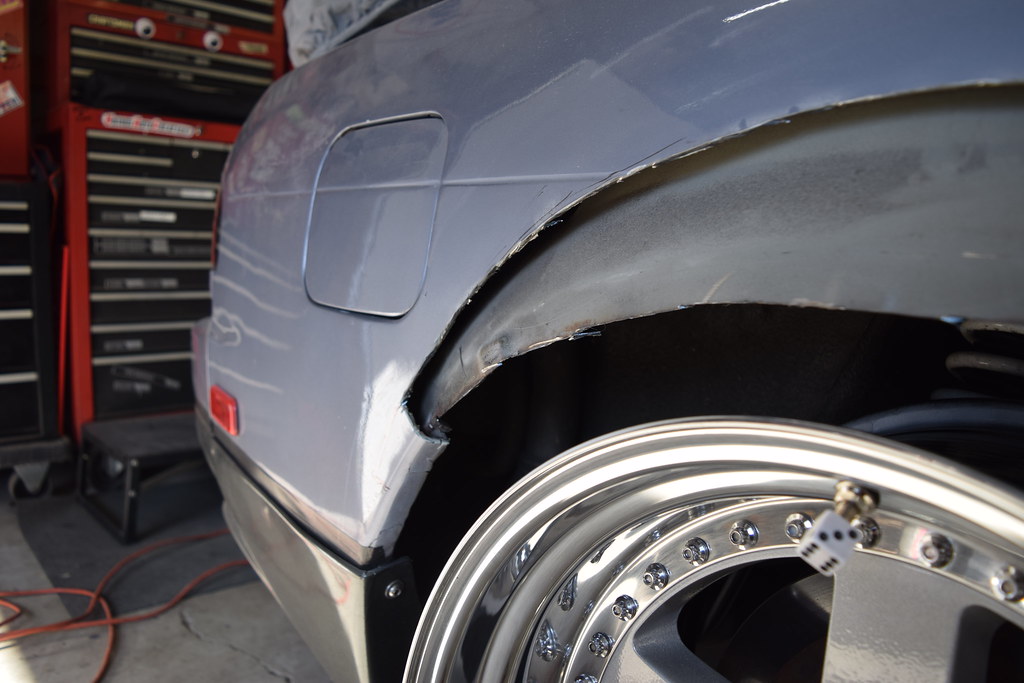 Added some relief cuts on the inner wheel well metal.  I hammered the inner metal out to the outer body and started tacking all the tabs in place. Once it was all welded I cut the excess off and wire brush/wheeled it.  Etch Primer over the bare metal after wiping down with prep-all for better adhesion.  I'm glad my Nan made me watch bob ross growing up, I brushed this stuff on like a pro...  Make sure to get it in EVERY crack and hole in/around the wheel arch !! Make sure to get it in EVERY crack and hole in/around the wheel arch !!  After I put the seam sealer on and let it cure for a day or 2, I used the truck bed coating from Rustoleum, it seemed to have held up nice on other parts of the car when prepped properly before spraying.  I put the overs on for dry-fitting them and noticed this one needed some work.   Next I shaved the markers. 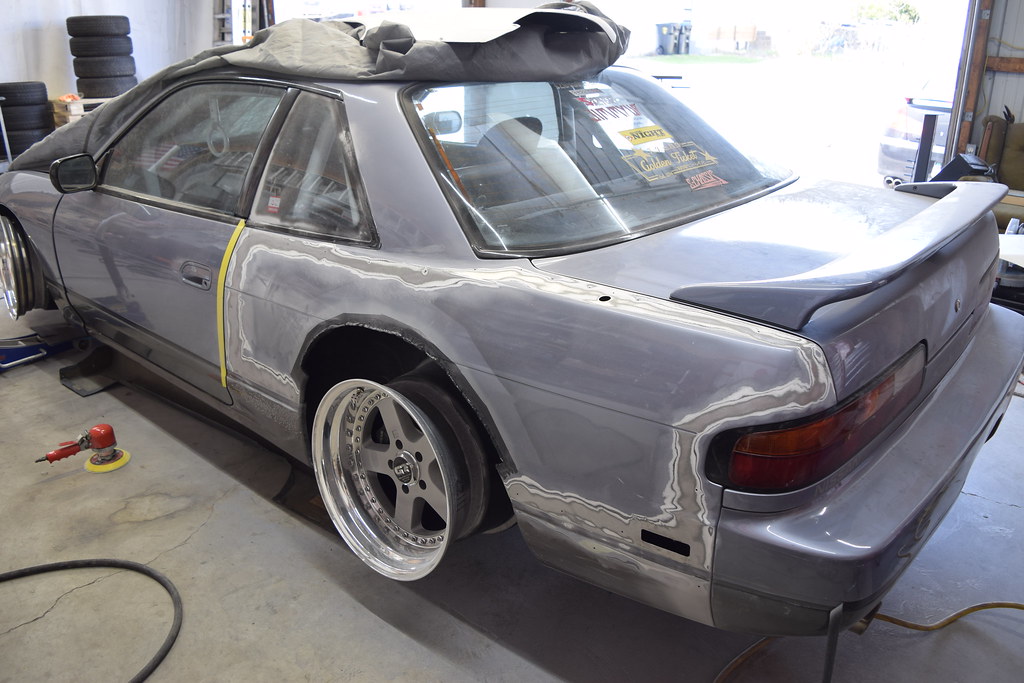 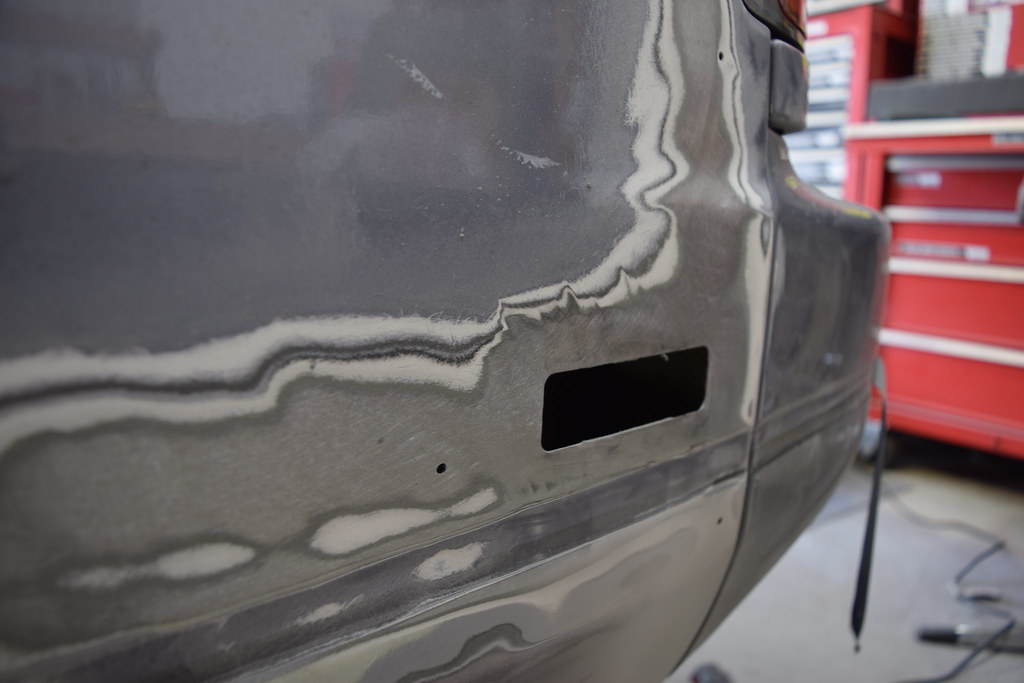   I ended up using a construction adhesive that I see guys normally use for seam sealer. It listed bonding different materials together (steel and fiberglass in my case), so I roughed up the areas, taped off the car and etch primed the areas i wasnt looking to bond but keep sealed from the elements.. 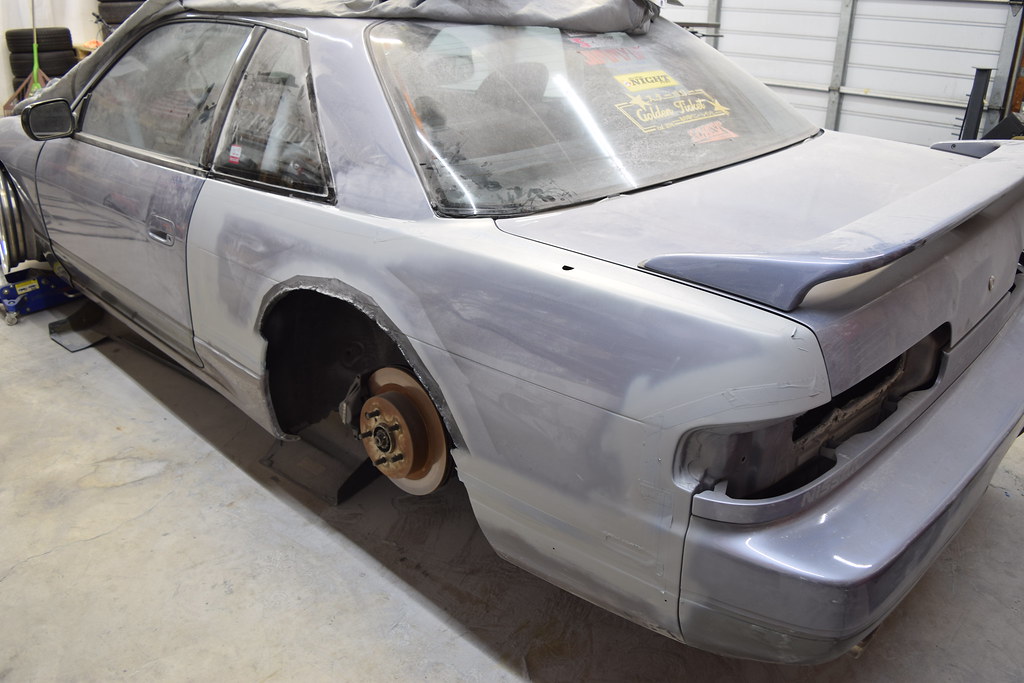 after i put the adhesive on the panel and put it on, i used clecos to hold it in place, I let it sit for a day (it was still kind of cool out), and went to pull a cleco out and noticed the glue didn't cure, so i put a heat lamp on it over that night and the next morning still the same result.. I ended up just Countersinking where the rivets mount a little bit and just left them in, with the adhesive behind it, im thinking it will act as a type of seam sealer too..  after i got both sides mounted with the glue on the back and rivets in place.. i started on the filler/sanding/blocking everything down.. FIBERGLASS FILLER OVER THE RIVETS AND EDGES HELP IF THERES FLEX.  Supplies for the job.  When i got the rears to a point of just needing finished with regular filler i moved to the front..... It had a good amount of poke but i started thinking and saw ideas ect ect... 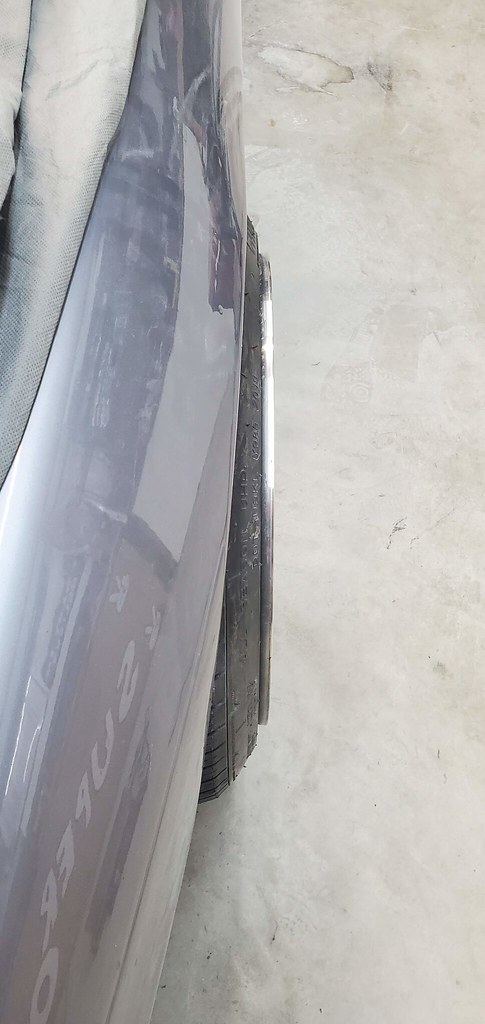 I made a Body scribe tool and marked beside the lip. Super High Tech...  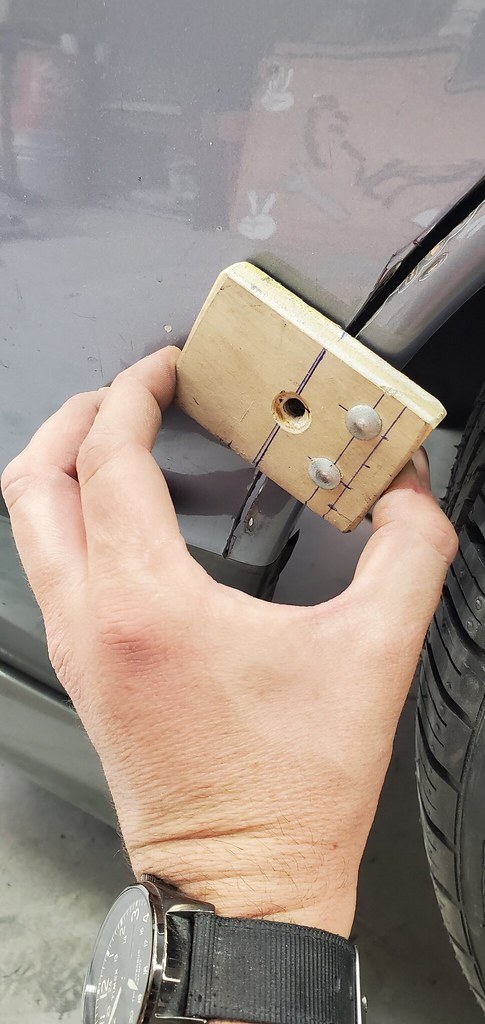 After cutting, i bent it out to where i wanted it..  Marked where for the relief cuts for the arch.  ZINNNNNGGGG!!!!!      I bought these a while ago and tried them. Well, they weren't the right tool for that project I guess, and sat in my welding cart forever. I was having trouble keeping the slits lined up to tack them and the filler piece back in, remembered i had these and helped keep things straight much easier.   Repeat for both sides..   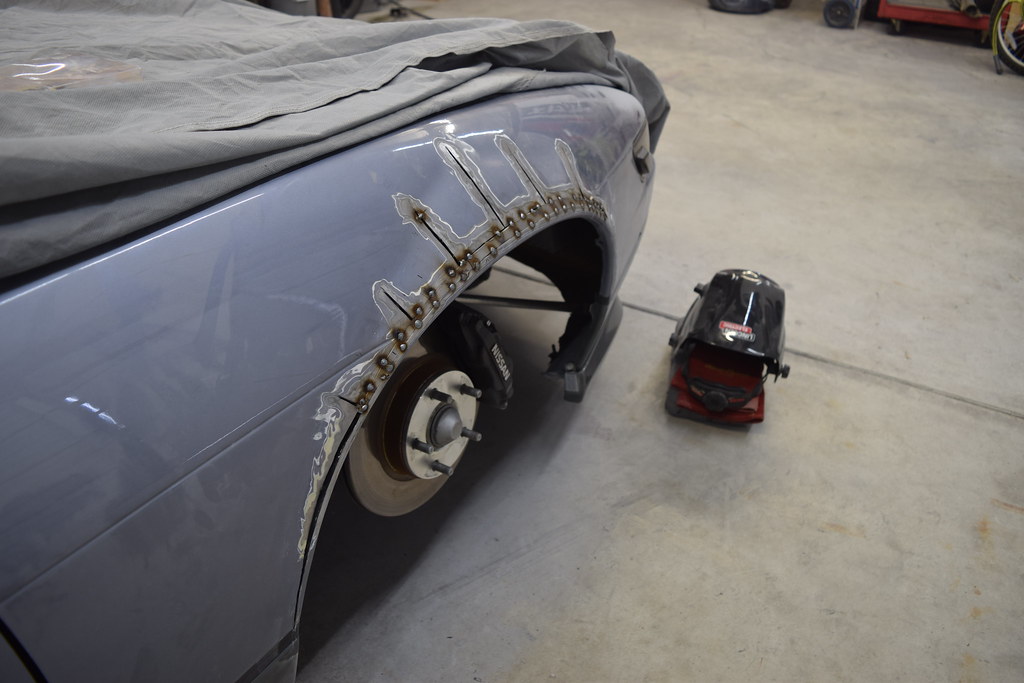 All tacked up and lip rolled flat.  Prepping before fiberglass filler.  This part sucked for me, I don't know body work and don't have that special feel for it. It took so fucking long for this to be perfect enough for me. Sanding and block sanding for dayssssss......   Literally, all I did for weeks was sand and block sand the panels... Just pick one and sand it, guide coat it, block sand it, filler, DA sand it, block it smooth..   Before I did the doors I replaced the pins and bushings on the hinges and new door strikers. I wish I would have done it YEARS ago.... while I had them off the car and doors, I sand-blasted the mounts, to re-spray with truck bed liner.   Noticed on one of the doors, the mounts weld was cracked, so I welded it.   After the hinges were good, I blocked the doors off the car. It was much easier off the car and on a table !!   One thing I feel is an important part of a car is the body lines. Incorporating my details and vision into what Nissan did was important to me. So, I took the time to clean up the small/thin line down the side of the car !  These overs just needed a little more definition to that small line, also I am not moulding them into the car, but i am cleaning up the edge that so its just clean looking. 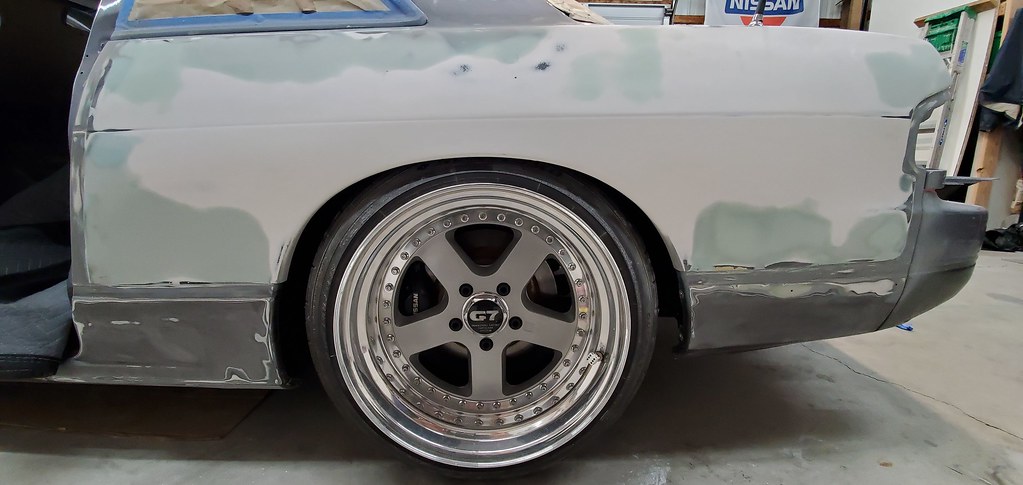 To Be Continued... |
|
|
|
|
10-10-2021, 06:57 PM
|
#194 |
|
Zilvia Junkie
Join Date: Feb 2008
Location: Carry Water, Chop Wood
Age: 36
Posts: 507
Trader Rating: (0)
Feedback Score: 0 reviews
|
Figured i could take the opportunity to get the car out of the garage and blow it out and blow the rest of the dust off the car.
 I pulled the car back in and started with putting the fenders back on so I could fix any small details before they go on permanently and not tweaked. 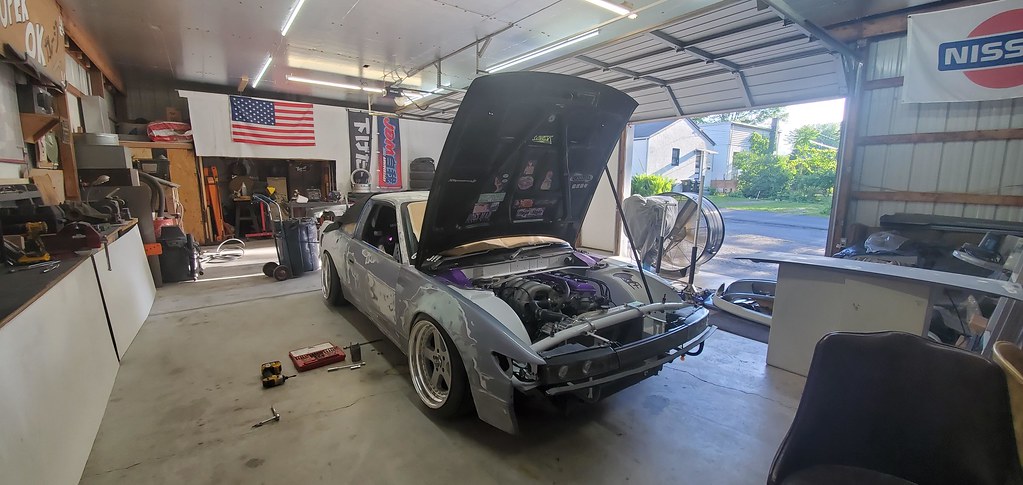 started on the front/rear bumper taking off the wrap and sanding them down.   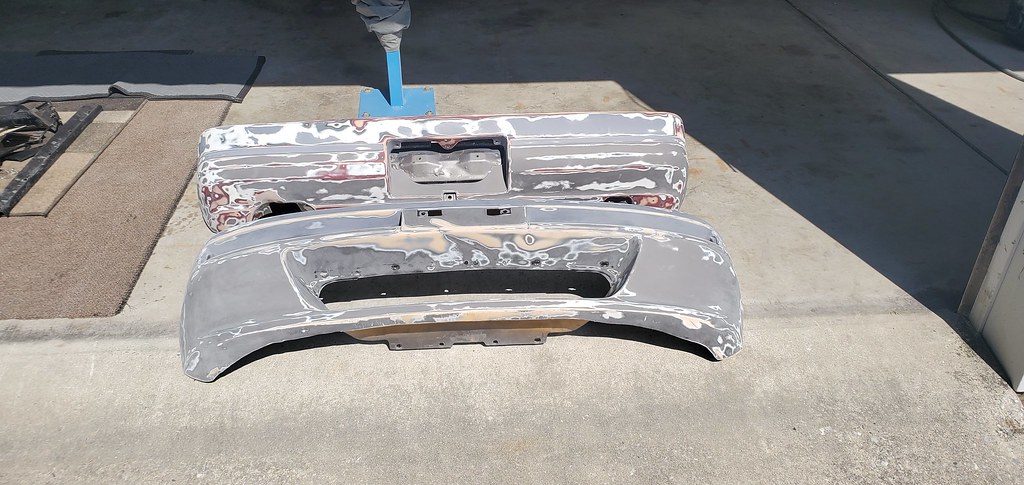 --------------------------------------------------------------------- I wanted to do something with other parts of the car that are a little touch of my eye for detail and make look extra since it has overs but not CRAZY wide overs. I decided on making the OEM spoiler a little longer, but not too long or an eyesore hanging off the back. Started with a piece of foil-backed foamboard insulation, drilled some small holes in the spoiler and put some pins in that protrude into the foamboard and give a little support. i sanded the spoiler down past paint/primer. after that I used masking tape to hold the foamboard to the spoiler and slightly shape the edges and curves to blend it all back together.   After laying the fiberglass layers i let it cure outside each time. Benson came to check it out for QC.   After Fiberglass/resin, I used fiberglass filler to build up a little bit for rough shaping then regular filler for final shape and glaze finish before primer, with a shitload of DA and Block sanding in between... 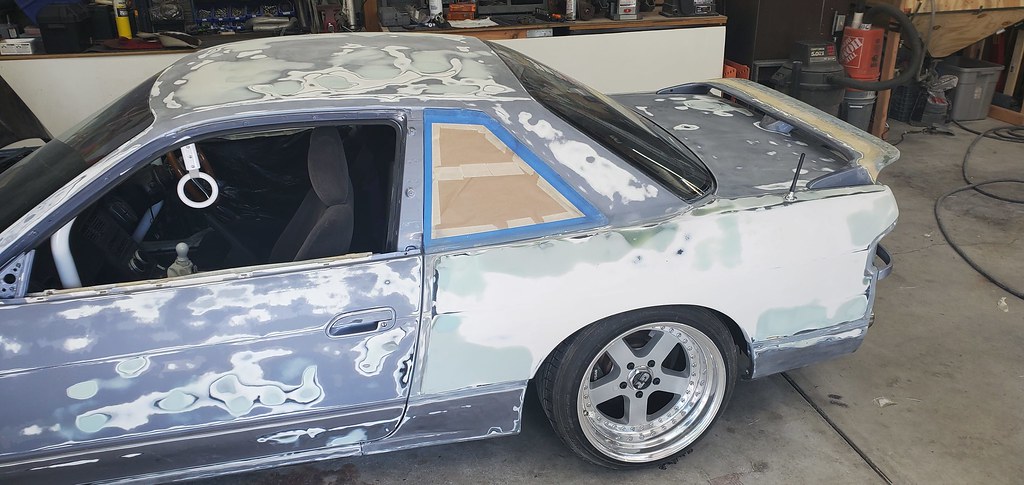  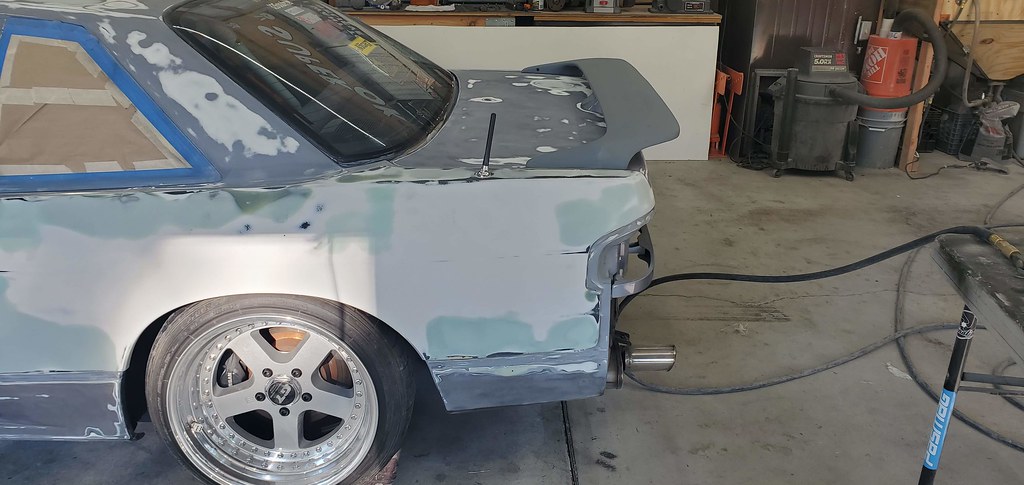  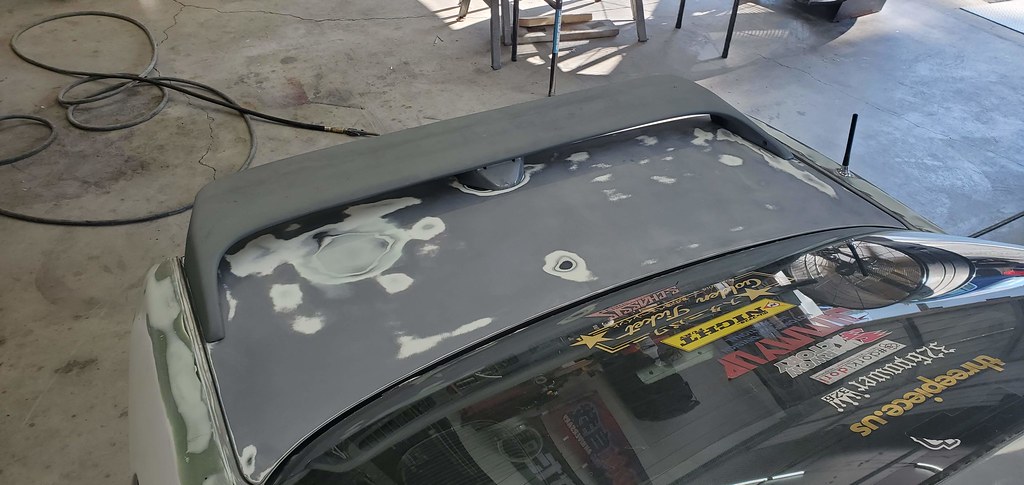 In the middle of working on the car, we had the opportunity to get the driveway paved and didn't blink when they wanted to come..   They cut the ramps off the garage at my request, so there was little to no transition into the garage from the asphalt.    After sanding the rest of the aero I made sure all the panels were lining up good for when its re-assembled after painting..   there was a couple things that i touched up like the corner light area.  finally put some epoxy primer on to see it more or less one color again is a relief !! plus all the bare metal is sealed now too... 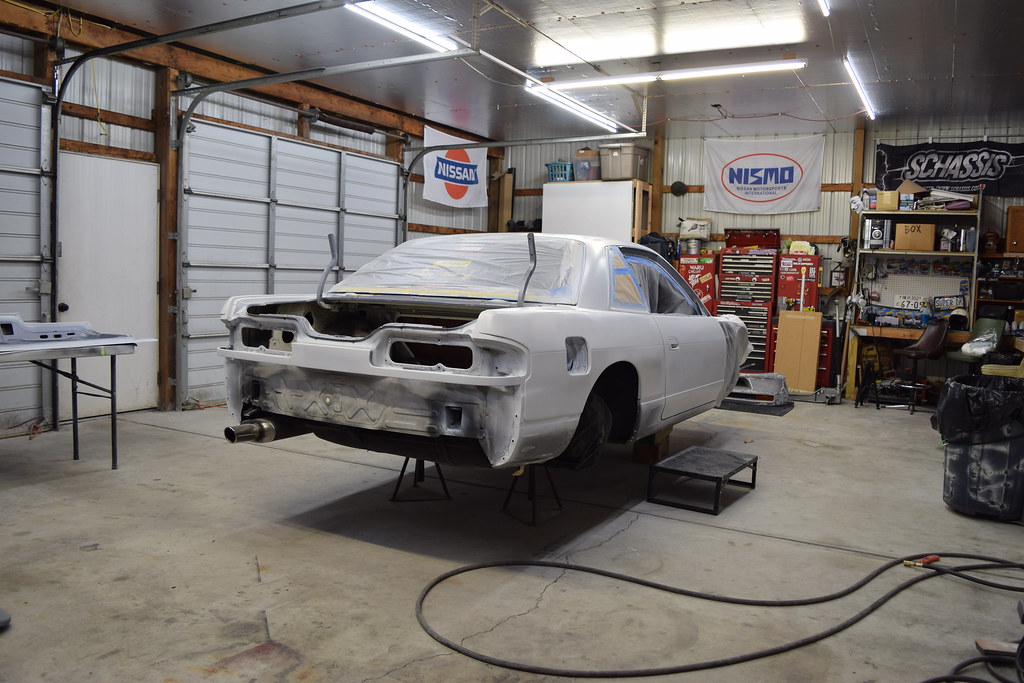  On the back of the rear spats, i glassed in little nubs that fit into hole i drilled into the body instead of rivets showing, these will help hold the piece against the body with the double sided tape as well. Maybe overkill but what ever...    I also fixed up the end of the front lip so it has a nice endcap look too it as well...  After all the aero pieces were good I shot everything with 2 coats of high build primer..  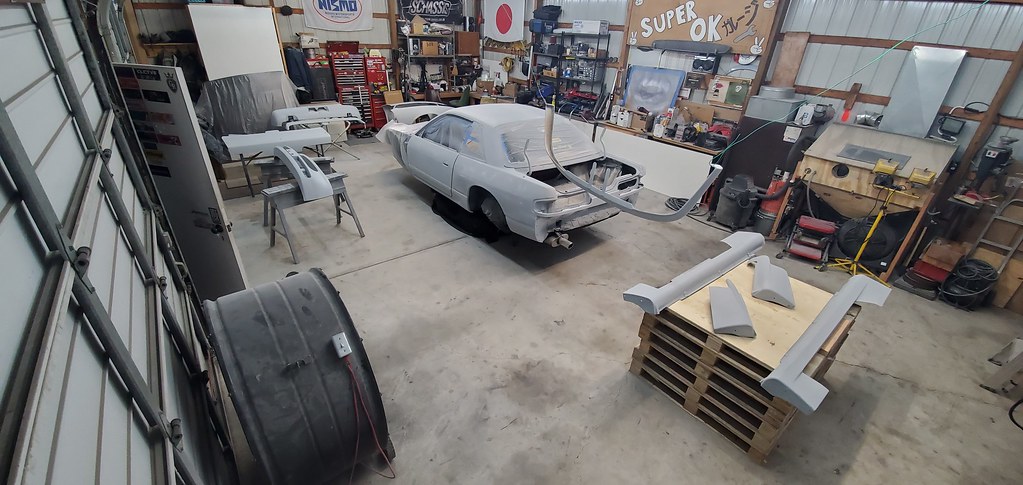 after the primer, sand down with 400 grit. THEN... FINALLY.... Mask it off for first color of BASE COAT!!!  463 --- Dark Grey Metallic....  Spent the rest of the night taking off the masking and re-masking for the other color. LH1 --- PURPLISH SILVER METALLIC   ....... Continued .......... |
|
|
|
|
10-10-2021, 07:29 PM
|
#195 |
|
Zilvia Junkie
Join Date: Feb 2008
Location: Carry Water, Chop Wood
Age: 36
Posts: 507
Trader Rating: (0)
Feedback Score: 0 reviews
|
After I took off the masking I shot the clear coat.
I had to let it sit for a few hours to cure before i could peel the final masking off or move anything around to start assembly... 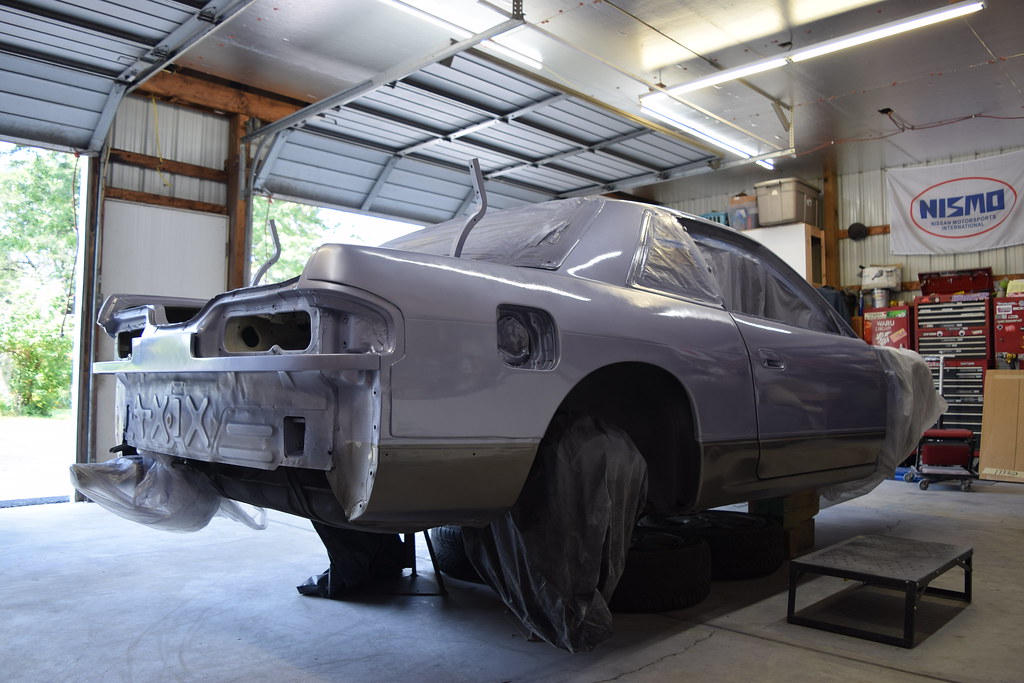  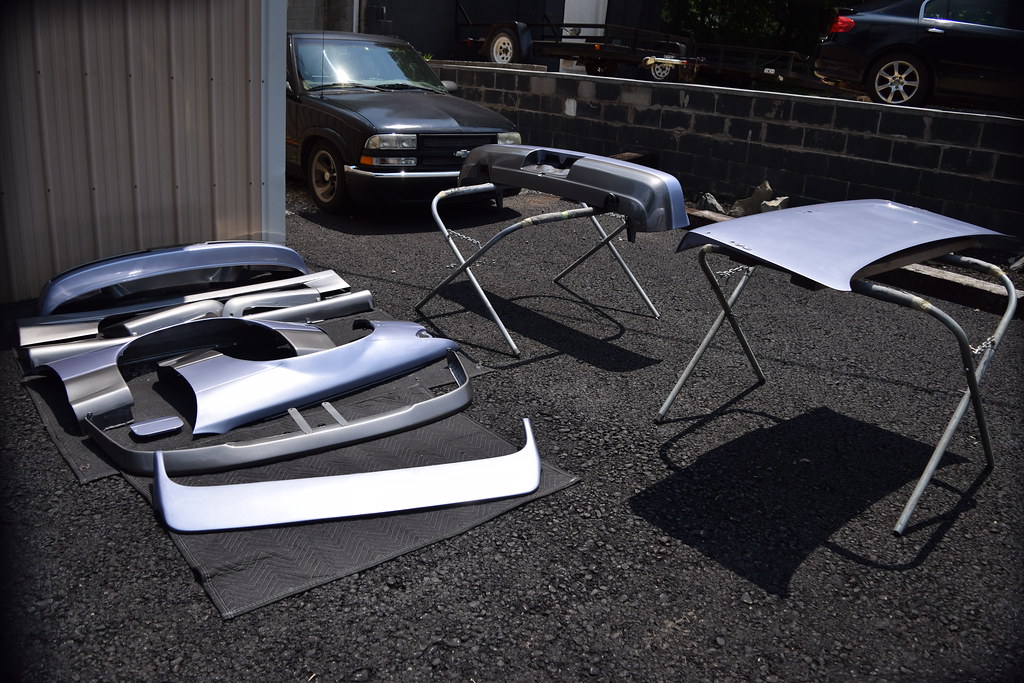 brought it down on the stockies for re-assembly !!  The Color it resembles it between this one ^ and the picture below. Its purple is some light but still bluish in other..  Started by assembling the front end and putting the black stripe on.    I also decided to change some stuff on the rear window. It hurt, but with change comes the next evolution of the car ( i guess  ).. )..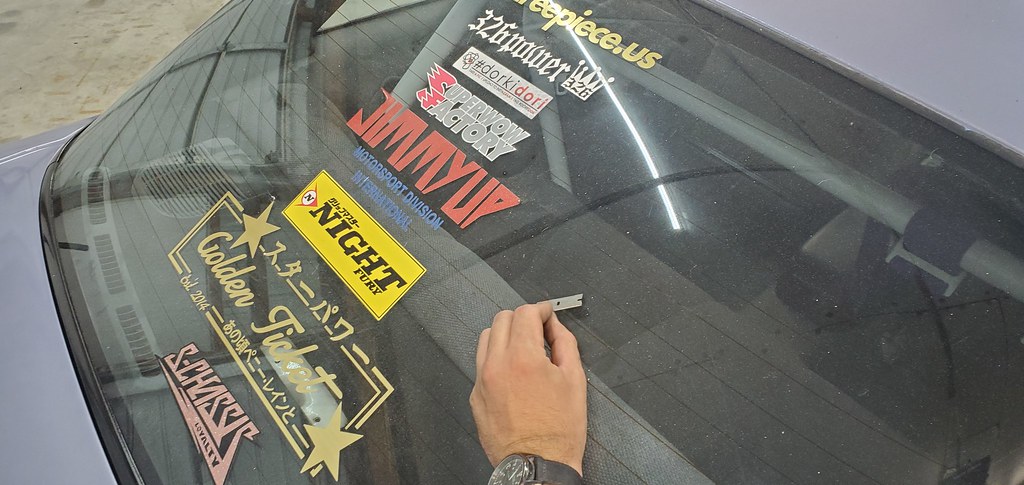 Simple/Clean  These pieces were an idea for a long time, I want to get them 3d printed, instead of being flat 1/16" abs sheet... but i they used to be solid, now they have mesh for airflow !!  I also changed up the interior since last August. I put the guages back on the dash and put the radio/din pocket in. Now i can have music in the car again !!  Wheel specs are now 17x9.5f 205/45 & 17x10.5r 215/45 I haven't measured for offset yet...  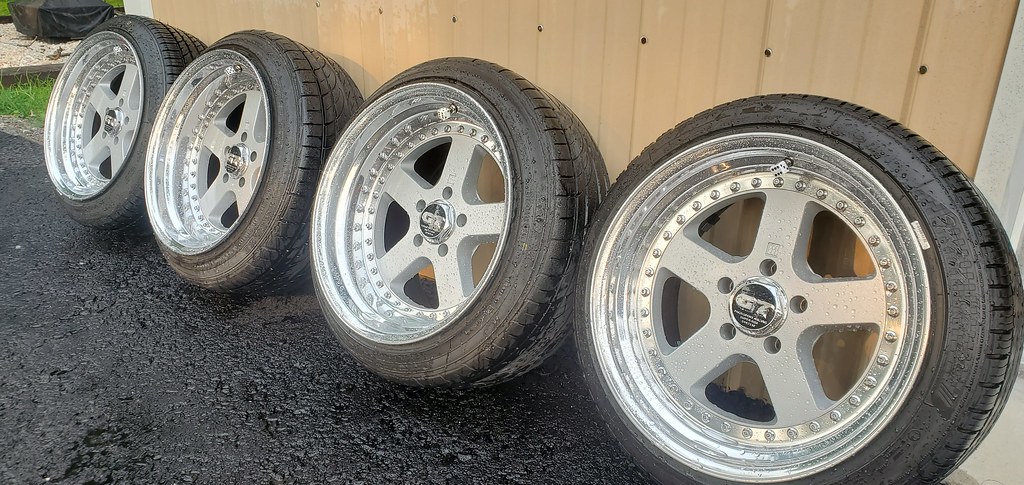 So, I present, my SuperOK! S-Chassis   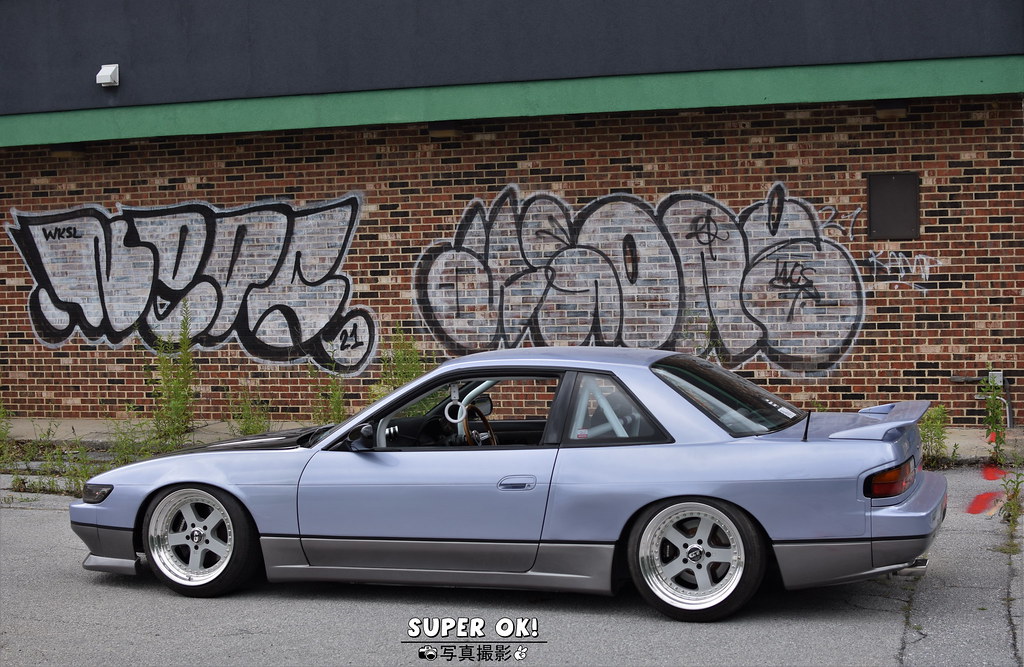 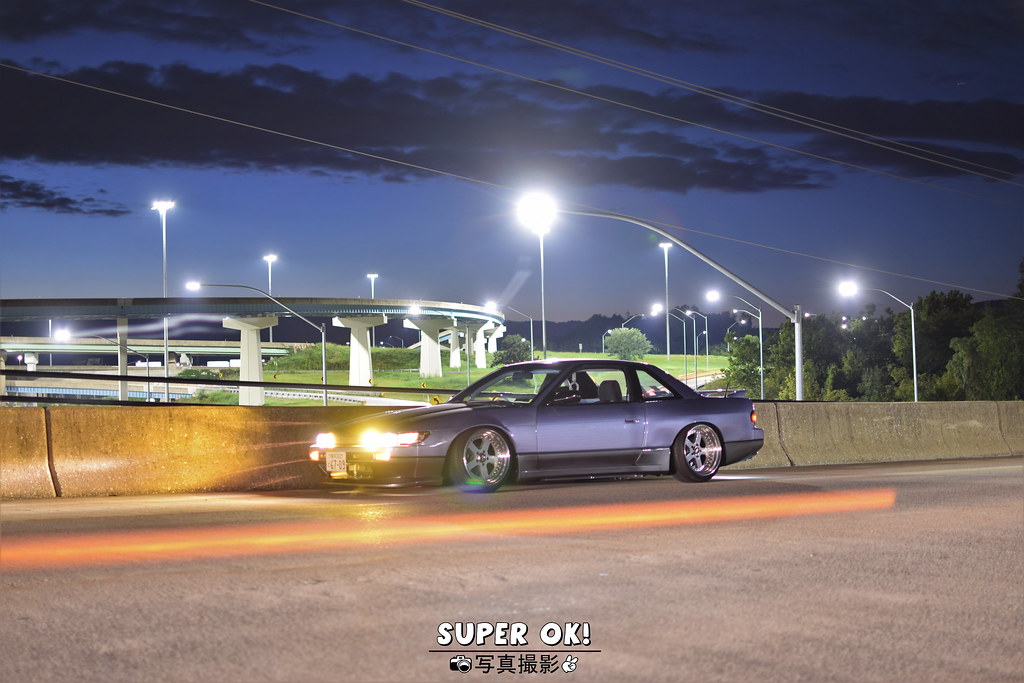     |
|
|
|
|
10-10-2021, 07:32 PM
|
#196 | |
|
Zilvia Junkie
Join Date: Feb 2008
Location: Carry Water, Chop Wood
Age: 36
Posts: 507
Trader Rating: (0)
Feedback Score: 0 reviews
|
Quote:
 I'll be doing the Volks for the RSX soon.. Easy to change media with the plug on the bottom. it needs new gloves and a better seal around the lid though. |
|
|
|
|
|
10-11-2021, 05:24 PM
|
#200 | |
|
Zilvia Addict

Join Date: Jul 2008
Location: Canada
Age: 37
Posts: 719
Trader Rating: (0)
Feedback Score: 0 reviews
|
Quote:
. the transformation is killer.
__________________
-Jordie Lewis '93 Skyline Type M |
|
|
|
|
|
10-12-2021, 06:23 AM
|
#201 | ||||
|
Zilvia Junkie
Join Date: Feb 2008
Location: Carry Water, Chop Wood
Age: 36
Posts: 507
Trader Rating: (0)
Feedback Score: 0 reviews
|
Quote:
Quote:
Quote:
Quote:
|
||||
|
|
|
|
| Bookmarks |
| Thread Tools | |
| Display Modes | |
|
|


 Linear Mode

