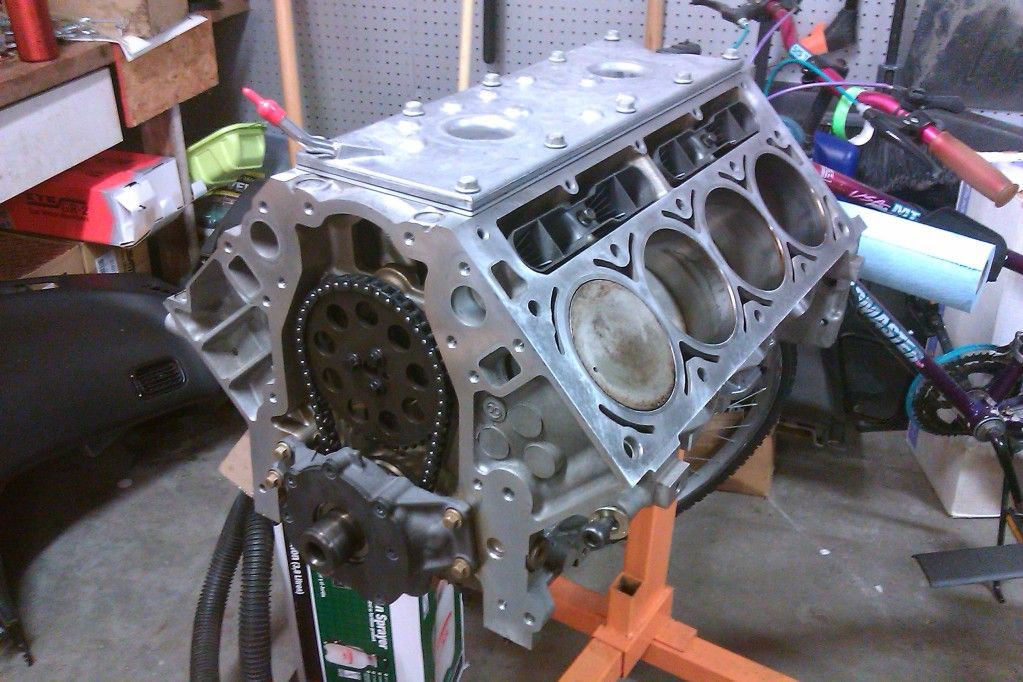
After the headers came out for ceramic coating, the engine went on the stand where I promptly tore it down.

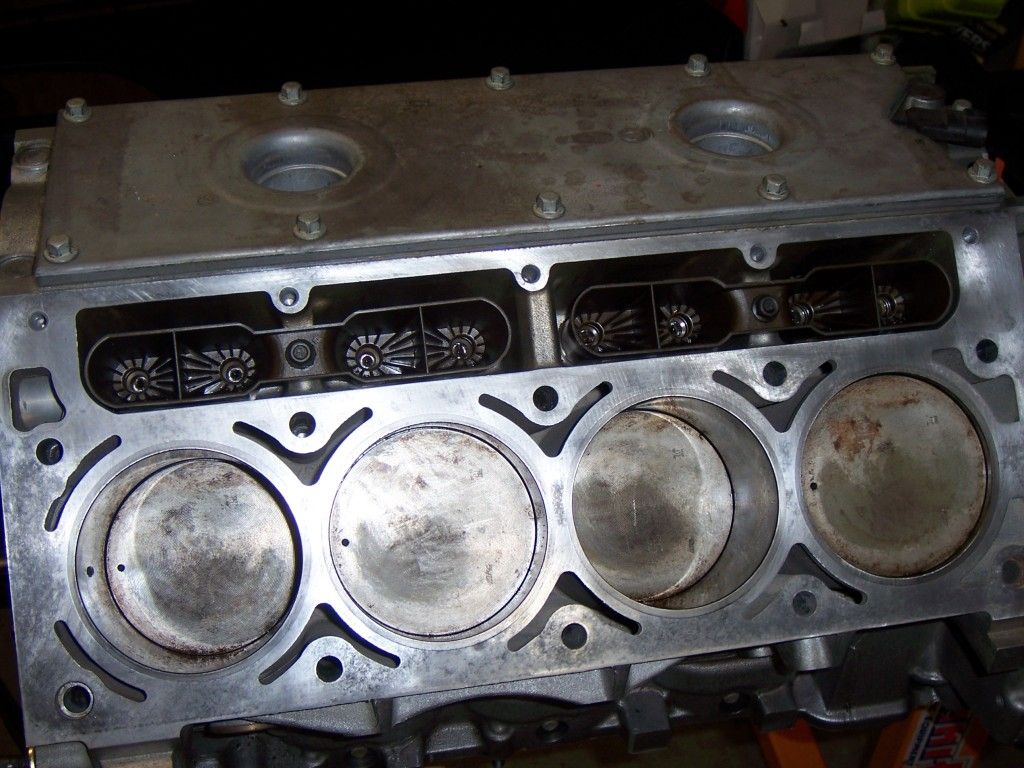
The engine had carbon headgaskets, which are nasty. I bought a plastic scraper and some Permatex gasket remover and went to town on all the crap they left behind. To get all the left over residue off, I went over the surface with a nylon Scotchbrite pad (no aluminum oxide) until all the remaining gasket was removed. After that I used some 2500 grit sandpaper to get the final finish, to give the Cometic headgaskets a good sealing surface. Then I cleaned everything over and over again and checked all the surfaces for dirt with my fingertips and then cleaned some more. You can never be too clean when you open an engine. All and all the cleaning took about 3 hours per side.
Goodies from the FedEx and UPS guys.
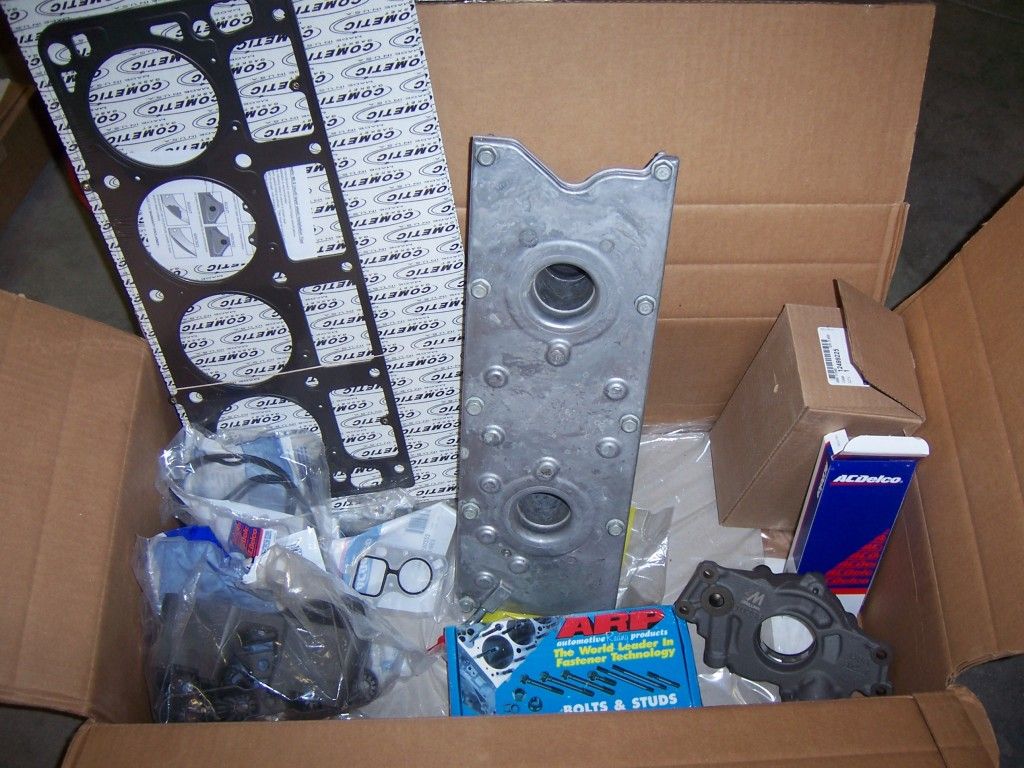
Here's the grocery list from above:
- Cometic .040 MLS Headgaskets
- LS6 Valley cover, for its improved PCV system
- LS2 Lifter Guides
- LS7 Lifters
- GMPP Heavy Duty Timing Chain
- Melling High Volume Oil Pump
- GM camshaft install gasket kit
- ARP Headbolts
- ARP Camshaft Bolts
- ARP Cam Retainer Bolts
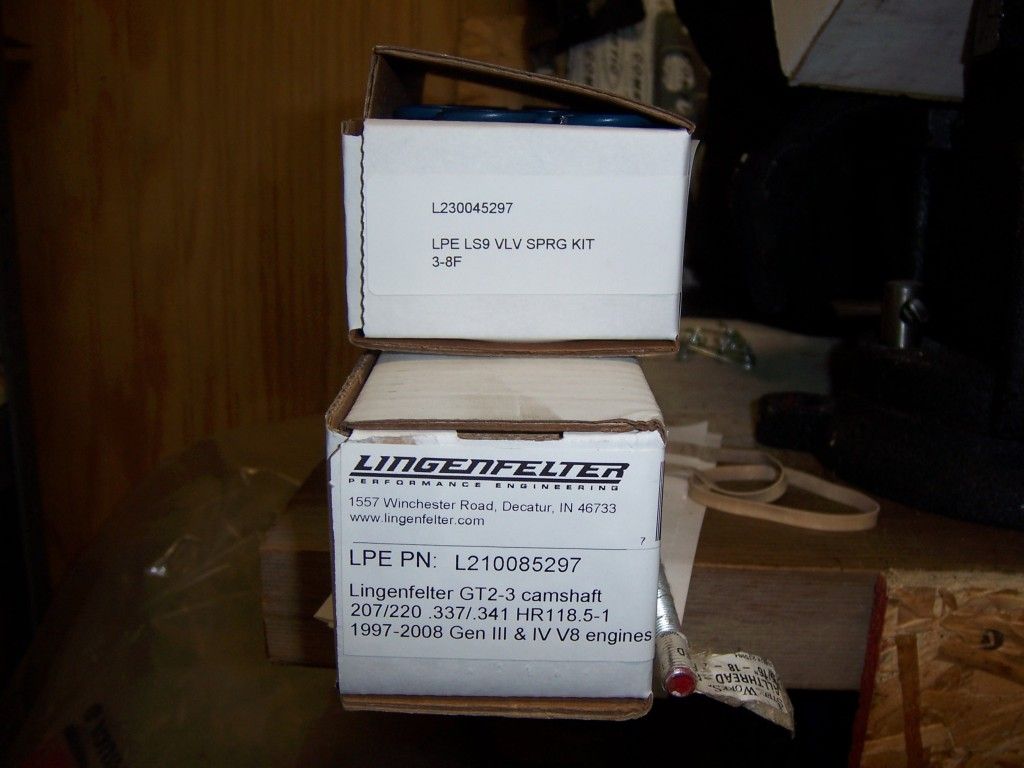
- Lingenfelter GT2-3 Cam
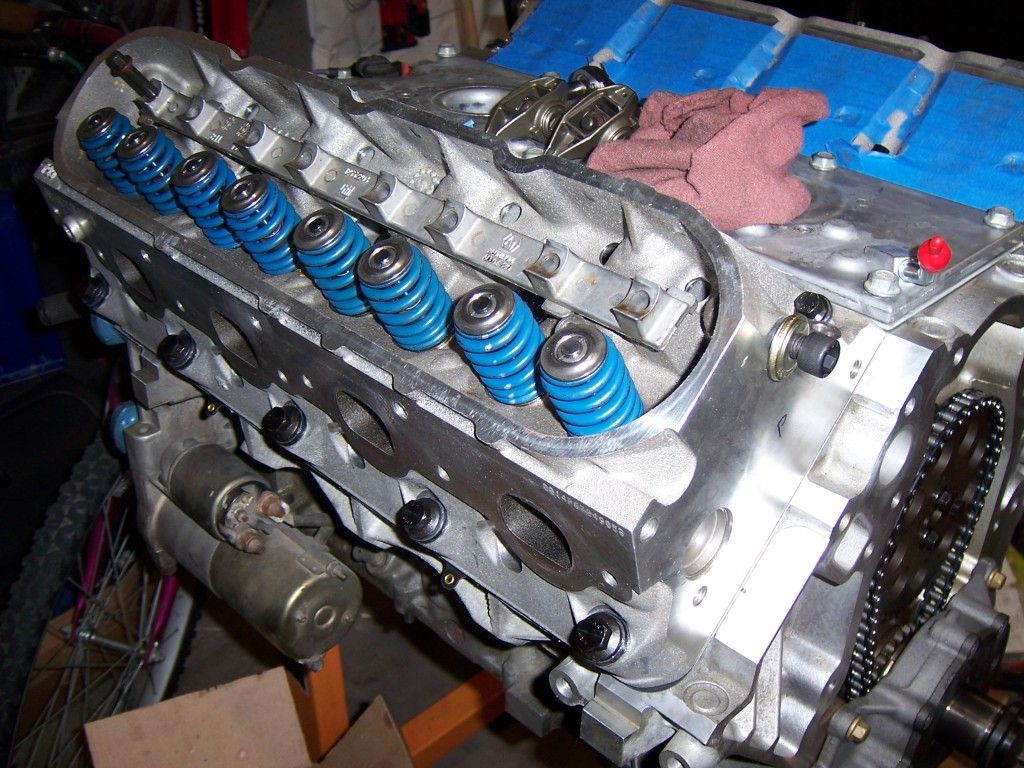
- Lingenfelter LS9 Blue Springs (hand checked for lift to work with the cam)
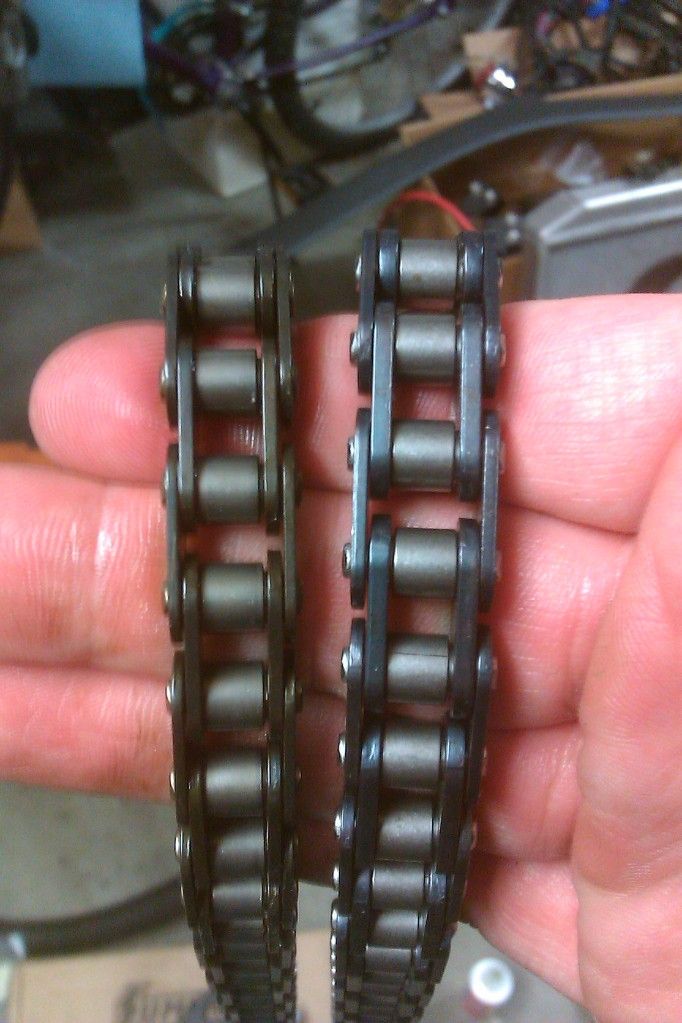
Check out the difference between the original chain and the heavy duty one, can you tell which one is which? I consider it cheap insurance when getting heavier valve springs, the HD chain has some serious beef to the side plates compared to the original part.
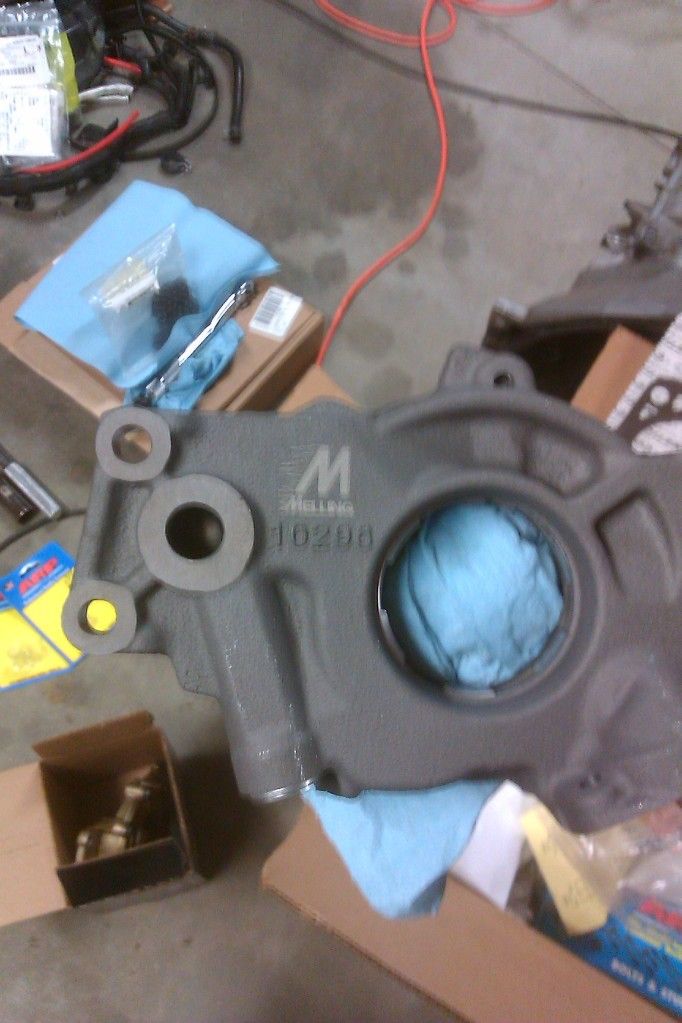
Also the melling high volume oil pump is more of a preventative maintenance item as well. Its the part number 10296. It comes with the red high pressure spring installed, which I switched out for the blue standard pressure spring. I suspect that the increased volume alone will try to drain the pan, so I'm at least going to start with a little less pressure.
The cam install was pretty uneventful. I discovered that cams are very sharp while I was cleaning it with a bunch of little paper cut like cuts on my hands that I discovered when hosing it down with brake cleaner. I then used some assembly lube and slid the cam into place. Overhead cams (like the SR20DET) are way easier to install, but all and all it wasn't bad. You just have to be patient and careful so that you don't damage the bearings or get it stuck.
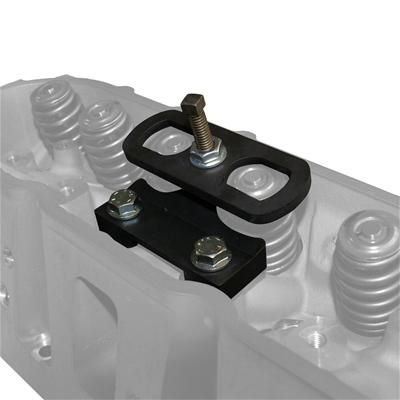
On to the valve springs. I considered getting a loaner tool, but ended up just buying one specifically made for the job instead. I love new tools anyways. I got the Trick Flow valve spring tool, this tool made the valve spring change simple and quick, its definitely a quality tool.
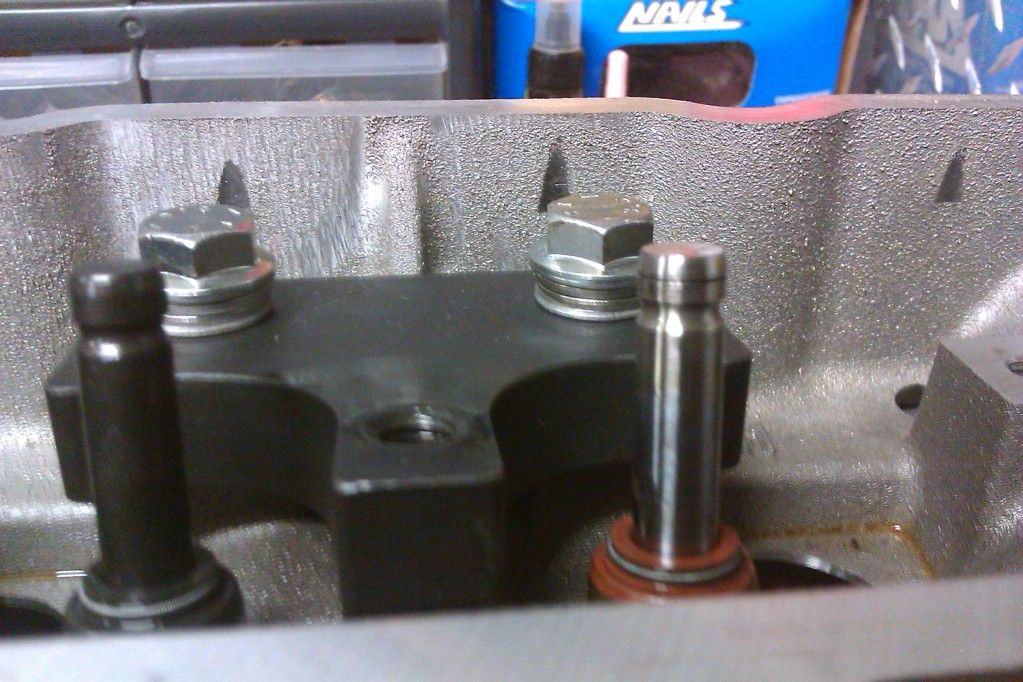
While I was in there I found something interesting, my 799 heads have what looks like hollow exhaust valves and the intake valve is black oxided, I'm not quite sure what to make of it.
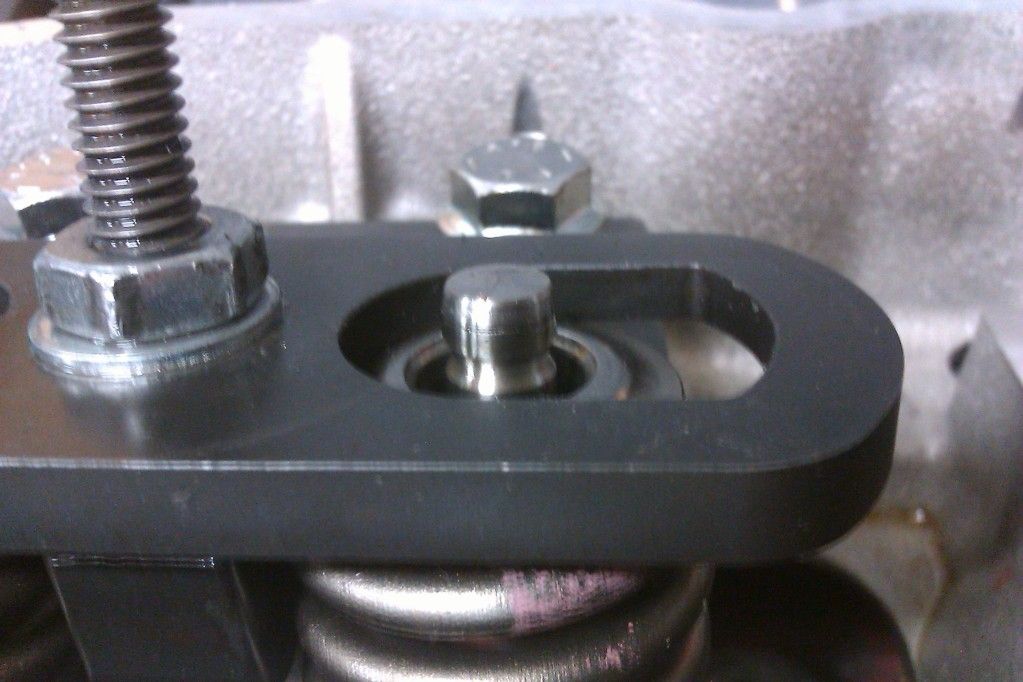
Super easy, just turn the nut down and pull the locks, there was enough room that I could remove and install them with my fingertips fairly easily.
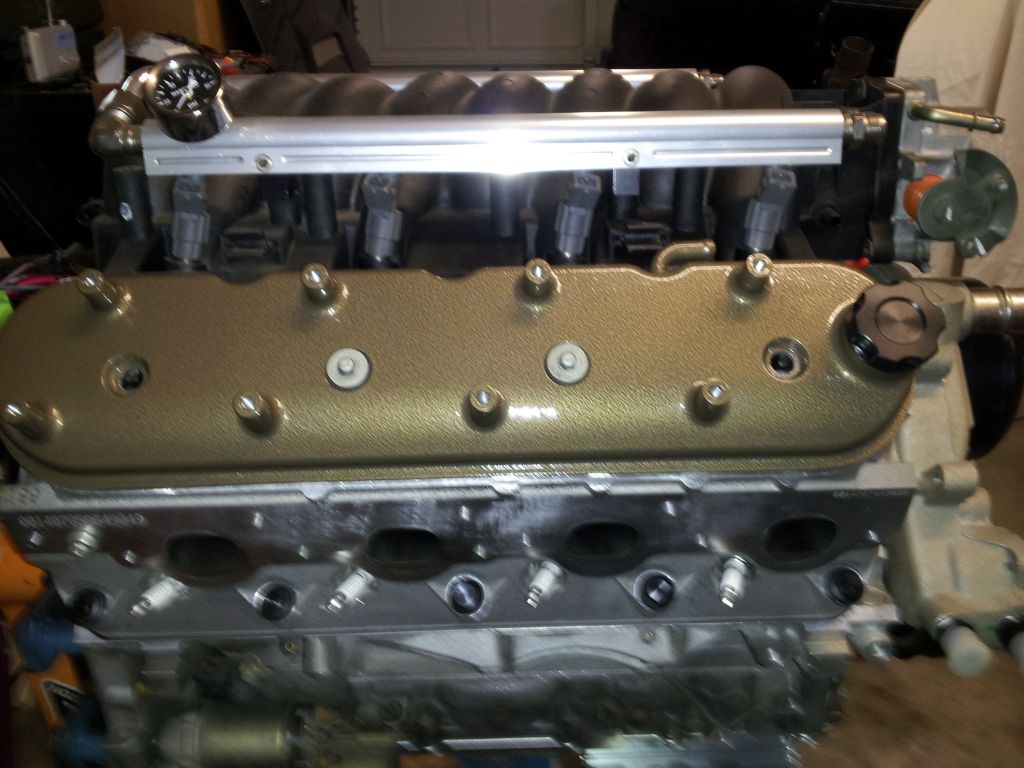
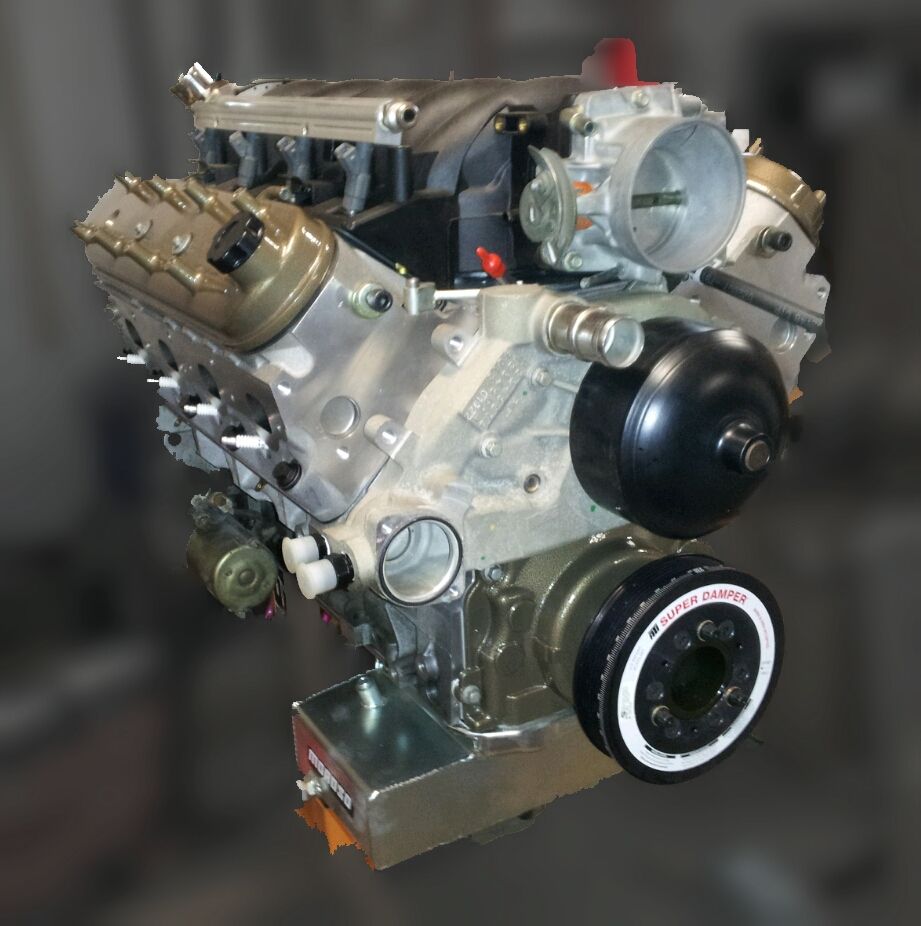
For the valve covers I got the holley ones that eliminate the coil pack brackets in natural cast. I sent those out along with the timing cover for powder and had them coated with a hammertone bronze.
While installing the timing cover I installed the ATI Super Damper. I chose ATI p/n 917277, It's a 10% under drive without an air conditioning pulley and SFI approval. No need for A/C since I removed the evaporator from under the dash along with the rest of the system. I wanted an under drive and the ATI seemed to be the best insurance for my engine while providing under drive.
I've also added -8 AN heater fittings to the water pump. The original stainless steel fittings were pretty difficult to remove. I tried twisting them with a pipe wrench, wishful thinking that they might just forcefully twist out, but no luck there. I ended up up supporting them with a board to protect the waterpump, smashing in one side with a chisel to collapse it, taking pressure off the sides then they popped right out. After they came out it was just a matter of tapping the holes they're already the correct size, the small side with a 3/8 npt and the larger with a 1/2 npt.
