|
|||||||
| Builds (and builds only) Got a build thread? It goes here, build threads anywhere else on the forum will be locked and never moved. |
 |
|
|
Thread Tools | Display Modes |
 11-10-2013, 04:05 PM
|
#31 | |
|
Zilvia Member
 Join Date: Sep 2005
Location: Bartlesville, OK
Posts: 227
Trader Rating: (5)
 Feedback Score: 5 reviews
|
Quote:
__________________
Facebook Link: https://www.facebook.com/brickhouseproductsllc |
|

|

|
| Sponsored Links |
|
11-10-2013, 04:57 PM
|
#32 | |
|
Post Whore!
 Join Date: Dec 2010
Location: SoCal 909
Age: 31
Posts: 4,743
Trader Rating: (42)
 Feedback Score: 42 reviews
|
I'm partial also. We have had a 07 Armada and now own a 2010 Titain and that shit is a beast in a million pound truck. I can't imagine it in a 240. I've killed my friendd "fast" hondas with swaps and all by bus lengths. Sounds amazing at WOT with the intake screaming
__________________
Quote:
|
|
|
|
|
|
11-23-2013, 03:10 AM
|
#34 |
|
Zilvia Member
Join Date: Sep 2005
Location: Bartlesville, OK
Posts: 227
Trader Rating: (5)
Feedback Score: 5 reviews
|
I am honestly about to run short of things until I start making more final pieces!! I best get to working more.
I am going to visit the shifter setup this time. I know most of you are probably thinking, I have seen this before, but I am promise I went another route. Basically I needed another way to move the shifter forward so the shifter hole didn't need to be altered - FD rules and what-not, plus no sheet metal to cut in cabin. It also needed to be able to allow the articulation the Z33 transmission requires. I started on the shifter and attempted using the stock shifter, and attempted, and attempted. Basically I decided to step back and do something else after while. Then one day I was showing Steve some progress on the shifter. I started explaining my frustration with it and he had a really good suggestion: make a new shifter. I attribute myself being too close to the problem to see the simple solution in front of me. From that point forward, it has gone pretty smooth. Had to source some heims and links, which took some time, but otherwise simple. Like always this is a prototype piece and not the final setup. The major revision will be: to ditch the square tube and go round instead; to install a reverse lockout; to solve potential loosening of components; and finally to pick a height for the shifter. Here is what the stock linkage looks like: 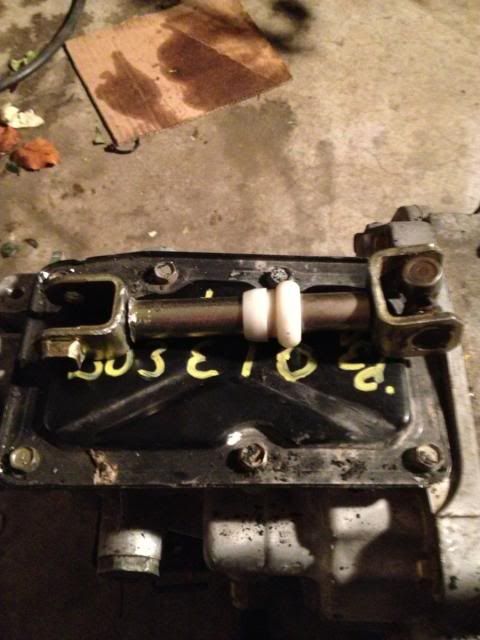 Here is what most people do with the stock linkage. I may end up using this in the S14 if it has more room for it. It allows the shifter to articulate a bit freer: 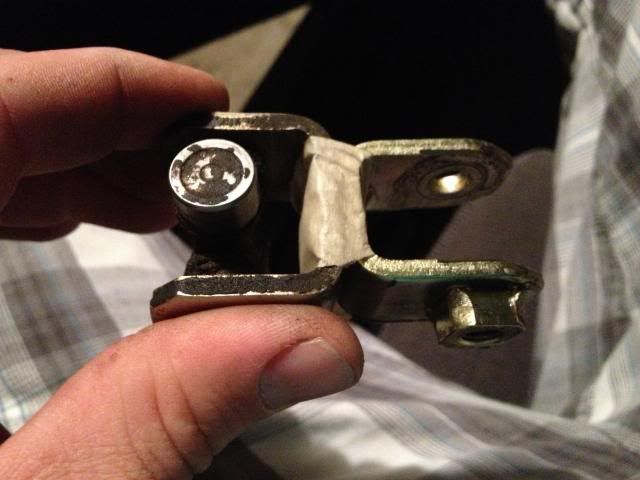 Here is how I did my linkage. The bad part about this linkage is it doesn't allow the in/out motion to occur, but does allow the twist: 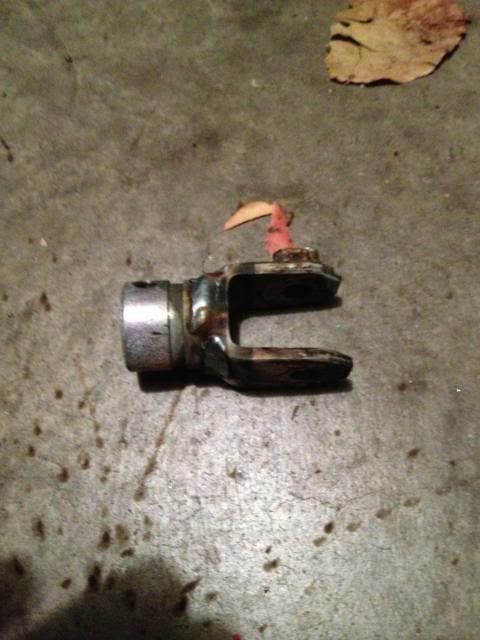 After installing the linkage on the transmission here is where it wound up in the shifter hole. It is only off center in the pictures as I didn't have it lined up...it is nice and centered now. 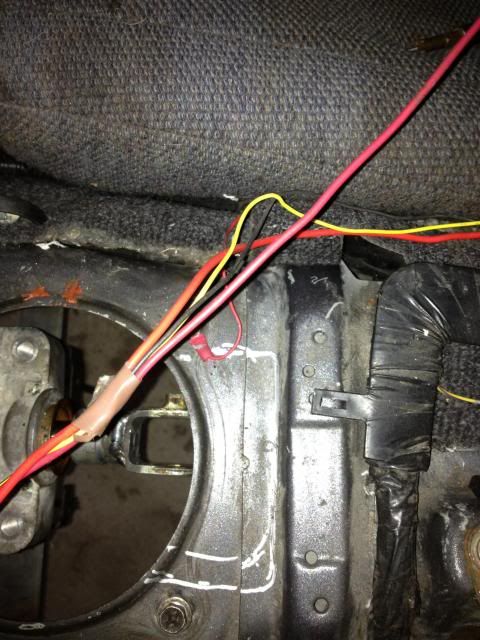 So in order to get the in/out movement and retain the twist I came up with this setup: 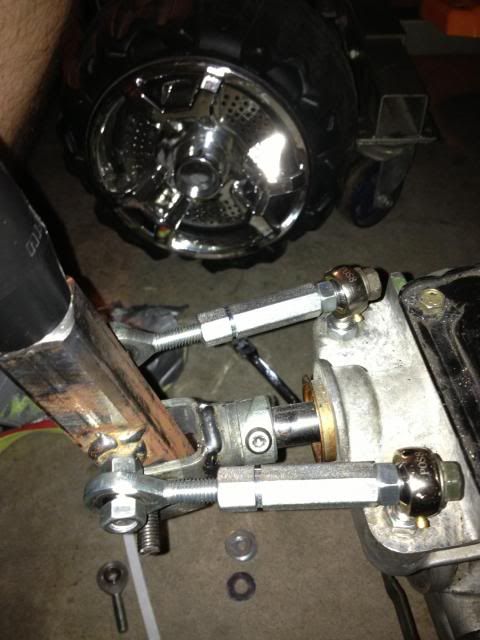 Shifter in the car! Functioned awesome:  Shift boot on, centered up good, I like the placement: 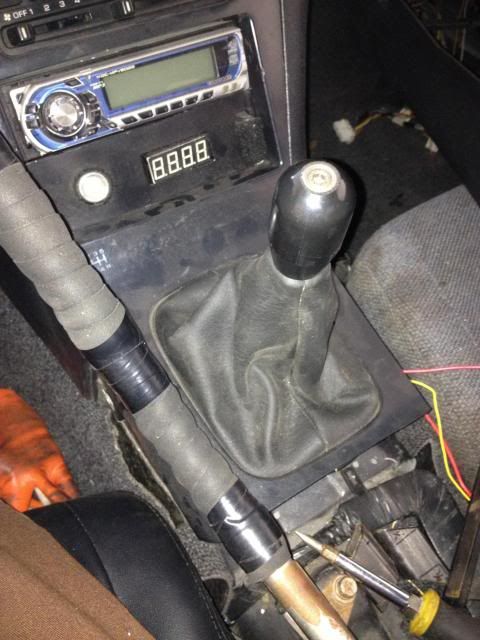 I will have to get a video of the setup in progress.
__________________
Facebook Link: https://www.facebook.com/brickhouseproductsllc |
|
|
|
|
11-25-2013, 08:04 AM
|
#37 | |
|
Zilvia Member
Join Date: Sep 2005
Location: Bartlesville, OK
Posts: 227
Trader Rating: (5)
Feedback Score: 5 reviews
|
Quote:
I don't remember the place and tossed the recipes already. However, I actually bought more than I needed so if you want to replicate the setup you can buy some of them off me. PM me if interested. Greg
__________________
Facebook Link: https://www.facebook.com/brickhouseproductsllc |
|
|
|
|
|
12-16-2013, 08:39 PM
|
#38 |
|
Zilvia Member
Join Date: Sep 2005
Location: Bartlesville, OK
Posts: 227
Trader Rating: (5)
Feedback Score: 5 reviews
|
Hey guys,
This build continues! I have been working to get sooooo much done prior to my second child's entry into the world. She and Mom are doing awesome! I will have an update soon. Thanks for following!
__________________
Facebook Link: https://www.facebook.com/brickhouseproductsllc |
|
|
|
|
12-16-2013, 08:54 PM
|
#39 | |
|
Post Whore!
Join Date: Dec 2010
Location: SoCal 909
Age: 31
Posts: 4,743
Trader Rating: (42)
Feedback Score: 42 reviews
|
Got excited when this thread was bumped. Either way your family is way more important. Congratulations!
__________________
Quote:
|
|
|
|
|
|
02-08-2014, 06:18 PM
|
#40 |
|
Zilvia Member
Join Date: Sep 2005
Location: Bartlesville, OK
Posts: 227
Trader Rating: (5)
Feedback Score: 5 reviews
|
The Build Continues!!!
It has been awhile since my last post. Just been busy with the new kiddo, and now I am getting ready to move to a bigger place. The new place will offer more living and shop space. The extra space will be very helpful. I will be able to keep my mess in the shop and keep the garage cleaner and my wife should be able to park inside!! haha
During the slow down on the build, Steve and I have kept busy sourcing some of those one off parts that will make the swap possible. Our list included: flywheel, drive shaft, ecu, and wiring. We have successfully located 3 of the 4, with the flywheel on its way to production...or so we hope. The drive shaft was sourced fairly quick and fit up the first try. The ecu and wiring is slightly more interesting not so much in story but in its history. I sent a email over to MA Motorsports with hopes of finding out their suggestion for the best bang for your buck standalone ecu for the VK56. I figured they have the experience with this motor that I don't so they should be the guys to help me figure this out. The response I got back put a ridiculous grin on my face. What I got back was offer to purchase Chris Forsberg's 2010 or 2011 competition 370z BigStuff3 ecu, wiring, and crank pick up. I mean this is the guy that started the VK swap, and has proven its venerability (albeit highly modified). So what do you say when offered this? You say: "Yes, please. And could you and the crew sign it?" So being cool dudes they did just that! At sometime in this down time, I got bored and Steve suggested I make the valve cover fit under the brake booster. So I did that. There is plenty of room for the motor's side to side rock but to say it isn't tight would be a lie. Basically we just wanted to do this to prove it could be done aka play guinea pig. As I sit finishing this post, I am entering my second day of my lower back either having a severe spasm or a bulging or blown disk. So I am now on lifting restriction which will make moving next week interesting. Hopefully I will get an MRI early this next week and get this taken care of. Now on to pictures.... New driveshaft:  Here is a stock drive shaft joint next to the new drive shaft joint. Much more beef!:  THE BOX:  Overall of contents:  Crank and trigger wheel:  Special 370Z Bigsturff3 Ecu...haha:  Thanks Ray, Bill, and Chris:    Here was the boredom tester valve cover. I don't know if we will ever use it but who knows.:  As you can see clearance is tight but it does fit fine.:  Full picture of valve cover installed and brake booster installed:  That is it for this edition. I hope to be back at it in the next couple weeks and get more regular on the posts again. Until next time...
__________________
Facebook Link: https://www.facebook.com/brickhouseproductsllc |
|
|
|
|
03-07-2014, 04:37 PM
|
#41 |
|
Zilvia Junkie
 Join Date: Mar 2005
Location: Cincinnati / Gaithersburg
Age: 38
Posts: 360
Trader Rating: (2)
Feedback Score: 2 reviews
|
Sick man, Looking forward to you finishing this build. I've been throwing around the idea but always assumed there wouldn't be a way to close the hood! Let us know how that ECU goes
|
|
|
|
|
03-12-2014, 09:08 PM
|
#42 |
|
Zilvia FREAK!
 Join Date: Sep 2005
Location: Ashland, NE
Age: 38
Posts: 1,359
Trader Rating: (20)
Feedback Score: 20 reviews
|
Thanks man! It should be a rad setup. A custom manifold that will clear the hood is the plan down the road. It's kind of on the round two parts list. Round one is get it in the bay with the necessities - mounts, driveshaft, oil pan, etc.
__________________
BRICKHOUSE PRODUCTS
IG @brickhouse_products |
|
|
|
|
06-08-2014, 08:30 PM
|
#43 |
|
Zilvia Member
Join Date: Sep 2005
Location: Bartlesville, OK
Posts: 227
Trader Rating: (5)
Feedback Score: 5 reviews
|
Little bitty teaser. I got multiple full posts coming in the next couple weeks.

__________________
Facebook Link: https://www.facebook.com/brickhouseproductsllc |
|
|
|
|
06-10-2014, 06:11 AM
|
#45 | |
|
Zilvia Member
Join Date: Sep 2005
Location: Bartlesville, OK
Posts: 227
Trader Rating: (5)
Feedback Score: 5 reviews
|
Quote:
At this point I think it is pure stubbornness. However we have invested in the parts and we have the knowledge, tools and the ability to get this thing done. I think once we do this others will follow and improve upon it. An example would be the rb26 swap 8-10 years ago compared to now. I think it is kind of exciting and challenging to take the road less travelled albeit lonely.
__________________
Facebook Link: https://www.facebook.com/brickhouseproductsllc |
|
|
|
|
|
06-10-2014, 07:02 AM
|
#46 | |
|
Zilvia Junkie
Join Date: Dec 2011
Location: Hampton VA
Age: 33
Posts: 417
Trader Rating: (1)
Feedback Score: 1 reviews
|
Quote:
you guys seem to know what you're doing, so i'm really excited to see how this build pans out. New aero looks good by the way, forgot to mention that in my first comment. lol.
__________________
(*≧▽≦) |
|
|
|
|
|
06-10-2014, 06:11 PM
|
#47 |
|
Leaky Injector
|
lol, i was wondering who bought that setup.
cams and itbs are the ticket to making good power on these motors.
__________________
Of all the things I've lost, I truly miss my mind the most. |
|
|
|
|
06-10-2014, 06:58 PM
|
#48 | |
|
Zilvia Member
Join Date: Sep 2005
Location: Bartlesville, OK
Posts: 227
Trader Rating: (5)
Feedback Score: 5 reviews
|
Quote:
I hope you don't mind Carl H, but I fixed your comment. I have made this swap kit with my own sweat and some beers. If you were referring to the motor set itself, we picked that up at a junk yard. It will be stock rebuilt for this summer with power adders hopefully to follow this winder.
__________________
Facebook Link: https://www.facebook.com/brickhouseproductsllc |
|
|
|
|
|
06-11-2014, 10:02 AM
|
#50 |
|
Join Date: Dec 2013
Location: San Diego
Age: 36
Posts: 20
Trader Rating: (0)
Feedback Score: 0 reviews
|
Love this thread man!! ever since my buddy got a titan i have wanted to use the motor in my 240. This thread has been insane, I love all the custom work you have put into it. Also I now have even more respect for Chris Forsberg and his crew. Super cool of them to not only sell you his set up but to sign it as well. GLWB can't wait to see it start up
|
|
|
|
|
06-11-2014, 07:29 PM
|
#51 |
|
Leaky Injector
|
i was talking about the ecu/harness/trigger... i understand you put the motor in the car.
__________________
Of all the things I've lost, I truly miss my mind the most. |
|
|
|
|
06-11-2014, 08:34 PM
|
#53 | |
|
Zilvia Member
Join Date: Sep 2005
Location: Bartlesville, OK
Posts: 227
Trader Rating: (5)
Feedback Score: 5 reviews
|
Quote:
Thanks to everyone for the kind words. I am trying to get a post up before this weekend. Life has been busying what can I say.
__________________
Facebook Link: https://www.facebook.com/brickhouseproductsllc Last edited by thetopcow; 06-11-2014 at 09:09 PM.. |
|
|
|
|
|
06-17-2014, 10:38 AM
|
#54 |
|
Zilvia Junkie

Join Date: May 2009
Location: Illinois
Age: 33
Posts: 351
Trader Rating: (0)
Feedback Score: 0 reviews
|
To fix your brake booster clearance problem you could use the brake booster delete that chasebays has or you could use the pedal box that enjuku racing sells, just an idea
Sent from my XT1080 using Tapatalk |
|
|
|
|
06-18-2014, 05:05 PM
|
#55 | |
|
Zilvia Member
Join Date: Sep 2005
Location: Bartlesville, OK
Posts: 227
Trader Rating: (5)
Feedback Score: 5 reviews
|
Quote:
__________________
Facebook Link: https://www.facebook.com/brickhouseproductsllc |
|
|
|
|
|
06-18-2014, 05:07 PM
|
#56 |
|
Zilvia Member
Join Date: Sep 2005
Location: Bartlesville, OK
Posts: 227
Trader Rating: (5)
Feedback Score: 5 reviews
|
Well it has been sometime since I got anything up....*muttered under breath*...4 months...*cough, cough*.
There has been a large gust of wind in the VK56 swap sails. Steven and I have set a couple dates we would like to see things done: end of July should see swap completion and ready for tune; Mid-late August should see the remaining small bits on the car. Steven is going to make a trip back for a month in July/August to see family and then work with me on getting this beast to a tunable state. That way, Steve (Iceman), can come down, celebrate birthdays, and tune this thing and get it moving under it own POWA!!!! We picked out a body kit to run on ol' Minty. I am pretty excited about the kit. It is a JP USA or JP Vizage Type 2 180sx kit. It fits my style for sure and it was the one Steven and both agreed on. The bad part about the kit is it just added to my ever growing "to do list". hahaha...fml. The whole goal of all this show and go parts list, is to make the Offset Kings event in Fort Worth that is in conjunction with Formula D. (If this gets cancelled, someone please let me know!!) Oh, and I redid the motor mounts for the 3-4th time. I am much happier with them now, they allow better clearance for the headers. Did you say headers?!? Oh, and I redid those as well. I have been really stuck on these things as they weren't equal length...until now. Now that they are equal length the e-nerd in me can sleep easier at night. Sometime in the near-ish future I would like to make a set of headers as similar to stock headers as I can to see what the potential power gains are and where they lie side by side on the dyno graph. Some of the every extending list of things to do is: Move engine bay wiring to under dash Prep and paint the kit after fitting it Prep and paint the new rims - info to follow Make a "y" pipe Finish my 1, 2,...3rd set new and improved should be equal length headers Extend front LCAs Fix passenger front fender(or buy a decent one for cheap) Fill rear windshield squirter hole that I forgot to do the first time I painted the body...fml Add back new bling gauges - more info later Install fresher seats - more to come on this too Swap steering wheels - yep, later update Clean up door card fabric Add Dvd Deck, and sub enclosure (if time, stupid high school me wants this) Make rear jacking point for rear bumper support Install new GP Sports G Master coilovers Finish welding stuff that needs it Clean and Rebuild motor Rebuild R200 Kaaz unit and set lash in pumpkin I am sure there is more but that was only 10 minutes of thinking about it...hanging head... Anyway lets do some pictures: I finally started using the Evolution Raptor Saw, and it is badass. I have used it to cut my header piping and it makes for a very clean and true cut:  Here is the redone motor mounts. Thankfully I made a jig. It made the remake effortless:  Painted and installed:  The headers are coming, the headers are coming:  For you duct tape fans out there:  Tacking it together, and the current state:  Motor mounts now allow more room for headers:   I did a quick check with the oil pan to make sure nothing had warped during welding, and thankfully it was all just fine:  Then I got distracted!!!:    Oh and whats that more shit to distract me further!!!!:   For anyone needing to rebuild their KAAZ R200 here is a diagram for how to place the clutch plates for 80% and 100% engagement:  Follow me on instagram @brickhouse_greg for in the moment postings. I will be trying to document the next couple month as best as possible. LOTS TO COME!!
__________________
Facebook Link: https://www.facebook.com/brickhouseproductsllc |
|
|
|
|
08-19-2014, 03:36 AM
|
#57 |
|
Zilvia FREAK!
Join Date: Sep 2005
Location: Ashland, NE
Age: 38
Posts: 1,359
Trader Rating: (20)
Feedback Score: 20 reviews
|
Normally Greg writes these posts but this time I, Steve, am at the helm because for the first time since starting this project I was able to work on it in person. My wife, Shio, and I came back to the States for four weeks starting in mid-July and, while seeing family was a big part of the trip, a secondary goal was re-working our VK56 S13 demo car (aka the Minty Smash and Minty Fresh categories on the blog).
Back in June or so, Greg and I set the deadline for the car's debut to be the Offset Kings Car Show at Formula Drift Texas September 13th weekend...and it's now nearing mid-August. We've got some work to do! With the deadline set and the fabrication nearing completion on the swap, our discussions turned to what we wanted the car to look like. The VK56 swap was cool alone but we wanted to present it in a complete package - engine, interior, exterior, and suspension. We both agreed on "JDM-ish with a clean VK56 swap." That's somewhat vague but we both were on the same page when we started planning out each aspect. Since I live in Japan and YAJ like a madman, I had the JDM part covered. And as Shio and I neared our departure date, things really started to move into high gear and our tatami room looked like this as I packed and shipped some last minute items. 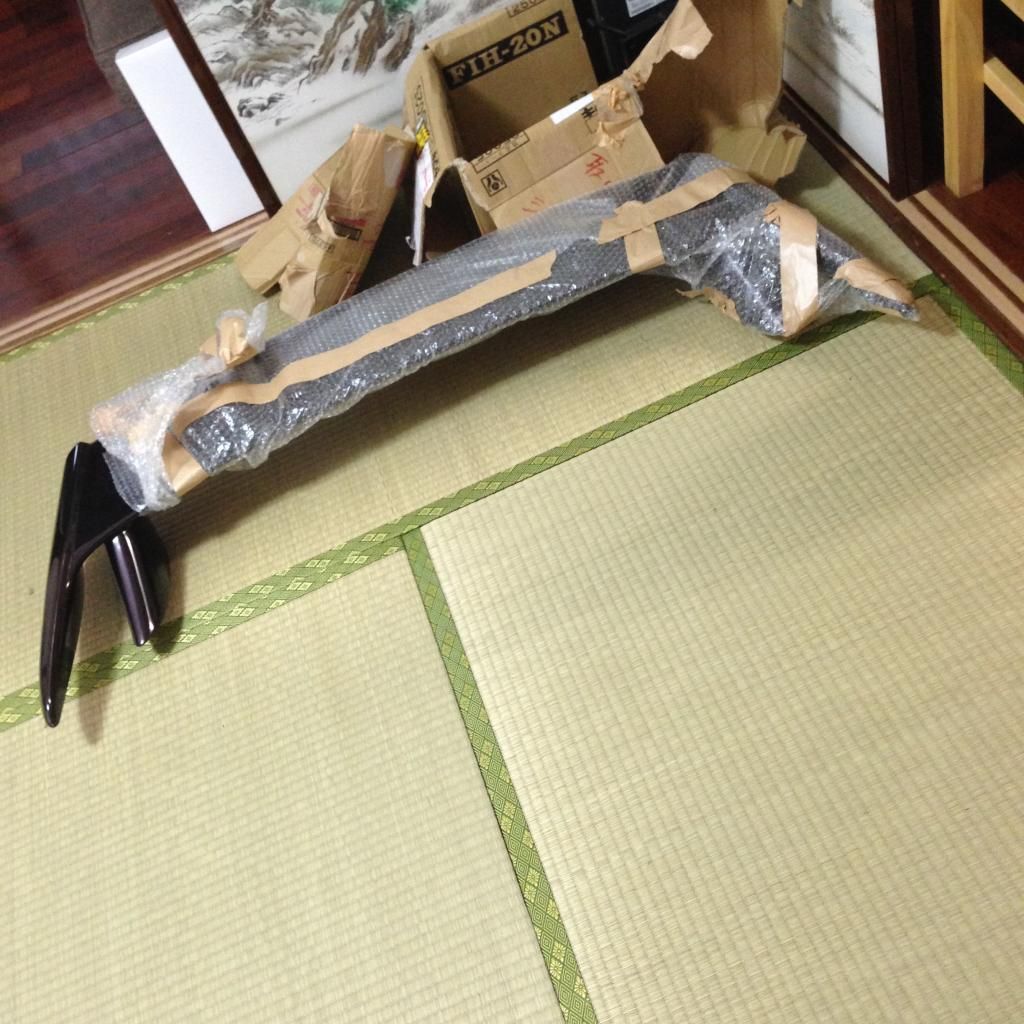 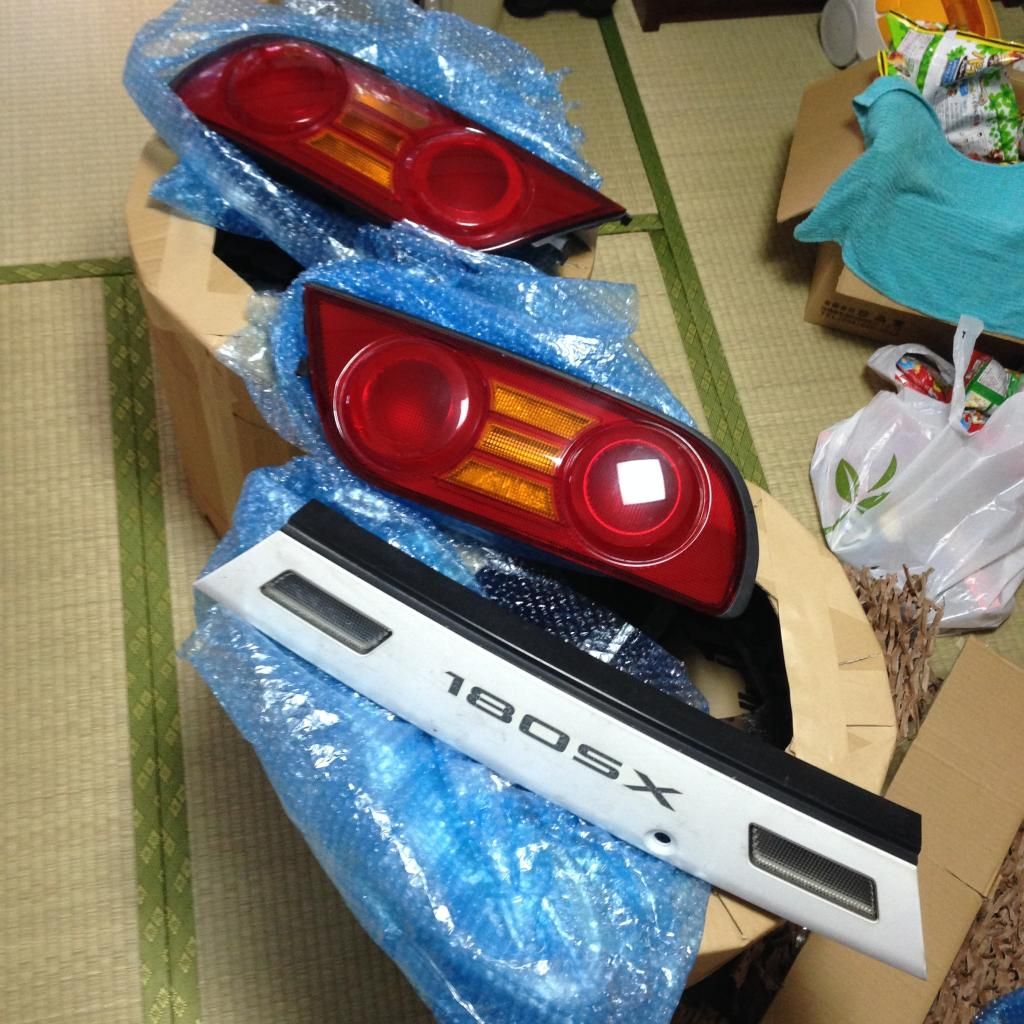 When we finally made it to Greg's house, he and I laid out three to-do lists - engine/engine room, exterior, and interior - and started tackling each item as it made the most sense. First up was finishing the equal length headers Greg's been working on. As I watched him adjust the runners and test fit it all in the bay, it really made me appreciate how many times he had pulled and put in the engine by himself. There's seriously a ton of man hours in these headers and every other aspect of fitting the engine in the bay. I can't give him enough credit for what it's taken to get this far. 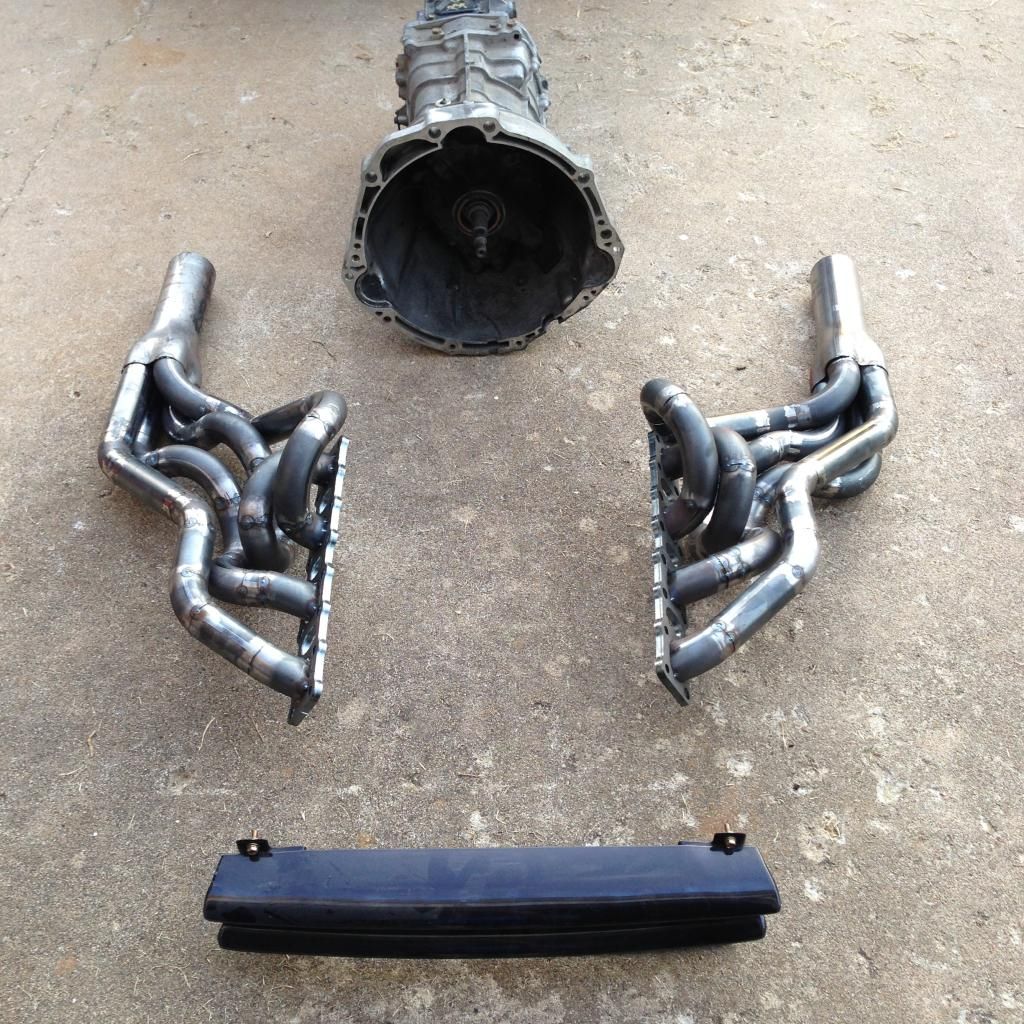 And with those sorted out, the engine could be disassembled. If you'll recall from one of the first posts, our engine had a bent rod so a rebuild was on the to-do list. This was also each of ours first time time rebuilding an engine. So if it runs awesome or fails on the first crank, it will have been a HUGE success in terms of learning experience. 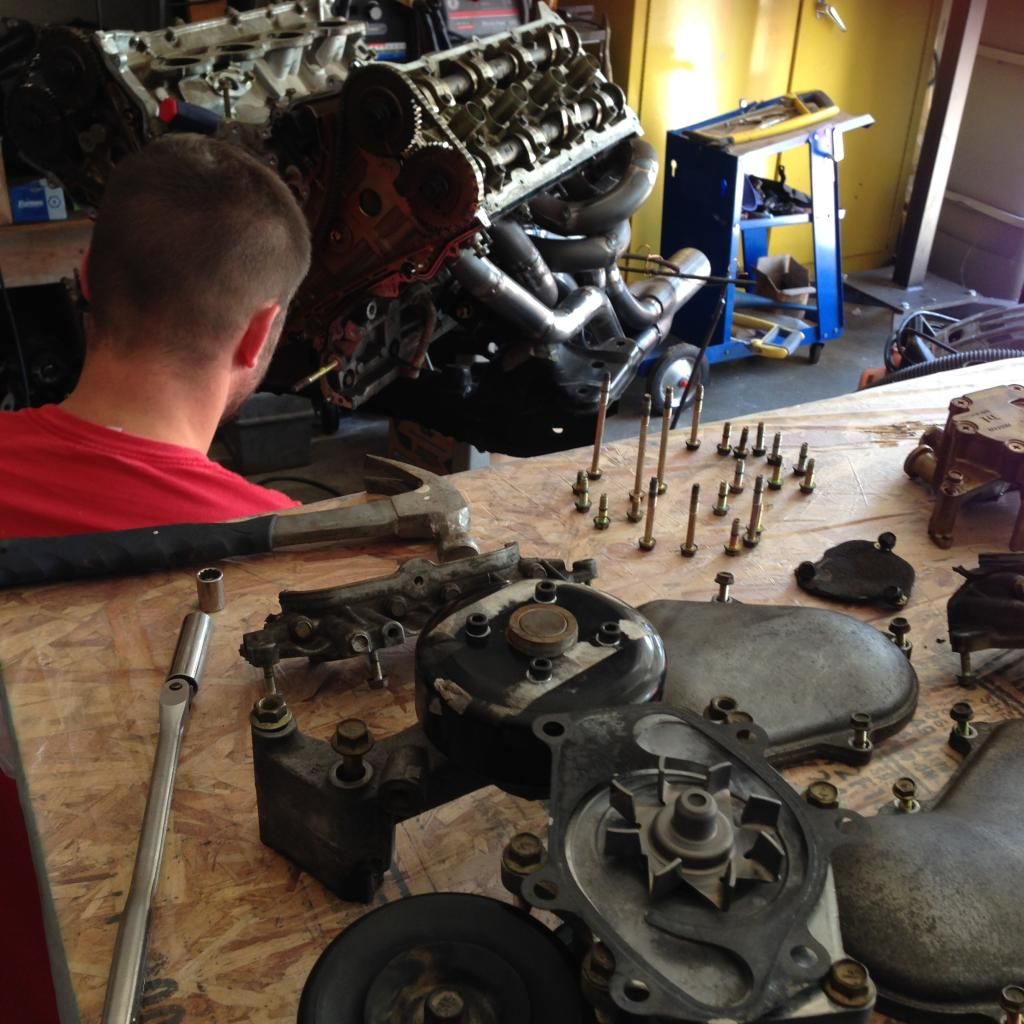 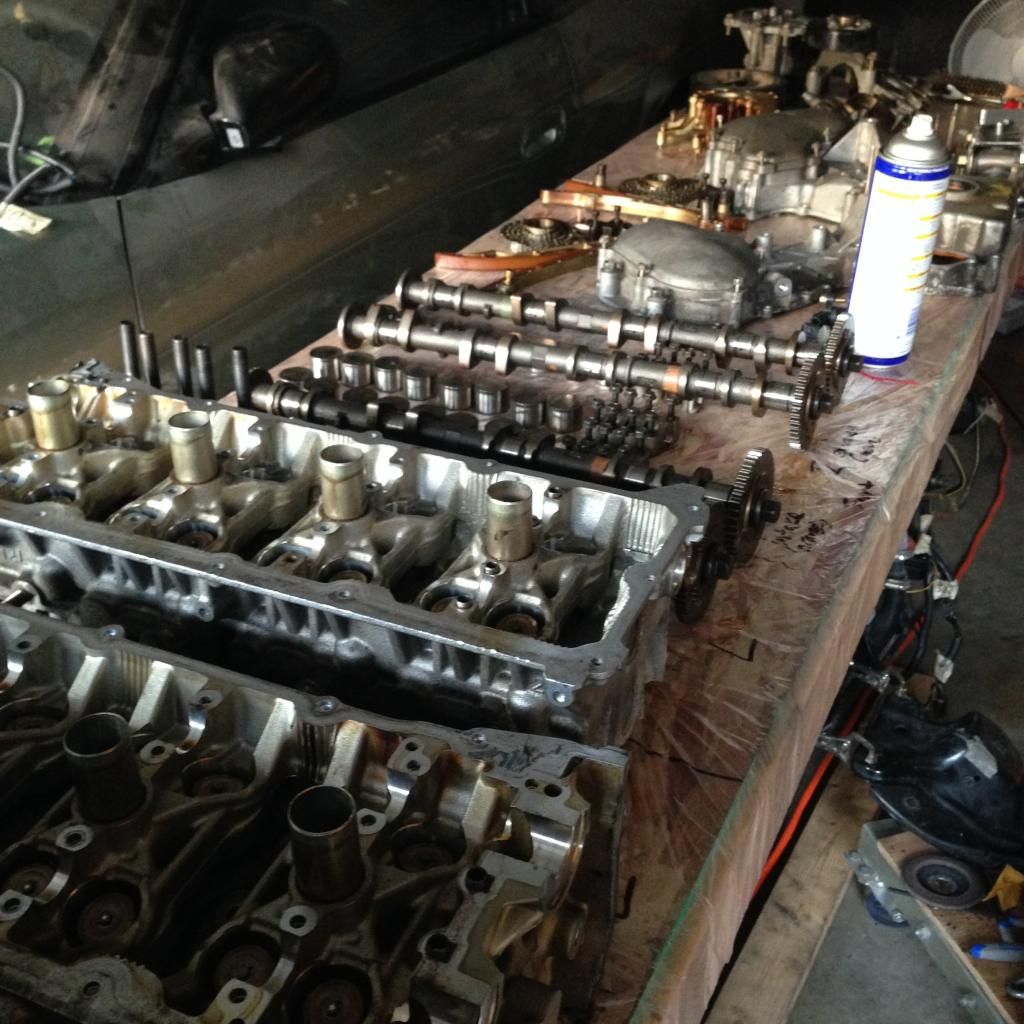 I spent a good deal of time sandblasting the timing covers. This is a show car after all (at least for it's debut) - gotta get that engine looking it's best! Here is the before and after: 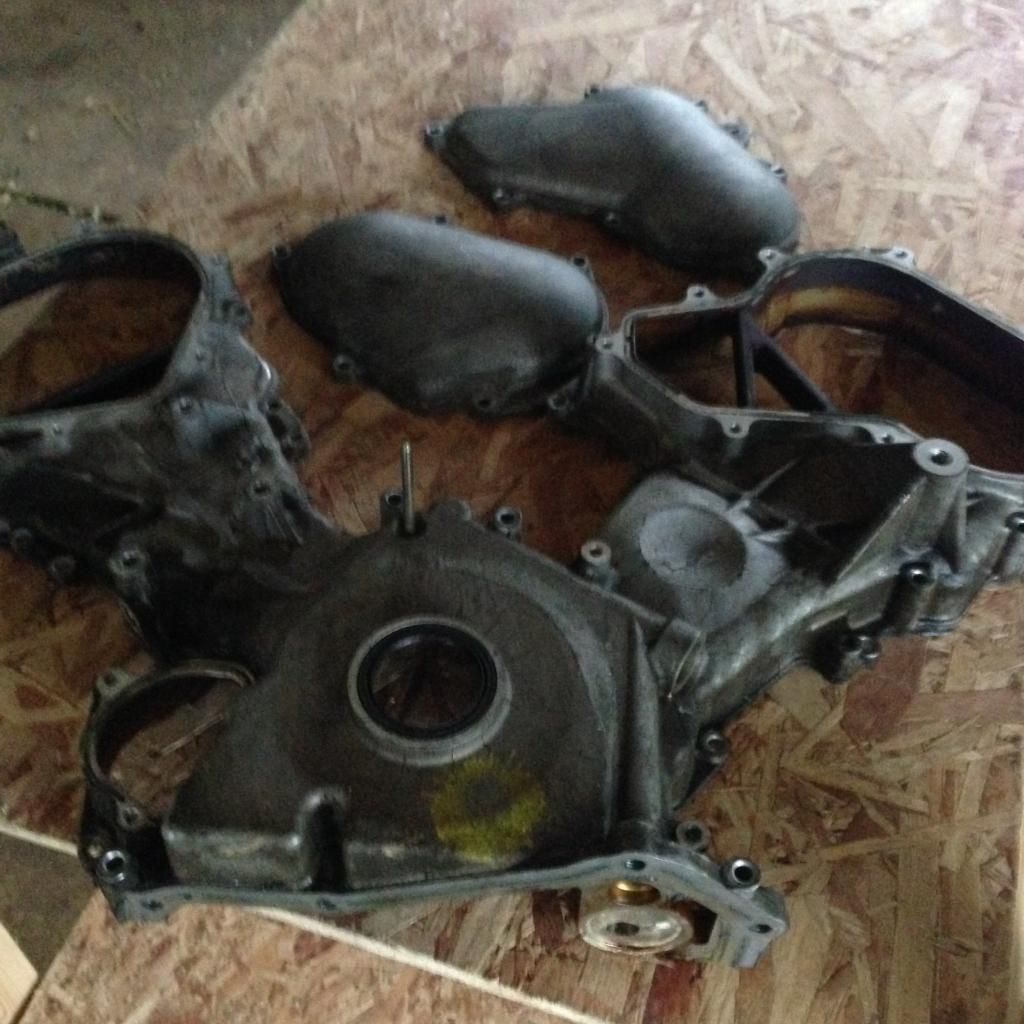 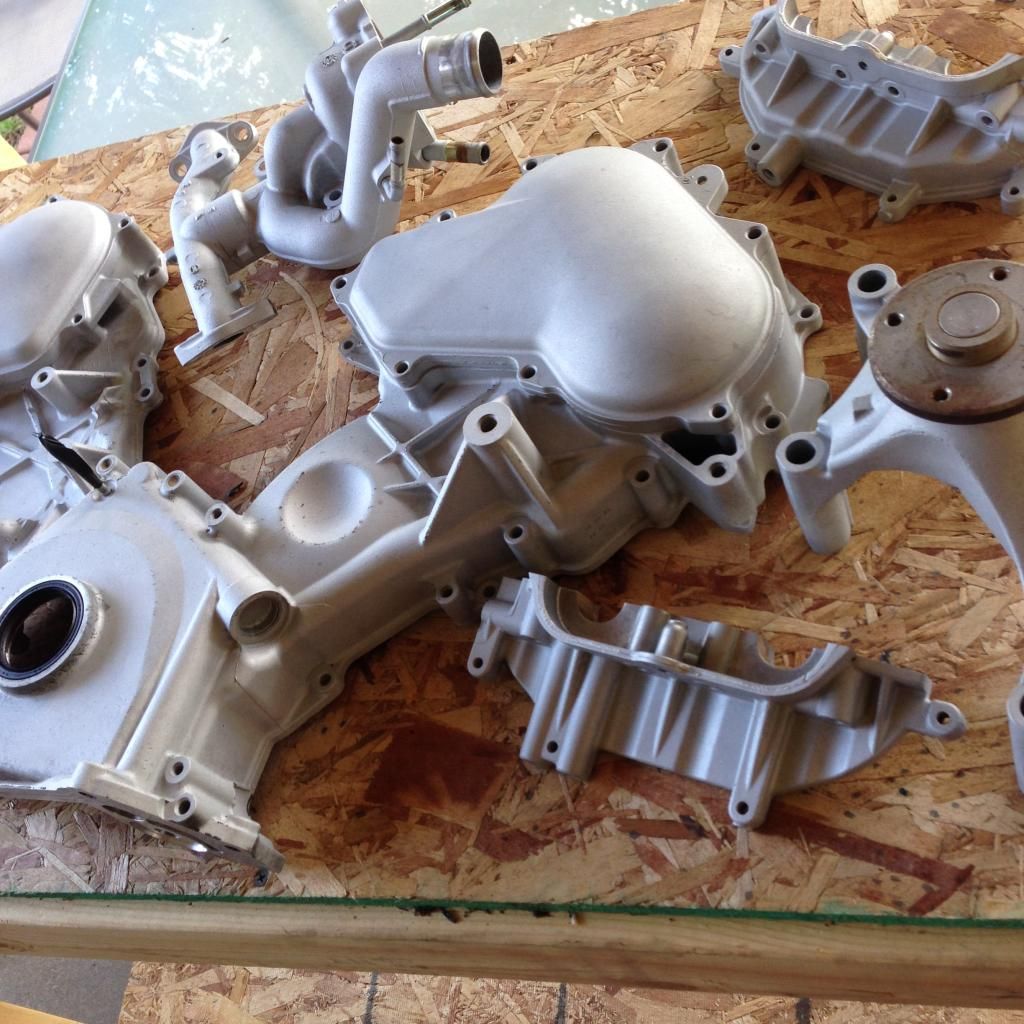 With the to-do lists came an equally impressive to-buy list. Funny how that works. And as the money went out, the parts, fittings, piping, and tools started rolling in. 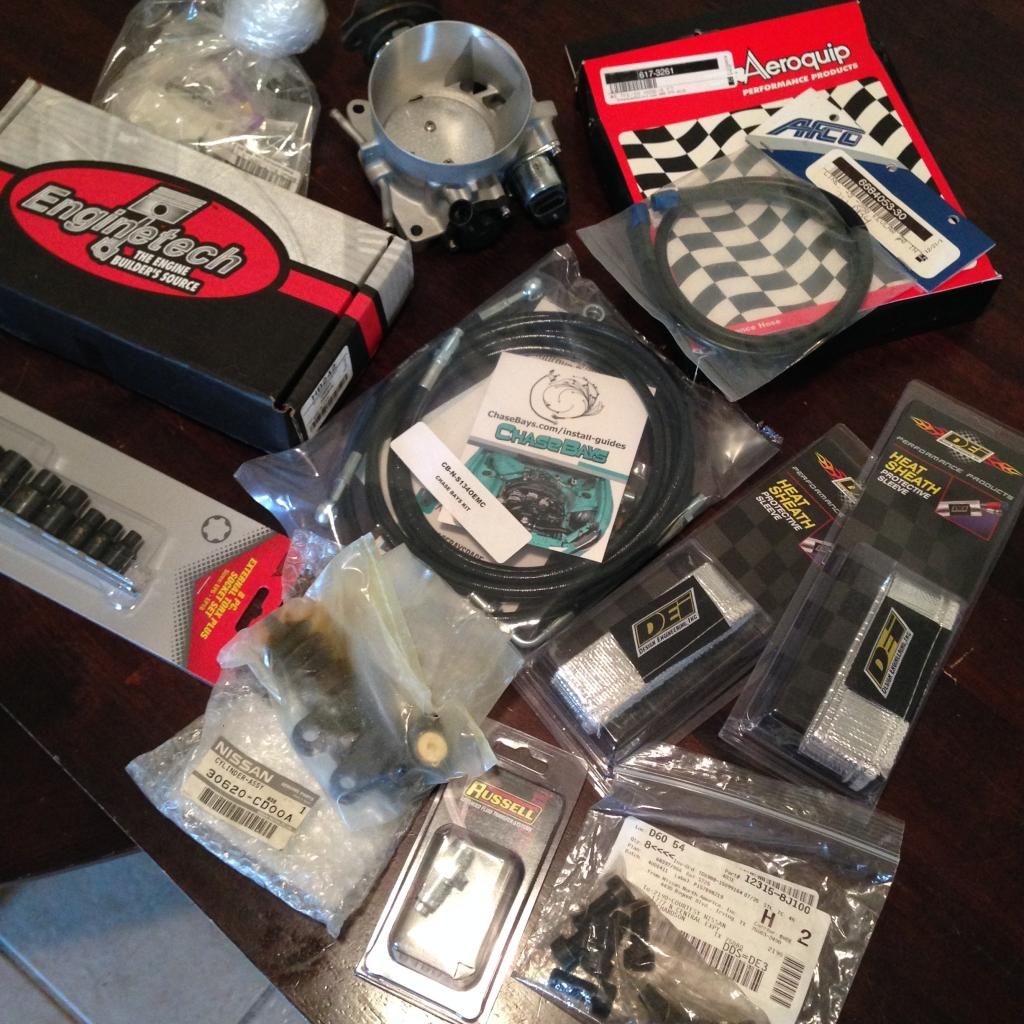 About that time, we signed the lease on our first shop - super excited about this! We definitely needed the space as it doubles (and then some) the current two car garage all this has been happening in prior. Space for other projects has always been an issue. So wait...let's add a shop buildout to the to-list. Haha. Either way, Brickhouse now has a home of it's own!! 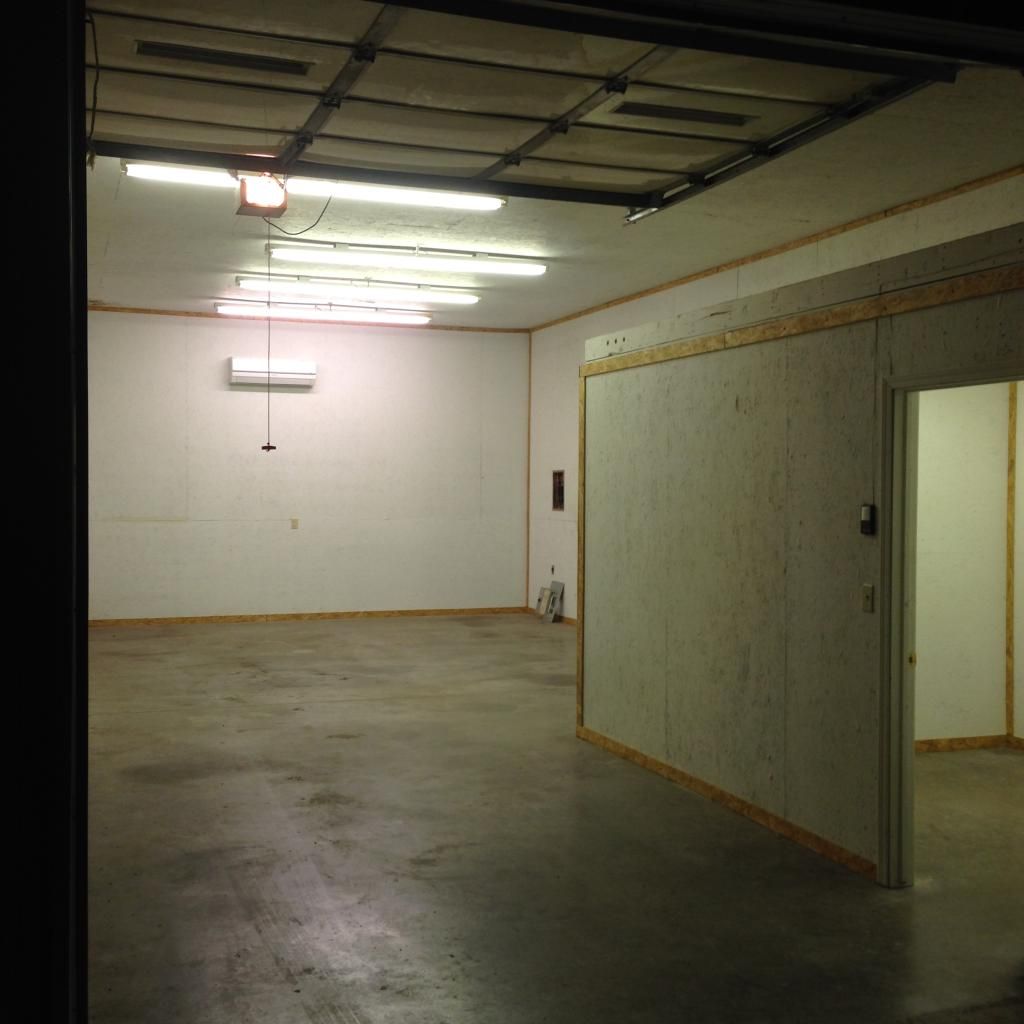 Greg got after welding up some final bits on the oil pan and other odds and ends. 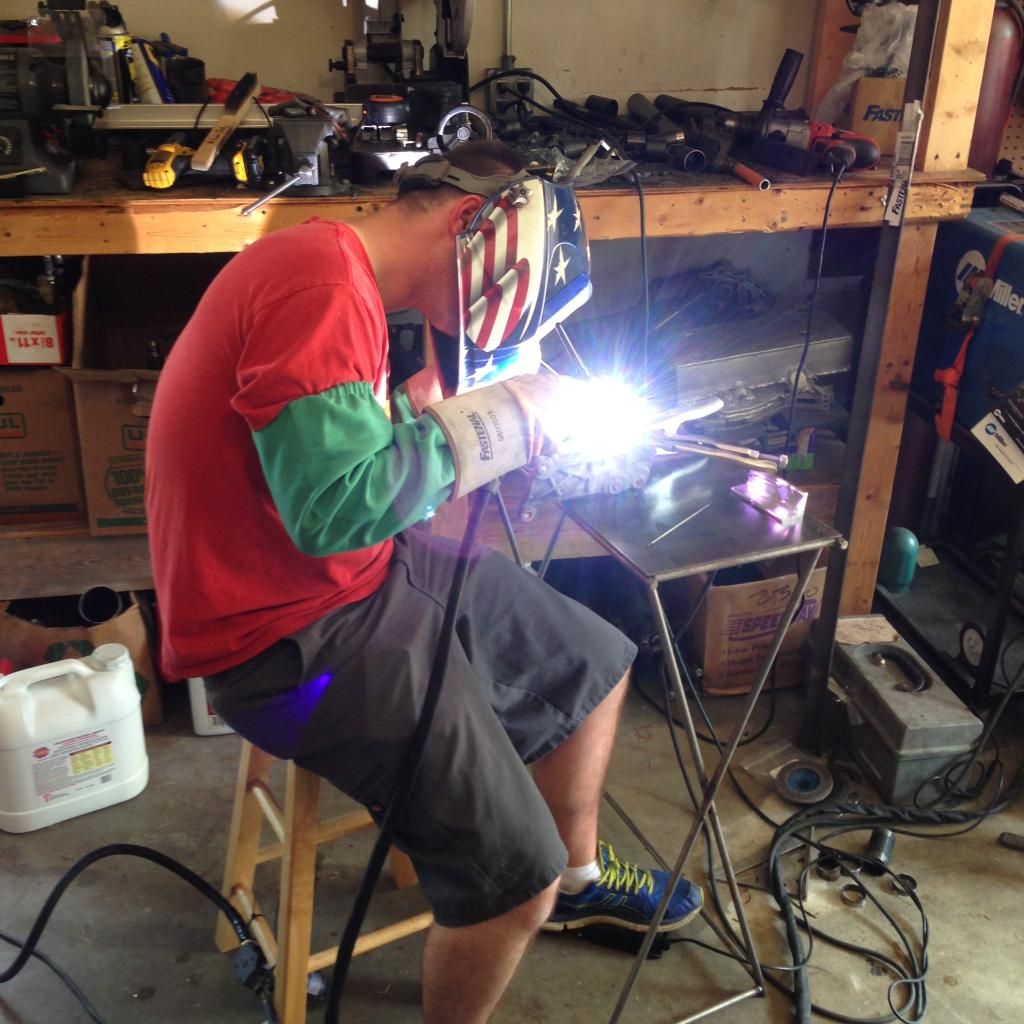 He also knocked out a mount kit for a cool dude who's been a supporter from day one and really wants a VK'd S13! These aren't production pieces - just something to allow the customer to locate his engine in the bay and figure the next aspects of his VK56 build. 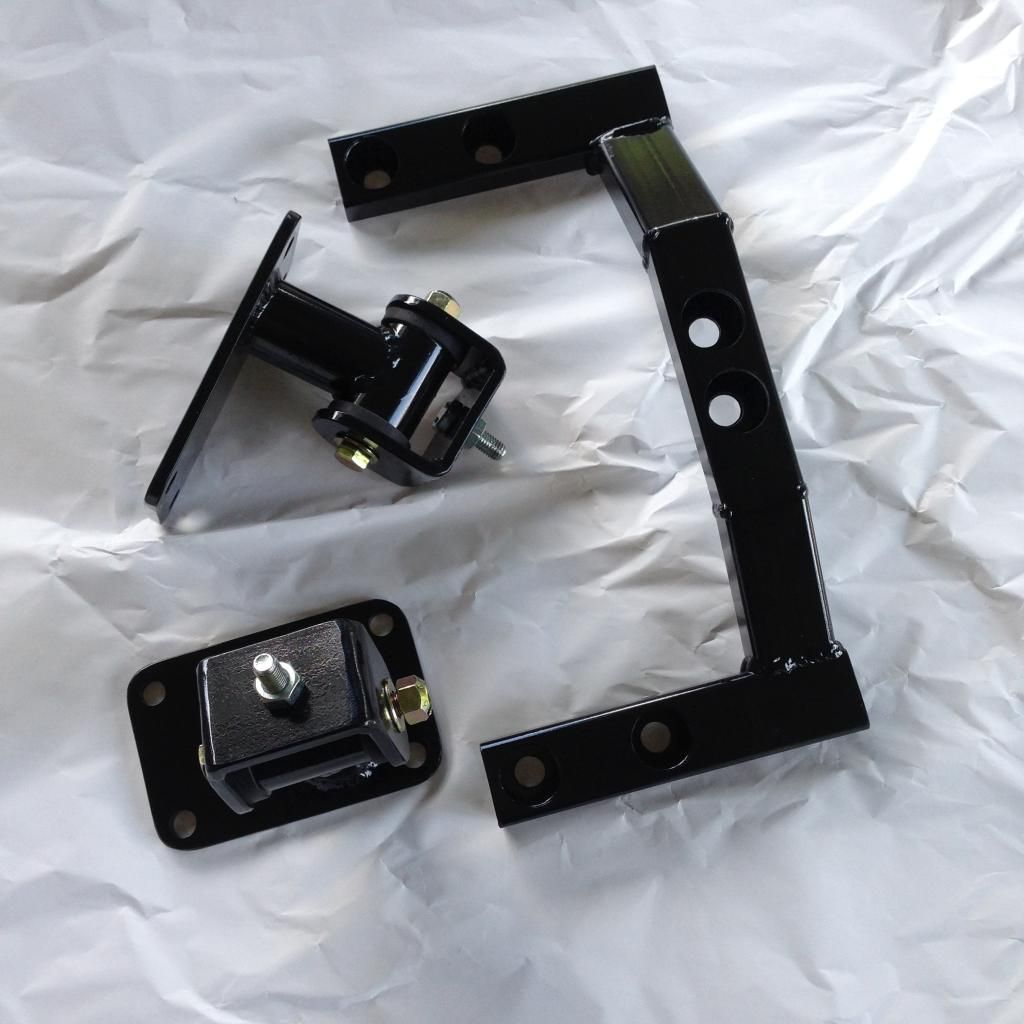 I got after getting the exterior pieces ready for paint. First up was our lovely set of 17/18 Regamasters. If you'll recall the set I sold a while back, these are the other half to that. See there is some method to my madness. Haha. 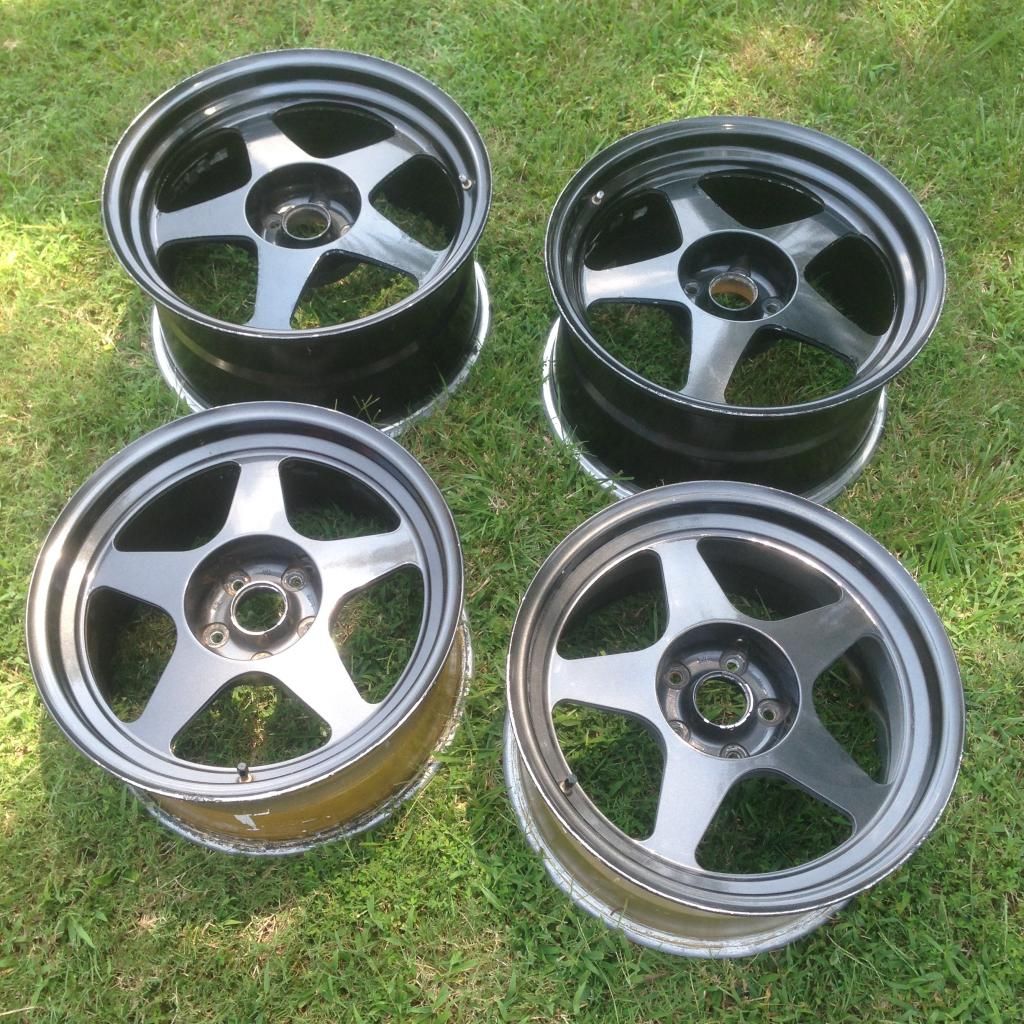 They got sanded down. Trust me, he's a professional...for real. Greg can get a straighter surface with a DA than most dudes could hope to blocking it. 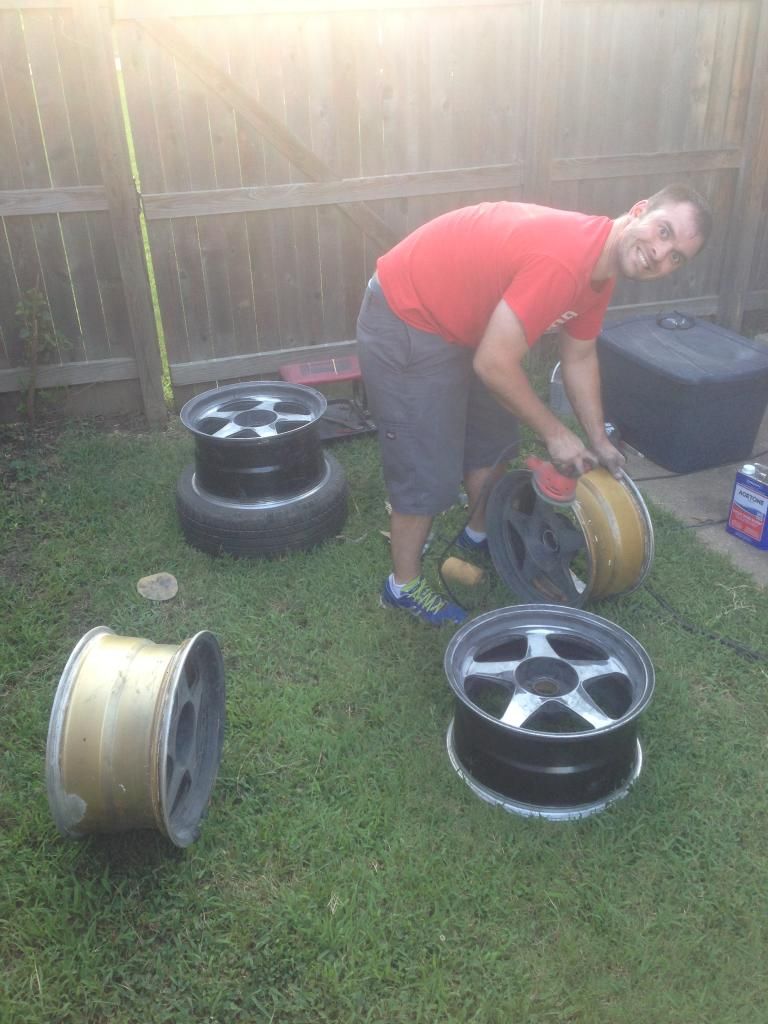 And primered. The shop has thus far turned into a temporary paint booth which has allowed us to split up the bodywork from the engine work. That alone has been a huge help. 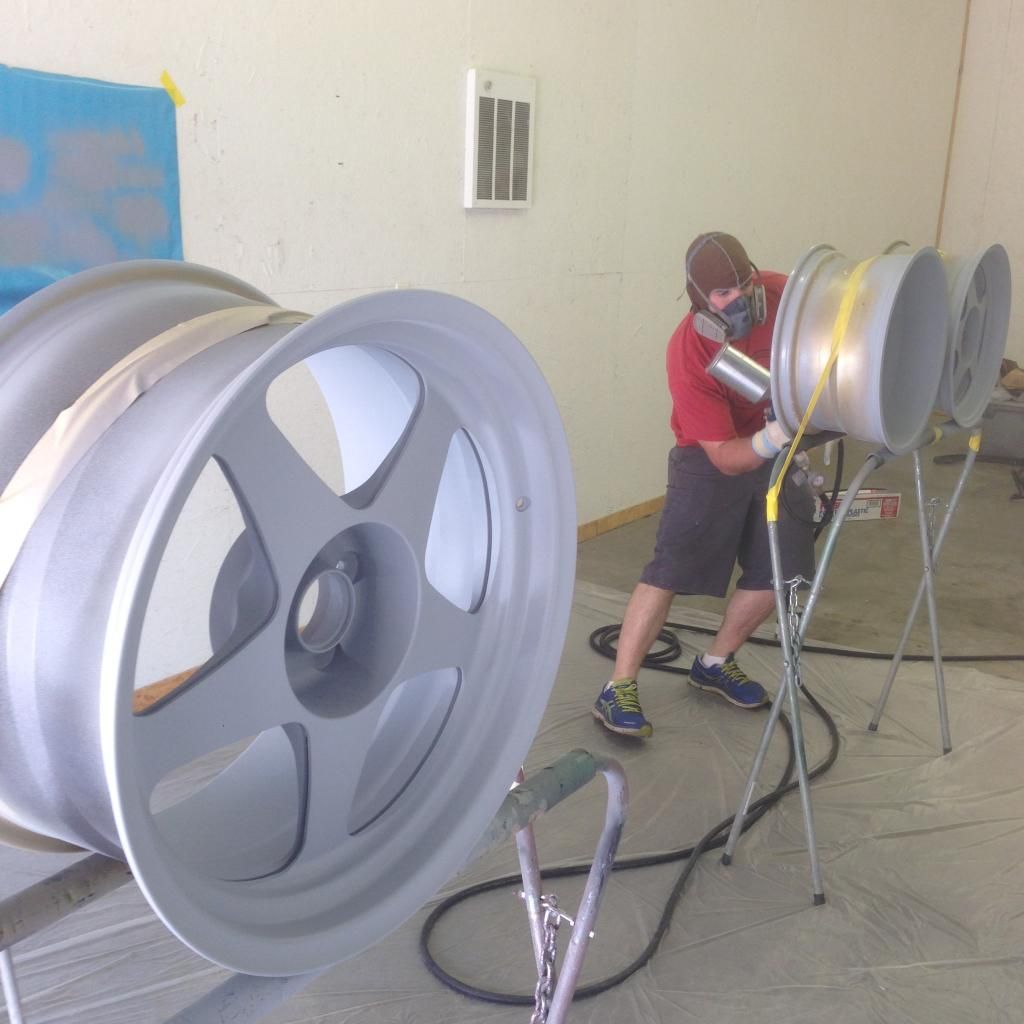 We really wanted that aggressive front camber look. Like D1SL car setup - aggressive camber front and straight up and down in the rear. Greg did up some 30mm extended FLCAs. These should work great with the cut knuckles and relocated rack we did a while back. 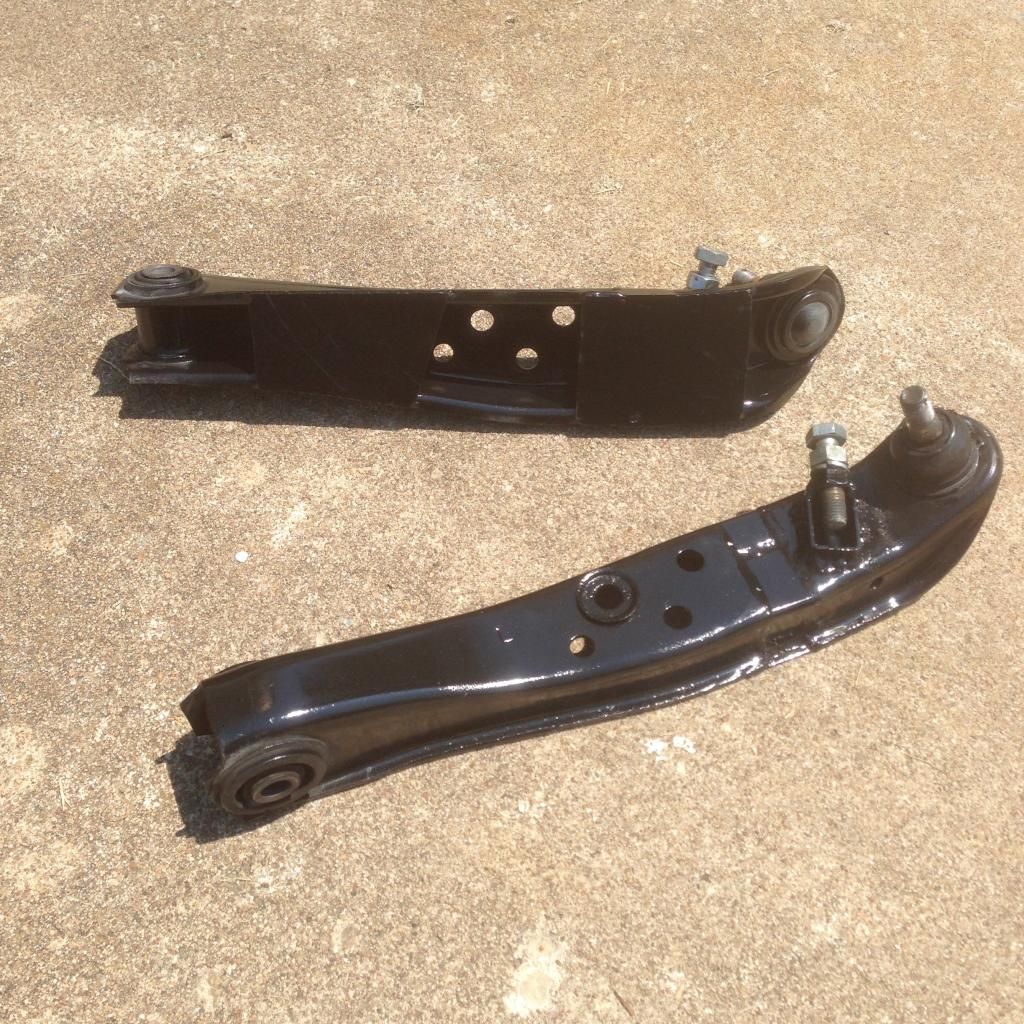 Mission accomplished. This kind of gives you an idea of the front camber. So awesome. 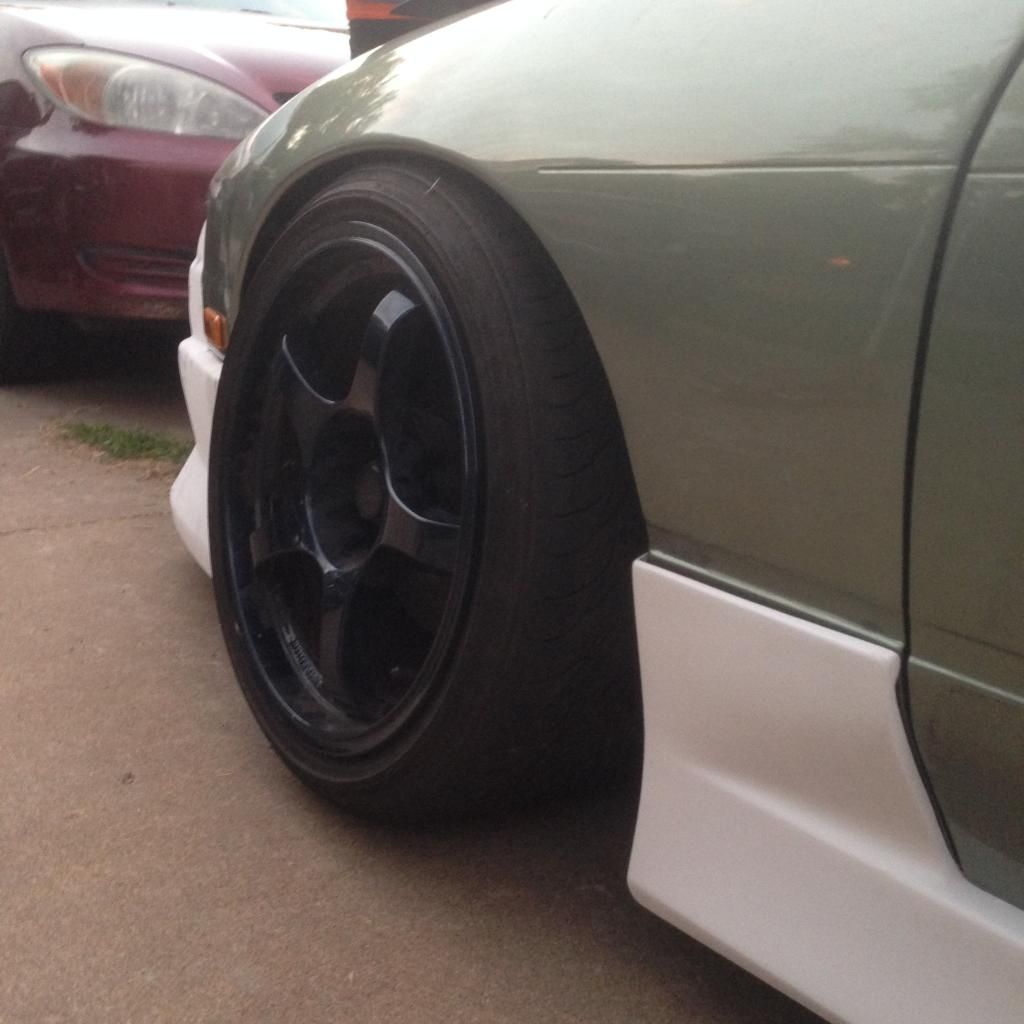 Keeping with the exterior work, we needed to test fit the body kit. 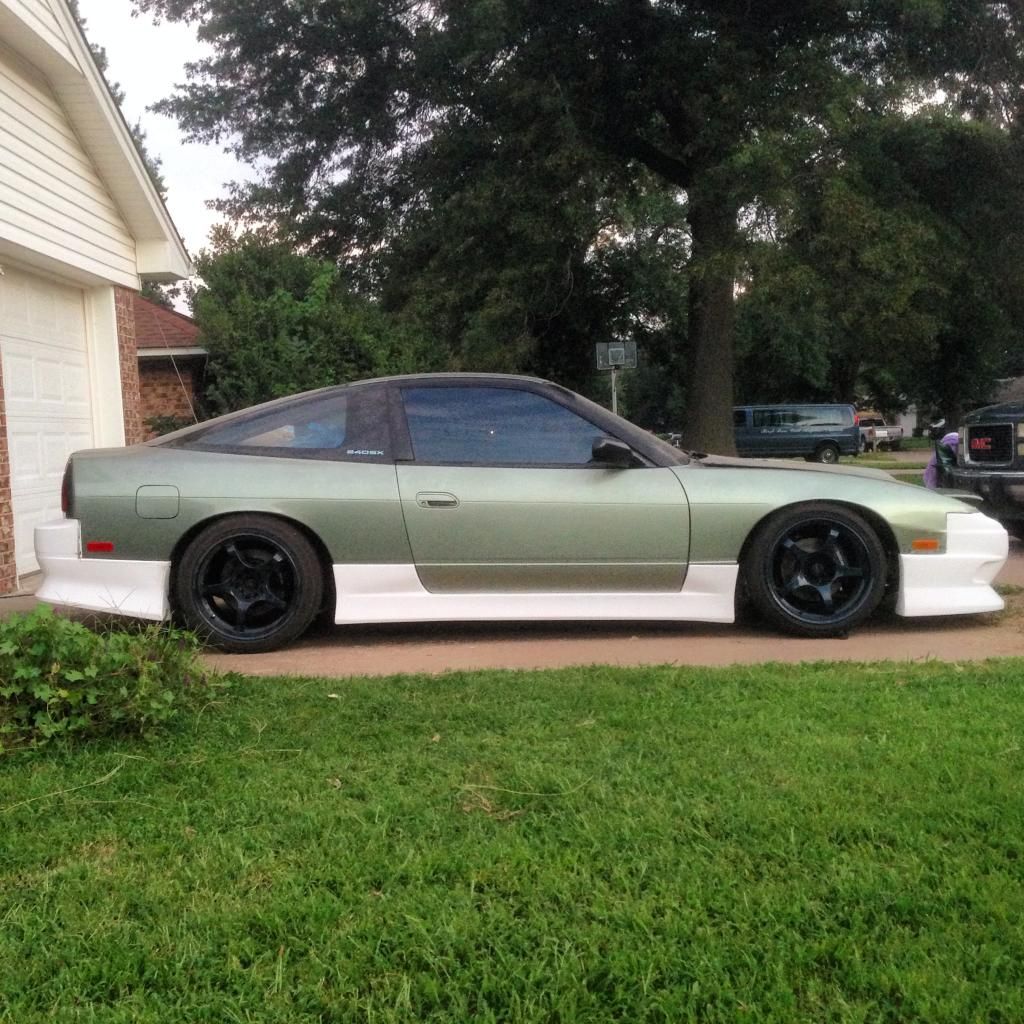 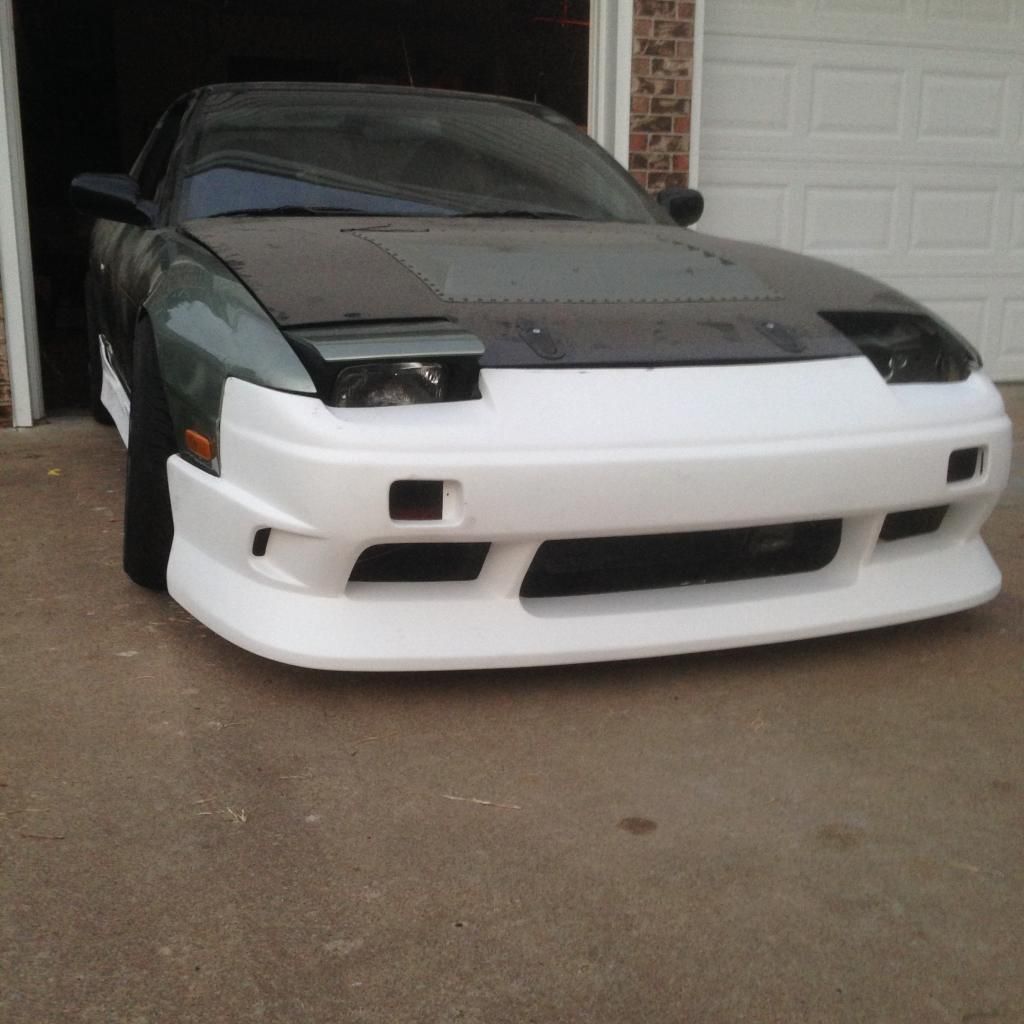 It was pretty darn close and just took a touch of finessing the rear bumper. I love fiberglass. Actually it's itchy and pretty terrible but I enjoy the challenge of getting it all laid up before your hands turn into a sticky ball of goober. 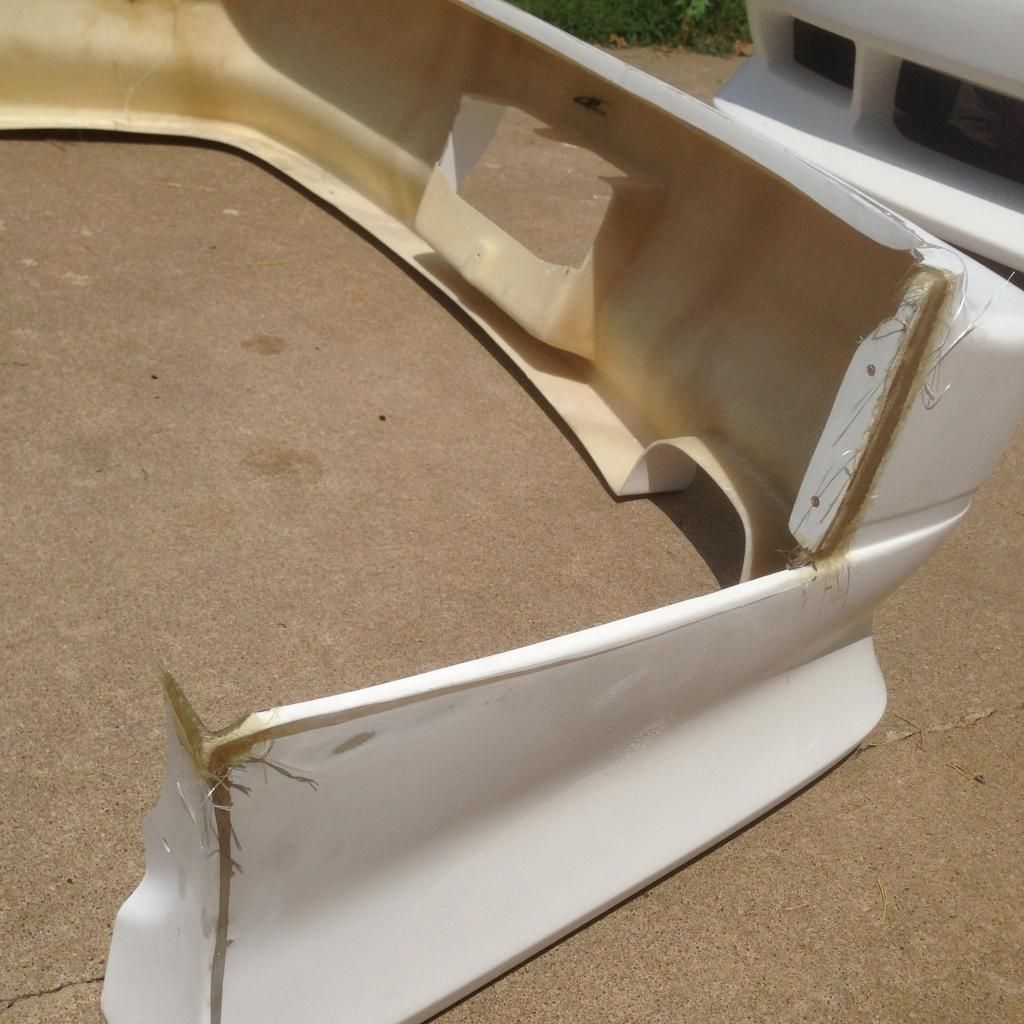 With it on the ground and out of the garage, it got it's first bath in a reallllly long time. 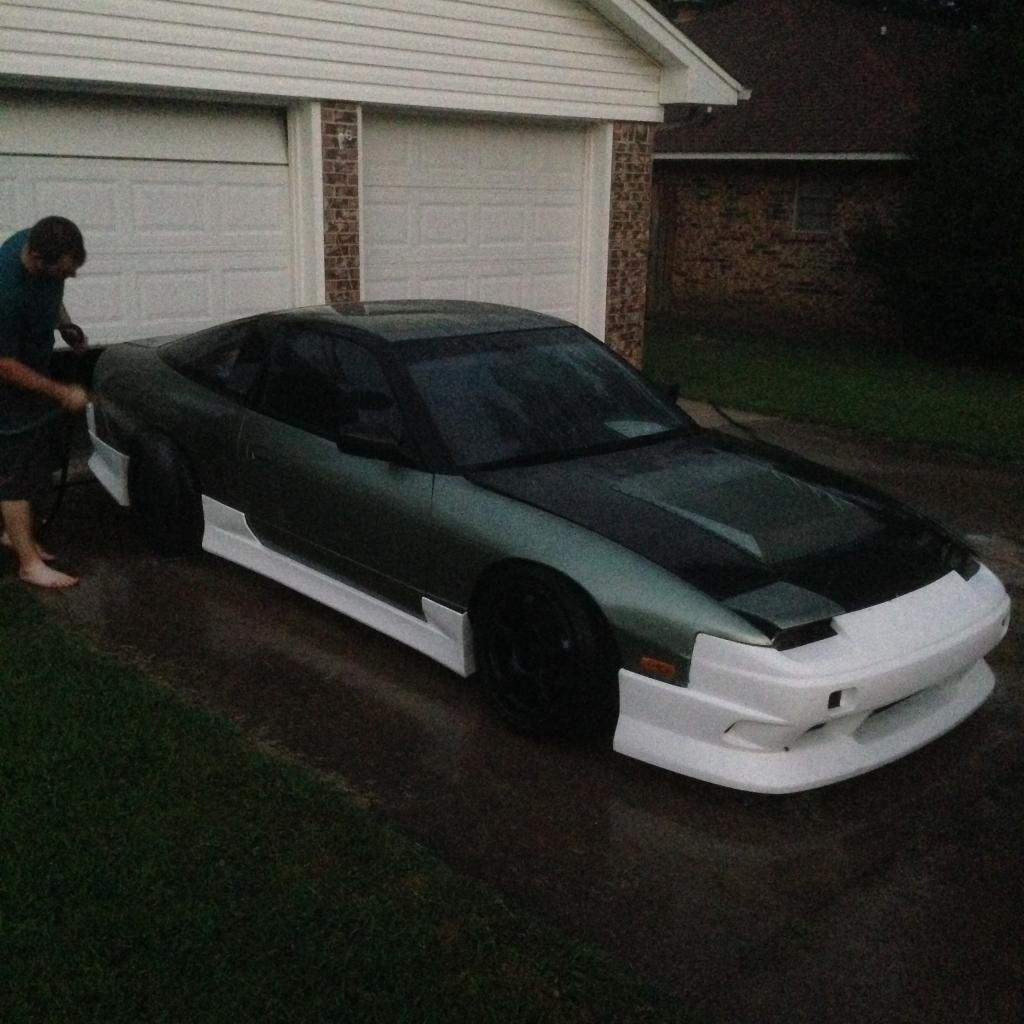 This gets me excited!! 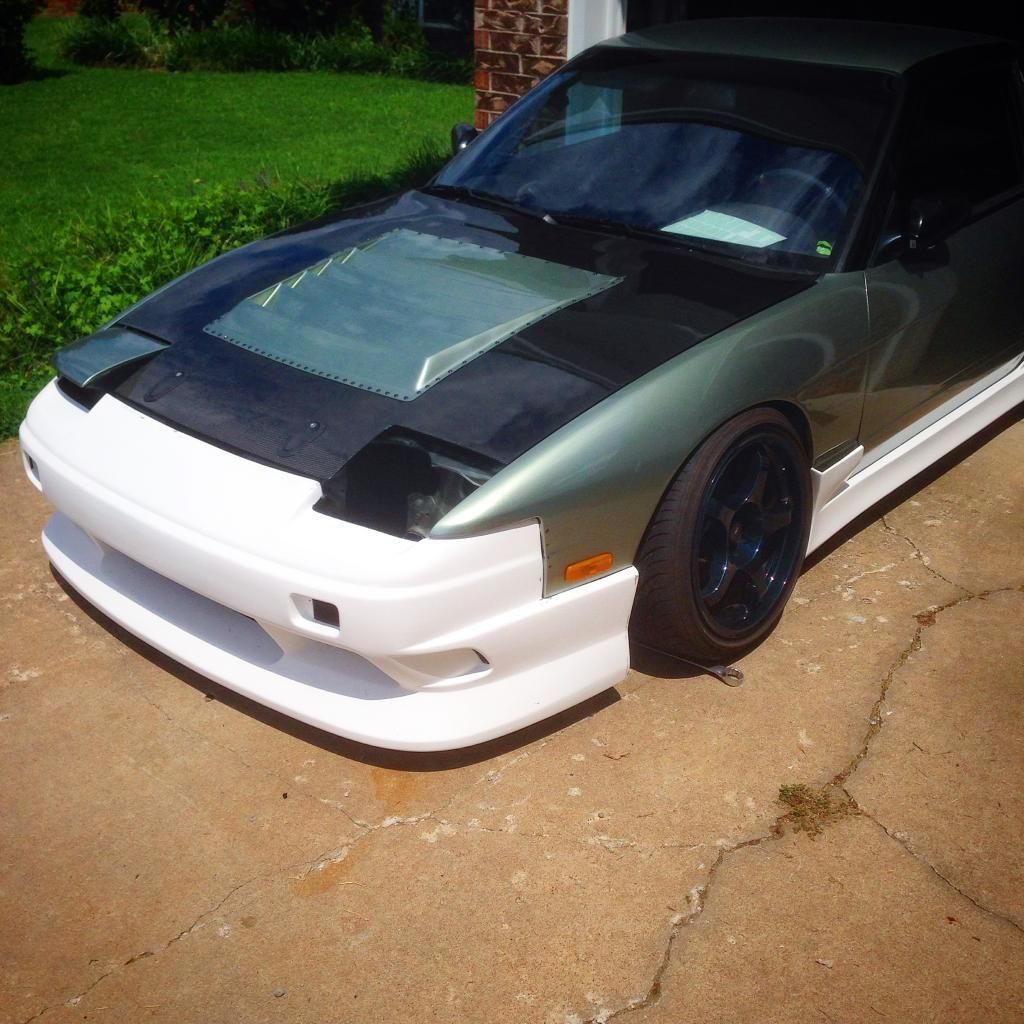 Getting back to the engine work, with the block stripped and cleaned, it was time to reassemble. But first there was even more cleaning of each piece. For every 5 minutes of work, 15 minutes was spent cleaning. 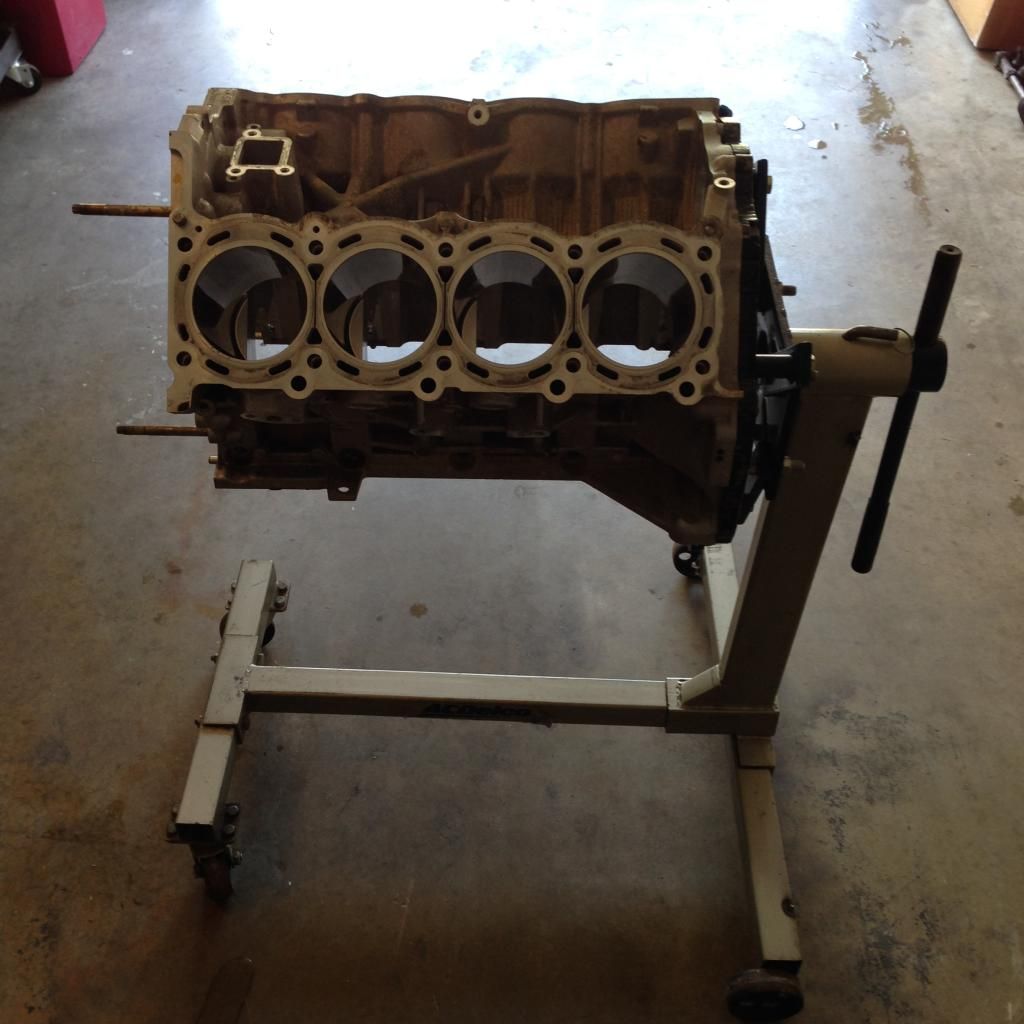 These are all the rod and main bearings. These are a hot commodity apparently as we snatched the last Grade 5 main bearing in the country. We've ordered all the Nissan OEM stuff from Courtesy Nissan in Texas. They've been great answering questions on the phone and calling with updates. And a bonus for us, the standard shipping time to our location is one day. Over night parts without paying for it.  No mid-assembly pictures as we were too occupied following the FSM's specs and, oh yes, cleaning. So here's the assembled bottom end. 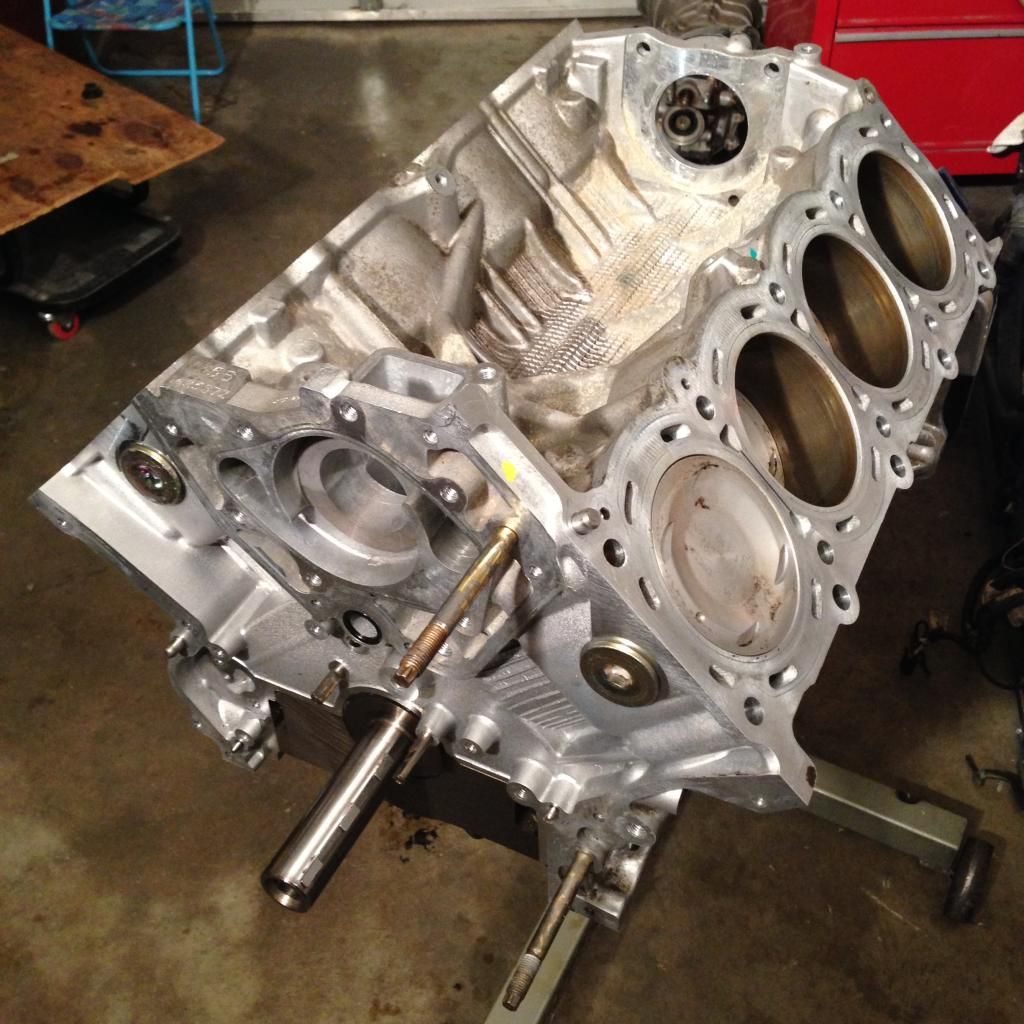 Late evenings were had.  This one resulted in a pile of primed aero. 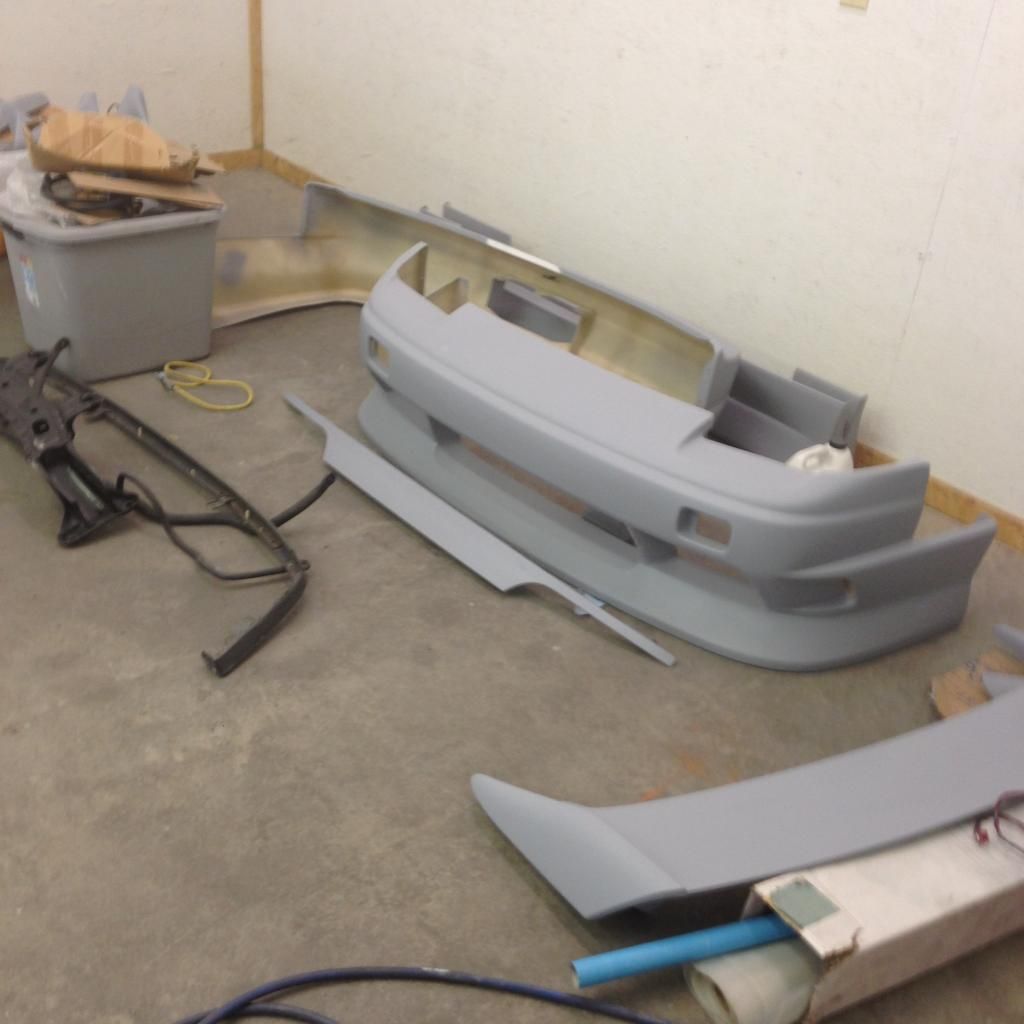 Plenty of thinking moments along the way as we figure out what's going to work.  We picked out a silver and spent a Sunday afternoon painting the Regas! 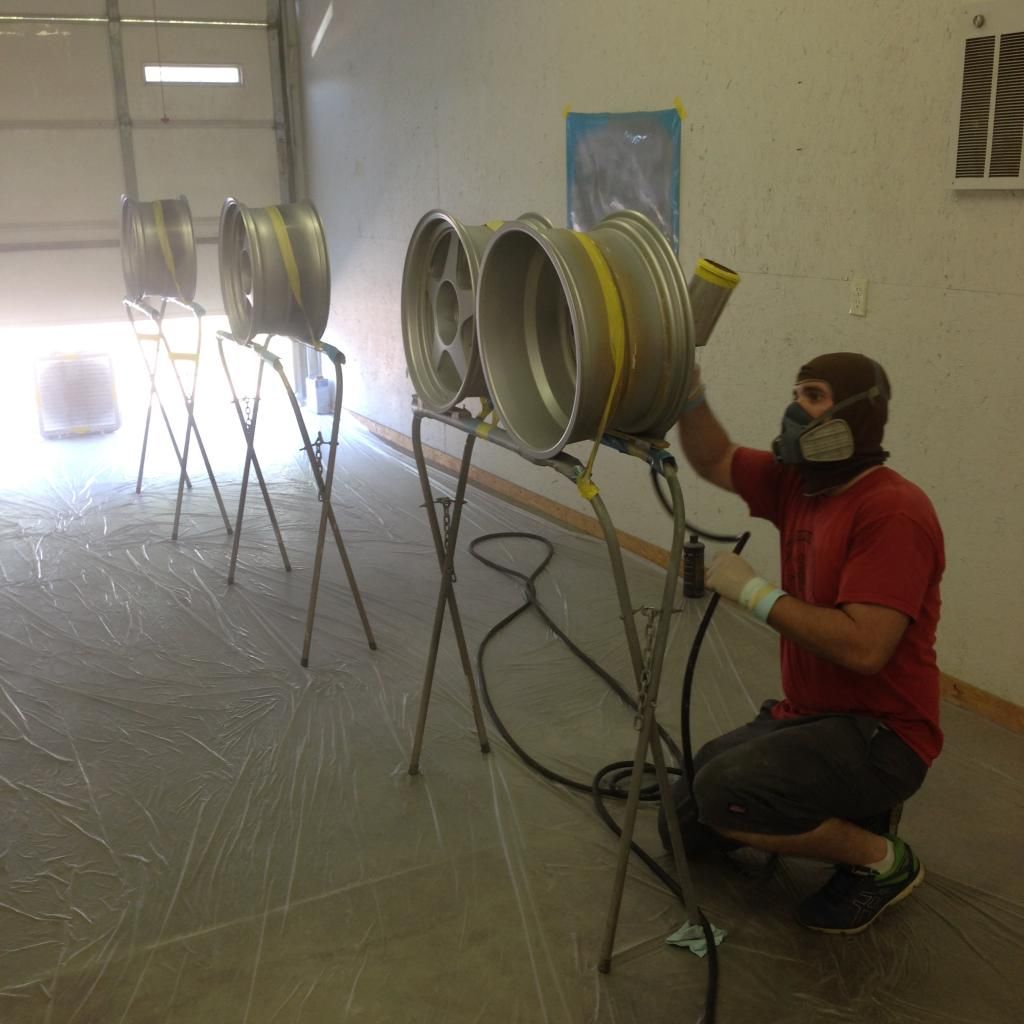 Sneak peek - can't wait to get tires on these things!!! 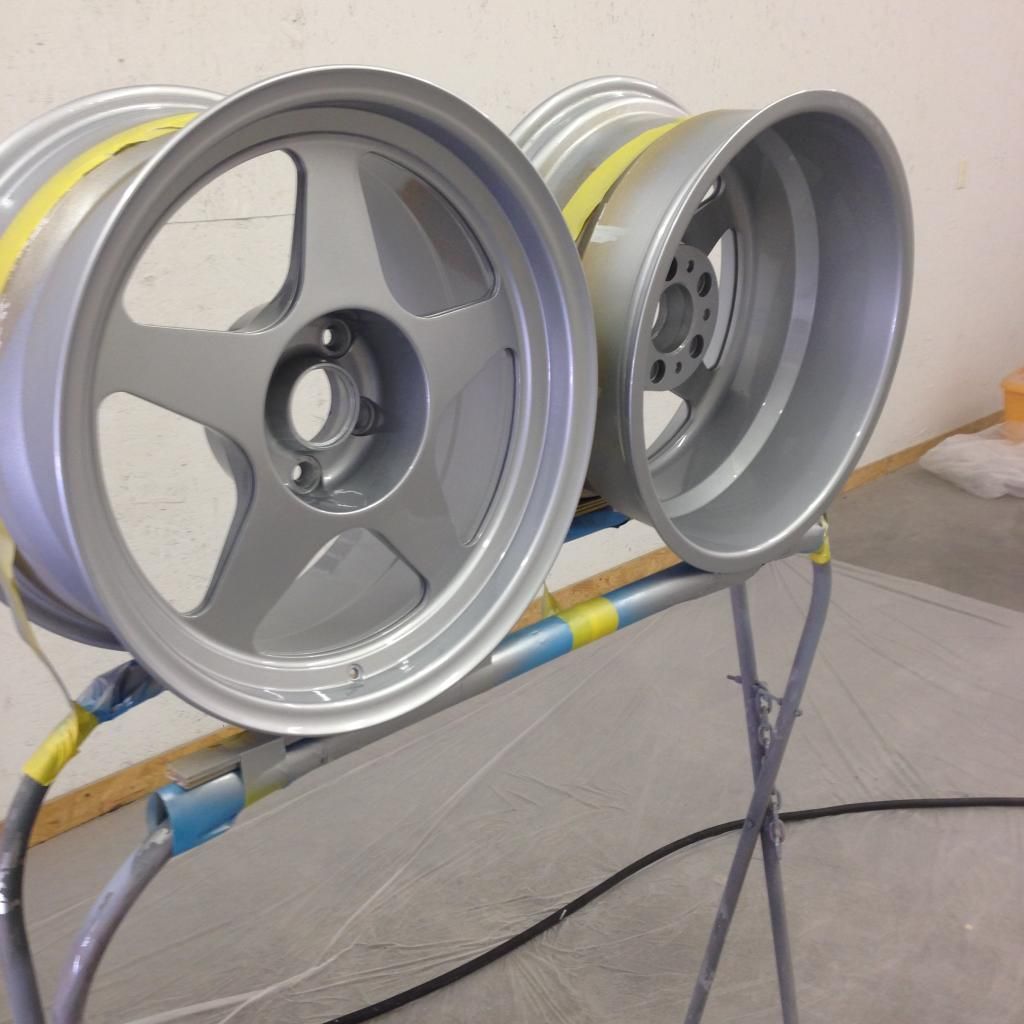 All the wiring and relay boxes have been removed from the bay...now we just need a VK56 in there!!! 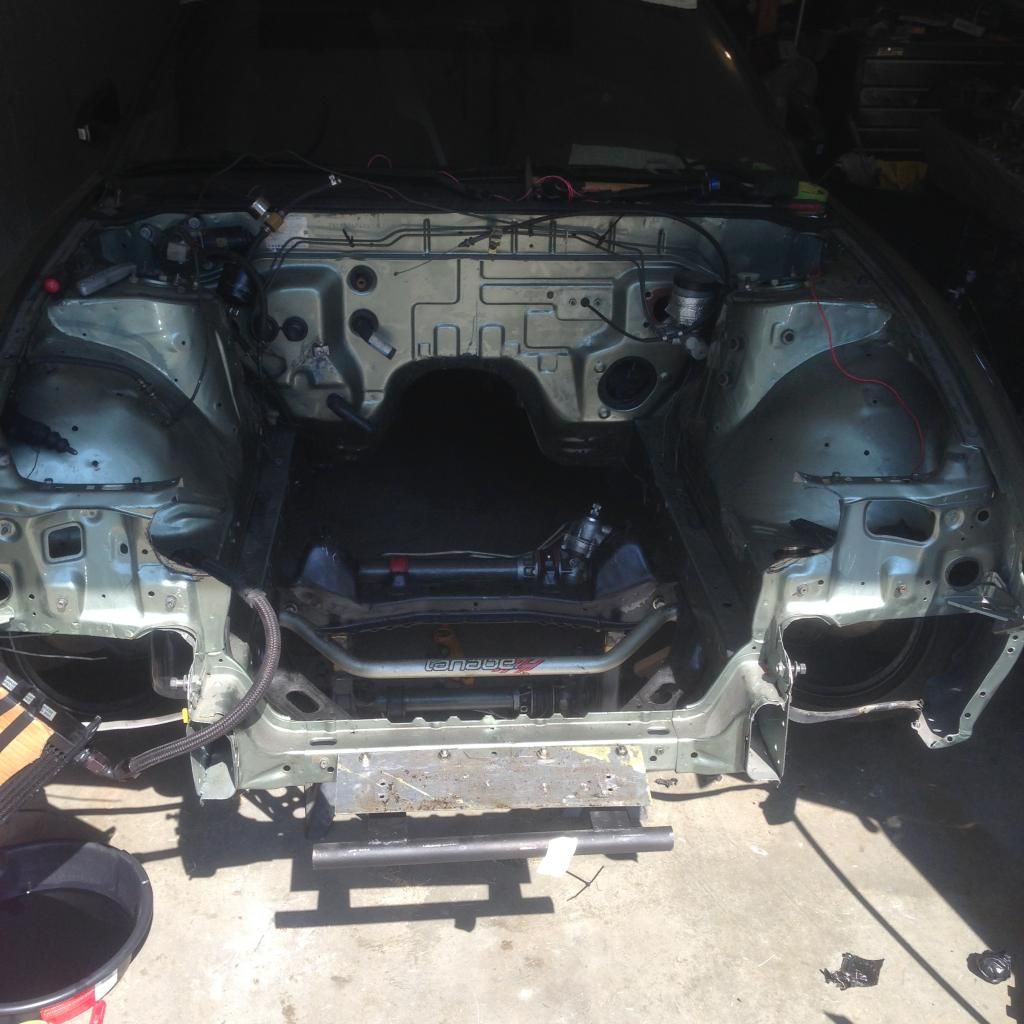 We got the tires mounted and wheels test fitted. We were both stoked on the new look. 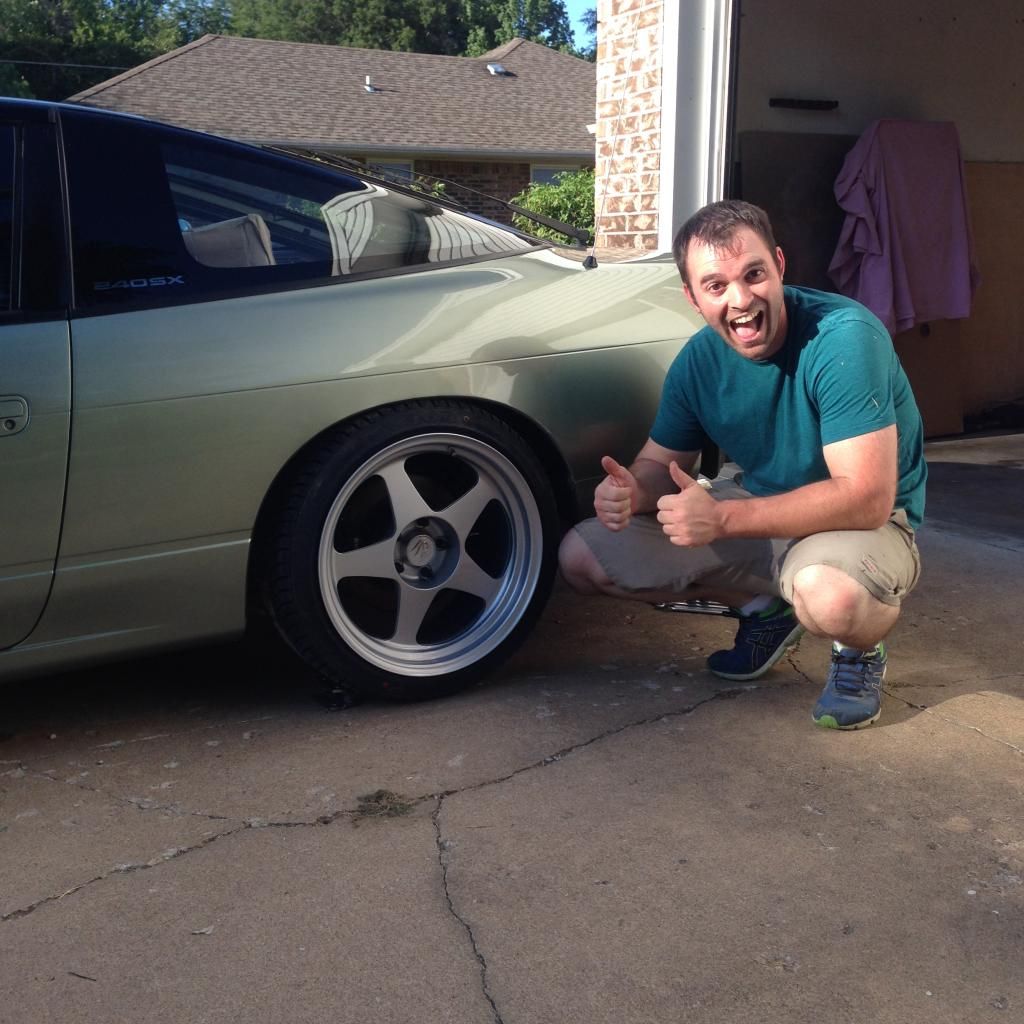 But of course we needed more low so room was made. 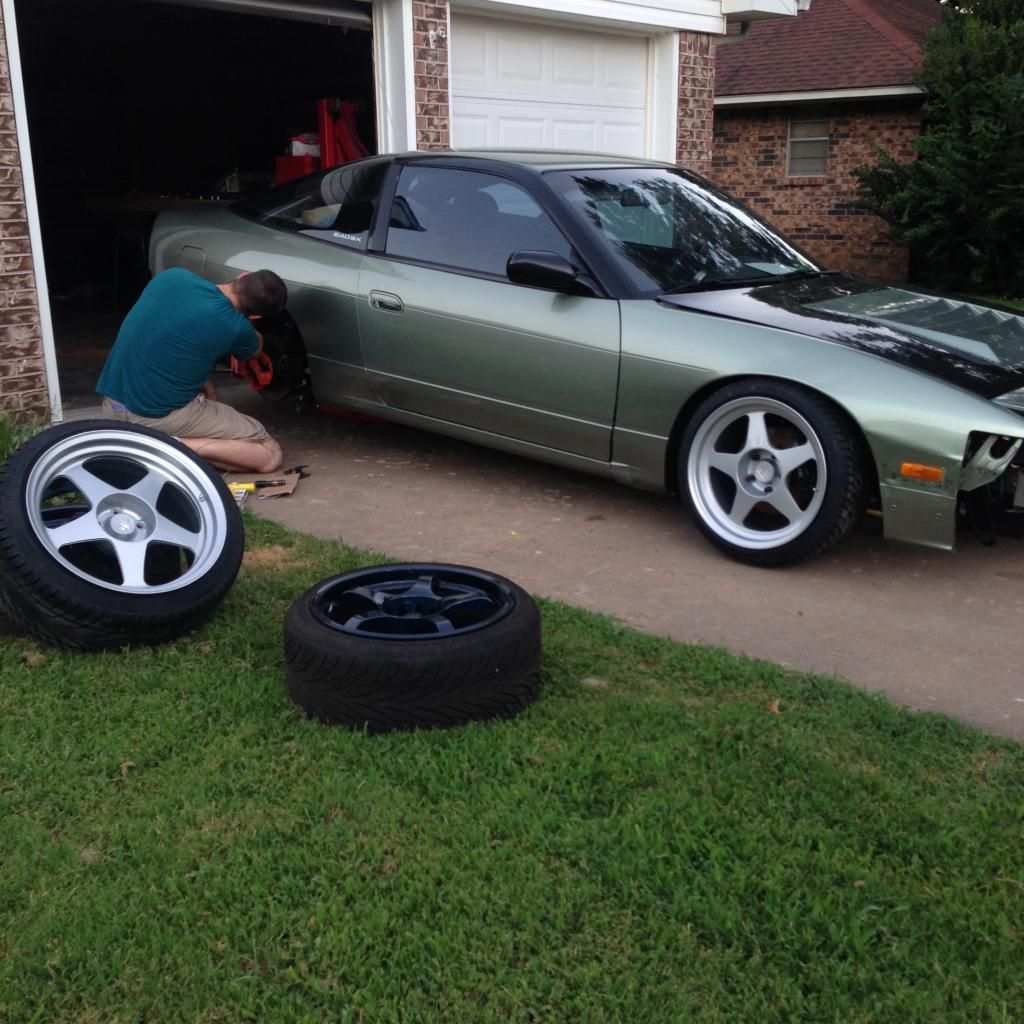 ...and got it sitting like this. Still need to go a bit lower. 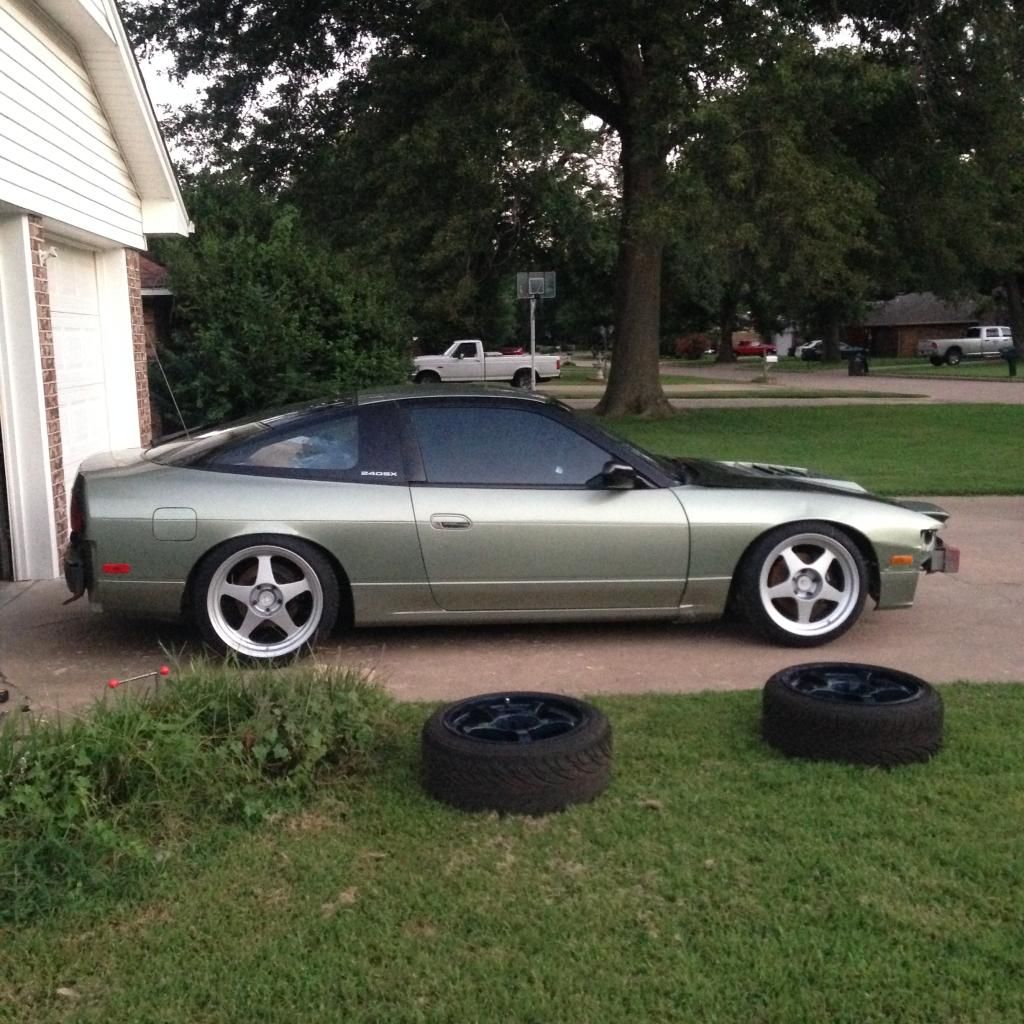 But that's were my time with the car ended and so I too will wrap up this post. Stoked to see this thing coming together just as awesome as we planned! Can't wait for the full aero and start up vids! Hard to believe we might hear this thing fire in less than a month!! For more up to date updates, we post a lot of it to instagram since it's quicker than a full post - @brickhouse_steve and @brickhouse_greg. And if you're at the FD Texas event, stop by and say hi!
__________________
BRICKHOUSE PRODUCTS
IG @brickhouse_products |
|
|
|
|
08-19-2014, 04:32 AM
|
#58 | |
|
Nissanaholic!
 Join Date: Jan 2013
Location: Minneapolis, MN
Posts: 2,178
Trader Rating: (8)
  Feedback Score: 8 reviews
|
Please tell me it will stay this color. The Regamasters look incredible with this color!
__________________
Quote:
|
|
|
|
|
|
08-19-2014, 06:53 PM
|
#59 | |
|
Zilvia FREAK!
Join Date: Sep 2005
Location: Ashland, NE
Age: 38
Posts: 1,359
Trader Rating: (20)
Feedback Score: 20 reviews
|
Quote:
__________________
BRICKHOUSE PRODUCTS
IG @brickhouse_products |
|
|
|
|
|
03-15-2015, 11:40 PM
|
#60 |
|
Zilvia FREAK!
Join Date: Sep 2005
Location: Ashland, NE
Age: 38
Posts: 1,359
Trader Rating: (20)
Feedback Score: 20 reviews
|
Welllll, it's been a good while since we've updated so let's pick up where we left off and try and fill in the gaps a bit. There has been a TON of behind the scenes type stuff happening to push the VK56 swap kit closer to completion but not much to share pictures off. Things haven't slowed down and it feels really good to say we see the light at the end of the tunnel. So here's a rundown of what's been going in the Brickhouse shop.
When we left off, we had just gotten the keys to our much needed shop space. First order of business was to move in. 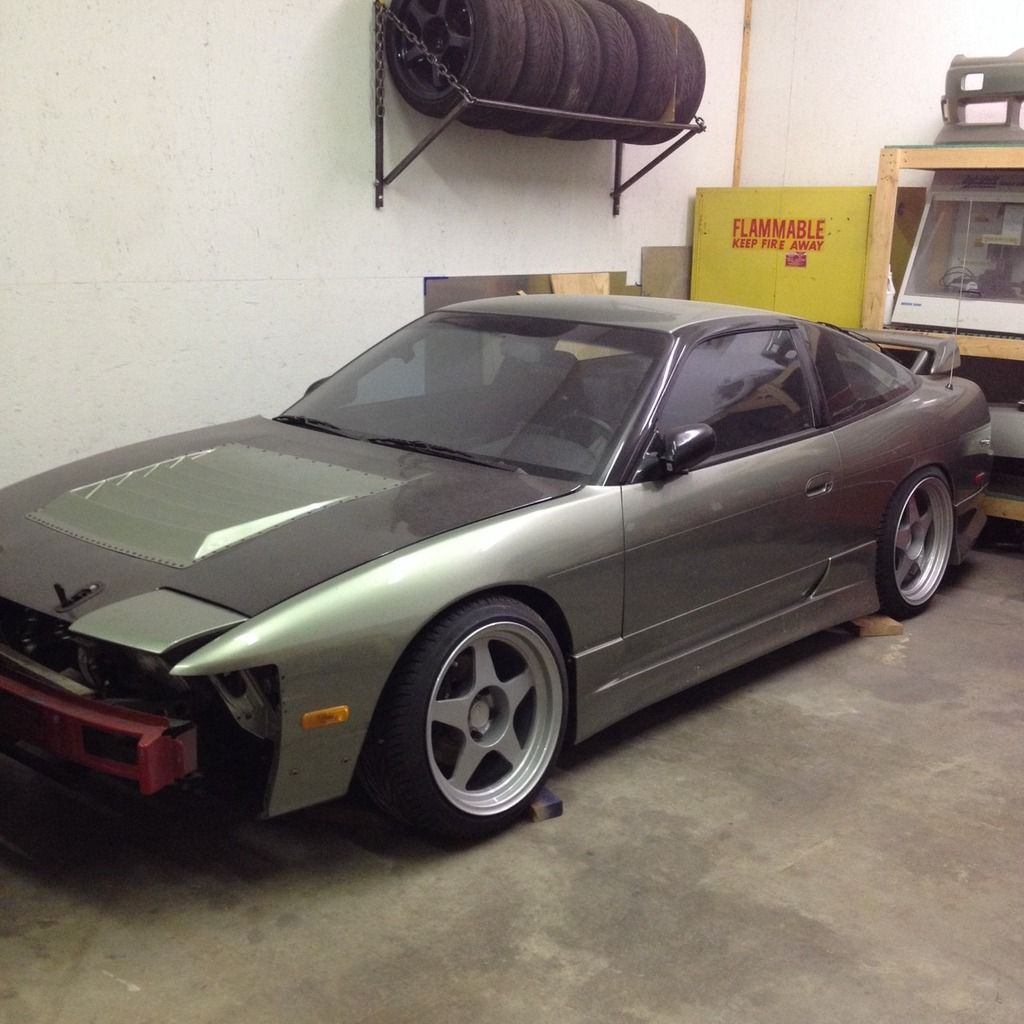 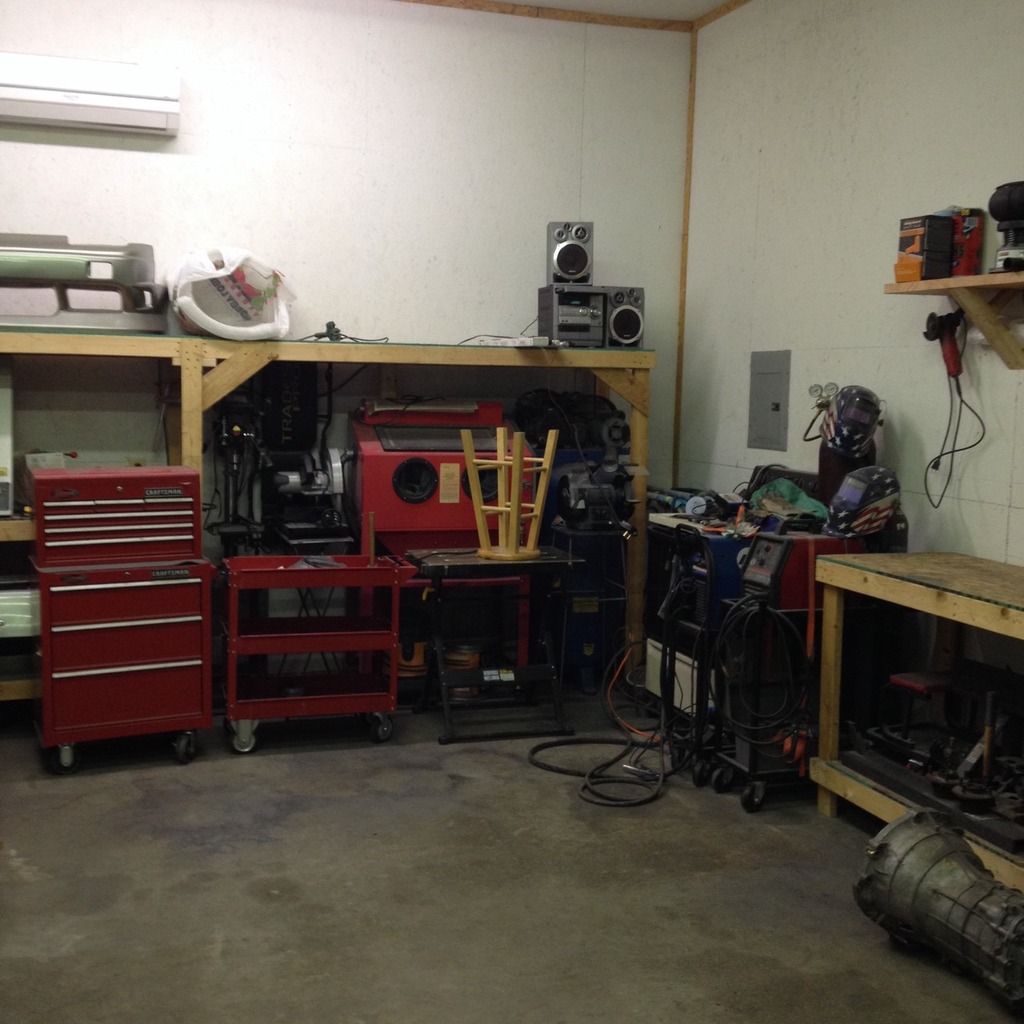 This staircase that Greg whipped up is way more awesome than you'd think. 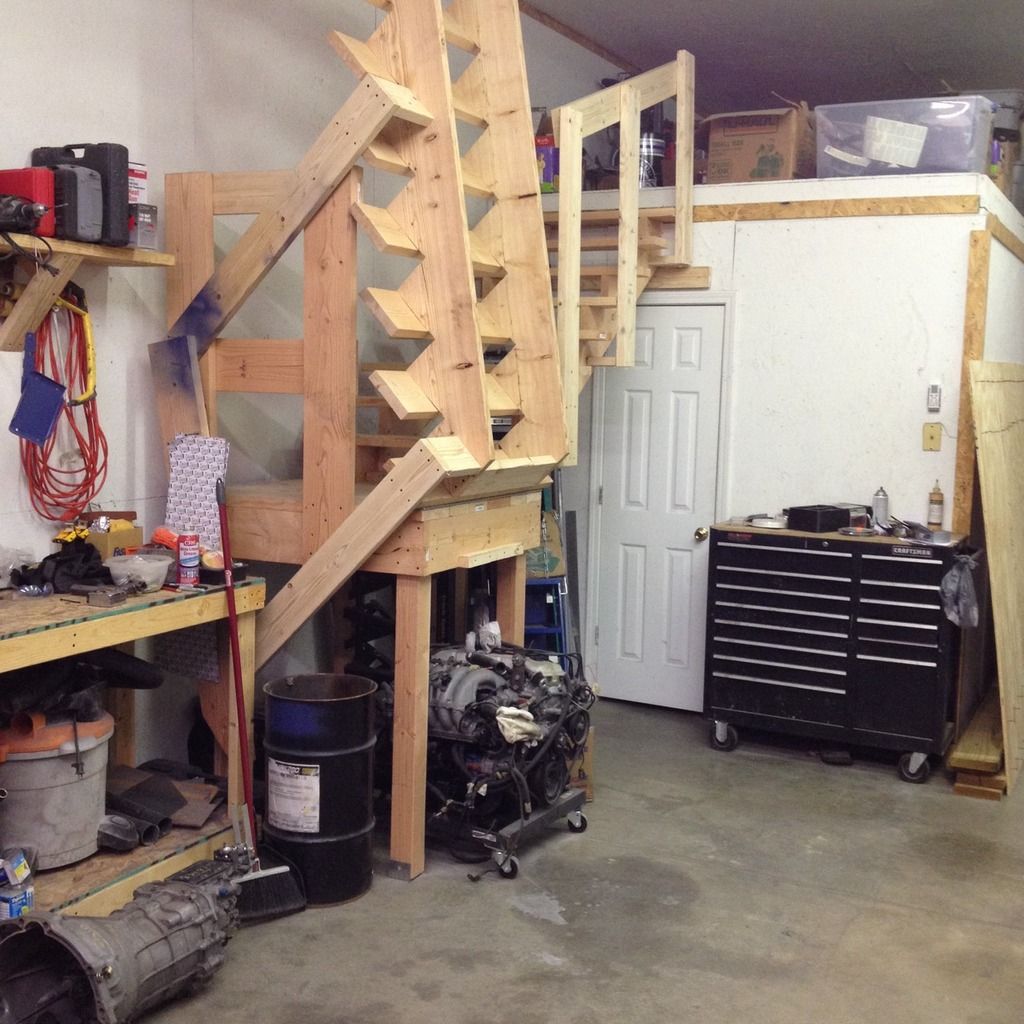 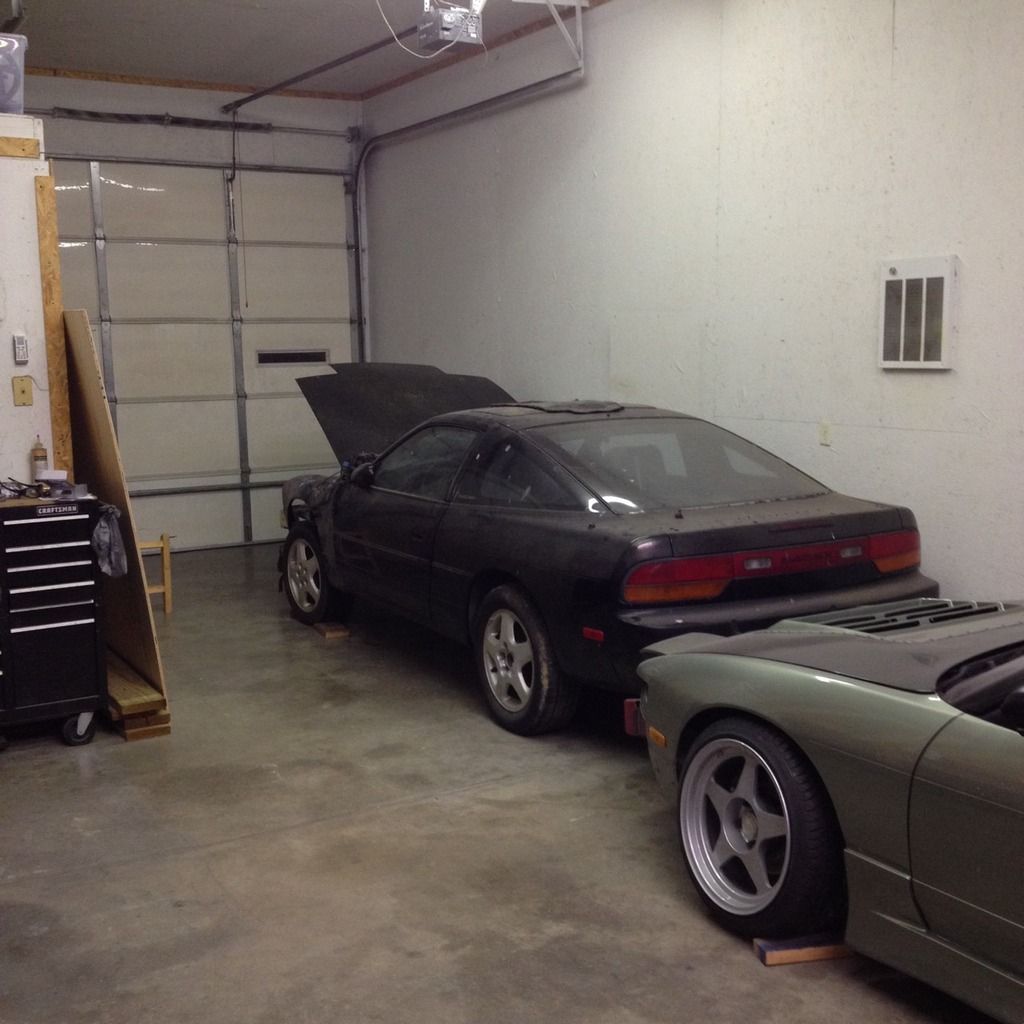 As you can see above, the aero got painted and more of the exterior goodies installed. Our goal was to finish the car for the FDTX Offset Kings show, but it just wasn't in a state we were happy with to debut it. 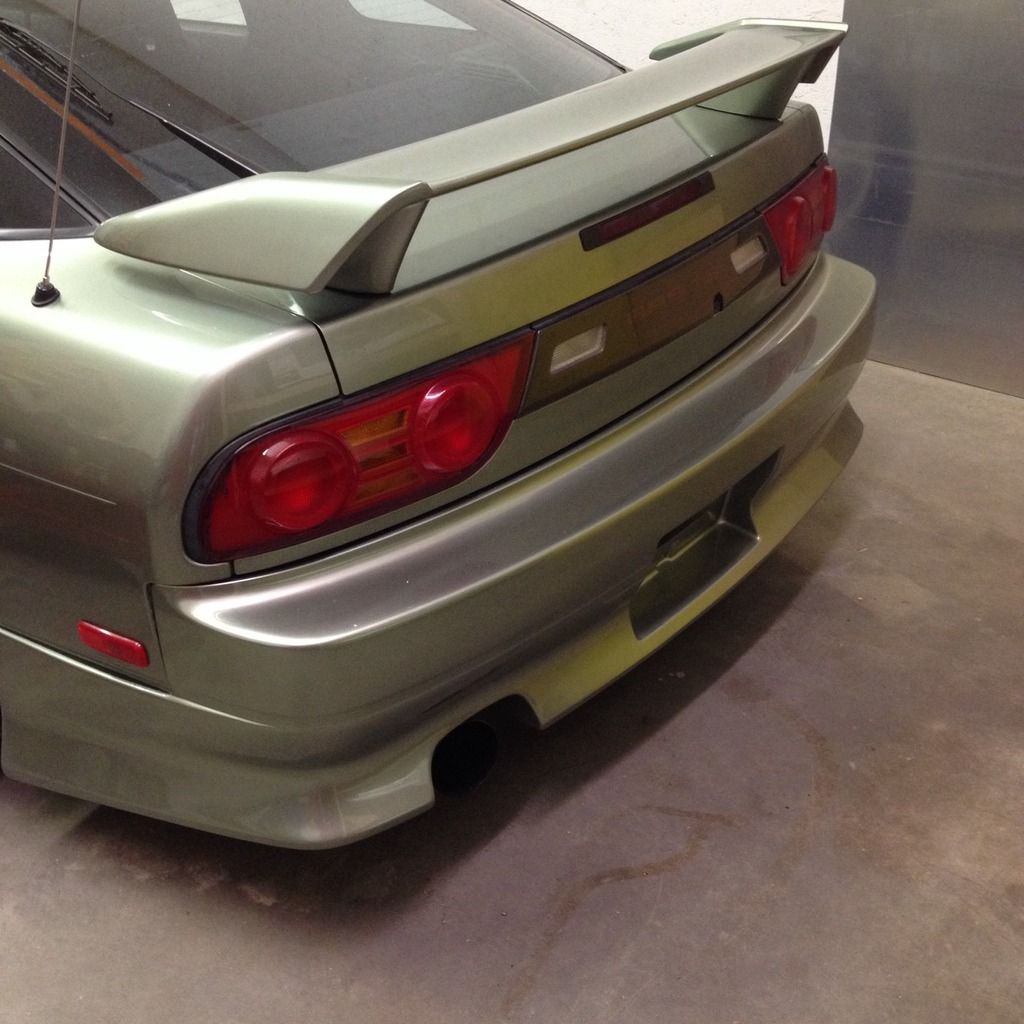 Leading up to Christmas Greg started another 4-wheel build - rebuilding this go kart for his son. Paint, engine rebuild, nuts and bolts, etc. Fully reworked. Can't wait to see my nephew ripping around in this thing in the spring. Before: 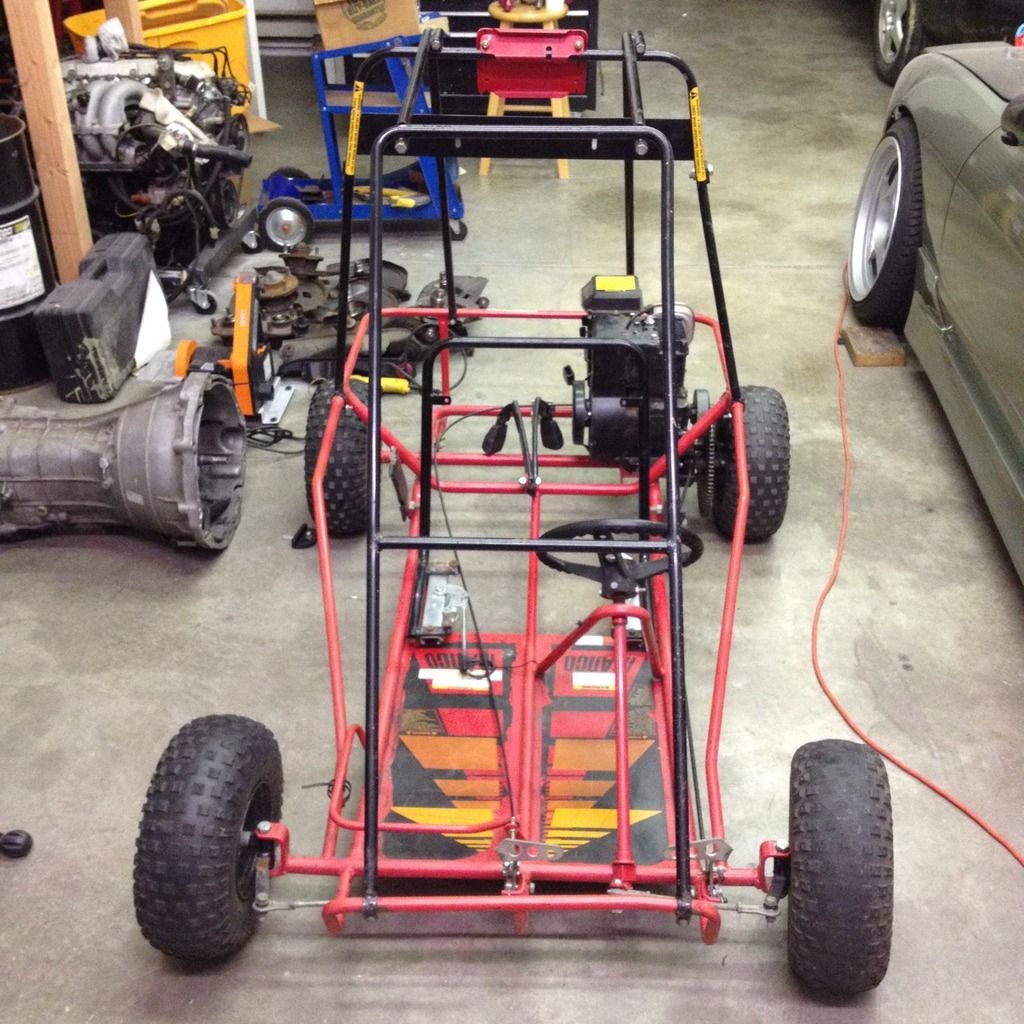 After: 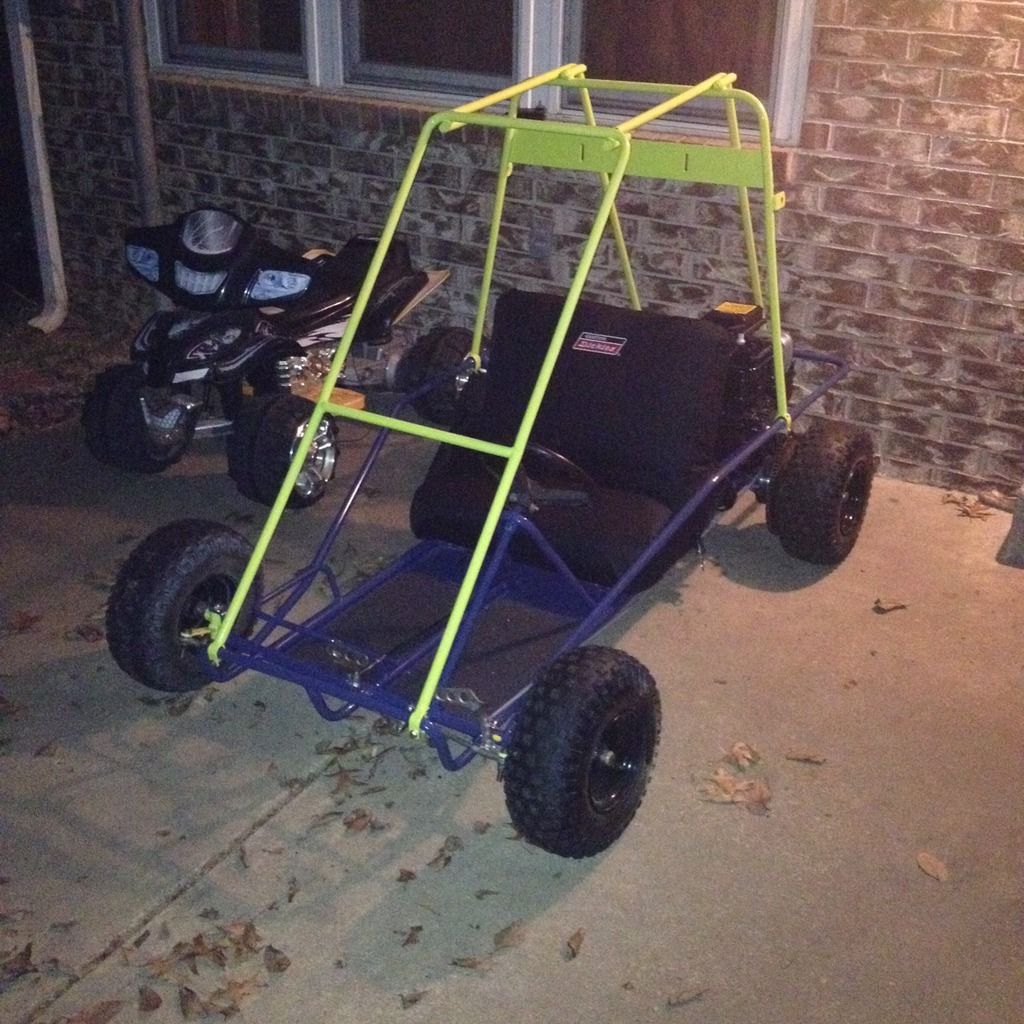 Maybe you spotted the black hatch above. We've had it for a while now and it's finally getting some love. It's going to be thrown together using our spare parts we've got lying around. Goal is for a super basic, super reliable, great for learning drift car. Basically something anyone can hop in and have fun. It'll get the built KA that was originally in my S14, but we sold off 57 trim turbo setup, 740's, and NIStune. We are going to run a T28, 550's, and a chipped ECU. Think TX Street Legal basic-ness. 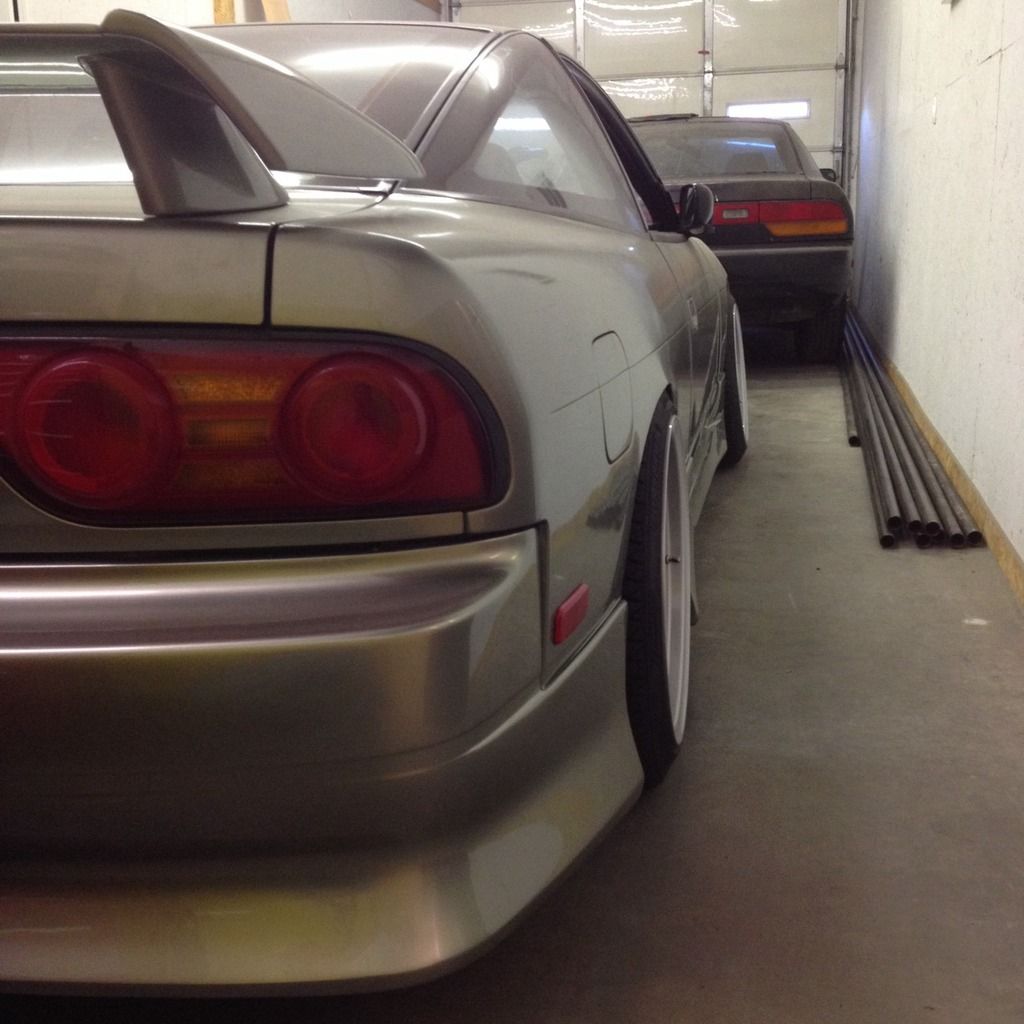 It was supposed to be a rust-free, 5-lug shell when we picked it up. Hidden beneath the front sheet metal was a history of ugly repairs. 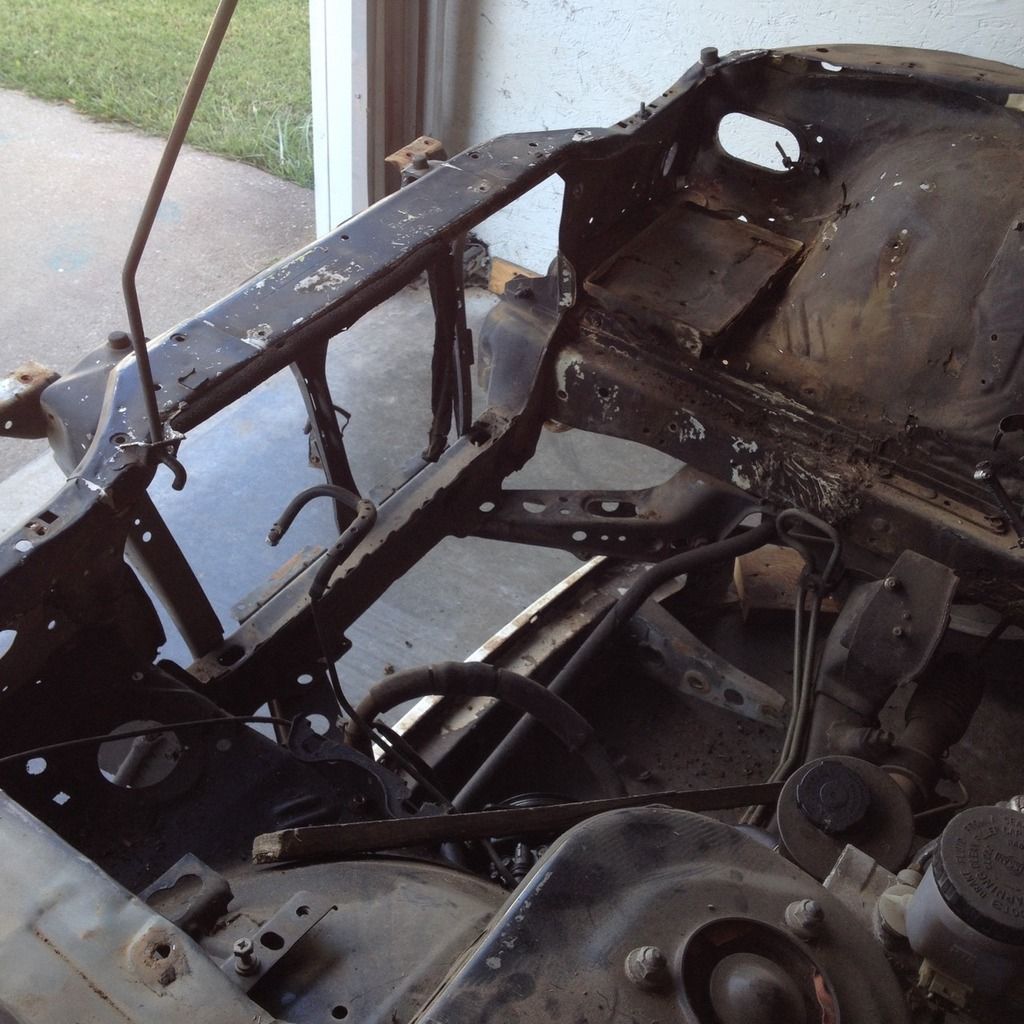 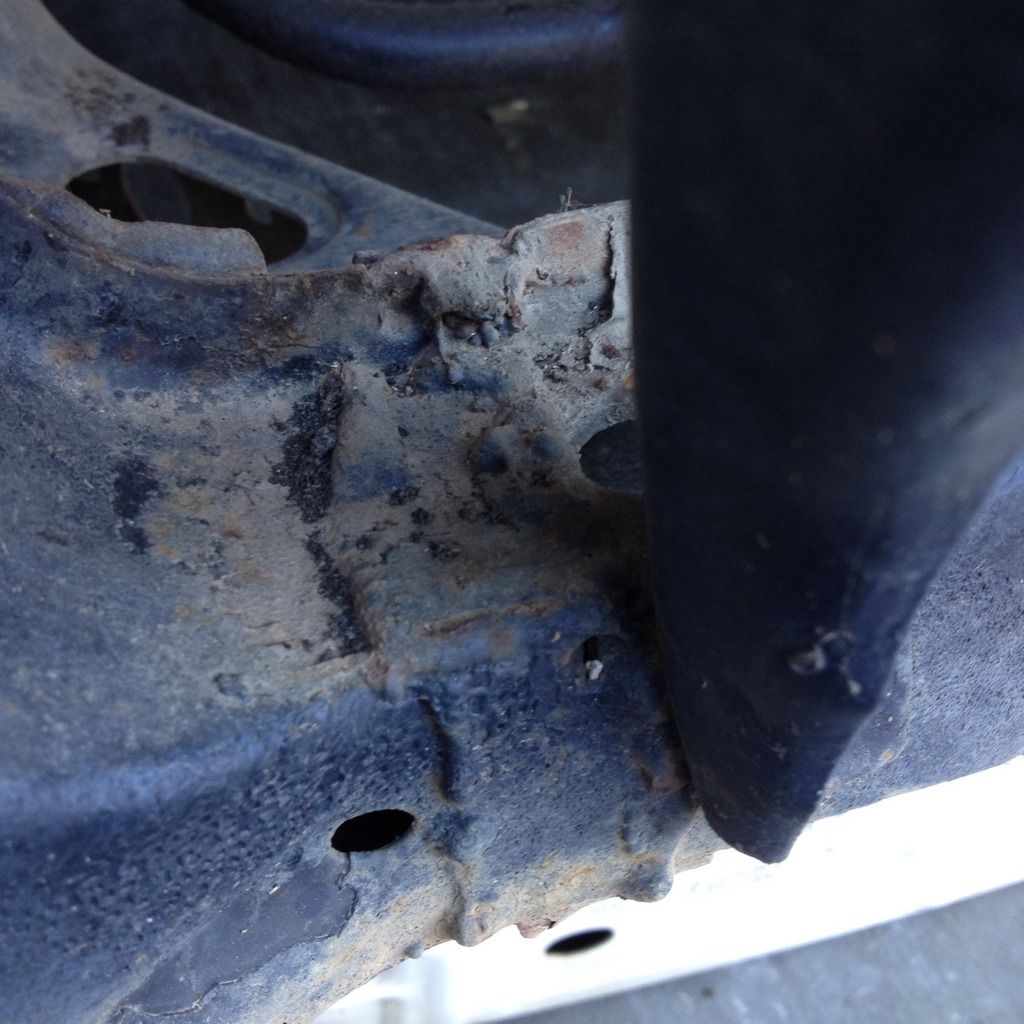 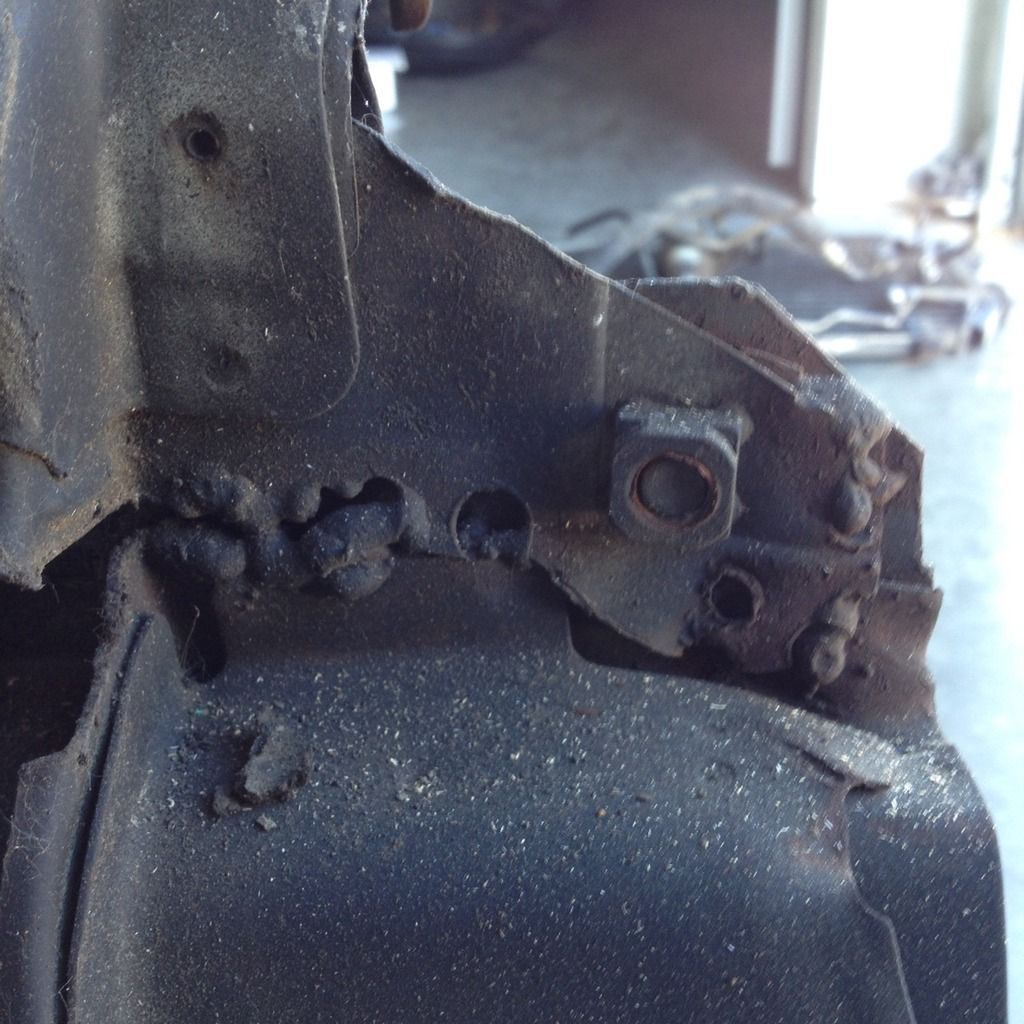 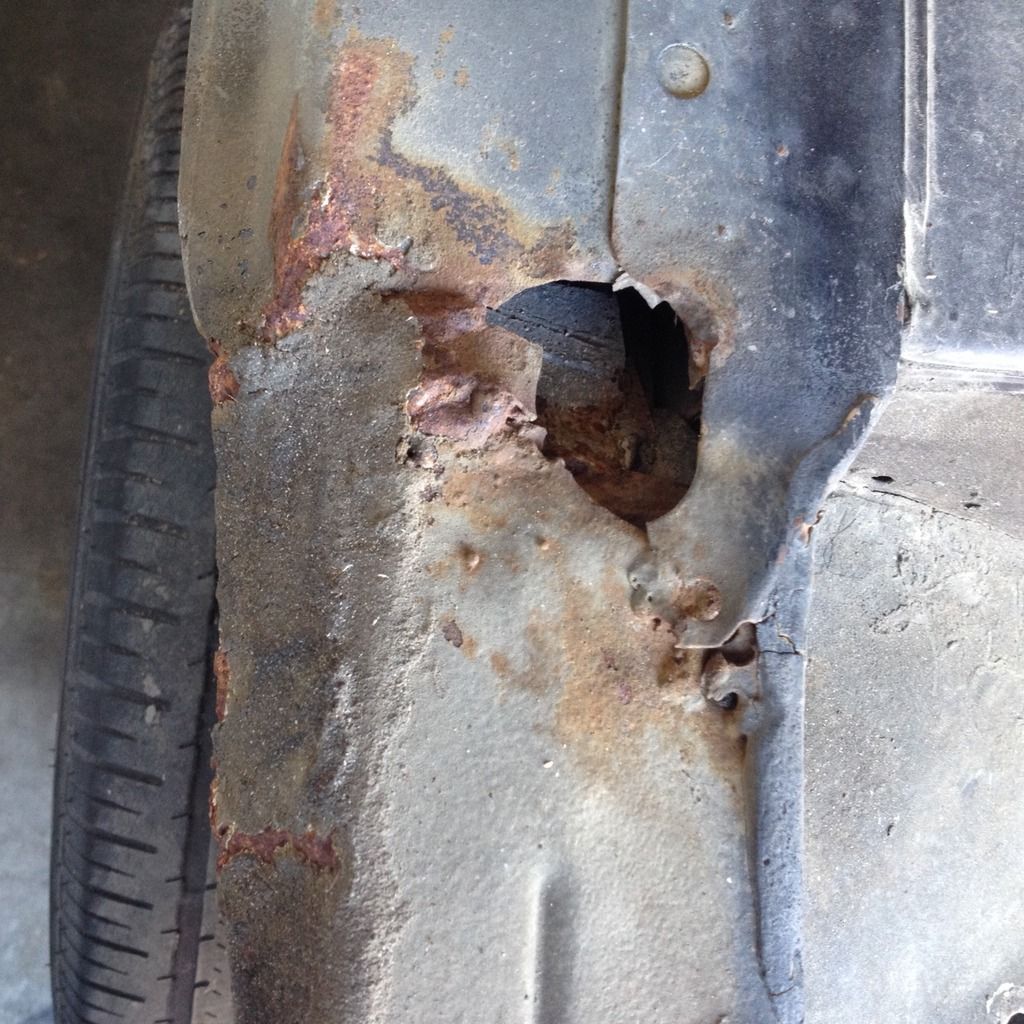 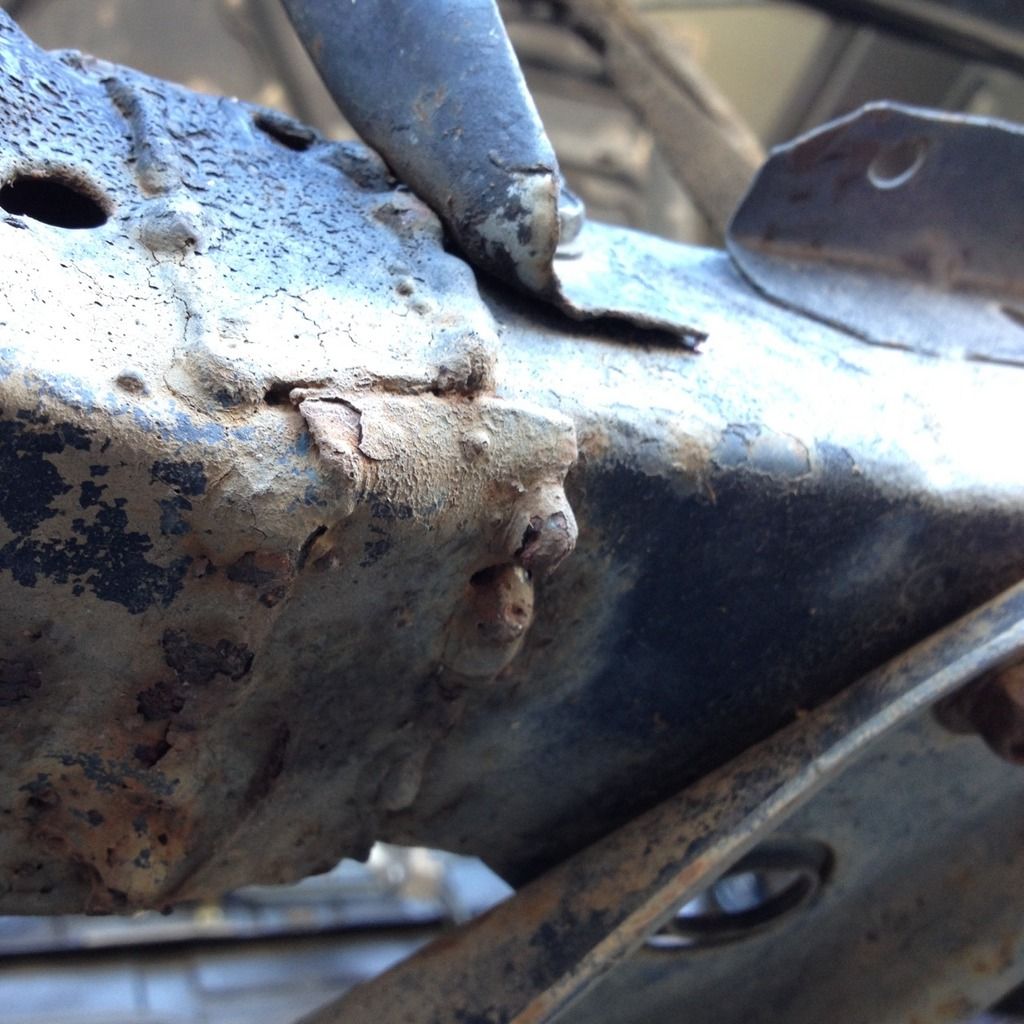 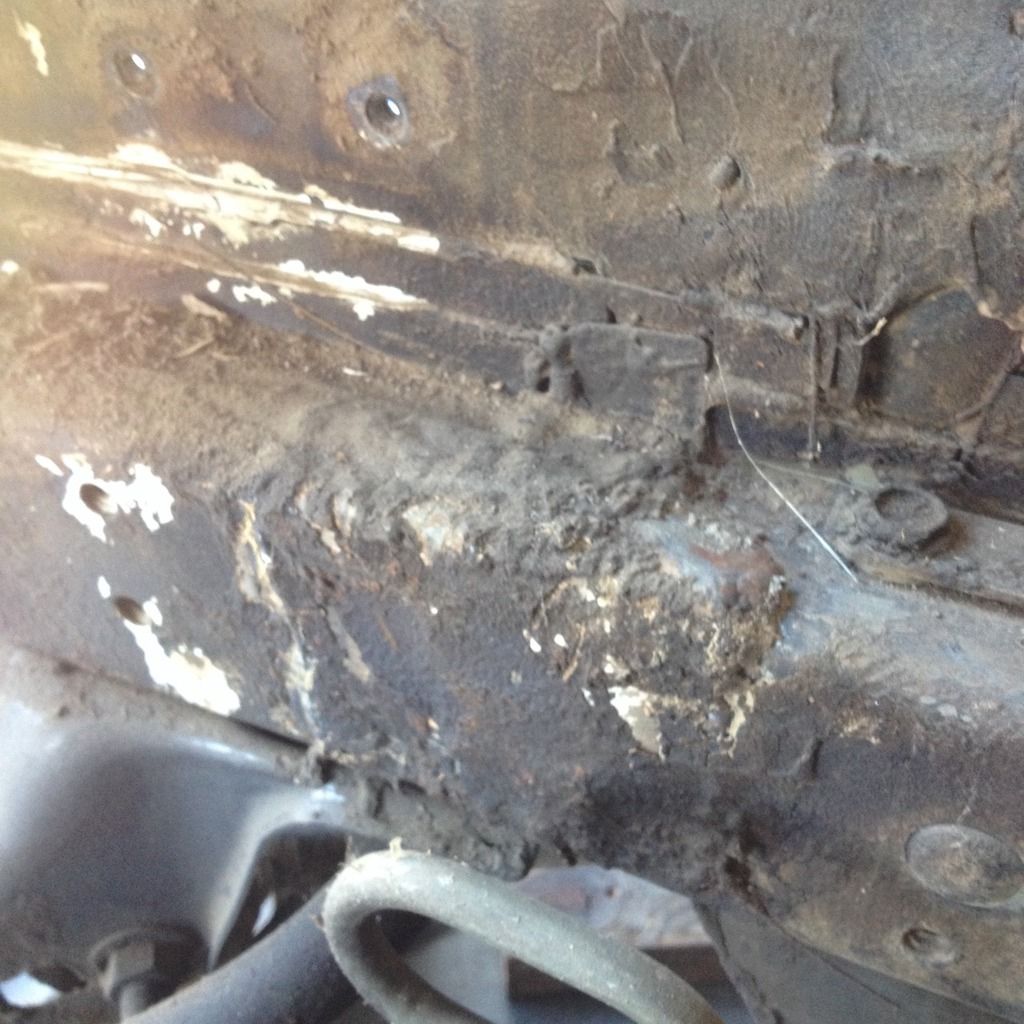 So naturally there was only one thing to do. 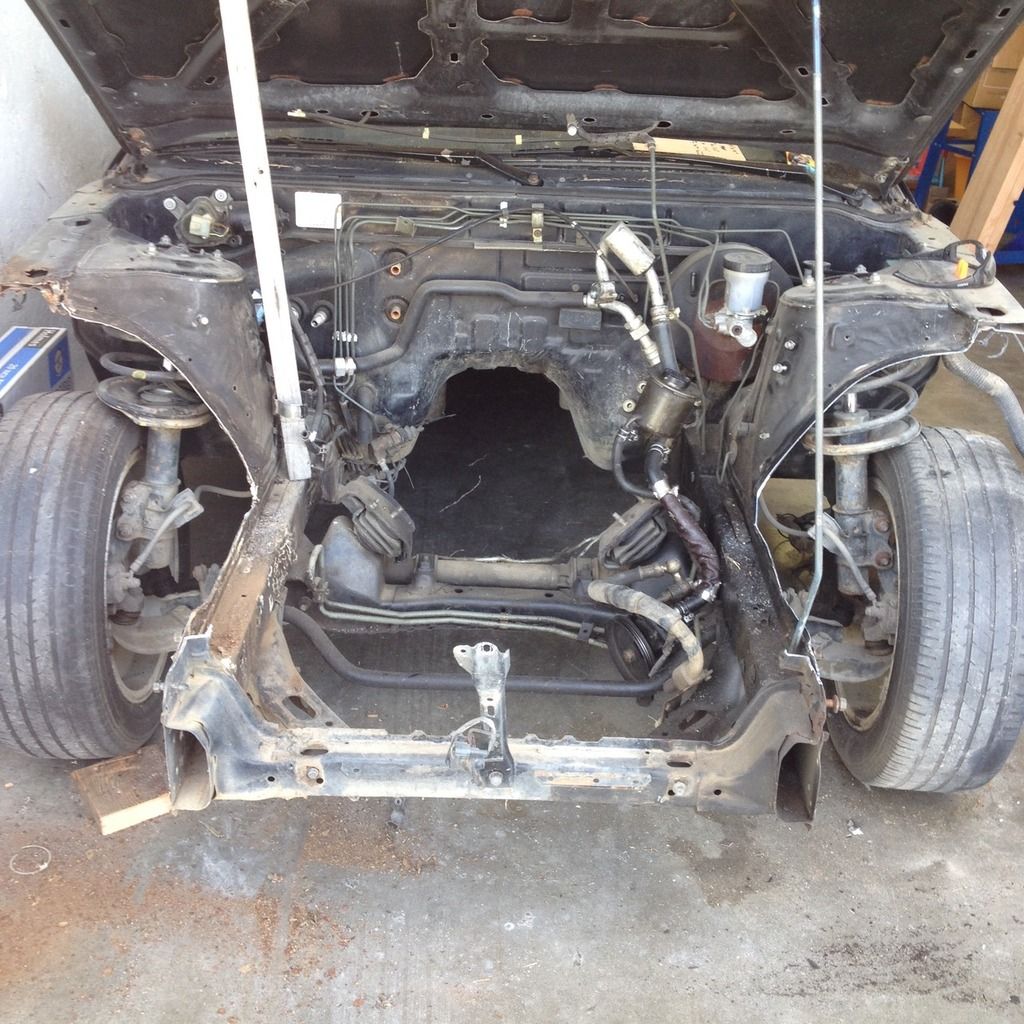 Hack off all the bad and tube front it! 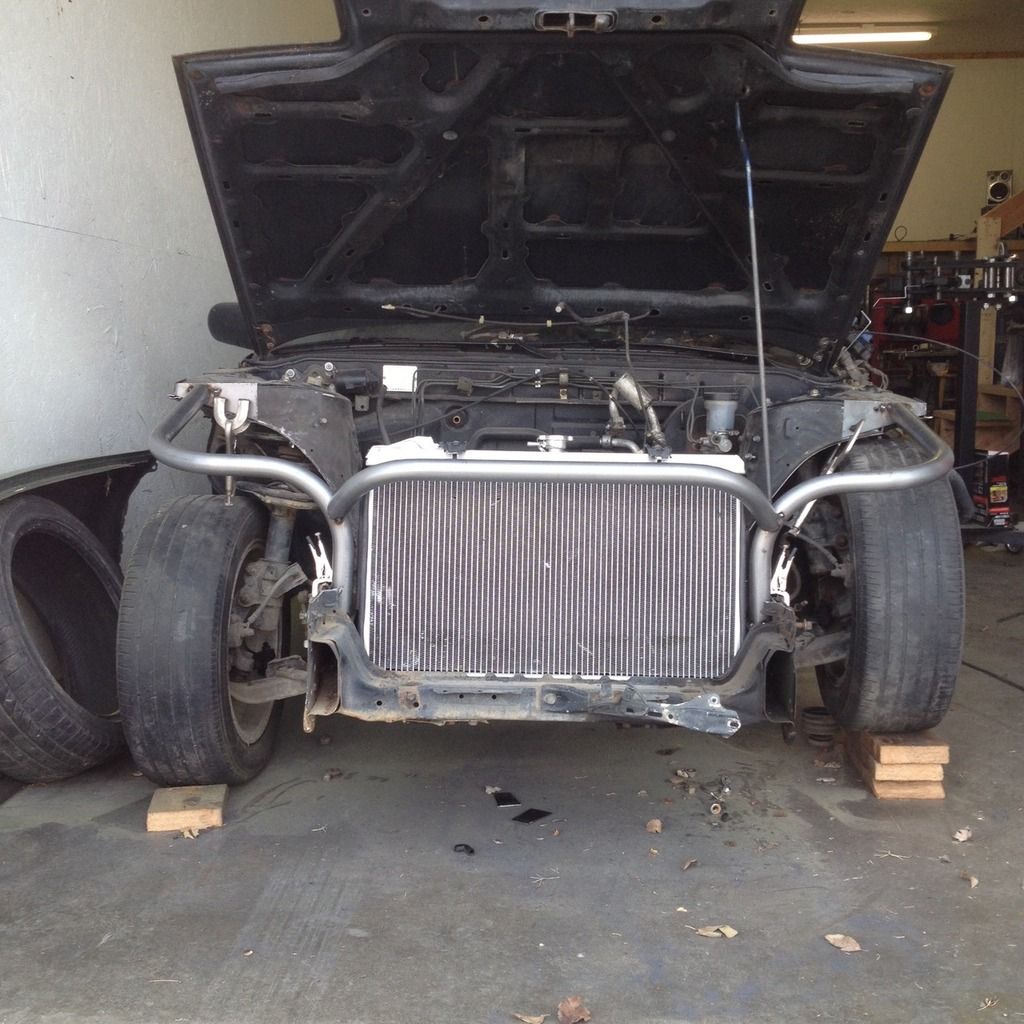 And what fun is stock steering angle, so Greg did up another set of Brickhouse knuckles, extended lower arms, and a relocated rack will be done before the engine goes in. 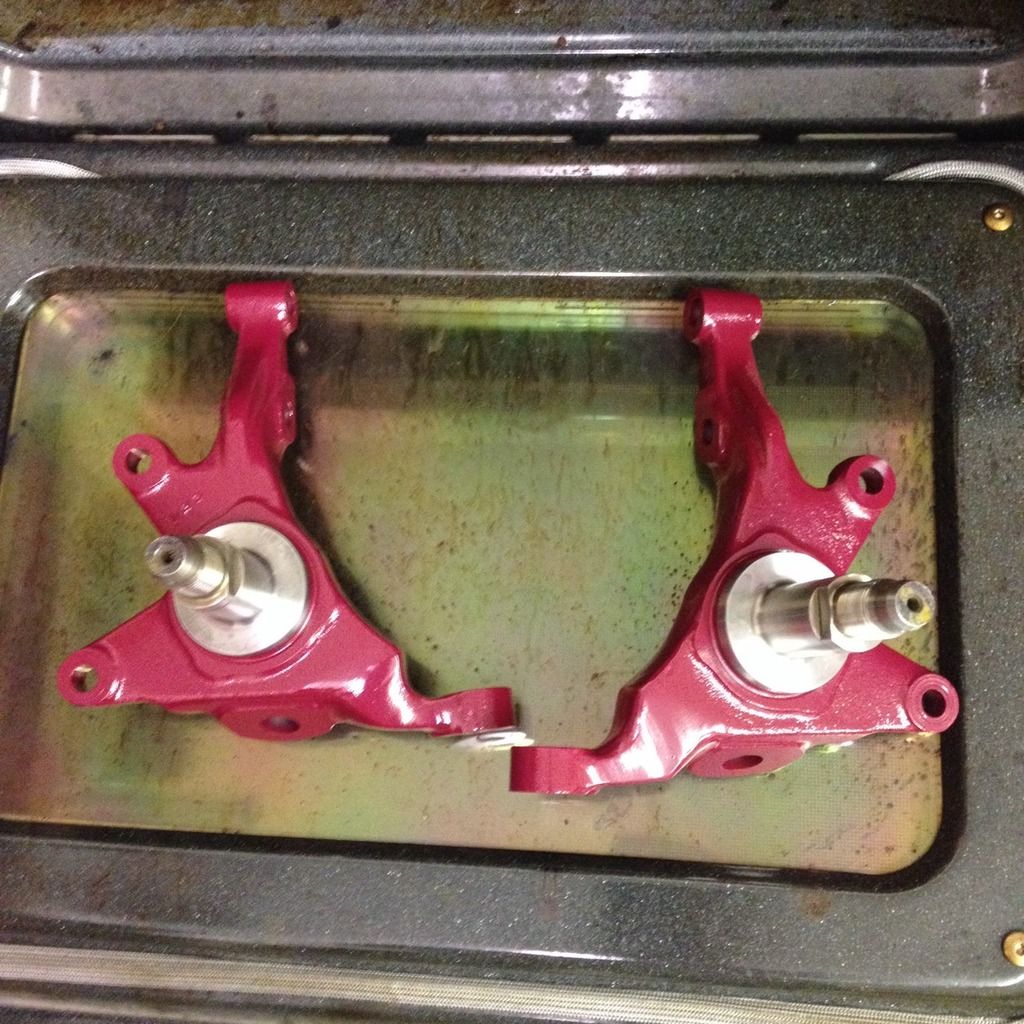 Love that color. Freshly powder coated. 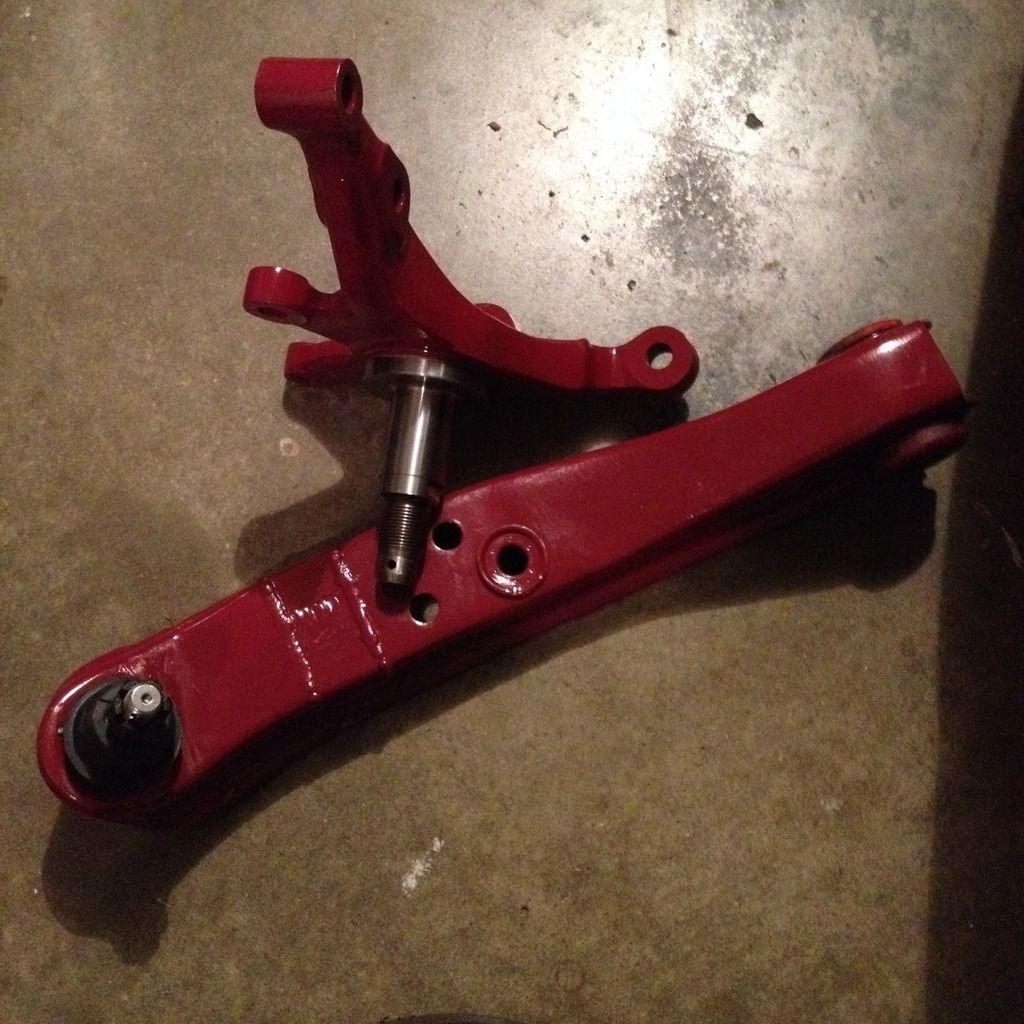 Alright, alright. Back to what this thread is really about - the VK56 S13! Greg's been practicing a lot and working on his consistency with TIG welding. 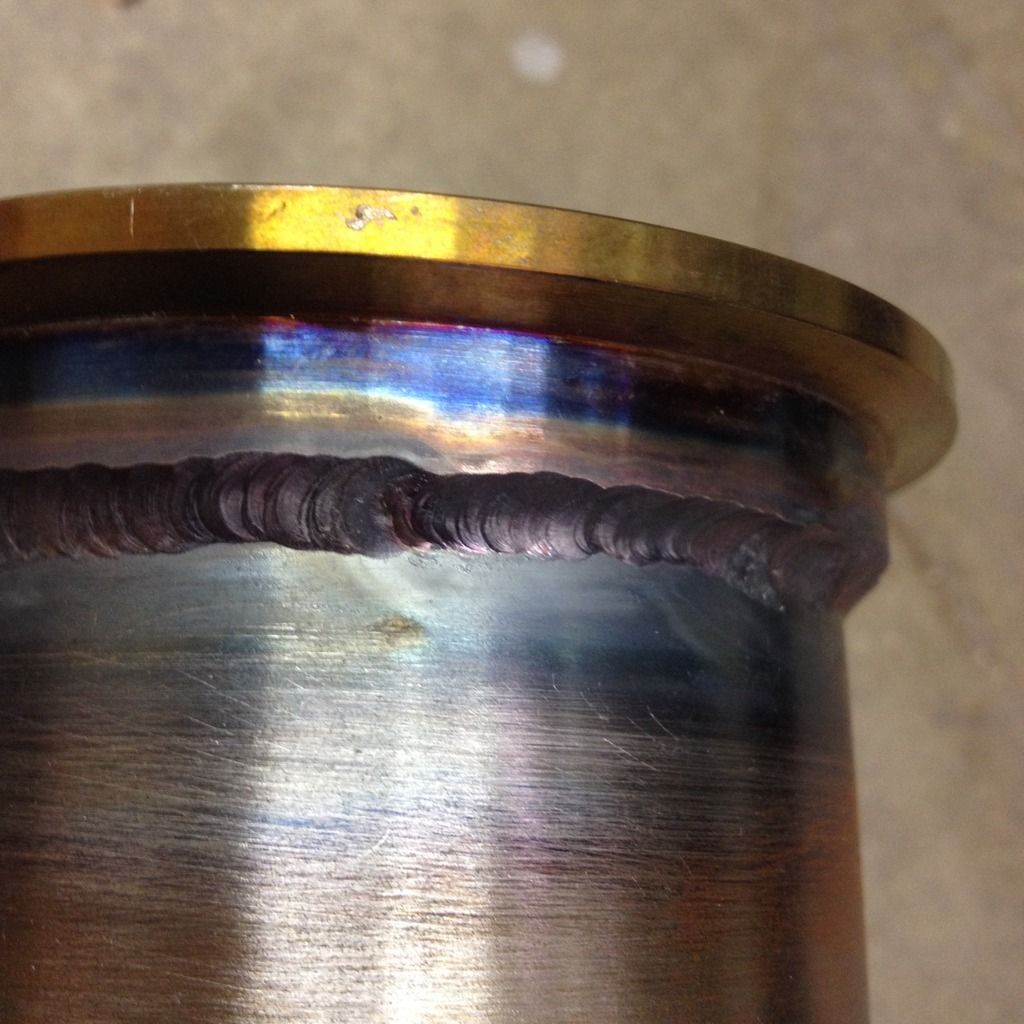 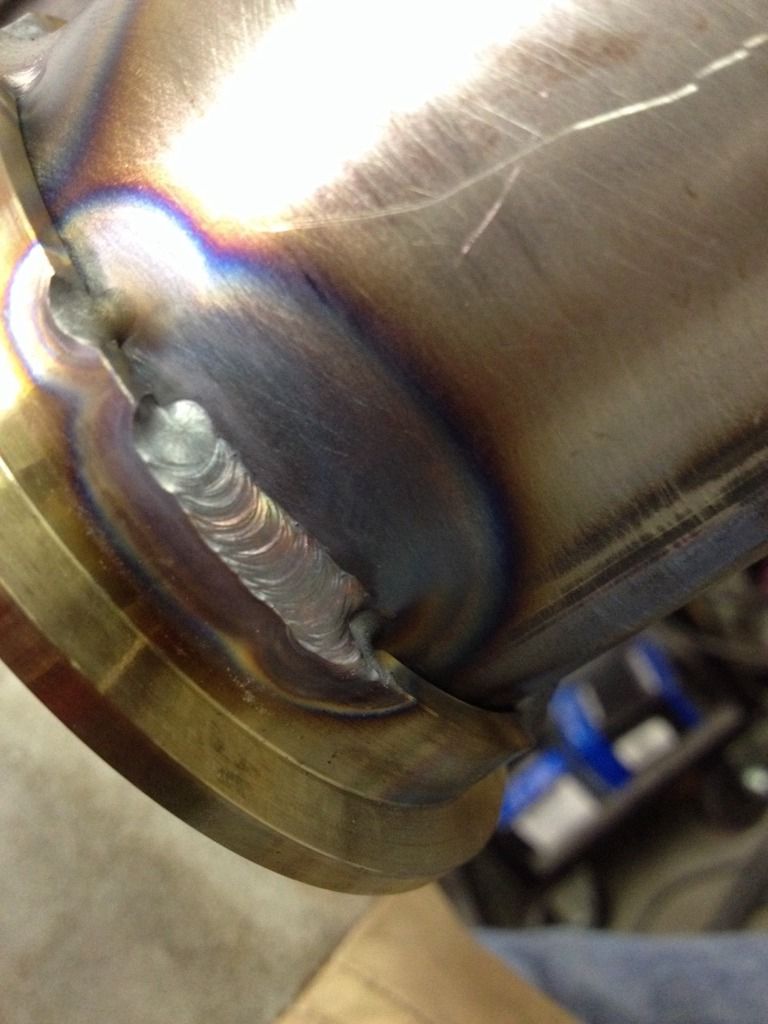 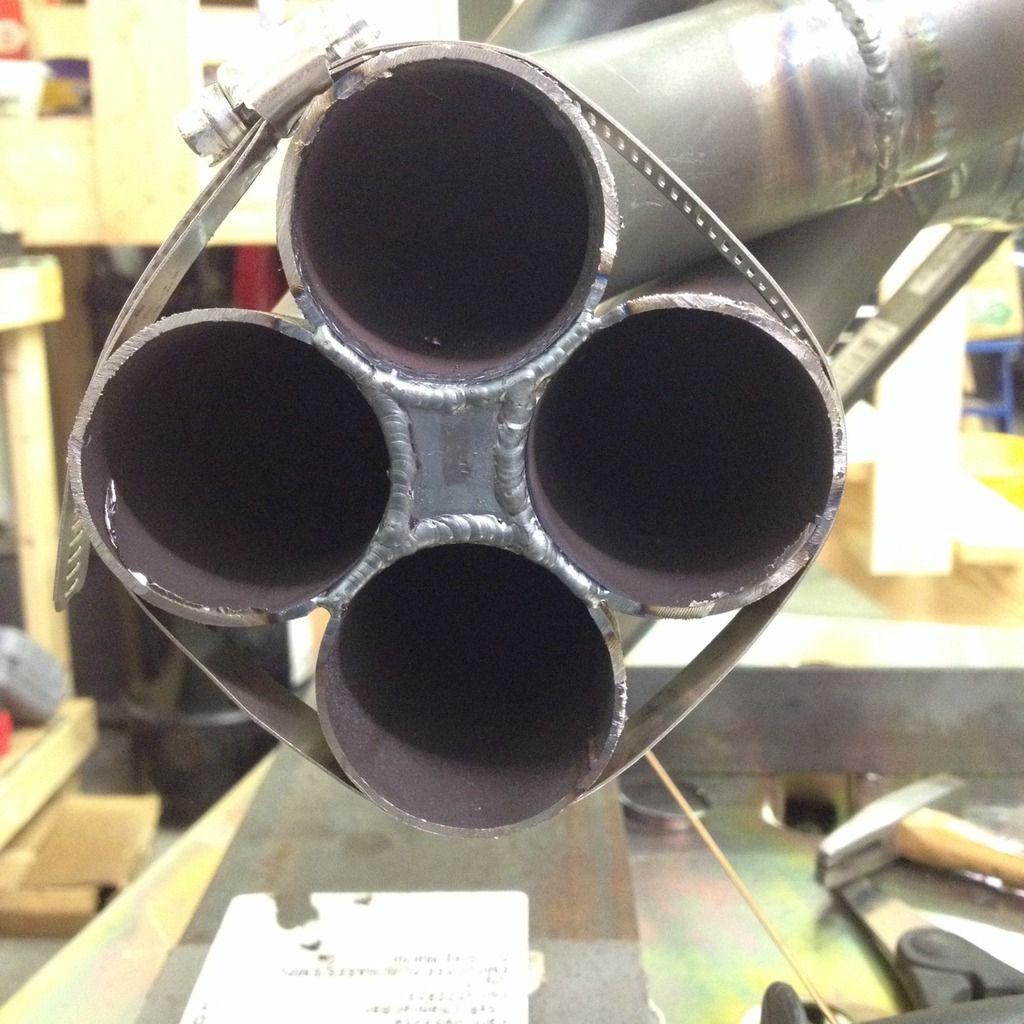 The equal length headers were a good excuse to practice. Haha. It should be noted that these are purely for experiement's sake and the production headers will be a simpler design (similar to the Ver. 3 headers posted previously in the build). These are just to compare to the production set and see how the dyno numbers change. 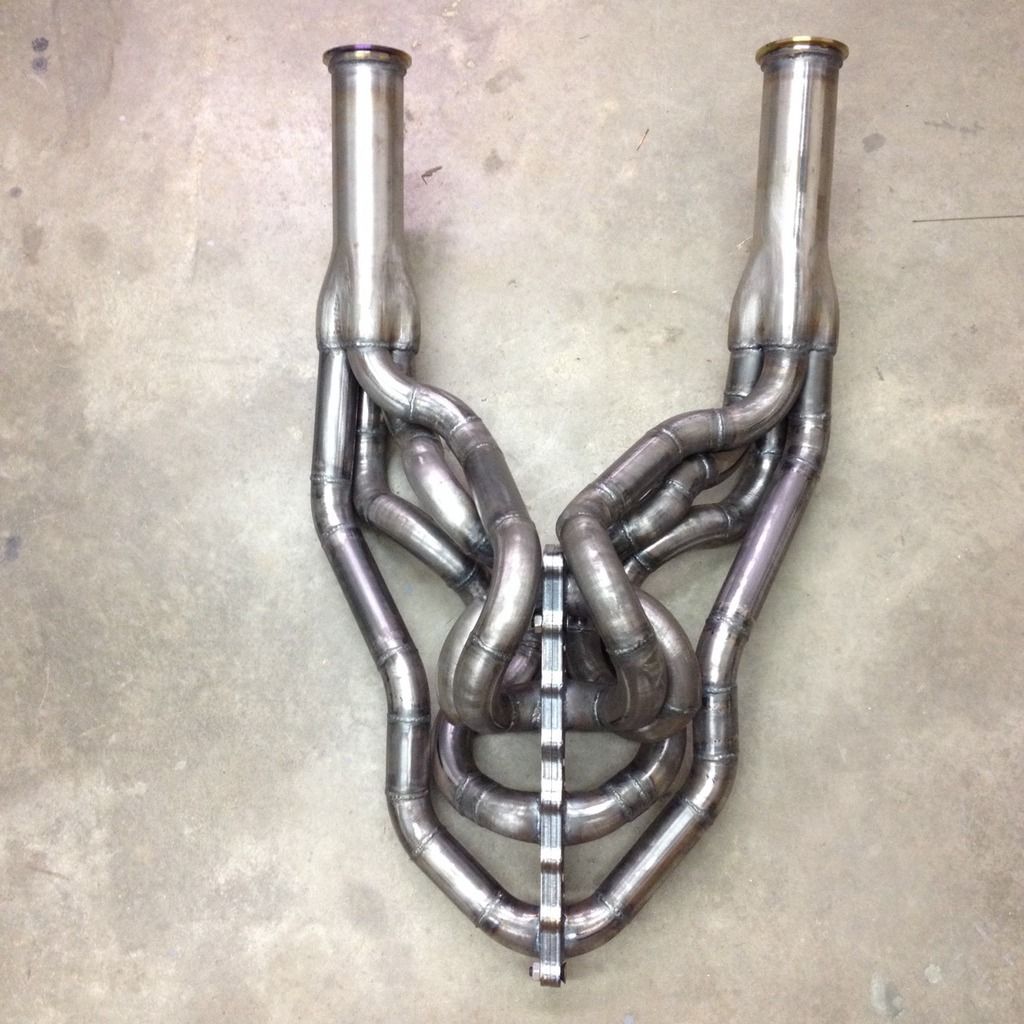 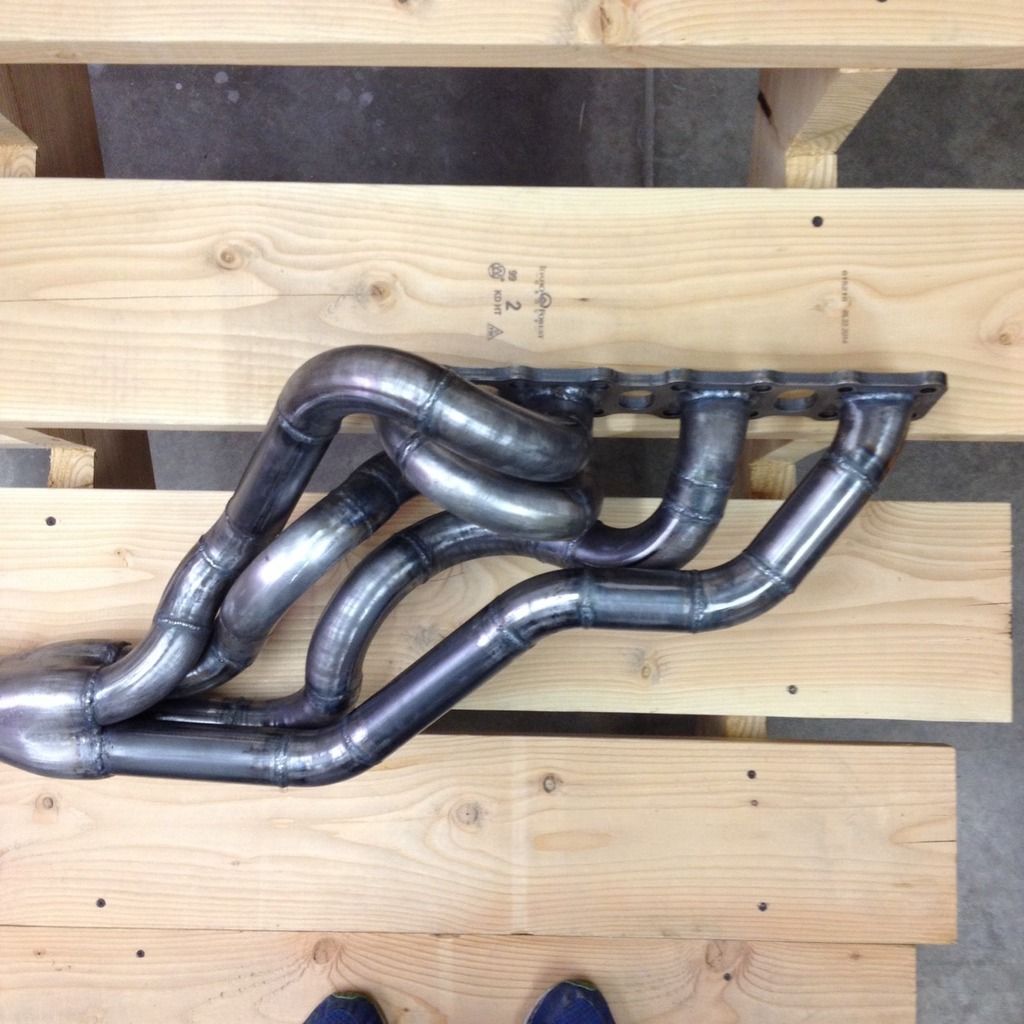 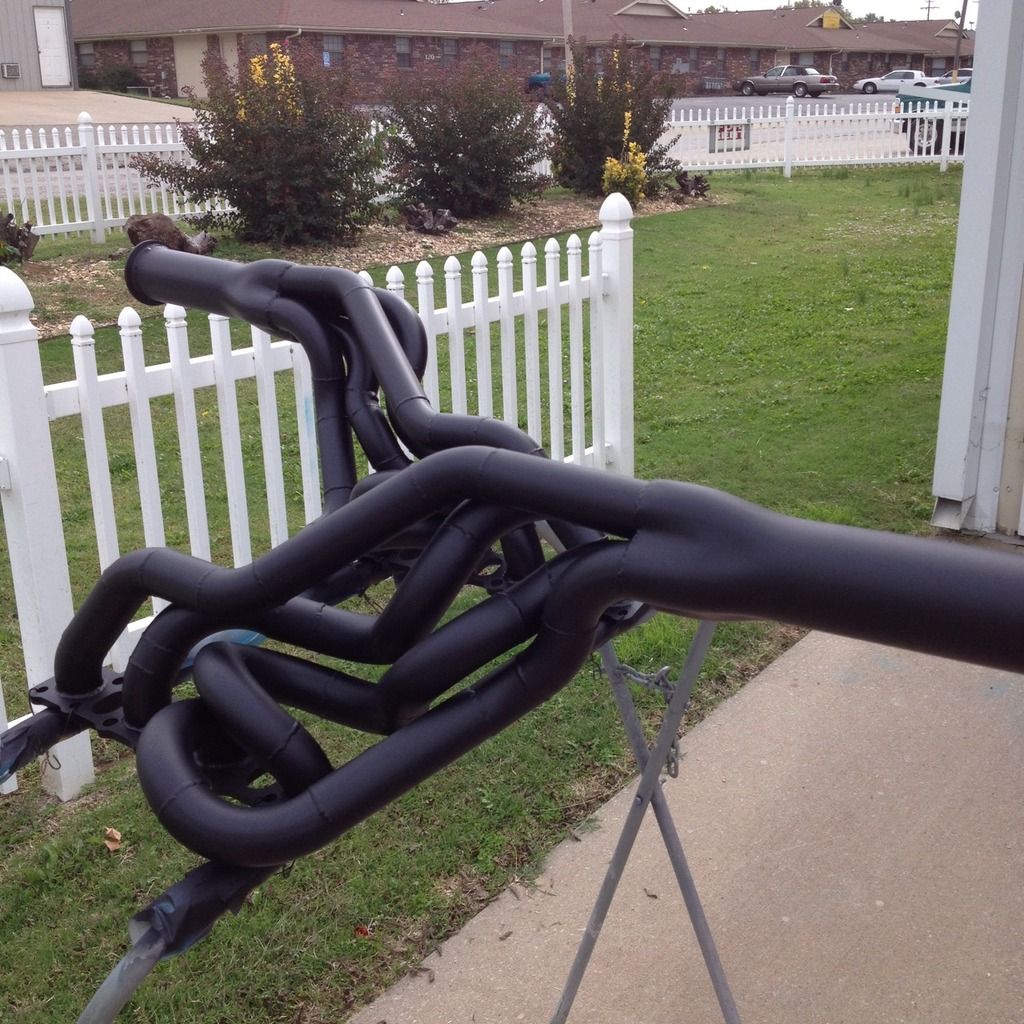 New toys showed up - FUPA cups. 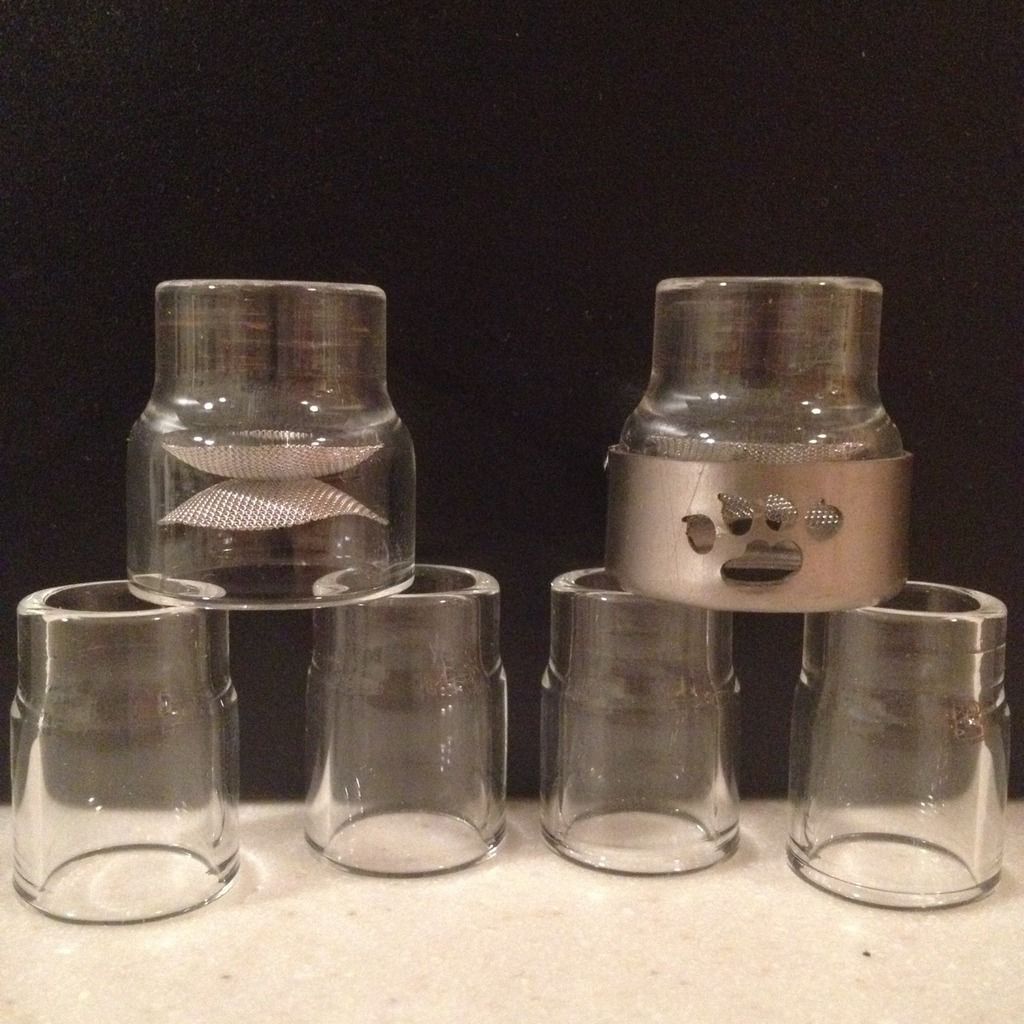 Then, and bringing us to the present, our really big "toy" showed up - a LDR Motion Systems CNC plasma table with a Hypertherm Powermax 85 plasma cutter. 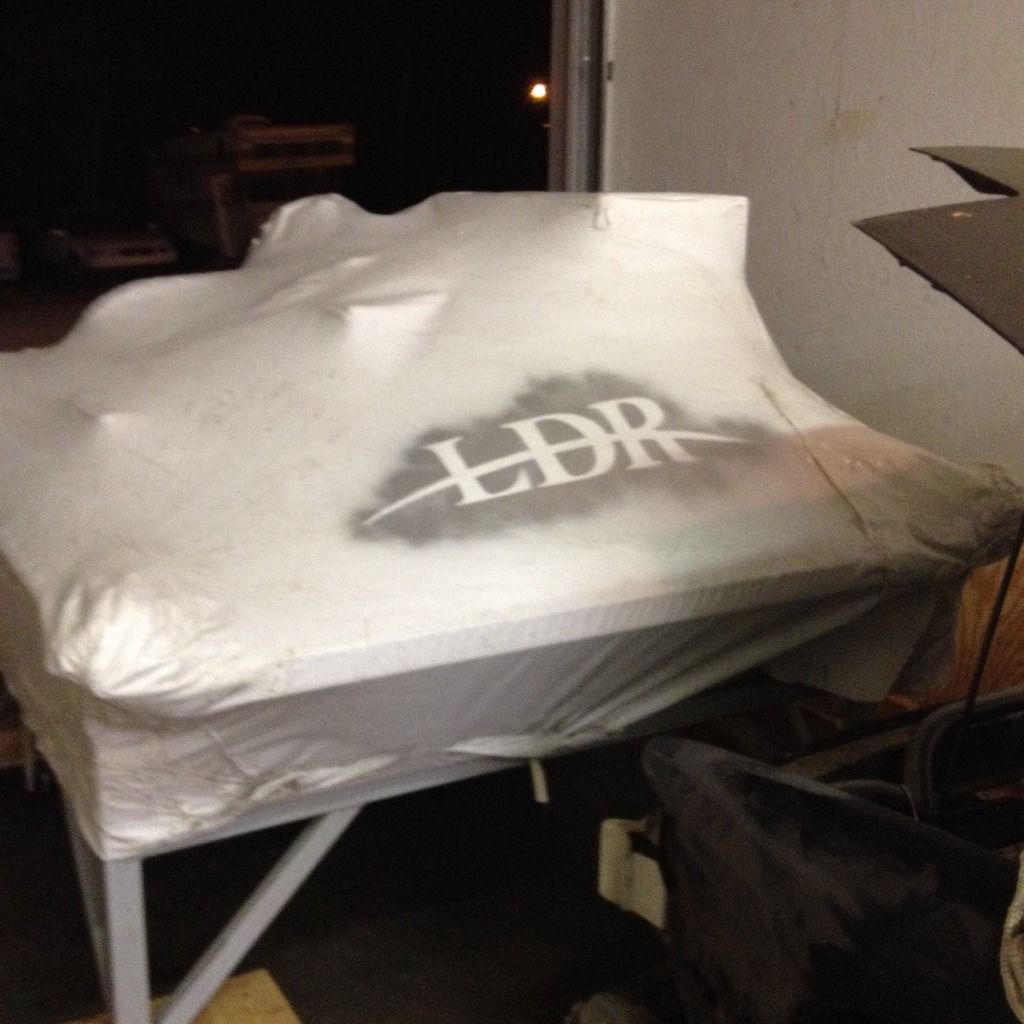  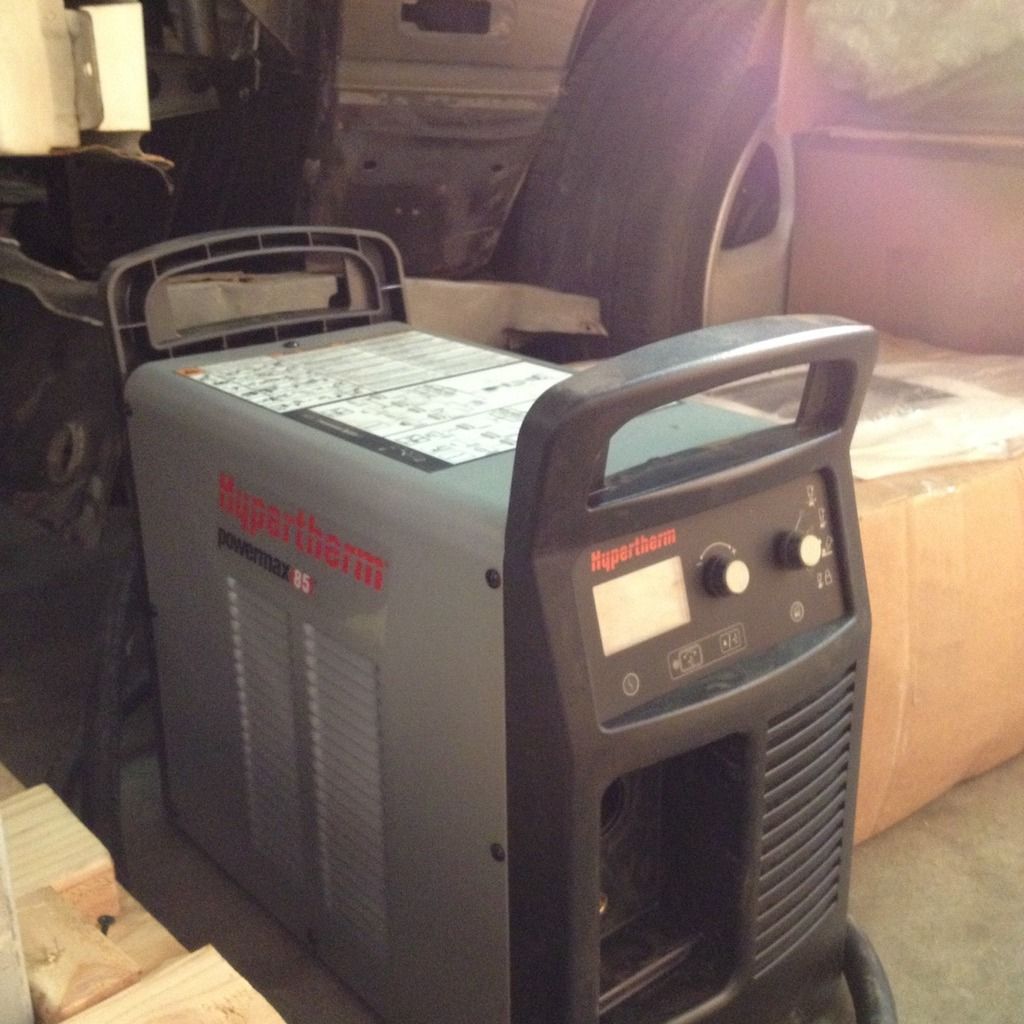 Getting it positioned and hooked up in the shop. We've always wanted to keep as much of production in house as possible and a big part of that was investing in our own CNC cutter. This will allow us to make precision pieces with the flexibility to make revisions when needed. Flanges, adapters, covers, oil pan, brackets, intake manifold, yada yada - you name it pretty much and this will let us create it in a precise reproducible manner. 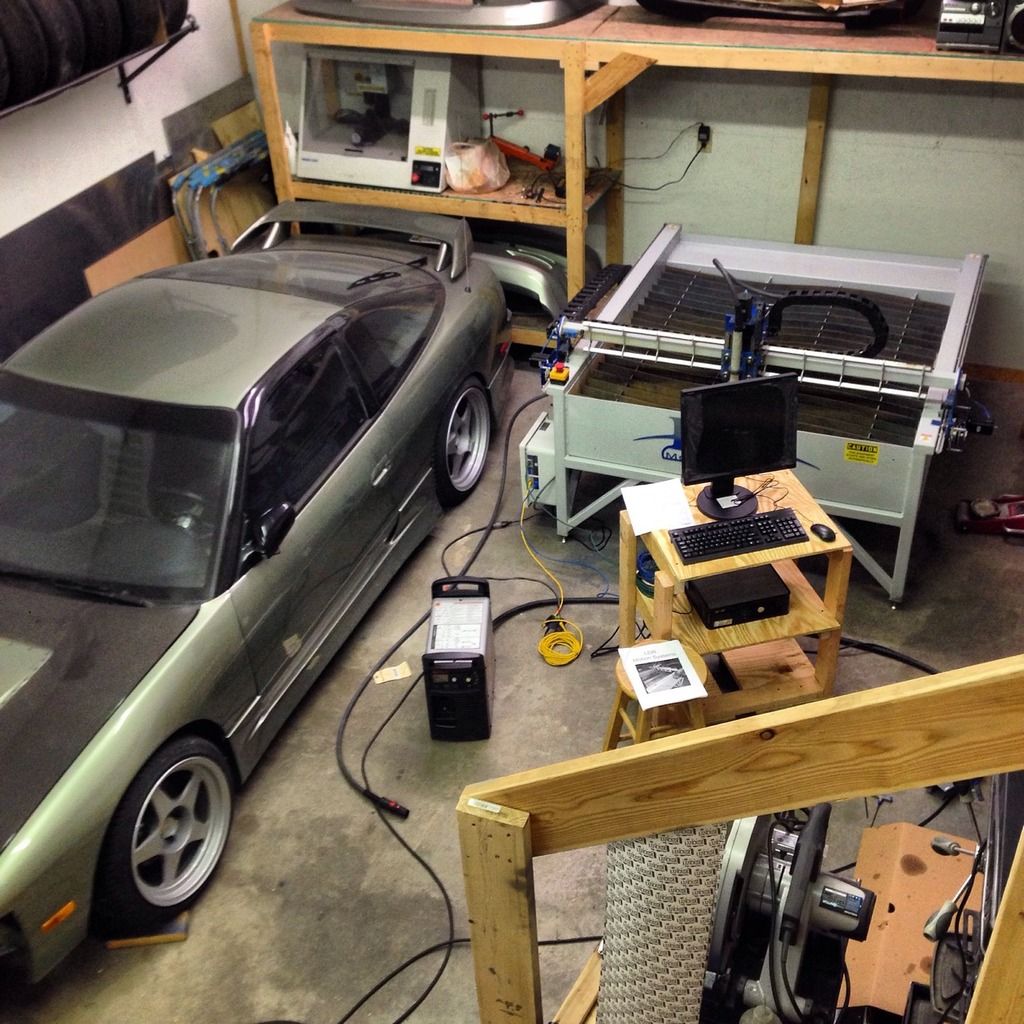 One of the test cuts which gives a good idea what it can do.  And the rebuilt VK sitting in the bay...likely to only be removed and installed two or three more times before it's plumbed and wired. Haha. It's getting close!! 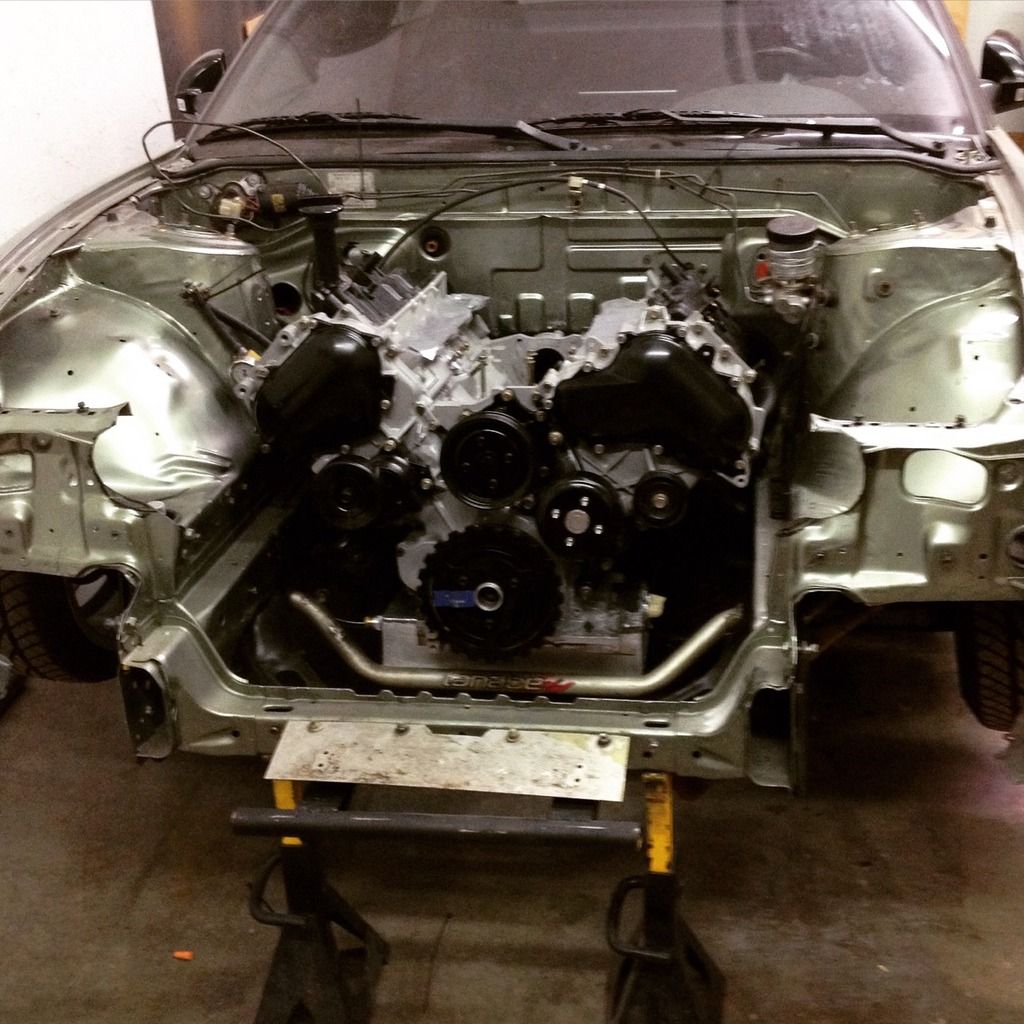 As always throughout this build, thanks for all the support and words of encouragement!! It's been the fuel in finishing this project!
__________________
BRICKHOUSE PRODUCTS
IG @brickhouse_products |
|
|
|
|
| Bookmarks |
|
|


 Linear Mode

