
 |
|
|||||||
| Builds (and builds only) Got a build thread? It goes here, build threads anywhere else on the forum will be locked and never moved. |
 |
|
|
Thread Tools | Display Modes |
|
|
#1 |
|
Leaky Injector
Join Date: Dec 2012
Location: Bristol, UK
Age: 30
Posts: 92
Trader Rating: (0)
 Feedback Score: 0 reviews
|
Jordan's S13 Silvia
Hey guys,
I've been browsing this forum for ages now, so thought it was time I put my build up on here for you all to have a look at. I currently started the build mid-2014 whilst I was in uni, so you'll see how things have developed over the past 2 years to where it is now! (Ripped from my driftwork's project thread) So as some of you may have read in my previous project thread, my S13 has come to its end as something cropped up at the right time and fancied a change. As of now, I haven't picked the shell up, but hoping to asap whilst I'm off Uni  Here's the old girl which ill start stripping when I get motivation;    Always planned to strip the old girl down and fully rebuild it stronger than before, but as I mentioned this popped up off a friend; So here is the new girl, pictures courtesy of the old owner before all subframe were removed, which I'll be consequently replacing with all the drivetrain and parts off my 13 :smokin::smokin::smokin: (I'll get better pictures when I get it) 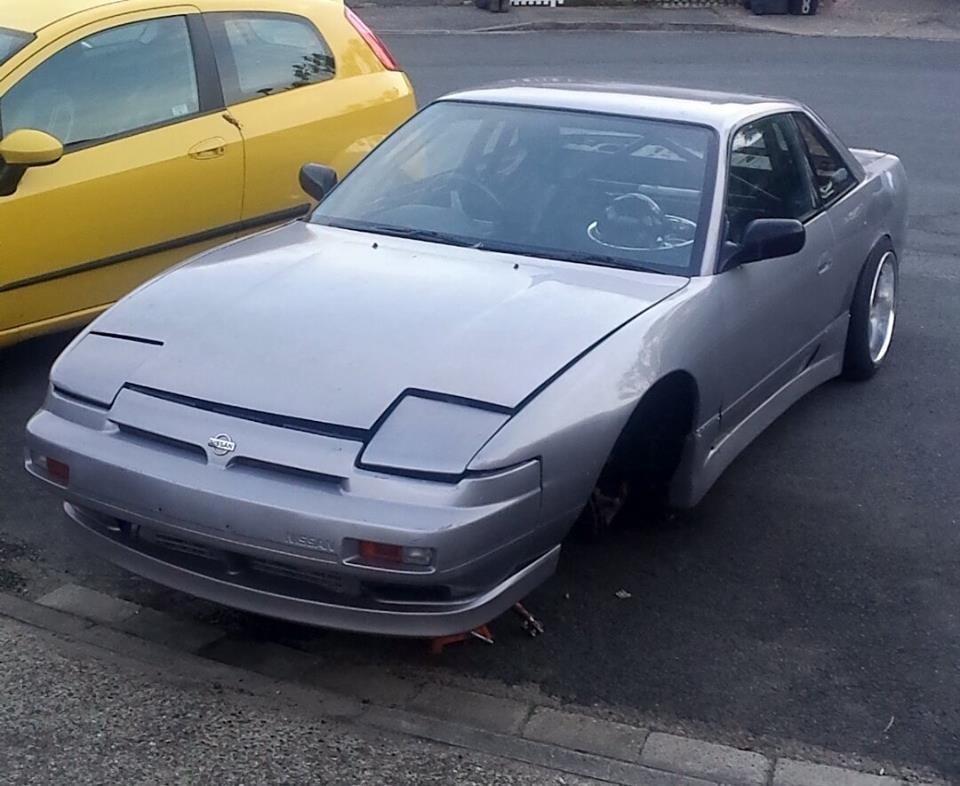 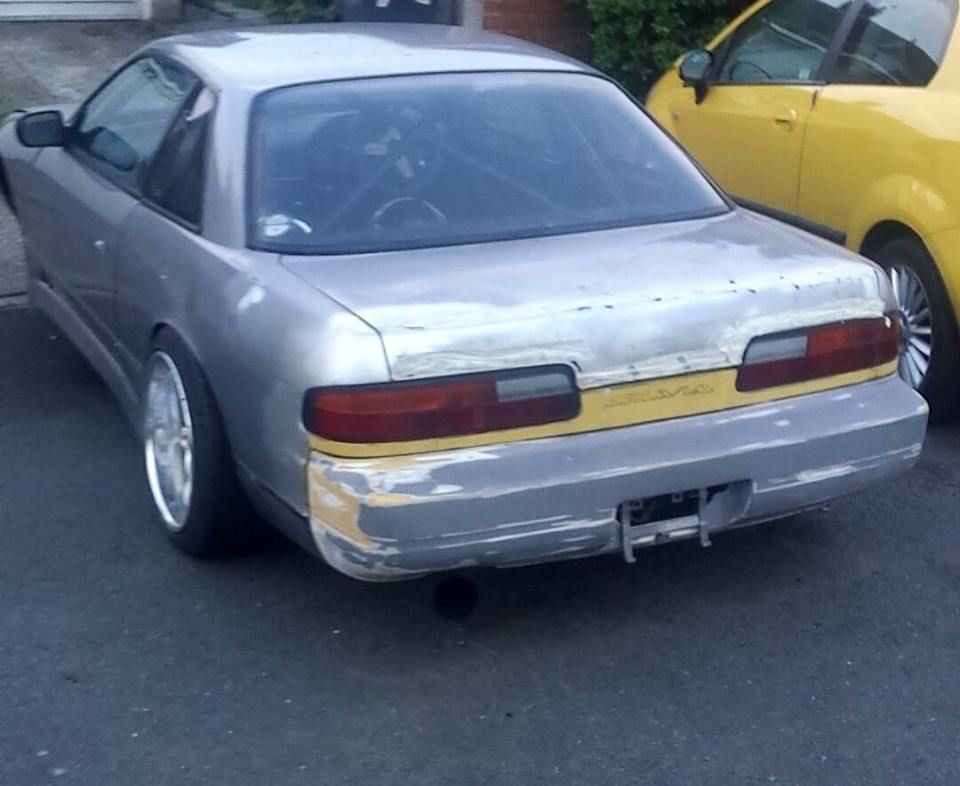 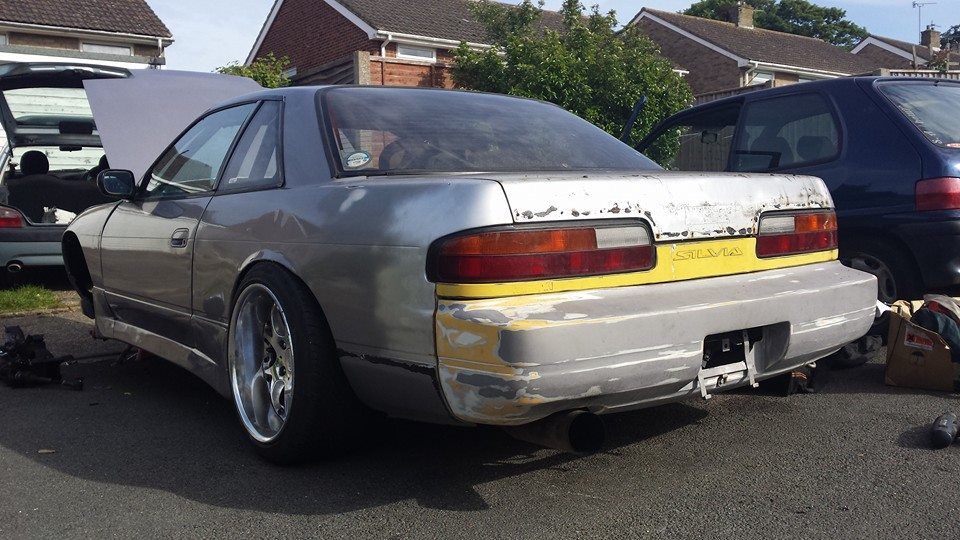 Key selling point; Solid as a nut and has been fully treated underneath, one less job to do! 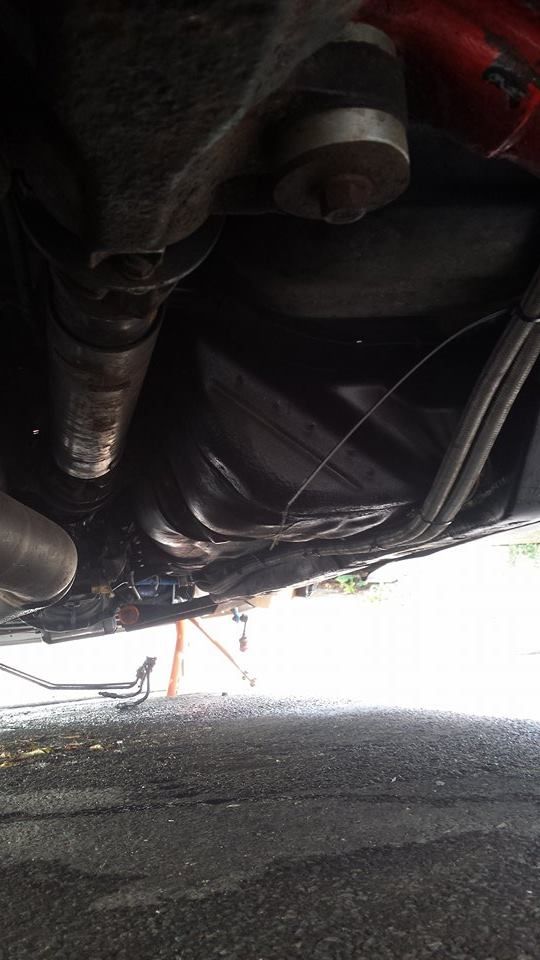 And for those eager eyes, it has Digital Climate Control, something I havent seen in many PS's so i'll confirm which model PS13 it is  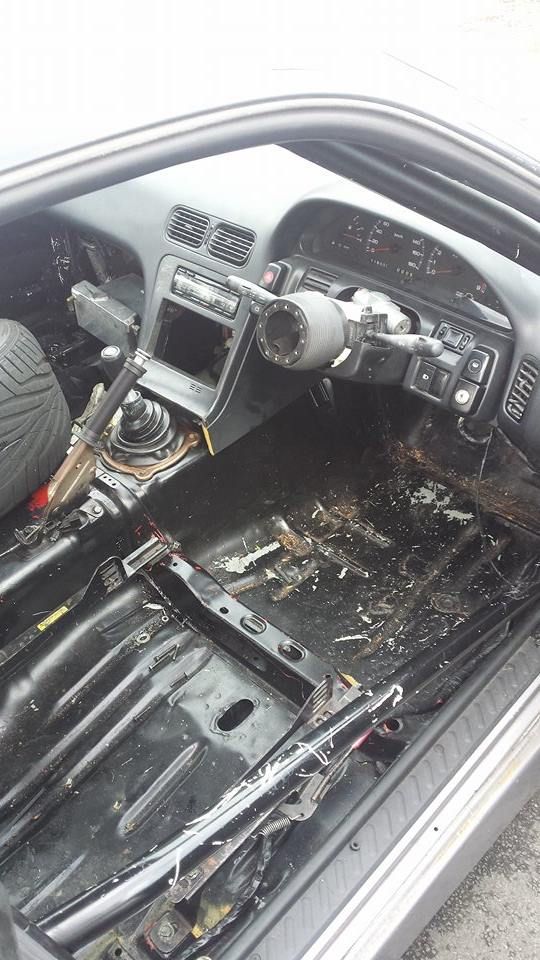 Another key feature is the Fabricage that the car has. Ever since running an Apex bolt in cage, I feel a cage is something id rather have than not  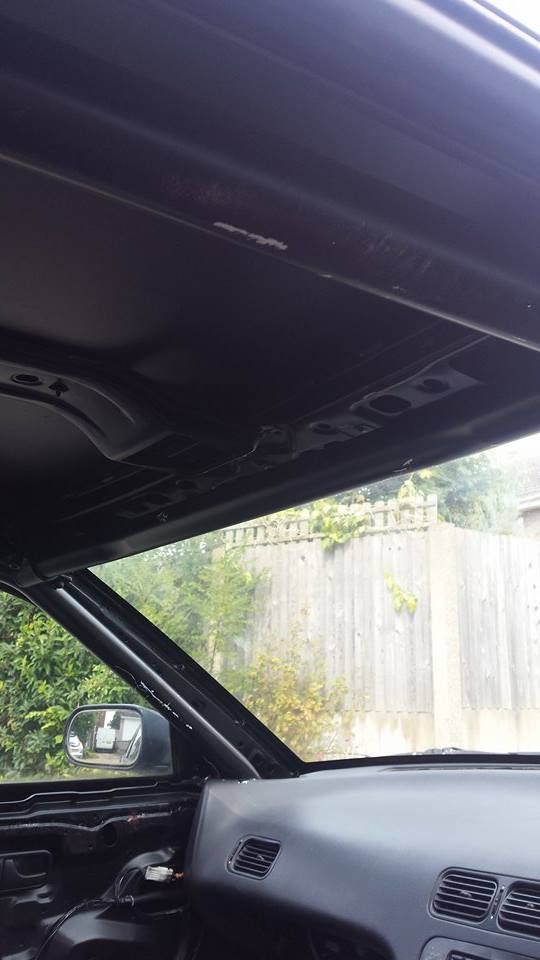 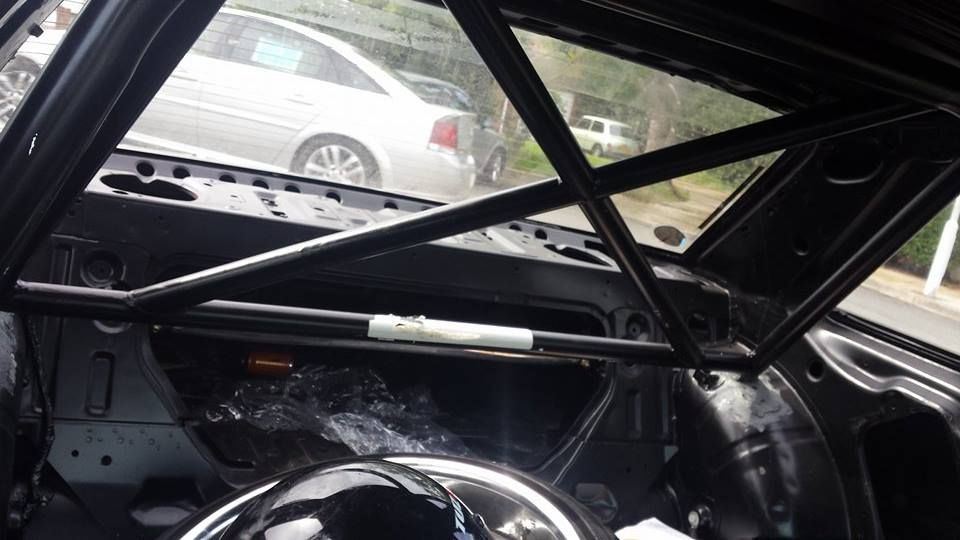 The shell is quite tidy and has a ton of work I want to do to it, but I'm planning on turning this into something special, something everyone who knows what I'm up to has agreed  |
|
|

|
| Sponsored Links |
|
|
#2 |
|
Leaky Injector
Join Date: Dec 2012
Location: Bristol, UK
Age: 30
Posts: 92
Trader Rating: (0)
 Feedback Score: 0 reviews
|
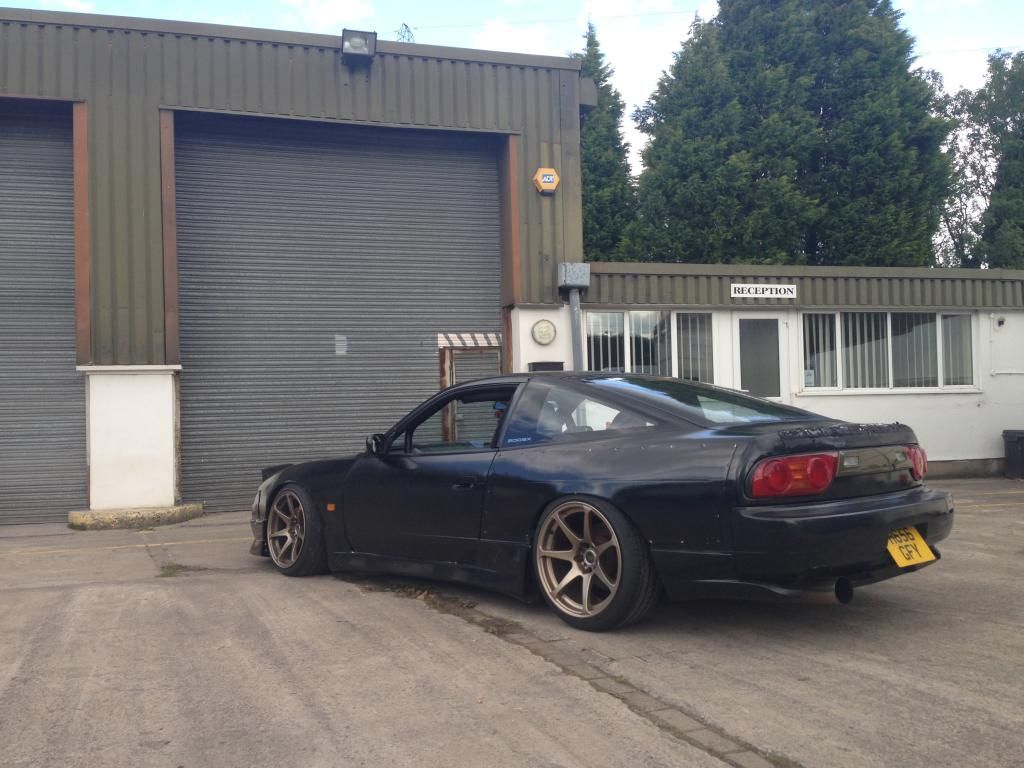
This was a sad day - the final drive of my old S13!
 Next up was D-day, which meant I was now officially in possession of the PS13 shell after taking the 400 mile round trip, which I must say a huge huge thanks to a friend of mine who offered to drive and tow it back for me. So, got there, met Glen etc and went about getting the shell "rolling" and slap my spare rota's to get it onto the trailer. This is all went relatively straight forward, maybe too easy.. 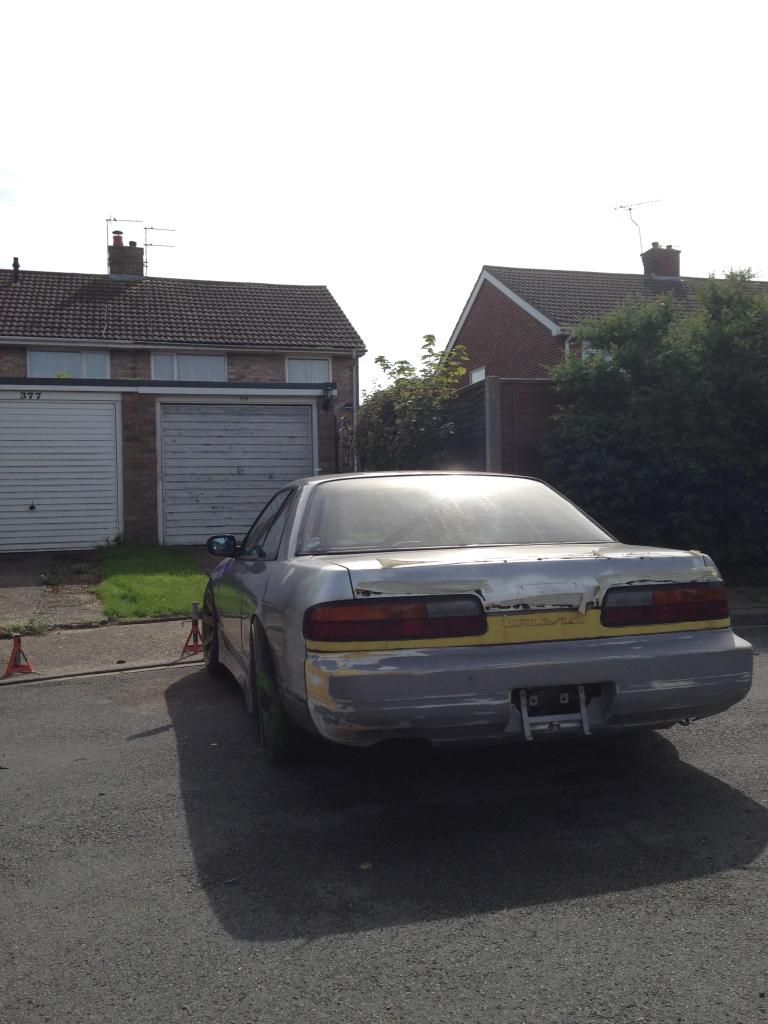 Because the front had no steering setup, nor tension rods etc the wheels weren't the easiest things to control. With the car looking like it had been in a number of crashes and each wheel pointing in an opposite direction, we eventually got it onto the trailer and set about strapping it down. 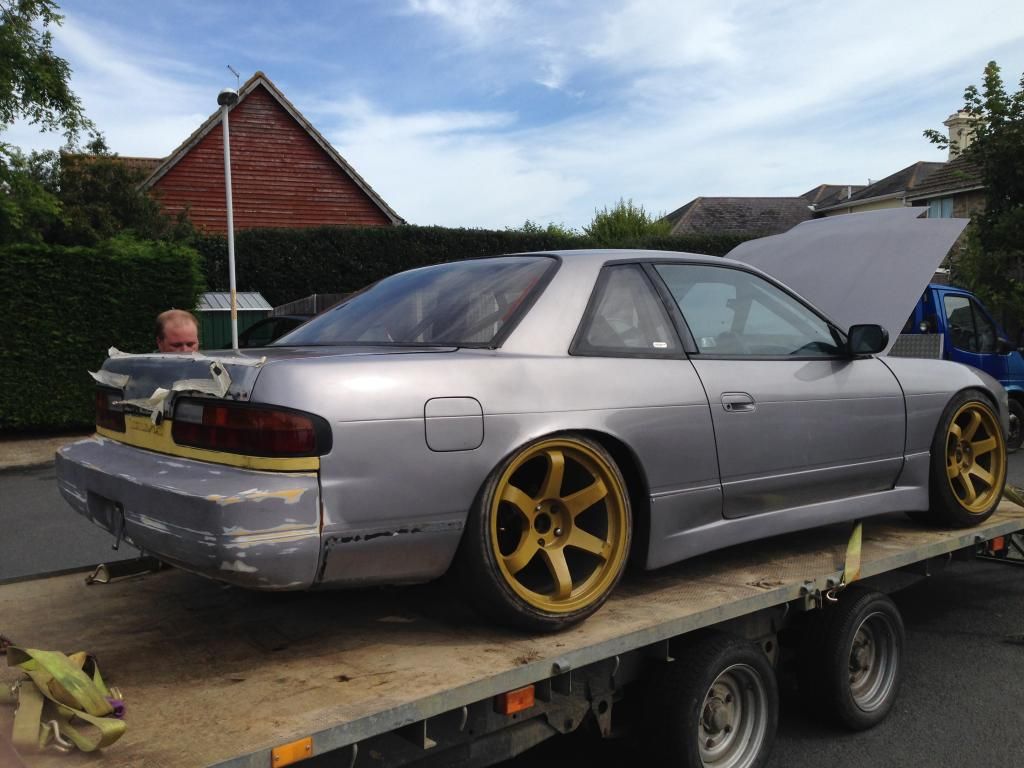 The following morning I went down to the car, cleared it out and see where I stood with it, and to be honest I'm more than chuffed with the shell, goes to show there are some decent dudes in the scene and honestly advertise things. 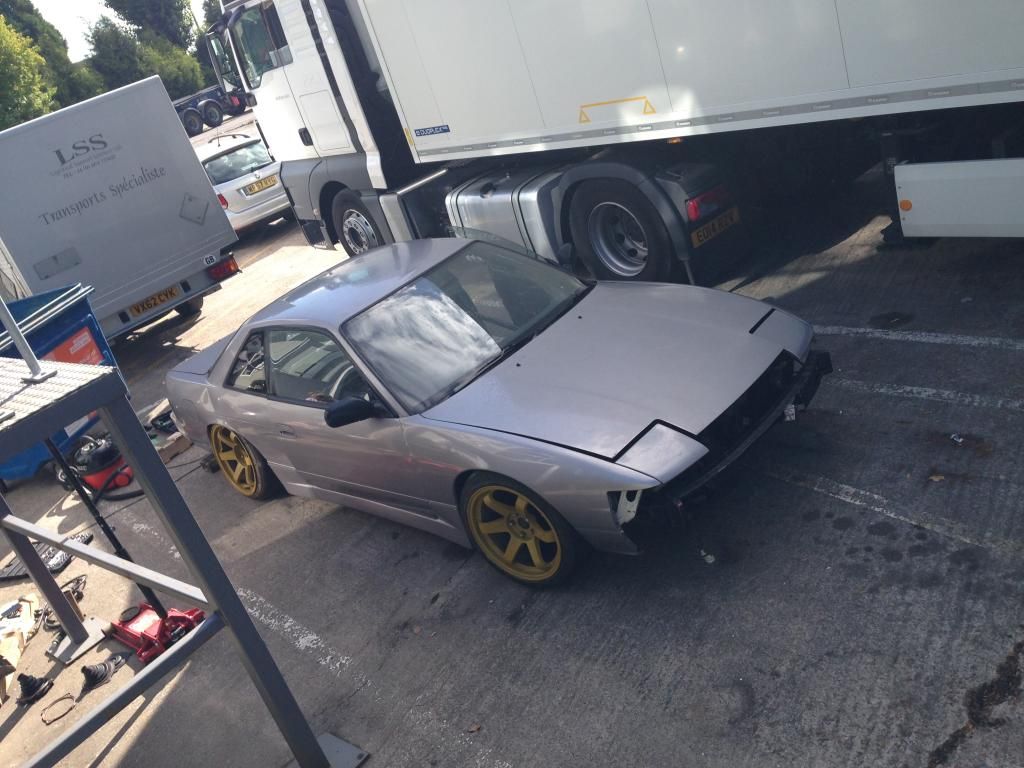 The next phase was to remove my old rear subframe, which wasn't as easy as it should have been with one of the boomerang brackets deciding to not come undone, but a bit of gentle persuasion here and there - it came off pretty straight forward. 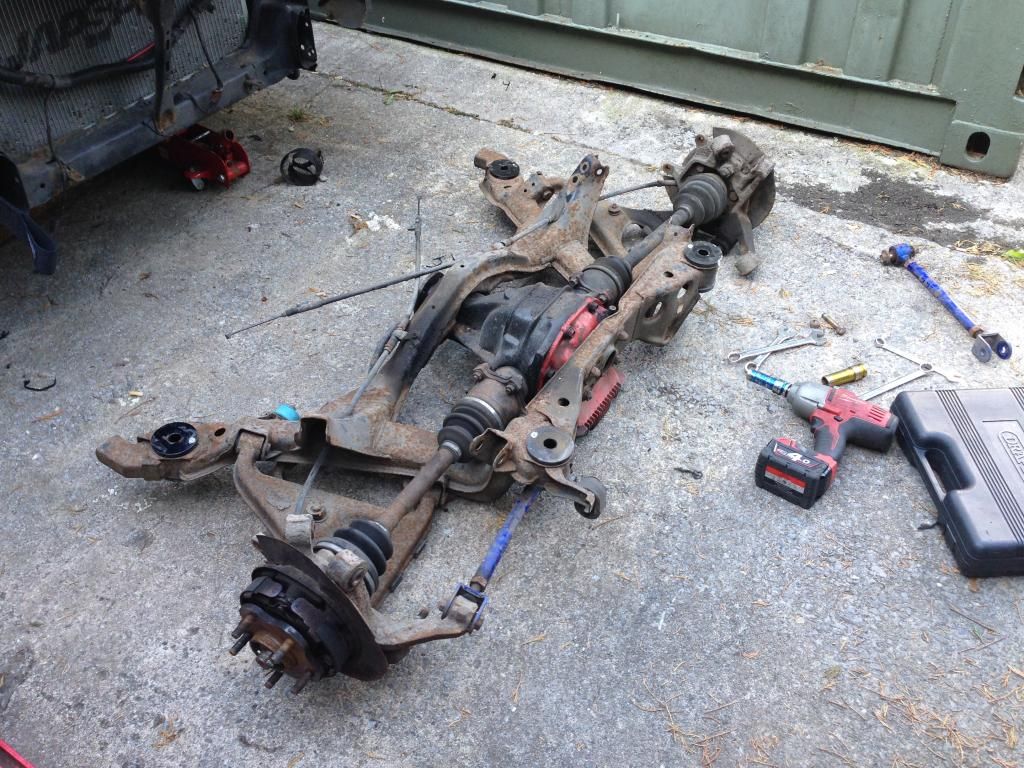 I was originally going to strip the subframe bare and get it powder coated, but seeing as it wont be seen, I settled upon hand painting to save some costs and time. Me being me, couldn't resist taking a few more pictures 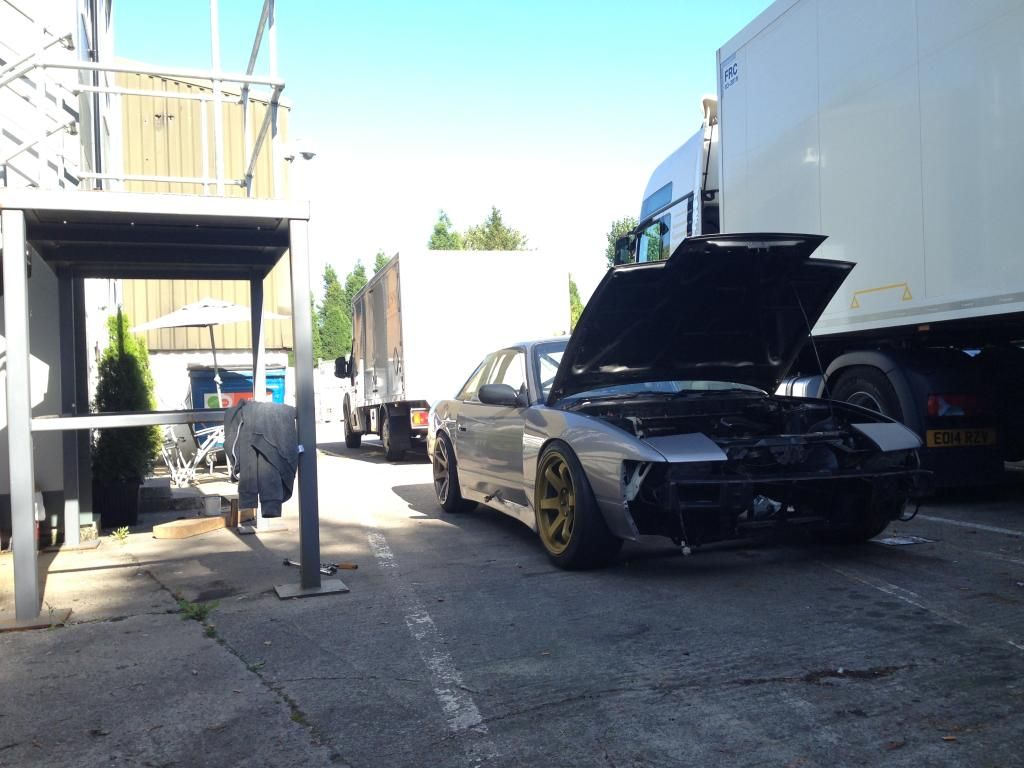 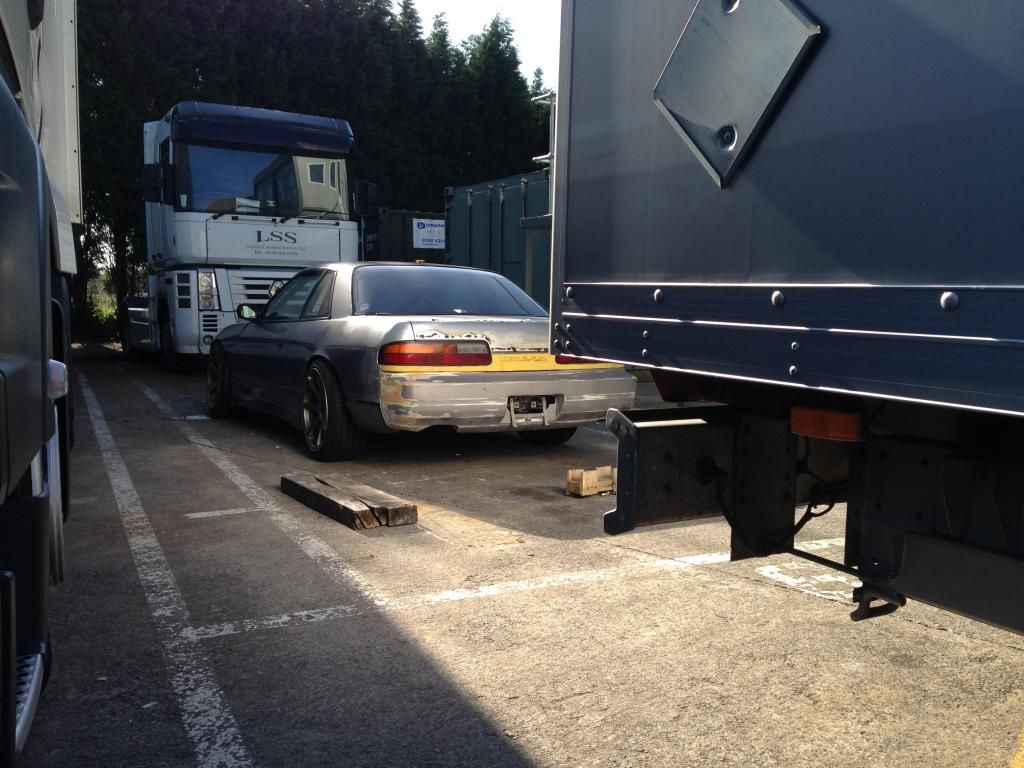 Left the day with the rear subframe looking like so; 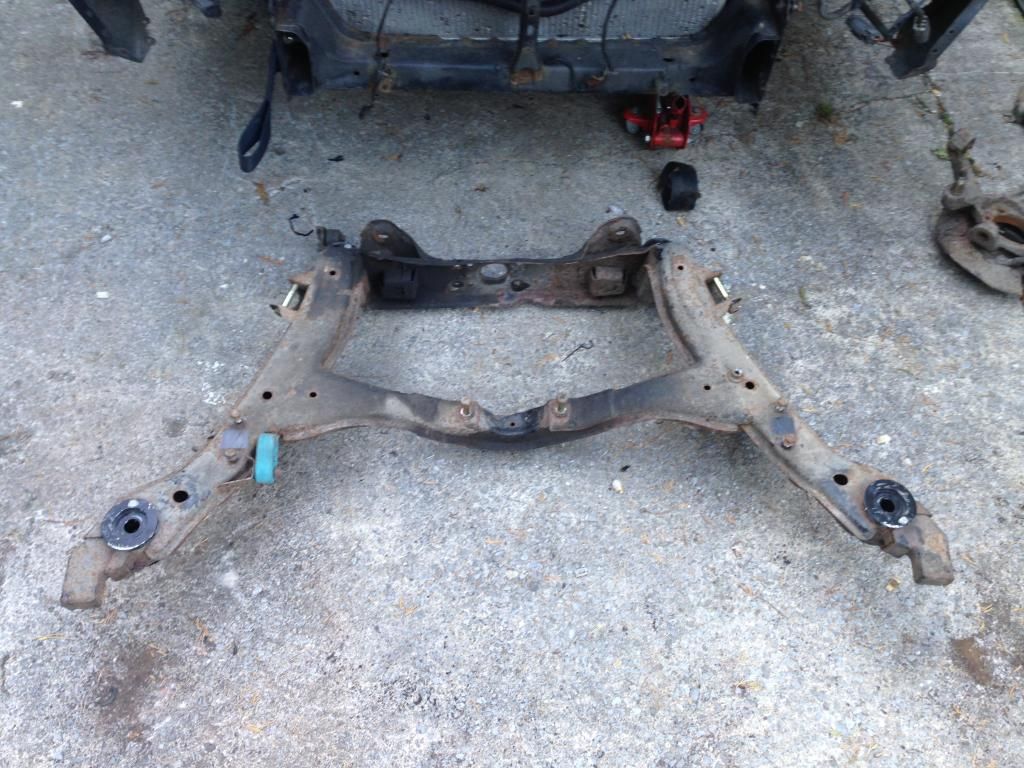 The overall condition is pretty good - most S13/S-Body components over here are terrible with rust. So plan of attack is use a wire brush & sander to try and get a reasonable finish for something I wont always be looking at. In the process, I ordered some fresh rear ball joints for the RLCA's as a measure of preventative maintenance. Also ordered some Driftworks RLCA bushes, as my LCA's are still using the standard bushes from the factory and definitely need replacing if I want more grip/better handling characteristics with the new setup. 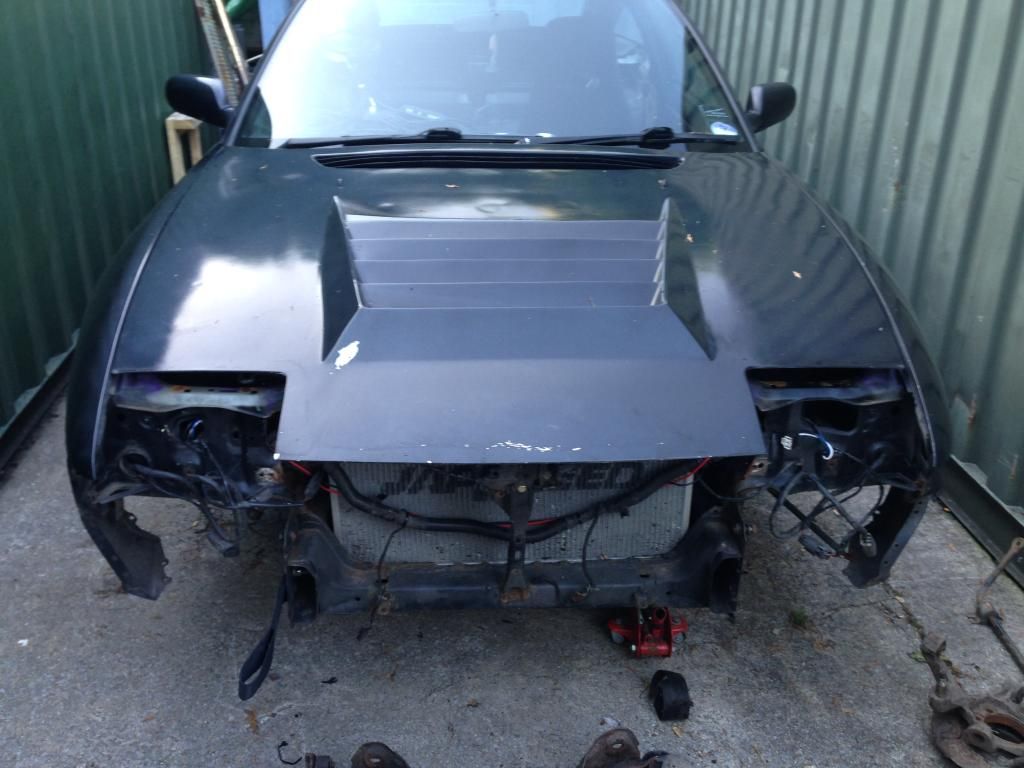 |
|
|

|
|
|
#3 |
|
Leaky Injector
Join Date: Dec 2012
Location: Bristol, UK
Age: 30
Posts: 92
Trader Rating: (0)
 Feedback Score: 0 reviews
|
I started to refit my Powered by Max high mount intercooler that I ran on my 13. When I fitted it previously, I had to rush fitting it as it was a daily driver and needed to get to uni the next day, so wasn't as neat as i'd like. So another chance of installing this let me to try and neaten things up and improve on where to cut etc.
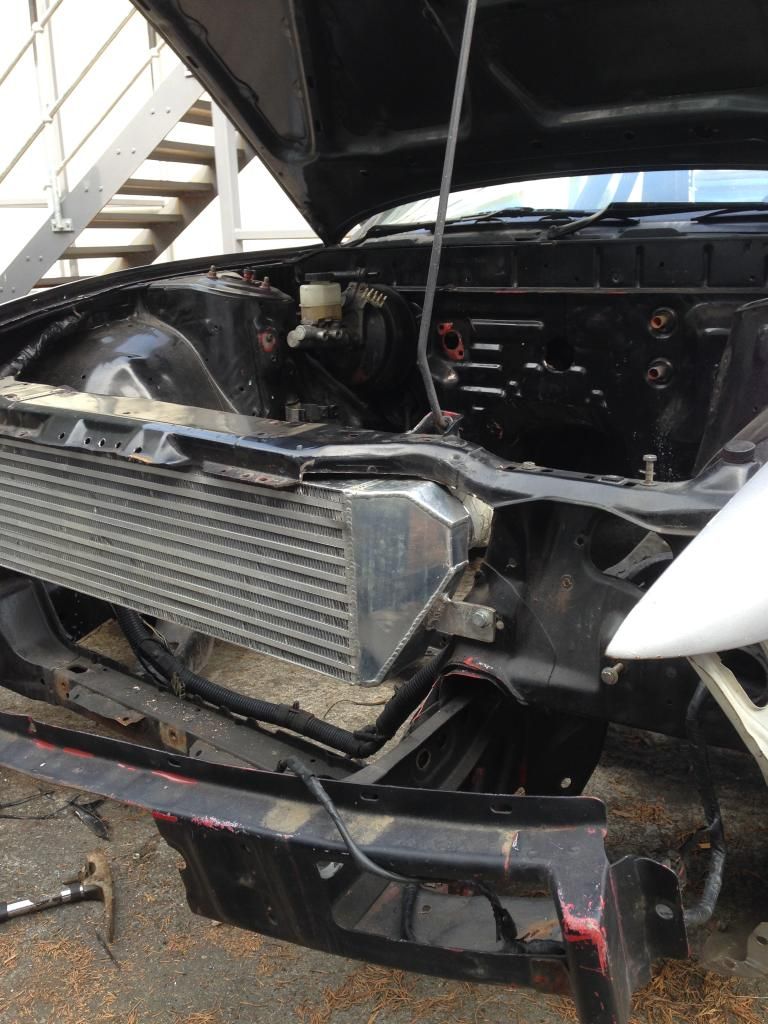 I decided to cut a bit further up towards the slam panel this time, reason being it was a pain to tighten hose clamps when fitting the boost hoses, so a more neater and larger cut was my solution to this and fingers crossed it wont be such a problem. I decided to bin the centre bonnet latch, as the car isn't registered on the UK roads anyway. Plus, with the fibreglass bonnet off my 13, I wouldn't mind running aero/bonnet catches of some kind to make it easier. I trimmed the headlight support brackets though and made them fit for 2 reasons; a) It gives the slam panel a bit more support b) It'll help support the front bumper from sagging (fingers crossed!) All fitted up; 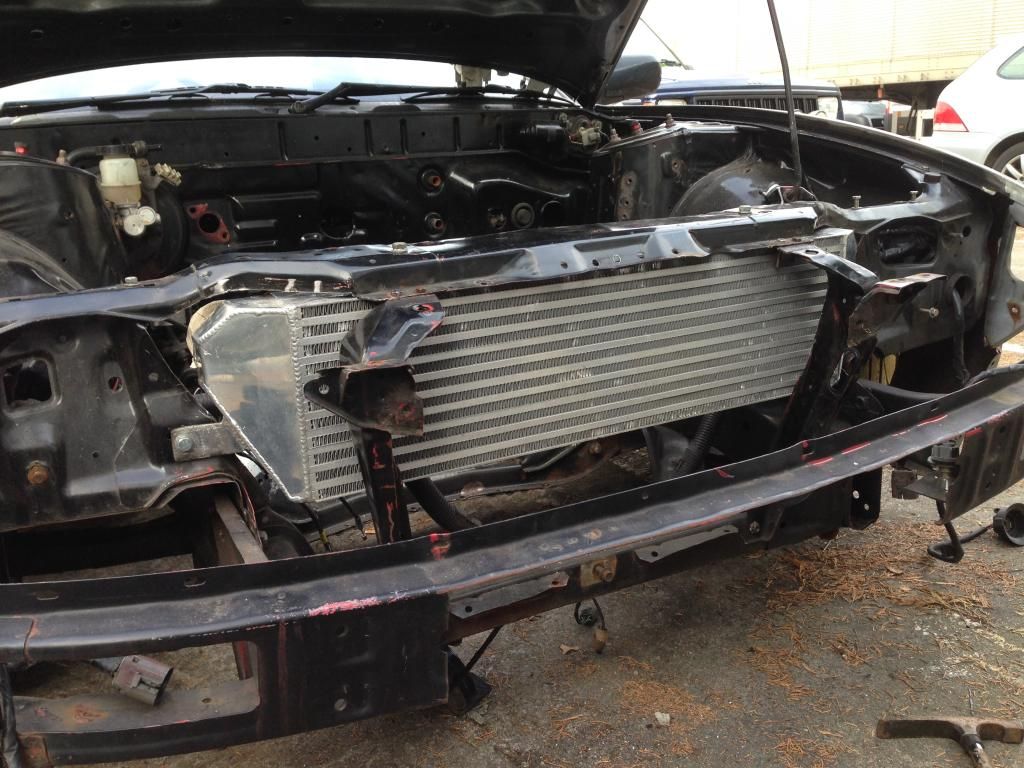 After this I felt it was needed for a bit of fun, so a friend popped over, fitted his uprated rear ARB and messed about with my PS for a bit, I slapped on my old headlights that are fixed in the up position (due to the HMIC requiring the removal of headlight motors) and also slapped on my D-Max bonnet just to cheer me up and see what it looks like. Once again, another negative has come forward. The wiring loom was cut and tucked above the arches which I thought was a great idea when I bought the car. But on closer inspection the wiring was cut, with a number of plugs removed. So with a bit of head scratching, me and my friend realised what has happened. We'll replace it with the wiring from my old S13, and manually add the wiring for the Silvia climate Control, as there is no way that is going! Just like I said at the start, it seems to be 1 step forward and 5 back at the moment, questioning myself why I decided to switch shells but the image of what this car will be like once done is what's slowly keeping me on track and ploughing through a number of small problems. All will be sorted, and no doubt many more problems will arise in the near future :thumbs:  Anyway, last picture for tonight that I took when I was disassembling a part off my old 13; 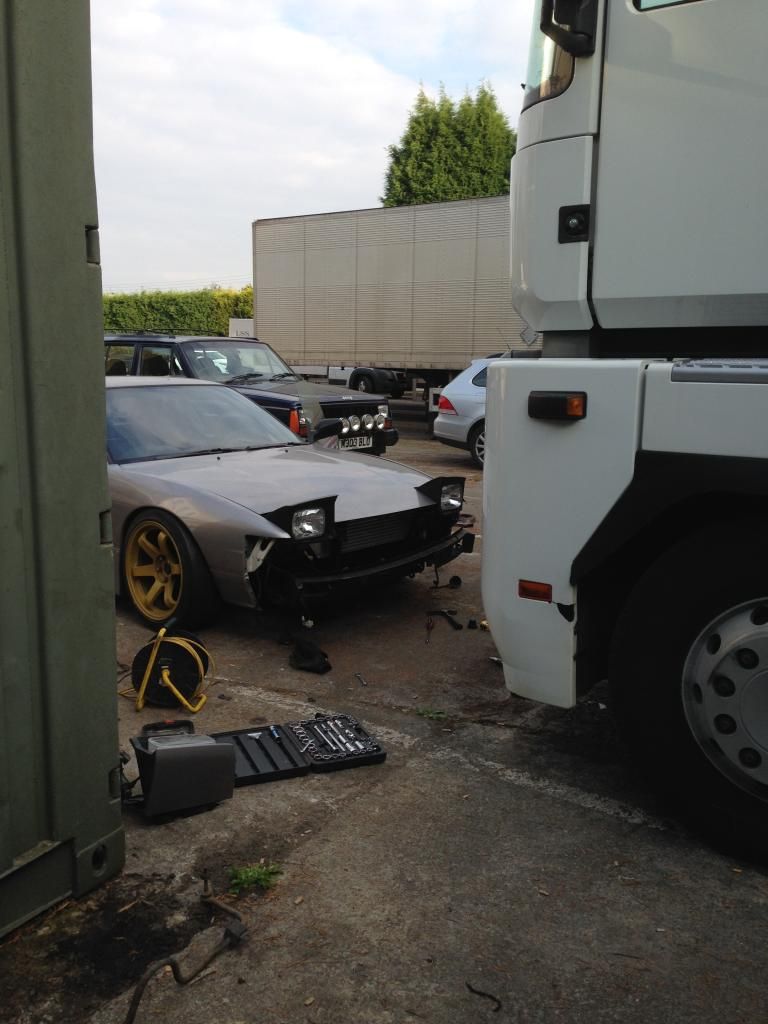 A very sorry Onevia, but I still believe it has great potential and I will try my hardest to make sure it reaches that and most importantly it makes me smiles when I drive it whenever its complete  |
|
|

|
|
|
#4 |
|
Leaky Injector
Join Date: Dec 2012
Location: Bristol, UK
Age: 30
Posts: 92
Trader Rating: (0)
 Feedback Score: 0 reviews
|
So, the current plan of attack is to completely replace the main wiring harness/loom that runs from the drivers fuse box to the wiper motors.
I began by removing the untouched harness from my old 13; 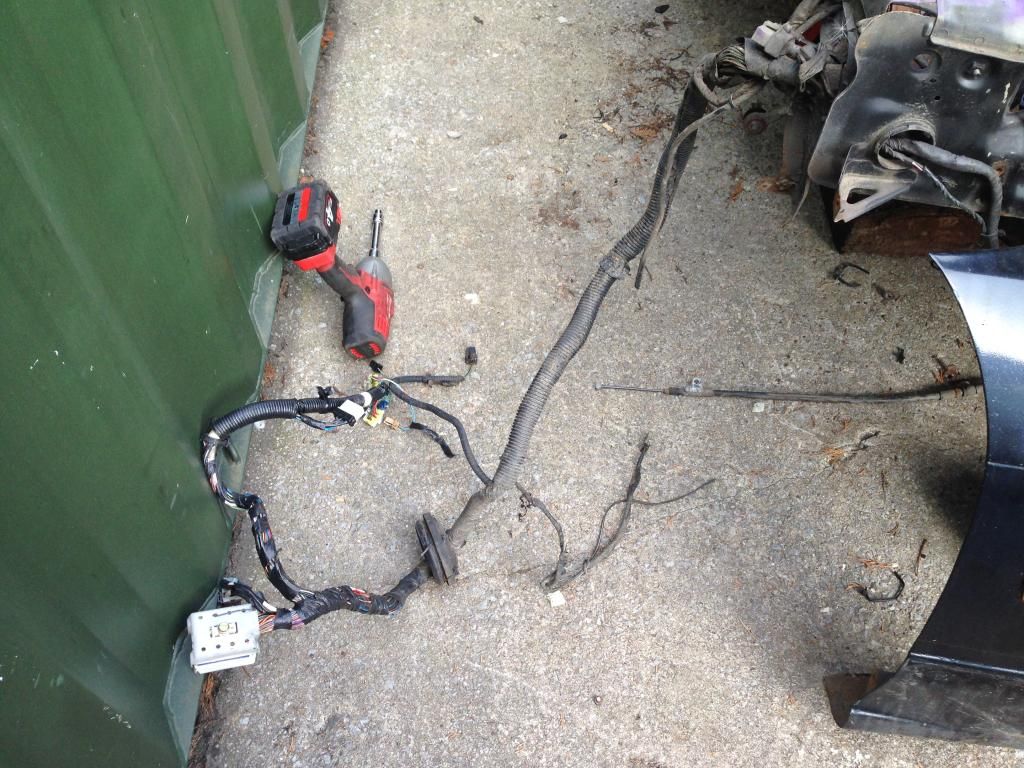 Whilst I waited for a friend to come and help me with my wiring, I decided to remove the tension rod brackets as one was dented fairly badly due to ground clearance. But as with everything, bad luck continued and the captive nut broke free inside the chassis leg. There was only one option left, and out came the grinder. 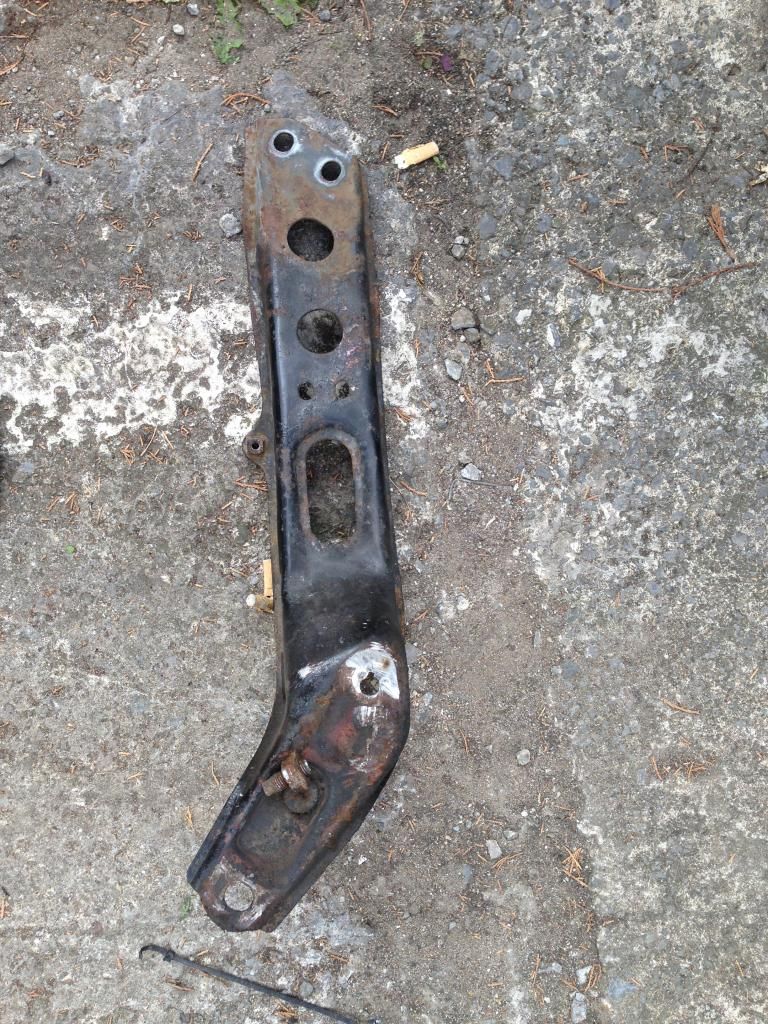 The offending captive nut haha. Wasn't too bad with an empty engine bay, removed the other 3 bolts and span the bracket round and could easily just slice between the chassis leg and the bracket. Quickly whipped my old front ARB off whilst I was as it: 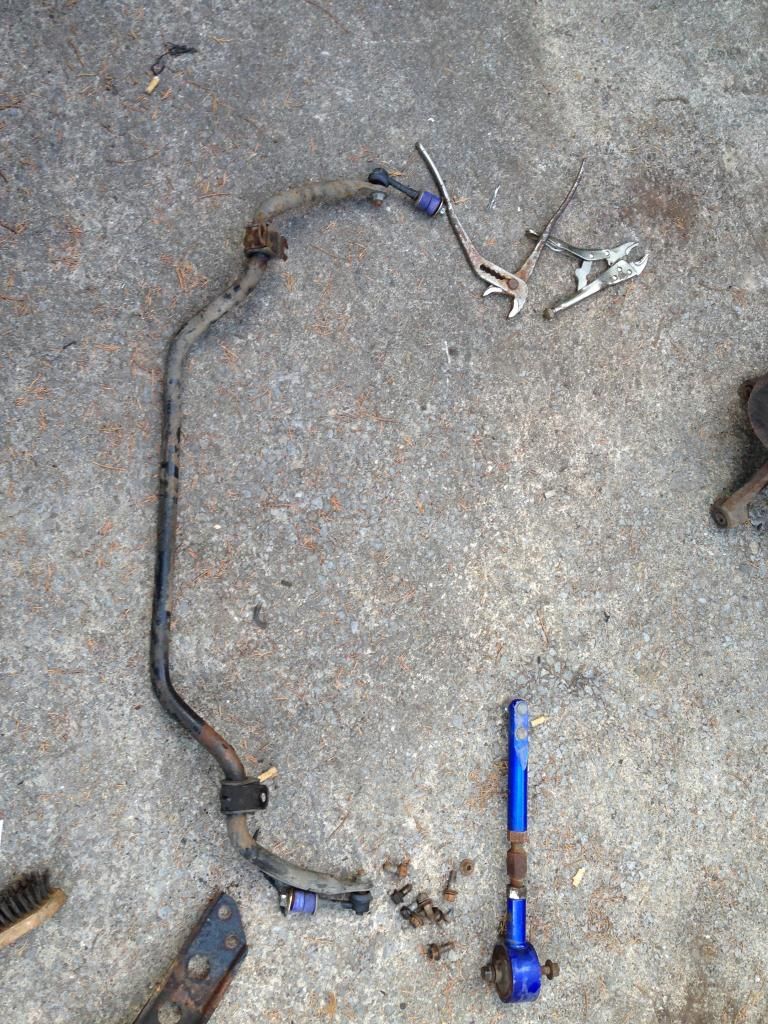 And decided to call it a day after doing a few small odd jobs here and there. 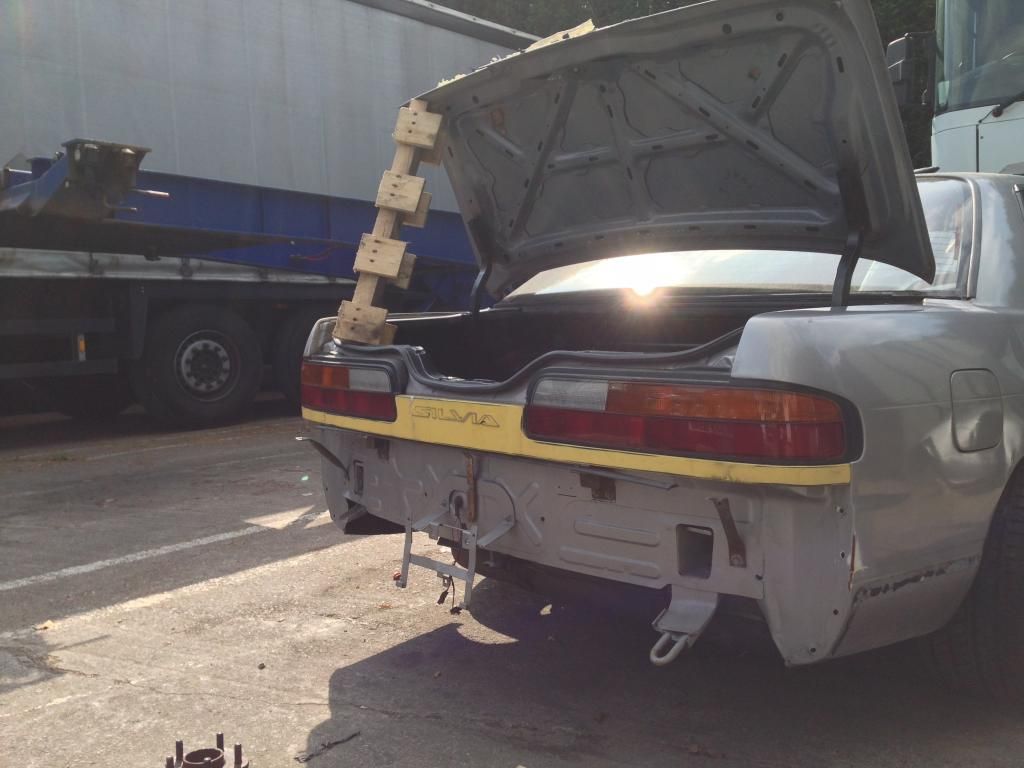 The next day I went back to the car with a fresh head and removed the dash and unplugged the harnesses that I'm replacing. I found a few of the heater matrix boxes loose so spent a bit of time making all of them secure again, hopefully in aid of trying to avoid those annoying rattles they may make. Whilst I was under the dash, I quickly fitted my old clutch pedal off the 13 and loosely bolted it into the Silvia just to try and make it feel like a normal car haha! 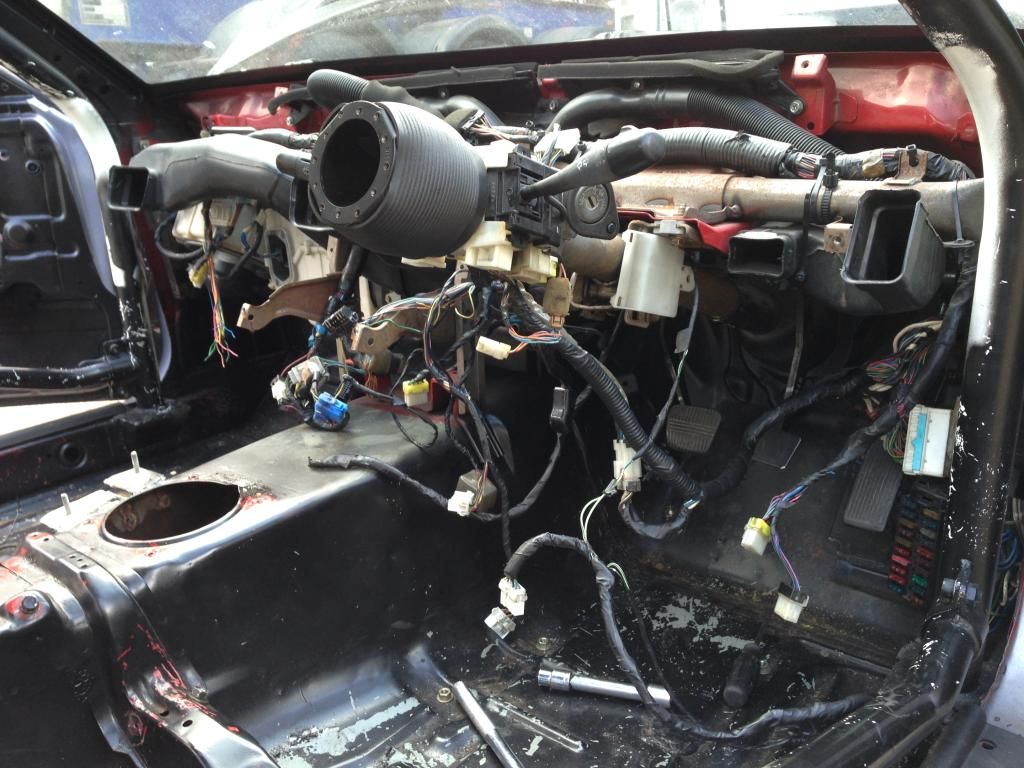 Annoyingly the car had a hydro bracket welded to the tunnel. Now, I'll be running a hydro in this car but planning on a much different setup so this needed to go. 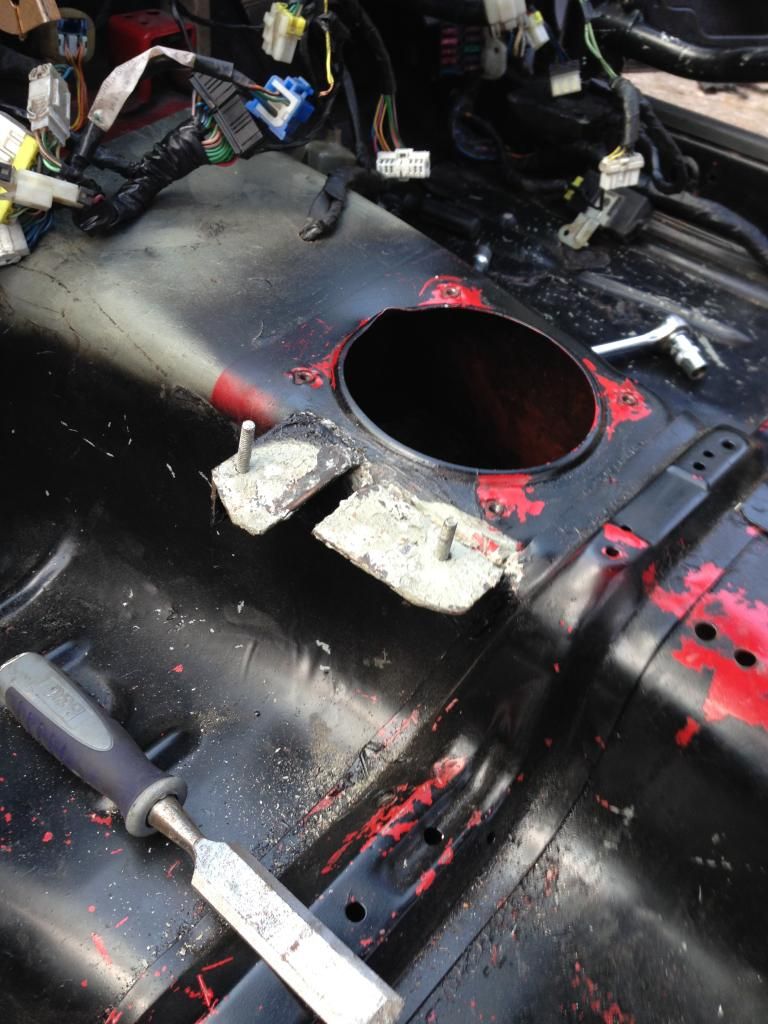 So out came the grinder, but unfortunately unprotected weeds meant rust had gotten the better of the trans tunnel. Nothing too serious though. 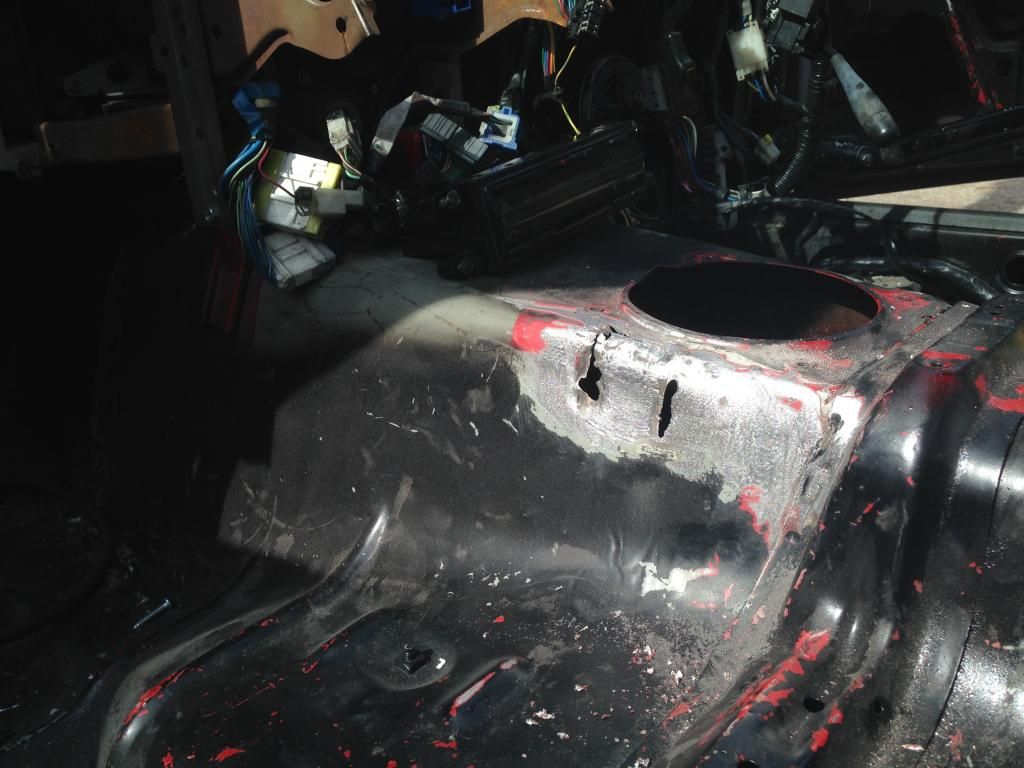 Decided to have a quick break and threw my front wheels on with a 25mm spacer. I like the way this thing is starting to look, it's pretty aggressive. 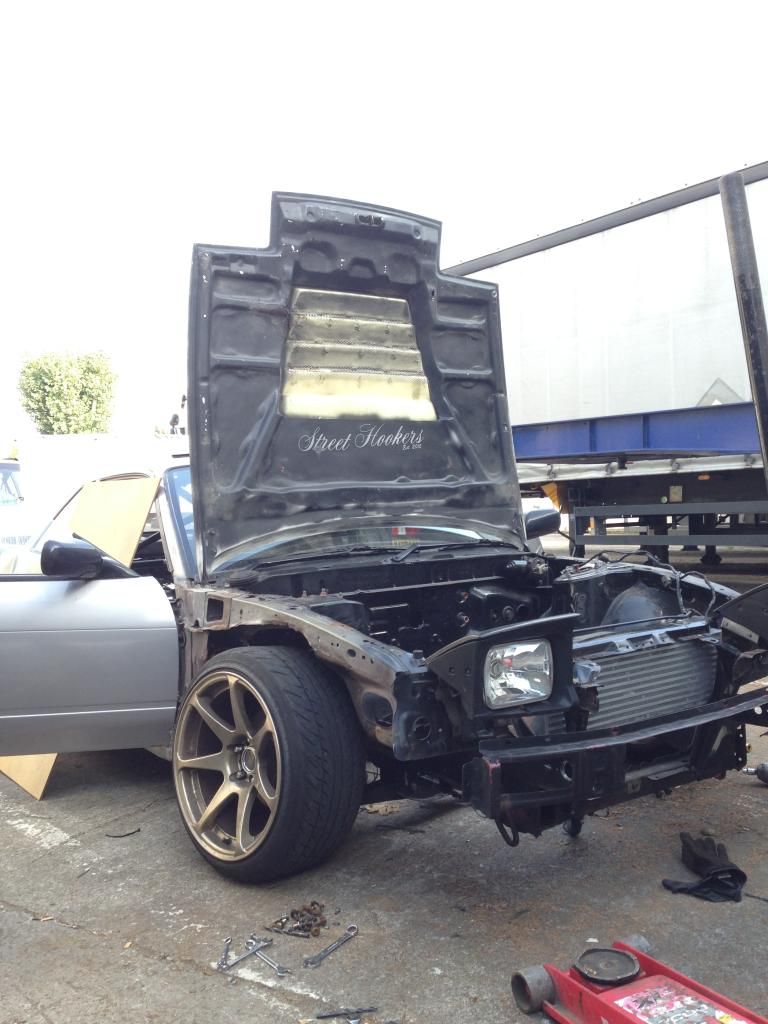 Whilst I had the tension rod brackets off, I decided to quickly try and clean them up. So a quick wire brush and a little bit of sanding and they were ready for some zinc primer. 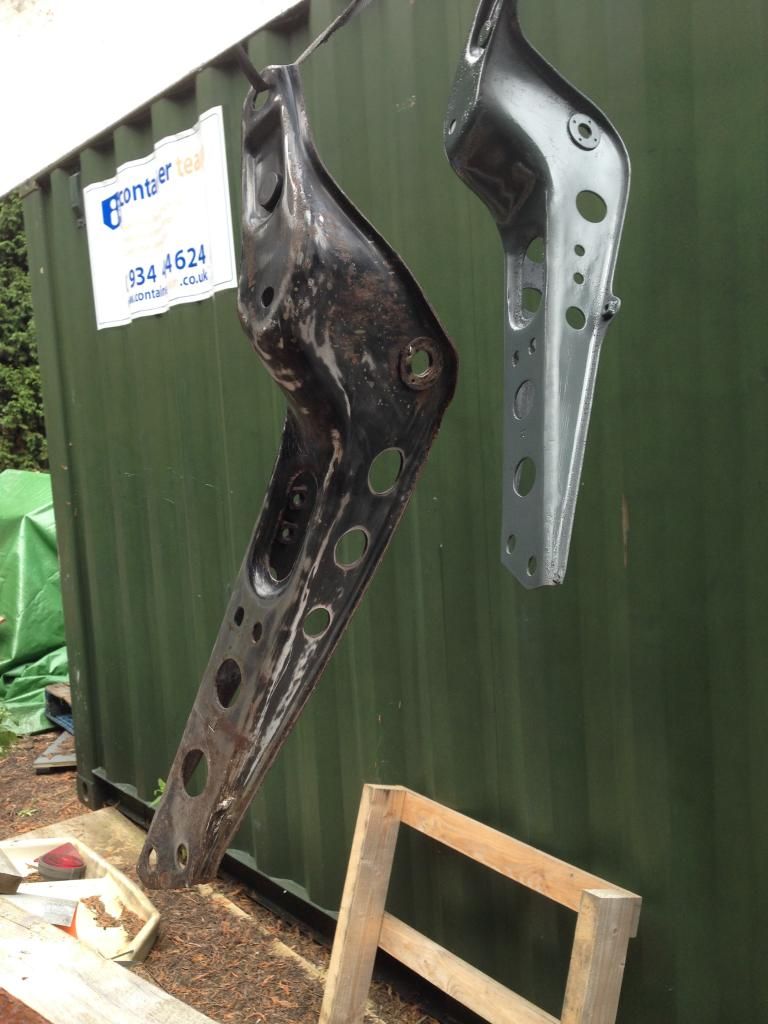 I had my bare subframe off the 13 ready to get cleaned up too, so more wire brushing and sanding and it was in a semi-decent state. The reason not for splashing/wasting money on fancy powder coating is purely because I just wanted to make them clean as its a happier place to work on if that makes sense, plus with some plans that i'll soon to reveal id rather spend the money on somewhere that counts. 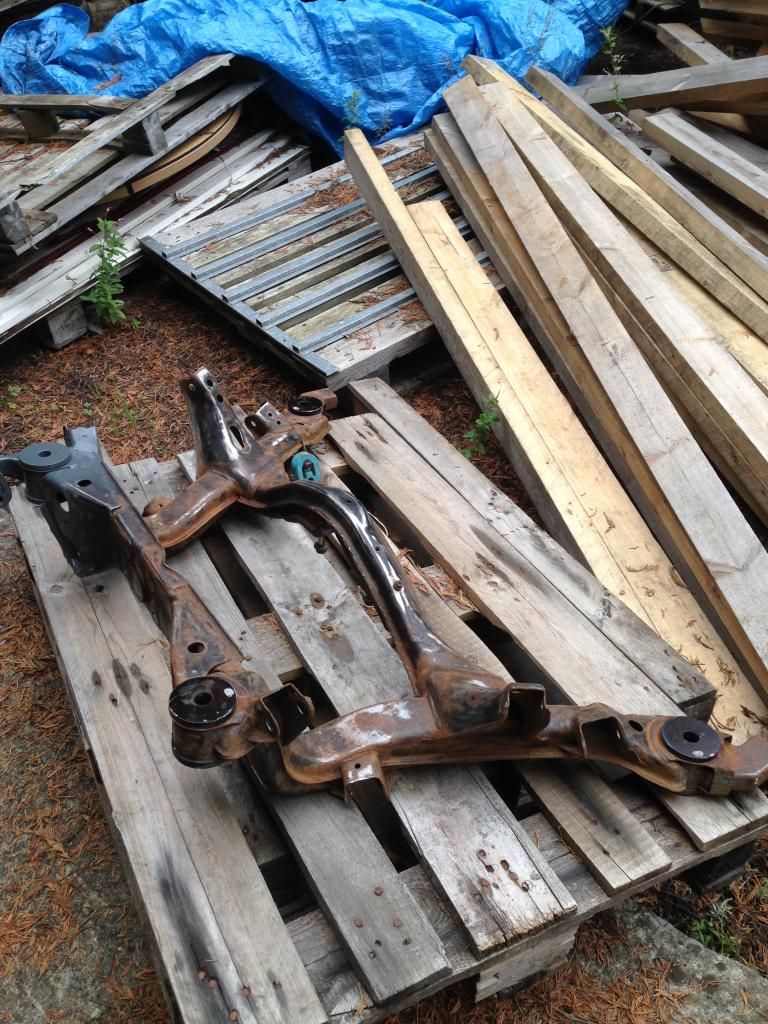 Following this, I had two mates pop over who began to tub my front arches. 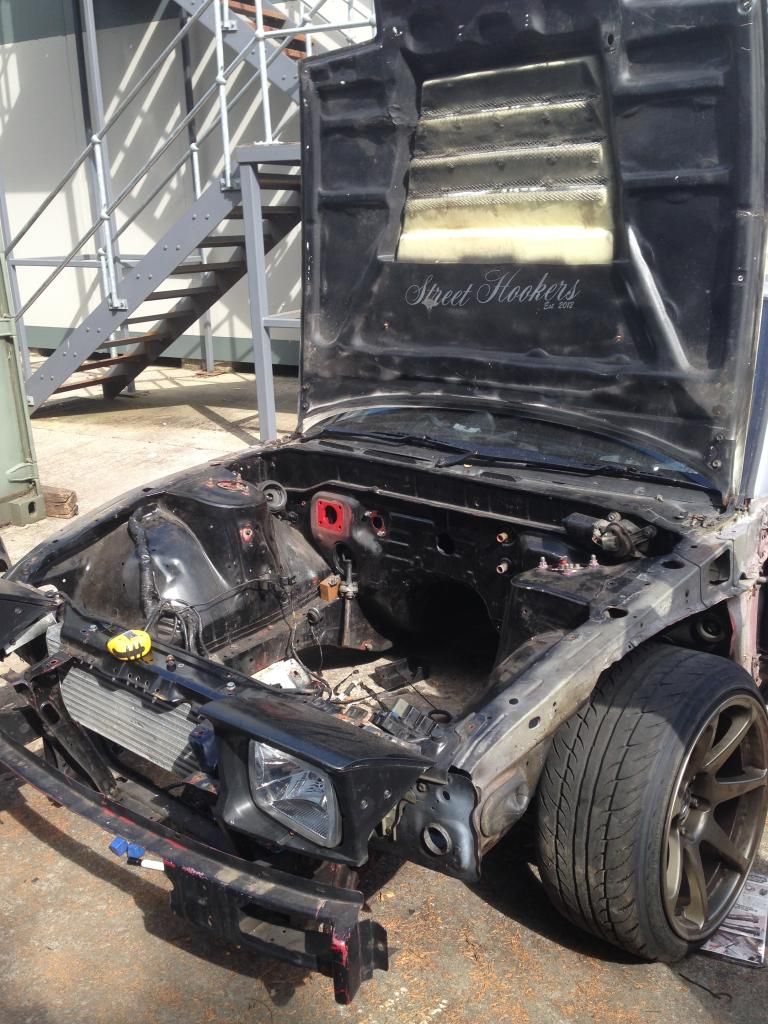 Didn't take long for them to convince me to get the grinder out so we said goodbye to them in a true fashion: 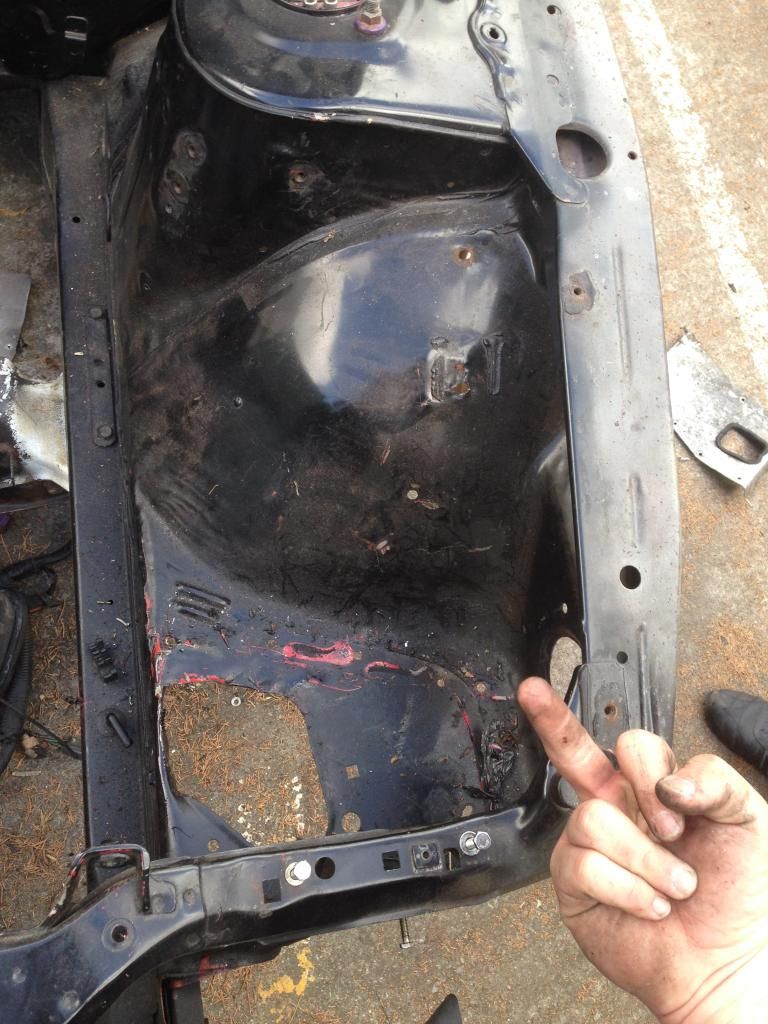 Plus, this gives me the chance to make sure the engine bay is nice and tidy, and due to the PBM High Mount Intercooler, I dont need the unnecessary holes for a FMIC. Even though this car will be used hard, it wont stop me making sure the car is as presentable as I can make it. Before I knew it, the engine bay was like this! 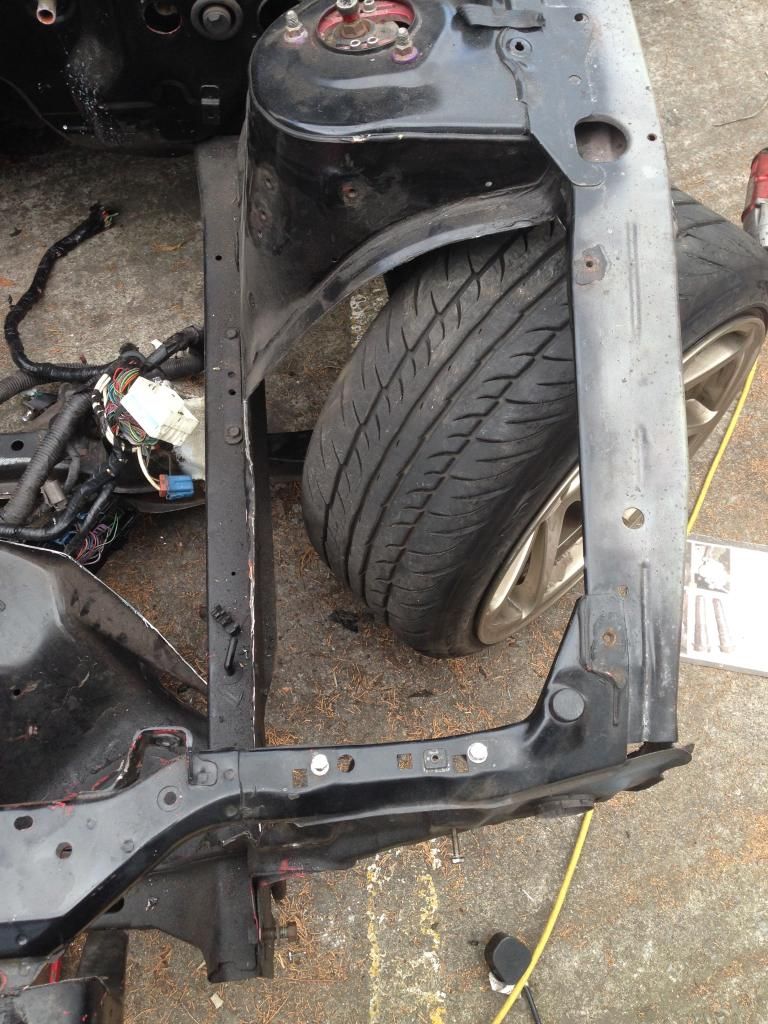 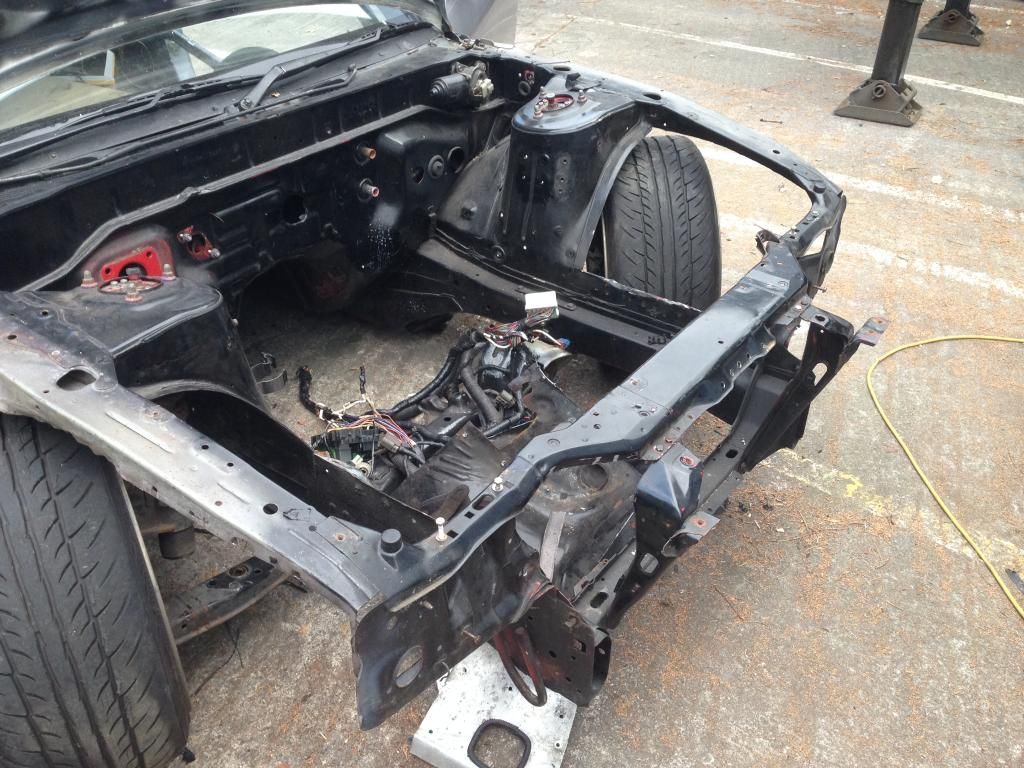 We were discussing the route we are going to tub my arches, and we have tried to cut along the seam lines in order to try and keep as much strength along the arches as possible. Although, the excess metal left of the struts will be removed once the arches are here. Quickly chucked a bit of Hammerite on the rear subframe and didn't come out too bad in my opinion, for something that you wont see anyway. 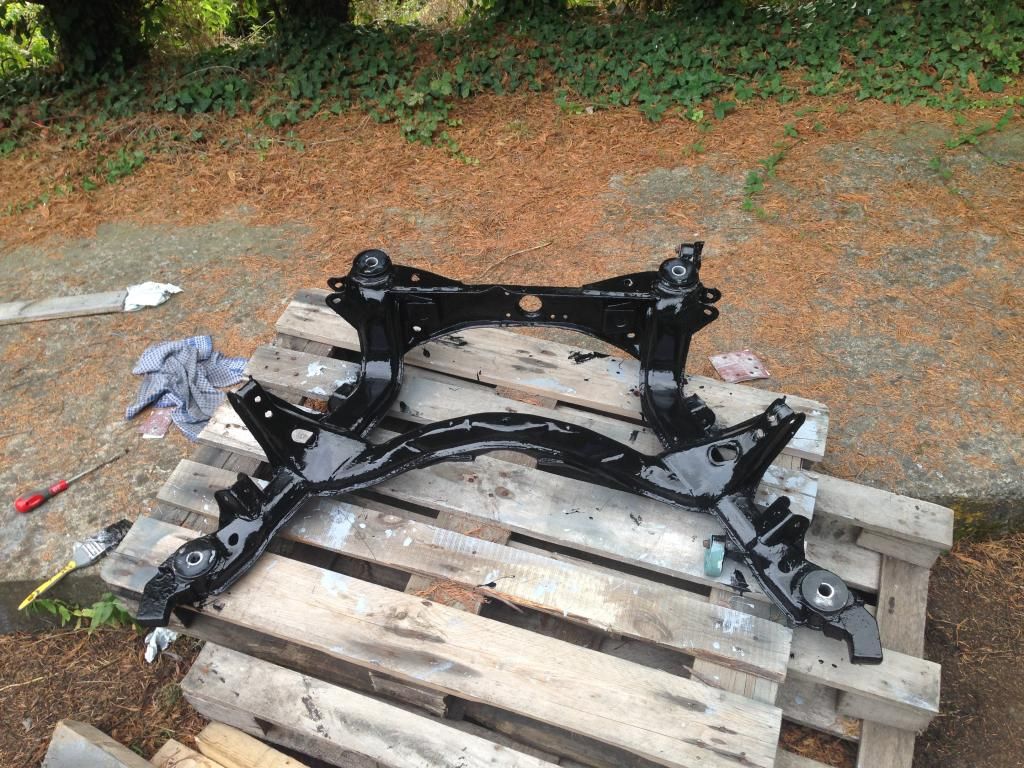 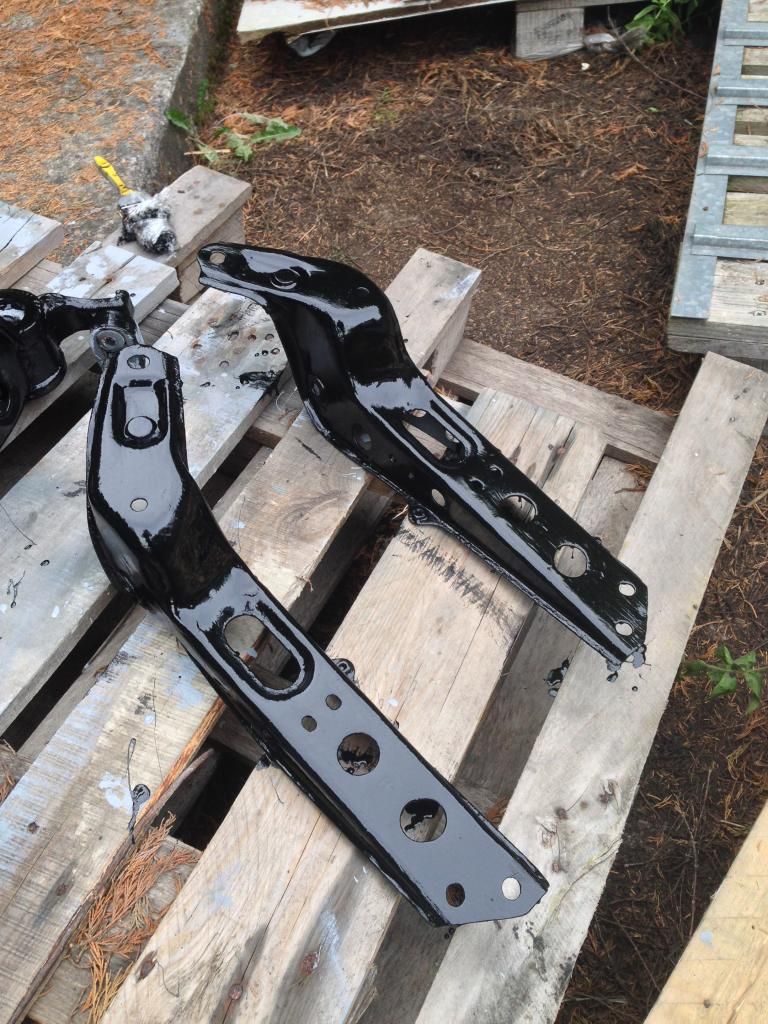 However, I keep finding small little problems with the shell, like the ignition barrel can be moved with a screwdriver  So more inconvenient issues that need to be sorted. BUT most importantly - the Digital Climate Control and power windows now work So more inconvenient issues that need to be sorted. BUT most importantly - the Digital Climate Control and power windows now work  Onwards and upwards! Onwards and upwards!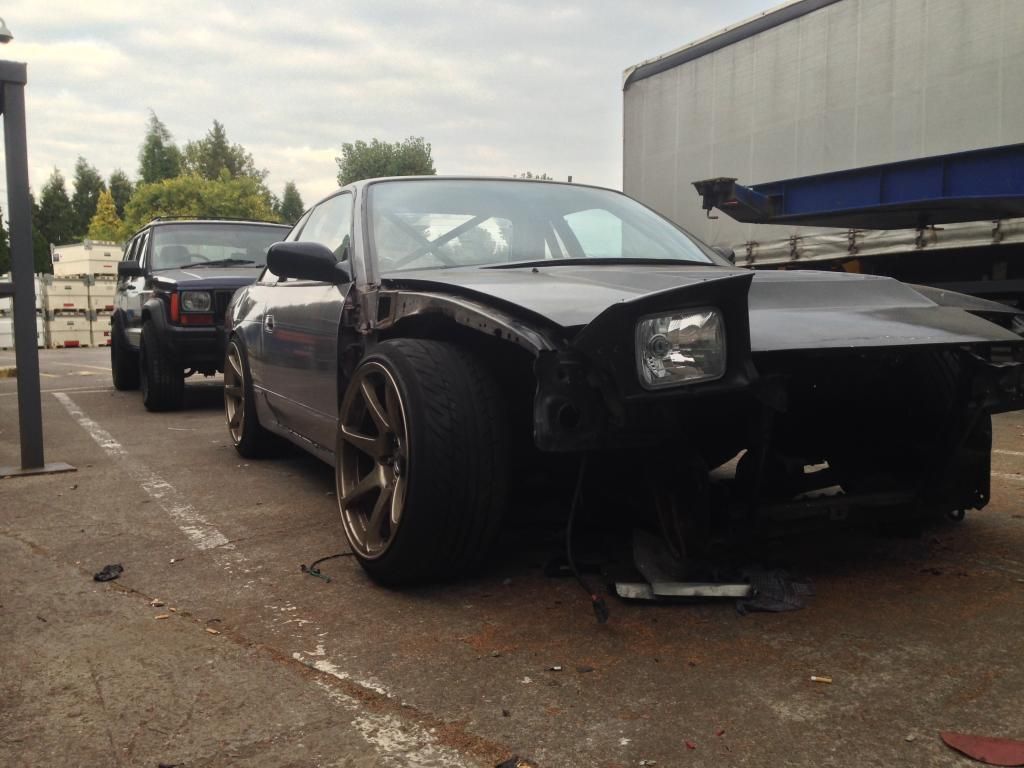 |
|
|

|
|
|
#5 |
|
Leaky Injector
Join Date: Dec 2012
Location: Bristol, UK
Age: 30
Posts: 92
Trader Rating: (0)
 Feedback Score: 0 reviews
|
So, the other day I started getting my SR ready to come out of my 13. I forgot how simple these things come apart, and I guess it's another reason why I love the SR20 engine!
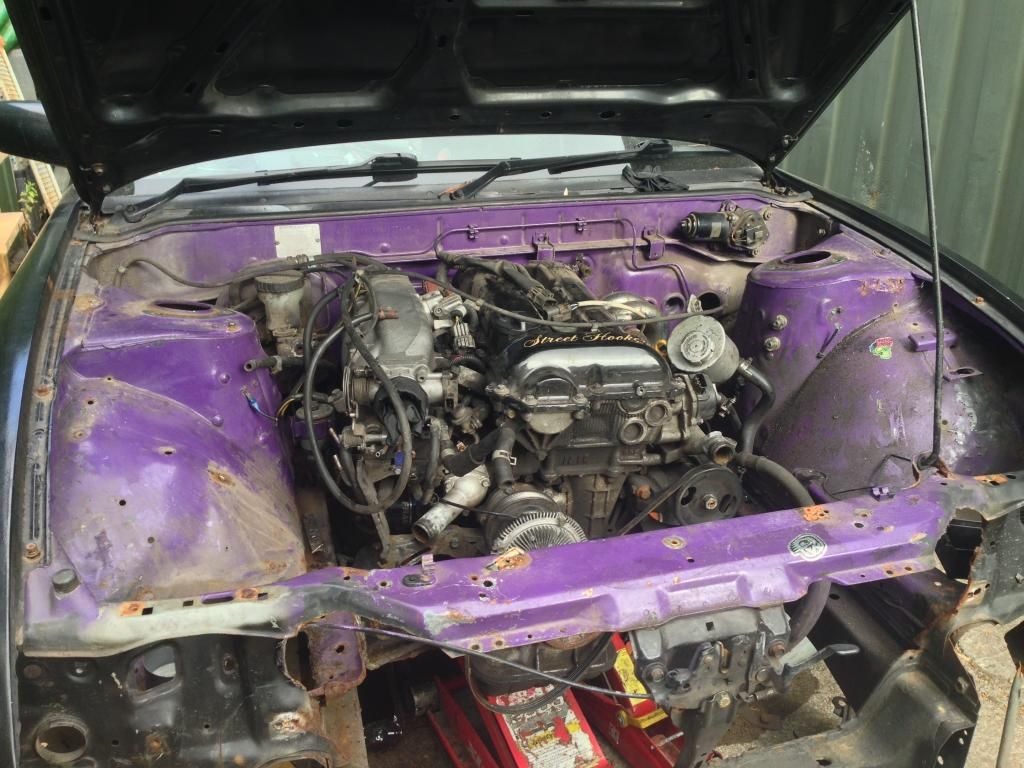 Anyway, after removing yet another broken front subframe bolt, I dropped the front subframe ready for the same treatment as the rear subframe. Just a quick freshen up, nothing drastic to keep things simple for things that wont be seen. So, after draining all the power steering fluid I was left with this: 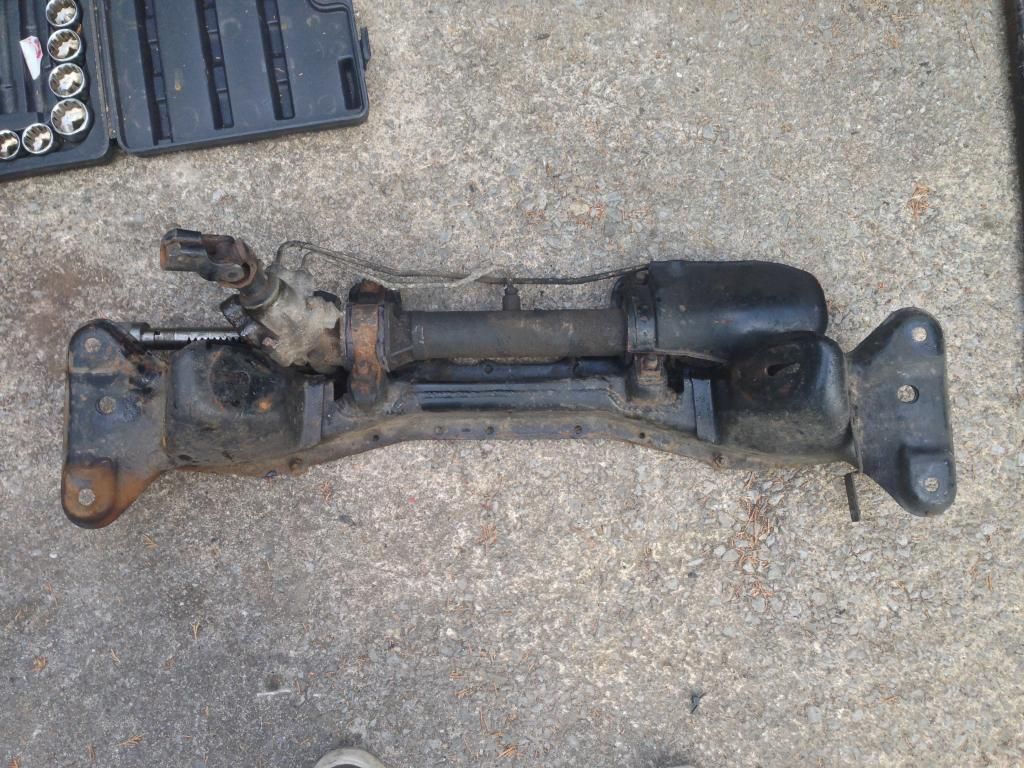 The bushes were still as good as new which is always good to see, considering I havent driven it that much at all haha! It gave me some time to inspect how the subframe is coping since the rack mountings were moved forward, plus I hit a drain win my way back from an event one night. Low cars and high drains don't really go by the way. Results were as expected, it coped just fine which pays testament to my friend who did the fab work. Quick wire brush to get all the rubbish off the subframe, quick bit of hammerite paint and it's looking semi-presentable now: 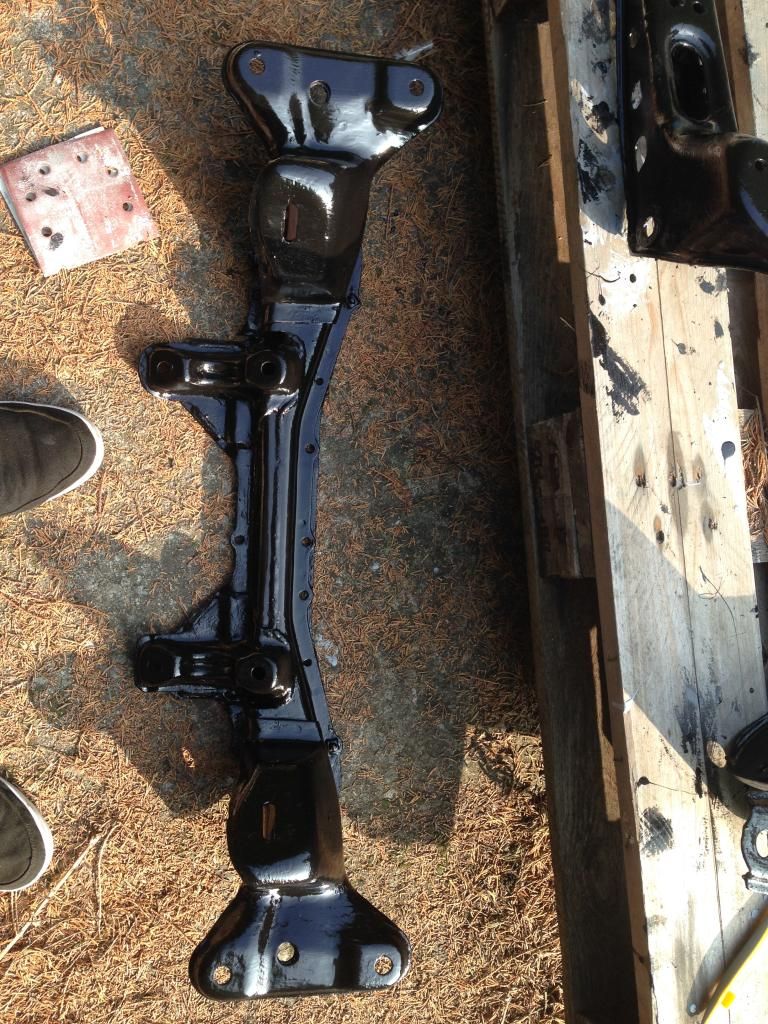 I ended up fighting with the rack for a few minutes, trying to get the clamps to go on square without cross threading a bolt, simple solution was that there was some dirt on the rack causing a bush to become misaligned so thankfully, for once a simple solution to the never ending list of problems! So, quickly whipped the S14 front subframe off that I was borrowing to keep the shell moving and quickly put my subframe on. I need to source some proper bolts to hold the subframe to the chassis legs now, I've gone to remove my subframe twice on my S13 and both times the bracket holding the bolts captive have broken free, even though I replaced it with a "low milage import" ones. 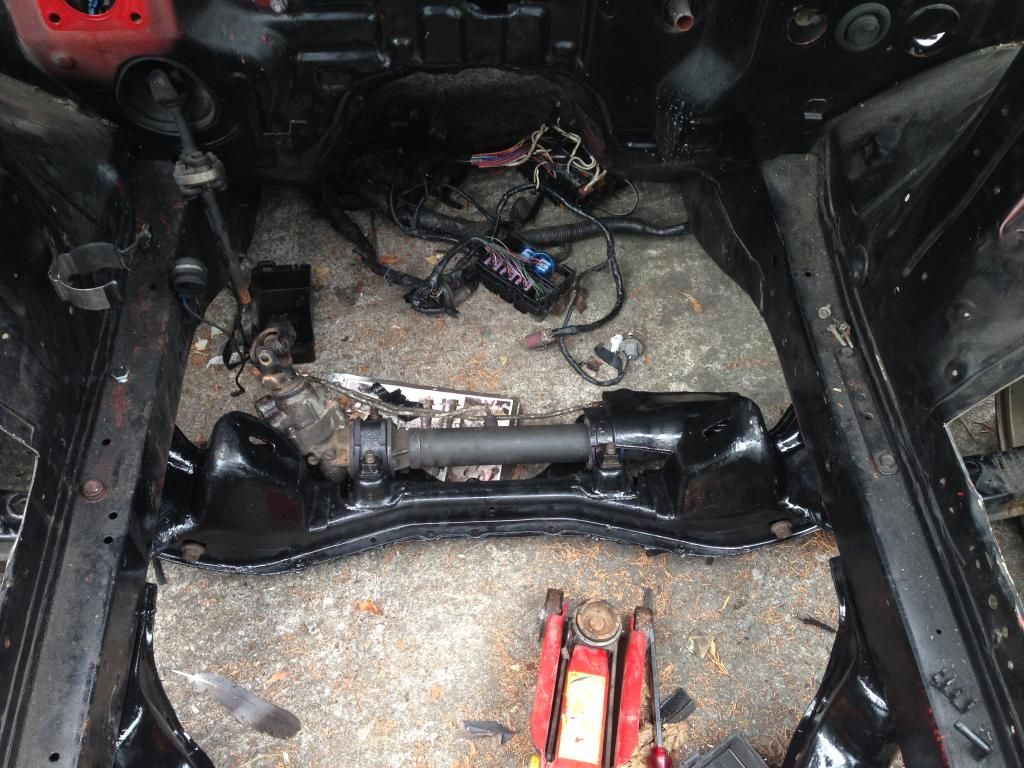 I'm also now constantly greeted by my old 13 looking pretty distraught. 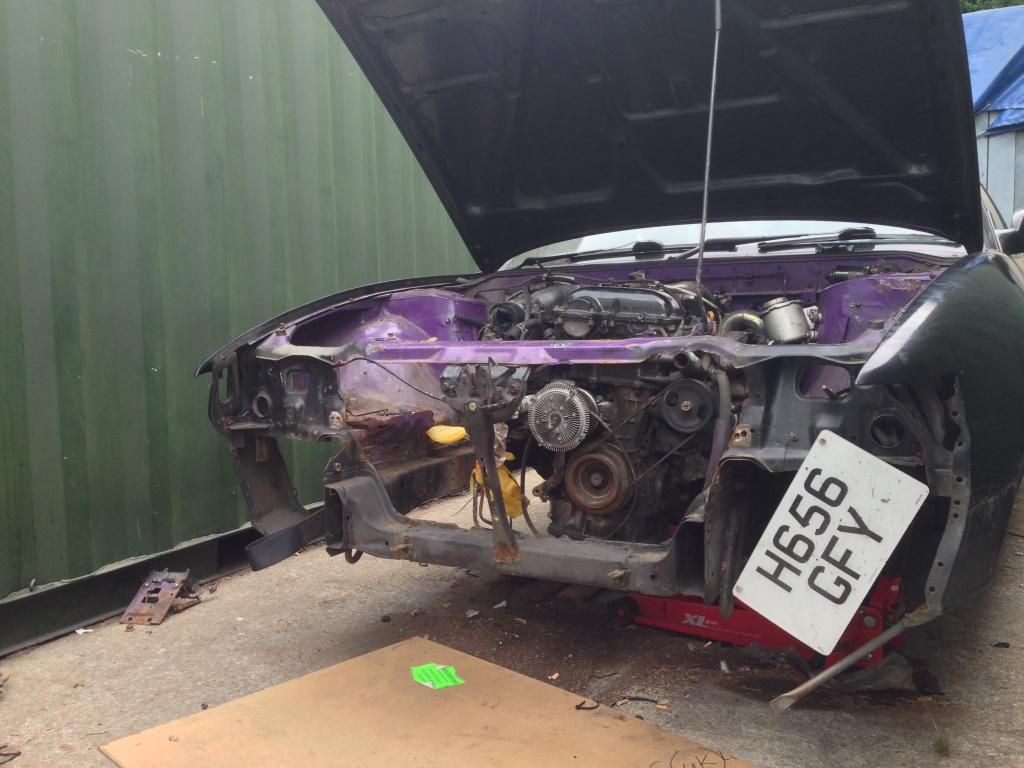 Also had further developments today on my cage scenario, and since taking a picture it made me realise the sheer angle in the bottom of the main hoop, something that isn't as noticeable to the naked eye. 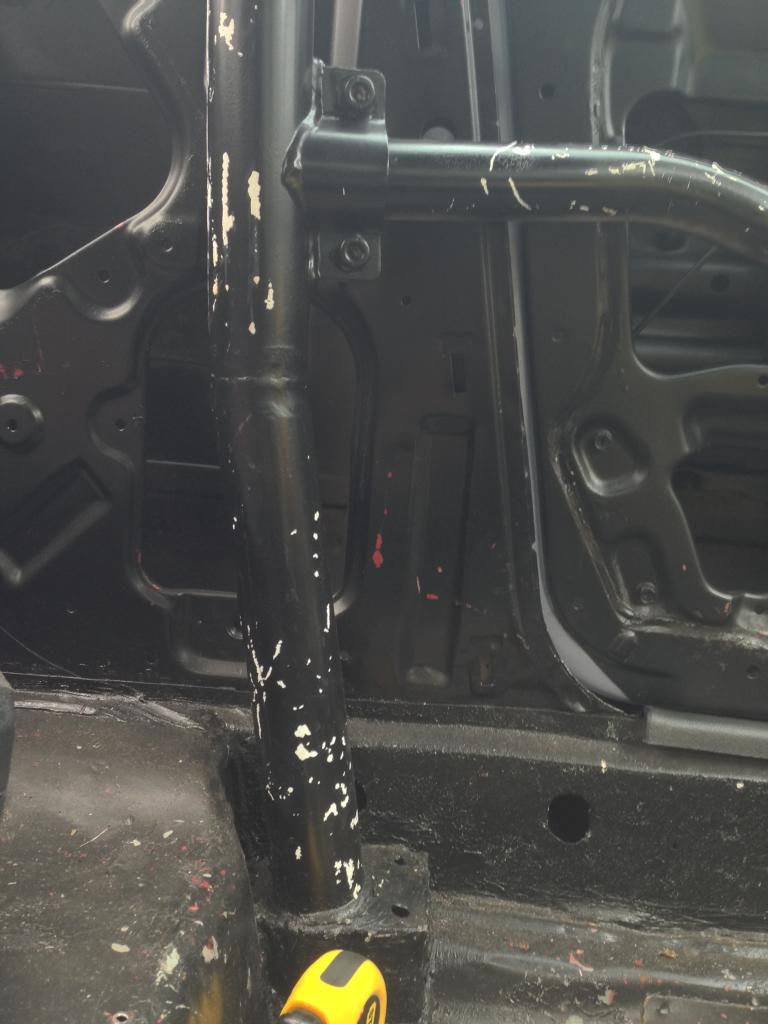 Ive been in contact with a local fabricator, Huxley Motorsport to dicsuss the cage and to get his opinion on the safety of the current cage. The news back from him was as expected, it's as good as scrap. From my understanding, to meet safety regulations and to be deemed safe, a cut cage must be properly sleeved and butt welded but it seems none of this has been done. So I'm considering future options regarding cage, as I want to push myself and this car as far as I can, and a cage being a requirement from a safety point of view. I do appreciate Hux's work and he's local-ish to me, so who knows what may happen in the future after looking at some examples of cages in the S13/PS13 chassis. |
|
|

|
|
|
#6 |
|
Leaky Injector
Join Date: Dec 2012
Location: Bristol, UK
Age: 30
Posts: 92
Trader Rating: (0)
 Feedback Score: 0 reviews
|
We began tackling tubbing the front arches. After a few measurements of what would be a suitable size, this promptly arrived in the post:
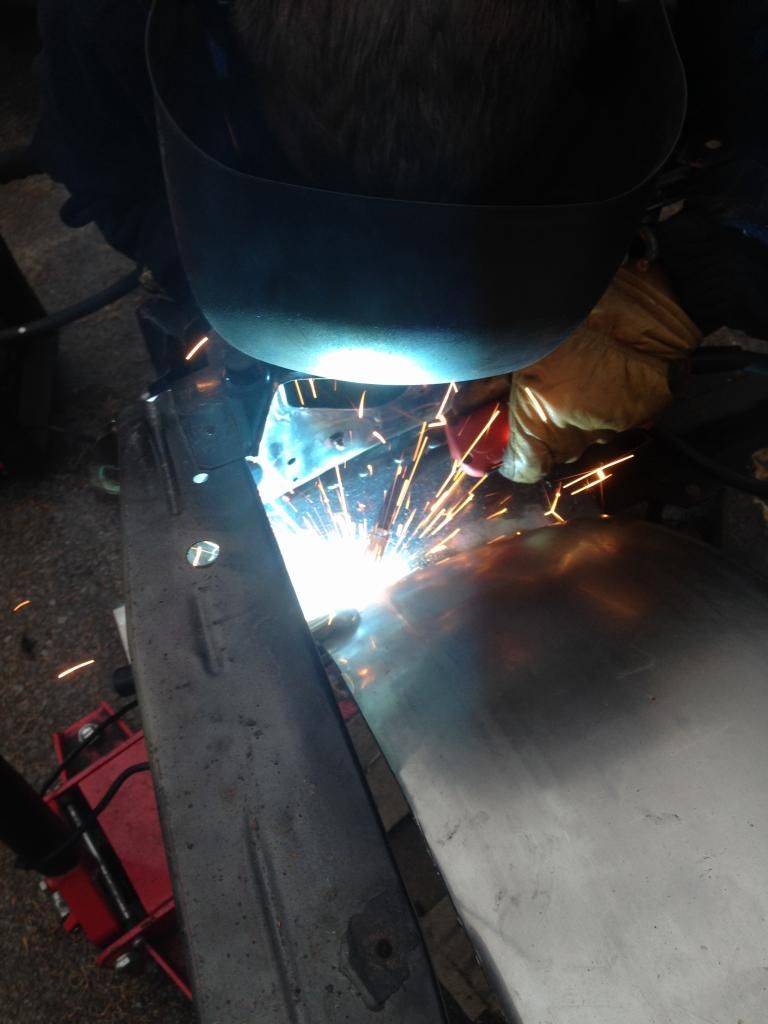
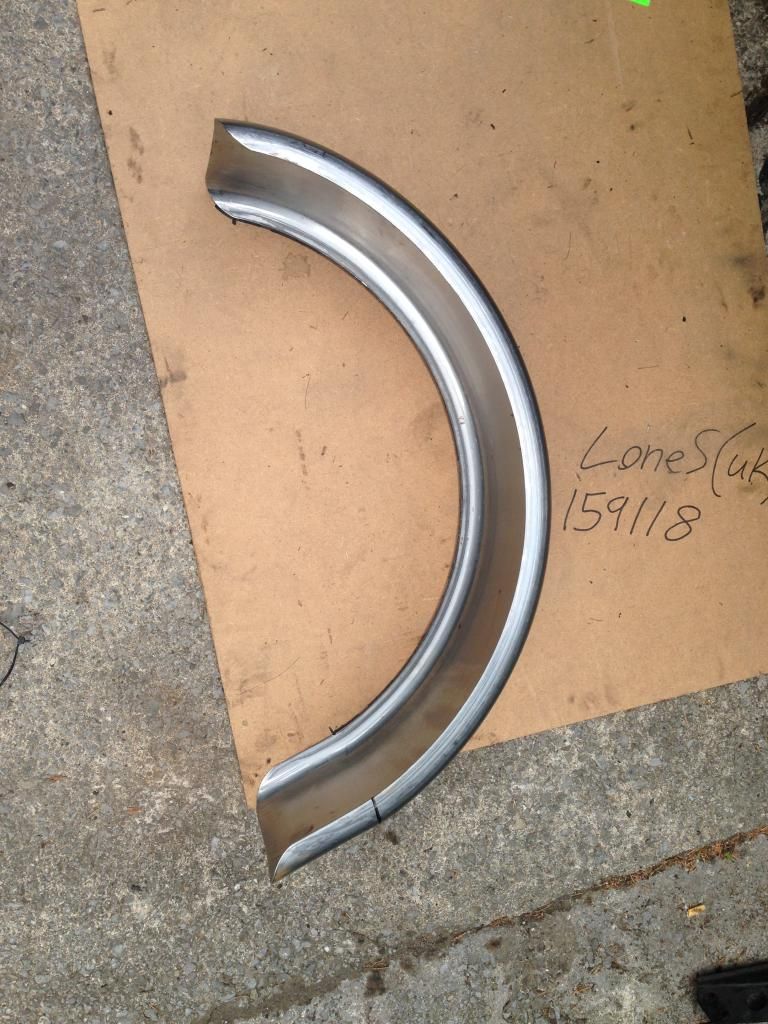 I've stolen this idea off my friend Rich, and I can see why he chose it. It's a nice smooth radius for the front arches instead of some the ugly tubs I see people make. Everything has to be about Form AND Function so this will fit right in, making the engine bay look pretty whilst giving me more clearance for lock. Whilst I was making measurements, I quickly set about replacing the ignition barrel, something tI wanted to change ASAP, as literally anybody could start the car haha! 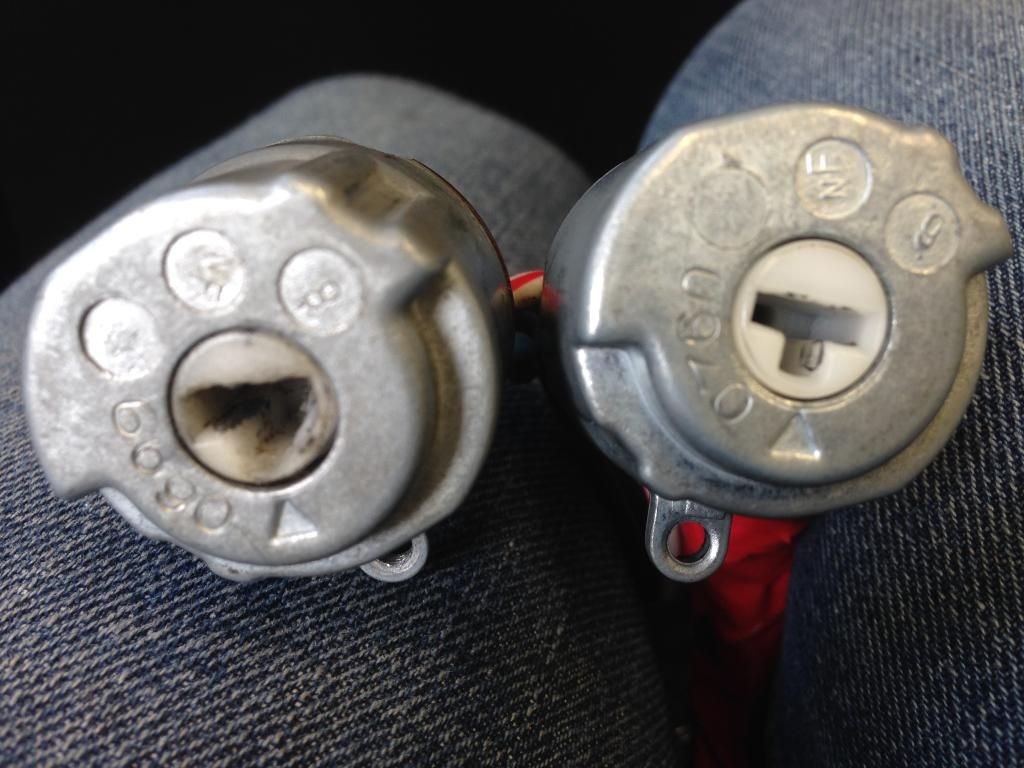 As you can guess, the left barrel is out of the Silvia, looking very worn or somebody has messed with it, due to the fact the ignition barrel has been off beforehand  Luckily, my old 13 saved the day. So I've switched the ignition barrel's over, and hopefully I'll swap the door locks to match when I get a chance in order to have the same key for both set of locks. Luckily, my old 13 saved the day. So I've switched the ignition barrel's over, and hopefully I'll swap the door locks to match when I get a chance in order to have the same key for both set of locks.After mocking up the arch, we marked out the exact area of the arch we need to trim down, so began by doing so: 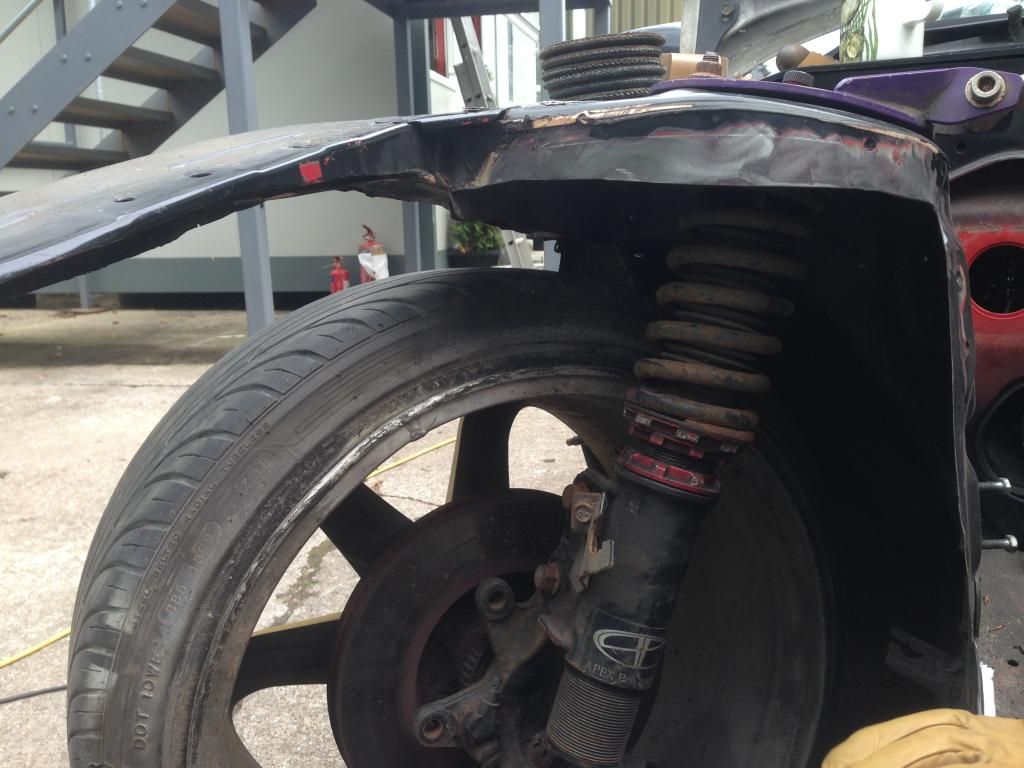 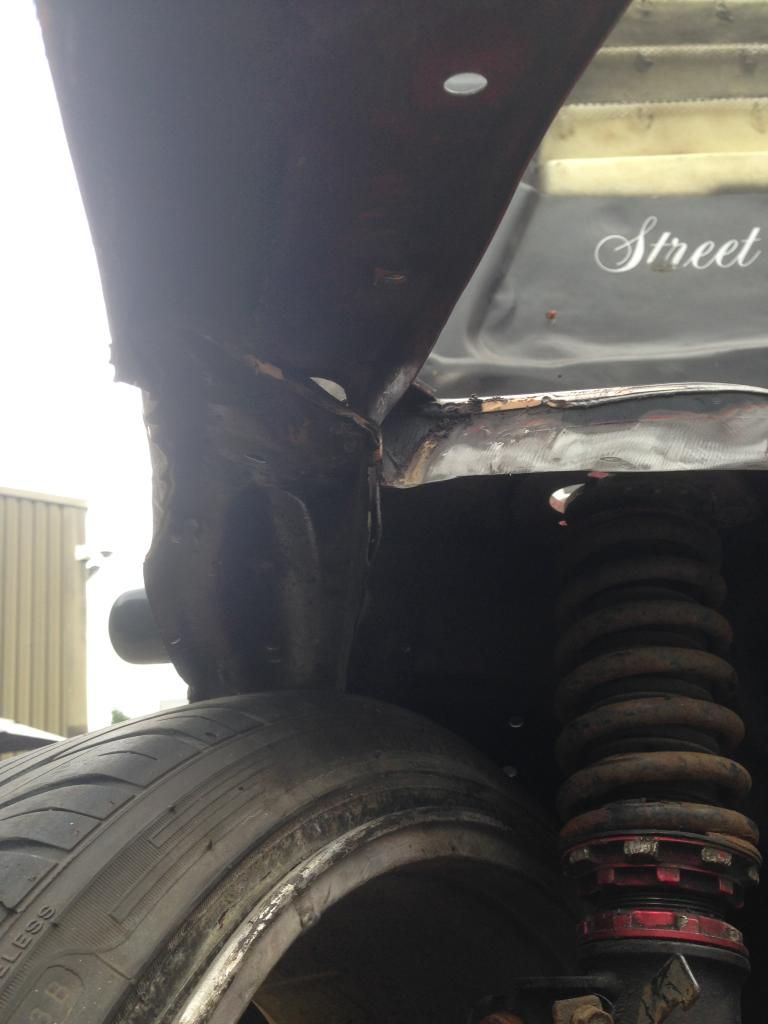 A few tack welds were done to hold the arch in place: 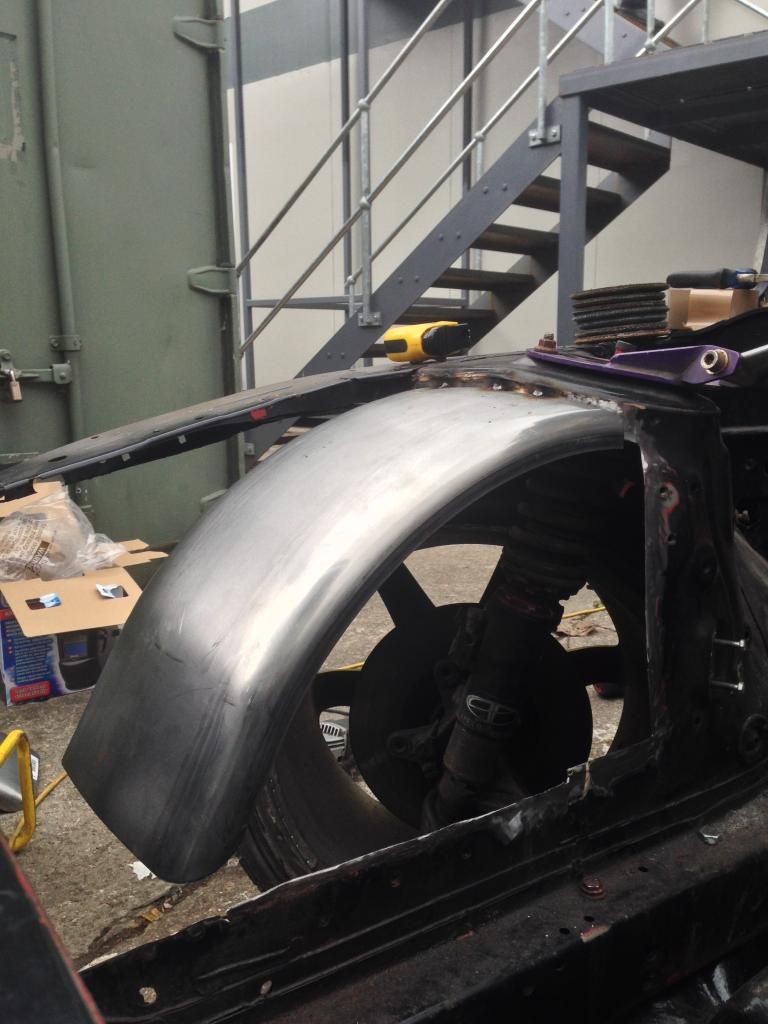 Once we knew the angle the arch had to sit at, the top of the arch was quickly welded in: 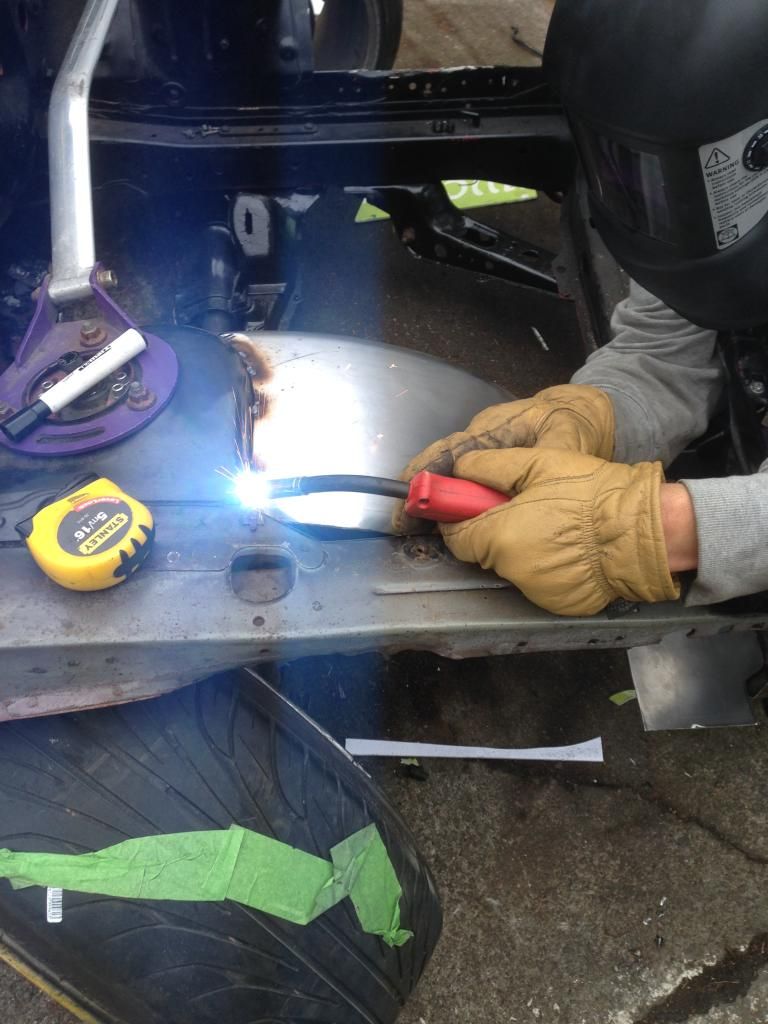 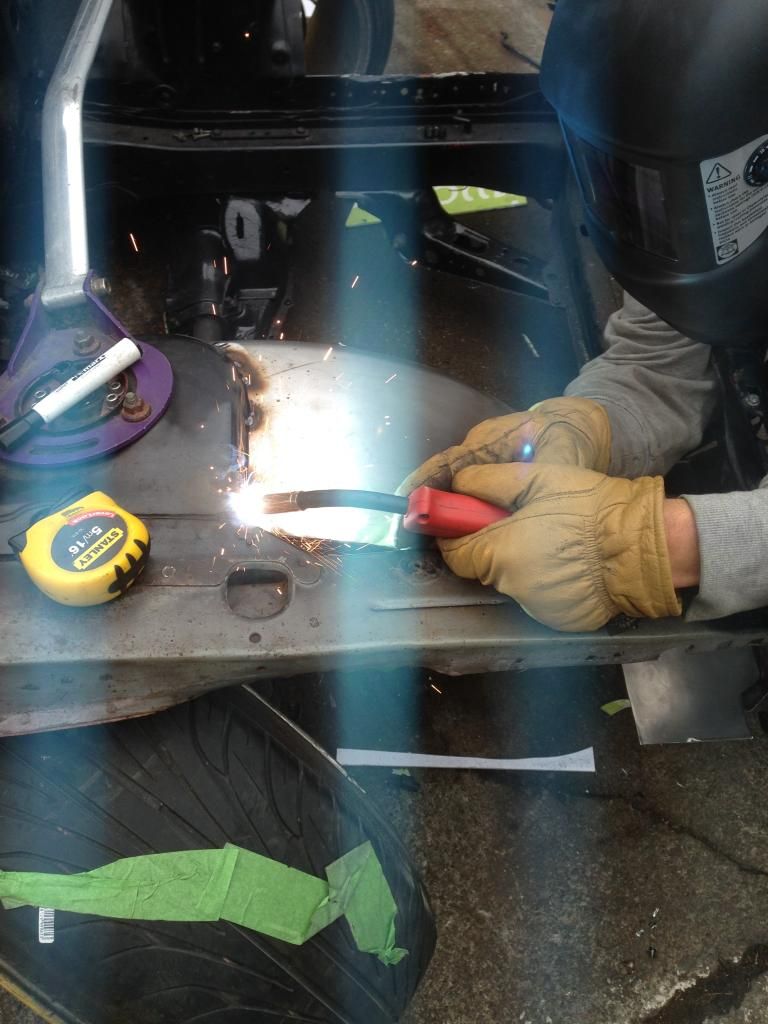 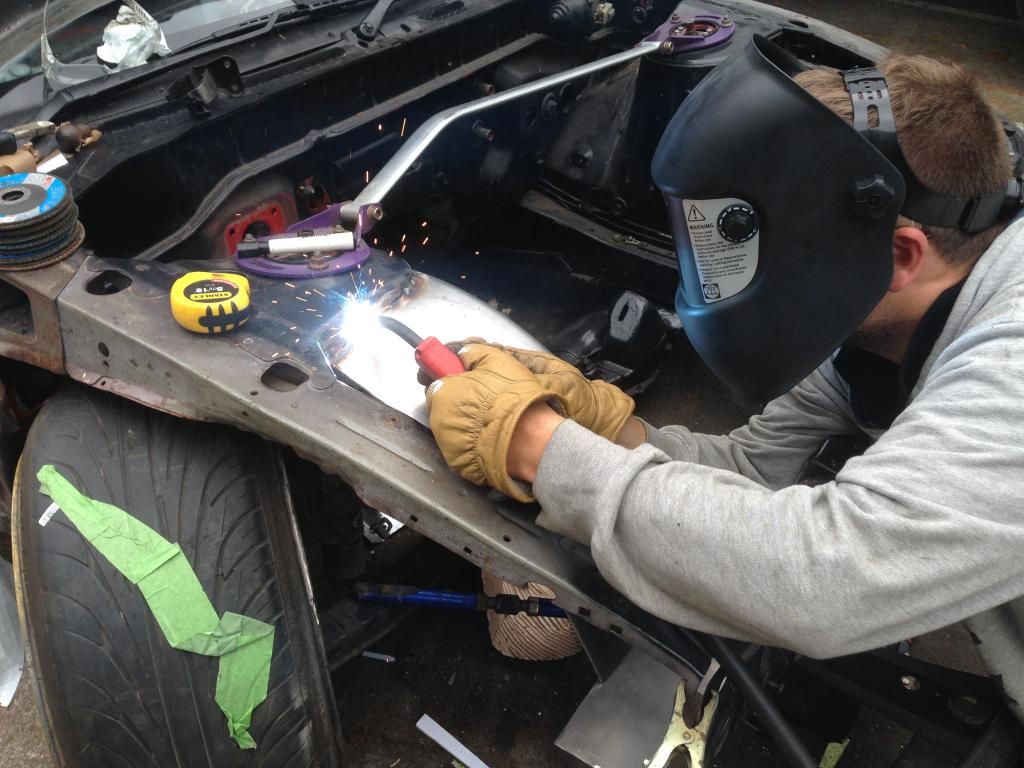 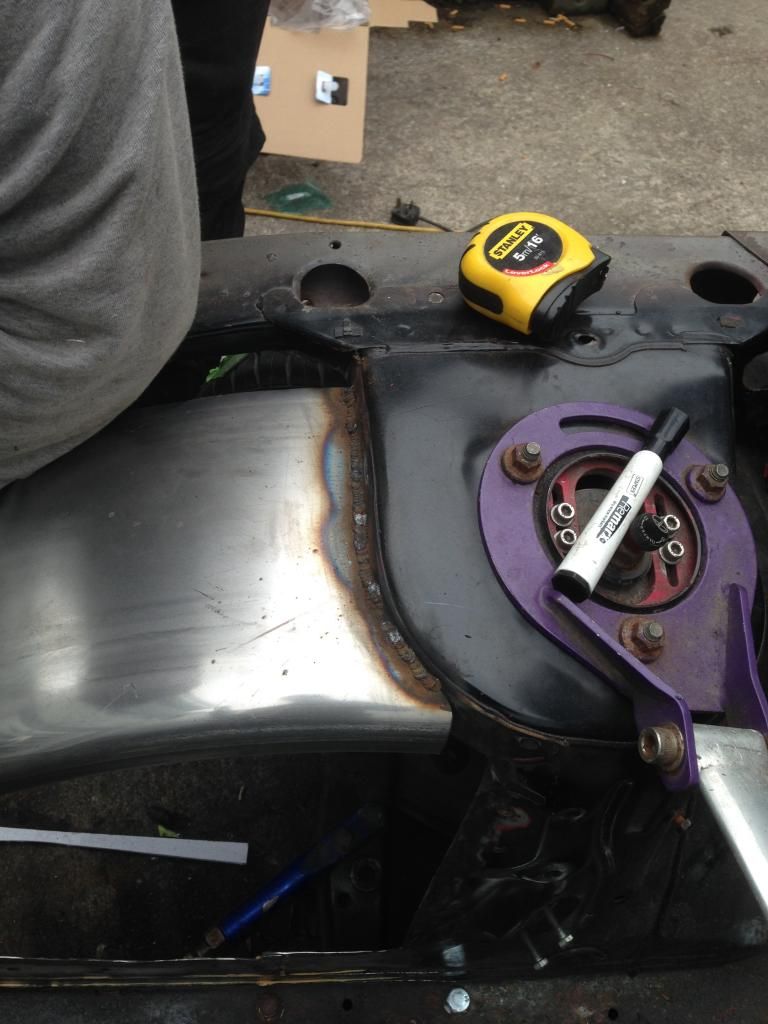 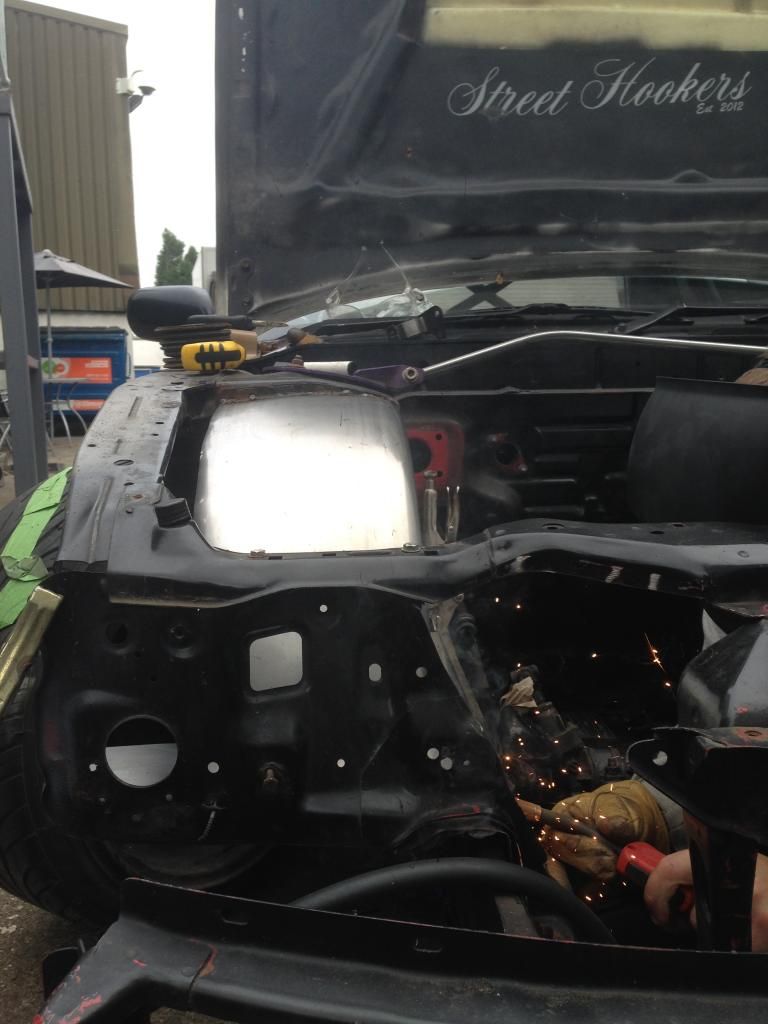 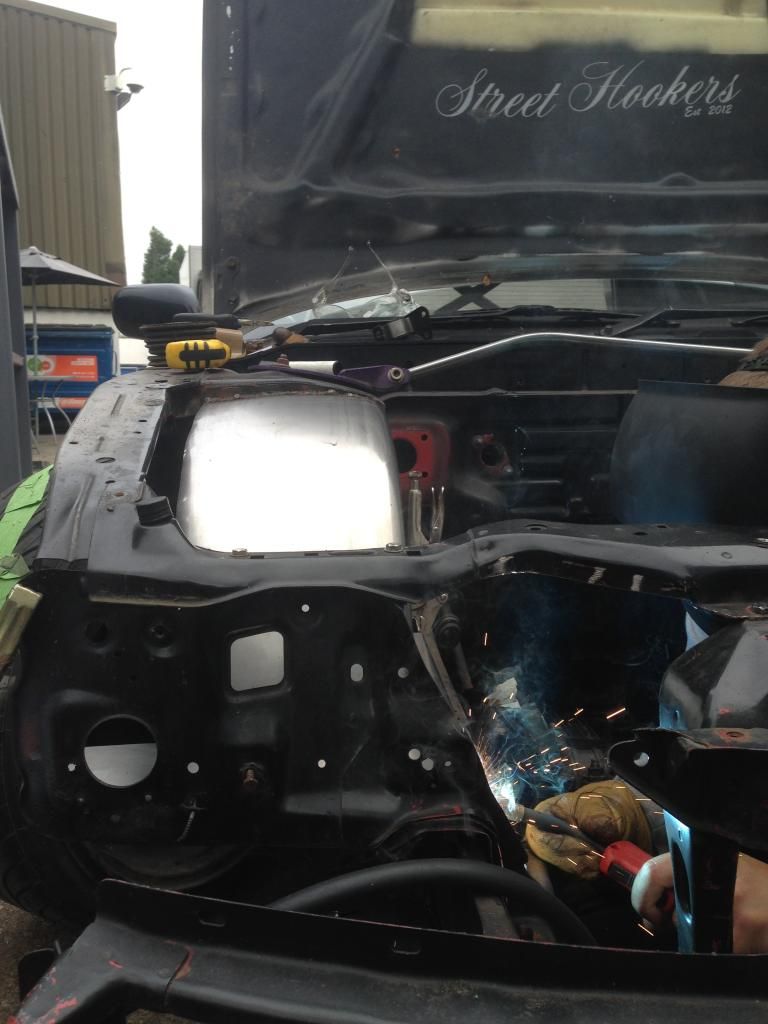 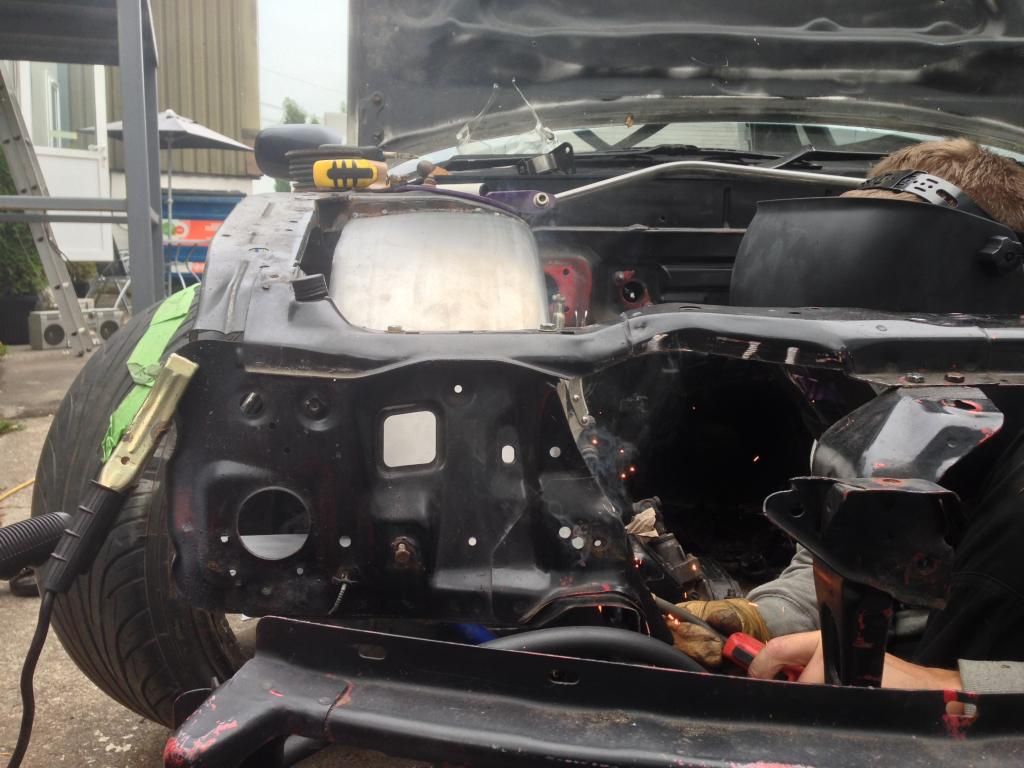 You can definitely tell I'm the little tea boy during the welding phases! I'd love to learn to weld properly though, would be so useful when making little things in the build. Quick look at how things are currently looking with the arch and lower plate welded in; 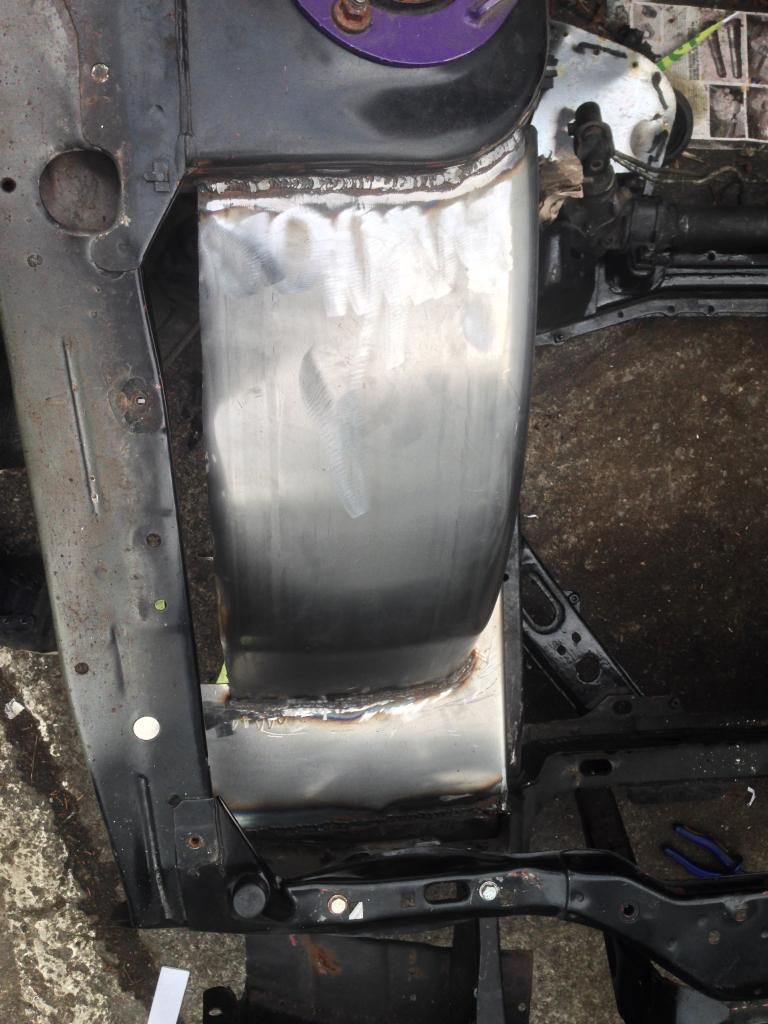 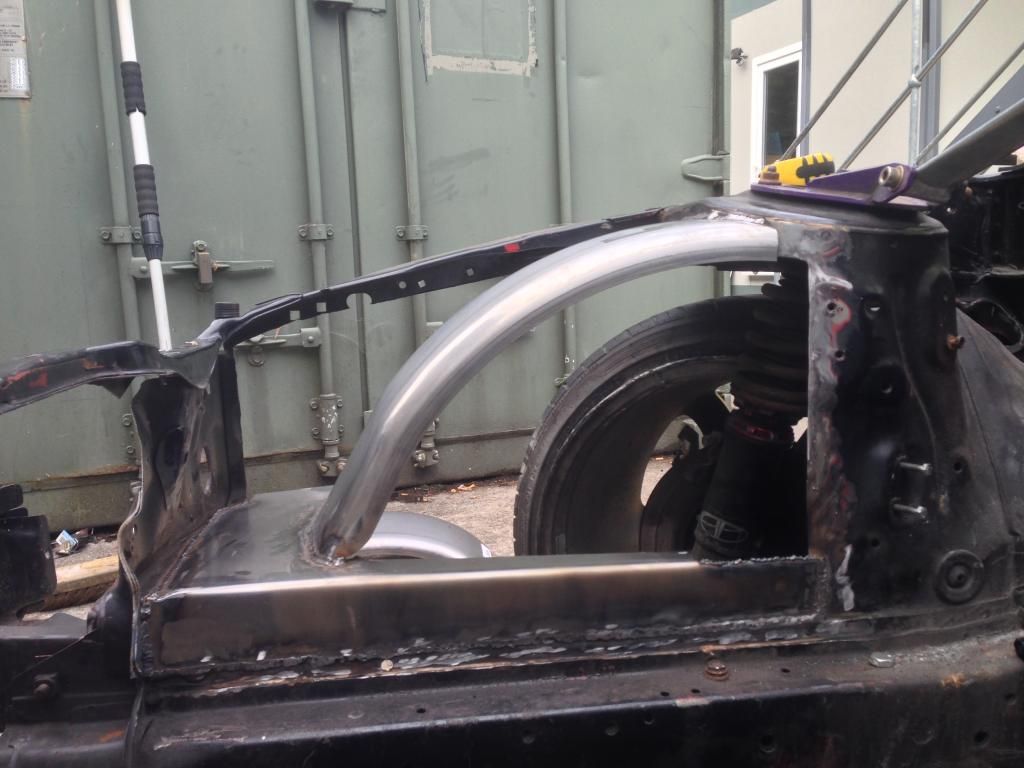 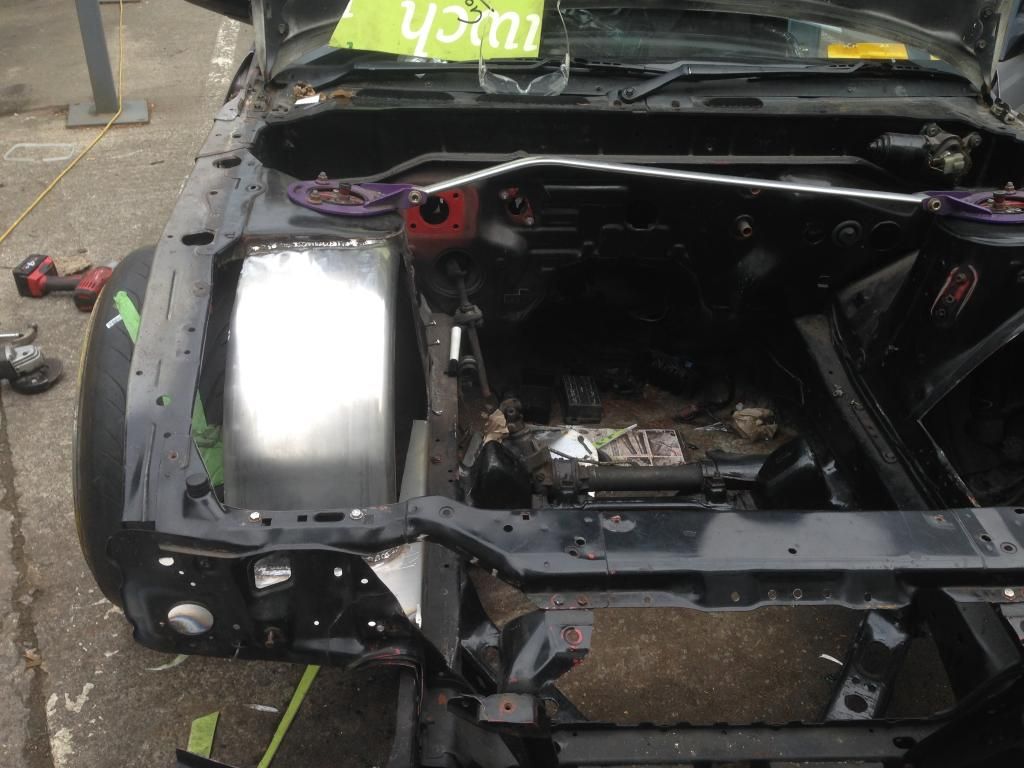 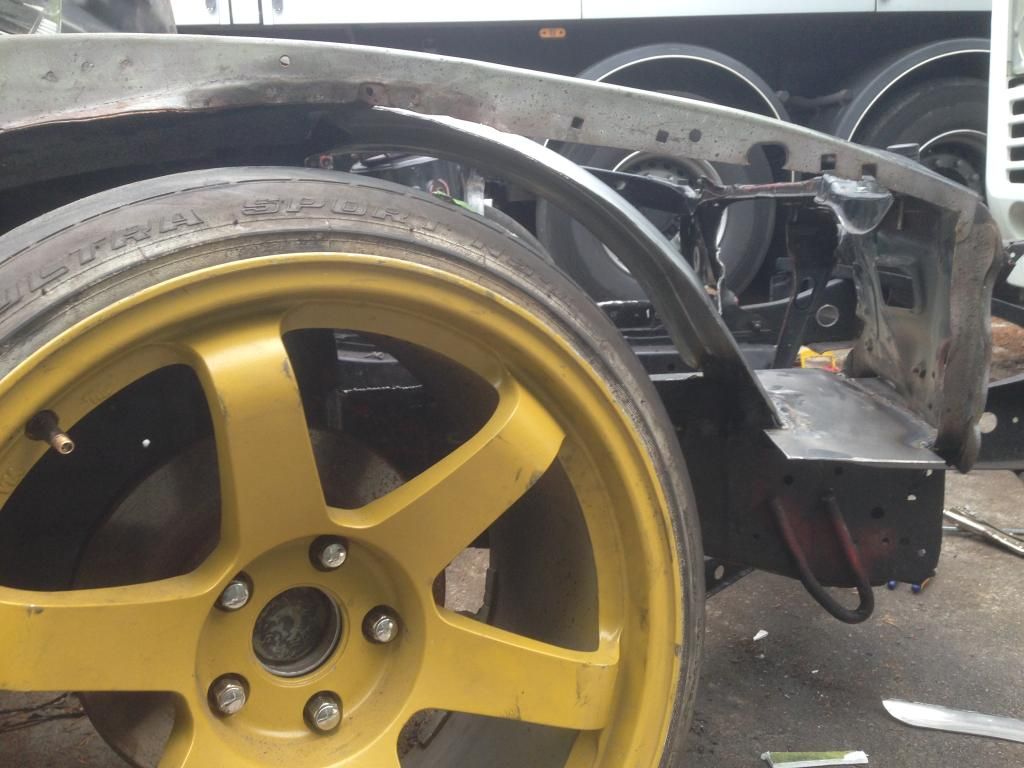 I threw the spare 18's up front so we can make sure I have enough clearance as I may be planning to switch to 18's all round with this build. |
|
|

|
|
|
#8 |
|
Leaky Injector
Join Date: Dec 2012
Location: Bristol, UK
Age: 30
Posts: 92
Trader Rating: (0)
 Feedback Score: 0 reviews
|
I went and collected my new gearbox with a friend, which was pretty cool to have road trip for car parts
 I forgot to grab some picture, but I managed to source a 2005 350z Gearbox. Supposedly as strong as the Toyota V160 boxes, but for me the fact its stronger than RB boxes makes it an obvious choice in my eyes  The important code, the faded "CD009" and "AZQ" confirms its the CD009 version of the box, aka the desirable box that have triple syncro's. 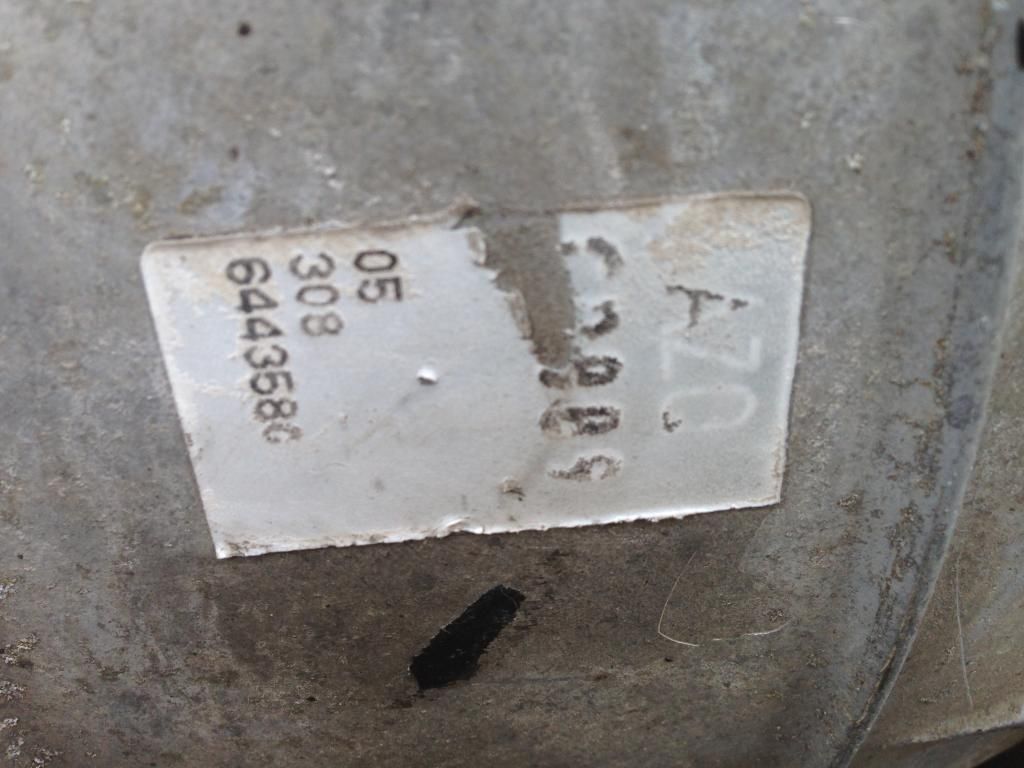 Another confirmation is the CDO#2 stamp on both the bell housing and inside; 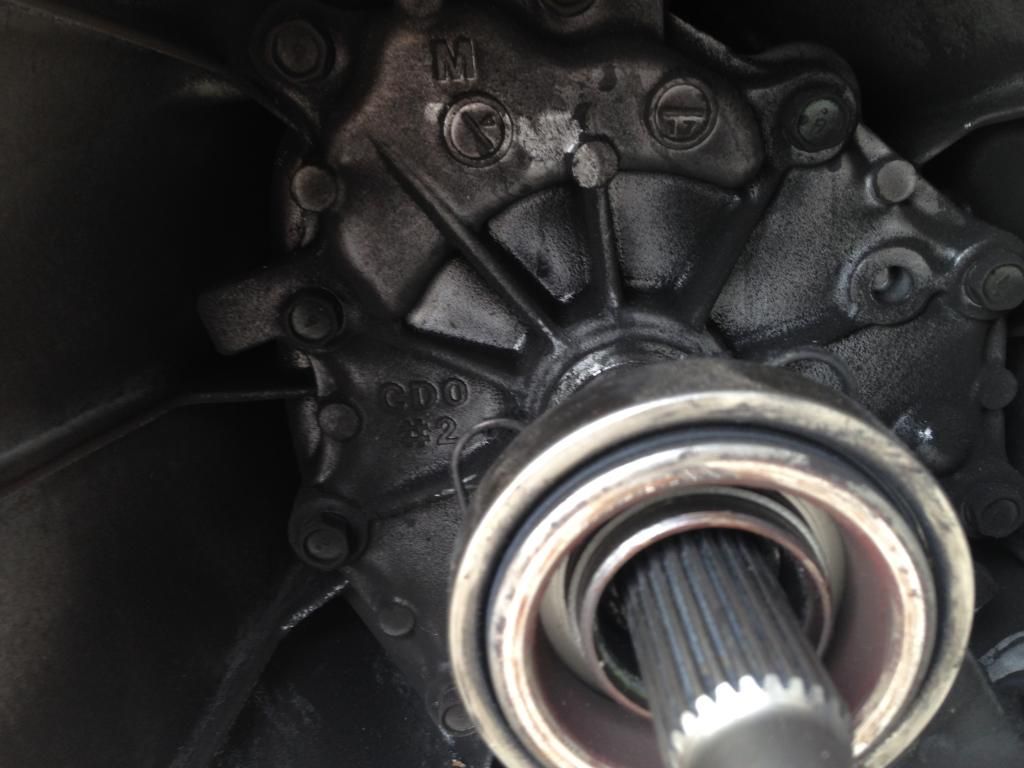 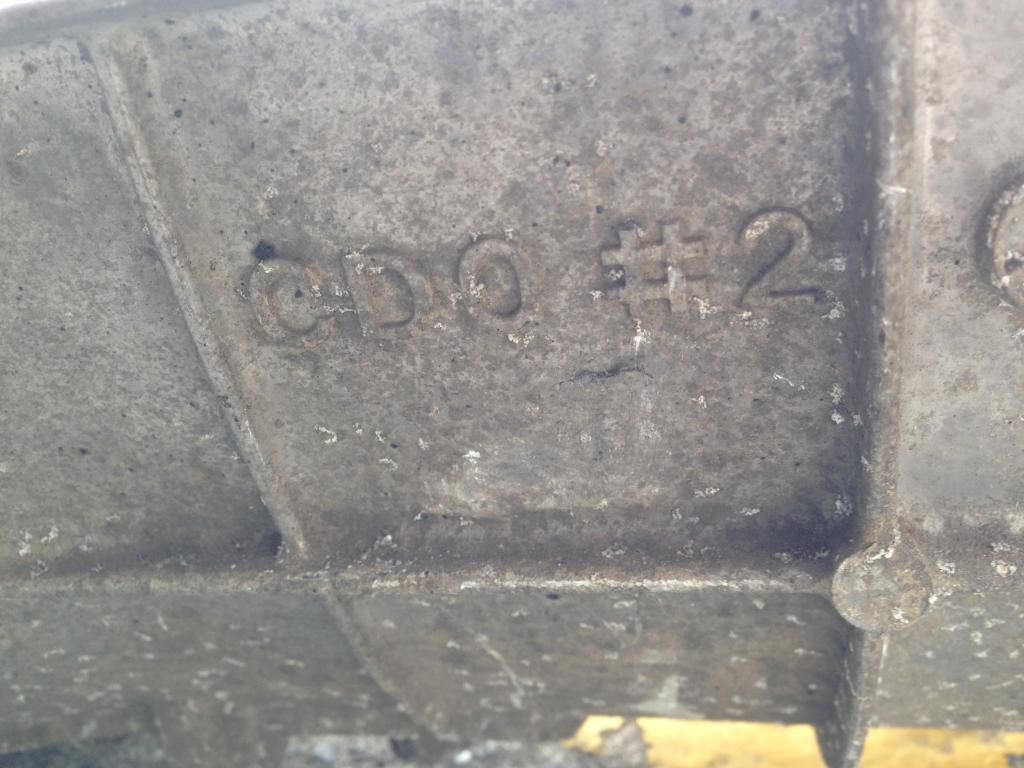 The box seems smooth, no nasty noises or movements when rotating or changing gear which kinda helps show the box is as good condition as the seller described. It supposedly has 50/60k miles on it which is even better! I hadn't done done much on the car, having returned back to university for my final year - the first week was a bit hectic what with my timetable and getting comfortable again with the workload. Had to turn the car around today, so grabbed some pictures of how its currently sitting; 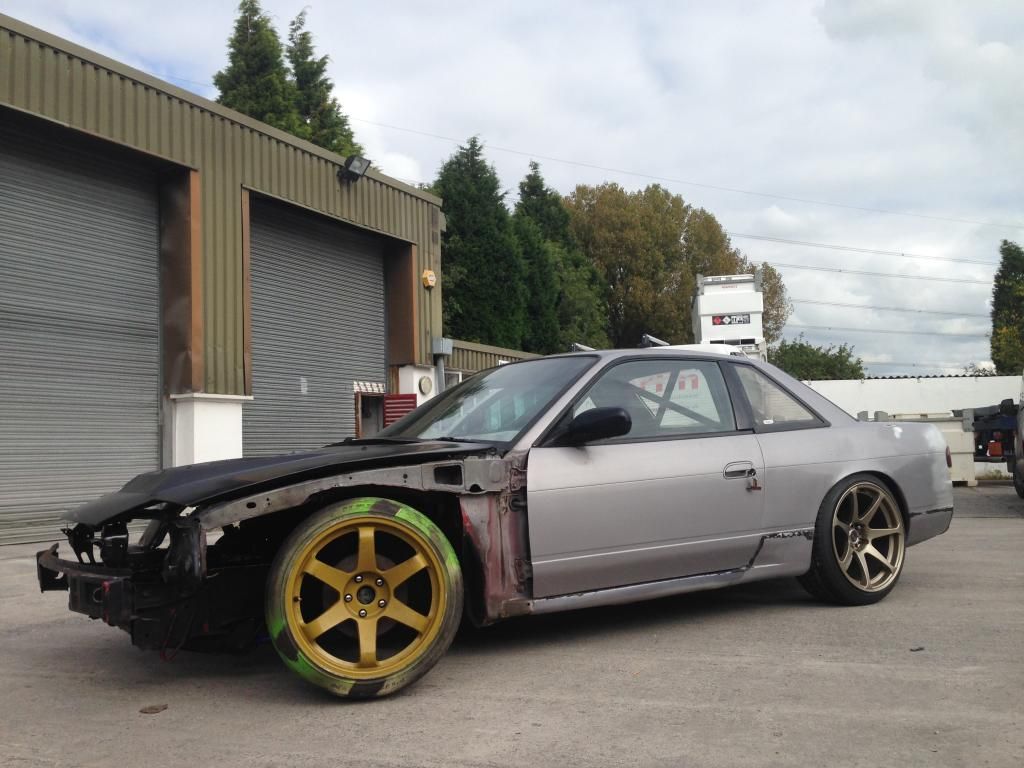 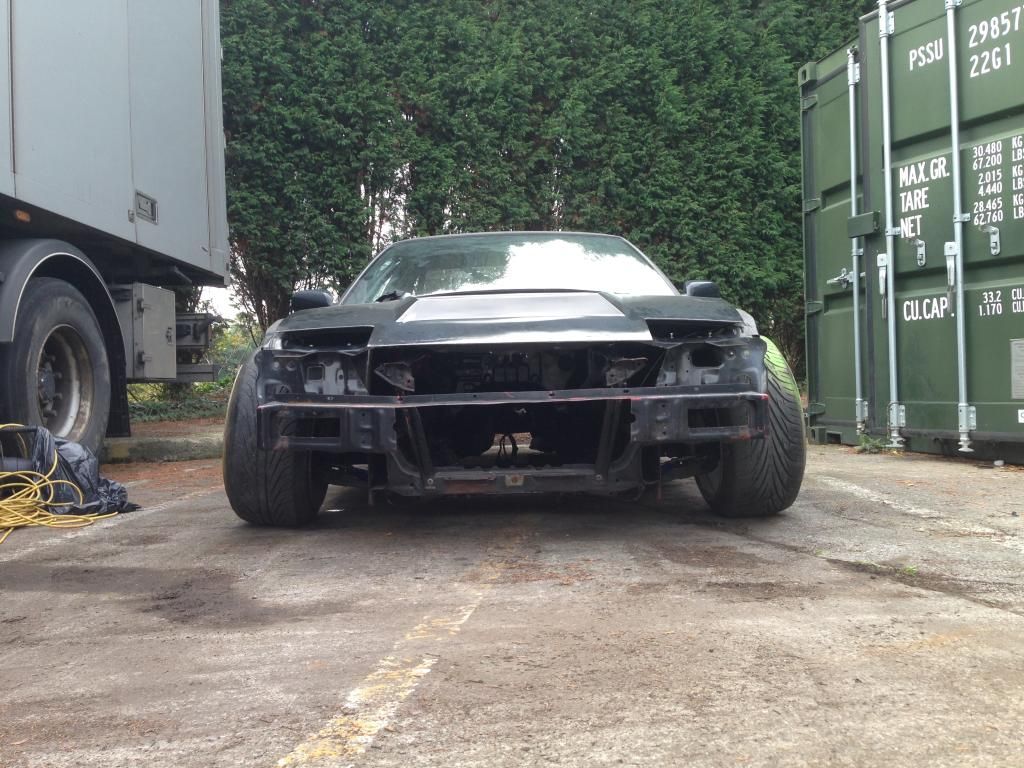 Ive had these beautiful things waiting to go on the car for a while now too - PBM Rear Hubs! 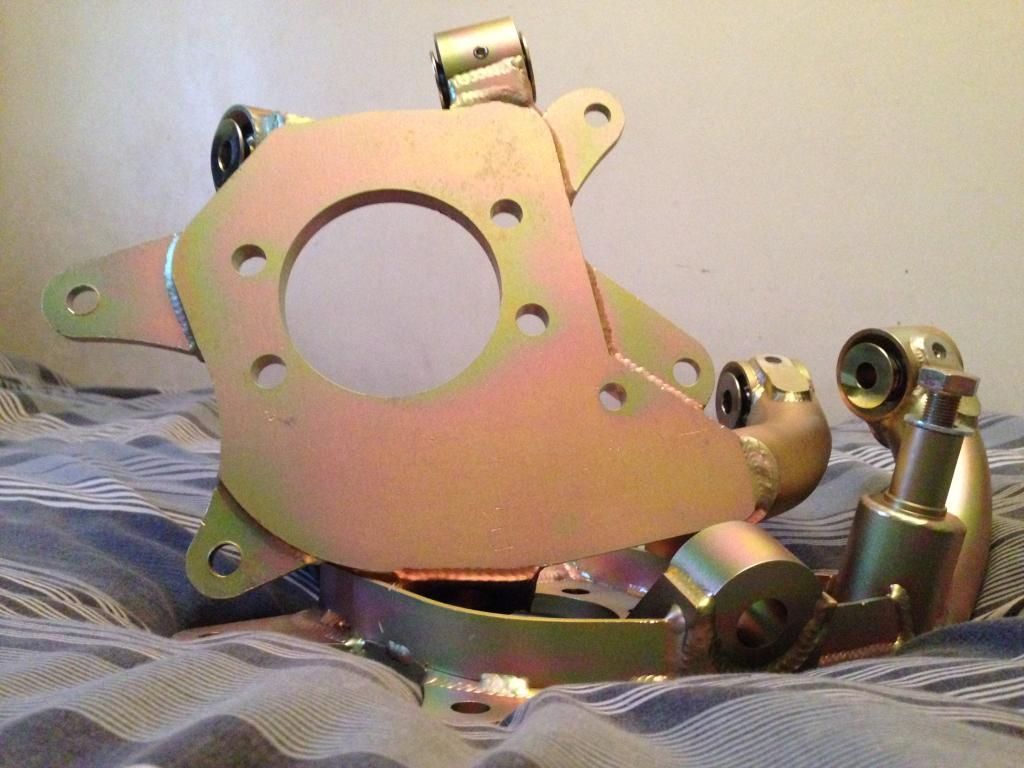 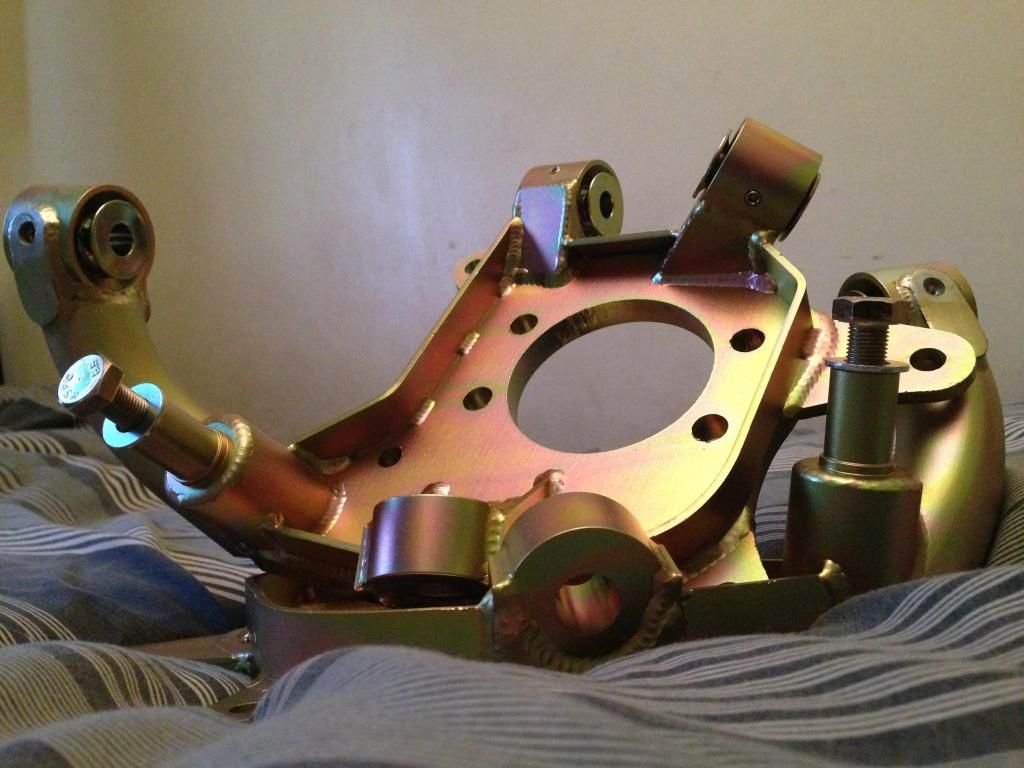 I also now need to explore what release bearing combo I'm going for, as I've been offered a Quartermaster Tri-Lite hydraulic release bearing for a very tempting price. So I either need to research exactly how to install a hydraulic release bearing or fingers crossed Greg @ Protuner will get back to me with more details about his adapter plate, so he can confirm what release bearing he used when doing his personal conversion with his own adapter plate. To top it all off, the shifter mechanism needs to be shorted so I either need a new bracket from the states or get the OEM one shortened. |
|
|

|
|
|
#9 |
|
Leaky Injector
Join Date: Dec 2012
Location: Bristol, UK
Age: 30
Posts: 92
Trader Rating: (0)
 Feedback Score: 0 reviews
|
So in-between university I pressed the new DW bushes into the lower arms, relatively straight forward using nothing else other than a vice
 Managed to give them a quick coat in a satin black aerosol, just something to tidy them up a tad :thumbs: Managed to give them a quick coat in a satin black aerosol, just something to tidy them up a tad :thumbs: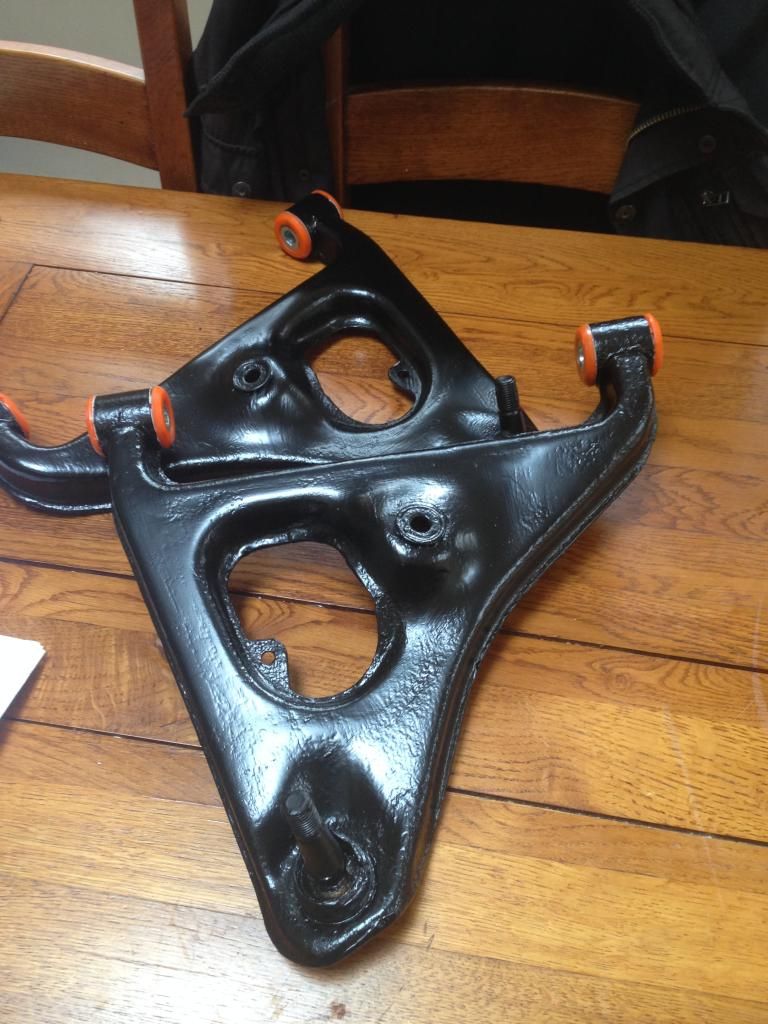 A friend came and saved the day as he usually does, and did me the massive favour of swapping the balljoints over. Some people say a hammer works but Ive never had much joy. 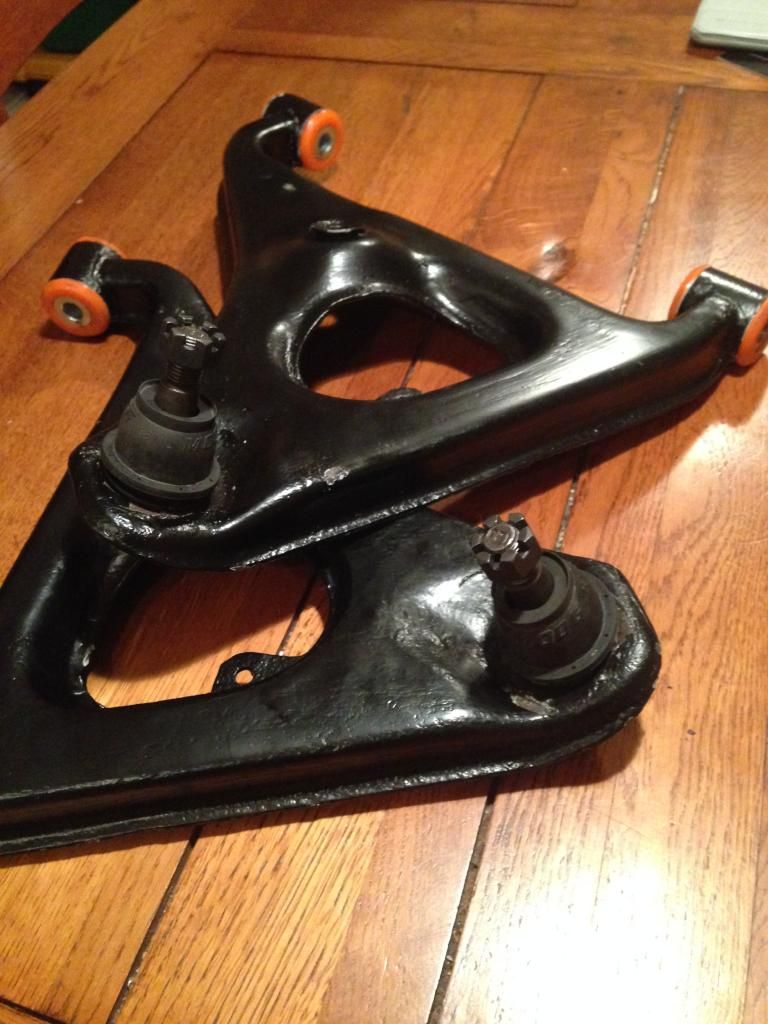 Brand new rear Moog joints! Fingers crossed i'll be building up the rear subframe tomorrow ready to go onto the Silvia. I mentioned earlier on in the thread about having to change the ignition barrel, and didnt fancy having 2 keys for 1 car, so swapped the door locks over; 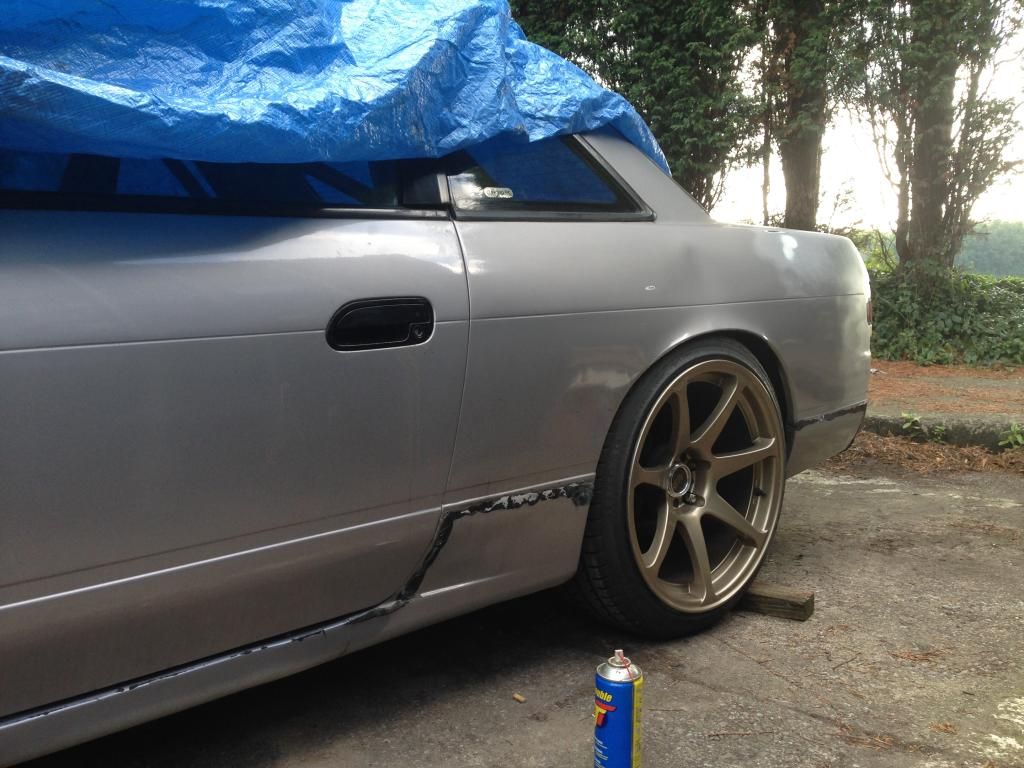 Relatively simple task, much easier than I imagined which is handy to know. Gave my old locks a good coating in WD40 to ease them a tad as the drivers lock always started to get harder to turn. All seems well now though :thumbs: Its this kind of time where I get a bit bored, so threw my Grip Royal steering wheel, mainly to see if it fitted the boss that came with the car, and well it looks pretty so it'll keep me happy for a few minutes  Ive used this wheel for agesssss now, but absolutely love it! It was originally black, but somehow has managed to fade a really weird but nice bronze/copper/black colour, i'll try and grab some proper pictures in the daylight to show you guys. Ive used this wheel for agesssss now, but absolutely love it! It was originally black, but somehow has managed to fade a really weird but nice bronze/copper/black colour, i'll try and grab some proper pictures in the daylight to show you guys.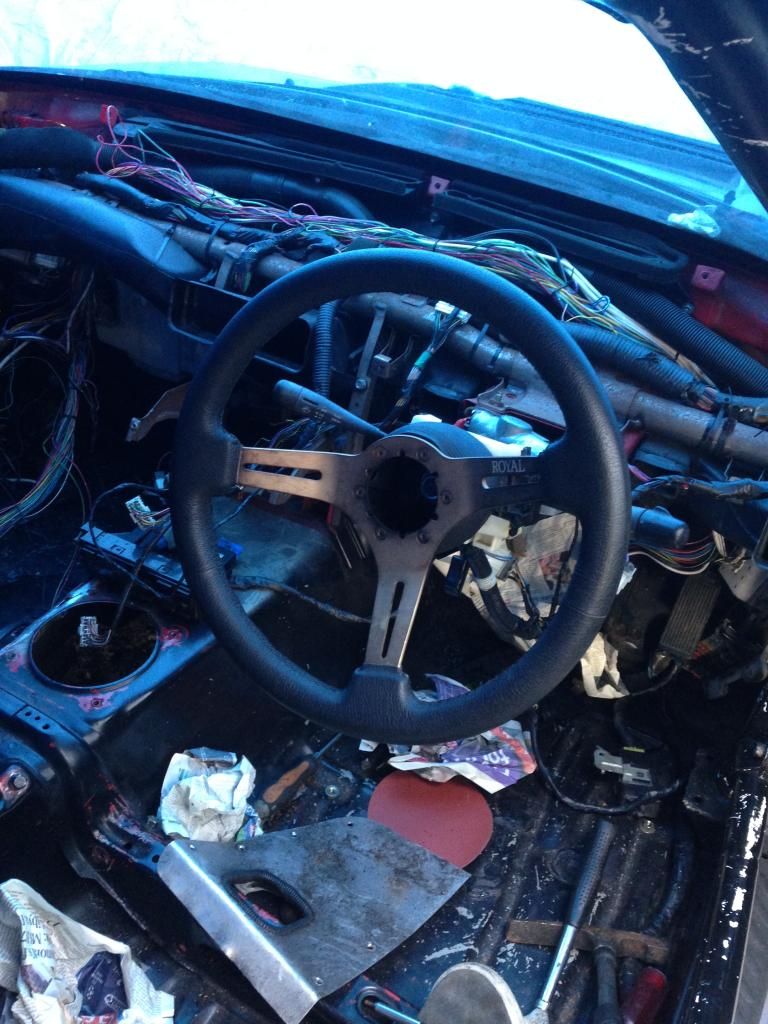 As I forgot last time, heres the obligatory gearbox photo  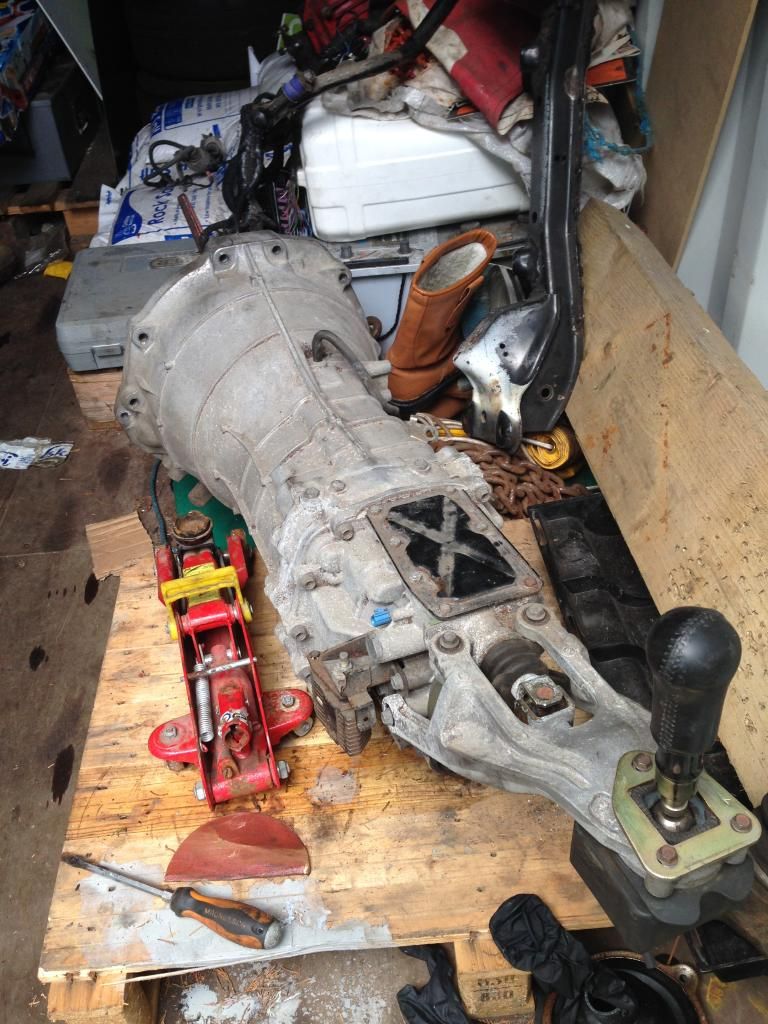 Threw the standard S13 shifter on that came in my hatch many many years ago, just to feel what shifting in the box is like. Seems pretty smooth which is good, but i'll fully inspect the box when I pull the bell housing off. |
|
|

|
|
|
#10 |
|
Leaky Injector
Join Date: Dec 2012
Location: Bristol, UK
Age: 30
Posts: 92
Trader Rating: (0)
 Feedback Score: 0 reviews
|
I spent an afternoon building up my rear subframe with the fresh new lower arms, PBM rear drop knuckles and generally trying to tidy everything a bit.
Started off by getting the Silvia's rear end high in the air, kinda thought this angled looked cool; 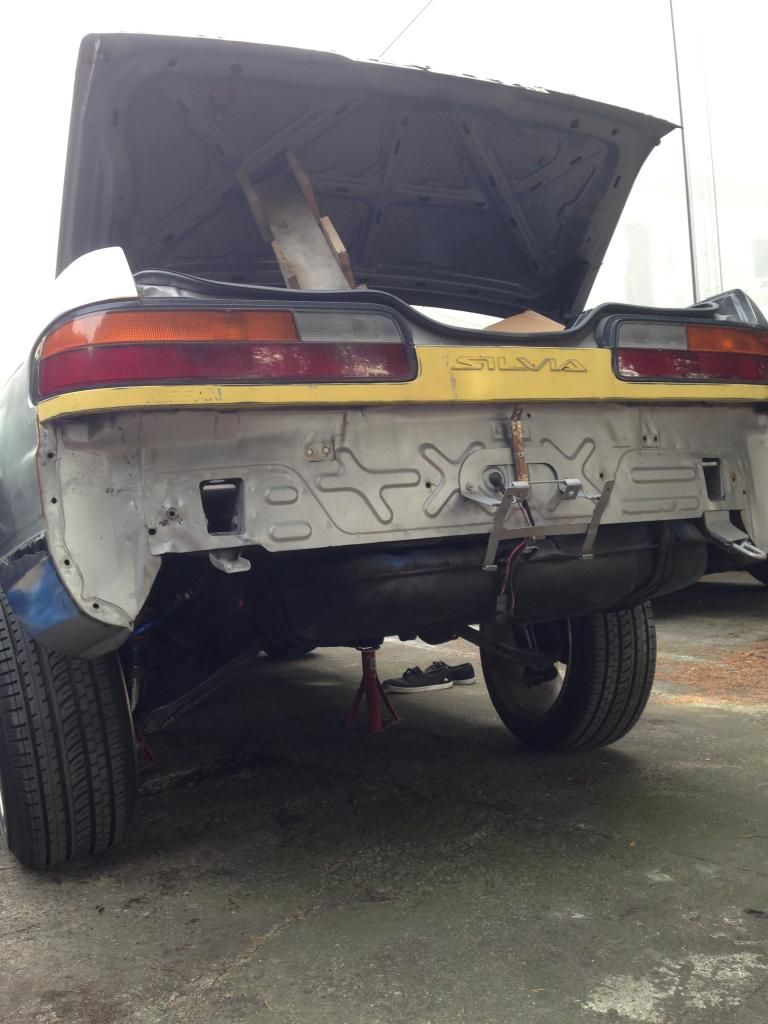 Kind of like some old school lowrider! Anyway, I installed everything back onto the subframe, with the new PBM knuckles looking far too good to use on the car, they're so b-e-a-utiful!! 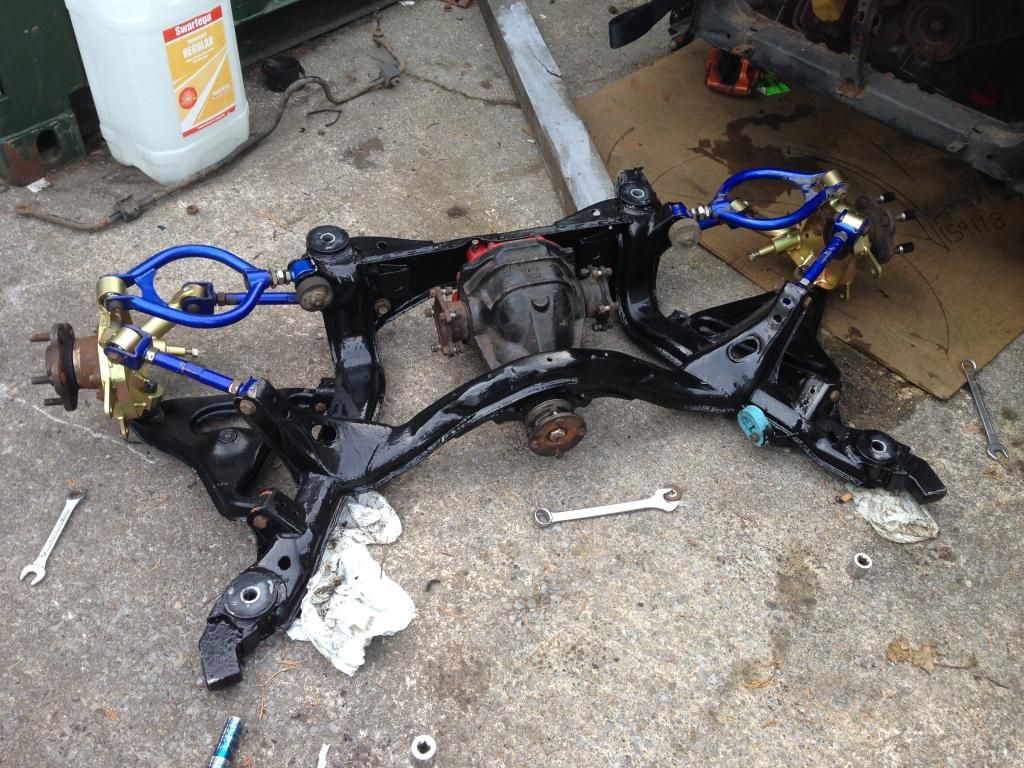 JUST LOOK AT THEM.. 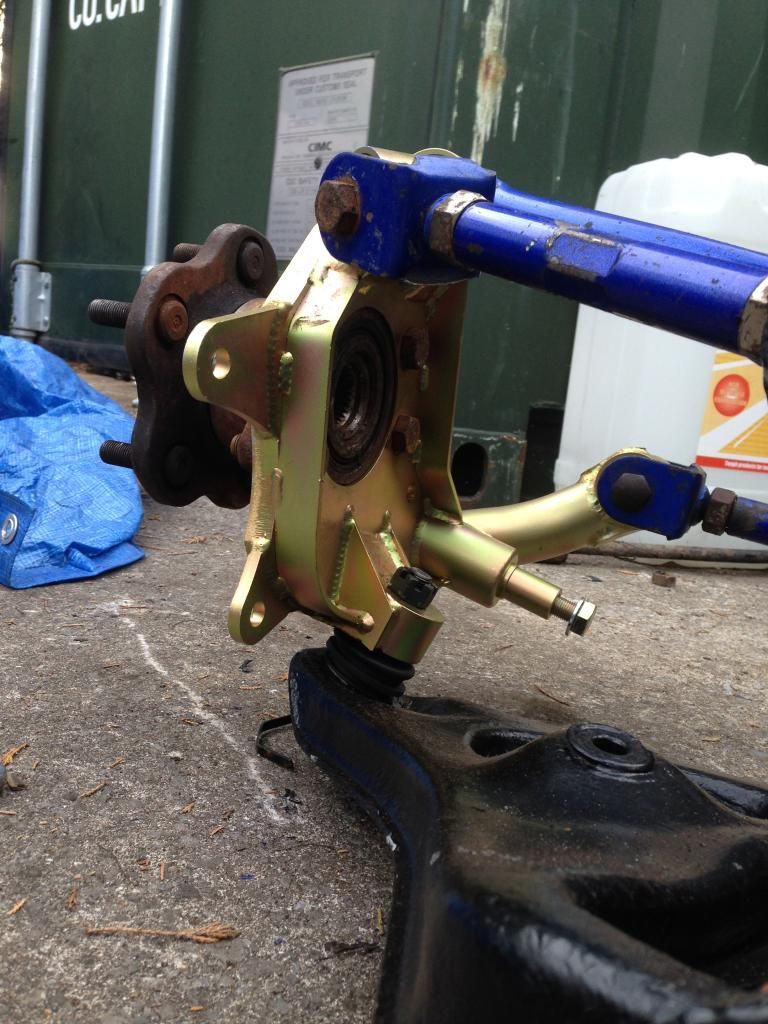 When you're on your own, how else do you move a subframe 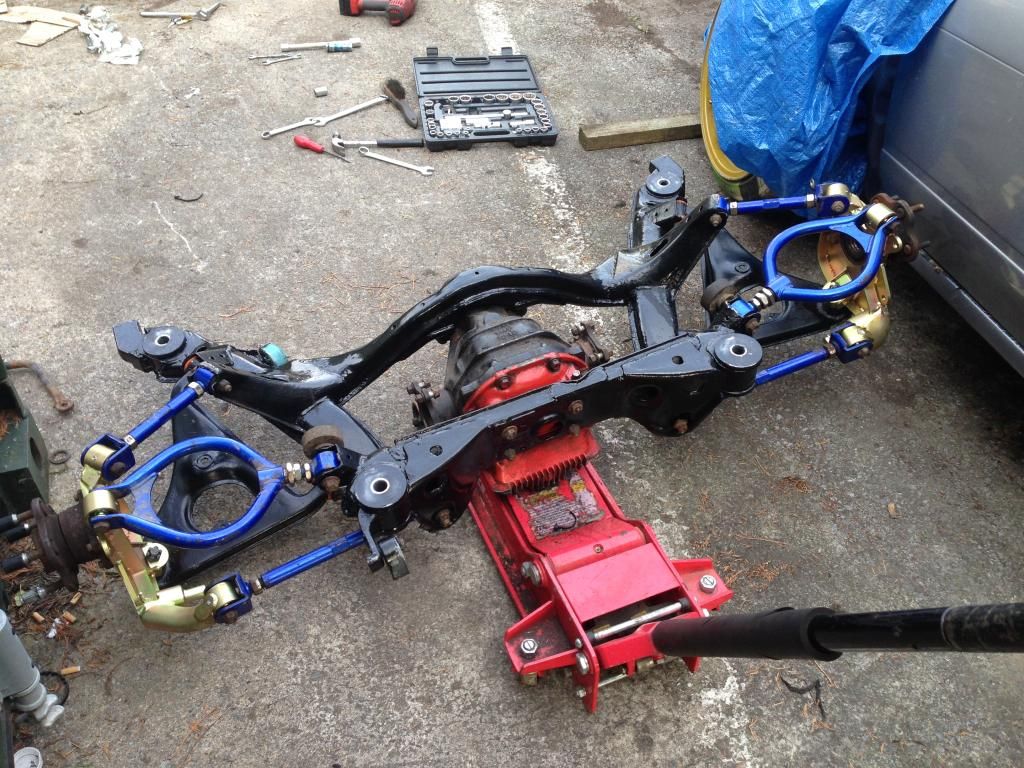 Quickly whipped the standard rear subframe off in no time at all, I suppose it was only held in by 2 nuts for transportation purposes.. 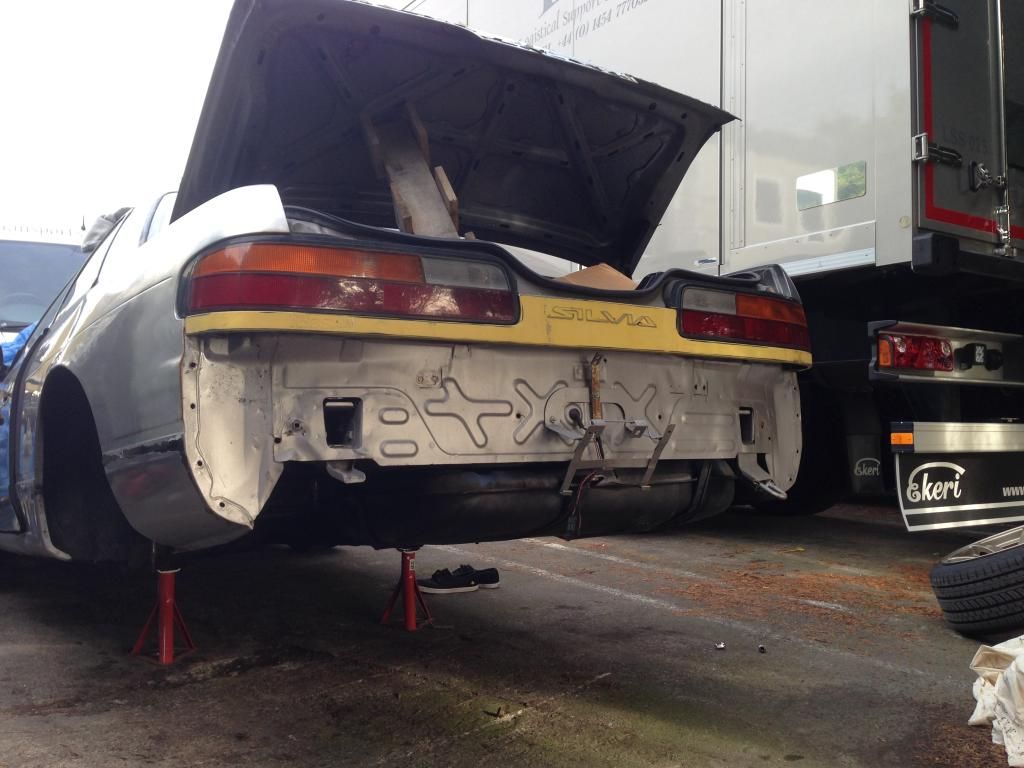 This gave me another opportunity to look underneath the rear end. Good to see everything is as fresh as I first saw it, something positive to take away which makes a change! 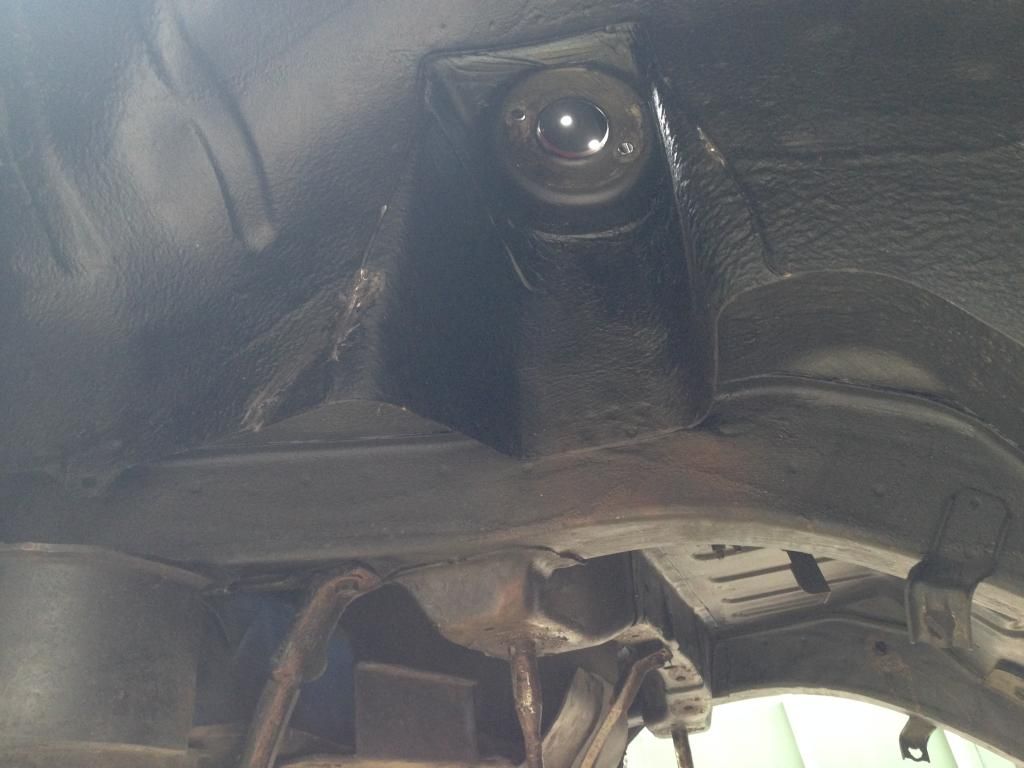 Theres a patch which needs to be undersealed; 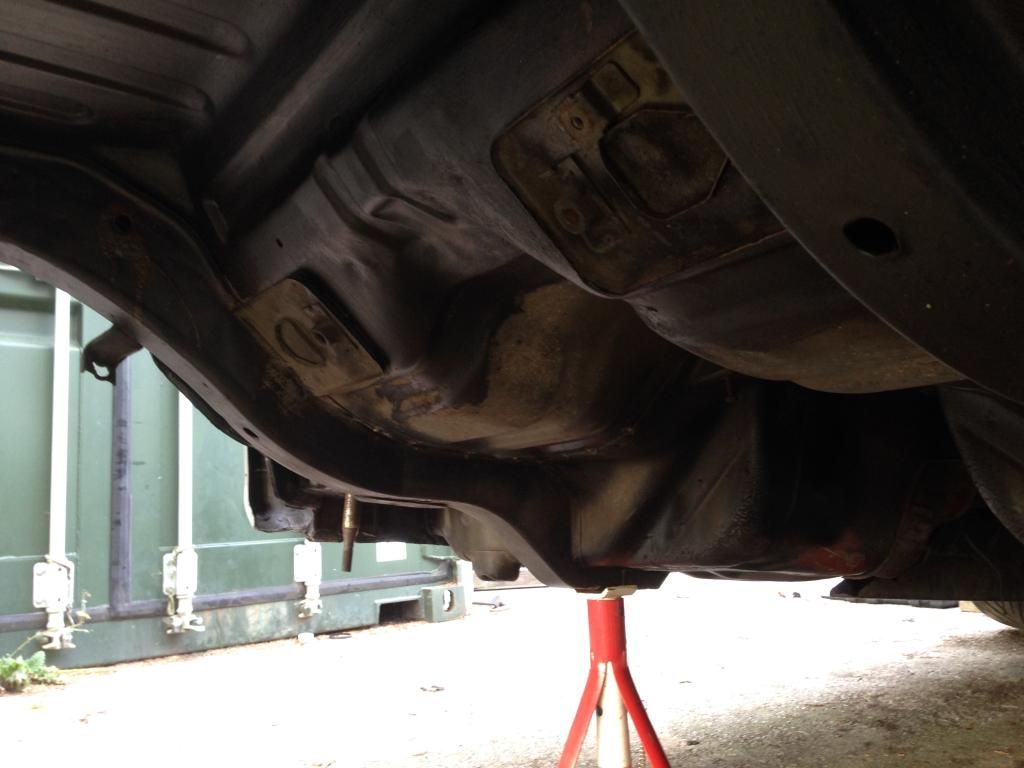 But, seeing as the car is going nowhere soon, I'll do that when I re-underseal the car so everything is nice and fresh before it hits the track. 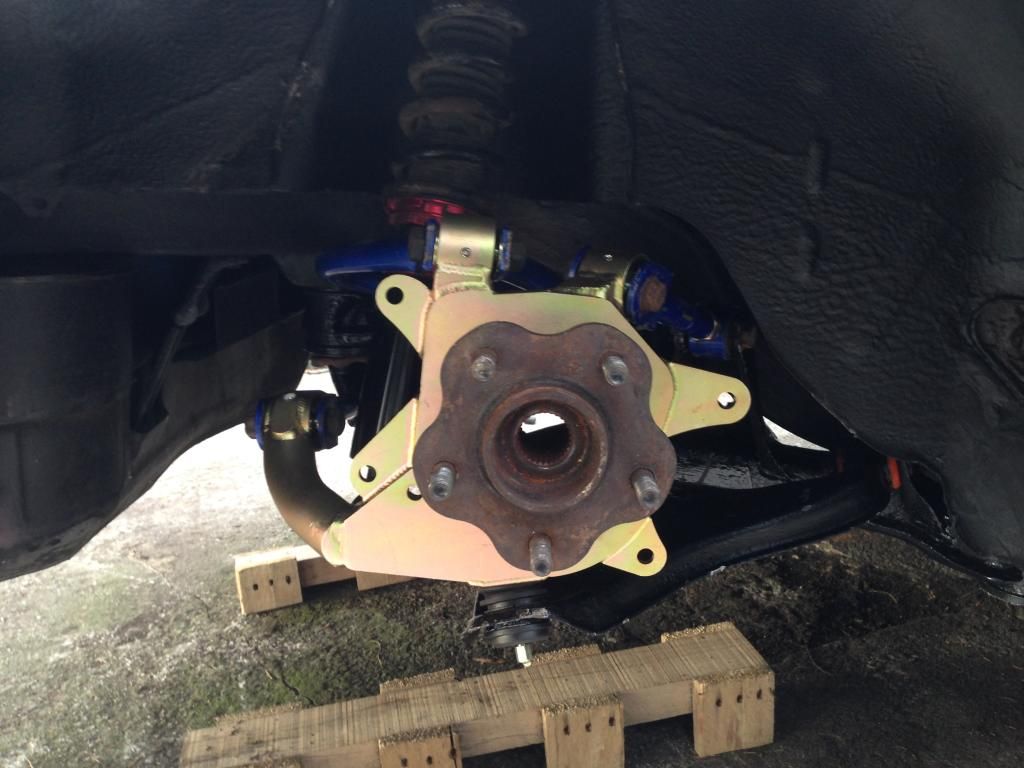 Still can't get over how much I love the look of the knuckles! Cant wait to get the 2nd set of callipers on whenever I have a chance to find some, dual calliper setup should look cool as f***! Oh yeah, and should give me a spot on handbrake Considering I was on my own, it took no time at all to get the rear subframe on. I think anyone who tried to put a subframe with solid bushes on the first time can appreciate what an utter sh*te job it can be  Re-adjusted my rear coilovers to roughly where they sat on my 13, just to see how the rear end would sit. Didn't want to spend too much time adjusting the ride height as these coil overs will be for sale soon as I may have an opportunity to get a fresh pair elsewhere. Anyway, when I saw the height was like so in the air, it had to be low  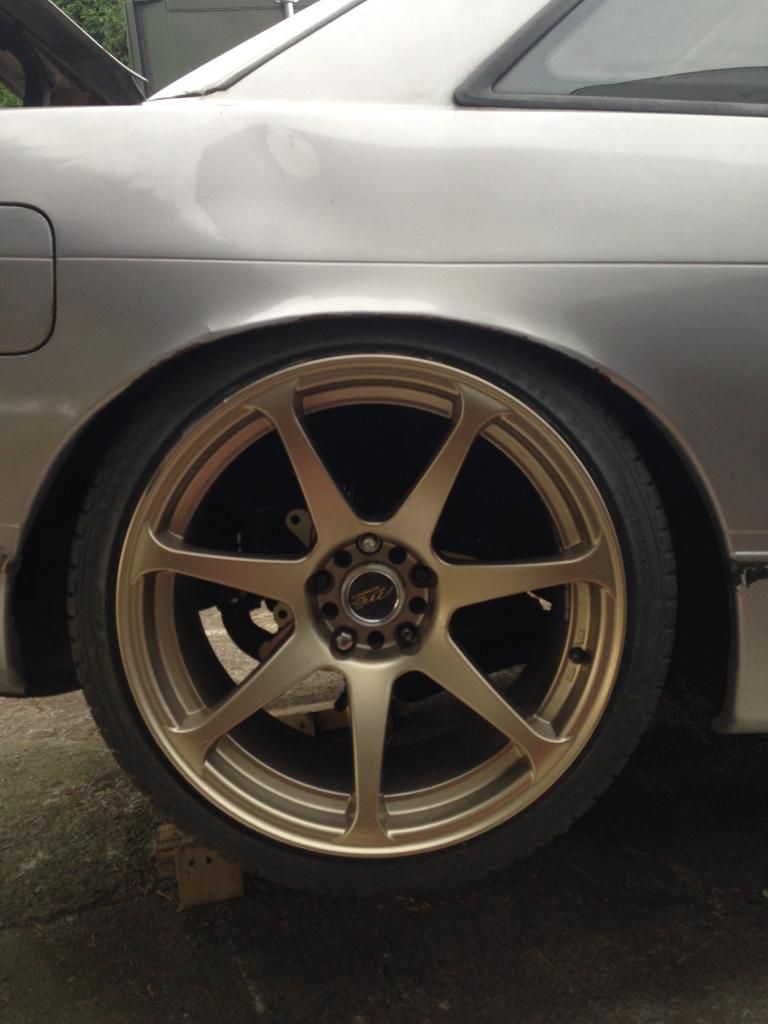 On the floor; 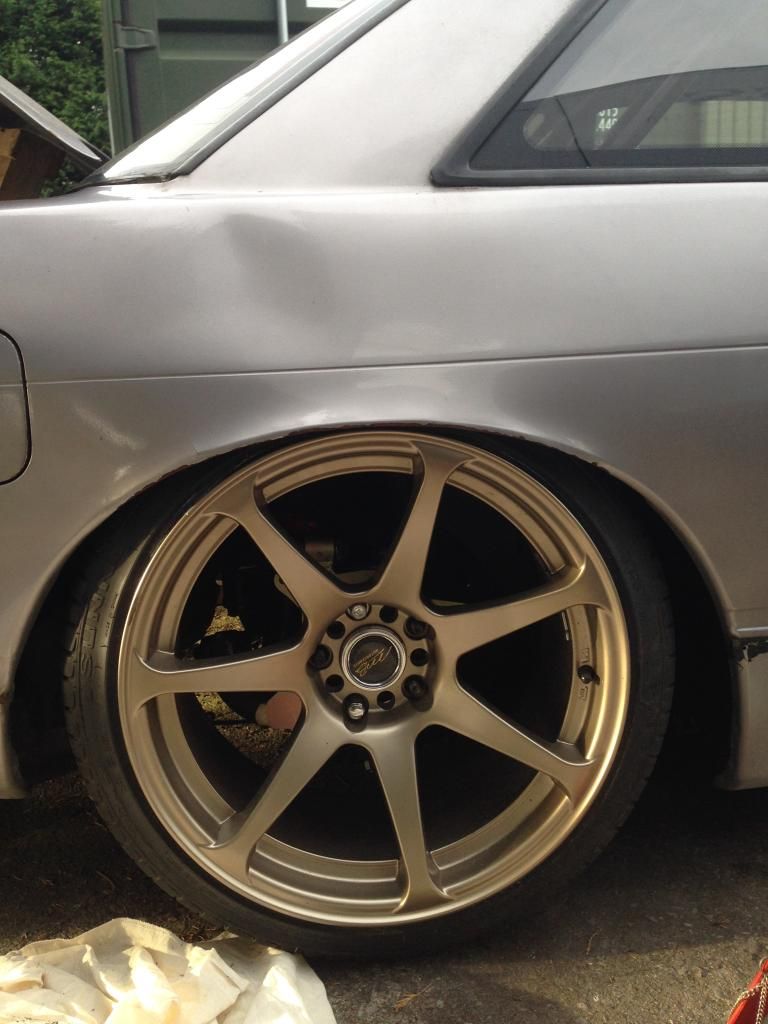 The PBM knuckles give a true 25mm drop which helped to get this low, the Apex Gen 2 coil overs still have an inch and a bit to go, so plenty of room to go lower still. :smoking: 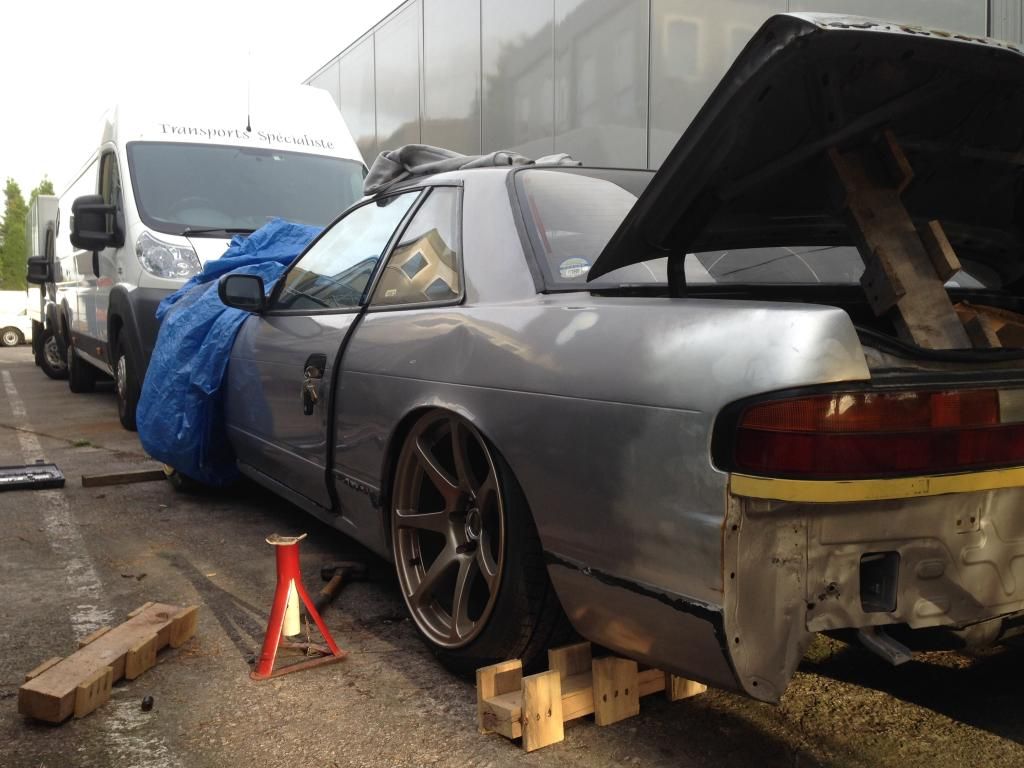 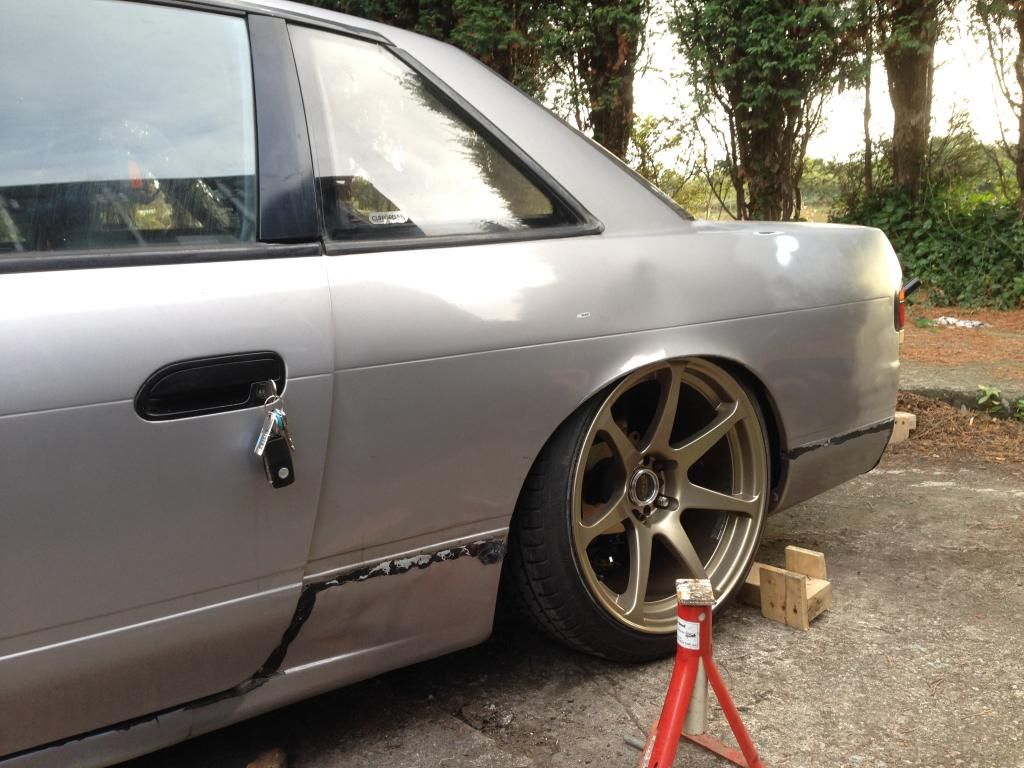 I'll be looking at a further half inch ish drop when I finalise the ride height, just so statically it'll tuck a bit of rim but under squat it'll tuck alot more, maybe even just scrape the skirt if I can. Ya'know, being a cool kid and all. Tried to get another picture just to capture the colour of the centre of my steering wheel <3 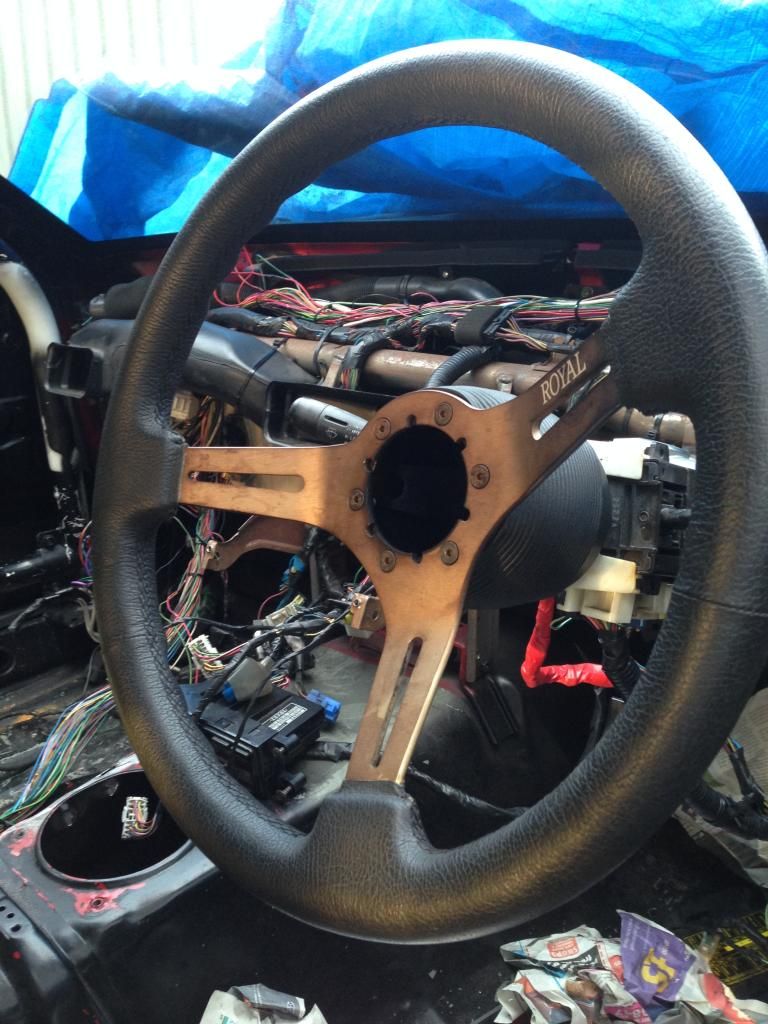 |
|
|

|
|
|
#11 |
|
Leaky Injector
Join Date: Dec 2012
Location: Bristol, UK
Age: 30
Posts: 92
Trader Rating: (0)
 Feedback Score: 0 reviews
|
So today, my friend popped back over and decided to crack on with tubbing the front arches again. We planned to start on the other side before we start plating the sides of the tubs so it'll be easier to make sure both tubs are level and symmetrical to each other.
 And the end result of todays effort, amongst many coffee breaks; (Started to go dark hence the terrible pictures  ) )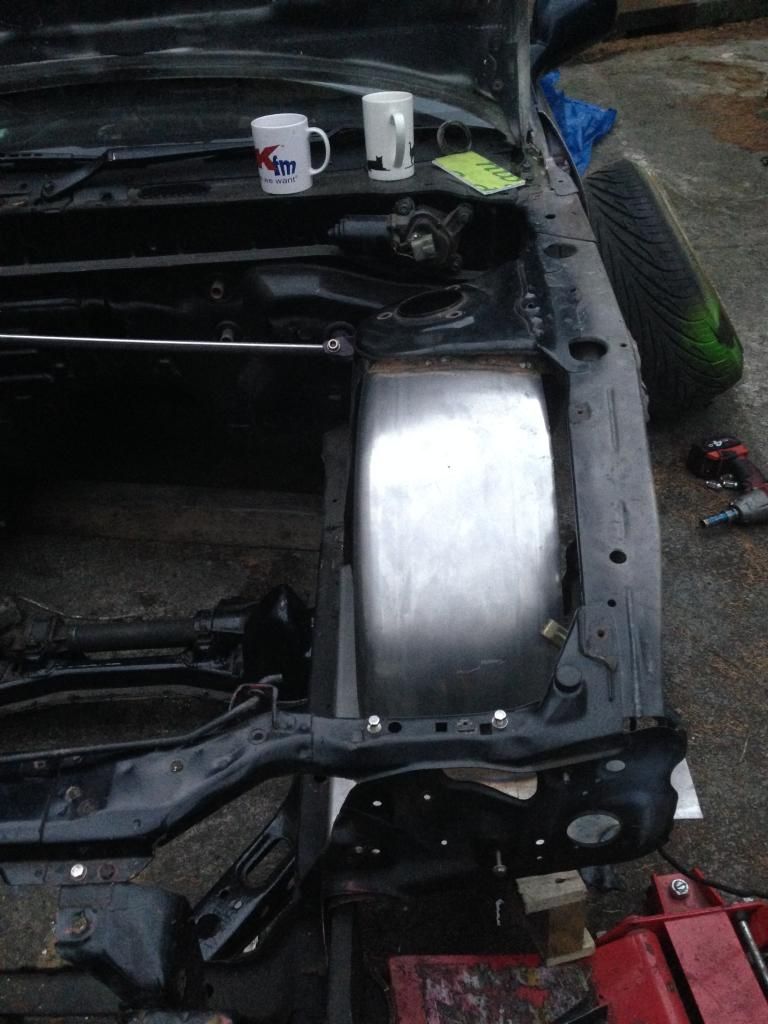 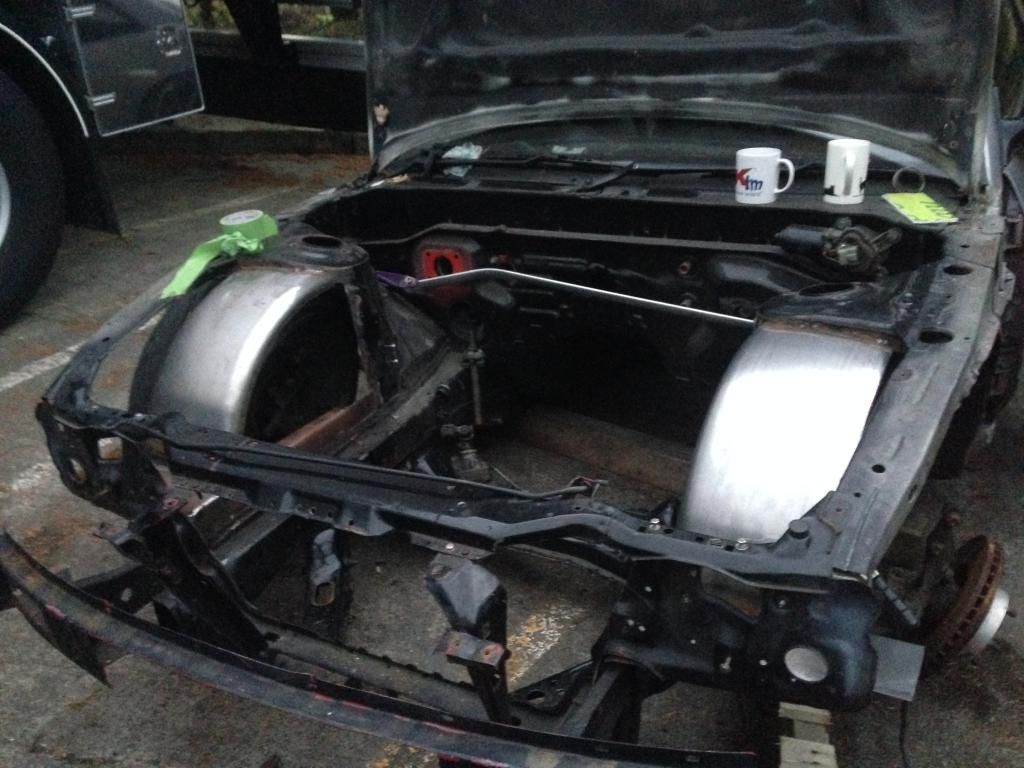 I/we can't wait for them to be done, they're really starting to take shape and can't wait to have a pretty engine bay at last. Hoping to put some hours into prepping the engine bay to make sure everything is spot on before I even consider putting the engine in. |
|
|

|
|
|
#12 |
|
Leaky Injector
Join Date: Dec 2012
Location: Bristol, UK
Age: 30
Posts: 92
Trader Rating: (0)
 Feedback Score: 0 reviews
|
Set about today removing the old turbo setup off my SR, not as much of a hectic job everyone makes out!
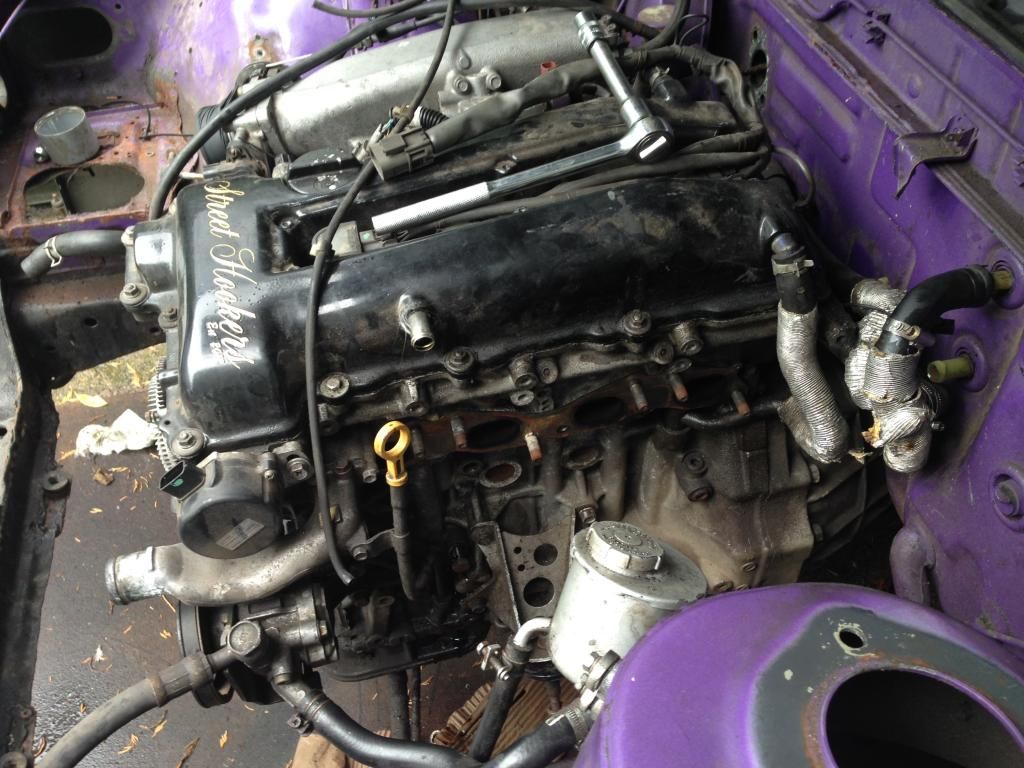 Wasn't going to post any information about these until I fitted them but they're just so god damn good to look at I need to share and keep you guys entertained  So, as soon as I got the rear end sitting nice and low, I kind of sold my Apex Gen2 Coilovers. They served me well and if the time came to change them, it'd be now during the build process. Obvious choices included Driftworks CS2's BUT since I was so happy with the build quality of my Powered By Max stuff, I couldn't help but treat myself to a set of their coilovers (and also a gear knob). 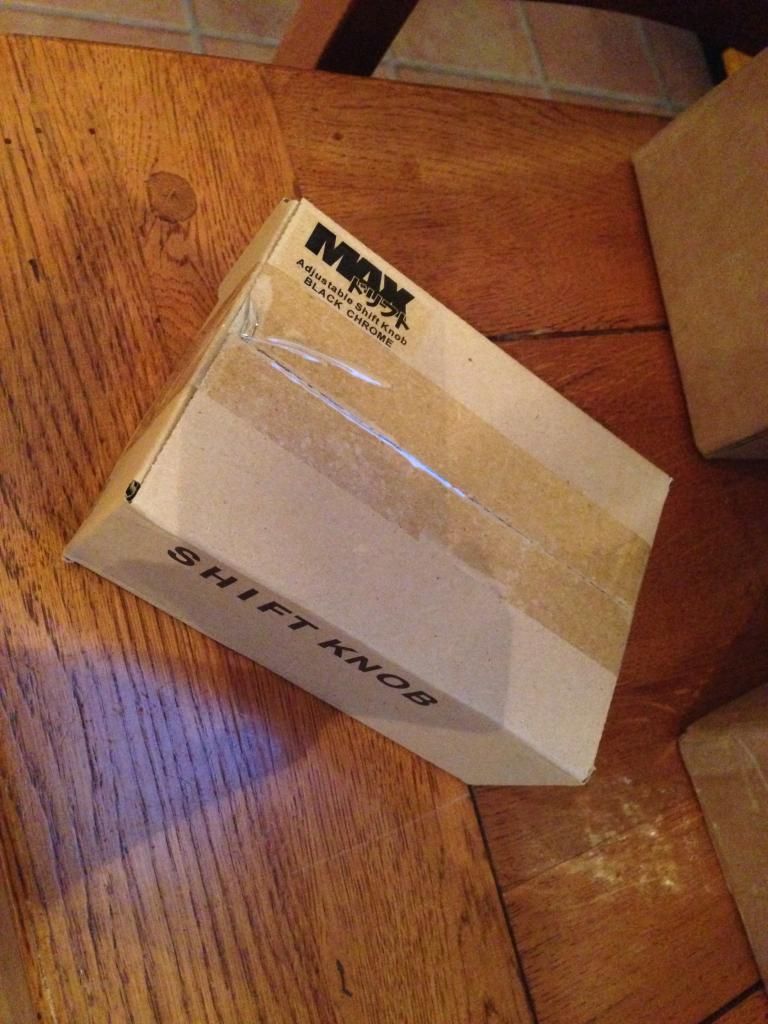 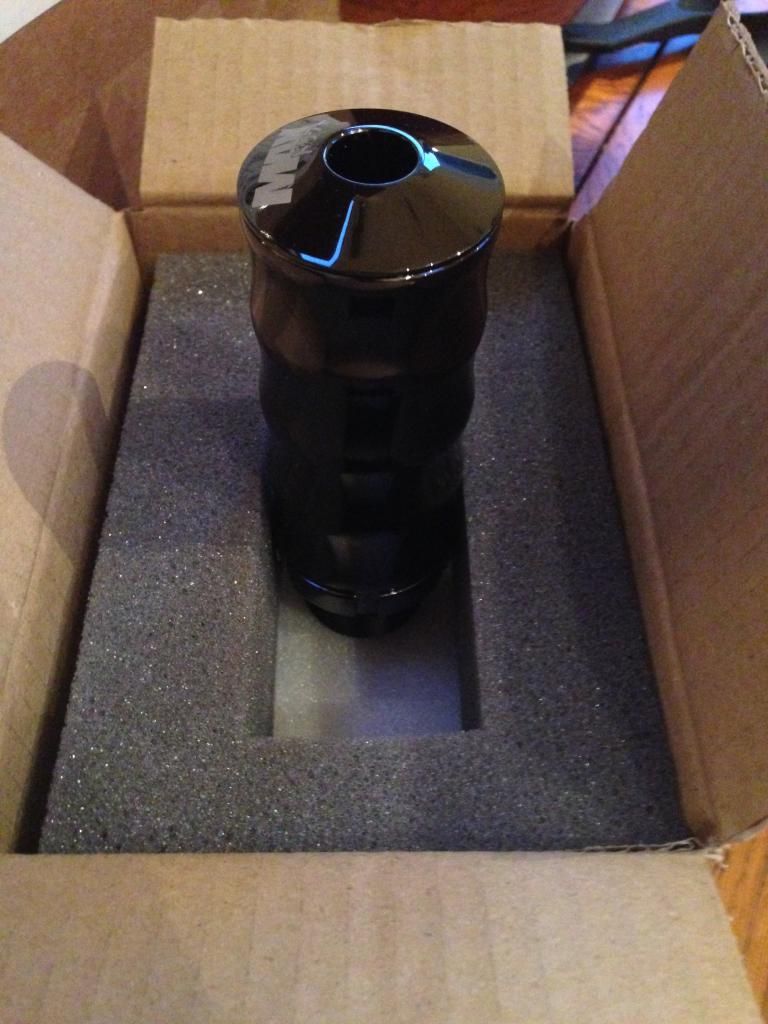 Colour is in Black Chrome which in the flesh makes a slight but noticeable difference against gloss black, another little detail I'm putting into the car which should help everything come together at the end, plus I liked the look of these gear knobs and feel surprisingly nice in the flesh! Next up was this box! 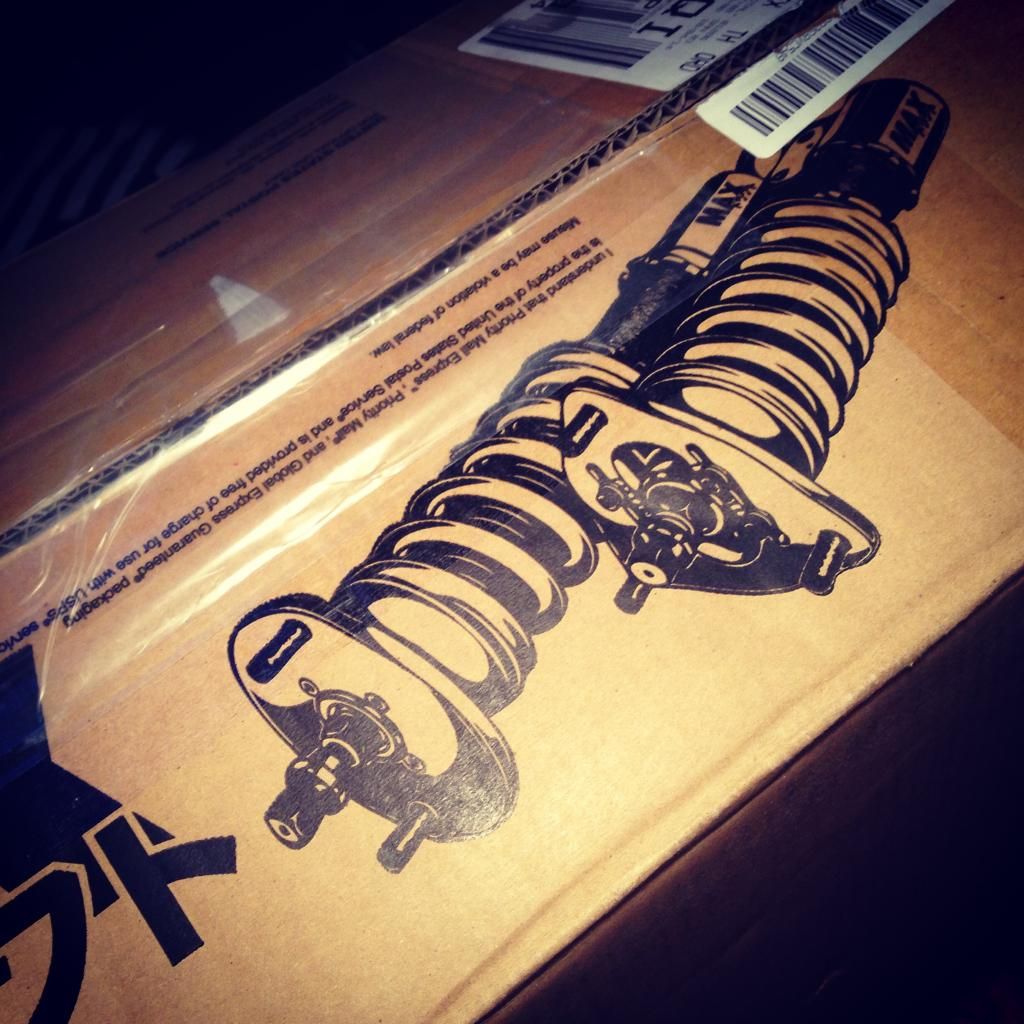 Just looking at the diagrams on the box I was stupidly excited to open them, the phrase like a kid at Christmas certainly springs to mind! 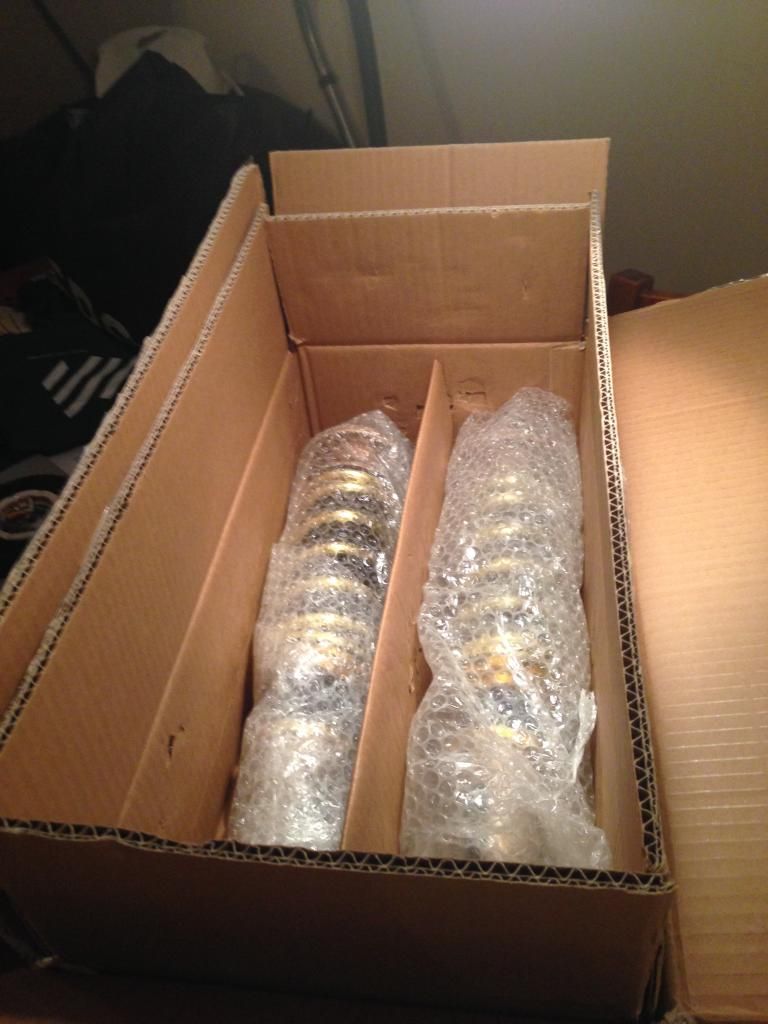 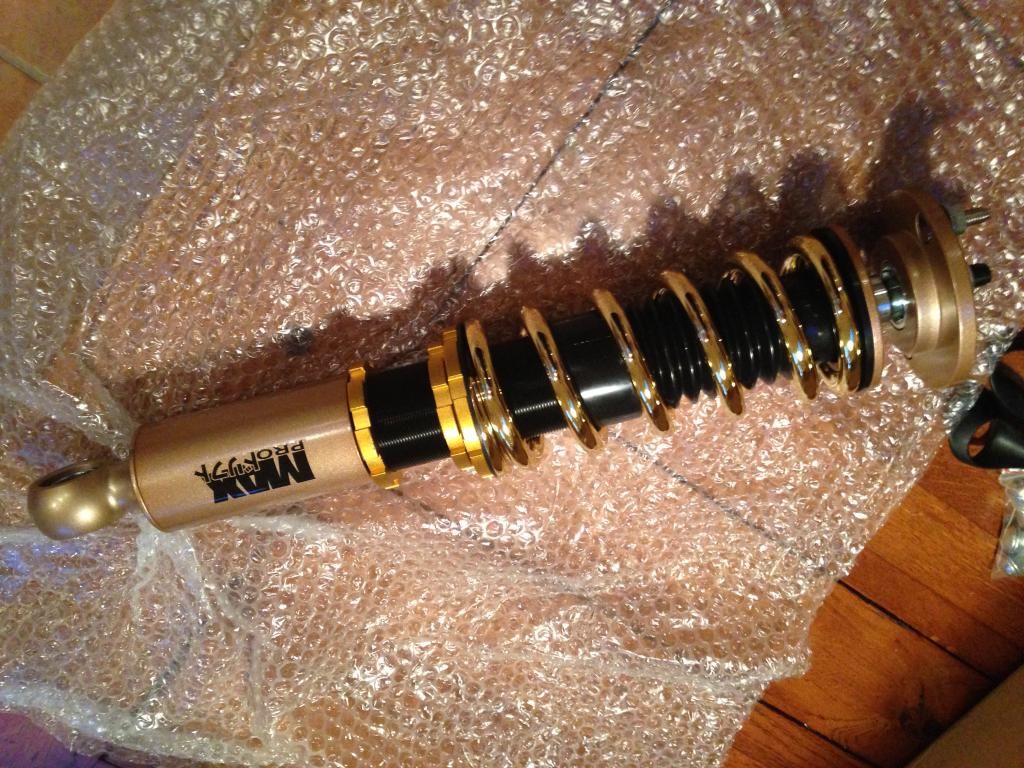 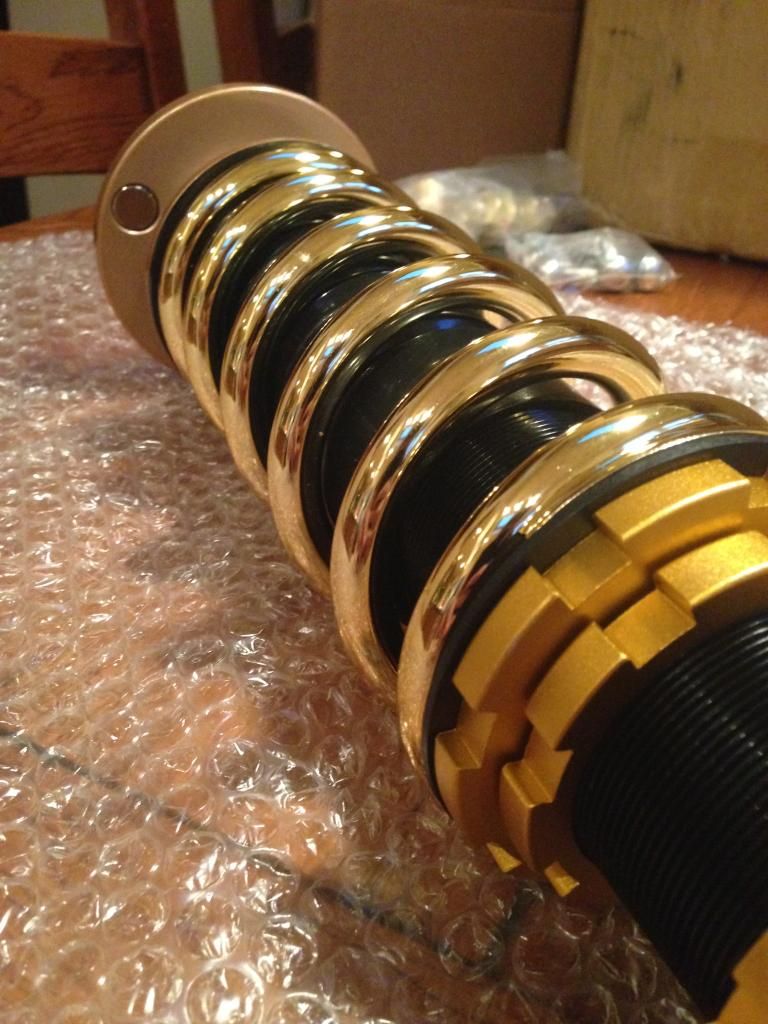 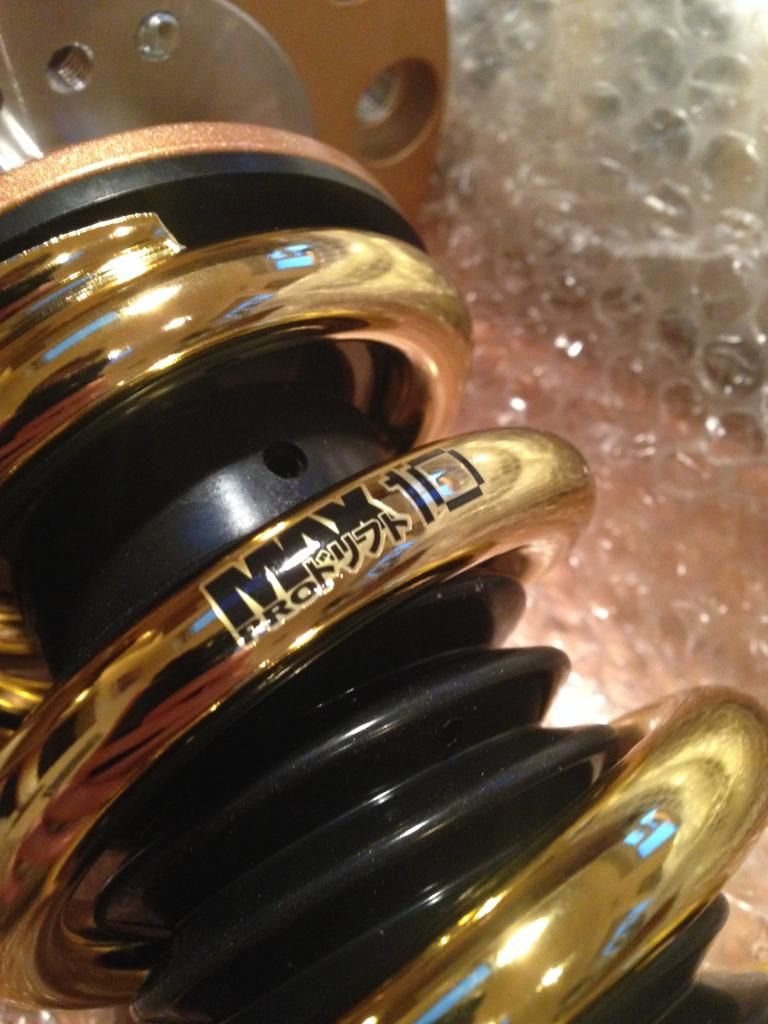 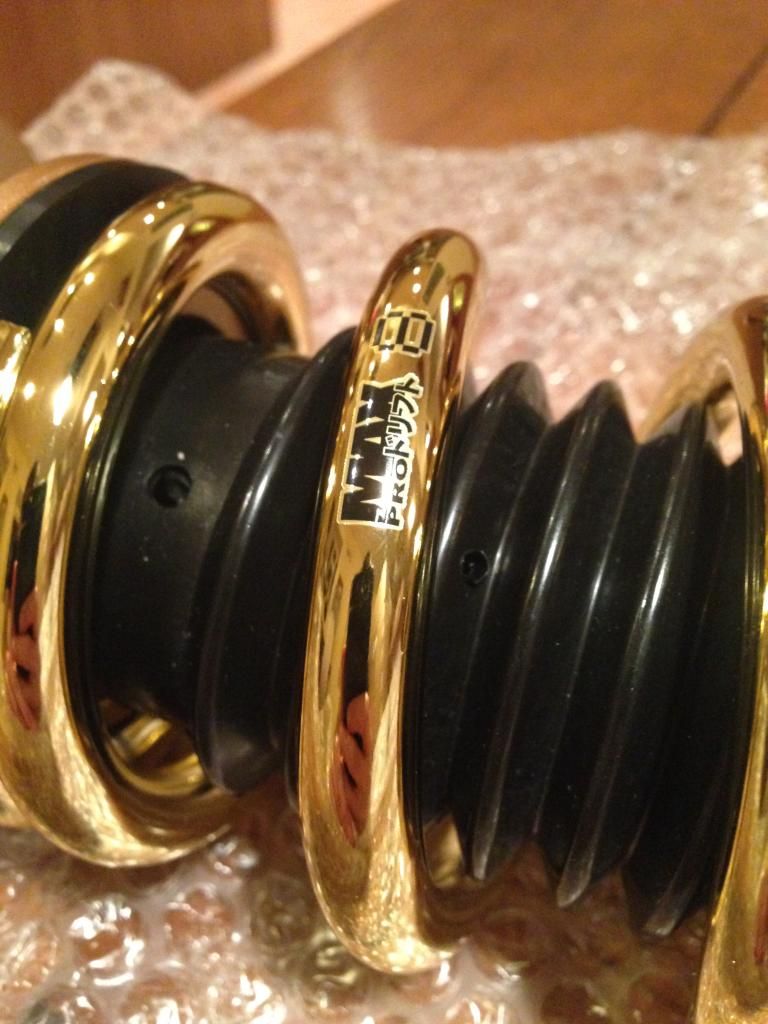 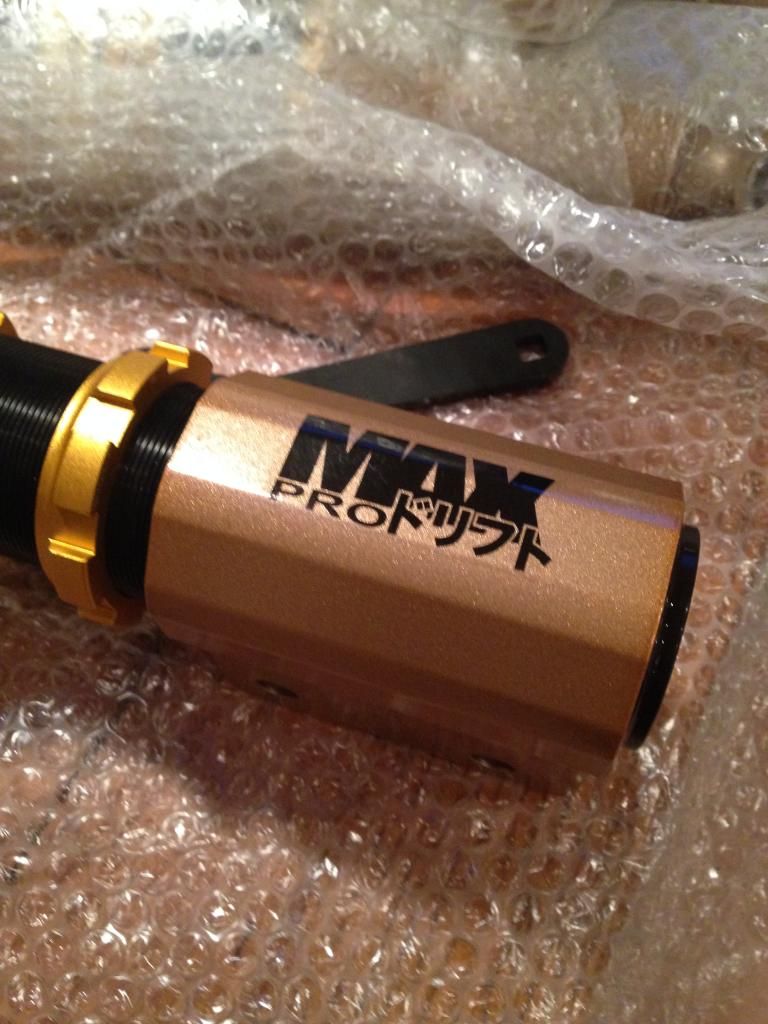 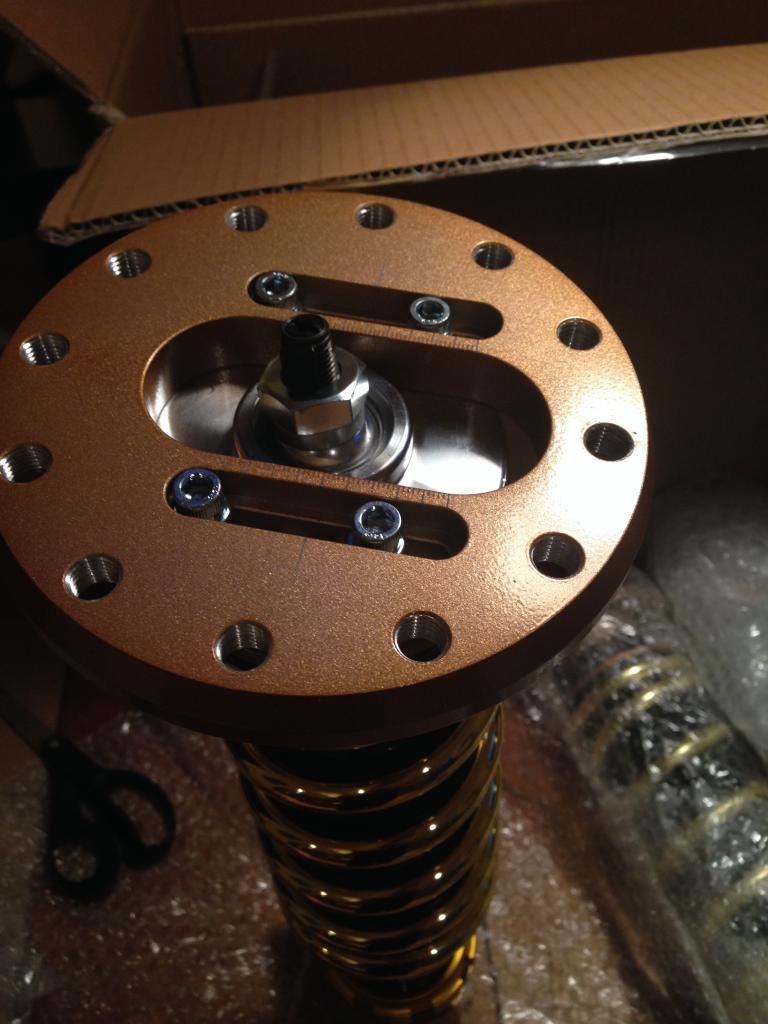 They are UNREAL! Quality wise, I was genuinely blown away after being used to Apex Gen2's (Nothing against them) and the quality is a notch up from the rear hubs which I wasn't sure was possible! Those who know the PBM range will have noticed these aren't the "Competition" or entry level coilovers, they're indeed the Pro range. Spring rate wise, they're 10/8's so a tad stiffer than CS2's but supposedly the SLL springs will make them feel a bit softer than they actually are, as well as aiding rear grip  Cant wait to install them and set them up, but the other part of me just wants to keep them in their box for the rest of their lives haha Cant wait to install them and set them up, but the other part of me just wants to keep them in their box for the rest of their lives hahaThis is just the beginning of things to come! |
|
|

|
|
|
#13 |
|
Leaky Injector
Join Date: Dec 2012
Location: Bristol, UK
Age: 30
Posts: 92
Trader Rating: (0)
 Feedback Score: 0 reviews
|
Managed to get a couple of hours on the car, well I mean my old S13.
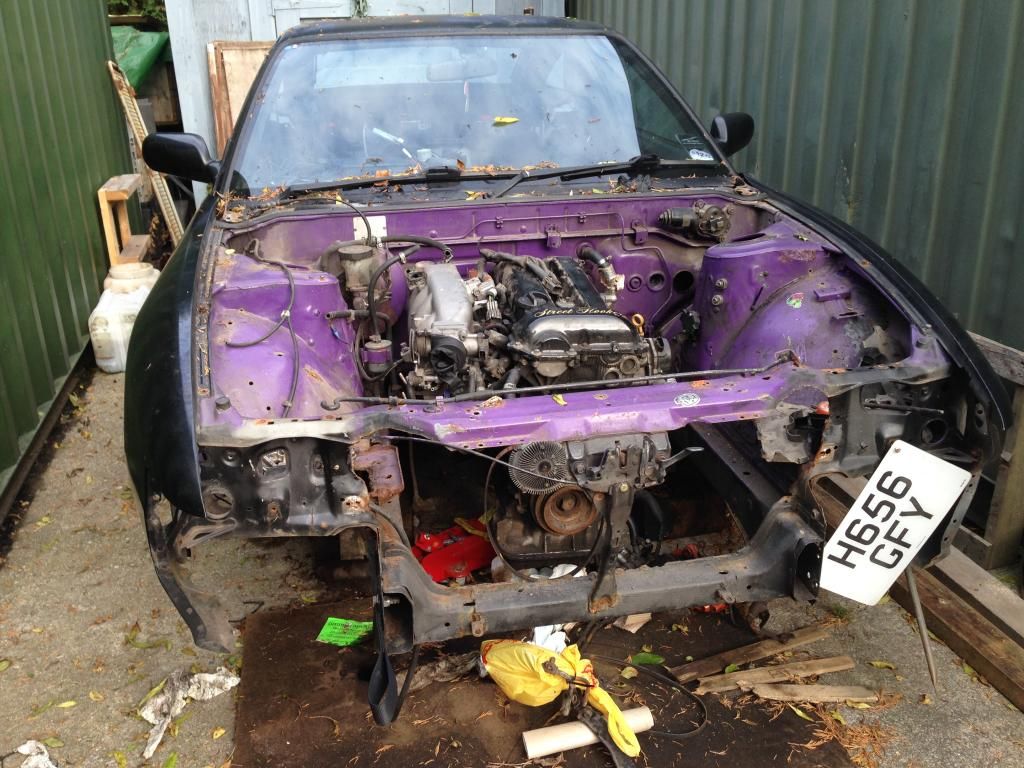 I spent some time getting the SR ready to pull out when the weather allows. The engine needs to be back in before the car takes a little trip up the road from me to see the metal magician that is known as Hux @ Huxley Motorsport to get some exhaust work done  Apart from the glove on the rear of the gearbox deciding to split and throw its oil everywhere, removing my SR was just as easy as I remember it  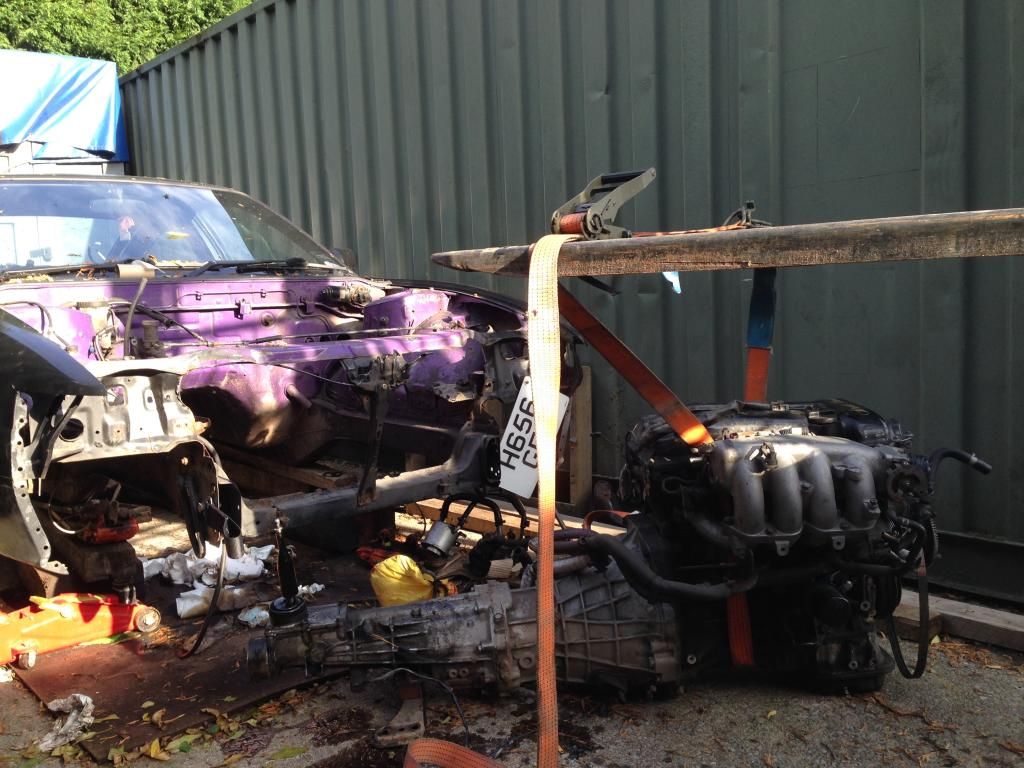 Check out the engine crane, this makes things much easier and less stressful! 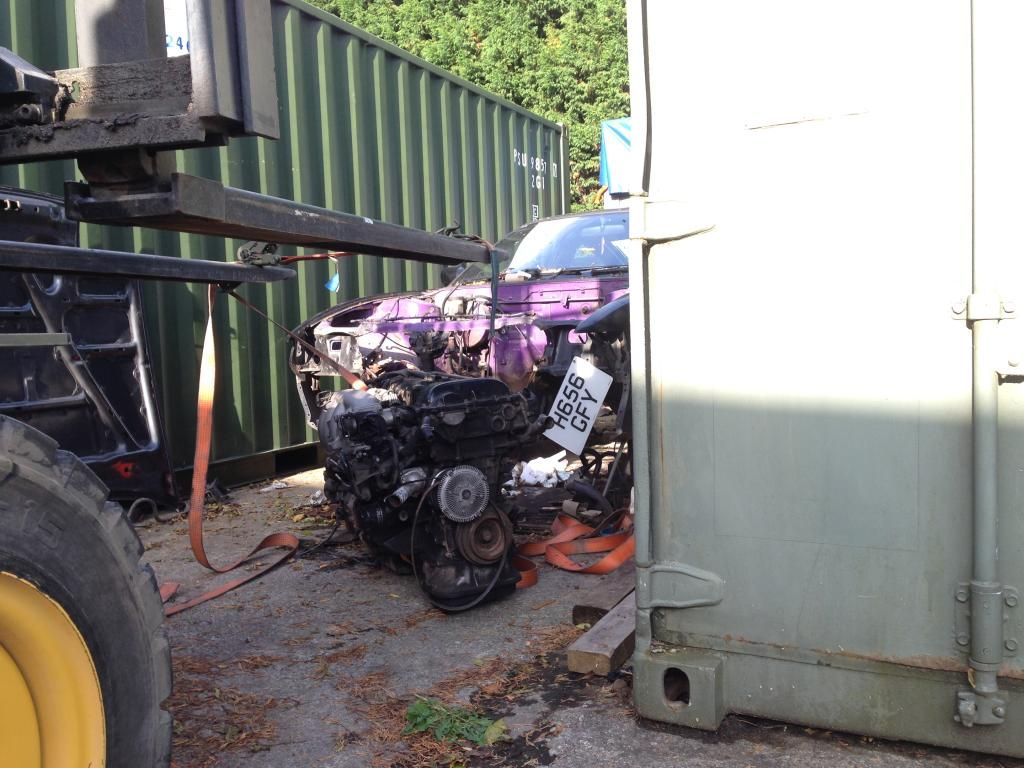 So I whipped the gearbox off and wasn't sure what to expect of the clutch after roughly 2 years of clutch kicks and a years worth of daily driving duties and this was what came off the engine; 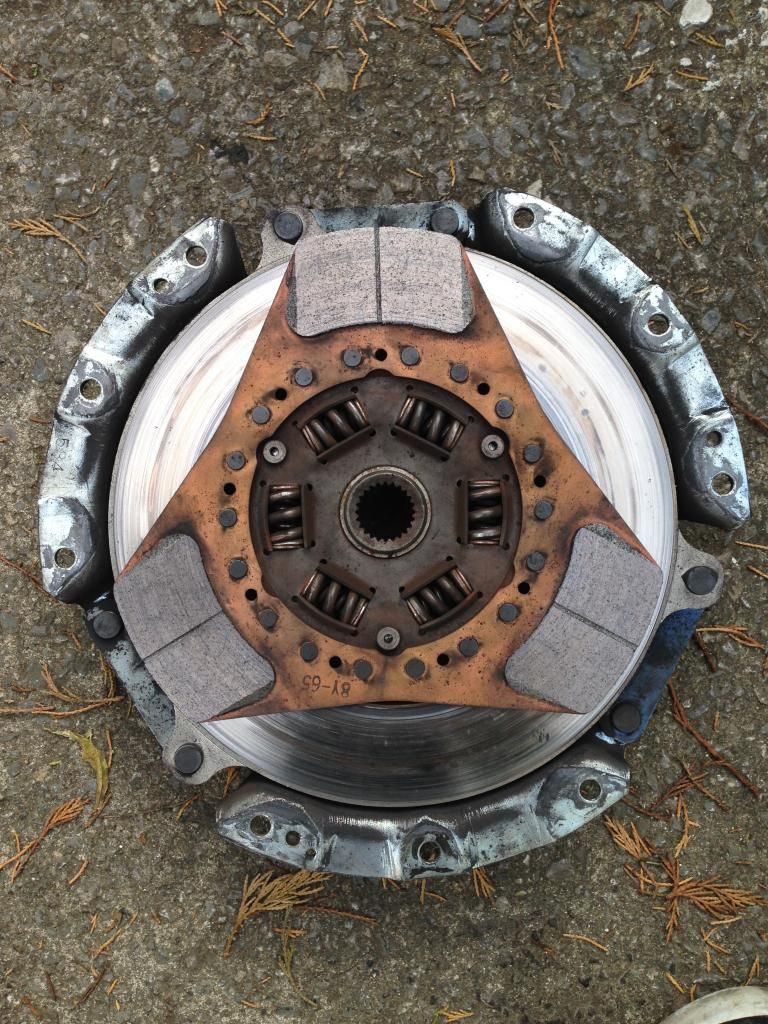 Bear in mind this clutch was an Exedy 3 puk that was given to me when I bought my SR so had unknown life and milage before I used it! Plenty of material left on the friction plate, and no heat spots on the flywheel or pressure plate so its been quite happy during its life  It was nice to find out once the box was off the rear crank seal was in good condition, something that tends to go on quite a few SR's these days.. 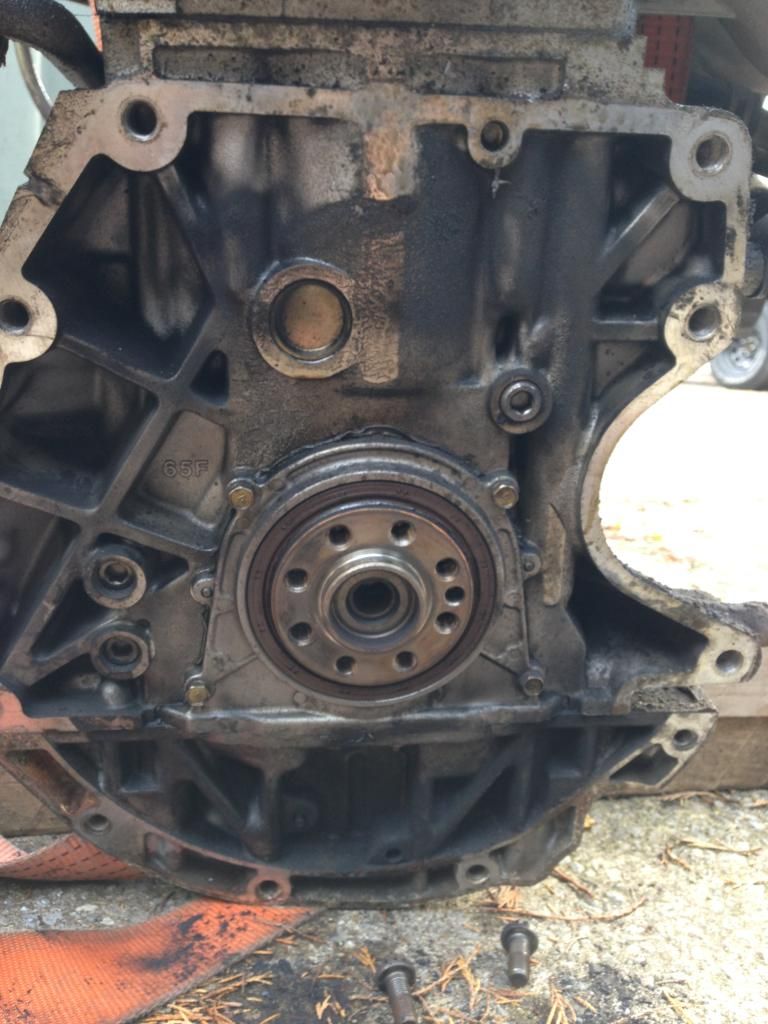 So, after stripping the inlet off I was left with one dirty SR20! 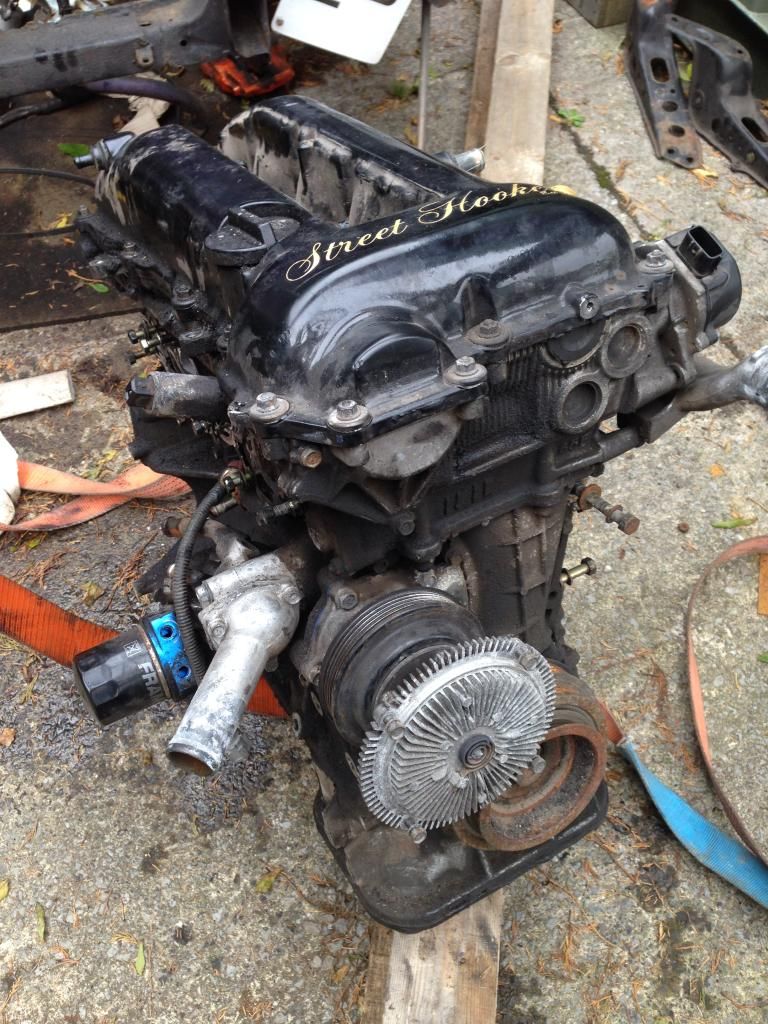 Used the amazing engine crane again and promptly loaded up into the back of a van.. 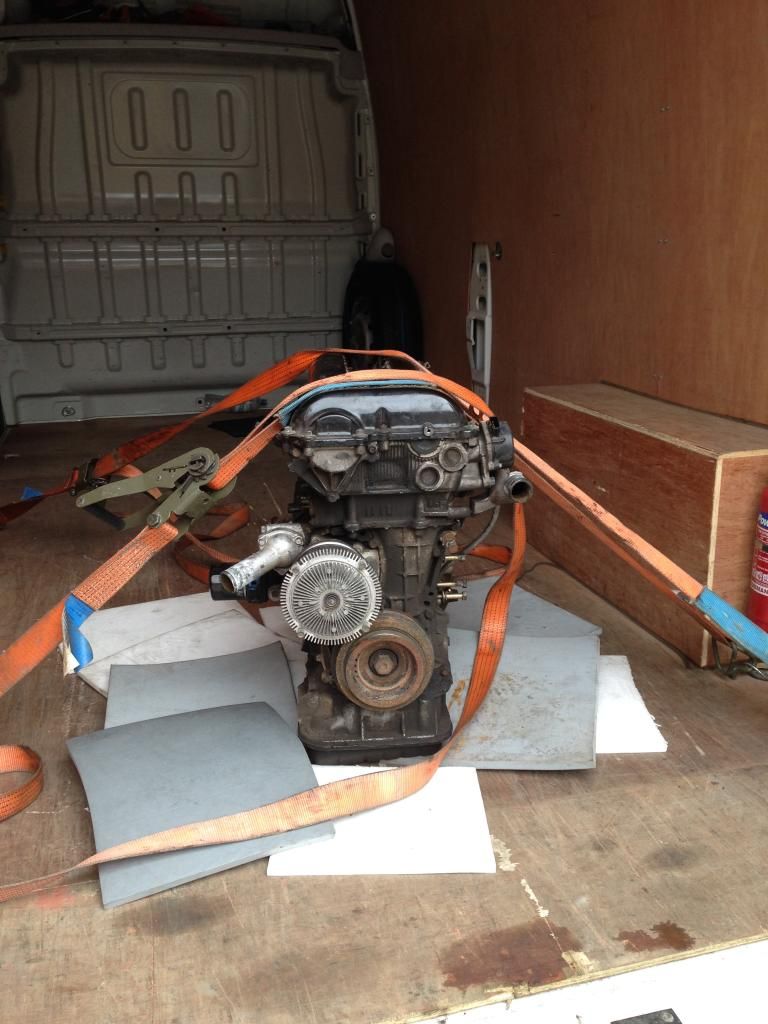 This should be where things start getting more interesting! |
|
|

|
|
|
#14 |
|
Leaky Injector
Join Date: Dec 2012
Location: Bristol, UK
Age: 30
Posts: 92
Trader Rating: (0)
 Feedback Score: 0 reviews
|
These soon turned up - an additional pair Z32 rear brakes for use with he PBM hydraulic handbrake setup:
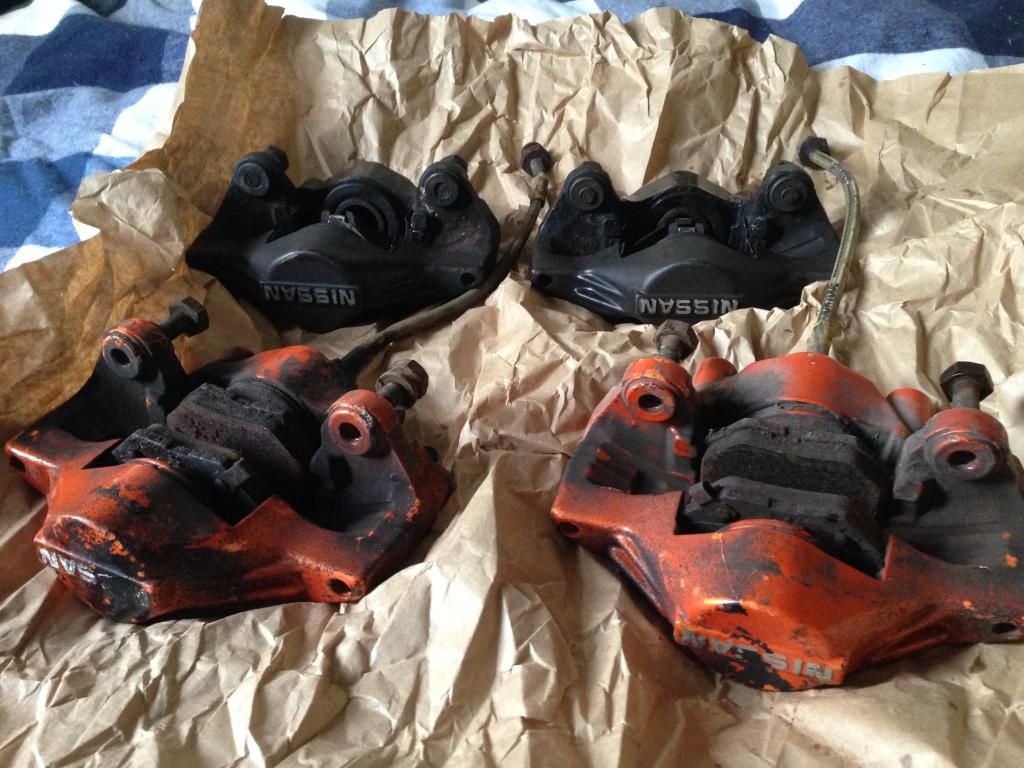 So plan is to refurb my old pair from the horrible "Lamborghini Orange" , as well as the new pair. The idea is fairly simple, one pair will be used as a regular brake system would have, whilst the others would be connected directly to the hydraulic handbrake - which means the level should have a nice feel and lock effortlessly. |
|
|

|
|
|
#15 |
|
Leaky Injector
Join Date: Dec 2012
Location: Bristol, UK
Age: 30
Posts: 92
Trader Rating: (0)
 Feedback Score: 0 reviews
|
So first things first; The Turbo!
Those who are keen on my Instagram or my old build thread may remember posting the picture below; 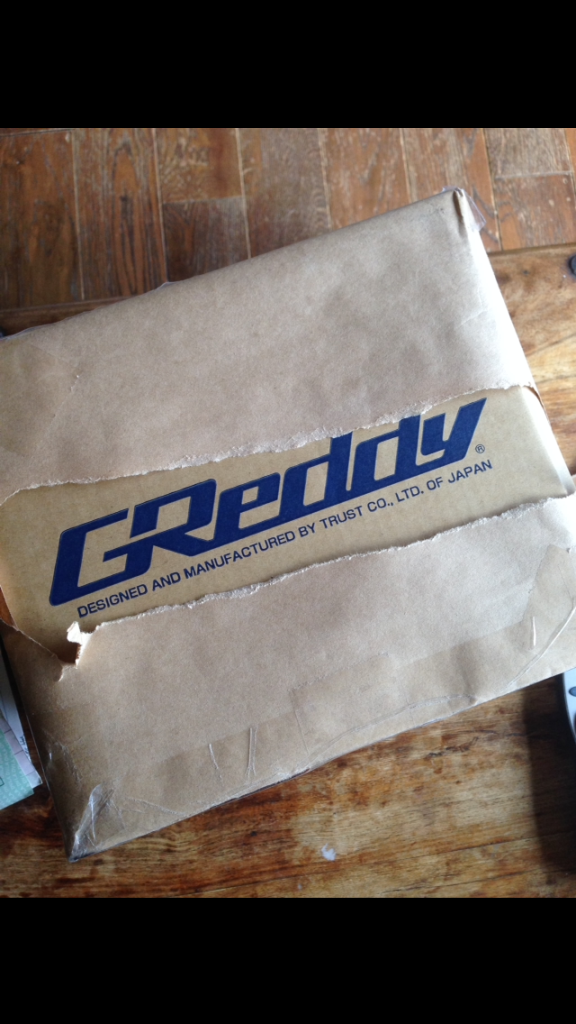 Inside this box of amazing Japanese goodness lies a brand new, genuine Greddy TD06L2-20G! 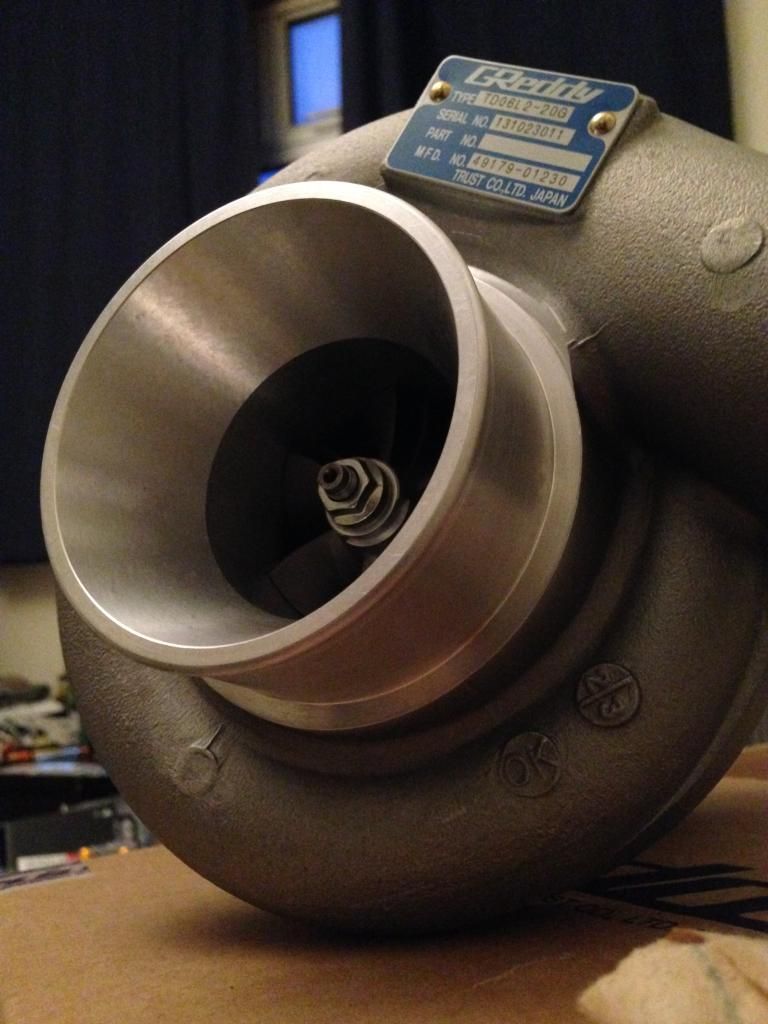 Truth be told, ive had this sat in my room for a fair few months, more towards the beginning of the year in fact! Ive pretty much spent the whole year planning how I want the car/engine setup after using my experiences in my old S13. The thing that annoyed me was that I loved the 4:3 final drive, but as im always mid-top end of the rev range the poor little T28 felt gutless, literally as if it was N/A car as it had none of the old Japanese kick to it no more, also due to the fact the T28 is quite a small turbo too! The reason why I chose the TD06 over the more common GTX series is that fact, I want a kick so brutal, it’ll make me driver harder and faster than before. Full boost tends to be around 3.5-4k which suits me fine, as im spec’ing this car more towards a mid-range monster than try to get maximum spool, when im not even down low in the rev range! Oh, and there’s also the fact these turbo’s sound AWESOME on full boost, we all know this is a crucial factor!  The Manifold Since I wanted the original 3 bolt exhaust housing for authenticity and the fact it’s the 8cm^2 housing, my manifold options were fairly limited. Either genuine Greddy manifold (which will more than likely crack after being made of stupidly thin metal!) or I do Option B) Contact Andrew Ward (Wardy) off SXOC. Some people may know of his work as he sure is getting more popular and theres a reason for this, his work is awesome and for the prices he charges it’s a no brainer why people still consider off the shelf generic ebay manifolds which will all crack at some point! With the TD06 setup I have a further 2 choices regarding the manifold setup, generic Top Mount setup which can sound the absolute nuts! (Those who know Charlie Hadfield’s PS13 from Australia will understand  ) or the option ive always preferred after taken a massive inspiration from the C’s Garage boys and Jesse Streeter amongst other Japanese drivers, the notorious mid-mount which gives that throaty crackle/rasp noise! So, Wardy got hold of a manifold thanks to Daze (Yes, Daze from the internet ) or the option ive always preferred after taken a massive inspiration from the C’s Garage boys and Jesse Streeter amongst other Japanese drivers, the notorious mid-mount which gives that throaty crackle/rasp noise! So, Wardy got hold of a manifold thanks to Daze (Yes, Daze from the internet  )and began replicating these manifolds in a more durable “Steam Pipe”, and if ive gotten them the right way round the materials used are; )and began replicating these manifolds in a more durable “Steam Pipe”, and if ive gotten them the right way round the materials used are;The runners are made from sch10 stainless steel The collector is CNC cut from sch40 stainless steel The flanges are laser cut from 10mm mild steel What I enjoyed about Wardy’s work was not that its second to none, but he tried to improve the manifolds where he can. For example, the Greddy manifolds are notorious for the design of their collectors in terms of they aren’t the best, but Wardy comes up with this! 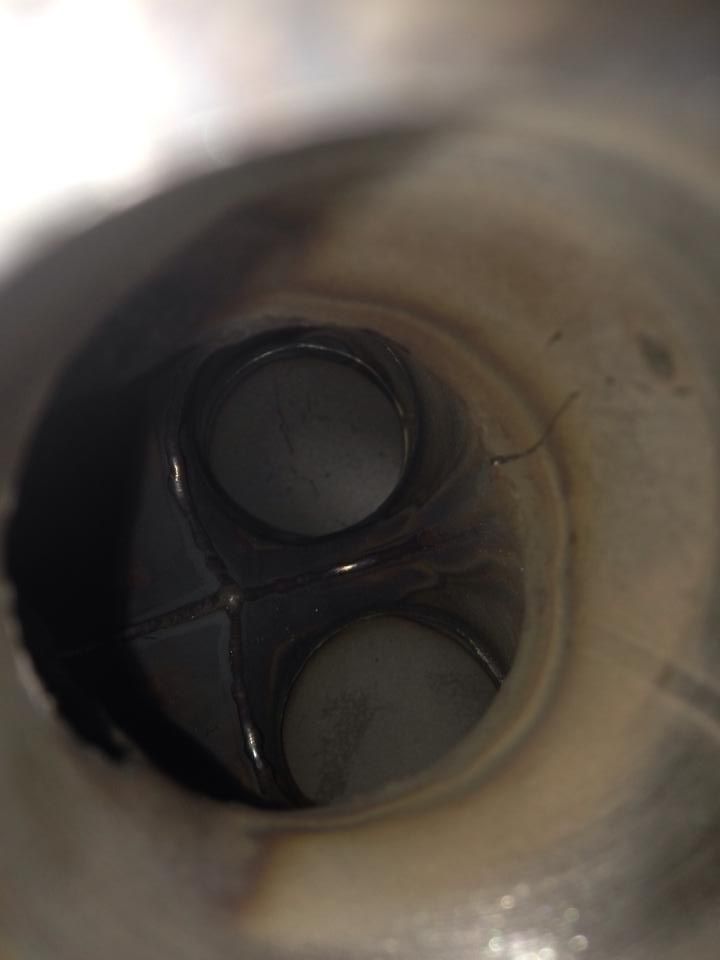 Massive improvement, I did have the original pictuire of the Greddy collector but cant seem to find it ☹ Upon Wardy’s jig whilst making the manifold; 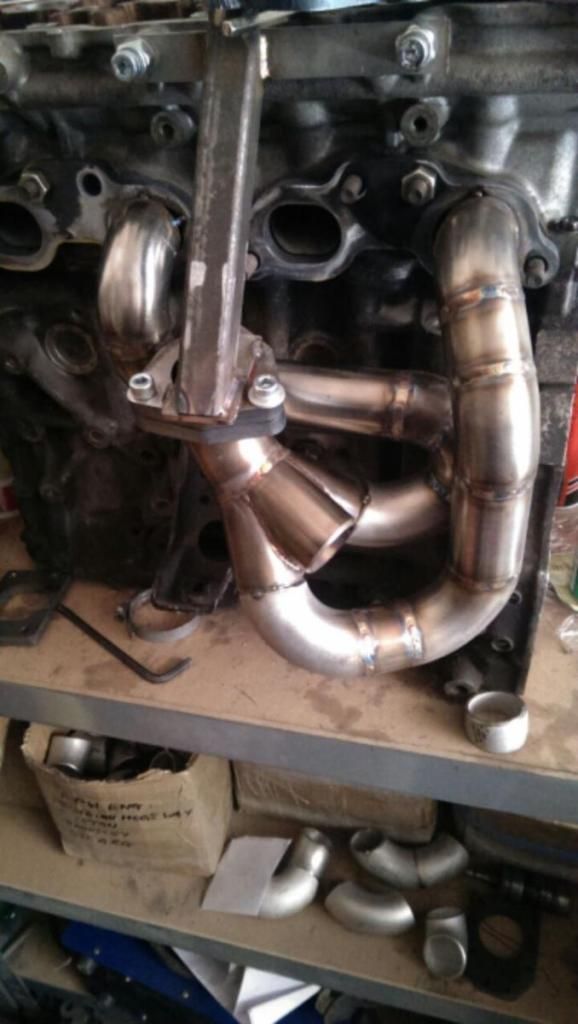 Moment of truth!  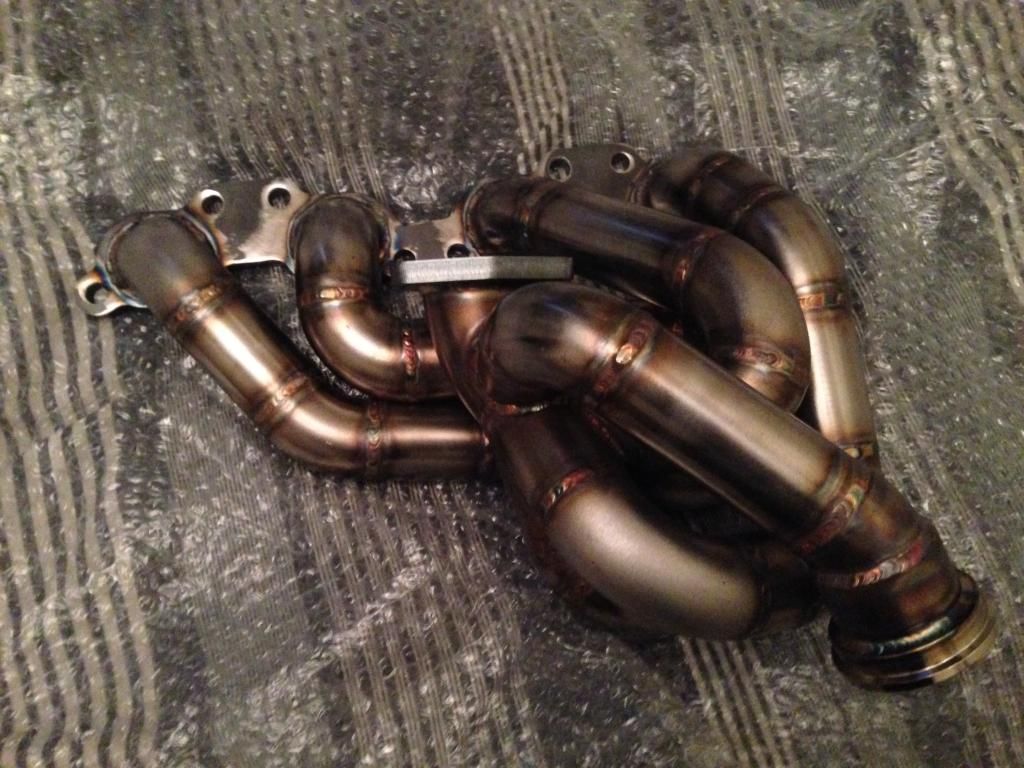 I remember opening the box, I was simply blown away! The quality is unreal, lets hope it sounds as good as it looks  |
|
|

|
|
|
#16 |
|
Leaky Injector
Join Date: Dec 2012
Location: Bristol, UK
Age: 30
Posts: 92
Trader Rating: (0)
 Feedback Score: 0 reviews
|
Boost Control
Now, ive always wanted an external gate just to make those noises and have rock solid boost control. So whilst my vision is to built it once and build it right, ive opted to choose the Turbosmart 45mm Hyper-Gate. Tial’s are notoriously bad for leaking even genuine ones from what ive been told from numerous people who know their stuff, and Turbosmart is apparently one of the few that actually seal and wont leak, which is fine by me! So a friend hooked me up a killer deal @ Enjuku Racing and before you know it, its sat in my room waiting patiently! (And it still is lol!) 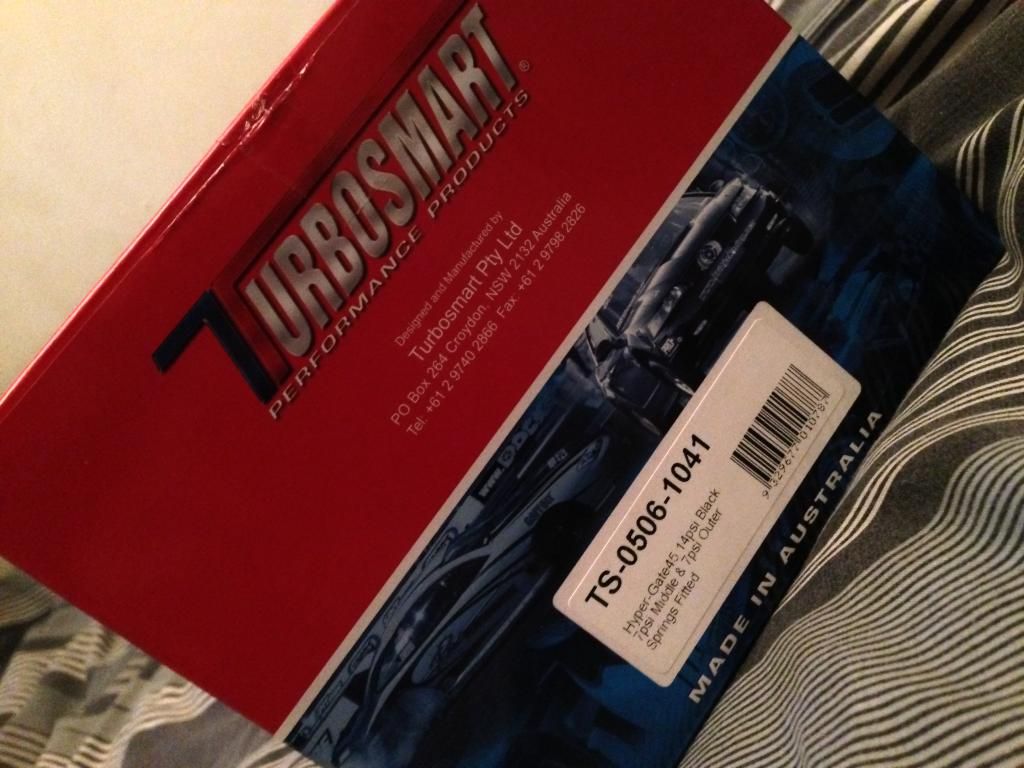 Opted for black to try and keep the car simple and classy ☺ 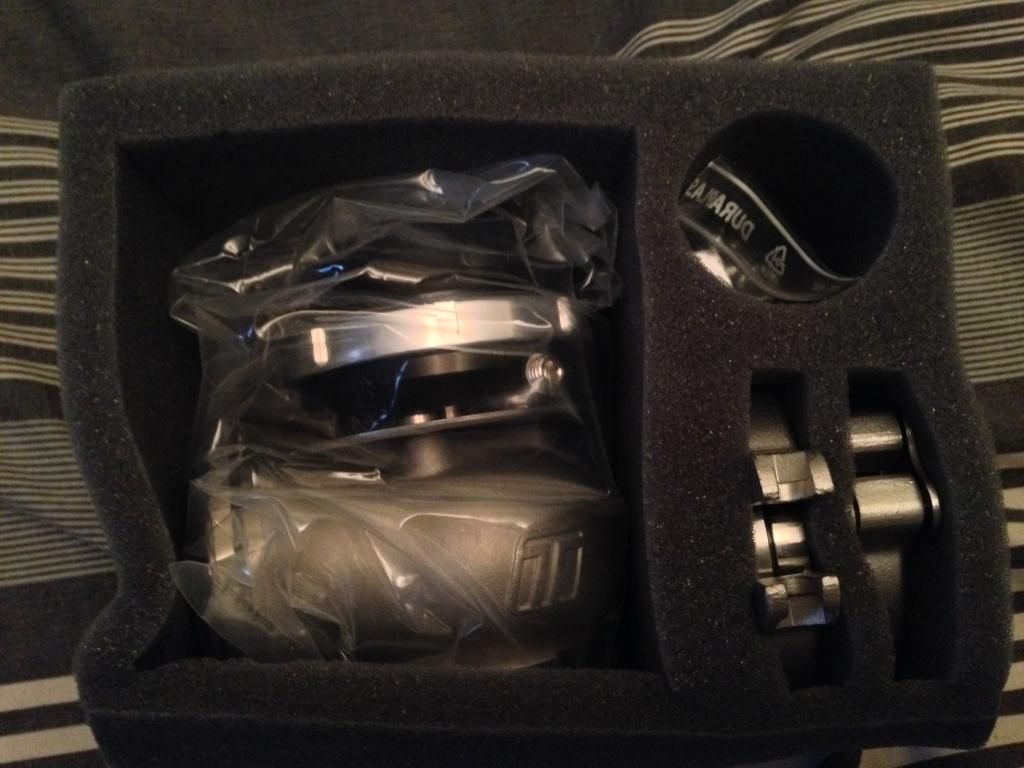 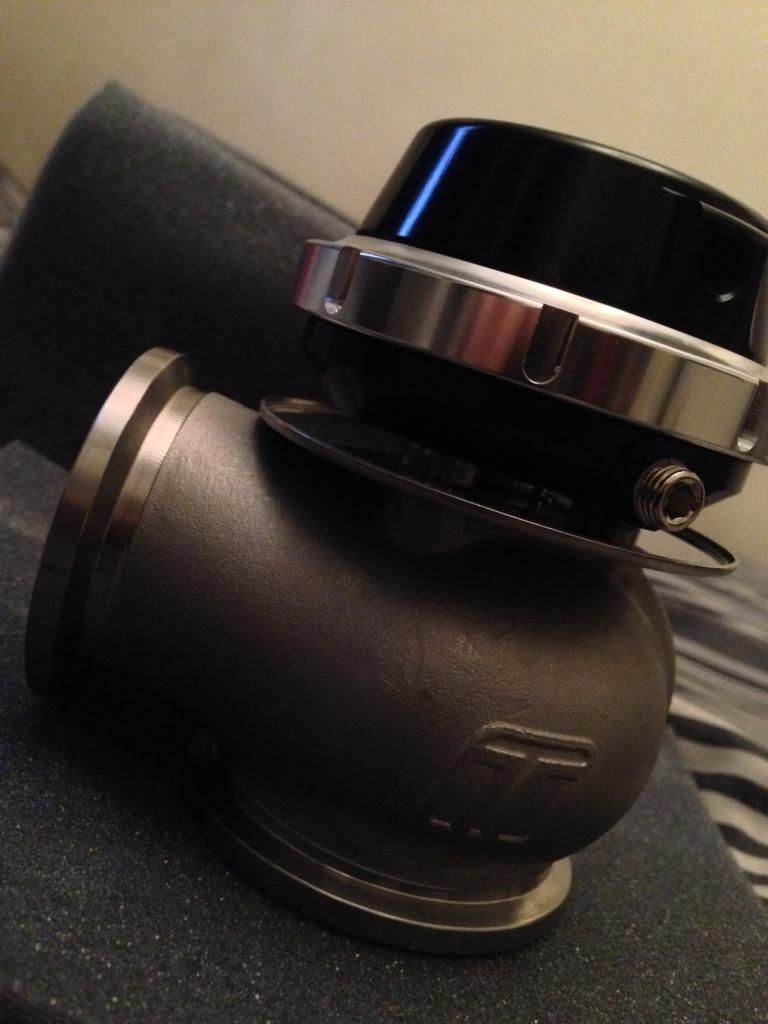 Another selling point was the 45mm V-Bands it uses, allows for quick and easy changes and alterations ☺ The Clutch So far ive sorted how to blow lots of air nicely, now I needed to decide how to get that power down to the ground. My aim was a clutch that was above my requirements so I know it wont slip and will handle some aggressive clutch kicks, as im not interested in high power, handbrake entry drifting. I still want to retain the proper way, a flick and a kick! So after speaking to a number of people around the world who have pretty decent SR20’s, I settled for an OS Giken Super Single, then changed my mind as the id be running it near its maximum torque application so a twin plate has to be done, purely for the little metallic jingle they make upon start up!  I then settled for an STR Twin Plate, a clutch that its optimized for the street but then I was recommended the OS Giken TS2BD clutch, which in laymen’s terms, a Dampened Twin Plate clutch. Ive stuck with a sprung clutch just to ease the box a bit, even though the hefty 350z box is going in :smoking: I then settled for an STR Twin Plate, a clutch that its optimized for the street but then I was recommended the OS Giken TS2BD clutch, which in laymen’s terms, a Dampened Twin Plate clutch. Ive stuck with a sprung clutch just to ease the box a bit, even though the hefty 350z box is going in :smoking:So ordered from Japan, wasn’t too long til it was here. Only way to know it was genuine too; 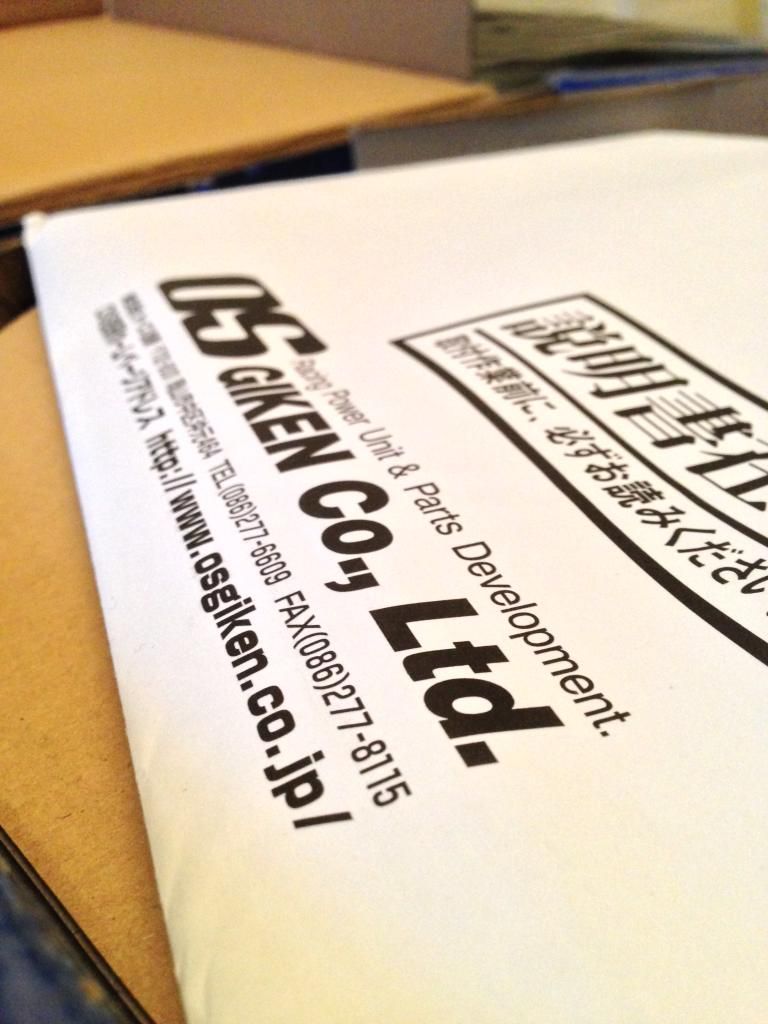 Some proper snazzy stickers which im sure ill whore off somehow; 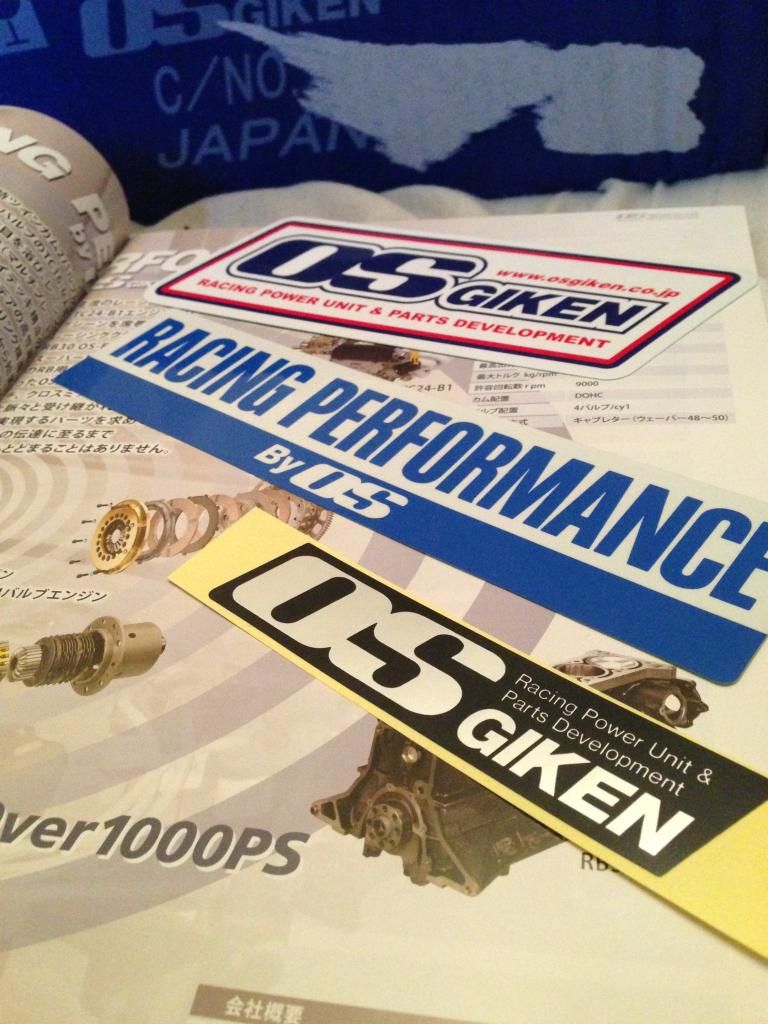 It even has its own proper instruction manual, albeit in Japanese. Hey, it makes me feel cool haha 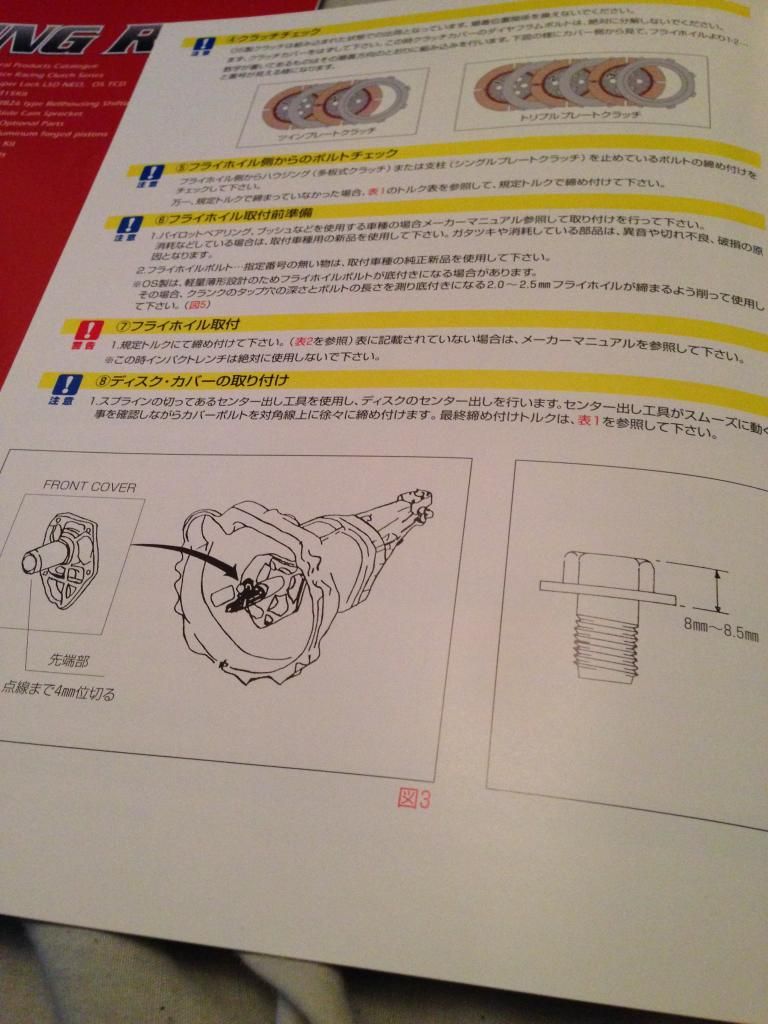 SR20? Check! 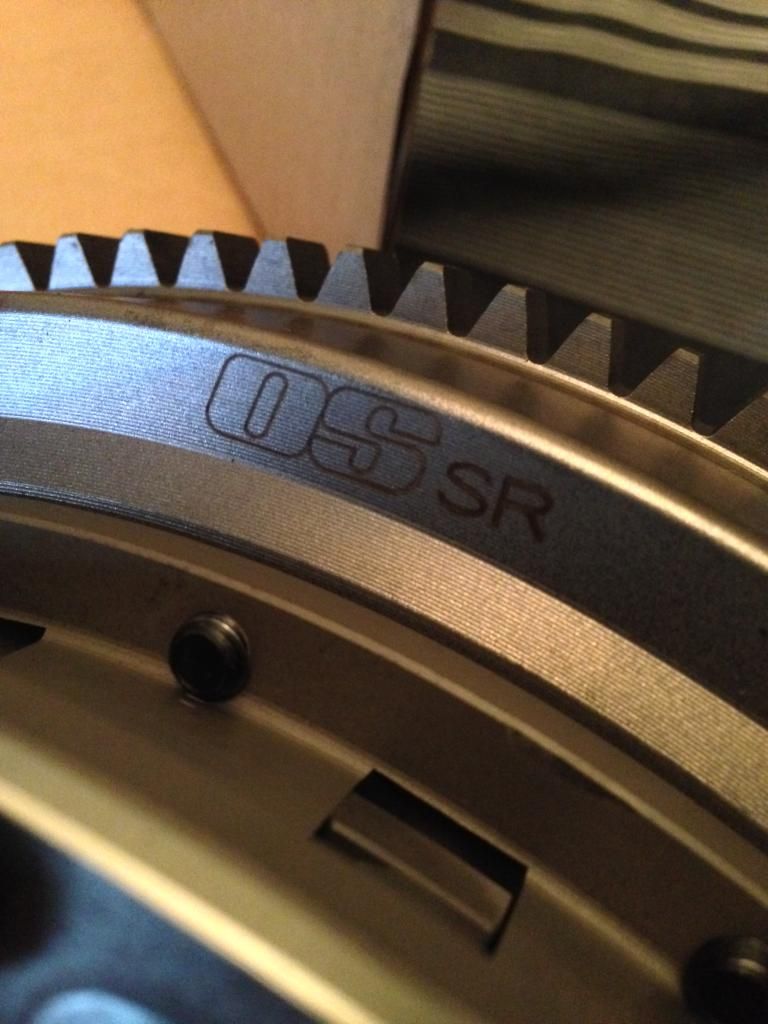 The money shot! 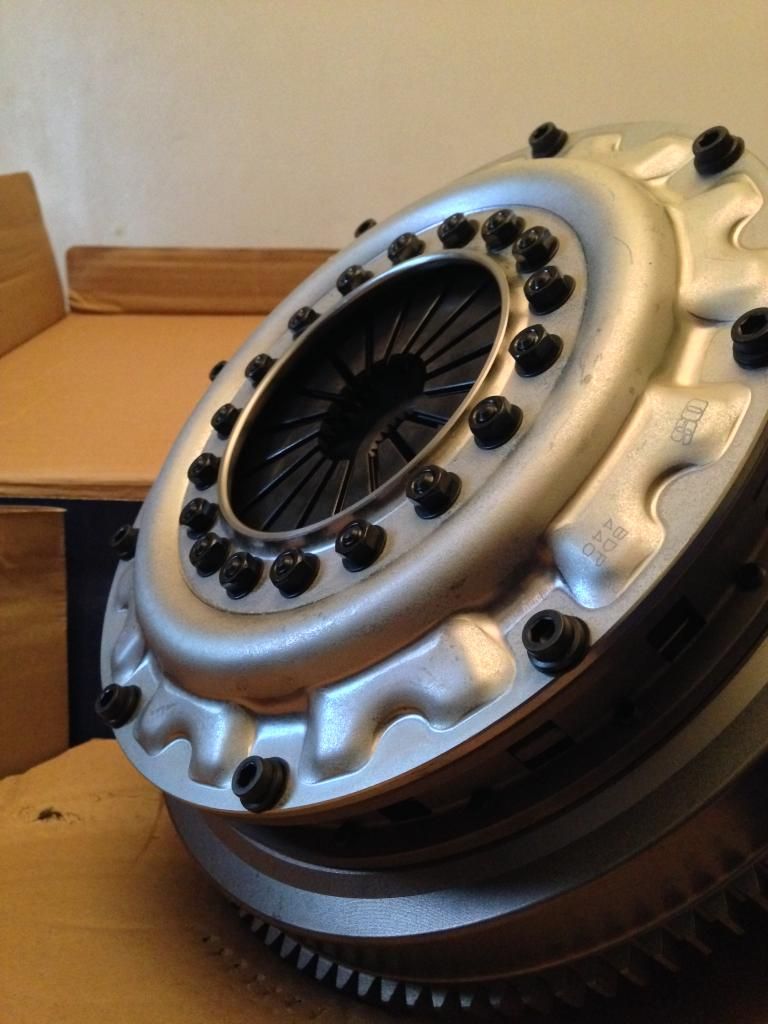 Standard Flywheel bolts are stretch bolts and should* only be used once, and whilst I have a fancy clutch it’d be rude not to run some proper flywheel bolts, so got hold of some ARP’s which’ll do the job nicely! 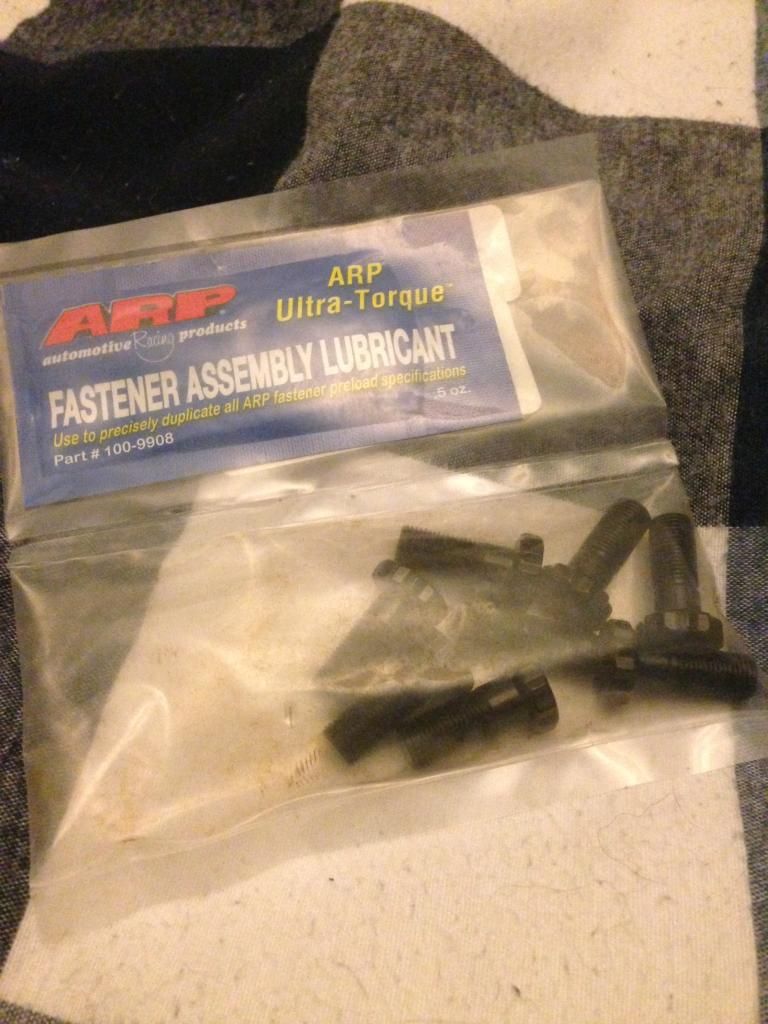 It sure is big, but it’ll handle what I throw at it and combined with the lightened flywheel, it should weigh around the same as the standard flywheel and clutch combo ☺ - - - Updated - - - Engine Management I hate running Air Flow Meter’s, even though ive never had any trouble with them you always hear non stop running issues which 99% tend to be down to the AFM’s, and id rather not run an old Z32 AFM anyway. So a MAP sensor based ECU was required, id considered the Link G4 as a friends car ran one on an RB and it ran sweet, but the JDM boy inside of me wanted a Power FC D-Jetro, just to have the controller in front of me :P Plus, Greg @ Protuner will hopefully be mapping this, so has loads of experiences with PFC’s and no doubt one of the best mappers in the UK so I have faith he’ll be able to push the engine to its limits with the ECU setup. So off some money went to Japan again and back came this;  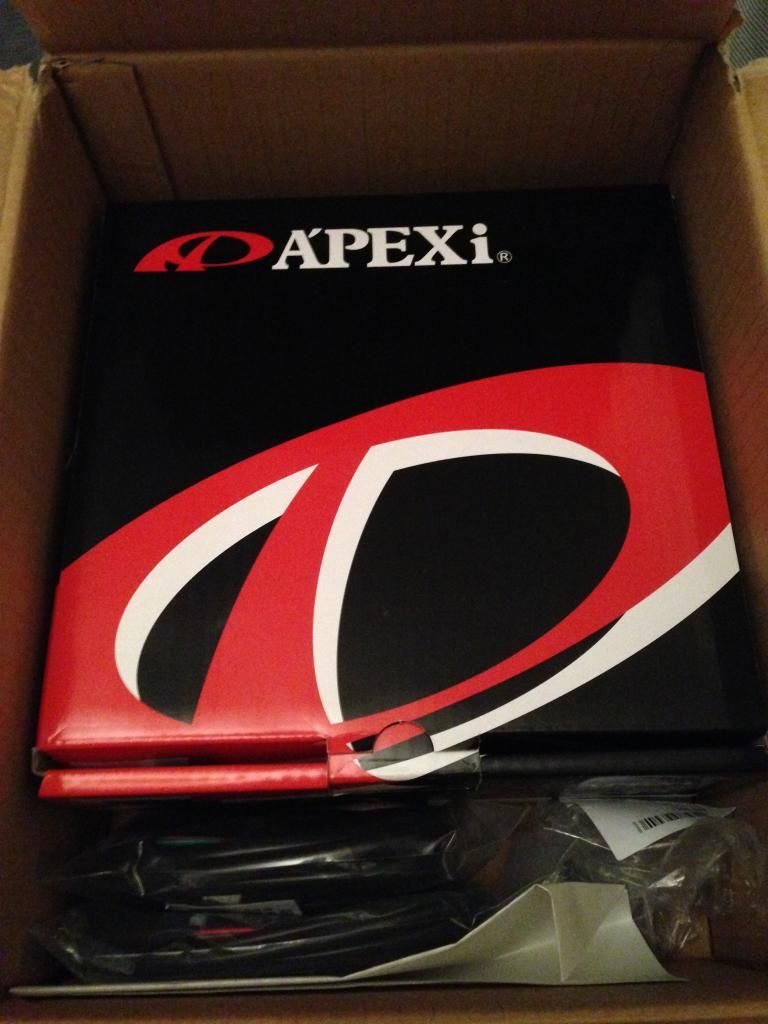 Came with the new funky controller too 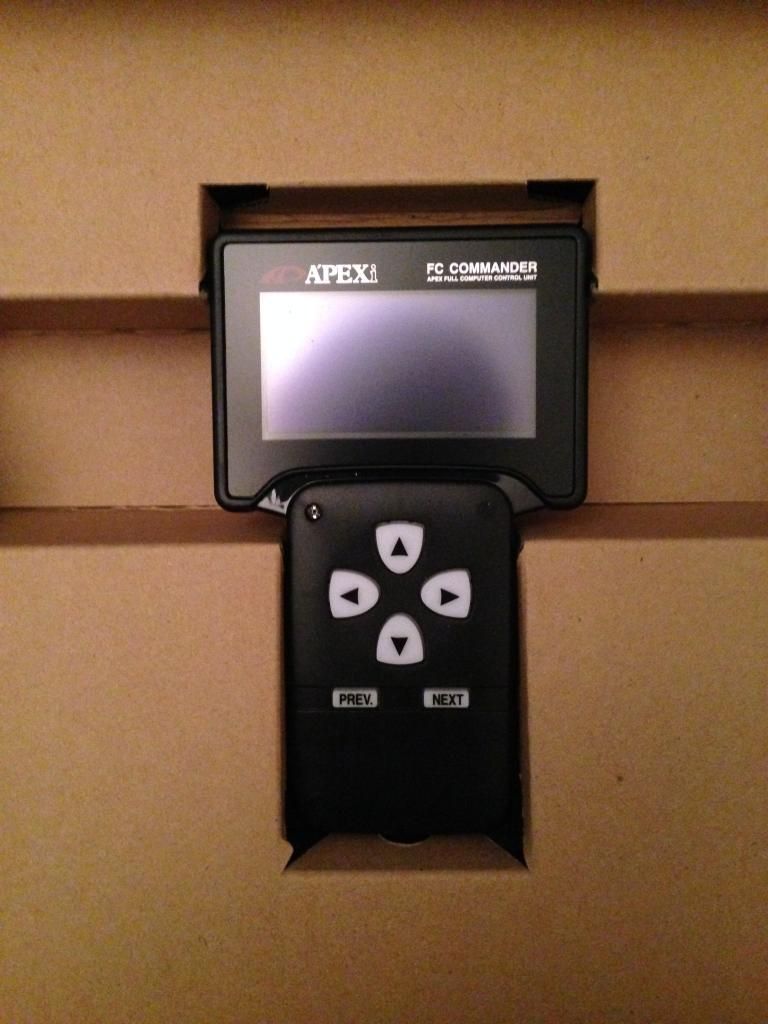 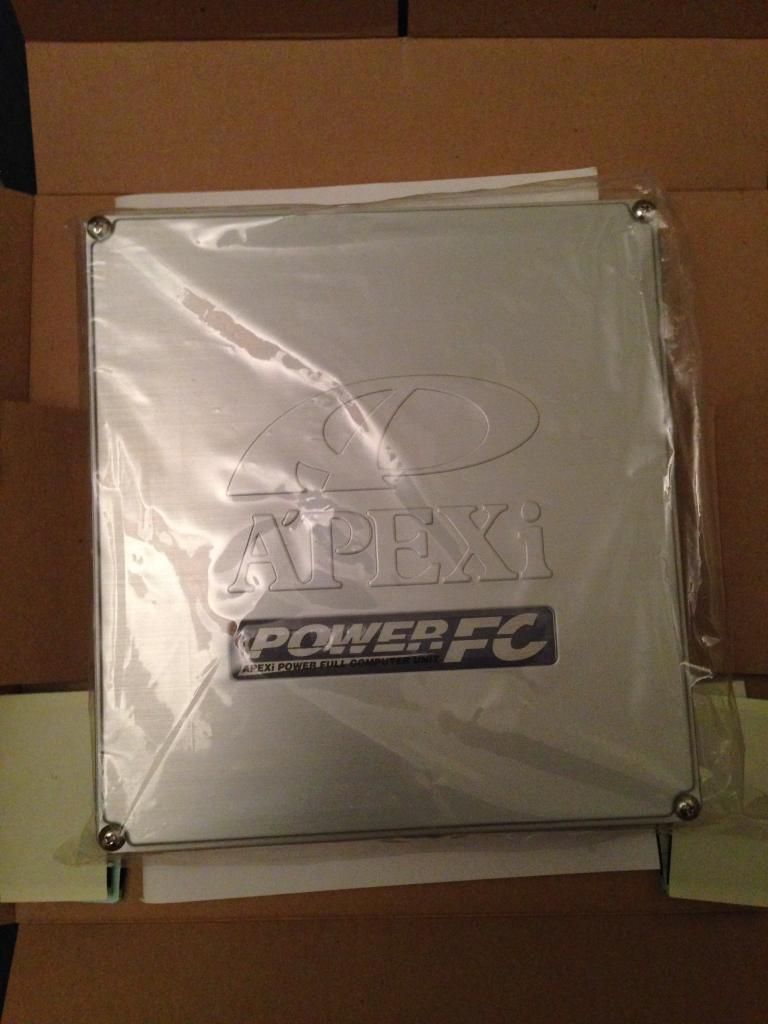 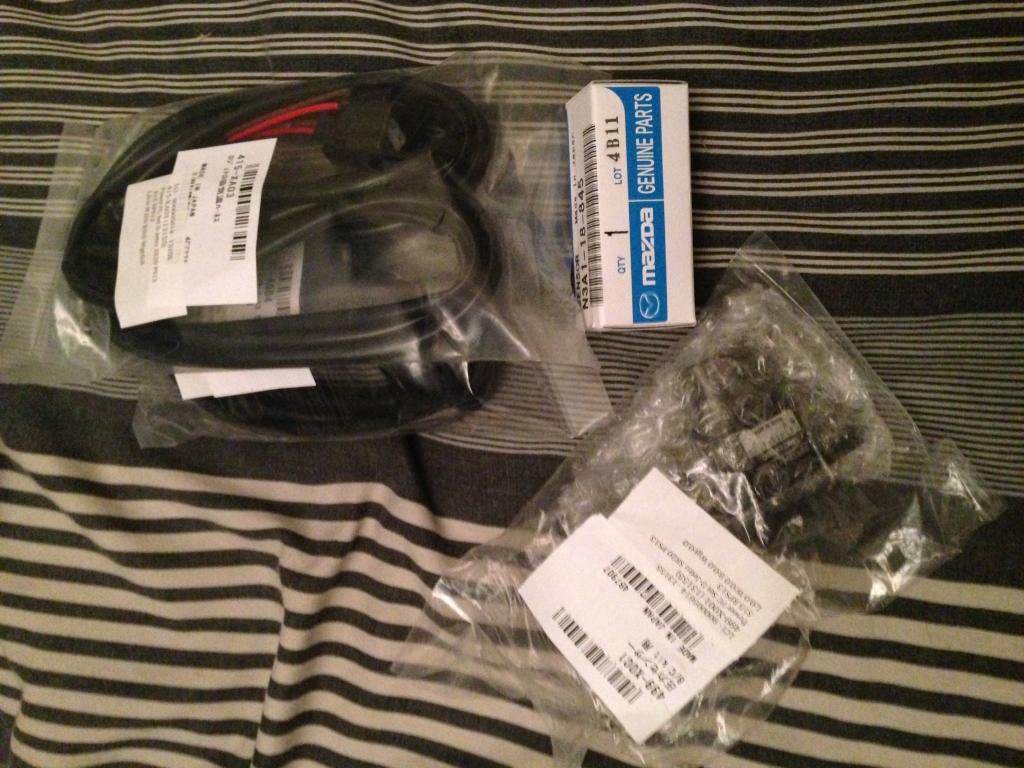 Whilst I bought my Wastegate form Enjuku, I also bought the Tomei Oil Block so I can ditch the standard water cooler block from factory. A key point of doing this is to eliminate the chances of the standard block cracking which would be bad! An since I have a Tomei love I had to buy one! 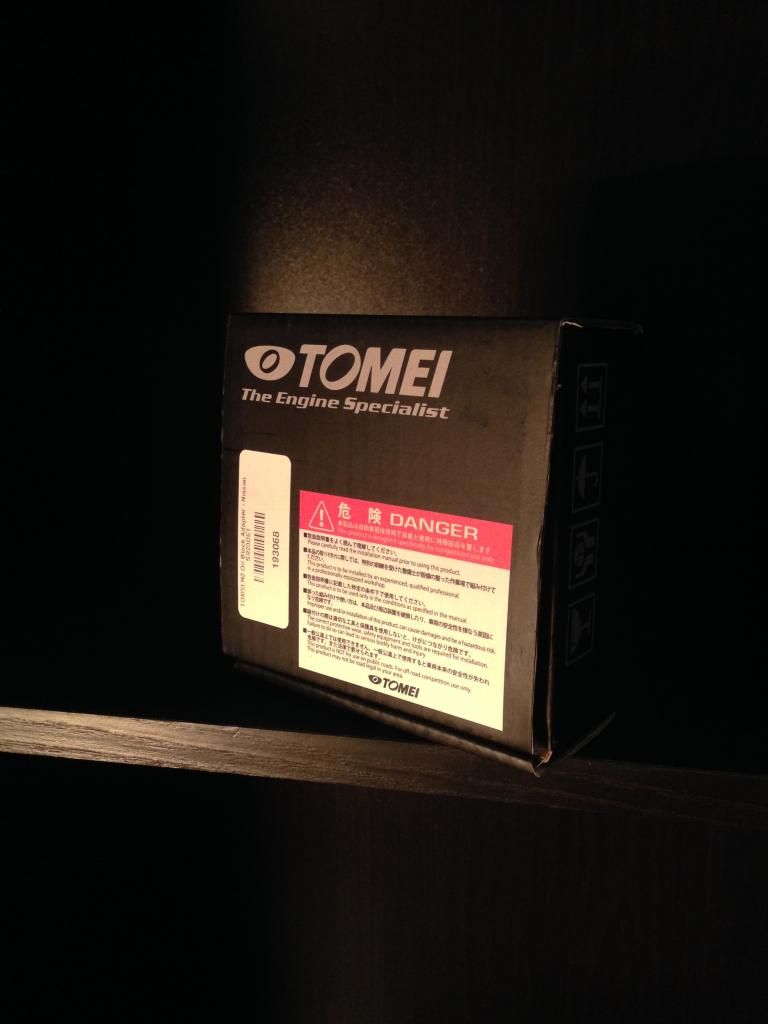 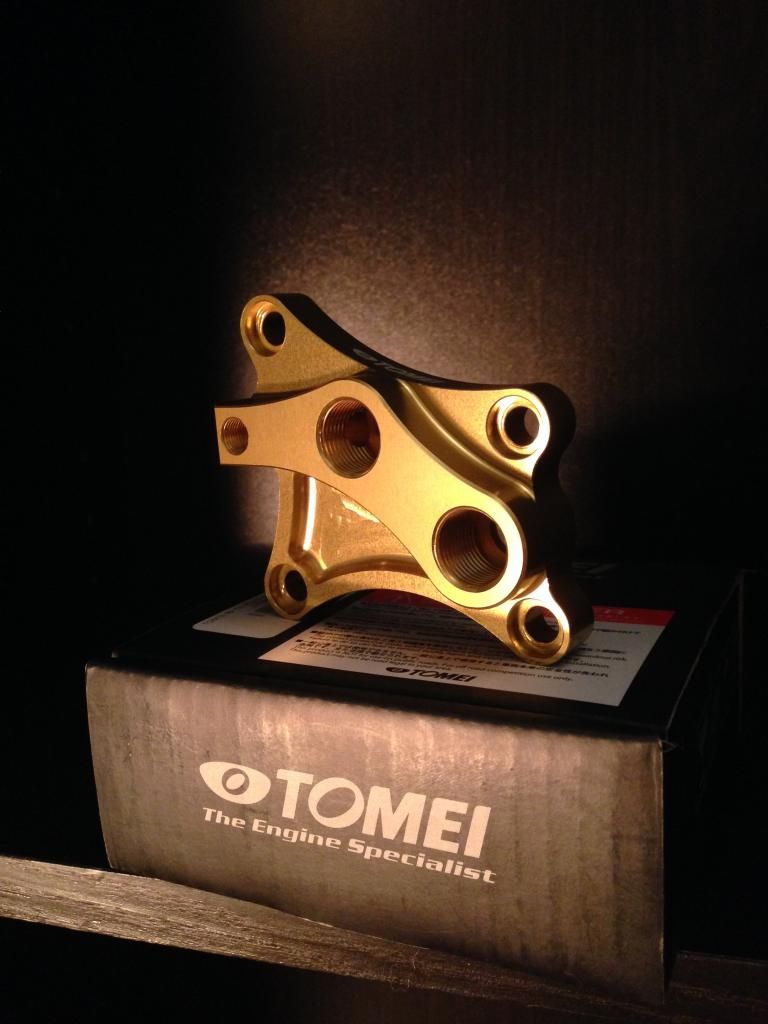 Quality is as you’d expect, second to none. I couldn’t help myself just staring at it to be honest, reminded the reason why I’d rather save that little bit longer and buy quality goods. Now I needed a sandwich plate as I want to run an oil cooler to make sure the SR stays at optimal temperatures, not that ive had any ounce of temperature issues anyway. Prevention is key! So, ordered myself a GREX/Trust sandwich plate, again its beautifully made and everything about it looks like something id trust running my oil with ☺ 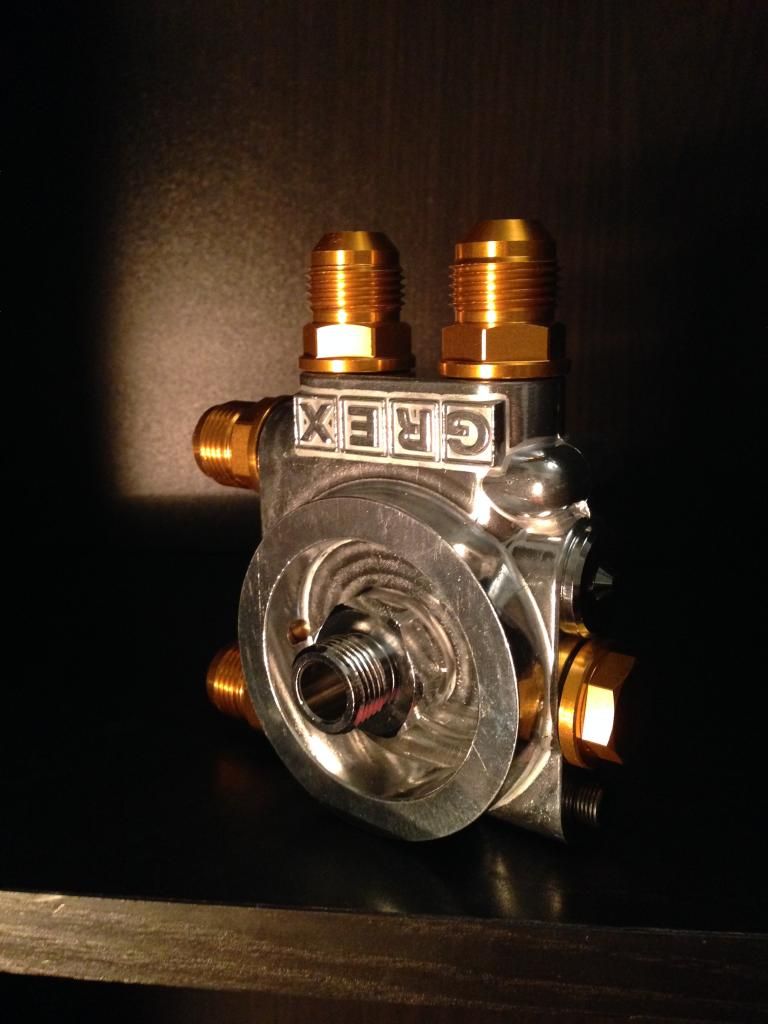 Just need to find somewhere to mount it the engine bay but im sure that’ll be easy enough. |
|
|

|
|
|
#17 |
|
Leaky Injector
Join Date: Dec 2012
Location: Bristol, UK
Age: 30
Posts: 92
Trader Rating: (0)
 Feedback Score: 0 reviews
|
Fuelling
The minimum size id want to run would be 740’s so naturally the thing to do would be to buy Nismo 740’s, which I did  Came from Japan again too, ensuring they aren’t knock off’s and brand new, so fingers crossed they’ll flow exactly what I want them too ☺ Came from Japan again too, ensuring they aren’t knock off’s and brand new, so fingers crossed they’ll flow exactly what I want them too ☺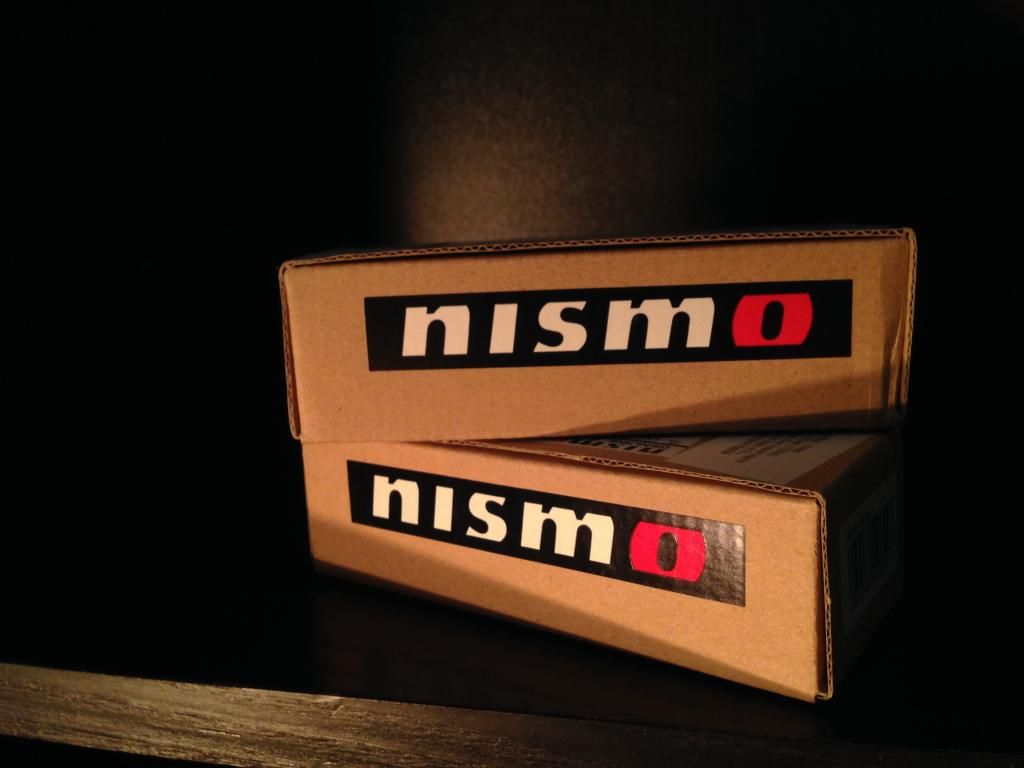 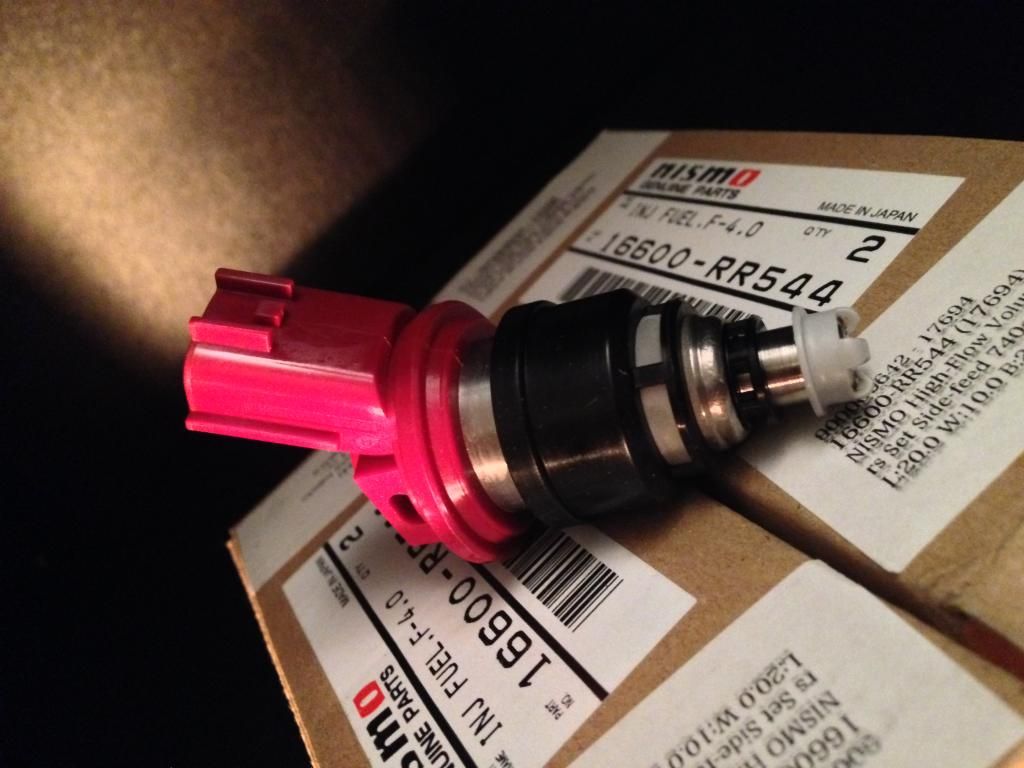 I couldn’t just leave it there now could I?! I decided to run a Fuel Pressure Regulator too, purely so if its needs upping it can, or whether I want to monitor it, I can ☺ Plus, if I can upgrade from the stock regulator, why not! So bought a Tomei Type L FPR, Hudson runs one and advised to go for the larger diaphragm version too ☺ 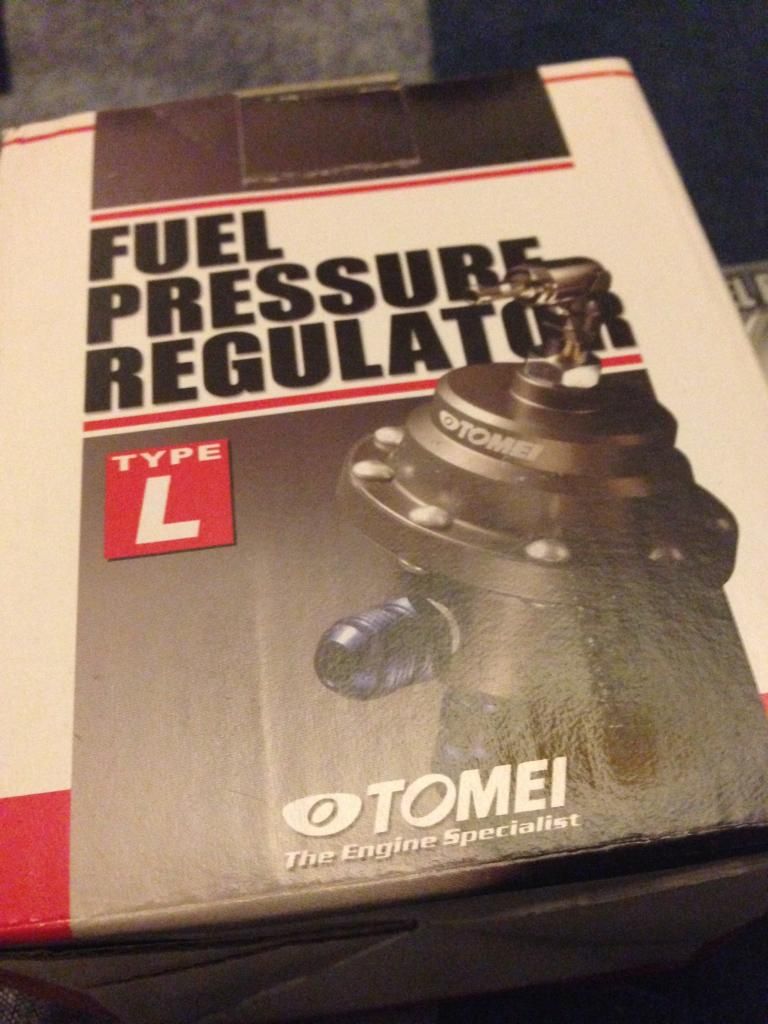 Ordered a few fittings to attach it to the stock fuel rail too, and whilst I was there a small Tomei Gauge so I can easily monitor the pressure. 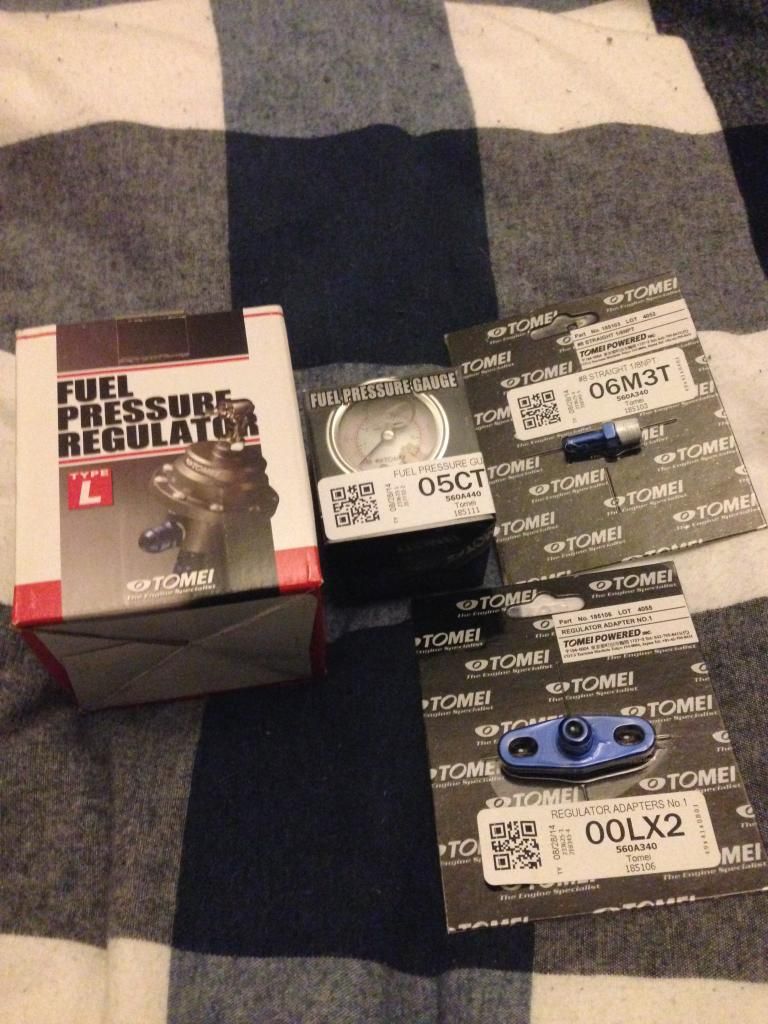 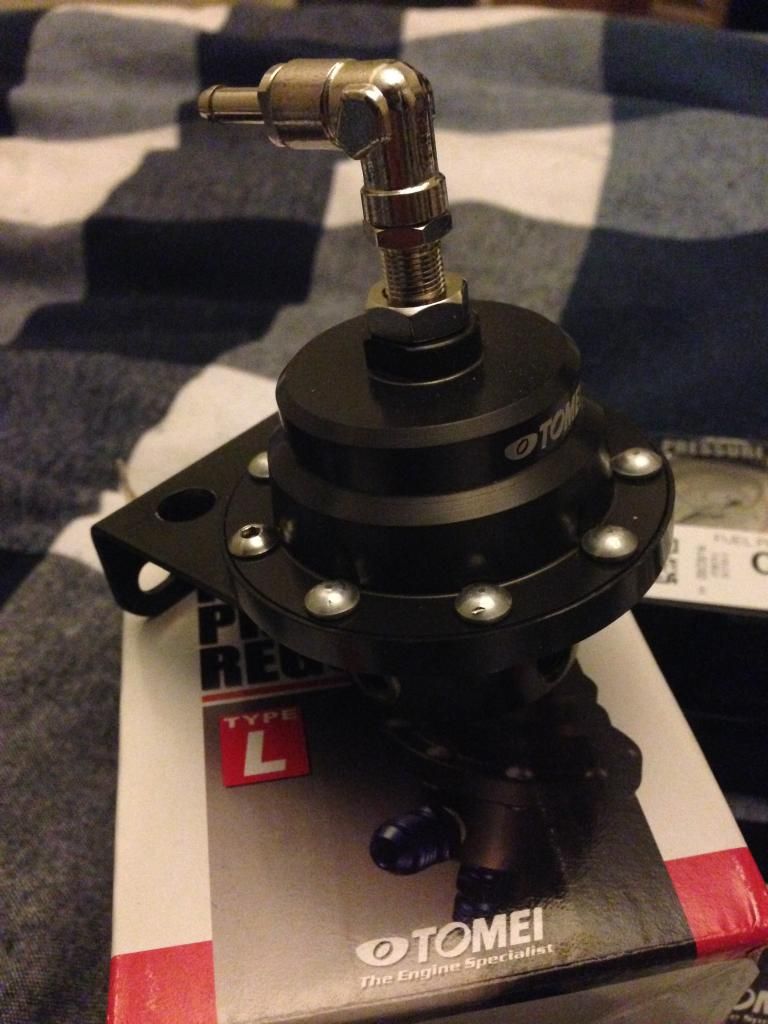 The engine will be having a “slight” refresh so to speak  Something I was intrigued about was the Mazowrx Timing Chain Tensioner. The stock tensioner is purely oil pressure activated, may be a good thing, but can also be a bad thing too. Plus with stiffer valve springs it can cause excess wear on the standard tensioner, so why not run a fancy billet tensioner from the SR20 gods that are Mazworx in the USA?! Seriously looks awesome in the flesh! Something I was intrigued about was the Mazowrx Timing Chain Tensioner. The stock tensioner is purely oil pressure activated, may be a good thing, but can also be a bad thing too. Plus with stiffer valve springs it can cause excess wear on the standard tensioner, so why not run a fancy billet tensioner from the SR20 gods that are Mazworx in the USA?! Seriously looks awesome in the flesh!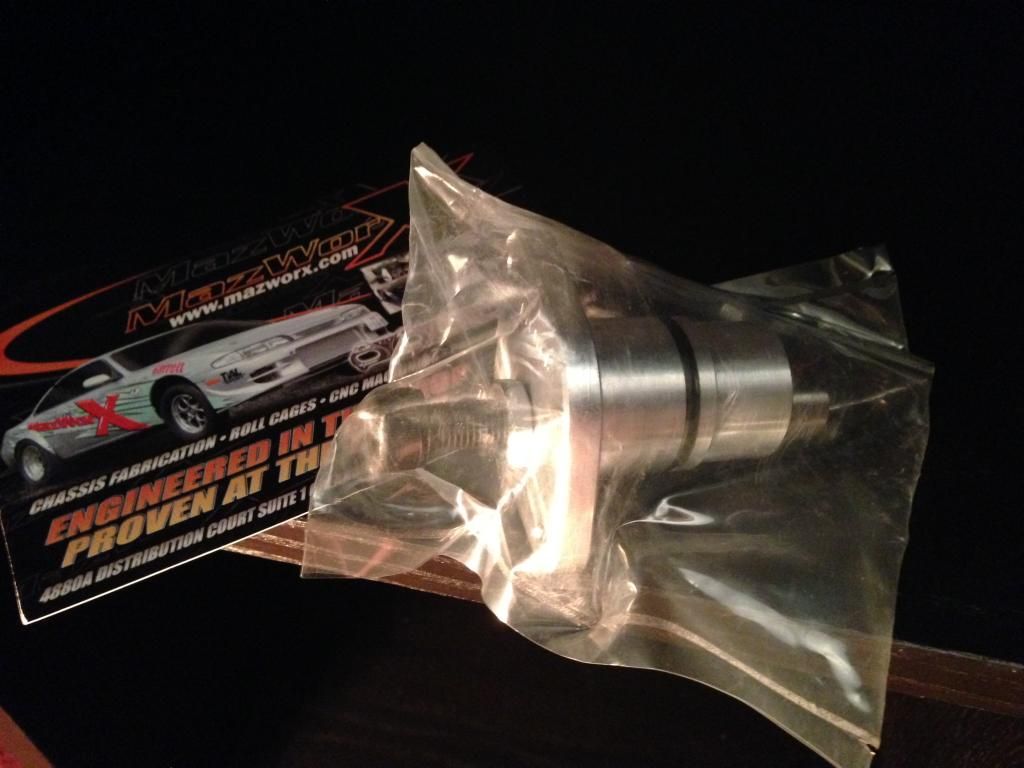 |
|
|

|
|
|
#18 |
|
Leaky Injector
Join Date: Dec 2012
Location: Bristol, UK
Age: 30
Posts: 92
Trader Rating: (0)
 Feedback Score: 0 reviews
|
Valvetrain
Stiffer valve springs must mean CAMS! To really make the most of the TD06, cams are kind of essential to “wake” it up and make more power = more smoke right?! Haha. Well I had a set of 2nd hand 256 Poncams in my room for a while, plan was to use them with my T28 before things escalated. Sold them to a chap on here and swiftly purchased a pair of 260 Procams, with Brian Crower springs and titanium retainers. Hey, if your going to do it, do it right aye! 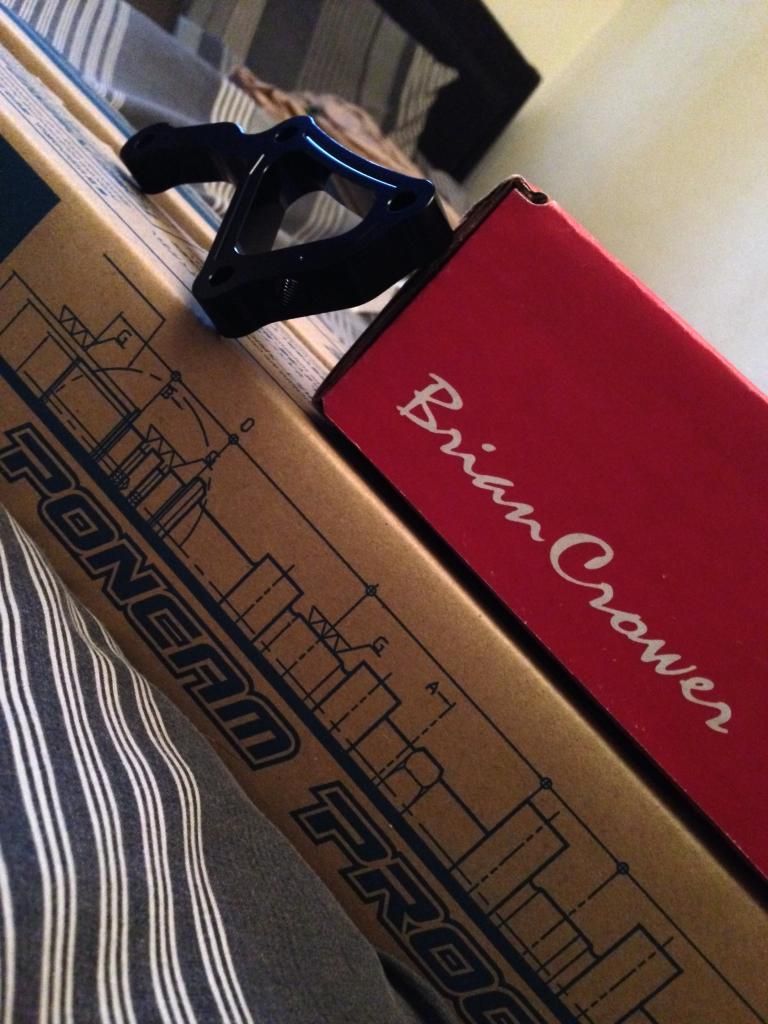 (Note the GKtech water neck adapter, im planning on running this for the Water Temperature gauge sensor instead of keeping the cut radiator hose at the top, something I always doubted to leak whilst out on track) 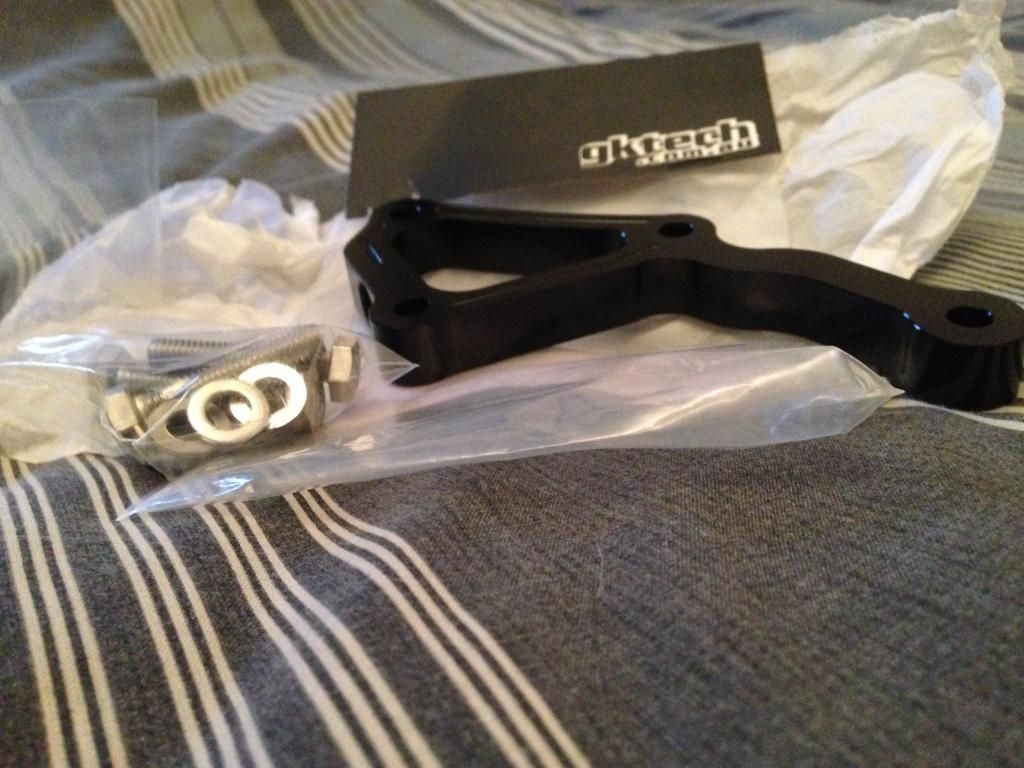 Anyway back to Camshafts; Titanium goodies! 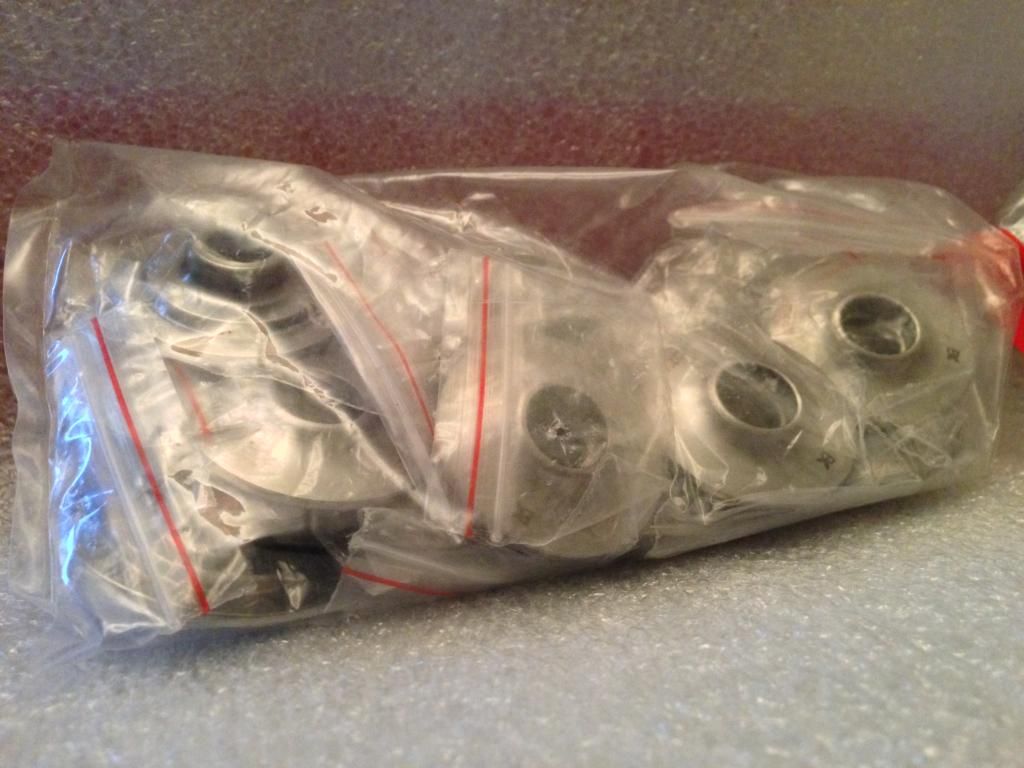 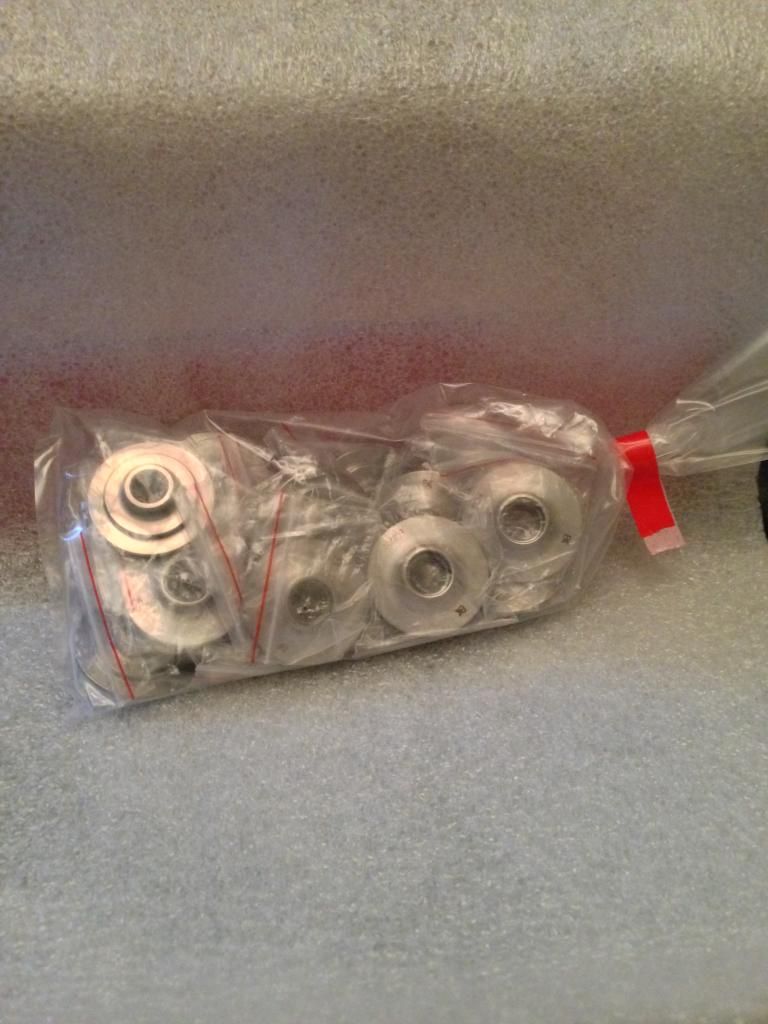 BC Springs; 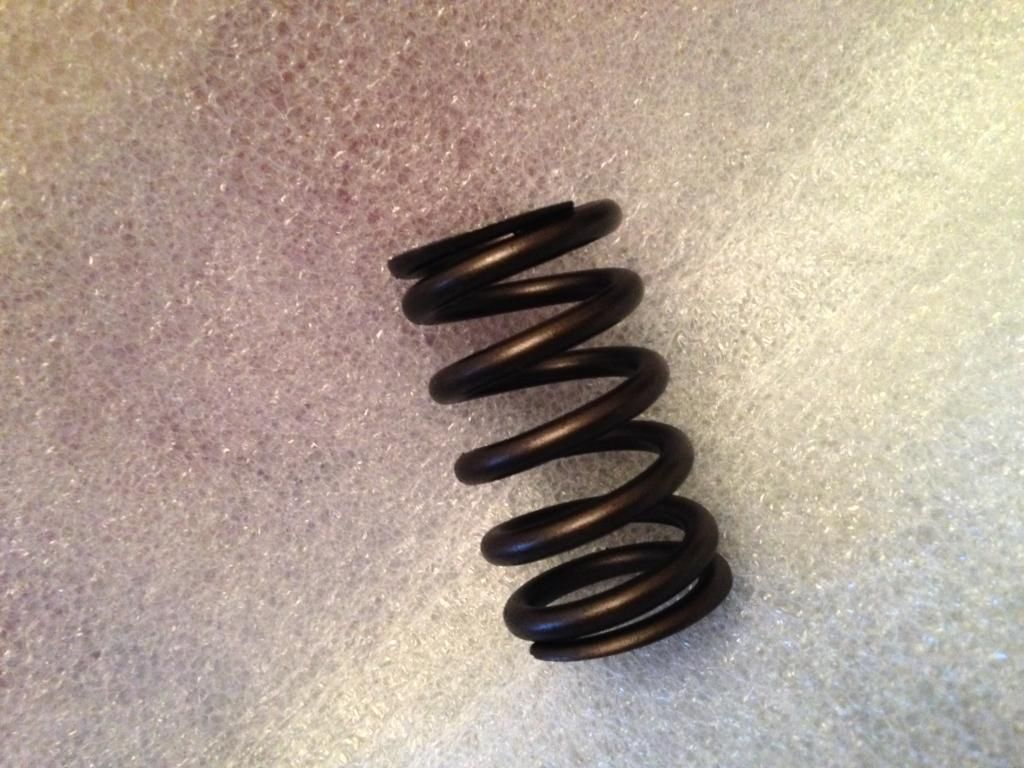 I think Tomei have something to say about the intelligence of some people!  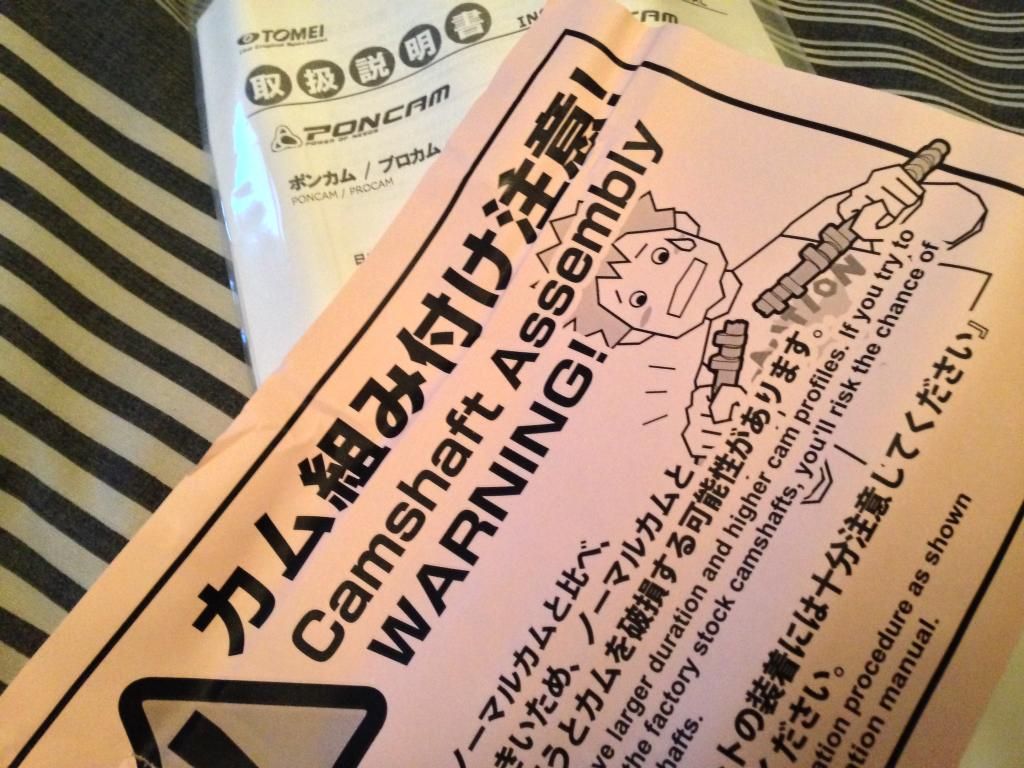 Really blurry picture unfortunately, but kinda “the money shot” showing the spec’s of the cam but im sure you guys know them anyway ☺  In order to get the most from the cams, Ive opted for adjustable pulley’s so Greg can really dial them in how he wants to and make those cams work hard! So, in reality there was only one brand I wanted, Yea, you guessed it. Tomei! 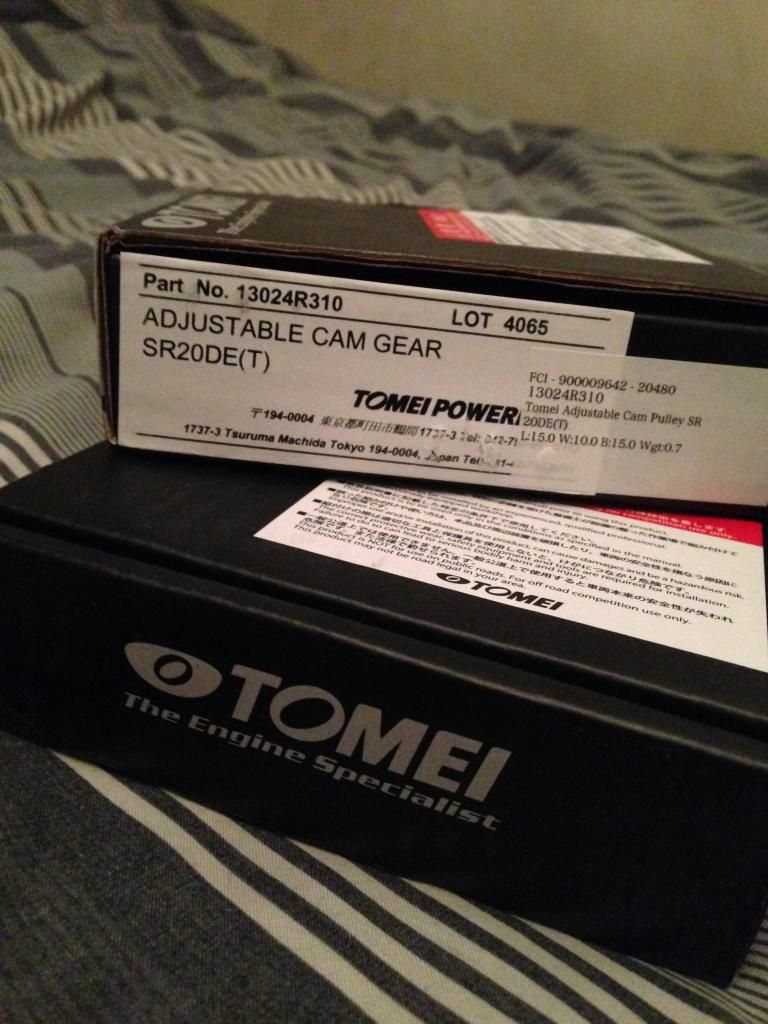 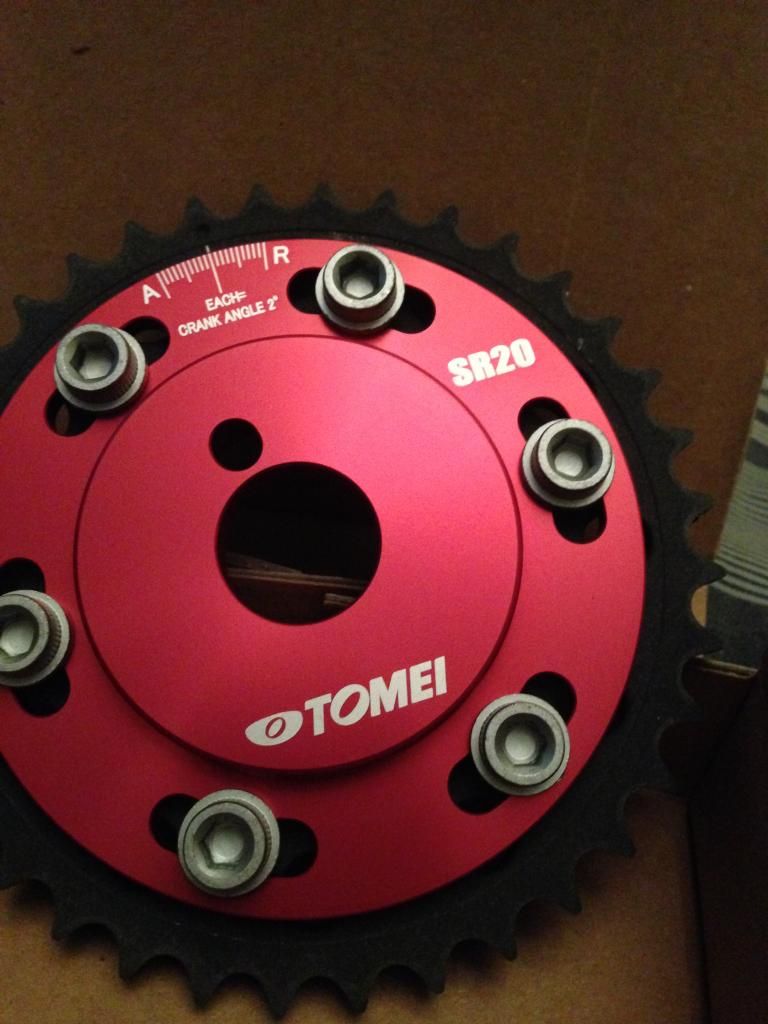 Im planning on deleting the VVT after speaking to Greg, so this was necessary. Whilst people will want extortionate amount for a Non-VVT camshaft bolt, I simply ordered one through FRSport for pennies! 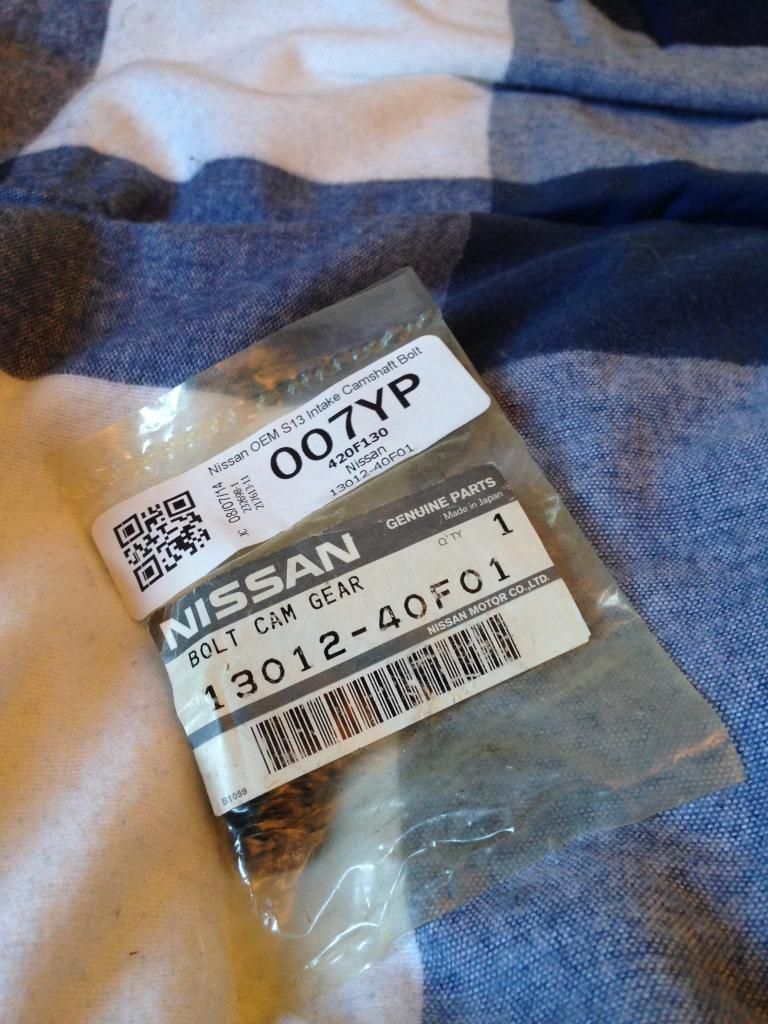 My Coilpacks have never let me down, but whilst I was ordering a few bits from Japan these kinda snuck into the basket for a steal of a price, whoops! 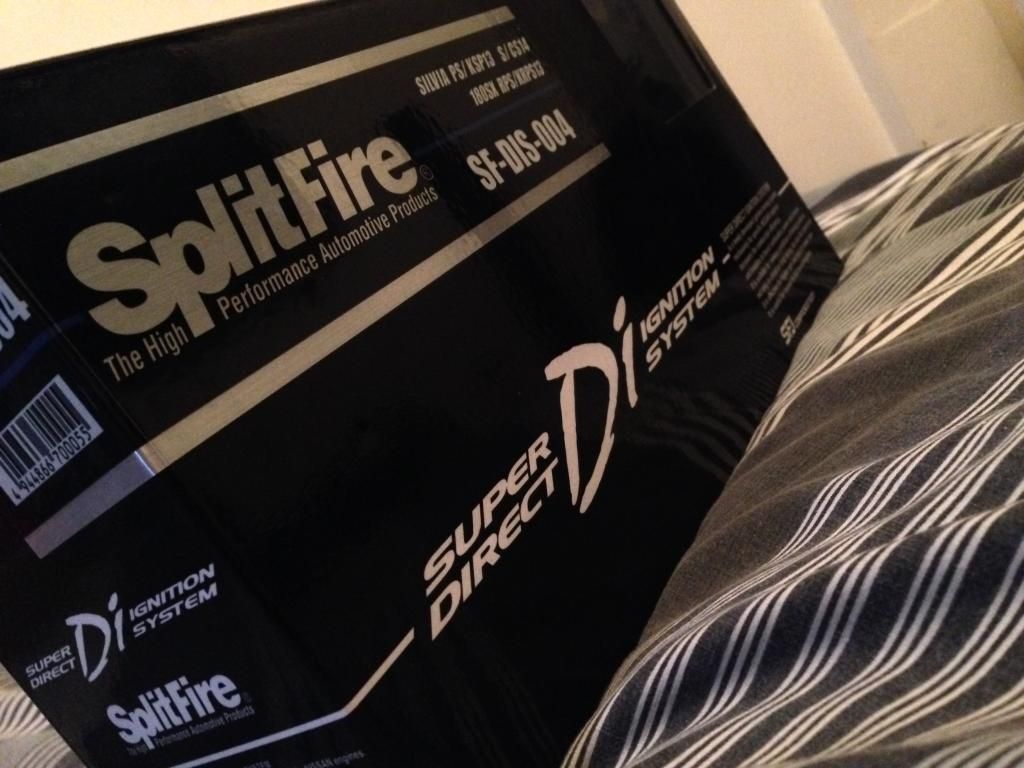 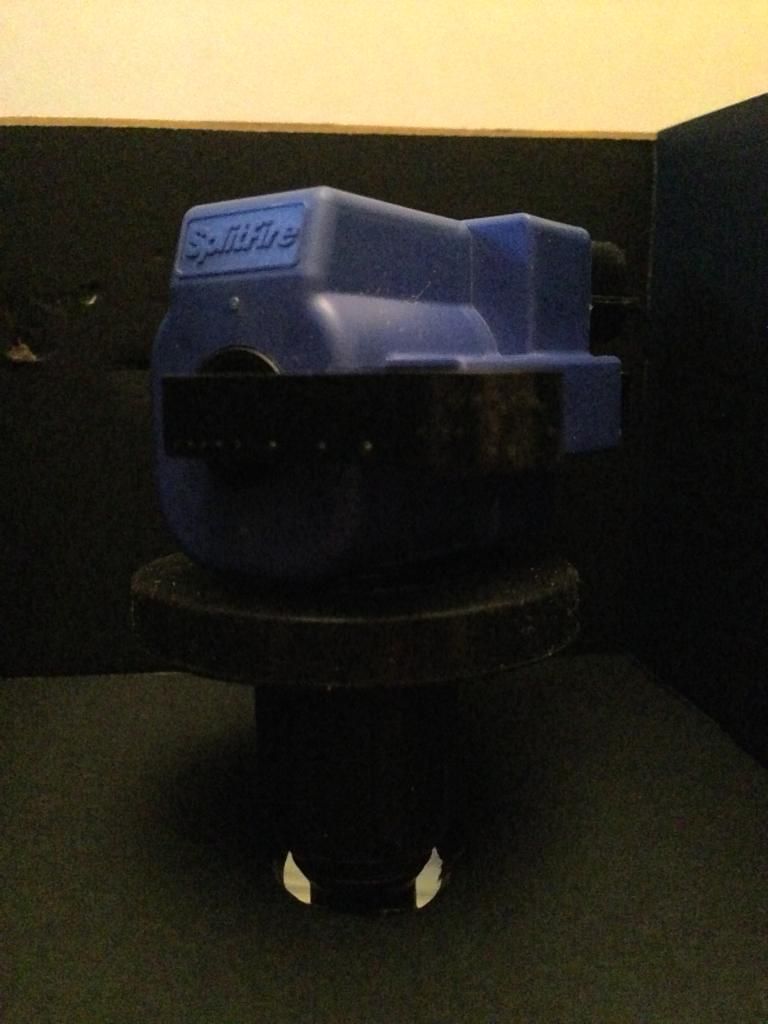 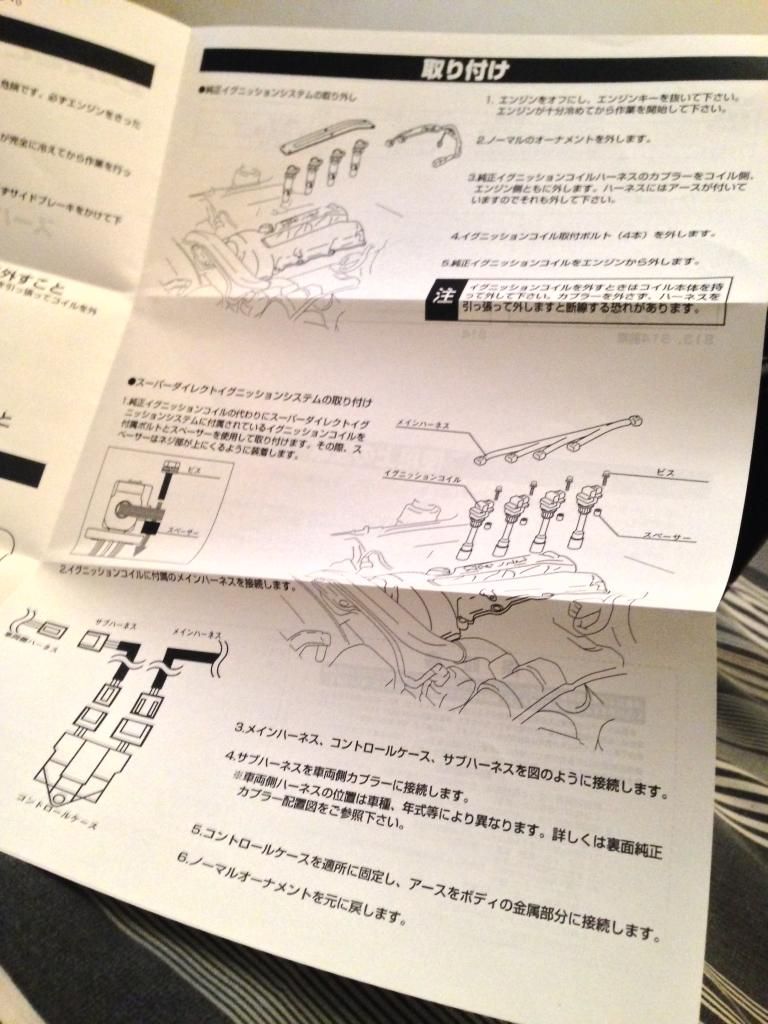 These along with new spark plugs should help me get a slightly stronger spark, which should make a tiny tiny bit more power but if anything, prevents the Coilpacks breaking down like the old Nissan ones start doing. My sticker game has been upped! 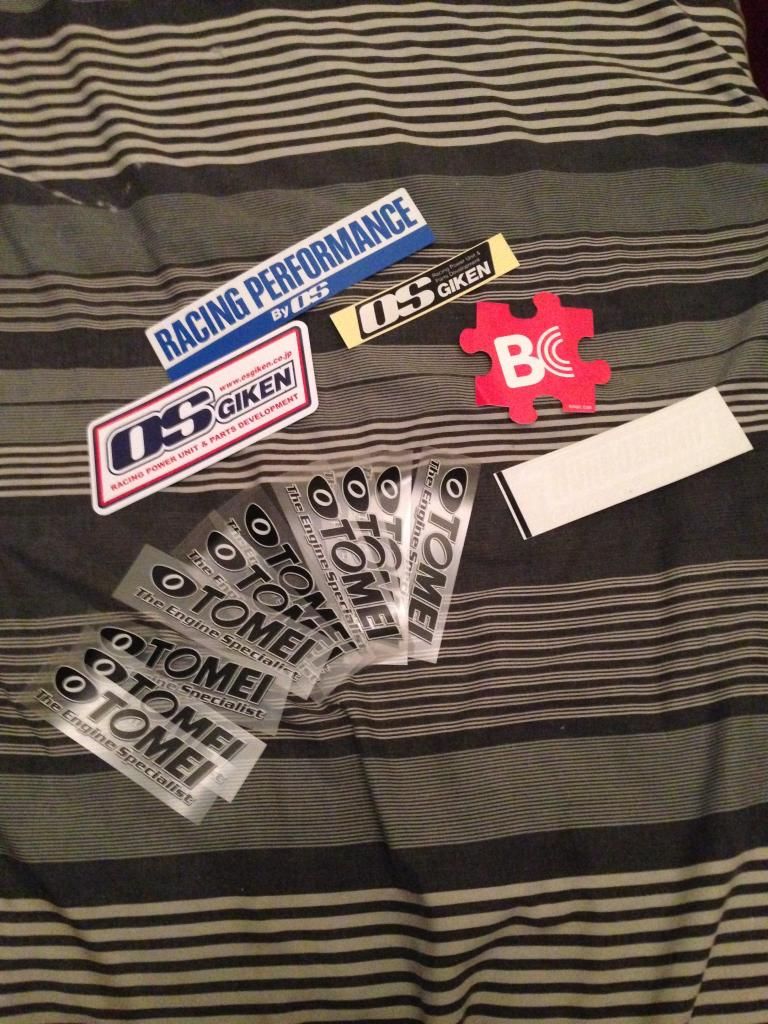 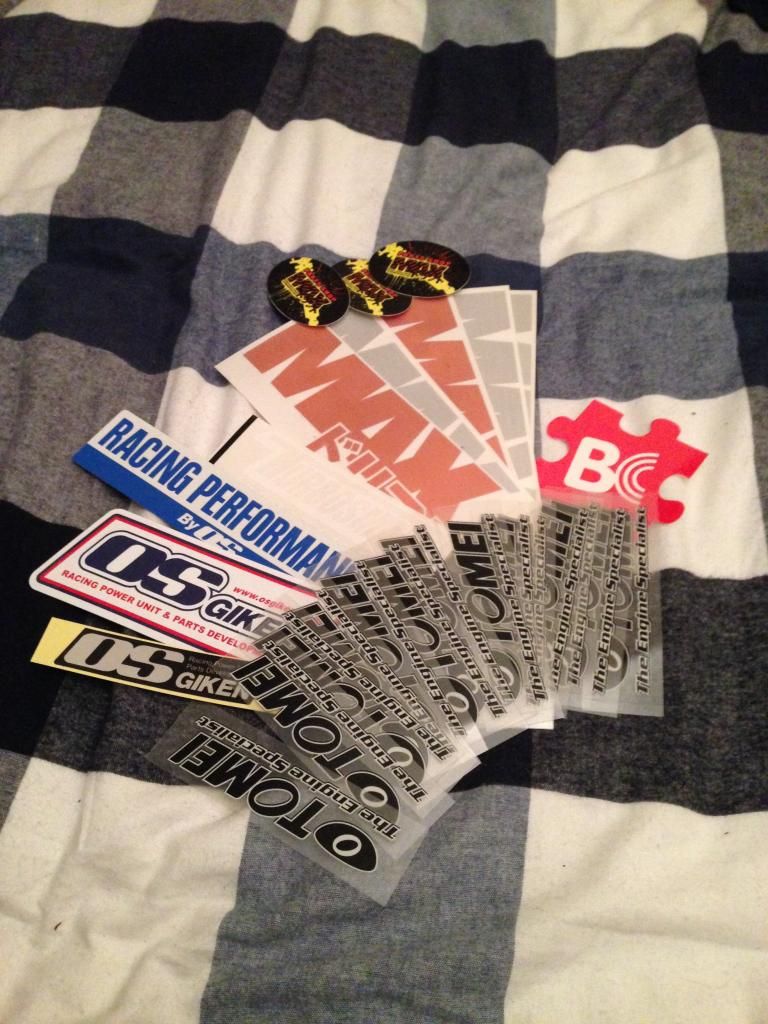 After running my S13 pretty low to the ground, my original sump had some small dents in it. Now, I could’ve either got an OEM replacement or spent the time bashing it straight again, but since this car is going to be initially aimed towards track duties, for the piece of mind I’d rather run a baffled sump to try and prevent any issues that could occur. So, more money went into Tomei’s pockets and in return they sent me this; 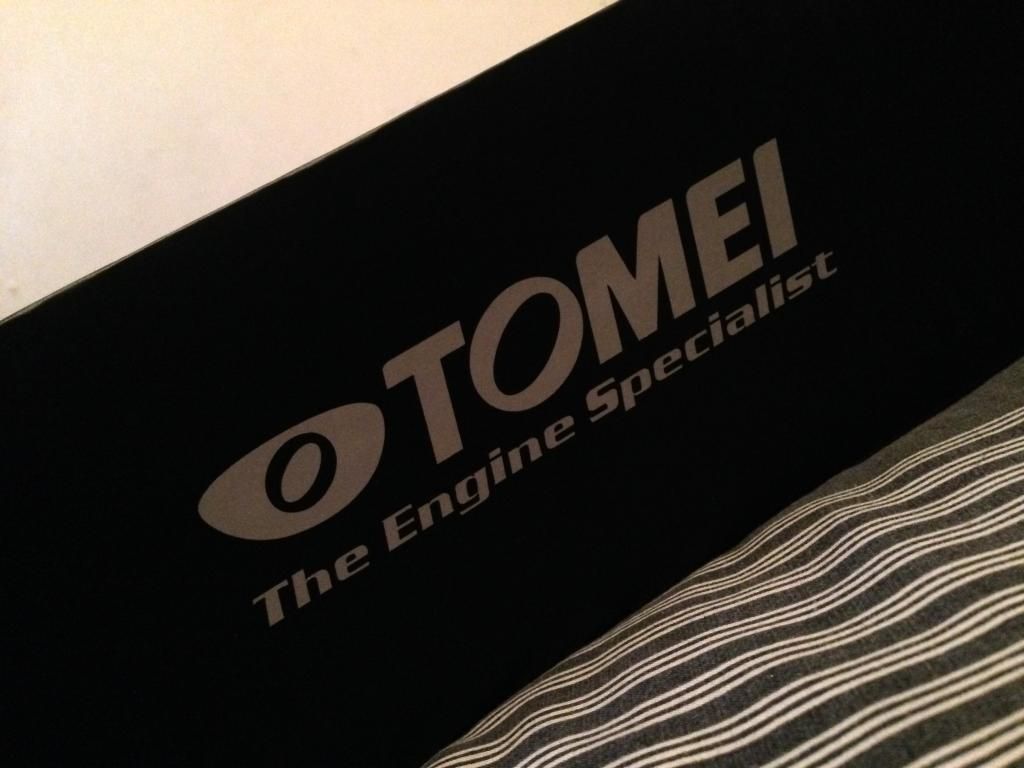 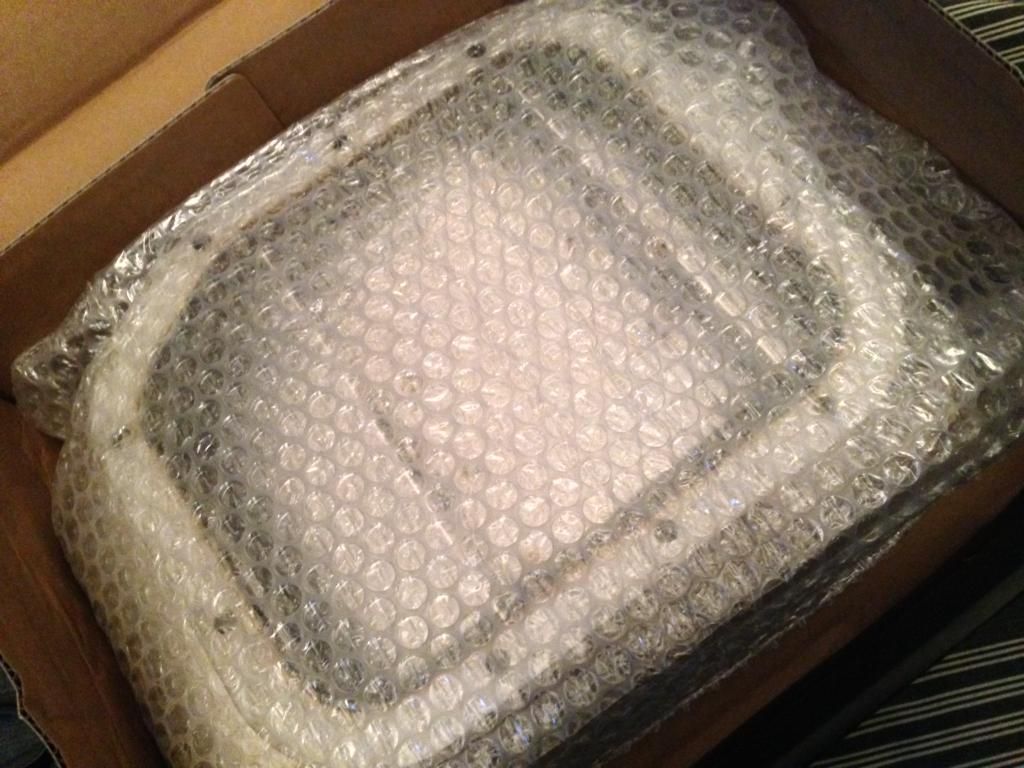 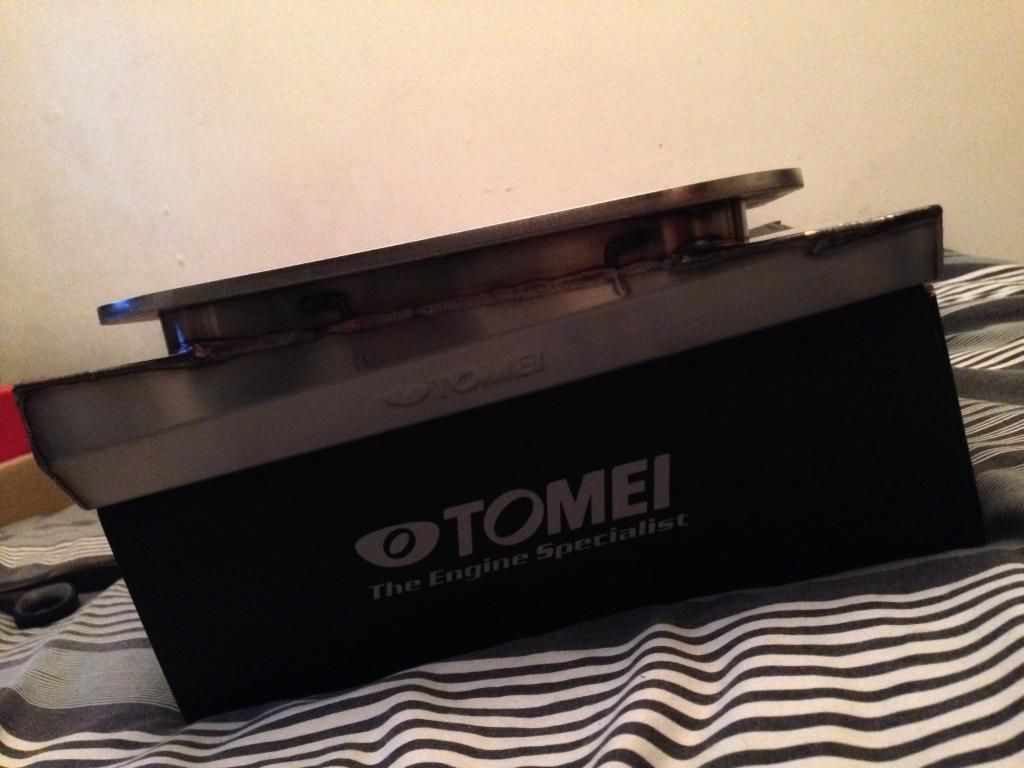 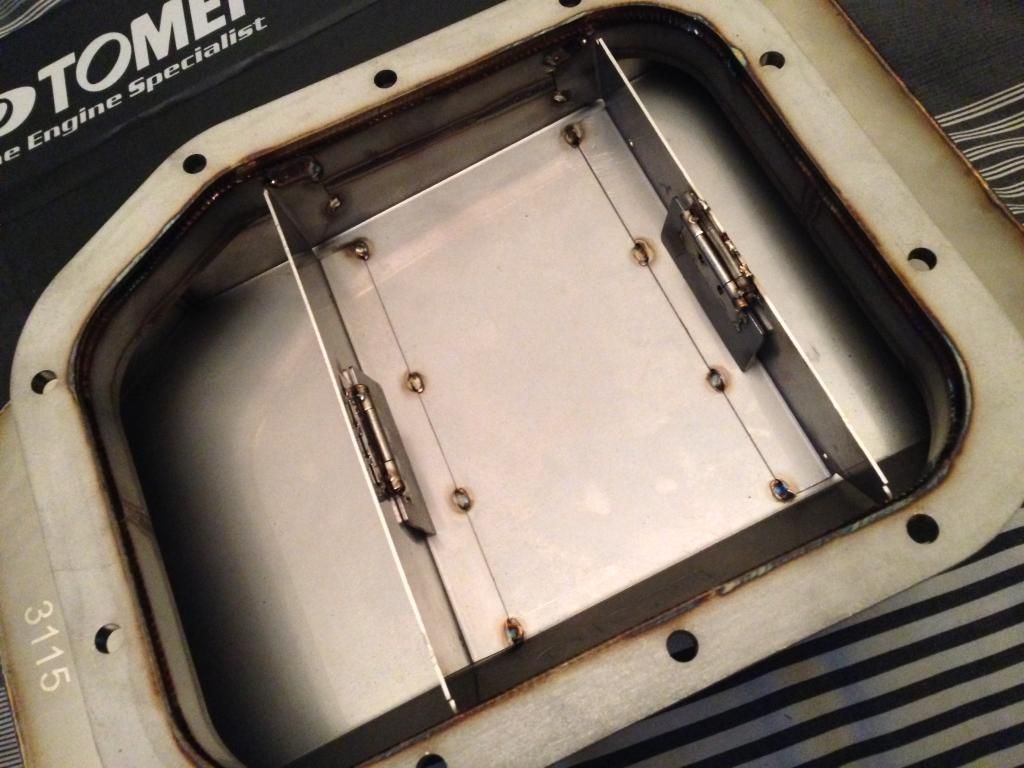 Now, if ive gotten my fact the right way around, Tomei had a problem a few years back with these sumps, where the baffles came loose and resulted in engine going pop. But after countless hours of researching the internet, the general consensus seems to be it occurred when they outsourced the manufacturing to China, which nowadays they do in Japan? Either way, me and a friend checked the baffles over and all the welds look spot on which is good news! (I also have a Tomei Oil Cap <3 which I forgot to take pictures of  ) )Managed to grab some fresh M8x1.25 studs from Horsham Developments to run in the manifold, pretty insignificant compared to the other stuff, but I need to attach the turbo somehow haha! 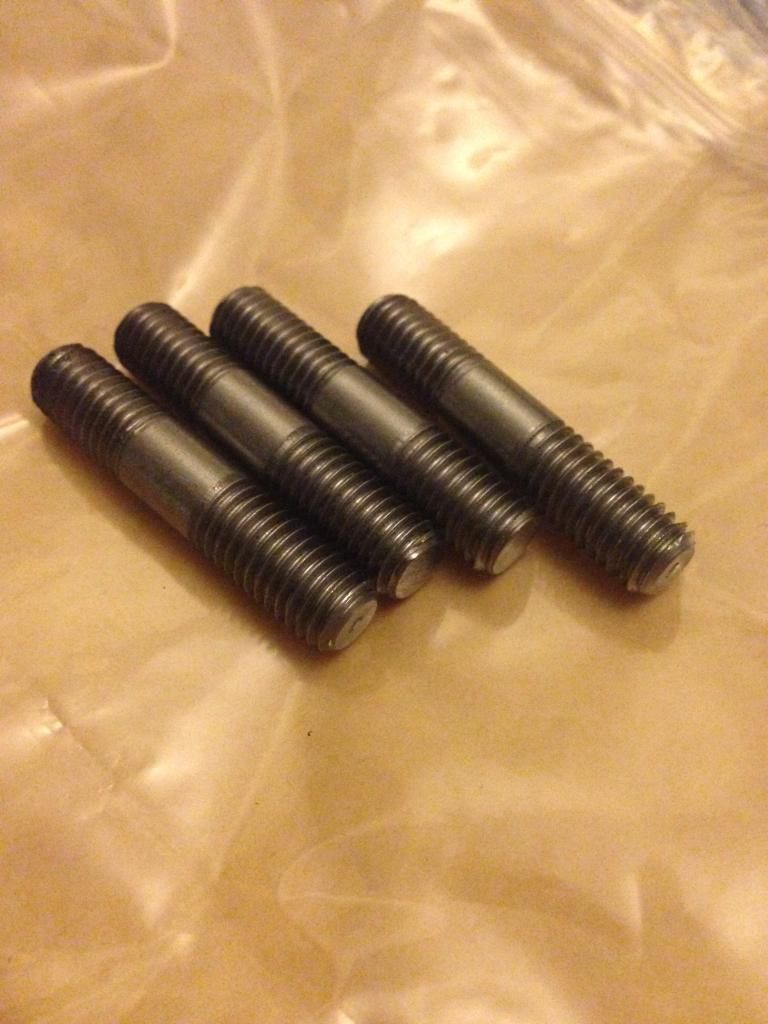 Quick test fit  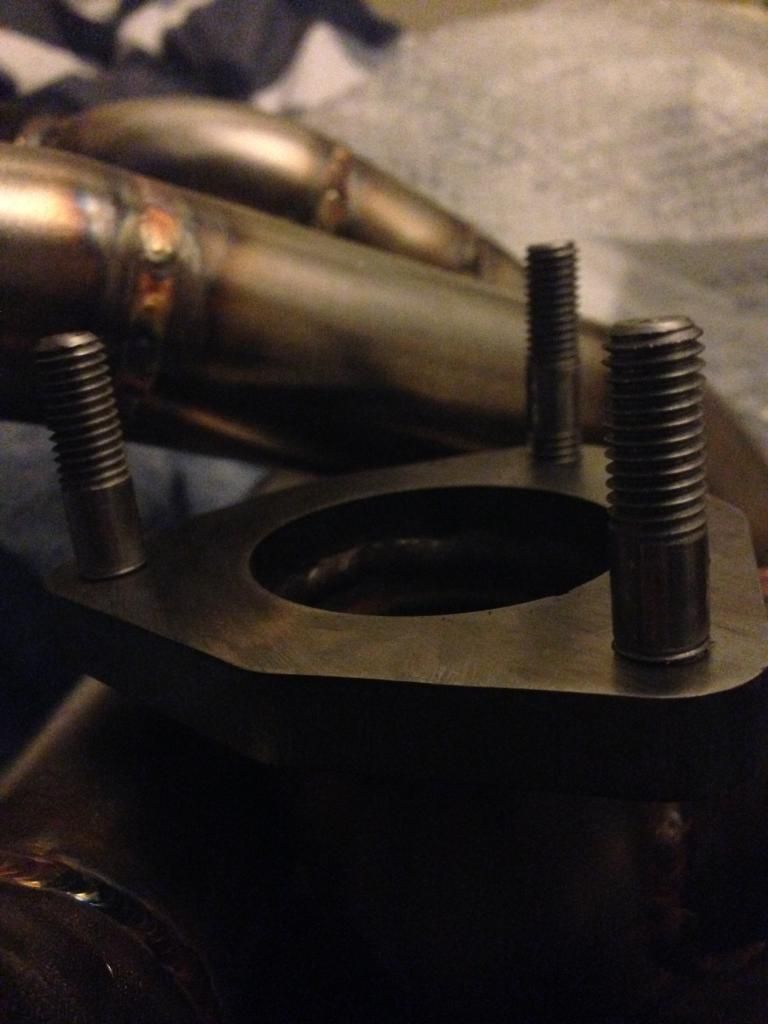 PS: Few more hints, its not going to be a Onevia no longer.. Oooops! Oh, and the car is booked in to Huxley in January for something.. |
|
|

|
|
|
#19 |
|
Leaky Injector
Join Date: Dec 2012
Location: Bristol, UK
Age: 30
Posts: 92
Trader Rating: (0)
 Feedback Score: 0 reviews
|
So a couple of packages turned up thanks to a good friend who's been a huge help getting parts for me. So the first package to arrive was from the 'states. My crank pulley was in an alright condition, but had seen much much better times and it looked a bit tired to be honest. After weighing up an OEM replacement pulley, I bit the bullet and went all out (as ever) and treated myself to an ATI Super Damper pulley. Something that tends to be used on pretty mental spec SR20's so should be pretty fitting here then
 Supposedly better than the OEM pulley in regards to the harmonics, but everyone that I had read who used one can't fault them one piece and recommends using them! Supposedly better than the OEM pulley in regards to the harmonics, but everyone that I had read who used one can't fault them one piece and recommends using them! 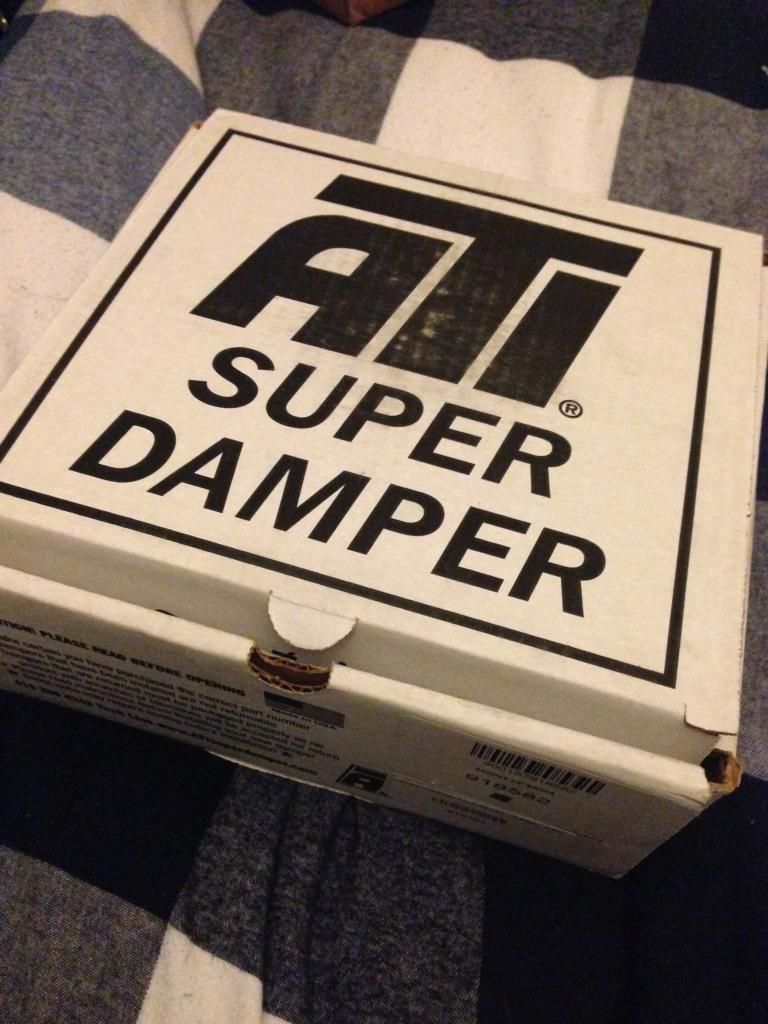 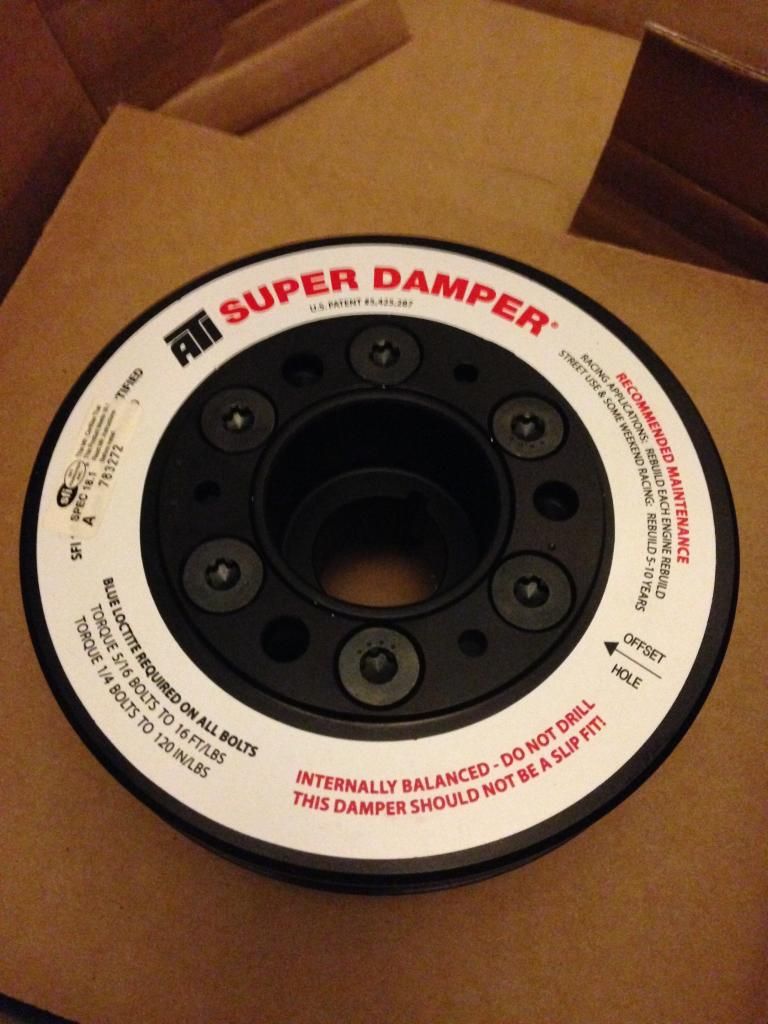 So the next parcel is something that I've been waiting a fair old while for, mainly due to shipping as it got returned for some weird reason in the end but nonetheless its here safe and sound!  Can 'ya guess what it is yet?  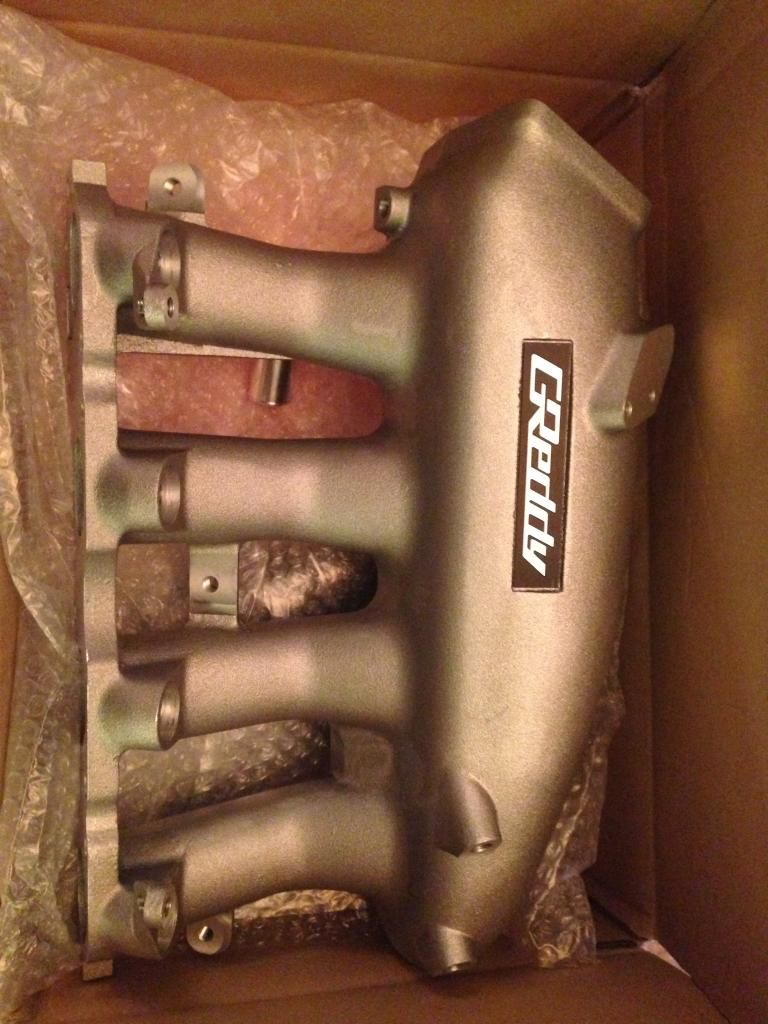 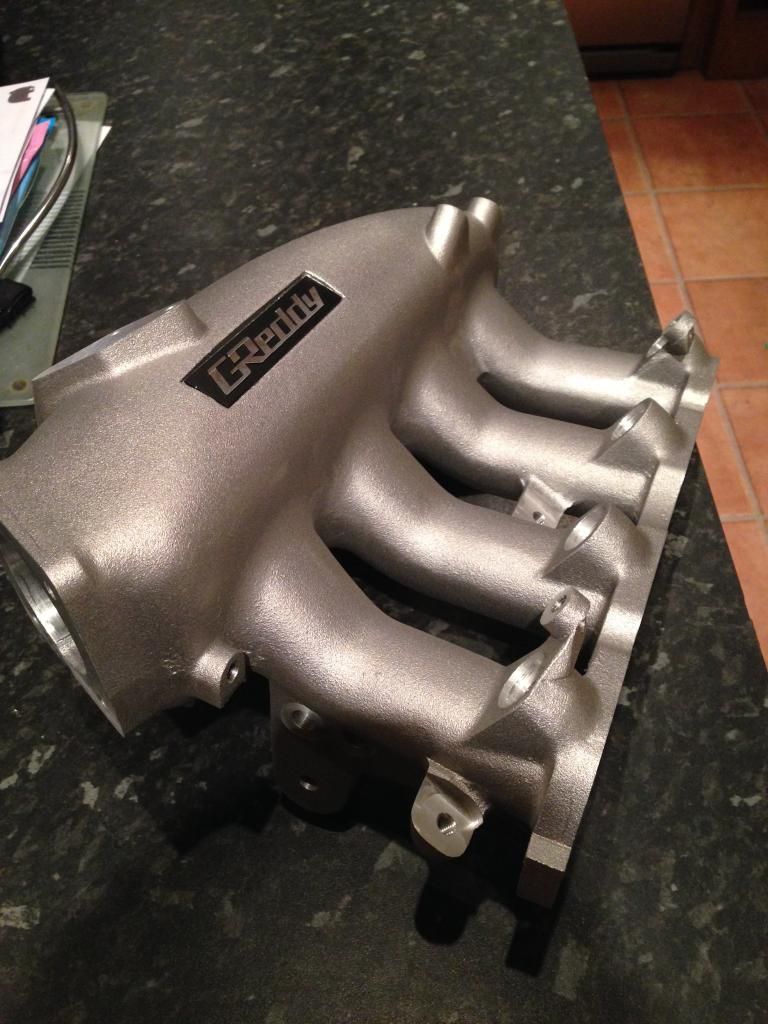 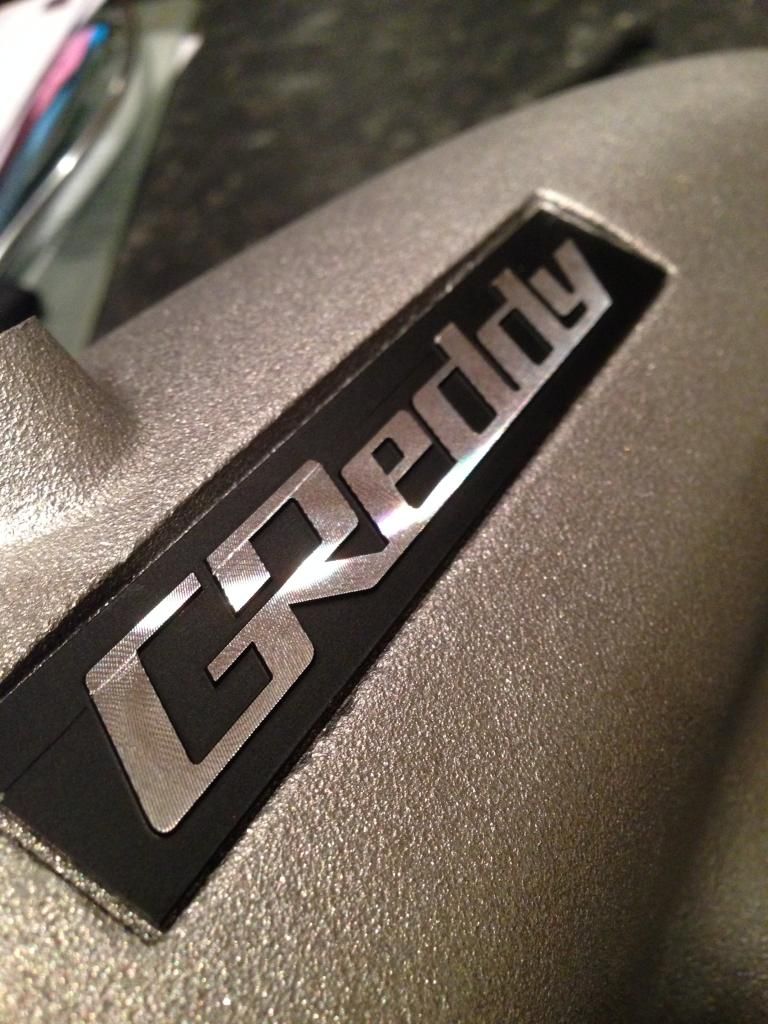 Greddy Short Port intake for the SR  I chose this since I'm building this engine to come alive during the mid range so seemed fitting, plus helps to make some more power up top so should be sweet. The quality is unreal which is kinda to be expected really, the copy inlet I had a few months back was decent but this blows it out of the water and rightly so! Literally can't wait to start getting things strapped on. I chose this since I'm building this engine to come alive during the mid range so seemed fitting, plus helps to make some more power up top so should be sweet. The quality is unreal which is kinda to be expected really, the copy inlet I had a few months back was decent but this blows it out of the water and rightly so! Literally can't wait to start getting things strapped on.Im currently trying to source an S14 SR20DE throttle body as they are 60mm, rather than the standard 50mm S14 DET's run. Plus, I really can't see a 60mm throttle body becoming a limiting factor with the amount of puff I'm planning on running through the 20g. *cough* 1.6 bar *cough* |
|
|

|
|
|
#20 |
|
Leaky Injector
Join Date: Dec 2012
Location: Bristol, UK
Age: 30
Posts: 92
Trader Rating: (0)
 Feedback Score: 0 reviews
|
I managed to source some pretty brick headlights in excellent condition:
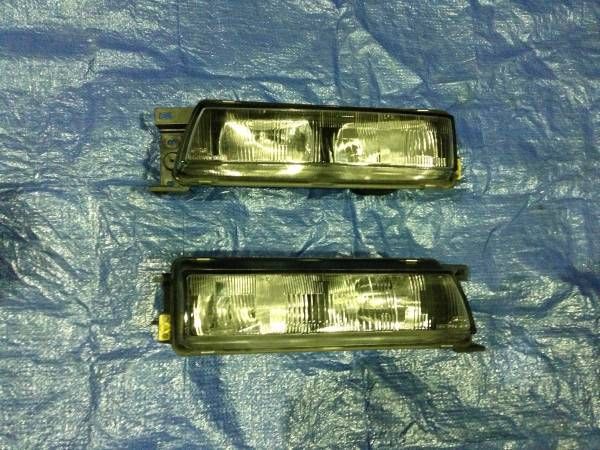 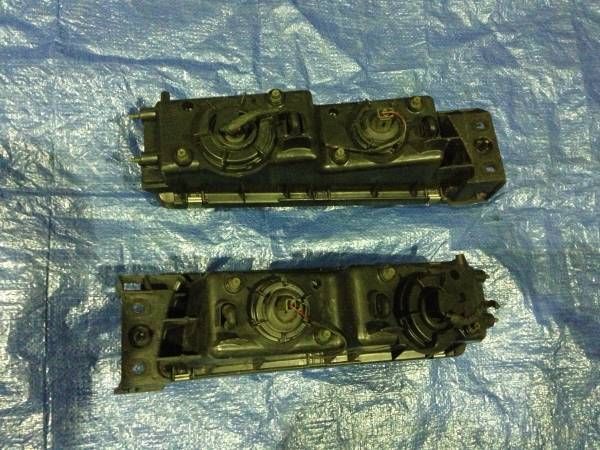 Not really sure you can get any better condition ones than those, and came in a pretty nice price too thanks to Jesse Streeter in the end  I have also got a pair of Silvia front brackets en route from America after seeing them priced stupidly cheap, so made sense to grab a pair of new OEM ones, rather than pay a crazy amount for some tatty 2nd hand ones. I have also got a pair of Silvia front brackets en route from America after seeing them priced stupidly cheap, so made sense to grab a pair of new OEM ones, rather than pay a crazy amount for some tatty 2nd hand ones.Been on the phone to Greg @ Protuner recently regarding mapping/engine spec etc and everything seems to be as happy as it can be, he wanted me to use a milder cam, but after looking at friends cars running 260 Procams I think they'll suit it spot on  Anyway, aiming to book mapping in this week with him to get a date in the book and a slight deadline to work towards. Whilst I was on the phone I grabbed an SR20 > VQ gearbox adapter plate he makes. Considered a few other plates on the market but Greg's seems to be the best out there in my opinion, small but significant differences. (It's essentially a copy of the Maverick Motorsport plate from what I can see) Anyway, aiming to book mapping in this week with him to get a date in the book and a slight deadline to work towards. Whilst I was on the phone I grabbed an SR20 > VQ gearbox adapter plate he makes. Considered a few other plates on the market but Greg's seems to be the best out there in my opinion, small but significant differences. (It's essentially a copy of the Maverick Motorsport plate from what I can see)Received it pretty quick, and even managed to get a little helper to have a quick look over it. 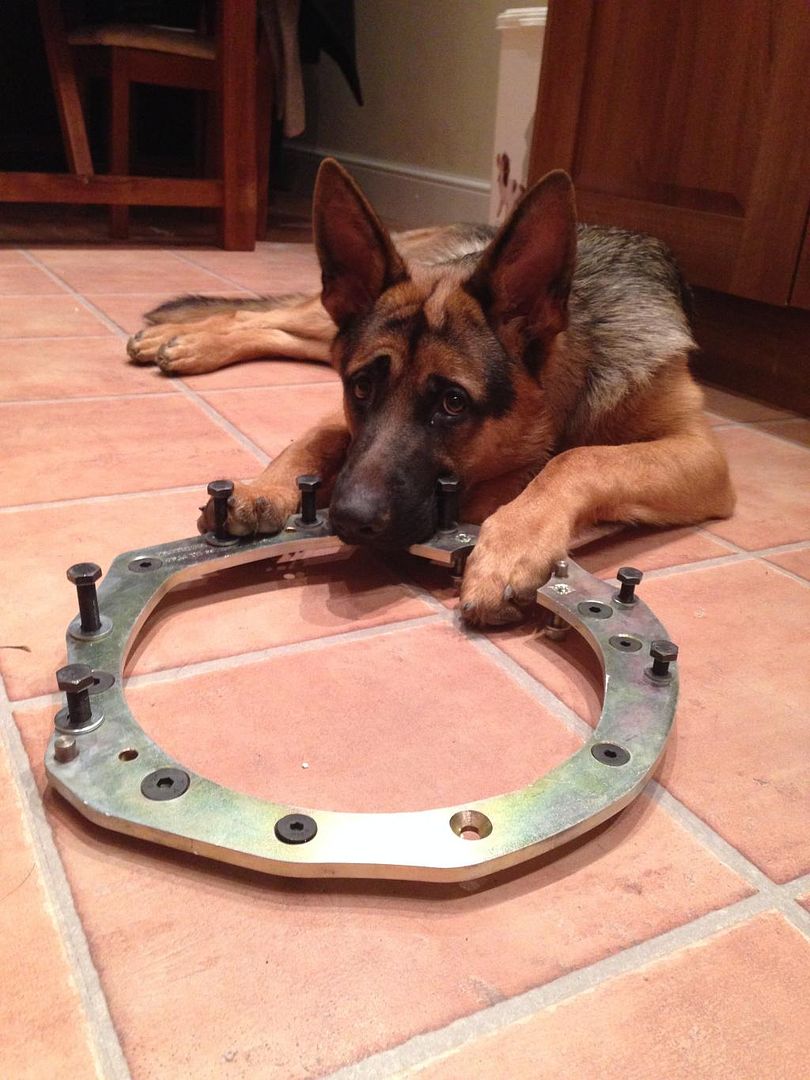 Ideally I want to have the gearbox on the back of the engine when the car goes off to Huxley for the cage and also the downpipe to be made so Hux knows where it can and can't go. Still not sure what Release Bearing & Carrier I need to use but i'll do some head scratching once the car is back. Recently sold my old Z32 front brake setup, and have something alot more meaningful waiting to go on. |
|
|

|
|
|
#21 |
|
Leaky Injector
Join Date: Dec 2012
Location: Bristol, UK
Age: 30
Posts: 92
Trader Rating: (0)
 Feedback Score: 0 reviews
|
During a sunny and cold day, I started to remove the existing cage so the car can go straight to Huxley on the 12th and he can crack with what he does best. It was quite easy getting the main bulk of it out, getting the actual legs off the chassis- not so much so have left those for another day! Here's kinda what happened:
I'm glad Hux told me it was dangerous because sure enough he was right. The welding has no penetration on the inside so it was literally a death trap! 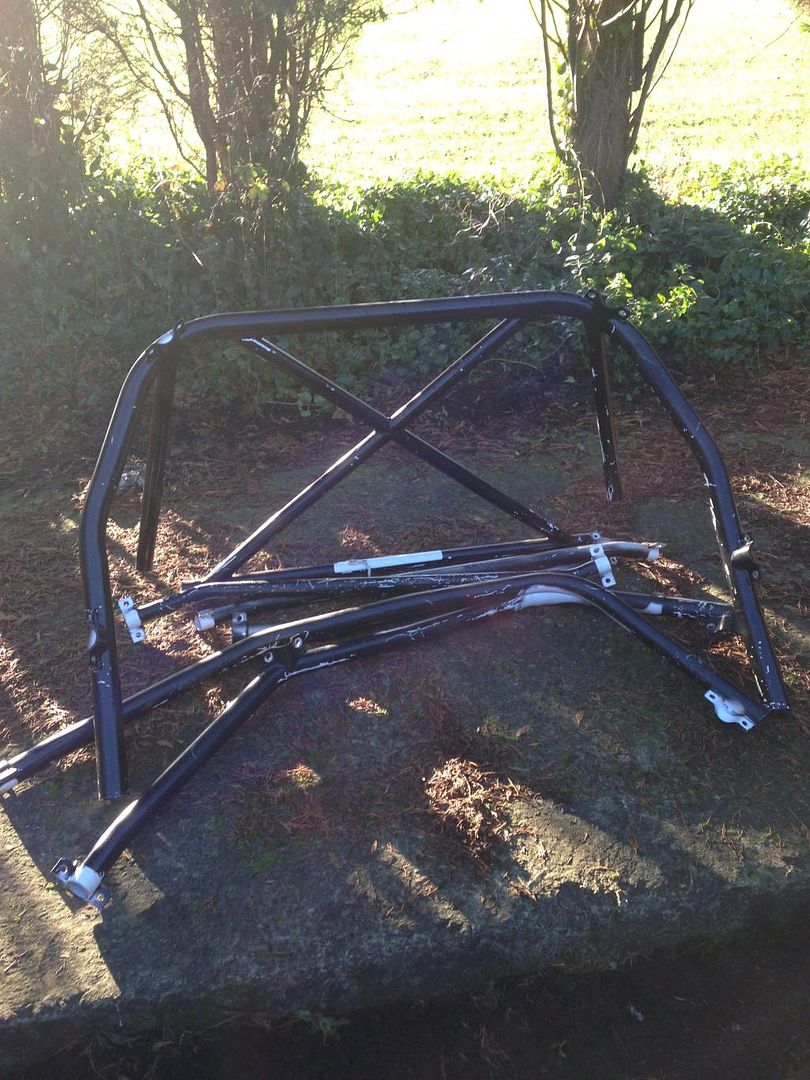 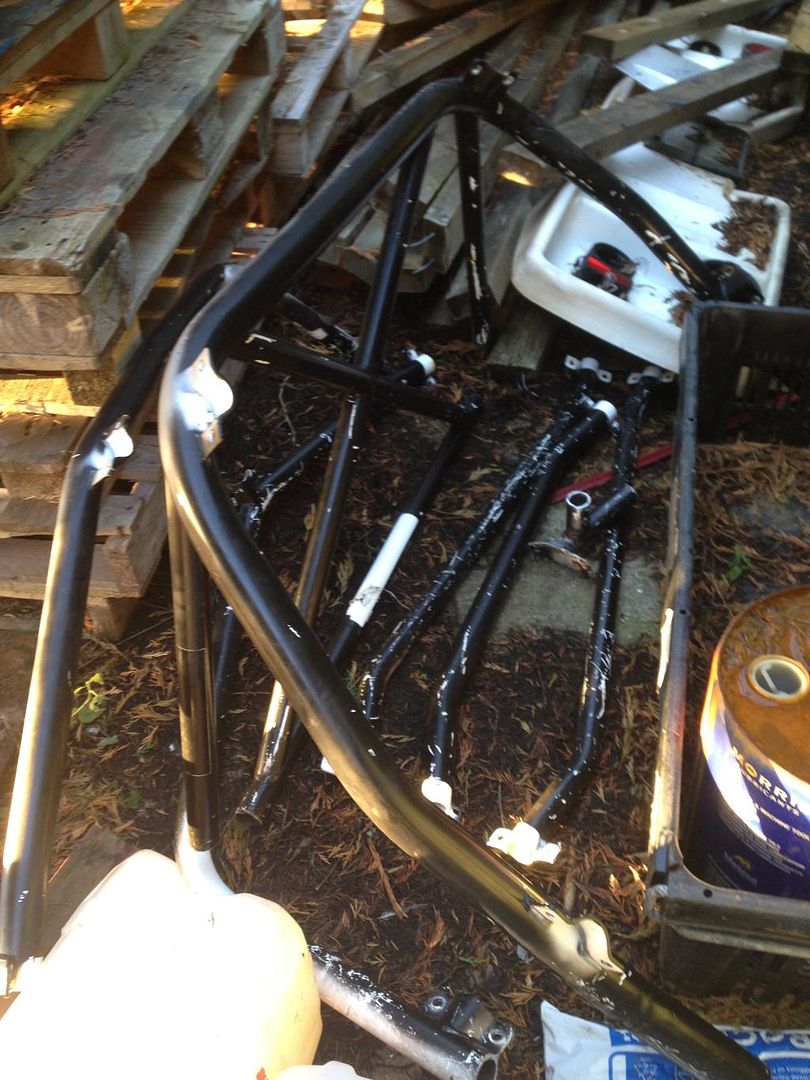 One rear leg off, tried removing the welds as neatly as possible  Theres a small hole that fell off with the leg, probably due to being unprotected etc, so i'll fix that at a later date Theres a small hole that fell off with the leg, probably due to being unprotected etc, so i'll fix that at a later date  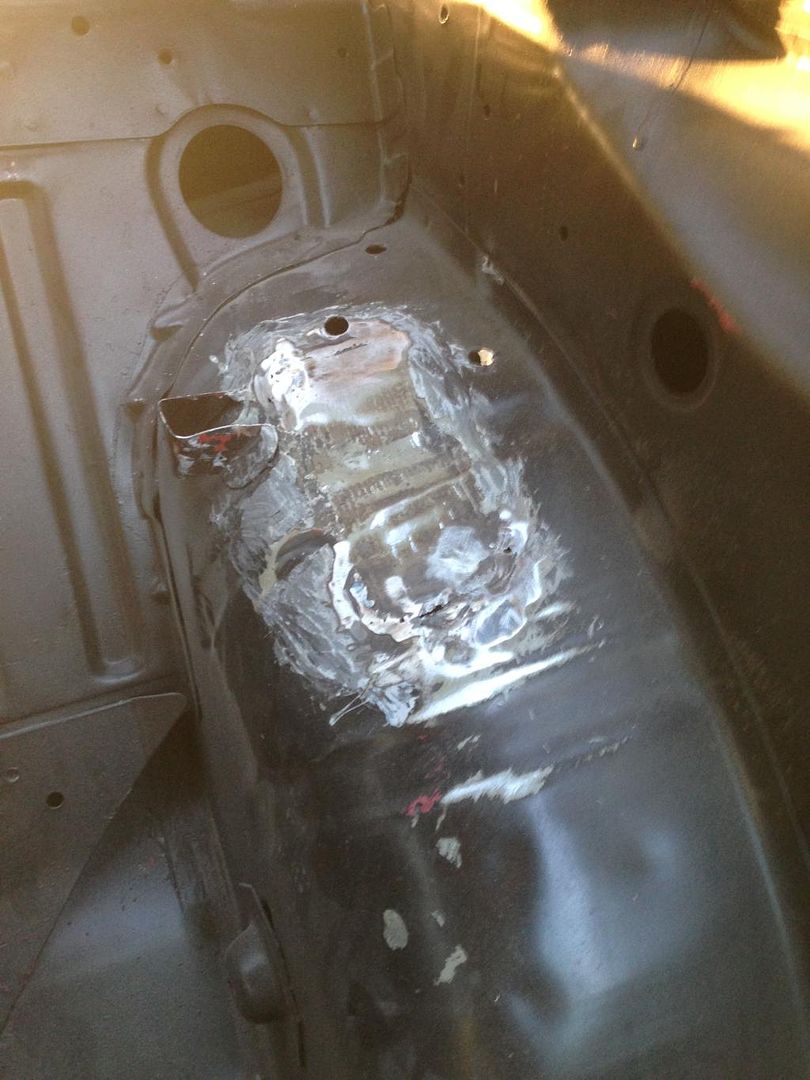 The drivers side I've yet to attempt: 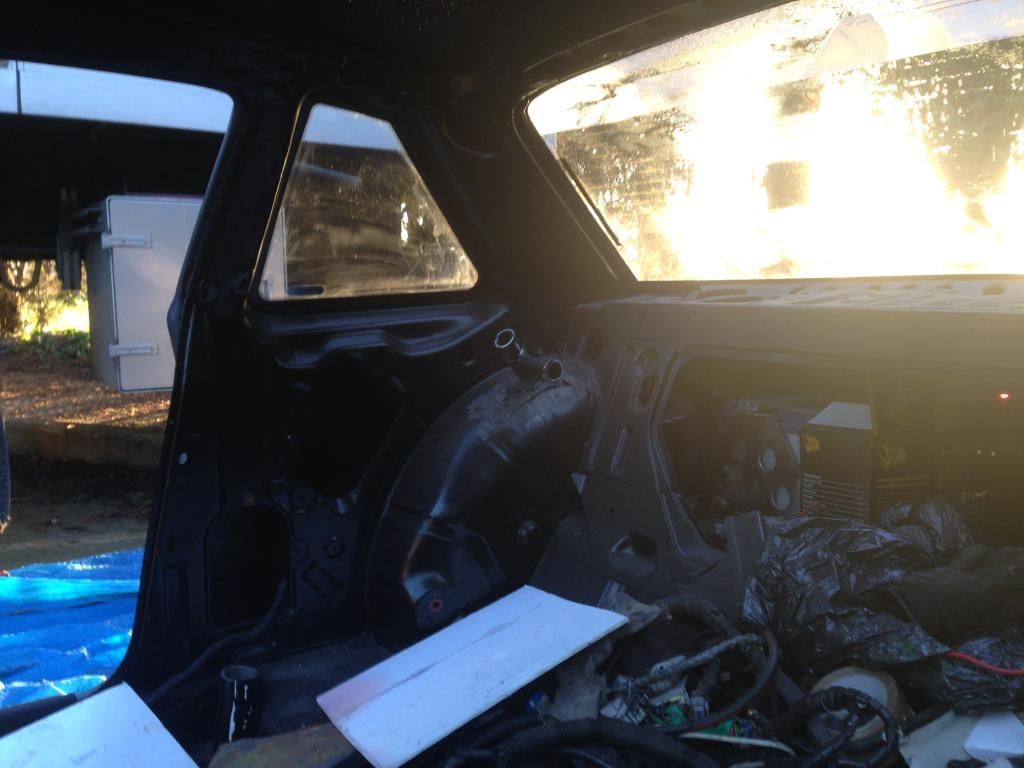 I'm constantly doubting the whole reshell with problem after problem, but I believe it'll be worth it in the end : 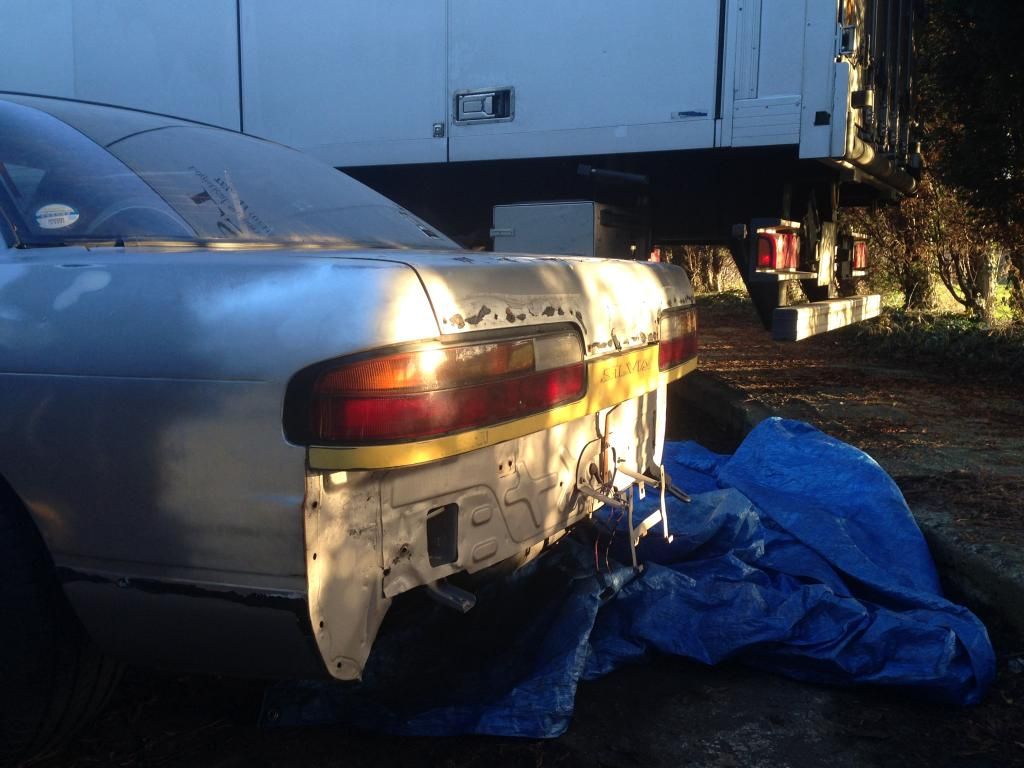 Engine should be making an appearance in a week or so time, so time to get some hockey pucks and ditch those god awful Japspeed engine mounts! |
|
|

|
|
|
#22 |
|
Leaky Injector
Join Date: Dec 2012
Location: Bristol, UK
Age: 30
Posts: 92
Trader Rating: (0)
 Feedback Score: 0 reviews
|
So something pretty major happened today and here goes the timeline of how it happened.
My SR supposedly had around 60,000 miles when I bought it approx. 2 years ago and has always ran flawless. I was in the mindset of running the turbo at low boost and keep the standard engine happy, but soon realized more boost = more fun, right?! I had 2 options present to me now; a) I throw in a metal headgasket, run near my desired boost and pray the SR holds up, as most SR’s are pot luck when you’re running them around ~400hp in regards to whether they blow or last forever. b) Rebuild the engine! As you guys may have gathered over the last couple of pages, the setup I had in mind was pretty aggressive, which was chosen once I had chosen to rebuild the engine. Now, I could done the generic “throw pistons, rods and bearings in, crank the boost up and it’ll be fine” mindset, but luckily I knew a guy who wasn’t too far away from me who knew how to use a spanner or two. This is where I add in a friend, Dave Yandell from DY Engine to be exact. I’ve seen a number of his engines in a couple of friends cars, and they’ve always done exactly what is asked of them including a couple of SR’s and even a dreaded CA18! The amount of time and effort Dave and his apprentice put into each of the engine is incredible, which was one of the contributing factors of choosing him to build my engine out of many so called garages out there. In fact, I think if you’re reading this and can appreciate the work gone into engines then give the guy a like on his facebook page, he needs the credit he deserves after bending over backwards for me in the build and keeping me constantly updated with what’s happening :thumbs: DY Engine: https://www.facebook.com/pages/DY-En...94008124026384 Instagram: @dyengines One of these said SR’s is in a friends 14a, which to be frank made a ton of power! (just shy of 500 during mapping before the boost was turned down). Realistically, this turbo is good for just over 400whp on pump fuel so if he can build an engine that will happily take a power level above what I’m aiming for, then its ideal for my current setup as well as for any future changes. So, after a few messages agreeing on what level of build we’re settling for it was time to pull the old SR out of the 13 ready to go to DY, looking really sorry and tired; 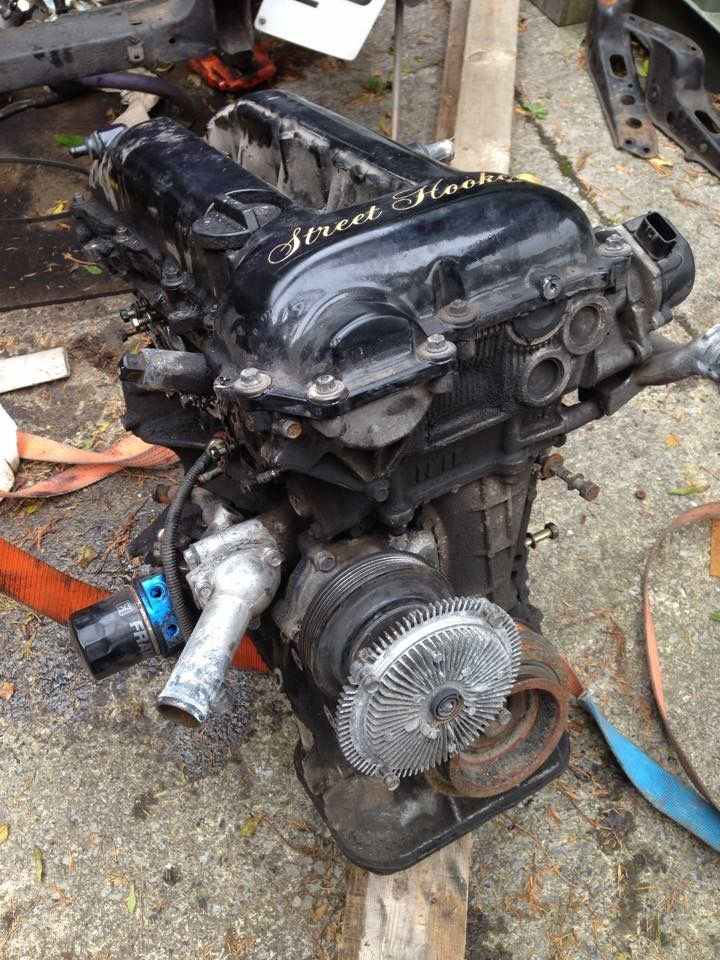 Cue the picture of the engine sat in the back of a van, where its mysterious fate awaited. As soon as the engine was off loaded, it began. Within a few days I received a message saying the majority of the parts needed had been ordered! He began as anyone would do and strip the ol’ faithful down. Luckily I chose this route, as upon inspection of the bearings, they were heavily worn, in fact from what Dave showed me, they were on the verge on letting go! Goes to show, no matter how well you maintain your engine, its only as good as the life it had before, which in this instance was uncertain as it was acquired from an imported S14a. Anyway, no problem as DY can sort out the crank and new bearings were planned ☺ The thing I wanted most throughout the build was pictures! I love pictures to see the process of the build, and the first picture I received was this; 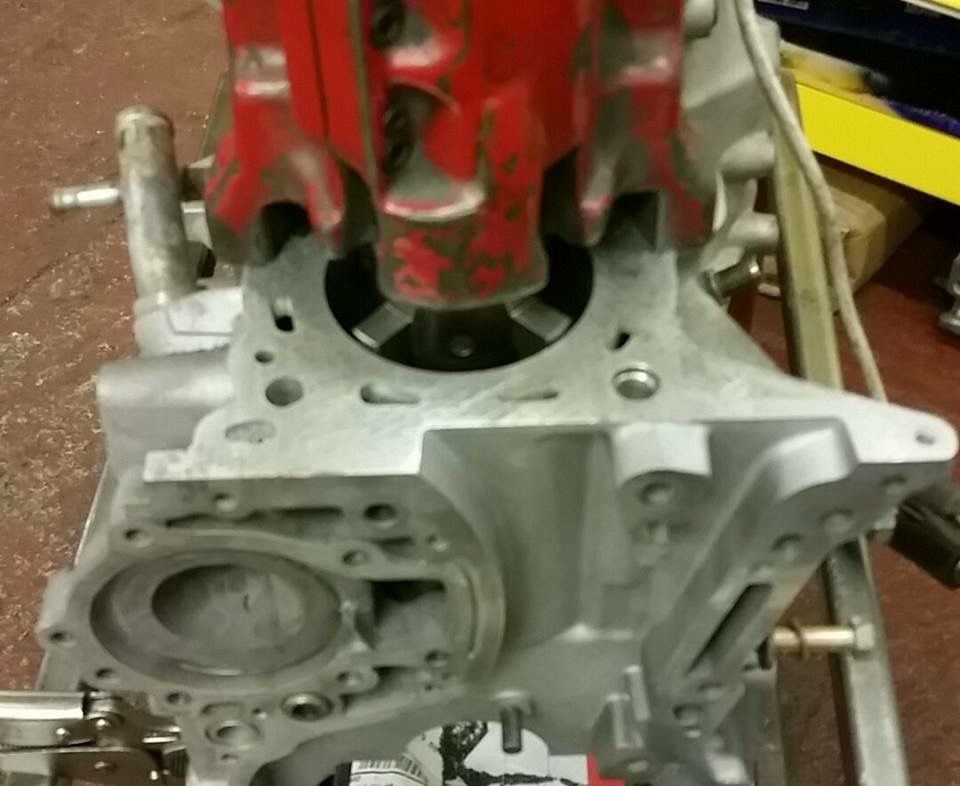 The block needed to be bored out to 86.5mm in order to accommodate the forged pistons. Originally Dave suggested using Wossner pistons as hes used them in other builds and liked using them. However, the problem that arose was Greg @ Protuner wanted me to retain around an 8.5:1 Compression Ratio, but the highest ratio Wossner’s offer are only 8.0:1. Fortunately for me, the SR mentioned above had special thought gone into the compression ratio which ended up becoming 8.7:1 with similar work that was planned as my engine, so we chose to use the same piston/compression ratio setup as it worked wonders on the dyno. We chose to run the highly popular CP 9.0:1 pistons, what a piece of art they are! 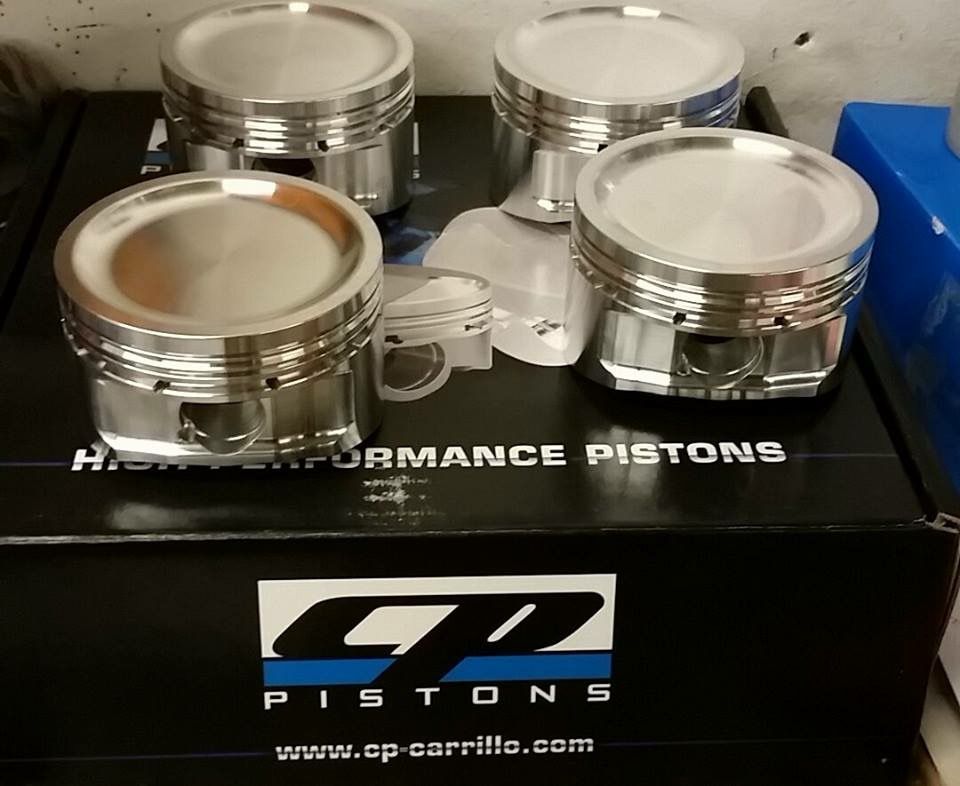 What was nice to see when I was shown my old pistons was that there was no signs of det, especially since I was always worried after seeing the boost controller peaking over the boost level it was mapped for occasionally. - - - Updated - - - An important step in the build process, which I think** is the cause for the old leaky/dirty SR’s is that the front covers and block are never machined together, causing a slight gap which allows the engine to breathe rubbish out of. So, another step in the build and another picture was received! This time, it was of the machining of the block and front cover. My perception of machining the block was to ensure a 100% seal on the headgasket? Theoretically it should raise the compression ratio also. Something DY and his apprentice ensure, is that everything is always cleaned, and then cleaned again before painting just to give that nice and fresh image a new build should have. Plus, one of the key factors of building an engine is always to keep everything as clean as possible to ensure everything seals and works spot on, right? Anyway, here’s the block after machining, looks pretty damn hawtttt I must say so myself! 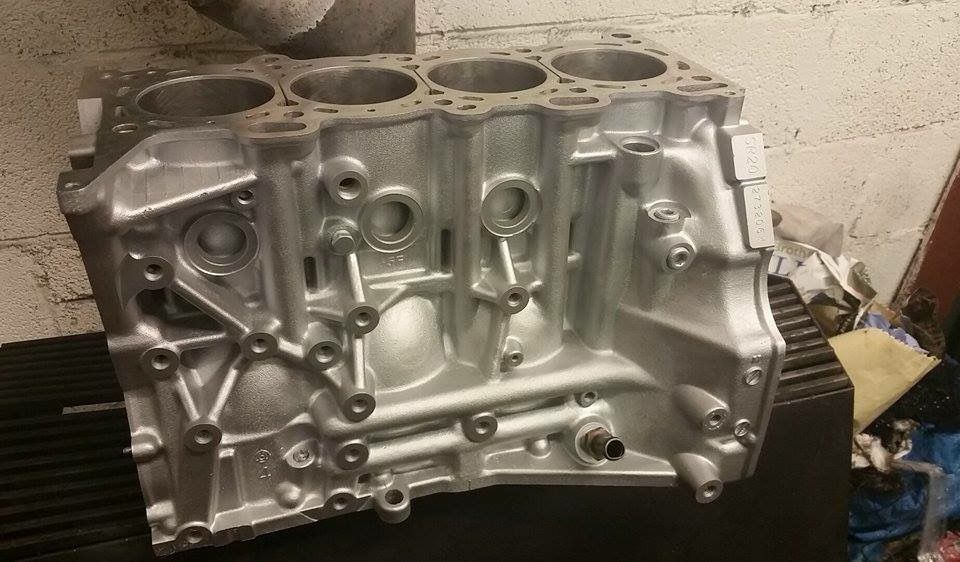 After visiting the workshop a couple of times prior, you get a sense of everything is in the right order and exactly where it needs to be, with no exception to shiny, clean parts! Ever wondered what the bottom end of an SR20DET looked like once laid out neatly? Nope? Well here’s how it looks; 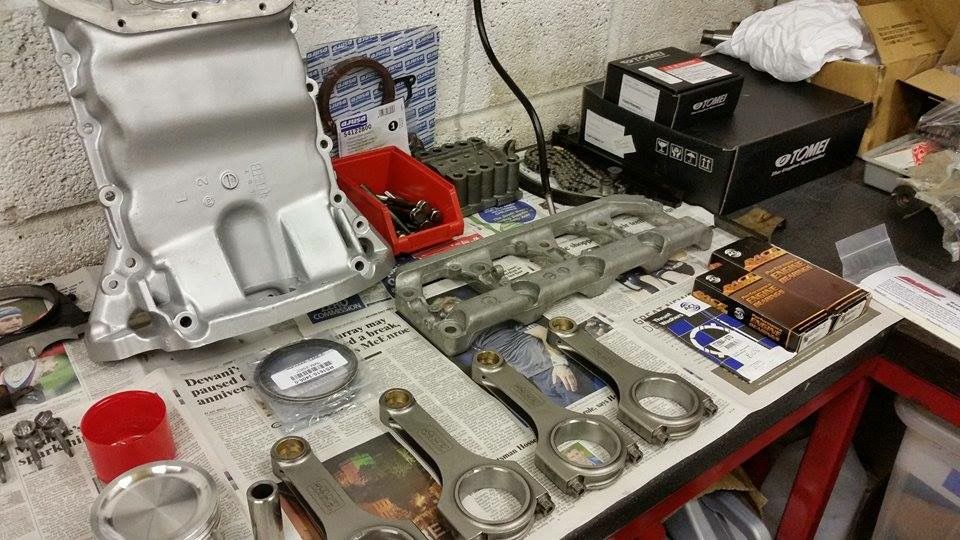 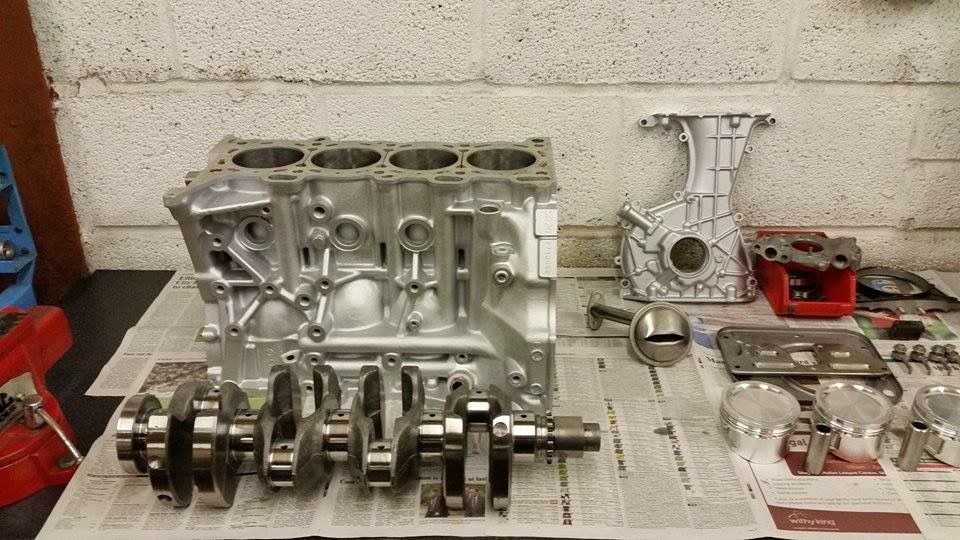 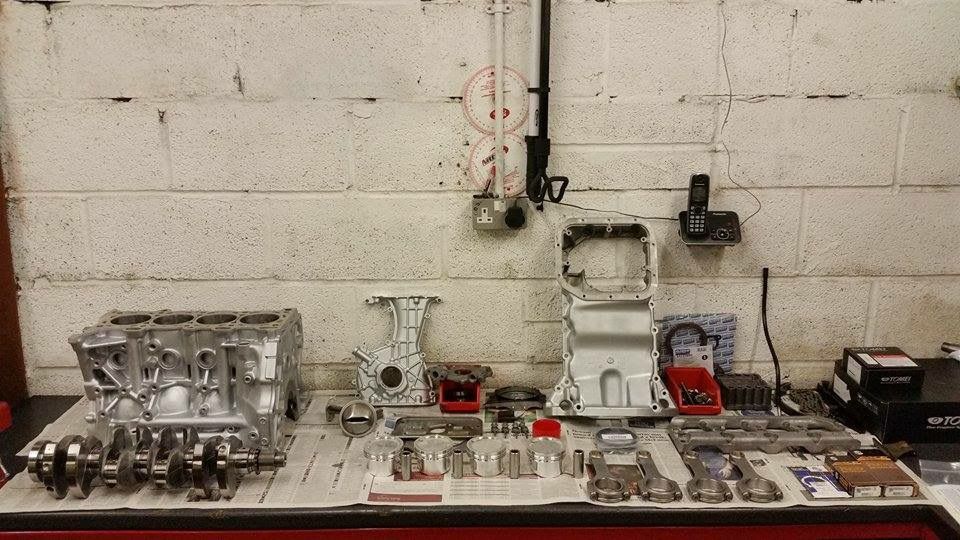 Pretty spectacular ehhhh? A quick note here, Dave recommends using ZRP rods, they comes with ARP bolts and are rated to around 200hp per cylinder, plenty for what I’m aiming for! In fact, these are the same brand rods James Deane used in his SR20 RXY (albeit I think he’s running the SR22 Stroker Kit) aswell as my friends 14a and they’ve held up superbly, so another tick for me. Usual ACL bearings were used too, everything being nice and fresh  Whilst I was doing what I usually do in lectures, I received an unexpected picture. The bottom end had already been assembled after checking everything beforehand. 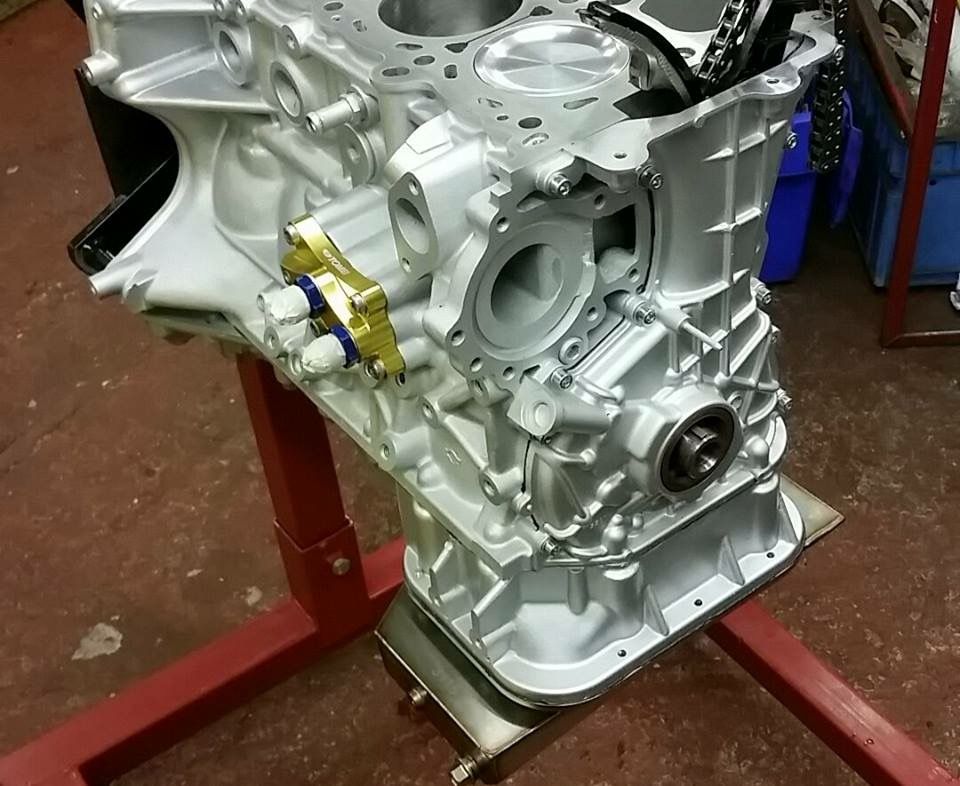 You can see the Tomei Sump and Oil Block fitted too whilst everything was getting assembled. Even just the bottom end, what a sight already! Wait, it gets better, trust me! It was at this point, it was time for me to pop down to DY’s workshop and have a nosey at the progress being made whilst he waited for a few parts I had received as well as the head to return. I looked at the above in the flesh, and having seen numerous builds online I kind of knew what to expect, but after he unwrapped the engine for m to see, I felt 5 again. I’ve never been so excited for something for so long! |
|
|

|
|
|
#23 |
|
Leaky Injector
Join Date: Dec 2012
Location: Bristol, UK
Age: 30
Posts: 92
Trader Rating: (0)
 Feedback Score: 0 reviews
|
You may have caught on just then, the head was sent away to have some “special” work done to it. We got chatting before the build and my friends 14a had the squish pads removed in order to running higher boost pressure as my understanding of this, is that it helps to eliminate any hot spots for detonation to occur. Ideal, as I’m planning on running 1.6 bar, plus whilst its apart I may as well take the extra step to future proof the engine.
Whilst the head would be away for some fettling, it was only right to have the inlet and exhaust ported and polished to try and seek those extra few ponies by making everything flow nice and easily. Instead of choosing a random engine shop to do this work, Dave knew a shop (I’ll confirm exactly which shop at a later date when I remember, but I think it was down South way) which excelled in this work and actually do the task they say they would, instead of a quick/messy job . Although the head had been delayed a few days by the specialist doing the work, and my words to Dave were along the lines of “It’ll be worth the wait”, and right I was! Here’s how it returned; (Shame you can’t see the work gone into this once its all assembled!) Exhaust Side 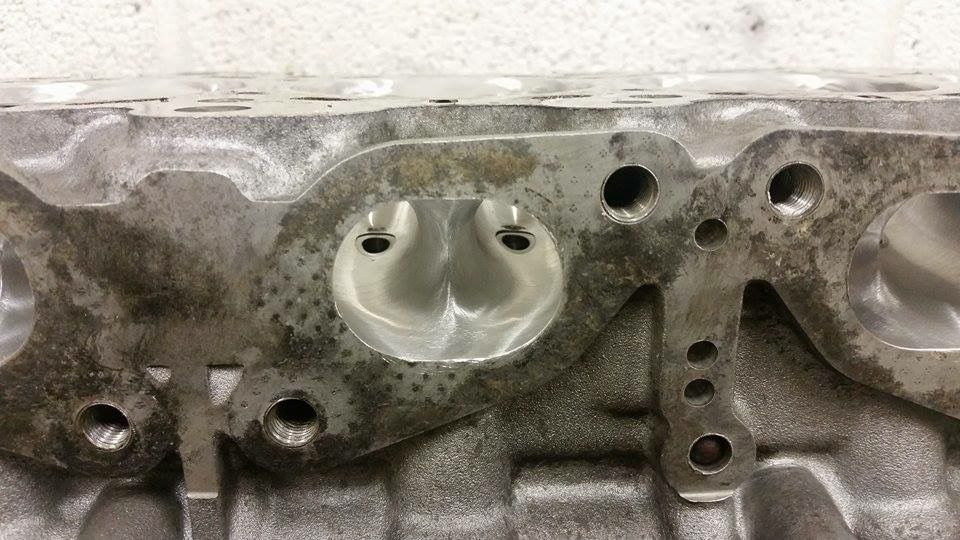 Squish Pads; 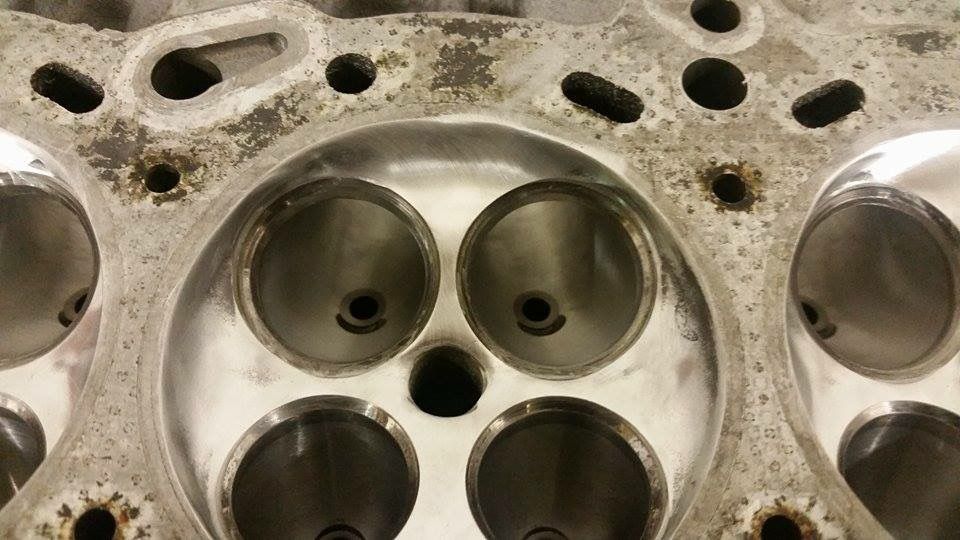  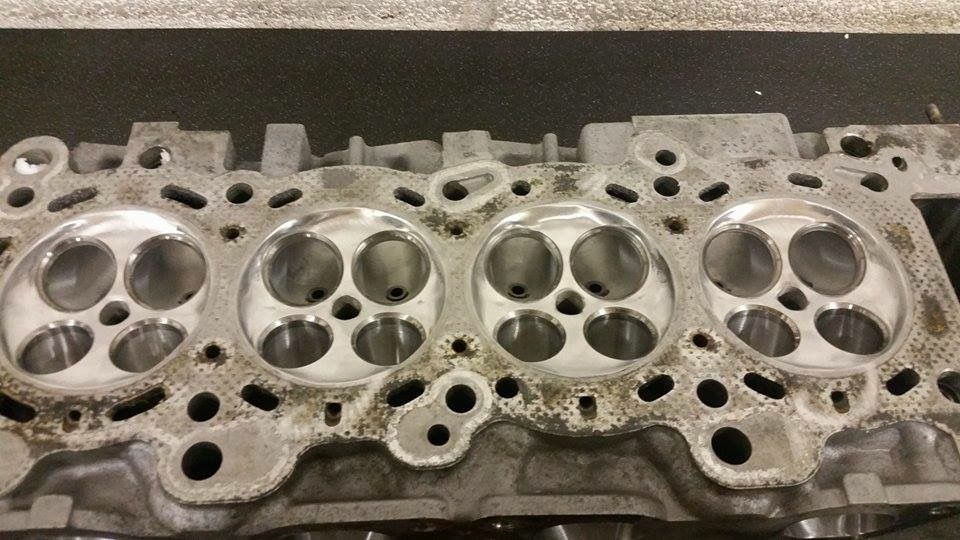 Inlet Side; 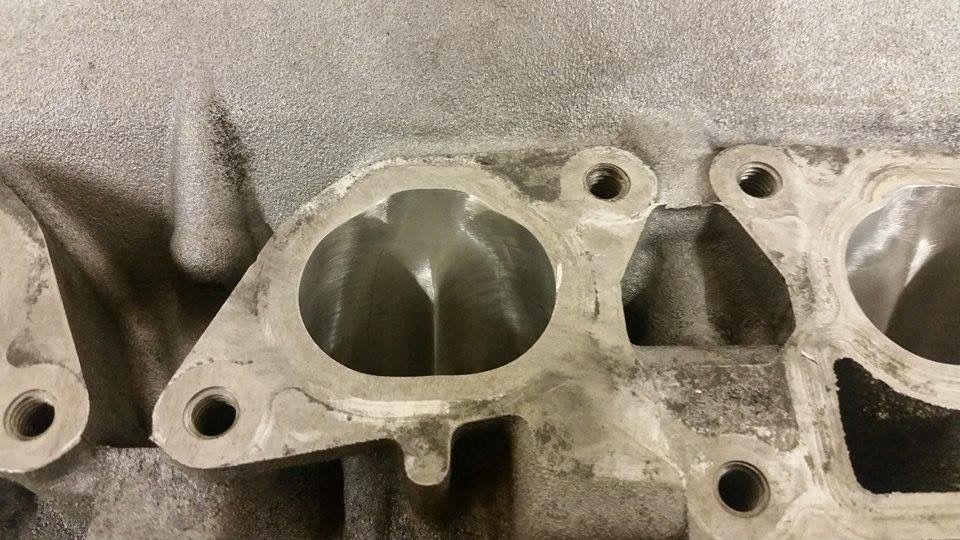 What d’ya think? Pretty damn good aren’t they! I think it was at this stage, I literally couldn’t wait any longer. The phrase “like a kid at Christmas” summed me up perfectly, and its almost Christmas so its actually fitting! We hit a snag though, my exhaust valve guides were a bit worn so the sensible decision was made to replace them with Supertech items. Makes sense to do them now to make sure everything operates as it should, rather than on the dyno and cause destruction. Dave sorted all of this out, and within a few days he had the final piece to his puzzle. A pretty puzzle to say the least. With everything needed at his disposal, the assembly of the head can begin. Started off with a skim; 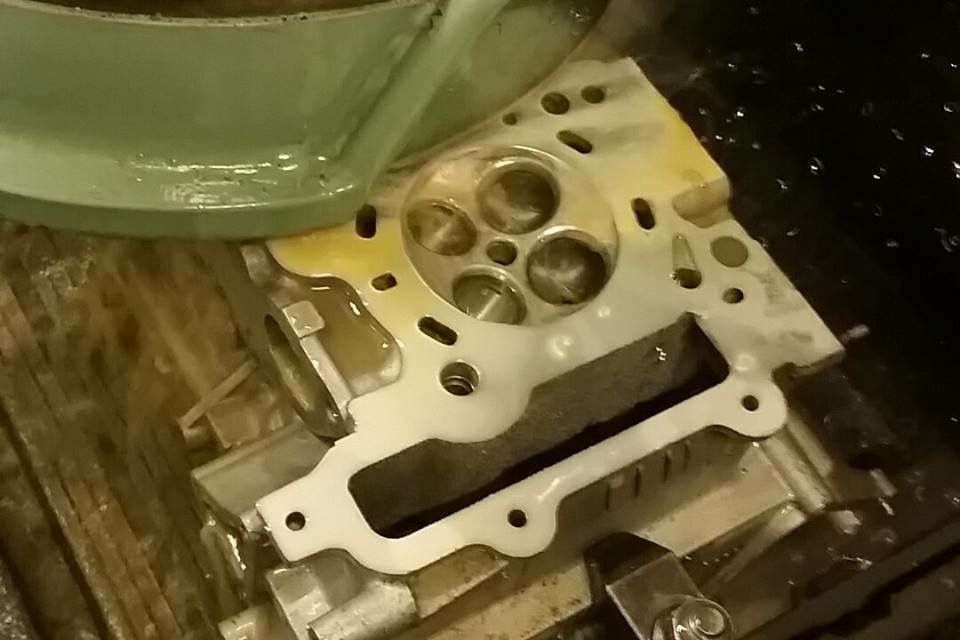 Again, to ensure a 100% seal between the mating surface and the headgasket. So once this had all been acid dipped, cleaned, cleaned again and painted like the rest, it was time to start using the fancy parts and assembling them into the head. In went the Brian Crower Springs, and Titanium Retainers, along with the rocker arms and all shims/adjustment necessary to get everything spot on. After all, we all know how sensitive some SR’s can be to throwing a rocker after bouncing on the limiter. 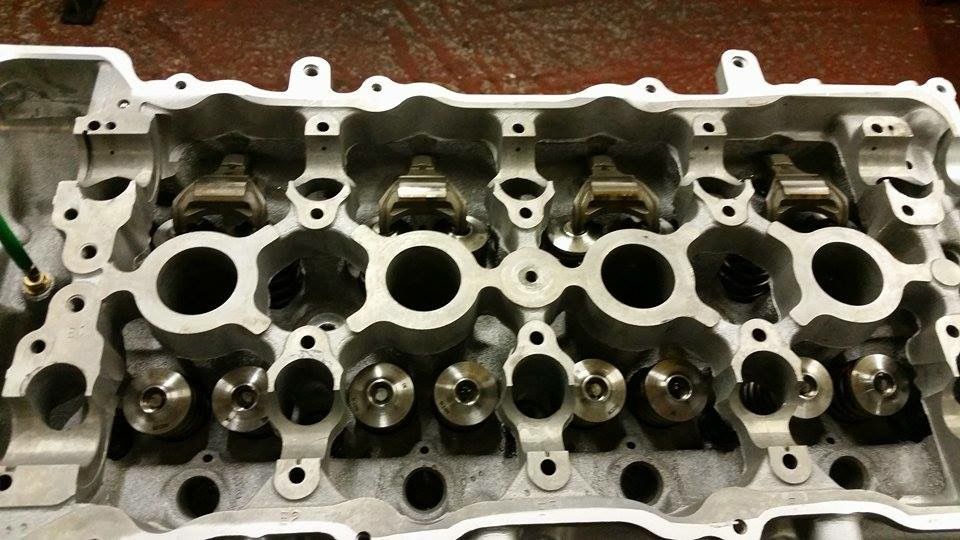 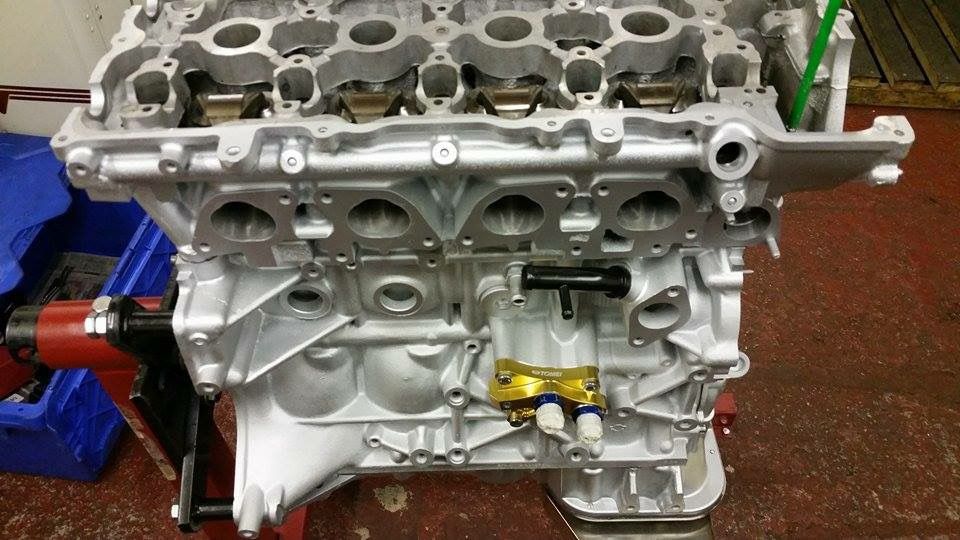 Originally we planned to run a Cosworth 1.1mm Headgasket but due to stock constraints a Tomei 1.2mm Headgasket was used, which shouldn’t alter the compression ratio too much (albeit itll lower it slightly) and the inner fan boy couldn’t help but love the fact another Tomei part was being used!  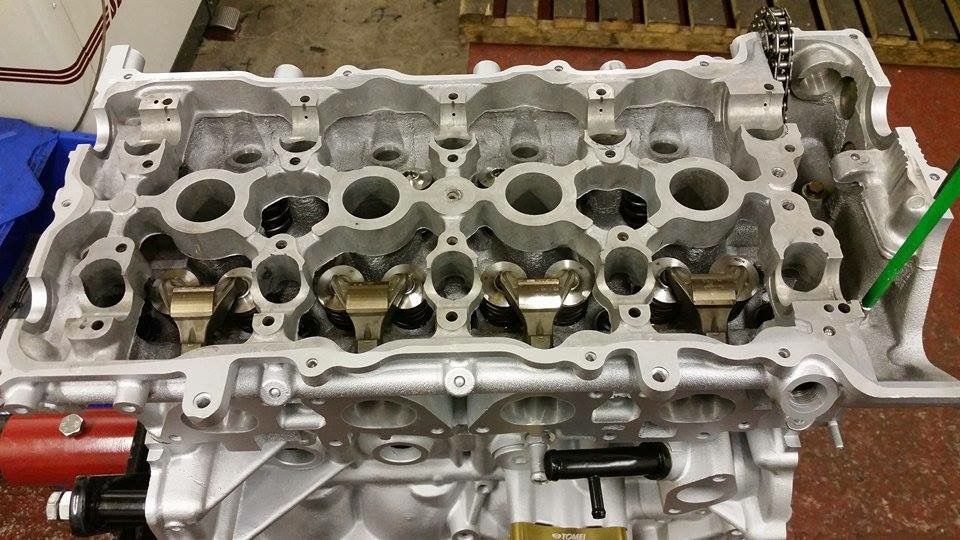 The other day I was doing my daily routine, fighting traffic on my way to Uni around 8/8:30 before my phone went off, and to my surprise another message from Dave. Now, my first thought was something wouldn’t fit as I vaguely knew how to delete the VVT with cam gears but there aren’t may definite answers online, but in fact the message was Dave busy working away on the timing of the engine/cams to Greg’s specification. Not what I expected before 9am, after all most of us do enjoy a lie in, but certainly not Dave! Cant resist a shot of the gorgeous Tomei Cam Gears & 260 Procam’s now can we?! 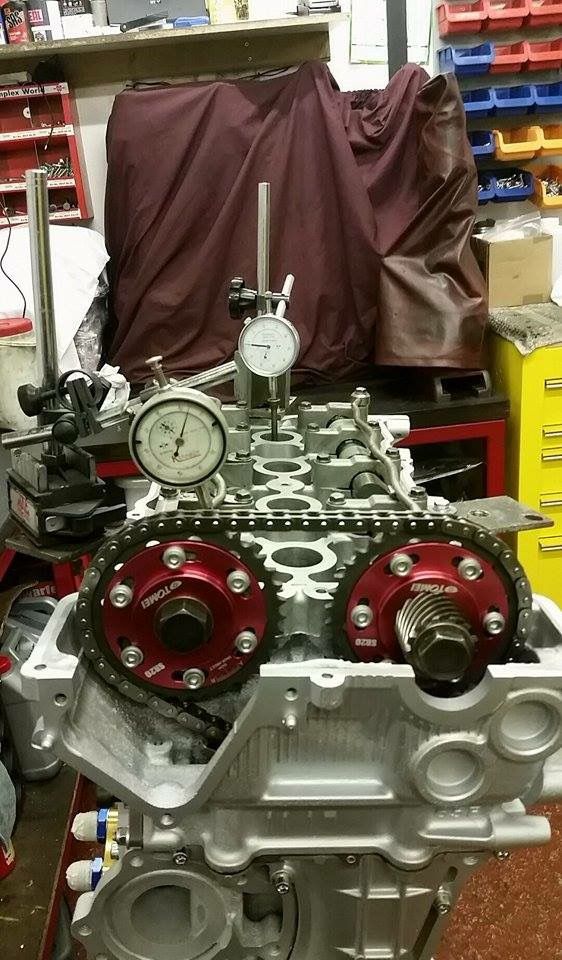 So, are you all ready for the final product? You sure? Okay then  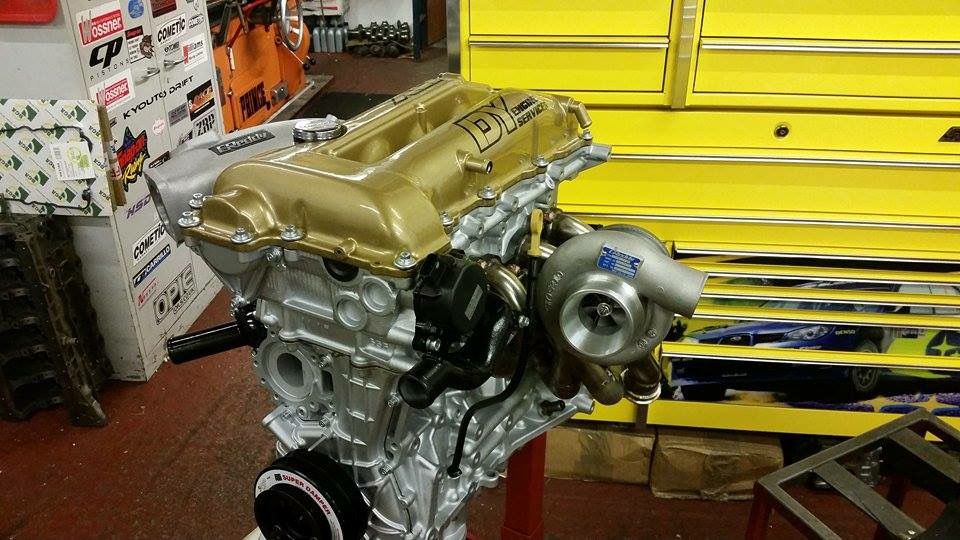 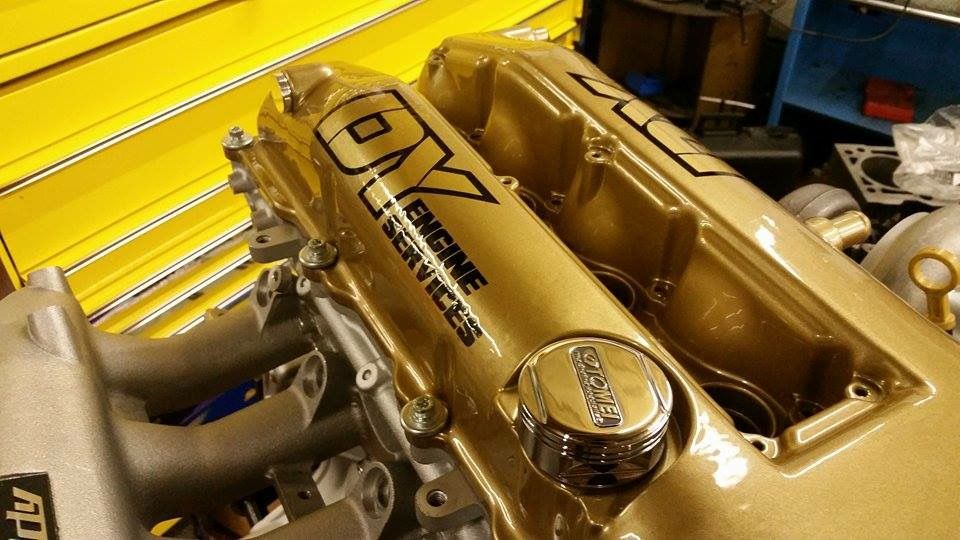 (Cant remember if I mentioned it before, but with a few purchases form FRSport earlier on in the thread I bought myself a Tomei Oil Cap, a small little feature that’ll suit the engine :thumbs: ) 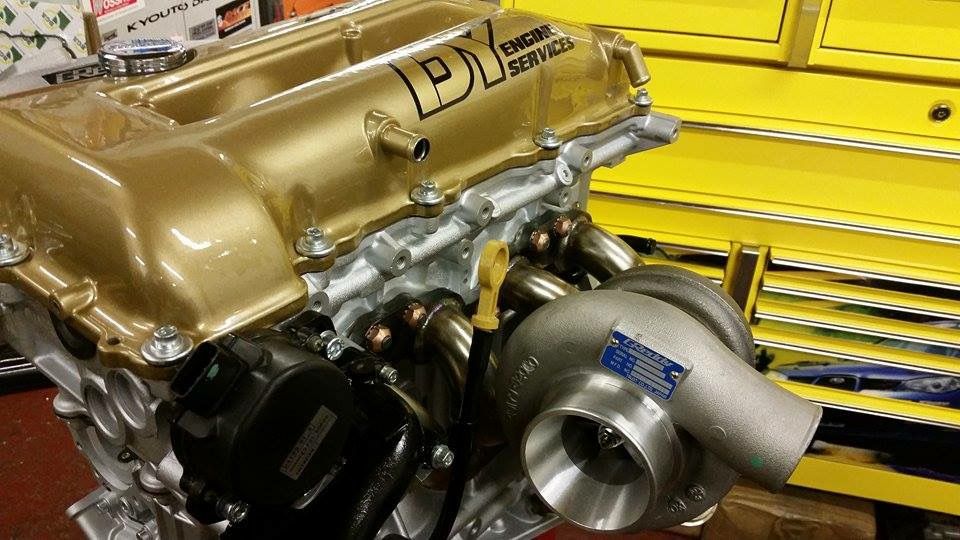 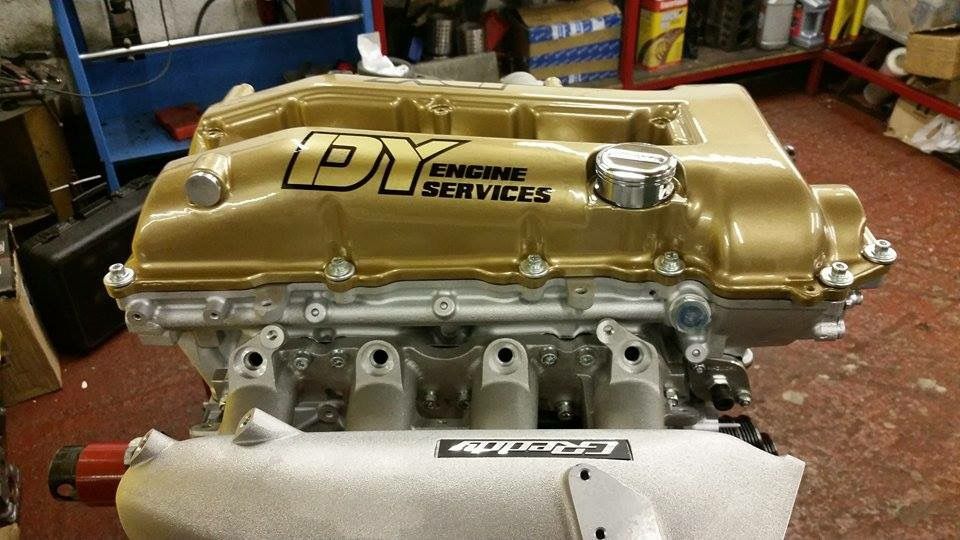 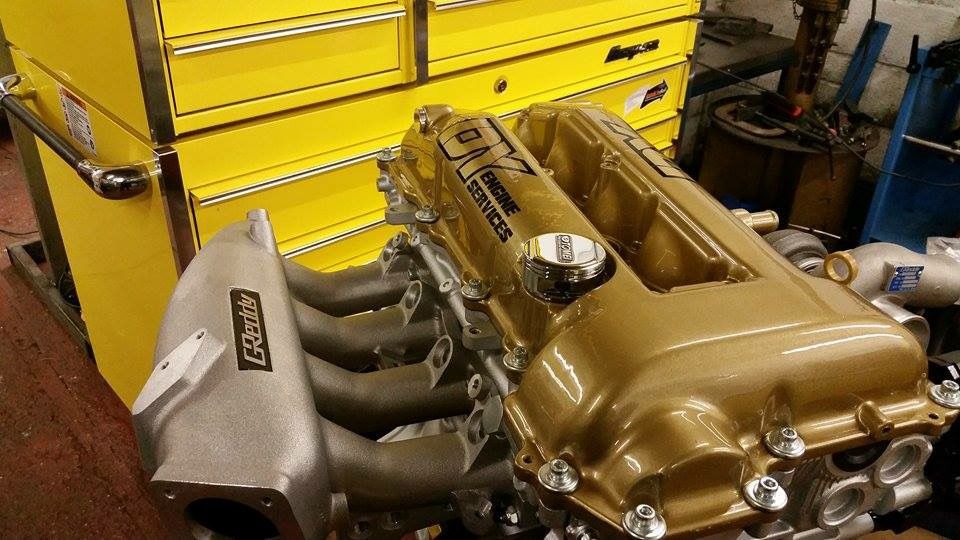 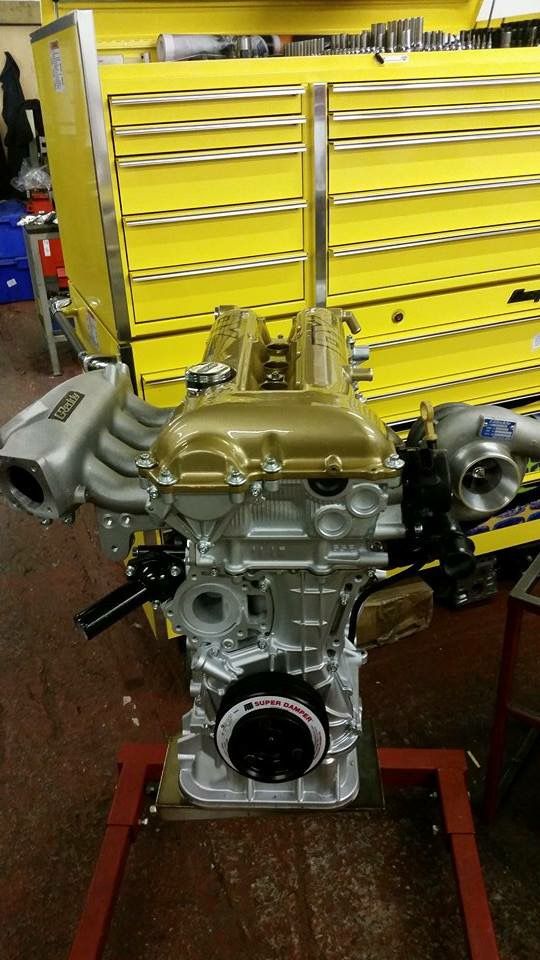 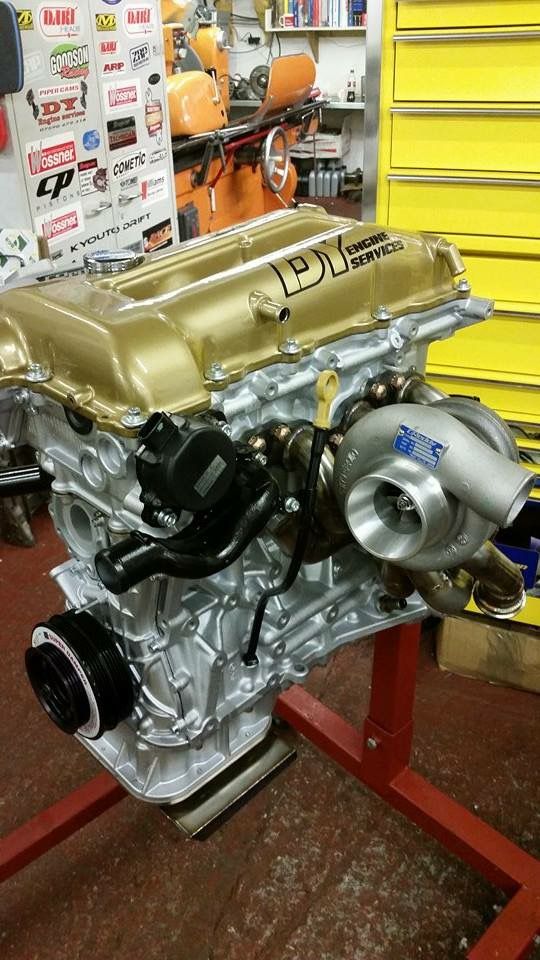 I was literally speechless for a minute whilst my jaw hit the ground once he sent me this pictures this afternoon. I mean, I expected a good looking engine with the amount of work he puts into each engine, but he’s literally exceeded all of my expectations. The thing other builders in the scene don’t always consider are the litter details involved. For example, DY’s signature colour on the rocker cover tends to be white, and I asked for Gold to match the planned colour for the engine bay, and whilst he tends to use a white sticker on the rocker cover, he made a black outline sticker, which looks the dog’s nuts in my opinion. There are other elements though, for example after deleting the VVT (Which by the way you need Cam Gears, Non-VVT SR20 Camshaft Bolt & the washer from the original bolt) instead of running the VVT solenoid disconnected, leaving an ugly clylinder shape poking from the top of the head, a friend suggested about removing it and using a bung to get a cleaner look, which Dave went that extra mile to do. Same with turbo water feed and return, where the TD06-L2 is only oil cooled, he went and got bungs to block them off! I mean, there are a vast amount of detail that even I probably wont realise until I pick the engine up! Another example of the top of my head was the blanking of the PCV on the rocker cover, something that is prone to leaking under high pressure but a nice bung in its place will prevent any leakage. The keen eye may notice no water pump, this is because Dave’s usual supplier couldn’t get hold of an SR20 water pump for some reason. Luckily I bought yet something else from FRSport so picked up an OEM Water Pump for a very, very good price which Dave will be installing once I collect the engine, plus, OEM quality is unrivaled so it’ll be worth the wait for sure! I found the other week for reason the flange on my manifold didn’t 100% fit the turbo, which was unusual as Wardy had never had any problems with them. 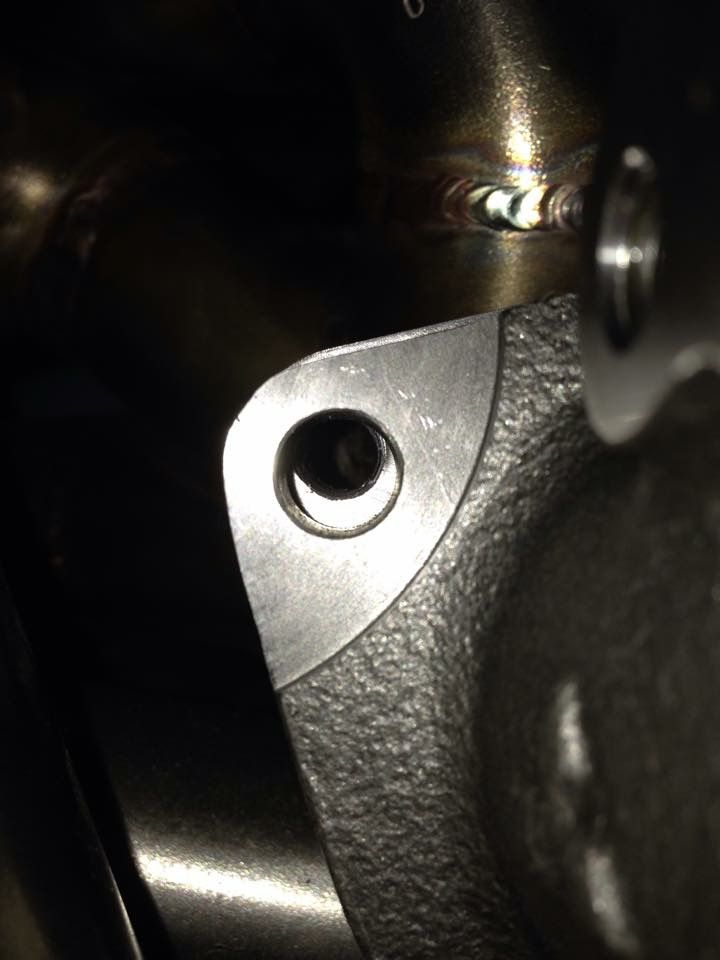 Sods law! But Dave came to my rescue and offered to correct this for me, what a gentleman! - - - Updated - - - Off the top of my head the current specification of the engine is; (I’ll get an exact list from Dave when I grab the engine, so we can see the vast amount of work gone into it) Parts are Acid Dipped, Cleaned, Cleaned again and painted before assembly when needed; • Greddy TD06L2-20G 8cm • Wardy Mid Mount Manifold • Tomei 260 Procams • Brian Crower Springs • Brian Crower Titanium Retainers • Tomei Baffled Sump • Tomei Adjustable Cam Gears x2 • GKtech Water Neck Spacer • Tomei N2 Oil Block • Non VVT Camshaft Bolt (VVT Delete) • Tomei Oil Cap • Mazworx Timing Chain Tensioner • Greddy Short Port Inlet Plenum • ATI Harmonic Pulley • ACL Bearings all round • Ported & Polished Headwork • Squish Pads Removed • PCV Valve Delete • Tomei 1.2mm Headgasket • CP 9.0:1 86.5mm Forged Pistons • Head and Block both skimmed to ensure 100% seal • ARP Headstuds • ZRP H-Beam Connection Forged Rods • Supertech Exhaust Valve Guides • OEM Nissan S14 Water Pump • Brand new OEM gaskets all round • Crank was grinded and polish to specification • New Core Plugs • Oil Pump was not replaced, as the gear was well within OEM guidelines (In fact Dave commented on how the condition it was in, always had strong oil pressure prior to the rebuild which is handy to know) There’s probably a lot more that’s gone on behind the scene’s which I’ll update as I can, as the above is merely off the top of my head. I cant stress enough how happy I am with the engine, and I haven’t even seen it in the flesh yet! In fact, I think I have to incorporate DY Engines on the car somewhere, seeing as he built the party piece of the car. I think we’re both as excited as each other to hear the engine on full song, its going to be special that’s for sure. And from a guy who’s built high horsepower engines, it was ncie for him to say it was one of the best engines he’s built, I’ll be sure to give him a ride to show what a mental SR20 he has built. I’d appreciate you guys to like his Facebook page to keep up with his work, he recently built a lovely VR38, as well as V8’s, SR’s, anything with cylinders really which is nice to see how other engines can be built, not just the Japanese motor’s. Facebook: https://www.facebook.com/pages/DY-En...94008124026384 Website: http://www.dyengineservices.co.uk If any of you guys need engine work doing, I’d highly recommend Dave. He’ll make sure your happy with everything, plus I wouldn’t knowingly recommend someone how doesn’t build decent stuff, let alone use them for my build. Hope you guys enjoy this update, as much as I’ve enjoyed writing about my/our master piece, so much thought has gone into the setup its unreal. I suppose I better get a provisional date for mapping booked in at Protuner now… |
|
|

|
|
|
#24 |
|
Leaky Injector
Join Date: Dec 2012
Location: Bristol, UK
Age: 30
Posts: 92
Trader Rating: (0)
 Feedback Score: 0 reviews
|
Whilst everyone enjoy's the new update, heres a small, cool but insignificant update compared to the last one :wack:
It was time to reconsider my front braking setup, as it felt a lil' soft for my liking and with more power, I suppose I need to be sensible and up the braking power. I considered a front R33 GTR setup, as well as the K-Sport 8pot w/ 356mm Disc option but the latter option retails at a hefty price. After alot of thinking, by the time I refurb the R33 GTR's, with decent pads and discs it wont actually end that far off the price of K-Sports, so the hunt was on. This actually happened about a month ago, I sold my front Z32's to a local chap for a deent price, which always helps to buy new things. It just so happened so, that a pair of practically brand new K-Sport's popped up on here, with Ferado DS2500 pads, braided lines, brackets, discs etc, basically everything you'd expect when you buy them brand spanking new. So after a couple of hours thinking on it, few messages exhanged and they were mine, with a hefty saving if I were to buy them brand new with the uprated pads (which are a couple £'00's alone). They were test fitted on a lovely spec'd 14 but unfortunately had to be broken before any use, so basically brand new! 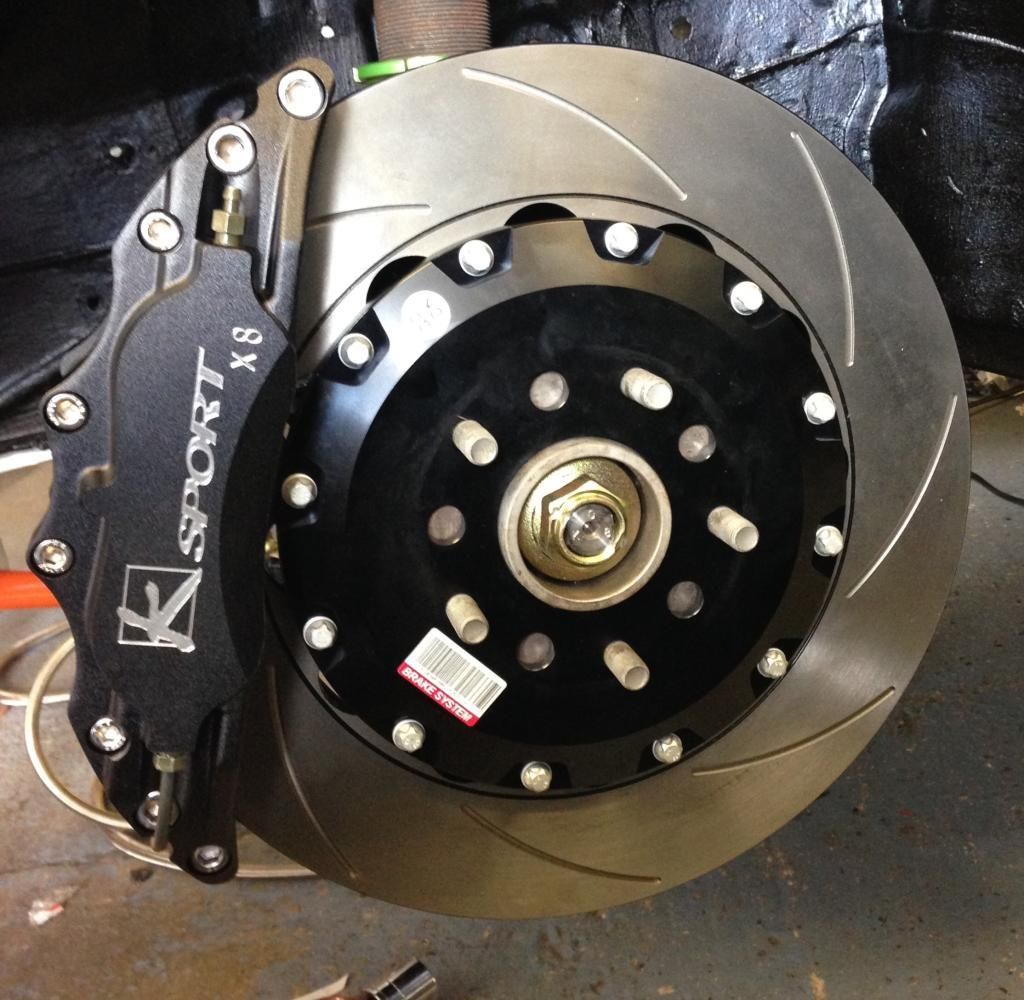 (^^ Stolen from the seller's pic  ) )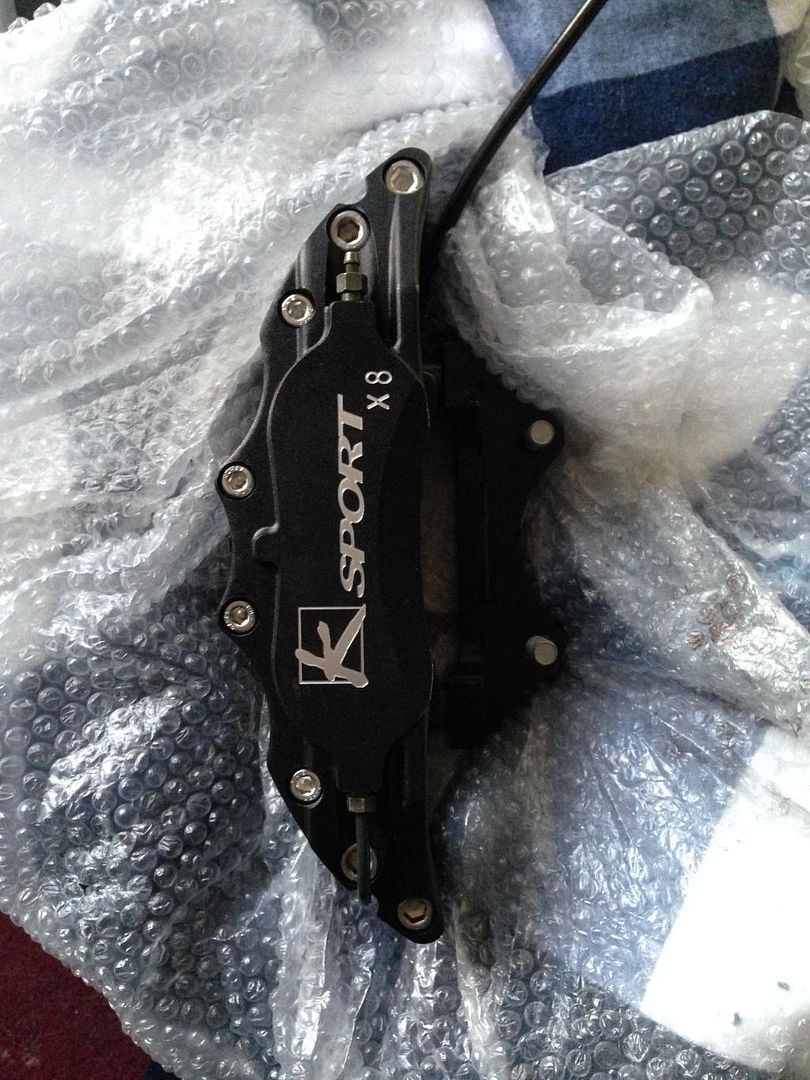 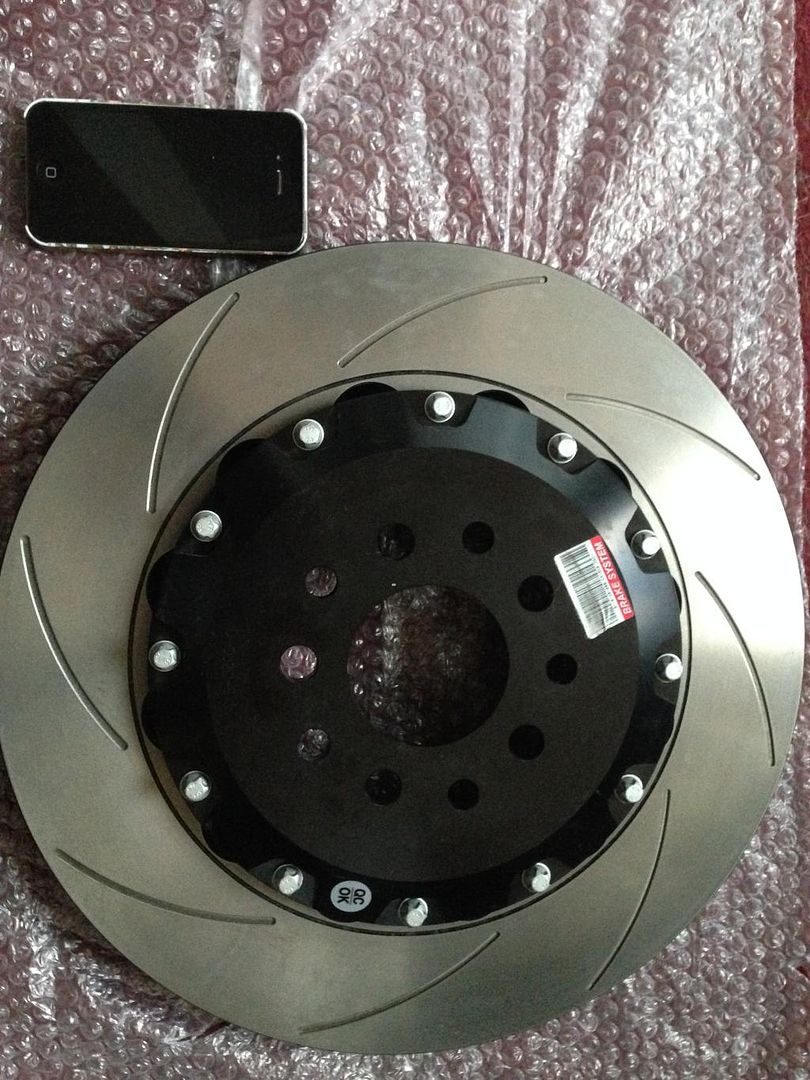 I chose to opt for the 356mm when searching for them brand new as I wouldn't mind doing some grip work if and when in the future, so decent brakes are a must :thumbs: Thankfully I've chosen to go down the route of 18's all round with this car which are required for this brake setup, unlike the 17/18 stagger I ran on my old 13. Although, this decision was made purely upon the basis I dont think the stagger works well on Coupe's, merely just S13/Hatch's that pull it off due to their shape  Ive got a vague idea of the new wheel I want to run, but things need to be sold in the new year to afford them after the roll cage in January. Ive got a vague idea of the new wheel I want to run, but things need to be sold in the new year to afford them after the roll cage in January.PS: People with K-Sport's, what Brake Master Cylinder do you guys run? I ran a standard BM50 with the Z32's, so I'm thinking to get the full benefit from the new brakes i'd be better off using the BM57? Something i'd rather do now and bleed the system up once and right  I received this little package; an oil return flange for the TD06 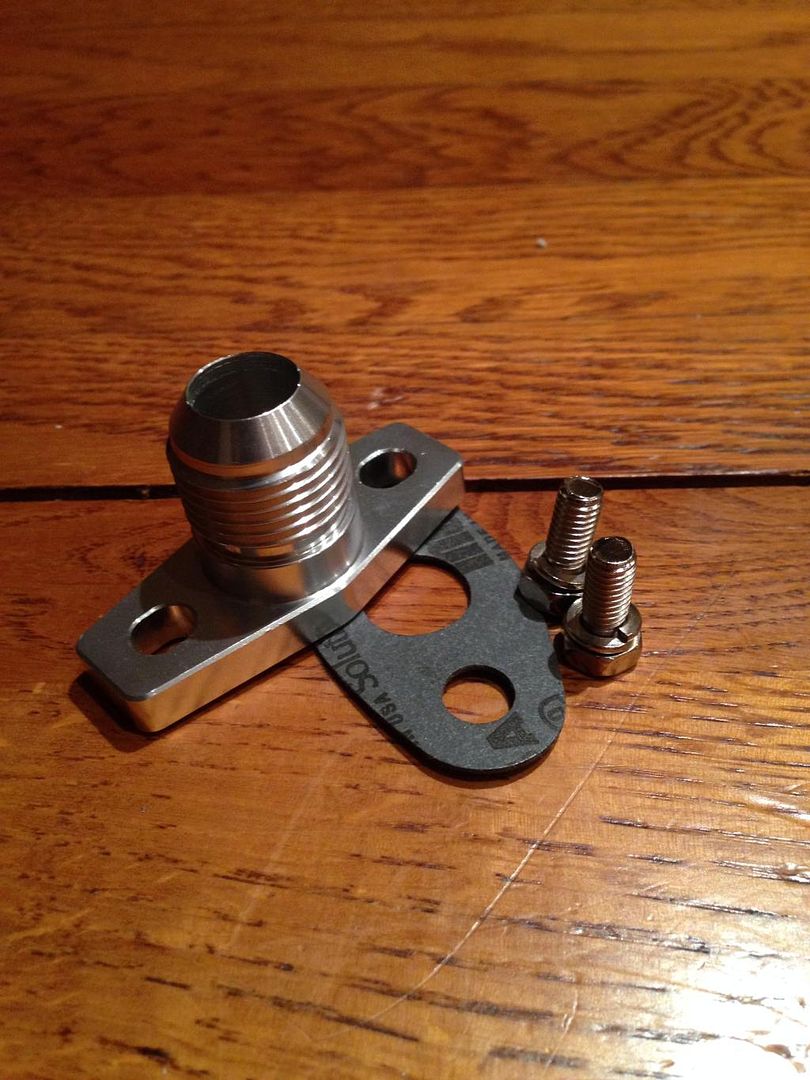 I was intending on using a barbed fitting and use some hose and clamps, but after speaking to Daze I much preferred his idea and looked a lot safer. After all, id rather be on the safe side using an AN10 > Push On hose fitting which Daze said is so tight he has to cut the rubber off, which sounds awesome! (In a weird technical/safety perspective) So, as soon as the engine is back (slight delay in the water pump arriving) I'll measure up the hose I need, and order the adapters needed to covert the block and turbo oil feed fittings into AN4  I also had another little surprise package turn up - I wasn't expecting these for a short while! 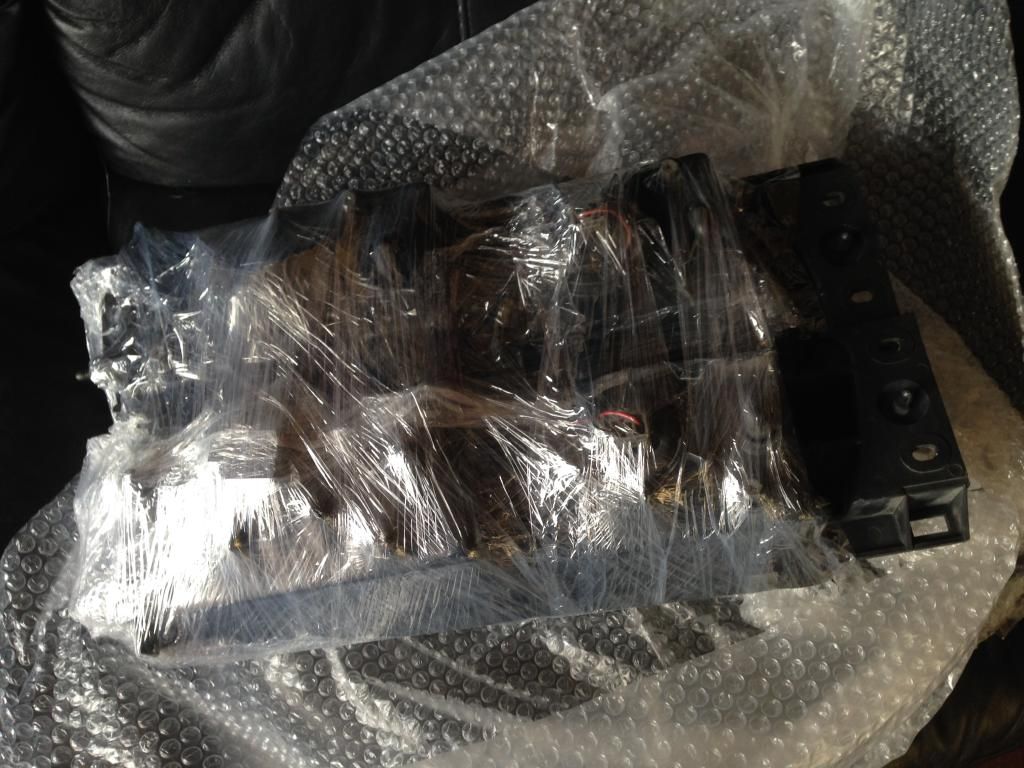 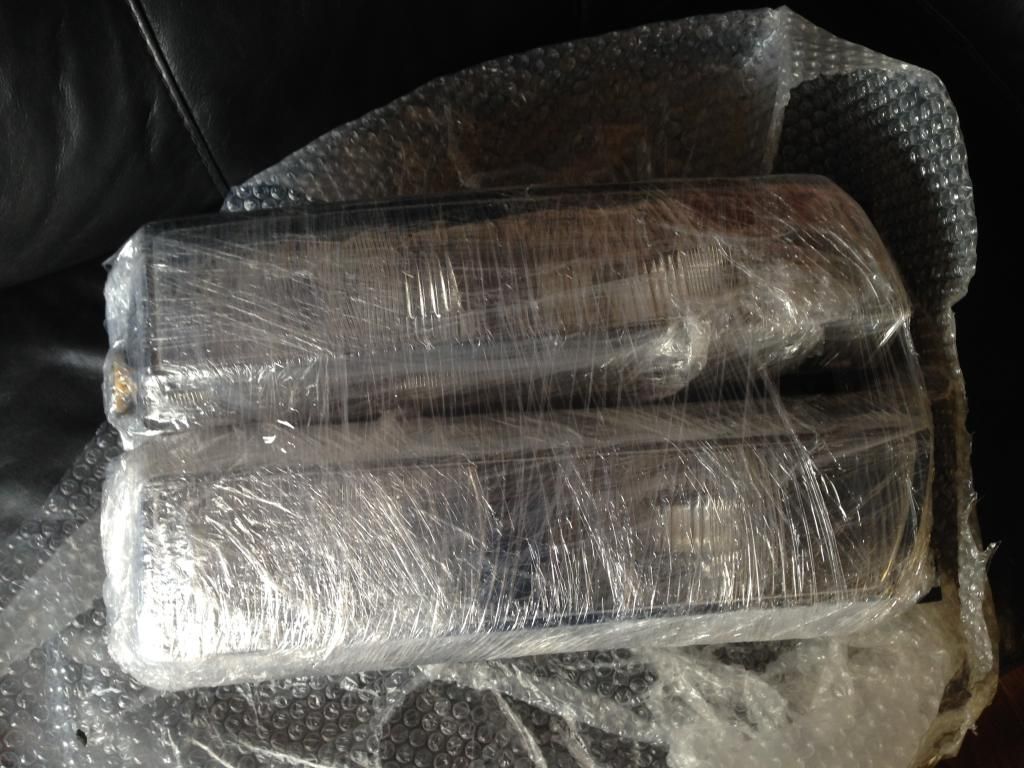 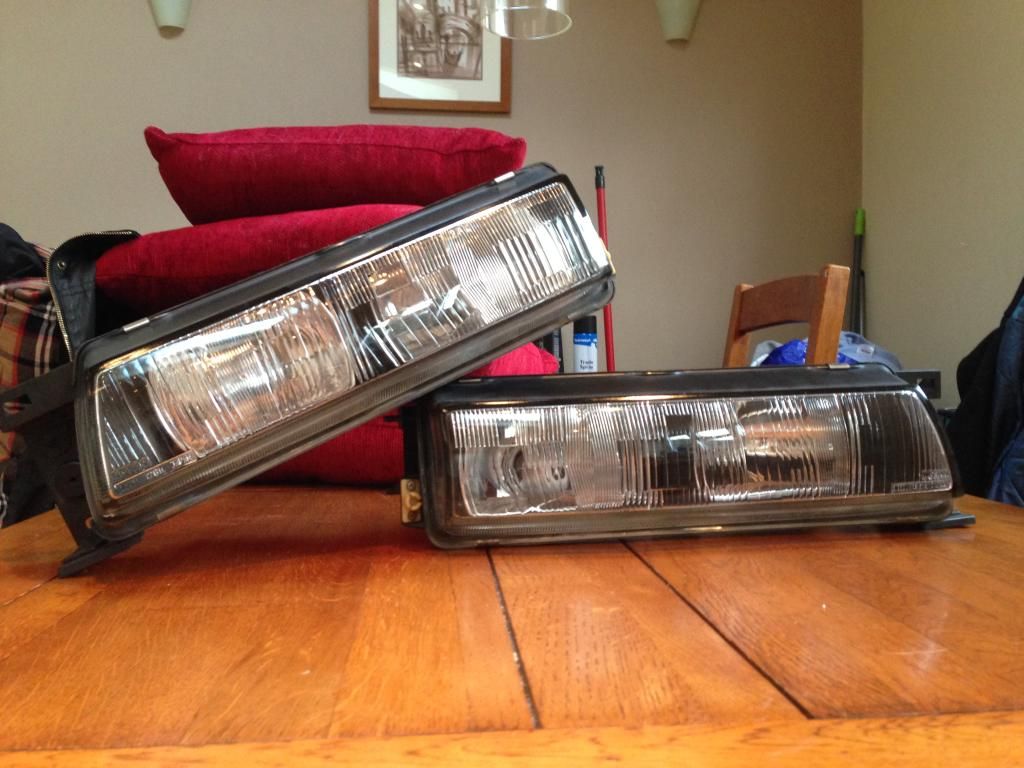 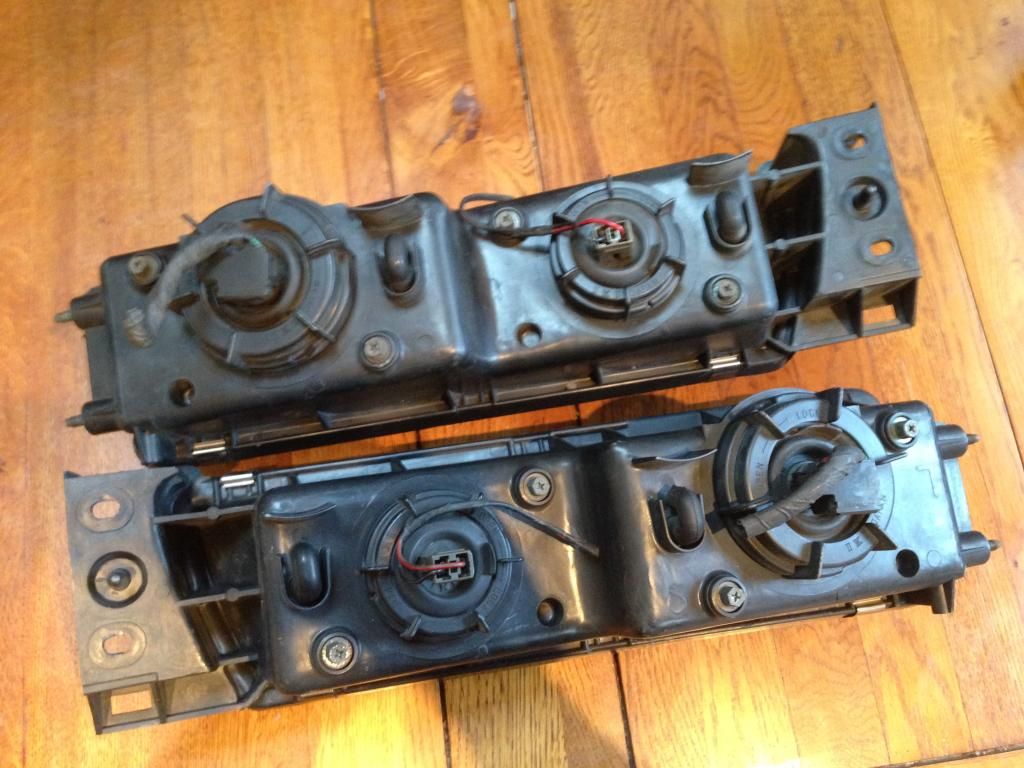 Whilst I grabbed these, it was rude not to grab some clear corner lenses! Would've be rude not to put the corners on to test the fitment  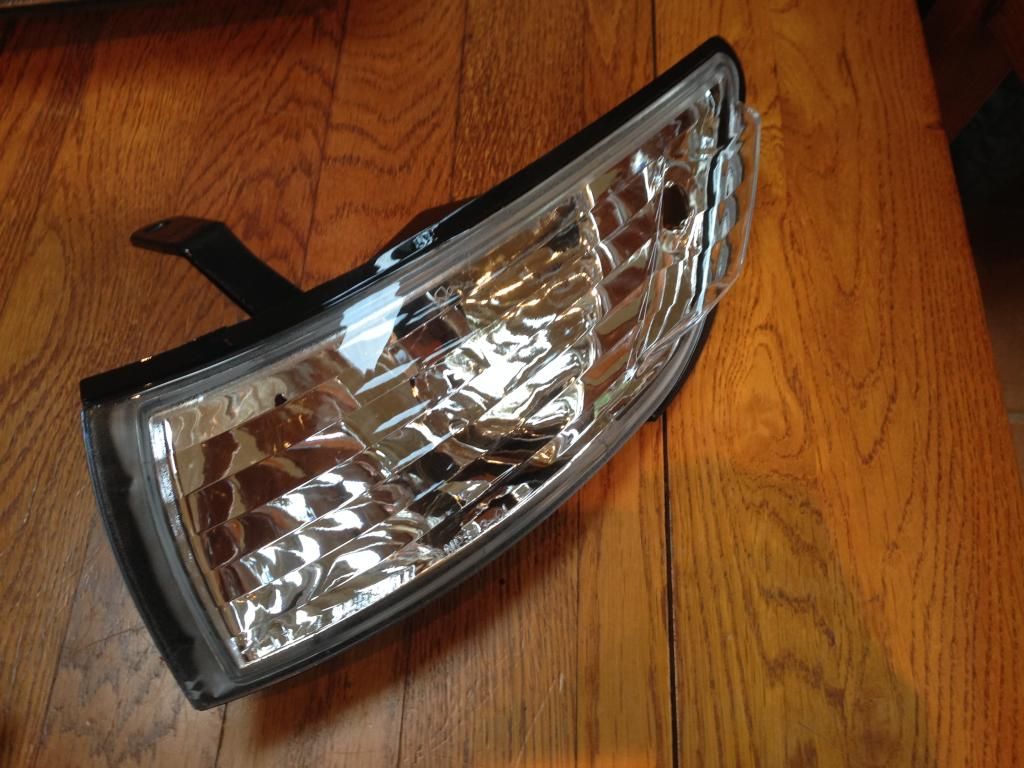 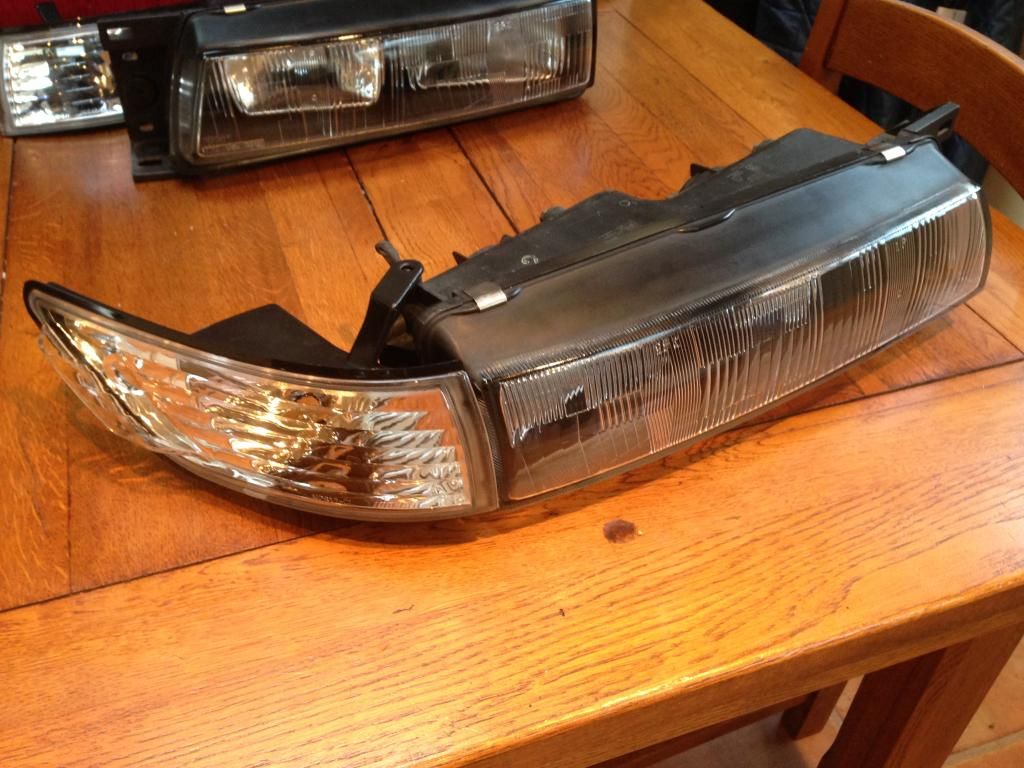 A massive thanks to Jesse Streeter who got the above Bricks and Corner Lenses at a great price, service is second to none and stupidly well packaged, so much so the immaculate Bricks didn't suffer a single scratch on their journey from Japan! My original plan was to source some Bricks with tip top mounting points but cracked lenses as I want to run clear covers on them, with the corner light tinted orange, similar to a 'GTR' style effect, but the condition of these lights make me question whether it'd be a sin to split them apart! |
|
|

|
|
|
#25 |
|
Leaky Injector
Join Date: Dec 2012
Location: Bristol, UK
Age: 30
Posts: 92
Trader Rating: (0)
 Feedback Score: 0 reviews
|
Sooooo, I was only waiting on the water pump to arrive before collecting the engine which promptly turned up.
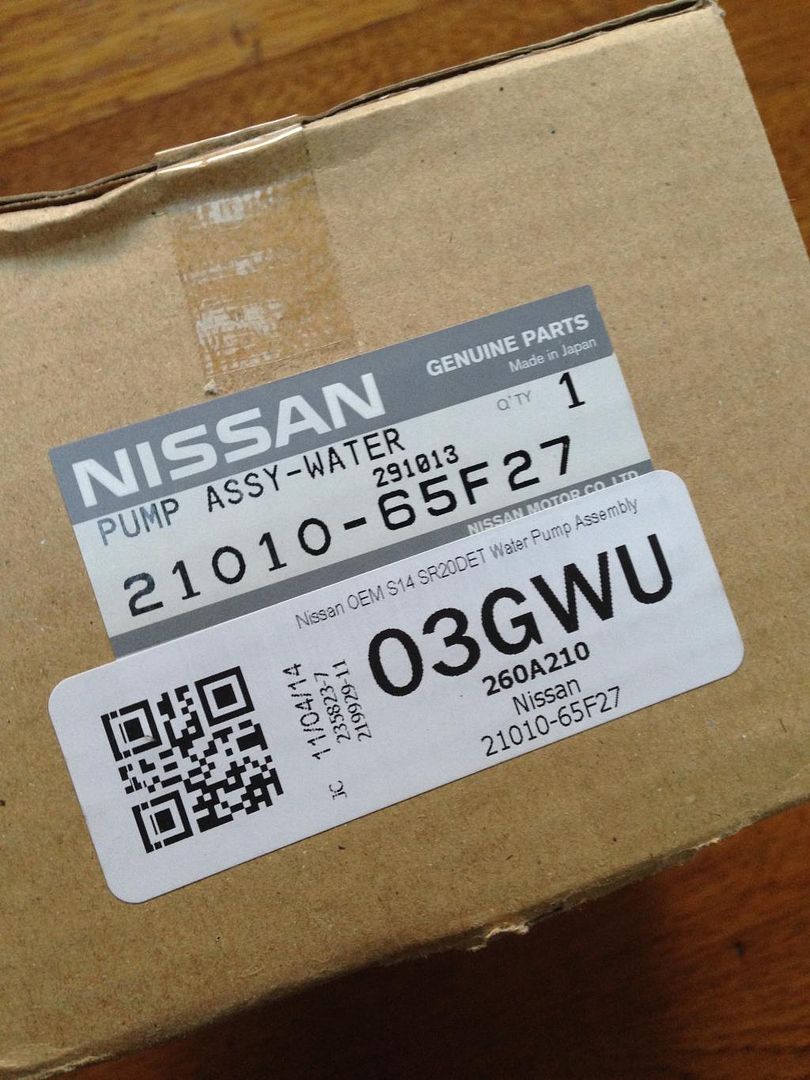 I ordered the water pump from FRSport from an unbeatable price, which was combined with another item  Now, anyone who knows about the S13/PS13 front end differences will realise you need a different set of headlight brackets which also act as a support for the slam panel. I saw one set for sale over here for quite a few pennies, but instead I bought a pair of brand new OEM ones for half the price! Cant beat Nissan OEM quality! Now, anyone who knows about the S13/PS13 front end differences will realise you need a different set of headlight brackets which also act as a support for the slam panel. I saw one set for sale over here for quite a few pennies, but instead I bought a pair of brand new OEM ones for half the price! Cant beat Nissan OEM quality! 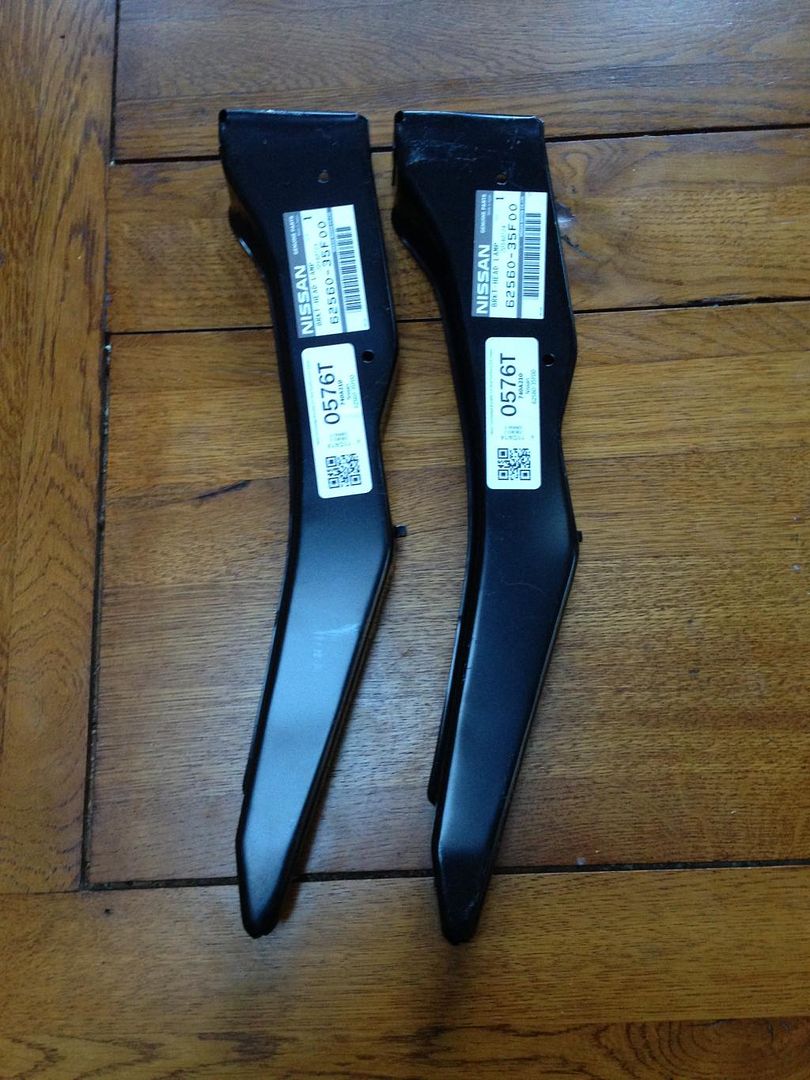 Luckily Dave was about in the afternoon, which considering this was Christmas Eve (2014) was pretty lucky as everyone wants to stay in doors, get ready for the big day etc etc. Anyway, popped up, had a sweet little chat whilst he fitted the water pump and we were good to go! From the photo's it looked pretty damn cool, but seeing it in the flesh.... now thats cool! I left it wrapped up over Christmas, as I didnt have much time to work on it what with family duties to attend, as well as another priority, preventing any rubbish falling into it! 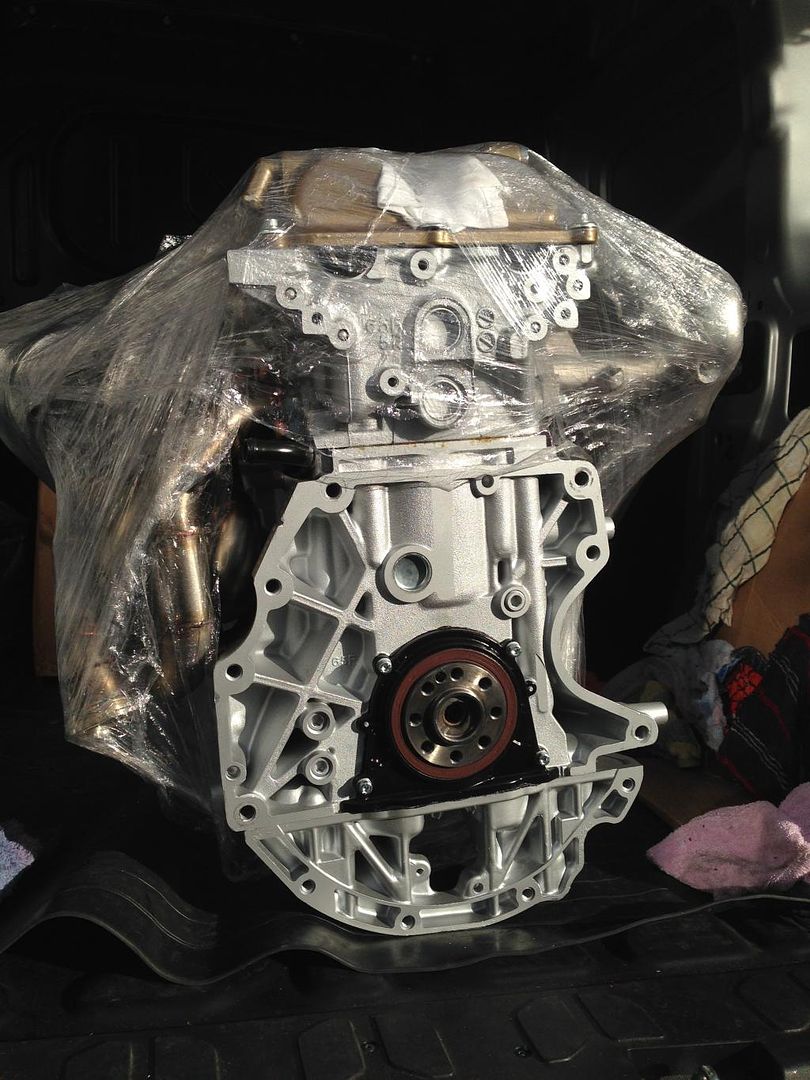 I managed to spare a few hours and unwrap it again and do a few little things. First up was fitting the old spark plugs and Splitfire coil packs. I did this as I didnt want to leave the bores exposed, but at a later date i'll get the correct plugs and whip the old ones out, better safe than sorry  I couldn't remember whether I had the gearbox bolts with me to put the engine onto the stand for a 'lil while, but hey, I had the adapter plate so may as well throw that on and use the bolts from that to fix the engine to the stand. I had to "trim" the top left corner as it ever so slightly fouled the breather pipe, just one of those things that's real simple and insignificant which was solved within 60 seconds. 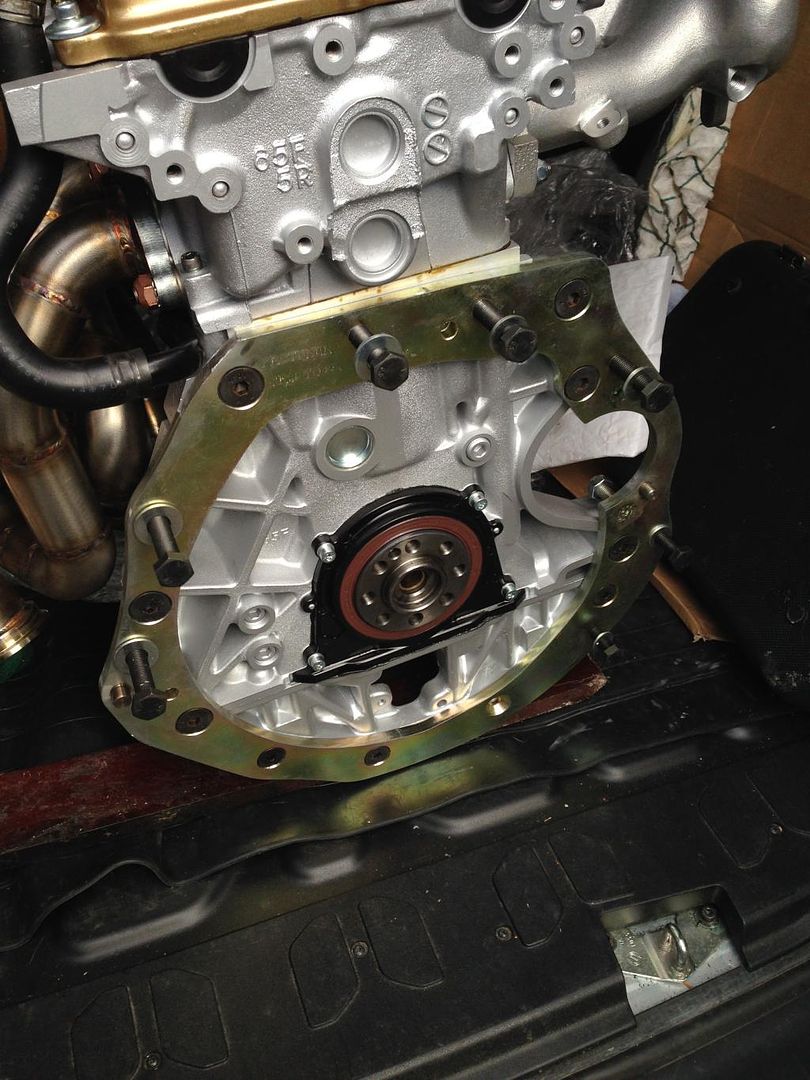 I remembered I brought my GKTech fan home, so gave that a quick wash and bolted it up. Something pretty vital in my opinion as it made my SR run so much nicer temp wise. It also looks really good haha! 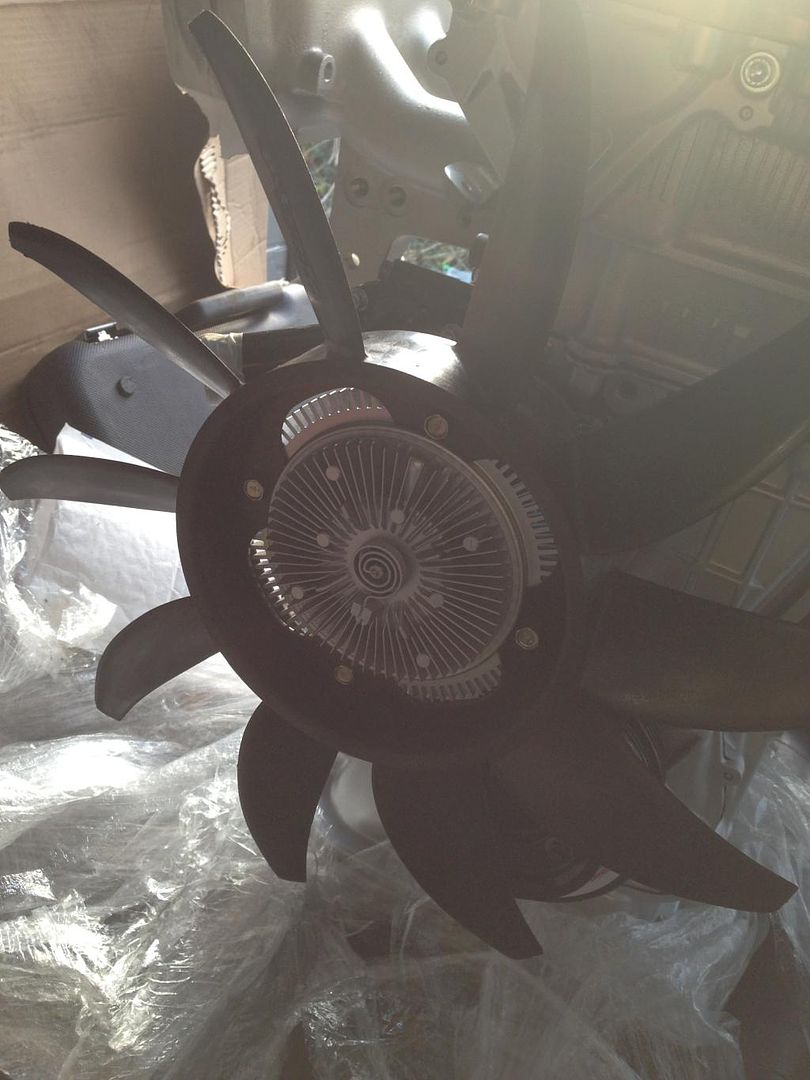 Couldn't resist taking pictures throughout, so here, have one; 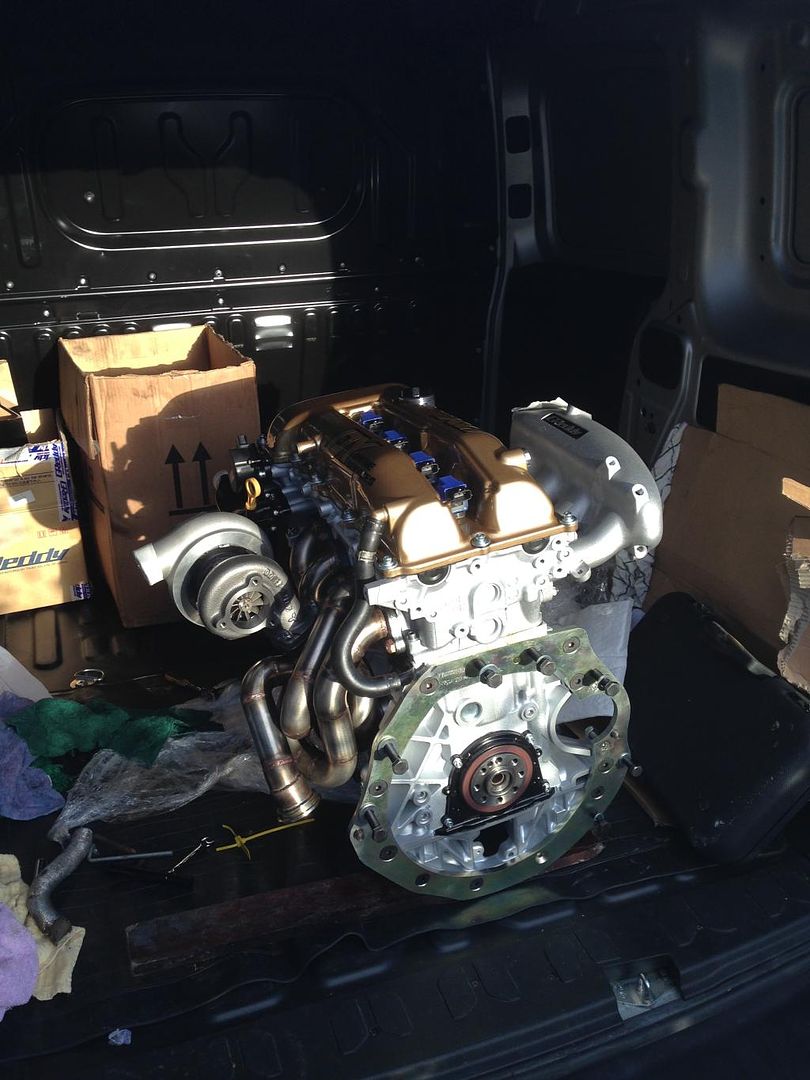 Quickly threw on the new oil return flange too; 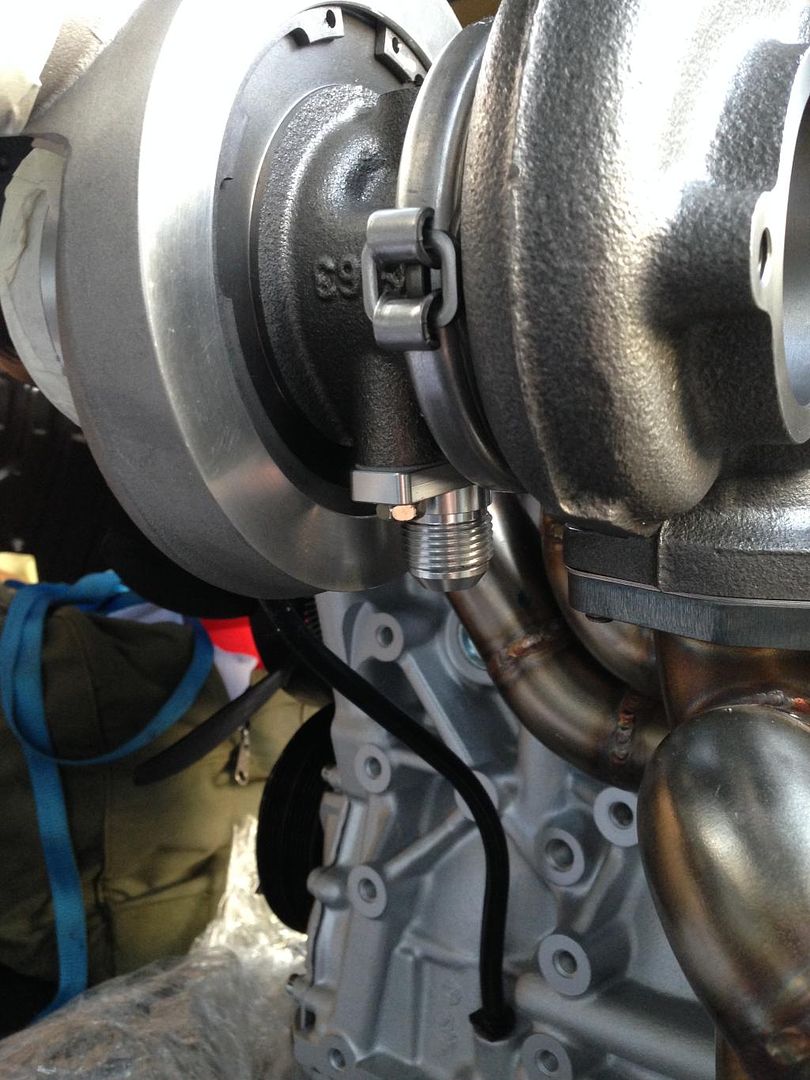 I must say it looks 10x the quality of the previous one I was going to use. It is pretty close to the compressor housing though as Daze pointed out to me when he suggested it. I torqued it up whilst trying to leave as much room as I could, but time will tell. Only a 5 minute job to slacken the bolts and move around if the worst comes to it. I need to order up a few more parts to finish the oil drain, but due to the shape of the manifold/unequal length runners, there isn't a nice continuous bend that will miss the manifold, so may have to ask Huxley to knock up a metal return whilst the car is with him  |
|
|

|
|
|
#26 |
|
Leaky Injector
Join Date: Dec 2012
Location: Bristol, UK
Age: 30
Posts: 92
Trader Rating: (0)
 Feedback Score: 0 reviews
|
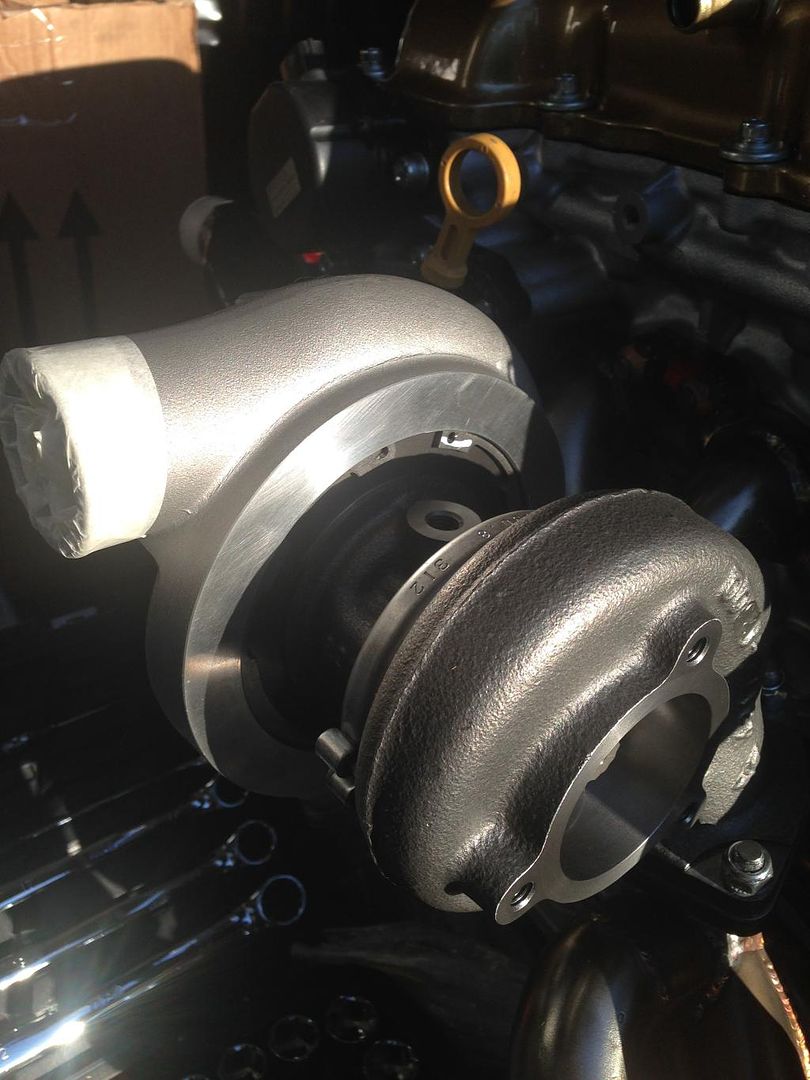
Once I had a couple minutes out on the engine, I made a couple of little tweaks. I noticed when the turbo came the core wasn't clocked properly - i.e. the oil feed and return weren't vertical, maybe that could be due to the angle of the manifold but took 2 minutes to rectify this. Thankfully the Greddy unit has a clamp with a 10mm nut, quickly loosened that off and span a treat!
 Now with the core clocked how it should be, it gave me an idea of the oil return, something that has been bothering me for a few days. To get a more accurate perspective, I threw the Turbosmart wastegate on to see how that would sit in relation to the return on the block 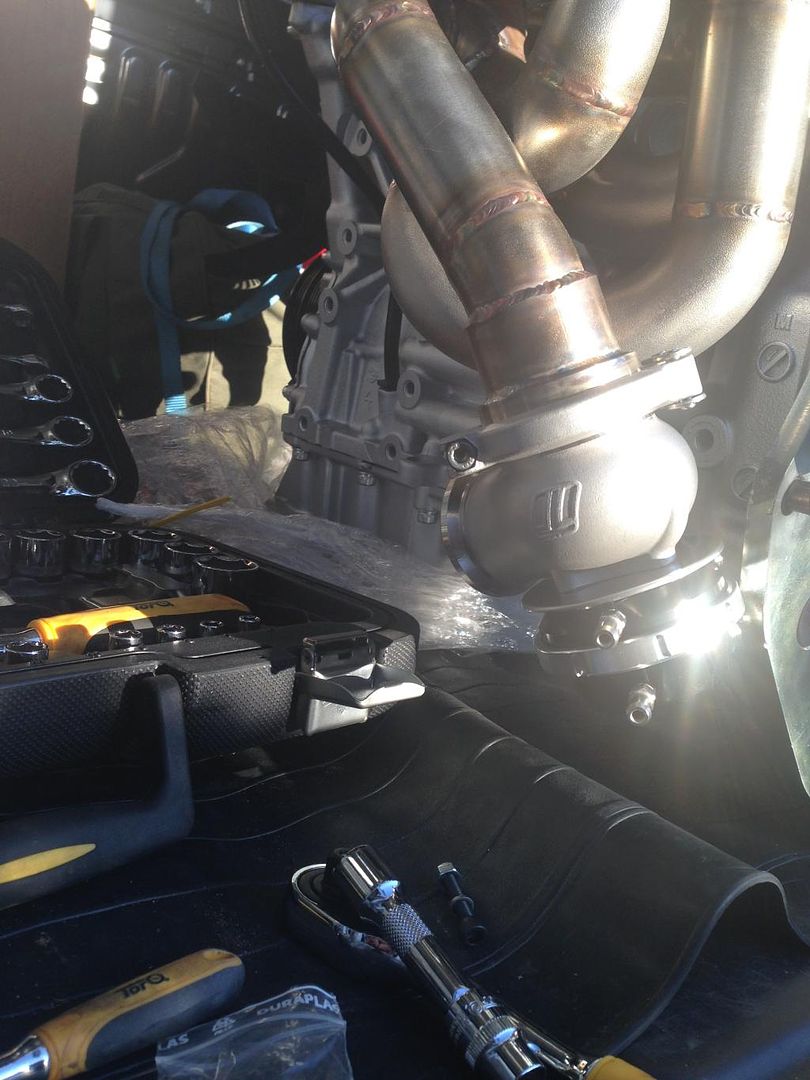 Here's what I'm faced with; 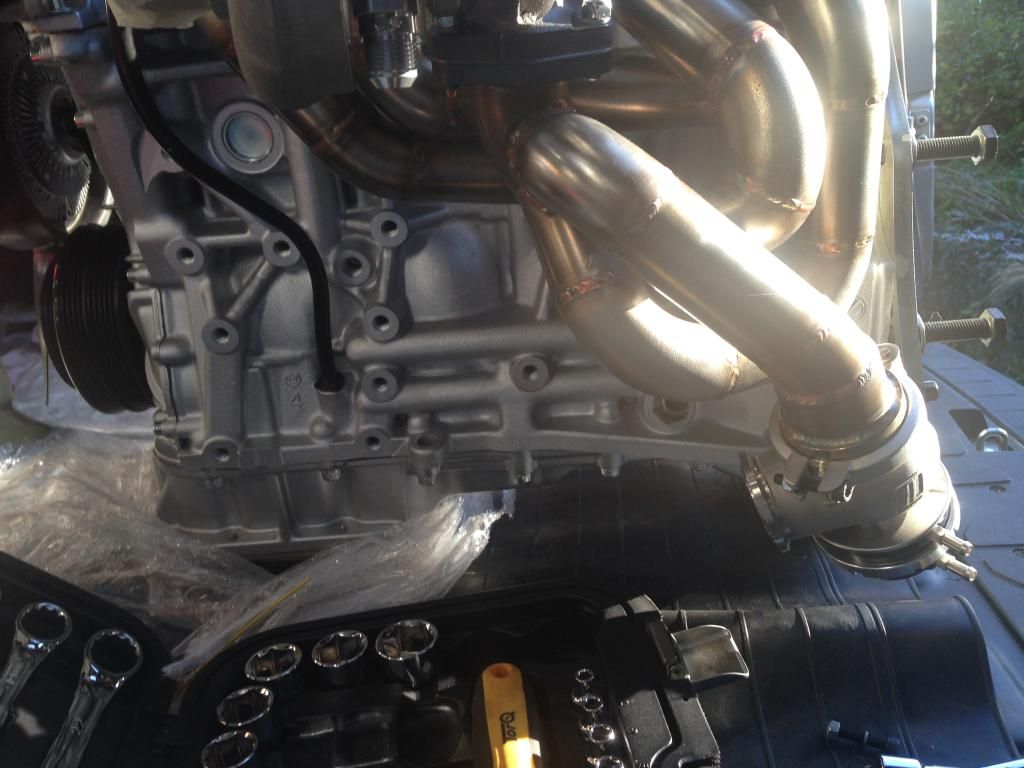 As you can see, the way the Mid-Mount manifold is designed, 2 runners sit quite low meaning a simple hose with a curve wouldn't clear it. Now, I'm thinking whether to remove the standard return in the block in favour on an AN10 fitting to match the return on the turbo. This could give me the freedom to purchase angled fittings to try and clear the manifold? Whilst it was sunny, I thought i'd throw the clutch on loosely to check it clears the adapter plate. Reason being, when I researched adapter plates a couple of months ago, I read stories where some plates aren't designed for twin plate & above clutches. But, everything clear nicely so another plus on the Protuner Z33 > SR20 plate :thumbs: 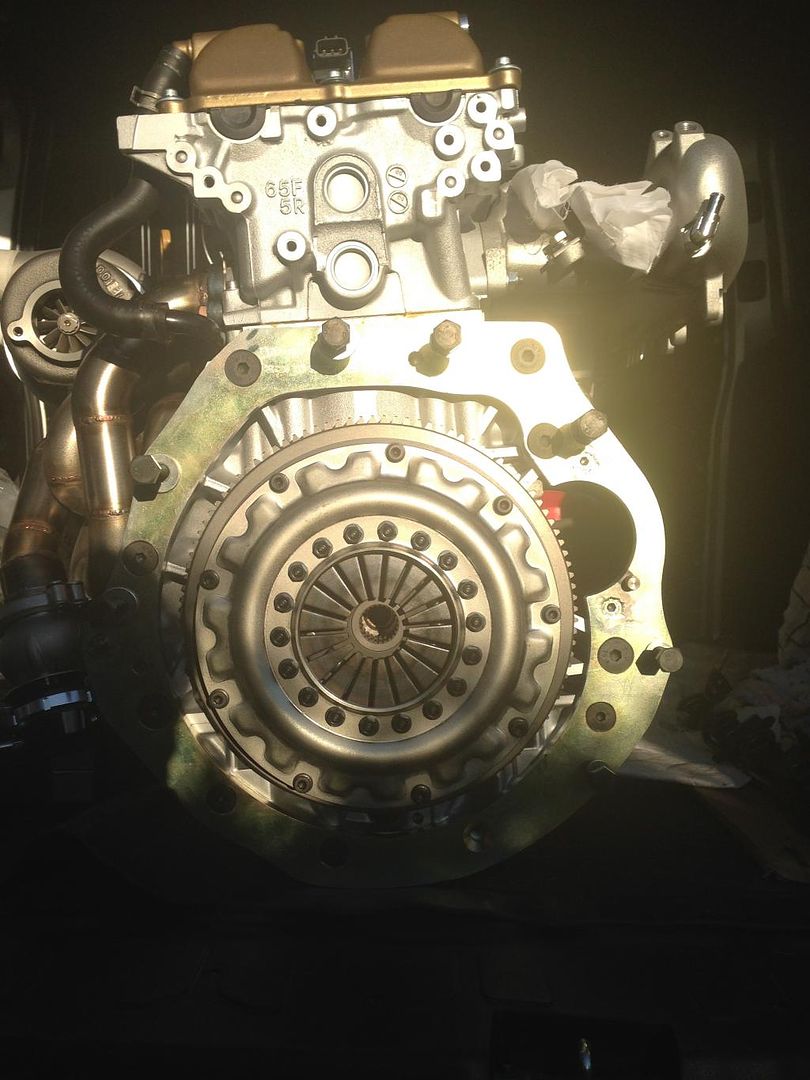 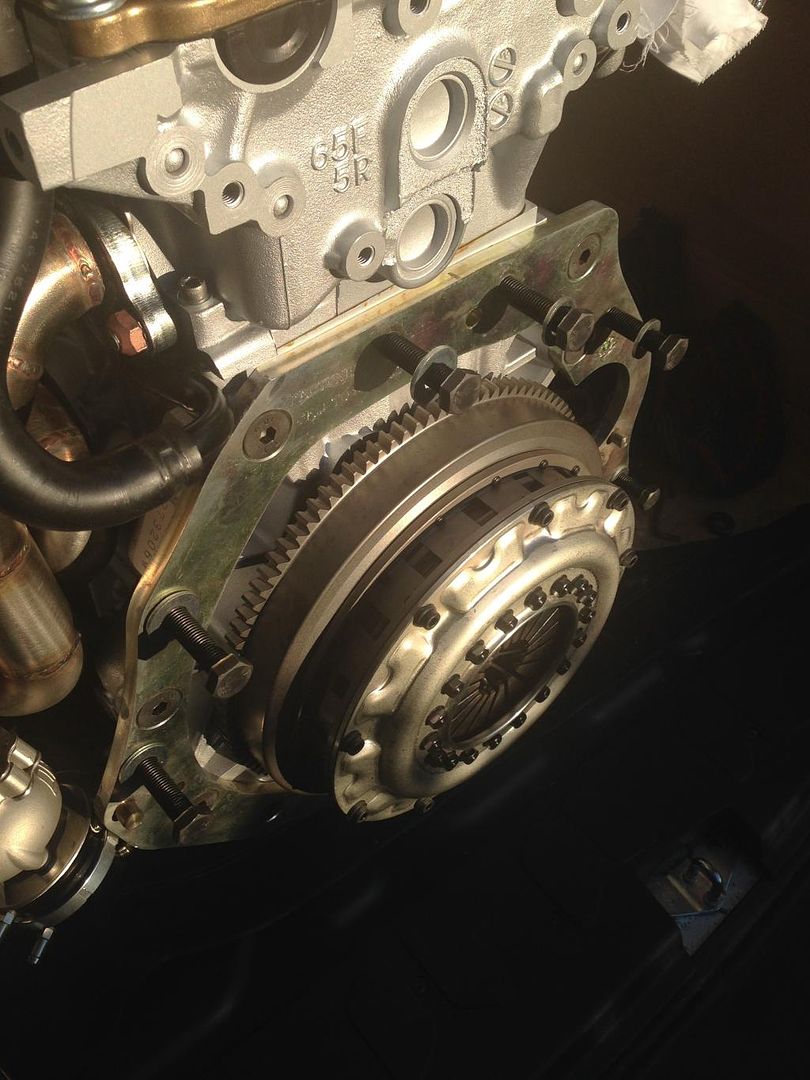 I really do love how everything comes together on this engine, such as the GKtech water neck spacer, which blends in lovely with the refurb'd water neck  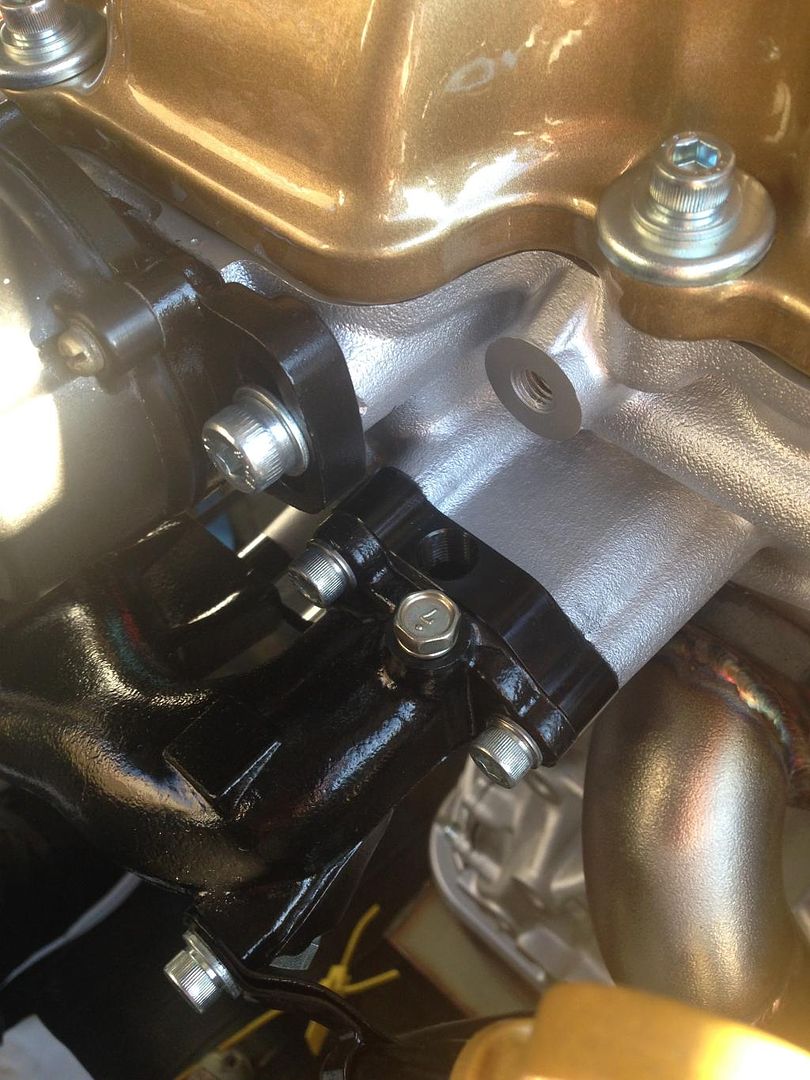 Seriously can't wait for the first start up, mapping and then feeling what this car can do on track. Its going to be a little bit different to the 13 I used to drive. |
|
|

|
|
|
#27 |
|
Leaky Injector
Join Date: Dec 2012
Location: Bristol, UK
Age: 30
Posts: 92
Trader Rating: (0)
 Feedback Score: 0 reviews
|
I needed to get a move on to make sure the car is ready for Huxley to rectify the terrible cage issue and make a Turbo Elbow and Downpipe for me.
So first things first, I started having a go at removing the front windscreen. The idea was to keep it in one piece as a spare, as its not in the best of condition and wouldn't mind replacing it with a new one in the future, so worst case scenario was that i'd kick it out. Turns out, removing a windscreen is pretty easy, time consuming as it was my first time but now I know what to do and what not to do  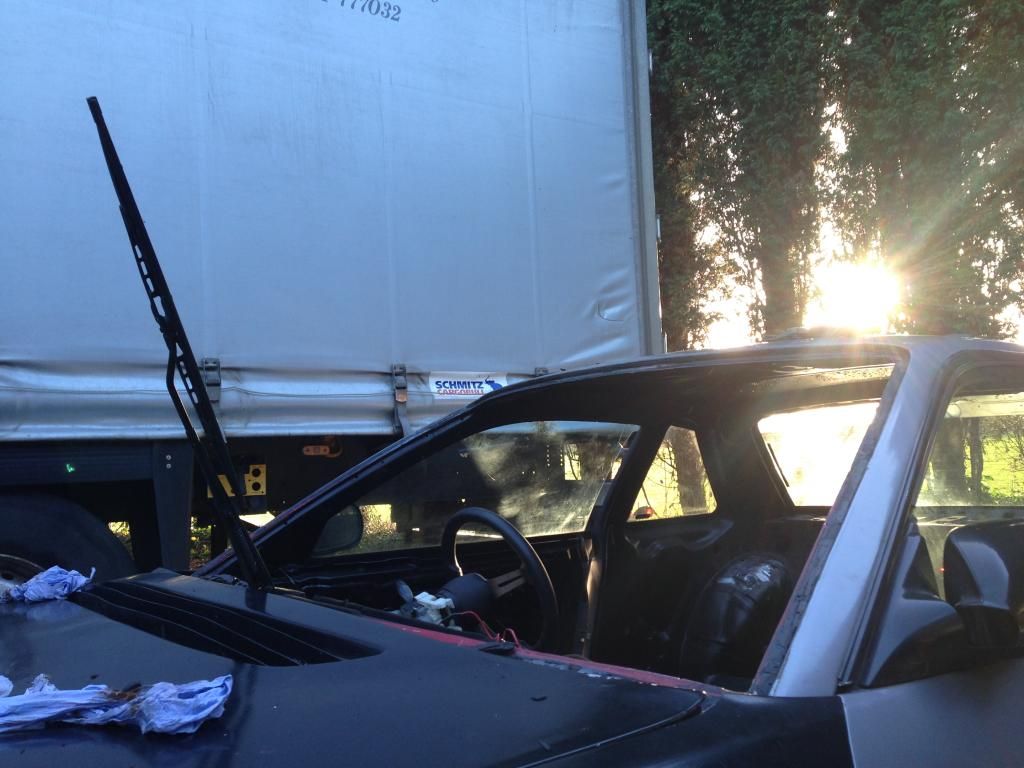 Whilst I was pretending to be an windscreen fitter, I thought id have a go at removing the other windows. Reason being, when it comes to spraying the interior, its going to be hell trying to spray the rear interior with all the glass in and a jungle gym of a cage. This part was a tad scary for me, as the rear windows aren't easy to find 2nd hand  So, with a but more patience and perseverance I got one out but ran out of time, need to keep revising for my upcoming exams  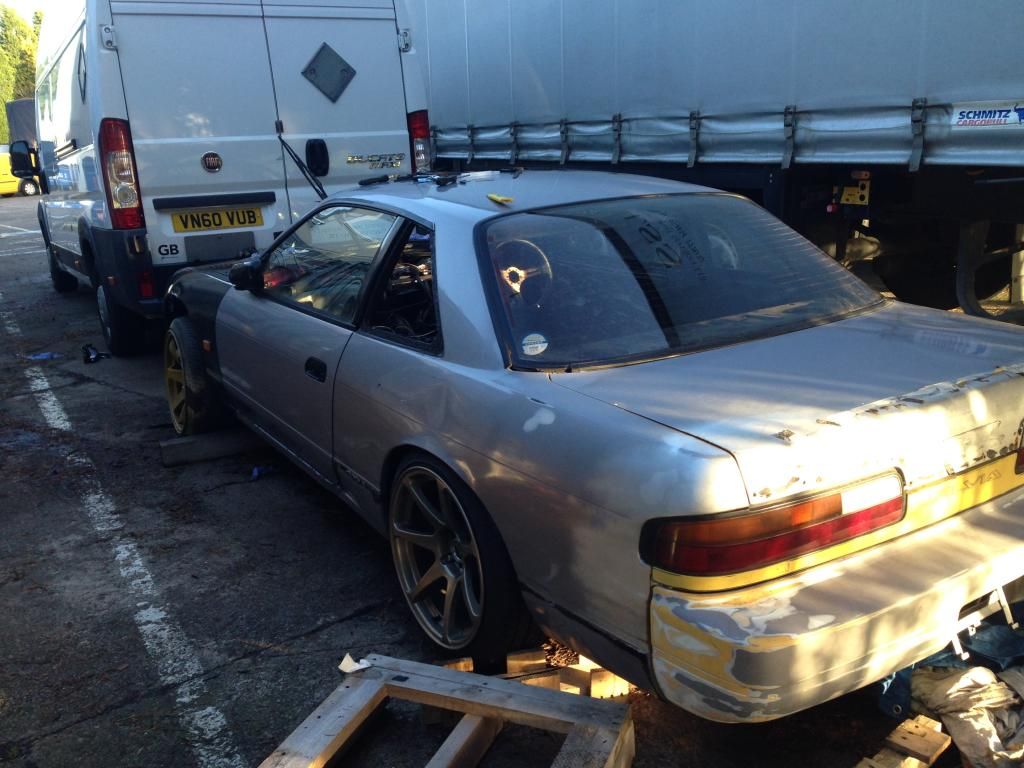 The car is also rolling now, I disassembled the Powered by Max coilover's and lube'd them right up, theres no way I'm letting these beautiful things seize! Didn't get any pictures, but as you can imagine, it was quite a boring job to be honest. Front ride height is currently set to Formula D/BDC/4x4 with the rear still on a fairly high setting but much lower than the front :wack: My issue now is that, the engine needs to be in the car for the exhaust work So, to make my life a bit easier, I removed the standard remote shifter on the Z33 box so the linkage can just hang around as thats not important at the minute. 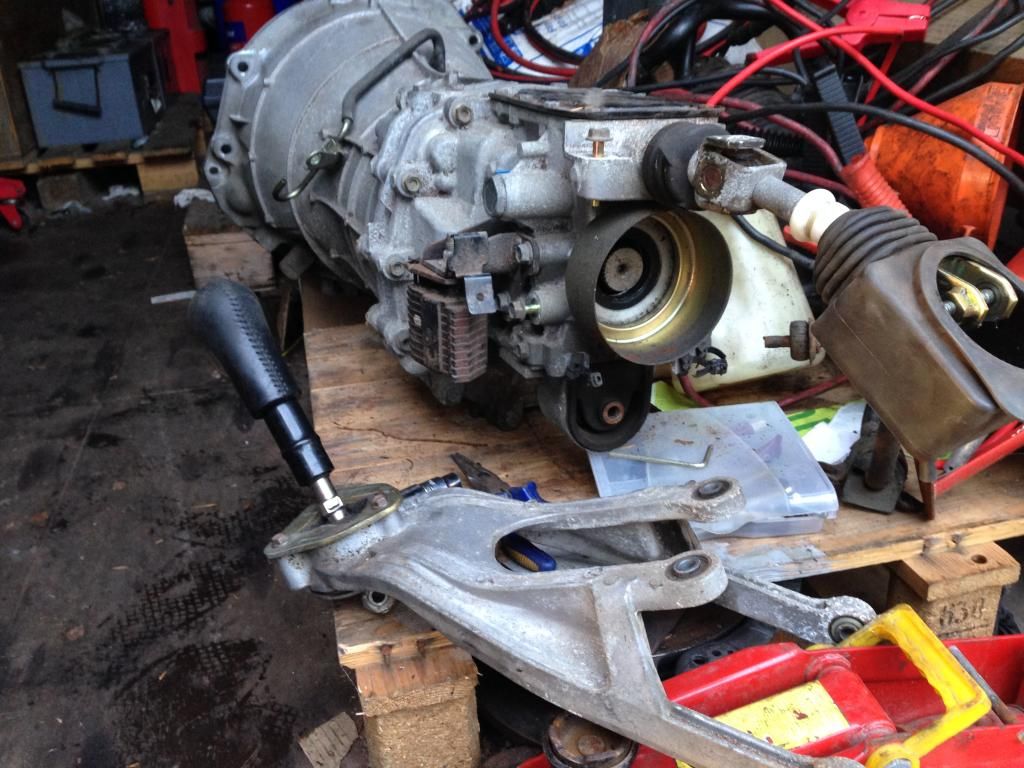 My only chance to put the engine in was on the weekend, when surpise surprise it started raining. So me and my dad set out removing the engine from the back of the van, in the form of an extreme engine crane, but wouldn't trust anything else whilst having this engine dangling in the air! 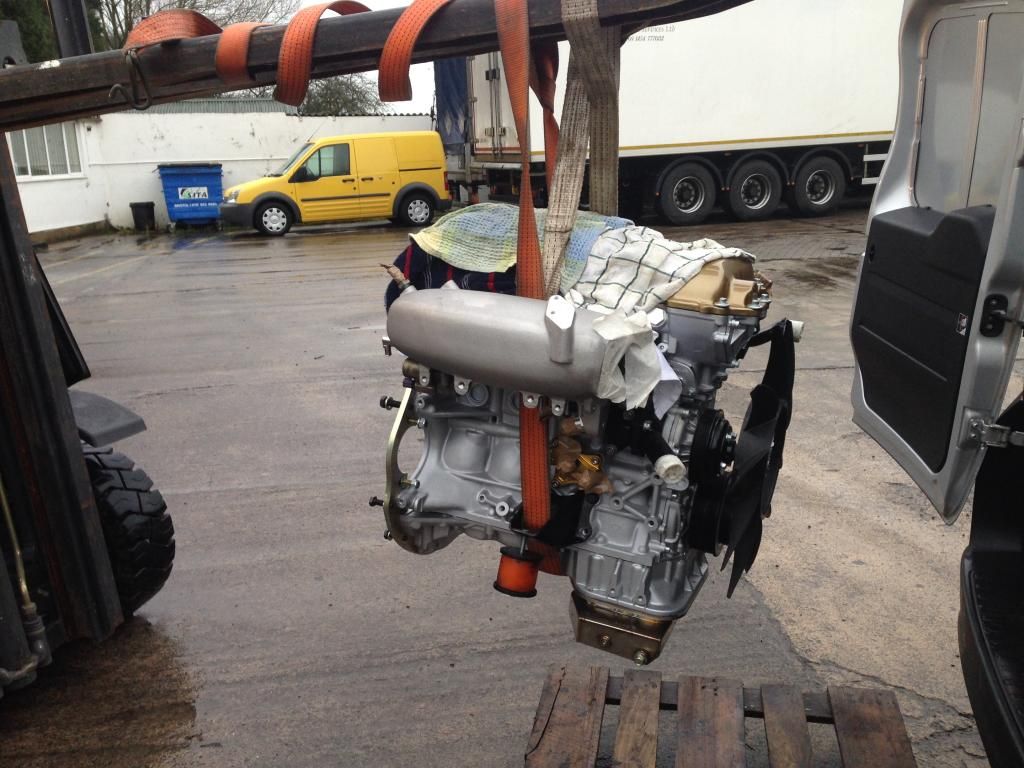 Placed the gearbox on a pallet, making sure its ready to go into the car: 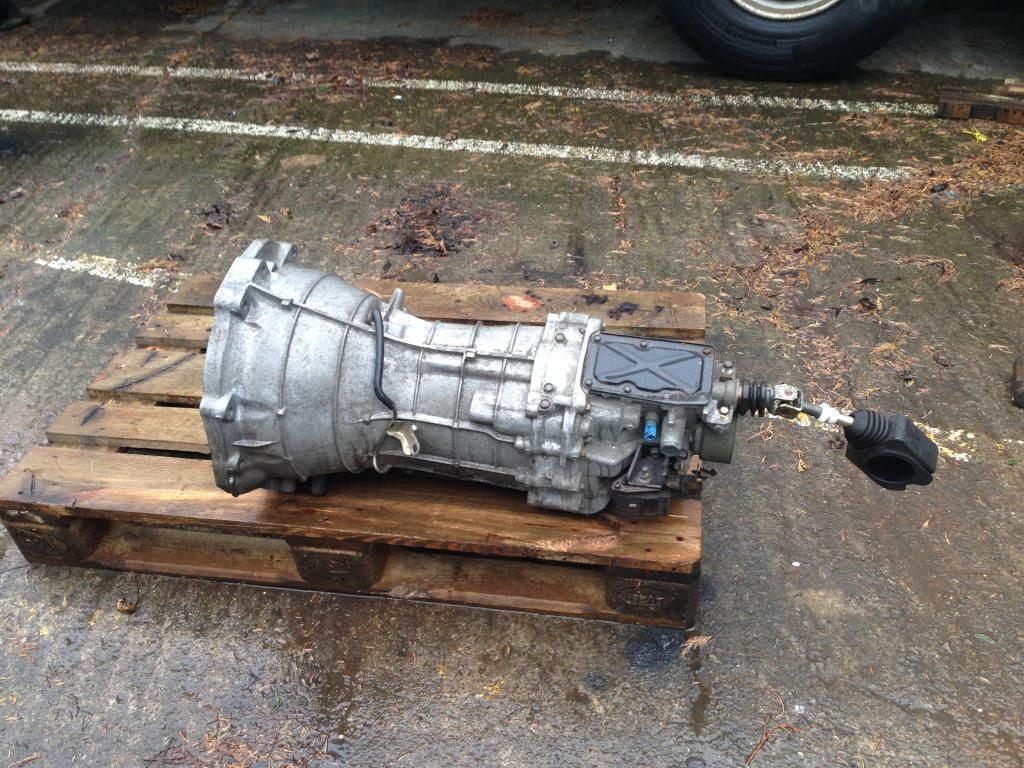 Engine meet gearbox, gearbox meet engine  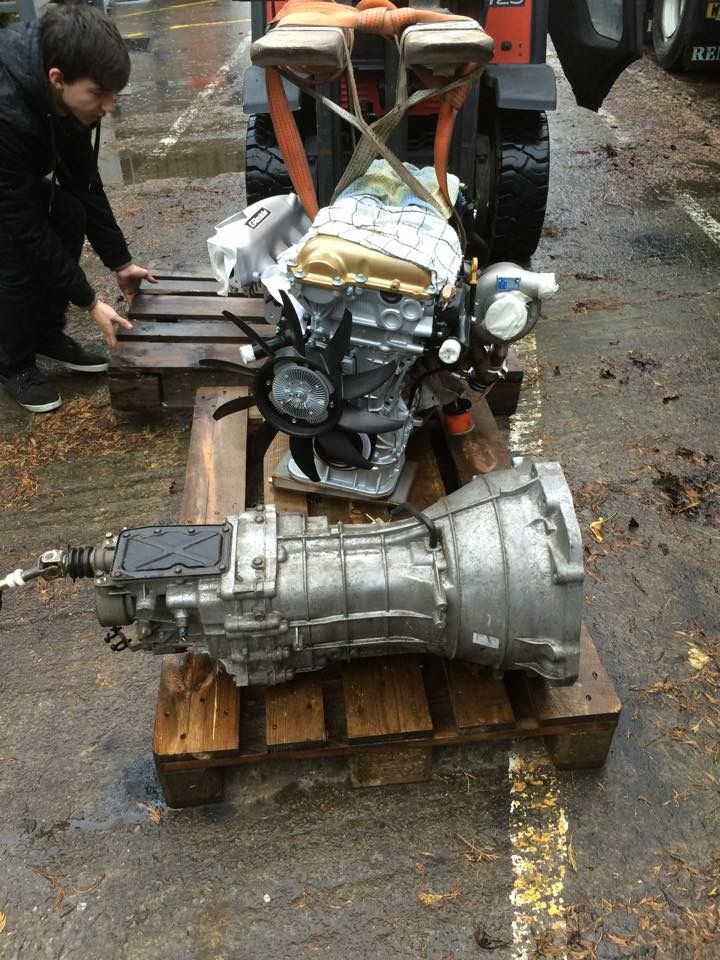 Everything lined up perfectly! Another rating for Greg @ Protuner's gearbox plate, everything slotted straight in, including the dowels which is a key feature of his plate in my opinion. Input shaft slotted in beautifully, which made life a bit easier. 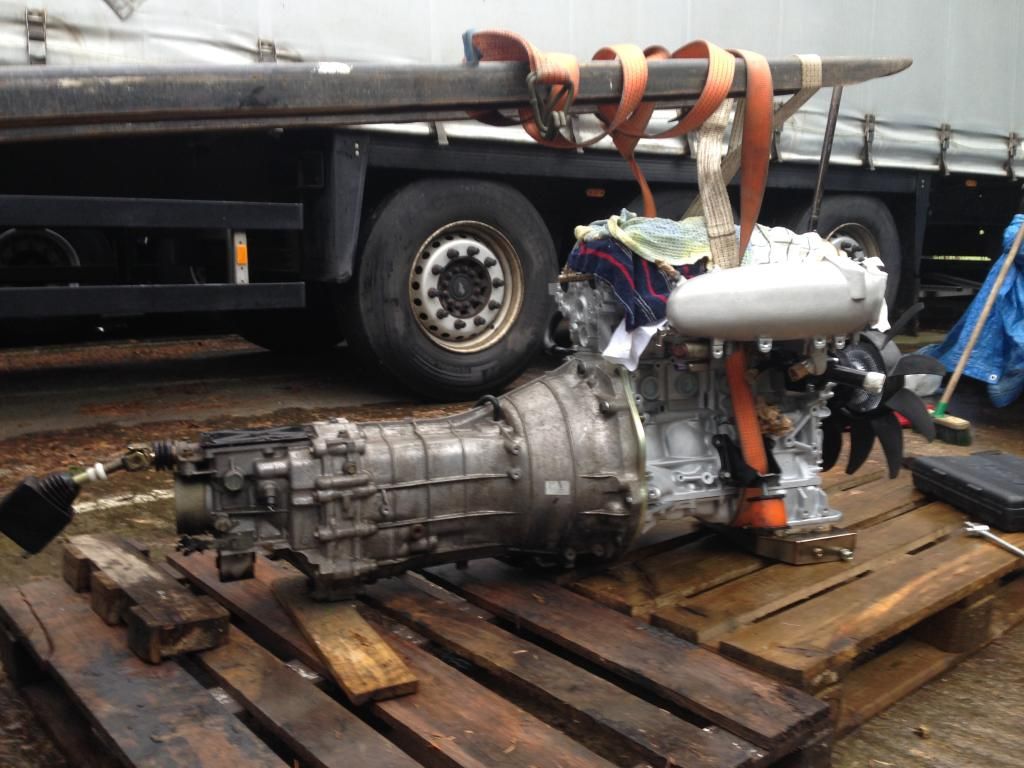 Moment of truth; 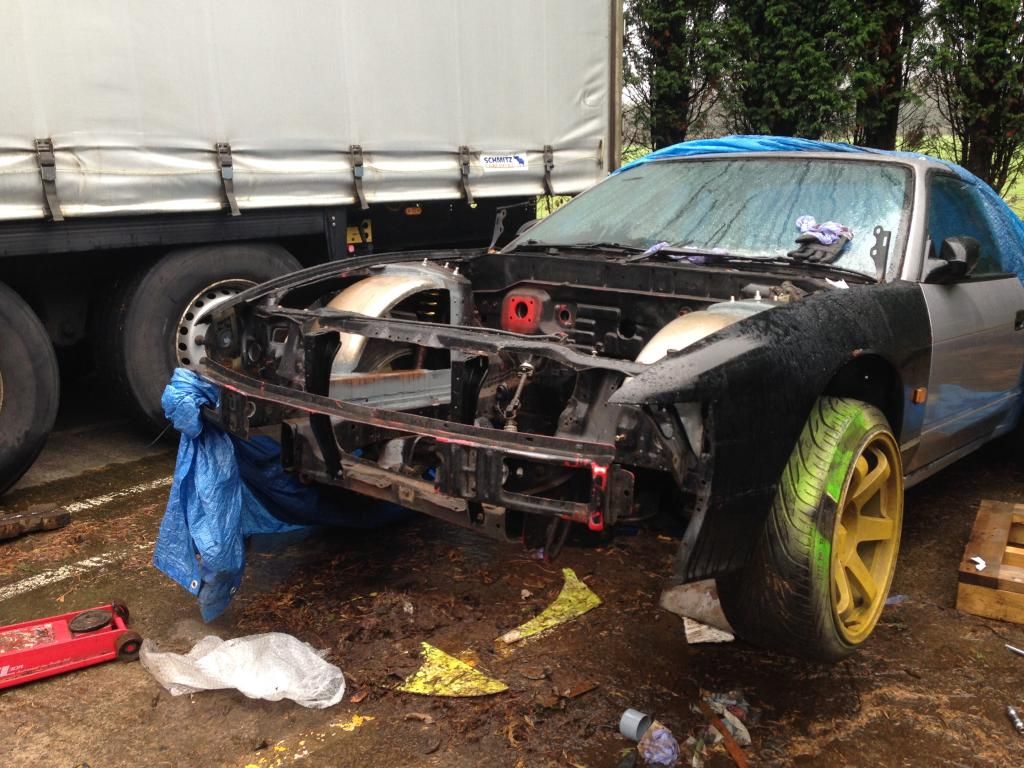 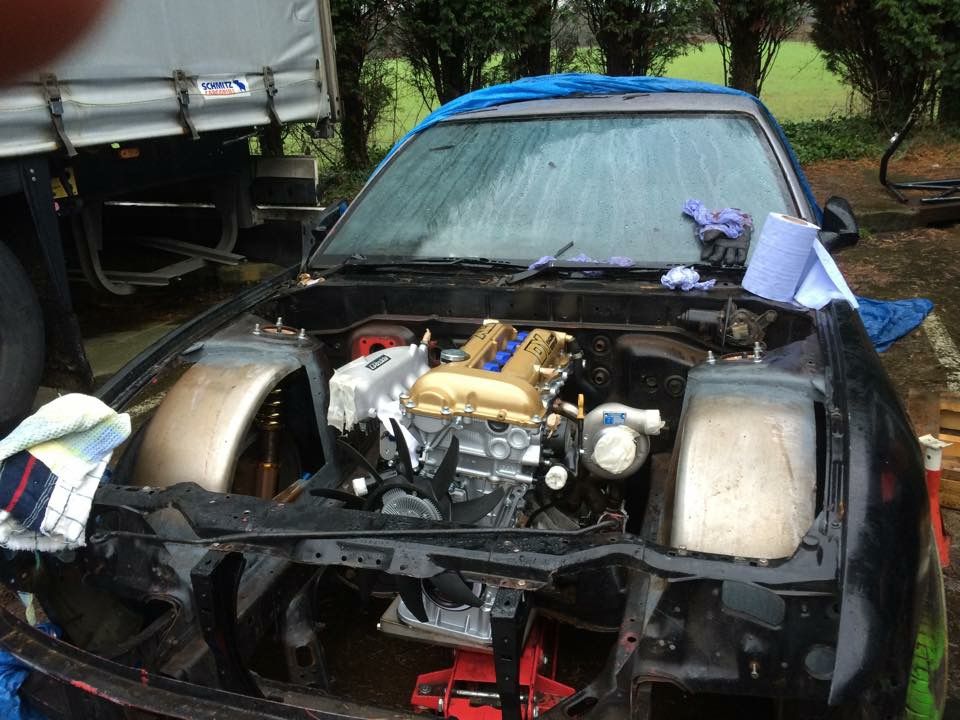 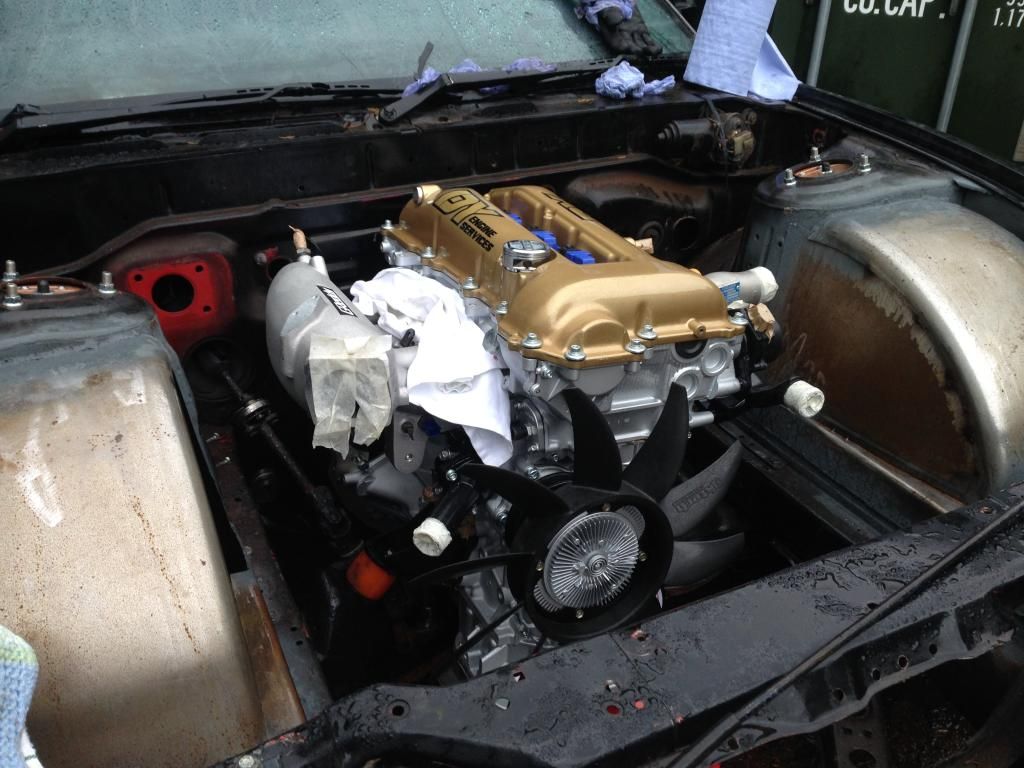 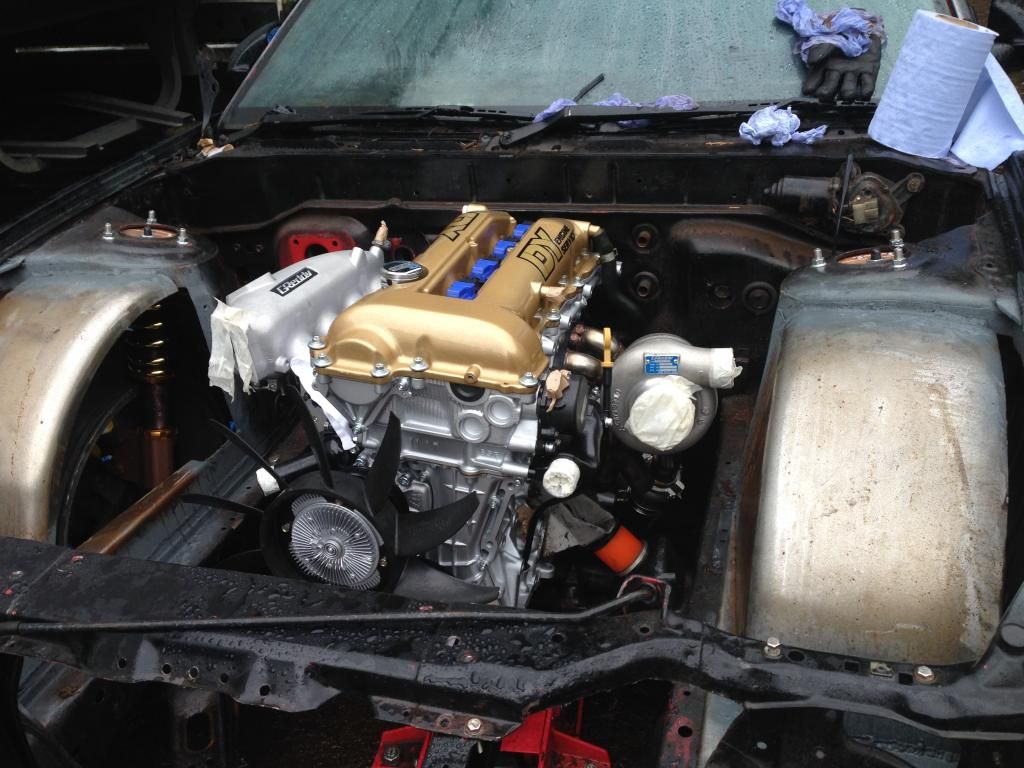 Everything went perfectly for a nice change and it was quite refreshing working with my dad on a car, must have been years since we did something like this. Can't say I didnt have a little smile when I stood back and saw the SR sat in its new home, just need to make sure the rest of the car can compliment such a beautiful engine setup, but I will try my hardest  Hopefully i'll receive the gearbox mount and remote shifter soon, so I can at least get the gearbox mount fitted so Hux knows exactly how much room he has to play with regarding the exhaust. |
|
|

|
|
|
#28 |
|
Leaky Injector
Join Date: Dec 2012
Location: Bristol, UK
Age: 30
Posts: 92
Trader Rating: (0)
 Feedback Score: 0 reviews
|
After the last update, I got myself a set of Aerokit +50mm rear overfenders. A friend uses these and said they’re quite flexible, ideal considering they’ll see some fair use in the future.
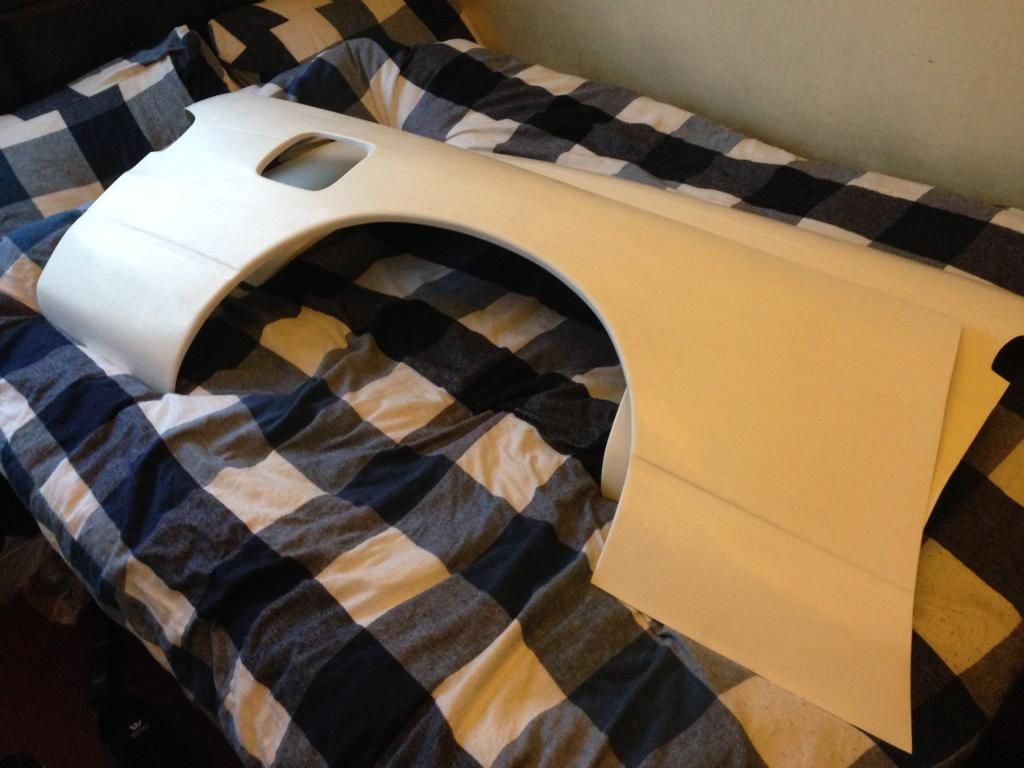 I also purchased the Mazworx Z33 shifter bracket from the ‘states. It looks a lot better in the flesh, but mainly got this as its designed to fit from the off, rather than trying to guess and weld like the majority of people who do the SR/Z33 conversion; 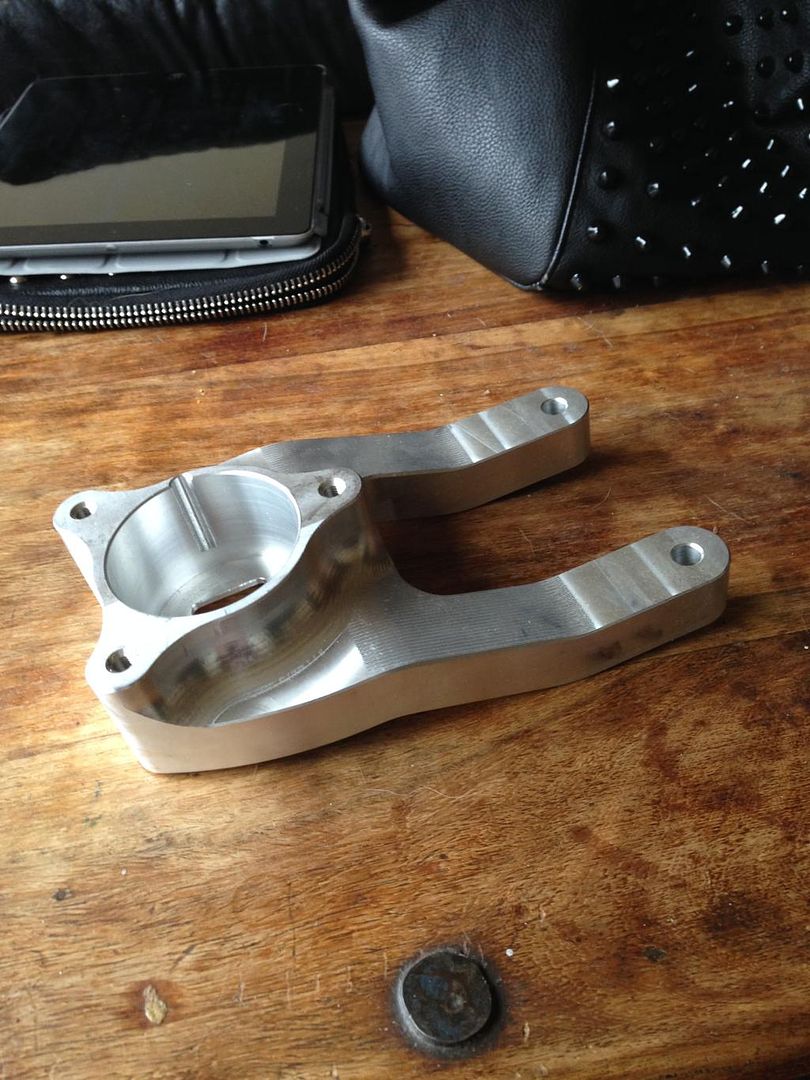 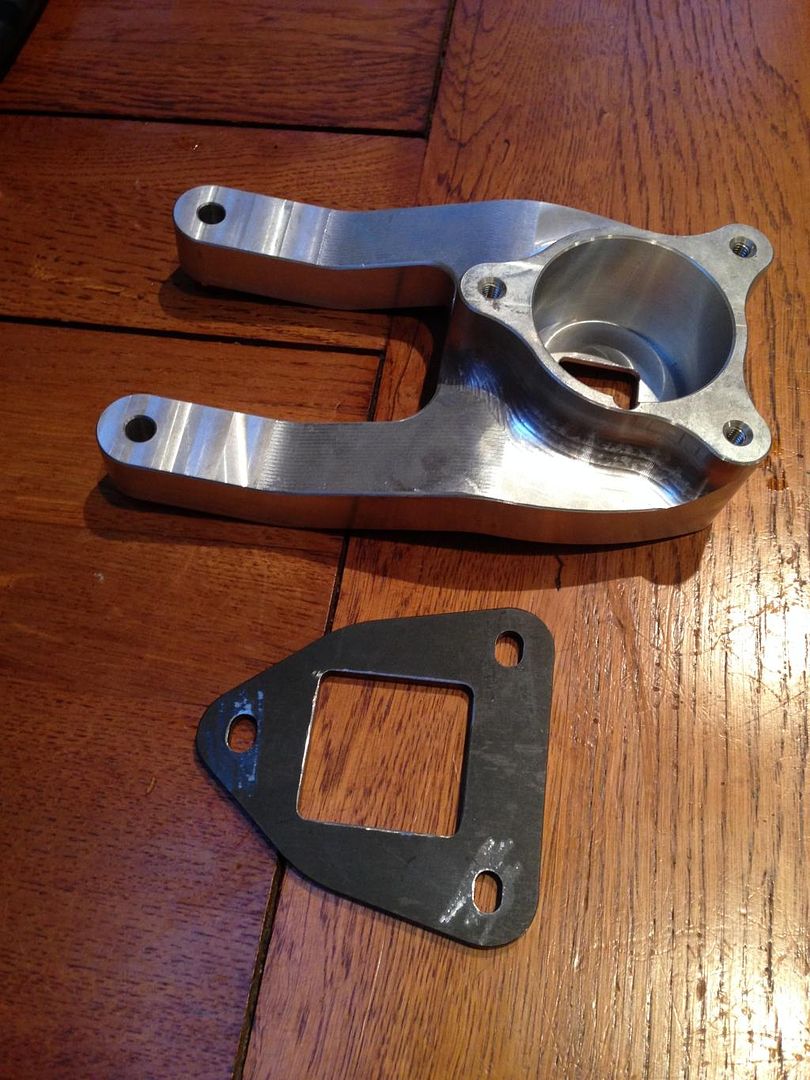 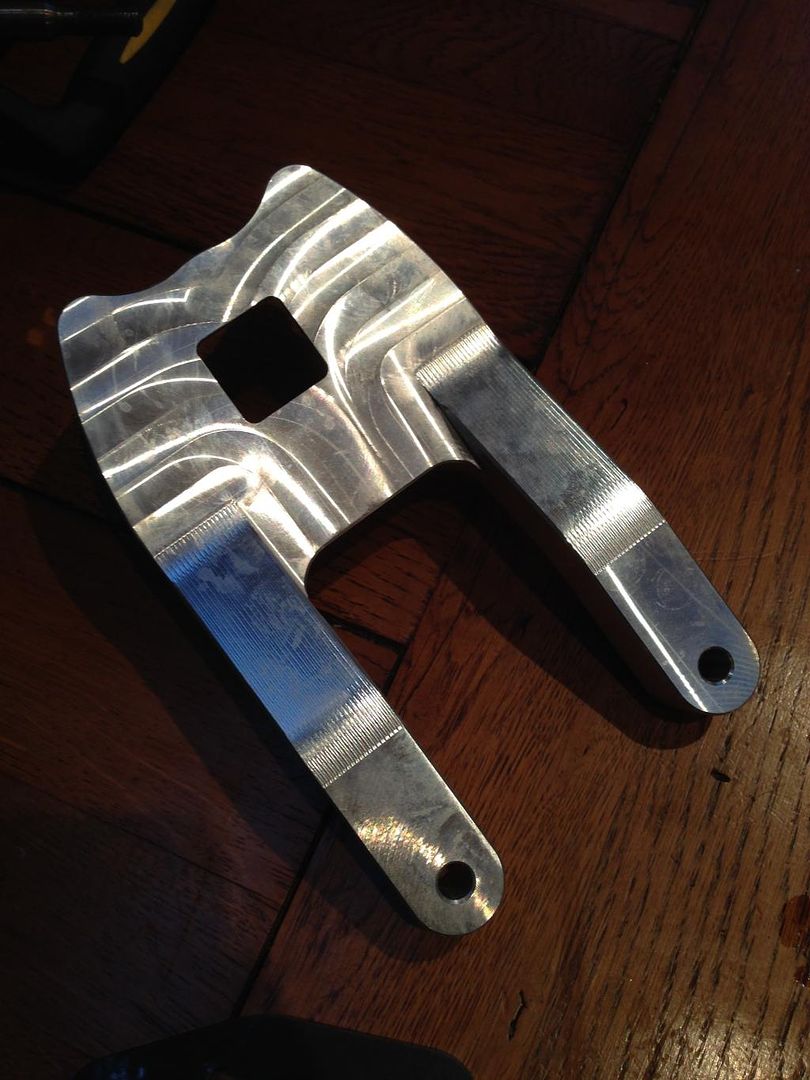 Whilst I was trying to sort the aero out, I finally settled for a pair of genuine Origin +40mm front fenders, purely because of how I envision the car in the future. Trust me, it’ll look good! 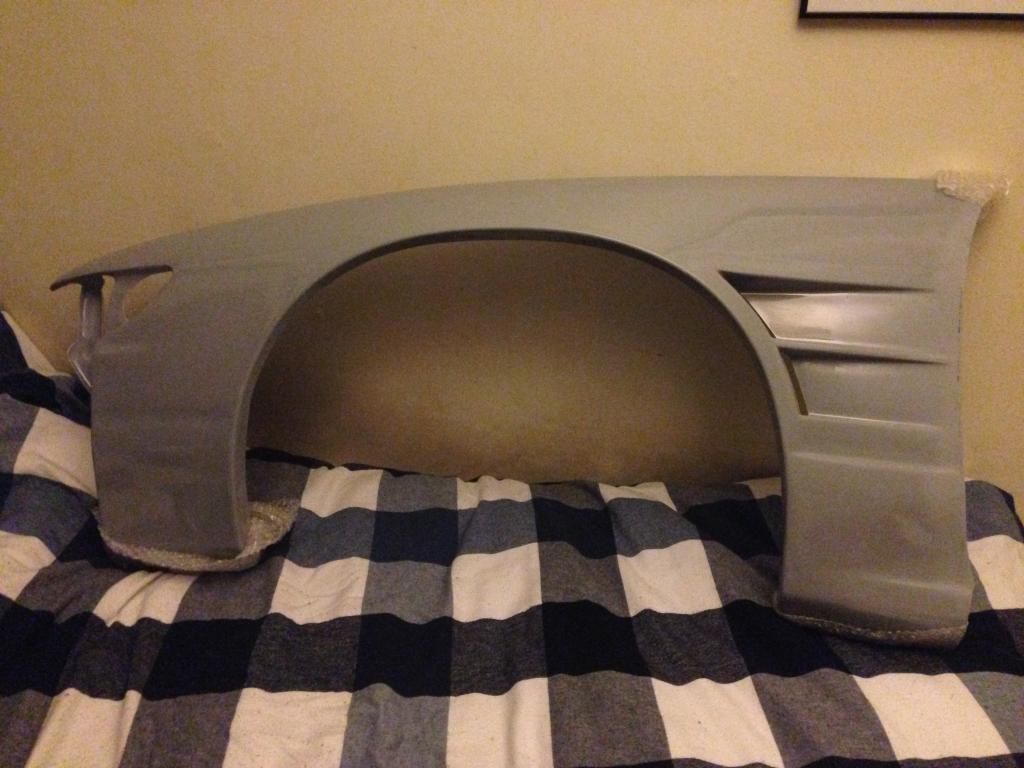 Here's the car at Hux's: 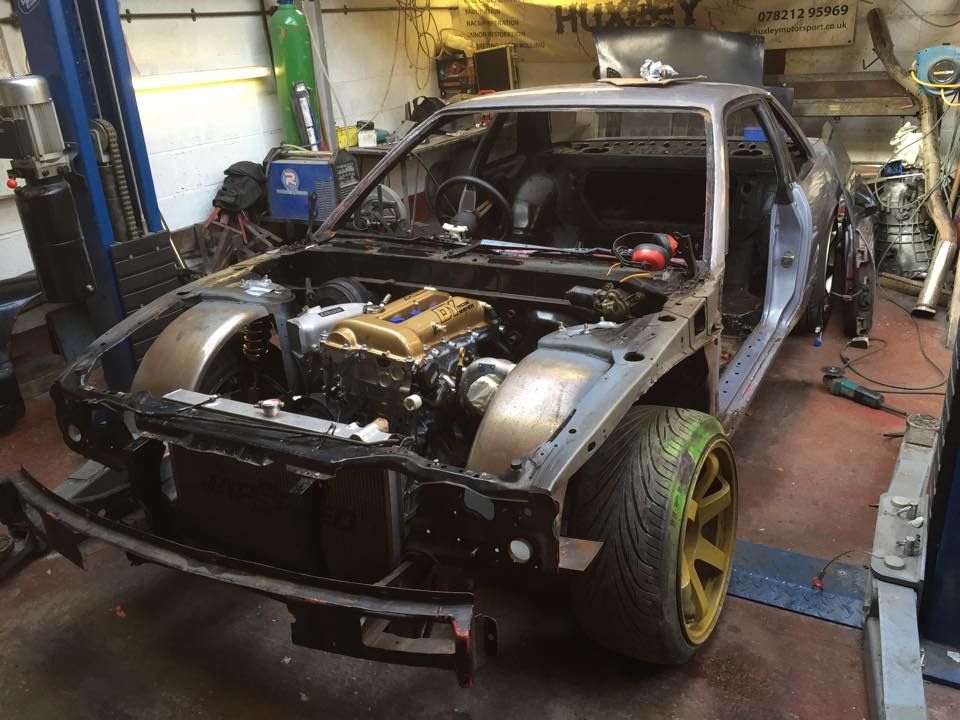 And here's one of the rear mounting points for the old cage! You can see MIG wire from a poorly setup welder with zero penetration! Same as what I found inside the main hoop where it had been cut. Pretty scary stuff! 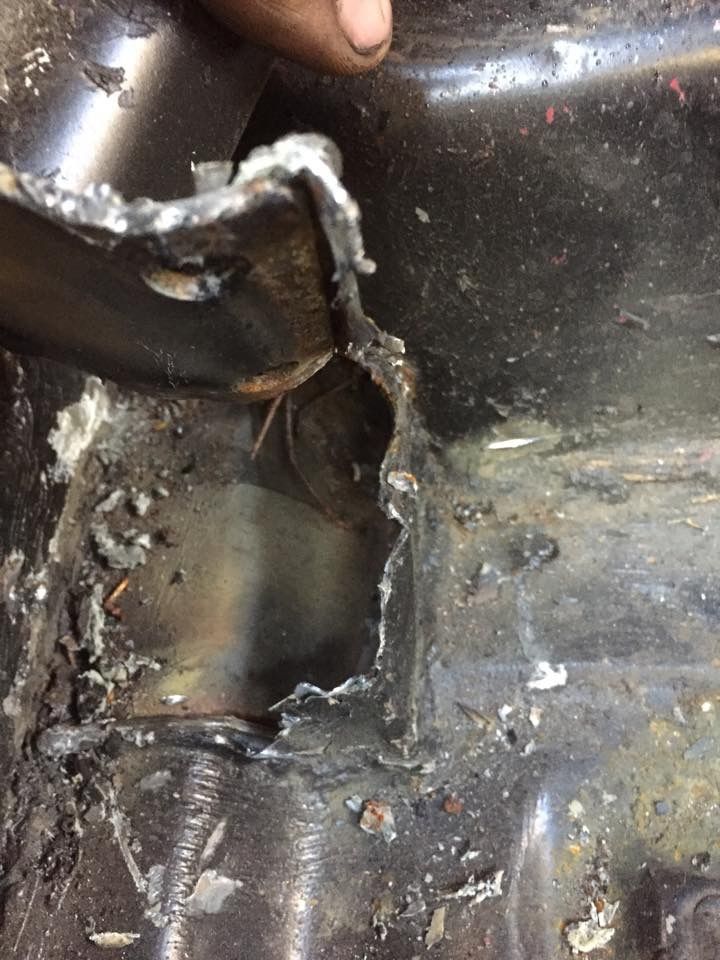 After a minor delay with the material being delivered later than planned, it was time to soon start the roll cage! 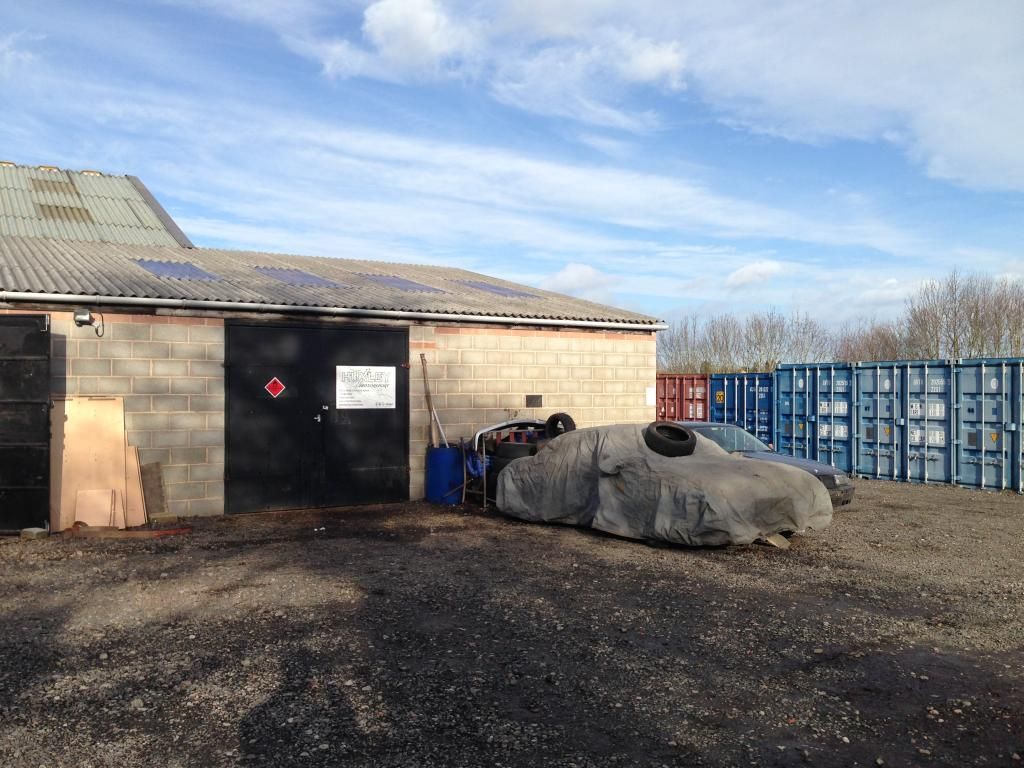 Hux began attacking the car ready for the new footplates. Although, as ever with this car, its unknown past comes back and what should have been a nice straight inner sill, Hux was greeted with filler flying everywhere! 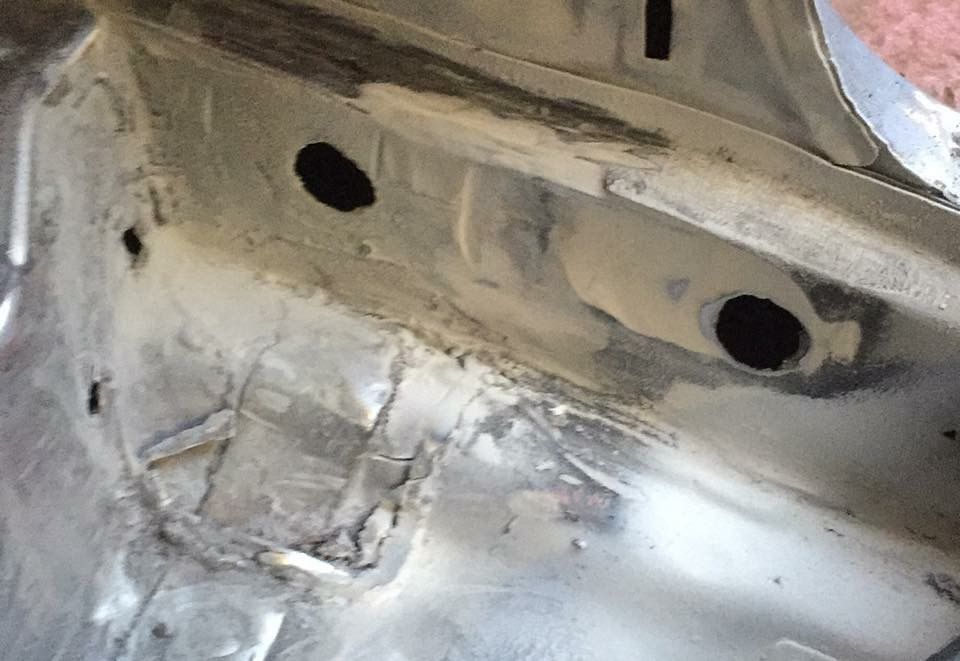 When I was sent this photo, I was kind of expecting it to be honest. Nothing with this car ever seems to go as planned! So Hux did some more digging; 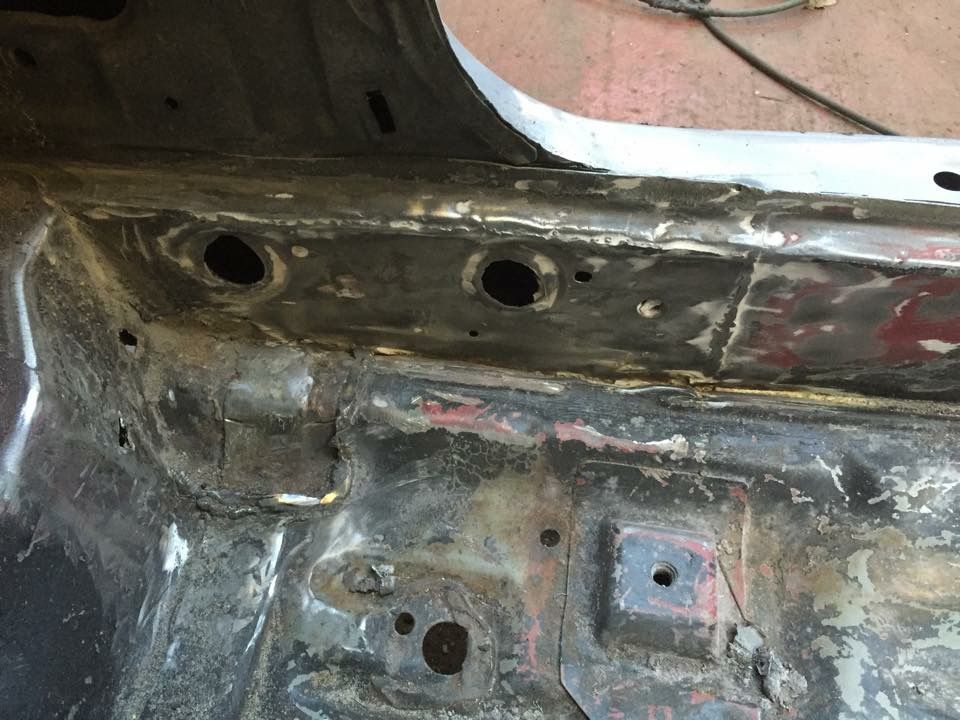 It appears somebody in the past has cut and rewelded the inner sill, possibly due to damage but the main thing is the car is still straight so gave the go ahead to commence the cage. Afterall, putting a cage in a bent car would be a shame, so I appreciate Hux double checking everything for me and seeing what I wanted to do :thumbs: So Hux began his magic! 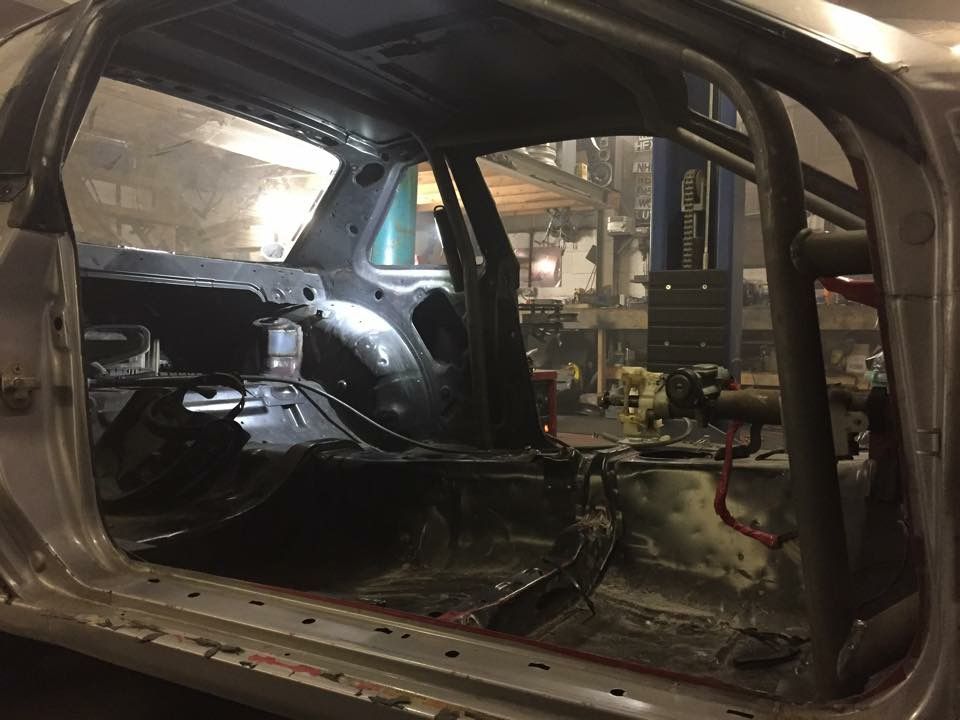 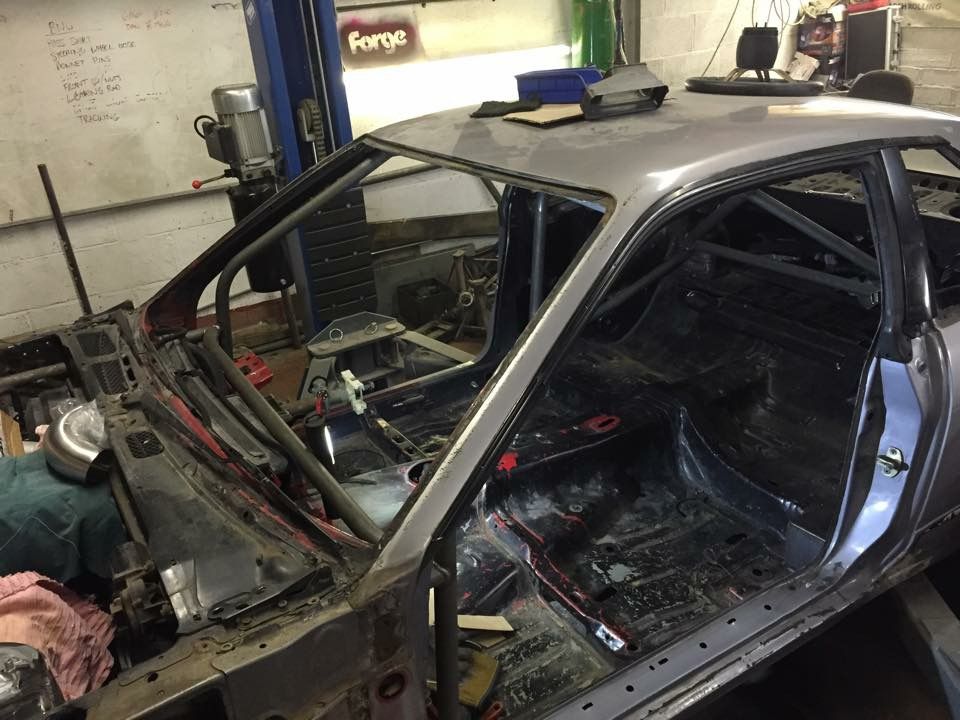 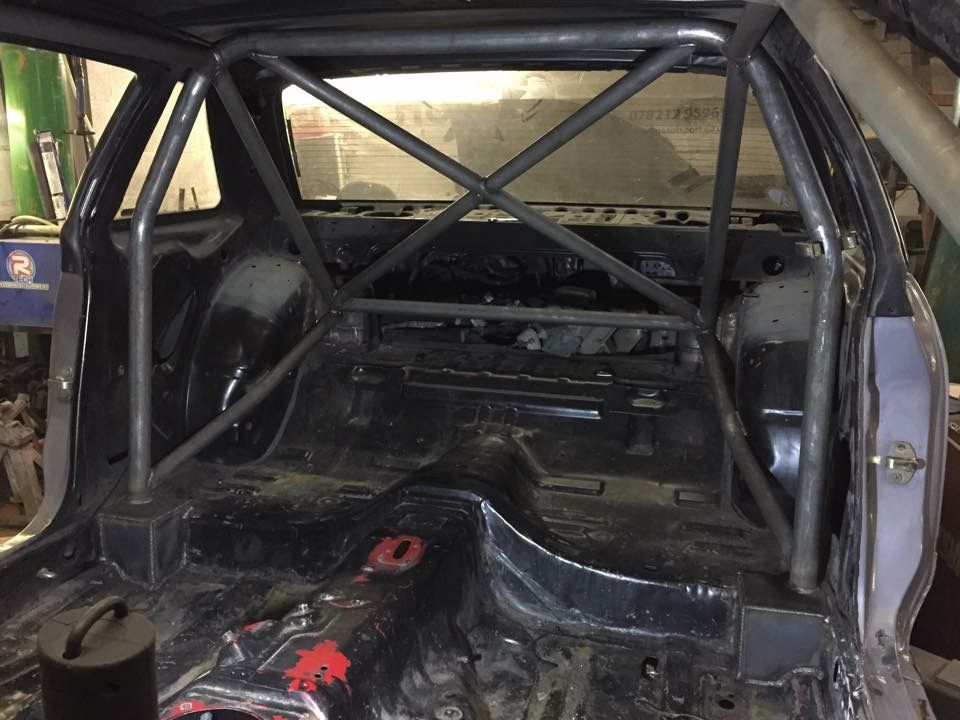 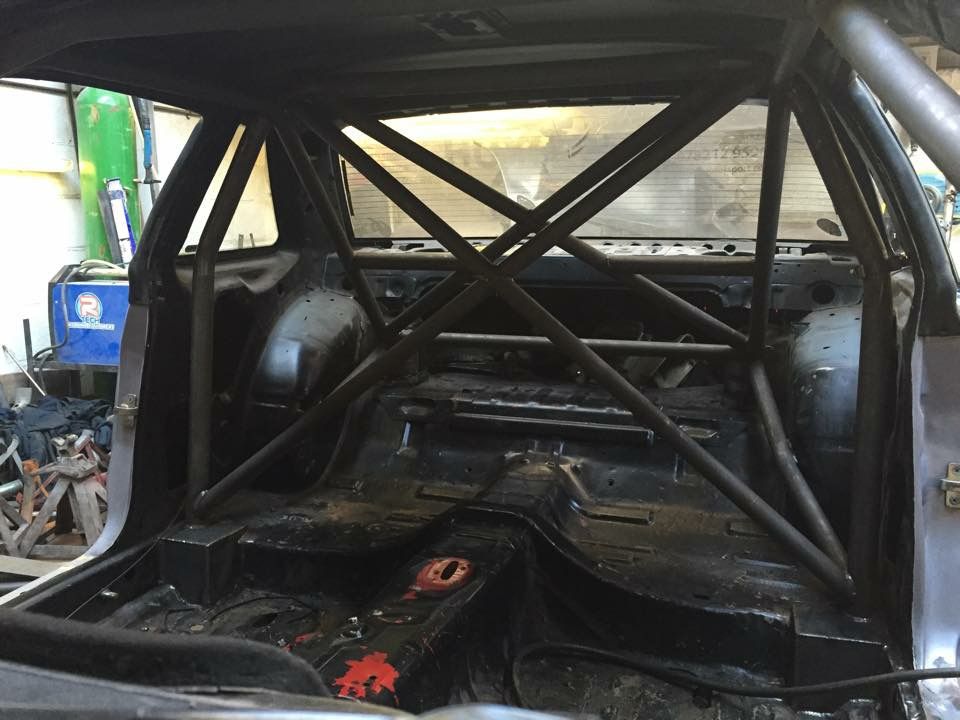 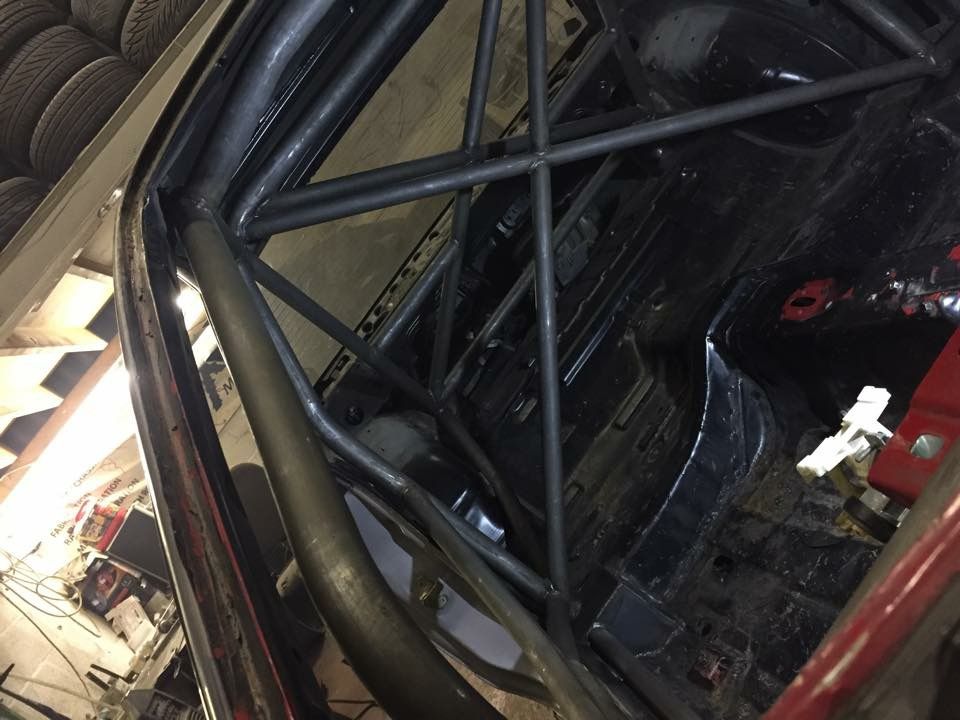 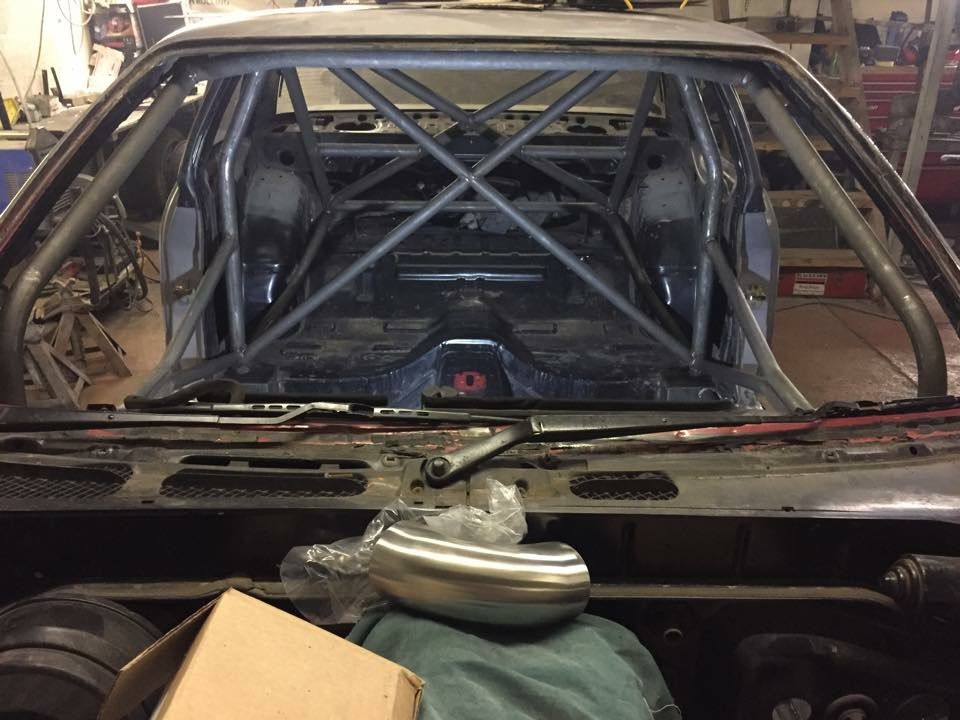 Doorbars in! 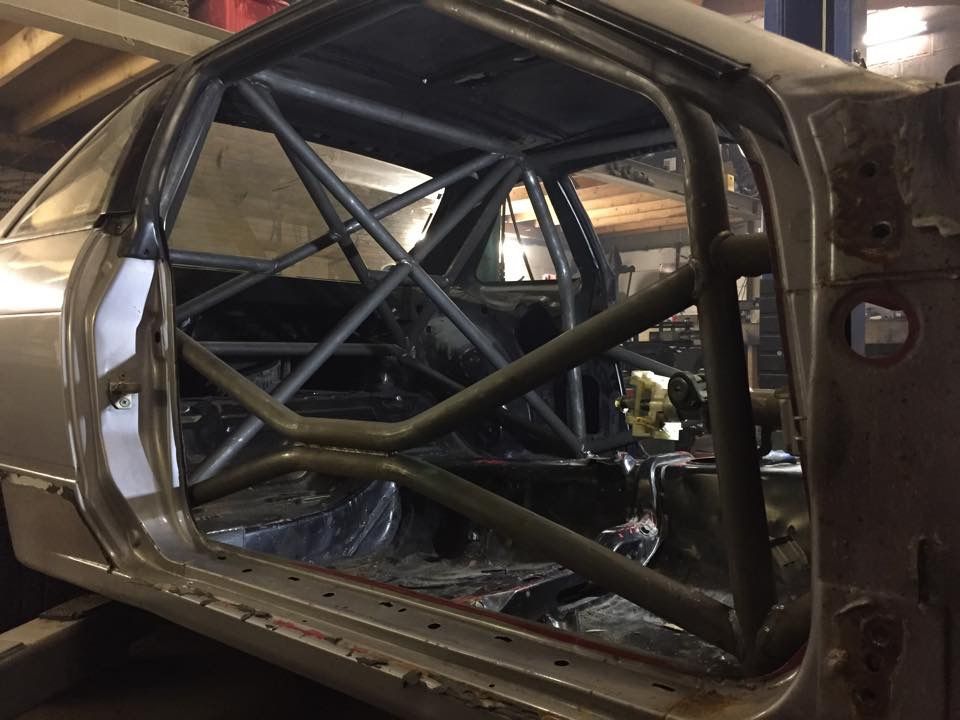 New dash support bar 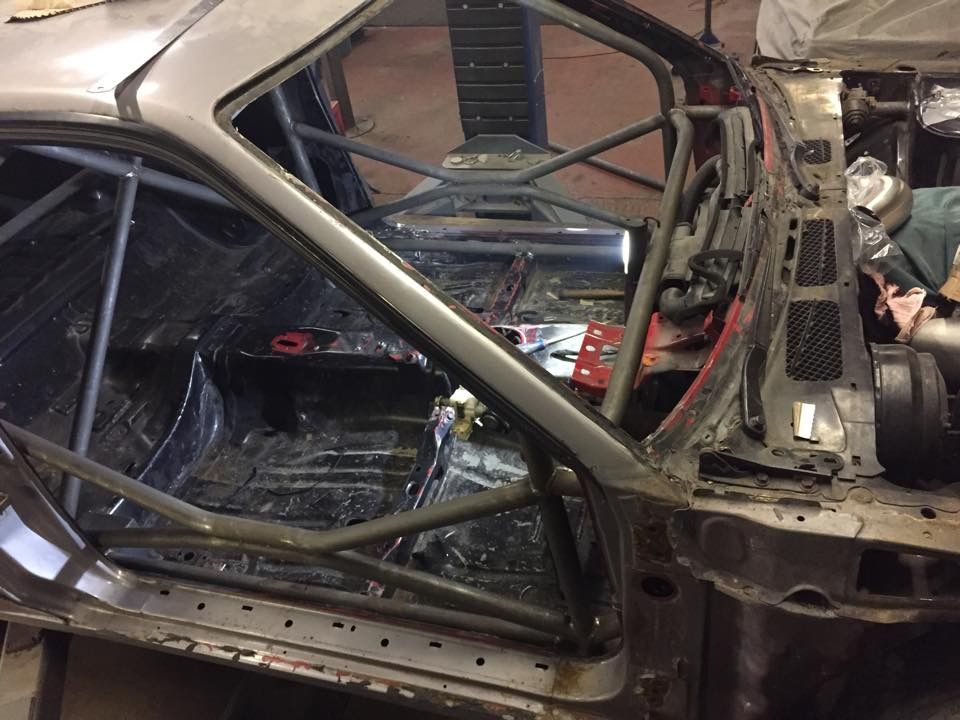 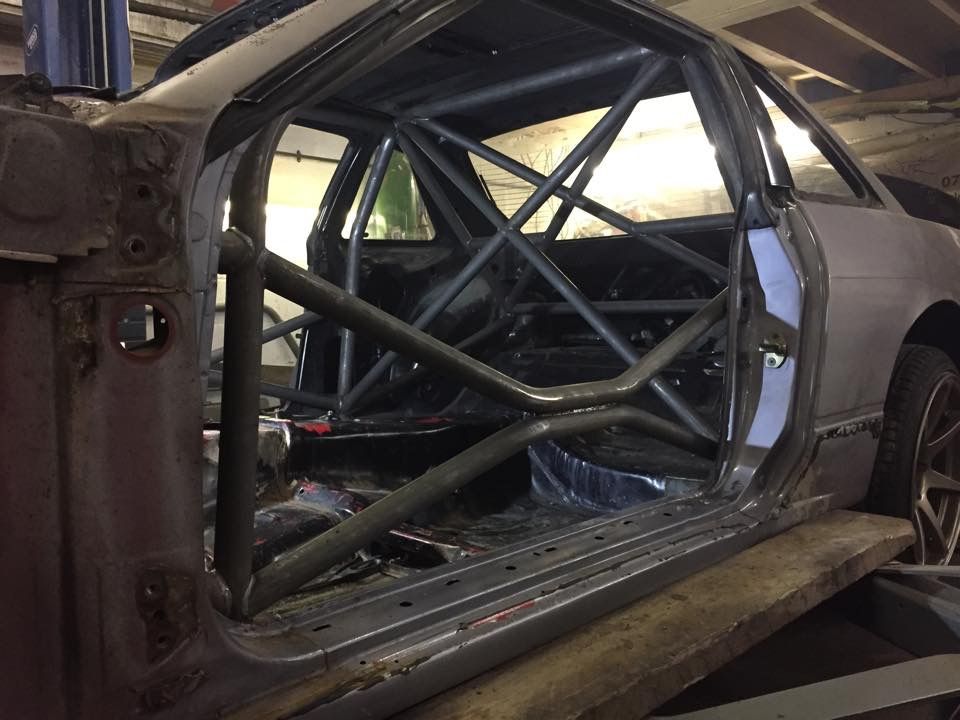 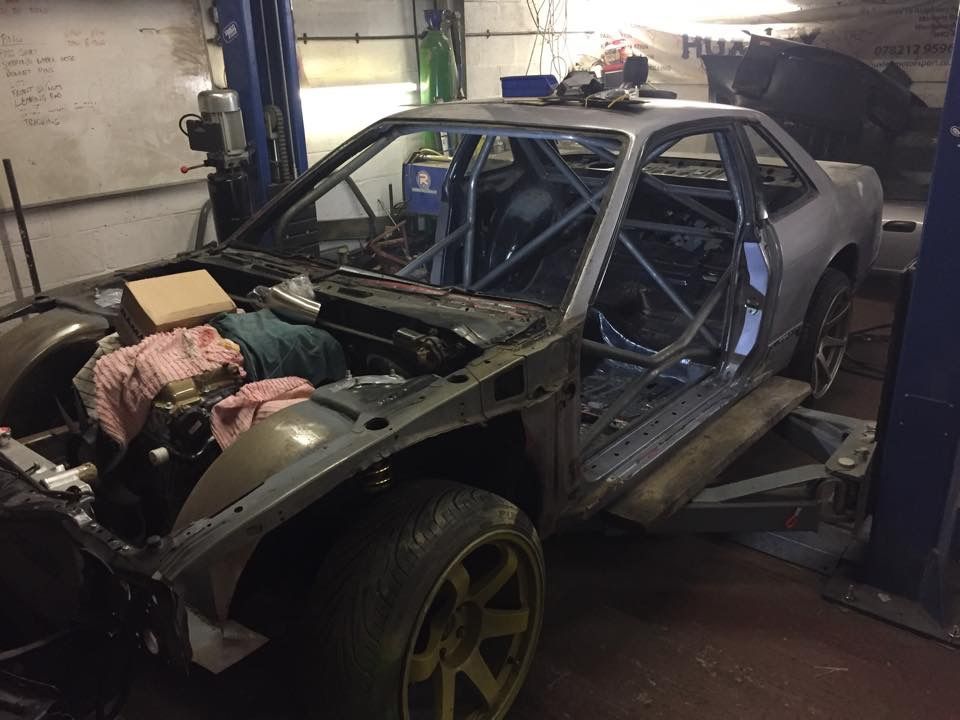 So the cage is all done! What next? GUSSETS! 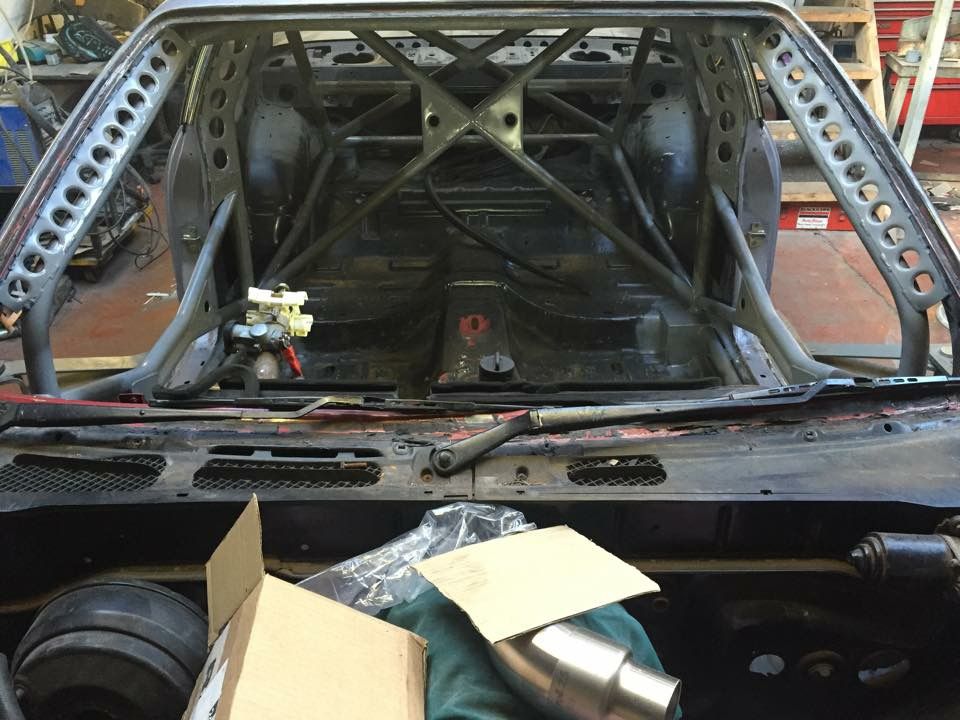 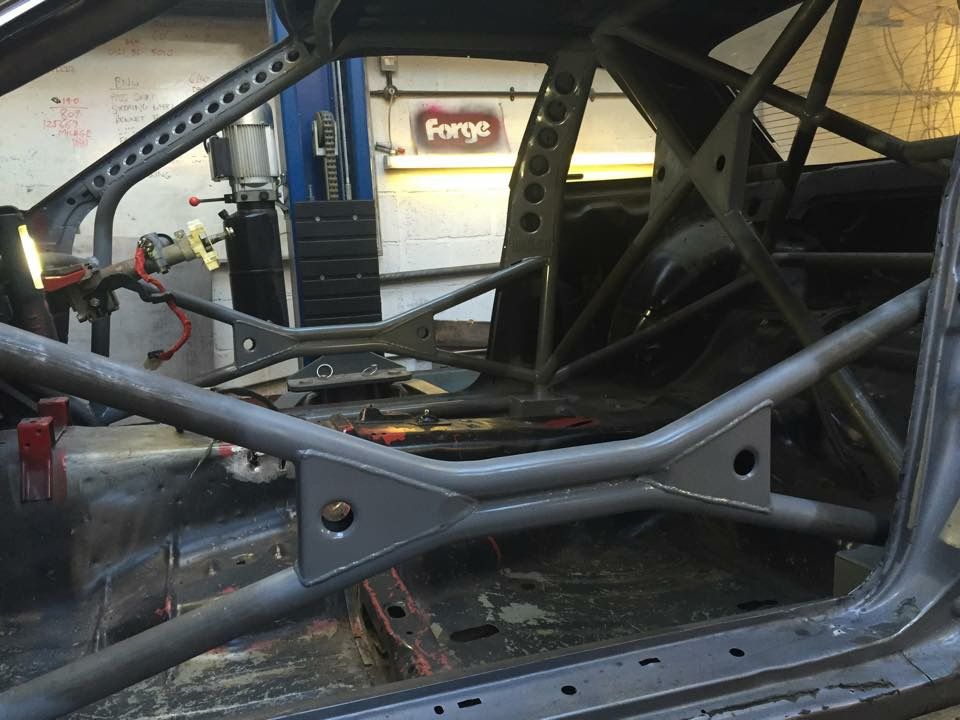 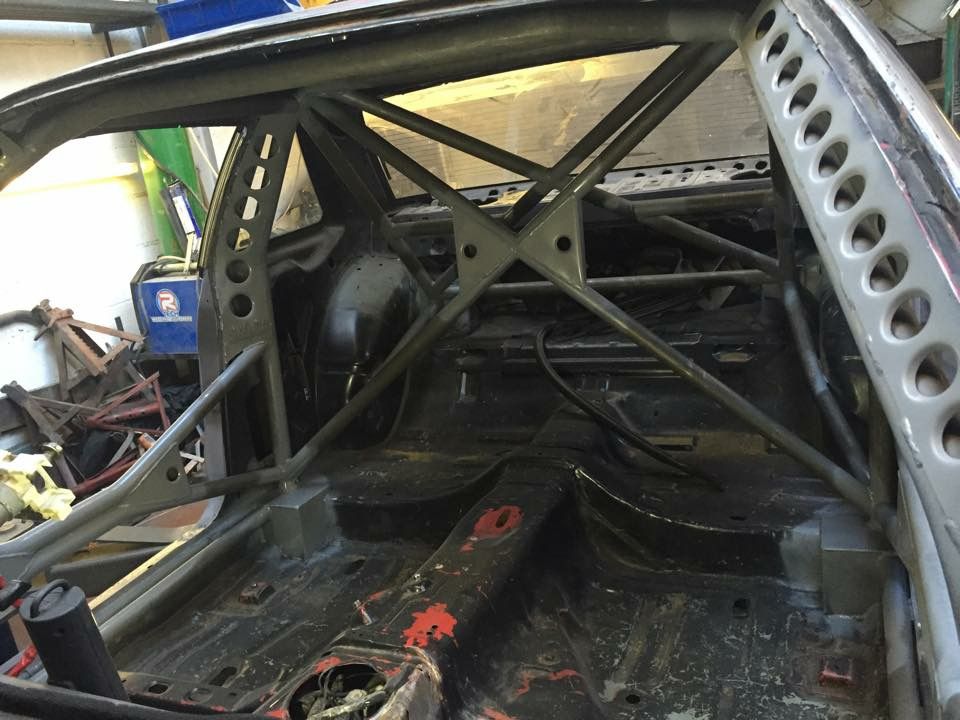 There are also gussets where amongst the triangulation to the front struts!  |
|
|

|
|
|
#29 |
|
Leaky Injector
Join Date: Dec 2012
Location: Bristol, UK
Age: 30
Posts: 92
Trader Rating: (0)
 Feedback Score: 0 reviews
|
So now Huxley has finished doing the cage, it was time for his next task, the exhaust work! A Mid-Mount isn’t the nicest of manifolds in regards to space for the turbo elbow and downpipe, then there’s the issue of how the runners sit etc, you get the picture its nowhere near as spacious as the traditional top mount setup. There’s also the complication of trying to get the exhaust to 3” as soon as possible for performance reasons. Huxley told me he had a few ideas so left him to do what he does best.
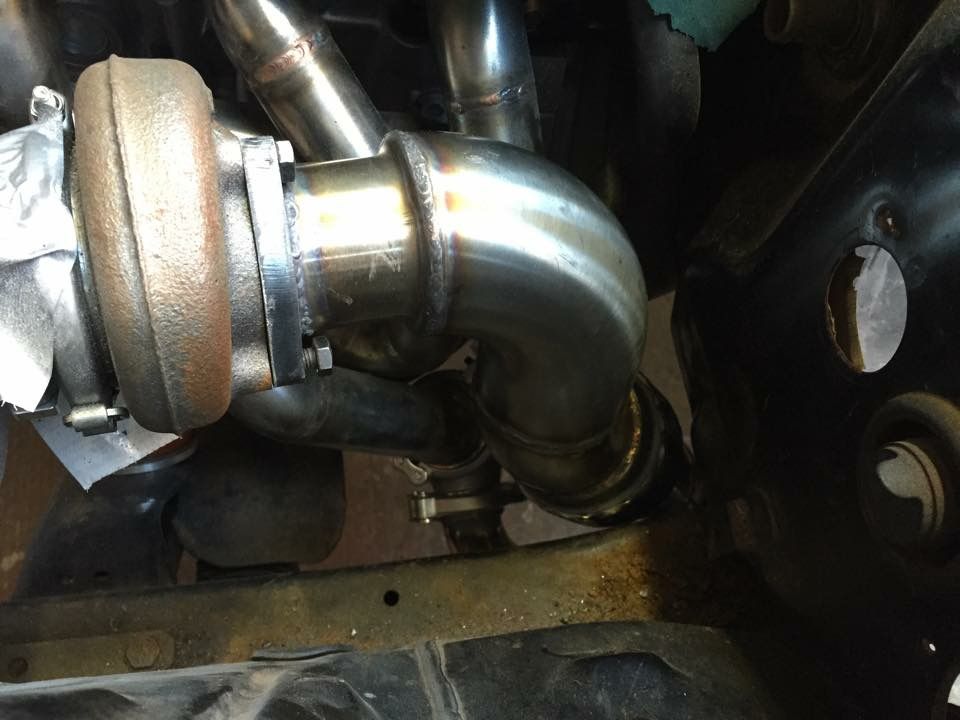 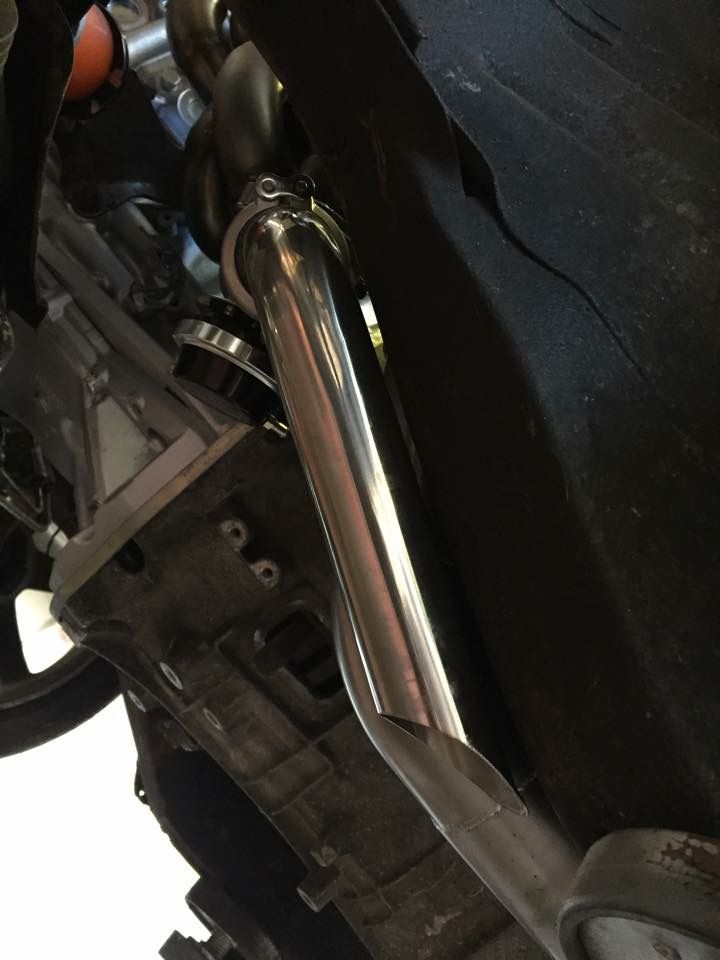 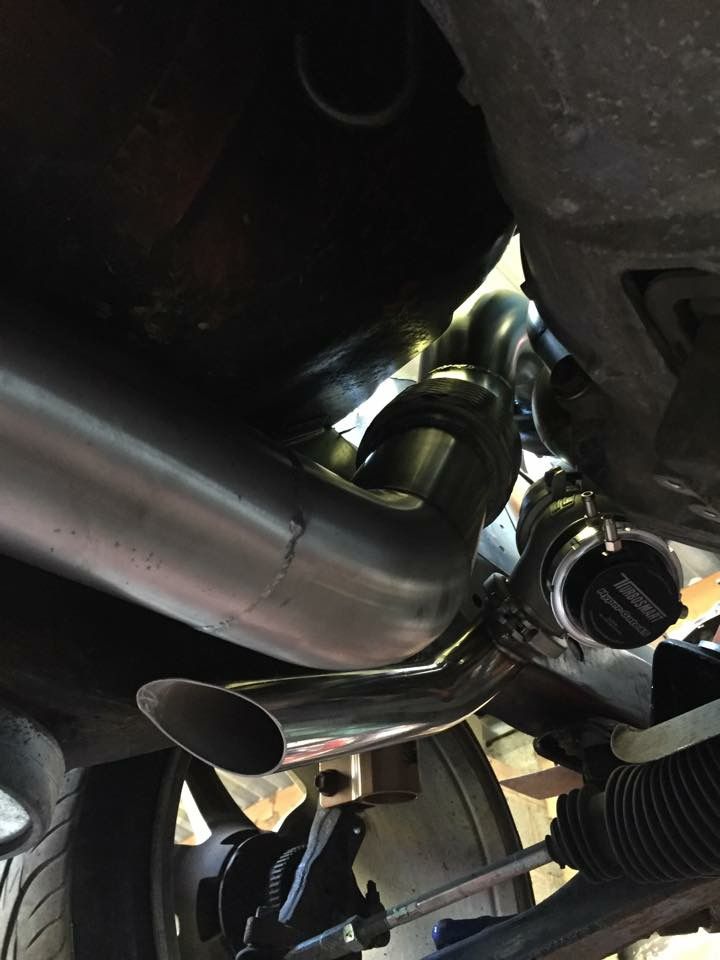 I also asked him to do the screamer pipe while he was there, and he just so happened to make it as I thought of. Great minds think alike  But I have to say, Huxley has done an amazing job on the cage and exhaust work, and I would without a shadow of doubt recommend his work to anyone! So much so, the car may be booked back in around March sometime.. I managed to go and have a look at the car for the first time since it came back. I cant get over the quality of his work! 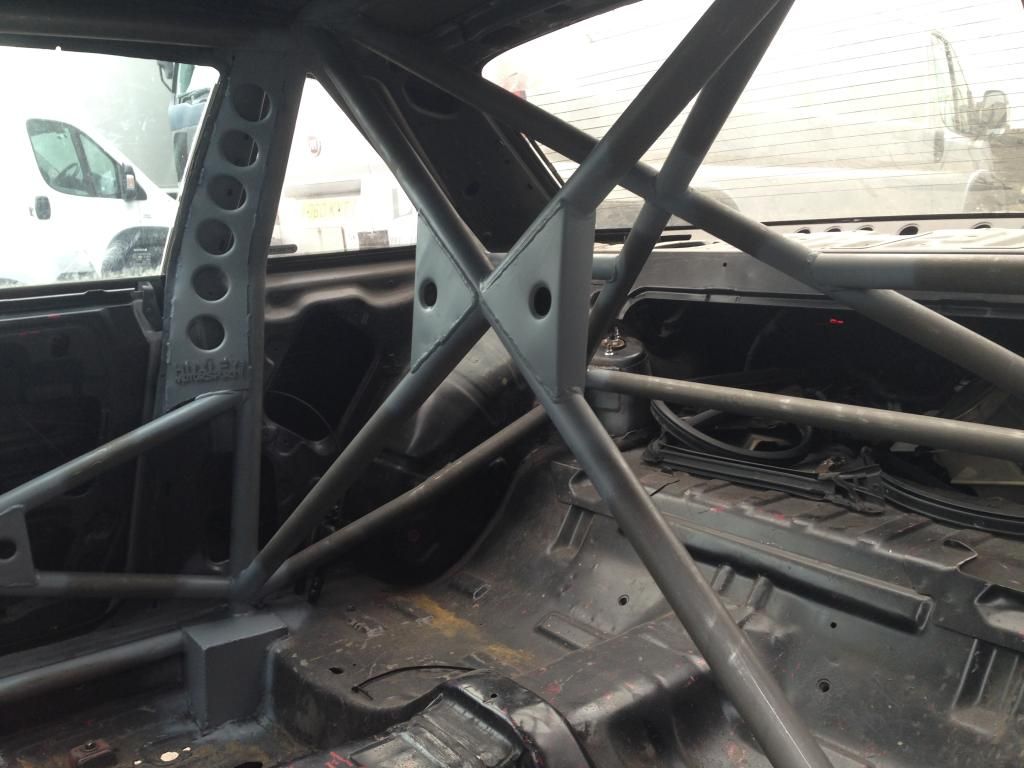 I love the Huxley Motorsport tag on the B pillar gussets! Such a small, simple but effective token. In fact, I’m pretty happy to be representing his name on the car somewhere! 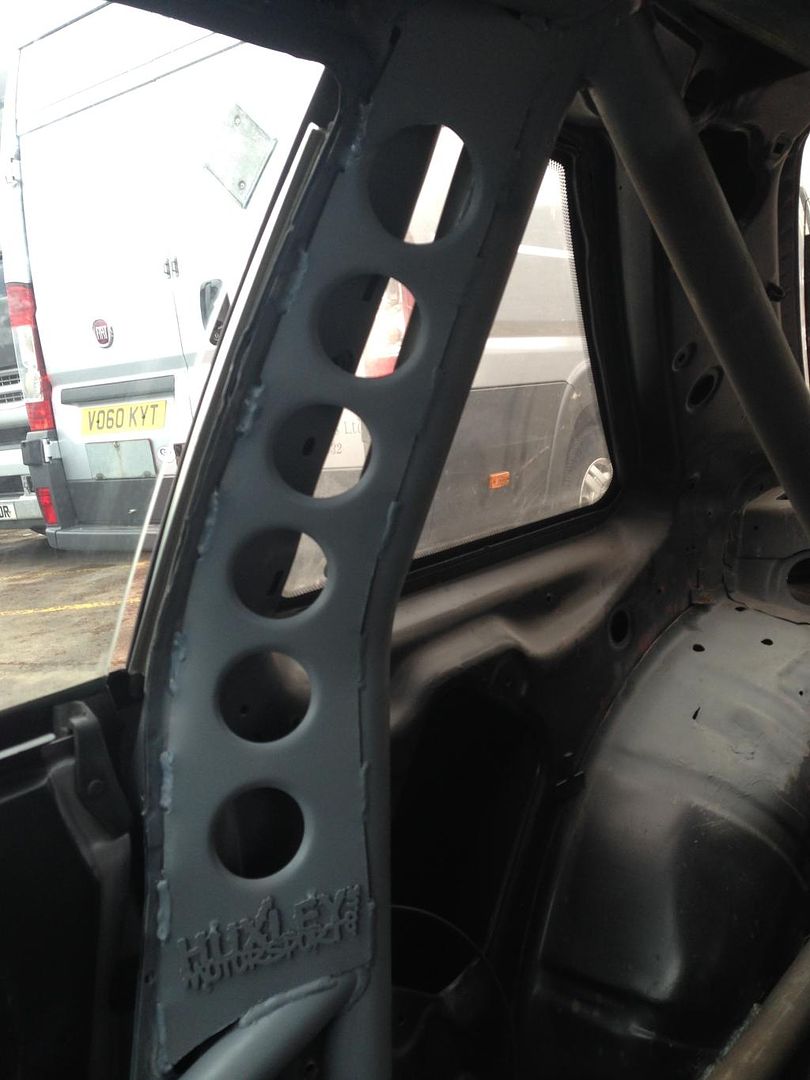 Next up to try and get some motivation was to slap on the fiberglass and see how it all fits. I had a friend who recently got the same Origin wings but had some fitment issues, but thankfully mine don’t seem so bad, they’ll need some fettling but they are definitely along the right lines 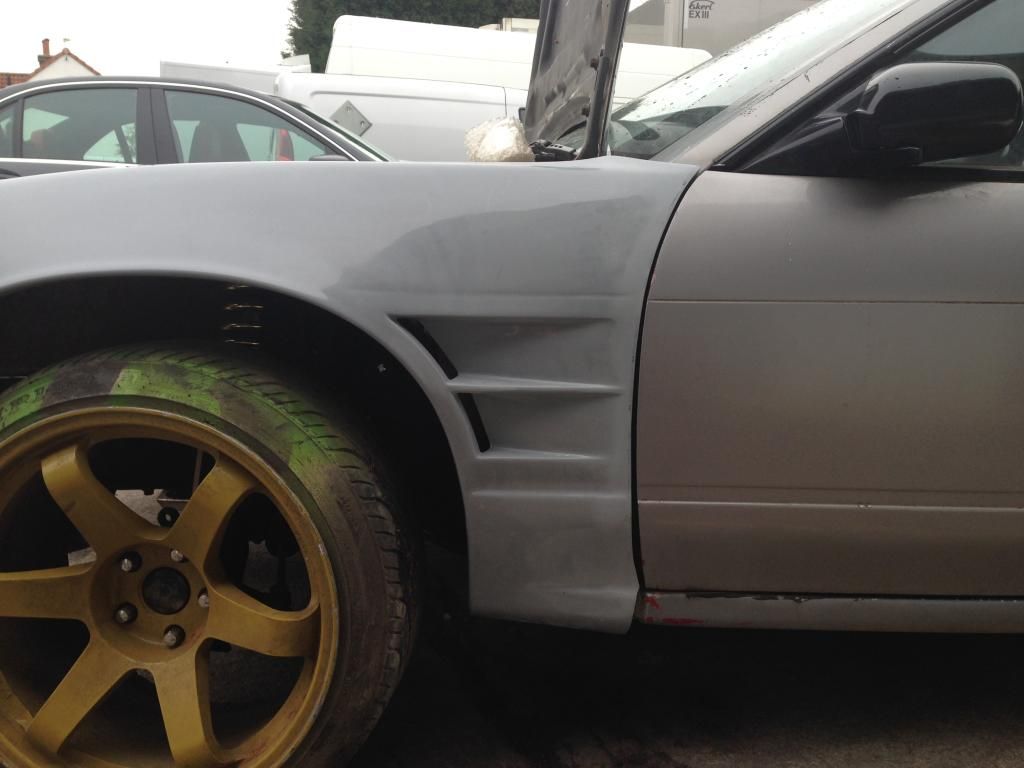 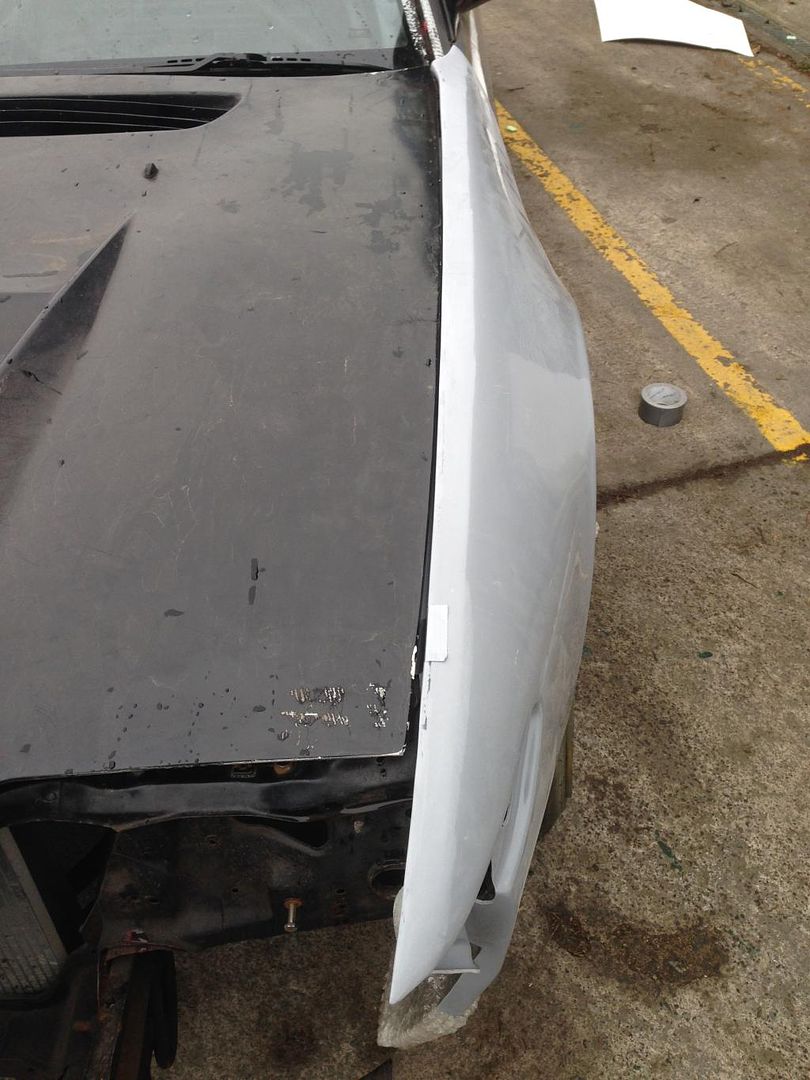 #weldporn  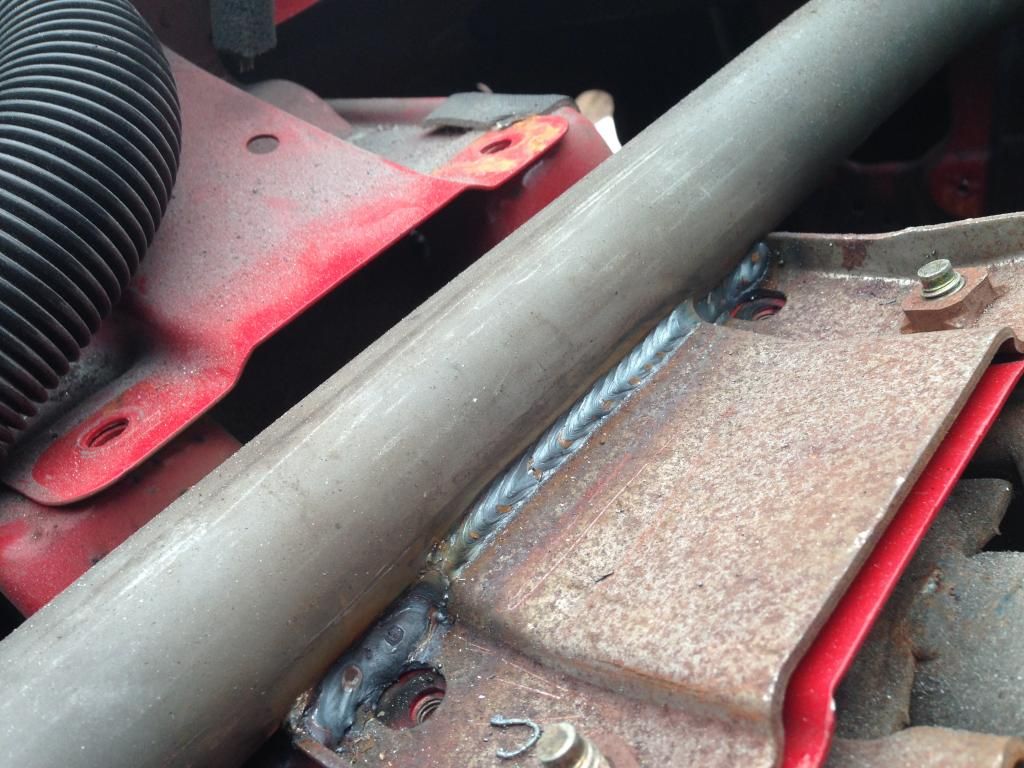 More of the cage! Started to throw some Zinc primer over the welds to give it and extra bit of protection until I can get the interior sprayed. Not entirely sure on the interior colour, I have some sort of gun metal grey in my head though? 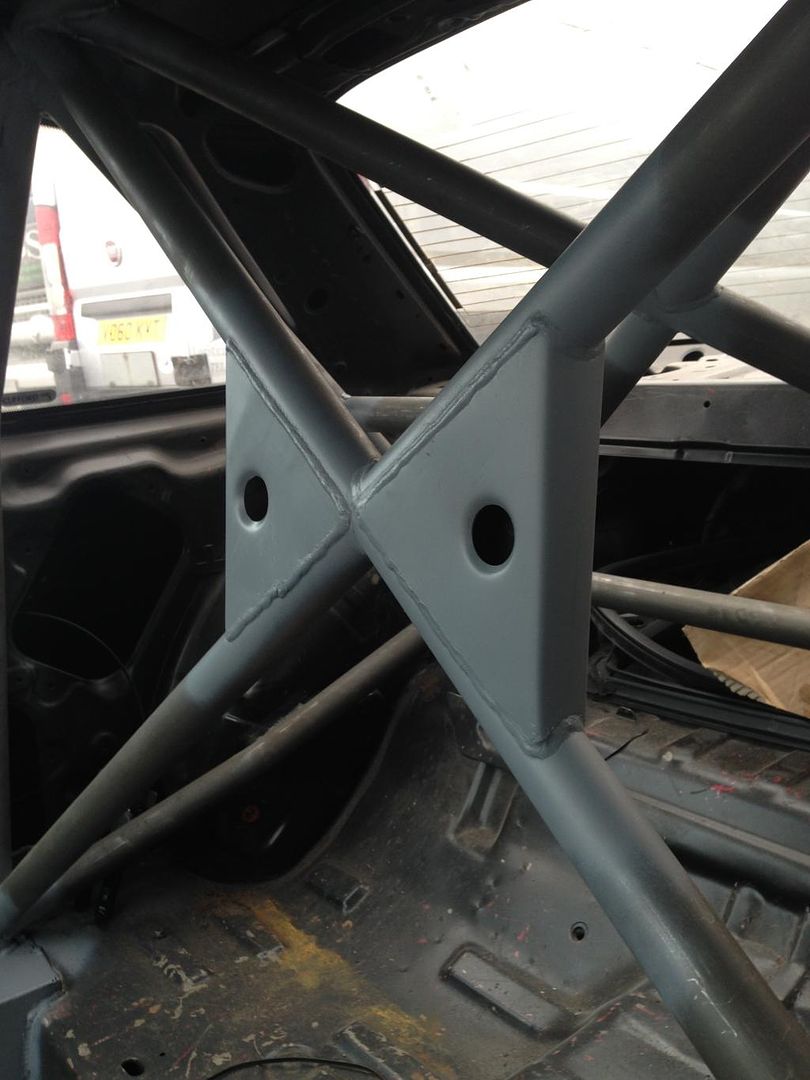 Gussets! 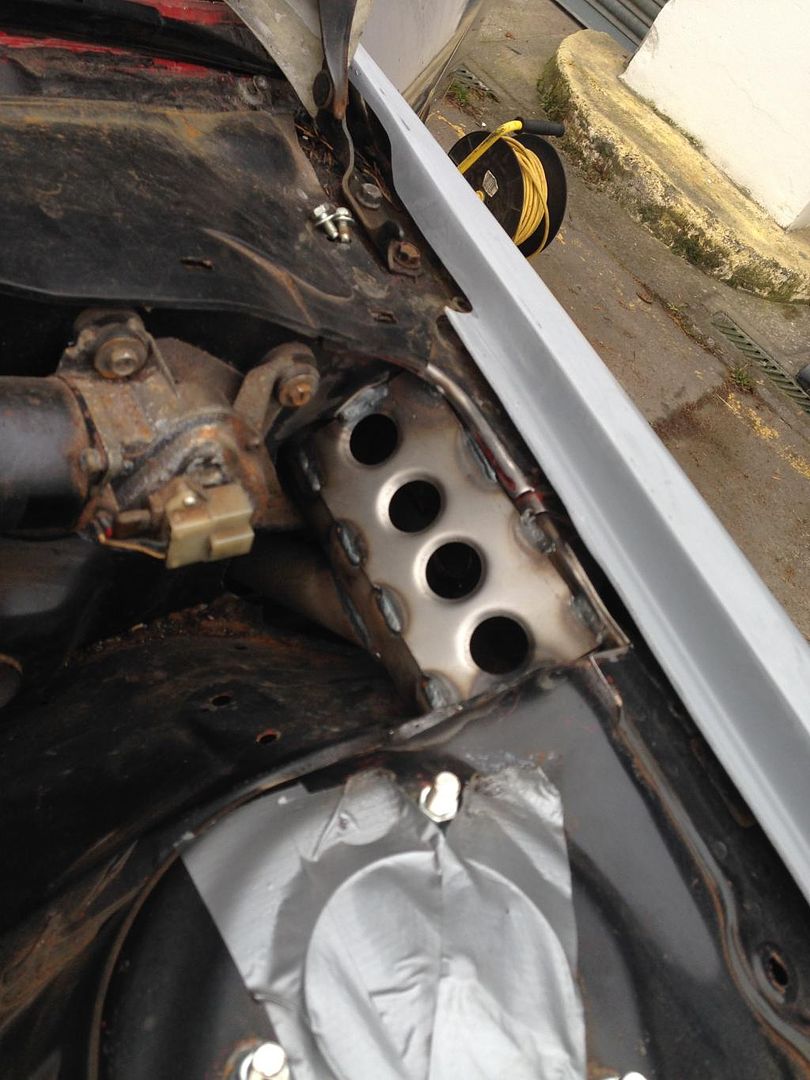 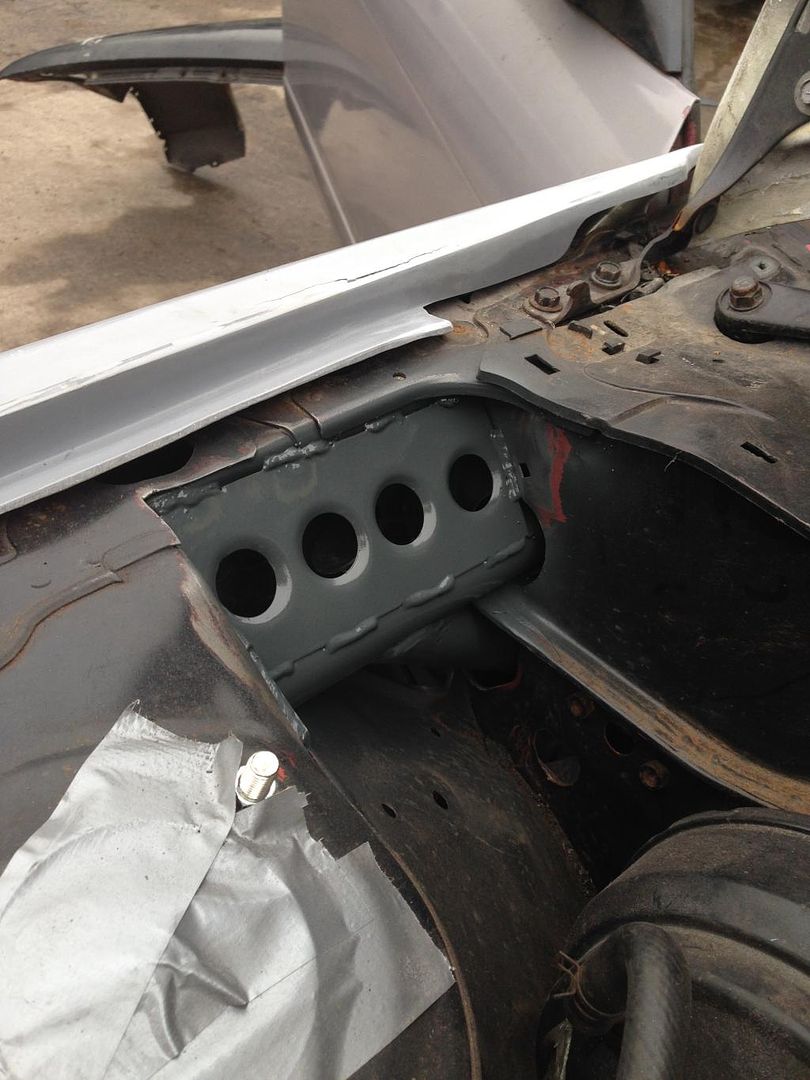 I slapped on the rear overfenders just to check how they’ll fit. Seems pretty decent to me, so wont be long until I can annoy a good friend to tub my rear arches  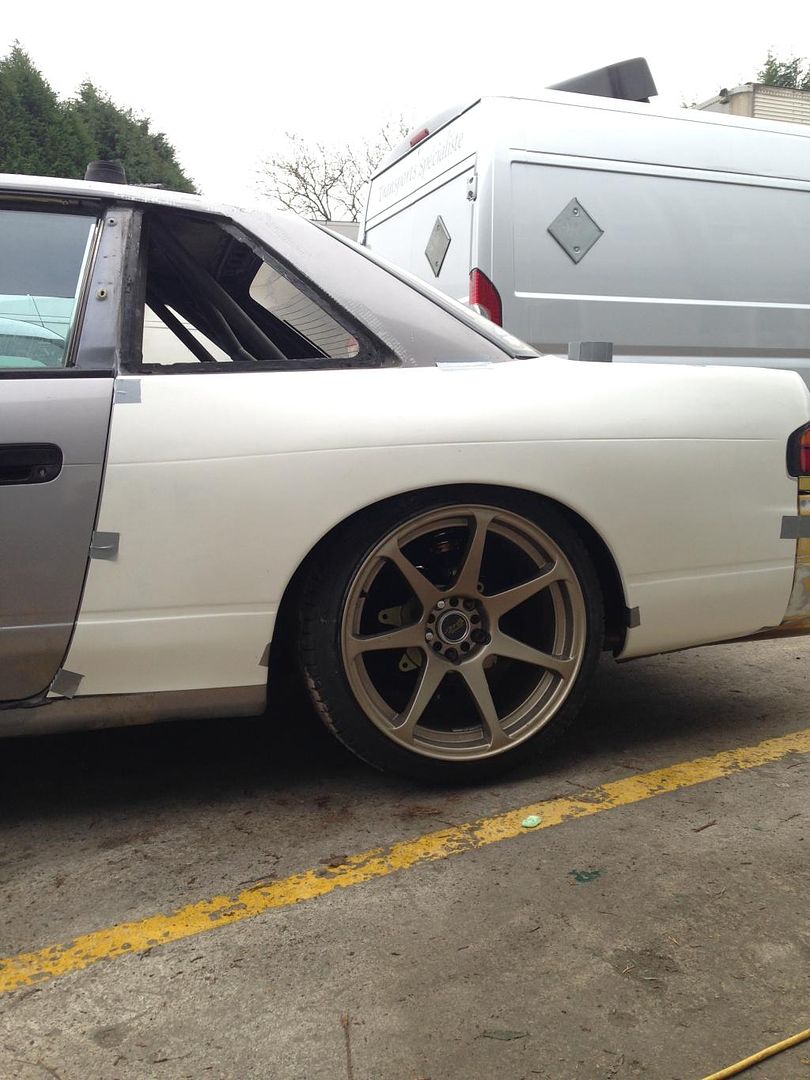 Whilst I was there, it’d be rude not to throw the PS13 Brick headlights on  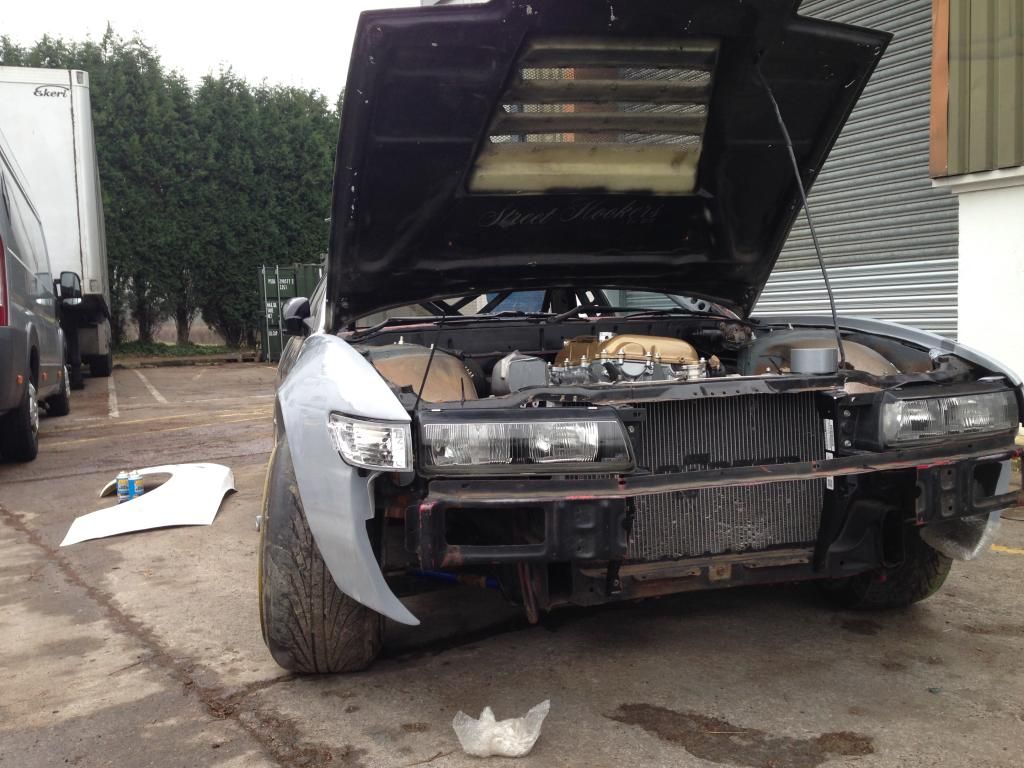 Next task for the afternoon was trying to make the dash fit. It took quite a bit of cutting, but that’s to be expected with quite an intense cage. Plan is to mock up some small plates that’ll bolt onto the dash and sit around the front legs to tide the cuts up a tad. 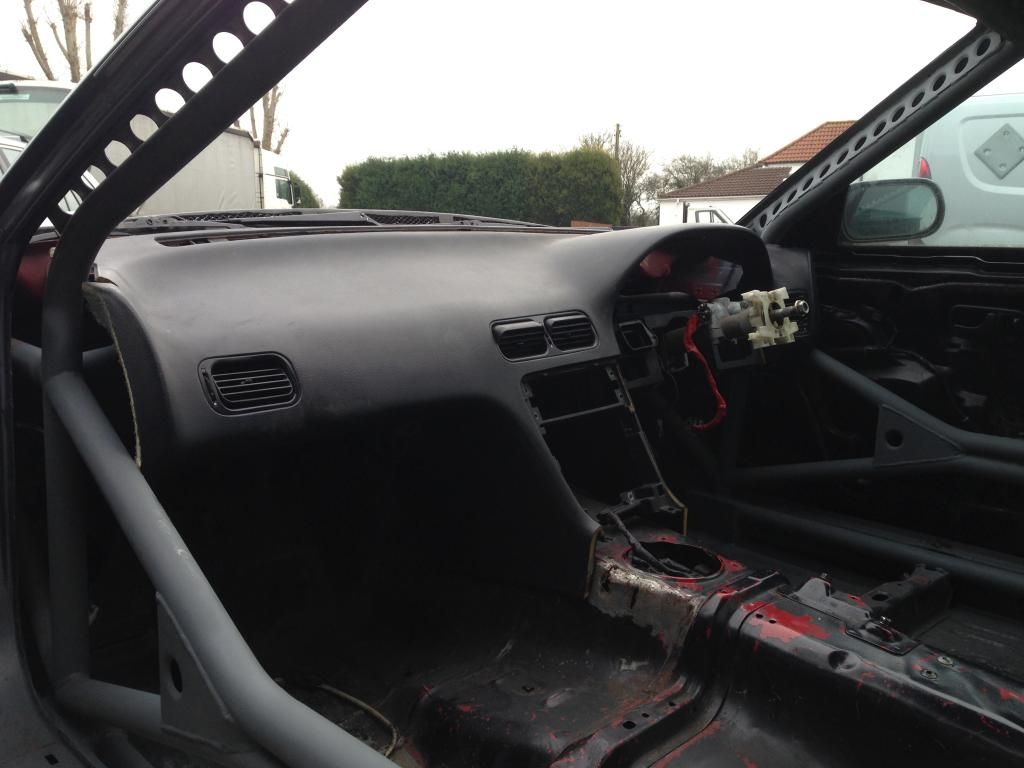 Then, I threw my Bride in to see how it feels with the cage, and it sounds stupid but I’m already excite to improve my driving and try more riskier things, knowing there’s a proper cage surrounding me. 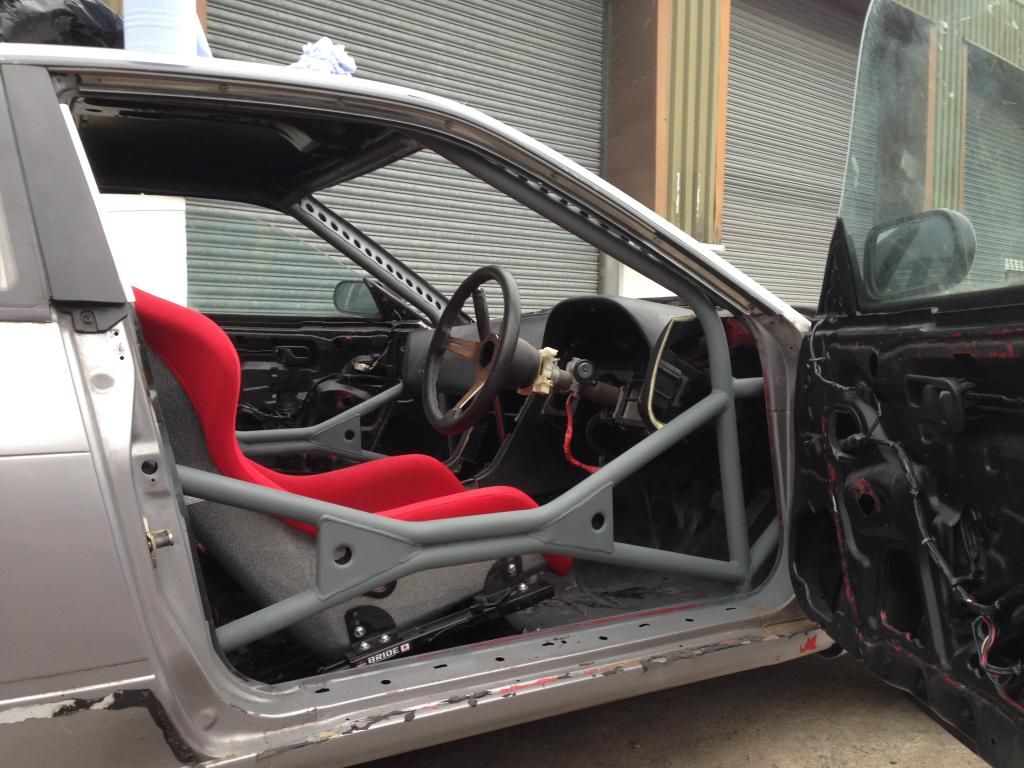 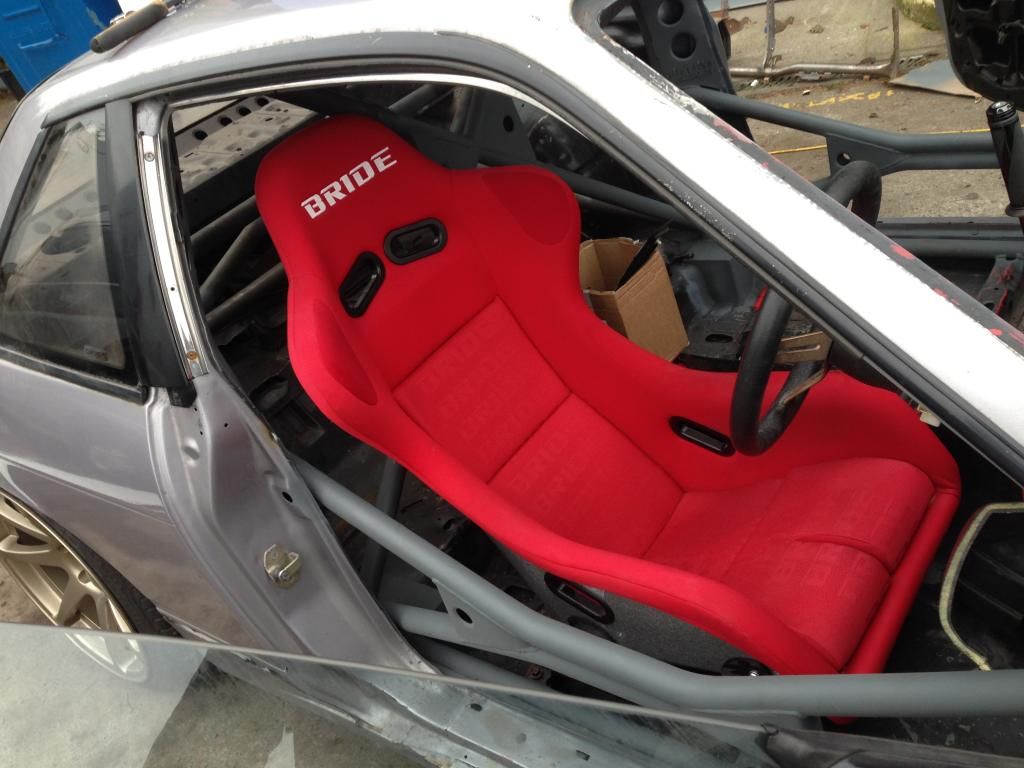 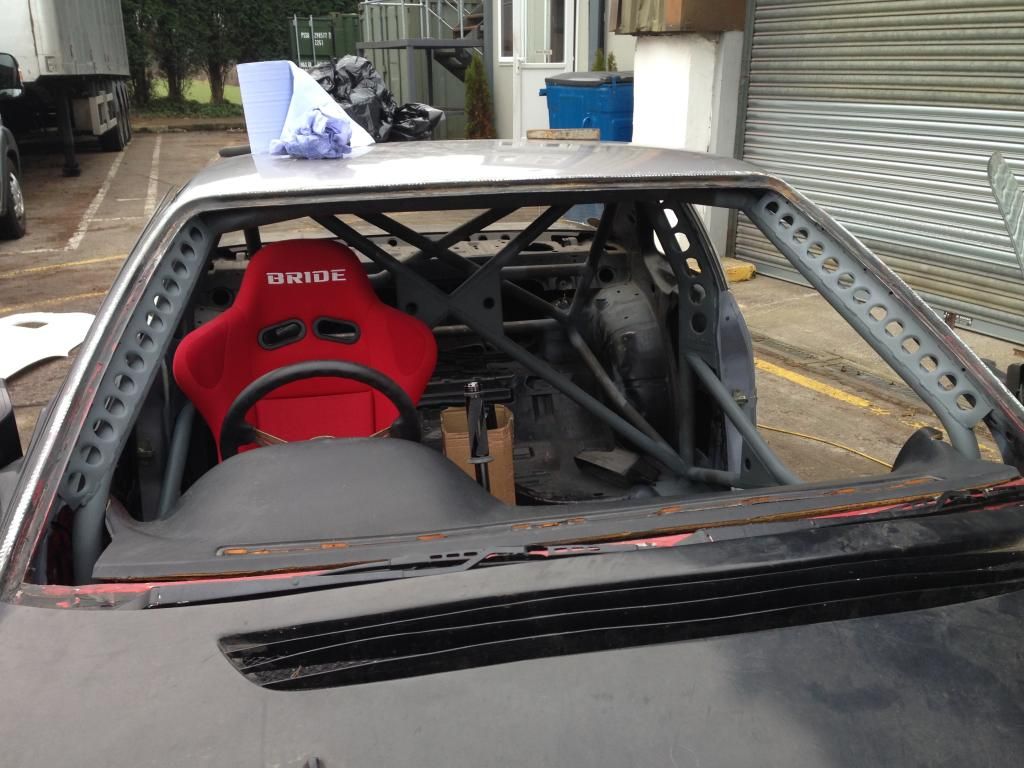 Started playing around with my Powered by Max handbrake to see how I’d want it sit. I’ve got a vague idea of the positioning but ill confirm that once I can get a friend to weld it in. 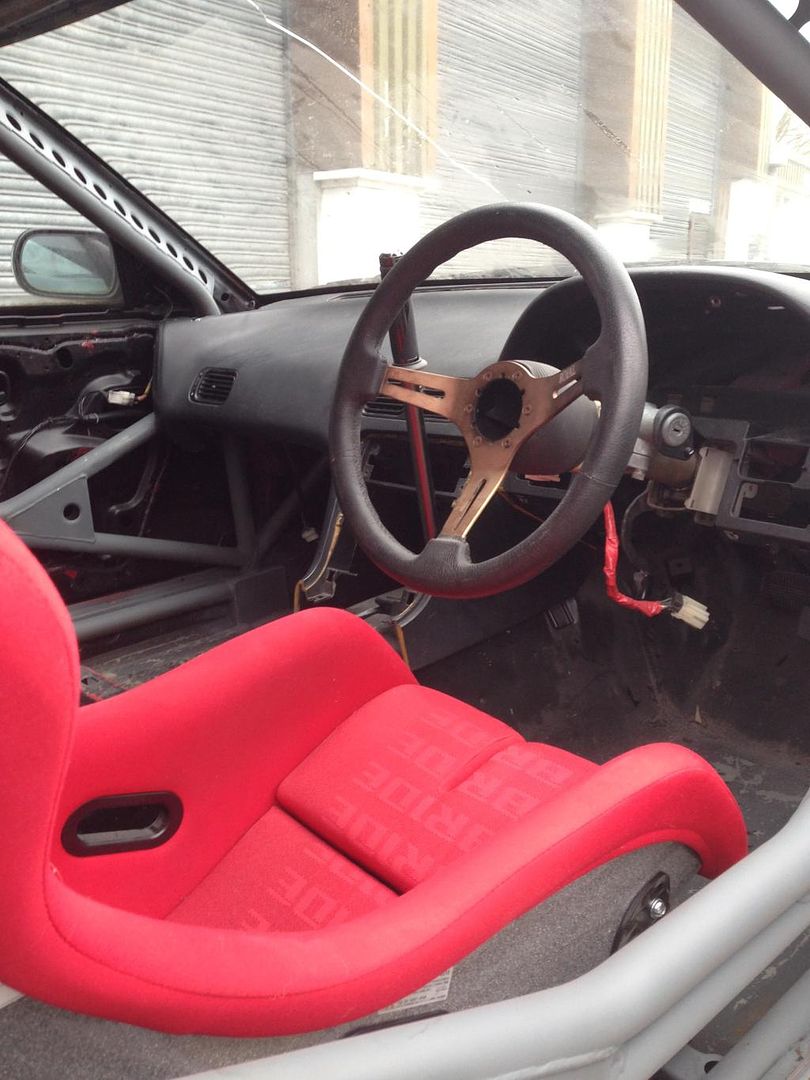 That lost shot reminds me hugely of my old S13. I suppose if you know what’s right, you can build and improve on that!  |
|
|

|
|
|
#30 |
|
Leaky Injector
Join Date: Dec 2012
Location: Bristol, UK
Age: 30
Posts: 92
Trader Rating: (0)
 Feedback Score: 0 reviews
|
A good friend of mine decided to help complete the horrible task of tubbing the rear arches.
(Apologies for the terrible photo’s haha) First things first was to cut and slit the inner skin: 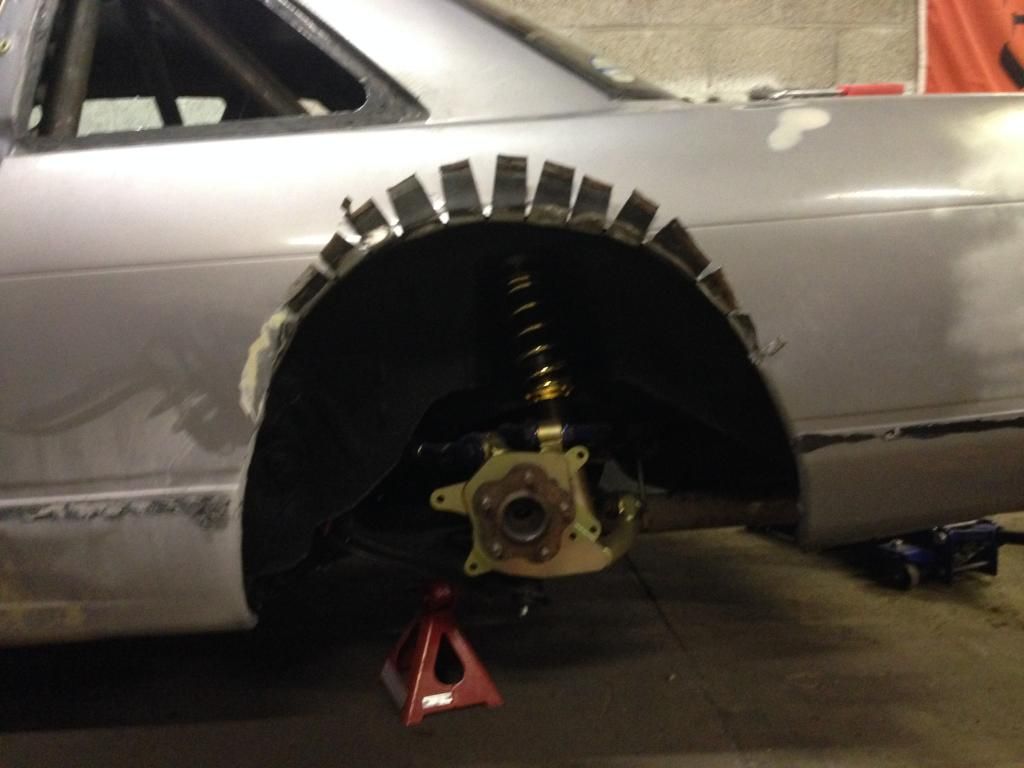 My friend then proceeds to weld up the rear arches, and make sure they are fully sealed, hopefully so that no smoke is able to get in. 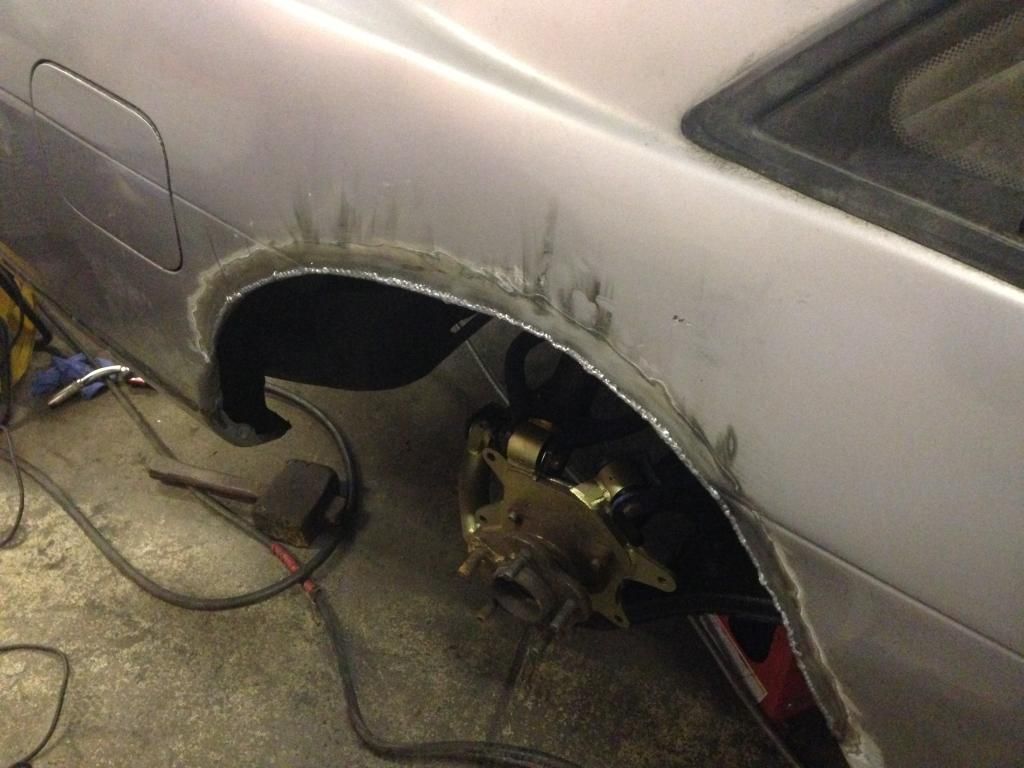 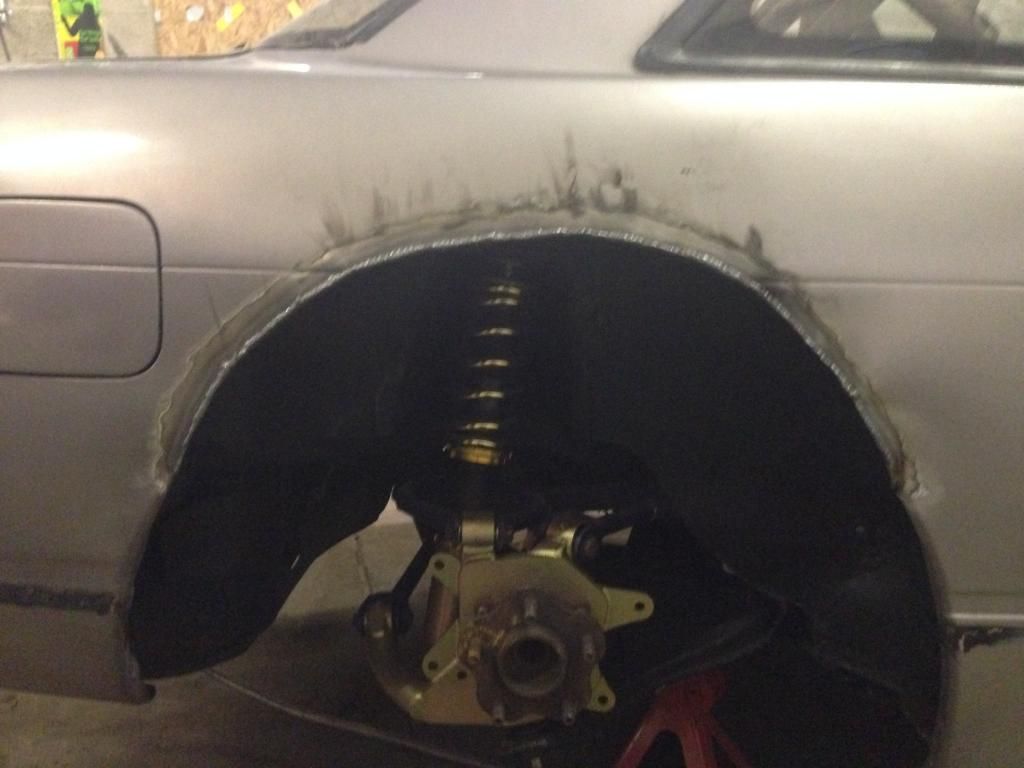 Originally I was worried about whether we didn’t cut high enough, but after some measuring I think there should be quite some room to tuck rim :thumbs: BUT. We couldn’t leave it there no could we. The next step was to build a lip, where some people usually cut out the original Nissan metal inside the arch, we decided to just build an “add-on”, reason being who wants to weld upside on the terrible Nissan metal! 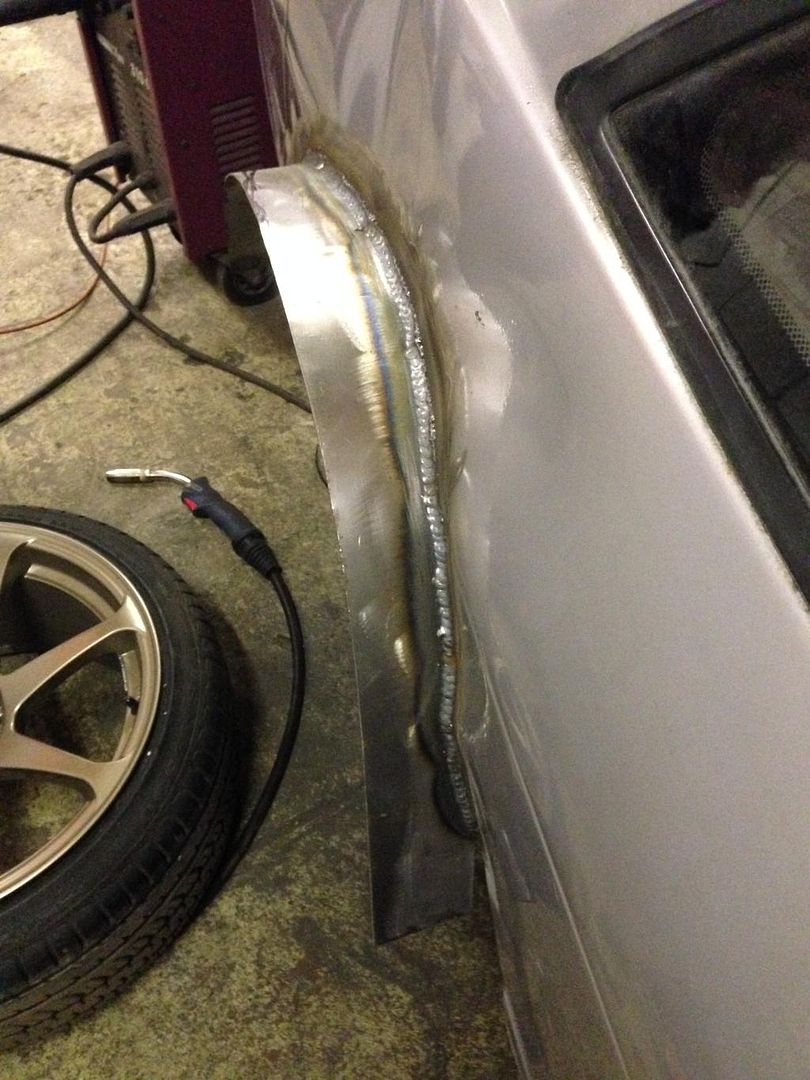 Once that was done, we took some meausrements, placed the fender on and off a few times and before we knew it, we shaped it perfectly to meet the fender but so that it pushes the fender out. Winner! Hopefully this means any delam will face the metal lip, rather than smashing the overfender. 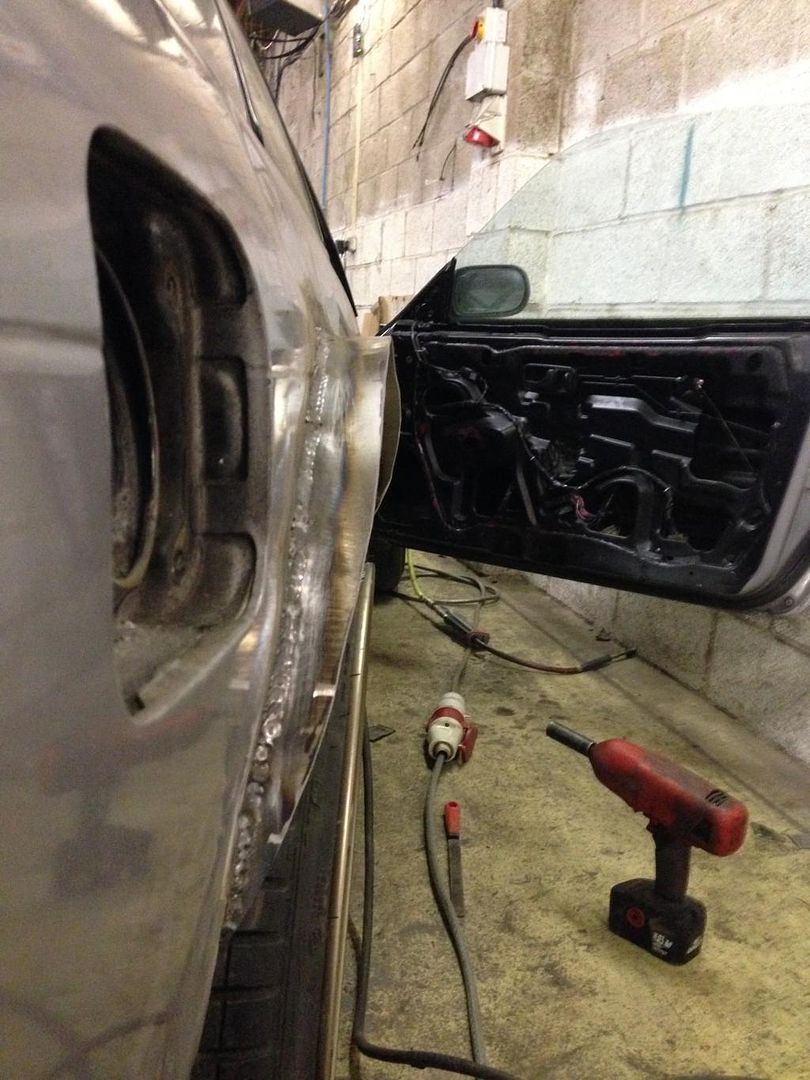 Next job was mounting the Powered by Max hydraulic handbrake. Unlike the convention hydro’s, these style don’t offer the regular “bolt-in” style. So we had to get creative, I say we, but my good friend Rich had a little play on the TIG welder and see what shapes he could throw. 1) Place the hydro bracket for a fancy photo 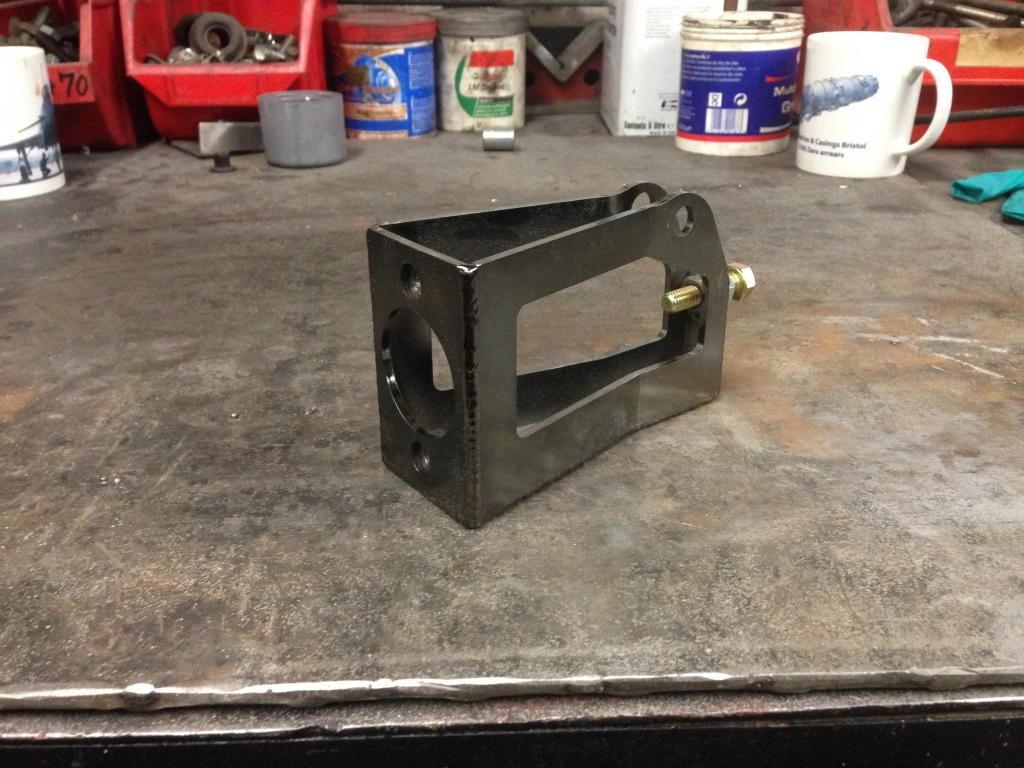 2) Acquire a base plate to weld the bracket too, and remove the plated finish 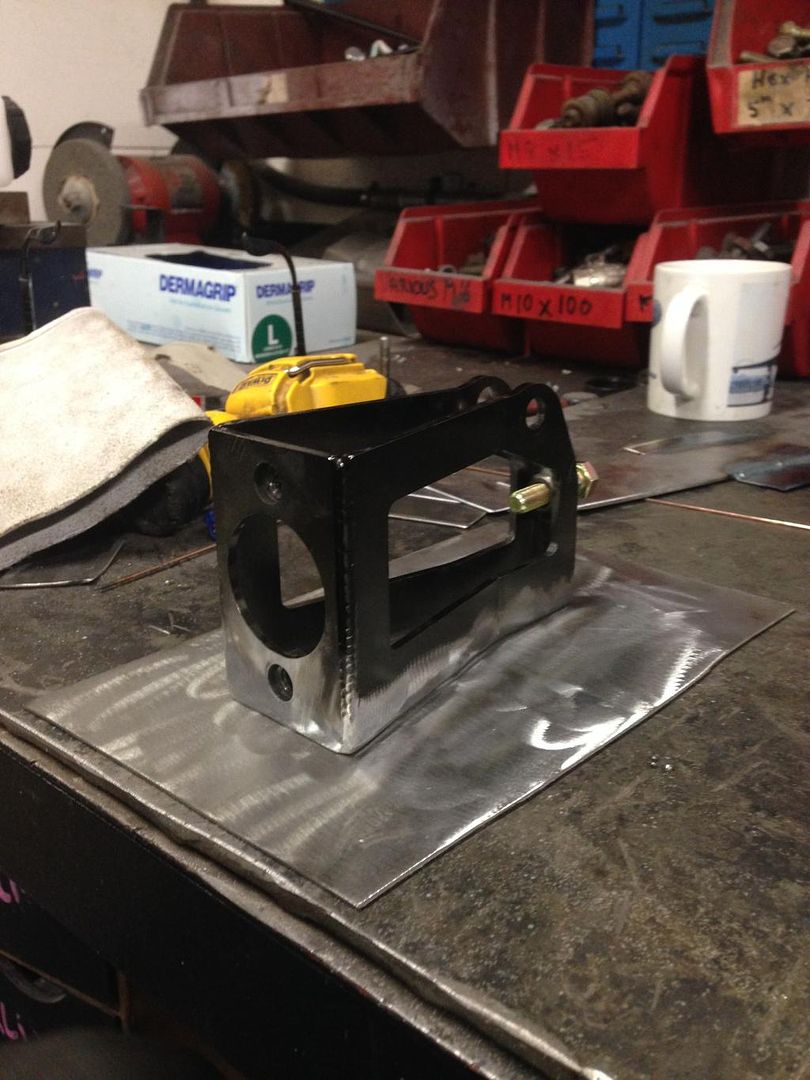 3) Lay down some funky shapes with the TIG welder! 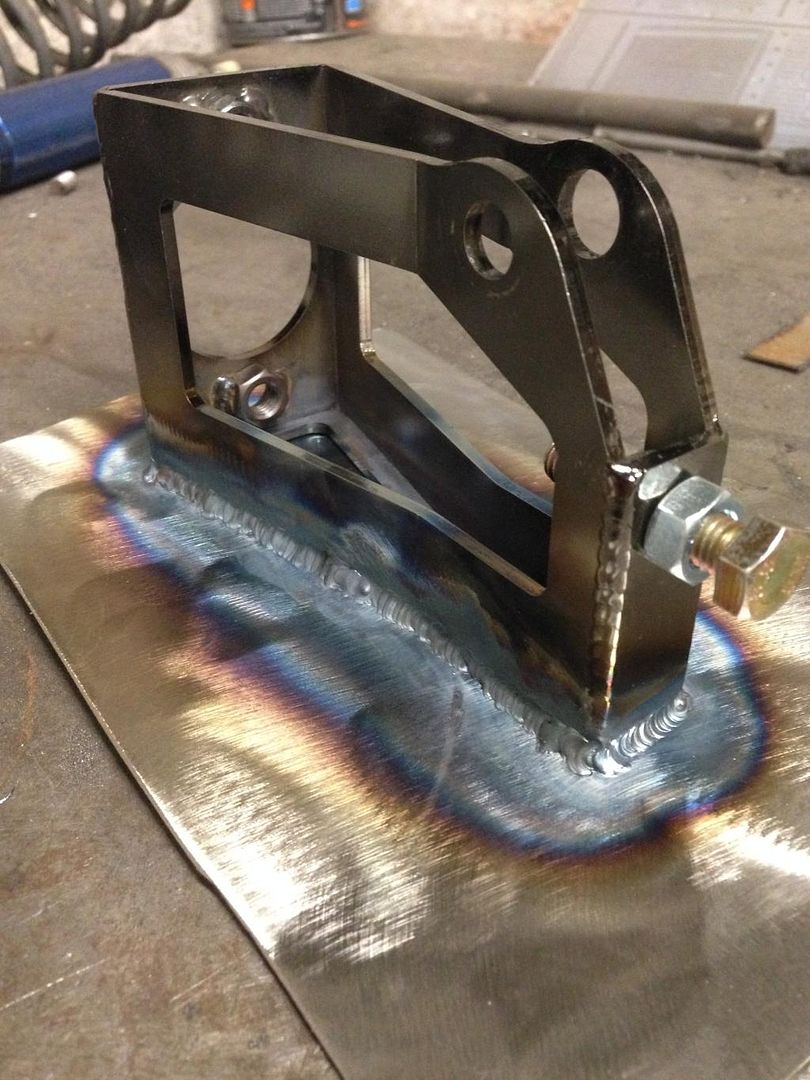 Rich wasn’t too happy with it, but I was stoked with the result. Looks pretty, with some pretty colours!  4) Trimmed down the base plate, and found the best position to mount it. Rich proceeded to MIG with base plate to the transmission tunnel. The odd thing was how easy the tunnel warped under heat, but that’s thin Nissan metal for you! 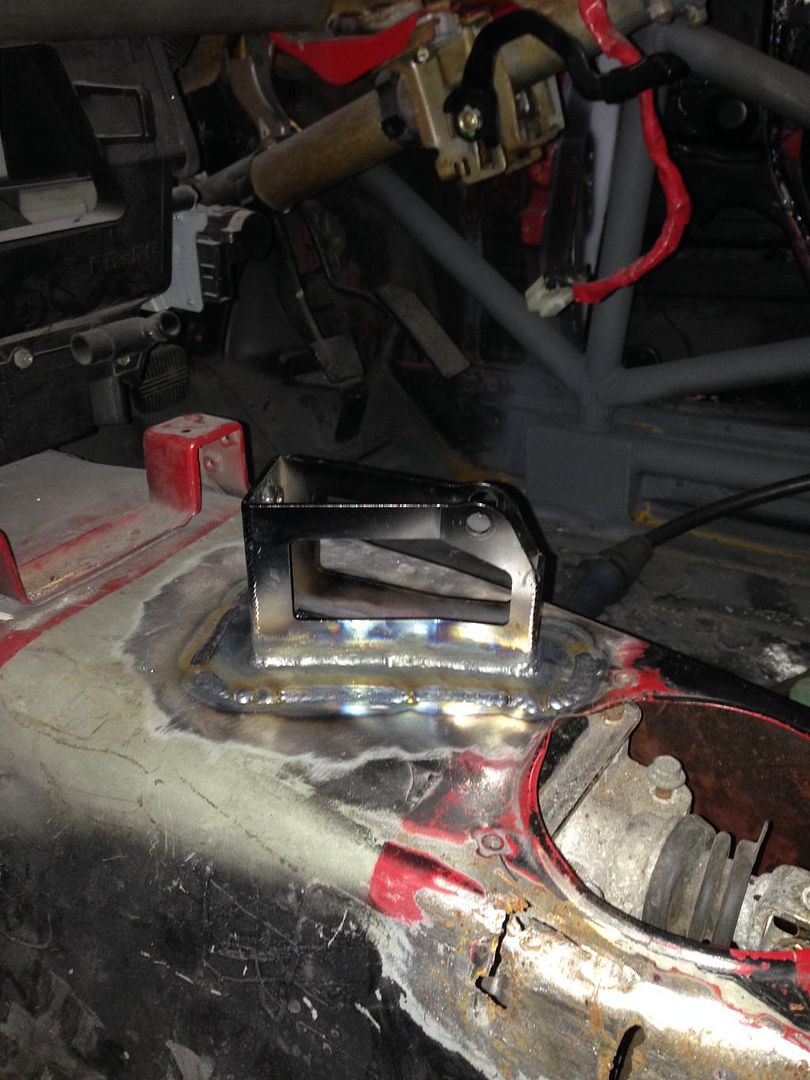 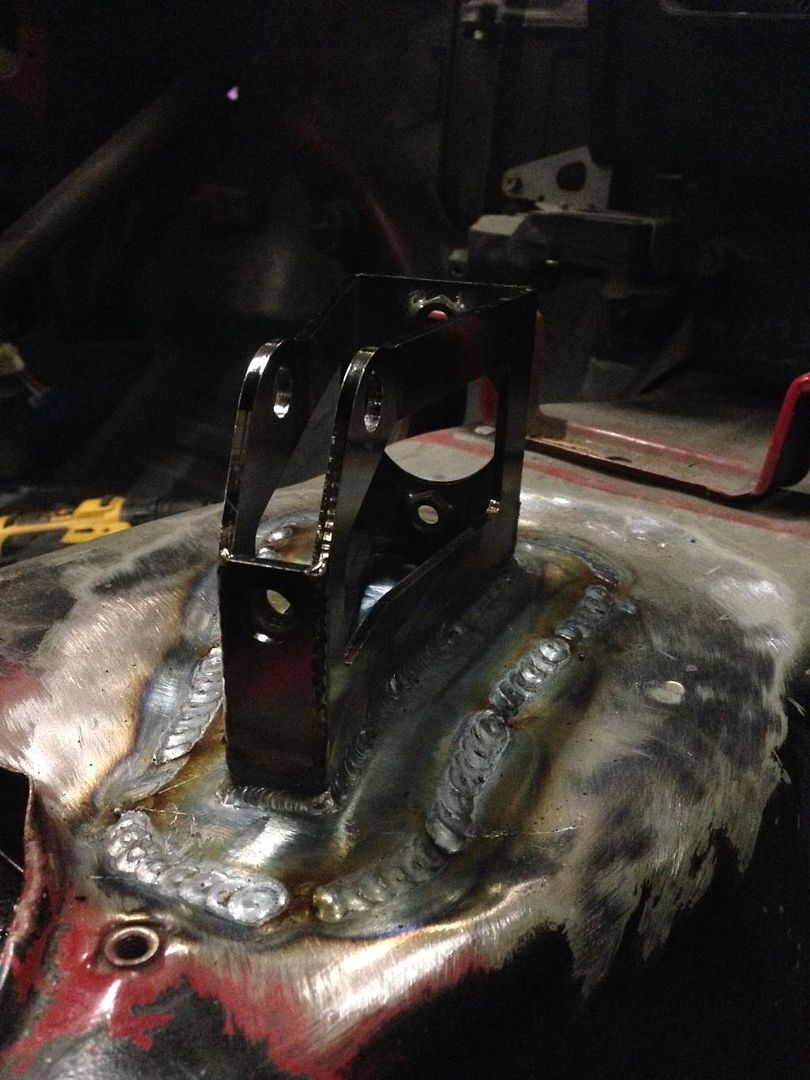 Whilst the car was at Rich’s, we proceeded to plug the holes left by the old cage, anything to stop smoke coming in! Anyhow, whilst this was happening I thought I’d treat myself. Once again, great thanks to this guy;  Those who don’t know, Jesse is a top guy! Anything you want from Japan, he can get it, and send it. Plus he drives a badd ass PS13 with a Mid-Mount TD06  This may have arrived;  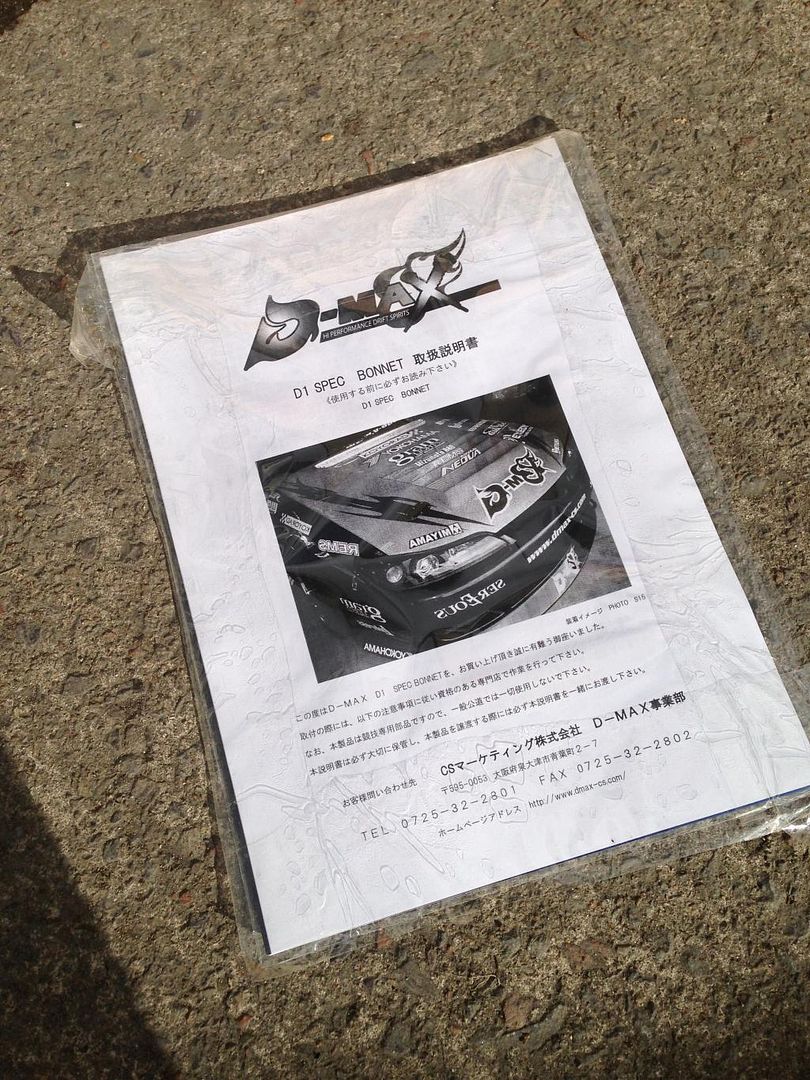 A genuine FRP D-Max PS13 bonnet of course! 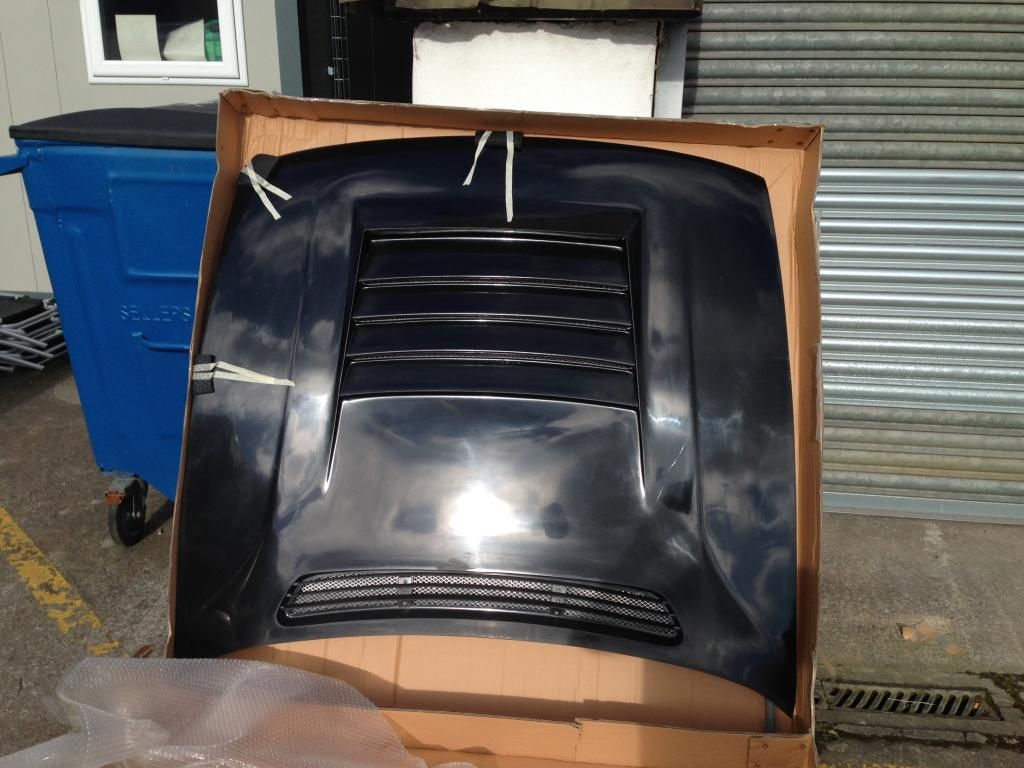 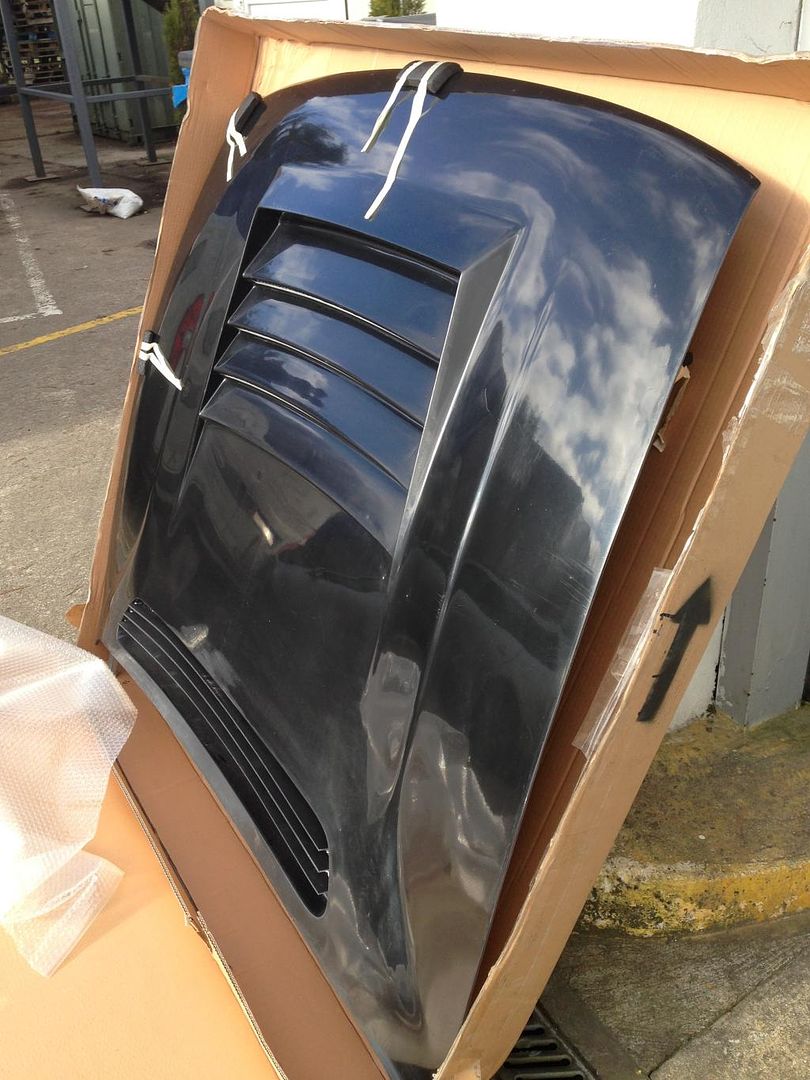 The quality is unreal! Cant wait to see the aero start coming together, I have taken an inspiration from a couple cars and hopefully able to do my own twist on it. Plus, I need motivation to finish the car! EPRacing proceeded to hook me up with D-Max Type 3 kit. A few guys I know are running the same kit, each of us will have our own small twists on it which will be cool. Just imagine 4 PS13’s running the same kit, whilst in a mini-train. That’ll be a cool sight! Some may even say Japan  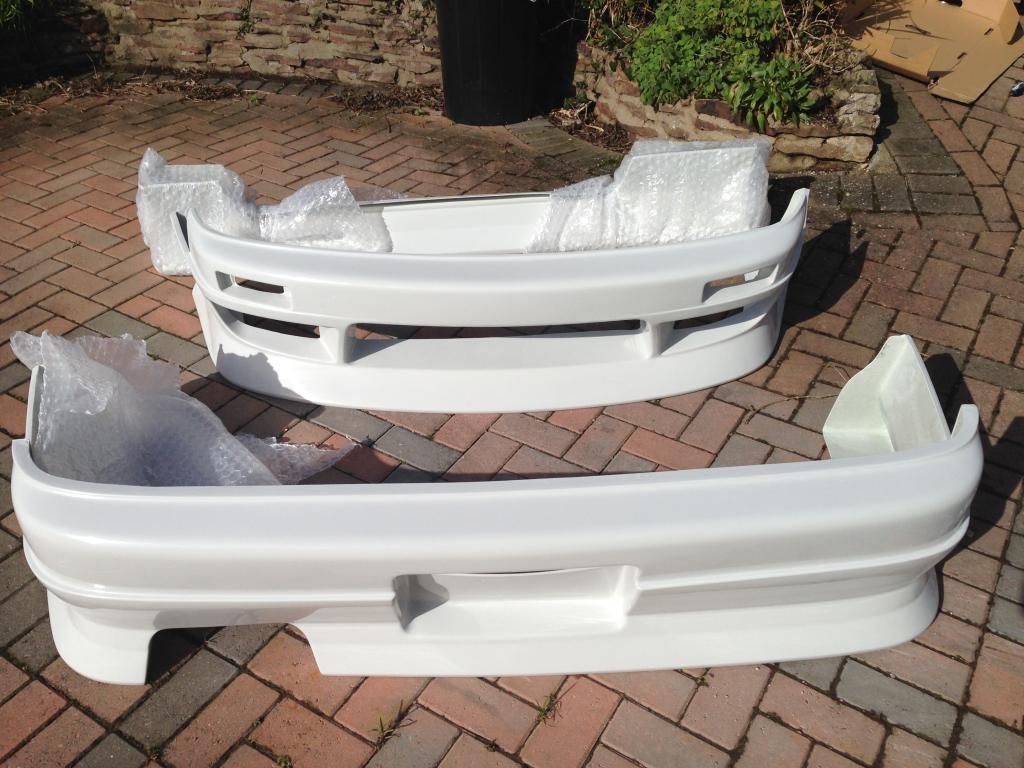 Final pictures from today, I rebuilt the Hydro back up again. Cant wait to throw the seat back in again, I may have to make brum brum noises and pretend the cars finished haha 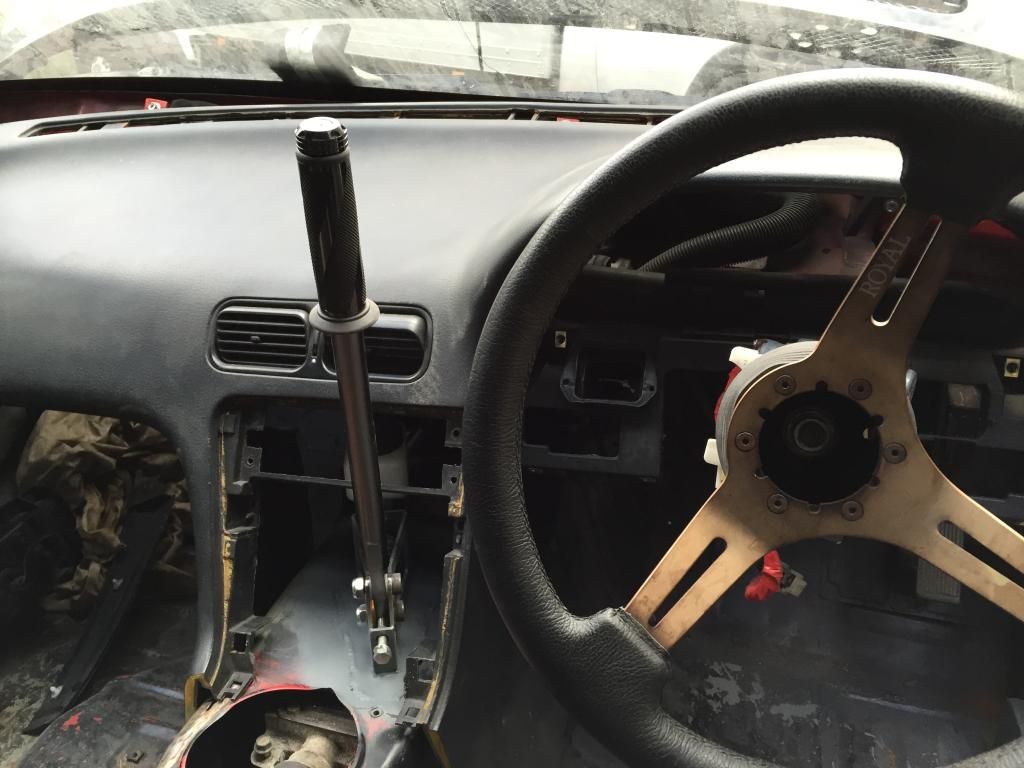 Threw the bonnet, wings and kit on today. Front and rear bumpers need some work though. Hopefully it wont take much with a heat gun, but ideally needs to be done ASAP before the car gets a new front end next Saturday by Huxley.  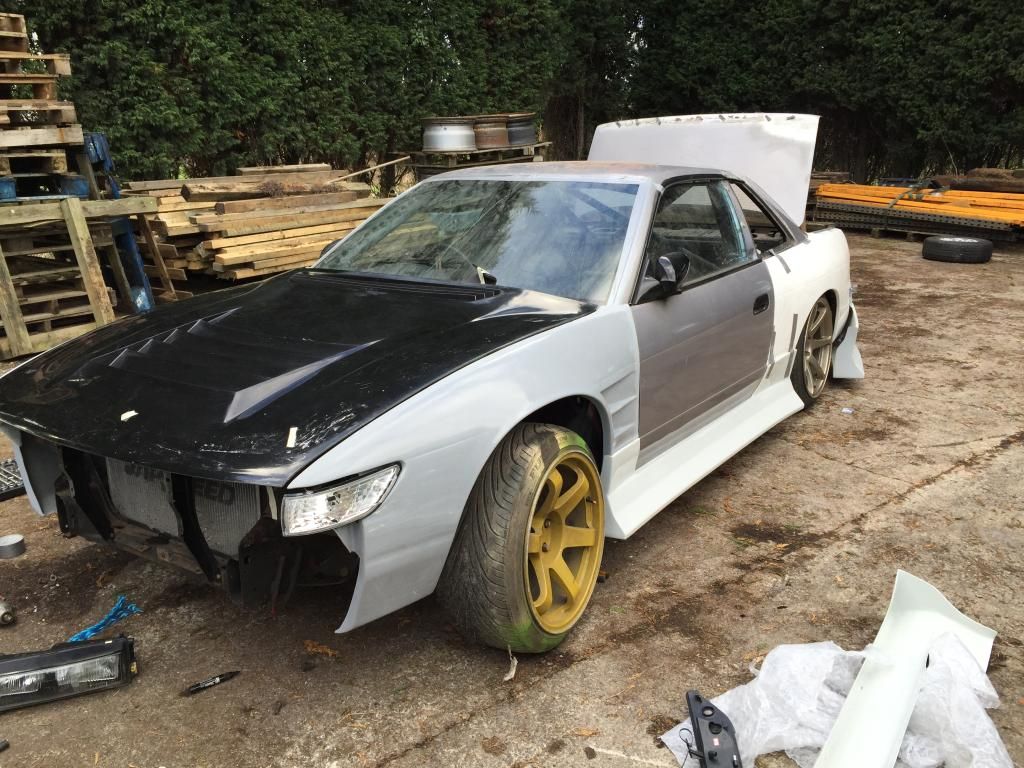 Trying to sort the bonnet, wings and headlights without no previous panels is an absolute a**! Kinda gave up today so I’ll have another go on the weekend,. Seriously cant wait after Huxley has done his magic again, THEN its time for those coilovers to finally be wound down! Exciting news is that I may finally have a unit, so I can go down at nights, during the rain, whenever which will be nice. A few years working outside on cars gets a very tedious, very fast! Sold my PBM intercooler on the weekend, so I have a new Intercooler, Radiator and Oil Cooler setup courtesy of Mishimoto! So stoked on the new setup im planning to run, should stay super cool at all time, plus the bigger intercooler should mean I can run some big boost  |
|
|

|
 |
| Bookmarks |
|
|